21 Music Studio Inspiration Setups That Sound as Good as They Look

When I was a kid, my neighbour played the piano every night at nine. I never once saw his music room. But I could picture it from the sound.
It sounded small and warm. Like the notes had nowhere to escape, so they just stayed in the room and kept you company. I used to sit on my bed and listen through the wall, and it felt like the room was hugging the piano.
Years later I learned the truth. He played in a plain little bedroom. A thick rug under the piano. Heavy curtains over the window. Nothing fancy at all. But the room treated the sound well, and that made the whole thing feel special.
That is what this list is about. These 21 Music Studio Inspiration setups all share that one secret. They sound as good as they look, and most of them started as ordinary rooms, just like yours.
1. The Warm and Cosy Corner Studio
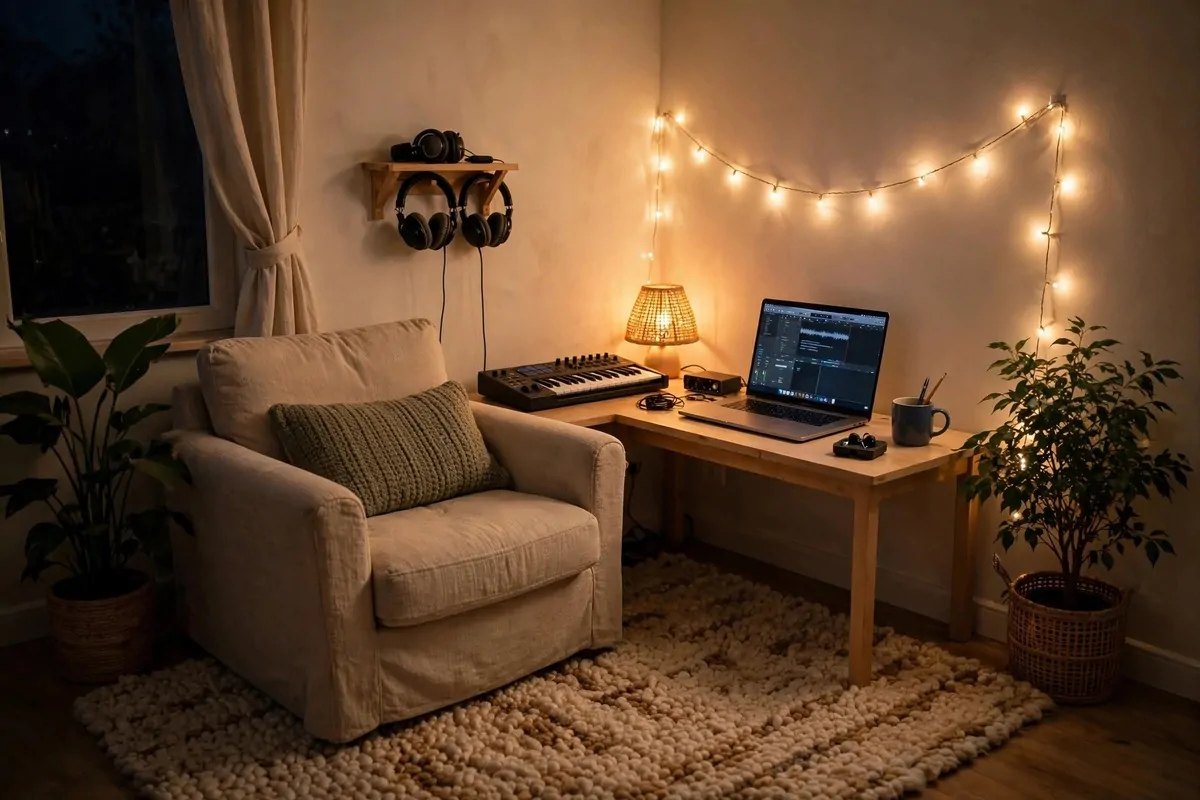
This is the kind of studio that feels like a hug when you walk in. Warm string lights, a soft rug under your feet, and a chair you never want to leave.
I love this style because it makes long sessions easy. You stop watching the clock. You just play, record, try things, and the room keeps you comfortable while you do it.
Start with one corner. A small desk holds your laptop and a MIDI keyboard. That is honestly enough to make real music.
Add a rug. Hard floors bounce sound around, and a thick rug calms that down in one move. It also feels so much nicer under your feet.
String lights or a warm lamp come next. Skip the cold white overhead light. Warm light makes the room feel smaller in a good way, like it is holding you.
A shelf above the desk keeps your gear off the table. Headphones, cables, a small speaker. Everything in reach, nothing in the way.
Throw a plant in the corner too. I know it sounds silly, but a little green makes the room feel alive. Pick one that is hard to kill.
The secret of this setup is comfort first, gear second. When the room feels good, you show up more. And showing up is where the music comes from.
2. The Clean Minimalist Studio
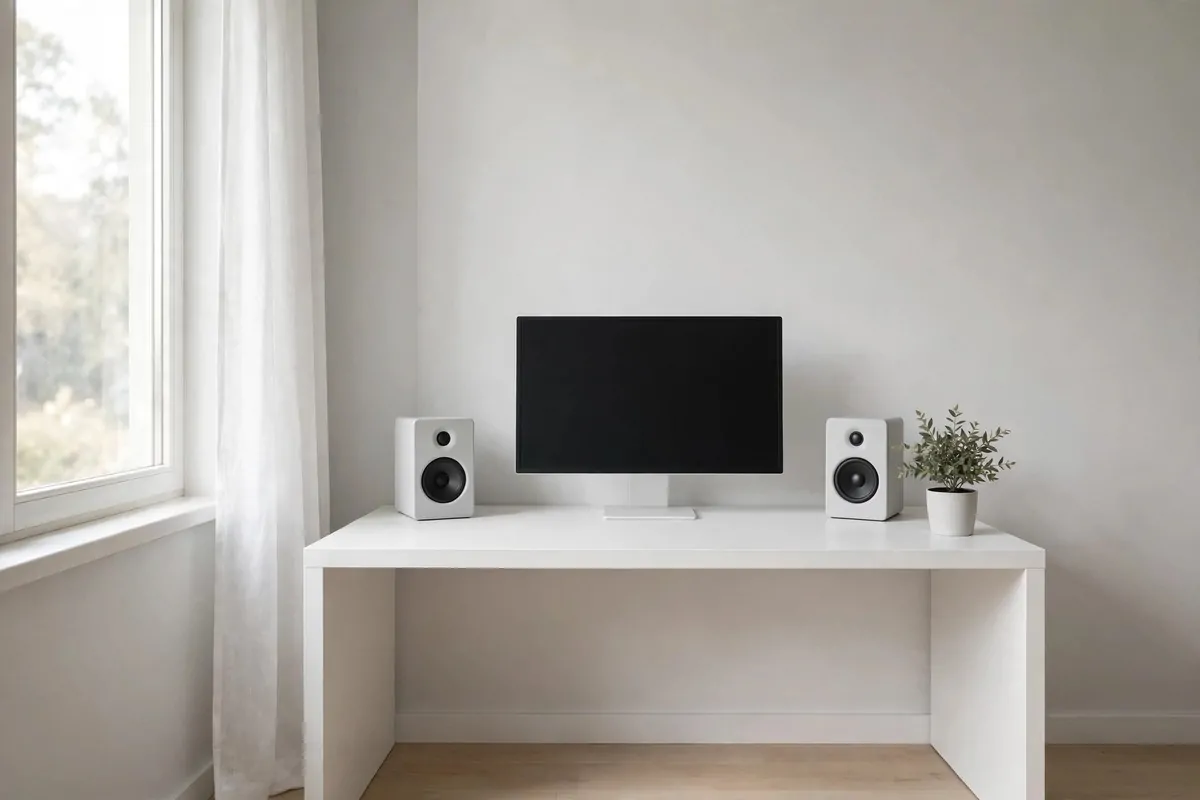
Some studios have fifty things on the desk. This one has five. And it works better.
Minimalist studios stick to neutral colours. White, black, grey. Maybe one wood tone. Nothing shouts for your attention.
The rule is simple. Only show the gear you actually use. If you have not touched it in a month, put it in a drawer.
I used to think a bare desk meant I was not serious. Turns out it is the other way round. A clean desk makes your brain calm, and a calm brain makes better choices.
One monitor, not two. One keyboard. One pair of speakers. A lamp. That is the whole desk in this setup.
Cables get hidden, not tangled. A little tray under the desk holds them. It takes ten minutes and changes everything.
The walls stay plain or get one piece of art. White space is not empty. It is breathing room for your ears too.
This setup is perfect if you get distracted easily. There is nothing to look at except the work in front of you. And that is kind of the point.
Fewer things also means less dust and less cleaning. Your gear lasts longer. Your room stays nice with almost no effort.
3. Geometric Acoustic Panel Walls
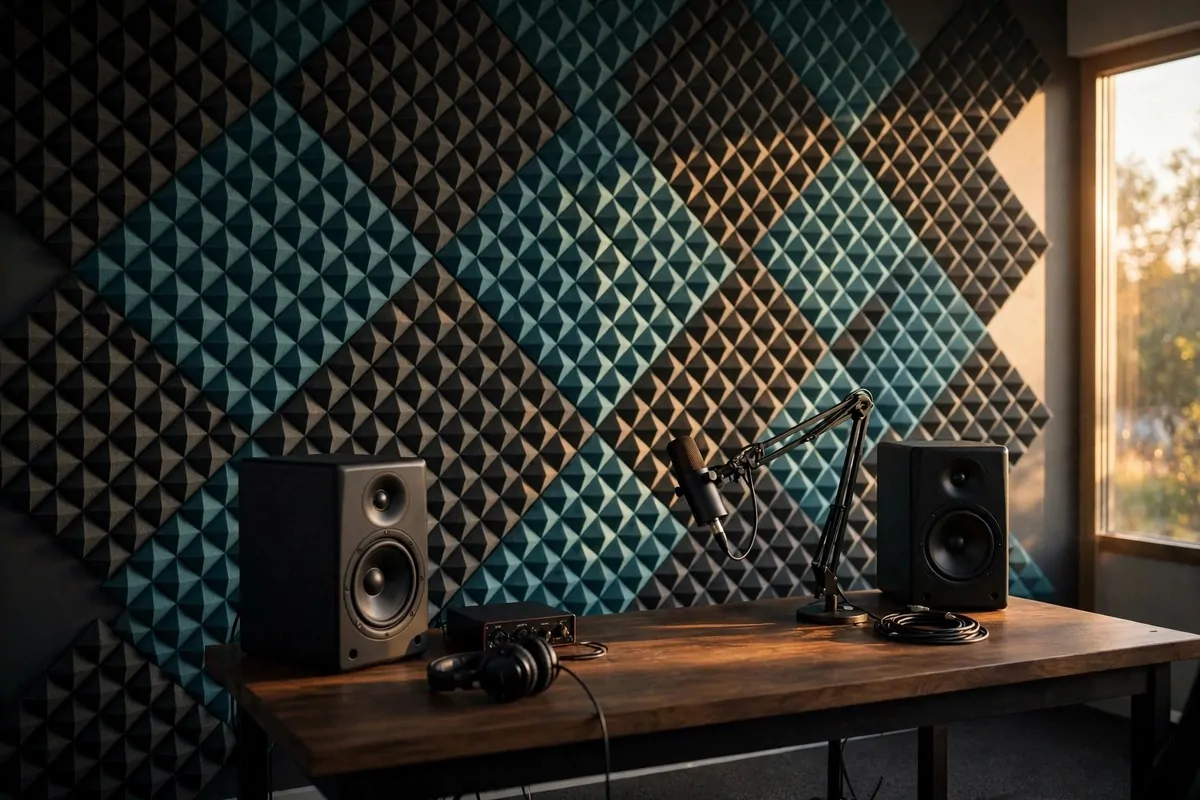
Walk into any studio that sounds amazing and you will see these. Panels on the walls, arranged in patterns that look like art.
The patterns matter less than the placement. Sound bounces off bare walls, and panels catch those bounces. Pros say covering about a third of your wall space with panels fixes most echo problems in a small room.
You do not need to cover every wall. That is a common mistake. A room that is too dead sounds flat and weird. You want some life left in it.
The best spots are the mirror points. Sit at your desk and picture a mirror sliding along the side walls. Anywhere you could see your speakers in that mirror is a spot that needs a panel.
Ceilings count too. A couple of panels above your desk catch the sound bouncing down. People always forget the ceiling.
| Panel type | Best spot | Why it works |
|---|---|---|
| Fabric wrapped panels | Side walls | Thick, pretty, and catch mid and high sound |
| Foam wedges | Behind the desk | Cheap and easy to cut into shapes |
| Bass traps | Room corners | Corners collect low sound, traps soak it up |
| Ceiling clouds | Above your chair | Stop the echo bouncing straight down |
Hexagons look great. Diamonds look great. Even plain squares in a grid look smart if the colours match the room.
You can buy panels or make them. A wooden frame, some thick insulation board, and fabric stretched over the front. It is a fun weekend project.
Arrange them with small gaps between each one. The gaps look intentional, and they let a little wall show through so the room does not feel padded like a cell.
4. The Small-Corner Desk Studio
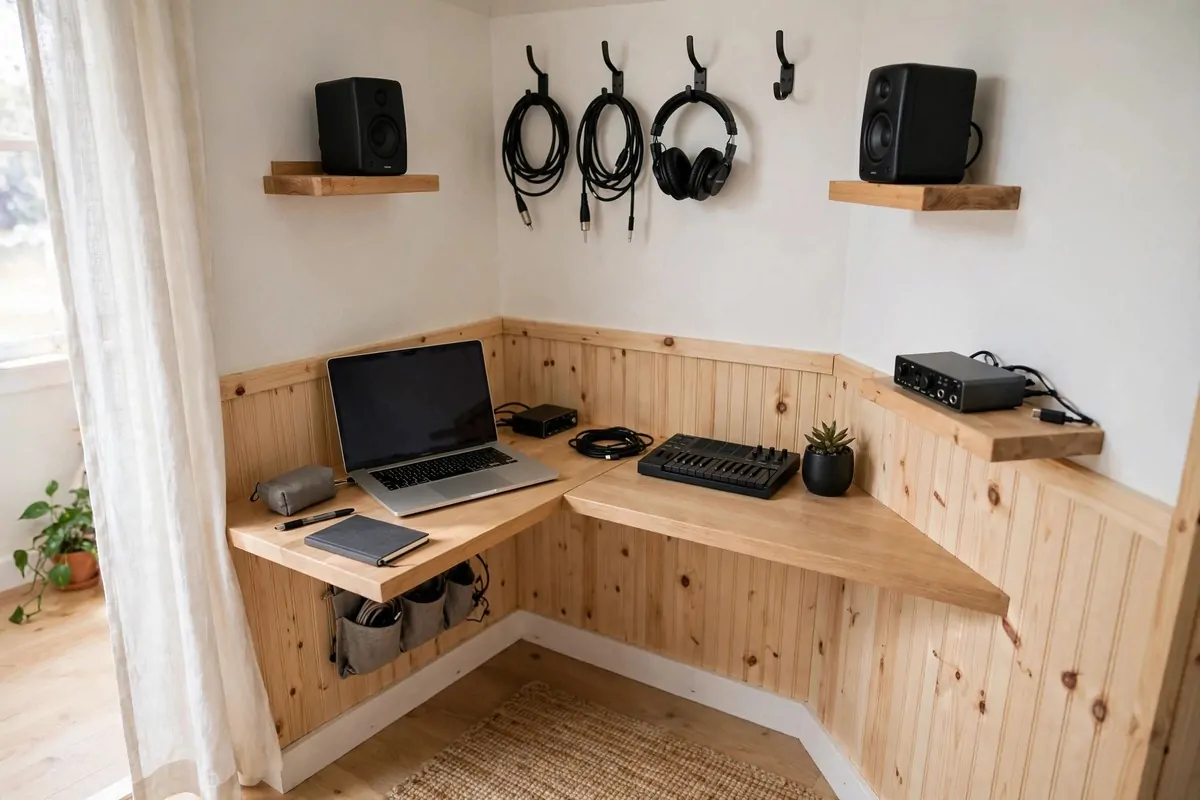
Four feet by six feet. That is all some people have. And it is enough.
The corner is the most useful spot in a small room. Push your desk right into it and you get two walls of storage and sound help for free.
Mount your speakers on the wall or on small stands. Keep them at ear level. They should point at you like a triangle, with you at the front point.
- Hang headphones and cables on wall hooks above the desk
- Slide your keyboard under the desk when you are not playing
- Use one floating shelf for the gear you grab daily
- Pick smaller monitors, they fit the corner better
- Keep the floor clear so the corner feels bigger
Vertical space is your best friend here. The walls hold what the floor cannot.
A foldable stand for your mic saves room too. Fold it flat against the wall when you are done. The corner goes back to being a corner.
Light matters in a tiny spot. A small clip lamp on the shelf beats a big floor lamp that eats your floor space.
I have seen corner studios that sound better than big ones. Small rooms are easier to treat. A few panels and a rug, and the sound gets tight and clean fast.
The best part is the price. A corner setup can start with stuff you already own. The room does most of the work.
Do not wait for a bigger room. Start in the corner. Your music will not know the difference.
5. The Neon LED Studio
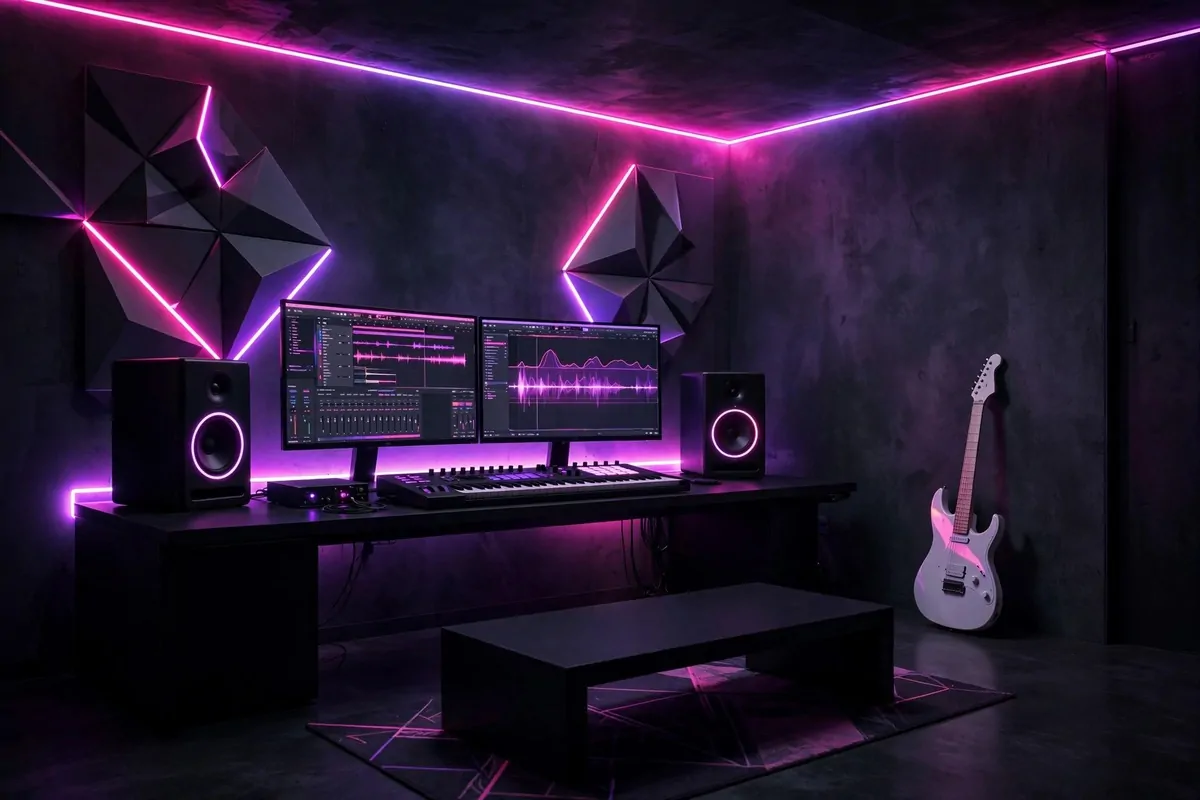
Dark walls. Pink and purple light. This studio looks like the future, and it costs less than you think.
LED strips are the whole trick. Run them behind your desk, along the ceiling edge, or behind your monitors. The glow bounces off the walls and the room comes alive.
Pick two colours and stick with them. Pink and blue is the classic. Purple and teal looks cool too. Too many colours and it starts to feel like a party shop.
The desk setup is simple underneath the lights. Dual monitors, a MIDI keyboard, studio speakers. The neon makes basic gear look expensive.
Dark paint helps a lot. Black or deep grey walls drink the light and make the glow pop. If you rent, dark curtains or fabric panels do the same job.
Geometric panels on the wall fit this style perfectly. They catch the coloured light and throw cool shadows. Sound treatment that looks like decor.
A white guitar leaning against the wall is the finishing touch. I keep seeing this in neon studio photos and it always works. The white catches every colour.
Keep one warm light too, like a small lamp. Neon all the time can tire your eyes. Flip the lamp on when you are editing for hours.
This look photographs beautifully. If you share your music online, the room becomes part of your brand. People remember a glowing pink studio.
6. The Rustic Wood Studio
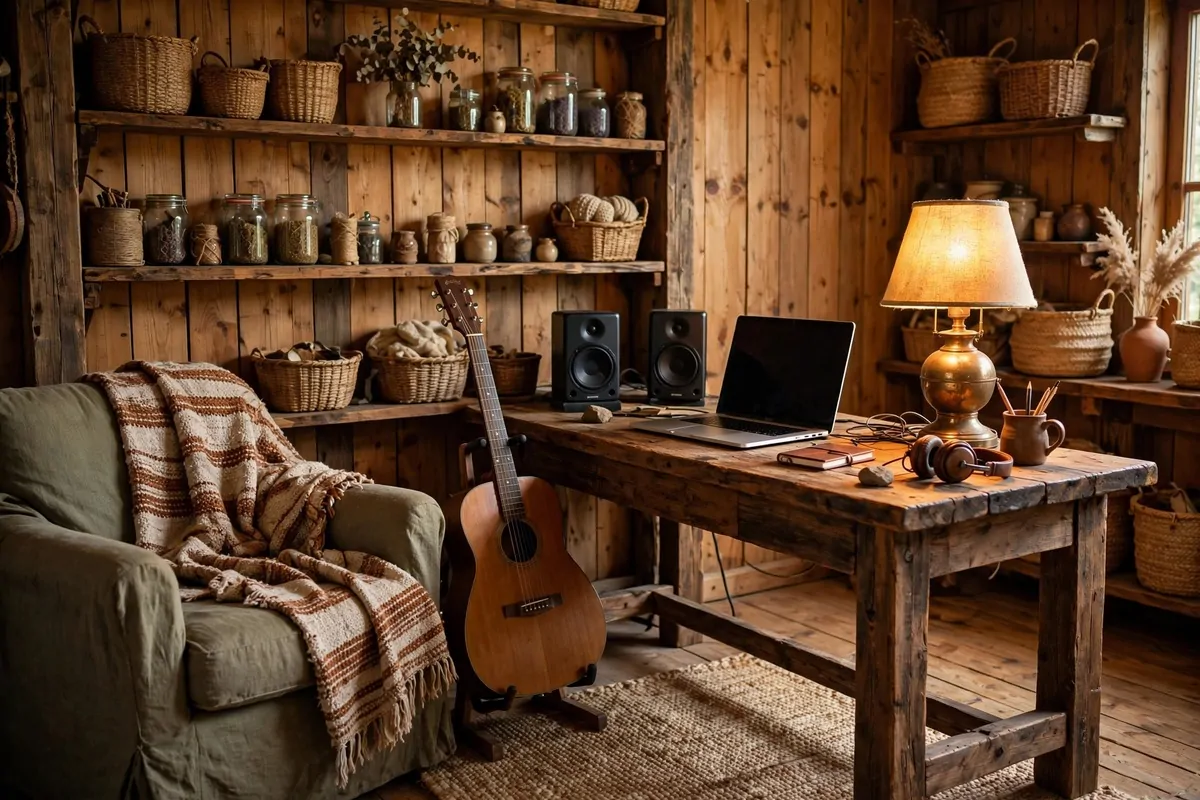
Wood tones. A vintage lamp. Soft fabric on the chair. This studio feels handmade, like it grew over years instead of being bought in a weekend.
Rustic does not mean messy. It means natural. Real wood, warm browns, things with a bit of age on them.
A solid wood desk is the heart of this setup. Heavy wood does not vibrate much, which is actually good for sound. Your gear sits still and quiet.
The vintage lamp is not just pretty. Warm yellow light is easy on the eyes during long night sessions. I always reach for warm bulbs in a studio.
Soft fabric matters too. A fabric chair, a woven throw, maybe a cushion on the floor. Soft things soak up a little sound while they make the room cosy.
Hang your acoustic guitar on the wall or keep it on a wooden stand. In a rustic room, instruments are decor. They belong out where you can see them.
Open shelves with boxes and jars hold the small stuff. Cables in a basket. Picks in a tin. It looks lived in, not staged.
Wood slats or wood panels on one wall add texture. They break up flat surfaces, which helps the sound a little, and they look amazing behind a desk.
This style suits songwriters best, I think. It feels like a cabin where songs are supposed to be written. You sit down and the room tells you to slow down and play.
7. The DIY Vocal Booth Corner
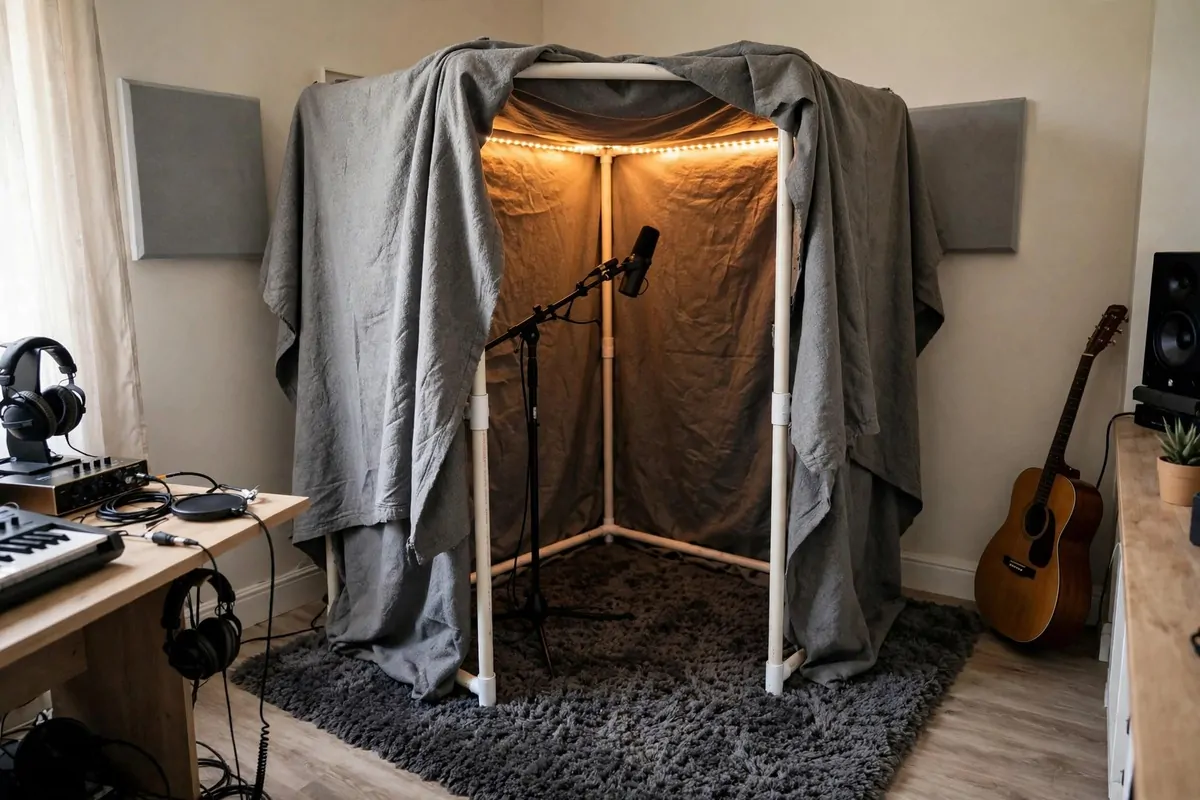
Vocals are the hardest thing to record at home. The fridge hums. The neighbours talk. The room echoes. A vocal booth fixes all of that in one small corner.
The cheapest good booth is blankets on a frame. PVC pipes make a light frame. Hang thick moving blankets over it. Step inside with your mic and the world goes quiet.
It does not have to be pretty from the outside. It has to be dead quiet on the inside. Blankets eat the reflections that make home vocals sound washy.
| Material | What it does | Good to know |
|---|---|---|
| Moving blankets | Soak up mid and high sound | Heavy ones work best, hang two layers |
| Mattress | Big soft blocker behind you | Stand one up behind the singer |
| Thick rug | Stops floor bounce | Layer two if the floor is hard |
| Acoustic panels | Clean, pro looking absorption | Stick them inside the blanket walls |
Put a small quiet light inside. LED strips are perfect because they make no noise. Old bulbs can buzz, and mics hear everything.
Leave a gap for air. A sealed blanket box gets hot fast. Sing a few takes, then step out and breathe. Your voice will thank you.
A mic stand with a boom arm keeps the mic steady. Handheld mics pick up every little move. A stand lets you focus on singing.
Face the open side toward the softest part of the room. Curtains, a sofa, a bookshelf. The sound that escapes should land somewhere soft.
Record a test and listen back on headphones. You will hear the difference right away. The voice sits forward, clear, with no roomy echo around it.
This booth folds away when you are done. Take the blankets down, lean the frame in a corner. Your room goes back to normal in five minutes.
8. The Guitar Wall Studio
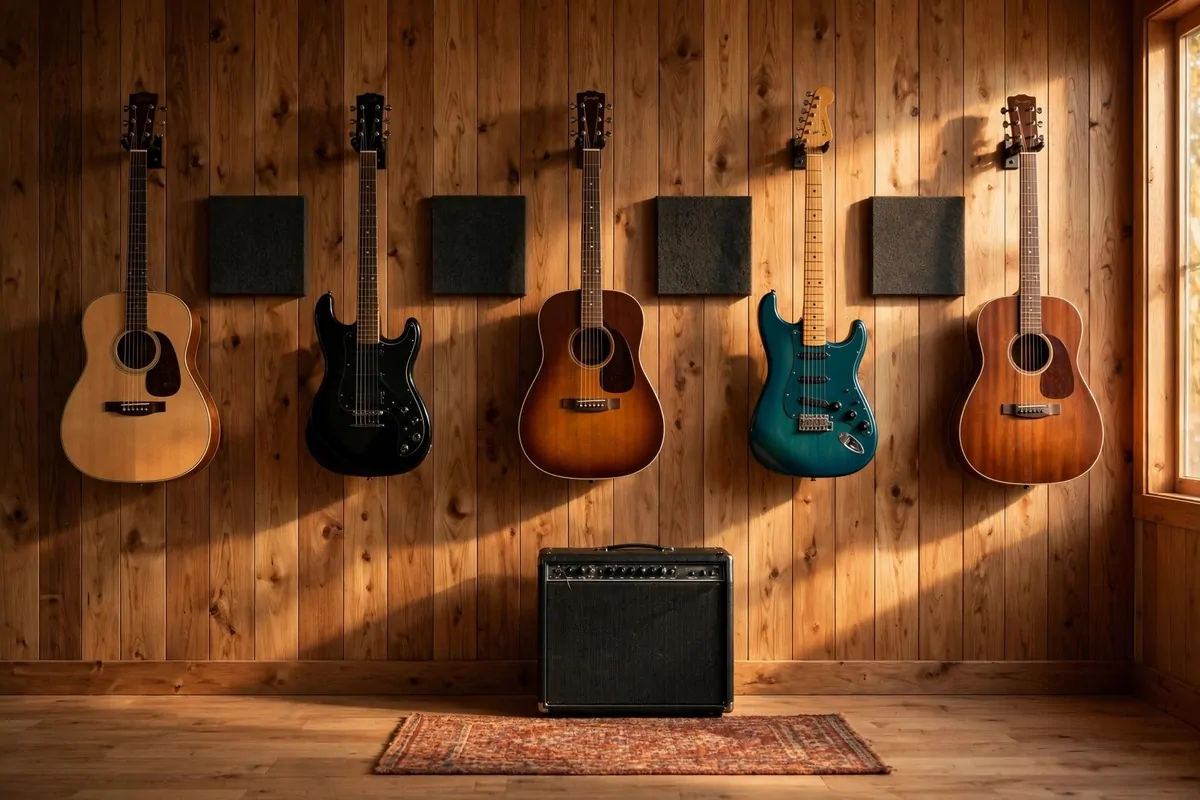
Guitars on the wall are two things at once. Art for your eyes, and broken-up wall surface for your ears.
Flat bare walls are the enemy of good sound. Sound hits them and bounces straight back. A row of guitars breaks up that flat surface and scatters the reflections.
Wall hangers are cheap and safe. They hold the neck so the guitar hangs straight. Put one stud screw in and it will hold for years.
Plan the layout before you drill. Lay the guitars on the floor first and move them around. Odd numbers look best. Three, five, seven.
Leave space between each one. Crowded guitars look like a shop. Spaced out guitars look like a collection.
Keep the amp below them on the floor. Short cable runs mean less mess. A small rug under the amp stops it rattling against hard floors.
Acoustic panels fit nicely between the guitars. Alternate a guitar, a panel, a guitar. It looks planned and it treats the wall at the same time.
This setup makes you play more. I am convinced of it. When the guitar is on the wall and not in a case, you pick it up. Ten minutes here, ten minutes there. It adds up.
Your room tells your story this way. Every scratch on those guitars is a song you learned. Guests see the wall and know exactly who you are.
9. The Vinyl Record Wall Studio
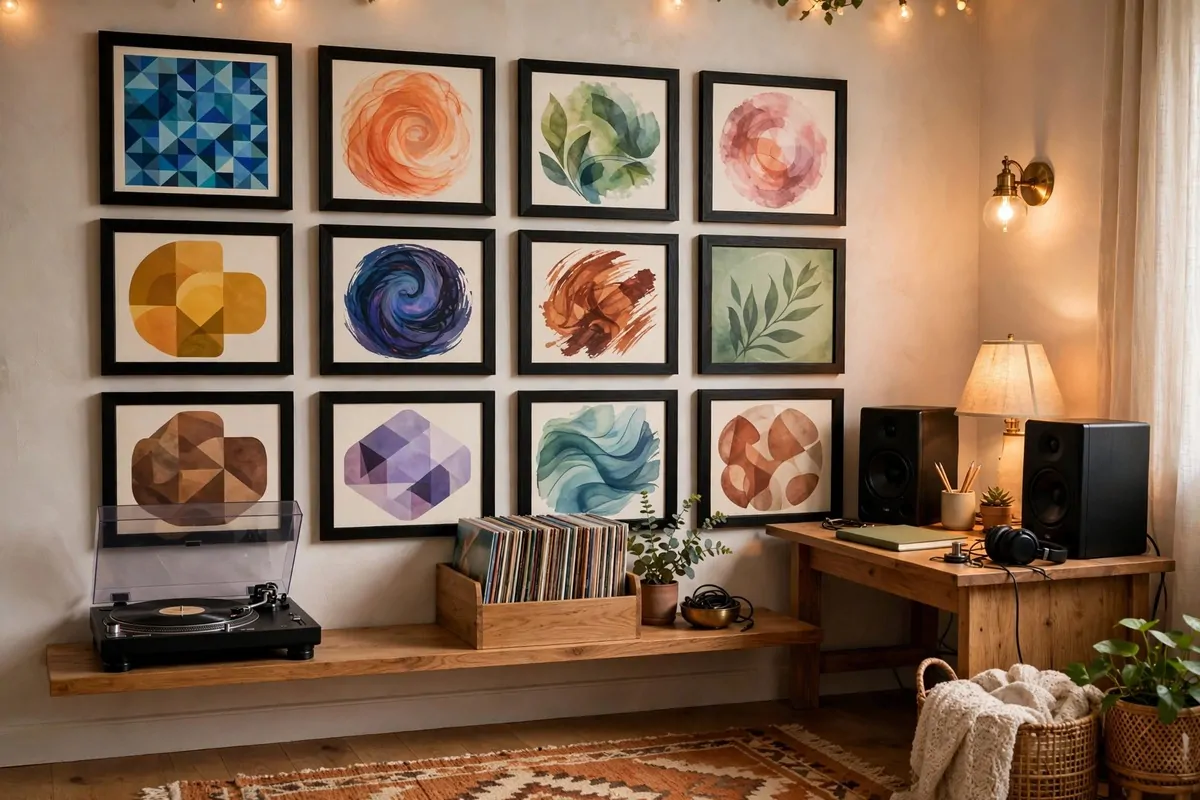
Some studios show off gear. This one shows off taste. A wall of vinyl records tells everyone what shaped your sound.
Framing records is easy. Cheap square frames from any home store fit a twelve inch record perfectly. Hang them in a grid and the wall becomes a gallery.
Pick records that mean something. The first album you loved. The one that made you want to make music. When you look up mid session, they remind you why you started.
A turntable on a shelf below the wall completes the look. It does not have to be expensive. It just has to work and look loved.
Records add a little sound help too. The frames and sleeves break up the wall just like panels do. Not as much as real treatment, but every bit helps.
Mix in some concert tickets or photos if you like. A personal wall beats a perfect wall. This room should feel like yours, not a showroom.
Keep the records out of direct sun. Sunlight fades the covers fast. An inside wall or a shaded corner keeps the colours bright for years.
Rotate them sometimes. Swap a few out every couple of months and the wall feels new again. It is the cheapest room refresh there is.
I like this style for producers who sample and dig for sounds. The wall is your library. Your inspiration is literally hanging in front of you.
10. The Window-Light Studio
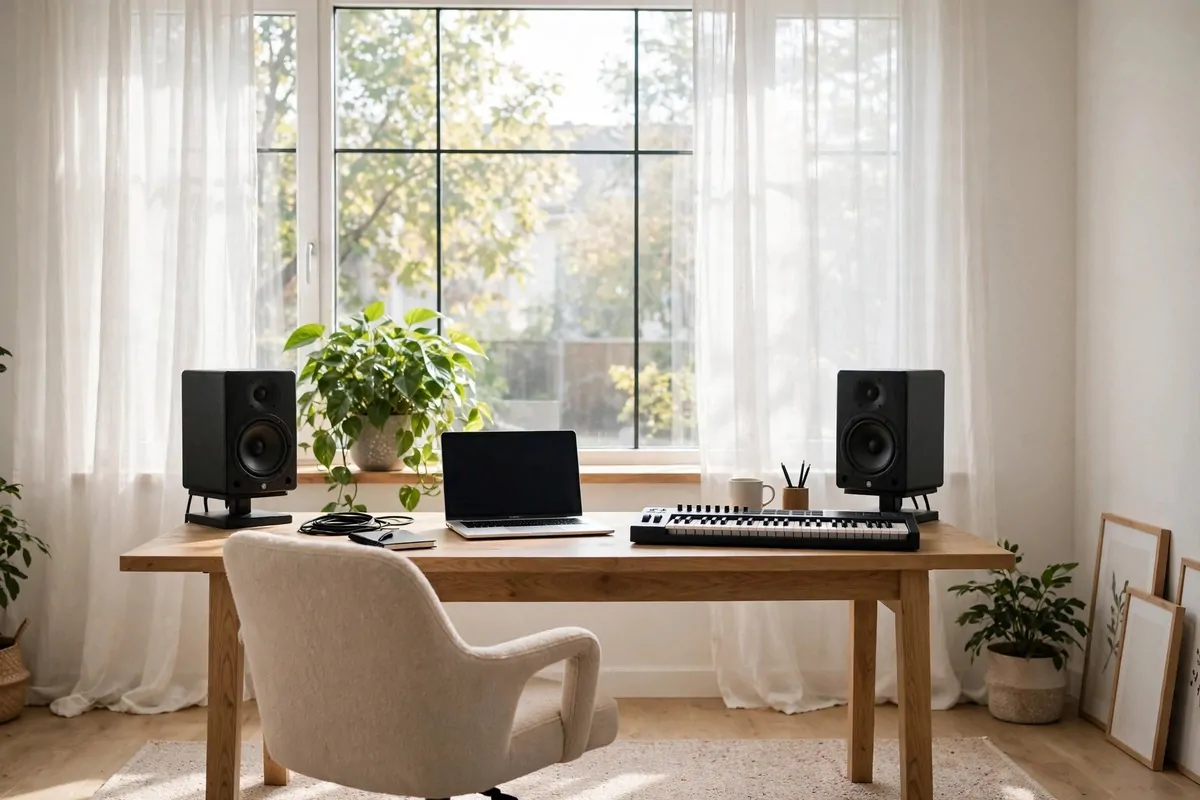
Face your desk toward the window. That is the whole idea. Natural light changes how a studio feels more than any lamp can.
Morning sessions feel different in this light. The room wakes up with you. Colours look true, which helps if you film anything in the room.
Watch the screen glare though. Direct sun on your monitor is a nightmare. Angle the desk a little, or use a sheer curtain to soften the light.
Sheer curtains do double duty. They cut the glare and they take a tiny edge off the echo. Thin fabric will not fix bad sound, but it helps a little.
A plant on the windowsill loves this setup. So do you, probably. Green leaves next to your keyboard make the desk feel less like work.
Keep the window closed when you record. Street noise ruins takes. Thick curtains you can pull shut turn a bright room into a quiet room in seconds.
The view matters more than people admit. Looking outside between takes rests your eyes and your brain. Staring at a wall for six hours is draining.
At night this studio needs a plan. One warm lamp behind the desk keeps the glow going after sunset. String lights along the window frame look lovely too.
This is my favourite setup for songwriters who work in the daytime. Light, air, a view, and your instruments within reach. Hard to beat.
11. The All-Black Sleek Studio
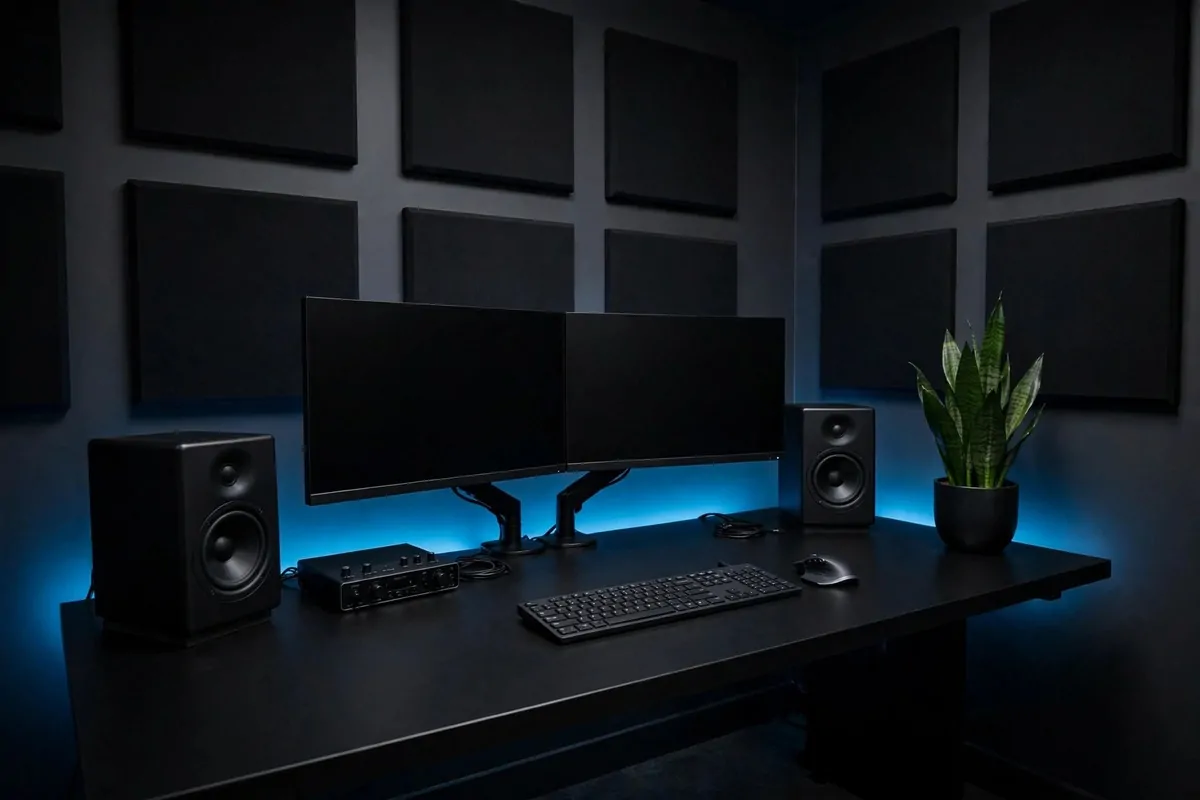
Black desk. Black monitors. Black speakers. This studio means business.
The all black look is about focus. Nothing in the room competes with the screen. Your eyes go where they should, and they stay there.
LED backlighting keeps it from feeling like a cave. A strip behind the desk or behind the monitors adds a soft glow. Blue and white look sharpest with black.
Cable hiding is not optional here. On a black desk, a grey cable snake screams at you. Run everything through a tray or clips under the desk.
Match your gear where you can. Black keyboard, black mouse, black headphones on a stand. It does not have to be the same brand. Same colour is enough.
One plant breaks the darkness nicely. Deep green against black looks expensive. A snake plant is nearly impossible to kill, which helps.
The walls can be dark grey or black. If painting feels like too much, black fabric panels give you the look and treat the sound at the same time.
Keep the desktop clean. In a black studio, dust shows fast. A quick wipe once a week keeps it looking sharp.
This style suits night owls and electronic producers. It feels like a cockpit. You sit down, the lights glow, and the rest of the world disappears.
12. The Thrift-Budget Studio
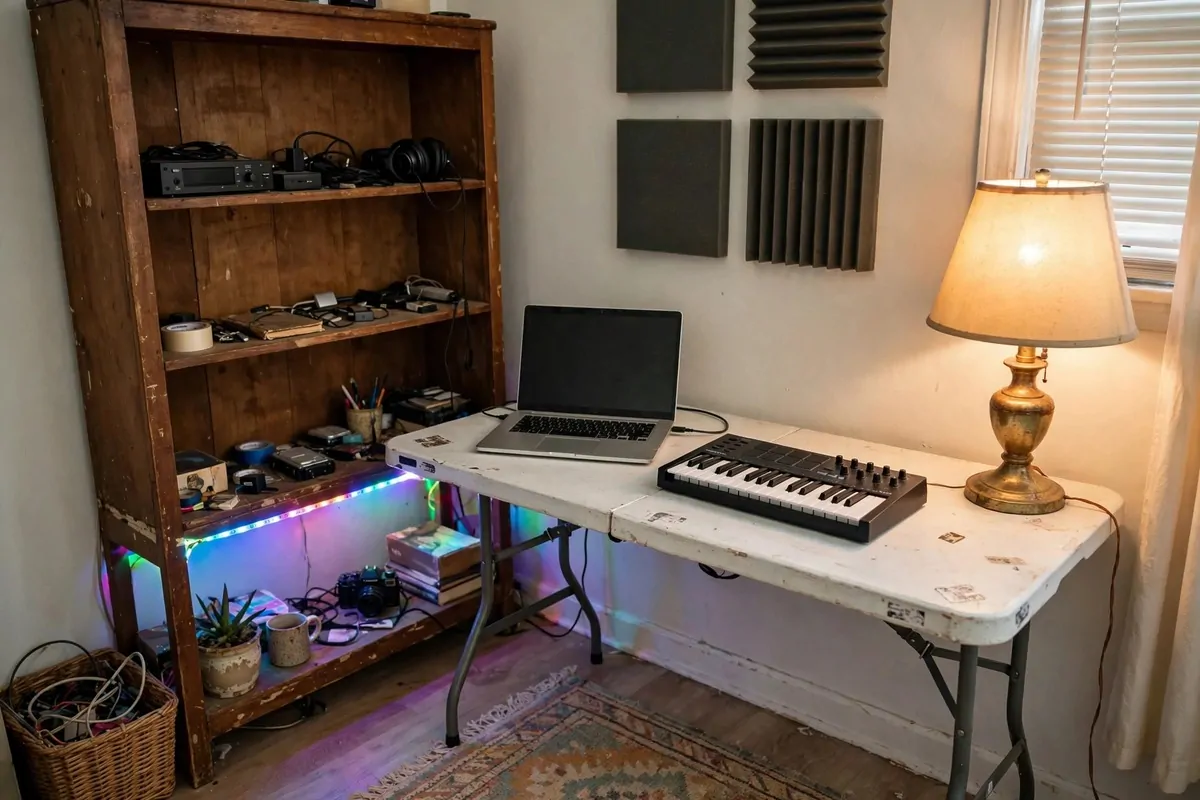
You do not need a big budget. You need a folding table and some imagination.
Thrift stores are full of studio furniture. Solid wood side tables, small bookshelves, lamps with good bones. Old furniture is often sturdier than the cheap new stuff.
A folding table makes a fine desk. It is wide, it is light, and you can fold it away. Put a tablecloth or a desk mat over it and nobody knows.
Stick on LED lights cost very little and change the whole mood. Put them under a shelf or behind the table. Instant studio glow.
| Thrift find | Studio job | What to check |
|---|---|---|
| Small bookshelf | Gear and cable storage | Sturdy shelves, no wobble |
| Table lamp | Warm desk light | Works, shade not cracked |
| Wooden chair | Session seating | Solid joints, comfy enough |
| Thick curtains | Window sound help | Heavy fabric, long enough |
| Area rug | Floor echo control | Thick pile, big enough |
Foam panels can be bought a few at a time. Start behind your desk where it matters most. Add more when you can. Nobody says you have to do it all at once.
DIY cable holders are free. A toilet roll tube holds rolled cables. A mug holds pens and picks. A shoe box becomes a drawer organiser.
Secondhand gear is the real secret. Last year’s audio interface does the same job as this year’s. Check local listings and be patient.
Paint is the cheapest makeover. One dark accent wall behind your desk makes thrift furniture look intentional. A tin of paint costs less than lunch.
I love this setup because it proves a point. The music comes from you, not your wallet. A thrift studio with heart beats an expensive studio with no soul.
13. The Piano Corner Studio
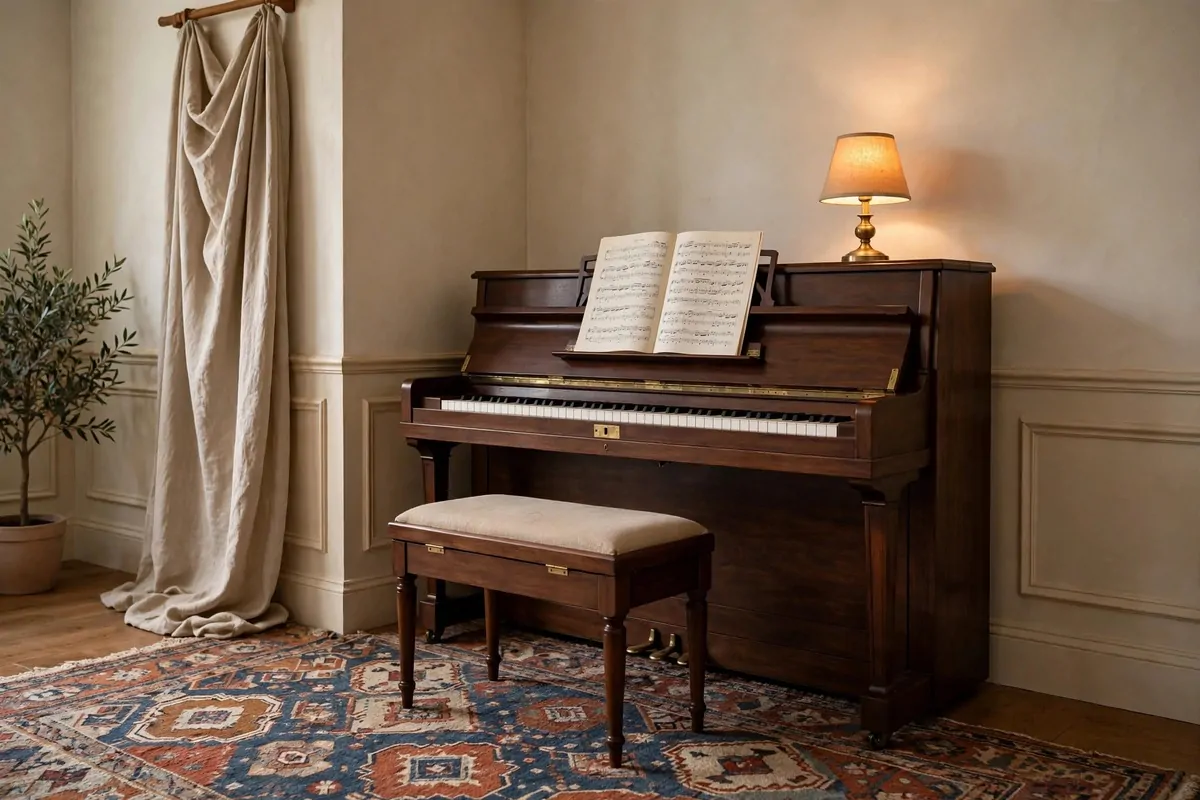
An upright piano in the corner is the most beautiful thing a studio can hold. It does not even need to be plugged in.
Corners suit pianos. The two walls hold the sound close, and the player faces into the room. It feels private, like a little stage.
Put a thick rug under the piano. Pianos are loud and bright, and hard floors throw that brightness everywhere. A rug warms the tone right down.
A bench with storage is a smart pick. Sheet music, notebooks, a metronome. Everything lives inside the bench instead of piling on top of the piano.
Light the keys well. A small lamp on top of the piano or a clip light on the music stand. Bad light makes reading music tiring fast.
Hang something soft on the walls near the piano. A tapestry, a fabric panel, even a thick curtain. Pianos fill a room with sound, and soft walls keep it sweet.
Keep a notebook on the music stand. Ideas come while you are warming up, and they leave just as fast. Write them down before they go.
A mic on a stand nearby turns practice into recording. When a good take happens by accident, you are ready. Some of the best recordings are accidents.
Dust the keys sometimes. It takes one minute with a soft cloth. A clean piano invites you to play. A dusty one quietly tells you not to bother.
This corner works for all levels. Beginners, pros, kids learning scales. A piano corner never goes out of style.
14. The Drum Corner Studio
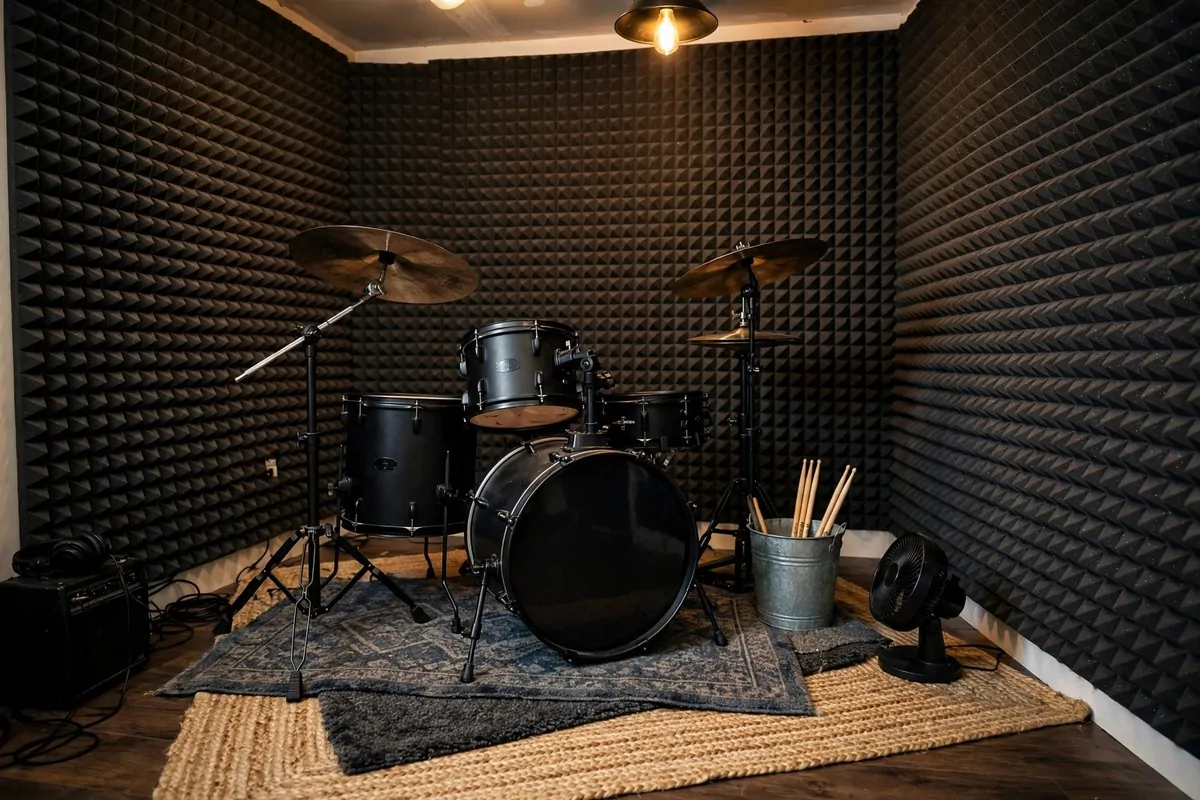
Drums at home scare people. The noise, the space, the neighbours. But a small drum corner can work with a little planning.
Start with the floor. Two thick rugs under the kit, layered if you can. This is the single biggest noise saver. It stops the thump travelling downstairs.
Panels on the two corner walls catch the crash and snap. Drums are loud in the high frequencies, and panels eat exactly those.
An electronic kit solves most problems at once. Mesh heads are quiet, you can use headphones, and it folds smaller than an acoustic kit. The neighbours will never know.
If you play acoustic drums, talk to your neighbours first. Agree on practice hours. A little honesty buys you a lot of goodwill.
Low volume cymbals and mesh head swaps exist for acoustic kits too. They cut the volume way down while keeping the real feel. Worth looking into.
Keep sticks, brushes and spare heads in a bucket by the kit. Drummers lose sticks like socks in a dryer. A bucket ends the hunt.
A small fan pointed at the drummer is a kindness. Drumming is a workout. An hour in a closed corner gets hot fast.
Record with one or two mics to start. An overhead mic and a kick mic capture a lot. You can add more mics later when you know what you are missing.
A drum corner teaches you about sound fast. You learn what loud really is, and you learn how a room answers back. Every drummer should have one.
15. The Three-Zone Studio
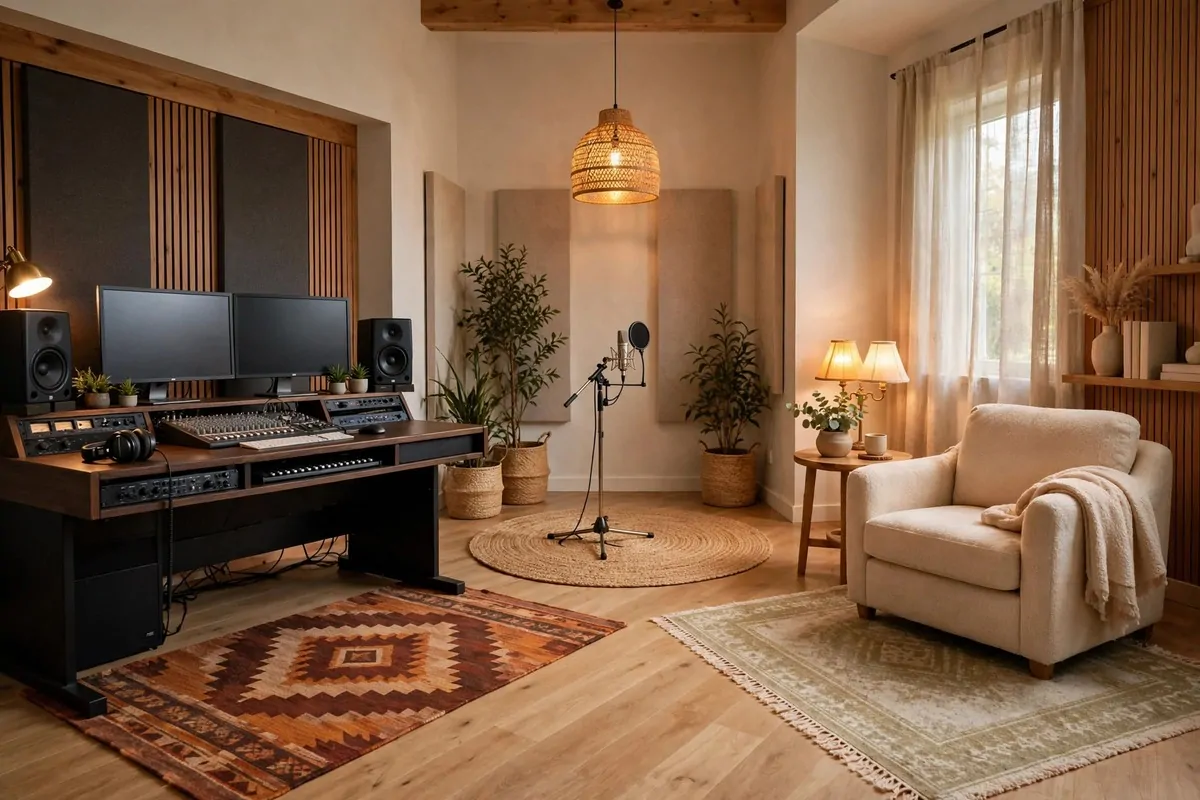
One room, three jobs. Recording, mixing, relaxing. Give each job its own zone and the room stops feeling cluttered.
The mixing zone is your desk. Monitors, keyboard, screen. This is mission control. Keep it tidy because you sit here the most.
The recording zone is a few steps away. A mic on a stand, maybe your instrument. A rug and some panels make it sound right. You walk over, record, walk back.
The relaxing zone is a chair and a small table. No gear. This is where you listen back with fresh ears. Distance from the desk helps you hear the mix honestly.
- Use a rug to mark each zone on the floor
- Point a lamp at each zone so they feel separate
- Keep recording gear in the recording zone, not on the desk
- Let the relaxing chair face away from the screens
- Move between zones on purpose, it clears your head
You do not need a big room for this. A medium bedroom fits three zones fine. The zones can be small. They just need to be separate.
Cable runs get shorter with zones. The mic cable lives by the mic. The headphone cable lives by the chair. Nothing stretches across the room.
This layout copies real studios. Pros have live rooms, control rooms and lounges. You are doing the same thing, just smaller.
I like how zones end the day too. When you leave the desk and sit in the relaxing chair, work is over. Your brain gets the message.
Try it for a week. Most people never go back to one big mixed up pile of gear.
16. The Plant-Filled Studio
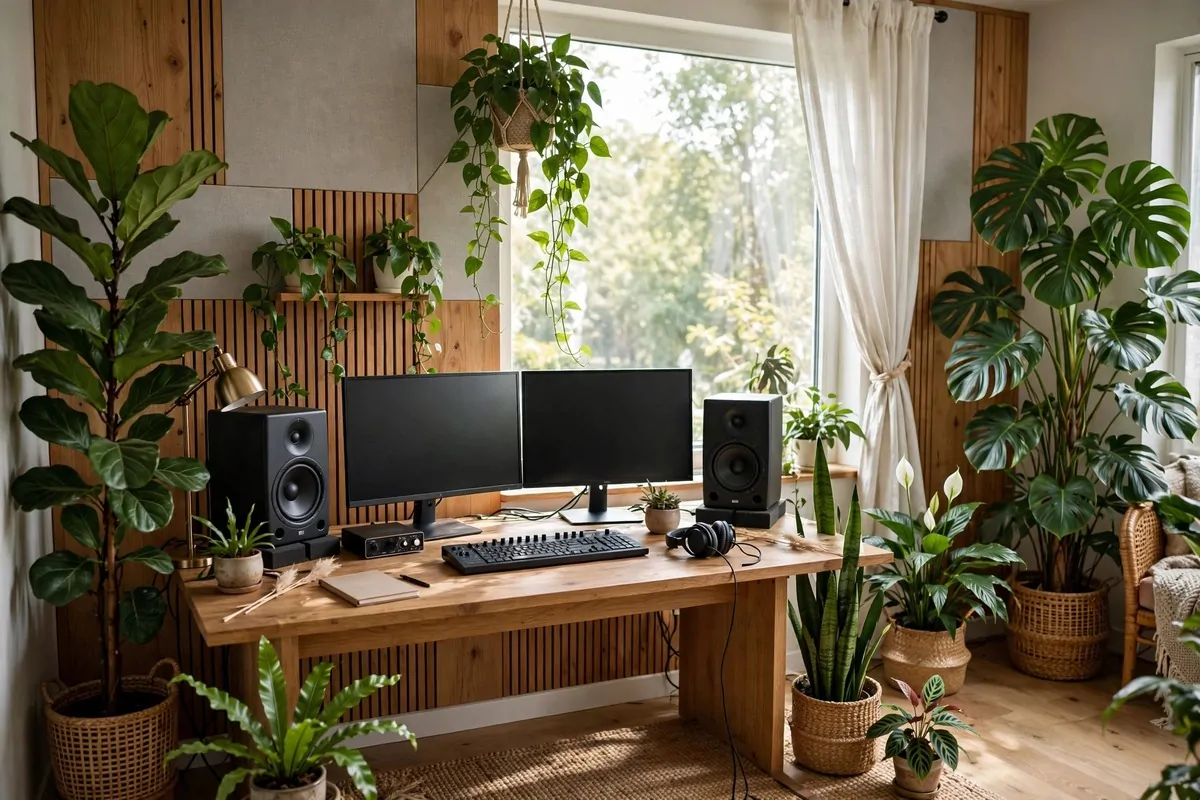
Big leafy plants in the corners. A hanging plant by the window. This studio breathes.
Plants do a small sound job too. Big leaves scatter high frequencies, and a plant in a bare corner is better than no plant. It will not replace panels, but it helps a little.
Corners are the best plant spots. They are often dead space anyway. A tall plant fills the corner and softens it at the same time.
Hanging plants add layers. Sound likes flat empty air. Plants at different heights break it up. Plus they look amazing in photos.
Pick easy plants. Snake plants, pothos, peace lilies. They survive low light and missed waterings. A dead plant helps nobody.
Woven baskets as pots fit the studio vibe. They add texture, and texture is good for sound. Ceramic pots look sharp too.
Keep plants away from gear. Water and electronics are not friends. A shelf above the desk is fine. Right next to the interface is not.
A little watering routine becomes a nice ritual. Before a session, check the plants. It slows you down and gets you in the room mentally.
The air feels better with plants around. Whether that is science or just feeling, I will take it. A fresh room makes fresh music.
This style is perfect if your studio doubles as a living space. It never looks like a tech cave. Guests just see a lovely green room.
17. The Wood Slat Wall Studio
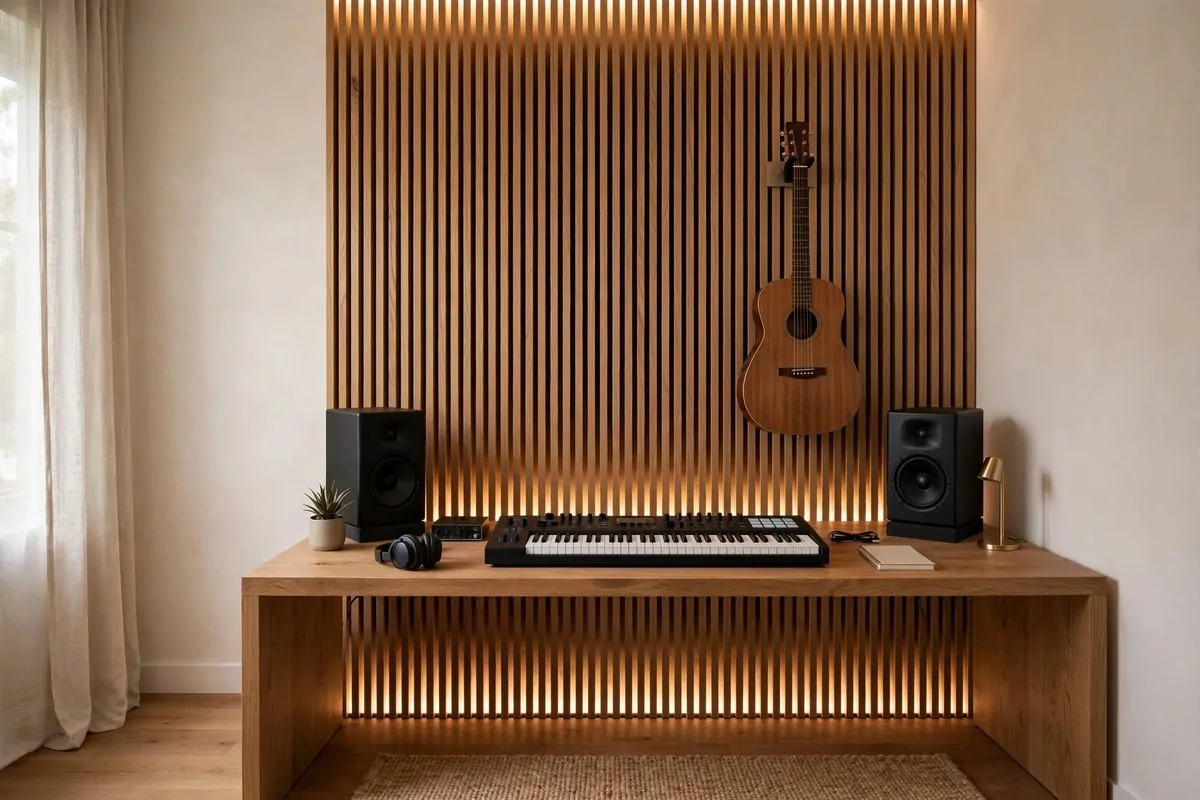
Vertical wood slats on one wall. That is the whole look. And it is stunning.
Slats add texture that flat paint never can. Light catches each edge. The wall looks deep and warm even before you add anything else.
They help the sound a little too. The gaps and ridges break up reflections. Real studios use wooden diffusers for this exact reason.
You can buy slat panels ready made. They come as sheets you screw to the wall. Or you can build them with thin wood strips and a free weekend.
Stain or paint them to match your room. Natural oak looks warm. Dark walnut looks moody. White painted slats look clean and modern.
Put your desk against the slat wall. The texture becomes your backdrop. On video calls or streams, it looks like you hired a designer.
Hang one guitar on the slats. The wood on wood looks rich. Or mount a small shelf for headphones between the slats.
LED strips hidden behind the outer slats glow through the gaps. At night the whole wall lights up softly. It is my favourite trick in this list.
Keep the other walls simple. One slat wall is a feature. Four slat walls is a sauna. Let the one wall do the talking.
This is the setup people photograph. It looks expensive, it sounds a touch better, and guests always ask about it.
18. The Closet Vocal Booth
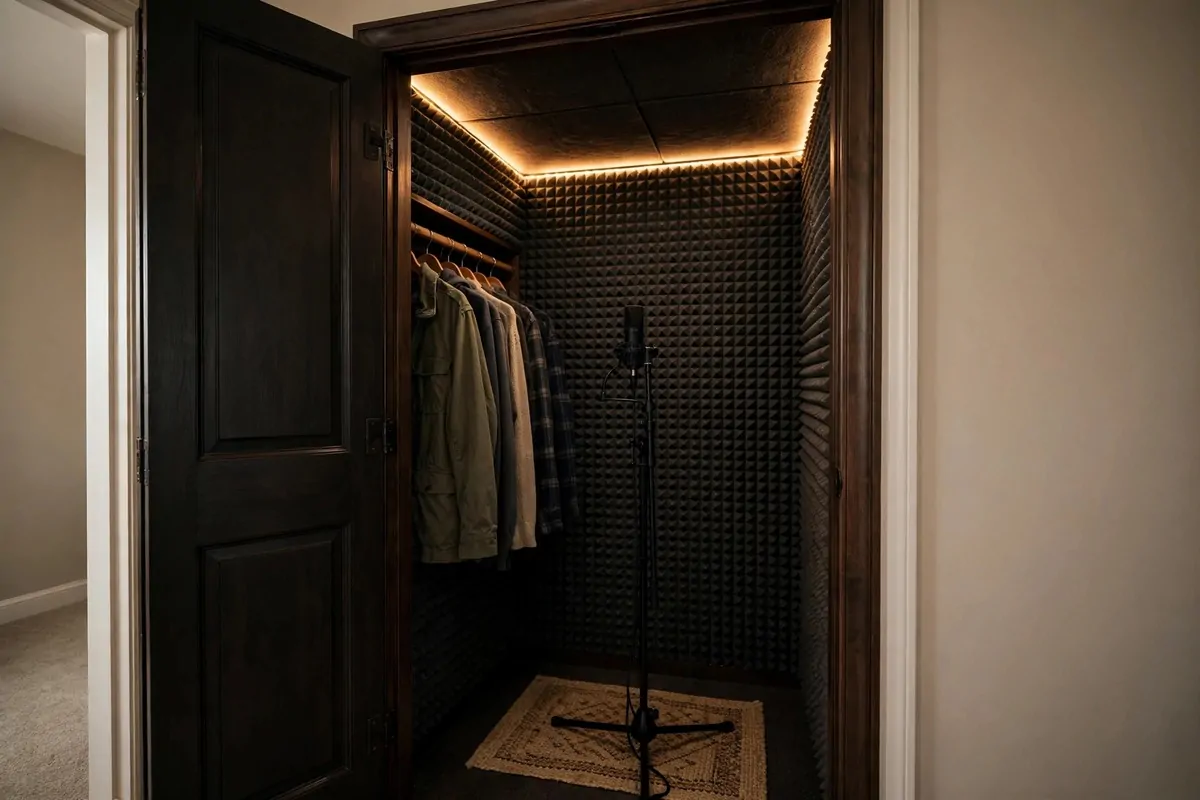
Your closet is already a booth. It just does not know it yet.
Closets are small, full of soft clothes, and closed off from the room. That is a great starting point for recording vocals.
Clear one side for you and the mic. Clothes on the other side stay. They are free sound treatment. A closet full of coats sounds better than an empty one.
Cover about two thirds of the bare wall with panels or blankets. You want it dead in there, but not weird. Too much treatment makes vocals sound boxy.
- Take the doors off if they rattle, hang a thick curtain instead
- Run a power strip in for your interface and a small lamp
- Add a USB fan for air, heat builds up fast in a closet
- Put a rug or foam mat on the closet floor
- Keep water nearby, singing is thirsty work
LED strips are the perfect closet light. They are cool, quiet and stick anywhere. Singing in soft light feels better than a bare bulb anyway.
Watch the low end. Small spaces boost bass in funny ways. If your voice sounds tubby, pull the mic a little further from the walls.
A pop filter on the mic is a must in a closet. You are close to the mic in a small space, and plosives hit harder. A cheap filter fixes it.
Test with a verse and a chorus. Listen on headphones. The vocal should sound close and dry, like the singer is right next to you. That is the closet magic.
When you are done, the booth disappears. Close the curtain, and it is a closet again. Nobody has to know your secret studio.
19. The Heavy Curtain Studio
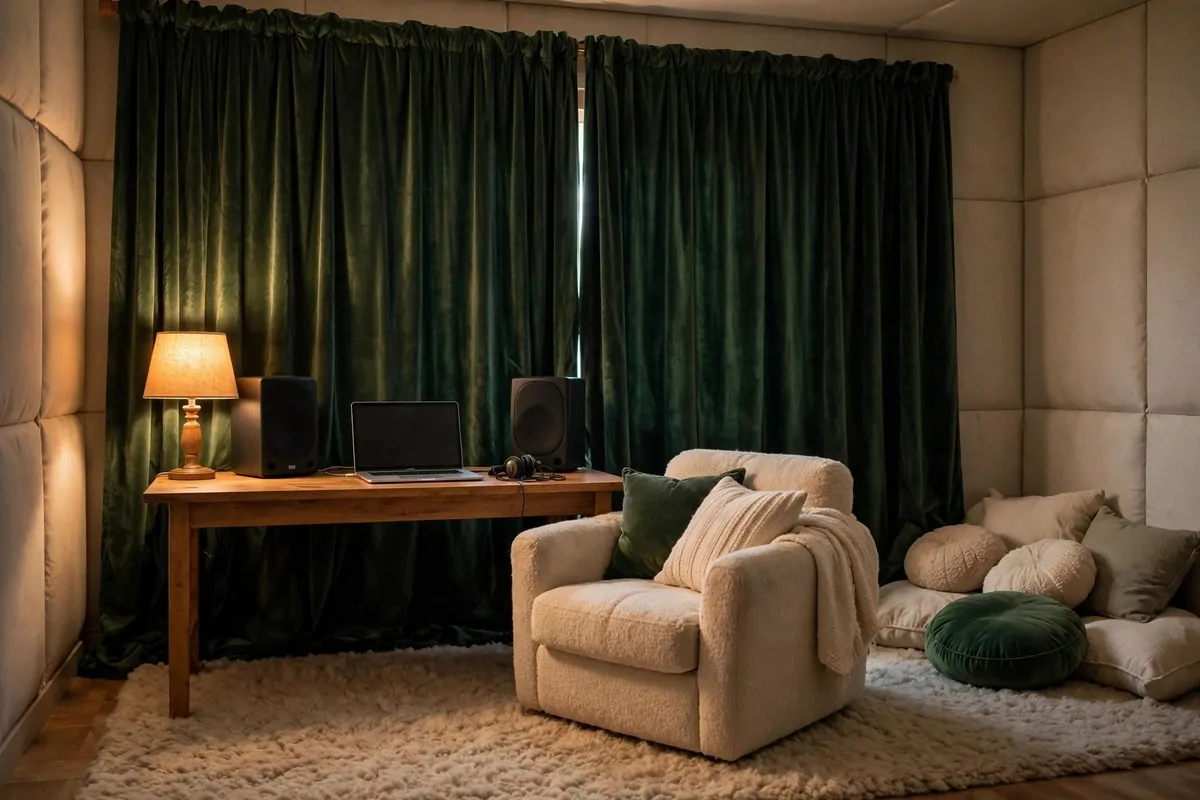
Thick curtains. Heavy rug. Soft chair. This studio is built from fabric, and fabric is a musician’s quiet friend.
Heavy curtains over the windows do two jobs. They block street noise coming in, and they stop your sound bouncing off the glass. Glass is one of the worst surfaces in a studio.
Velvet or blackout curtains work best. The heavier the better. Hang them wider than the window so they cover the wall around it too.
A thick wool or jute rug under your chair covers the floor bounce. Hard floors are echo machines. One good rug tames a whole room.
This is the cheapest real soundproofing trick there is. Curtains and rugs cost less than panels and you probably need them anyway.
Layer curtains for extra effect. A sheer curtain for daytime light, a heavy curtain for recording time. Pull the heavy one shut and the room changes.
The look is soft and calm. Fabric everywhere makes a room feel quiet even before you play a note. It is the opposite of a cold tech room.
Add floor cushions for guests or bandmates. They are cheap, they look fun, and they soak up more sound. Win, win, win.
I recommend this style to renters most. No drilling, no damage, everything comes down clean. Your landlord never has to know it was a studio.
At night, with the curtains drawn and one warm lamp on, this room feels like a secret. Just you and the music. That feeling is worth everything.
20. The Bookshelf Diffuser Studio
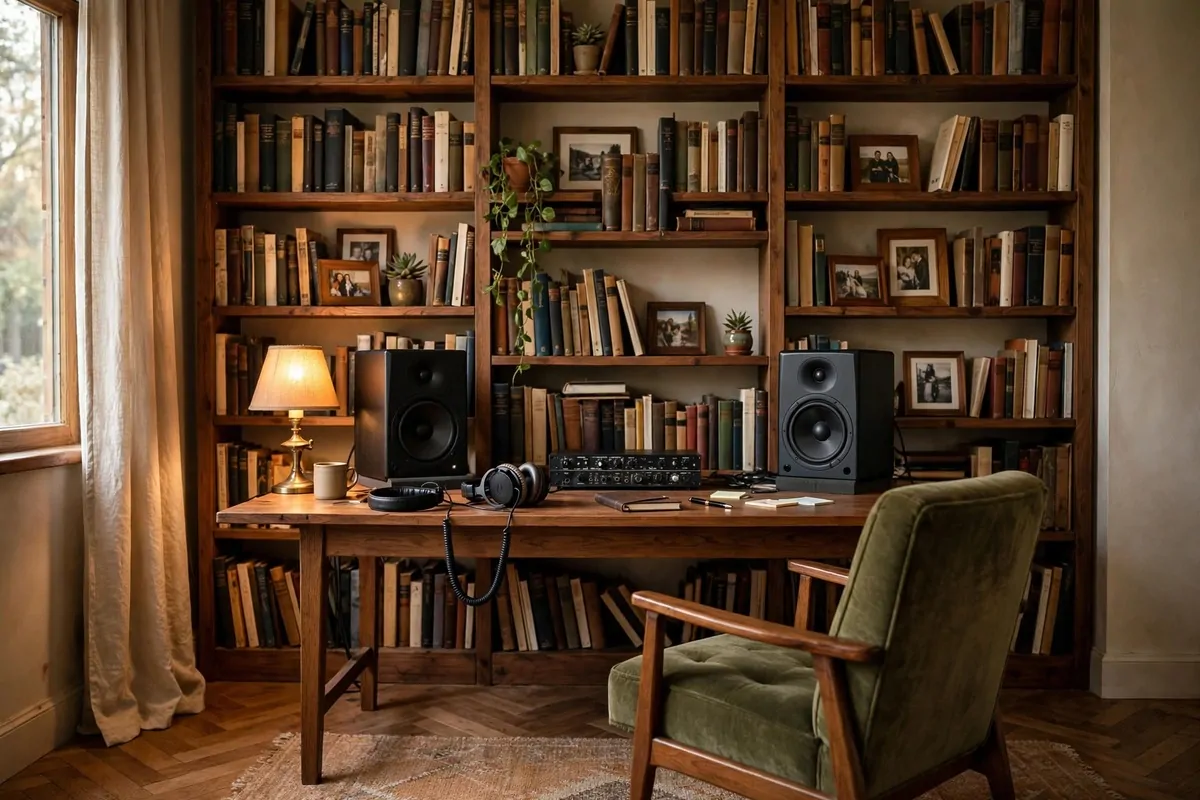
A full bookshelf is one of the best sound tools you already own. Books break up sound waves like nothing else in a normal home.
The trick is variety. Different book sizes, some leaning, some straight. A messy shelf scatters sound better than a perfect one. Finally, a reason not to tidy.
Fill it floor to ceiling if you can. A tall shelf treats the whole wall. Short shelves leave the top half bare and echoey.
Put the shelf on the wall behind you or to your side. Those are the spots where reflections mess with your mix the most.
Mix in some objects between the books. A small plant, a box, a framed photo. More shapes mean more scattering. It looks good too.
Sheet music and notebooks live here naturally. Your studio library grows on its own. Keep a pencil pot on one shelf for marking scores.
This is the studio for readers and collectors. It never looks like a tech cave. It looks like a smart person’s favourite room.
Dust it sometimes. Books collect dust, and dust gets in gear. A quick run with a cloth every few weeks keeps everything happy.
The best part is the cost. If you already own books, this treatment is free. The shelf might be the only thing you buy, and thrift stores have plenty.
A room full of books makes you feel clever. And feeling clever makes you brave. Brave is exactly what you need to finish a song.
21. The Cable-Tidy Pegboard Studio
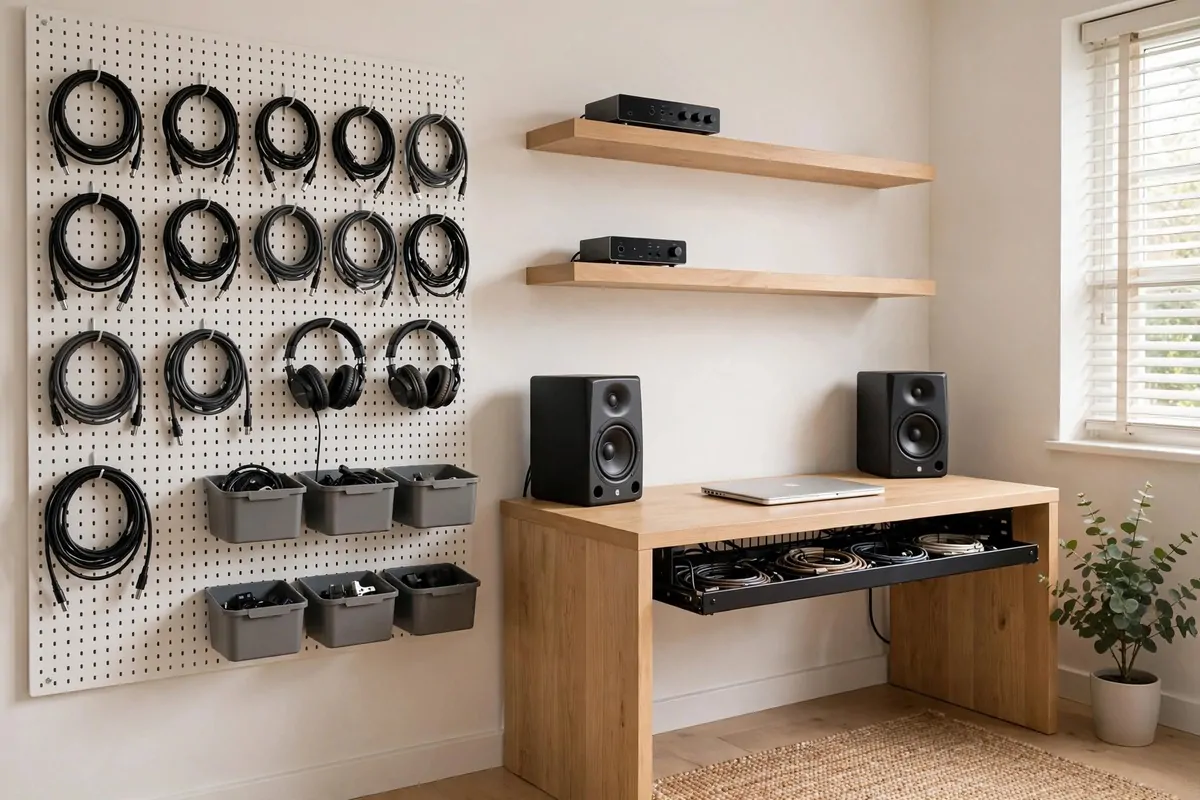
Cables are the weeds of a studio. Ignore them and they take over. A pegboard keeps them in line.
Hang the pegboard on the wall by your desk. Hooks hold headphones, coiled cables, and small bags of adapters. Everything visible, everything in reach.
Cable trays under the desk catch the rest. Power strips, chargers, the mess behind the monitors. One tray hides it all.
Label your bins. A little label maker or just tape and a marker. Cables, mics, picks, adapters. You will find things in seconds instead of digging.
- Coil cables in loose loops, never tight knots
- Hang the cables you use daily, box the rest
- Colour tape on cable ends shows what goes where
- Velcro ties beat zip ties, you can redo them
- One drawer for the mystery cables, we all have them
Wall mounted shelves above the pegboard hold the gear you grab often. Interface, headphones, a small speaker. Off the desk, on the wall, out of the dust.
A tidy studio sounds better too. I know that sounds strange, but clutter vibrates and rattles. A clean room has fewer mystery buzzes in your recordings.
Take a photo of the back of your desk before you tidy. Then compare after. The difference is always shocking. Show it to your friends.
This setup suits producers with lots of small gear. Synths, pedals, controllers. When every cable has a home, you spend time making music instead of untangling.
End of session tidy takes two minutes here. Hang the headphones, coil the cable, done. Tomorrow you start clean. That is a gift to your future self.