30 Craft Room Ideas That Make Creating Pure Joy

Walk into a good craft room and the first thing you get is the smell. Warm glue. Fresh paper. A little bit of paint still drying on something in the corner. It smells like something good is about to happen, and I love that feeling.
I have been in craft rooms that were whole spare bedrooms, and I have been in craft rooms that were just one corner of a laundry room. The size never decided how happy the room felt. The happy ones all had one thing in common. Everything you need was close, and everything had a home.
That is what this list is really about. Not fancy showrooms. Real craft room ideas that make your supplies easy to grab and your space fun to sit in. I looked through dozens of real craft rooms to find the ideas that people actually use and love.
You will find storage tricks, smart layouts, lighting tips, and pretty touches. Some cost almost nothing. Some take a weekend. All of them make creating feel easier and more joyful.
So grab a cup of tea, settle in, and picture your own little corner getting happier. These 30 craft room ideas will help you build a space where you actually want to sit down and make things.
1. The Pegboard Wall That Holds Everything
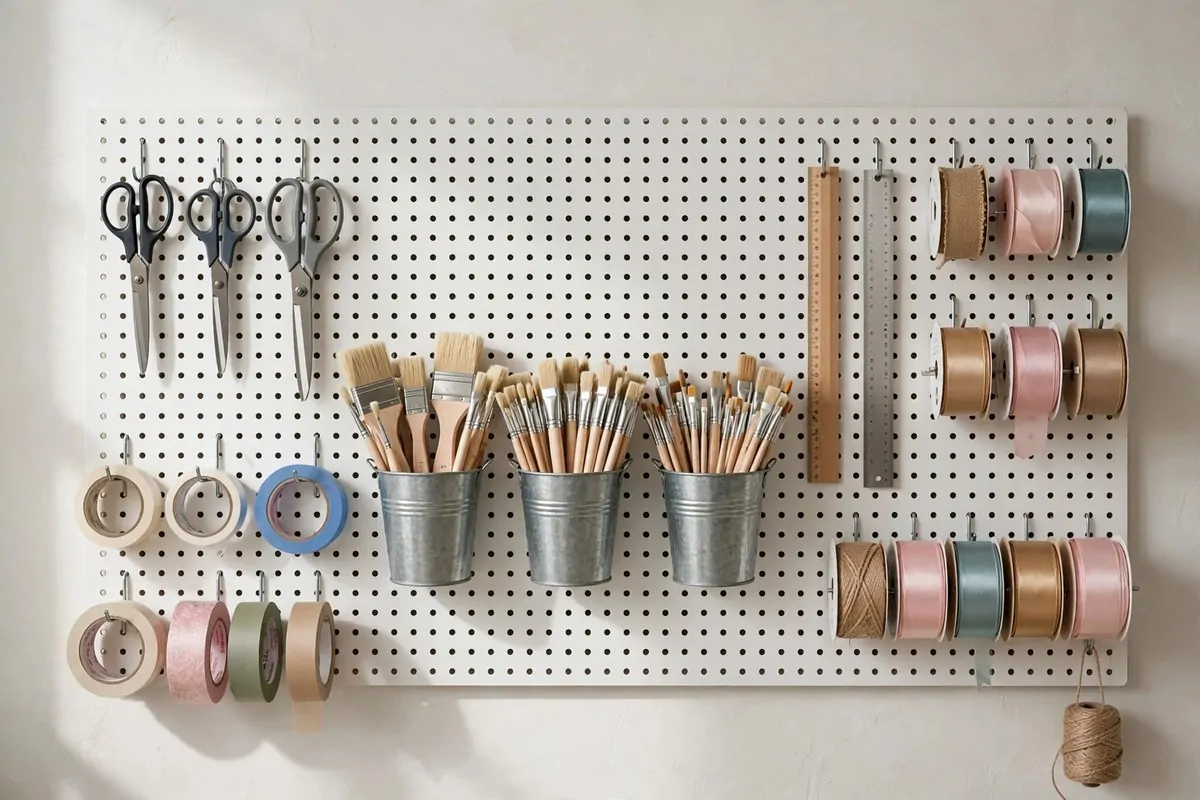
A pegboard wall is the hardest working wall in any craft room. It turns empty wall space into storage for all the little things that usually end up lost in drawers. Scissors, tape, rulers, brushes, and ribbons all hang right where you can see them.
I painted my pegboard the same white as my wall so it looked calm, not busy. Some people paint theirs a fun color. Both work. The point is that your tools stay visible and easy to grab.
Small buckets and cups hook right onto the pegboard pegs. I keep my markers in one bucket and my paintbrushes in another. It takes two seconds to lift one off the board and set it on my table.
Here is a trick I wish I knew sooner. Put your most used tools at arm height, right beside your work spot. The things you grab once a week can live higher up.
A pegboard is also cheap to start. One board, a bag of hooks, and you are done. You can always add more hooks later as your collection grows.
The best part is how fast cleanup goes. When I finish a project, everything has a hook waiting for it. I just hang things back up and the room looks tidy in minutes.
If you sew, hang your measuring tape and spare needles on the board too. If you do paper crafts, hang your paper trimmer and bone folder. The board fits whatever craft you love.
Kids love pegboards as well. Give them the lower half of the board for their own cups of crayons and safety scissors. They get their own spot and you keep yours.
2. A Rolling Cart That Follows You Around
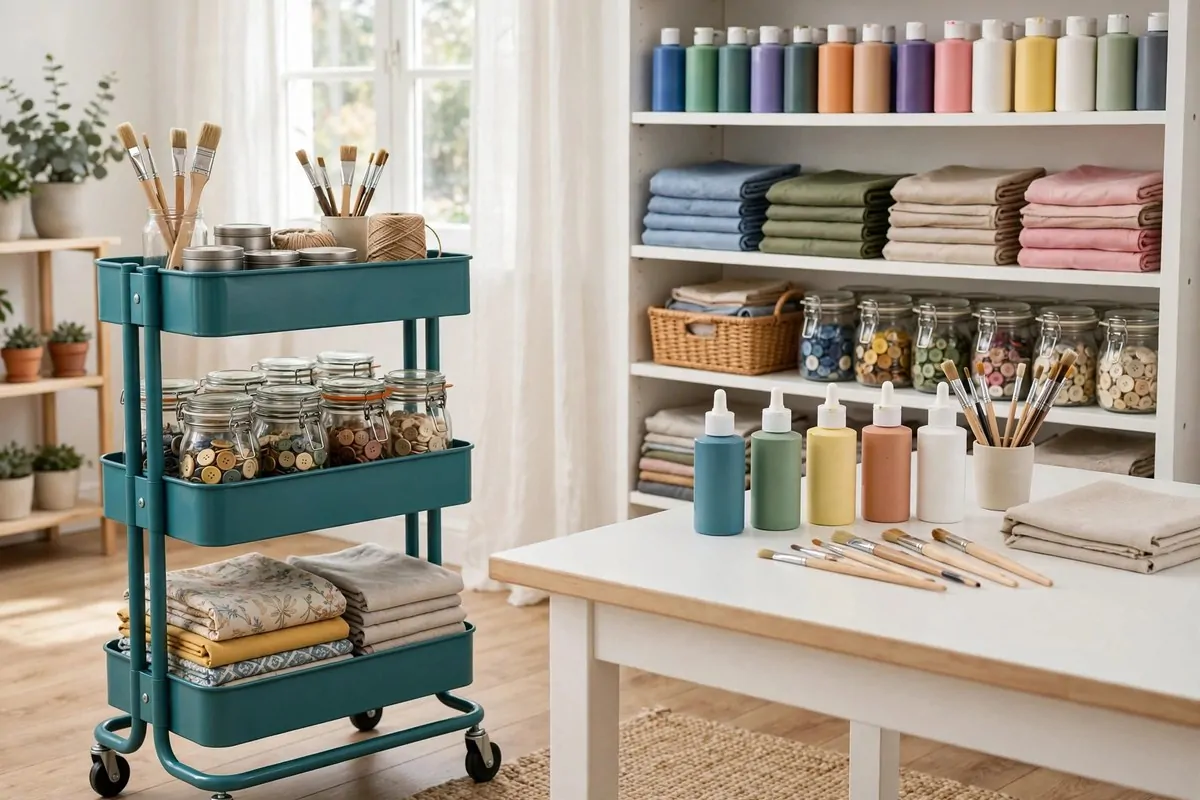
A rolling cart might be the best ten-minute upgrade in this whole list. You load it with the supplies for your current project, roll it next to your table, and everything is right there. No more getting up every five minutes.
I keep one cart for painting and one for paper crafts. But one cart is plenty to start. Just pick the craft you do most and stock it with those supplies.
The top shelf holds my go-to items. Scissors, glue, tape, and my favorite pens. The middle shelf holds the project itself, half finished, safe from being knocked around.
The bottom shelf is for the messy stuff. Paint tubes, water cups, and paper towels live down there where spills do not matter much. I line the shelf with a cheap tray for easy wiping.
When I am done for the day, I roll the cart into a corner. My table stays clear for dinner or homework or whatever else the table needs to do. That is the magic of wheels.
Carts also work great in small rooms. A corner cart takes up almost no space. You can even roll it into a closet when guests come over.
Label each shelf with a little tag if you like. It sounds fussy, but it stops the cart from slowly turning into a junk pile. I learned that the hard way.
If your craft room is shared with an office or bedroom, a cart is almost a must. It lets you set up and pack away your whole craft station in under a minute.
3. Clear Bins With Labels You Can Actually Read
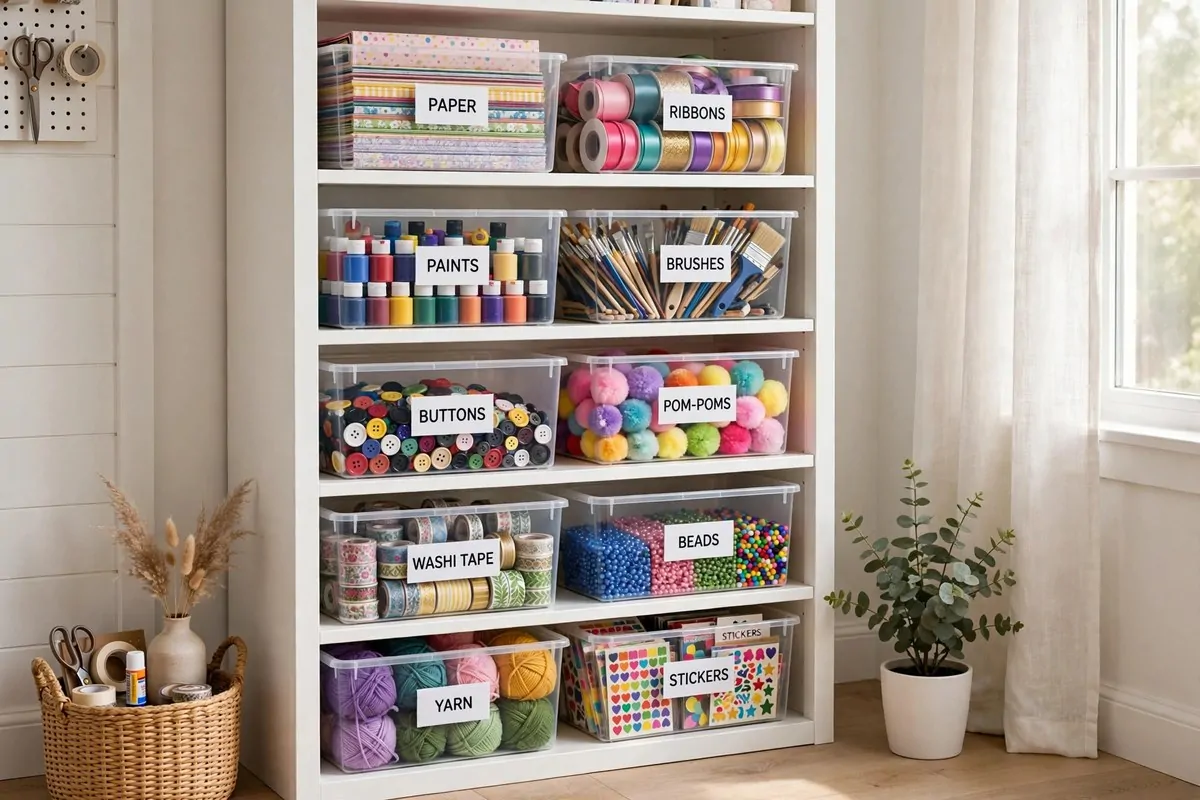
Clear bins are my favorite storage secret. You can see what is inside without opening anything. That saves you from buying a third bottle of glue because you forgot you already owned two.
Labels matter just as much as the clear plastic. Use big, simple words. GLUE. RIBBON. BUTTONS. If you have to squint to read the label, the label is too small.
I label with a simple label maker, but masking tape and a marker work just as well. Do not overthink it. The goal is finding things fast, not winning a handwriting contest.
Stack the bins by how often you use them. Everyday supplies go on the middle shelves where your hands reach easily. Seasonal or rare supplies can live up high or down low.
Here is a simple way to plan your bins. Give each craft its own bin, and give shared basics like glue and tape their own bin too. That way nothing hides inside the wrong box.
| Bin Label | What Goes Inside |
|---|---|
| PAINT | Tubes, brushes, palette, water cup |
| PAPER | Cardstock, scrap paper, envelopes |
| SEWING | Thread, needles, pins, measuring tape |
| SMALL BITS | Buttons, beads, sequins, eyes |
| FINISHING | Glue, tape, string, gift tags |
One more tip. Leave a little empty space in each bin. A bin stuffed to the lid is a bin you will avoid opening. Half full bins stay useful.
And do a quick cleanout after each big project. Toss the dried out markers. Put the leftover bits back where they belong. Five minutes now saves you an hour later.
Clear bins also look nice on open shelves. All that color peeking through the plastic actually makes the room feel cheerful. Storage can be pretty too.
4. A Mood Board Wall for Your Wildest Ideas
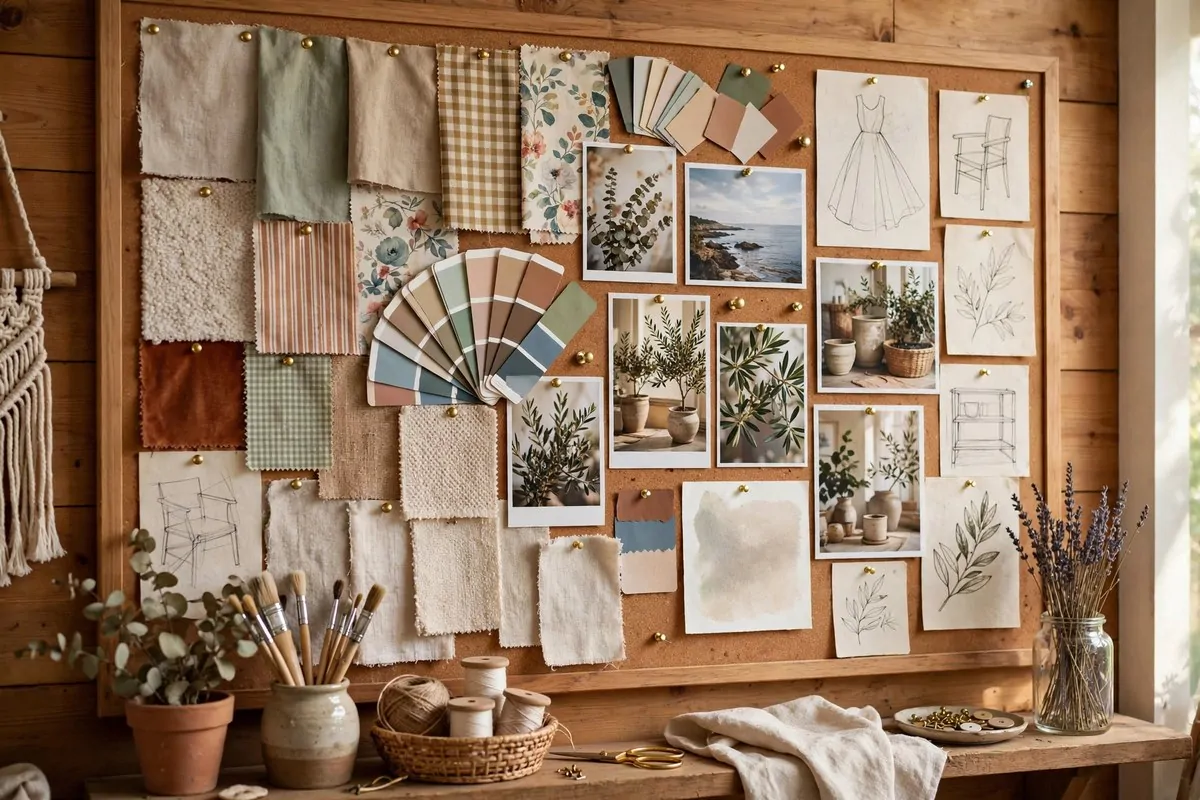
Every crafter needs a wall that dreams out loud. A mood board is just a big board where you pin the things that inspire you. Fabric scraps, paint chips, photos, magazine cutouts, and little sketches.
I use a cheap cork board from a thrift store. Pushpins hold everything up, and I change the board whenever a new project starts. It takes five minutes and it always gets my brain going.
Put the board where you can see it from your work chair. When you get stuck mid project, just look up. Something on that board will usually nudge you forward. It works for me almost every time.
Here is what I like to pin up:
- Fabric swatches and ribbon ends I am thinking about using
- Paint color cards from the hardware store
- Photos of rooms and crafts I love
- Little sketches of ideas that are not ready yet
- A kind note or quote that makes me smile
The board does not have to be pretty. It has to be honest. Pin the ugly first drafts too. They remind you that good work starts messy.
If one board is not enough, cover a whole wall. Some crafters use an entire wall of cork tiles. It looks amazing and it holds years of ideas.
You can also make a mini mood board on the inside of a closet door. When the door is closed, the room looks calm. Open it and boom, inspiration everywhere.
Change your board with the seasons. Fresh pins in spring feel like a fresh start. It is a small habit that keeps the room feeling alive.
5. Ribbon Curtain Rods That Double as Art
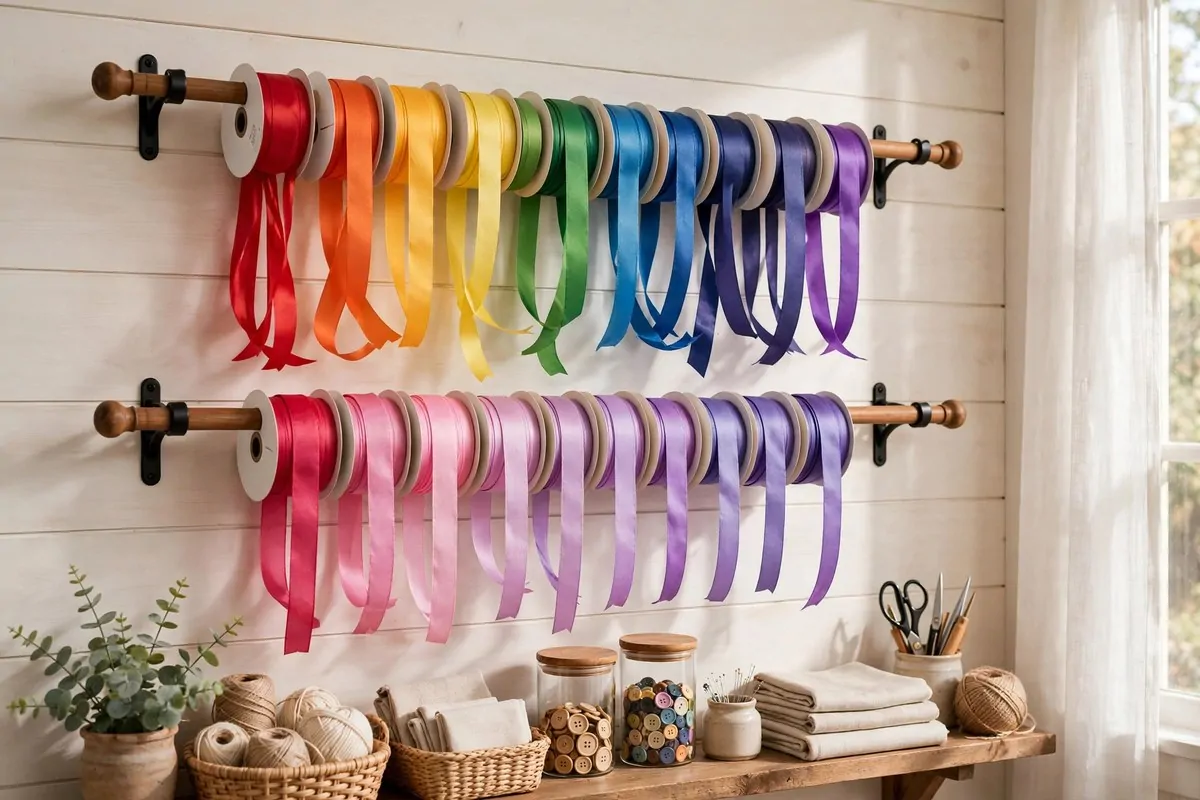
Ribbon is one of those supplies that turns into a tangled mess in a drawer. The fix is so simple. Hang a curtain rod on the wall and slide your ribbon spools right onto it.
I have two rods on my wall, one above the other. The spools hang in a rainbow and it is genuinely one of the prettiest things in my room. Guests always ask about it.
Pulling ribbon off a rod is easy. You just tug the end and cut what you need. No digging, no untangling, no kittens of ribbon knotted together in a box.
Use a rod with a round shape so the spools spin freely. A tension rod works if you do not want to drill holes. Just make sure it is strong enough to hold the weight.
Sort your ribbons by color or by width. I sort by color because it looks like art. My friend sorts by width because she grabs what she needs faster. There is no wrong answer.
This trick works for washi tape too. Small rods hold tape rolls the same way. You can see every pattern at a glance, which makes choosing fun instead of a chore.
The best part is the cost. A cheap curtain rod and two brackets is all you need. It might be the prettiest ten dollars you ever spend on your craft room.
When a spool runs out, you just slide a new one on. The rod never looks empty for long if you keep a small stash of refills nearby.
6. Magnetic Strips for Your Grab-and-Go Tools
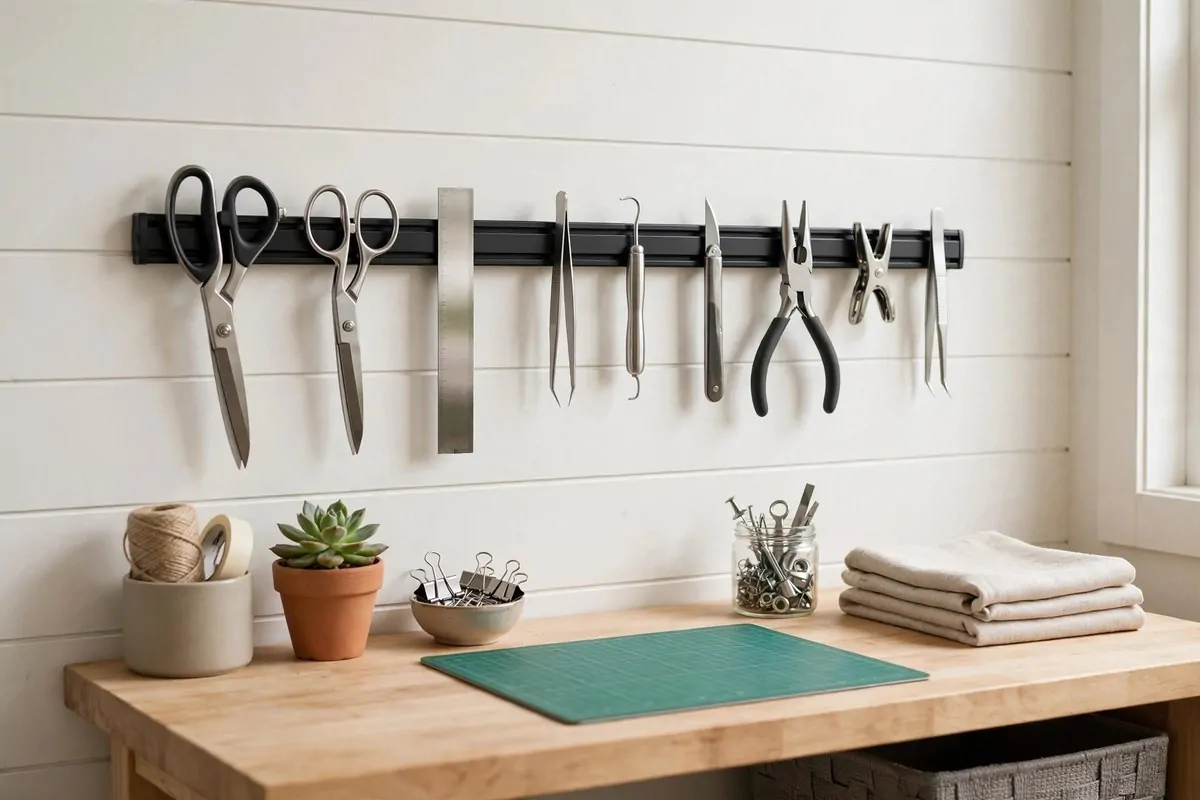
Magnetic strips are the quiet heroes of craft rooms. You stick one on the wall and suddenly your scissors, metal rulers, and small tools float there, ready to grab. No drawers, no digging.
I mounted mine right above my work table at eye level. When I need scissors, my hand just goes up and takes them. When I am done, they snap back with a satisfying click.
The strips hold more than you would think. Mine holds three pairs of scissors, two metal rulers, a seam ripper, and a handful of bobby pins I use for tiny jobs. All of it stays put.
Safety note for homes with little kids. Keep the strip high enough that small hands cannot reach the sharp things. Or keep only safe items like magnetic clips down low.
You can also use magnetic strips inside cabinet doors. It hides the tools but keeps them just as handy. I did this in my old apartment and loved it.
Here is a fun extra. Stick small magnets on the back of spice tins and they will cling to the strip too. Now your strip holds tiny containers of pins and beads. Two tricks in one.
Installation is easy. Most strips come with screws and wall anchors. A level and a pencil help you get it straight. Ten minutes and you are done.
Wipe the strip now and then. Dust and little metal filings can build up. A damp cloth once a month keeps the grip strong.
7. The Old Spice Rack That Became Storage
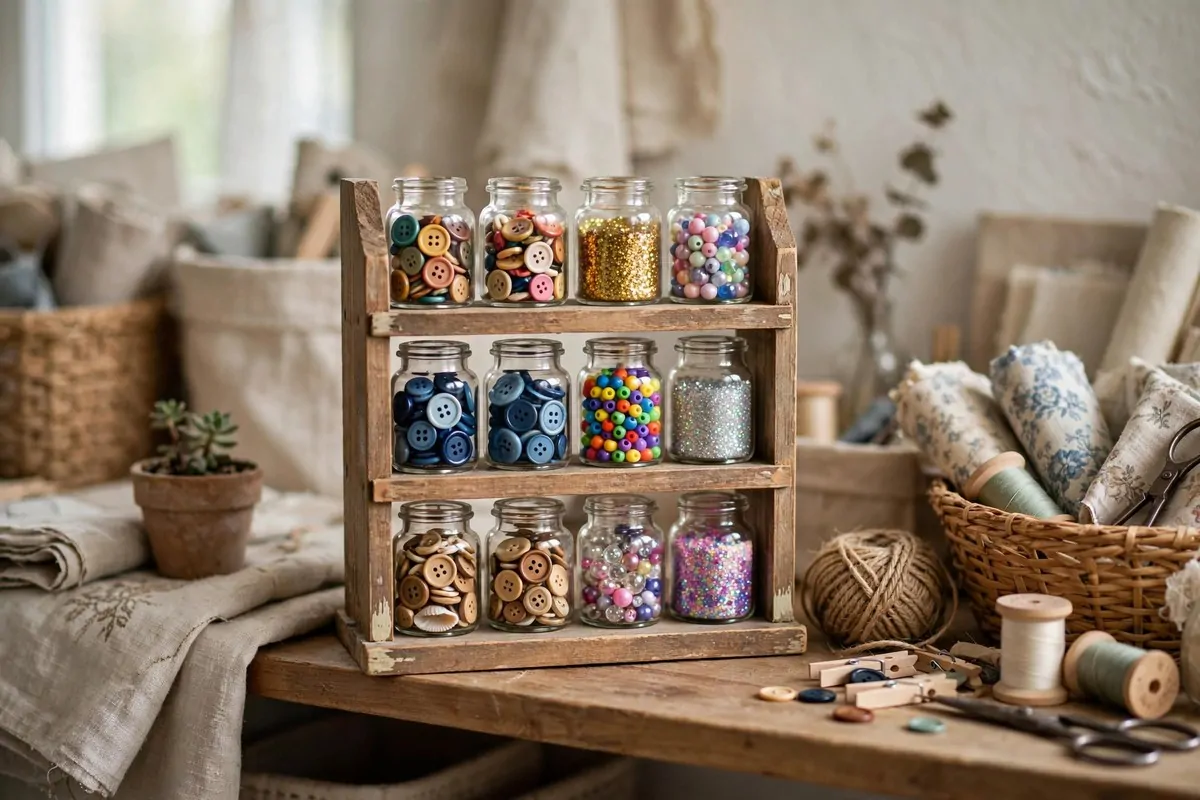
Got an old spice rack gathering dust in the kitchen? Give it a new job in your craft room. Those little jars are perfect for buttons, beads, sequins, and glitter.
I found mine at a yard sale for two dollars. A quick wash and it was ready. The jars spin around so you can see every color. It makes me happy just looking at it.
Sort the jars by color or by type. I do buttons in one row, beads in another, and glitter in the last row. My daughter sorts hers by color and hers looks like a rainbow. Both ways work great.
Label the lids if the jars all look alike. A tiny dot of paint on each lid can mark the color inside. Or just leave them clear and enjoy the view.
A spice rack fits on a shelf, a desk corner, or even a windowsill. It takes up almost no room but holds a shocking amount of tiny stuff. Small things are always the hardest to store.
If you do not have a spice rack, a small tiered shelf works the same way. Even an old muffin tin can hold sorted beads on your desk. Use what you have.
This is also a sweet gift idea for a crafty friend. Fill a thrifted rack with pretty buttons and tie a ribbon around it. Handmade storage for handmade things.
Check thrift stores first before buying new. Old spice racks show up there all the time for almost nothing. A little soap and water makes them good as new.
8. A Sewing Nook With Everything in Reach
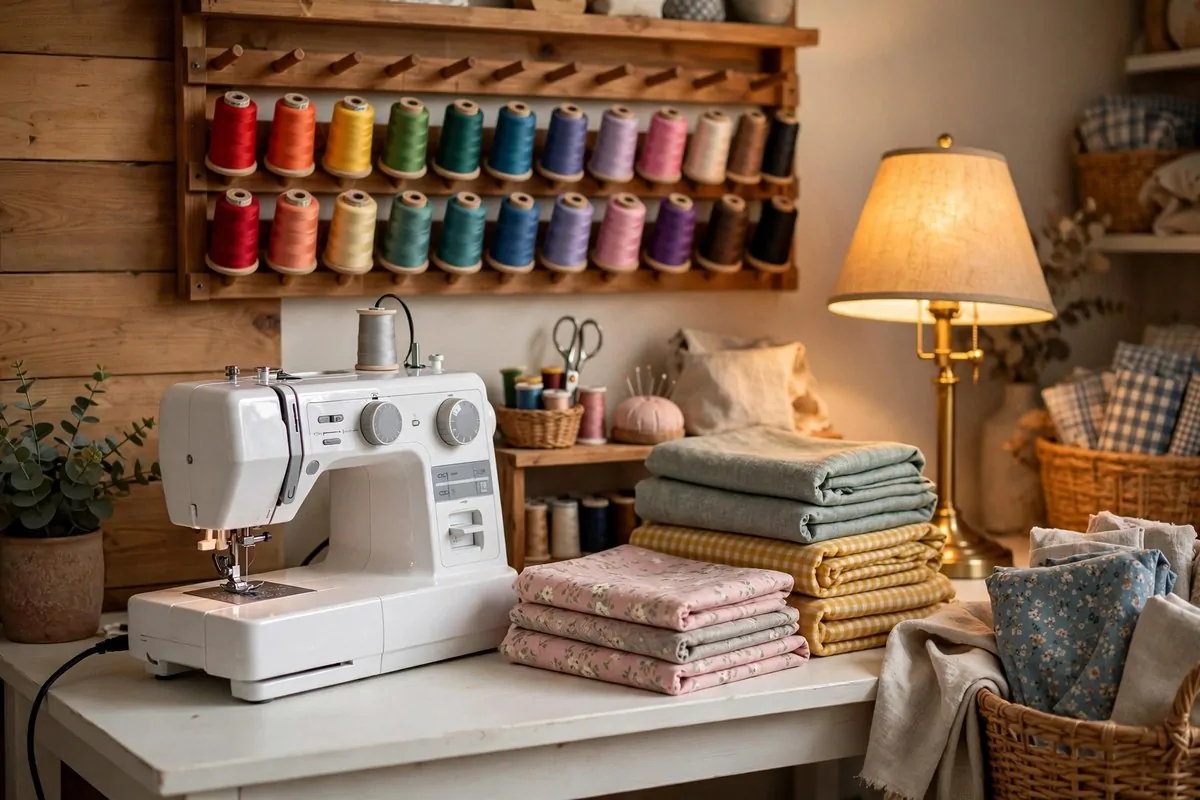
If you sew, you know the pain of dragging the machine out and putting it away every single time. A sewing nook fixes that. It is a small permanent spot where your machine lives, ready to go.
You do not need much space. A desk about as wide as your machine plus a little room on each side is enough. Mine sits against a wall in the corner of my craft room.
Keep your thread on a wall rack right above the machine. Seeing all the colors lined up is practical and pretty. You will grab the right shade in seconds.
A small basket beside the machine holds the daily bits. Pins, a seam ripper, spare bobbins, and your measuring tape. Everything you touch in every project lives in that one basket.
Good light matters a lot for sewing. A small lamp aimed at the needle area saves your eyes. I use a clip-on lamp so it does not eat desk space.
Keep your fabric close too. A shelf or a bin of your current project fabrics should be within arm’s reach. Digging through a closet for fabric kills your momentum.
A comfy chair makes a big difference. Sewing sessions run long. Pick a chair with back support and the right height for your desk. Your shoulders will thank you.
The best thing about a nook is that it invites you to sew more. When the machine is already set up, you will mend that hem and start that quilt. Friction is the enemy of hobbies.
9. A Paper Station That Keeps Scraps Under Control
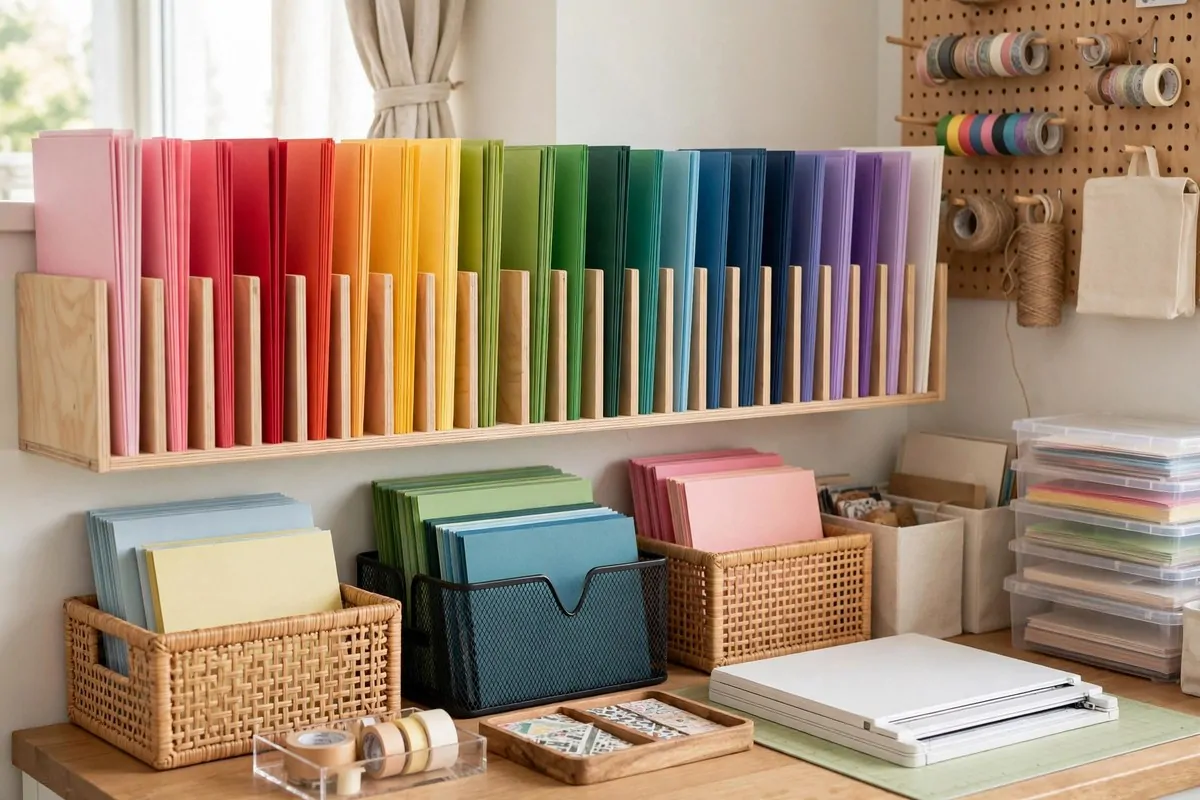
Paper crafters, this one is for you. Paper multiplies when you are not looking. A paper station keeps it sorted so you can find the exact sheet you need without a paper avalanche.
Start with vertical storage. Paper stored flat in stacks gets crushed and forgotten. Standing up in slots or magazine holders, every color is visible. It is like a little paper library.
Sort by color first, then by type. Cardstock in one section, patterned paper in another, and plain printer paper somewhere else. You will learn your own system fast.
Scraps deserve their own home too. I keep a small box for usable scraps and I am honest with myself about what counts as usable. If it is smaller than my hand, it goes in the recycling.
Here is a simple paper sorting plan that works for most people:
| Section | What Lives There |
|---|---|
| Cardstock | Heavy paper, sorted by color, standing upright |
| Patterned | Scrapbook paper and printed sheets |
| Specialty | Vellum, glitter paper, foil sheets |
| Scraps | Usable leftovers, one box only |
| In progress | Cut pieces for current projects |
Keep your cutting tools at the paper station. Trimmer, scissors, scoring board, and adhesives. When the tools live with the paper, you start projects faster.
A paper station also protects your paper. Sunlight fades pretty paper, so keep the station away from direct sun or use a curtain. Your patterned paper will stay bright for years.
Do a paper purge twice a year. Paper you have not touched in a year is paper you will not miss. Donate it to a school or a kids club and enjoy the empty shelf.
10. A Fabric Wall Sorted by Color
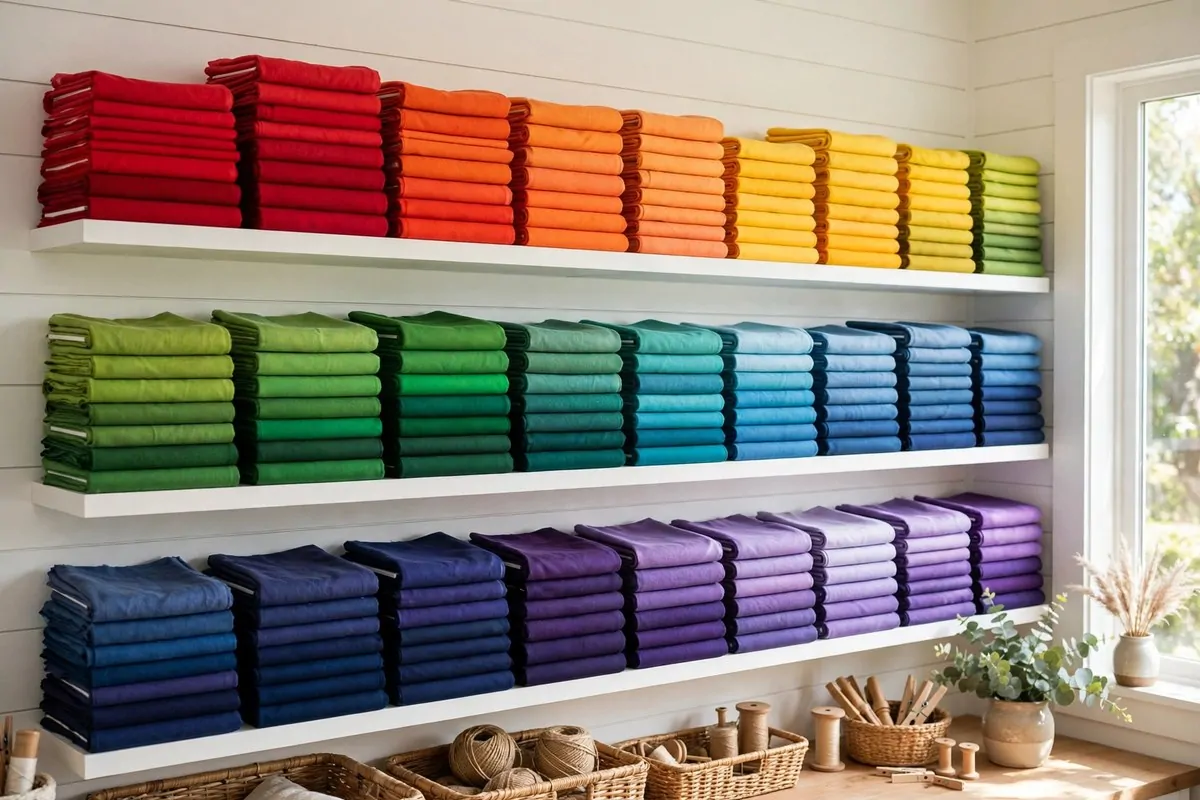
Fabric people, gather round. Storing fabric by color on open shelves is part storage and part art. The rainbow of fabric becomes the prettiest wall in your room.
Fold your fabric the same size so the shelves look neat. I wrap mine around small cardboard rectangles, like mini bolts. It keeps the folds crisp and the stack tidy.
Sort from light to dark or in rainbow order. Either way, you will spot the exact shade you need in seconds. No more unfolding six piles to find the blue you wanted.
Keep the shelves out of direct sun. Sun fades fabric fast, and a faded bolt is a sad thing. A sheer curtain on the window protects your rainbow.
This works for yarn too. Cubbies full of yarn sorted by color are gorgeous. Just keep the yarn in the cubbies and not in a giant tangled bag on the floor. We have all been there.
If you are short on shelf space, use clear file folders in a file box. One fabric per folder, sorted by color. It is the same idea, just smaller and cheaper.
The color wall also helps you shop smarter. When you can see you already own seven reds, you will not buy an eighth. Probably.
Take a photo of your fabric wall once it is done. When you are at the store wondering if you already own that print, the photo answers in seconds.
11. A Magnet Board Full of Tiny Tins
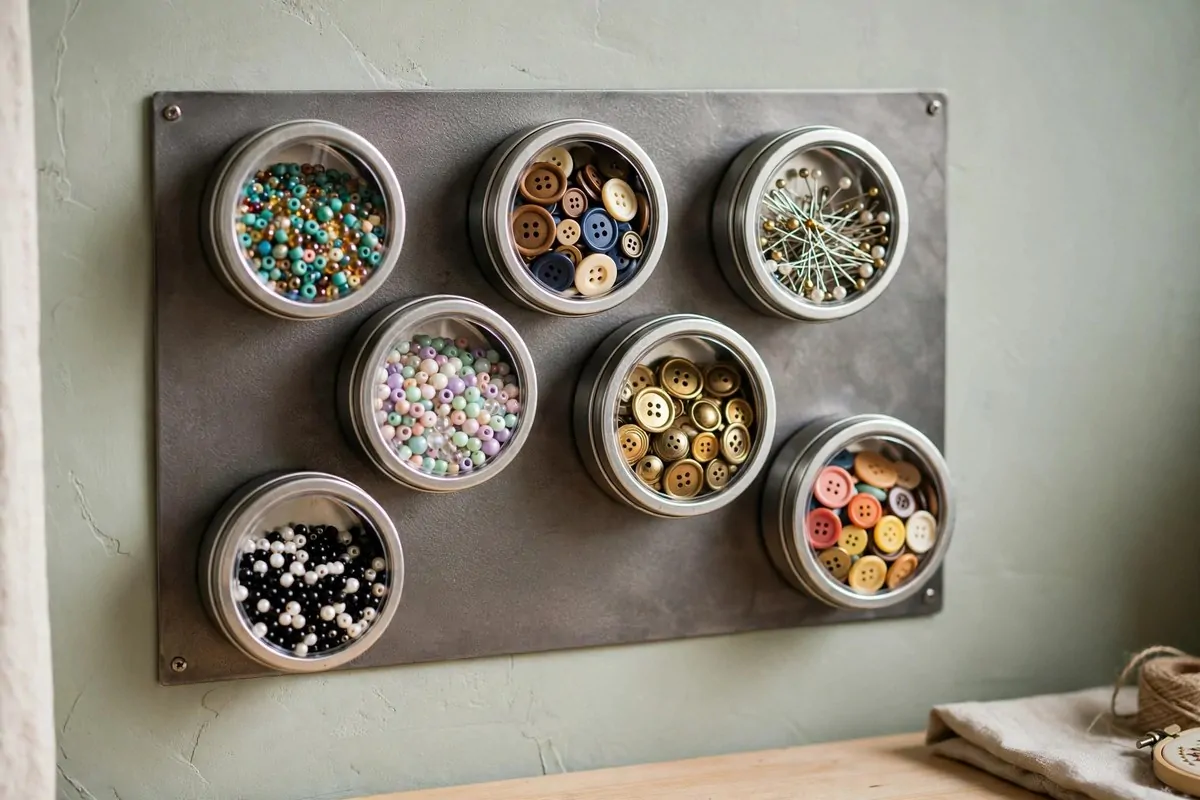
Tiny things are the worst to store. Beads, buttons, pins, and sequins vanish into drawers and never come back. A magnet board with little tins solves it beautifully.
Get a metal board and some small round tins with clear lids. Stick a magnet on the back of each tin. Now they cling to the board and you can see every tiny treasure.
Sort the tins by type or by color. I do buttons by color and beads by size. Whatever makes sense to your brain is the right system. There is no official rule book.
The clear lids are the key. You can see what is inside without opening anything. It stops you from opening twelve tins looking for the red buttons.
Mount the board at a height where you can reach every tin. The bottom row is for daily stuff. The top row is for the special things you use less often.
This setup is also great for embroidery floss bobbins if you add small clips. And for safety pins, snaps, and hooks. If it is small and metal friendly, it works.
Refill the tins when they run low and wipe the board now and then. It is a five minute job that keeps the whole thing looking sharp.
Traveling crafters love this trick too. Stick the tins on a small metal cookie sheet and your whole kit travels without spilling.
12. A Gift Wrapping Corner That Is Ready All Year
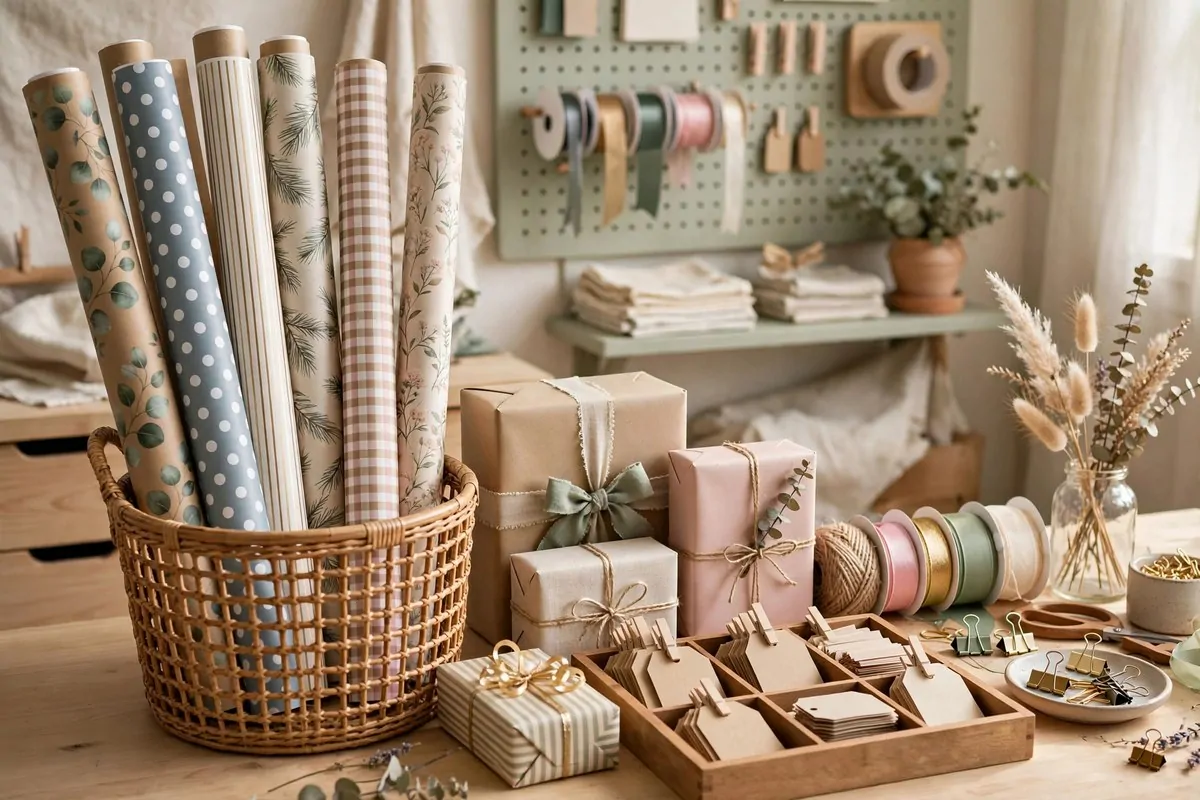
Birthdays do not warn you. They just show up, and suddenly you need wrapping paper at nine at night. A gift wrapping corner means you are always ready.
Set up a tall bin or a wall rack for wrapping paper rolls. Standing them upright keeps them from getting crushed. I keep mine in a tall laundry basket and it works perfectly.
Keep the rest of the kit together. Tape, scissors, ribbon, gift bags, and tags in one basket. When a gift needs wrapping, you grab the basket and you are done.
A small table or a clear patch of counter is your wrapping surface. You do not need much. Just enough room to roll out paper and fold the corners neatly.
Stock up after holidays when supplies go on sale. Plain kraft paper plus pretty ribbon looks classy for any occasion. One neutral paper covers birthdays, thank yous, and everything between.
Keep a little list taped inside the basket of upcoming birthdays. It sounds nerdy. It also means you never forget your nephew again. Ask me how I know.
This corner pulls double duty for craft projects too. The paper, ribbon, and tags are all craft supplies in disguise. Your wrapping station is really just a pretty craft station.
When the holidays come around, this corner becomes command central. You will wrap everything in half the time, and you will actually enjoy it. Maybe.
13. The Big Cutting Table in the Middle
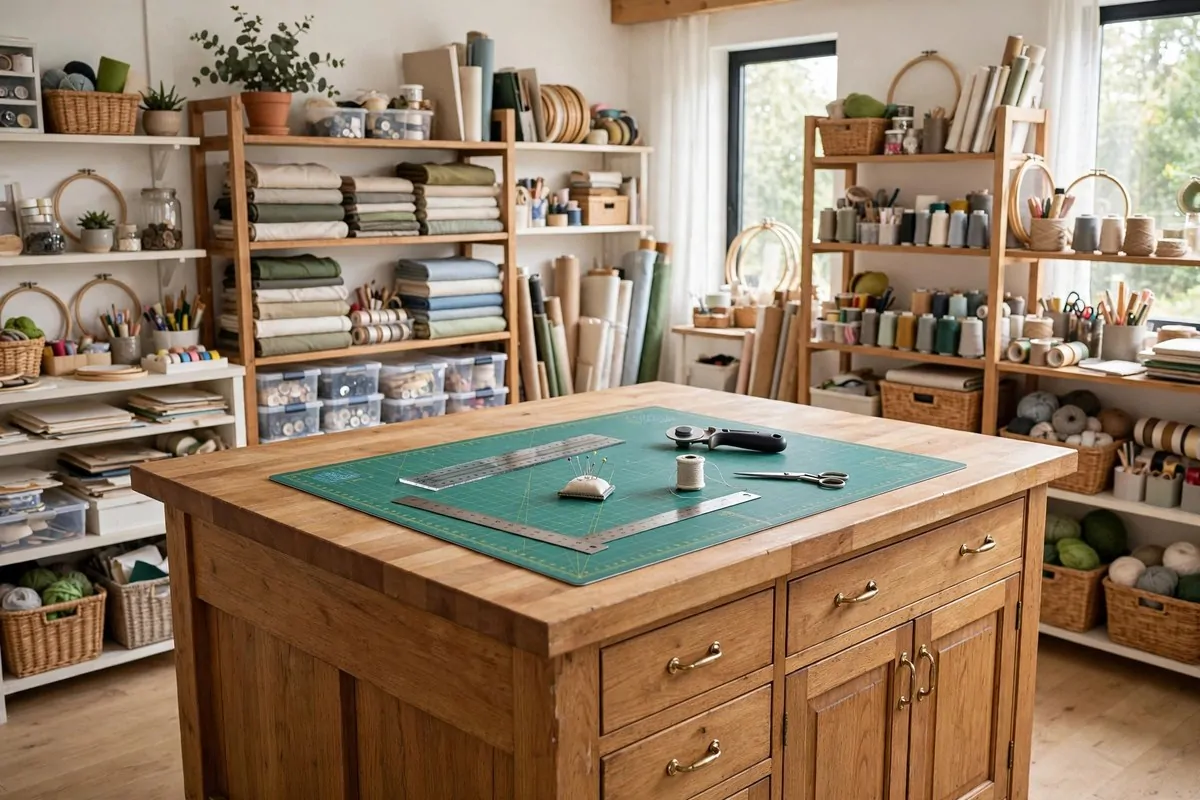
If you have the floor space, a big table in the middle of the room changes everything. You can walk all the way around your project. You can spread out. It feels like a real studio.
A cutting table should be taller than a normal desk. You want to cut standing up without hunching over. Your back will thank you after a long afternoon of measuring and trimming.
Put a self healing cutting mat on top. Get the biggest one that fits. A big mat means you can cut fabric, trim paper, and lay out patterns without moving things around.
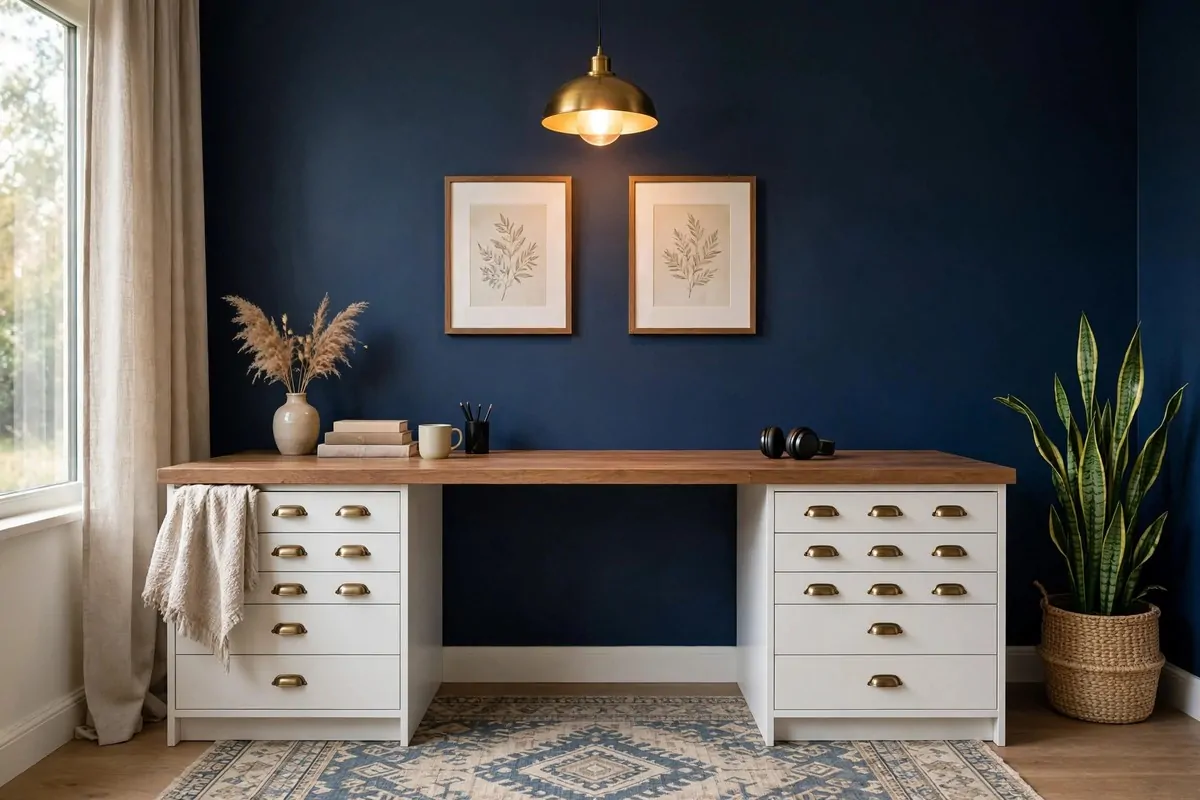
Storage underneath doubles the value of the table. Deep drawers or open shelves under the top hold fabric, paper, and tools. Everything stays close to where you use it.
I love that a center table lets two people craft at once. One on each side. Crafting with a friend is twice as fun, and a center table makes it natural.
If a full table is too big, a kitchen island on wheels works too. You get the height and the storage, and you can roll it aside when you need floor space. Flexibility is wonderful.
Keep the tabletop mostly clear. A clear table invites you to start something. A cluttered table makes you want to walk away. I try to end every session with a quick clear off.
Measure your room before you buy. You need at least two feet of walking space on every side of the table. A table you cannot walk around loses half its magic.
14. A Secret Craft Station Inside a Closet
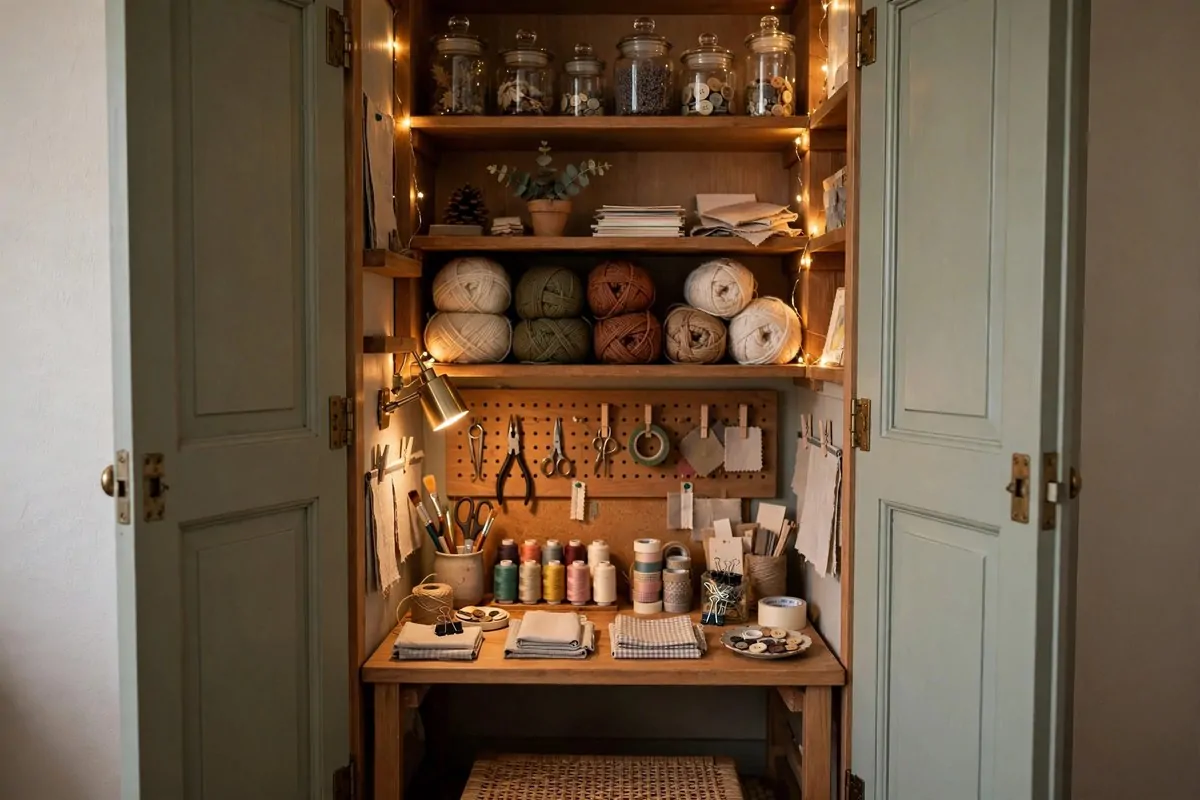
No spare room? No problem. A closet can become a secret craft station, and it is one of the cleverest craft room ideas I have seen. When you are done, you just close the doors.
Take the doors off or keep them, your choice. Doors that close hide the mess completely. No doors makes the space feel bigger and easier to use. I kept my doors because hiding the mess is half the fun.
Put a desk or a sturdy shelf at sitting height inside. That is your work surface. Above it, add shelves for supplies. Below it, bins for the bulky stuff.
Hang a small light inside the closet. Closets are dark by nature. A stick on LED light or a small clip lamp makes the little space bright and usable.
A cork board or pegboard on the inside of the door adds storage without taking desk space. Scissors, tape, and ribbons can all live on the door itself.
This setup is perfect for renters. Nothing is permanent. When you move, you just take your shelves down and the closet is a closet again.
The best part is the surprise factor. Guests open the closet looking for a coat and find a whole craft world inside. It never gets old.
Add a small stool that tucks inside when the doors close. Everything packs away neatly, and the whole station disappears in seconds.
15. Sharing Space With the Laundry Room
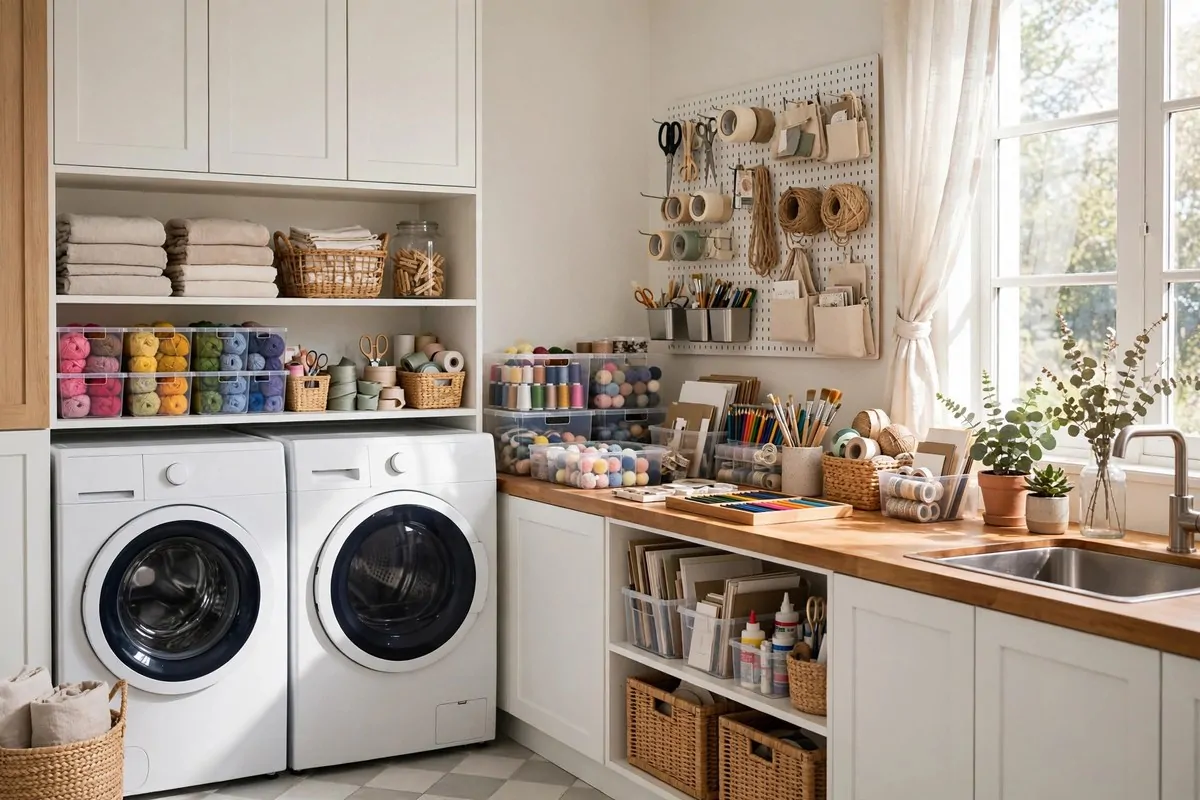
The laundry room is the most underused room in many homes. You are in there a few hours a week at most. The rest of the time it just sits there. Why not craft there too?
A long counter over or beside the washer and dryer makes a great work surface. It is already there, it is sturdy, and it wipes clean. Perfect for messy crafts.
Add wall shelves above the counter for your supplies. Clear bins work great here because laundry rooms can get humid. Keep paper and fabric in closed bins to protect them.
The sink is a bonus you did not know you needed. Rinsing brushes, dyeing fabric, and washing messy hands is so much easier with a utility sink nearby. I am a little jealous of this setup.
Fold your crafting space away when laundry day comes. A rolling cart holds your project supplies and rolls into a corner. The counter clears in minutes.
Keep craft supplies and laundry supplies separate. One shelf for detergent, one shelf for crafts. Mixing them up leads to glitter in the laundry, which is fun exactly once.
Ventilation matters if you use strong smelling glues or paints. Crack a window or run the exhaust fan. Your nose and your family will appreciate it.
This combo room is proof that you do not need a dedicated room to have a real craft space. You just need a surface, some storage, and a little creativity.
16. The Pretty Blue Craft Room
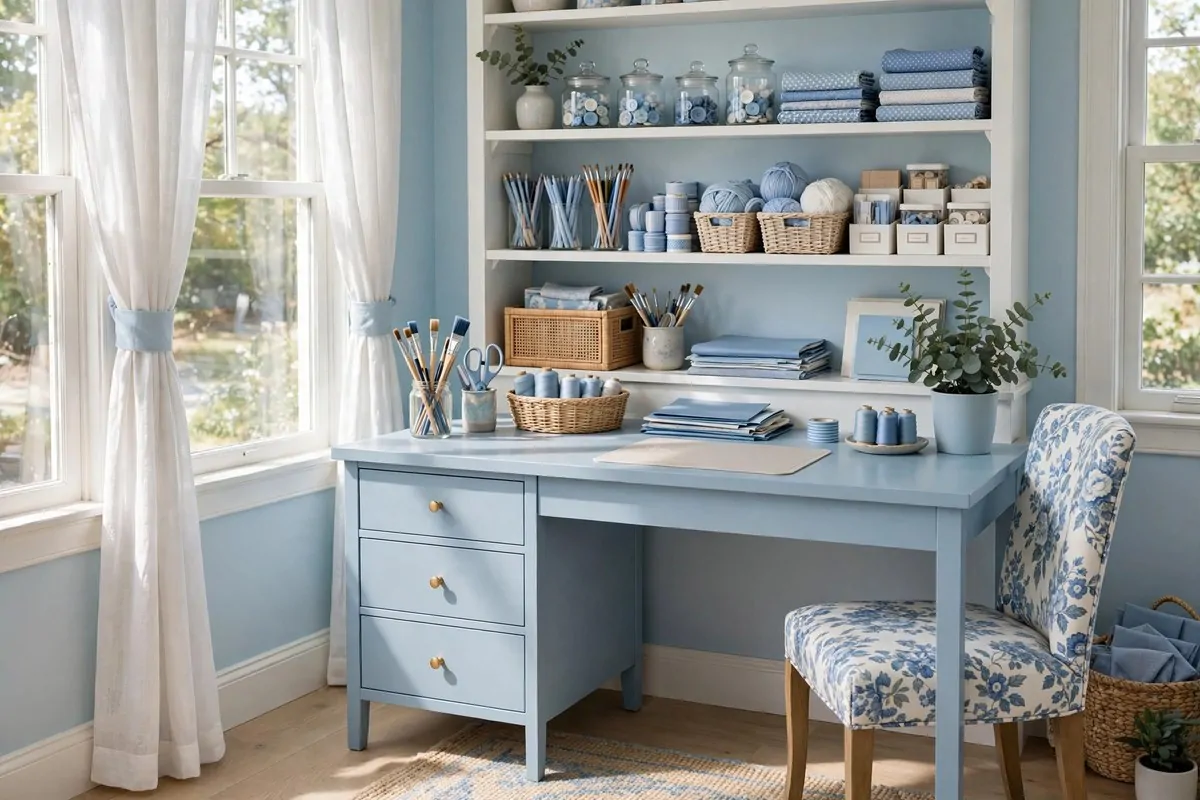
Blue is the color of calm, and a calm room makes for happy crafting. A light blue craft room feels airy and peaceful, like a deep breath you can walk into.
Paint the walls a soft powder blue and keep the big furniture white. The white shelves and desk keep the room bright. The blue gives it personality without shouting.
A blue and white floral chair adds a sweet touch. Pick one with a comfy cushion because you will sit there for hours. Comfort is not a luxury in a craft room. It is a requirement.
White oak floors or light wood tones pair beautifully with blue walls. If your floors are dark, a light area rug under your work table brightens the whole space.
Natural light makes blue rooms glow. Put your work table near the window if you can. The daylight bouncing off blue walls is soft and easy on the eyes.
Add white storage boxes and baskets to keep the look clean. Blue walls plus white storage plus colorful supplies peeking out is a combination that just works.
This color scheme suits almost any craft. Sewing, paper crafts, painting, all of it feels at home in a pretty blue room. It is a classic for a reason.
Blue also photographs beautifully. If you share your projects online, a blue background makes your work pop in photos.
17. A Ruby Red Room That Wakes You Up
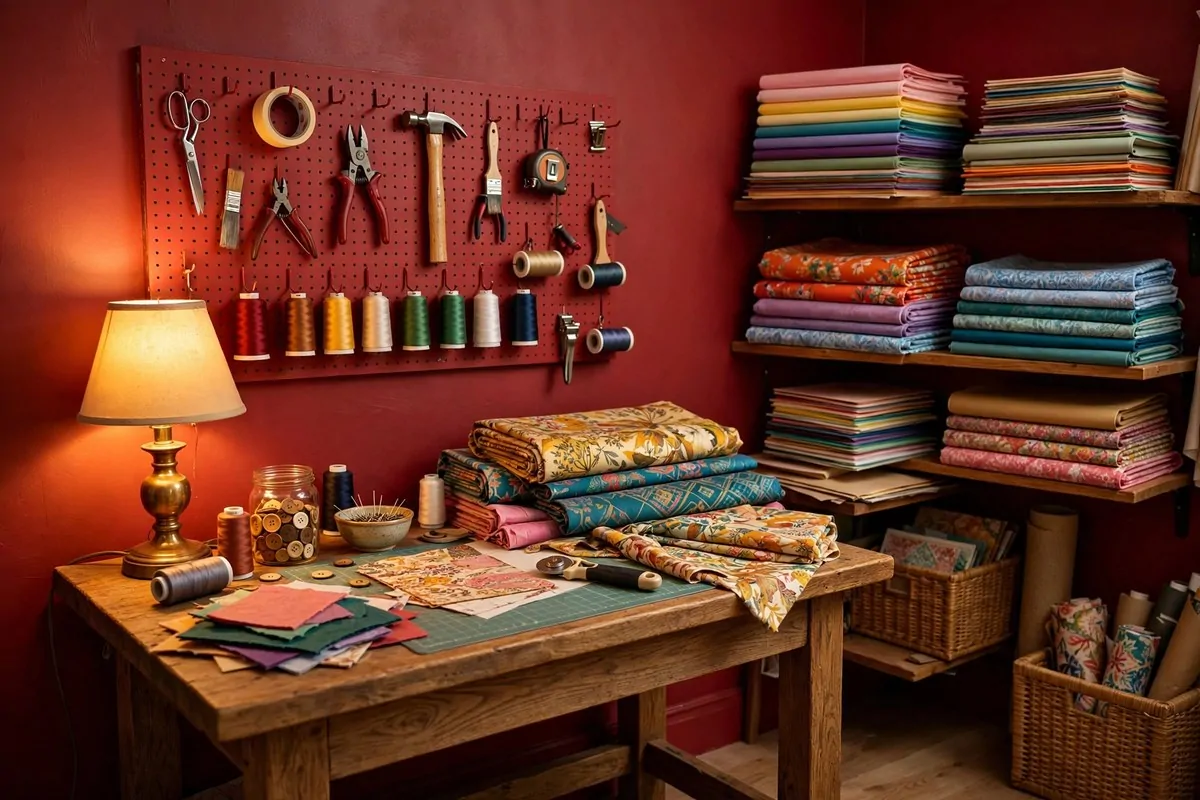
If blue is calm, red is energy. A ruby red craft room wakes you up the moment you walk in. It is bold, it is fun, and it makes the whole room feel alive.
The trick with red is commitment. Pick one shade and repeat it. Red walls, red storage boxes, red accents. A cohesive color scheme looks intentional instead of chaotic.
Balance the red with plenty of white. A white desk, white shelves, and a light floor keep the red from feeling heavy. The white gives your eyes a place to rest.
Red is a great choice if your craft room also needs to energize you after a long day. Some people craft to relax. Others craft to feel fired up. Red is for the fired up crowd.
Keep your supplies in matching red bins and boxes. When everything matches, even a full room looks tidy. It is a visual trick that really works.
Good lighting matters even more in a red room. Red absorbs light, so add extra lamps. Daylight bulbs keep the red looking rich instead of dark.
This is not a timid choice, and that is the point. Your craft room should make you feel something. If red makes you smile, paint it red.
Start with red accessories if paint feels scary. Red bins, a red chair, and red frames give you the energy while you decide about the walls.
18. Lime Green Walls With a Graphic Ceiling
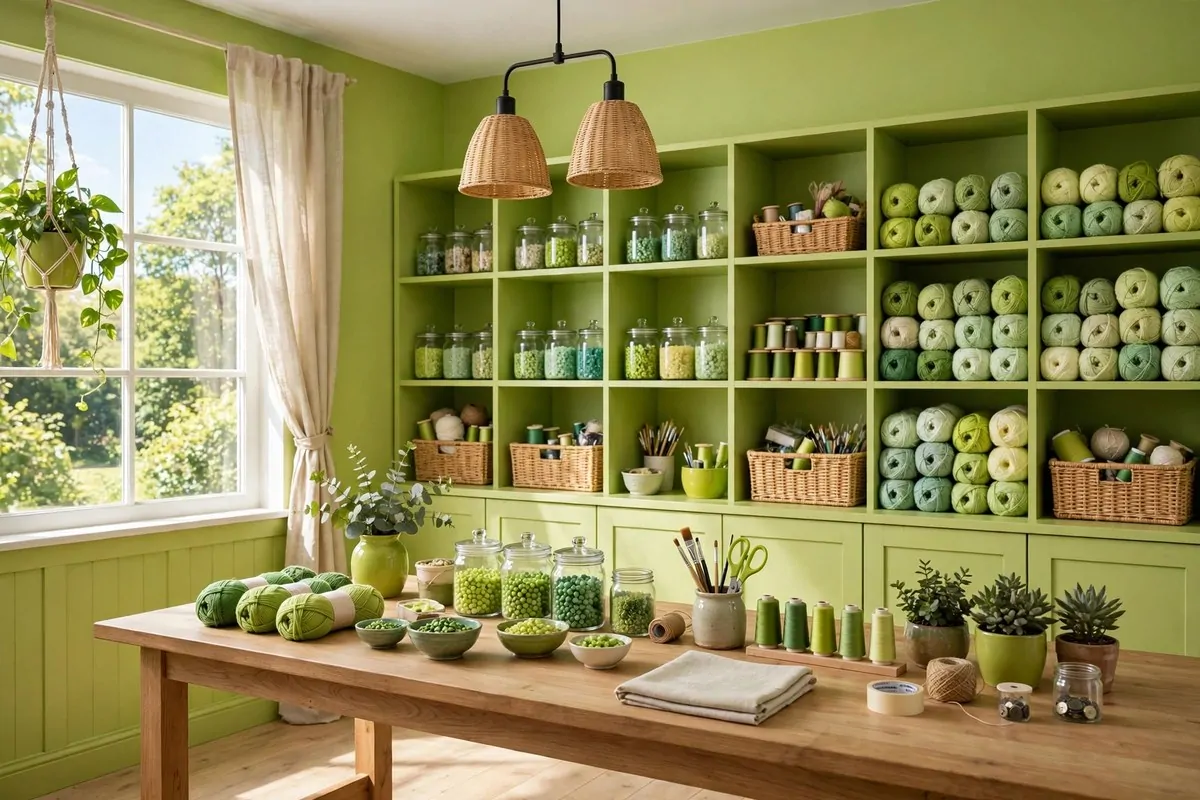
Lime green is not for the shy. It is bright, it is zesty, and it turns a plain room into a place that buzzes with ideas. If you want energy, this is your color.
Here is the fun twist I saw in a real craft room. Graphic wallpaper on the ceiling. Yes, the ceiling. When you look up from your work, you get a burst of pattern and color. It is pure joy.
Keep the furniture simple so the color can shine. White desks, open shelving, and clear bins let the green be the star. The supplies add their own color on top.
This look works best in a room with good natural light. Sunlight keeps lime green fresh and happy. In a dark room it can feel a bit much, so add strong lamps.
If full lime green walls scare you, try one accent wall. Paint the wall behind your desk and leave the rest white. You get the energy without the full commitment.
Kids love this color scheme. If your craft room doubles as a kids craft space, lime green makes it feel like a fun zone. Add their art on the walls and it is perfect.
The ceiling wallpaper is easier than it sounds. Peel and stick wallpaper works on ceilings and comes off cleanly. It is a weekend project with a big payoff.
Balance all that brightness with natural textures. A jute rug and wooden baskets calm the lime green down just enough.
19. The Turquoise Bookshelf Focal Point
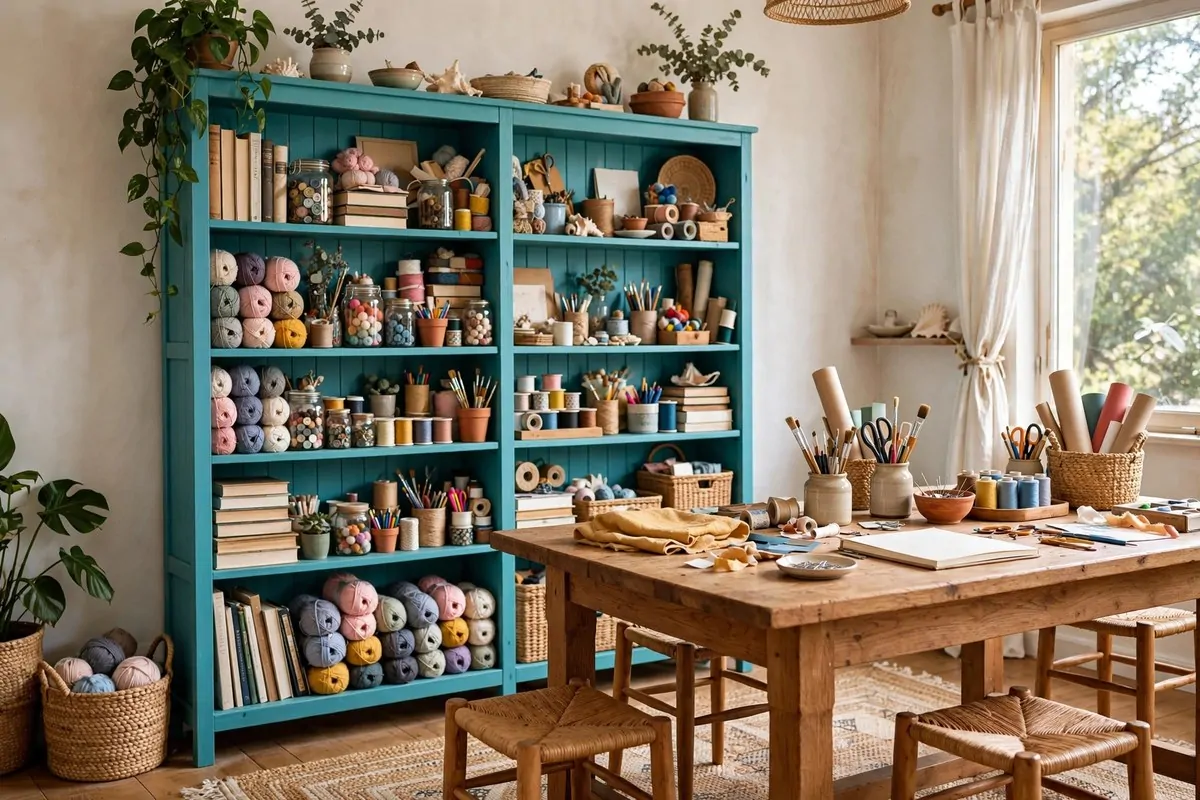
Every room needs one thing your eyes land on first. In a craft room, a turquoise bookshelf makes a perfect focal point. It is bold, it is useful, and it holds a ton of supplies.
Paint a plain bookshelf turquoise and it looks custom made. Fill it with supplies, books, and a few pretty things. The color makes even ordinary jars and boxes look special.
Style the shelves with a mix of pretty and practical. Pretty jars of buttons on one shelf, everyday supplies on the next. Leave a little breathing room so it does not look stuffed.
Put a big wooden table in front of the bookshelf with stools around it. Now you have a workspace with your supplies right behind you. Turn around, grab, turn back. Easy.
The turquoise works with almost any other color. White walls keep it fresh. Wood tones warm it up. Even a little yellow or coral looks great beside it.
If painting a whole bookshelf feels big, start with the back panel only. Paint just the back turquoise and leave the frame white. You get the pop of color with half the work.
This is also a smart buy secondhand. Old bookshelves are cheap at thrift stores and solid wood ones last forever. A coat of paint makes them look brand new.
Top the bookshelf with a trailing plant or a row of pretty jars. That finished top edge makes the whole piece look styled, not just stuffed.
20. A Backyard Shed Turned Craft Haven
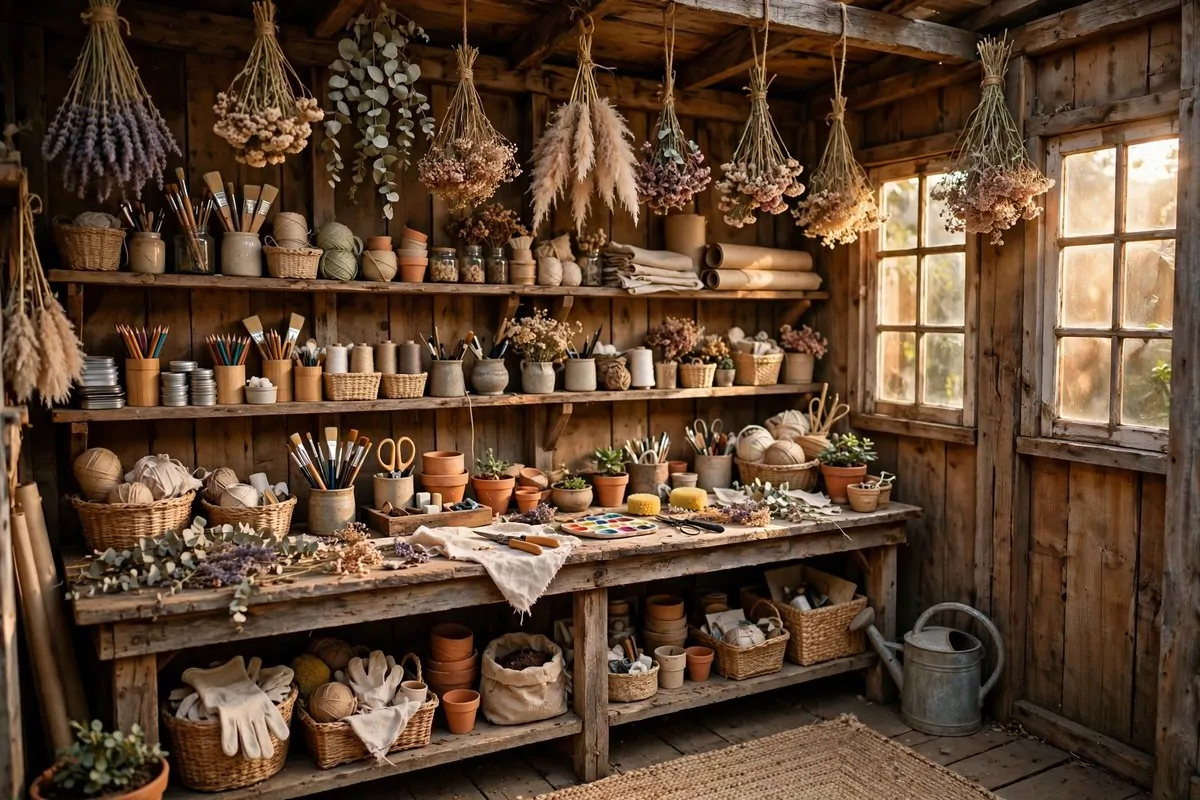
Got a shed full of rusty tools and old paint cans? Clear it out and turn it into your own craft haven. A shed craft room is separate, quiet, and completely yours.
Start by cleaning it out fully and checking for leaks. A dry shed is a must. Patch the roof, seal the gaps, and make sure the door closes tight. Your supplies deserve a dry home.
Insulation makes the shed usable year round. Even simple foam boards on the walls help a lot. A small heater for winter and a fan for summer keep it comfy.
A potting bench makes a perfect craft desk in a shed. It is sturdy, it has shelves built in, and it already looks at home there. Add a comfy chair and you are set.
Hang your tools and supplies on the walls. Shed walls are usually bare wood, which is perfect for hooks, pegboards, and shelves. Use every inch.
The best part of a shed studio is the separation. You walk out there and your brain knows it is creating time. When you walk back to the house, work stays behind. That boundary is golden.
Add a few cozy touches. A rug, a string of warm lights, and a plant or two. It is still a shed, but now it is your favorite shed.
Run a power strip out to the shed for your lamps, glue gun, and a small speaker. Music makes shed crafting sessions even better.
21. A Kid-Friendly Corner of Your Own
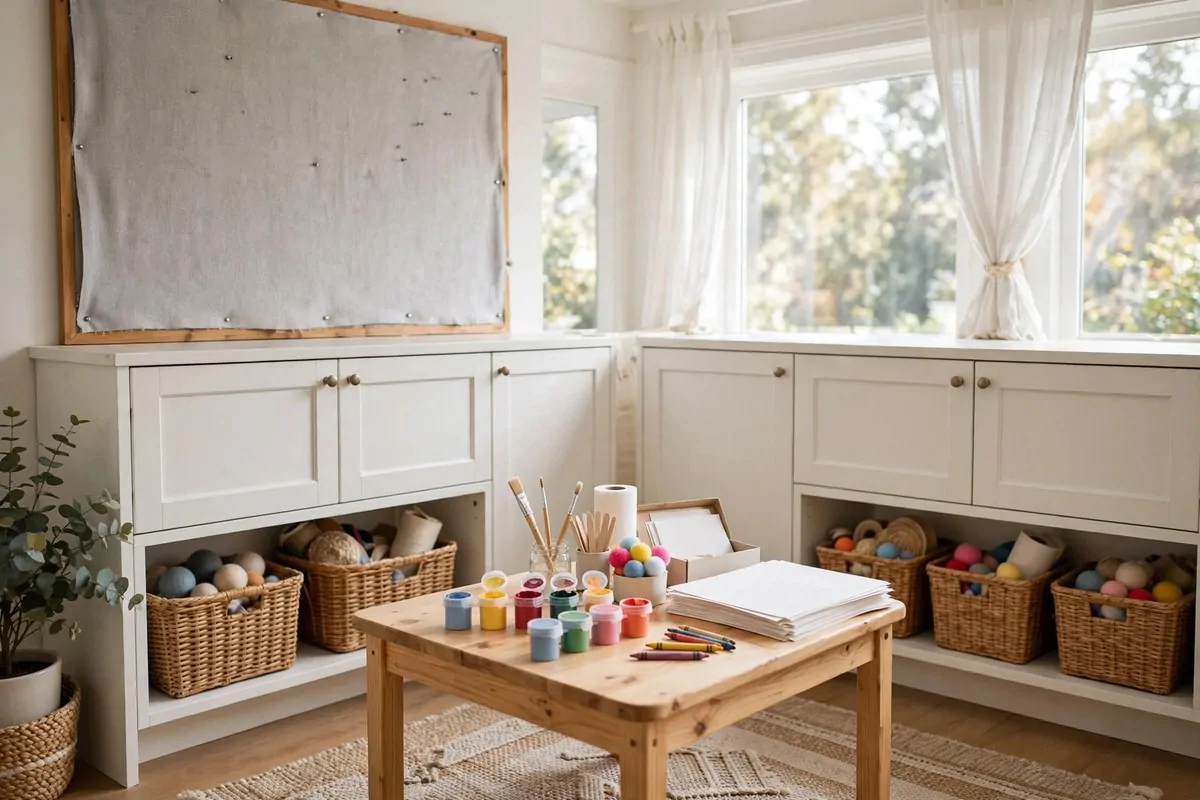
Crafting with kids is wonderful and messy. A kid-friendly corner in your craft room gives them their own space and keeps your supplies safe. Everybody wins.
Set up a small table and chairs sized for little bodies. Adult tables are too tall and wobbly stools are an accident waiting to happen. Kid sized furniture is worth it.
Stock their corner with washable everything. Washable paints, washable markers, and big paper. If it says washable on the label, it belongs in the kid corner.
A fabric tackboard on their wall lets them pin up their art. They will fill it fast. Rotate the art now and then and keep the favorites in a folder.
Use white cabinets with woven baskets for their supplies. The baskets are easy for small hands to pull out and put back. Label each basket with a picture, not just words, for little readers.
Keep your good scissors, hot glue, and tiny choking hazard supplies up high and out of reach. Their corner is theirs. Your corner is yours. Boundaries keep everyone happy.
Craft together when you can. Same room, side by side, each working on your own thing. Those quiet afternoons are the ones you will remember.
Keep a smock or old t-shirt in their basket. Cleanup takes two seconds when the mess stays on the smock instead of their clothes.
22. Daylight Lamps That Save Your Eyes
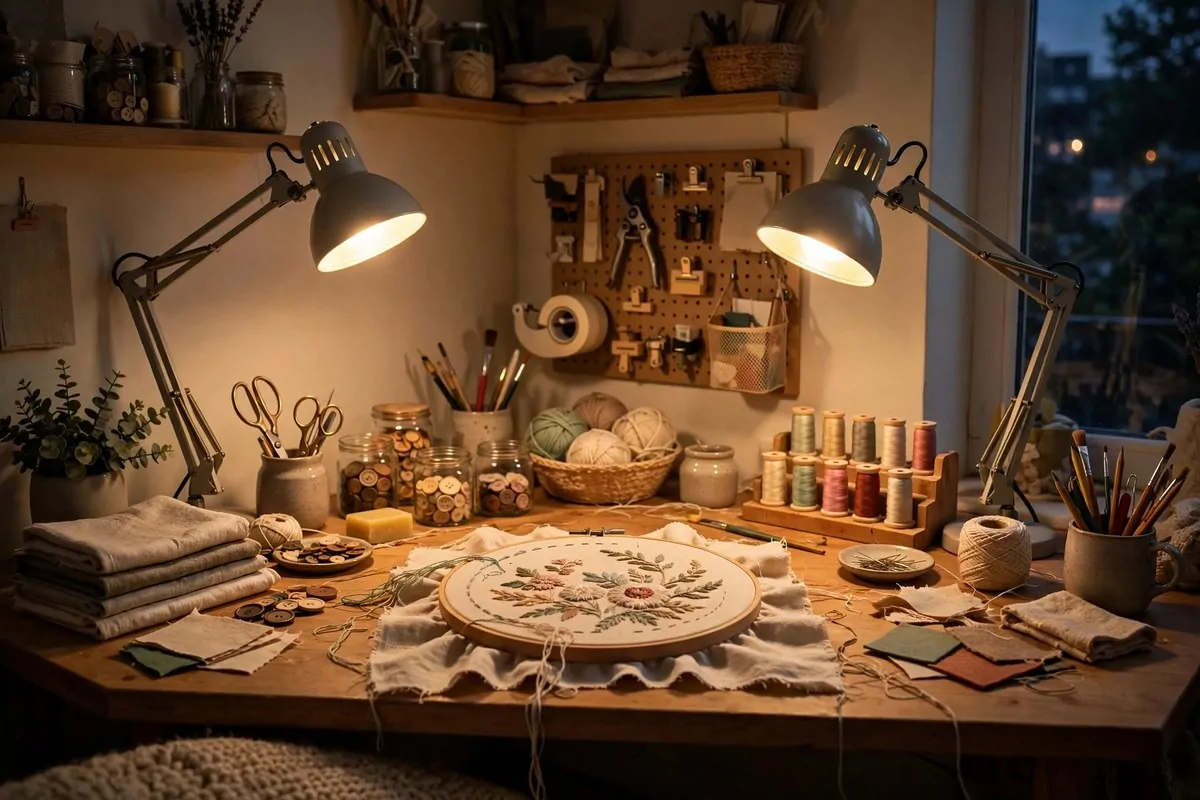
Good light is not a luxury in a craft room. It is the difference between enjoying your craft and squinting at it. Daylight lamps give you bright, true color light even at midnight.
A 5000K daylight bulb mimics natural daylight. Colors look true under it, which matters when you match thread, paint, or paper. Regular warm bulbs lie to you about colors.
Put an adjustable lamp at each work zone. A gooseneck lamp you can aim is perfect. Point it at your hands, not at your eyes. Your eyes will feel the difference in an hour.
Add LED strips under your shelves for bonus light. They are cheap, they stick on in minutes, and they light up the exact spot where your supplies sit. No more dark shelf corners.
A dimmer switch is a nice extra for evening sessions. Bright light for detailed work, softer light for relaxed crafting. Your room can match your mood.
Do not forget the ceiling light. One bright overhead light plus task lamps at the desk is the combo most crafters love. Layers of light beat one harsh bulb every time.
Your eyes work hard when you craft. Tiny stitches, small beads, fine print on patterns. Give them good light and they will keep up with your ideas.
Replace your bulbs once a year. Daylight bulbs dim slowly over time, and you will not notice until your colors start looking off.
23. A Work Table by the Brightest Window
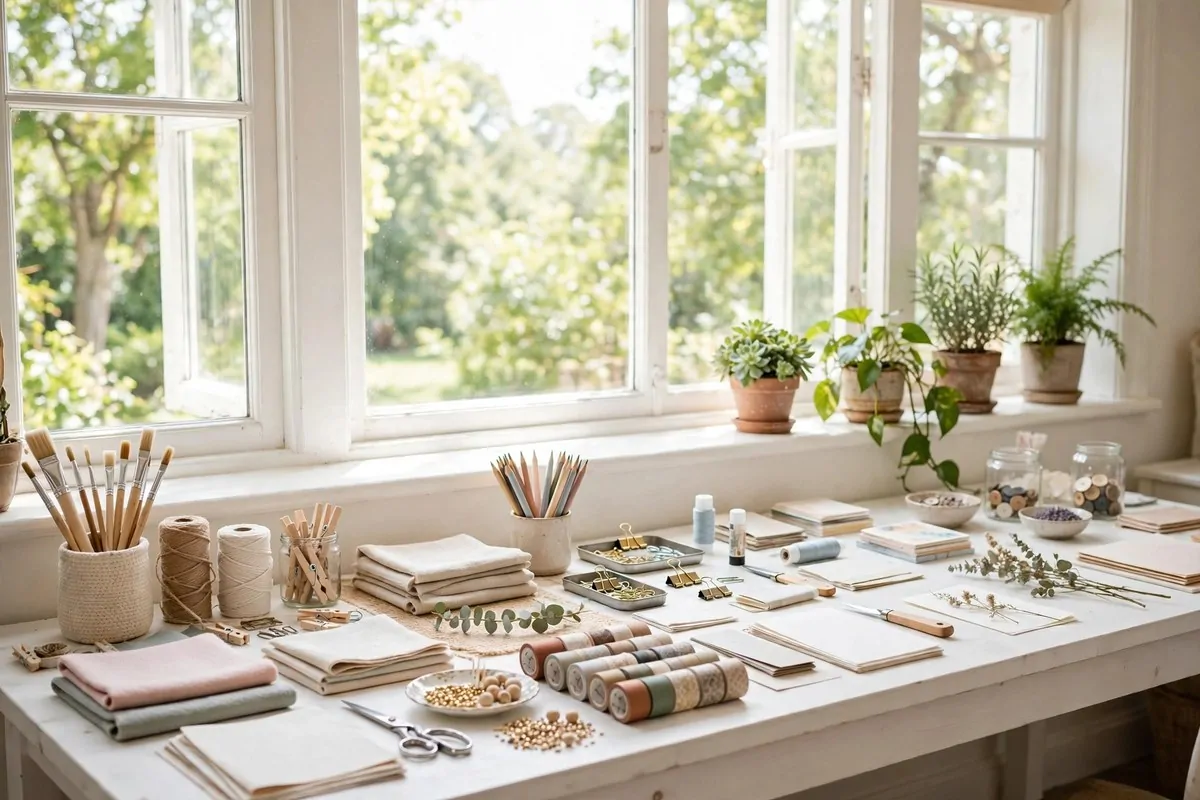
Nothing beats real daylight for crafting. If you have a bright window, put your work table right beside it. Your colors will look true and your mood will lift.
Here is a pro tip I learned from real crafters. Place your table perpendicular to the window, not facing it and not with your back to it. You get the light without the glare.
A long table under or beside the window gives you room to spread out. Fabric, paper, and projects can all live in daylight. It feels like crafting outside on a perfect day.
Keep a plant or two on the windowsill. Plants love that spot and they make the room feel alive. Just keep them out of your elbow zone. Knocking over a plant mid project is no fun.
Sheer curtains are your friend. They soften harsh sun so it does not fade your supplies or blind you. You still get all the brightness, just gentler.
In winter when days are short, this spot becomes even more precious. I do my color matching work in the middle of the day by the window. Evening is for the daylight lamps.
If your brightest window is in a shared room, claim that corner. A small table by the window is still a real craft space. Light matters more than square footage.
A sheer curtain also protects your supplies. Strong sun fades paper and fabric, so that soft filter does double duty.
24. Cubbies, Color, and a Little Chandelier
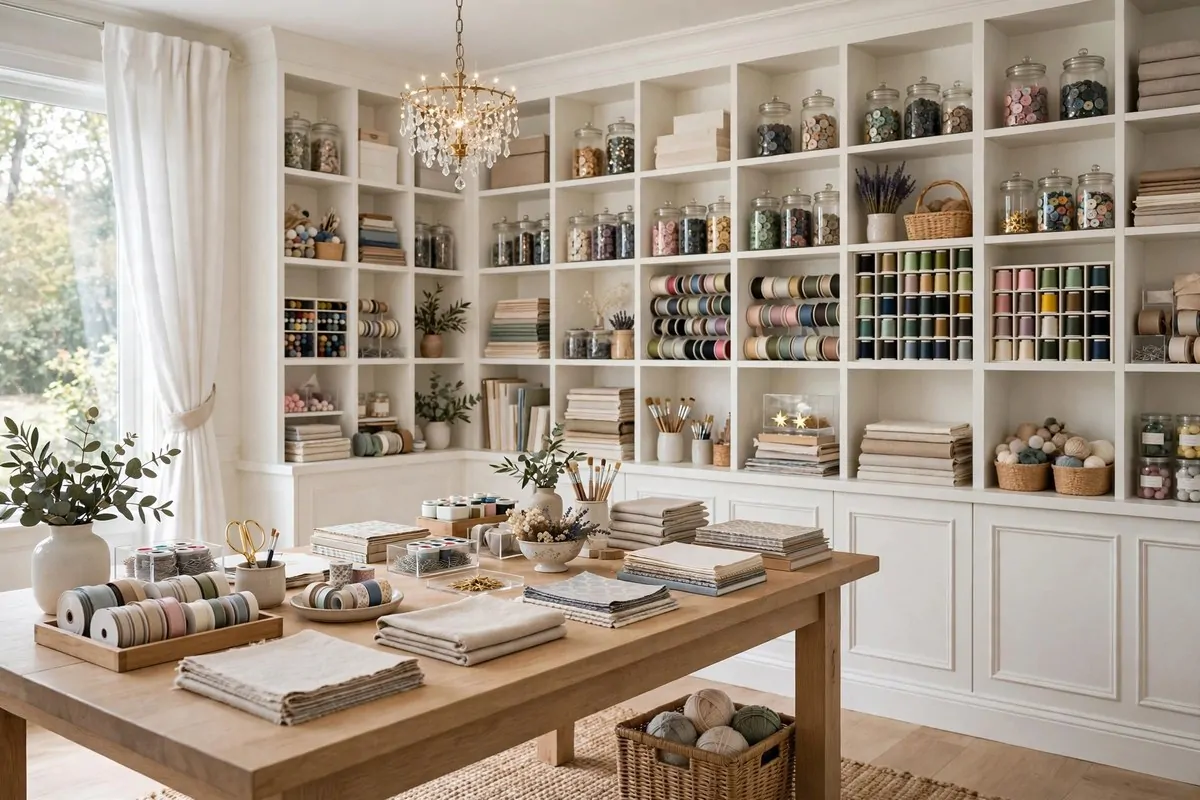
Who says a craft room cannot be fancy? Cubbies for perfect organization plus a little chandelier for sparkle gives you a room that works hard and looks gorgeous.
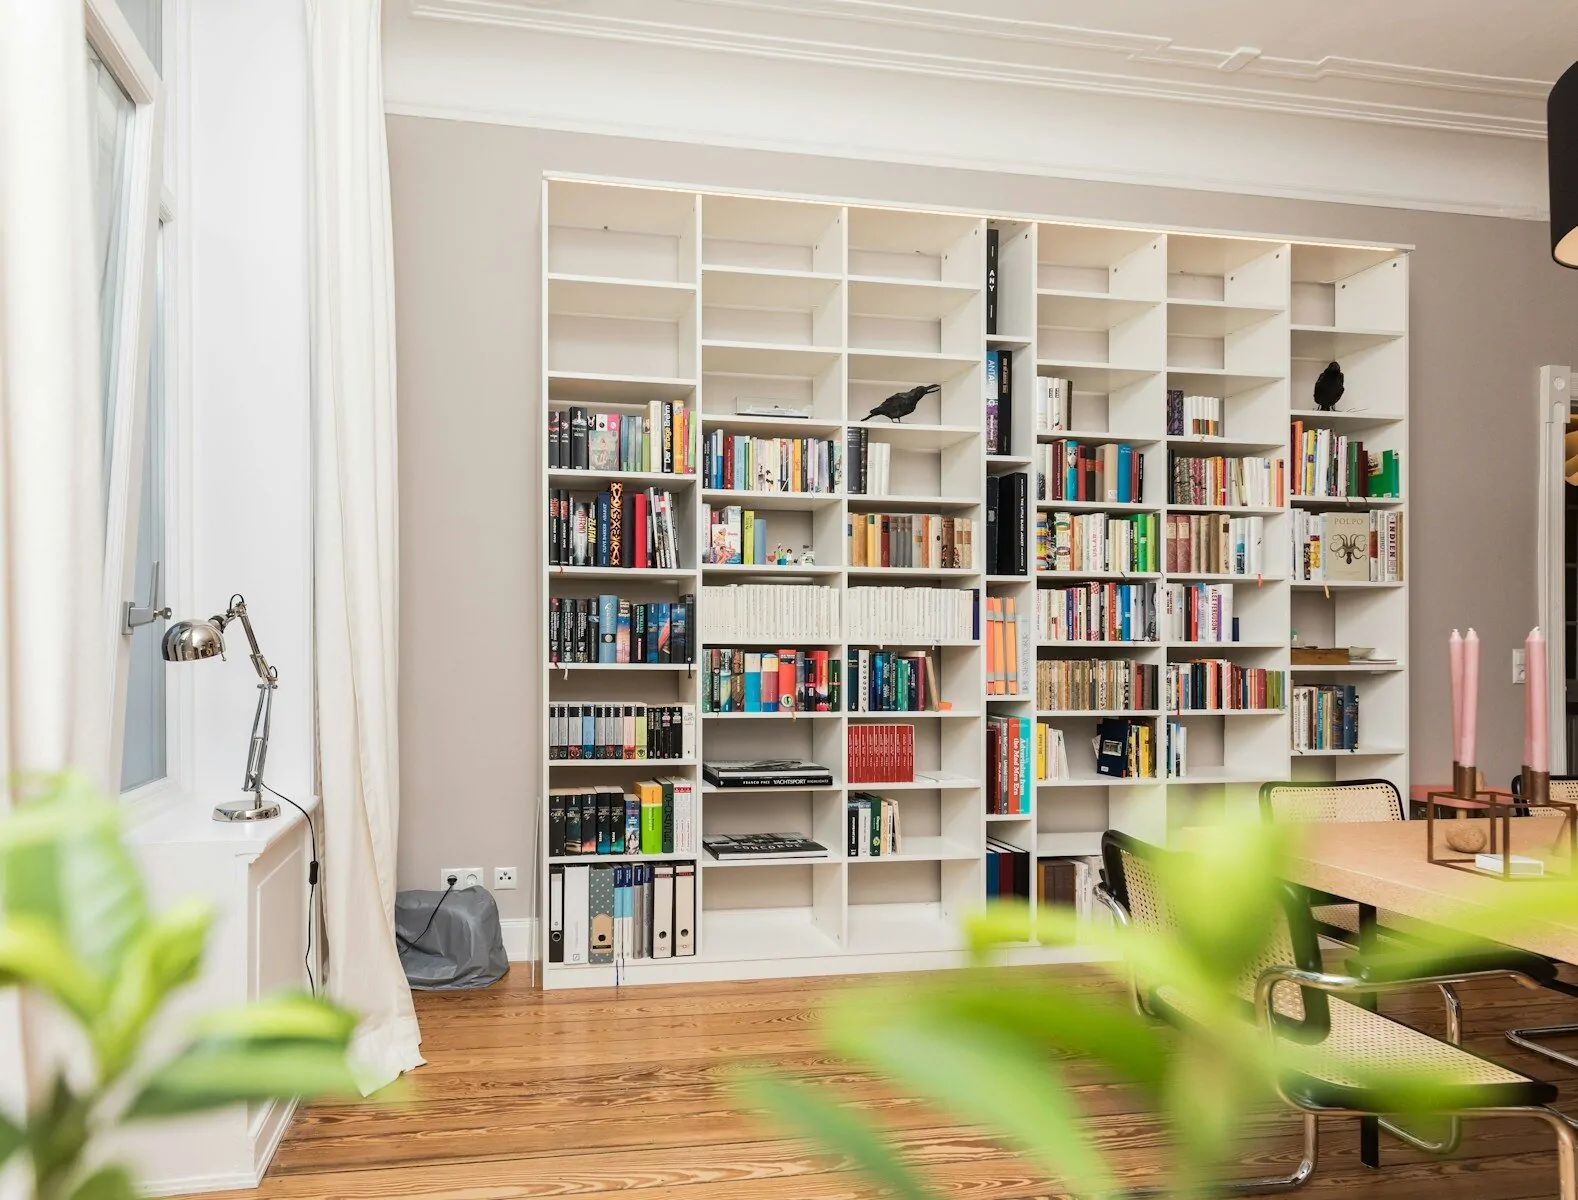
Cubbies are brilliant because every supply gets its own square. Fabric in one, paper in another, tools in the next. You can see everything at a glance and nothing hides.
Use matching baskets or bins inside the cubbies for a clean look. Label the front of each one. The whole wall becomes a beautiful grid of organized color.
Now the fun part. Hang a small chandelier over your work table. It sounds over the top. It is over the top, in the best way. It makes the room feel special every time you walk in.
A chandelier does not have to be expensive. Small ones are affordable, and some are made for plug in use with no wiring needed. Check the weight before you hang anything.
Pair the fancy light with practical furniture. A big sturdy table, a comfy chair, and your cubby wall. Pretty and practical can absolutely live together.
This style is perfect if your craft room is visible to guests. It looks like a designed room, not a storage closet. You will be proud to show it off.
When the chandelier sparkles over your work table, even a Tuesday night craft session feels like an occasion. And honestly, making things is always an occasion.
25. A Barn Door Entrance to Your Happy Place
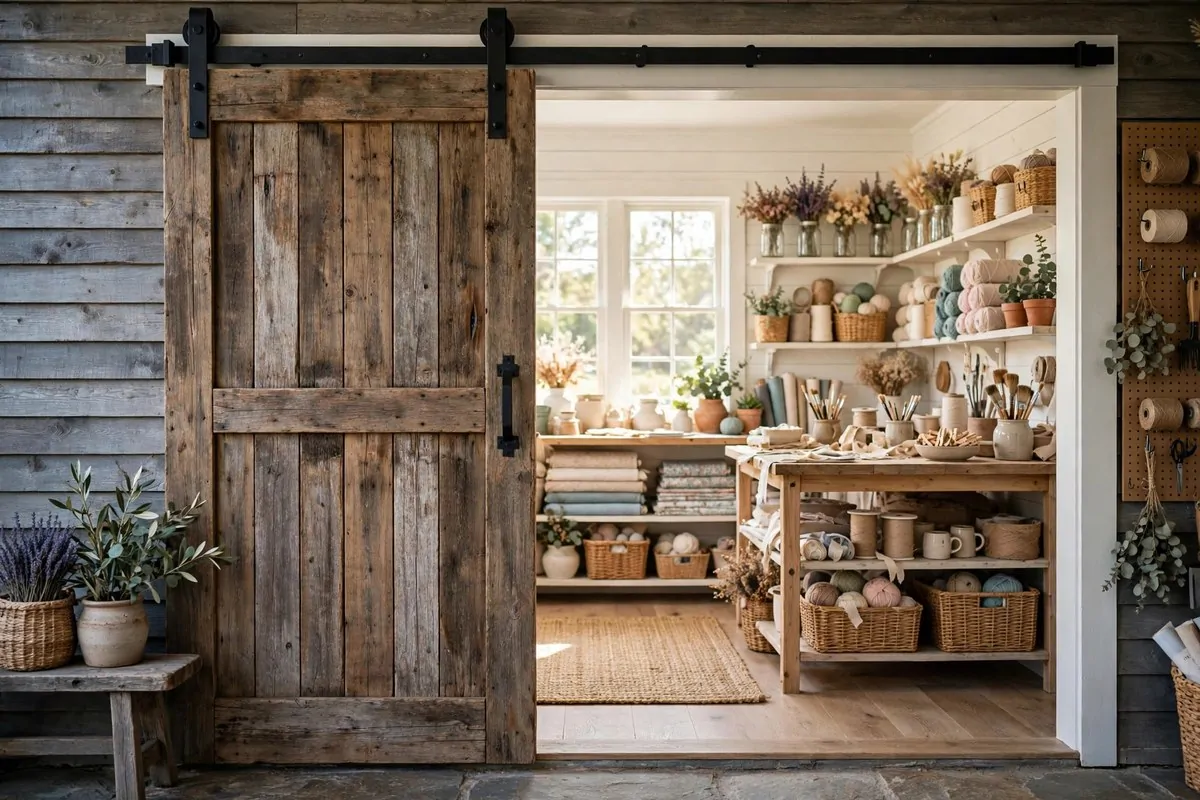
A sliding barn door is more than a door. It is a promise. Slide it open and you enter your happy place. Slide it shut and the mess disappears. Magic.
Barn doors are perfect for craft rooms because they do not swing. A swinging door needs clear floor space. A sliding door hugs the wall. In a small room, that saved space matters.
The look is pure farmhouse charm. Weathered wood, black metal hardware, and that satisfying slide. It makes even a plain doorway feel special.
You can buy a barn door kit or build one from planks. The kits come with the track and rollers. Hanging it is a solid afternoon project with a friend to help lift.
Paint or stain the door to match your room. White for a clean look, natural wood for rustic, or a fun color to match your craft room theme. It is a big surface, so have fun with it.
The door also works as a message board. Hang a small chalkboard on it for your project list. Or pin up inspiration right on the wood. It is a door and a mood board in one.
Every time you slide that door open, it feels like an event. Your craft time starts with a little ceremony. I love that.
Oil the track once a year with a dry lubricant. A smooth silent slide feels luxurious, and it takes about thirty seconds.
26. Color-Coded Zones for Every Project Phase
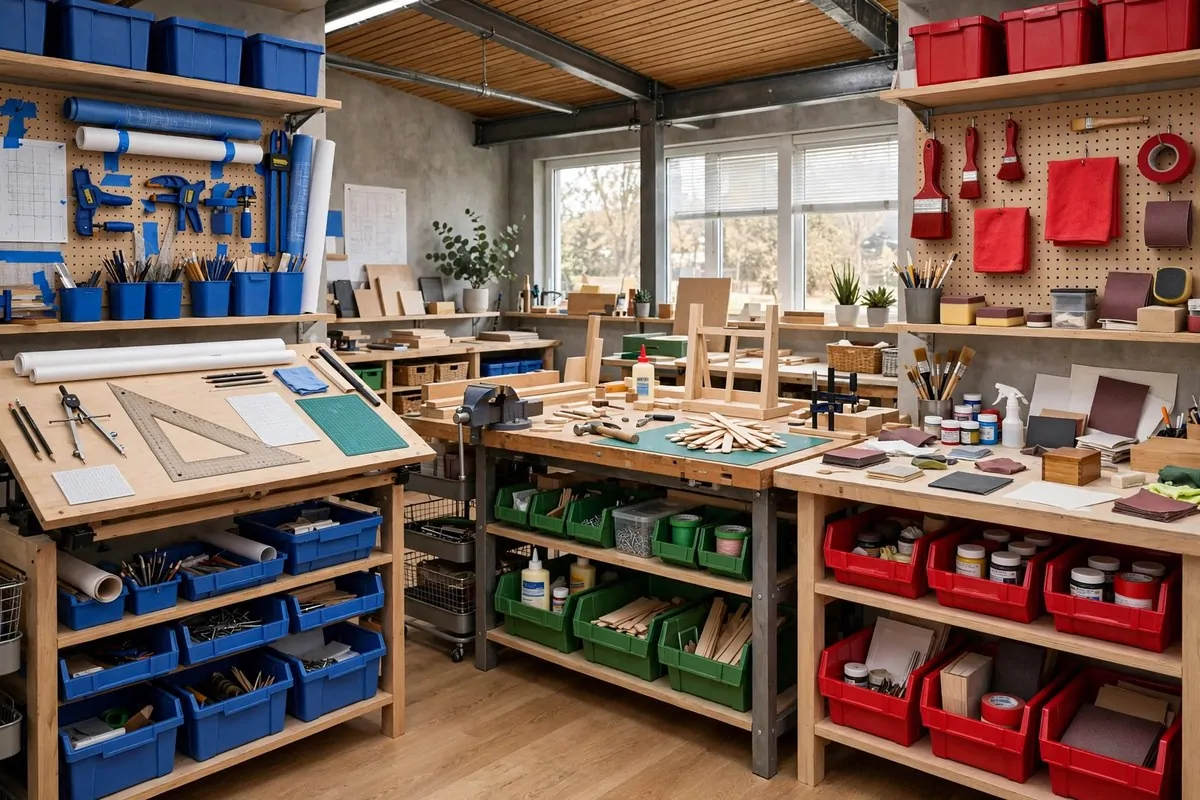
Here is an organizing idea that changed how I craft. Color code your room by project phase. Blue for planning, green for building, red for finishing. Your eyes learn the system fast.
Set up three zones, even in a small room. A planning corner with your sketchbooks and mood board. A building area with your main table and tools. A finishing spot with packaging and gift supplies.
Use colored bins to mark each zone. Blue bins in the planning zone, green bins at the table, red bins at the finishing spot. You always know where things belong.
This system shines when you juggle multiple projects. Each project gets a colored tag matching its phase. A quick look tells you what needs attention. No more forgotten half finished crafts.
Here is how the zones break down:
| Zone Color | Phase | What Lives There |
|---|---|---|
| Blue | Planning | Sketchbooks, swatches, patterns, ideas |
| Green | Building | Tools, main supplies, work table |
| Red | Finishing | Packaging, labels, gift wrap, camera |
You do not need to rearrange your whole room to try this. Start with colored bins on your existing shelves. The zones can be shelves rather than corners.
Kids grasp this system instantly. Blue means thinking, green means making, red means done. It turns cleanup into a sorting game.
Review your zones every few months. As your crafts change, the zones should change too. A system that grows with you is one you will actually keep.
27. Display Racks That Show Off Your Supplies
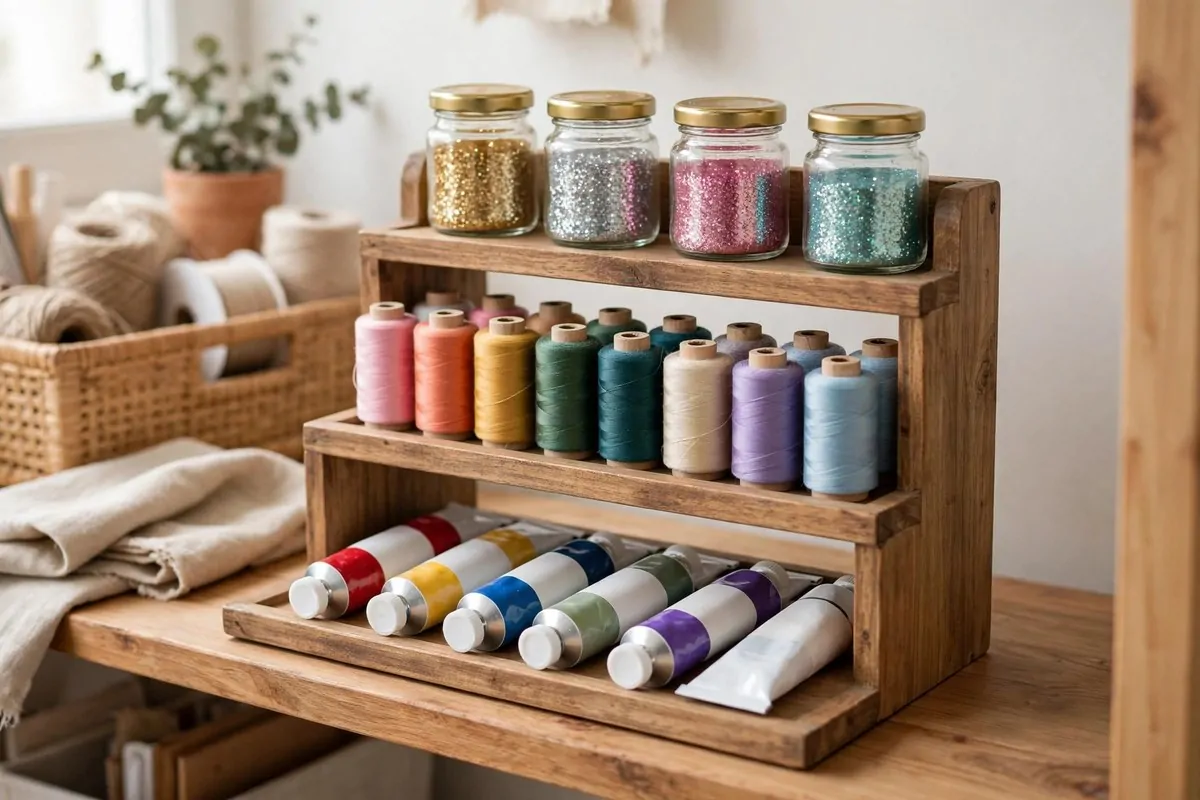
Some supplies are too pretty to hide. Thread spools, paint tubes, and glitter jars look like candy. Display racks put them on show where they inspire you every day.
Tiered racks work like little staircases for your supplies. Each row is visible, nothing hides behind anything else. You can see every color at once.
Use them for thread, paint, ink pads, or nail polish if you do nail art. Anything small and colorful looks amazing on a tiered rack. It is storage that doubles as decor.
Put the racks on a shelf or on your desk where you see them while you work. A glance at your beautiful supplies can spark the next idea. I am serious. It happens to me all the time.
Keep the racks dusted. Pretty supplies collect dust fast. A quick wipe with a dry cloth once a week keeps them sparkling.
If you sell your crafts, display racks help there too. Photograph your supplies alongside your finished work. Customers love seeing the colors and materials behind the magic.
This is one of those ideas that makes your craft room feel like a real studio. Professional, colorful, and completely you.
Group your racks by color family for the prettiest effect. All the blues together, all the reds together. It looks like a paint store in the best way.
28. Storage Hidden Under the Craft Table
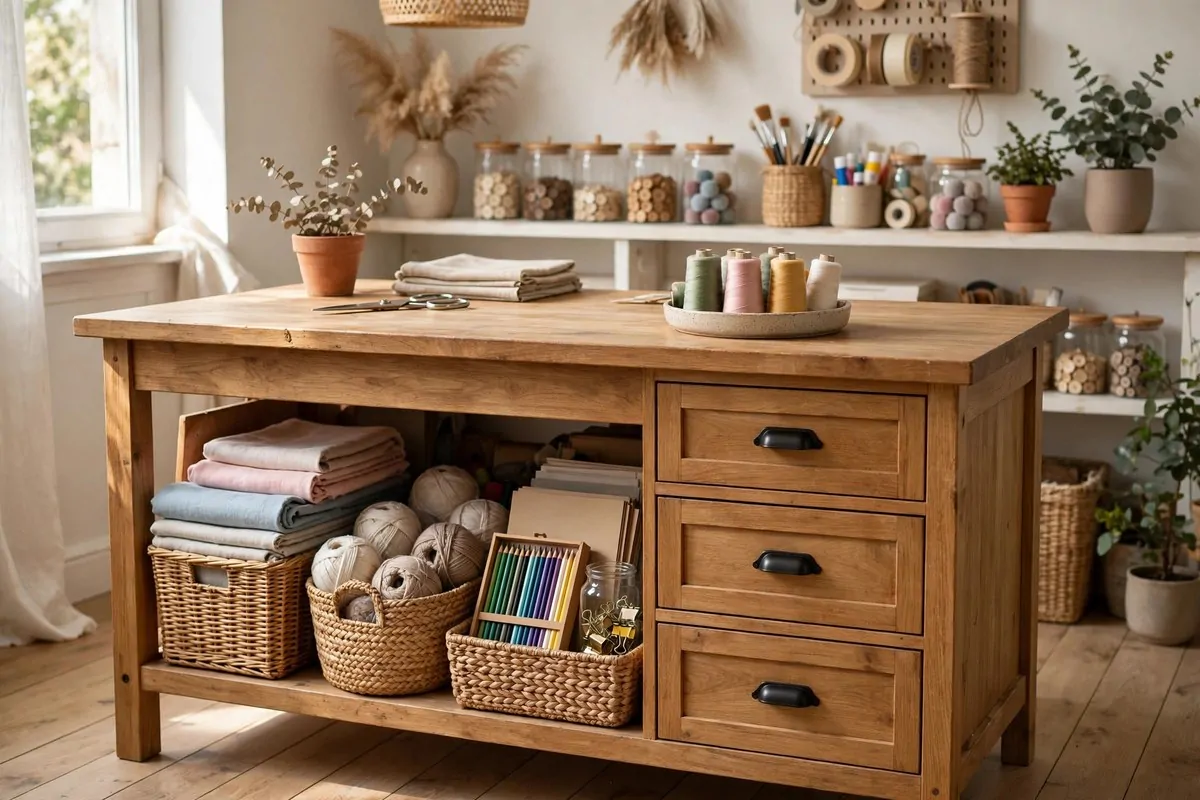
The space under your craft table is prime real estate. Do not let it become a dusty cave of forgotten boxes. Turn it into hidden storage that actually works.
Deep drawers under the table hold the bulky stuff. Fabric stacks, big paper pads, and project boxes slide in and out easily. Full extension drawers are worth the extra cost.
Open shelves under the table work too. Slide in matching baskets or bins and label the fronts. It looks tidy and everything stays within reach of your chair.
A rolling drawer unit that tucks under the table is super flexible. Pull it out when you need it, push it back when you do not. It is like a secret extra desk.
Keep the floor under the table clear enough for your feet and chair. Storage is great, but you still need to sit comfortably. Leave knee room in the middle.
This hidden storage is perfect for works in progress. A half finished quilt or a drying painting can live under the table, safe from cats, kids, and clumsy elbows.
The beauty of under table storage is that the room looks clean even when you are mid project. Everything has a home, even the messy middle stages.
Stick felt pads under baskets that slide on wood floors. They glide quietly and they will not scratch anything.
29. One Basket Per Project
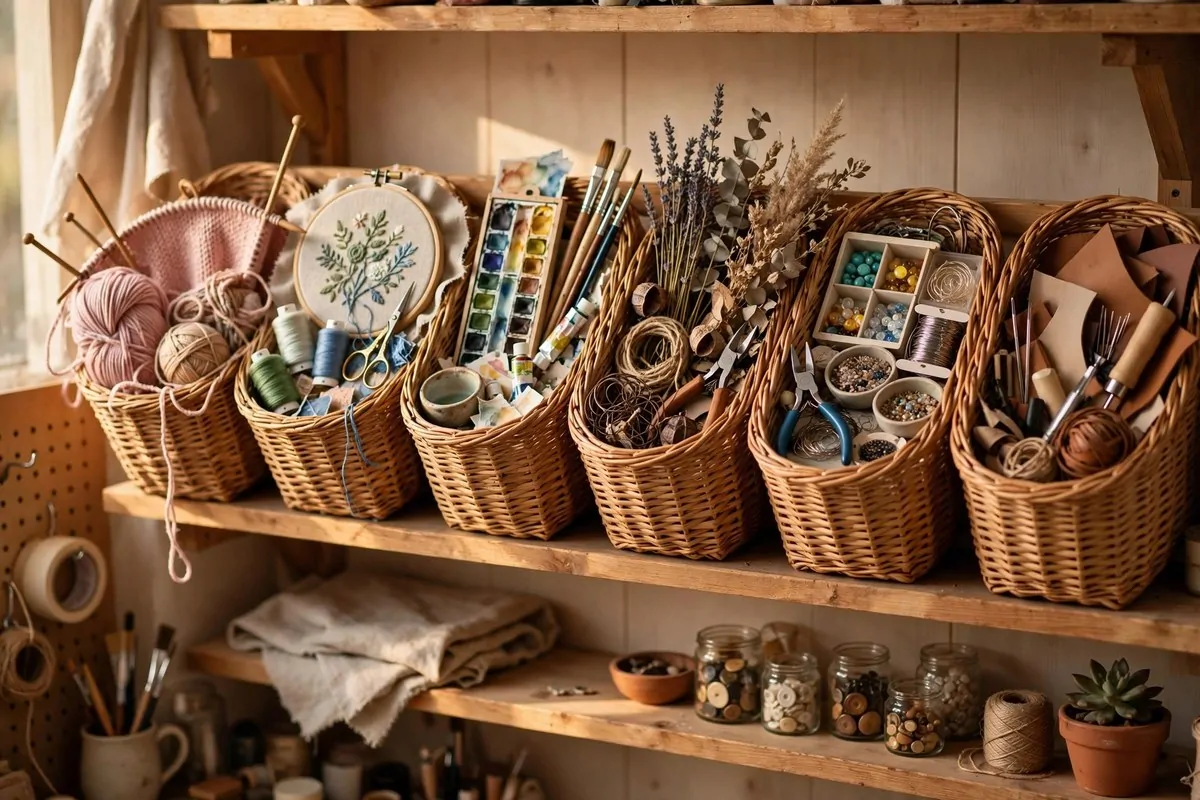
Here is the simplest organizing rule I know. One basket per project. Everything for that project lives in its basket. When you want to work on it, grab the basket. Done.
This stops the great supply sprawl. You know how it goes. You start three projects and supplies end up everywhere. Baskets keep each project contained and portable.
Pick baskets big enough to hold the project plus its tools. A knitting basket holds yarn, needles, and the pattern. A card making basket holds paper, stamps, and ink.
Label each basket with the project name. A little tag tied to the handle works. Future you will be grateful when you pick up a project after two weeks away.
Line the baskets up on a shelf and they look lovely. Woven baskets add warmth and texture to the room. It is storage that makes the room prettier, not uglier.
When a project is done, the basket gets a happy little empty moment. Clean it out, enjoy the blank slate, and start the next one. There is something deeply satisfying about that.
This system also travels well. Taking crafts to a friend’s house? Grab the basket and go. Everything you need is already inside.
Keep one empty basket on the shelf at all times. When a new idea strikes, you have a home for it ready and waiting.
30. A Rainbow Wall of Washi Tape
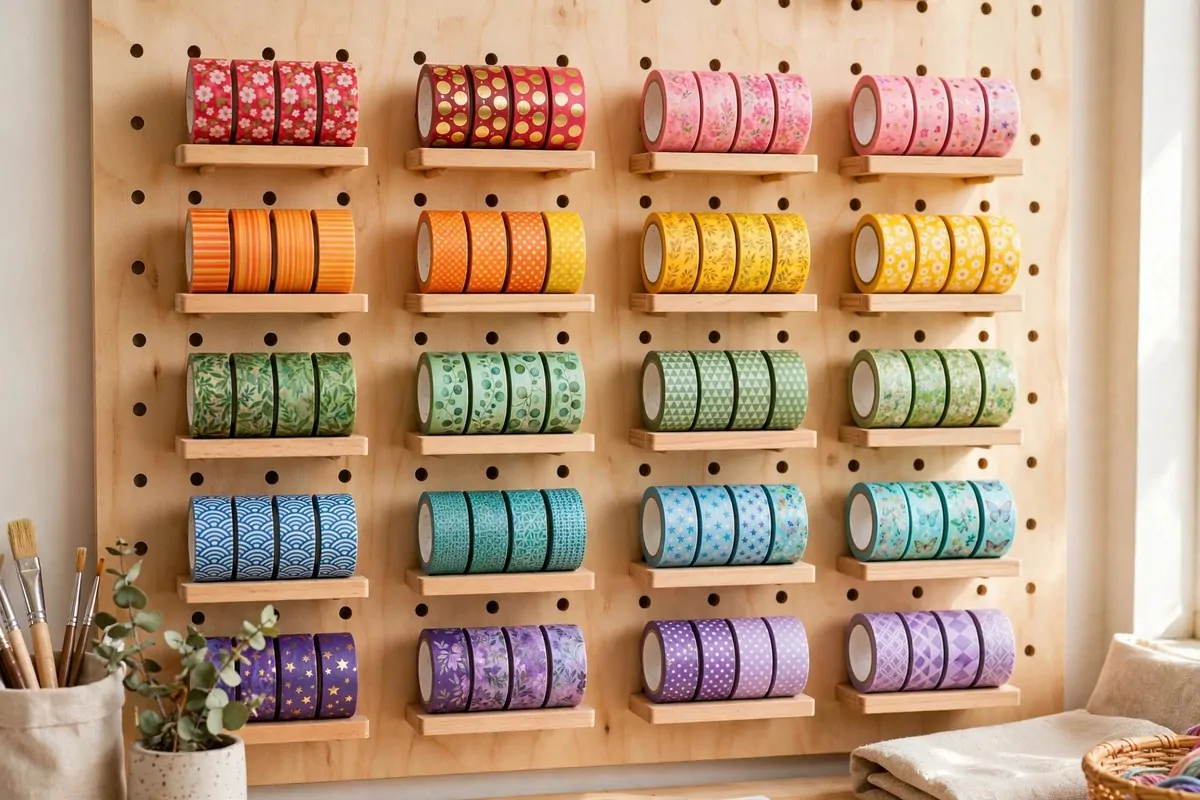
Washi tape collectors, this is your moment. A rainbow wall of washi tape is storage, art, and pure happiness all in one. It might be my favorite idea on this whole list.
Mount small rods or narrow shelves on the wall and line up your tape rolls in rainbow order. Red to orange to yellow to green to blue to purple. It is a rainbow you can use.
Seeing every pattern at once changes how you craft. You will reach for tapes you forgot you owned. Your cards, journals, and gift wrap will get more creative overnight.
Small curtain rods work perfectly for this, just like the ribbon rods in idea five. The rolls spin freely and you can tear off what you need. Refills slide right on.
If wall space is tight, use the inside of a cabinet door. Same rainbow, hidden away. Open the door and there it is, a secret stripe of color.
Sort by color, not by theme. It looks better and you find things faster. Your brain finds red faster than it finds the tape with the tiny foxes.
Take a photo of your rainbow wall when it is full. Then take another in six months. The collection always grows. It is the nature of washi tape. Resistance is pointless.
And that is our thirty. Thirty craft room ideas, from pegboard walls to rainbow tape. Pick the three that made you smile widest and start there. Your happy little craft corner is waiting.