22 Under-Sink Kitchen Storage Ideas That Hide Everyday Clutter

True or false. The space under your kitchen sink is too small and too awkward to ever look tidy.
False. I used to think the same thing in my own kitchen.
My cabinet was a mess of bottles that fell over every time I reached for one. I could never find the sponge I wanted, and the back of the cabinet felt like a dark hole.
Then I learned to work with the pipes instead of fighting them. I started to use the small side spots, the door, and the floor in a smart way.
In this post I share 22 under sink kitchen storage ideas that hide everyday clutter. You can pick one idea today and try the rest a little at a time.
Map the Pipes Before You Buy Anything
I know it is tempting to buy cute bins first.
Take everything out of the cabinet first. Wipe the floor clean so you can see what you really have to work with.
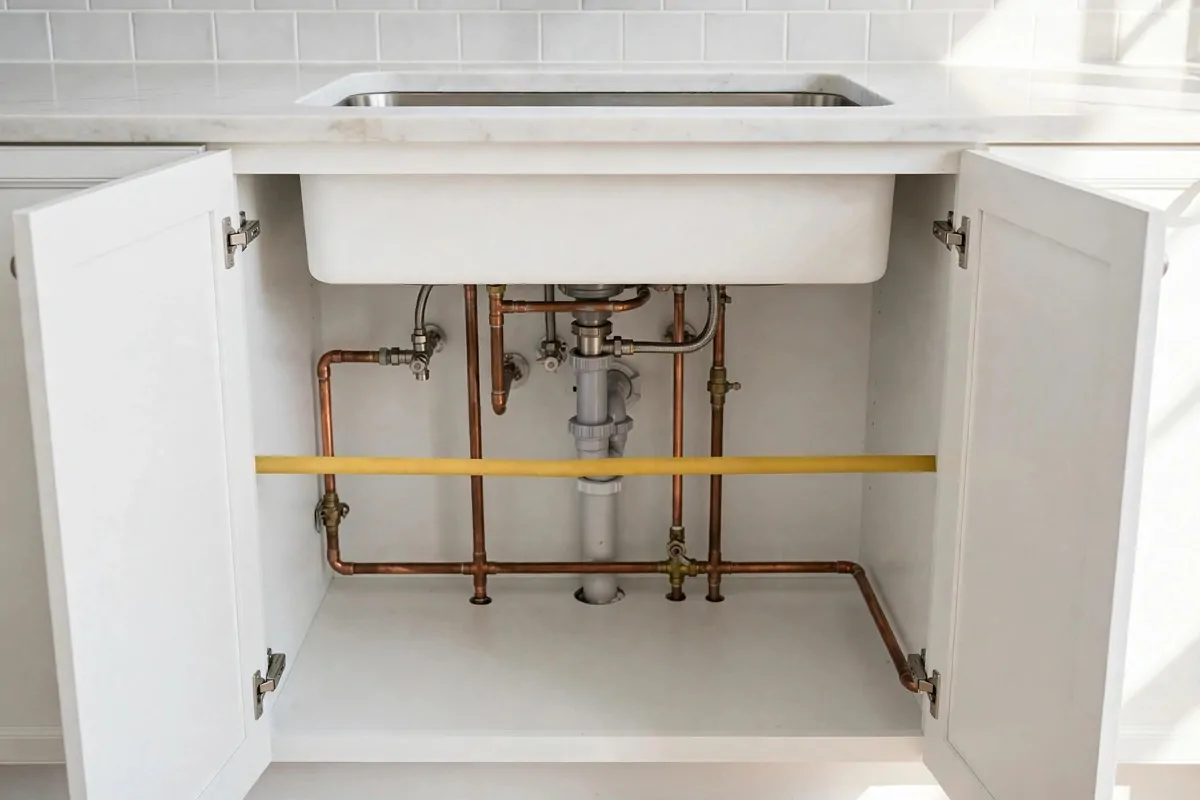
Look at where the pipes run.
They take up the middle, so the free space sits on the left, on the right, and in front of them. Measure the width from wall to wall with a tape. Then measure the height from the floor to the bottom of the sink basin.
Write your three numbers on a small card and keep it in your pocket when you shop. A bin that is even one inch too tall will not fit, and you will have to take it back.
Check the door too.
Open it wide and see how far it swings, because a bin that sticks out will block it. I made a quick sketch on paper with the pipes in the middle. It took five minutes, and it saved me from buying the wrong size twice.
Keep the things you use every day in the front. Put the back-up bottles at the back where you do not need to reach them all the time.
| Zone | Best storage | What goes there |
|---|---|---|
| Front center | Pull-out caddy | Daily spray and dish soap |
| Left side | Stackable bin | Sponges and extra cloths |
| Right side | Small bin or turntable | Pods and brushes |
| Deep back | Turntable or tall bin | Back-up bottles you use less |
| Floor | Leak-proof tray | Everything sits on this tray |
Hang Spray Bottles on a Tension Rod
This is one of my favorite tricks because it costs so little.
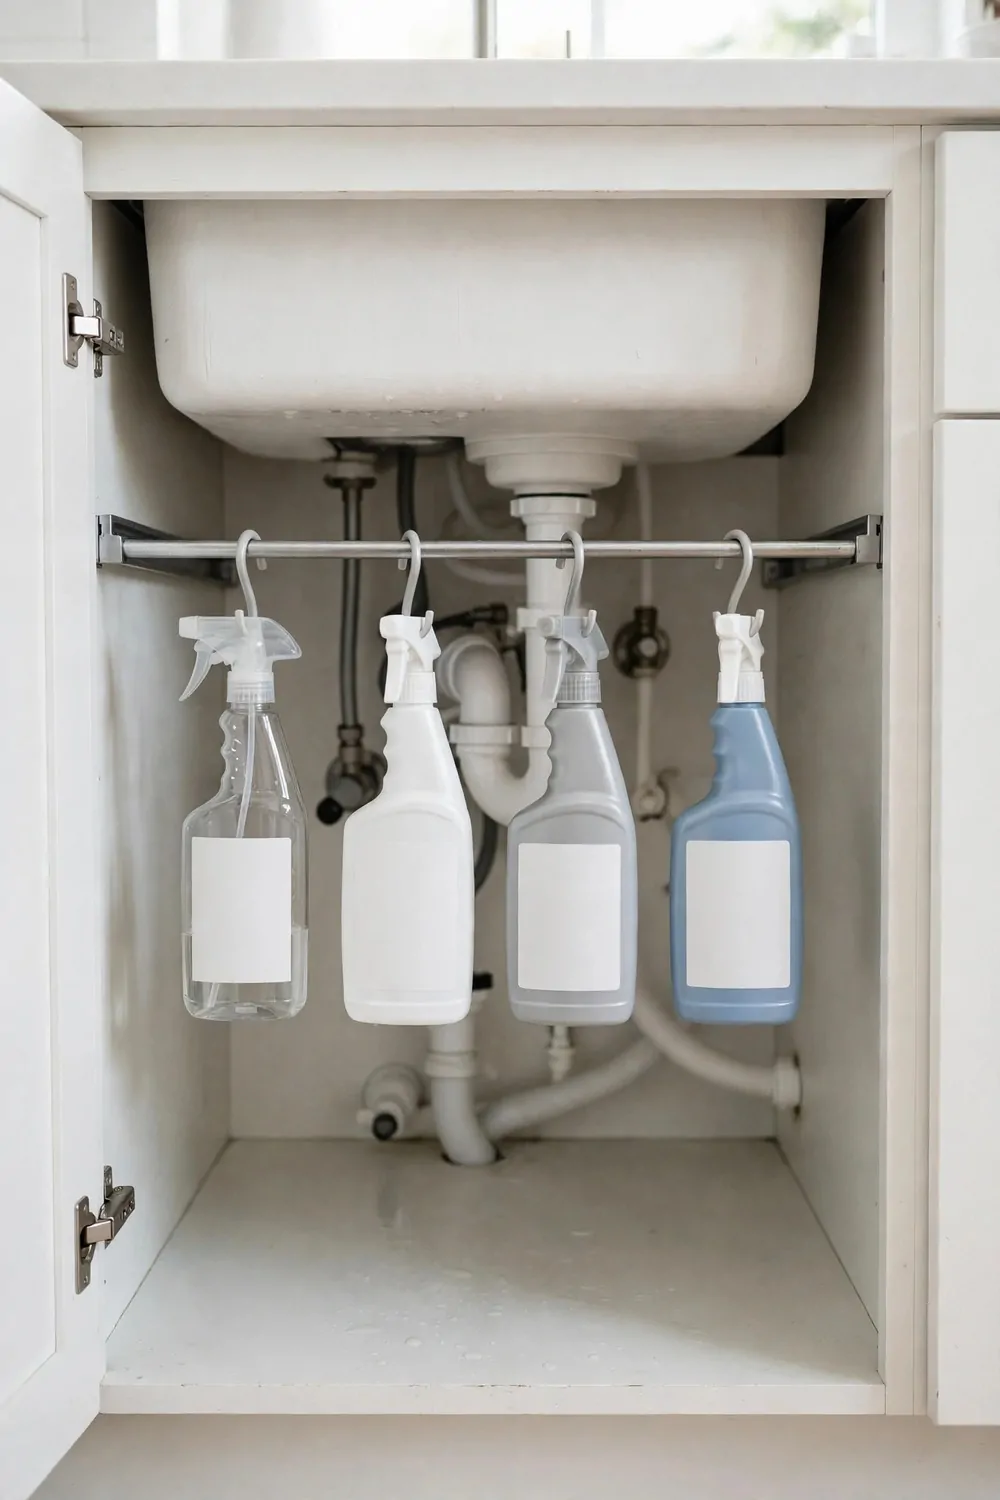
A tension rod turns dead air into a place to hang things. Pick a rod that fits the width of your cabinet, and twist it until it feels tight.
Hang each spray bottle by its trigger over the rod.
The bottle hangs down, and the nozzle points up out of the way. I love this because my bottles stop falling over. They used to tip and leak a little, and now they stay upright and neat.
Leave a small gap between each bottle so you can grab one fast. If they are packed too tight, you will knock the next one when you pull one out.
Put the rod high enough that the bottles do not touch the floor.
You want room under them for a small bin or a tray. Try your most used spray first and see how it feels. If the rod slips, twist it a bit more until it holds firm.
This trick frees the floor of the cabinet for other things. I use the space below my rod for a bin of cloths now.
Do not hang very heavy bottles on a thin rod.
Slide a Two-Tier Organizer Around the Pipes
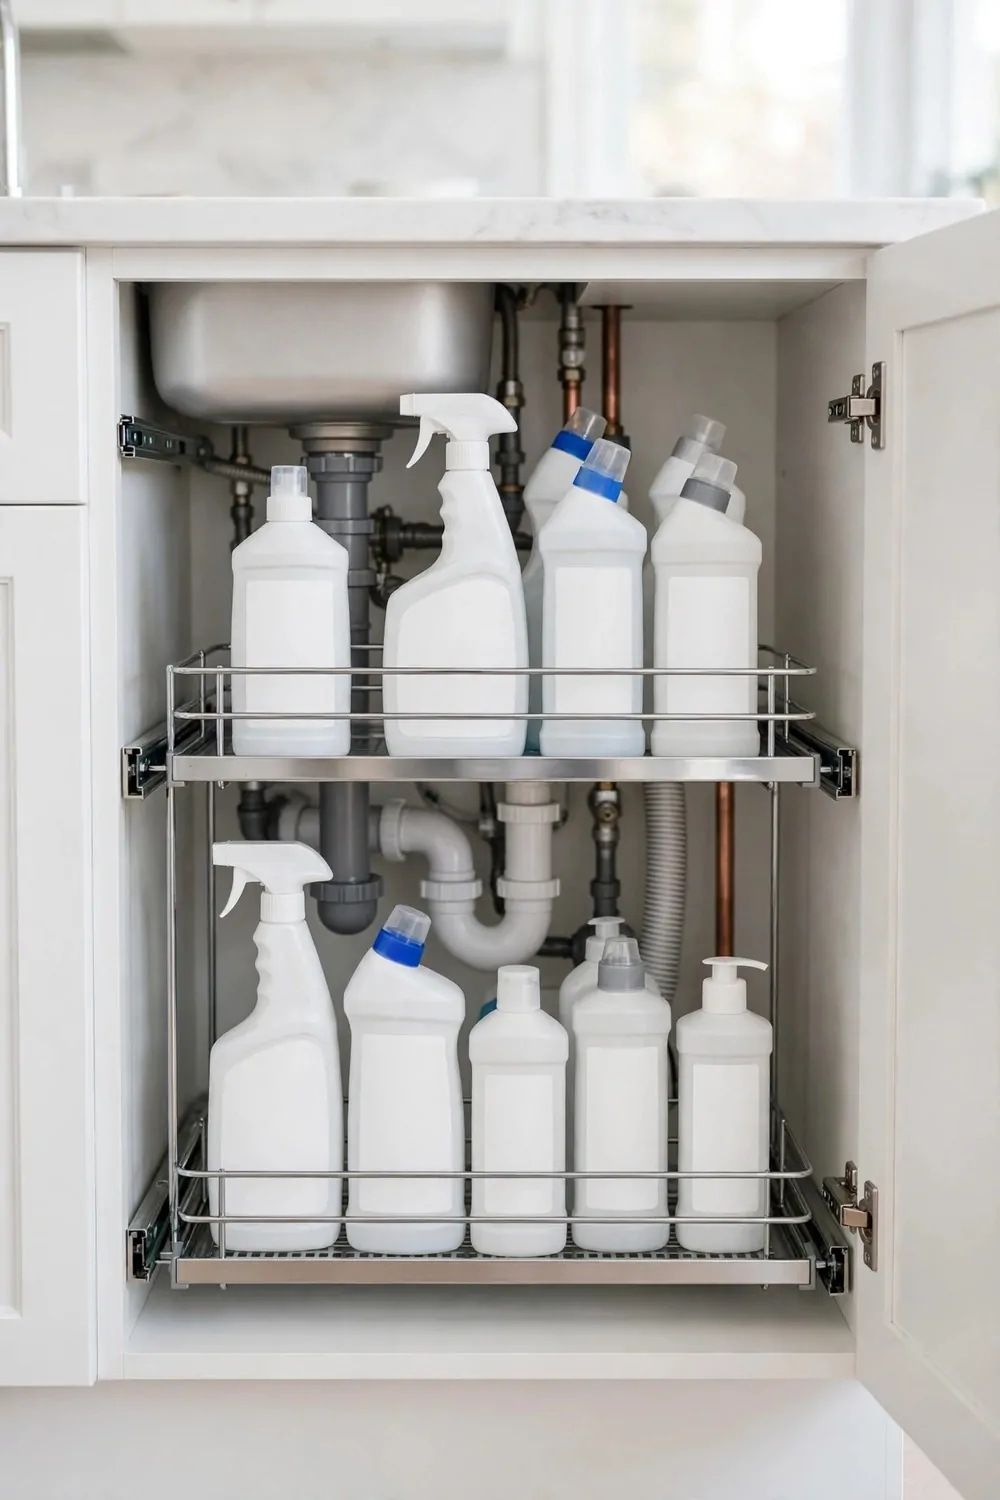
A two-tier organizer is made to fit around pipes.
It has a cut out part in the middle, so the pipes pass right through it. Slide it in slowly and let it sit flat on the floor.
Do not force it.
Put short bottles on the top tier. Tall bottles go on the bottom tier where they have more head room. I like that each tier slides out on its own.
I pull the top one toward me to grab the glass spray, then push it back in one smooth move.
Keep like things together on each tier.
I keep dish soap and all purpose spray on the top, and back-up bottles on the bottom. Wipe the tiers once a week when you wipe the sink. A quick wipe stops sticky rings from building up under the bottles.
Measure your pipe width before you pick one. Some organizers are wide, and some are narrow, so your tape numbers from section one really help here.
If the organizer wobbles, check that the feet sit flat.
Add a Pull-Out Caddy for Daily Cleaners
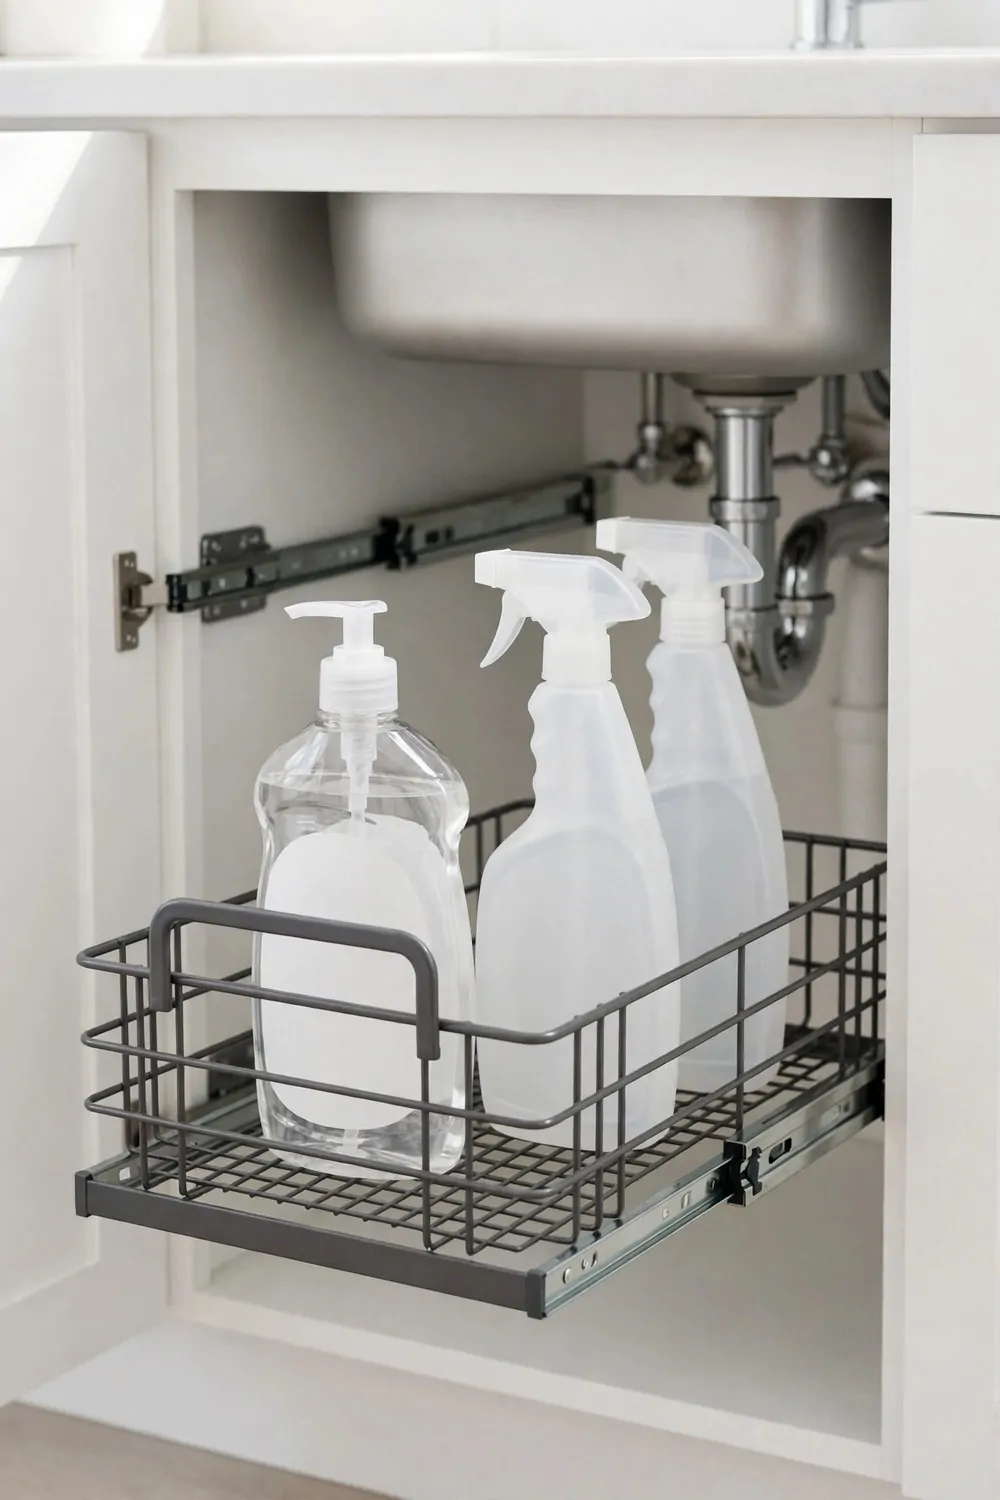
A pull-out caddy is a small basket with a handle that slides out like a drawer.
You pull it, you grab what you need, and you push it back. I keep mine in the front center where my hand lands first.
That way I do not have to bend low or dig past other bottles.
Put only your daily cleaners in it. Dish soap, one all purpose spray, and a small brush are enough for most days. Too many bottles make the caddy heavy and hard to pull.
Keep it light so it slides with one hand.
Look for a caddy with tall sides if your bottles tip a lot. The sides hold them in place when you pull it out fast. I wipe my caddy out every few days.
Soap drips happen, and a quick wipe keeps it from getting sticky.
If your cabinet is narrow, pick a slim caddy.
Use Stackable Bins for the Side Zones
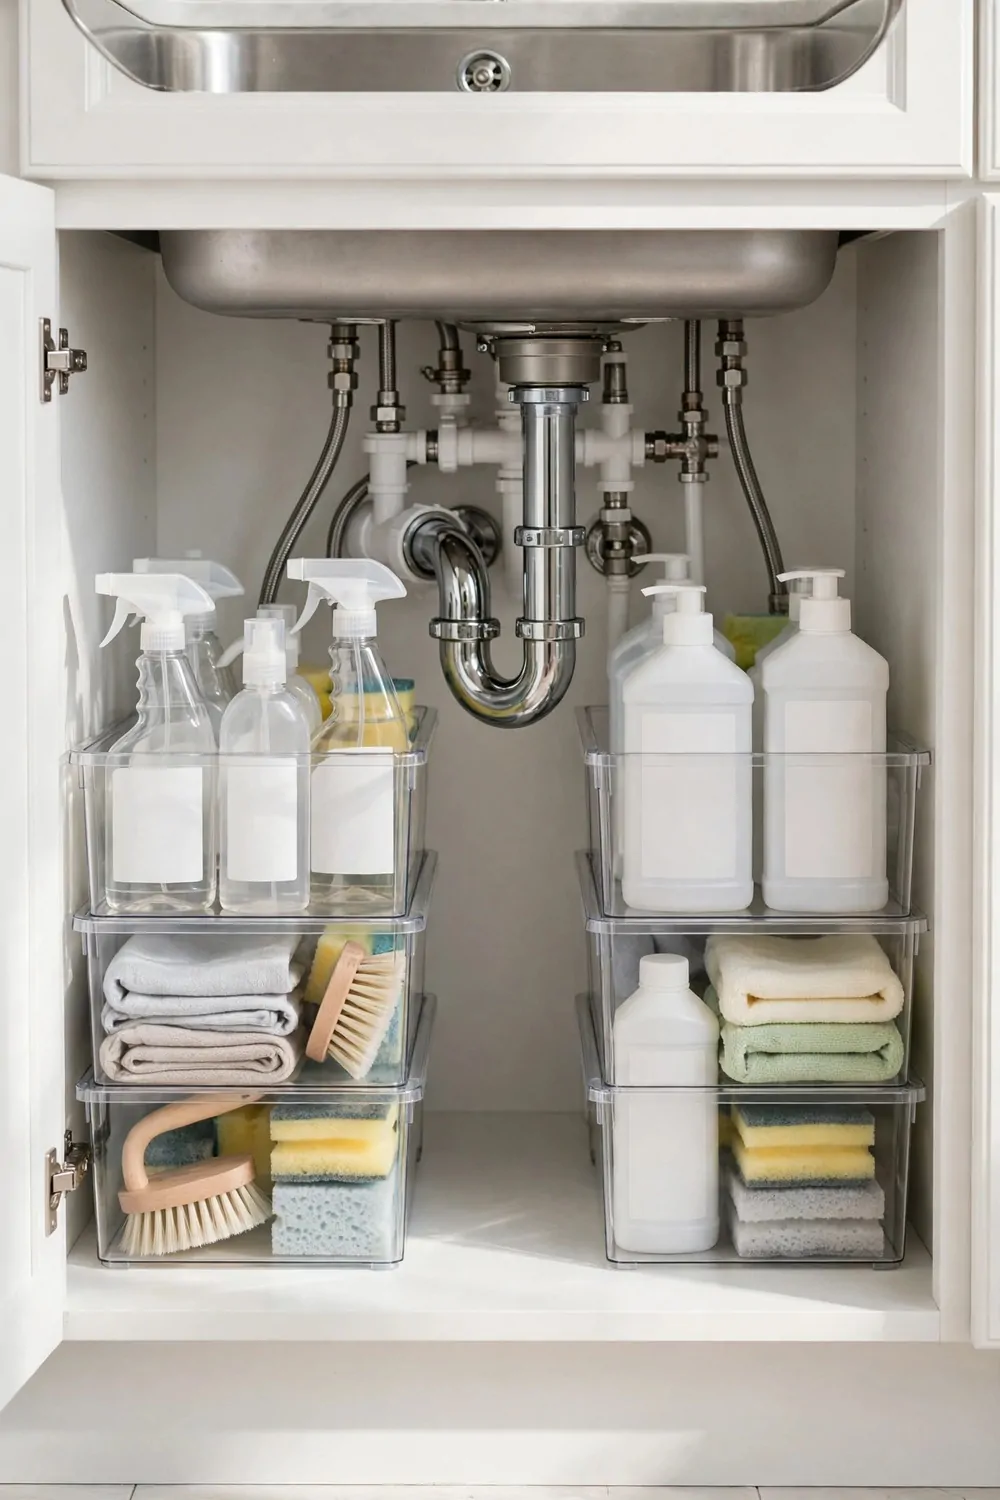
The sides of the pipes are often the most wasted spots.
Stackable bins fit right there and use the height. Start with one bin on each side, and add a second bin on top later when you see what fits.
Keep one side for washing things and the other side for wiping things.
I keep sponges and brushes on the left, and cloths on the right. Label the front of each bin with a small sticker if it helps you. I wrote “sponges” on mine in plain marker.
My family finally puts them back right.
Do not stack bins so high that you cannot lift the top one off.
You should be able to reach the top bin without pulling the whole stack out. Put heavy things in the bottom bin. Light cloths and sponges go on top, so the stack stays steady.
I like bins with a small handle cut out on the front. I can pull the bin out with one finger when my other hand is wet.
Check that the bins sit flat and do not lean on a pipe.
Put a Turntable in the Deep Corner
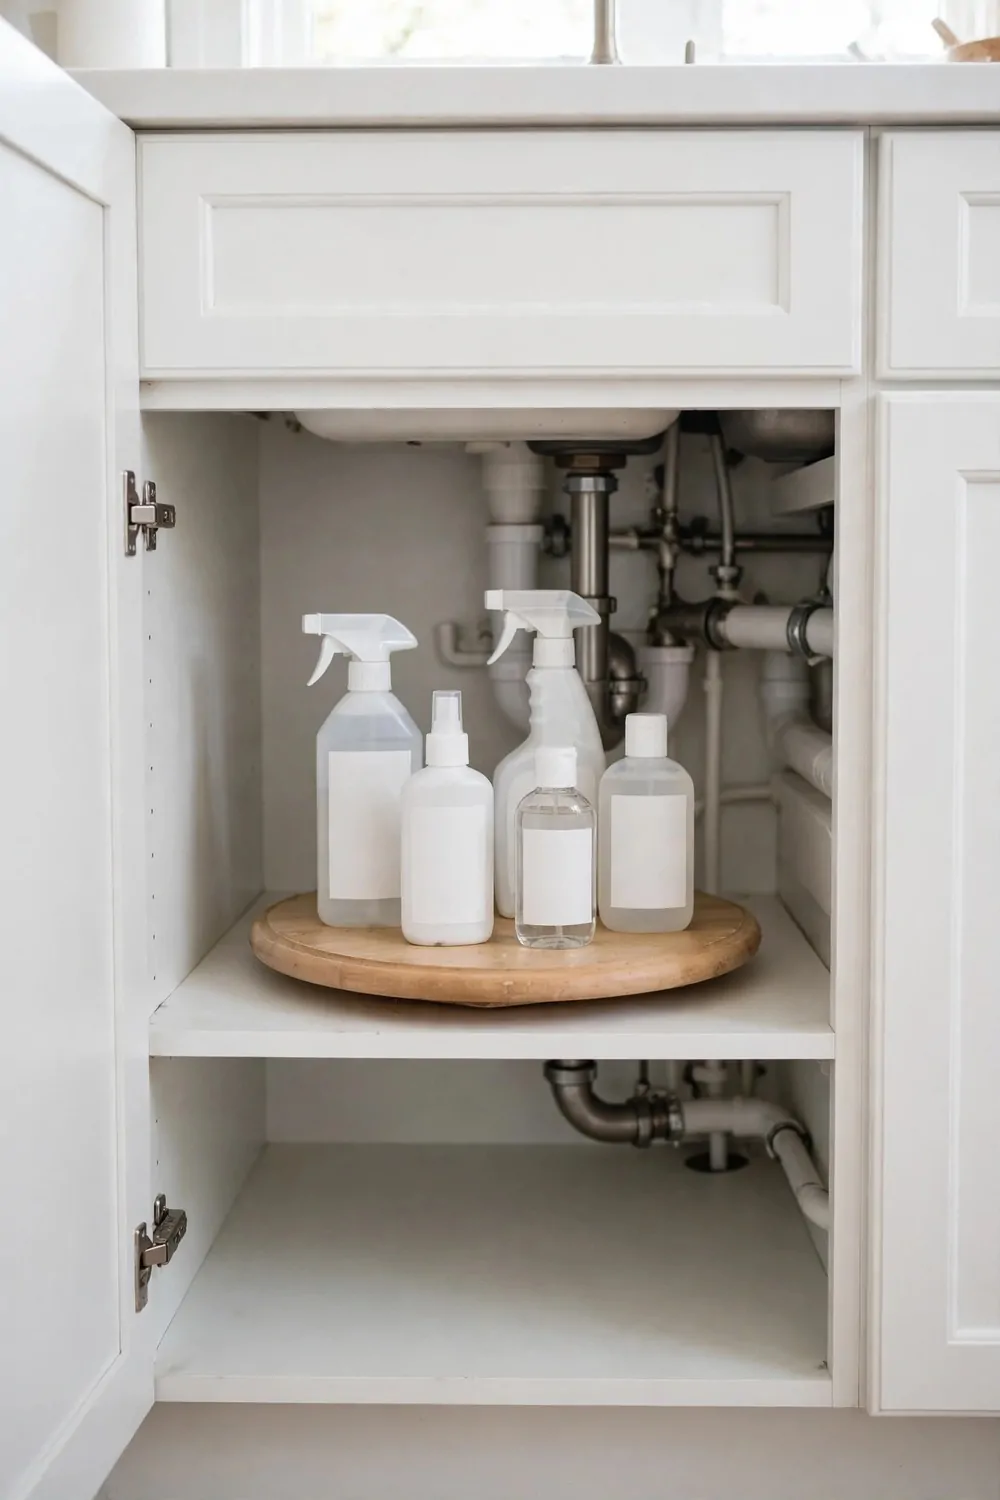
The deep back corner is hard to reach.
A turntable fixes that because you spin it and the bottle you want comes to you. Pick a low turntable that fits under the sink basin.
It should spin all the way round without hitting a pipe.
Put small bottles on it, like sink polish, drain cleaner, and small sprays. Tall bottles can tip when the turntable spins. I spin mine slowly with one hand.
A fast spin can knock a light bottle over, so slow is best.
Keep the turntable near the back but not stuck in the corner.
Leave a tiny gap so it can turn free. Group the bottles by job on the turntable. I put all the sink care things on one side and the small tools on the other side.
Wipe the turntable base when you clean the cabinet. A little soap under it can make it stick and stop spinning smooth.
If you have kids at home, keep strong cleaners on this back turntable and out of easy reach.
Hang a Rack on the Cabinet Door
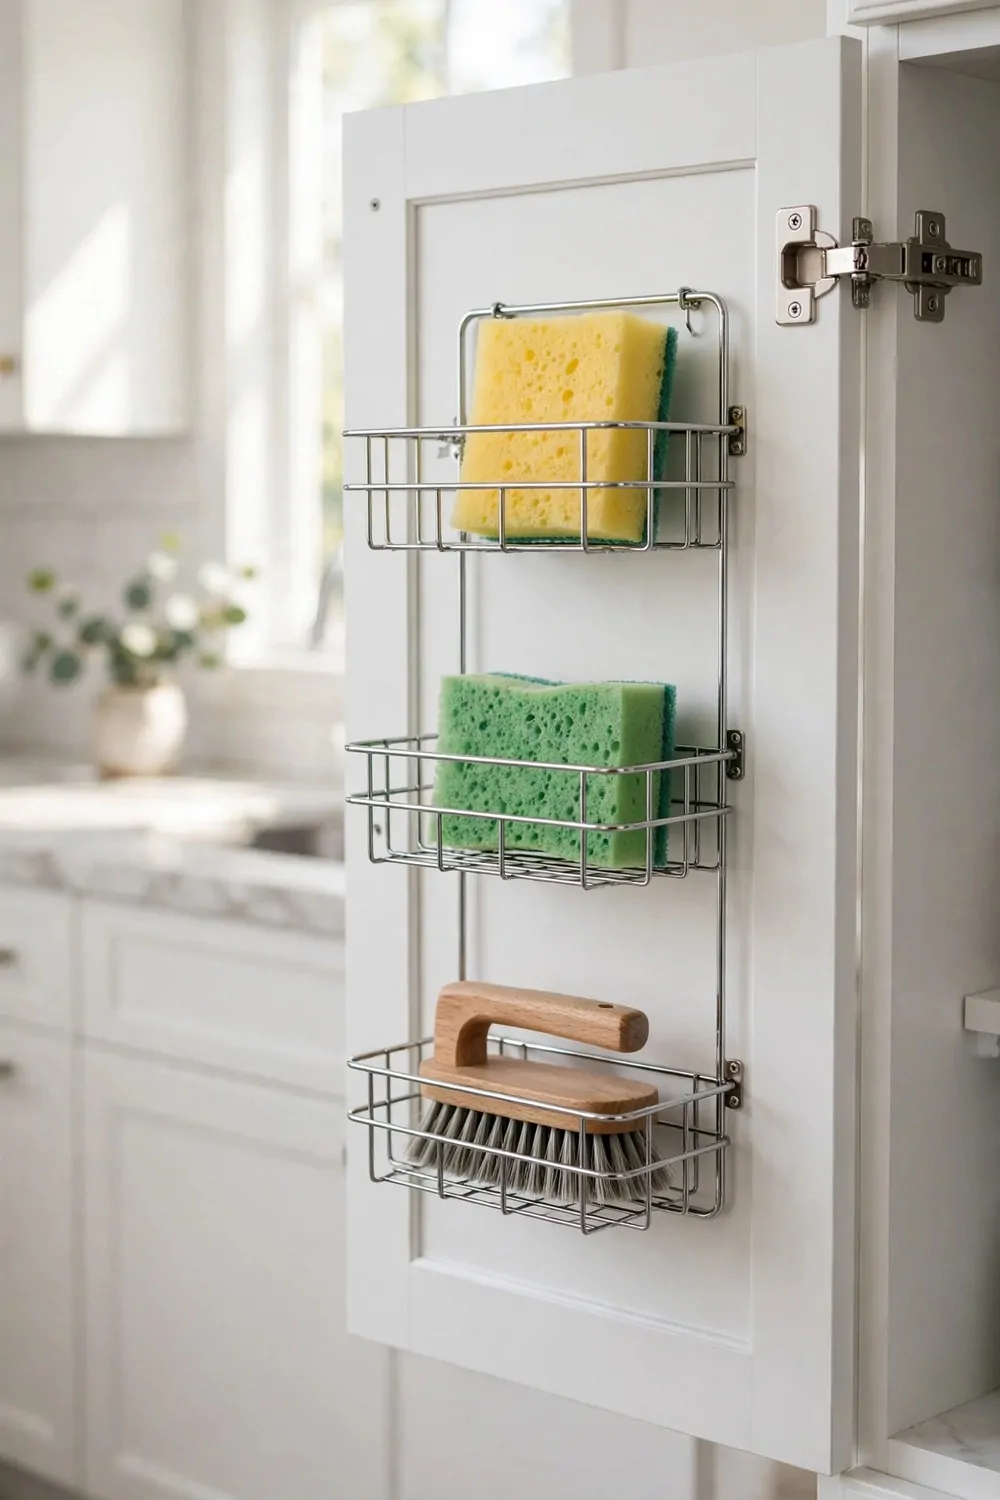
The inside of the door is free space.
A small wire rack there holds the things you grab most. Pick a rack that hangs over the top of the door or screws in with two small screws.
I like the over-door kind because I did not need tools.
Check the door thickness first. A rack made for a thick door will wobble on a thin one. Put sponges, a scrub brush, and a pair of gloves in the rack.
These are light, so they do not pull the door down.
Do not load the rack with heavy bottles.
The door hinges are not made for that much weight, and the door may start to sag. I keep my gloves hanging from a small hook on the rack.
They dry faster there than in a closed bin.
Close the door slowly the first few times to check the fit. The rack should not hit a bottle or a bin inside when the door shuts.
Wipe the rack when you see soap build up on the wires.
Line the Floor With a Leak-Proof Tray
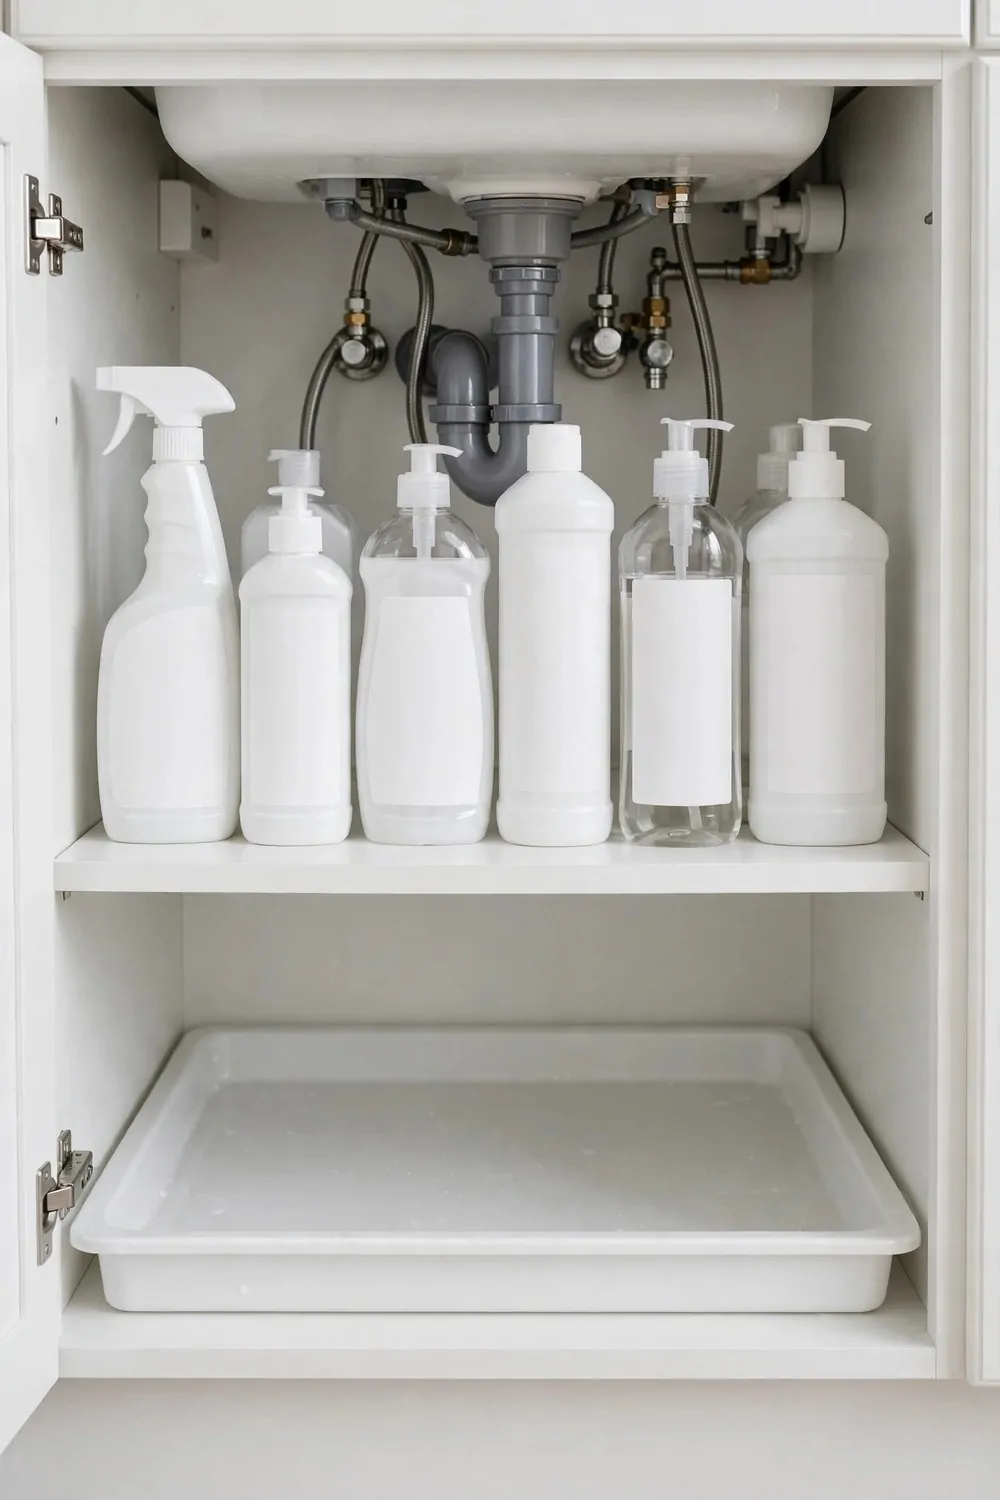
A leak-proof tray is a shallow tray with raised edges.
It sits on the floor of the cabinet and catches drips before they soak the wood. Pick a tray that covers most of the floor.
Measure the width and depth first so you do not buy one that is too big to slide in.
Put the tray in before you put the bins back. It is much easier to slide an empty tray in than a full one. Set your bottles and bins on top of the tray.
If a bottle leaks a little, the tray holds the liquid in one spot.
I check my tray once a week when I wipe the sink.
I lift it out, rinse it in the sink, and let it dry for a few minutes. Look for a tray with a small lip all the way round.
A flat mat will not hold a spill, and the water will run right off the edge.
Do not store loose packets or paper towels right on the tray floor. They can soak up a small drip and hide it from you.
Keep a Grab-and-Go Cleaning Caddy
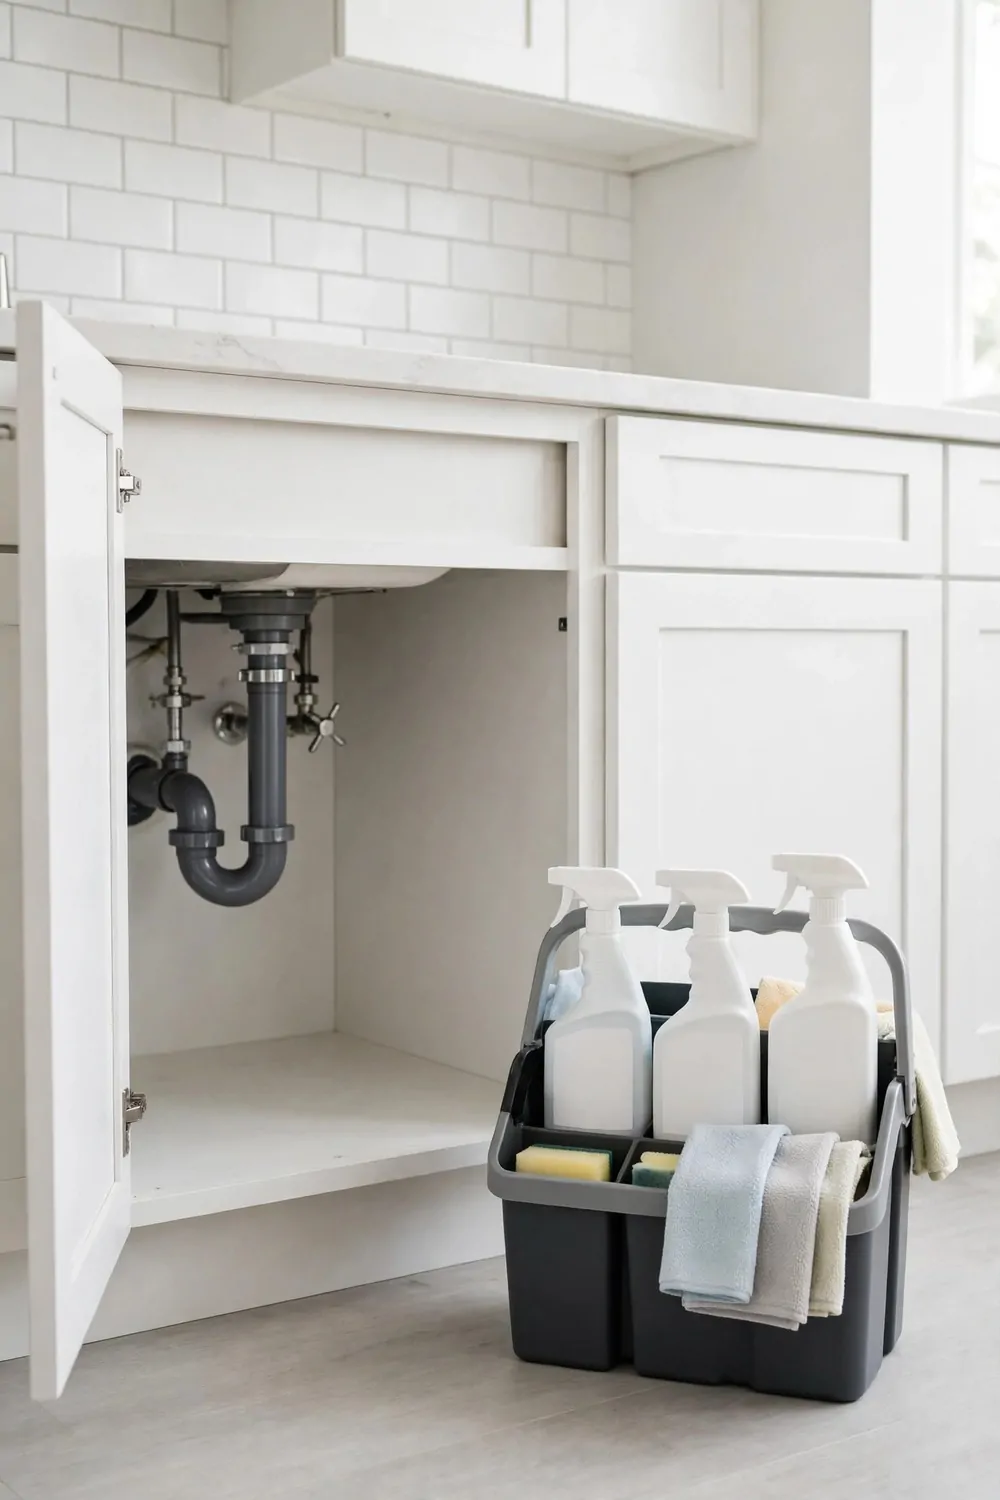
A grab-and-go caddy is different from the pull-out caddy inside the cabinet.
This one lives near the sink, and you carry it from room to room. Pick a caddy with a strong handle in the middle.
You will carry it with one hand, so the handle should feel firm and not bend.
Put your top three cleaners in it, plus two cloths. That is enough for a quick clean of the kitchen or the bathroom. I keep mine on the floor right next to the cabinet.
When I need it, I grab the handle and go, and I put it back in the same spot.
Do not fill it with every bottle you own.
A heavy caddy gets left behind, and then it does not help you at all. Refill it from the back-up bottles under the sink when a spray runs low.
That keeps the caddy light and ready.
Wipe the caddy out after a messy clean. Soap and dust can stick to the bottom, and a quick rinse keeps it fresh.
Store Dishwasher Pods in a Small Drawer Box
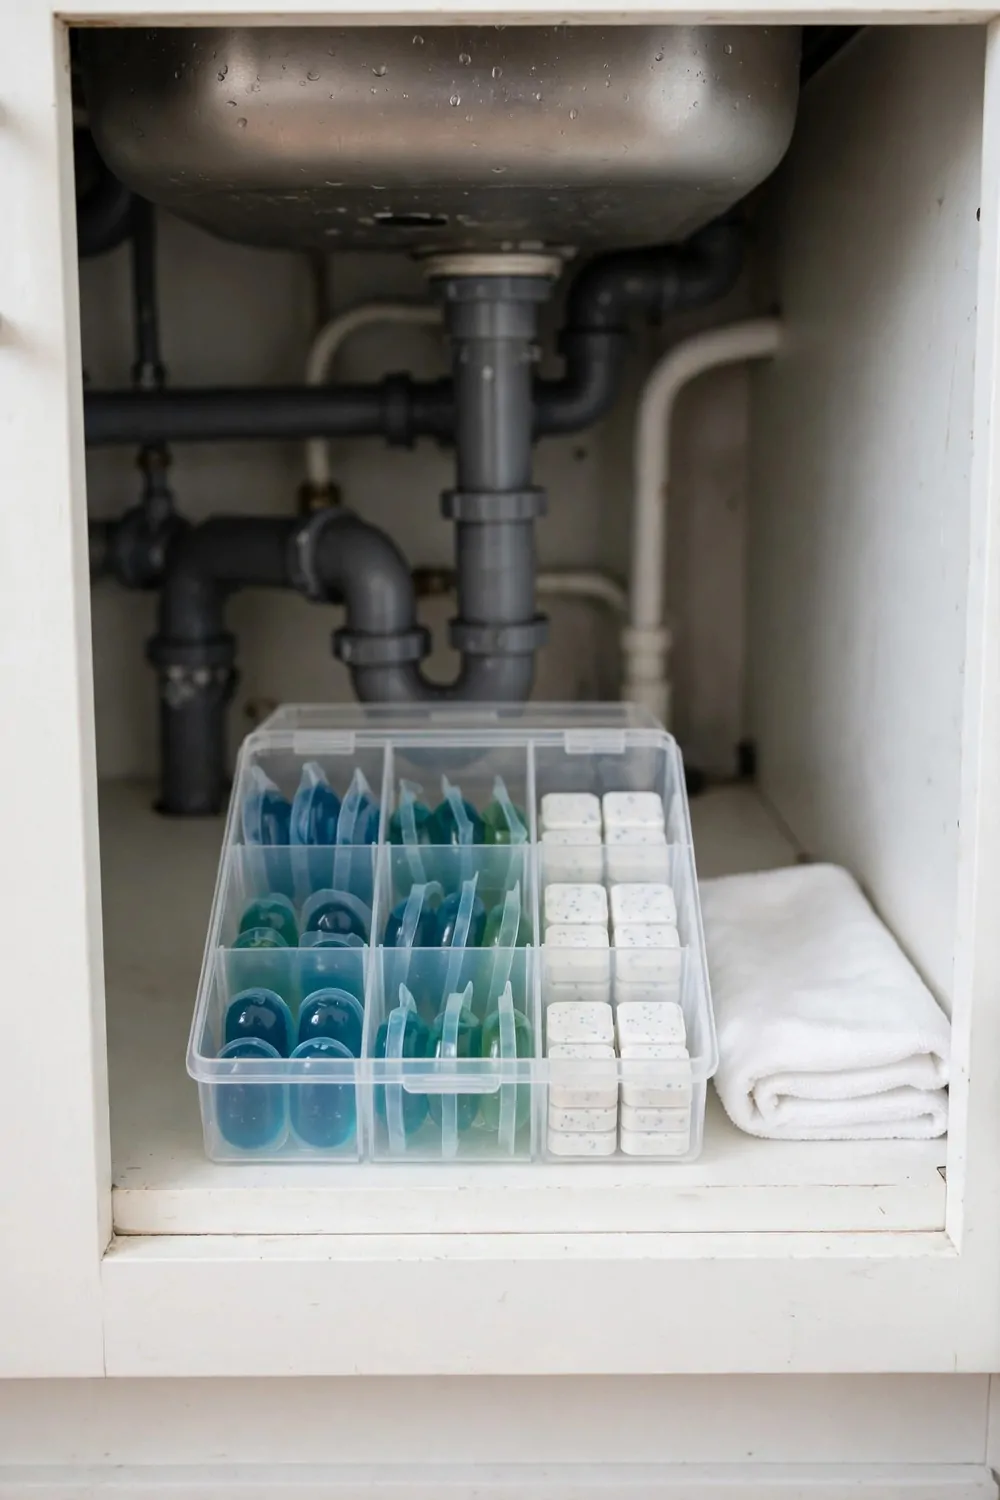
Dishwasher pods are small and easy to lose.
A small drawer box with sections keeps them in one place and easy to count. Pick a box with a lid that closes tight.
Pods can stick together if they get damp, so a closed lid helps a lot.
Put the box on the right side of the cabinet where it stays dry. Do not put it right under a pipe joint that might drip. I keep one box just for pods and nothing else.
When I mix in other things, the pods get buried and I buy more by mistake.
Count the pods when you fill the box.
I know I have about two weeks left when the box looks half full, and that stops last minute trips to the shop. Keep the box where kids cannot reach it with ease.
Put it toward the back or on a higher stack if little hands can open the cabinet door.
Label the lid with a small note if you share the kitchen. I wrote “dishwasher pods” on mine so no one puts soap packets in by mistake.
Wipe the box dry before you refill it.
Use Clear Bins So You Can See Everything
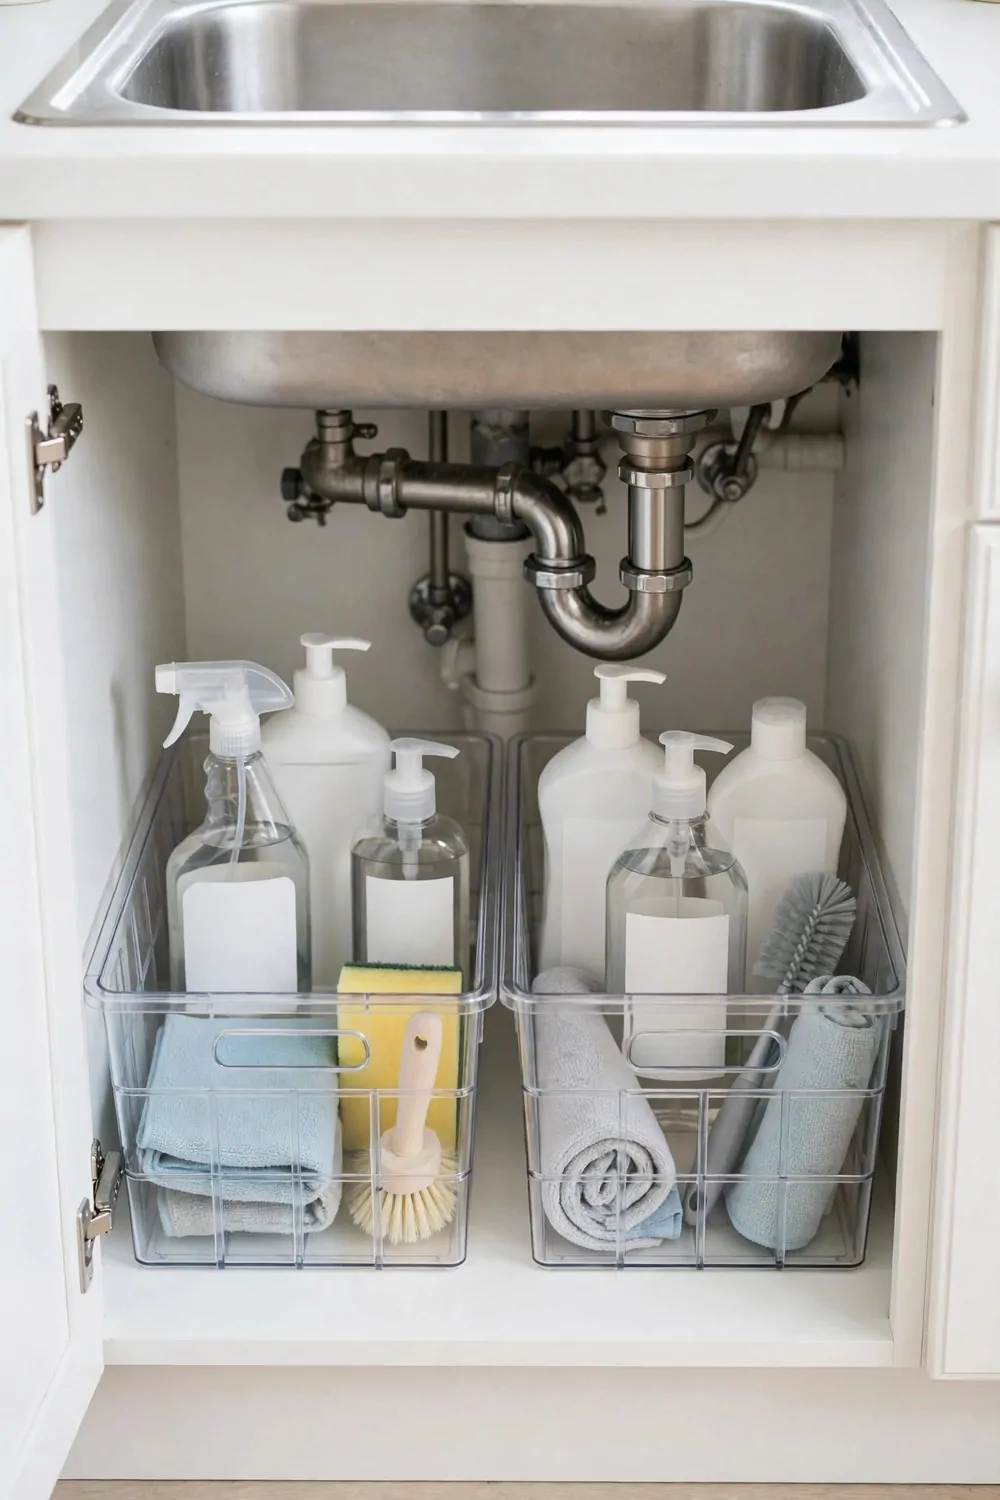
Clear bins let you see what is inside without opening them.
That one change stops a lot of digging and guessing. Pick bins with thick clear sides, not thin ones that crack.
They should feel firm when you squeeze the sides lightly.
Put one type of thing in each bin. I have one bin for sprays, one for sponges, and one for cloths, so I never mix them up. Line the bins up in a row with the open side facing you.
You can see the labels at a glance and grab the right one fast.
Do not overfill a clear bin.
When it is too full, you cannot see the bottom, and the whole point is lost. I wipe the outside of my bins once a week.
Finger marks and soap drips can cloud the clear sides over time.
If a bin starts to look yellow or cracked, swap it for a new one. A fresh bin keeps the cabinet looking clean and bright.
Clear bins also help you see when you are running low.
Add a Small Shelf Above the Pipes
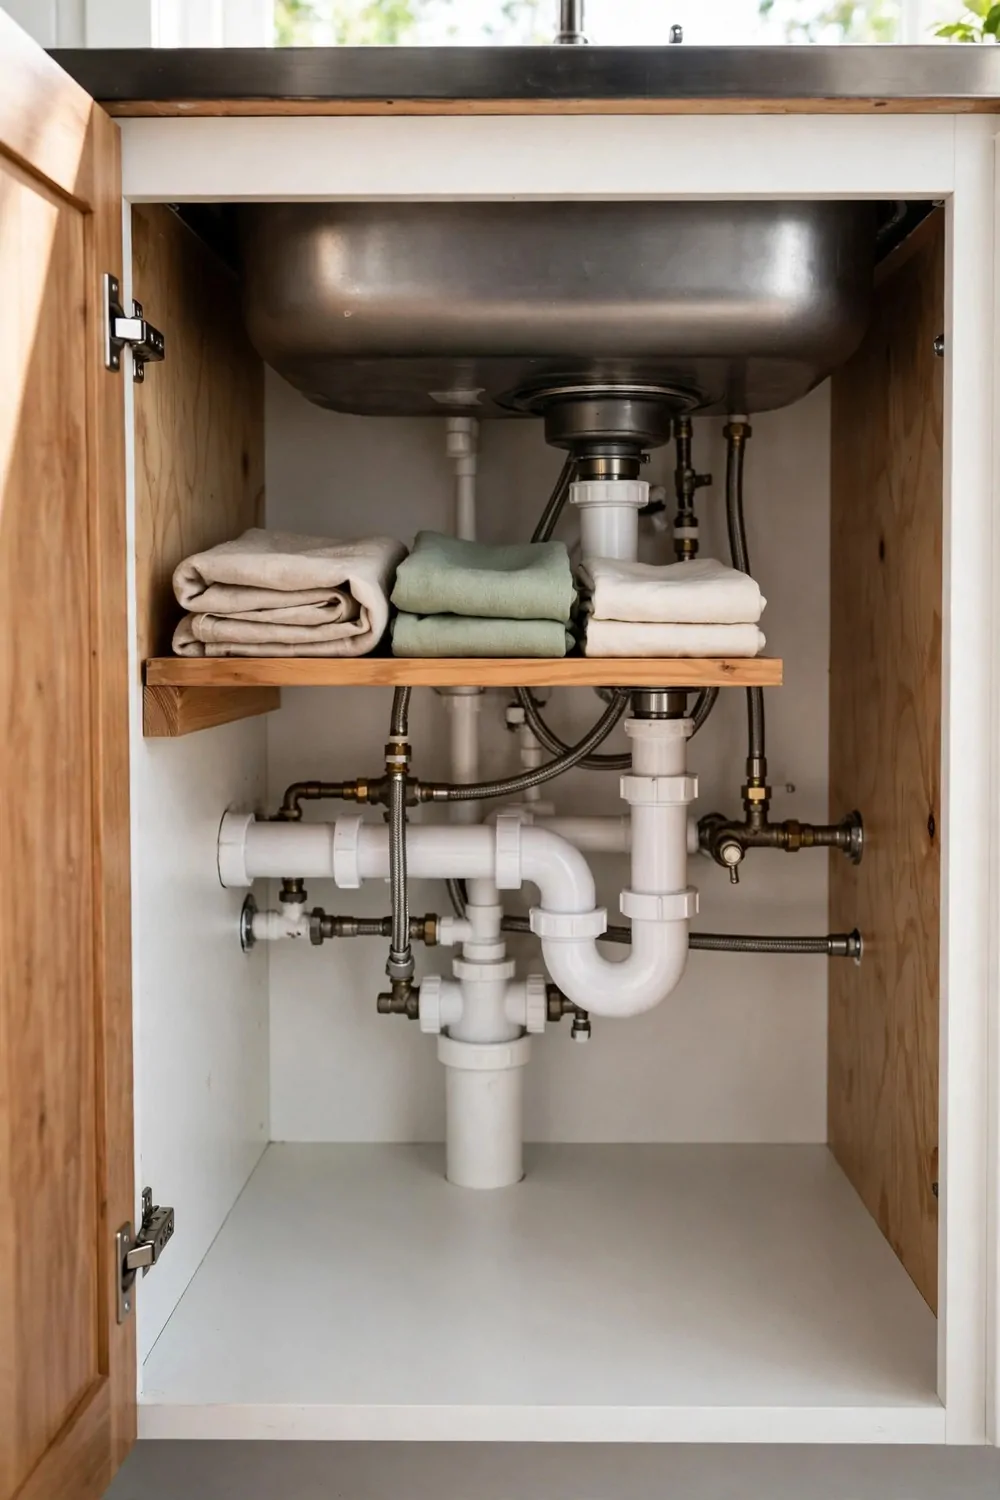
The space above your pipes often sits empty, and that is a shame because it can hold so much.
I looked under my sink one day and saw a big gap up high that I never used.
A small shelf turns that dead space into a real storage spot.
You do not need a big board or fancy tools to make it work.
Measure the width of your cabinet first, then cut a board to fit between the walls.
I like a shelf that sits just above the tallest pipe so nothing gets in the way.
Folded cloths fit up there so well, and they stay clean and dry.
You can also keep light items like spare sponges or small rags on it.
Make sure the shelf is steady before you load it up.
I use two small brackets on each side, and they hold it firm.
If you rent your home, a shelf that rests on brackets is easy to take down later.
It gives you one more flat surface, and under the sink every flat surface counts.
Hang Brushes and Gloves on Adhesive Hooks
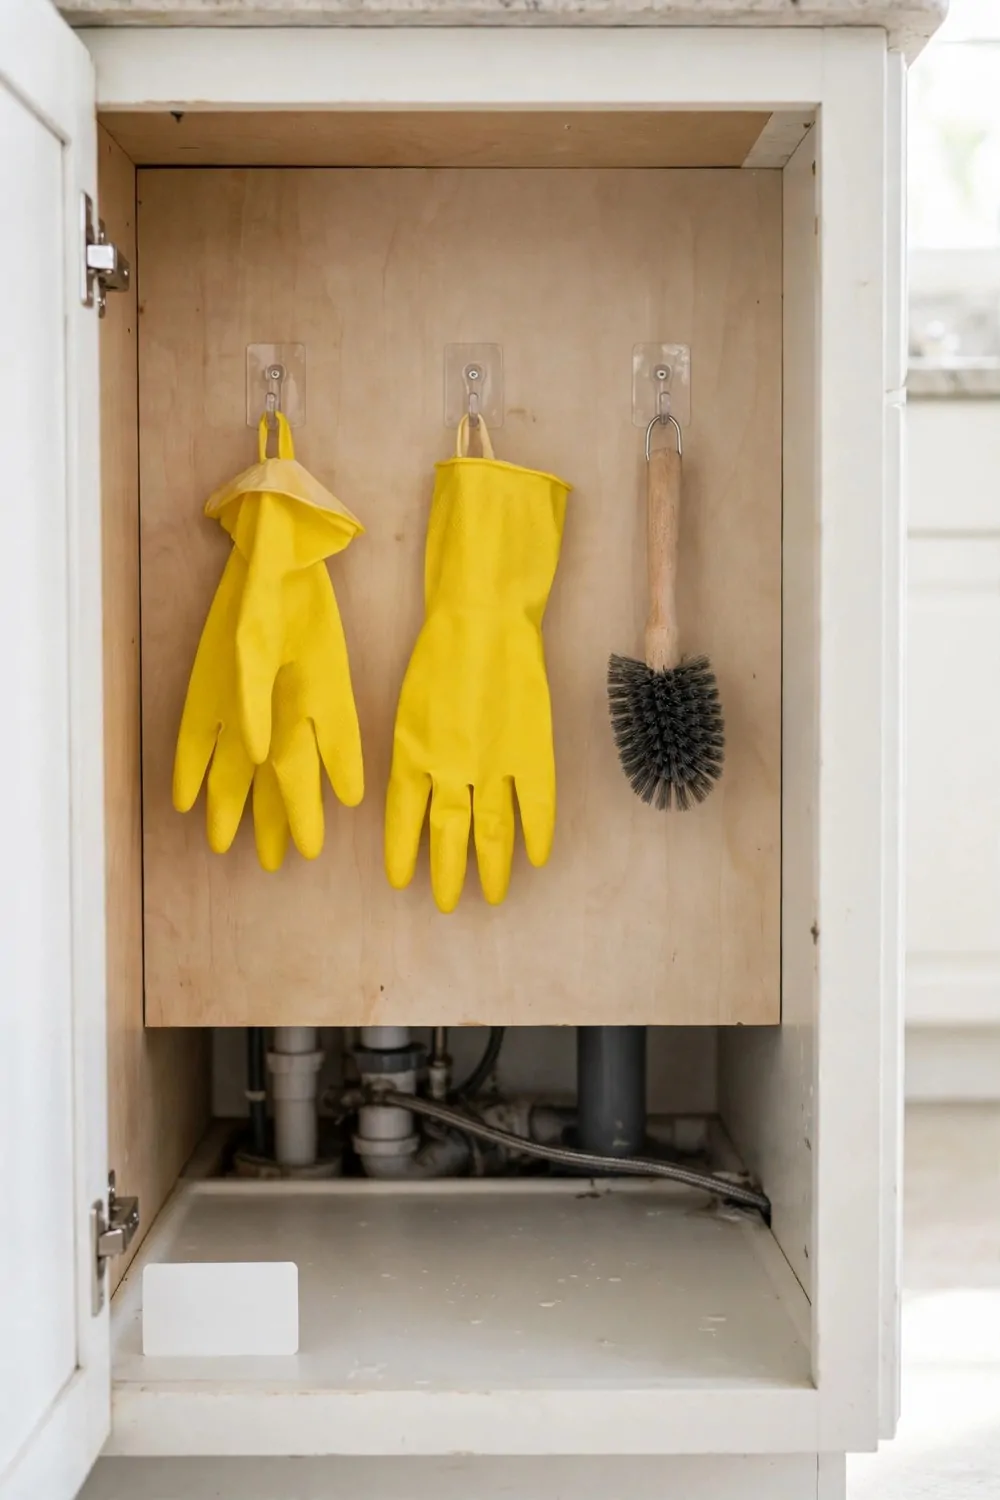
Brushes and gloves end up in a pile at the bottom of the cabinet, and I hate that.
They get damp, they get lost, and they make everything look messy.
A few adhesive hooks on the inside wall fix this in minutes.
Stick them on a clean, dry spot on the cabinet wall or the inside of the door.
Wait a bit for the glue to set before you hang anything heavy on them.
I hang my dish brush by its loop, and it dries fast up in the air.
My rubber gloves hang beside it, and they are always easy to grab.
This keeps wet things off the bottom of the cabinet, which helps stop bad smells.
You can add a hook for a small scrub pad too if you have room.
The best part is there is no drilling, so you can move the hooks any time.
Keep Trash Bags in a Slim Dispenser
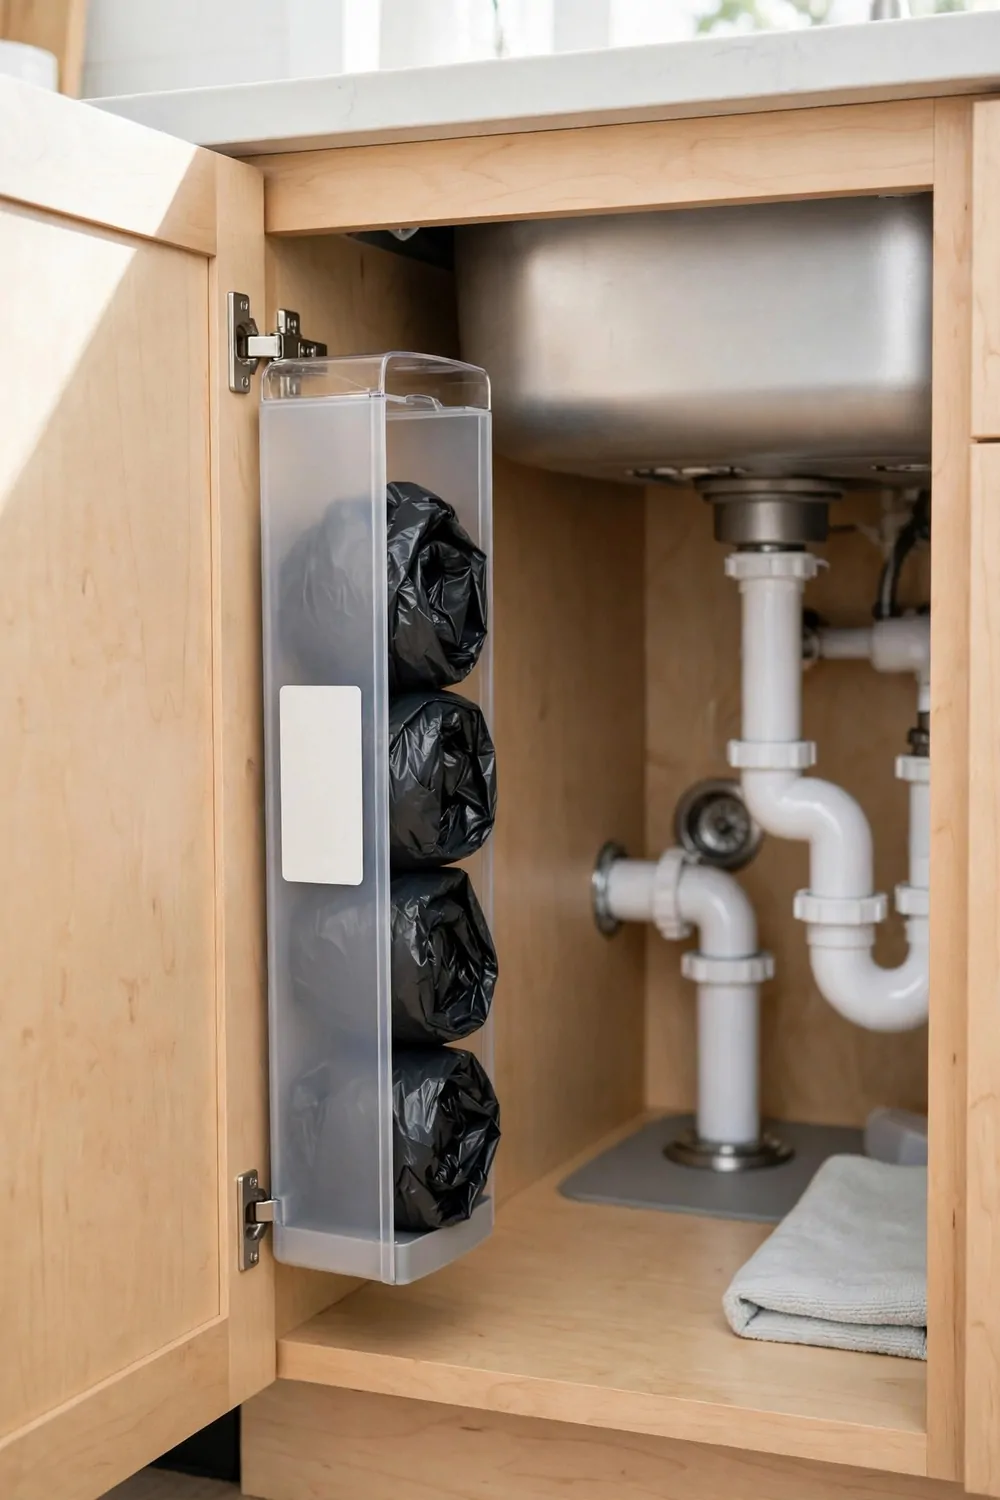
Trash bags are always needed, but a loose roll of them takes up space and looks untidy.
I used to keep mine in a big box, and the box kept falling over.
A slim dispenser changed all that for me.
It holds a whole roll of bags and lets you pull one out at a time.
You can mount it on the inside of the cabinet door or on a side wall.
I like the door spot because the bags are right there when I change the bin.
The dispenser is narrow, so it does not eat into the room you need for bottles.
Pick one that fits the size of bag you use most, so you are not forcing a big roll in.
When the roll runs out, you just drop a new one in and you are done.
It is a small fix, but it makes the whole cabinet feel more planned.
Use a Narrow Rolling Cart for the Gap
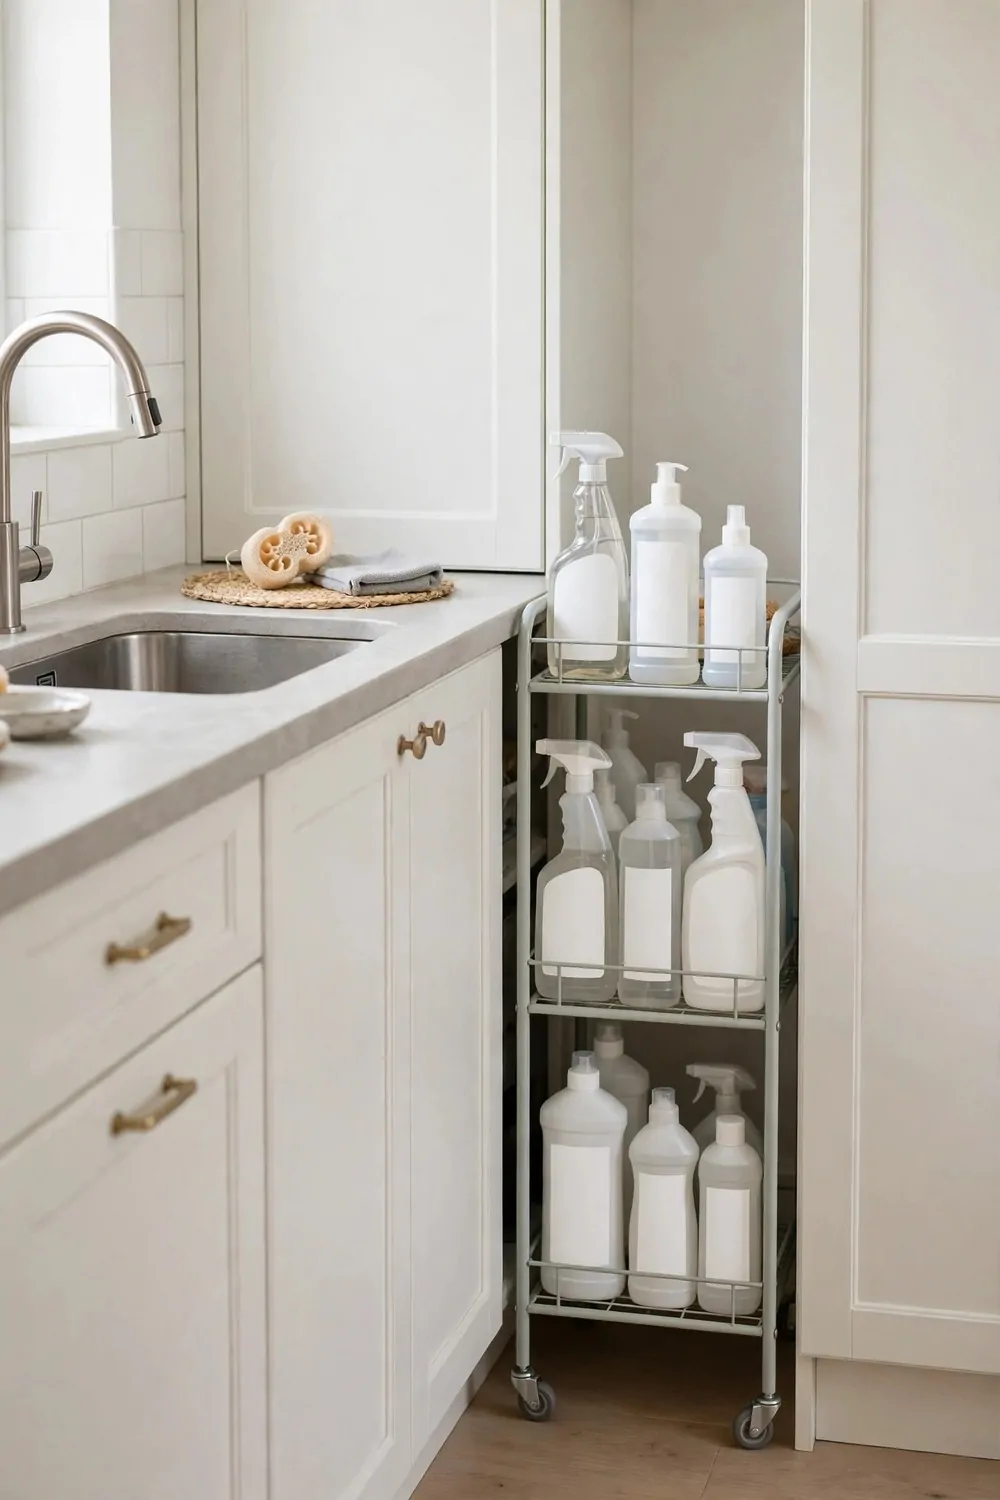
Some kitchens have a thin gap next to the sink cabinet, and most people just ignore it.
I saw mine for months and thought it was too small to use for anything.
Then I found a narrow rolling cart, and now that gap works hard for me.
The cart slides in and out on small wheels, so you can reach the back shelves with ease.
I keep my most used spray bottles on the top shelf.
The middle shelf holds dish soap and a spare sponge pack.
The bottom shelf is for heavier things like a big bottle of floor cleaner.
When you need something, you roll the cart out, take what you need, and roll it back.
It feels like magic the first time you do it.
Before you buy one, measure your gap with care, because these carts come in a few widths.
A cart that is too wide will jam, and one that is too narrow will wobble.
| Option | Best for | Watch out for |
|---|---|---|
| Narrow rolling cart | Thin gaps beside the sink and bottles you grab often | It can tip if the top shelf is loaded with heavy bottles |
| Fixed shelf | Adding a steady extra level above the pipes | It needs exact measuring and it cannot move once fitted |
| Caddy | Carrying supplies to another room and back again | Tall bottles can fall over when you lift it by the handle |
Sort Sponges and Cloths in a Mesh Basket
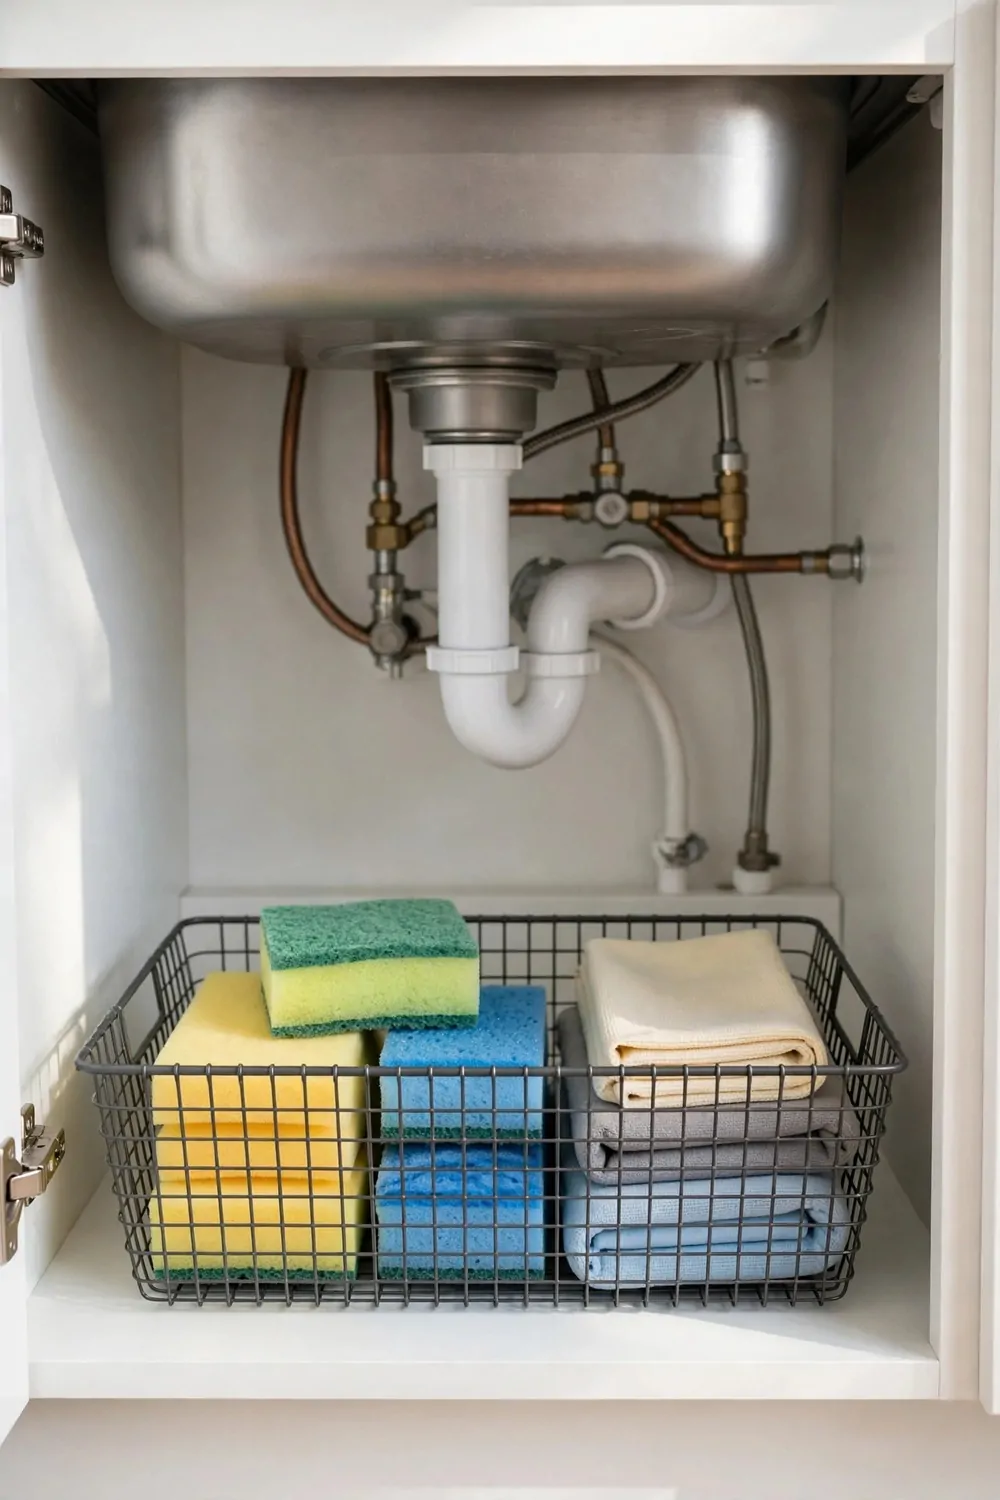
Sponges and cloths are small, but they spread out and make a mess fast.
I used to find them everywhere under my sink, some dry, some still damp.
A mesh basket keeps them all in one tidy place.
The mesh lets air move through, so things dry instead of staying soggy.
I fold my cloths in half and stack them on one side of the basket.
The sponges go on the other side, standing up so air can reach them.
When a sponge gets old, I can see it right away and swap it out.
You can rinse the basket under the tap now and then to keep it fresh.
Pick a basket that fits your cabinet floor without blocking the door.
It is a cheap fix, and it makes the whole space look calm.
Store Extra Refills at the Very Back
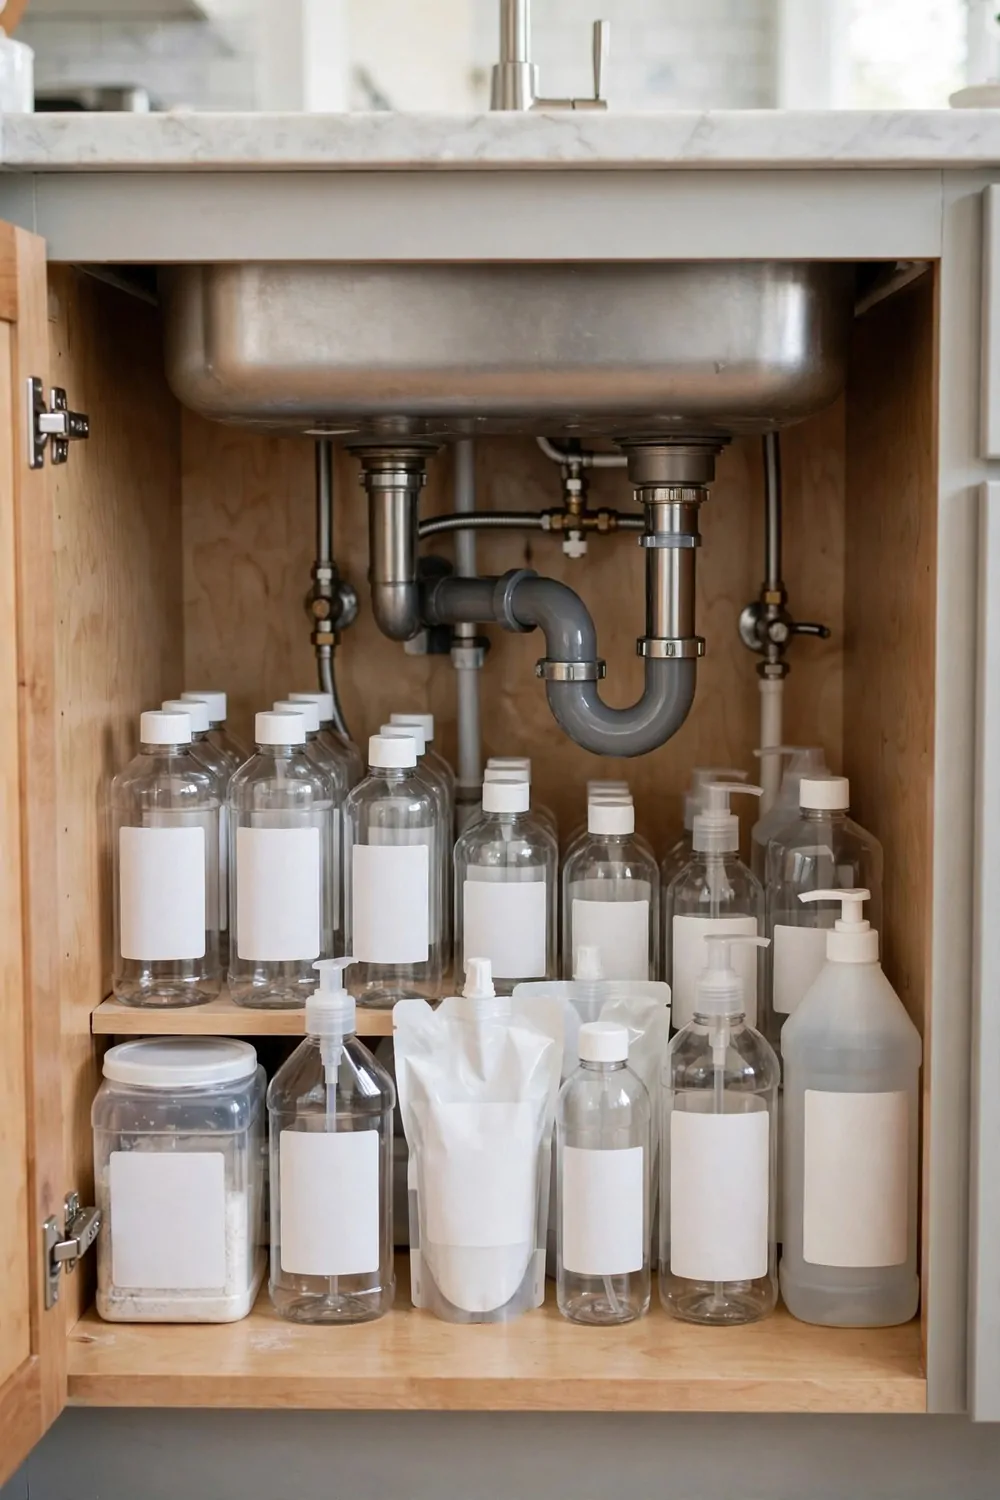
Refill bottles and bulk buys are great for saving money, but they are bulky.
They do not need to sit at the front where you reach every day.
I keep all my extras at the very back of the cabinet.
That way the daily bottles stay up front and easy to grab.
The back row holds big refill jugs, spare soap, and extra bin bags.
I line them up in a row so I can count them at a glance.
When a front bottle runs low, I pull a refill forward and top it up.
This stops me buying a new bottle when I already have one at home.
Make sure the caps are shut tight, so nothing leaks onto the cabinet floor.
I also put a small tray under them, just in case a drop escapes.
Add a Battery Puck Light Inside the Cabinet
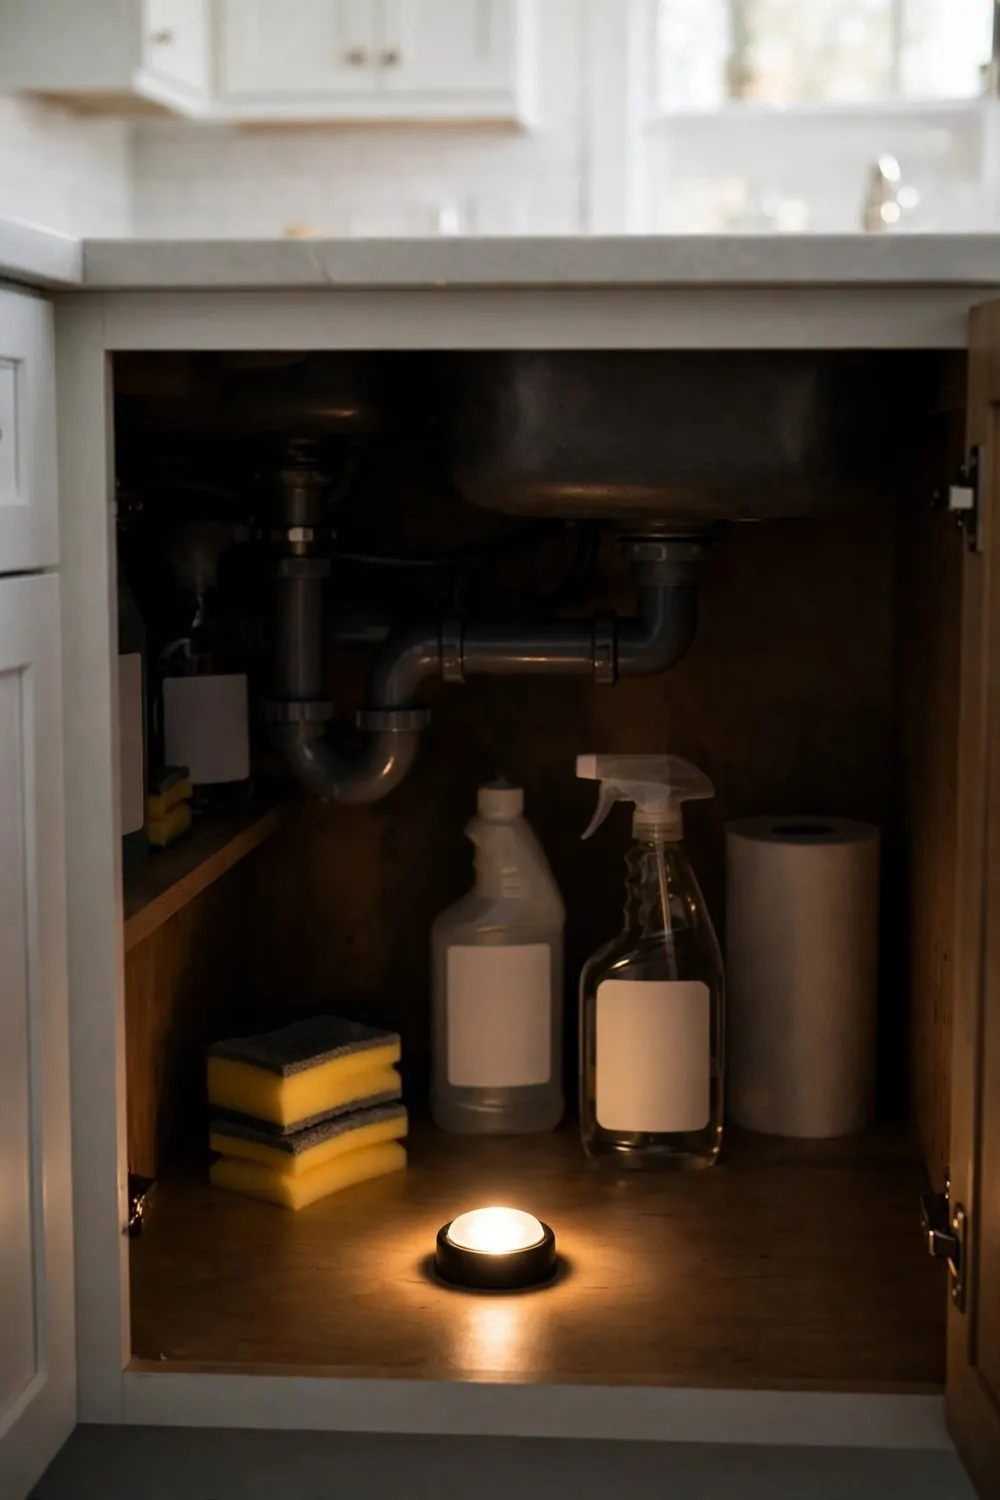
Under the sink is dark, and I used to fumble around trying to find the right bottle.
I would pull out three things before I found the one I wanted.
A battery puck light fixed that in a few minutes.
You stick it to the top or the side wall of the cabinet, and it runs on small batteries.
Tap it once and the whole space lights up.
Now I can see labels, caps, and the back row without any trouble.
I picked one with a warm glow, so it feels soft and not harsh.
It is easy to change the batteries when they run out.
Some puck lights come with a remote, which is handy if you have more than one.
This tiny light makes the cabinet feel like a proper storage spot, not a dark hole.
Tuck a Small Recycling Bin Under the Sink
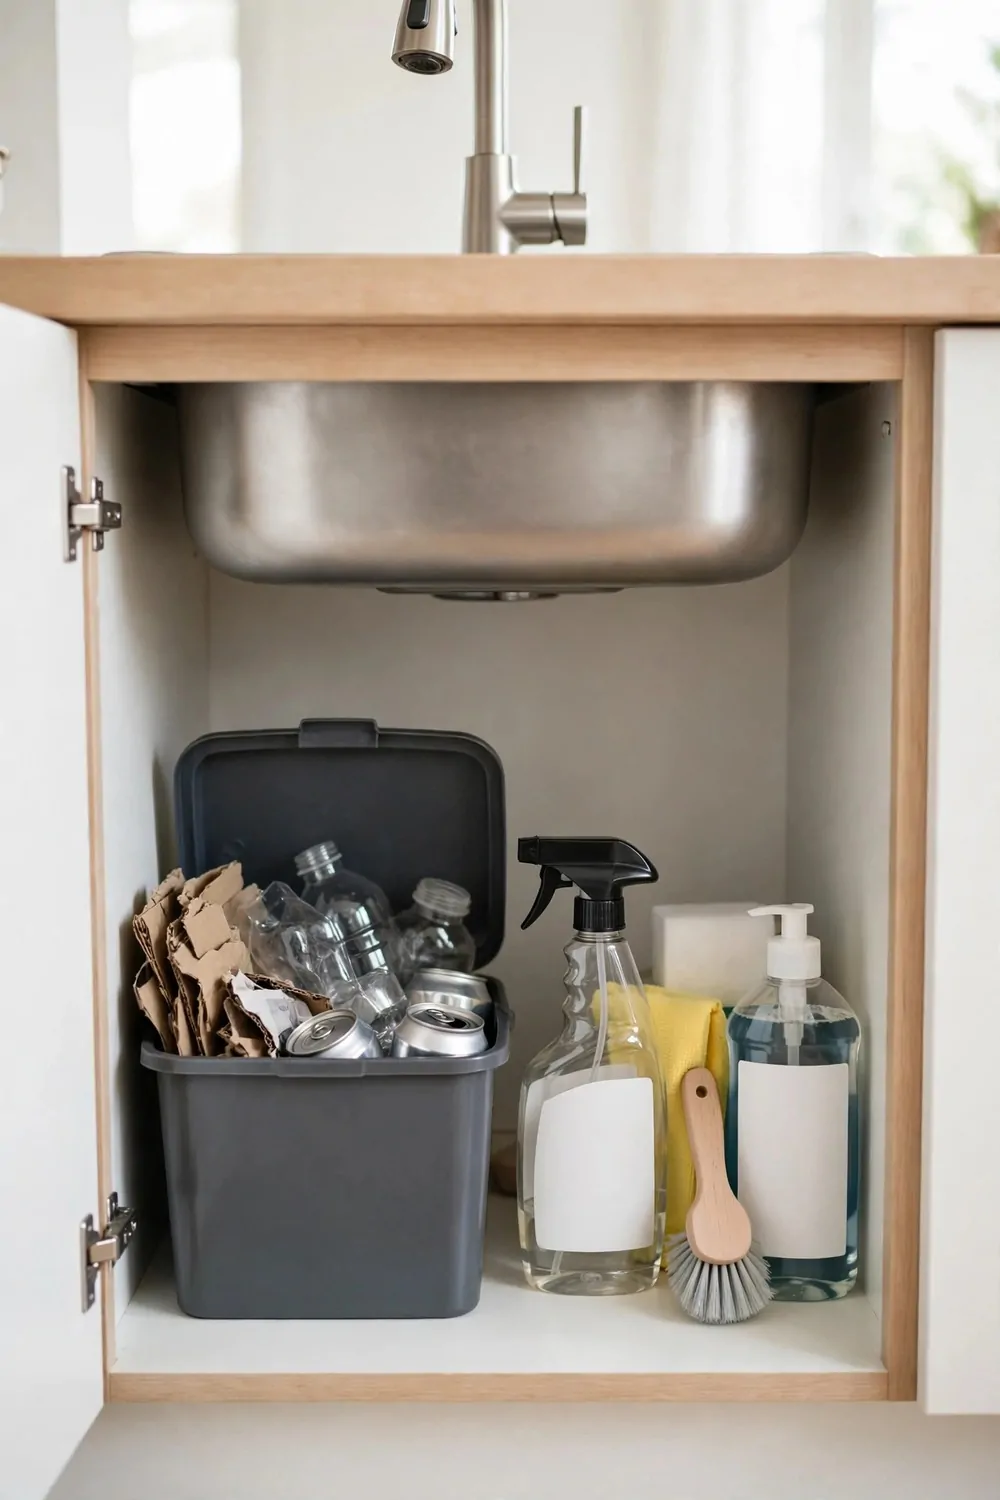
Recycling is easier when the bin is close to where you work.
I used to keep mine out in the open, and it took up floor space in my kitchen.
A small bin under the sink works much better for me.
It sits beside the cleaning supplies and stays out of sight.
I use one with two parts, so I can sort cans on one side and plastic on the other.
When it gets full, I carry it out and empty it into the big bins outside.
A lid helps keep smells in, so pick one with a lid if you can.
Make sure the bin is short enough to fit under the pipes.
I measured mine twice before I bought it, and it slid in just right.
It keeps the kitchen floor clear, and sorting takes only a few seconds a day.
Use a Tension Rod as a Drying Rail for Cloths
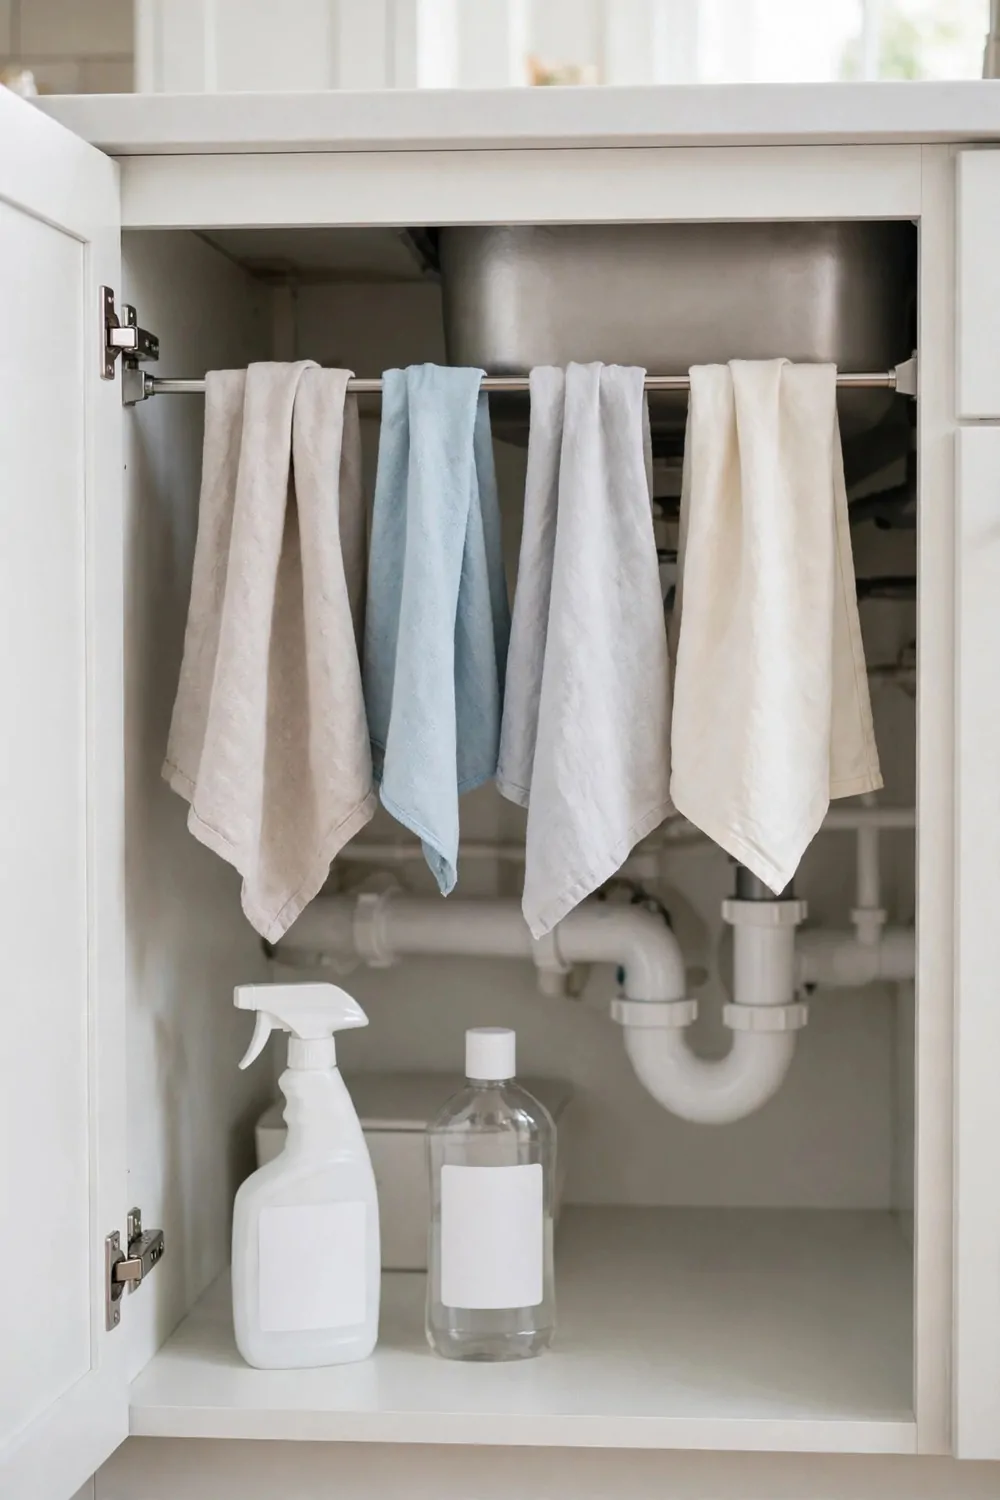
Wet cloths need air, but there is often nowhere to hang them in a small kitchen.
I used to drape mine over the tap, and it never looked nice.
A tension rod under the sink gives them a proper drying spot.
You twist it to fit between the two cabinet walls, and it stays put by pressure alone.
No screws, no holes, and you can take it down in seconds.
I hang my damp cloths over the rod after I rinse them out.
They dry faster in the air than they do in a pile at the bottom.
The rod also works for a small spray bottle with a trigger hook.
Just be sure the rod is not in the way of the door when it closes.
It is a simple trick, and it keeps the cabinet feeling fresh and dry.
Use Simple Labels So Everyone Knows Where Things Go
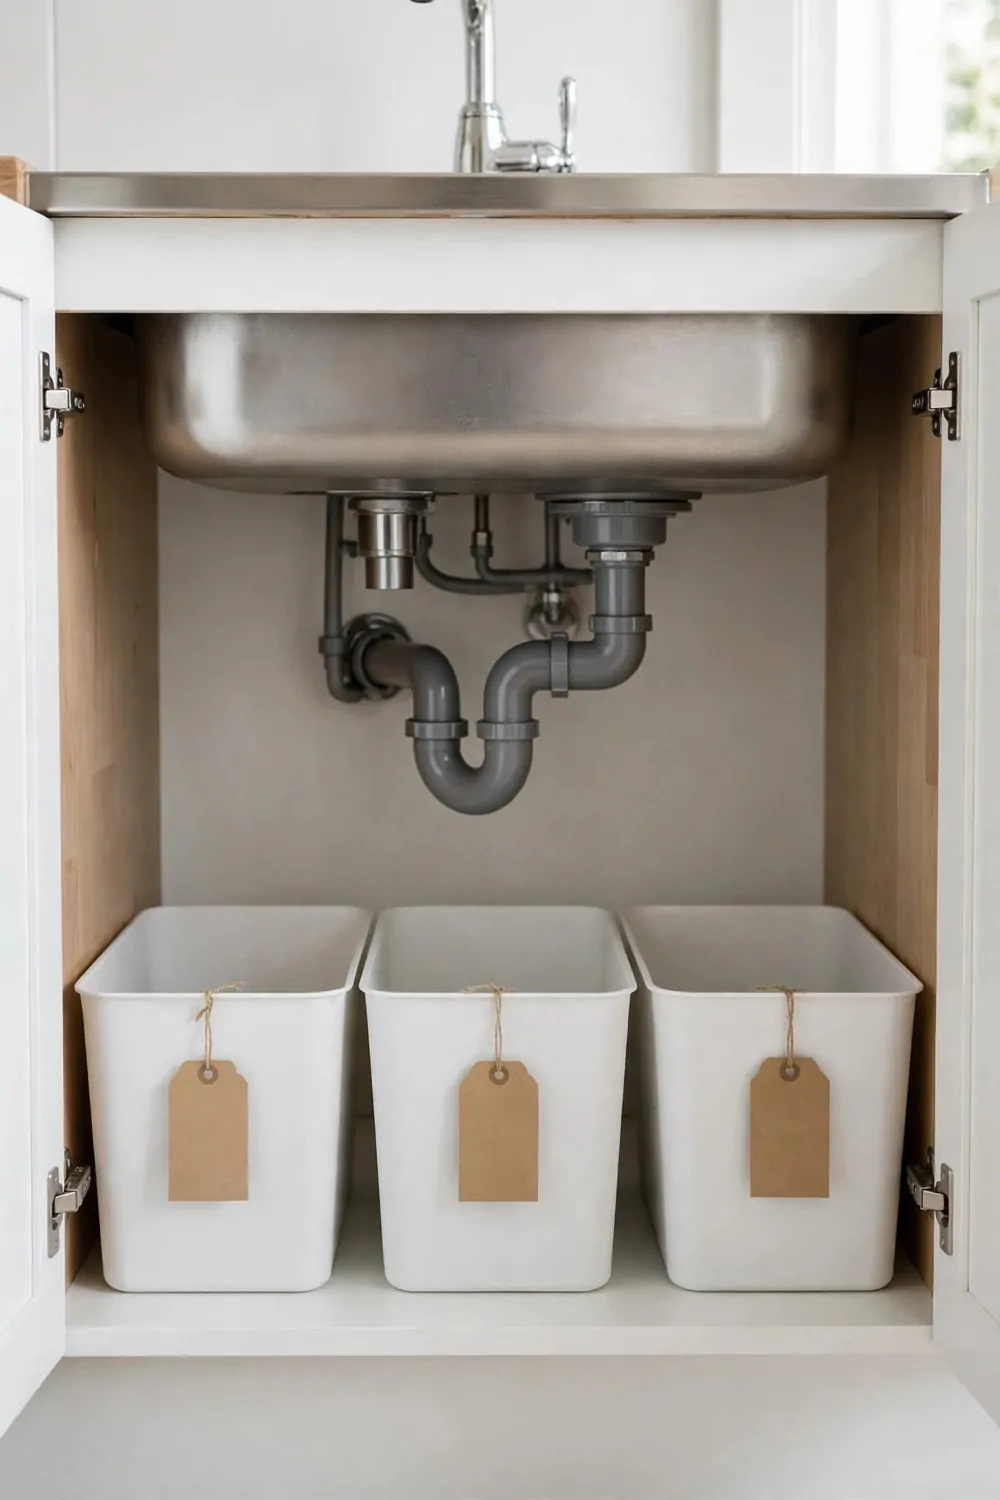
A tidy cabinet only stays tidy if everyone in the house knows where things go.
I learned this the hard way, because my family kept putting things back in the wrong spot.
Simple labels changed that for us.
I use plain tags on each bin, with one or two words on each.
One says soap, one says cloths, and one says bags.
The words are big and clear, so even a quick glance is enough.
You can write them by hand or print them out, it does not matter.
What matters is that every bin has a home and a name.
When something is used up, it goes back to the same labeled spot.
This saves time, and it stops the cabinet from sliding back into a mess.
Do a Five-Minute Weekly Reset
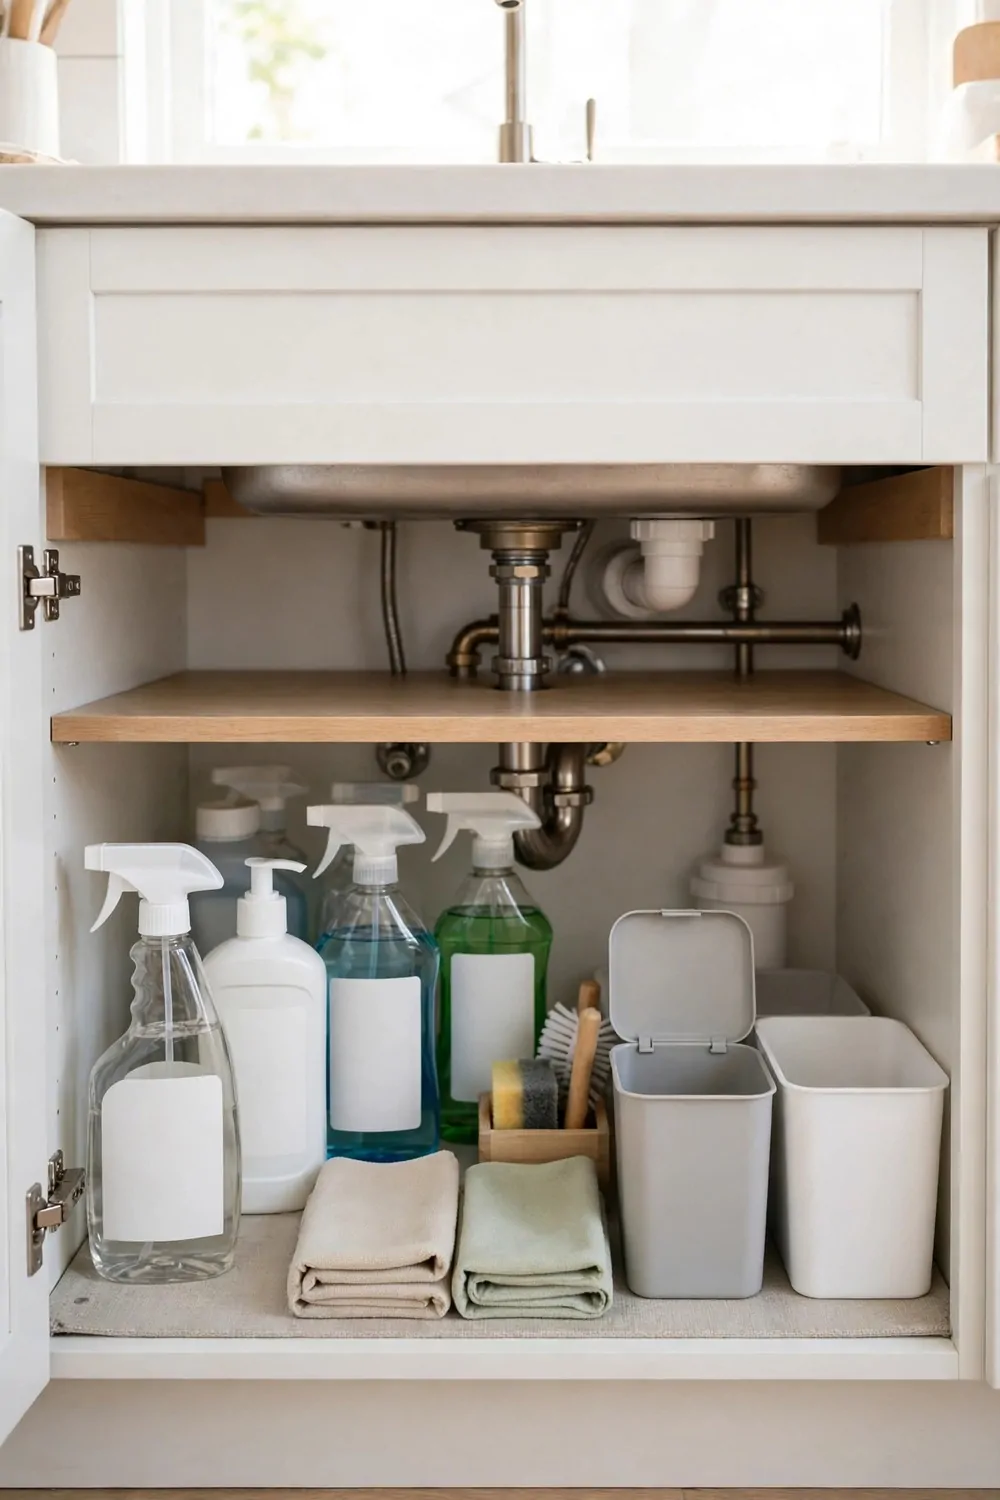
Even the best system needs a quick check now and then.
I do a five minute reset once a week, and it keeps the whole cabinet in shape.
It is short, and it stops small messes from turning into big ones.
I pick the same day each week so I never forget.
First I pull everything out and give the floor a quick wipe.
Then I toss anything that is empty or past its best.
I put the daily bottles back at the front and the refills at the back.
Labels get a quick look, and I fix any that have slipped off.
It feels good to close the door on a fresh, neat space.
| Step | Time | What to do |
|---|---|---|
| Pull out | 1 minute | Take everything out of the cabinet so you can see the floor |
| Wipe down | 1 minute | Wipe the floor and shelves with a damp cloth |
| Toss empties | 1 minute | Throw out empty bottles and old sponges |
| Put back | 2 minutes | Return daily items to the front and refills to the back |
Keep Reading
If you liked these ideas, there is more help waiting for you on the site.
These next posts share simple kitchen ideas that work well with the storage fixes above.
- 25 Small Kitchen Ideas You Will Wish You Knew Sooner
- 26 Kitchen Design Layouts That Look Stunning and Work Hard
- 27 Home Decor Ideas Living Room and Kitchen Looks That Match
- 26 Modern Home Decor Updates That Look Instantly Fresh
Pick one to read next and try a single idea from it this week. Small steps add up fast, and your kitchen will feel calmer with each one.