38 Kitchen Island Storage Ideas That Make Small Kitchens More Functional

Last week I stood in my kitchen with a mixing bowl in one hand and a bag of flour in the other. There was no clear spot to put either one down. The counters were full. The sink had dishes in it. And my little island was holding mail, keys, and a plant I forgot to water.
I moved the mail to a chair and set the bowl down on the island. Then I opened the drawer under it. It was full of things I never use. A broken whisk. Three old phone chargers. A bag of rubber bands. That was the moment I knew my island was not helping me at all.
So I cleared it out. I kept only what I use in the kitchen. Pots went in a deep drawer. Spices went in a small pull out rack. Towels got a rail on the side. It took one slow afternoon. But now the island works hard for me every single day.
If your kitchen feels tight, your island can fix a lot of it. You just need the right spots for the right things. These ideas will help you make room without adding a bigger kitchen.
Deep Drawers for Pots and Pans
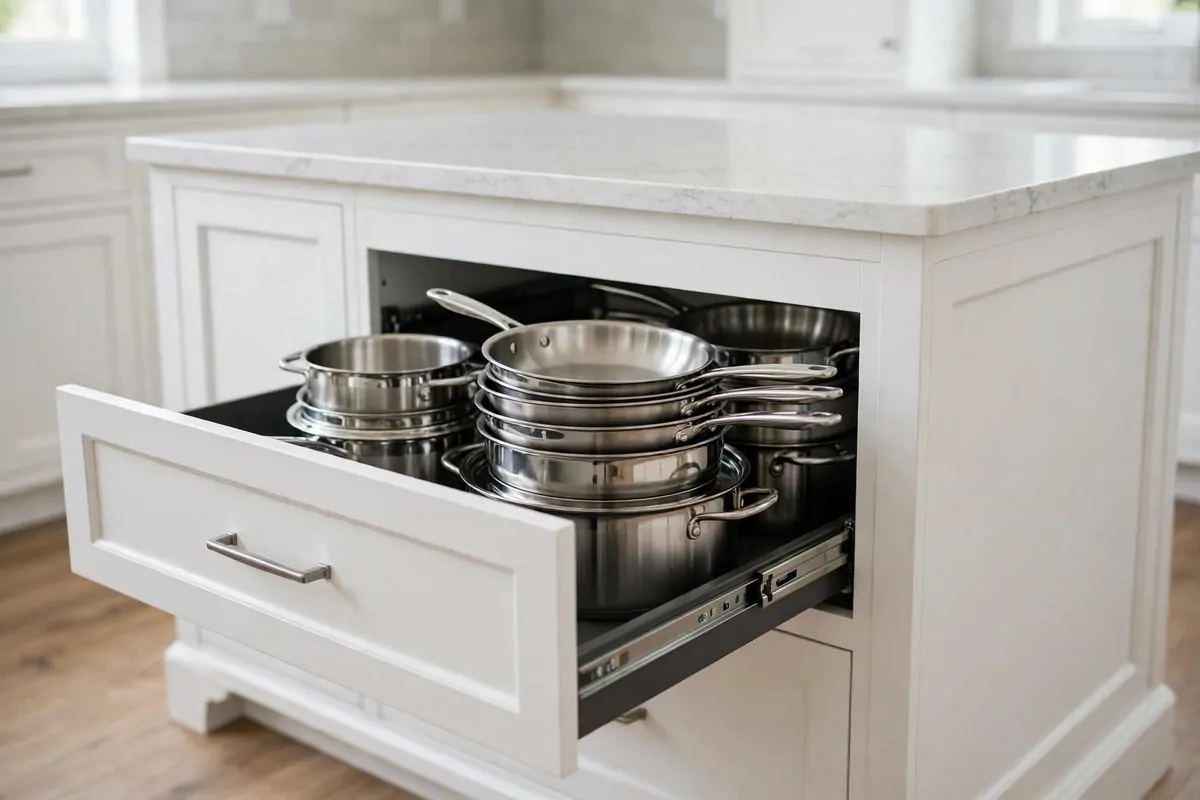
Pots and pans are heavy. They are also the first things that make a small kitchen feel messy. A deep drawer in your island can hold them all in one place.
I like deep drawers more than low cabinets for pots. You pull the drawer out and you can see everything. You do not have to bend down and dig in the back.
Put your biggest pot at the bottom of the drawer. Then stack the smaller ones on top. Keep the lids in a separate spot so they do not slide around.
You can add a simple divider in the drawer. It keeps the pans from bumping into each other. It also stops that loud metal sound when you open it fast.
I keep my two most used pans in the top deep drawer. The big stock pot lives in the lower one. That way I grab what I need without moving five things first.
Do not put too many pans in one drawer. If it is hard to close, it is too full. A drawer that sticks will drive you mad after a week.
Wipe the drawer out once a month. Grease and crumbs collect in the corners. A quick wipe keeps it clean and keeps the drawer sliding smooth.
A deep drawer also helps when you cook with kids around. They can reach a pan without climbing. You can watch them better too.
If your island is small, even one deep drawer helps a lot. Start with that one. You will feel the difference the first time you cook dinner.
Shallow Drawers Under the Seats
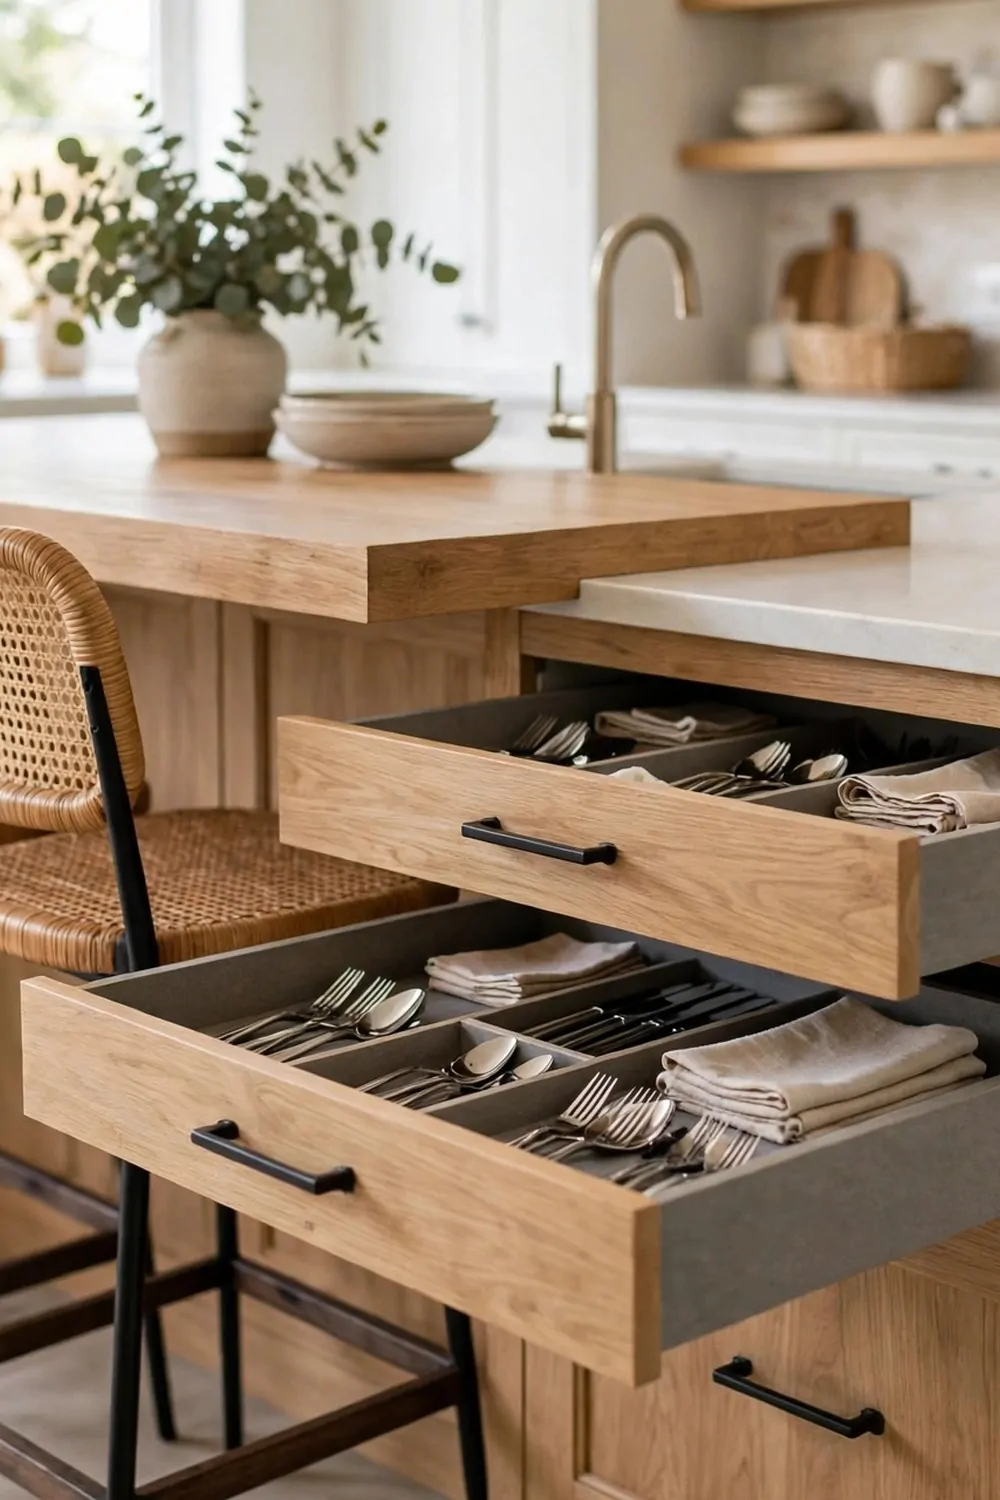
The space under the seats is easy to waste. Most people leave it empty. But a shallow drawer there is perfect for small things you use every day.
I keep forks, knives, and spoons in the drawer closest to the seats. When we sit down to eat, I just open it and hand them out. No trip across the kitchen.
Napkins fit well in a shallow drawer too. So do straws, chopsticks, and little packets of salt. These things get lost in big drawers. A shallow one keeps them in sight.
You can use small boxes inside the drawer to split it up. One box for spoons. One for napkins. One for the odd bits like bottle openers.
Kids can reach these drawers on their own. That is a good thing. They can set the table and feel proud of it. And you get one less job.
Do not store heavy things here. Shallow drawers are not made for pots. Keep them light so they slide open easy.
I wipe the inside of these drawers often. Crumbs fall in when we eat at the island. A quick shake of the little boxes keeps it tidy.
If your island has an overhang for seats, ask about a shallow drawer under it. It uses space you already have. It costs little and it saves you steps every day.
Open Shelves on the Living Room Side
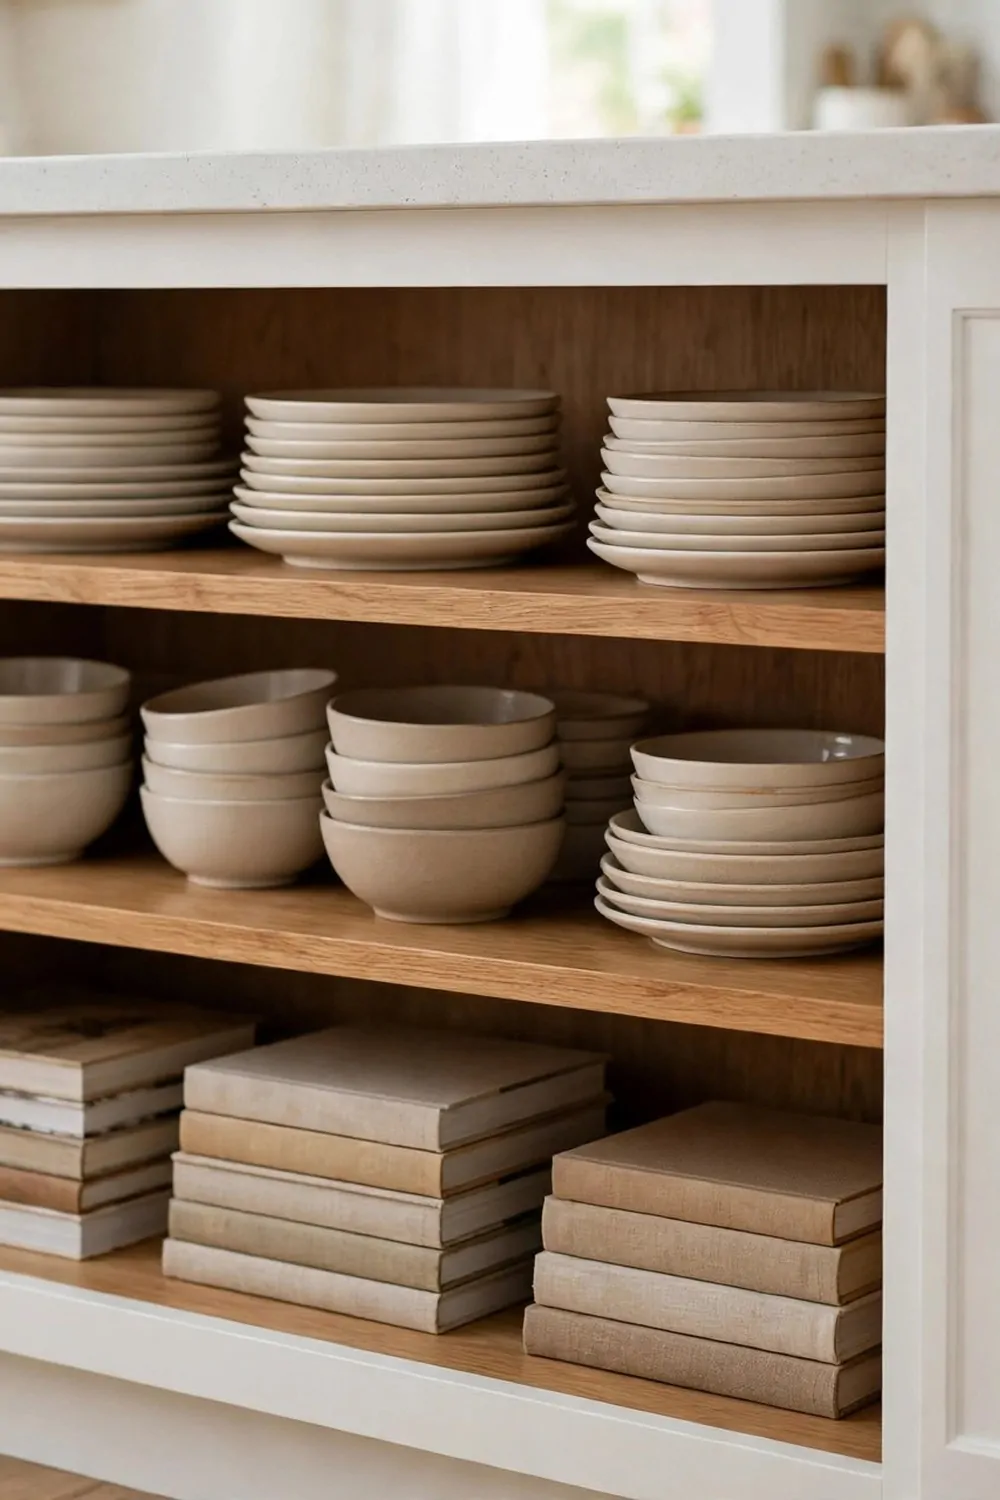
The side of the island that faces the living room is often just a blank wall. That is a waste. Open shelves there can hold a lot and look nice too.
I put my pretty plates and bowls on these shelves. They are easy to grab when friends come over. And they make the kitchen feel warm from the sofa.
Cookbooks fit well on open shelves. Pick the ones you really use. Leave the rest in a box somewhere else. Too many books make the shelf look full and dusty.
You can stack bowls in twos or threes. Do not stack them too high. A tall stack can fall when you pull one out in a rush.
I keep a small basket on the bottom shelf. It holds cloth napkins and placemats. It is easy to pull out and put back.
Open shelves need a quick dust once a week. Plates you use often stay clean. The ones you rarely use will need a rinse before you serve food on them.
Do not put things you are shy about on open shelves. If it is chipped or stained, keep it behind a door. The open side is for things you like to see.
This works best in a small kitchen because it adds storage without adding bulk. The island stays the same size. You just use the back of it better.
Back to Back Cabinets
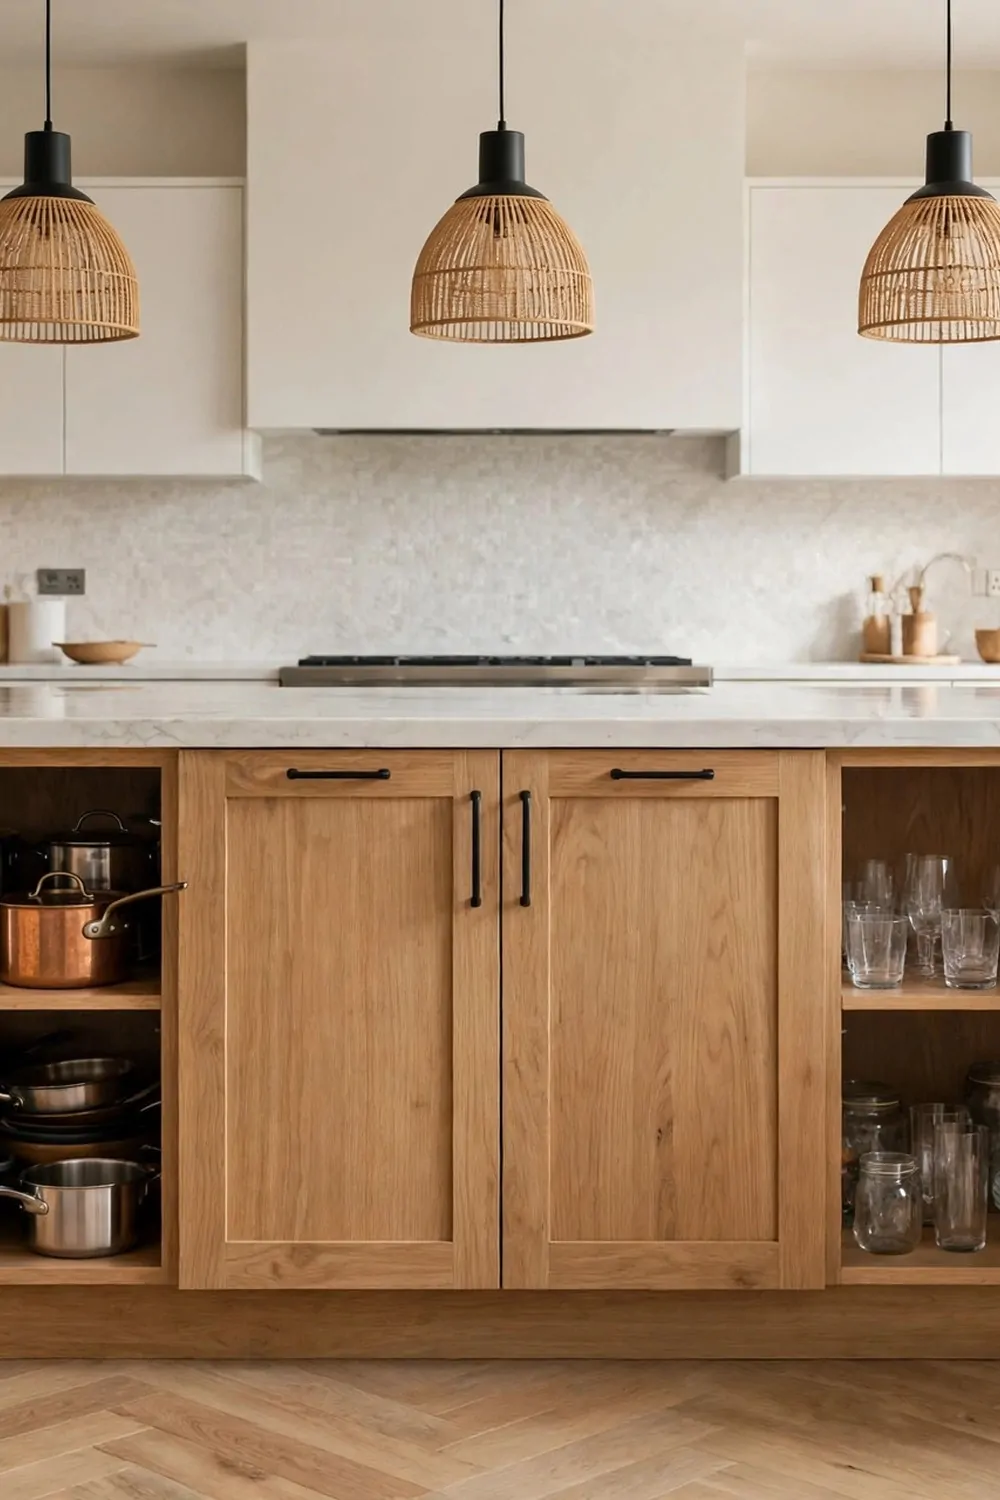
Most islands have cabinets on one side only. The other side is closed off. But you can put cabinets on both sides. That doubles your storage in the same island.
I use the kitchen side for pots and pans. I use the living room side for glasses and serving dishes. That way each side has a clear job.
It helps to label the inside of each door at first. You will forget what lives where. A small note on the door saves you opening three doors to find one thing.
Keep heavy pots on the kitchen side. Keep light glasses on the other side. Heavy things near the stove make cooking faster.
Back to back cabinets work well in a wide island. If your island is very narrow, they may feel too tight. Measure before you plan this one.
You can mix doors and drawers. A drawer on one side and a door on the other gives you choice. Drawers are good for small things. Doors are good for tall things.
I clean these cabinets out every few months. Things creep in and stay. Old vases. Extra mugs. If I have not used it in a year, it goes out.
This idea is simple but it changes how much your island can hold. You are not buying a bigger island. You are just using both sides of the one you have.
Pull-Out Spice Rack
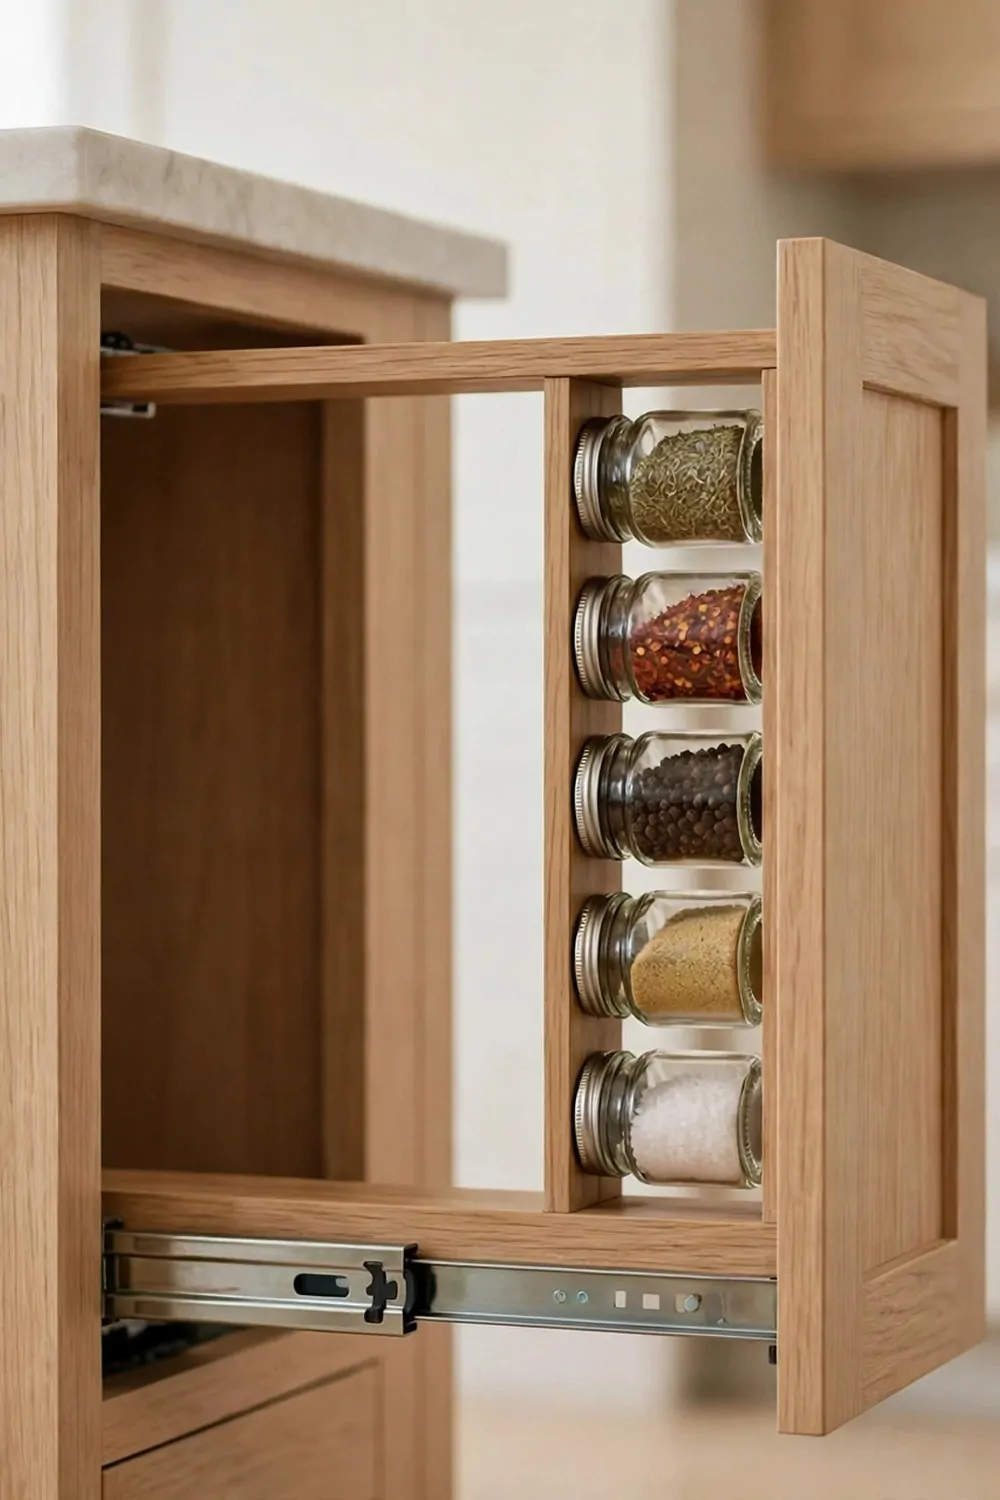
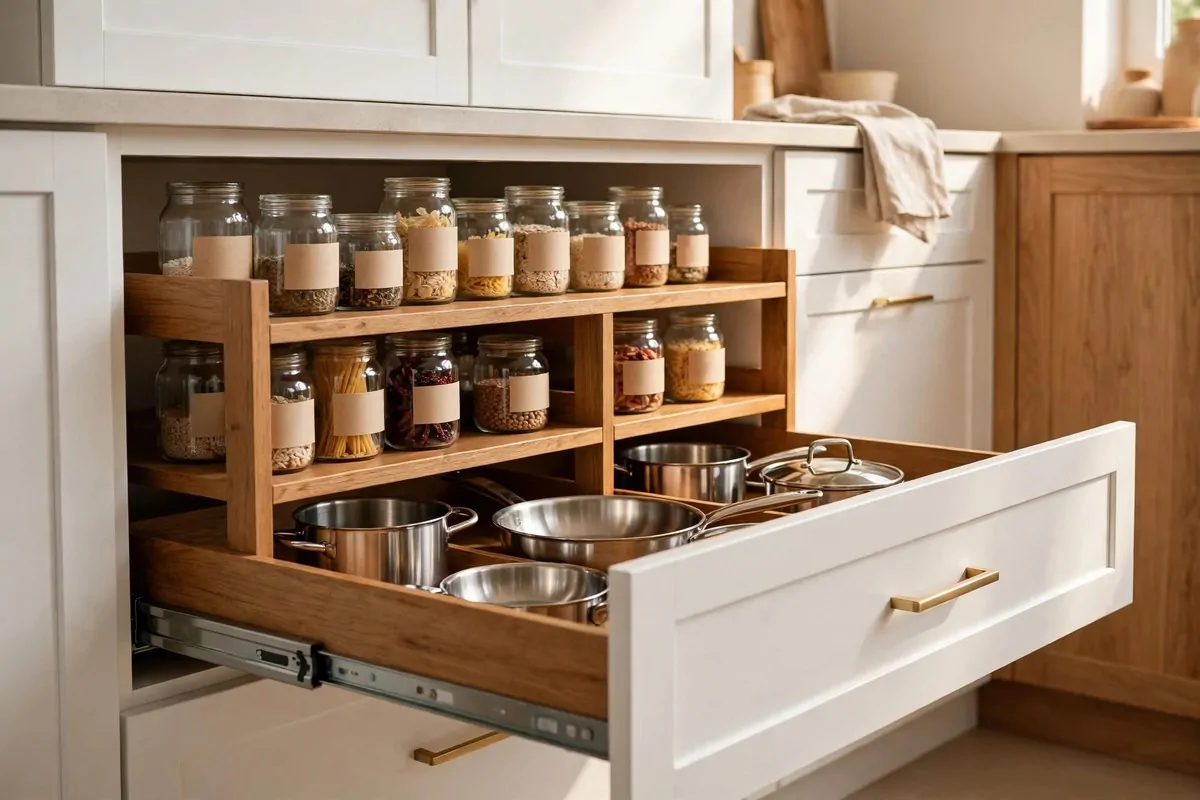
Spices are small but they take over a kitchen fast. A slim pull out rack in your island keeps them all in one thin spot. You pull it out and you see every jar at once.
I put my most used spices at the top of the rack. Salt, pepper, and paprika live there. The ones I use once a month go lower down.
Glass jars work best in a pull out rack. You can see what is inside without opening each one. Put a small label on the front of each jar too.
Do not put big jars in a slim rack. They will not fit and the rack will stick. Small and medium jars are the right size for this spot.
I keep my rack near the stove side of the island. When I cook, I pull it out, grab what I need, and push it back. It takes seconds.
Wipe the jars down now and then. Spice dust sticks to glass. A damp cloth keeps them clear so you can read the labels fast.
A pull out rack also stops spices from hiding in the back of a cabinet. You know that old jar you find two years later. That does not happen here.
If you like to cook, this is one of the best small changes you can make. It costs little. It saves time. And it keeps your counters clear of spice jars.
| Storage type | Best for | Watch out for |
|---|---|---|
| Deep drawer | Heavy pots and pans | Too much weight can make it stick |
| Door cabinet | Tall bottles and big bowls | Things get lost at the back |
| Open shelf | Plates and books you use often | Dust builds up fast |
Baking Sheet Dividers
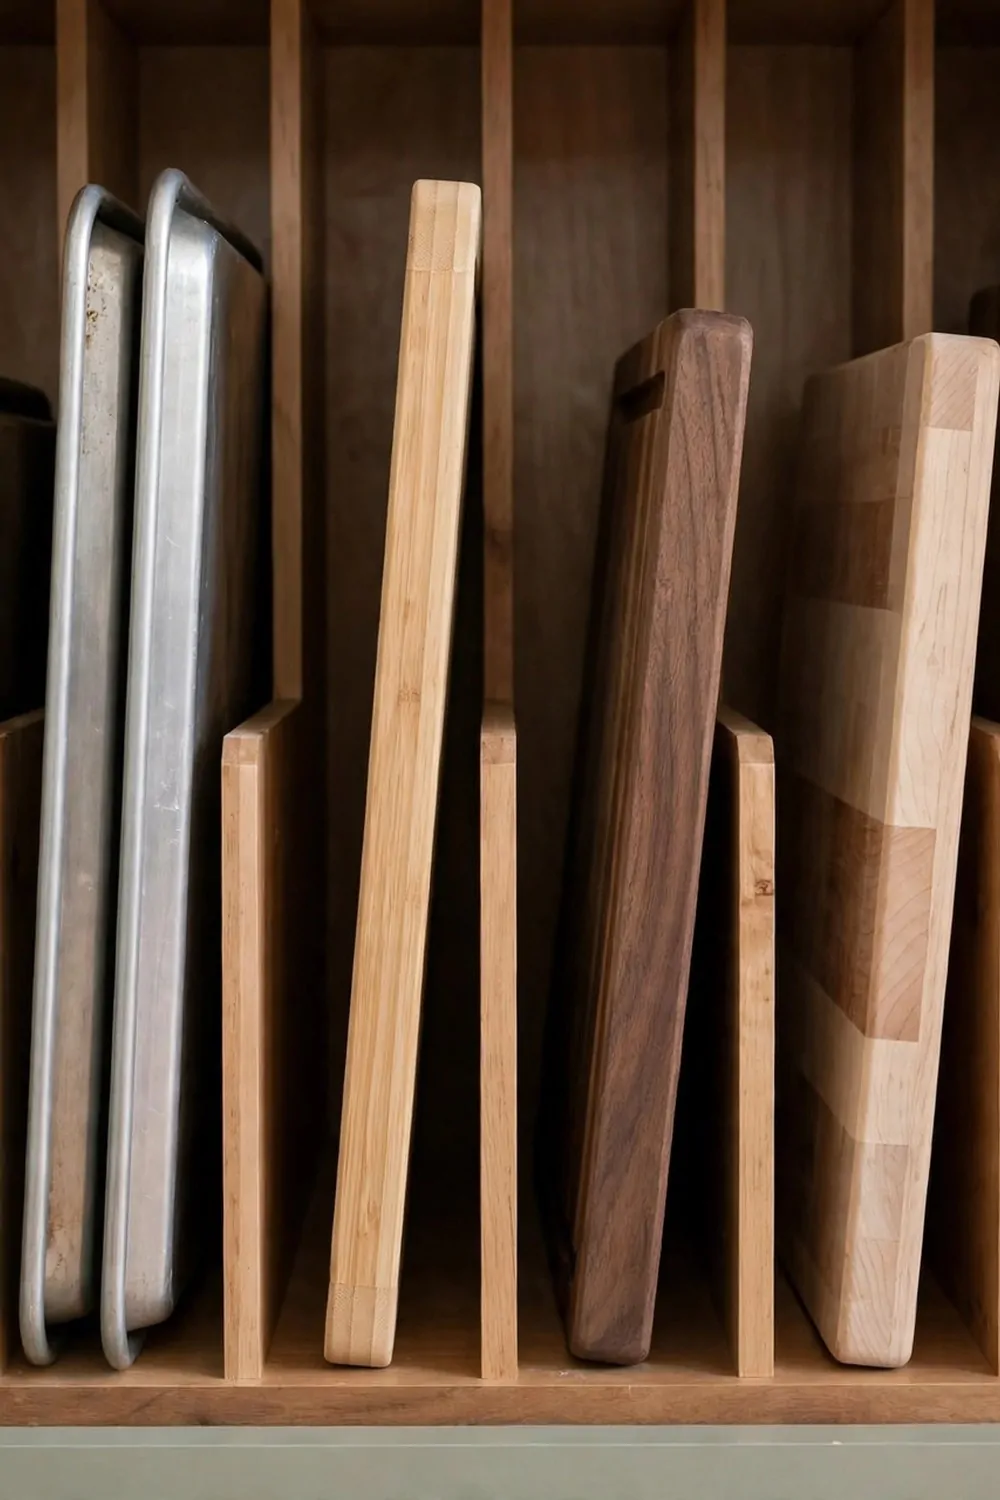
Baking sheets are flat and wide. They are hard to stack. When you stack them, the one you want is always at the bottom. Dividers fix that in a simple way.
I put thin dividers in one island cabinet. Each sheet stands up on its own. I pull out the one I need without moving the rest.
Cutting boards fit in the same spot. I keep the big board at one end and the small ones next to it. They do not slide around now.
You can buy dividers that fit inside a cabinet. Or you can ask for them when the island is made. Either way works.
Do not pack the dividers too tight. If the sheets are squeezed in, they are hard to pull out. Leave a little space between each one.
I keep my cooling racks in this cabinet too. They stand up the same way. It is nice to have all the flat things in one place.
Wipe the bottom of the cabinet now and then. Crumbs fall down between the sheets. A quick wipe keeps it clean.
This is a small change but it saves a lot of noise and fuss. No more clanging stack of trays. Just pull, bake, and slide it back.
Trash and Recycling Pull-Out
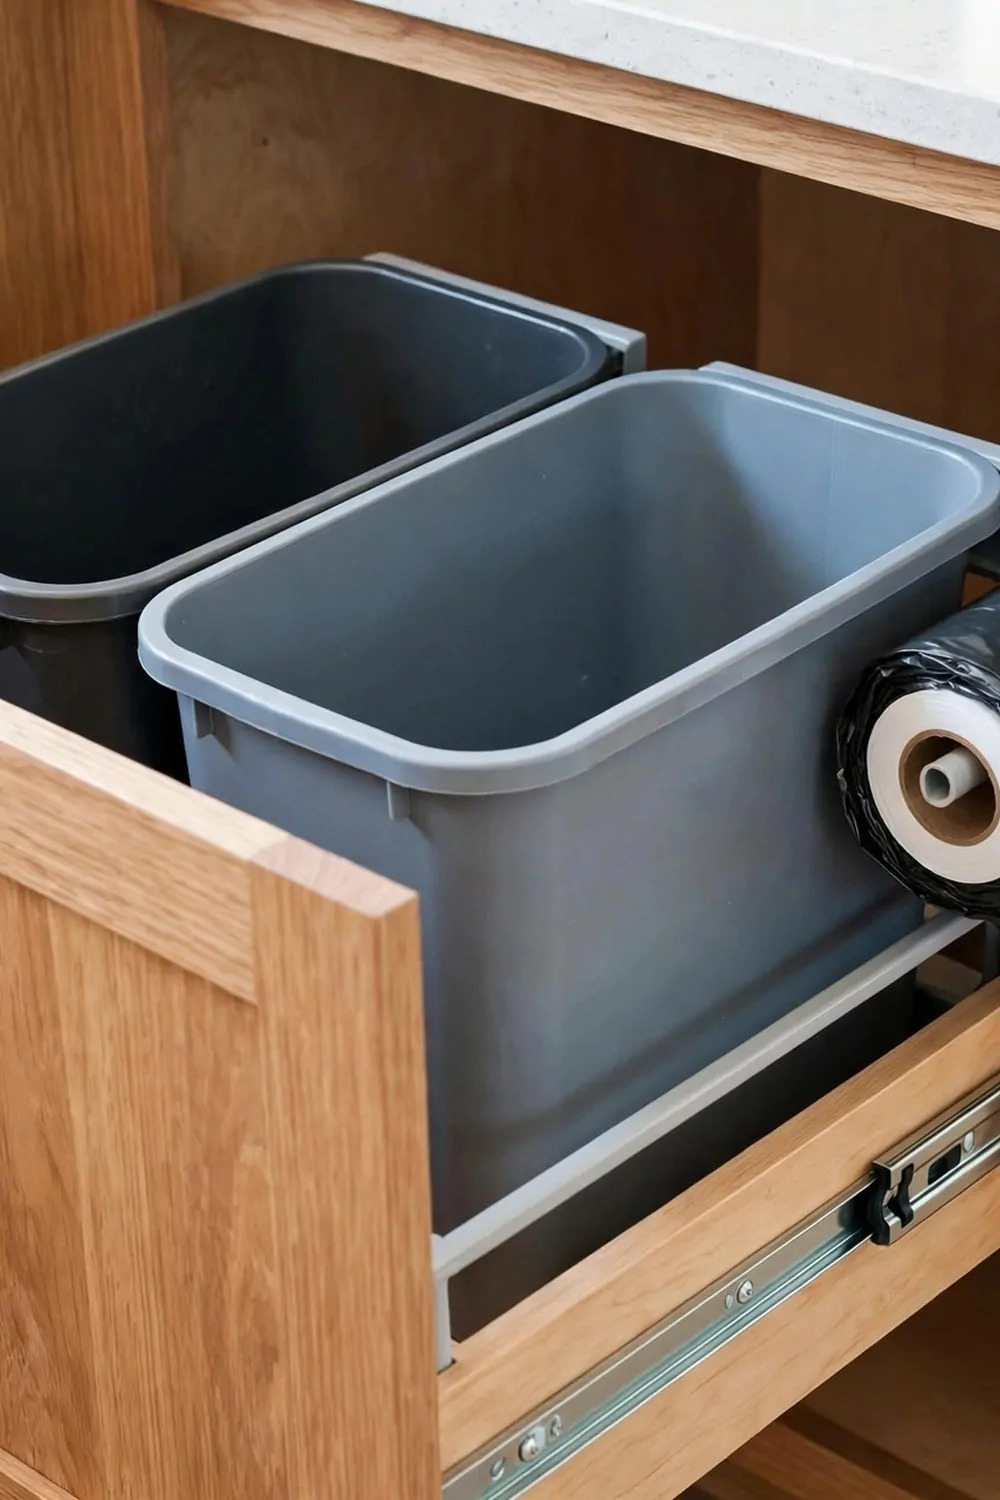
A trash can on the floor takes up room. It also gets in the way when you cook. A pull out trash in your island hides it and keeps it close.
I have two bins in my island pull out. One for trash. One for recycling. They sit side by side. It is easy to sort as I cook.
Keep extra bags in the pull out too. I keep a roll of bags on the side of the bin. When one bag is full, the next one is right there.
Wipe the bins out once a week. Food bits and smells build up fast. A quick wash with soap and water keeps it fresh.
Do not overfill the bins. If the bag is too full, it will tear when you pull it out. Take it out a little sooner than you think you need to.
I like this spot because it is near my prep area. I chop veg on the island and the peels go straight in the bin. No drips across the floor.
Kids can use it too. They learn to sort trash and recycling early. And the bins are hidden, so the kitchen still looks tidy.
If your island is small, even one bin helps. You get your floor space back. And you stop tripping over a can in a tight kitchen.
Towel Rail on the Island Side
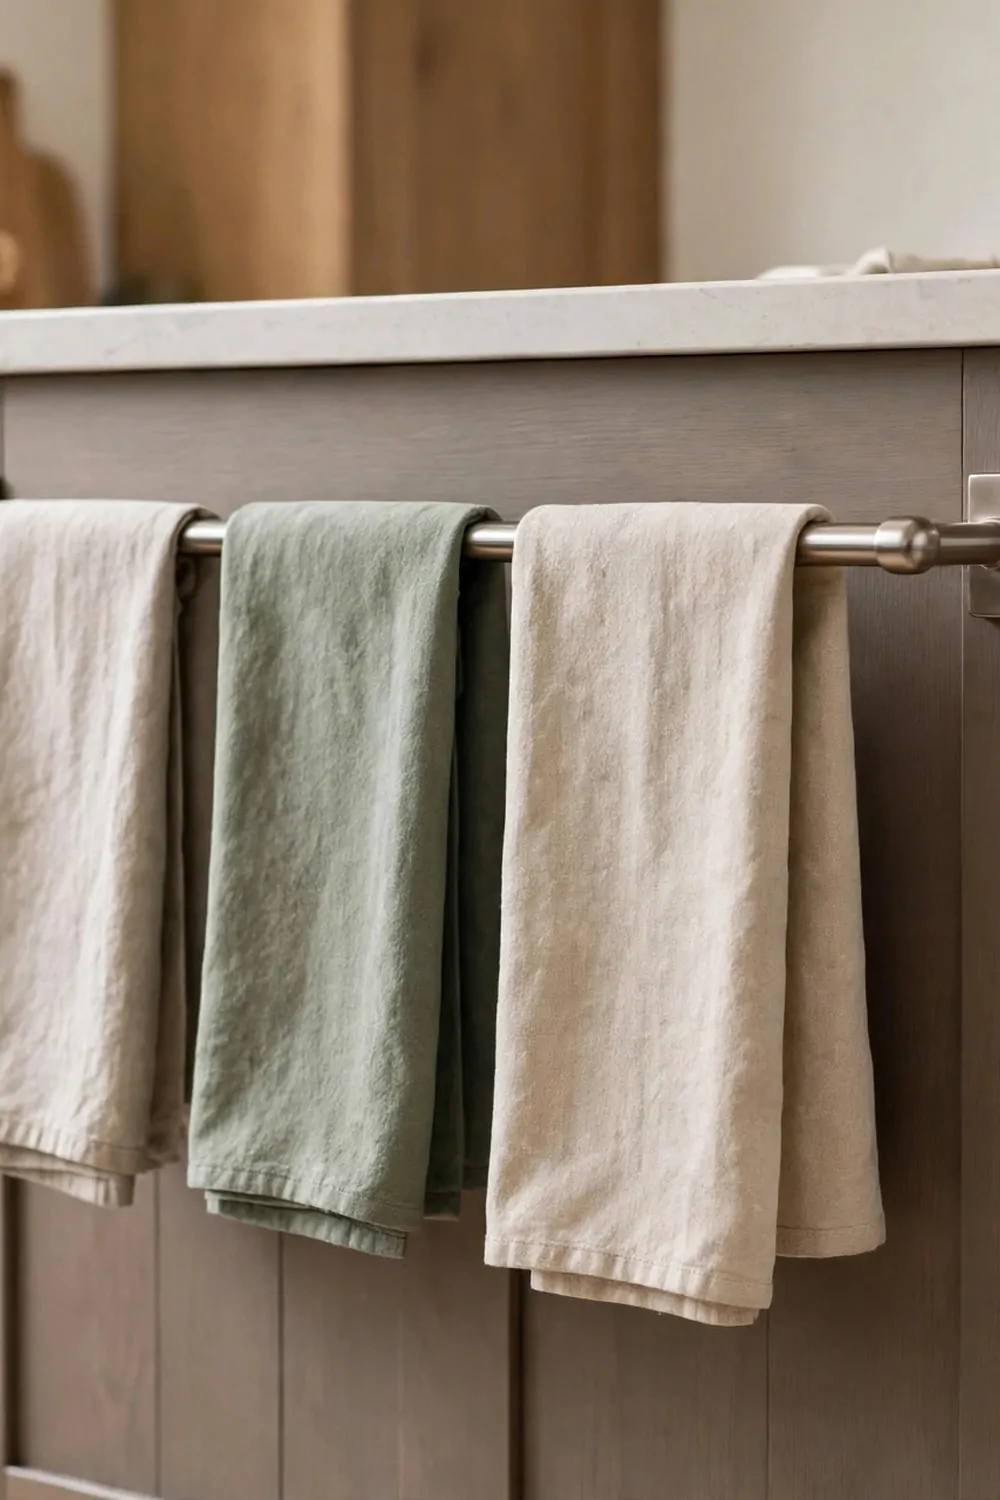
Towels end up everywhere in a small kitchen. On the counter. On a chair. On the oven door. A rail on the side of your island gives them a real home.
I put a simple metal rail on the end of my island. It holds two tea towels. I can reach one with wet hands without walking across the room.
Keep one towel for hands and one for dishes. That way you are not drying a plate with a damp hand towel. It is a small thing but it helps.
Fold the towels neatly on the rail. If they hang in a bunch, they take longer to dry. A flat fold dries fast and looks tidy.
Wash the towels often. Kitchen towels pick up smells fast. I swap mine every two days. Clean towels make the whole kitchen feel fresh.
Do not hang heavy wet cloths on a small rail. They can pull it loose. Light tea towels are the right weight for this spot.
A rail is cheap and easy to add. You do not need to change the island. You just fix the rail to the side and you are done.
I love this idea because it is so simple. It uses the side of the island that was doing nothing. And it keeps towels off the counters for good.
Cookbook Ledge
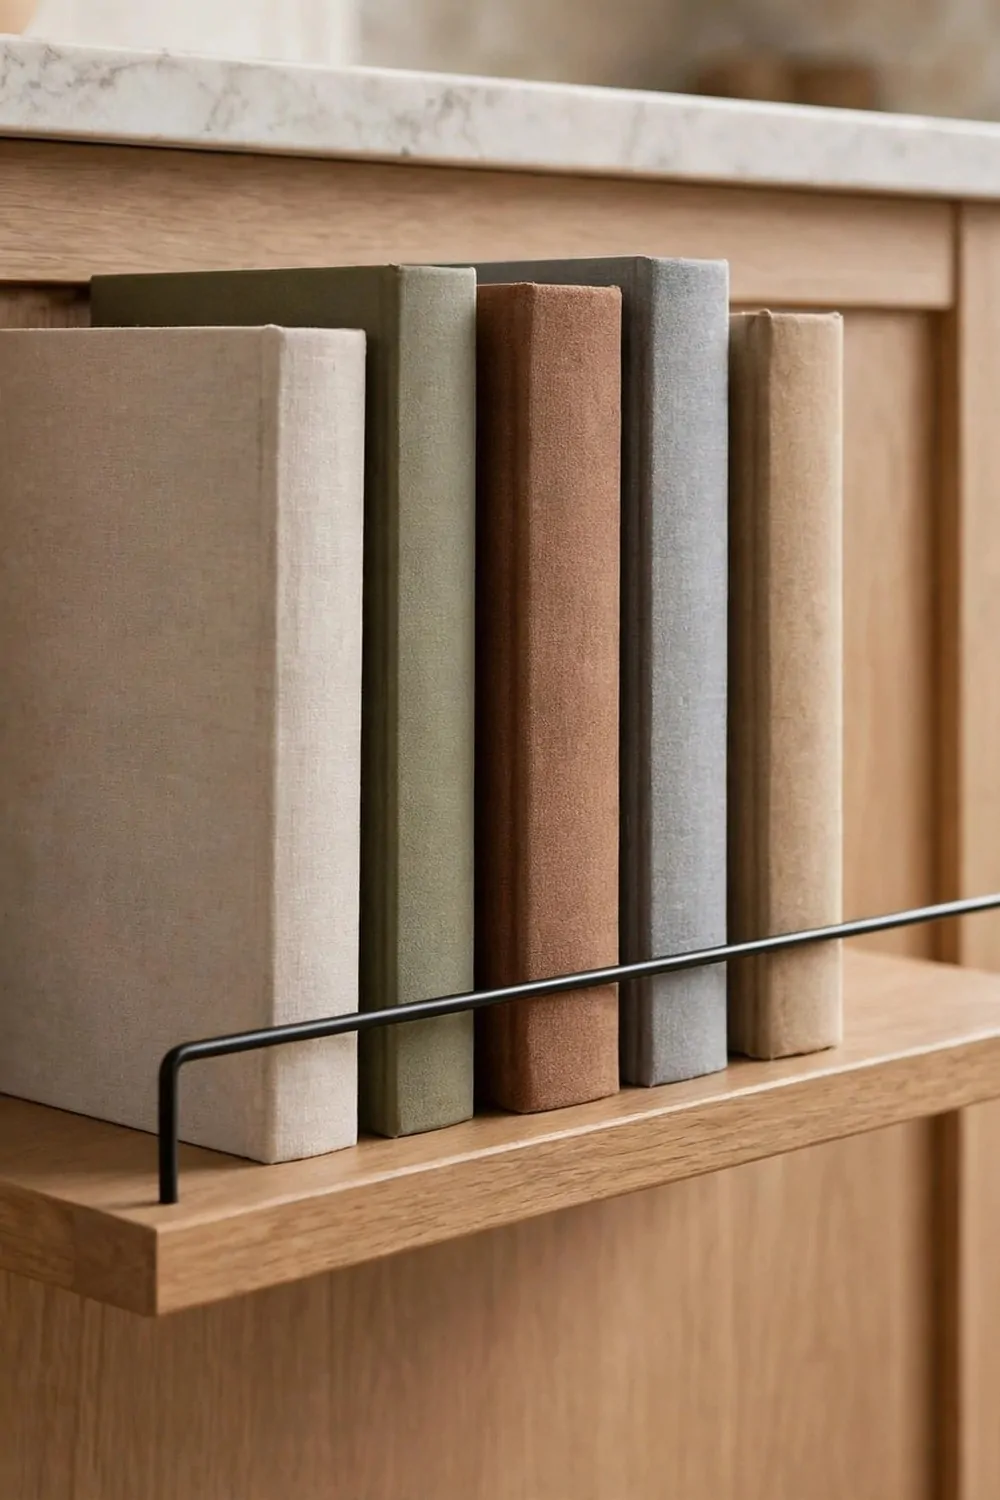
I love to cook from books. But cookbooks are big and they take up counter space. A small ledge on the side of your island keeps them close and off the counter.
The ledge is shallow. It holds books upright with a small rail in front. The books lean on the rail and stay put.
I keep three or four books on the ledge. Those are the ones I use most. The rest live on a shelf in another room.
When I cook, I pull a book down and open it on the counter. When I am done, it goes back on the ledge. It never gets lost in a pile.
Pick books with strong covers for the ledge. Thin paperbacks can bend. Hard books stand up well and look nice too.
Dust the ledge once a week. Flour and crumbs drift over from the counter. A quick wipe keeps the books clean.
Do not put too many books on one ledge. If they are packed tight, they are hard to pull out. Leave a little room at the end.
This ledge makes the kitchen feel lived in. It shows what you like to cook. And it keeps your best books right where you need them.
Rolling Island With Lockable Wheels
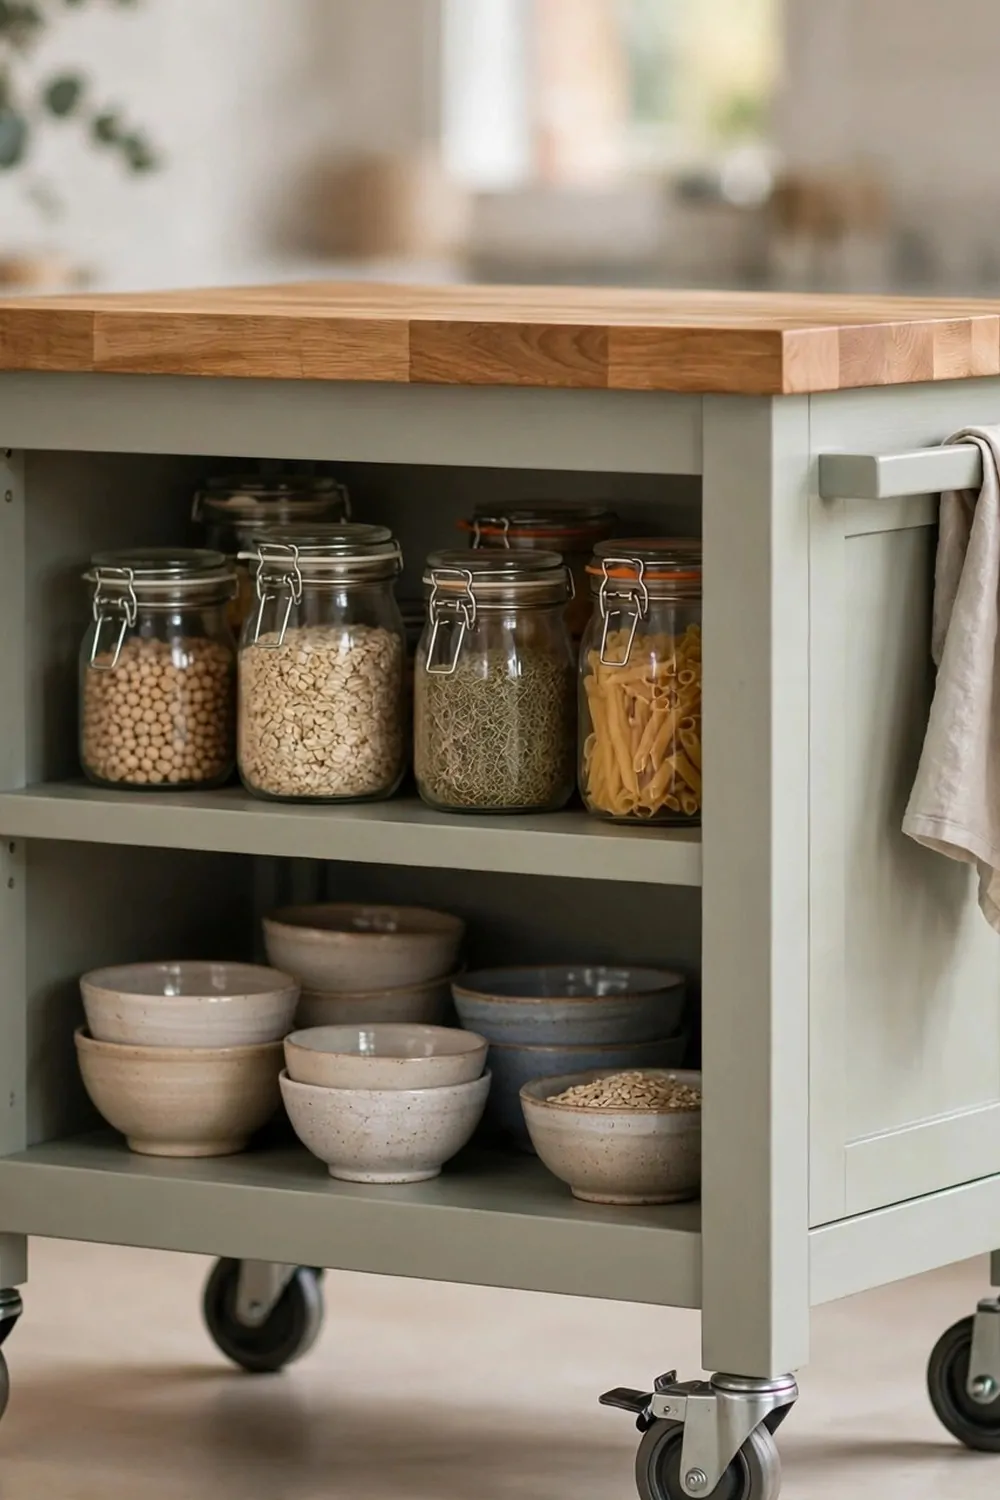
A rolling island is a good fix when your kitchen is small and your needs change. You can move it where you need it. Then you lock the wheels and it stays put.
I use mine as extra counter space when I bake. I roll it next to the main counter. Then I lock the wheels so it does not move while I knead dough.
The shelves under a rolling island hold jars, bowls, and small pans. I keep my baking jars there. Flour, sugar, and oats are easy to reach.
Lock the wheels every time you stop moving it. An island that rolls while you chop is not safe. A quick tap on each wheel lock takes seconds.
Do not overload a rolling island. Heavy pots can make it hard to move. Keep it light with jars and bowls. Save the heavy stuff for a fixed cabinet.
Wipe the wheels now and then. Hair and crumbs get caught in them. Clean wheels roll smooth and lock well.
When guests come, I roll the island to one side. It opens up floor space. When they leave, I roll it back. It is like having a kitchen that can change shape.
If you rent your home, a rolling island is a smart pick. You can take it with you when you move. It is storage that travels with you.
Drop Leaf Side for Extra Counter
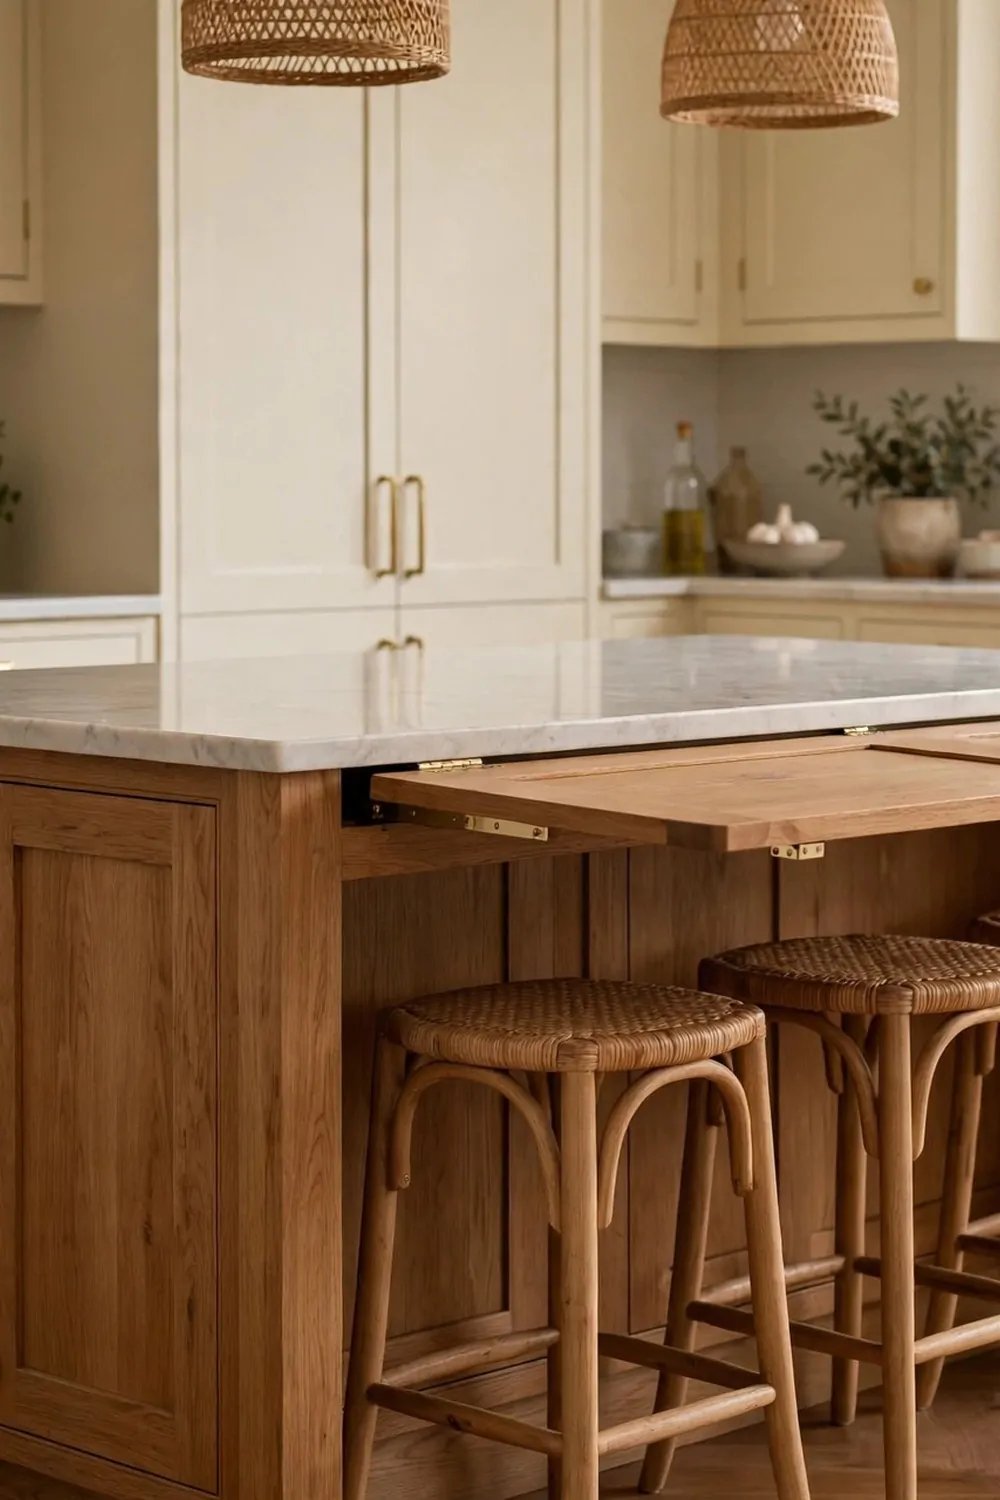
A drop leaf is a flap on the side of your island. You fold it up when you need more counter. You fold it down when you need floor space. It is simple and it works.
I fold mine up when I prep a big meal. It gives me room for a chopping board and a bowl. When dinner is done, I fold it down and the kitchen feels big again.
You can eat at a drop leaf too. Pull up a stool and it becomes a small table. It is perfect for breakfast or a quick lunch.
Make sure the leaf locks in place when it is up. A leaf that drops while you work is not safe. Check the hinge and the lock now and then.
Do not put very heavy things on a drop leaf. A big pot of water is too much. Keep it for chopping, mixing, and serving.
Wipe the hinge area often. Food and crumbs collect in the fold. A quick wipe keeps it clean and keeps the leaf moving smooth.
This idea is best for a very small kitchen. You get extra counter only when you need it. The rest of the time, your floor stays clear.
I wish I had added mine sooner. It is the kind of change you notice every day. More room to cook, and no extra bulk in the way.
Seating With Storage Underneath
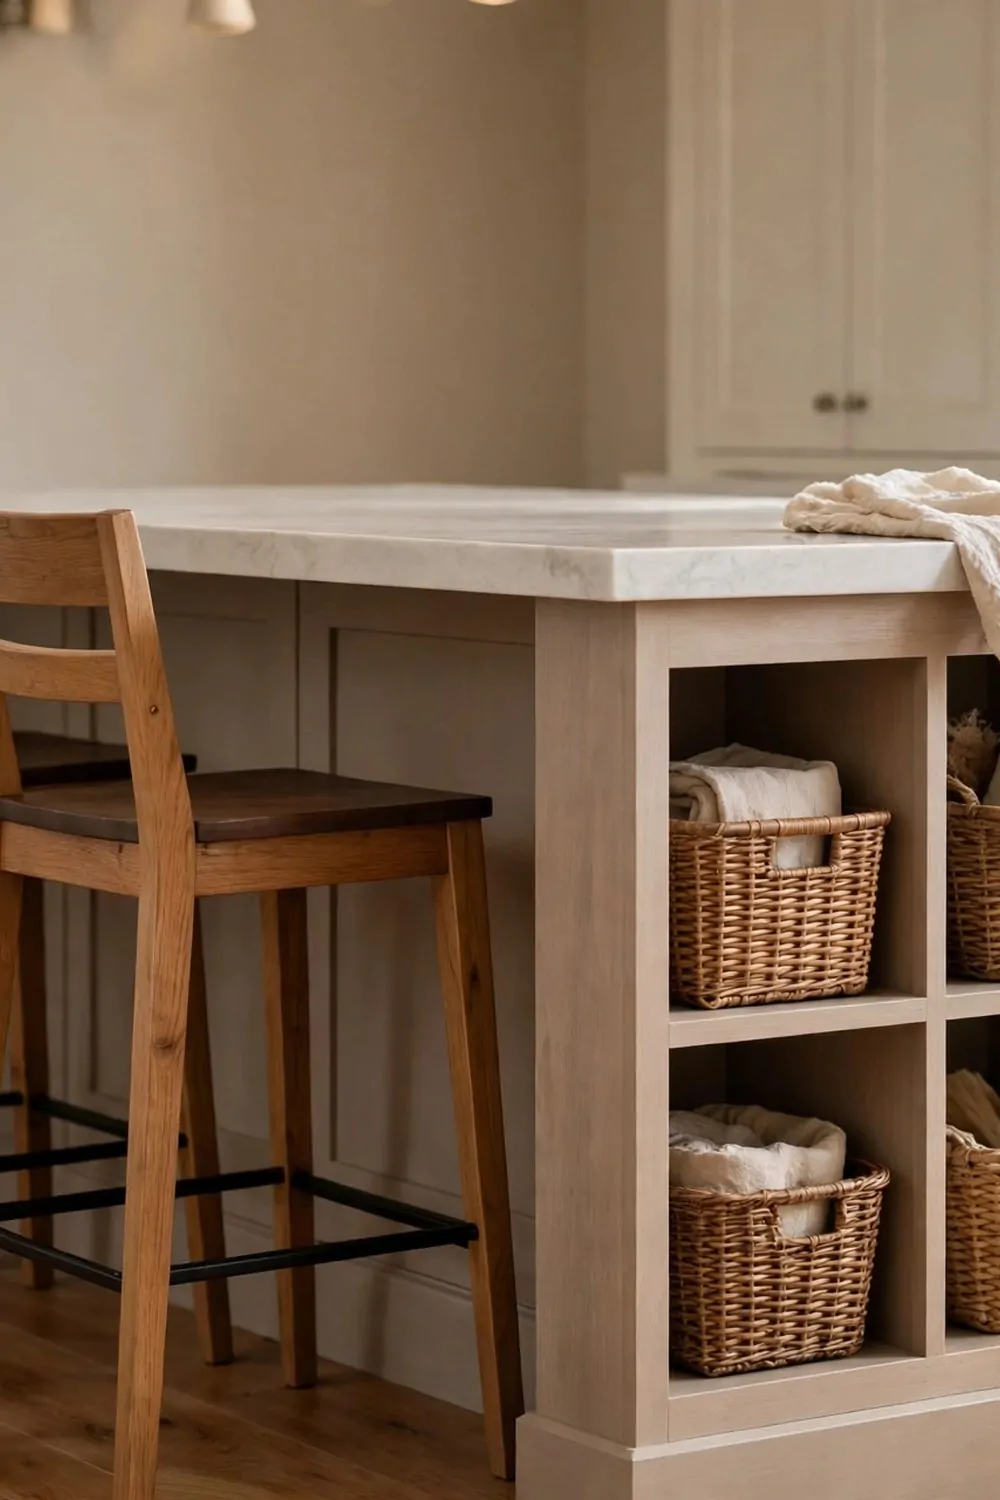
Seats at an island are great. But the space under the seats can do more than hold feet. Small cubbies under the counter can hold baskets and daily bits.
I keep a basket under each seat spot. One holds placemats. One holds napkins. One holds the kids’ colouring books for breakfast time.
The baskets slide in and out easy. When we sit down, I pull out the placemat basket. When we finish, it slides back in. No clutter left on the counter.
Use baskets that fit the cubby well. If they are too big, they stick out and catch your knees. If they are too small, they waste space.
Keep the baskets light. Heavy books or pots do not belong under seats. Light things like napkins and placemats are the right fit.
Kids love having their own basket. They know where their things live. They can get them and put them back on their own.
Wipe the cubbies out now and then. Crumbs fall in from the counter above. A quick wipe keeps them clean.
This idea turns dead space into useful storage. You sit at the island anyway. Why not let the space under you work too.
Microwave Drawer in the Island
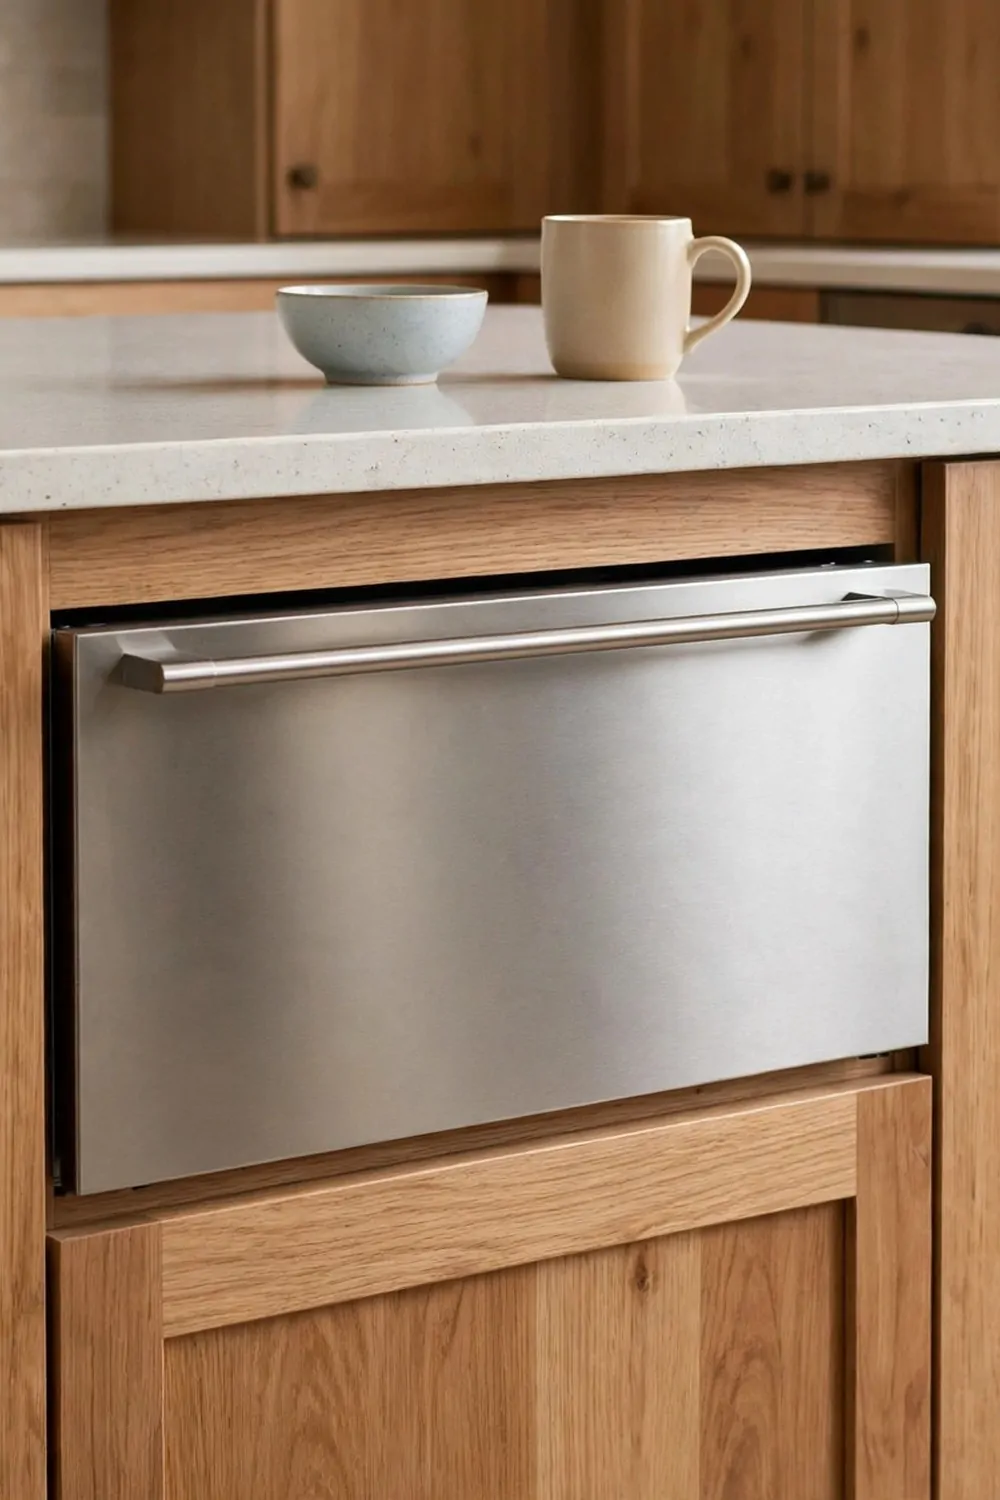
A microwave on the counter takes up a lot of room. A microwave drawer in your island frees that space. It sits low, it opens like a drawer, and it is easy to use.
I put mine in the island near the seats. The kids can heat up a snack on their own. They do not have to reach up high to a microwave over the stove.
The drawer opens with a soft pull. You put your bowl in, close it, and press start. It feels safer than a door that swings open at face height.
Keep mugs and small bowls on the counter above the drawer. When food is hot, you can lift it straight out and set it down. No long carry across the kitchen.
Wipe the inside of the drawer often. Food splashes happen. A damp cloth after use keeps it clean and stops smells building up.
Do not put metal in the microwave drawer. That rule is the same as any microwave. Use glass, ceramic, or microwave safe plastic only.
A drawer microwave costs more than a counter one. But in a small kitchen, the counter space you get back is worth it. You gain a whole work area.
I use my counter for prep now, not for holding a microwave. That one change made my small kitchen feel much bigger.
Mini Fridge Drawer for Cold Drinks
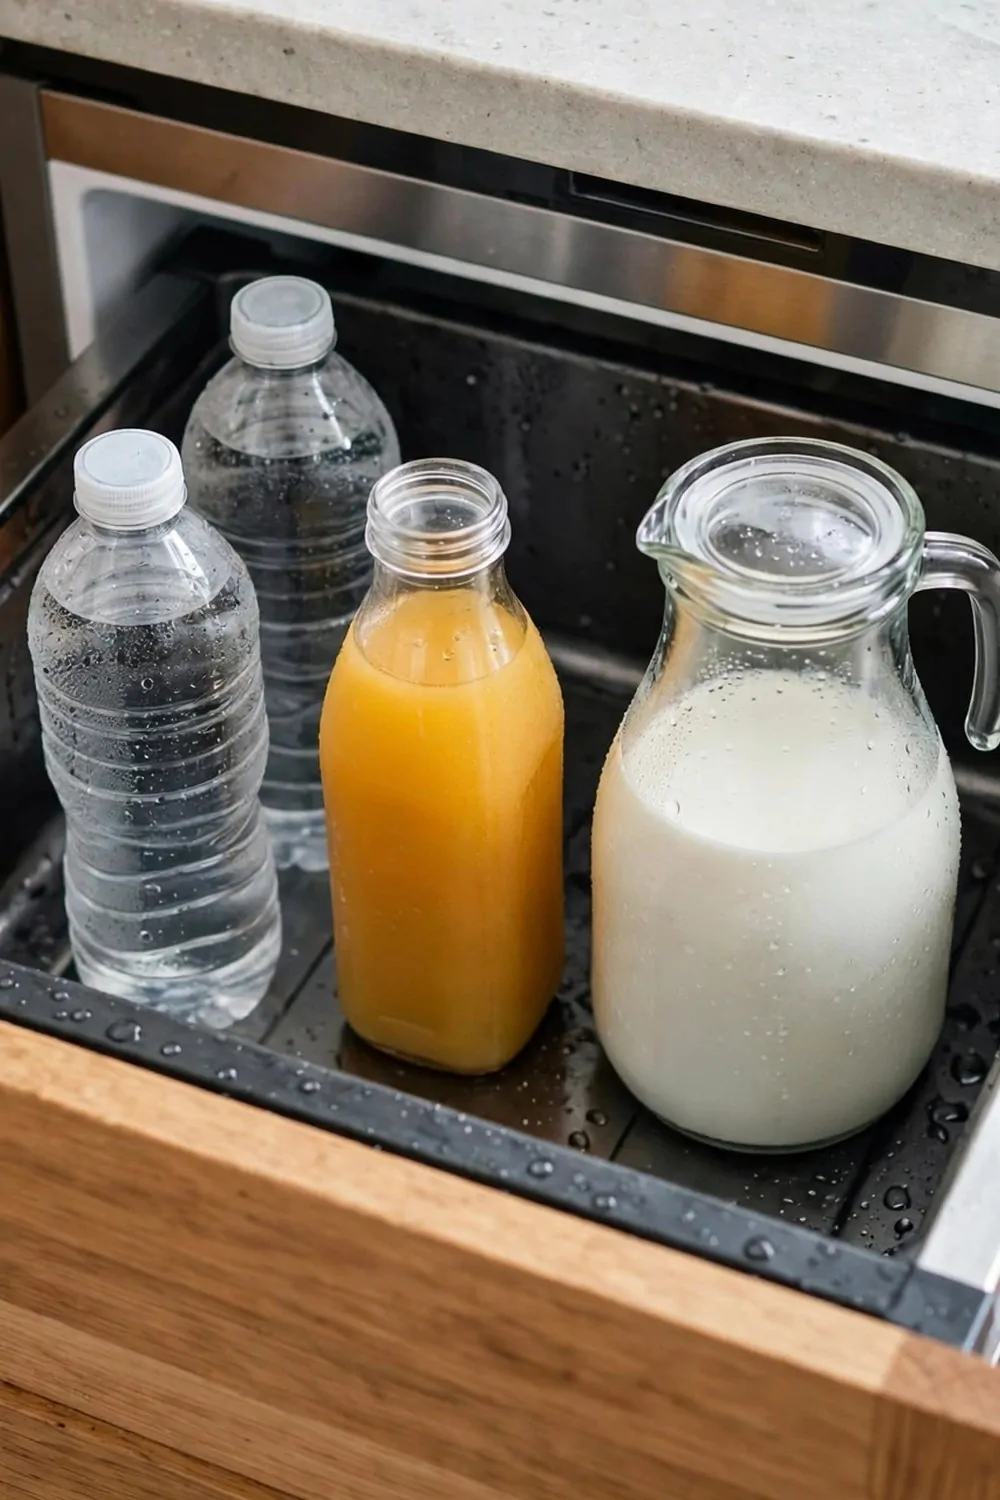
I love having cold drinks right where I work. A small fridge drawer in the island means I never walk across the kitchen for a bottle of water.
You just pull it open and grab what you need. It sounds small, but it saves you a lot of steps when you cook.
I keep water bottles in the front so they are easy to reach. Juice boxes sit right behind them for the kids.
A jug of cold milk fits in the back corner. It stays cold all day and it is right there when I need it for coffee or cereal.
The drawer is not as big as a full fridge. That is fine because it only holds drinks, not food.
I like that it frees up space in my main fridge. The big fridge holds food and the drawer holds drinks.
It also keeps guests out of your way. They can pull the drawer and help themselves while you keep cooking.
Kids love it too. They can reach the drawer on their own and get a bottle of water without asking you.
You do need power for the drawer. Ask someone who knows wiring to hook it up when the island is built.
Cutting Board Slot
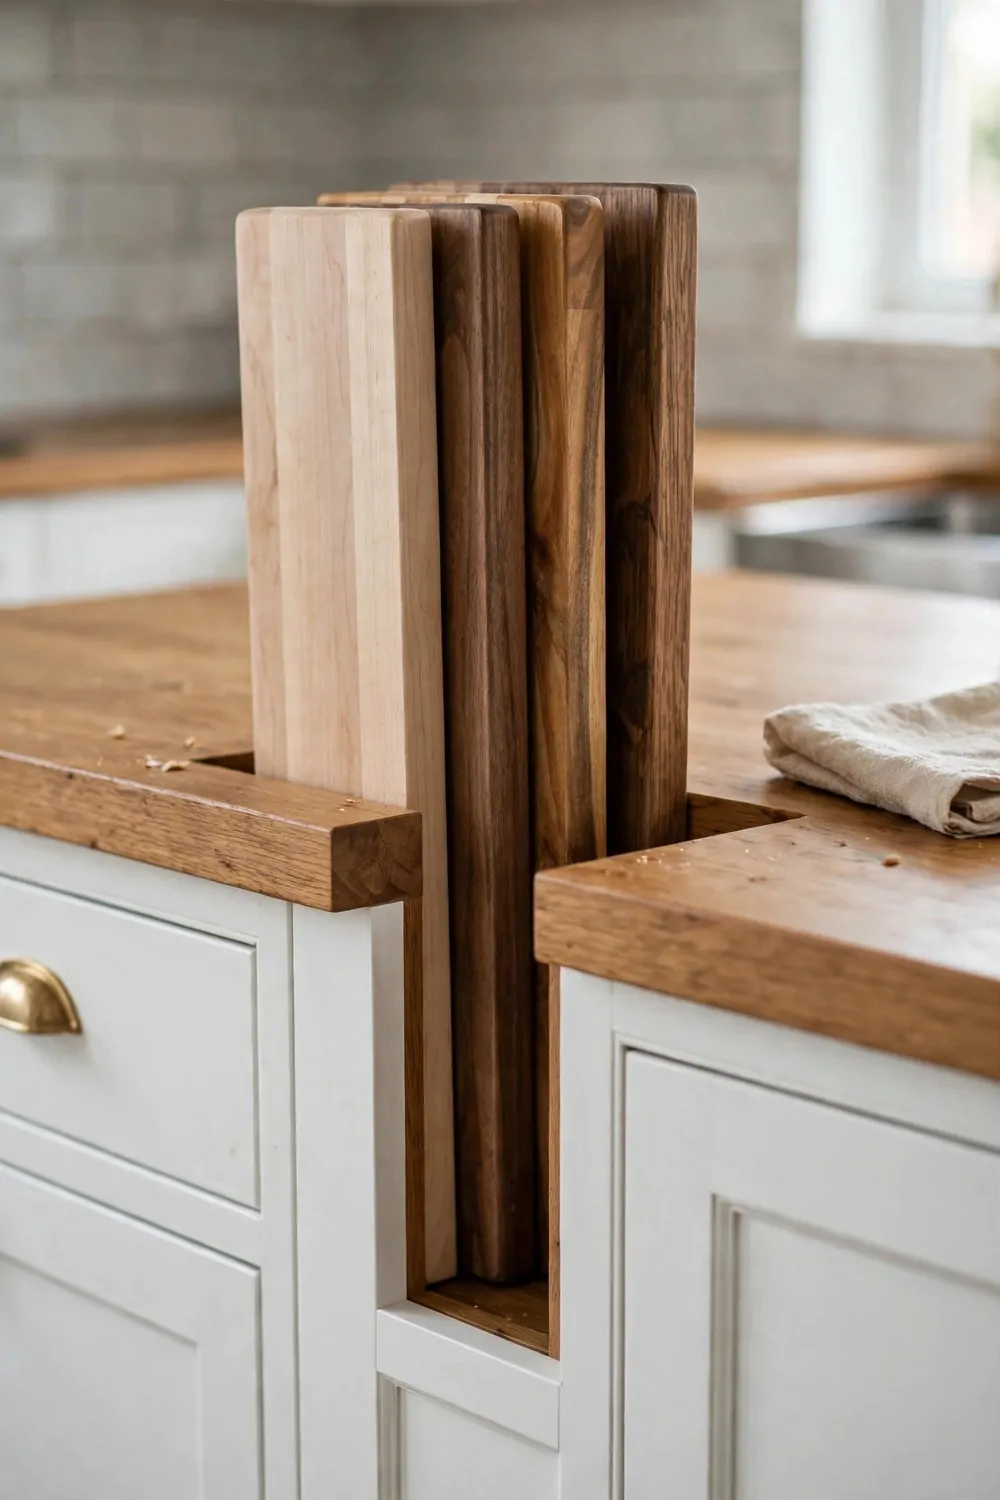
Cutting boards always fall over in my old kitchen. They leaned against the wall and slid down at the worst time.
A narrow slot in the island fixes that problem. The boards stand up straight and stay put.
You just slide a board in from the top. It drops into the slot and leans against the next one.
I keep three boards in mine. One is for vegetables and one is for bread.
The third board is my big one for meat. I like keeping them apart so nothing mixes.
The slot is easy to clean. I wipe the inside with a damp cloth once a week and that is all it needs.
You can build the slot into the side of the island. It only takes a few inches of space.
I like that the boards are right next to my prep spot. I grab one, chop, wash it, and slide it back in.
It also keeps the counter clear. No more boards stacked in a pile near the sink.
Wood boards look nice in the slot too. The edges show a little and they add a warm touch to the kitchen.
Knife Drawer With Inserts
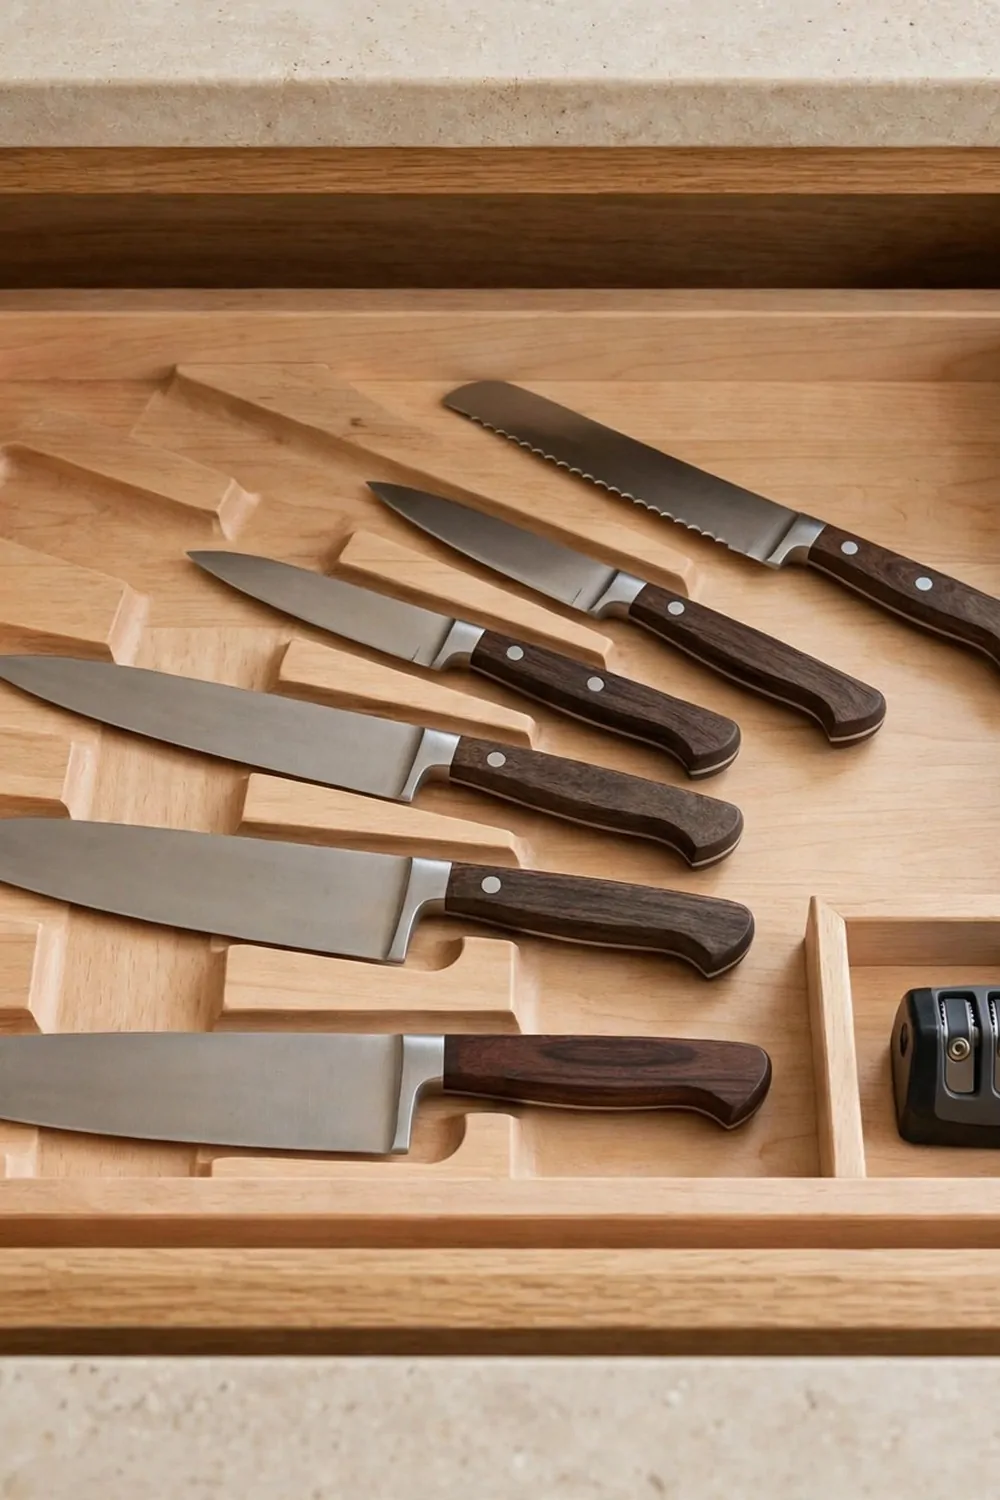
A knife drawer keeps sharp blades out of sight and out of reach. That matters a lot in a small kitchen with kids around.
The wooden insert holds each knife in its own slot. The blades sit down in the wood and the handles point up.
I can see every knife at a glance. No more digging through a drawer and grabbing a blade by mistake.
The insert also protects the edges. Knives stay sharp longer when they are not banging against other tools.
I keep my small sharpener in the same drawer. It sits in a little pocket at the end of the insert.
When a knife feels dull I sharpen it right there. It takes a few seconds and then I put it back in its slot.
You can buy inserts in many sizes. Measure your drawer first so the insert fits nice and snug.
I like the wood ones best. They feel solid and they do not slide around when you open the drawer.
A knife drawer also frees up counter space. No knife block taking up room next to the stove.
Keep the drawer near your prep area. That way you grab a knife, use it, and put it back without walking away.
Utensil Drawer With Dividers
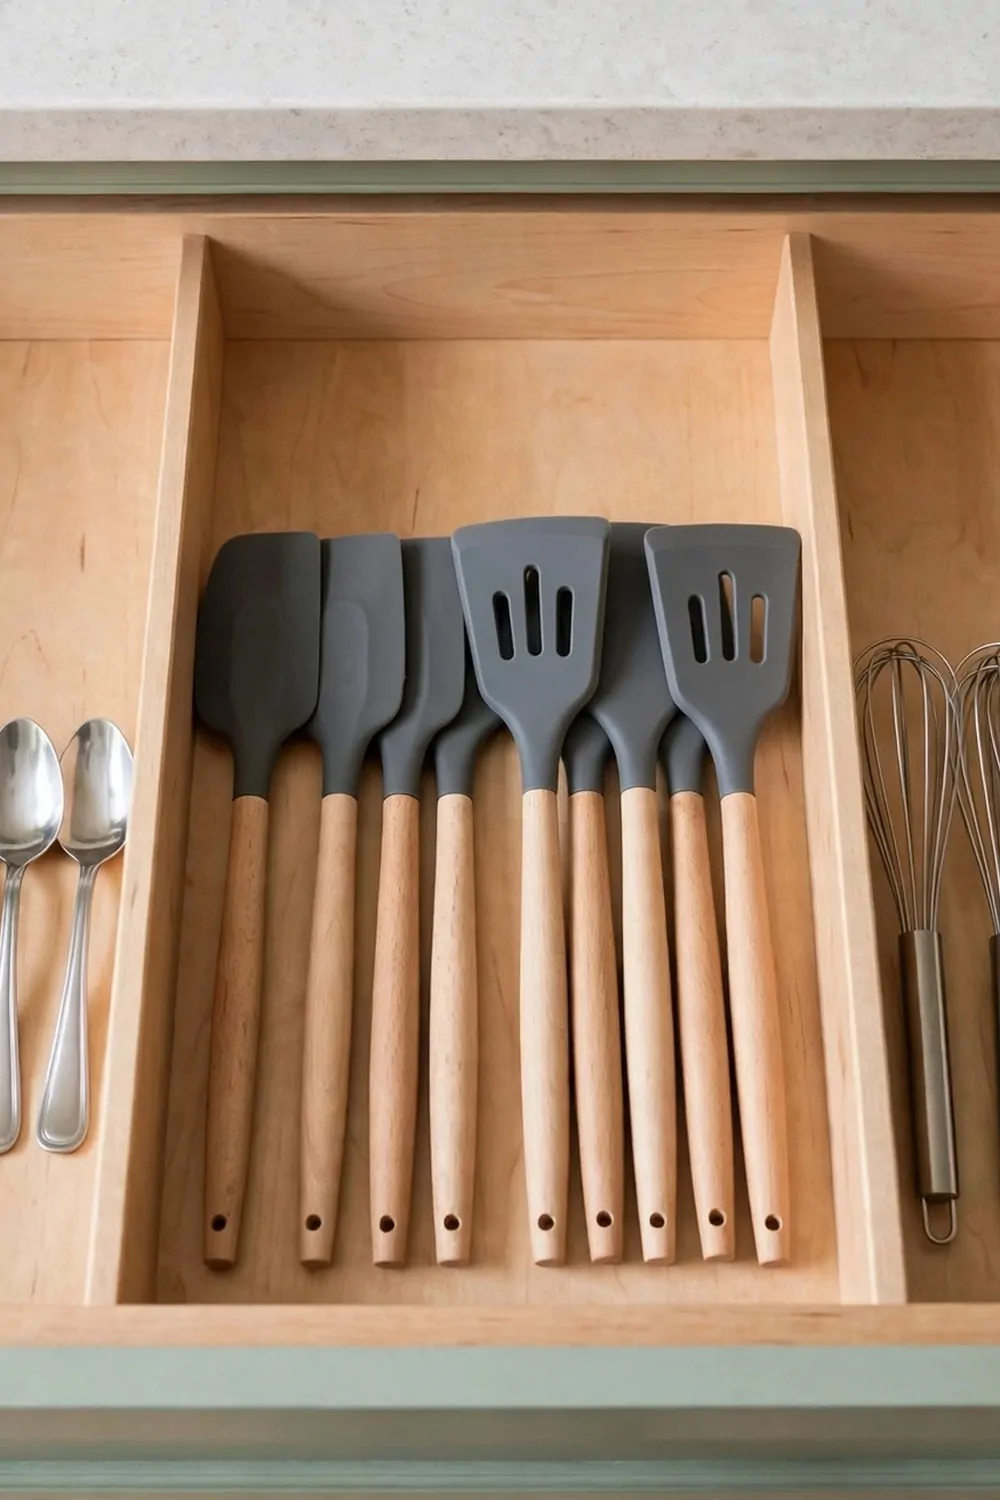
My old utensil drawer was a mess. Spoons tangled with whisks and I could never find the spatula I wanted.
Dividers changed all that. Now every tool has its own little row in the drawer.
Spoons sit in one row. Spatulas sit in the next row and whisks sit in the last row.
I open the drawer and I see everything at once. I grab what I need and I am done.
The dividers move around in some drawers. You can slide them to fit big tools or small ones.
I keep my most used tools in the front. The ones I rarely use go to the back.
A wide island drawer works best for this. It gives you room to lay everything out flat.
I like bamboo dividers. They look good and they are easy to wipe clean.
You can also use small trays inside the drawer. They hold little things like measuring spoons.
Keep this drawer close to the stove. That way you reach for a spatula while food is cooking and it is right there.
Pantry Pull-Out for Dry Food
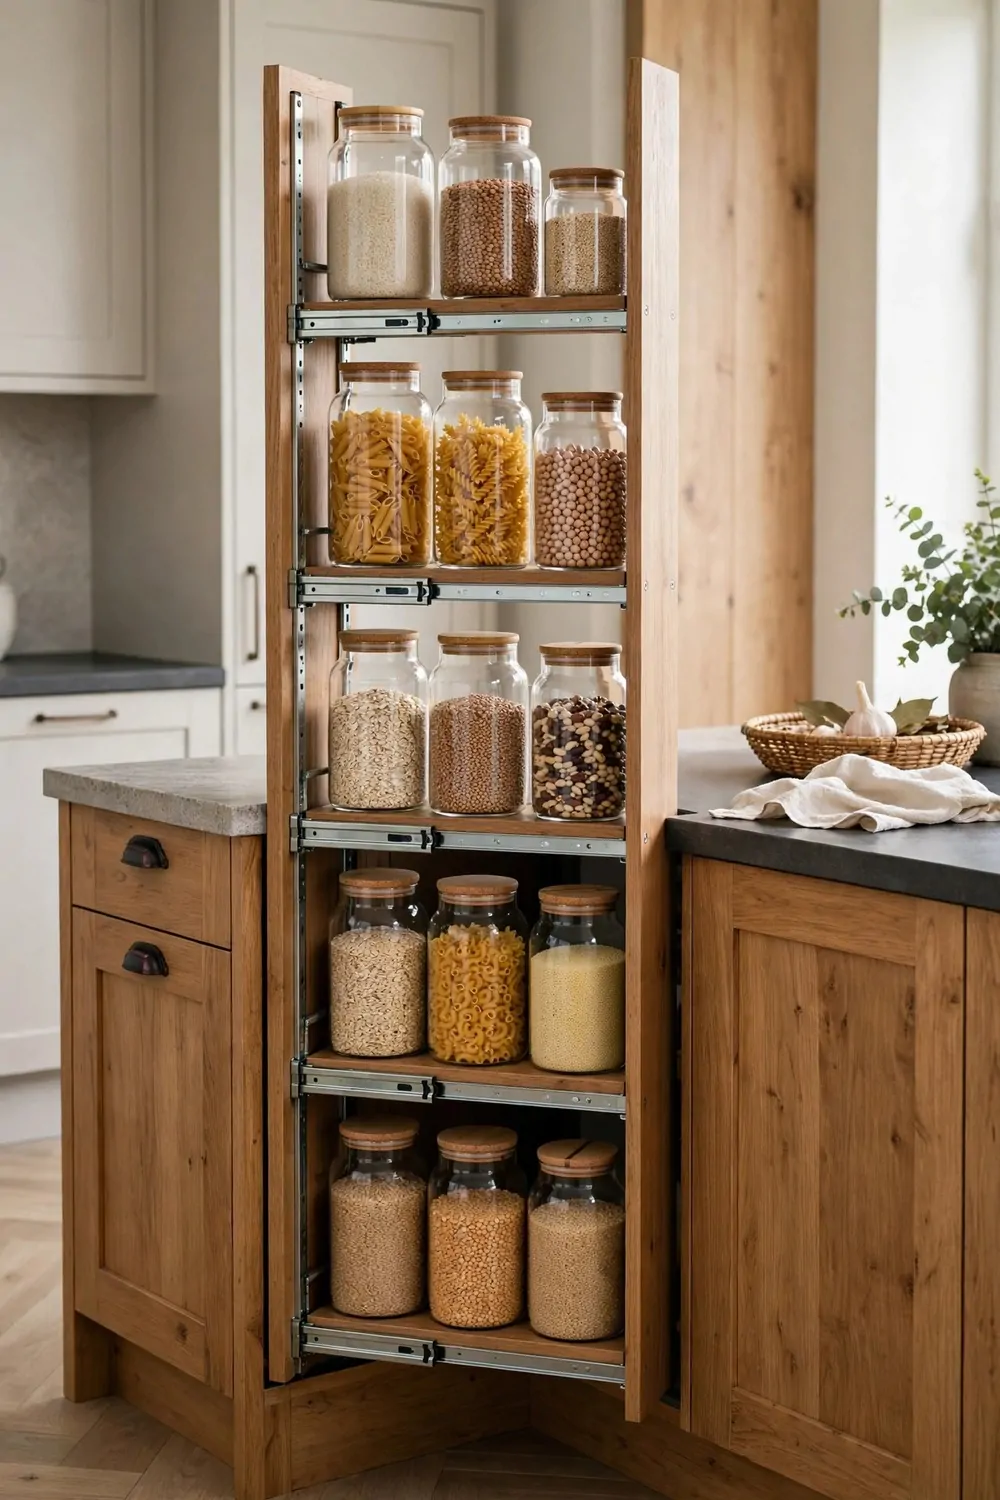
A tall pull-out pantry in the island is my favorite storage trick. It holds a lot of dry food in a very small footprint.
You pull it out and you see everything at once. Jars of rice and pasta line up in neat rows.
I keep flour on the bottom shelf. It is heavy and it is easier to lift from down low.
Cans and small boxes go in the middle. I group them by type so I can find things fast.
The top shelf holds spices and small jars. They are light and easy to reach up high.
Clear jars work best. I can see how much rice is left without opening every lid.
Labels help too. I stick a small label on each jar with the name and the date I filled it.
The pull-out slides back in and hides everything. Your kitchen looks clean and calm again.
This is great for a small kitchen. You get pantry space without building a whole pantry room.
I check my jars once a month. I refill what is low and toss anything that went stale.
| Island spot | What goes there | Why it works |
|---|---|---|
| Pull-out pantry | Rice, pasta, flour, cans | Everything slides out where you can see it |
| Top drawer | Knives and utensils | Tools stay close to your prep spot |
| Open shelves | Bowls and baskets | Big items are easy to grab fast |
| Bottom cabinet | Pots and small appliances | Heavy things sit low and stay steady |
Bottle Cubbies for Oils and Sauces
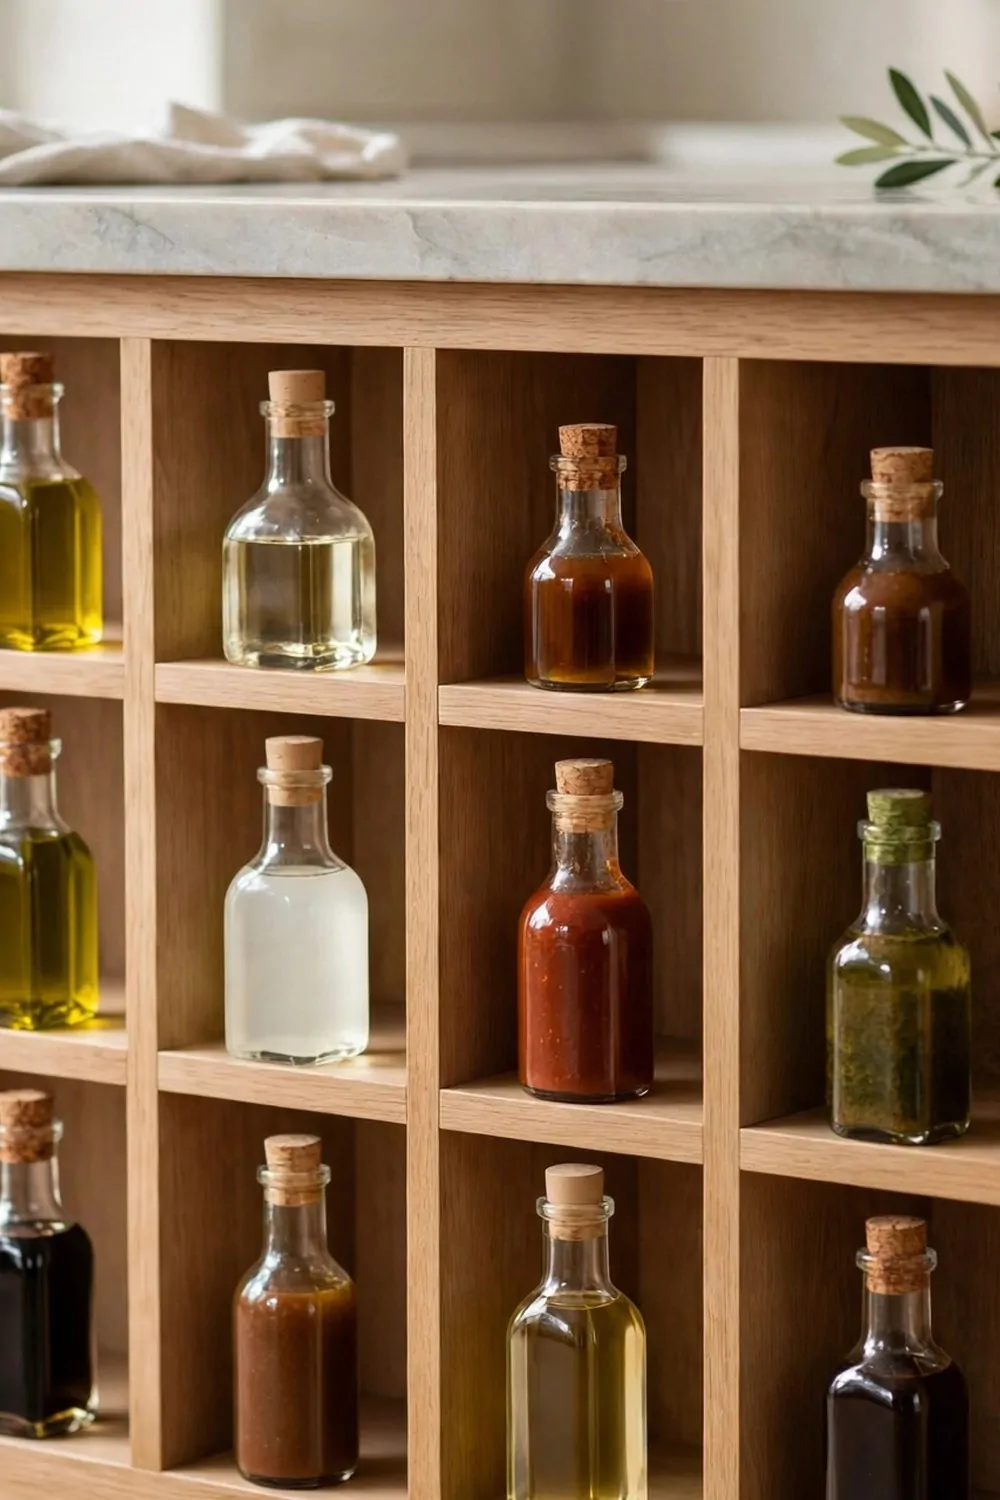
Bottles are hard to store. They tip over and roll around in a cabinet and you can never find the one you want.
Small square cubbies fix that. Each bottle gets its own little home in the island.
I keep olive oil in the front cubby. It is the one I reach for most when I cook.
Vinegar sits right next to it. Soy sauce and hot sauce fill the cubbies behind them.
The cubbies keep bottles standing up straight. Nothing tips over when you open the door.
I can see every label at a glance. I do not have to pull out ten bottles to find the right one.
You can build cubbies into the side of the island. They take up very little space.
I like to keep the cubbies near the stove side of the island. That way I grab oil while food is on the heat.
Small bottles fit best. Big jugs are better on a shelf where they have more room.
Wipe the cubbies now and then. Oil drips happen and a quick wipe keeps them clean.
Pegboard on the Island Side
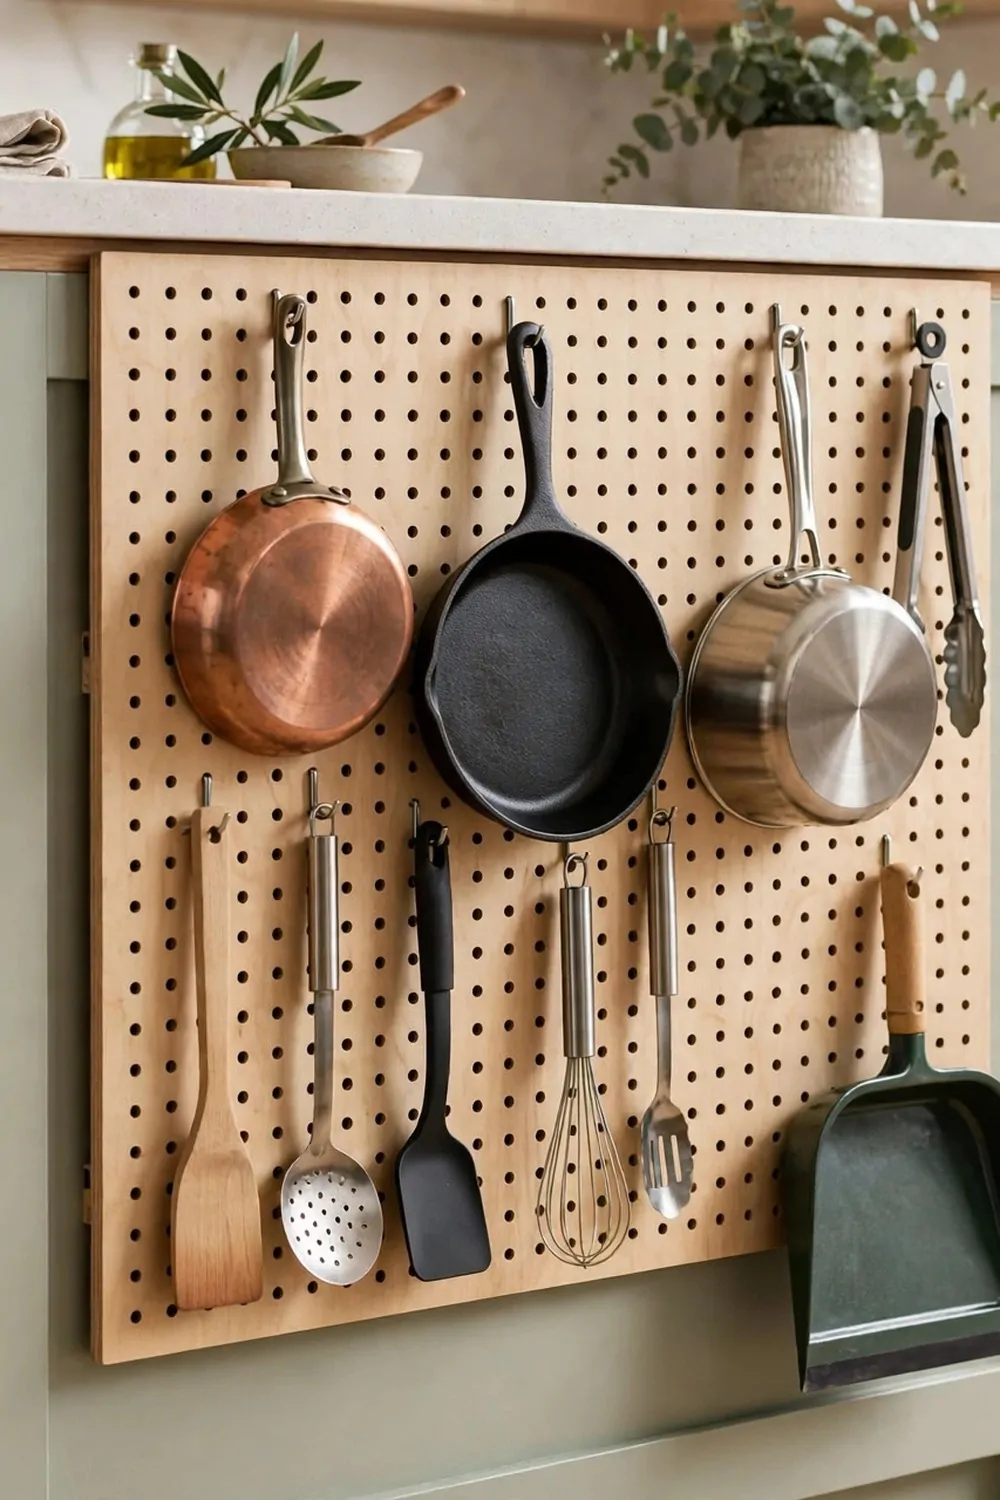
The side of an island is often just blank wood. A pegboard turns that wasted space into storage.
Hooks hold pans and utensils right on the side. Everything hangs where you can see it.
I hang my small pans on the pegboard. They are easy to grab when I start cooking.
Ladles and tongs hang on hooks too. They stay off the counter and out of drawers.
Even a dustpan has a spot. It hangs on a hook at the end and stays out of the way.
You can move the hooks around. If you buy a new pan you just shift a hook to make room.
Pegboard is cheap and easy to put up. A few screws hold it to the side of the island.
I paint mine the same color as the island. It blends in and looks like it was always there.
Keep heavy pans low on the board. Light tools can go up high where they are easy to reach.
This is perfect for a small kitchen. It uses wall space you already have and frees up cabinet room inside.
Prep Sink in the Island
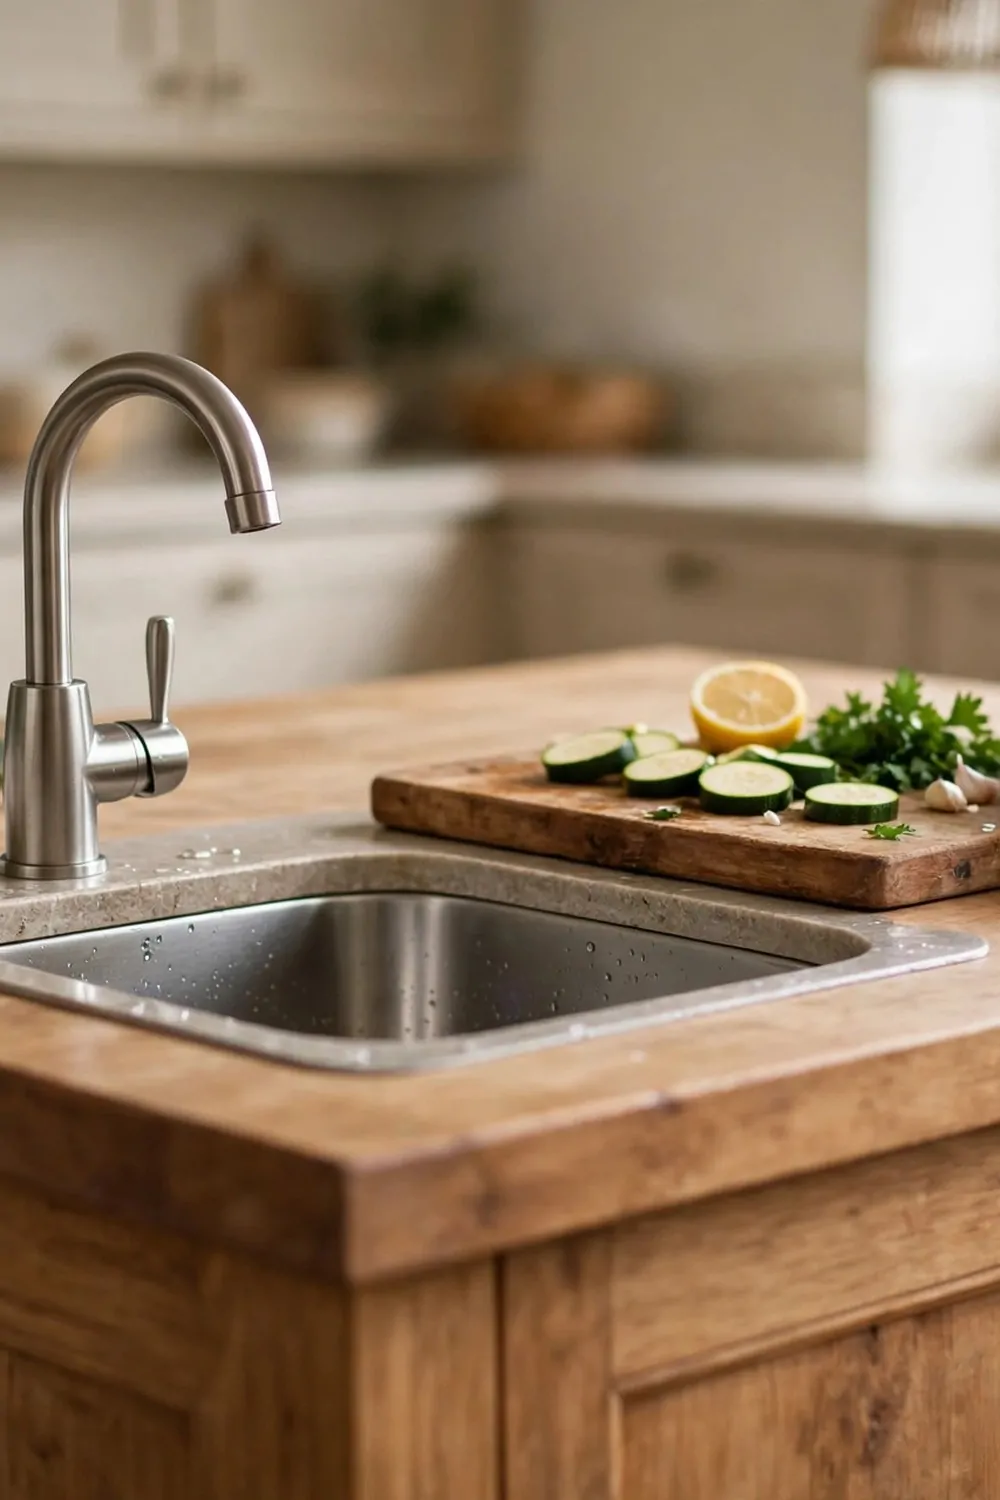
A small prep sink in the island makes cooking so much easier. You wash vegetables right where you chop them.
I fill a bowl of greens and rinse them in the prep sink. Then I set them on the cutting board next to it.
No more trips to the main sink with dripping vegetables. Everything stays in one spot.
The sink is small so it does not eat up your counter. You still have plenty of room to work.
I keep a small trash bowl beside the sink. Peels and scraps go straight in as I chop.
It also helps when two people cook at once. One person uses the main sink and the other uses the prep sink.
You need plumbing for this one. It costs more than a plain island but it is worth it if you cook a lot.
I like a single small faucet for the prep sink. It keeps the look simple and clean.
Keep a small drying mat under the cutting board. It catches drips and keeps the counter dry.
A prep sink turns the island into a real work station. You wash, chop, and cook without running all over the kitchen.
Two Tier Island for Prep and Eating
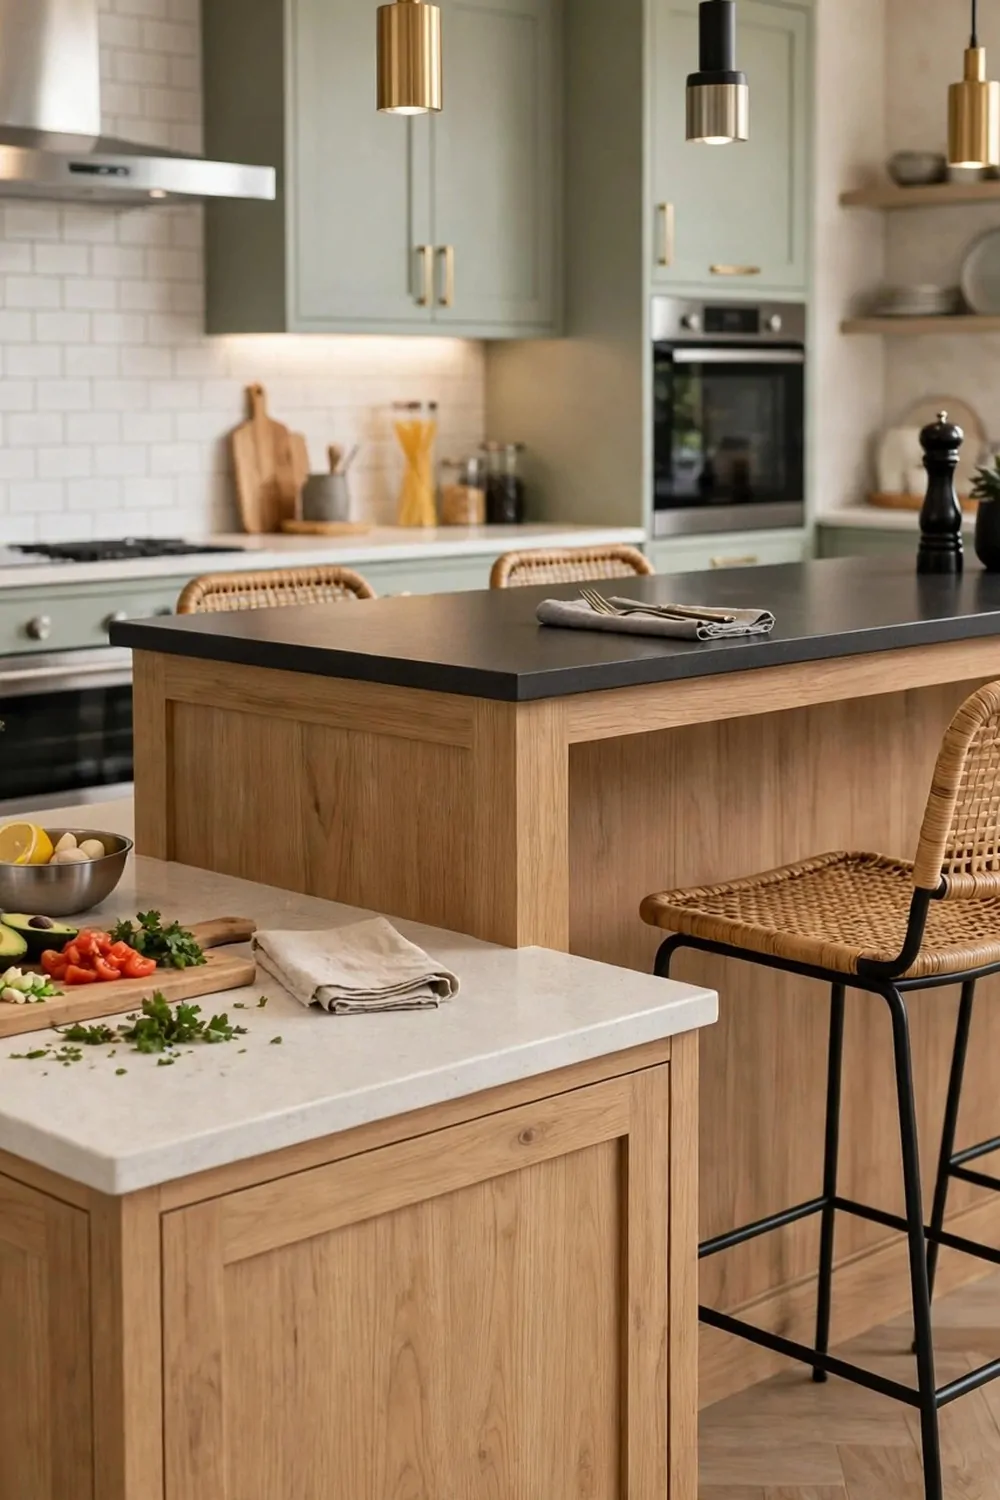
A two tier island gives you two jobs in one piece of furniture. The low side is for cooking and the high side is for eating.
I chop and mix on the lower counter. It is the right height for working with my hands.
The raised bar top sits above it. Stools tuck under it and people sit there for meals or snacks.
I love that the high top hides the mess. Dirty bowls sit on the low side where guests cannot see them.
Kids do homework at the raised bar while I cook. They are close by and I can talk with them.
The lower tier can hold drawers and shelves. I store mixing bowls and baking pans right under my prep spot.
The raised side needs a strong overhang. Make sure it is built well so it holds plates and elbows without wobbling.
I pick stools that slide all the way under the bar. They stay out of the walkway when no one is sitting.
This design works great in a small kitchen. You get a table and a work counter without adding more furniture.
It also makes the island feel lighter. The step up breaks up the big block of counter and looks nice.
Narrow Island for a Tight Galley
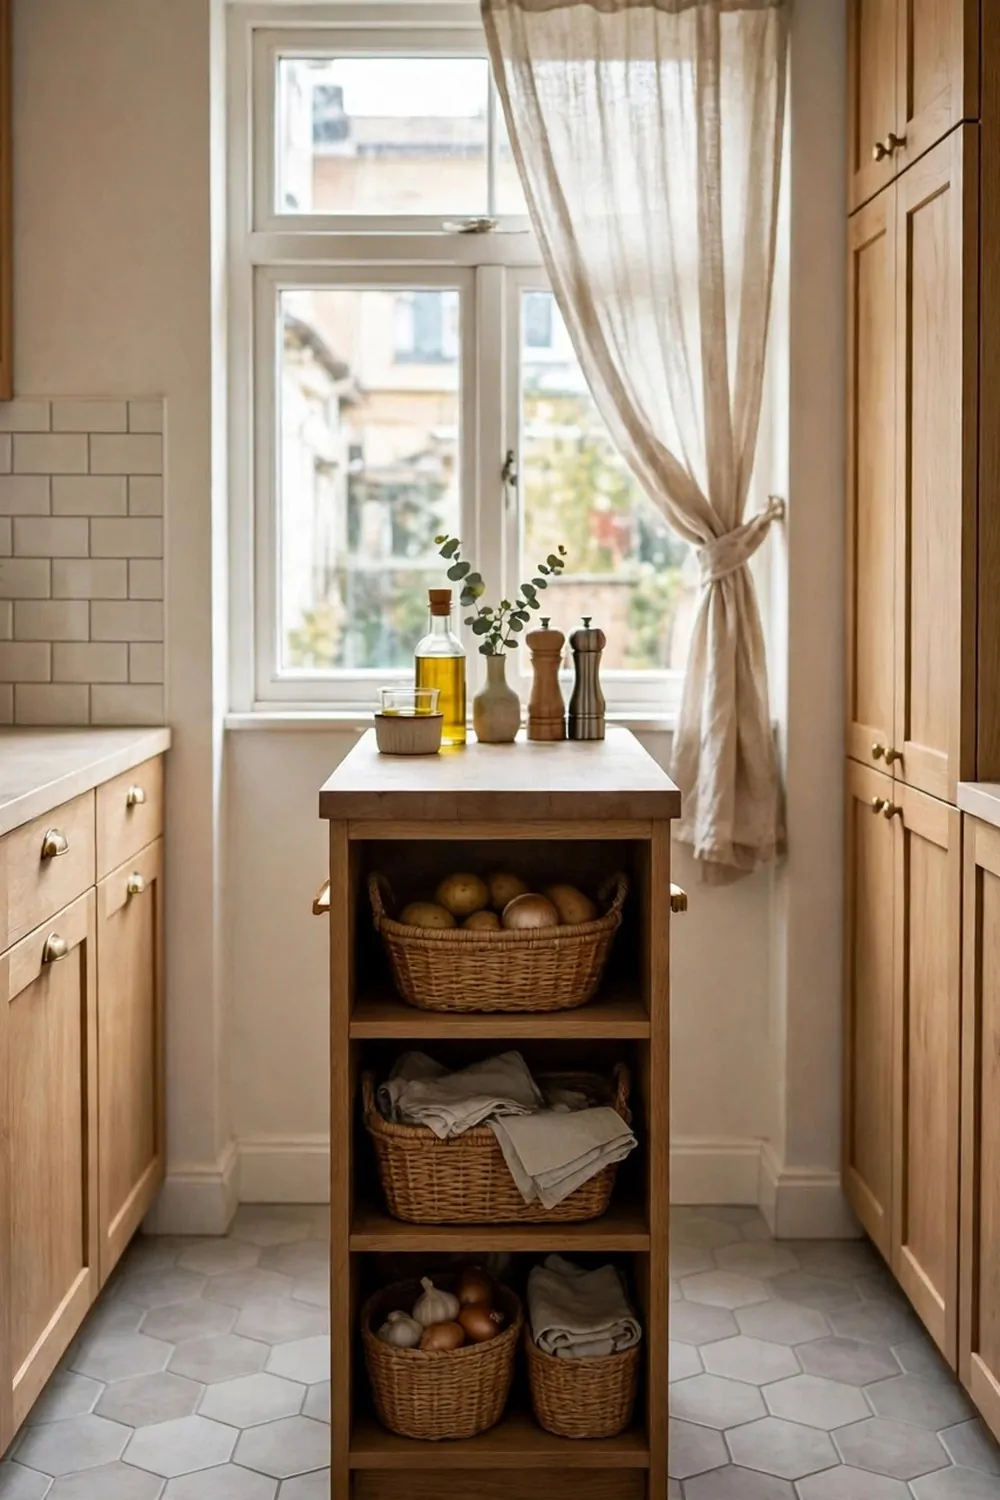
A galley kitchen feels tight. A slim island can still fit if you keep it narrow.
Mine is only about a foot and a half wide. It still holds a lot because I use the space under it well.
Open shelves run along the bottom. Baskets sit on the shelves and hold fruit, bread, and snacks.
I keep a few cookbooks on one shelf. They are easy to pull out when I need a recipe.
The top is just wide enough for a cutting board. I chop right on the island while dinner cooks.
You need room to walk on both sides. Leave enough space so you can pass without turning sideways.
Wheels help a lot on a narrow island. I roll mine to the side when I need more floor space.
I use the narrow island as a landing spot too. Groceries sit there when I bring them in from the car.
Baskets keep the open shelves tidy. Each basket has one job and I know what is inside it.
A small island beats no island at all. Even a slim one gives you extra counter and extra storage in a tight kitchen.
Butcher Block Top With Storage Below
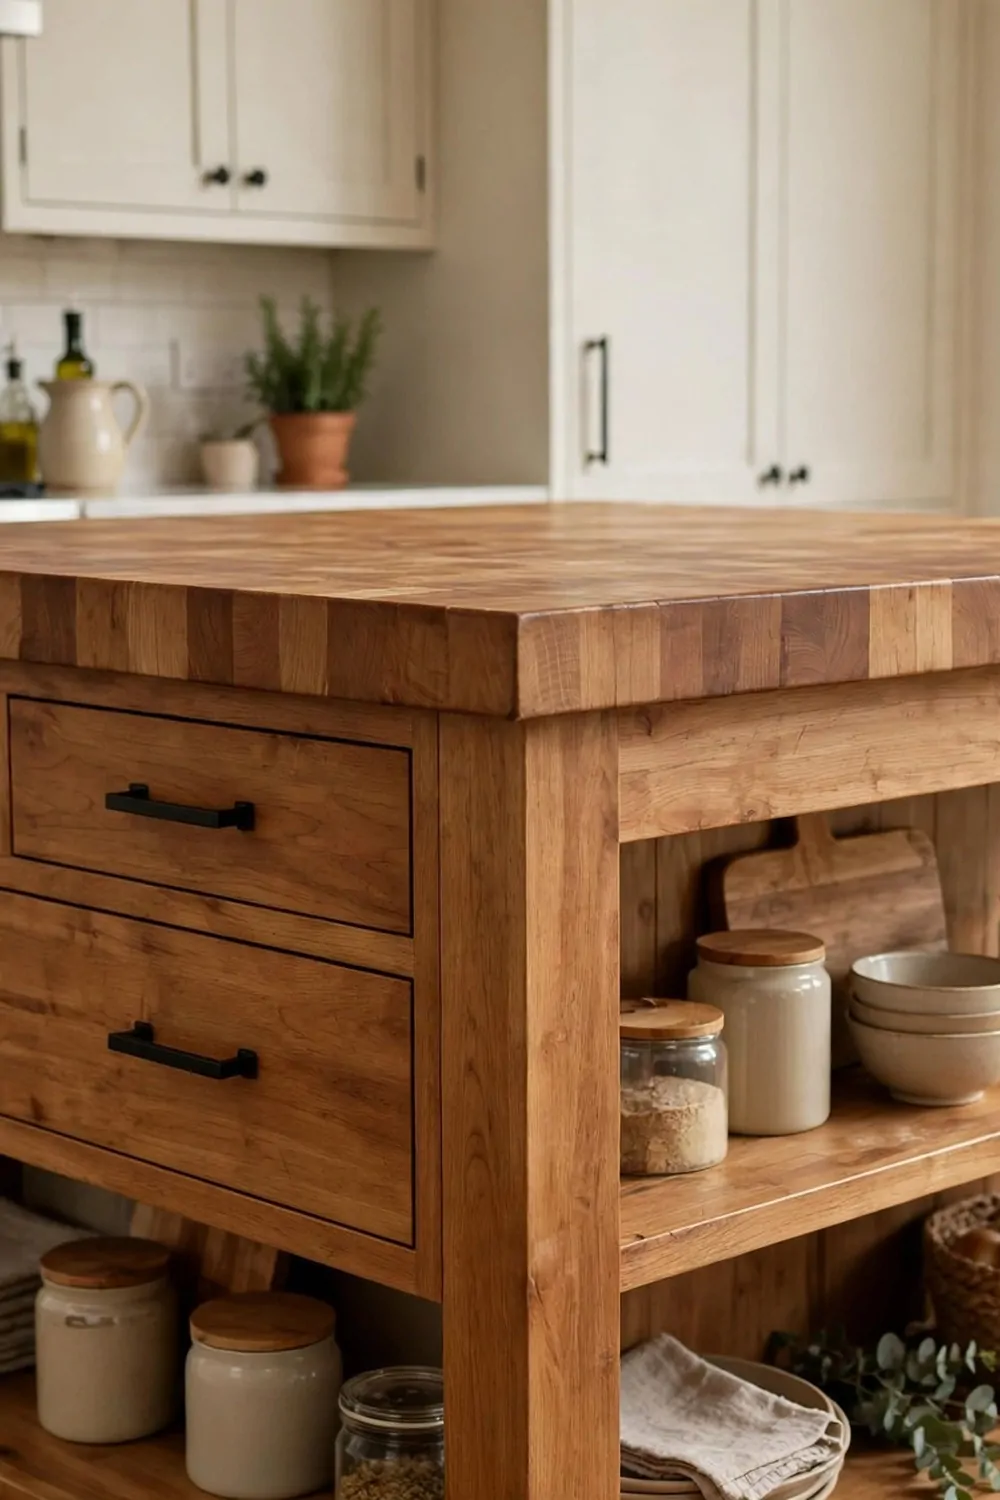
A butcher block top is warm and strong. You can chop right on it and it holds up for years.
The wood feels nice under your hands. It is softer than stone and kinder to knife blades.
I oil my butcher block once a month. It keeps the wood from drying out and it looks rich and warm.
Drawers under the top hold my baking tools. Rolling pins and measuring cups live right below my work spot.
Open shelves hold mixing bowls. I stack them by size and grab the one I need.
The wood top needs a little care. Wipe up water fast so it does not soak in and stain.
I keep a small cutting board on top for meat. That keeps raw juices off the main wood surface.
This island feels like the heart of the kitchen. People gather around it and lean on it while they talk.
The storage below makes it do double duty. It is a work top and a cabinet in one.
You can sand out small marks on butcher block. A quick sand and a fresh coat of oil makes it look new again.
Corner Island That Uses Dead Space
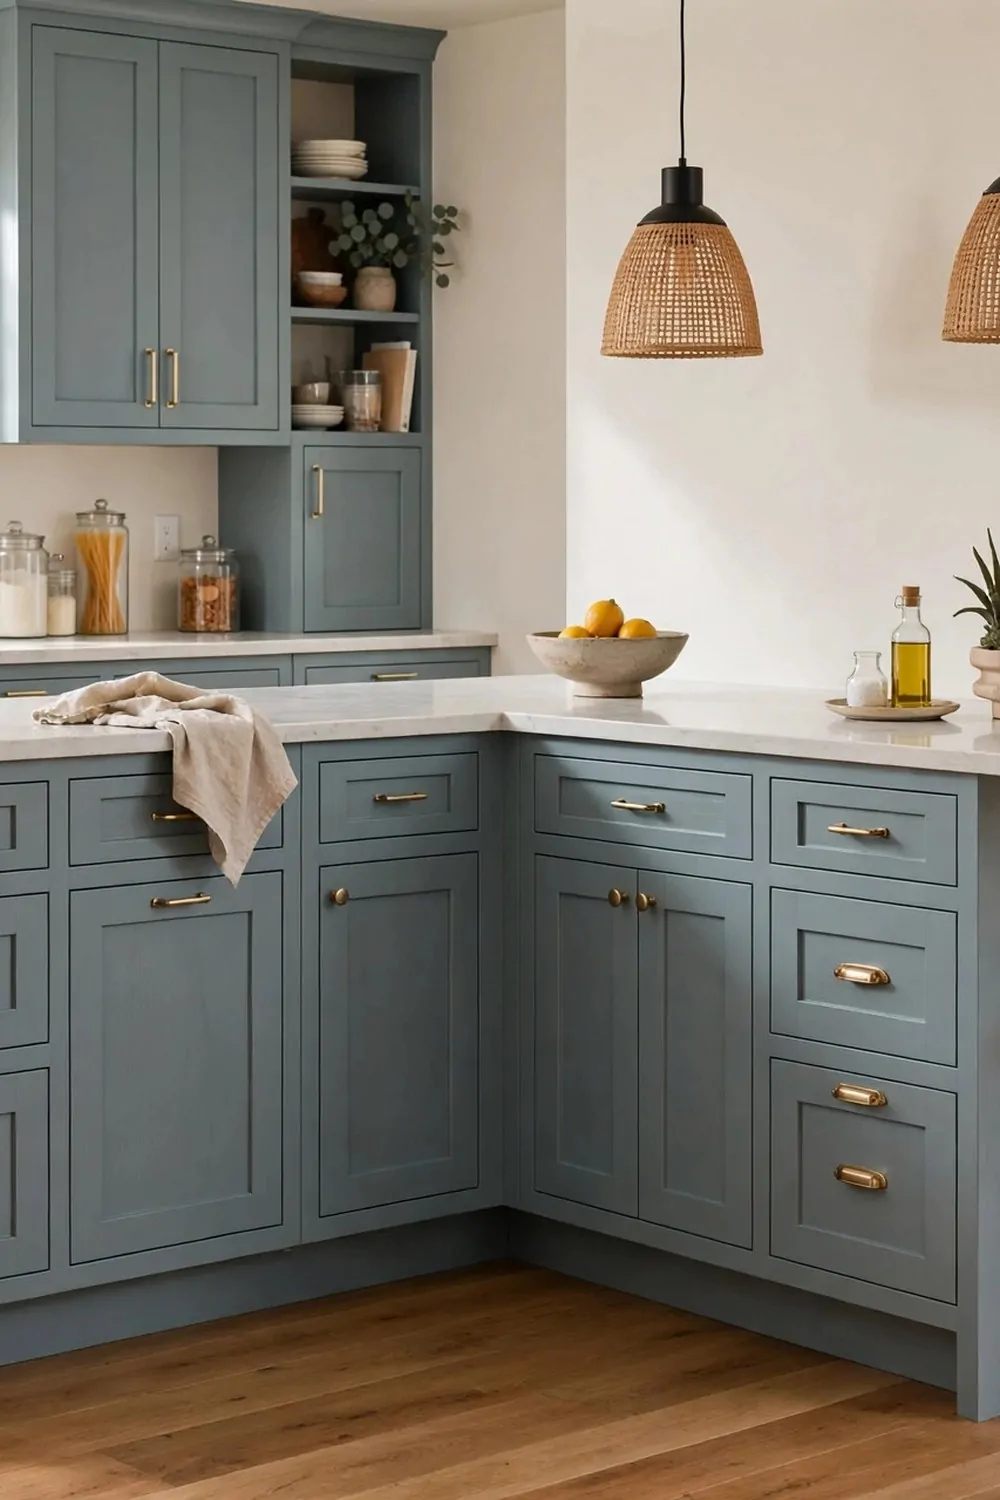
Corners are dead space in most kitchens. An L shaped island turns that corner into useful storage.
Cabinets run along both sides of the L. I store pots on one side and baking pans on the other.
The corner itself holds big items. My slow cooker and my large stock pot fit right in the bend.
A stool sits at the end of the L. It is a little seat for a quick cup of coffee in the morning.
I like that the island wraps the space. It makes the kitchen feel bigger because the corner is finally doing something.
You can put a lazy turntable in the deep corner. It spins and brings things to you without reaching way back.
Drawers work well on one leg of the L. I keep towels and oven mitts in the drawer near the stove side.
The other leg holds open shelves. Cookbooks and baskets sit there where I can see them.
Measure the corner well before you build. The island needs to leave room to open every door and drawer.
This shape is great for small kitchens with an odd corner. It uses space that would otherwise sit empty and wasted.
Charging Drawer for Phones
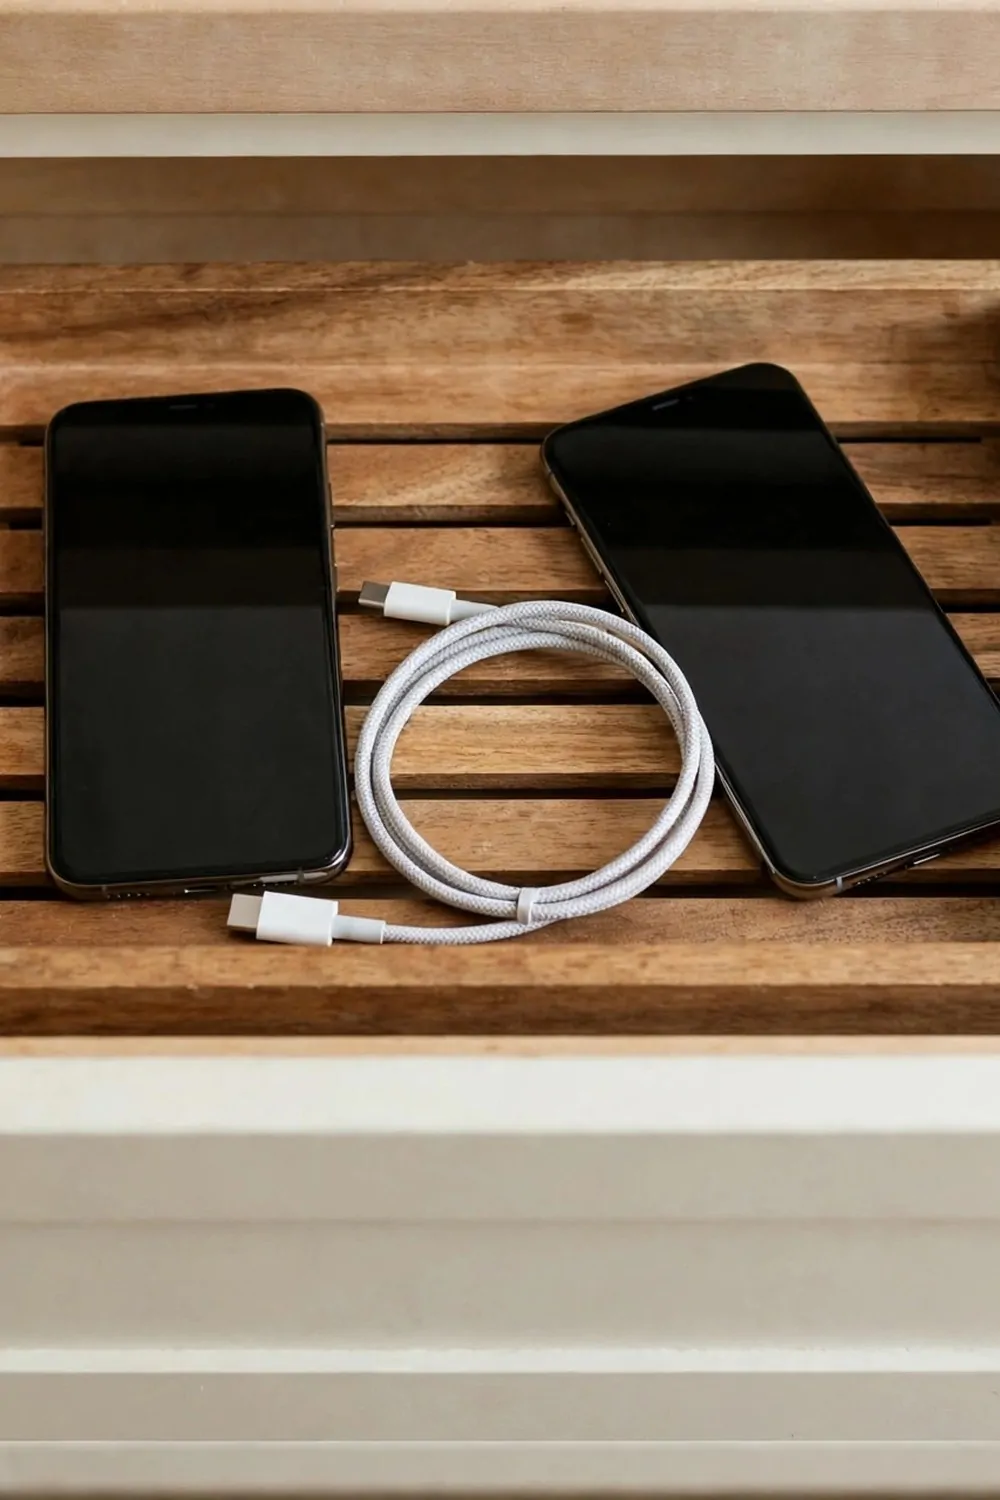
Phones end up all over my kitchen counter. They sit next to the stove and near the sink and it drives me crazy.
A charging drawer hides them away. Phones rest on a tray inside the drawer and charge while they sit there.
I plug a power strip into the back of the drawer. Cables run from the strip to each phone.
The drawer keeps cords off the counter. No more tangled cables near the cutting board.
I keep my phone in there while I cook. It charges and stays clean and dry away from water.
My kids put their tablets in the drawer too. It is the one spot where every device goes to charge.
You need an outlet inside the island for this. An electrician can add one when the island is built.
I use a small tray to hold the phones. It keeps them from sliding around when the drawer opens and closes.
Keep the drawer near the eating side of the island. That way you grab your phone when you sit down for a meal.
This little drawer makes the kitchen feel calmer. The counter stays clear and the phones stay charged and out of the way.
Pet Food Station in a Drawer
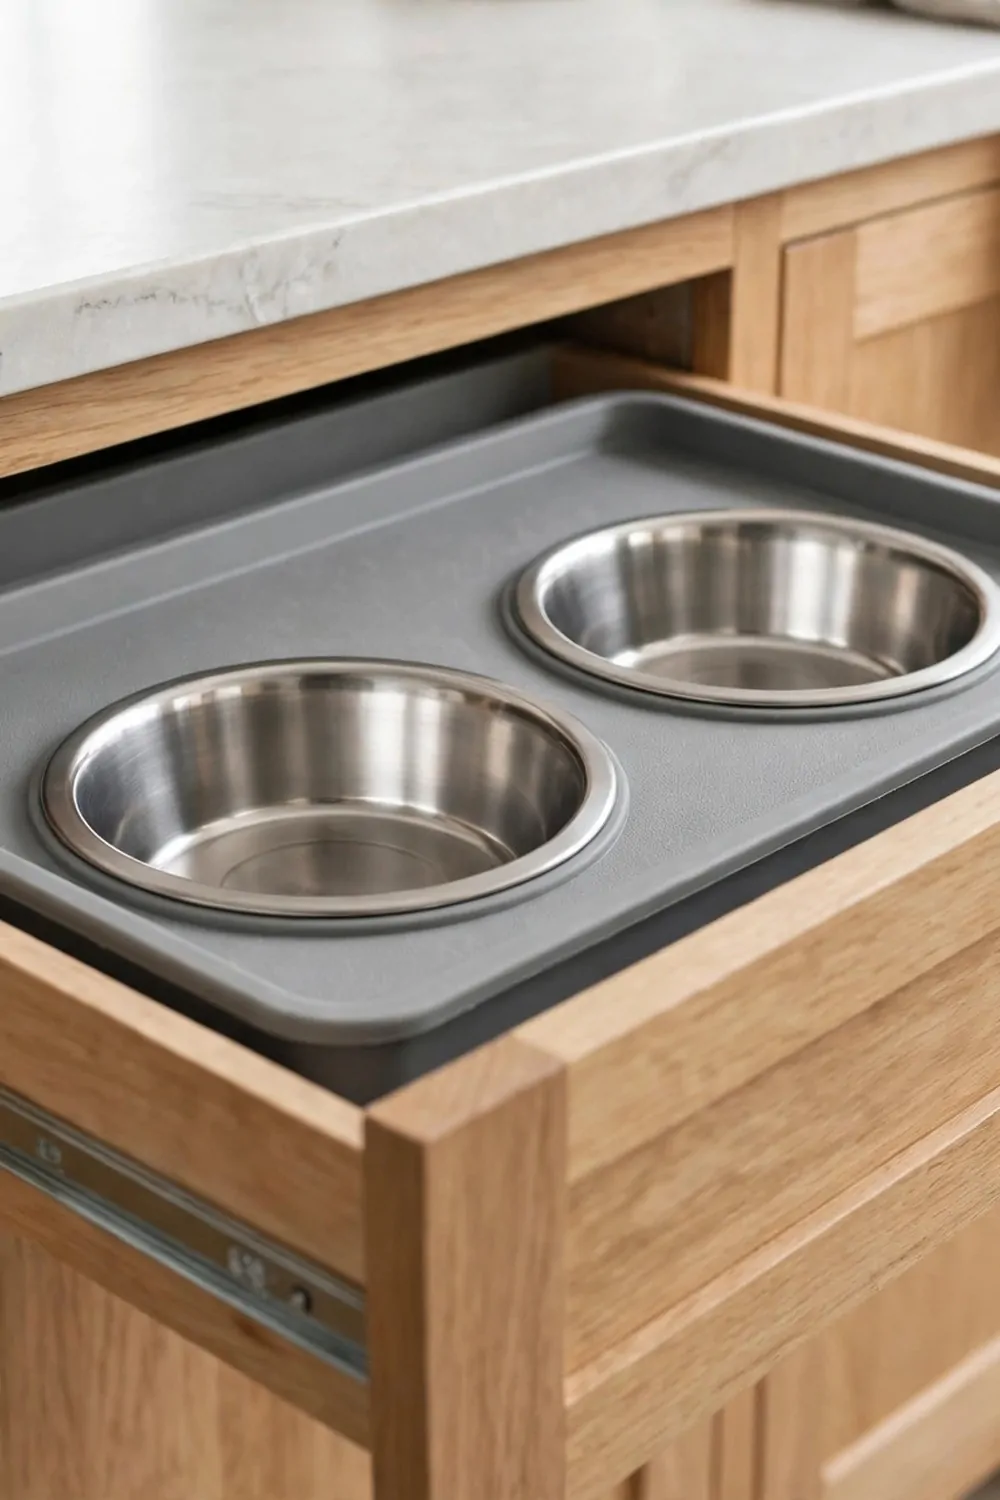
I keep my dog’s bowls in a drawer in my island. It sounds odd. It works so well.
The bowls sit in a tray that fits inside the drawer. Food stays in one spot. Water stays in one spot too.
I pull the drawer open at meal time. I push it shut when we are done. No more tripping over bowls on the floor.
The tray catches spills. I lift it out and wash it. That takes two minutes.
I keep a small bag of food in the drawer next to the bowls. A scoop lives there too. Everything is in one place.
My kitchen floor stays clear. The dog still knows where to eat. He waits by the island now.
You can use a shallow drawer for this. A deep one works too, just add a riser under the tray.
If you have a cat, the same trick works. Small bowls, same tray, same drawer.
Wipe the drawer down once a week. It stays fresh. Your pet will love the routine.
Breakfast Bar With Baskets Below
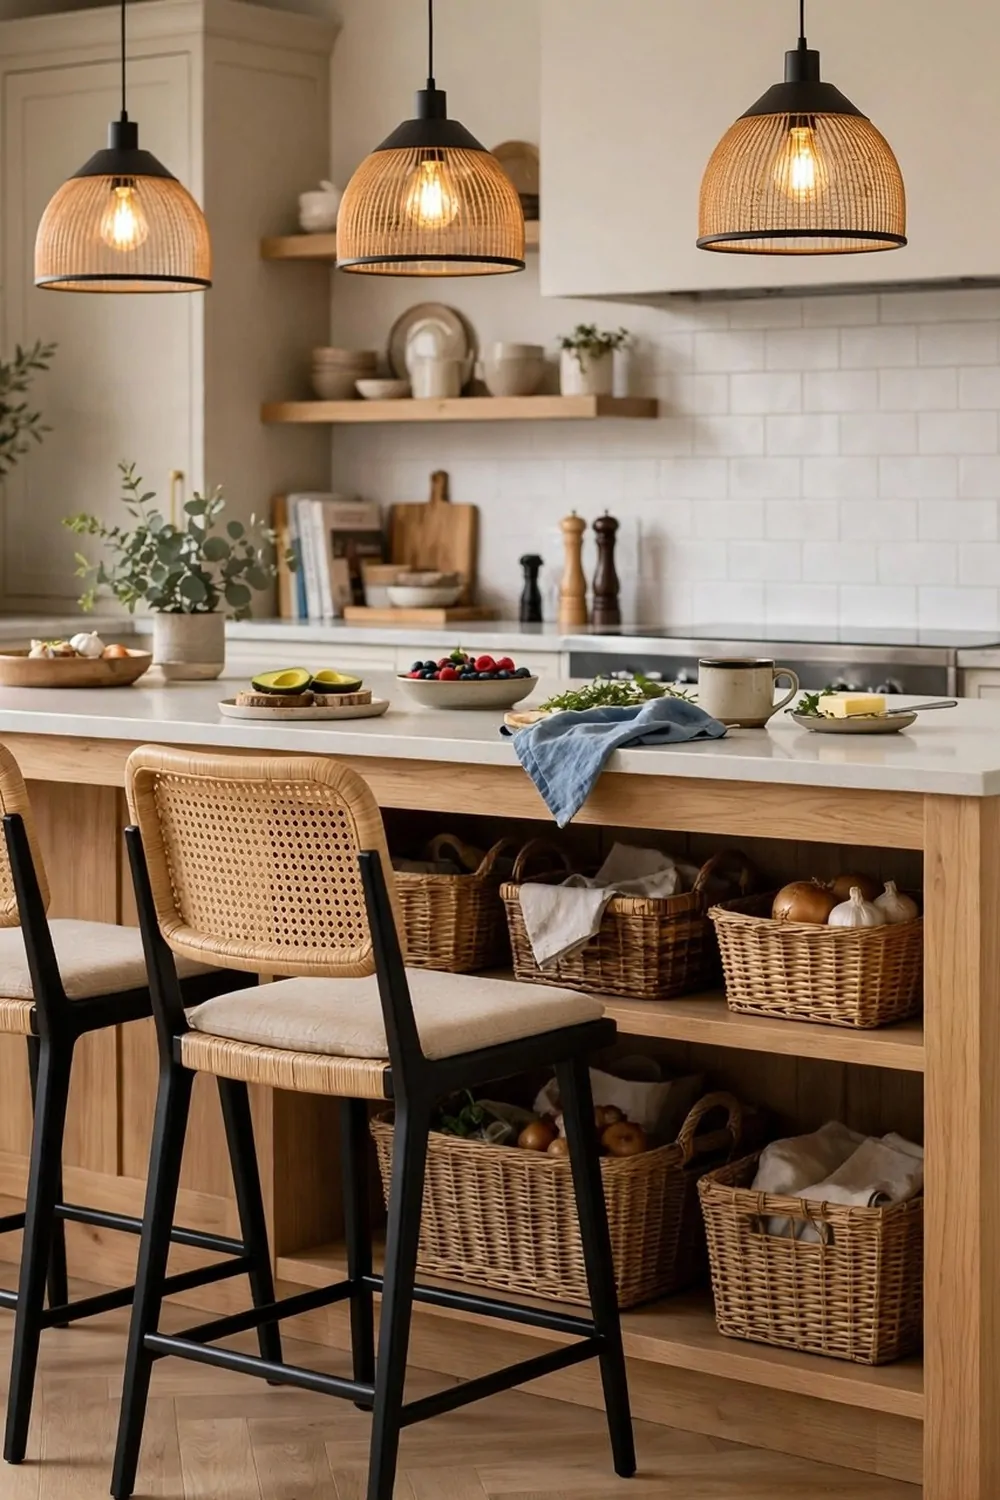
My island has a breakfast bar on one side. The stools tuck under it. The baskets live under it too.
The overhang makes a little pocket of space. Baskets slide right in. They hold napkins, placemats, and a few snacks.
I grab a basket when we sit down to eat. I slide it back when we are done. It feels easy.
The baskets keep the counter clear. No clutter piles up on top. The bar stays open for breakfast.
Pick baskets that fit the gap. Measure the height first. A basket that is too tall will not slide in.
I use one basket for each person. It sounds fussy. It stops the morning rush from turning into a mess.
Kids can reach their own basket. They like that. They set their own spot at the bar.
Wicker looks warm and soft. Fabric bins work too. Use what you already have at home.
Label the baskets if you want. A small tag helps. Everyone knows where things go.
Docking Cart That Slides Under
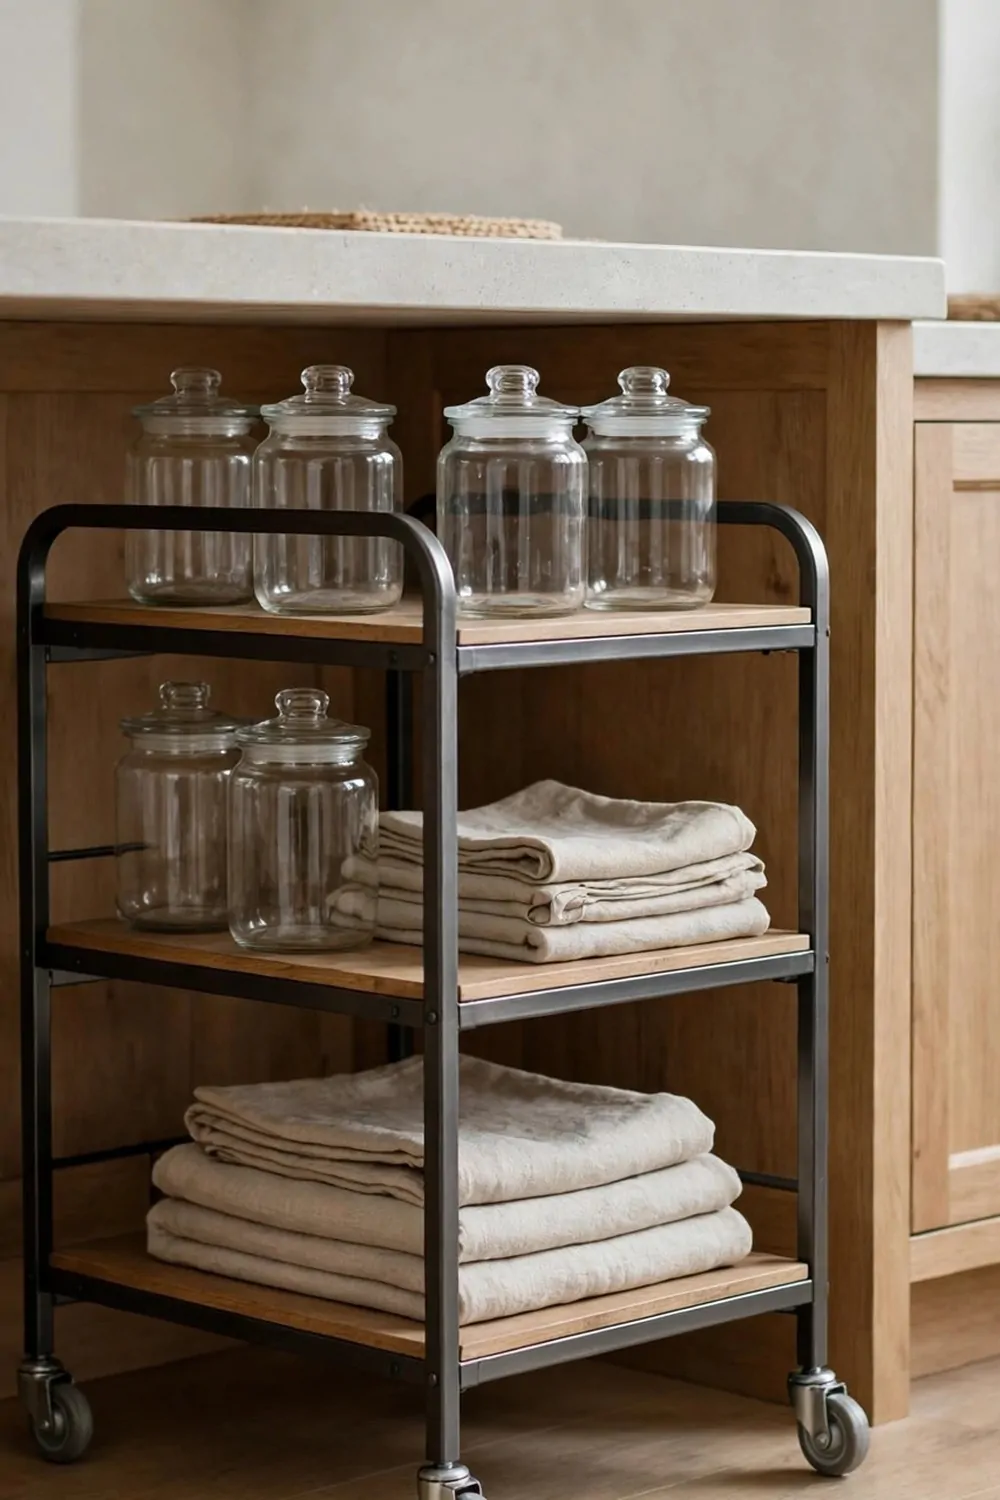
I have a small rolling cart that parks under my island. It docks there like a little car in a garage.
The cart holds jars, linens, and a few pans. I roll it out when I cook. I roll it back when I am done.
It gives me extra storage without taking floor space. The island hides it. The kitchen still looks tidy.
Pick a cart that is a little shorter than the counter. It needs to slide in with room to spare. Measure twice.
I keep the heavy jars on the bottom shelf. The light linens go on top. It rolls smooth that way.
The wheels lock. I lock them when the cart is parked. It will not drift out on its own.
You can use the cart as a tea station too. Kettle, mugs, tea bags. Roll it to the table at tea time.
Wipe the shelves once a week. Jars can get sticky. A quick wipe keeps it nice.
This trick works in tiny kitchens. The cart is storage that moves. That is the whole point.
Tiered Baskets Inside a Deep Cabinet
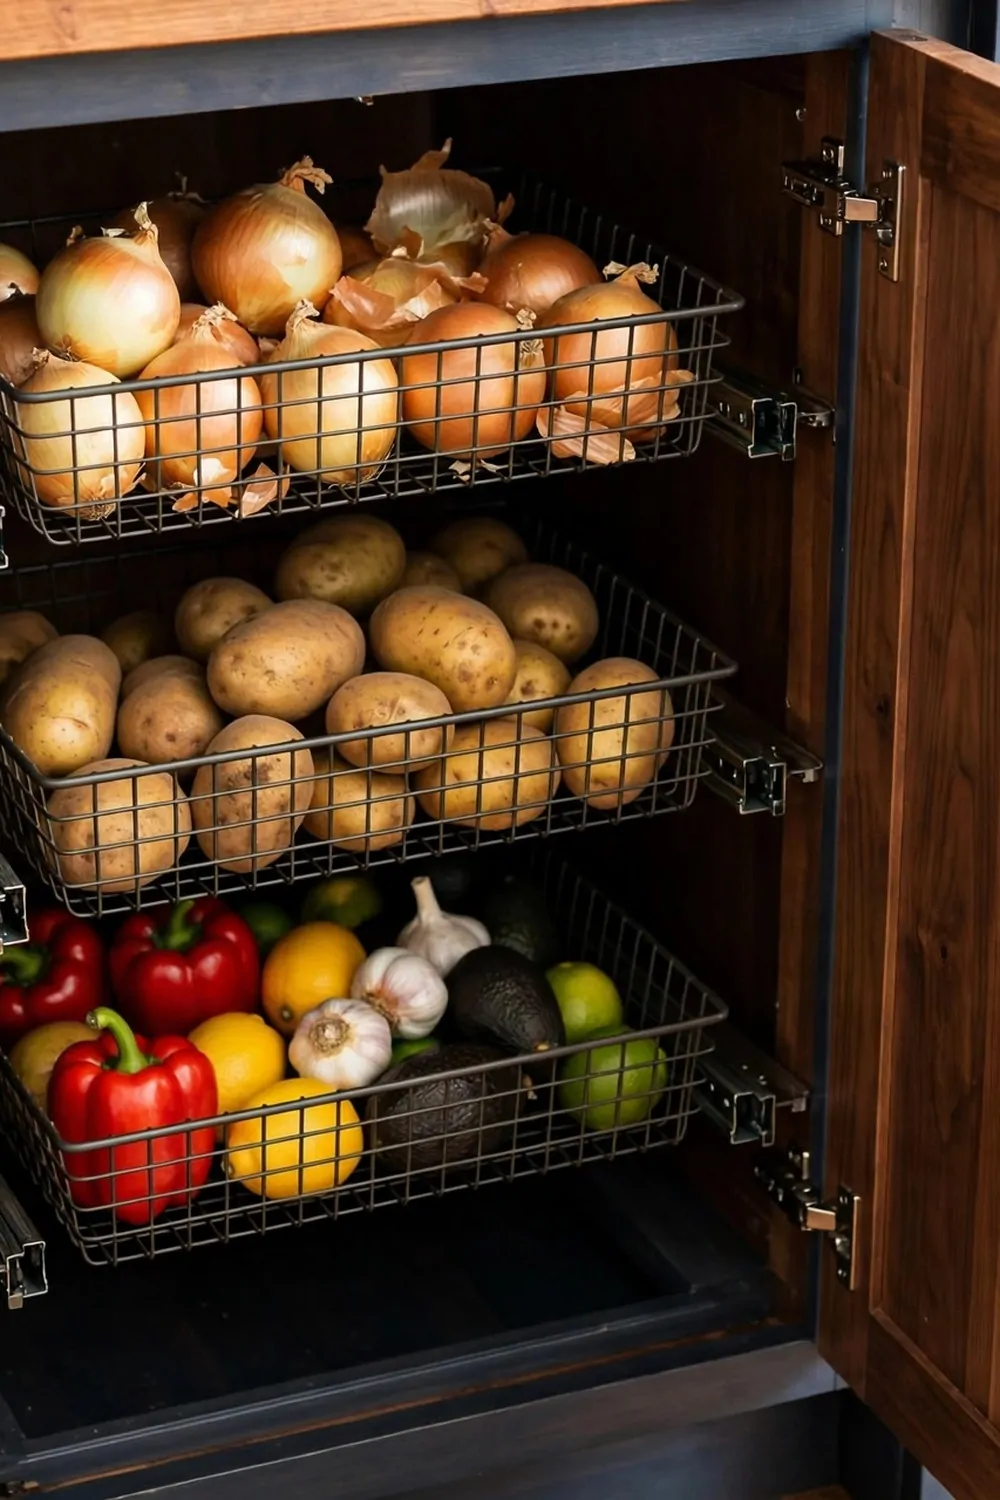
Deep cabinets swallow things. I lose onions at the back. I lose potatoes too.
Tiered baskets fixed that. They stack up inside the cabinet. Each level holds something different.
Onions go on the top tier. Potatoes go in the middle. Garlic and ginger sit at the bottom.
I can see everything at a glance. I pull a basket out like a drawer. Nothing hides at the back now.
Wire baskets let air move around the produce. That keeps it fresh longer. It also helps me spot anything going soft.
Measure your cabinet before you buy. The baskets must fit the width and the depth. Leave a little room on each side.
I line the bottom tier with a cloth. It catches dirt from the potatoes. I shake it out once a week.
This setup holds a lot in a small space. Three tiers beat one big pile. Your cabinet will feel twice as big.
Corner Turntable Inside the Island
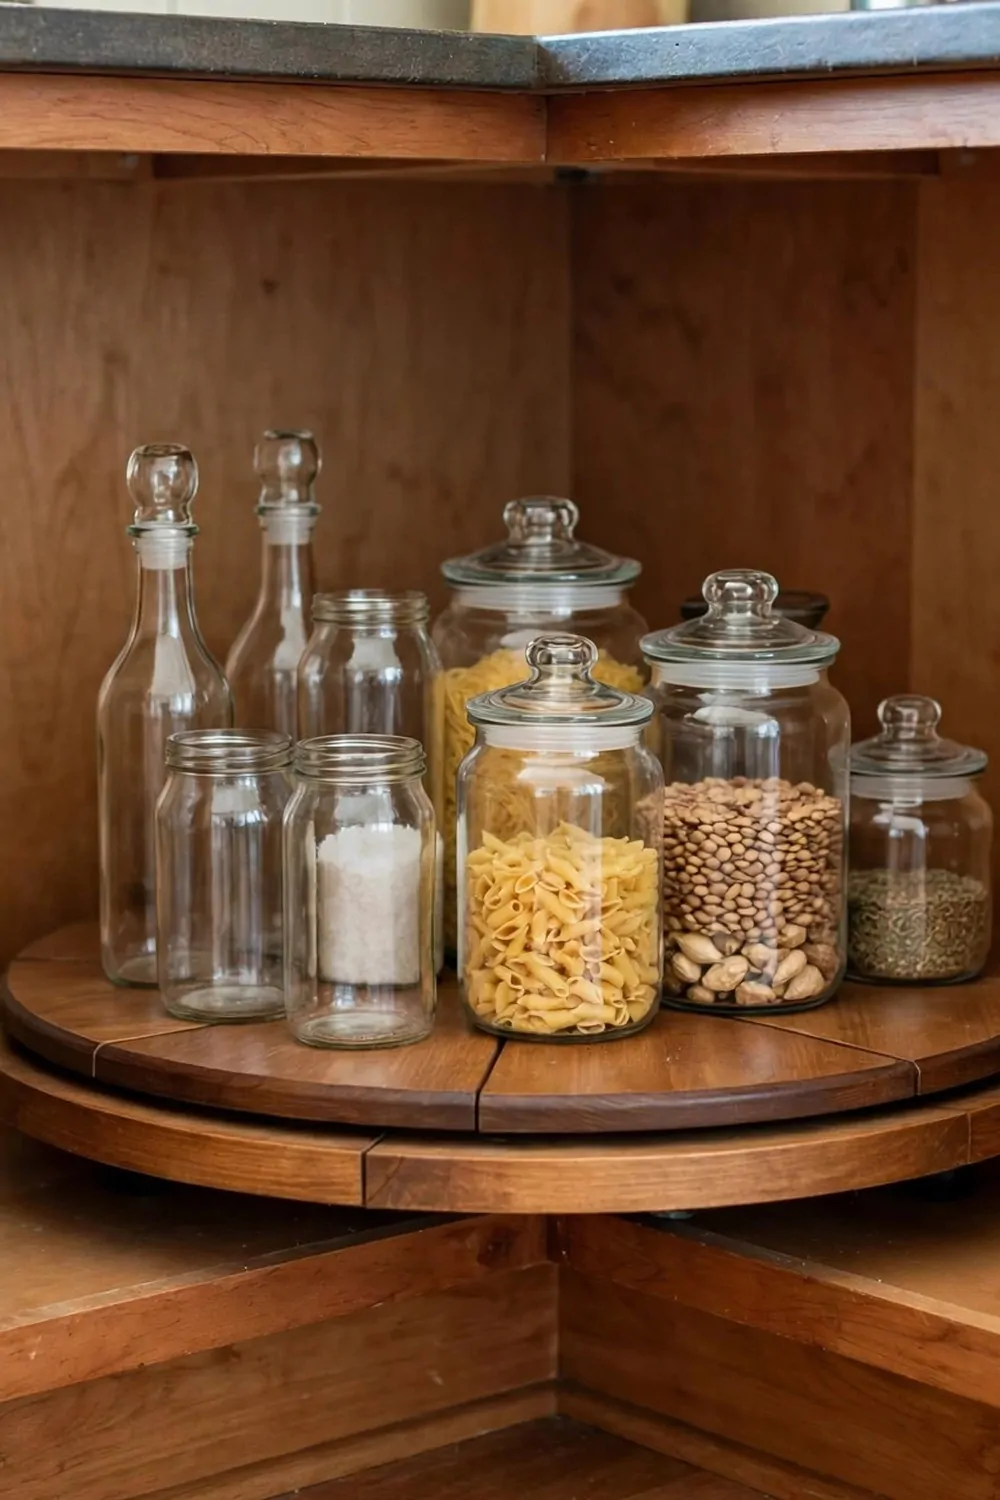
The corner of my island was a dead spot. Things went in and never came out. I hated it.
A turntable changed that. It spins. I turn it and the jar I want comes to me.
I keep oils, sauces, and spice jars on it. The tall bottles go in the middle. The short jars sit near the edge.
One spin and I see it all. No more reaching into the dark corner. No more knocking bottles over.
Pick a turntable that fits your cabinet. Leave a finger of space around the edge. It needs room to spin free.
I put a small mat under it. The mat stops it from sliding. It also catches drips from bottles.
Kids love spinning it. I let them. It makes them want to help in the kitchen.
Wipe it down when you clean the shelves. A sticky turntable spins slow. A clean one spins like new.
Glass Front Cabinets for Pretty Dishes
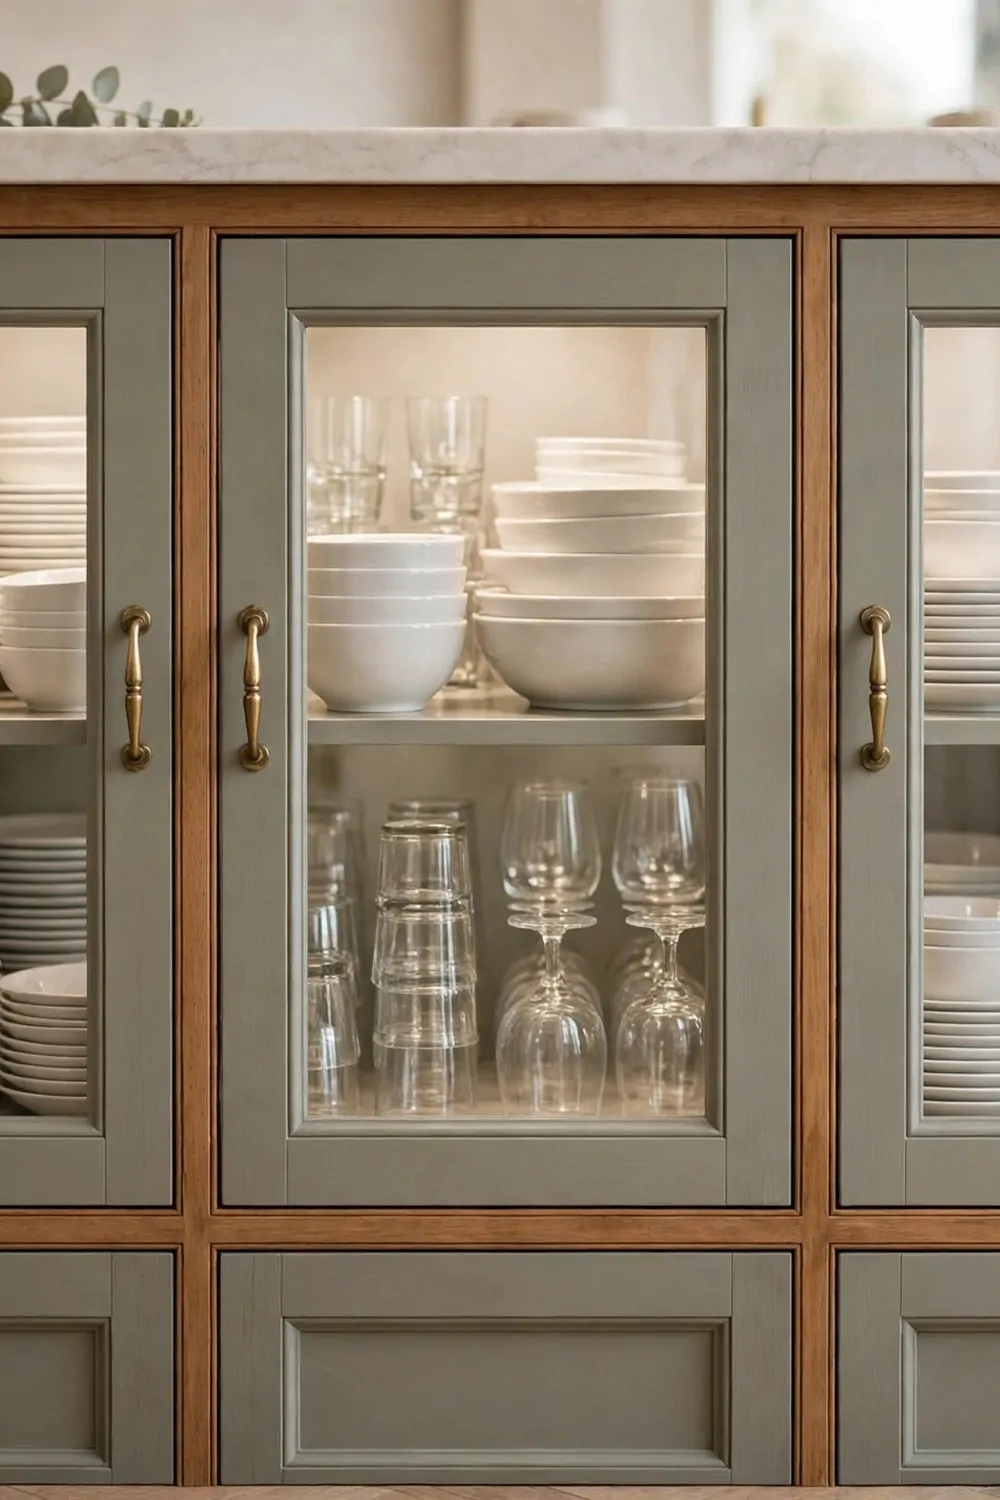
I swapped two solid doors on my island for glass ones. My pretty dishes now show through. The kitchen feels lighter.
Glass doors make you keep things neat. That sounds like a chore. It is actually a good push.
I stack white plates in one cabinet. Glasses stand in the other. The rows look calm and tidy.
You do not need fancy dishes. Plain white ones look best. They match everything.
Keep the everyday dishes behind solid doors. Save the glass for the pretty stuff. That way the mess stays hidden.
Wipe the glass once a week. Fingerprints show up fast. A quick spray and cloth does it.
If you rent, you can use stick-on film instead. It looks like frosted glass. No tools needed.
My island feels bigger with glass doors. Light bounces off them. The whole kitchen feels brighter.
Try one cabinet first. See how you like it. You can always change the other door later.
Wicker Baskets on Open Shelves
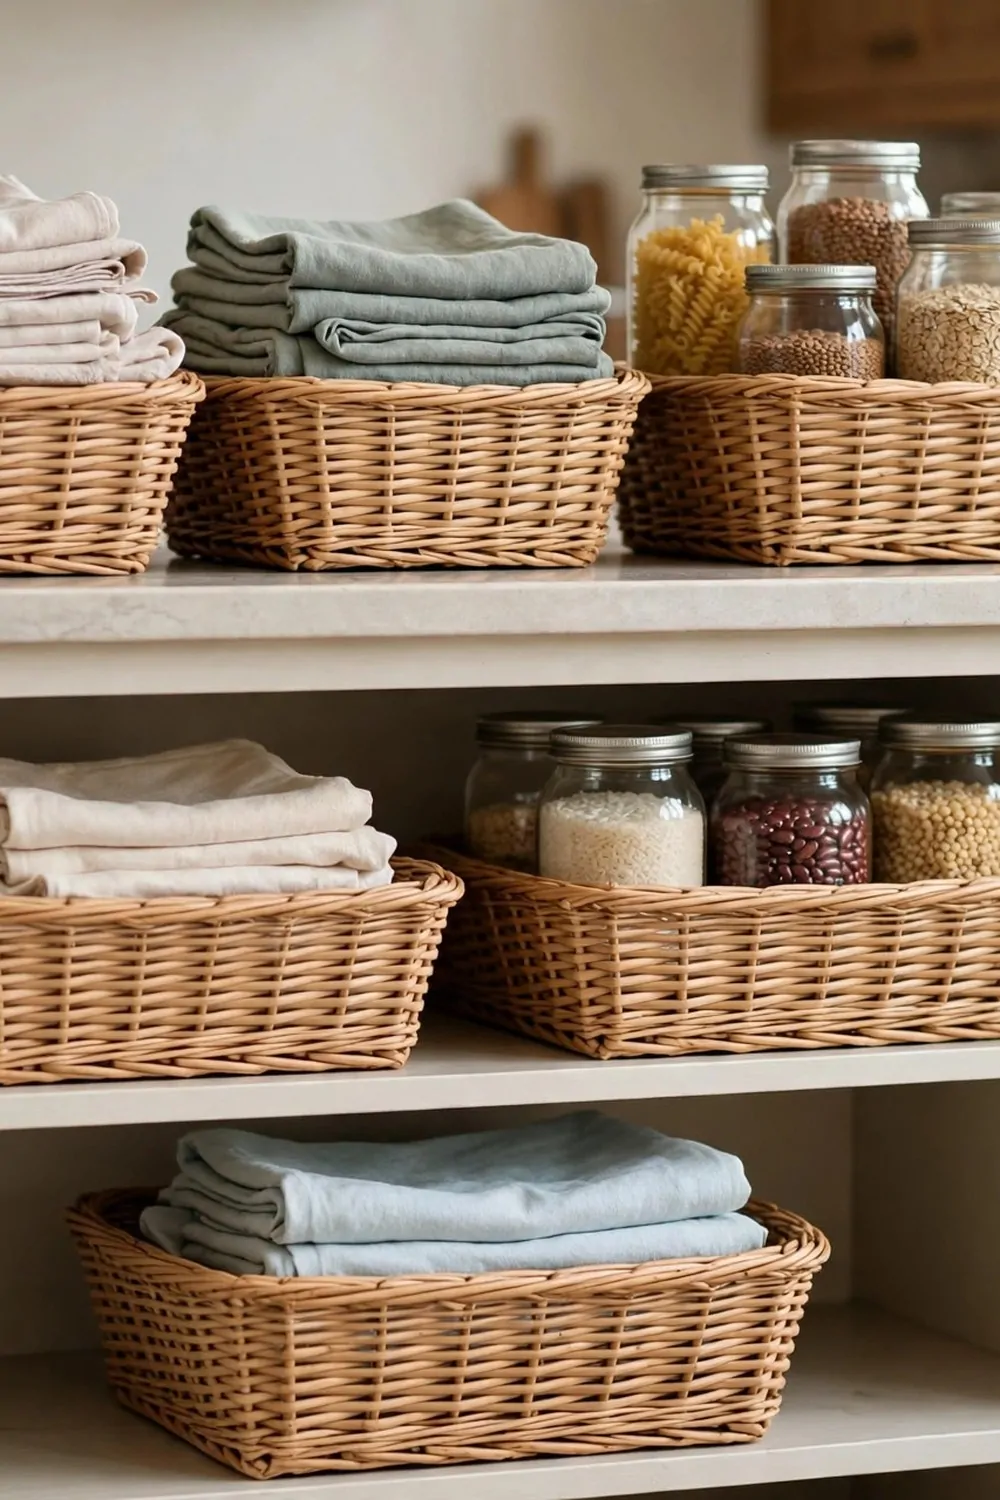
Open shelves on my island hold wicker baskets. The baskets hide the clutter. The shelves still look open and airy.
I use one basket for linens. One holds dry food like rice and pasta. One holds the stuff I use every day.
Wicker feels warm. It softens the hard lines of the island. It makes the kitchen feel like home.
Pick baskets that fit the shelf. Leave a small gap on top. You need room to lift things out.
I put a label on each basket. A small tag on the front. It helps everyone in the house.
Dust the baskets once a week. Wicker can catch dust in its weave. A damp cloth works well.
Mix basket sizes if you like. Big ones at the bottom. Small ones up top. It looks natural that way.
If a basket gets worn, swap it out. Baskets are cheap. Your shelves will always look fresh.
Labelled Bins Inside Island Cabinets
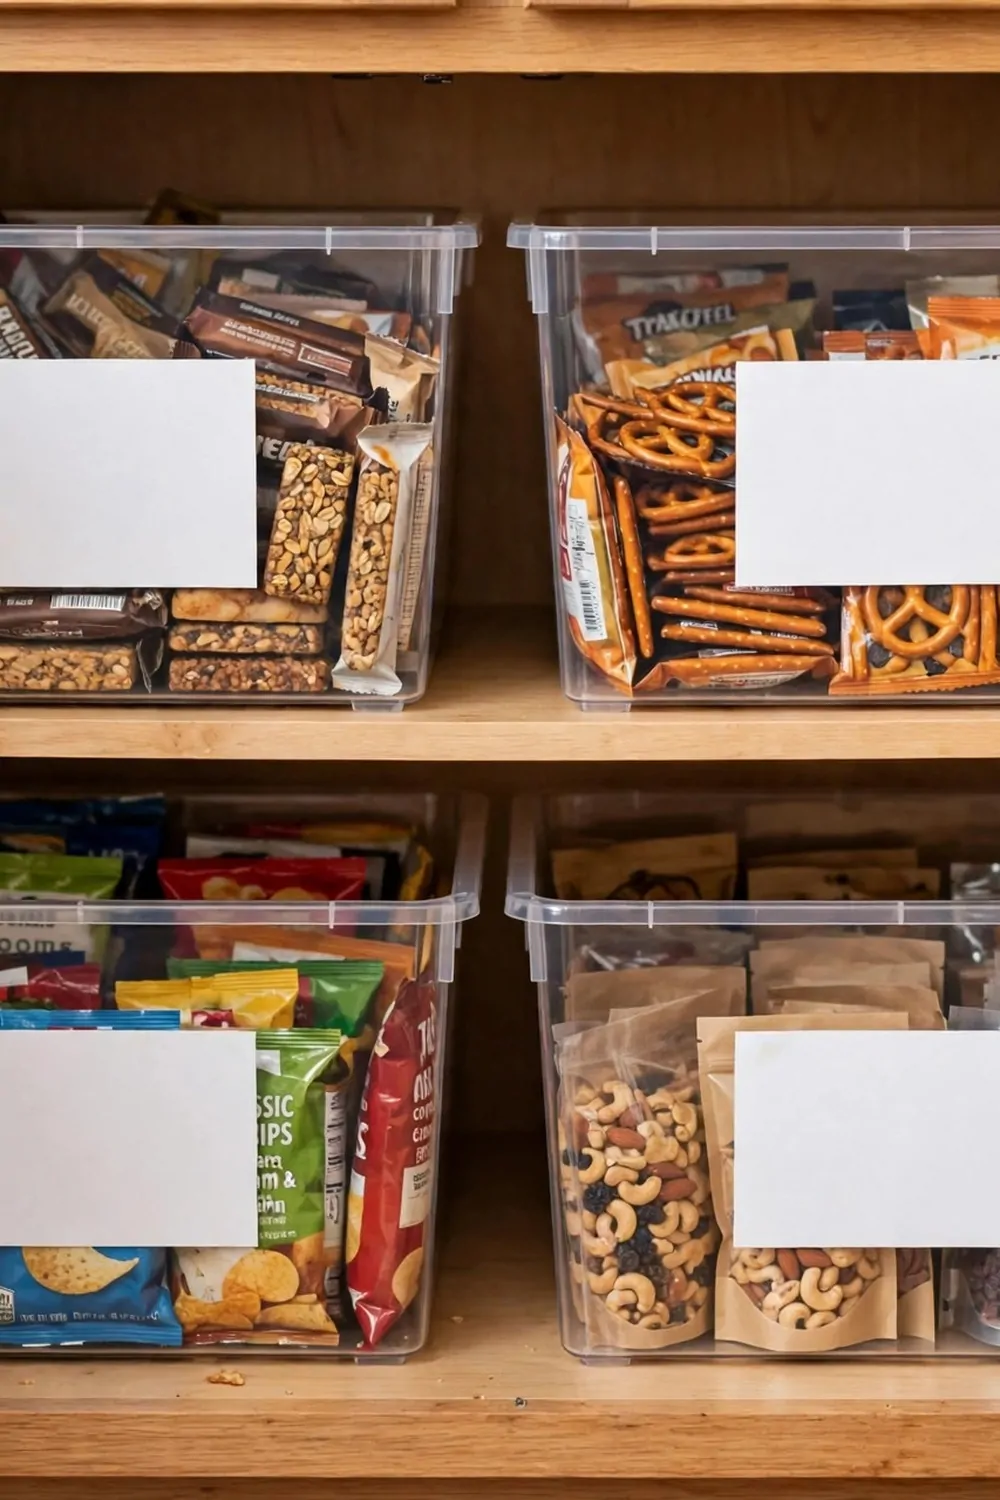
I label everything inside my island cabinets. It sounds picky. It saves me so much time.
Clear bins show what is inside. The label tells you where it goes back. Snacks in one bin. Packets in another.
I use plain white labels. Nothing fancy. A marker and a sticker is all you need.
The kids can find their own snacks now. They can put things back too. The labels do the teaching for me.
Keep the labels short. One or two words. “Snacks” is enough. “Pasta” is enough.
Put the label on the front of the bin. It should face out when the cabinet opens. That is the whole trick.
I re-label when things change. A sticker peels off easy. A new one goes on in seconds.
Clear bins also show when you are running low. You see the empty space. You add it to the shopping list.
Start with one cabinet. Label three bins. You will want to do the rest by the end of the day.
Pull-Out Table for Extra Seats
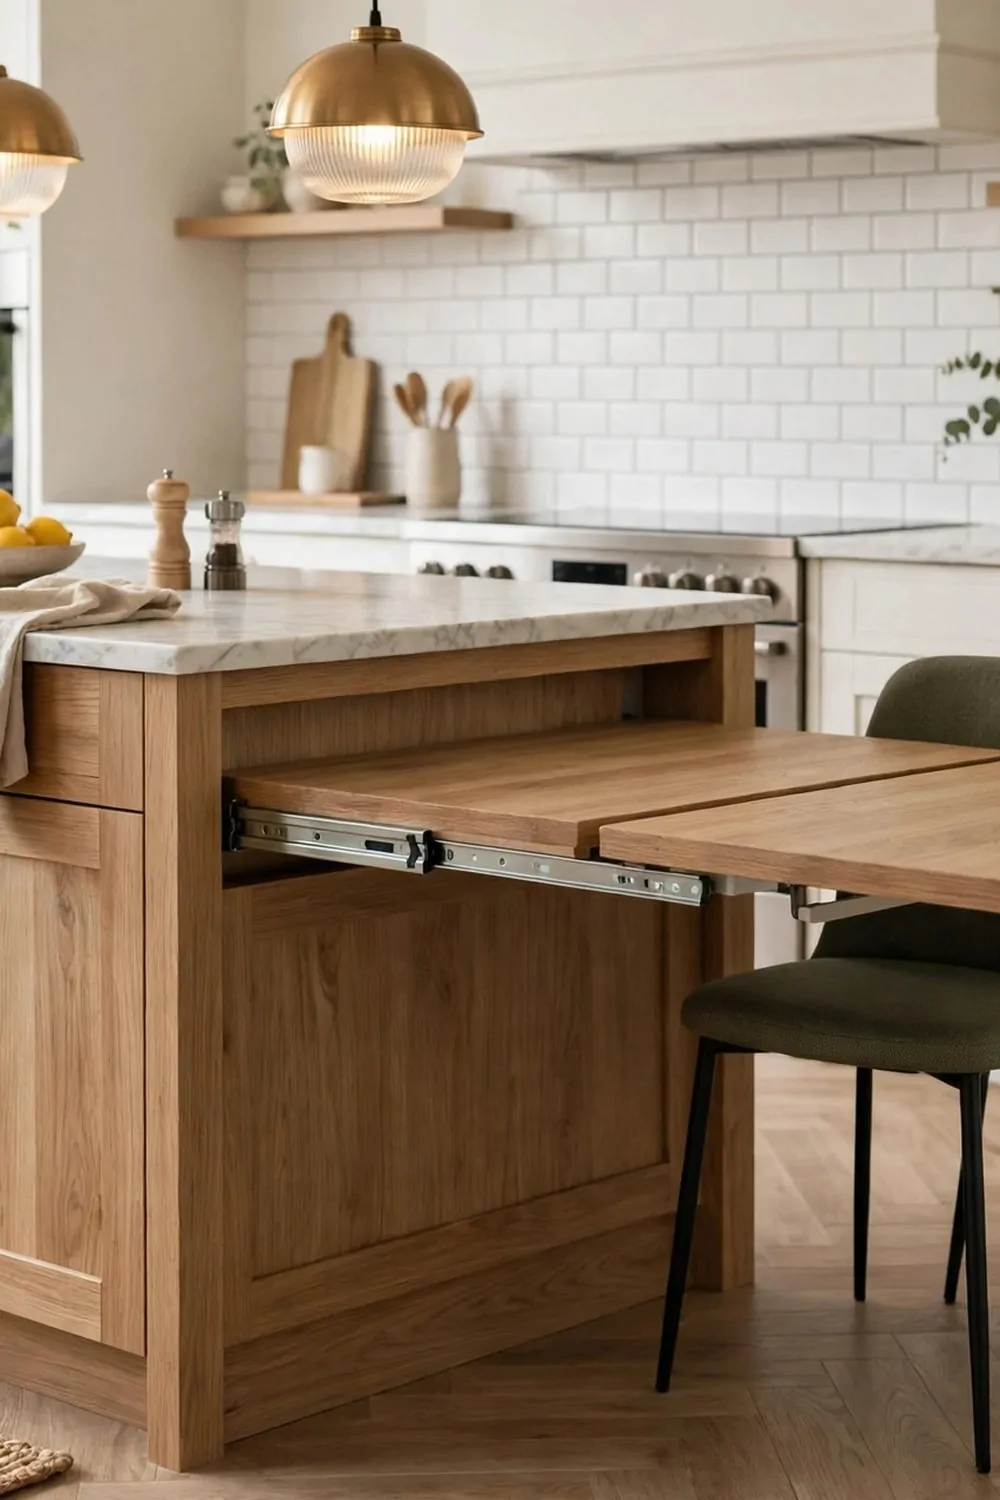
My island has a table that pulls out from the side. It hides away when we do not need it. It slides out when friends come over.
Two extra chairs tuck beside it. We seat four people at the island. On a normal day it seats two.
The pull-out top is the same height as the counter. It feels like one long table. No one notices the join.
I keep the chairs folded nearby. They lean against the wall. I grab them when the table comes out.
This is perfect for small kitchens. A full table would eat the whole room. A pull-out one gives you seats only when you need them.
Check the slide rails once in a while. A drop of oil keeps them smooth. A stiff rail is no fun.
Kids do homework at the pull-out table. I cook at the counter. We are together but out of each other’s way.
Push it back in after dinner. The kitchen feels big again. That is the magic of it.
Far Side Storage for Rarely Used Things
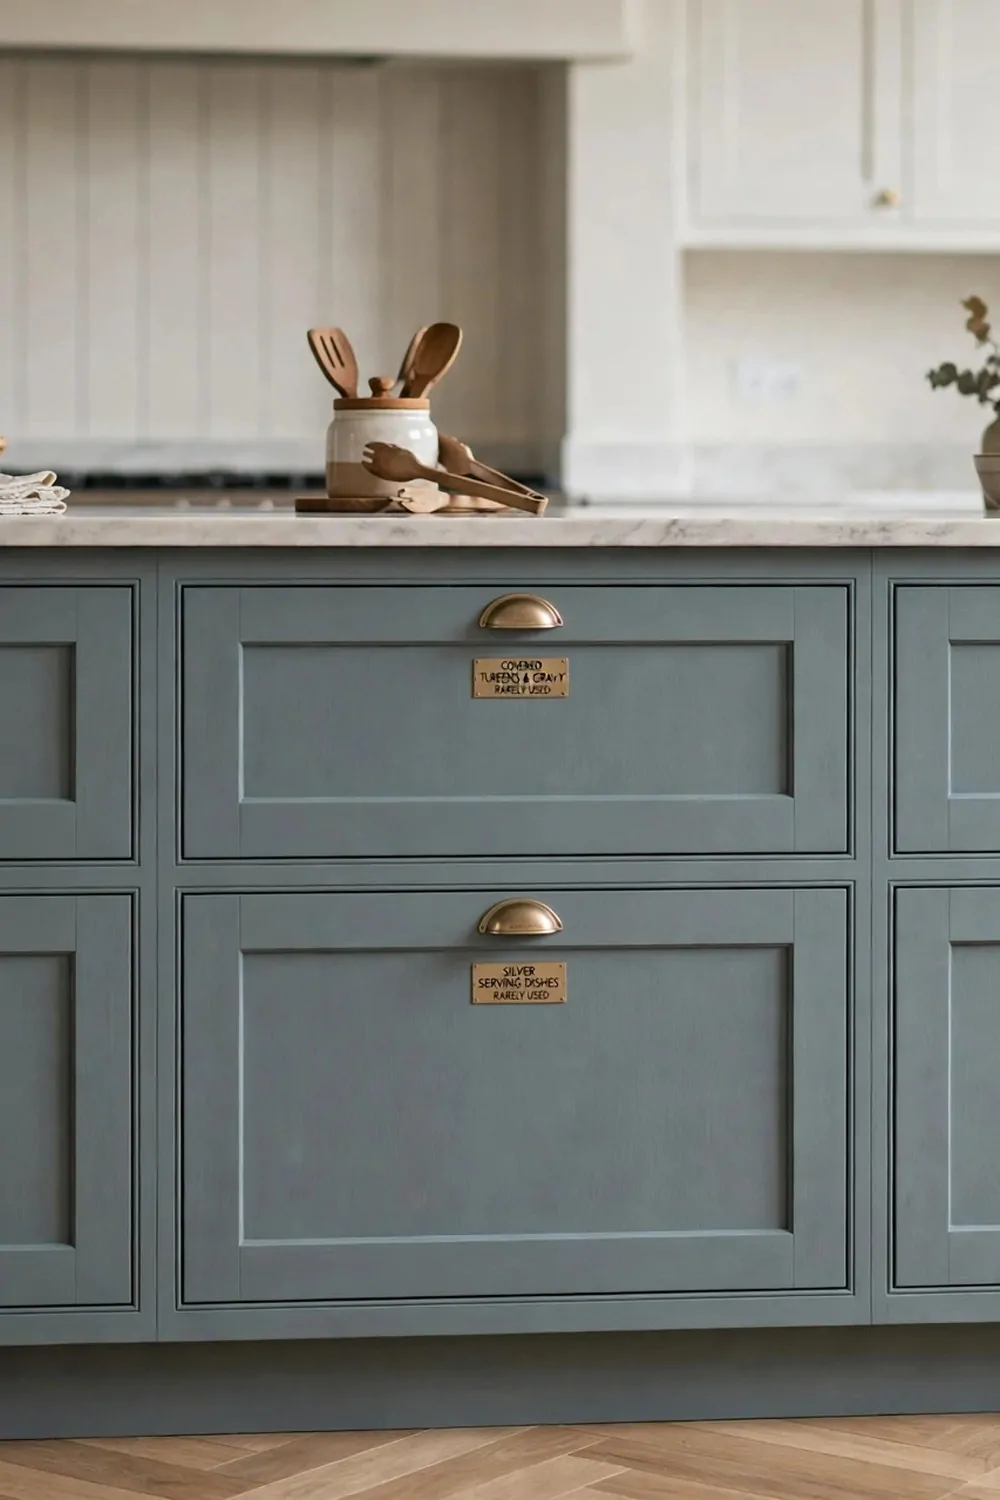
The far side of my island is the side no one sees. I use it for things I rarely touch. It is perfect for that.
Big serving dishes live there. So does the turkey roaster. And the punch bowl I use twice a year.
These things are bulky. They would crowd the cabinets I use every day. Out of sight is the right place for them.
I open that side maybe once a month. That is fine. The stuff inside does not mind waiting.
Put the heaviest items at the bottom. The light ones go up top. It keeps the cabinet safe and easy to reach.
I keep a small list on the inside of the door. It tells me what lives where. I do not have to dig around.
Wrap fragile dishes in cloth before you store them. It stops chips and scratches. They will last for years.
This trick frees up your best cabinets. The everyday stuff gets the easy spots. The rare stuff gets the far side.
Under Counter Lighting So You Can See
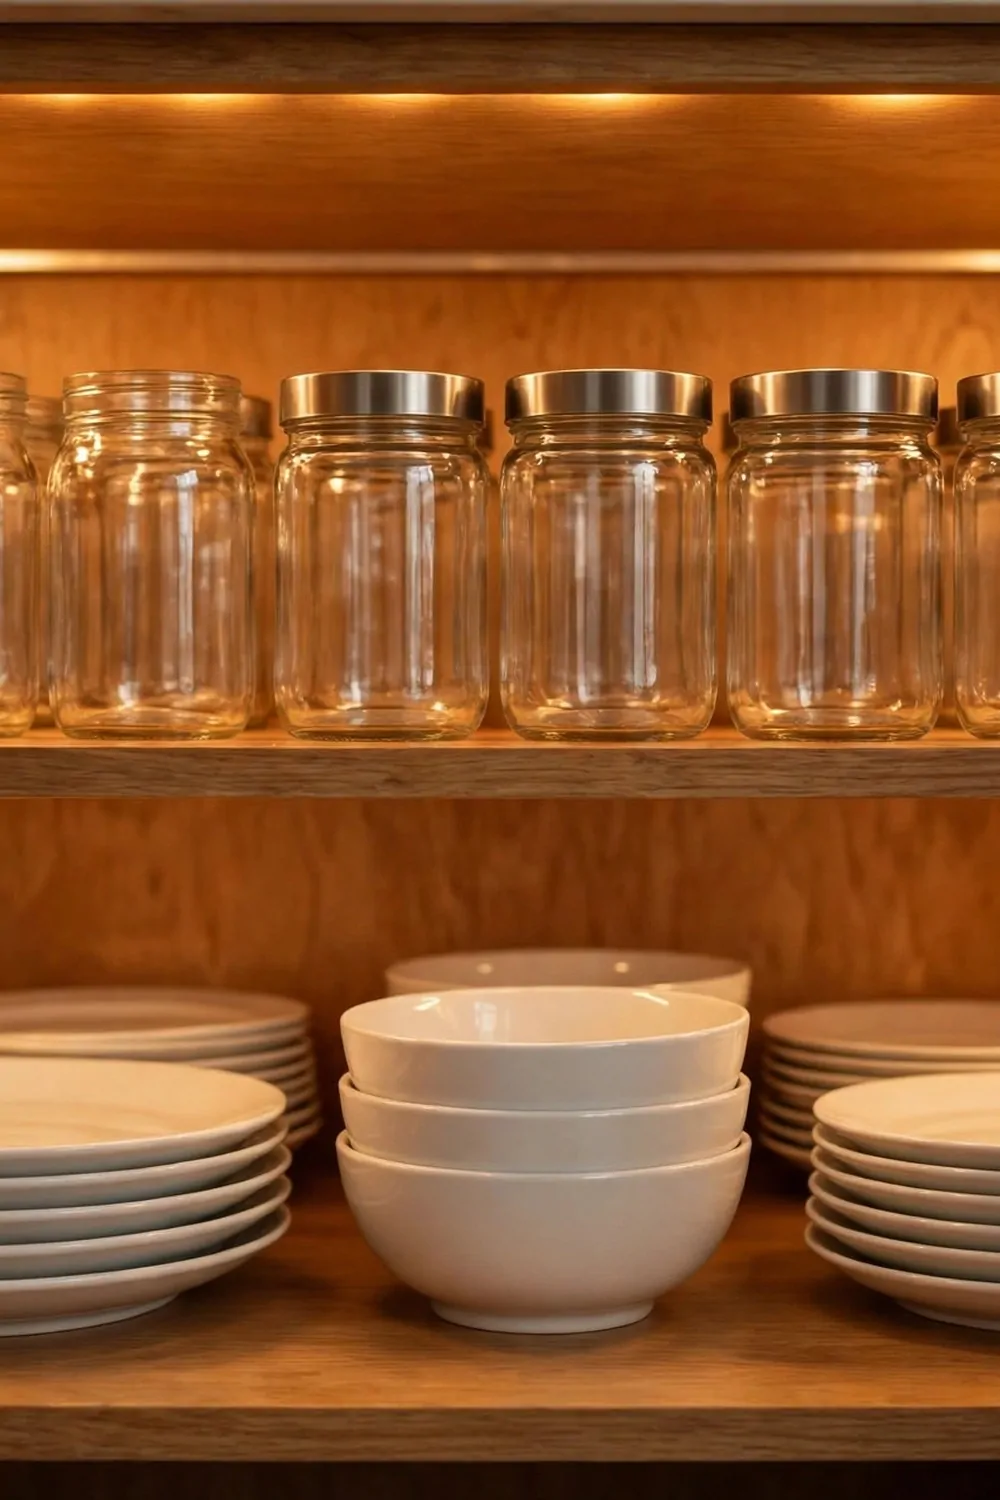
I added small lights inside my island cabinets. Now I can see everything. No more dark corners.
The lights turn on when I open the door. They turn off when I shut it. I do not even think about them.
Warm light looks best. It makes the jars and dishes glow a little. The kitchen feels cozy at night.
Battery lights work fine. You stick them under the shelf. No wires, no fuss.
I put one strip in each cabinet. The deep ones got two. The light reaches all the way to the back.
You will be surprised what you find. I found a jar of jam I forgot about. It was still good.
The lights also help at night. I open a cabinet for a glass of water. I do not need to switch on the big kitchen light.
Change the batteries every few months. Or use lights you can charge. Either way, it is a small job.
Good light makes a small kitchen feel bigger. You see your space. You use your space better.
Measure First Before You Buy Anything
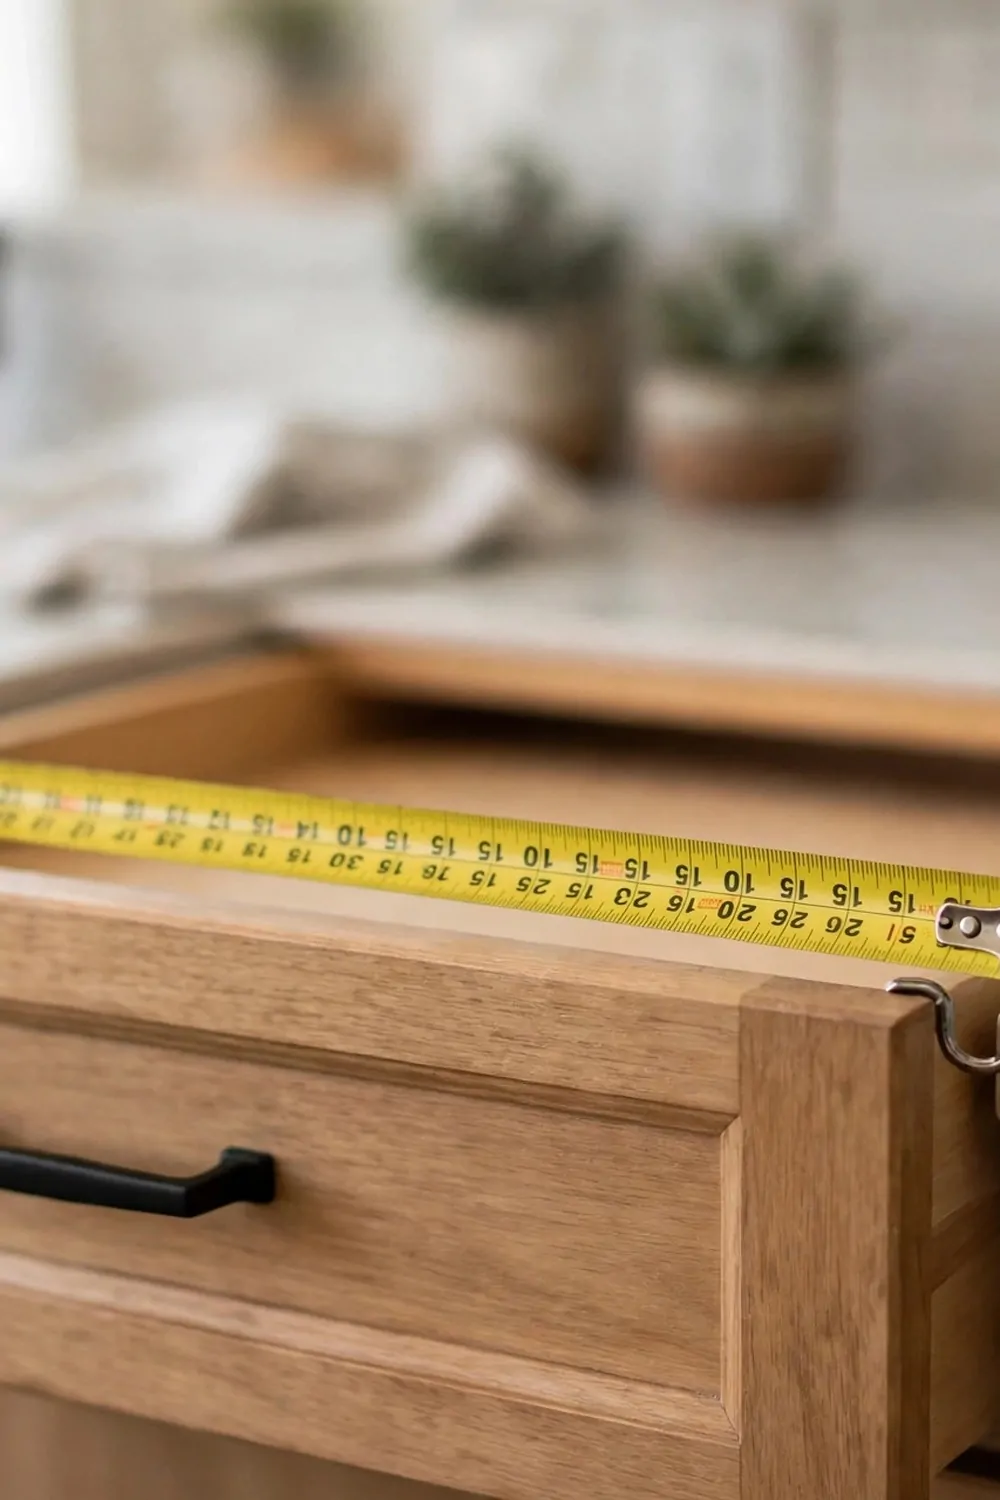
I learned this the hard way. I bought baskets that did not fit. They sat in a bag for a month.
Measure first. Always. A tape measure and a notebook are all you need.
Write down the width of each drawer. Write down the depth too. Height matters most of all.
Measure twice before you order anything. Numbers can fool you. A second check takes ten seconds.
I keep my notes in a small notebook by the island. Every drawer has its own page. I add to it when things change.
Leave a little room around each basket or bin. Things need space to slide in and out. Tight is not good.
This small-island size guide helps you plan. It shows what fits in each length.
| Island length | Seats | Storage it fits |
|---|---|---|
| 4 feet | 2 seats | 2 drawers and 1 cabinet |
| 6 feet | 3 seats | 4 drawers and 2 cabinets |
| 8 feet | 4 seats | 6 drawers and 3 cabinets |
A small island can still hold a lot. The guide shows you how much. Use it before you shop.
Measure the doorways too. A big island part has to get into the kitchen. I almost forgot that once.
Take your notebook to the store. Or keep it open on your phone. Shop with your numbers in hand.
Good measuring saves money. It saves trips back to the store. It saves that sad bag of baskets that do not fit.
Keep Reading
If you liked these island ideas, you will love these next. They are full of the same simple kitchen feeling, just in different corners of the room.
- 25 Small Kitchen Ideas You’ll Wish You Knew Sooner
- 26 Kitchen Design Layouts That Look Stunning and Work Hard
- 27 Home Decor Ideas Living Room and Kitchen Looks That Match
- 26 Modern Home Decor Updates That Look Instantly Fresh
Pick one drawer and start there. Just one. Empty it, sort it, and put back only what you use. Your island will feel calmer before you know it.