25 Small Kitchen Ideas You’ll Wish You Knew Sooner

My first kitchen was the size of a closet. I am not even joking. You could stand in the middle, stretch your arms out, and touch both walls. It had one tiny window, a sink that dripped, and a stove that only heated on one side. I cooked in that kitchen for two whole years.
I made every mistake you can make in a small space. I bought a giant food processor that lived on the counter forever because it never fit in a cupboard. I stacked pots inside pots inside pots until the whole tower fell over and dented my favourite pan. I gave up on the top shelf of my cabinet because I could never reach it, so all my baking stuff just vanished up there.
Then a friend showed me her own tiny kitchen. It was the same size as mine, but it felt twice as big. She had tricks I had never even heard of. I am not kidding when I say I stood there with my mouth open. That day changed how I saw small kitchens.
Everything below is what I wish someone had told me back then. Small Kitchen Ideas that actually work in real, small, rented or owned kitchens. No big remodel. No giant budget. Just clever moves that make a tiny kitchen feel calm and easy to cook in.
1. Run Your Cabinets All the Way to the Ceiling
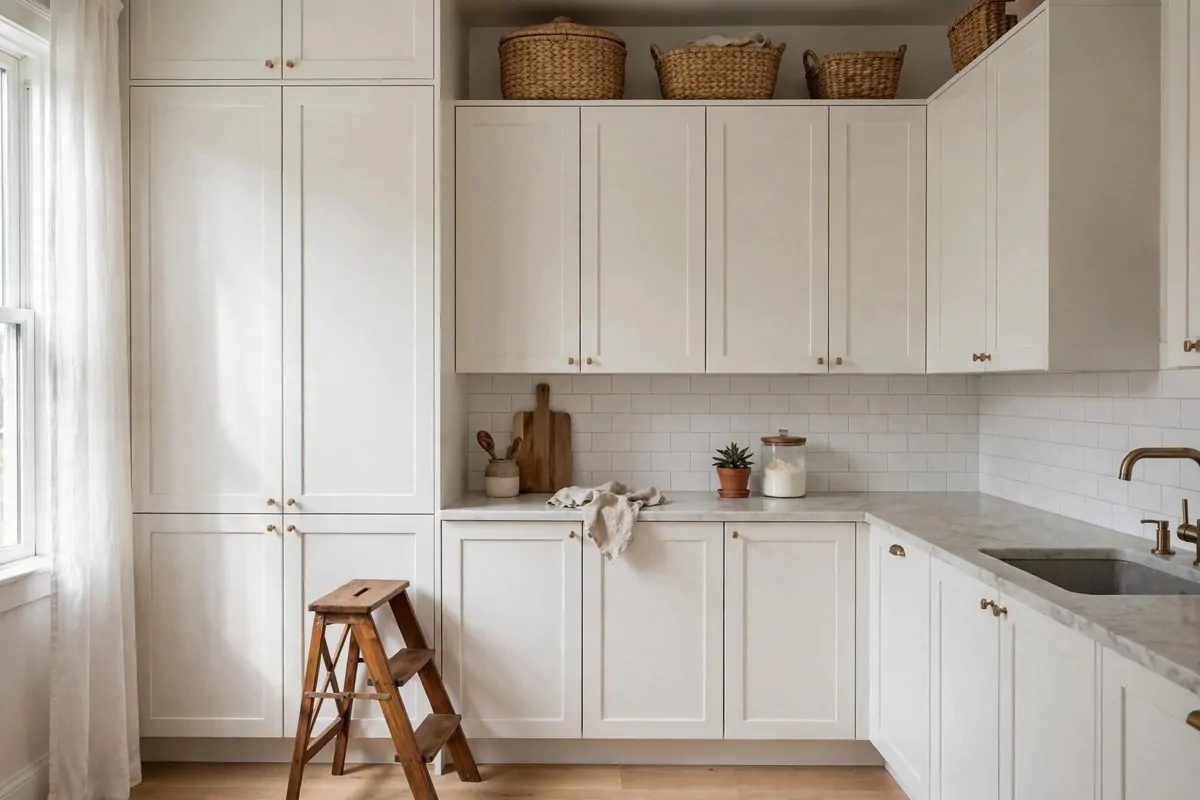
Most small kitchens have cabinets that stop halfway up the wall. Then there is a sad empty gap above them, and it fills with dust and random boxes. I did not know this at first, and I thought that gap was just how kitchens were.
Look up right now. That space between your cabinets and the ceiling is storage you already own. It just needs doors. When cabinets run all the way up, you gain a full extra shelf of room. That is where I keep my serving bowls, the blender I rarely use, and holiday baking pans.
You do not need new cabinets to do this. Some people add a matching top cabinet if the brand is still sold. Others just add a simple shelf with doors on top of the old ones. I used a cheap wall cabinet from a second hand shop once. It looked fine.
Tall cabinets also make the room look bigger. Your eye goes straight up and the ceiling feels higher. It is a small trick, but it works every time. My kitchen felt taller the same day the cabinets went up.
Keep the top shelf for things you grab once a month. Step stools help a lot. I keep a little folding step stool inside the pantry door. It takes up no room at all.
Put your least used items up high. Party plates. The big stock pot. That bread maker someone gave you. Keep daily things at arm level. This is the simple rule that keeps tall storage from becoming a mess.
| What to store | Where |
|---|---|
| Daily plates and cups | Eye level |
| Spices and oils | Near the stove |
| Rarely used gadgets | Top shelf |
| Cleaning supplies | Under the sink |
One warning: label the boxes you put up there. I did not do this at first, and I forgot what was inside every single box. Little labels saved my sanity later.
2. Build an Appliance Garage
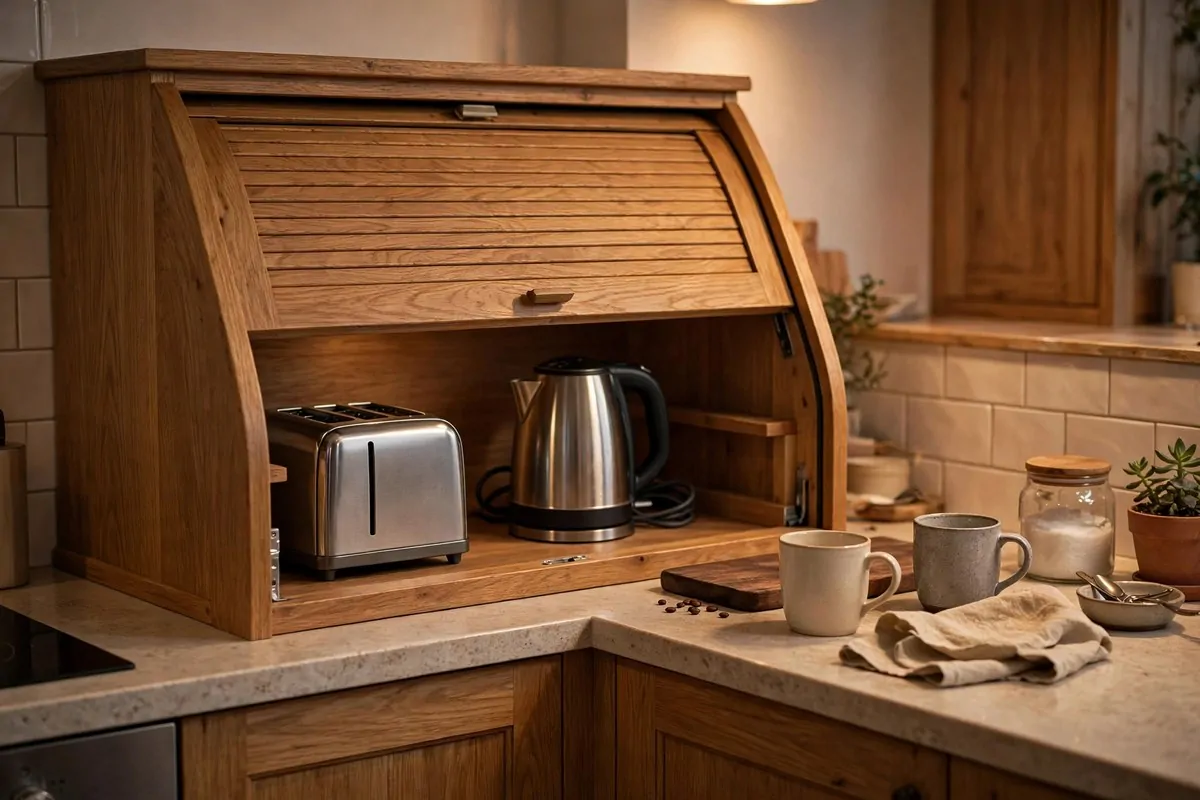
Your counter is tiny. So why do three appliances live on it all day? My toaster sat out for a whole year, and I used it maybe twice a week. That one little box ate up a whole corner of my counter.
An appliance garage is just a small cabinet that hides your gadgets. The front rolls up or opens like a door. You close it when you are done, and the counter looks clean again. It feels like magic the first week.
You can buy one that sits on the counter. Mine cost less than a takeaway dinner for two. It holds my kettle and toaster, and it matches my cabinets. When guests come, I just roll the door down and everything looks tidy.
The best spot is near a plug. Sounds obvious, right? I moved mine twice before I figured that out. Put the garage right where the outlet is, and you never drag cords across the counter.
Keep only the appliances you use in there. If you have not touched the sandwich maker in six months, let it go to a new home. Small kitchens punish clutter. I learned that the hard way.
Inside the garage, keep a little tray under the kettle. Kettles drip. A small tray catches it and wipes clean in one move. This one trick keeps the inside of the garage from getting sticky.
This idea works for the coffee maker too. I keep mine next to the mugs in the garage. Morning me just opens the door and everything is right there. It feels like a tiny cafe corner.
Some people put their garage in a corner cabinet. Corners are often wasted space, so that is smart. Just make sure the door can open fully without hitting the wall next to it.
3. Swap Upper Cabinets for Open Shelves
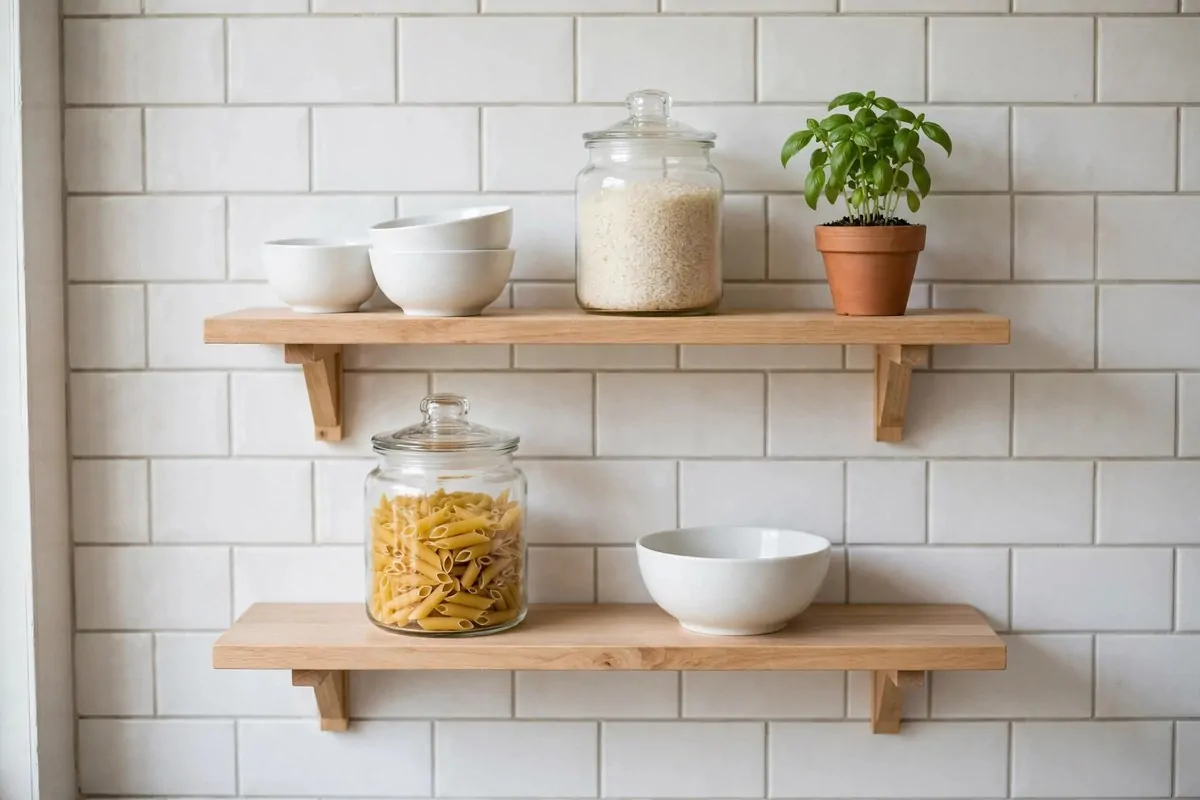
Upper cabinets can make a tiny kitchen feel dark and boxed in. Big solid boxes hang over your head. I used to bump into mine every single day, and I am not even tall.
Open shelves changed the whole mood of my kitchen. When I took down one cabinet and put up two wooden shelves, the room suddenly felt twice as wide. Light moved across the wall. It was the cheapest big change I ever made.
You can reach everything faster too. No more opening three doors to find a mug. I see my plates, I grab my plates. My morning routine got shorter, honestly. That is a small joy but it counts.
Only put pretty things on the shelves. This is the real rule. White dishes, glass jars, a little plant. Things you actually use and like looking at. My shelves hold my everyday plates, my cereal bowls, and jars of pasta and rice.
Keep it to two or three shelves max. More than that and it starts looking like a shop. I learned this from a photo I loved online, and it is true in real life too.
Dust is the one downside. Open shelves need a quick wipe now and then. I wipe mine when I do the counters. It takes one minute, so I do not mind.
Put heavier things on the lower shelf. That keeps them easy to lift and safe. Light things like mugs and small bowls go up top. I put my rarely used vases way up high.
If you rent and cannot remove cabinets, just take the doors off one cabinet. Same airy feeling, no landlord trouble. I did this in my rental and nobody noticed the difference.
| Shelf level | Best for |
|---|---|
| Bottom | Everyday plates and bowls |
| Middle | Mugs, jars, oils |
| Top | Vases, rarely used items |
4. Hang a Pot Rack from the Ceiling
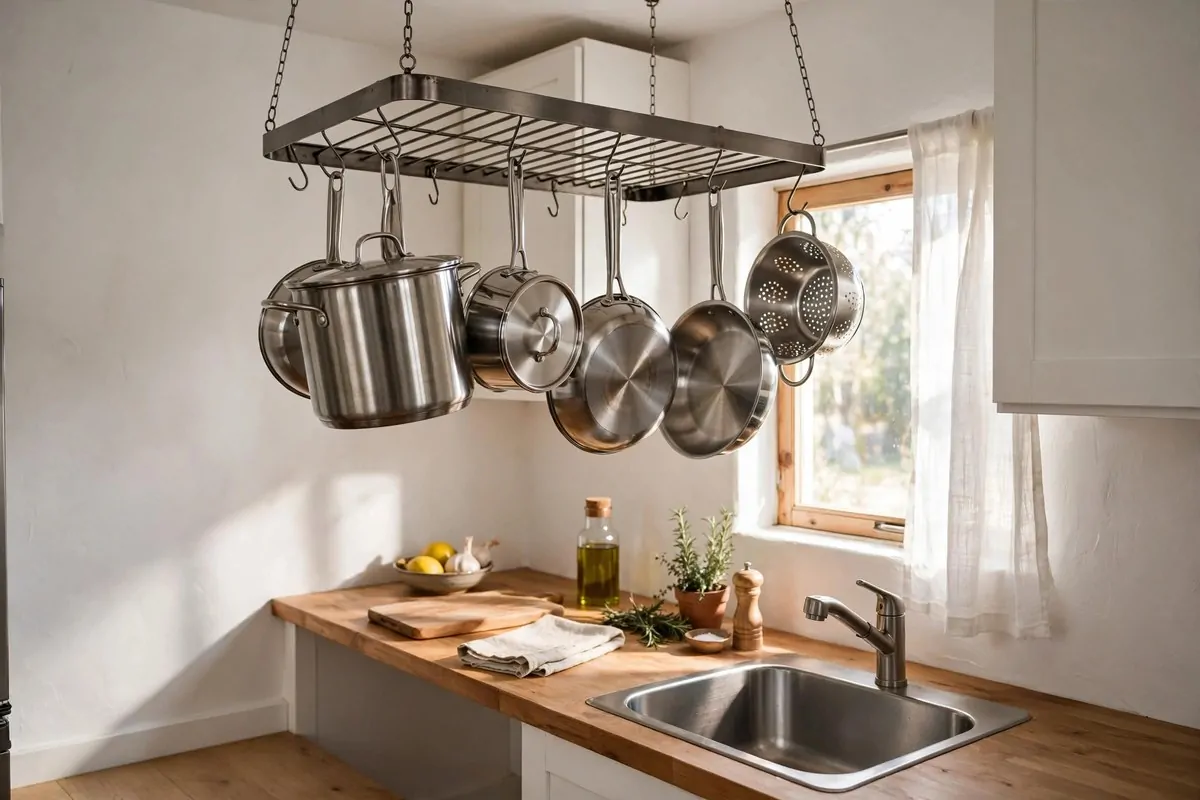
My pots were a nightmare before I got a rack. They lived in a deep cabinet, stacked like a puzzle. Every time I needed the small pan, I had to move four big ones first. It made me want to order takeaway instead of cooking.
A hanging rack moved all of that up into the air. My pans now hang above the counter where I can see them and grab them. It freed up an entire cabinet. I put my baking sheets in there instead.
Pick a spot over an island, a counter, or even the sink. You need strong ceiling beams to hold the weight. Pots are heavy. If you are not sure, ask someone handy to check. Safety first here.
I chose a simple rail style rack. It cost little and holds six pans. Some people love the big round racks. Those look nice too, but a rail fits small kitchens better. It takes up less visual space.
Hang the pans you use most where you can reach them. Put the big stock pot in the middle because it is the heaviest. Little saucepans go on the ends. This keeps the weight balanced and easy to grab.
Wipe your pans before hanging them. Greasy pans drip onto whatever is below. I keep a small cloth in a drawer just for this. Thirty seconds of wiping saves a lot of scrubbing later.
A rack also becomes a nice decoration. Shiny pans look warm and homey hanging there. My kitchen felt more like a real kitchen the day I put mine up. Guests always ask about it.
Not a fan of ceiling racks? A wall rail works too. Same idea, just on the wall by the stove. I have seen tiny kitchens where this looks amazing.
5. Get the Microwave Off the Counter
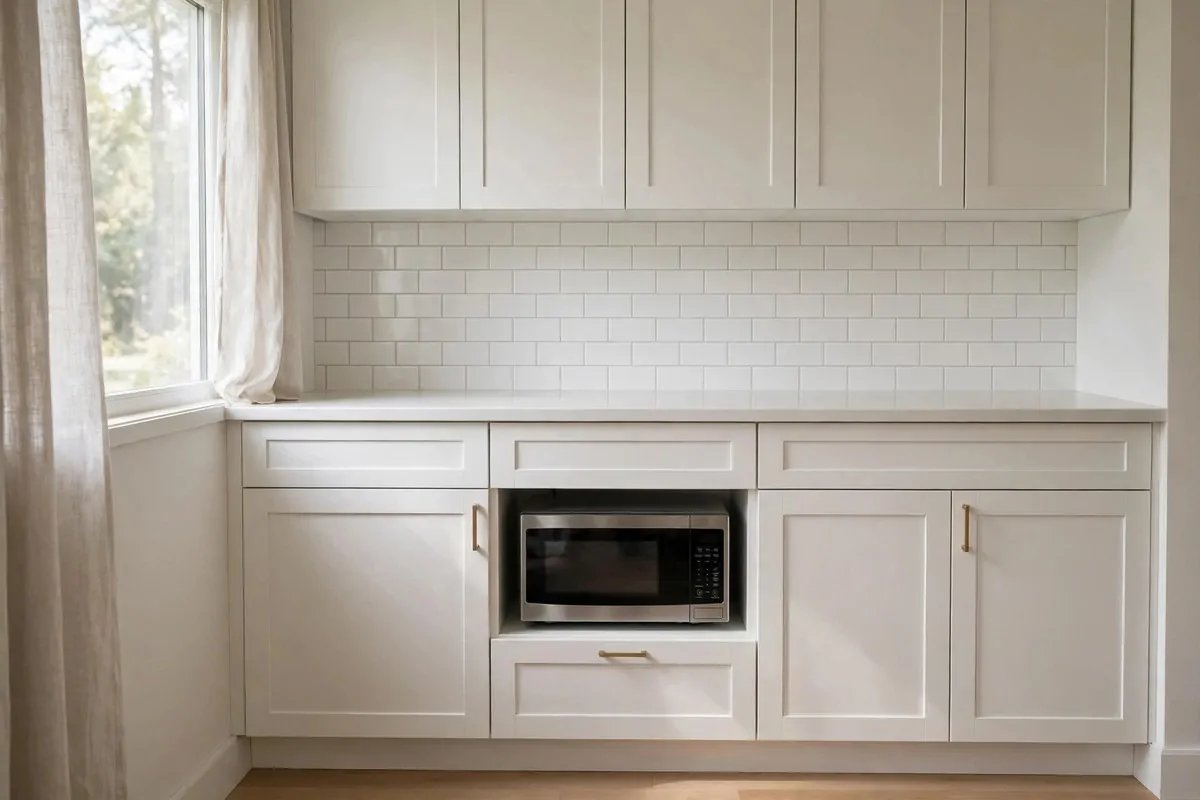
Microwaves are huge. Nobody tells you this when you buy one. Mine took up almost a whole corner of my counter for years. I had about one foot of workspace left, and I pretended that was normal.
Moving it off the counter gave me my kitchen back. I put mine on a small shelf inside the lower cabinets. It works exactly the same. I just open a door now instead of looking at a big box all day.
You have a few good spots to try. Above the stove works if the vent allows it. Inside an appliance garage works great. A low cabinet with a shelf at waist height is my favourite. No bending, no stretching.
Measure your microwave before you buy the shelf or cabinet. I almost bought one that was two inches too small. Measure twice, buy once. Write the numbers on your phone so you have them at the shop.
Keep the door of the cabinet open when the microwave runs if it is fully enclosed. Microwaves need air flow. I leave the door ajar during use. It is a small habit and easy to remember.
A small shelf above the fridge can work too. The top of the fridge is often dead space. If your microwave fits there safely, you just gained a whole counter corner back. Check that the fridge can hold the weight first.
If you hardly use the microwave, think about letting it go. I know, scary thought. But some people realise they only heat leftovers in it. The stove does that too. I kept mine, but my sister gave hers away and never missed it.
6. Stick Up a Magnetic Knife Strip
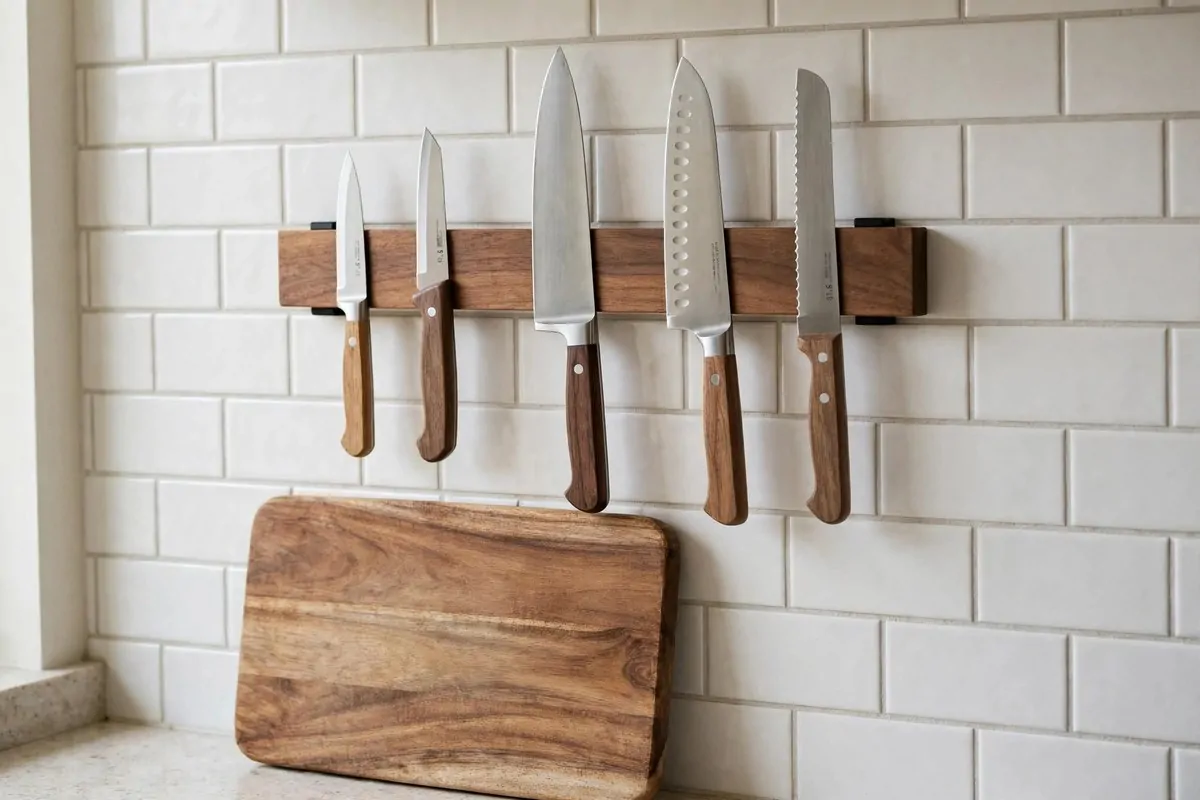
Knife blocks eat counter space. Mine was big and ugly, and it only held five knives. Then I learned about magnetic strips, and the block went straight to the donation box the same week.
A magnetic strip is a slim bar you mount on the wall. Your knives just stick to it. It takes up zero counter space and zero drawer space. It feels a bit like a magic trick every time a knife clicks onto it.
Mount it where you prep food, but away from little hands. I put mine on the side of a cabinet near my cutting board. The knives are right where I work, but high enough that kids cannot reach. That balance matters.
You can also stick metal spice tins to a strip. That is a bonus trick I love. Little tins with clear lids hold spices and stick right to the wall. It looks cute and saves a whole shelf.
Choose a strip with a wood or steel face. Cheap ones work fine. Just check the magnets are strong. A knife should hold firmly and not slide down slowly. Test it at the shop if you can.
Keep the blades facing up when you hang them. That protects the sharp edge from hitting the strip. I ruined one good knife by hanging it blade down for a month. Lesson learned the sad way.
Clean the strip now and then. Metal dust and tiny food bits stick to magnets. A damp cloth wipe once a month is plenty. Mine stays clean with almost no effort.
7. Add a Skinny Ledge Above the Stove
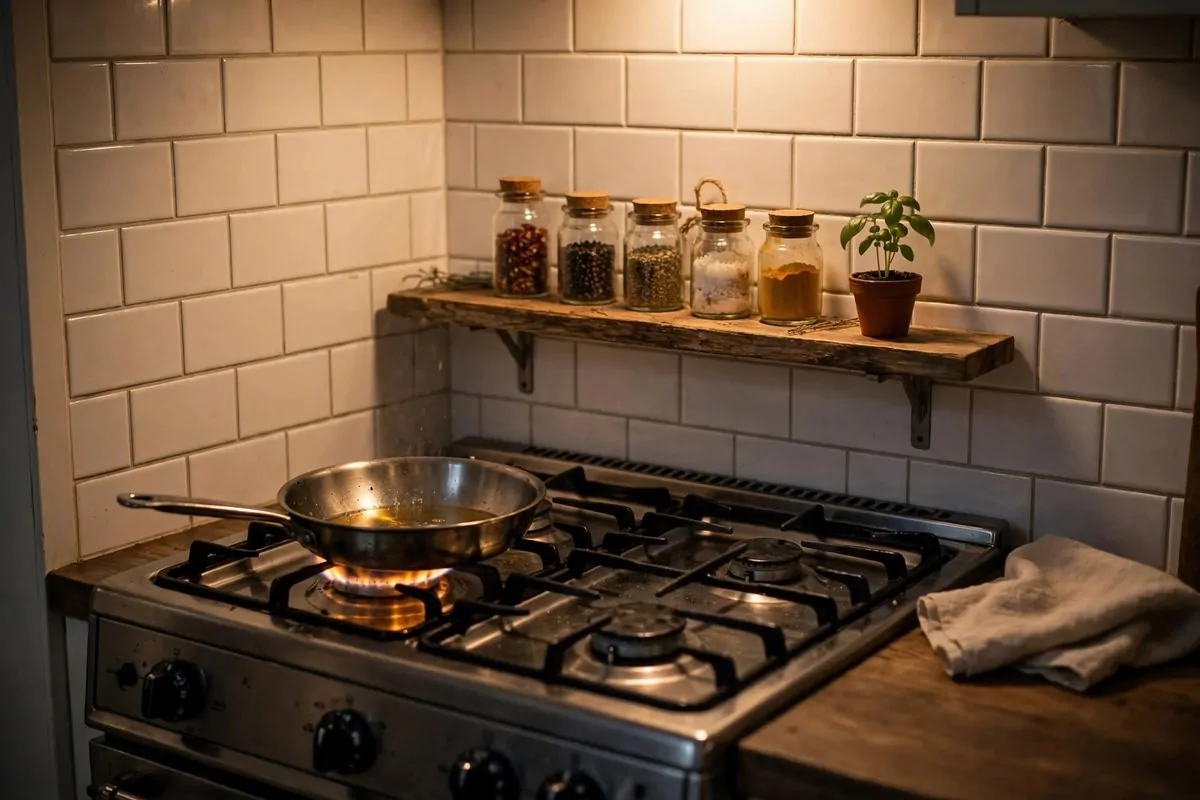
The wall above my stove was empty for ages. Just blank tile. Meanwhile my spices lived in three different cupboards, and I could never find the cumin. Sound familiar? It drove me a little crazy.
A skinny shelf above the stove fixed it in one afternoon. Now my everyday spices and oils sit right there in a neat row. I cook faster because everything is in reach. It is one of the simplest small kitchen ideas I know.
Use a shelf no wider than your hand. About four inches is perfect. Anything deeper gets in the way of tall pots. I measured my tallest pot first, then mounted the shelf above it. Plan around your cooking, not the other way.
Heat rises, so keep delicate things away. Spices are fine on a low shelf a bit higher up. Cooking oils too. But do not put plastic bottles right over the flame. I keep mine to the side of the burner, not directly above it.
Wood or metal both work. Wood looks warm and homey. Metal wipes clean easier and handles heat well. I went with a light wood ledge, and it matches my open shelves. It ties the whole wall together.
Anchor it well into the wall. A loaded spice shelf gets heavy. I used proper wall plugs, and mine has held for three years. Do not trust sticky hooks here. This is one spot where screws win.
This ledge is also a nice home for a tiny plant. I have a small basil plant on mine. It looks pretty and I snip leaves right into dinner. Just watch that the heat does not cook it. Mine sits at the cool end of the shelf.
8. Go All White to Bounce the Light
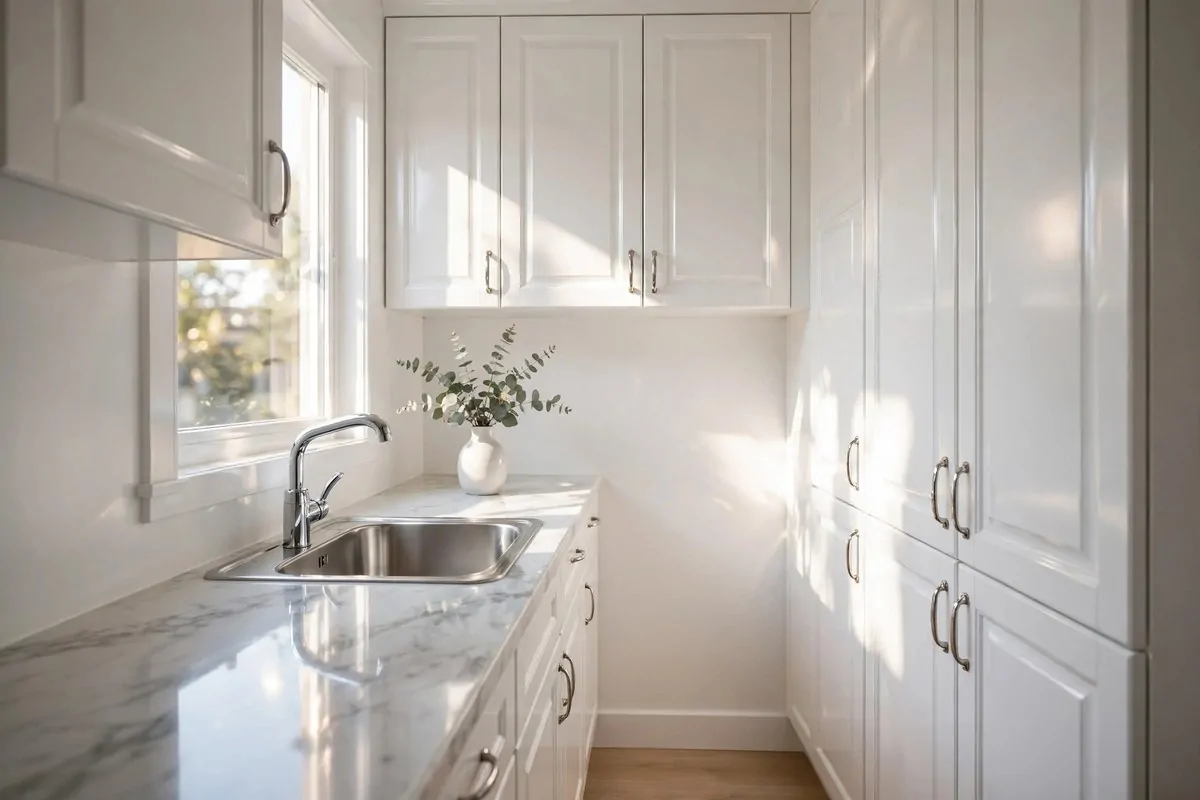
Colour can trick your eyes. Dark colours pull a room in and make it feel close. Light colours push the walls out. My first kitchen had dark brown cabinets, and it felt like cooking inside a cupboard. Painting them white changed everything.
White reflects every bit of light in the room. Sunlight bounces off the cabinets and the walls. Even a small window can light a whole white kitchen. My white kitchen feels cheerful on grey days, and that is worth a lot.
You do not need to paint everything at once. Start with the walls. A fresh white wall is cheap and fast. Then think about cabinet paint when you are ready. I did my walls first and the difference was already huge.
Mix shades of white so it does not feel cold. Bright white walls with warm cream cabinets. A soft off-white ceiling. Little texture keeps it cosy. I added a woven rug runner and wooden cutting boards, and the room felt warm again.
Glossy finishes bounce even more light. Satin or semi-gloss paint on cabinets reflects light like a mirror. My cabinet paint has a soft sheen, and the room glows in the morning sun. It makes me happy every single day.
Keep one warm accent so it feels like home. Wood handles. A brass tap. A green plant. These small touches stop white from feeling like a hospital. My brass handles were the finishing touch I did not know I needed.
White shows dirt, I will be honest. You will wipe the cabinets more often. But you will also see the dirt, which means your kitchen stays cleaner. I call that a hidden win.
9. Slide in a Pull-Out Pantry
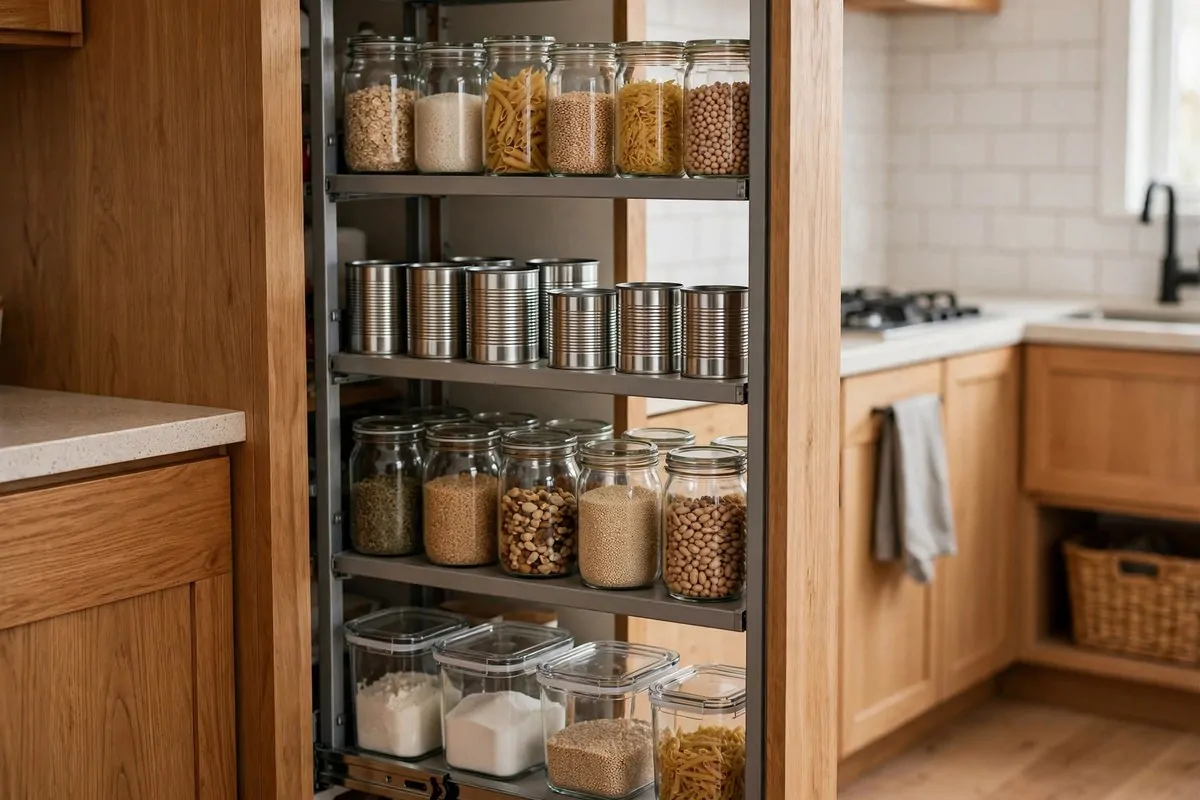
I lost food in my old pantry all the time. Cans hid behind cans. I bought pasta sauce three times because I could not see the two jars I already had. Money and food went straight in the bin.
A pull-out pantry ends that. It is a tall, narrow drawer that slides out of a gap between cabinets. You see everything at once. No more reaching into dark holes. I wish I had known about these years ago.
They come in very slim sizes. Some are only six inches wide. That is the width of your hand. If you have a thin gap anywhere, a pantry might fit there. Measure your gaps and be amazed at what is possible.
Organise it by shelf level. Top shelf for baking things. Middle for cans and jars you use weekly. Bottom for heavy items like big oil bottles. I put labels on the shelf edges so everyone in the house keeps it sorted.
| Pantry shelf | Store here |
|---|---|
| Top | Baking, flour, sugar |
| Middle | Cans, jars, pasta |
| Bottom | Oils, heavy bottles |
Load it from back to front when you restock. New cans go at the back. That way you use the oldest food first. It is the same trick shops use. I waste almost no food now.
If a built-in pantry is too much work, a slim rolling cart does the same job. It slides into the gap and rolls out when you need it. I used one in my rental and it worked great.
Wipe the shelves when you restock. Crumbs and sticky jar rings build up in narrow shelves. A quick damp cloth pass keeps everything fresh. I do mine every few weeks, and it takes five minutes.
10. Park a Slim Rolling Cart in the Dead Gaps
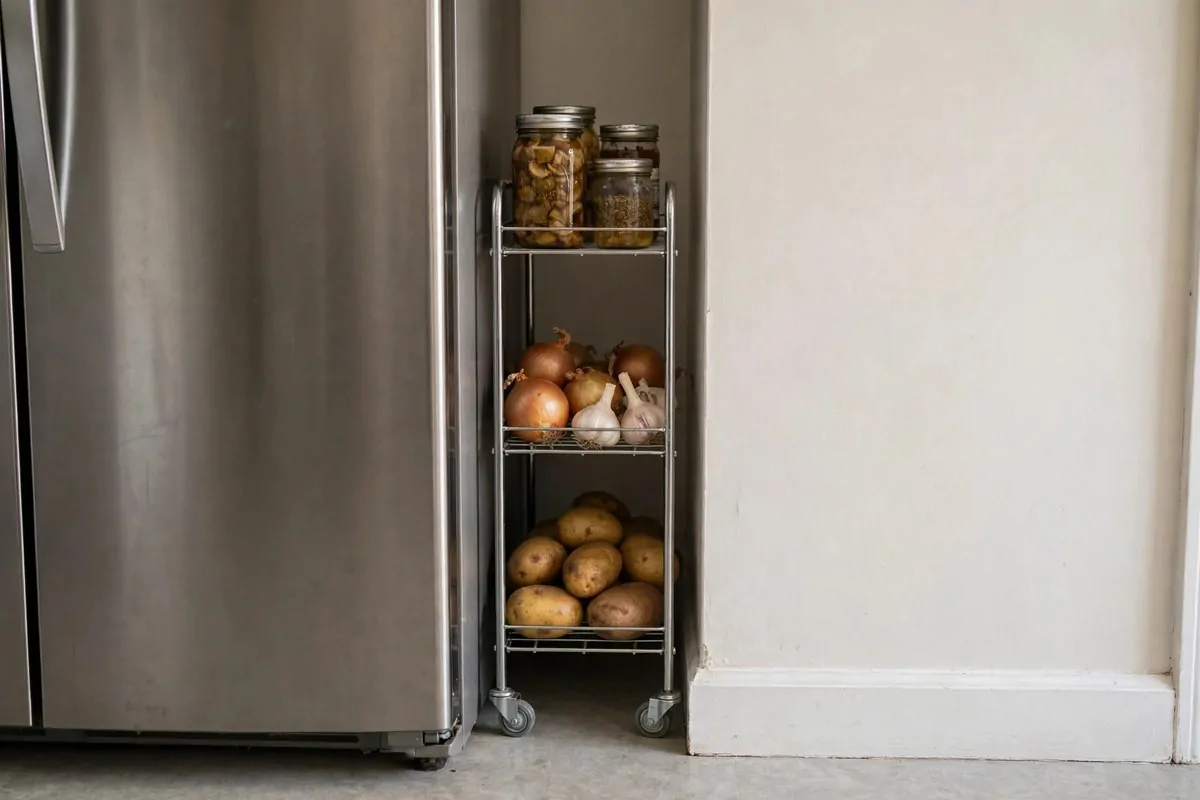
Every kitchen has dead gaps. The space between the fridge and the wall. The sliver next to the oven. I ignored mine for years and just let crumbs collect there. Then I saw a slim cart online and everything changed.
A rolling cart that is only a few inches wide slides right into those gaps. Mine holds vegetables, onions, garlic, and a few bottles. It rolls out with one finger. It is like finding a hidden cupboard you never knew you had.
Wheels matter a lot. Get a cart with good smooth wheels that lock. Mine has little brakes on two wheels. When it is parked, it stays put. When I need it, it glides. Cheap wobbly wheels will annoy you daily.
Use it for things that do not need the fridge. Onions and potatoes love these carts. They like dark, airy spots. I also keep my cooking oils on the middle shelf. Everything cooking related lives together.
The top of the cart can be extra counter space. When I need room to chop, I roll the cart next to me and use its top as a shelf for the bowl. It is not a cutting board, but it holds things close. That helps a lot in a tight space.
Clean behind it sometimes. Carts collect dust in their gaps. I pull mine out once a month and sweep. It takes two minutes. The floor underneath stays clean and the wheels roll smooth.
If the gap is really narrow, measure carefully. Some gaps look bigger than they are. My gap looked eight inches but was only six. I am glad I measured before ordering.
11. Use a Work Table Instead of a Fixed Island
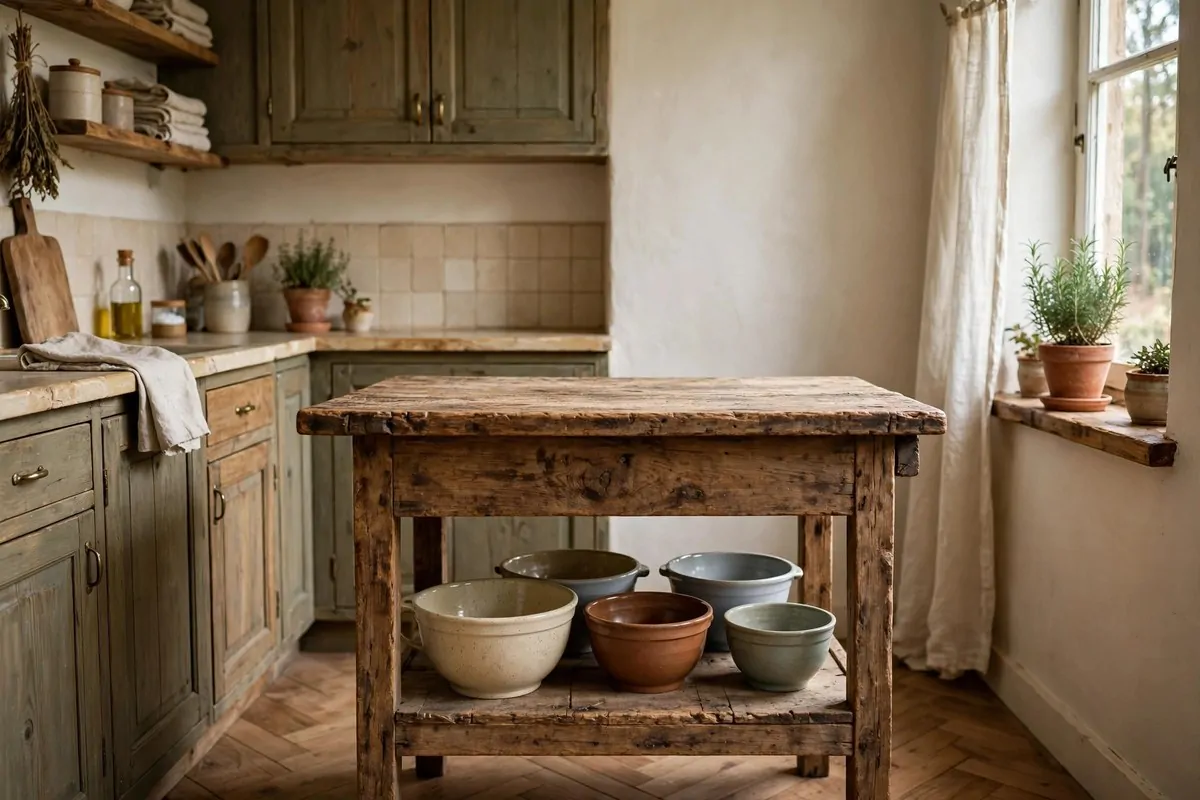
I wanted an island so badly in my first kitchen. I measured the space a hundred times. It never fit. A fixed island would have blocked the door. I felt like I was missing out on the one thing every dream kitchen had.
Then I found a wooden work table at a flea market. It was slim and sturdy, and it cost almost nothing. I put it in the middle of my kitchen. Suddenly I had an island. It was the best kitchen purchase I ever made.
Work tables move. That is the whole magic. Push it against the wall when you need floor space. Pull it out when you are cooking. A fixed island cannot do that. My table lives by the wall most days and comes out on cooking days.
Look for a table with a lower shelf. Mine has one, and it holds my big mixing bowls and the slow cooker. That is bonus storage hiding in plain sight. Tables with drawers are even better, but harder to find.
The right height matters. Kitchen counters are about waist high. Your table should match that. Mine is one inch lower than my counter, and it feels fine to work on. Too low will hurt your back after a while.
Wood tops are warm and forgiving. You can chop on a board right on them. Metal tops wipe clean but feel cold. I picked wood because my kitchen needed warmth. It scratches a little, and I do not mind. It tells a story.
A table also works as a dining spot. I eat breakfast at mine most mornings. One stool tucked under it, and it is a tiny table for one. It does three jobs in one footprint.
12. Choose Stools That Tuck Away
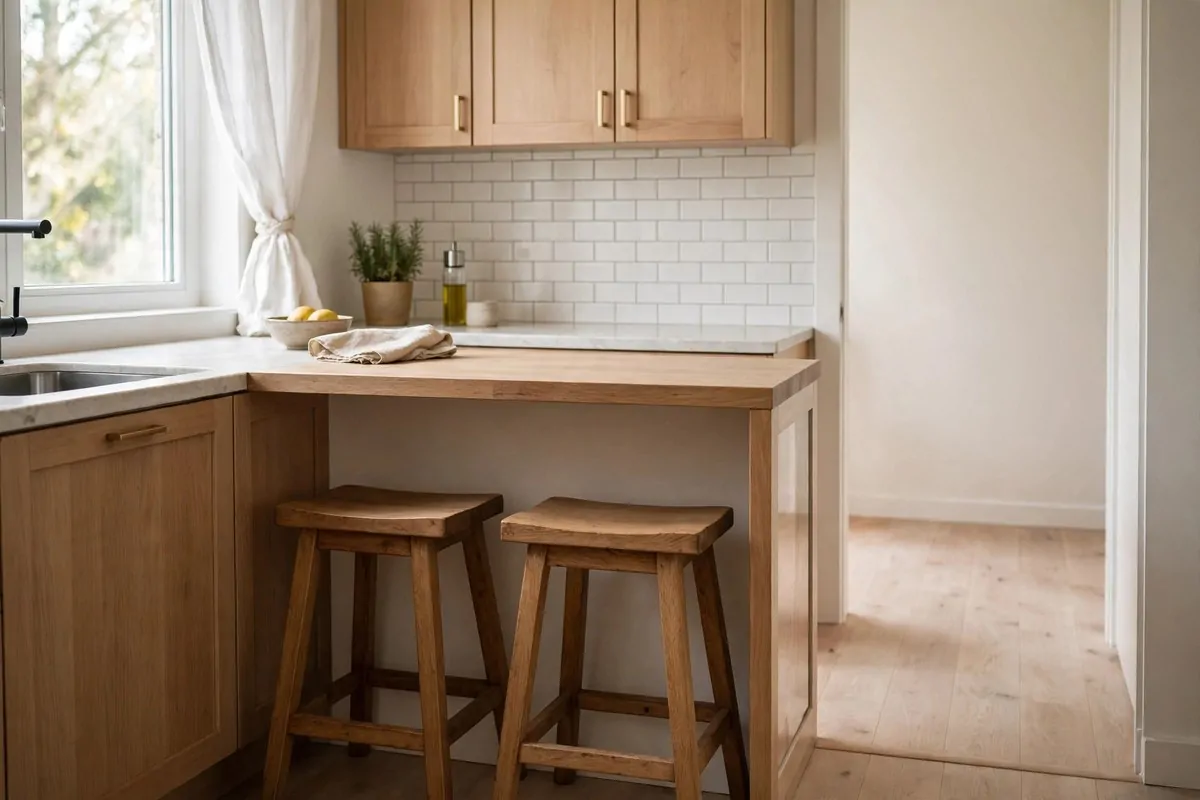
Chairs ruined my kitchen flow for months. They stuck out from the counter and blocked my path. I bumped into them carrying hot pans. It was stressful and honestly a little dangerous.
Tuck-away stools solved it. They slide fully under the counter when I am done. The walkway stays clear. I can carry things safely. My kitchen feels bigger the moment the stools disappear underneath.
Backless stools are the best pick for small kitchens. They have no back to catch on things. They slide in and out like a dream. I have two wooden ones, and they look nice too. Simple and honest design.
Make the counter overhang just deep enough. About ten inches lets most stools tuck in fully. If your counter is shallower, look for extra slim stools. They exist. I found mine at a small shop that sold cafe furniture.
Measure your counter height before buying. Stools come in different heights, and a mismatch is uncomfortable. Counter height is usually around three feet. Bar height is taller. Match your stool to your counter and your back will thank you.
Keep the stool count small. Two is plenty for most tiny kitchens. More than that and you are back to clutter. I have two, and when friends come over, someone always stands. Nobody minds.
Pick stools you can wipe clean. Kitchen stools get splashed. Mine are wood with a sealed finish. A quick wipe and they are clean. Fabric seats in a kitchen are brave. I would not do it.
13. Light It Up Under the Cabinets
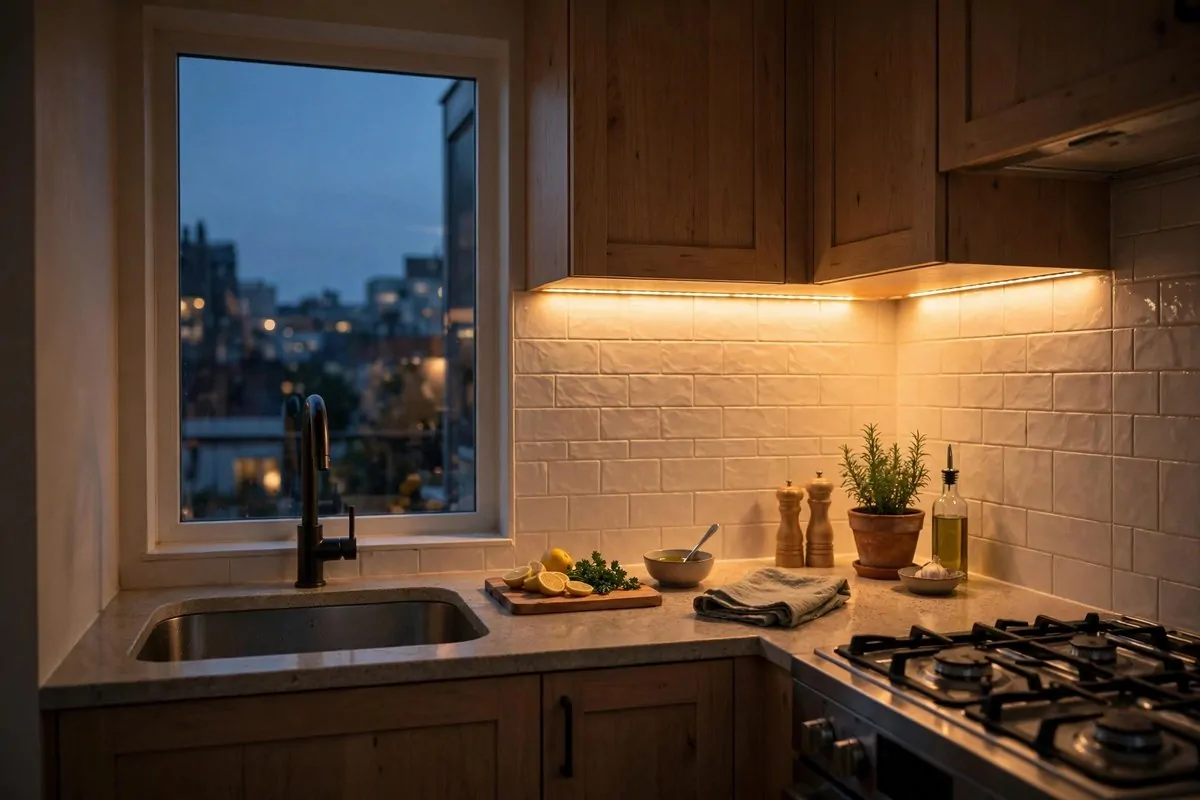
My old kitchen had one sad ceiling light. It cast shadows on the counter right where I chopped. I could barely see what I was doing at night. Cooking after work felt gloomy and hard.
Under-cabinet lights changed everything. Little strips of light under the upper cabinets wash the counter in a warm glow. I can see every onion slice. The kitchen feels cosy and expensive, even though the lights cost very little.
Battery lights are the easy start. They stick on with magnets or tape. No wiring, no electrician. I put three in my rental kitchen in ten minutes. They run on batteries that last months. When one dims, I just swap the batteries.
Plug-in strips are brighter and better for owners. They link together under the cabinets. I helped my friend install them, and her kitchen glows beautifully now. Pick warm white colour for the bulbs. Cool white feels like an office.
Put the switch somewhere easy to reach. Mine is on the side of the cabinet by the stove. I tap it when I start cooking. It becomes a habit fast, like turning on the radio. You will wonder how you cooked without it.
Good light also makes food look better. That sounds silly, but it is true. Warm light on fresh food makes dinner feel special. My weeknight pasta looks like a restaurant dish under these lights.
Clean the light strips when you wipe the cabinets. Grease floats up and settles on them. A quick wipe keeps them bright. I do mine with the weekly counter wipe, and they still shine like new.
14. Try Two-Tone Cabinets
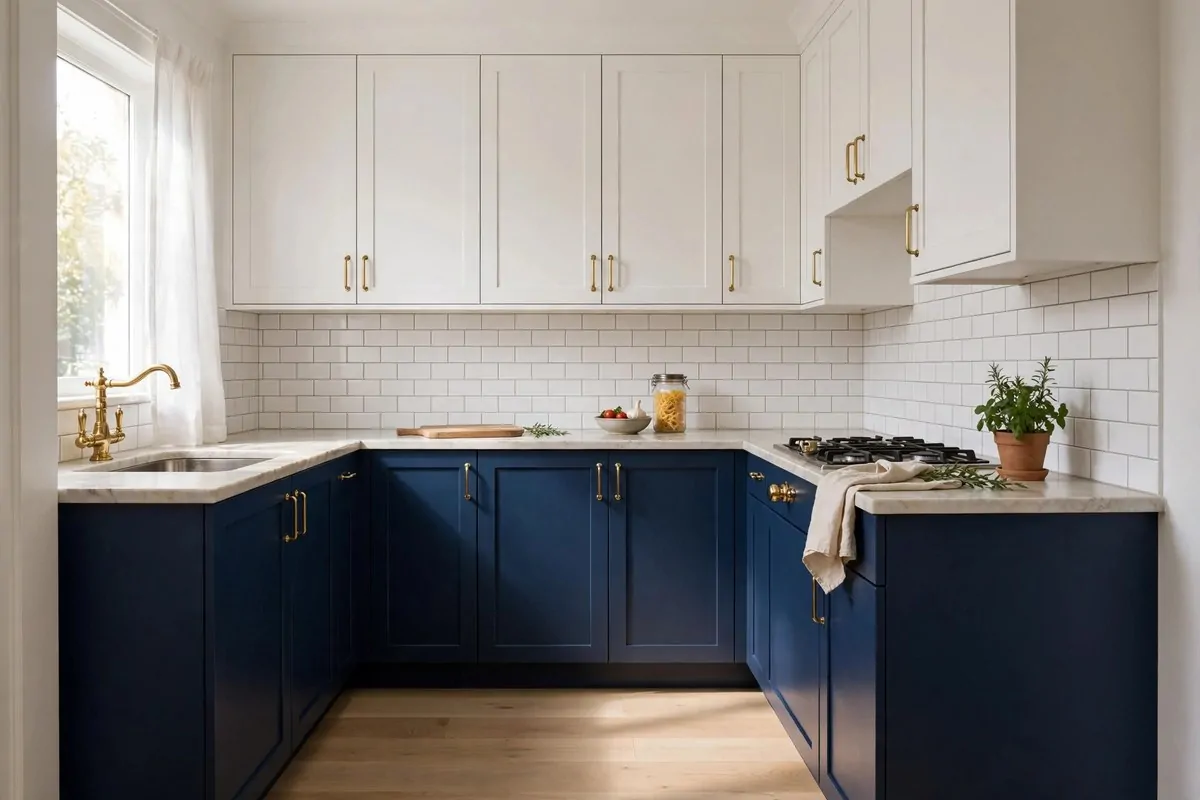
All one colour can feel flat in a small kitchen. Mine were all cream for years. They were fine, but nothing about the room had any character. It felt like a kitchen from a catalogue, not like my kitchen.
Two-tone cabinets fixed that. I painted the lower cabinets a deep blue and left the uppers white. The room got a whole personality overnight. The white uppers keep it light. The blue lowers ground it. It just works.
Dark lowers and light uppers is the classic combo. The dark colour hides scuffs and dirt near the floor. The light colour up top keeps the room feeling open. I chose a soft navy, and I still love it every day.
You can do this with paint in a weekend. Clean the cabinets well first. Use a good primer. Two thin coats beat one thick coat. I rushed my first door and it dripped. Slow and steady wins here.
Try the look with one accent first if you are nervous. Paint just the island or one run of cabinets. Live with it for a week. I painted a single cabinet door and taped it up to test the colour. Best decision ever.
Other combos work too. Sage green lowers with white uppers feel calm and fresh. Charcoal with pale grey looks modern. Soft black with cream is bold but beautiful. Pick what makes you smile when you walk in.
Keep the rest simple when cabinets are two-tone. Plain walls, simple hardware, calm counters. The cabinets are the star. Too many patterns fight with them. I learned to let the colour do the talking.
15. Pick One Bold Backsplash Tile
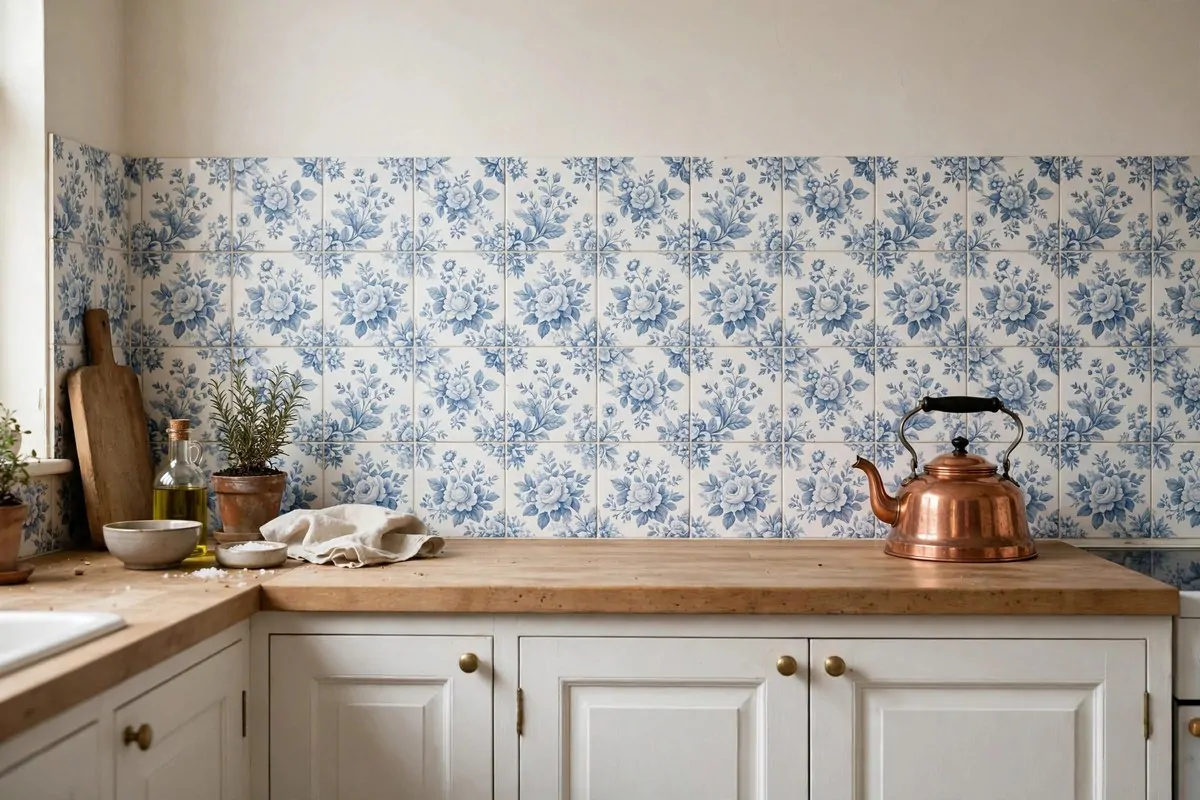
A small kitchen has one big advantage. You need very little tile. That means you can afford the gorgeous tile. The fancy handmade one. The patterned one you loved but thought was too pricey. In a tiny kitchen, it costs almost nothing.
I picked a patterned tile in soft blues and whites. The whole backsplash cost less than a nice dinner out. But it looks like a million pounds. Every guest comments on it. It is the jewel of my kitchen.
Small kitchens can handle bold patterns. A big pattern in a big room can overwhelm. In a small space, it becomes art. It draws the eye and makes the room feel designed. My patterned tiles make the whole wall a feature.
Lay the tiles out on the floor first. Step back and look. This is how you check the pattern flows nicely. I found two tiles that clashed and swapped them before the glue went on. Planning beats fixing.
Go all the way to the ceiling behind the stove if you can. It makes the ceiling feel higher. I stopped mine at cabinet height, and I wish I had gone higher. Full height tile looks so dramatic and tall.
Peel and stick tiles are a great rental option. They look surprisingly real now. I used them in one rental and nobody could tell. They come off clean when you move. Ask your landlord first, but most say yes.
Keep the grout colour simple. White or light grey works with almost everything. Dark grout shows every crumb in a kitchen. I picked a warm grey, and it hides a multitude of sins between cleanings.
16. Put Up a Pegboard Wall
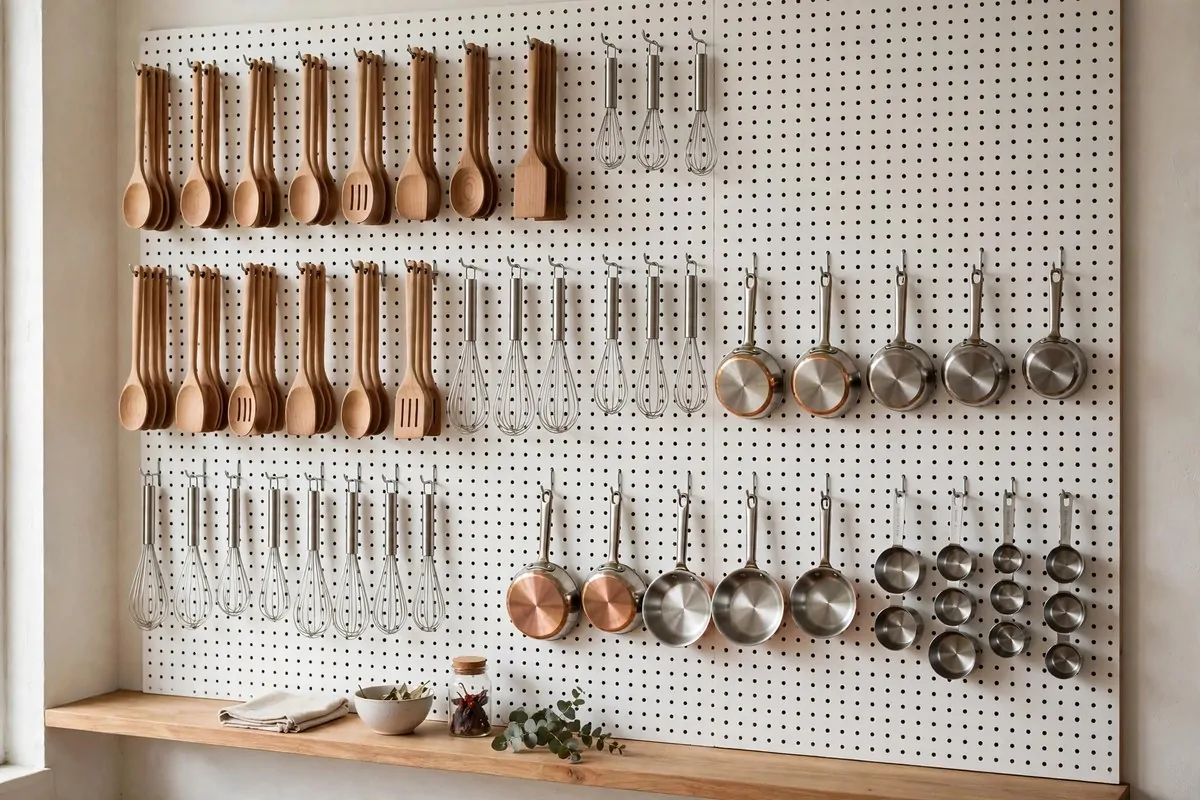
I had drawers full of tools I could never find. The whisk hid under the ladles. The tongs vanished completely. I owned three pairs because I kept losing them and buying new ones. It was silly and wasteful.
A pegboard ended the chaos. It is a board with little holes, and hooks go in the holes. I hung all my cooking tools on one wall. Now I see everything at a glance. Cooking feels calm because I am not digging through drawers anymore.
Paint the pegboard to match your kitchen. Mine is the same soft white as my walls. It blends in and looks neat. Some people paint theirs a fun colour and make it a feature. Both look great.
Map out your hooks on the floor first. Lay the board flat and arrange the tools. This saves you from drilling twice. I moved things around three times on the floor before I was happy. Drilling once is the goal.
Put heavy items low and light items high. Pans are heavy, so they hang low where they are easy to lift. Spatulas and whisks are light, so they go up top. This keeps the board balanced and safe.
Leave some hooks empty. You will buy new tools, and you need room to grow. I left a whole row free. Six months later it holds my new mortar and pestle. Future you will say thanks.
Keep it tidy like a little shop display. Hang things in neat rows. Group similar tools together. When it looks organised, you will keep it that way. Mine looks so nice that I actually enjoy tidying it.
17. Add Toe-Kick Drawers
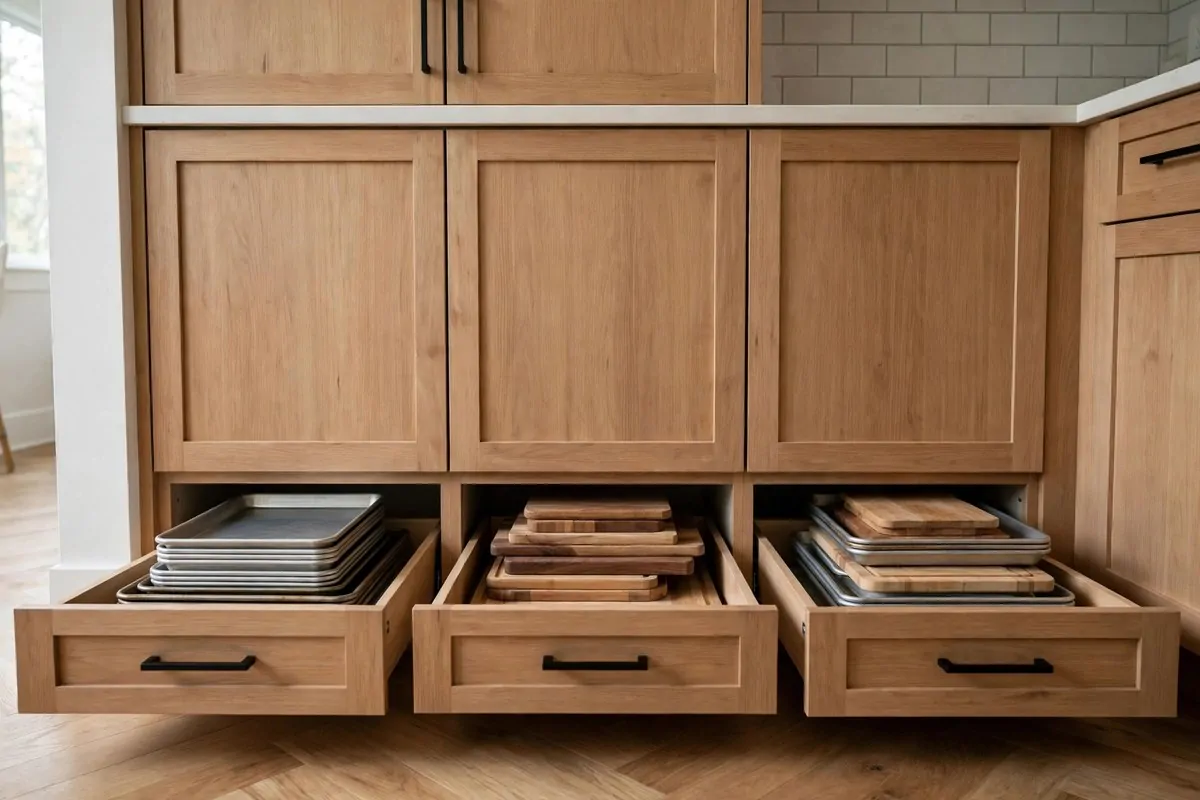
The toe-kick is that dark strip at the bottom of your cabinets. You know, where your toes go when you stand at the counter. I never thought about it for years. It was just dead space collecting dust bunnies.
Then I learned it can hold drawers. Real, working drawers. I stared at my kitchen for a full minute when I first heard this. All that space, hiding in plain sight. It felt like finding money in an old coat.
Toe-kick drawers are perfect for flat things. Baking trays. Cutting boards. Placemats. The roasting pan you use at holidays. Things that are awkward everywhere else slide in here beautifully. Mine holds all my trays in neat stacks.
They push open with a toe tap. No handles needed. You just nudge the drawer with your foot and it pops out. It feels very fancy for such a simple trick. My kids think it is the coolest thing in the house.
Keep them shallow and simple. These drawers are not deep, so do not plan on storing pots there. Flat and thin is the rule. I keep a liner on the bottom so trays do not slide around. Small detail, big difference.
Clean them out once in a while. Crumbs sneak in because the drawers are near the floor. I vacuum mine when I mop. Two minutes, done. They stay fresh and the trays stay clean.
If a full retrofit feels like too much, use the space another way. A slim boot tray under the sink cabinet catches drips. It is not a drawer, but it uses the space. Every inch counts in a small kitchen.
18. Cover the Sink with a Cutting Board
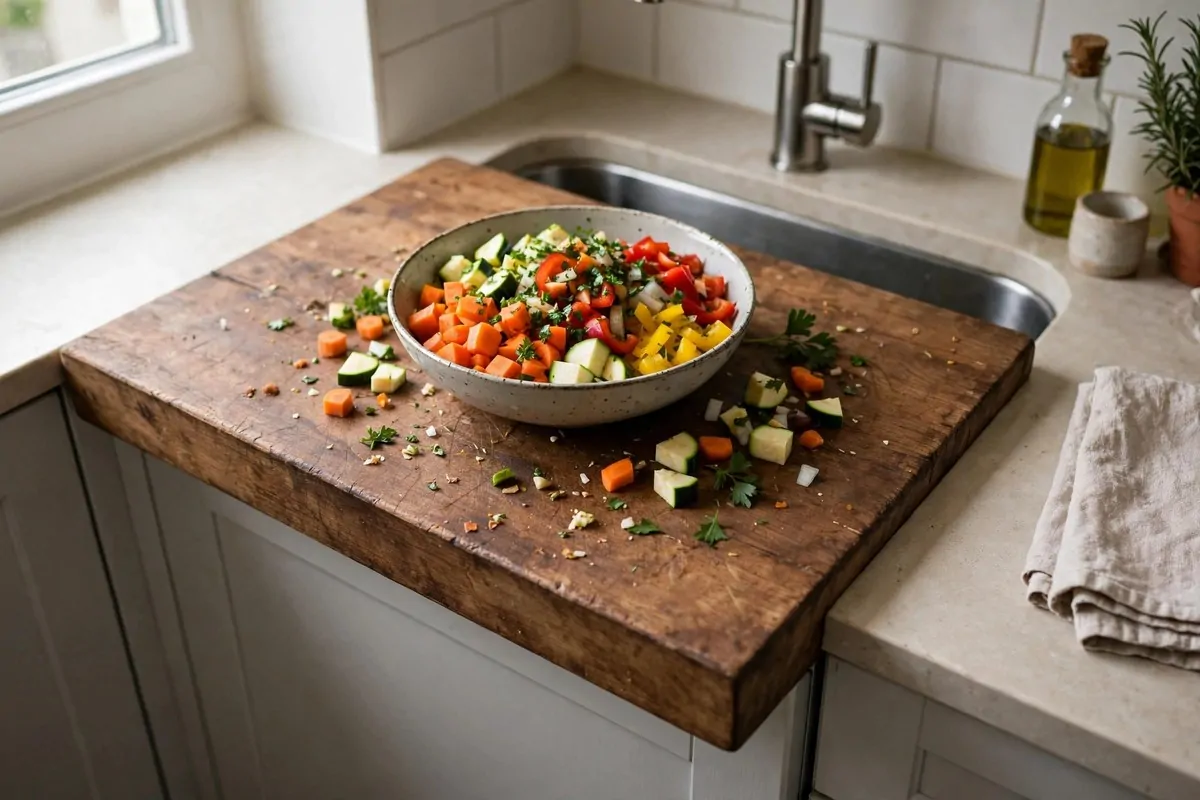
Counter space is gold in a small kitchen. I never had enough. Chopping, mixing, cooling, it all fights for the same small patch. Then I discovered the sink could become a counter, and my whole workflow changed.
An over-the-sink cutting board sits across the sink and gives you a whole new work surface. Mine is a thick wooden board cut to fit my sink exactly. When I need the sink, I lift the board off. When I need space, it goes on. Simple and brilliant.
Measure your sink before buying. Inside edge to inside edge. My first board was a little too short and it wobbled. Scary with a sharp knife. The right fit sits flat and steady. Take your time with the tape measure.
Wood boards need a little care. Oil yours now and then so it does not dry out. I use a food safe oil once a month. It takes two minutes. The board stays smooth and pretty, and it will last for years.
Use the board for prep, not for the oven. Hot trays can mark wood. I keep a trivet on the counter for hot things. The board is for chopping, kneading, and holding bowls. It does those jobs perfectly.
Some boards have a hole for scraping scraps into the sink. Mine does, and I love it. Chop the vegetables, push the scraps through the hole. No messy pile on the counter. It keeps everything neat as you work.
This trick also hides a sink full of dishes. Guests coming and the sink is full? Board on, problem hidden. I am not proud of this trick, but I use it. We all have those days.
19. Use the Space Around the Range Hood
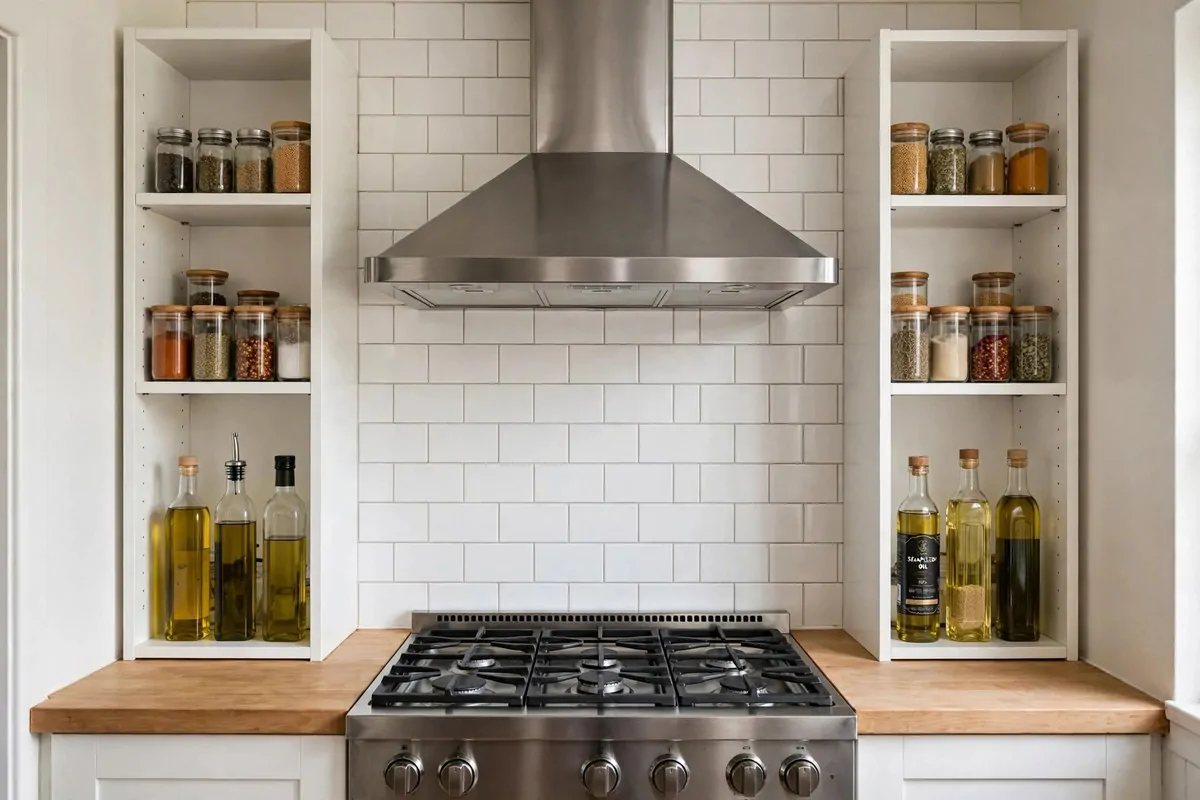
The range hood sticks out of the wall, and most people leave the space around it empty. I did. For years, my hood sat there alone with blank wall on both sides. It looked unfinished, and it wasted good storage.
Cabinets around the hood changed that. Narrow cabinets on each side hold my cooking oils, vinegars, and the salt I grab daily. Everything I need while cooking is within arm's reach. It feels like the kitchen was designed around how I actually cook.
Keep it symmetrical if you can. Two matching cabinets, one on each side. It looks tidy and balanced. My friend did mismatched shelves and it looked messy. Symmetry calms a small space. Your eyes rest easy.
Check the heat clearance rules for your hood. The maker lists a safe distance. Respect it. Oils and spices do not like too much heat. I keep my oils in the cabinet to the side, not directly over the burner. Common sense keeps things safe.
Open cubbies work here too. Little open squares hold pretty oil bottles and small jars. They look like a styled shelf in a magazine. I have one cubby with my nice olive oils. It is practical and pretty at once.
If cabinets are too much work, try a slim shelf on each side. Same idea, less building. A four inch shelf holds small jars fine. I started with shelves and upgraded to cabinets later. Both steps helped.
This area is also great for a small rail with hooks. Hang your most used spoons right by the stove. I have a little rail with two hooks for my wooden spoon and tongs. They live where the cooking happens.
20. Hang Hooks Inside Cabinet Doors
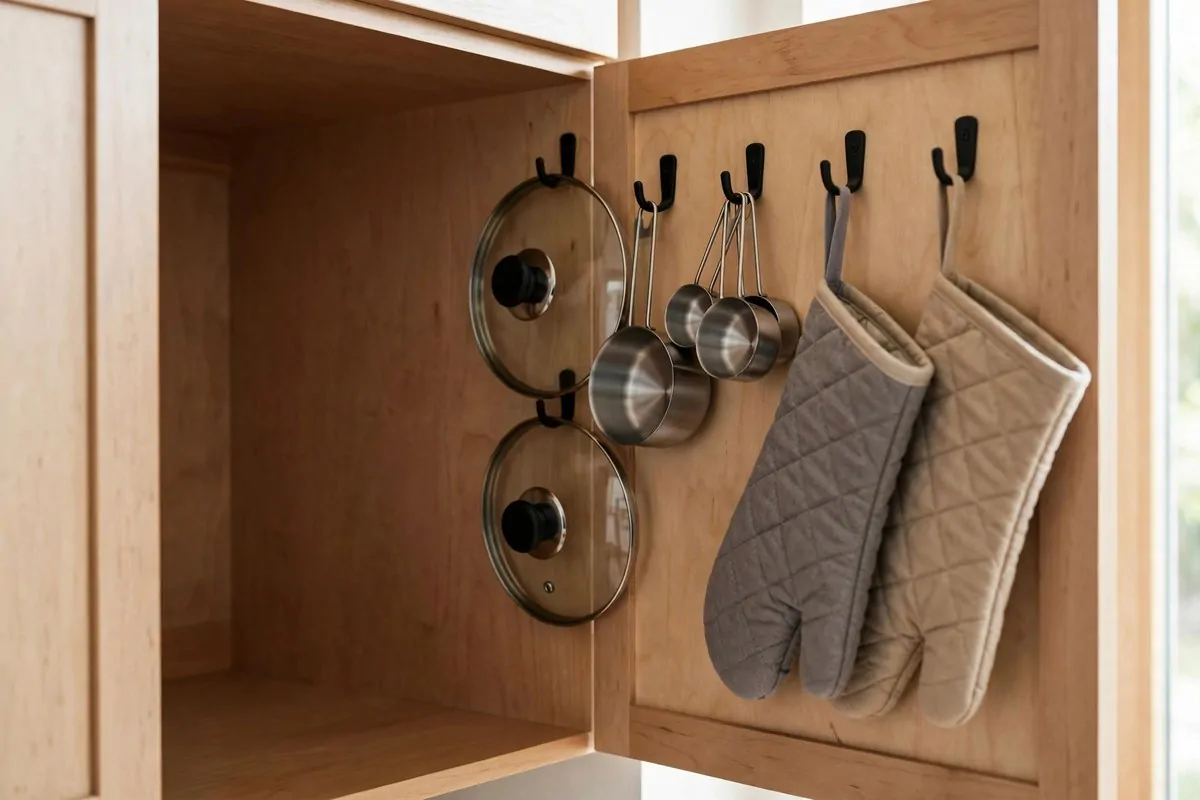
Cabinet doors are secret storage. The inside of every door is a blank wall doing nothing. I walked past mine for years without seeing it. Now every door in my kitchen works twice as hard, and I feel clever every time I open one.
Small hooks inside the doors hold so much. Measuring cups. Pot lids. Oven mitts. The little things that clutter drawers. My baking cabinet door holds all my measuring tools in a neat row. I smile every time I open it.
Use adhesive hooks if you rent. They hold light things fine and come off clean. I used them in my rental for two years. Not one fell off. For heavier things like lids, use small screw hooks. They are stronger and still tiny.
Keep the hooks shallow. Deep hooks bump into the shelves when you close the door. I learned this by closing a door onto a shelf and hearing a bad crunch. Shallow hooks close flat and safe.
Plan what goes on each door. The sink cabinet door holds cleaning gloves and a scrub brush. The spice cabinet door holds measuring spoons. Give every door a job. It stops the hooks from becoming random clutter.
Check the door closes fully after you add hooks. Close it slowly the first time. If something hits, move it. My lids needed shifting up by one inch. Small fixes keep everything working smoothly.
This trick costs almost nothing. A pack of hooks is cheap. The payoff is a tidier kitchen in one afternoon. I did all my doors in under an hour. It is the fastest win on this whole list.
21. Downsize to a Smaller Cooktop
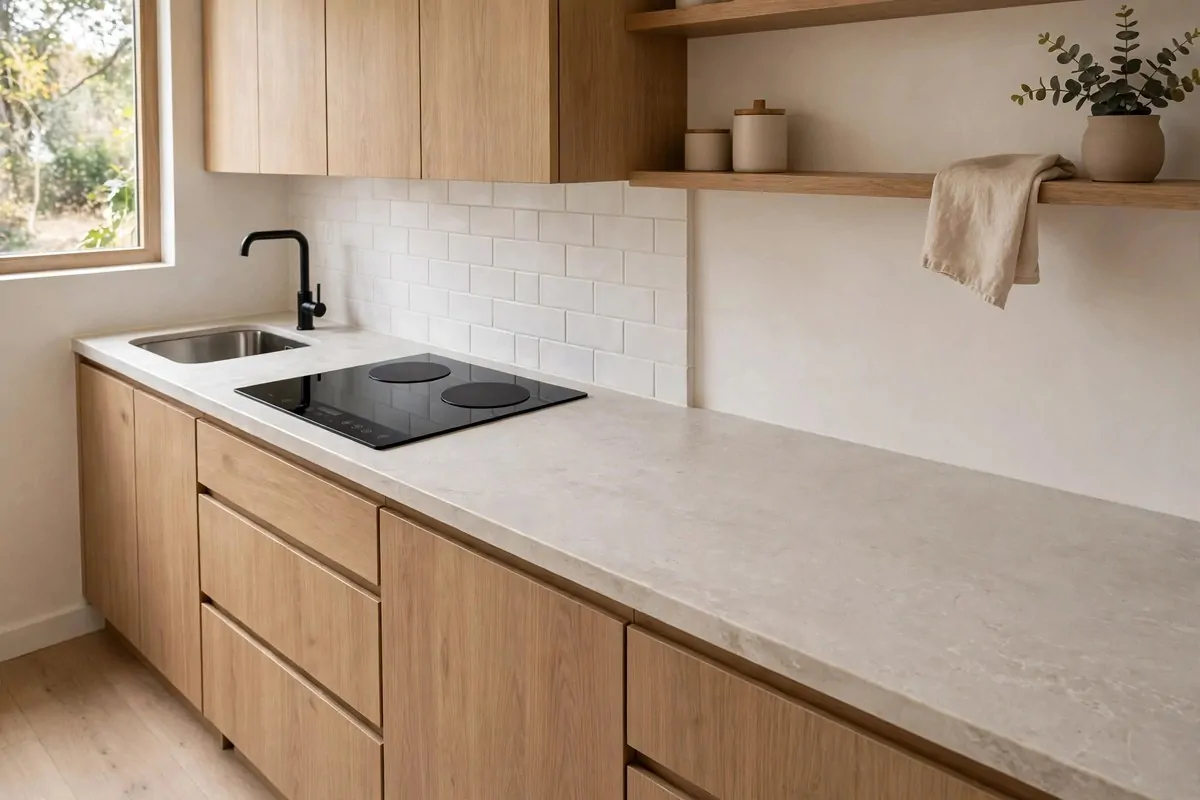
Be honest. How many burners do you use at once? I used to have four, and I used one. Maybe two on a big cooking day. The other two just held things that did not belong there. They were counter space in disguise.
A smaller cooktop frees that space for good. Two burners are plenty for most daily cooking. I switched to a slim two burner hob, and I gained a whole foot of counter. That foot gets used every single day.
Apartment size ranges exist for a reason. They are made for small kitchens. Mine is only twenty inches wide. It still fits my biggest pan. Measure your largest pot and make sure it fits. Most of the time it does.
You keep the oven either way. A smaller hob does not mean less cooking power. The oven still roasts and bakes like always. I cook full Sunday dinners on my small hob. Nobody has ever noticed the difference.
Portable induction hobs are another option. They sit on the counter when you need them and store in a drawer when you do not. I have one for big cooking days. It is like having a spare burner in a drawer. Very clever.
Renters can ask about this too. Some landlords allow a swap if you keep the old hob. I asked mine and got a yes. Put it in writing so everyone is clear. A quick email works fine.
Think about your real cooking, not your dream cooking. If you host big dinners twice a year, the big hob is not worth it daily. I cook for two most nights. My small hob matches my real life, and my kitchen feels roomier for it.
22. Sort Lids and Trays with Vertical Dividers
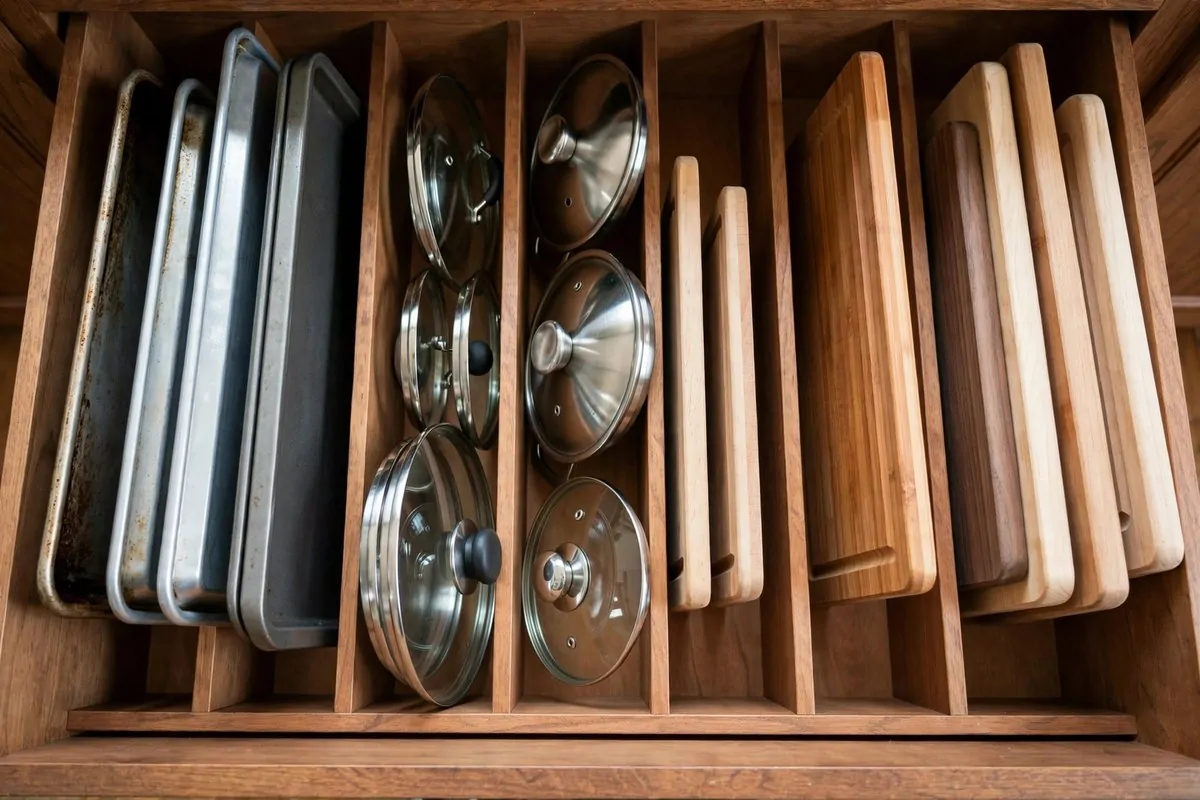
Lids are the enemy of small kitchens. They slide everywhere. They clatter. They take up weird amounts of room. My lid drawer used to be a metal avalanche. Opening it felt like a small earthquake.
Vertical dividers tamed them. They are simple slots that stand lids and trays upright, like books on a shelf. I slide each lid into its own slot. Now I see every lid at once. I grab the right one in seconds.
You can buy adjustable dividers that fit any drawer. Mine cost little and took five minutes to set up. Tension rods from the curtain aisle work too. I used two cheap tension rods in a deep drawer, and they hold everything perfectly.
Sort by size. Big lids together, small lids together. It sounds fussy, but it saves time. I reach in without looking now. My hands know where each size lives. Muscle memory is a wonderful thing.
Baking trays and cutting boards love dividers too. Stand them up in a narrow cabinet. They take up half the space this way. I keep mine upright next to the oven. They are easy to slide out and put back.
Chopping boards, muffin tins, and cooling racks all fit the same system. Anything flat and awkward goes vertical. My whole baking area is organised this way now. It feels so calm to open that drawer.
Label the slots if you share the kitchen. Little labels help everyone put things back right. I labelled mine with a marker on tape. My partner finally puts lids back correctly. It is a small miracle.
23. Keep the Palette Light and Reflective
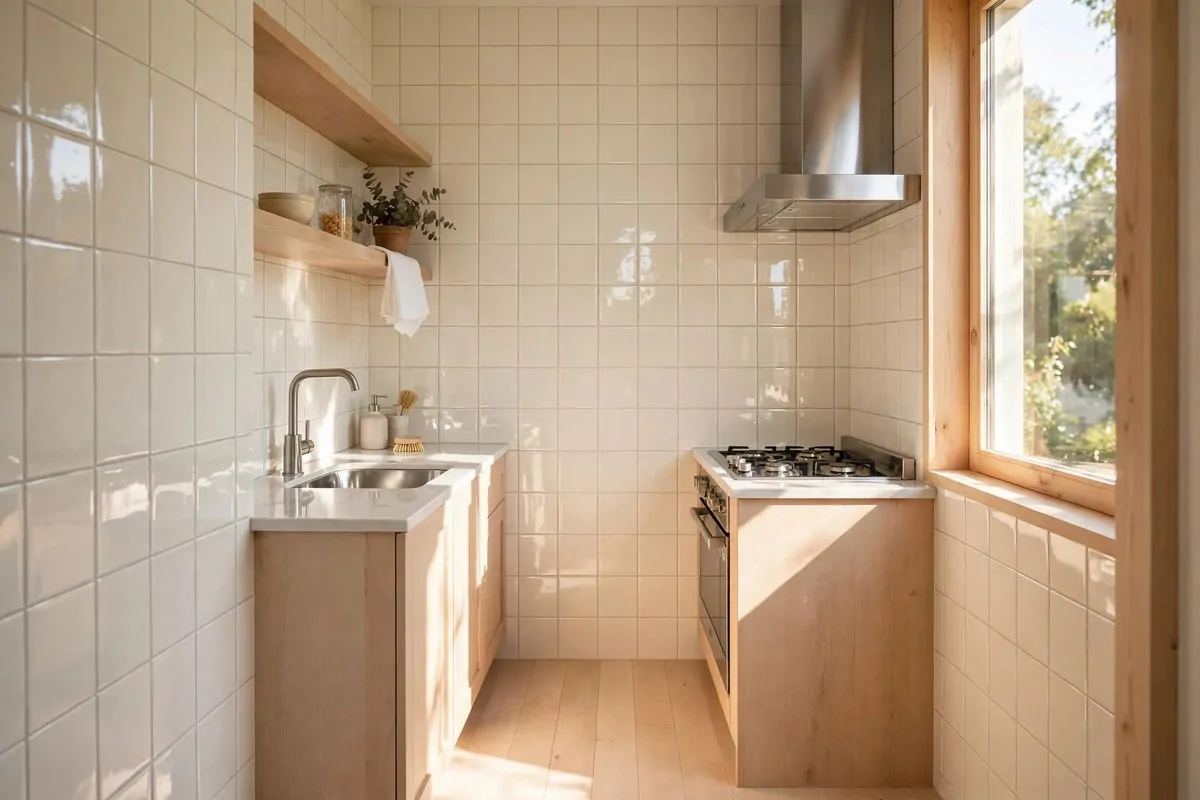
Light bounces. Dark swallows. This is the whole secret of small rooms in one line. My kitchen felt like a cave until I chose light, shiny surfaces. Now sunlight dances around the room all morning.
Glossy tiles are your best friend. A shiny backsplash reflects light across the room. Mine is a simple glossy white subway tile. It doubles the light in my kitchen. Guests always ask if I added a window. I did not. It is just reflection.
Light floors help too. Pale wood or light tile under your feet lifts the whole room. Dark floors press it down. When I swapped my dark mat for a light runner, the floor felt further away. It is a strange trick, but it works.
Glass cabinet fronts add sparkle. If you have a glass front cabinet, put light dishes inside. The glass catches the light and glows. I swapped one solid door for glass, and it became my favourite cabinet. It looks like a little lantern.
Mirrors work in kitchens too. A small mirror on the wall opposite the window doubles the daylight. I know it sounds odd for a kitchen. But mine is a pretty round mirror, and it looks like decor. The extra light is just a bonus.
Keep big appliances light coloured. A white or cream fridge blends into a light kitchen. A black fridge becomes a big dark box. When I replaced my old dark fridge, the room felt instantly calmer. Colour really does change the mood.
Shiny hardware adds tiny sparks of light. Brass or chrome handles catch the sun as you move. They are like jewellery for the kitchen. I changed my handles to a warm brass, and the room twinkles in the afternoon.
24. Put a Pull-Out Shelf in the Blind Corner
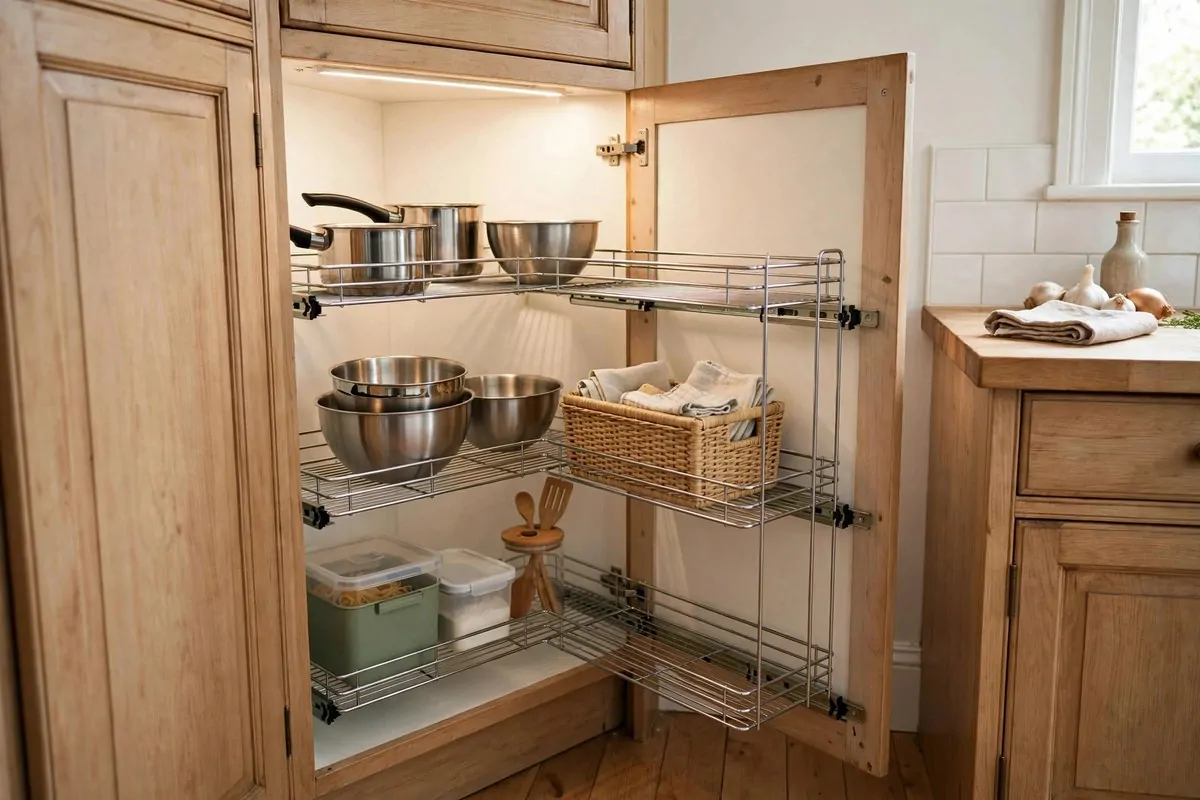
Corner cabinets are black holes. Things go in and never come out. I once found a fondue set in mine that I did not remember buying. It had been there for years, hiding in the dark back corner.
A pull-out shelf brings the back to you. The shelf swings or slides out, and everything comes into the light. I installed one in my corner, and it felt like gaining a whole new cabinet. Nothing hides anymore.
There are a few styles. Some shelves swing out on an arm. Some slide straight out like a drawer. I picked a sliding one because it felt sturdier. Ask at the shop which fits your corner shape. They will know.
Measure the door opening carefully. The shelf has to fit through the door. This sounds obvious, but corners are tricky shapes. I measured three times and wrote the numbers down. The shelf fit perfectly on the first try.
Put heavy pots on the bottom shelf. They are easier to lift from low down. Lighter things go up top. I keep my big Dutch oven down low and my mixing bowls up high. My back is grateful every day.
Keep the shelves organised with bins. Small bins stop things sliding around when the shelf moves. I use two simple bins. One for lids, one for small pots. Everything stays in its lane.
If a full mechanism is too pricey, use a lazy Susan. A simple turntable in the corner works almost as well. I used one for years before upgrading. Spin it and the back comes to us. Cheap and cheerful.
25. Corral the Counter Clutter on a Tray
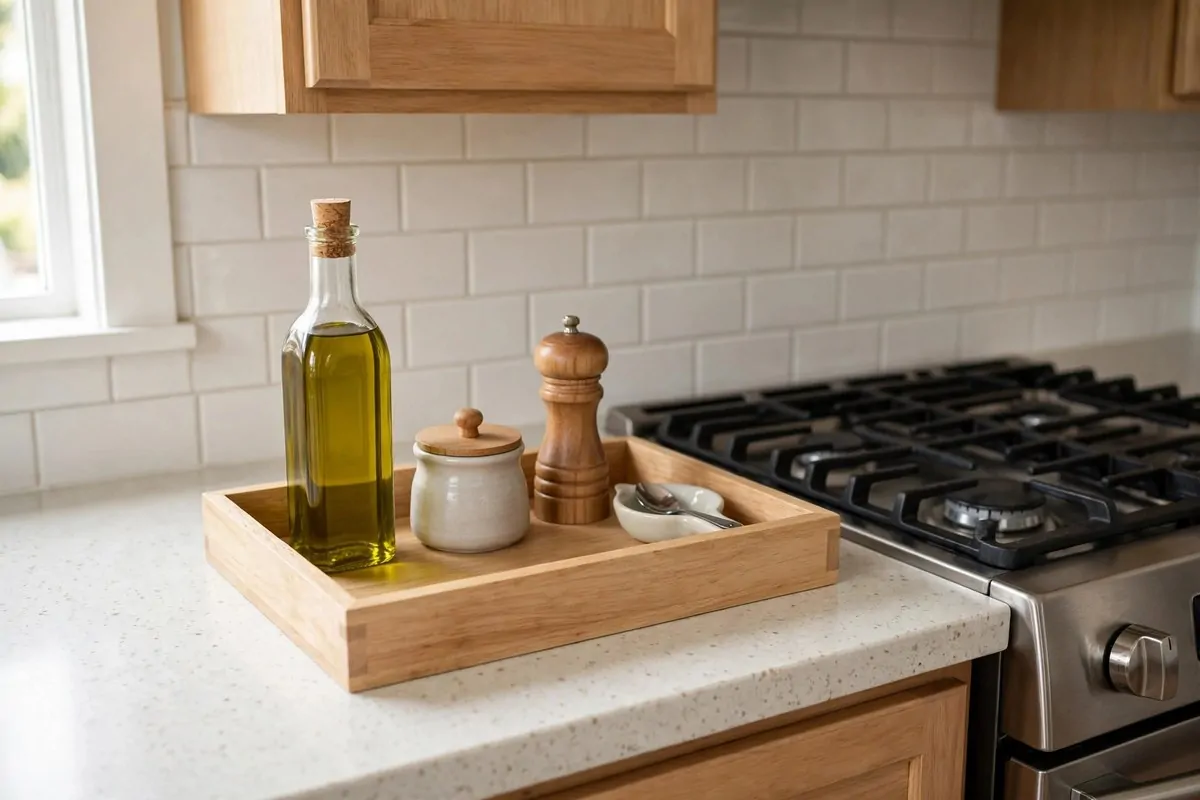
Counters collect clutter like magnets. The olive oil. The salt. The pepper grinder. The soap bottle. Each one is small, but together they make the counter feel messy. I used to look at my counter and just feel tired.
A tray gathers it all into one neat group. I put my everyday cooking things on a small wooden tray by the stove. Oil, salt, pepper, a little dish for spoons. It looks tidy. It feels calm. One tray changed the whole mood.
The tray also makes cleaning faster. Lift the tray, wipe the counter, put the tray back. Ten seconds. Before the tray, I moved six separate bottles and it took forever. I clean my counters more often now because it is so easy.
Pick a tray with a little lip. The lip stops bottles sliding off when you move it. Mine is wood with a raised edge. It is pretty and practical. A pretty tray makes everyday things look styled on purpose.
Keep only daily items on the tray. This is the rule that matters. If you do not use it every day, it does not live on the tray. My tray holds four things. When a fifth tried to move in, I moved it to a cabinet. Boundaries keep it working.
Match the tray to your kitchen style. Wood for warm kitchens. Marble for classic ones. A simple metal tray for modern spaces. Mine is light wood, and it ties in with my shelves. Little matches like this make a room feel pulled together.
Use small trays in other spots too. One by the coffee maker for sugar and spoons. One by the sink for soap and the sponge. I have three small trays now. Each one keeps its little area tidy. The whole kitchen benefits.
Small kitchens ask you to be clever, but they reward you for it. Every one of these ideas made my tiny kitchen a little calmer and a little easier to cook in. Start with one that feels doable this weekend. You will feel the difference right away, and then you will want to try the next one. Your small kitchen is not a problem to fix. It is a puzzle, and now you know how to solve it.