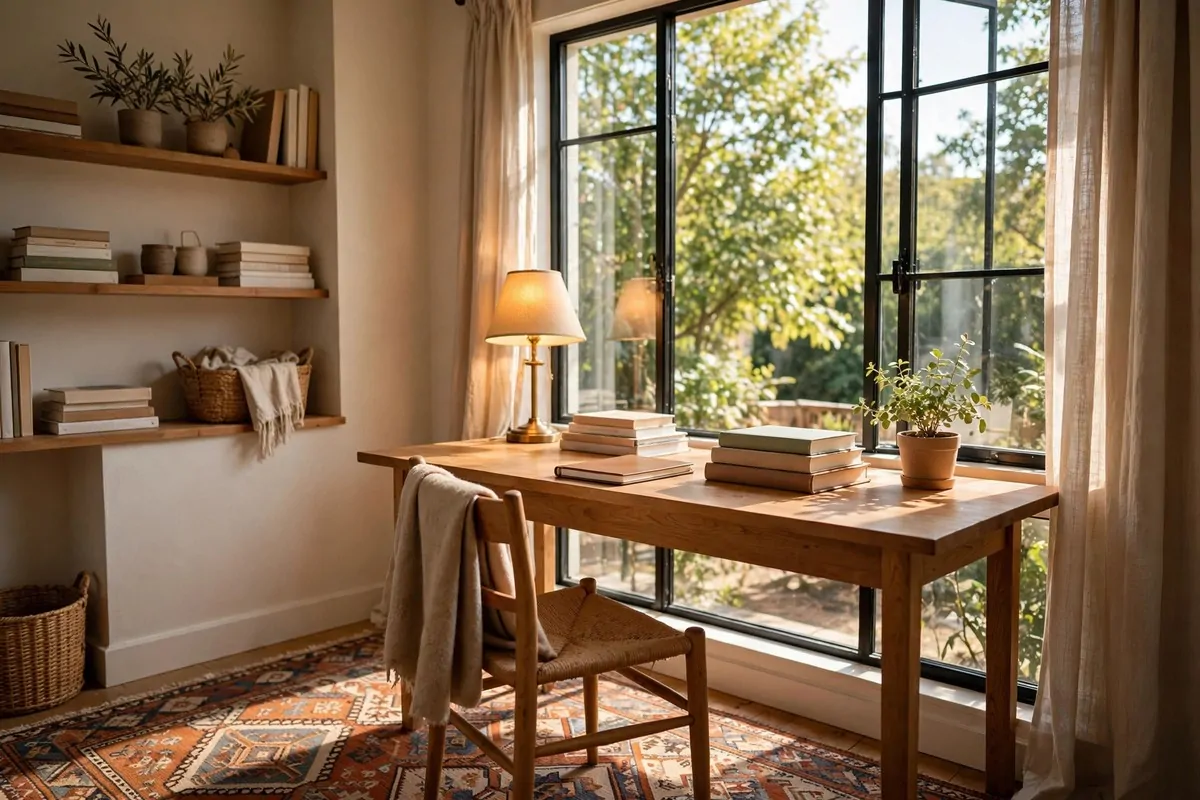
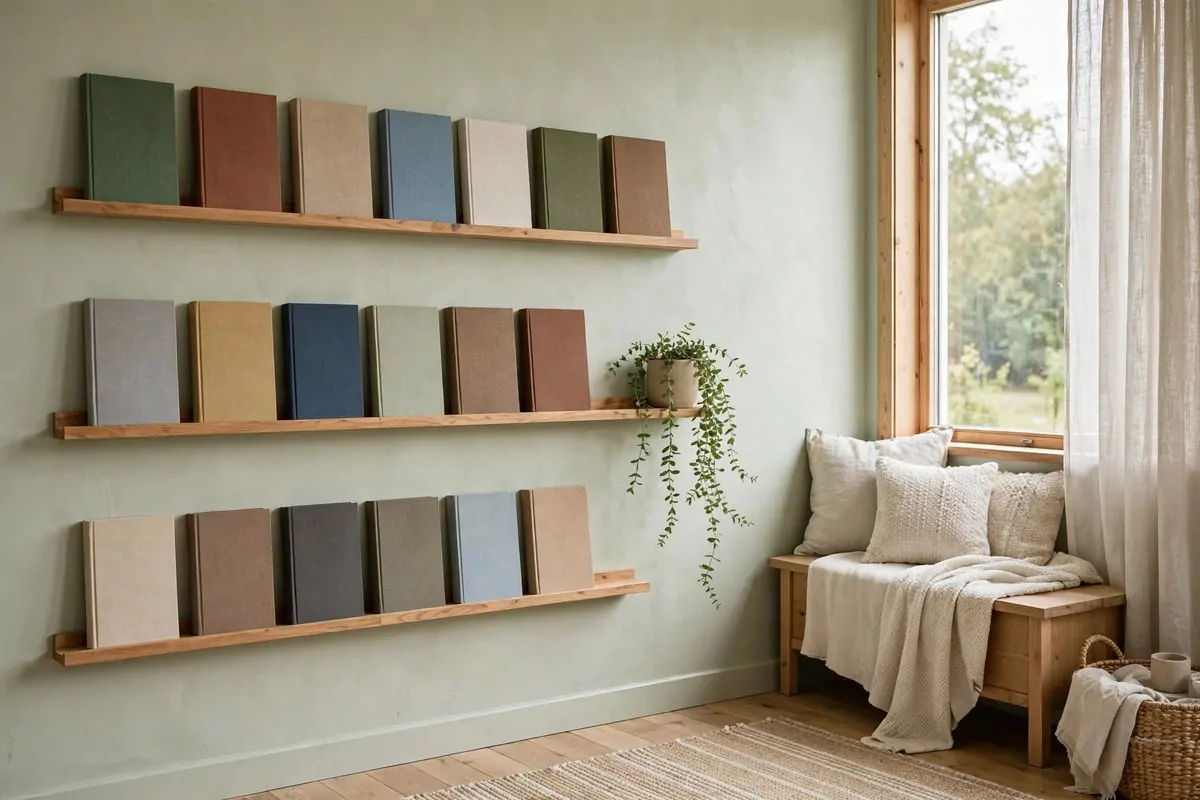
20 Photoshoot Studio Ideas You Can Build at Home

There is a strip of blue painter’s tape on my bedroom floor right now. It marks two corners. One for the backdrop. One for the light.
That little square of tape is my photoshoot studio. It cost me almost nothing to build, and the photos that come out of it look like they were taken in a real studio. I take product shots for my small shop there. I take portraits of friends. I even shot a whole set of outfit photos standing on that tape.
You do not need a big room. You do not need expensive gear. You need a corner, a backdrop, and one good light. The rest is just clever setup.
These 20 photoshoot studio ideas all work at home. Every one fits in a normal room. Pick the ones that match what you shoot, and start with just one.
1. The Paper Roll Corner
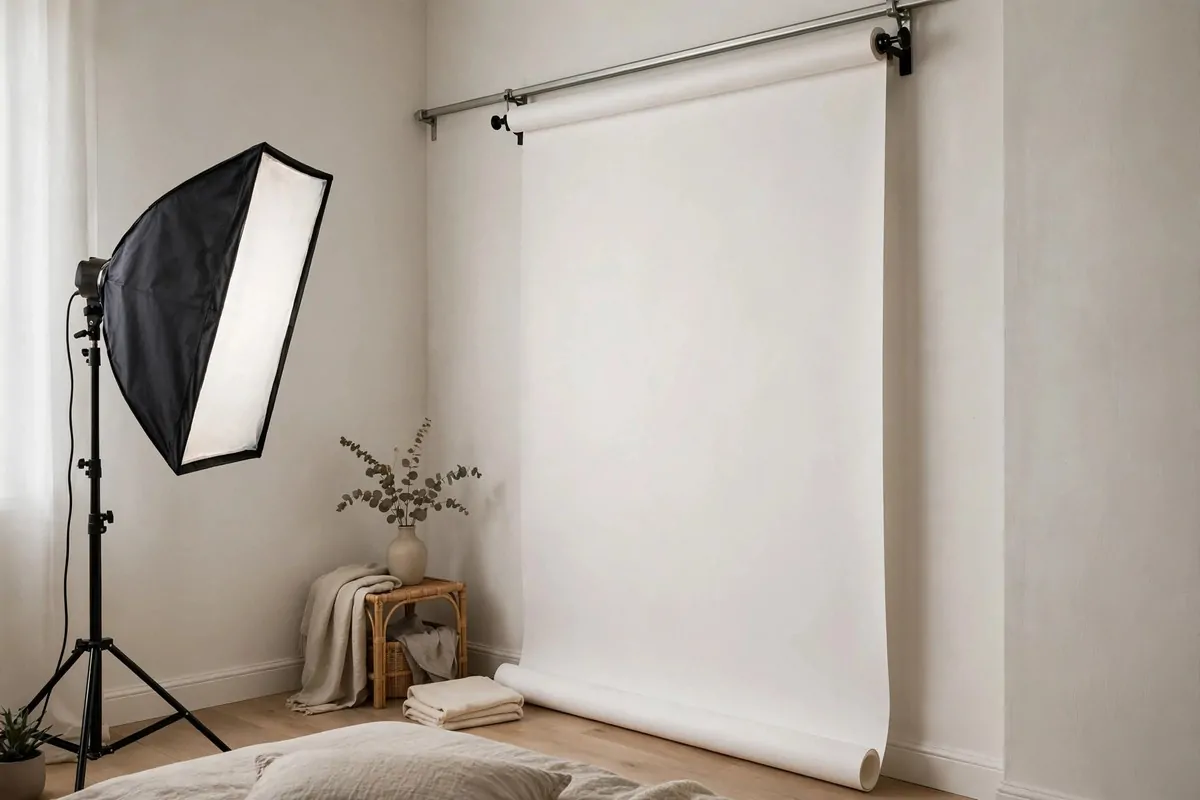
A roll of white paper is the cheapest studio you can buy. One roll costs less than a pizza. It gives you that clean, endless white background you see in product photos.
Hang it on a cheap curtain rail fixed to the wall. That way it uses zero floor space. Pull it down when you shoot. Roll it back up when you are done.
Let the paper curve gently onto the floor. That curve is called a sweep. It hides the line where the wall meets the floor, so the background looks endless.
Stand your subject about five feet in front of the paper. That gap keeps shadows soft and stops the backdrop from looking gray in photos.
One window or one softbox is enough light to start. Angle it at 45 degrees to the side. You will be shocked how pro the results look.
| Backdrop type | Cost | Best for |
|---|---|---|
| White paper roll | Low | Products, headshots |
| Gray paper roll | Low | Portraits with mood |
| Colored paper roll | Low | Fun themed shoots |
Tape the roll’s loose end to the floor with painter’s tape. It stops the paper from curling up mid-shoot.
Keep a spare roll in the closet. White gets dirty fast, and a fresh roll makes every product look new.
Try a gray roll too. Gray looks white with bright light and dark with low light. Two looks, one roll.
2. The Painted Canvas Backdrop
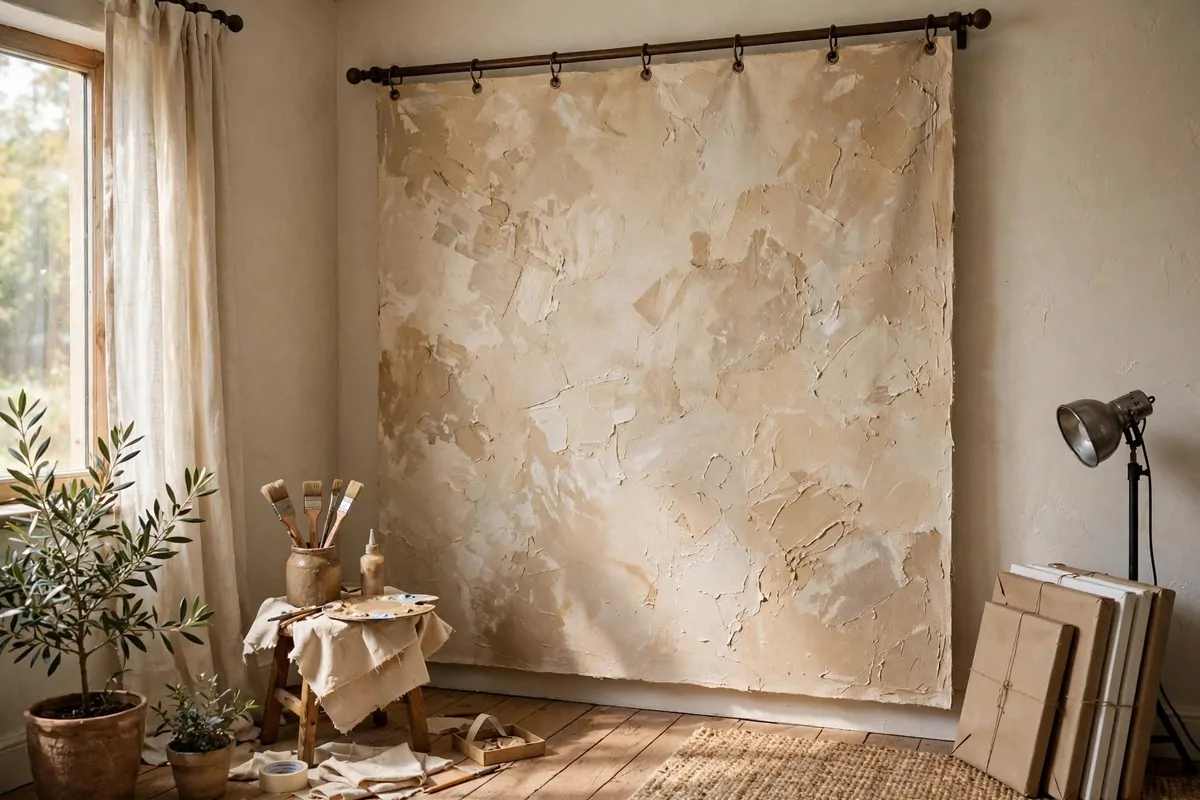
A plain white background is safe. A painted backdrop has soul. You can make one in an afternoon with a drop cloth and some wall paint.
Buy a cheap canvas drop cloth from the hardware store. Lay it flat outside or in the garage. Sponge on two or three paint colors that blend well together.
Think warm beige with soft brown. Or dusty blue with gray. The trick is soft blending, not sharp lines. You want texture, not a picture.
Hang it from a curtain rod with clips. It wrinkles a little, and that is fine. Wrinkles catch light and look expensive in photos.
This backdrop works best for portraits and family shoots. It gives that old-studio warmth that plain paper cannot.
- Use matte paint only, never glossy
- Blend with a dry sponge for soft clouds of color
- Make two sides if you want, one light and one dark
Let each coat dry fully before adding the next. Wet paint blends into mud. Patience gives you those soft clouds of color.
Store it rolled on a cardboard tube, not folded. Folds make hard creases that show up in photos.
If the color feels too strong, glaze over it with thinned white paint. It knocks the color back and adds depth.
3. The White Sheet Window Setup
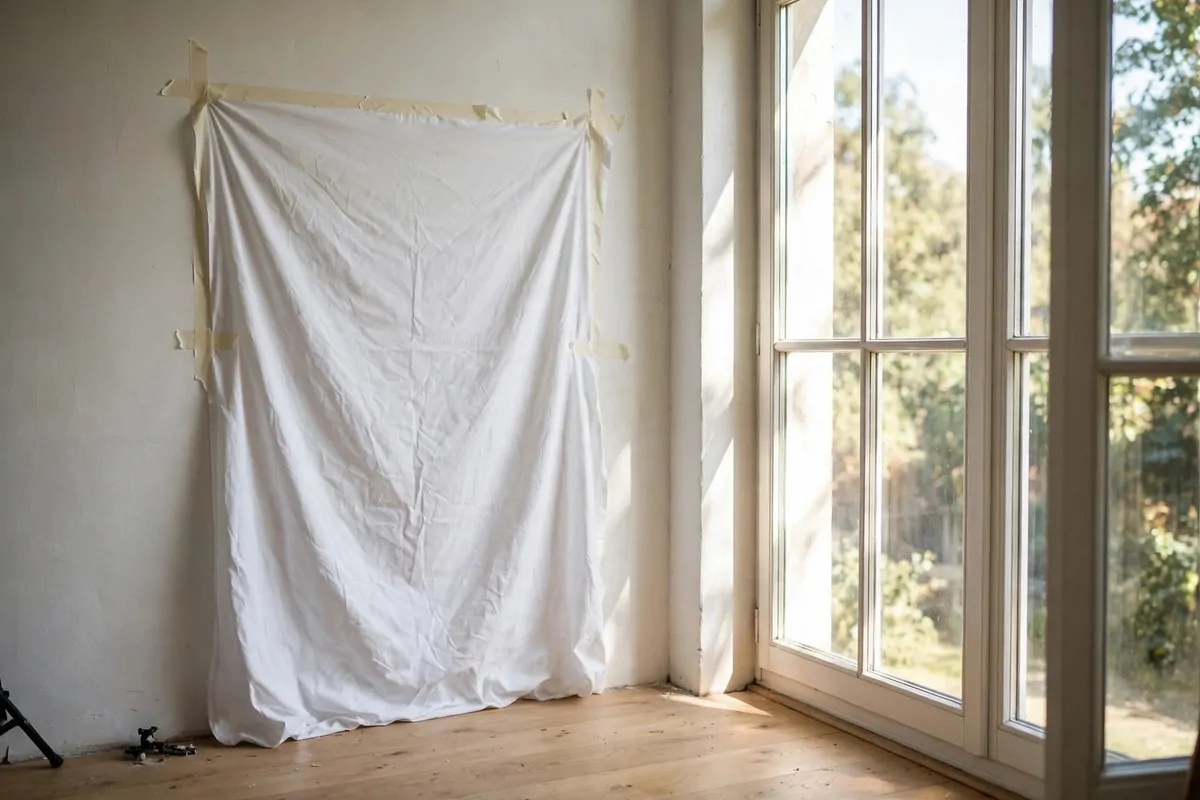
Before you buy anything, try a white sheet. A clean, ironed bedsheet taped to the wall beside a bright window makes a beautiful soft studio.
The window is your key light. It is free and it is the prettiest light you will ever use. Shoot in the morning or late afternoon for the softest glow.
Hang the sheet with painter’s tape so you do not mark the wall. Smooth it flat. A wrinkled sheet looks messy in photos, so take two minutes to press it.
Put your subject sideways to the window. That side light sculpts the face and makes skin look amazing. Straight-on window light looks flat.
Turn off all the room lights. Mixed light colors make skin look weird. Window light alone is clean and simple.
Iron the sheet or steam out the wrinkles. Every wrinkle catches light and shows in the photo.
A north-facing window is the dream. The light stays soft all day with no harsh sun patches.
Shoot in the morning for the prettiest skin tones. Late afternoon works too, but the light turns warmer and more golden.
4. The Tabletop Butcher Paper Sweep
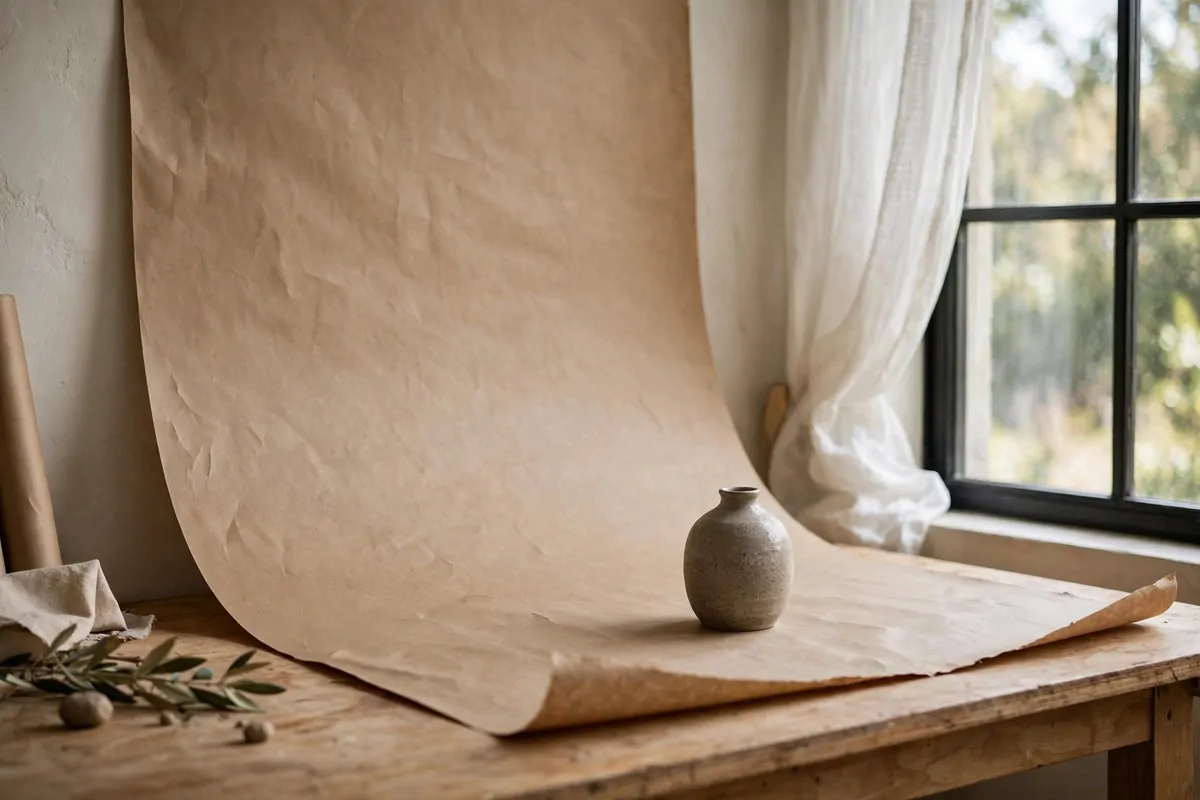
If you shoot small things, you do not need a full studio. You need a table, a roll of butcher paper, and a window. That is the whole setup.
Tape one end of the paper to the wall behind the table. Let it curve down over the table top. This sweep gives you a seamless background for products.
A dining chair works as a paper holder too. Drape the roll over the chair back and let the paper fall onto the table. Simple and fast.
Use a white bounce card on the shadow side. A piece of white foam board from the dollar store does the job. It fills in dark shadows for free.
This setup is perfect for food photos, handmade crafts, and things you sell online. I shot a whole product line on my kitchen table this way.
- Best paper colors: white, kraft brown, soft gray
- Shoot near a window, never under ceiling lights
- Keep the camera low for a pro look
Kraft brown paper makes food look amazing. It adds warmth that white paper cannot.
Wipe the paper between shots. Crumbs and dust show up huge in close-up product photos.
Shoot from slightly above for flat lays. Your phone on a stack of books works as a tripod.
5. The Cardboard Box Lightbox
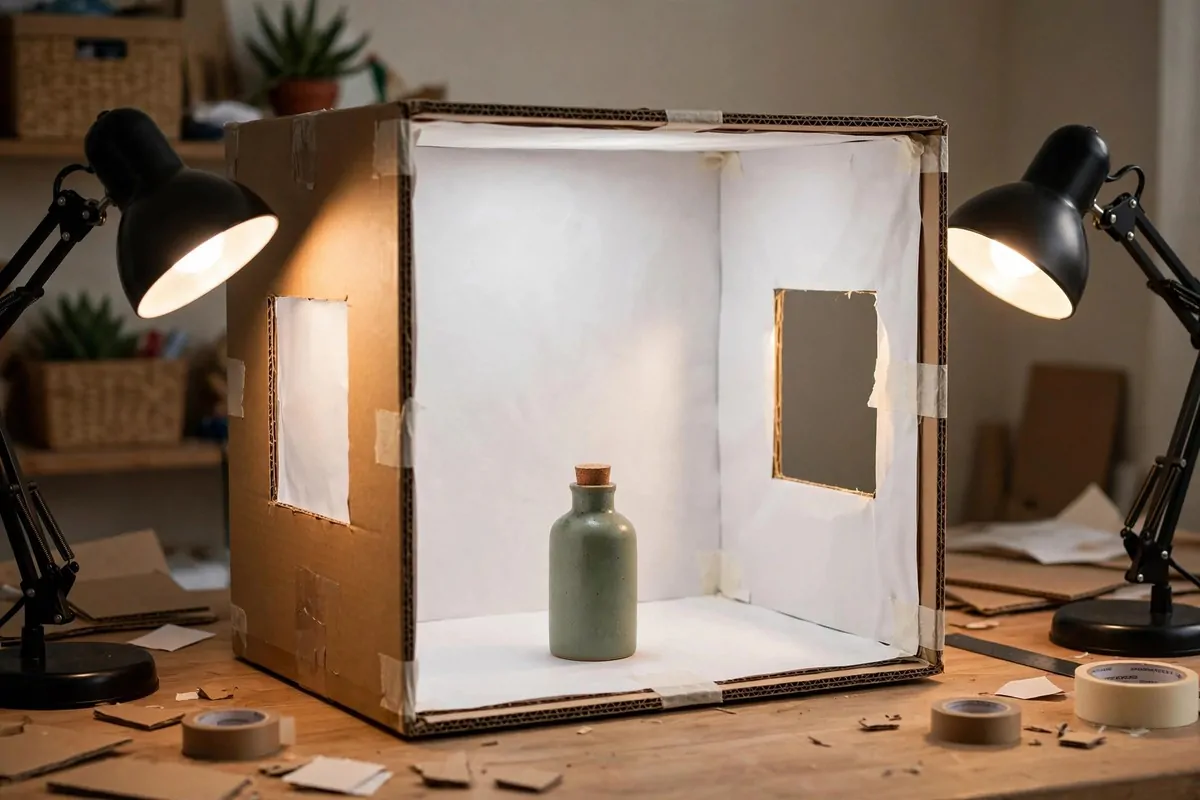
A lightbox sounds fancy. It is really just a box with light inside. You can build one from a cardboard box in twenty minutes.
Cut big windows in three sides of the box. Cover the windows with white tissue paper or thin white fabric. This softens the light that comes through.
Line the inside with white paper, curved at the back. Put your product in the middle. Shine two desk lamps through the side windows.
The result is soft, shadow-free product photos. Jewelry, cosmetics, and small handmade items look like they were shot by a pro.
The whole thing folds flat or slides onto a shelf. It costs almost nothing and it works every single time.
Use daylight bulbs in your desk lamps. Warm bulbs turn white products yellow.
Cut the windows big. Bigger windows mean softer light and fewer harsh shadows.
A piece of black paper inside makes a dark version. Same box, moody product shots.
6. The Closet Mini Studio
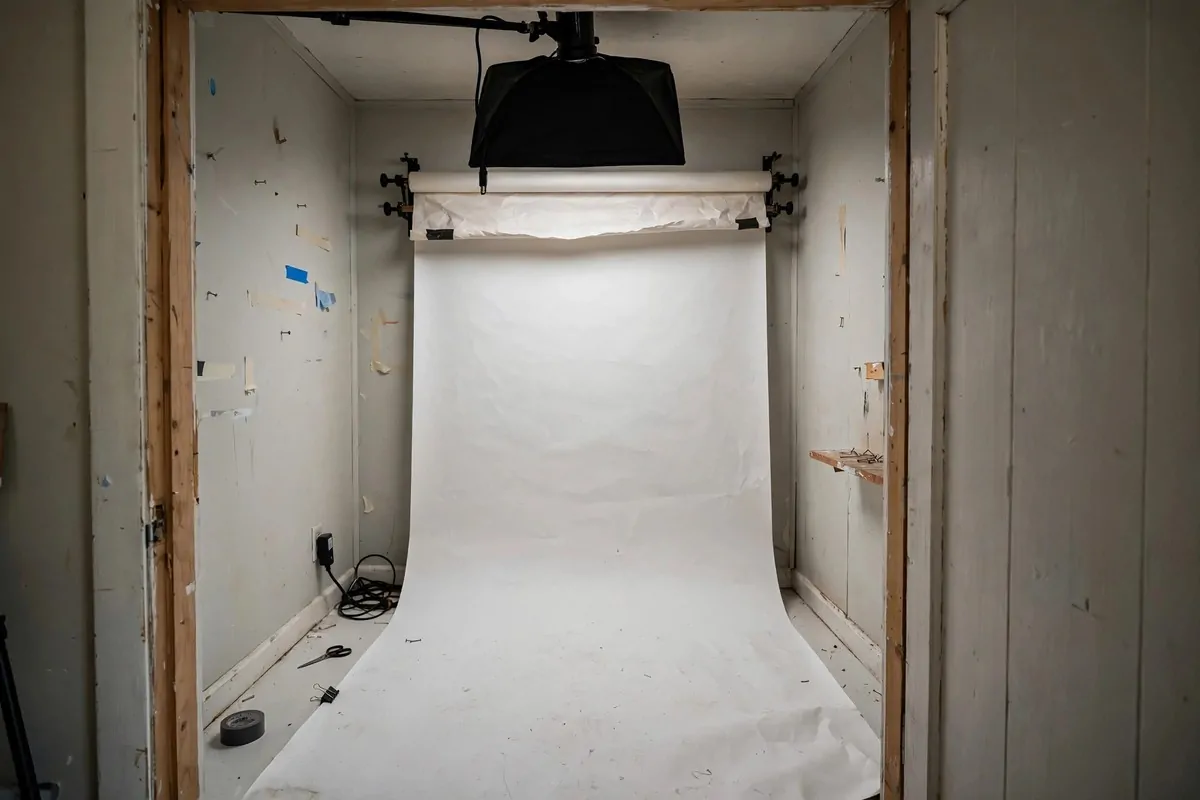
Take the door off a closet. You just gained a studio. A standard closet is deep enough for product shots and small portraits.
Hang a white sweep inside, floor to back wall. Add one light overhead in a softbox. The small space bounces light around nicely.
Closets are great because they are dark. No window light means no mixed colors. You control every bit of light, which makes photos consistent.
This is my favorite setup for online shop photos. Same light, same background, every time. Your product line looks clean and matched.
Store your paper rolls and lights in the closet when you are done. Close the curtain you hung instead of the door. The studio just disappears.
- Remove the door for easy access
- Use a 53 inch wide paper sweep
- One overhead flash in a deep softbox is enough
Paint the closet walls white if they are dark. White walls bounce your light around for free.
A small fan helps on long shoot days. Closets get warm fast with lights running.
Hang a curtain instead of the door. It looks nicer and you can pull it closed to hide the studio.
7. The Fairy Light Bokeh Wall
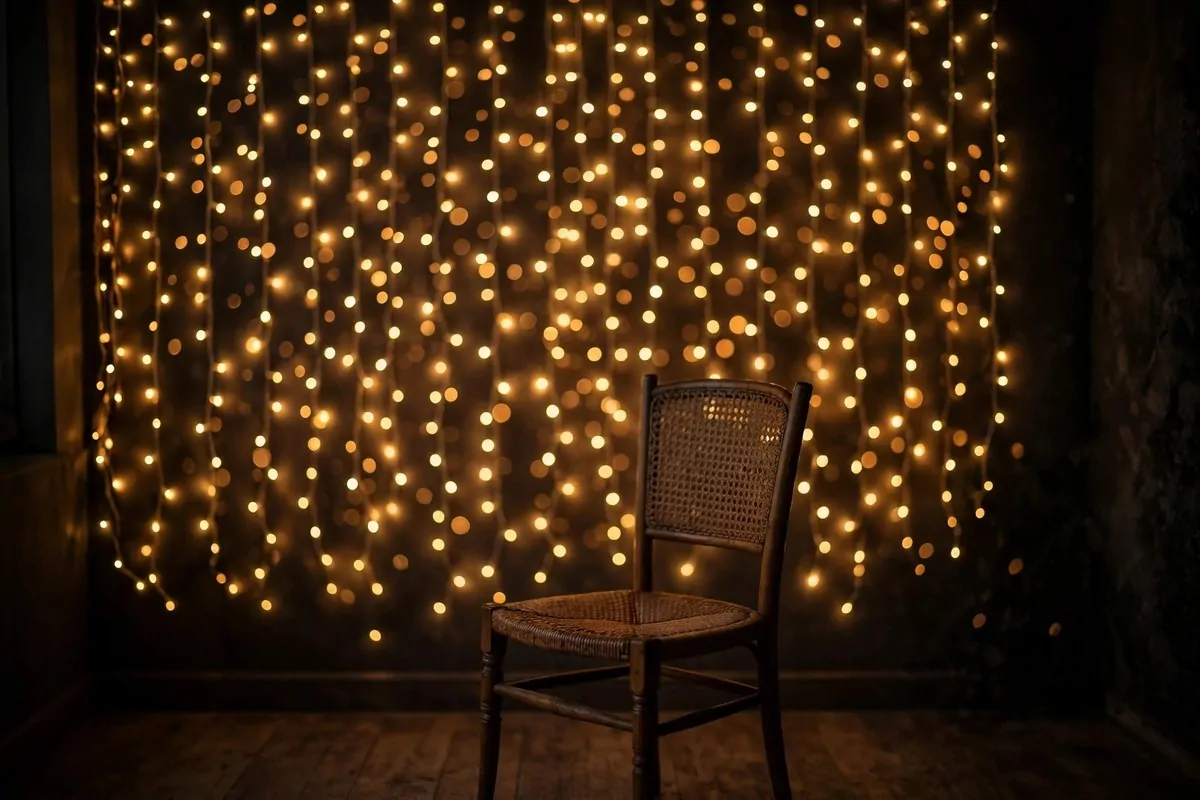
Fairy lights turn a plain wall into magic. Hang a few strings of warm white lights on a dark wall. Shoot with your subject in front of them.
The trick is distance. Keep your subject six feet in front of the lights. Shoot with a wide aperture so the lights blur into soft glowing circles.
That blur is called bokeh. It makes portraits look dreamy and expensive. The setup costs less than twenty dollars and takes ten minutes.
This works best in a dim room. Turn the room lights down low so the fairy lights are the brightest thing back there.
Holiday shoots, couple portraits, and kids photos all love this backdrop. It feels warm and happy in every picture.
Use warm white lights, not multicolor. Warm white blurs into golden circles that flatter everyone.
The more strings, the better the bokeh. Layer three or four strands for a full wall of glow.
Battery packs hide easily behind furniture. No cords trailing across your backdrop.
8. The Flower Wall Corner
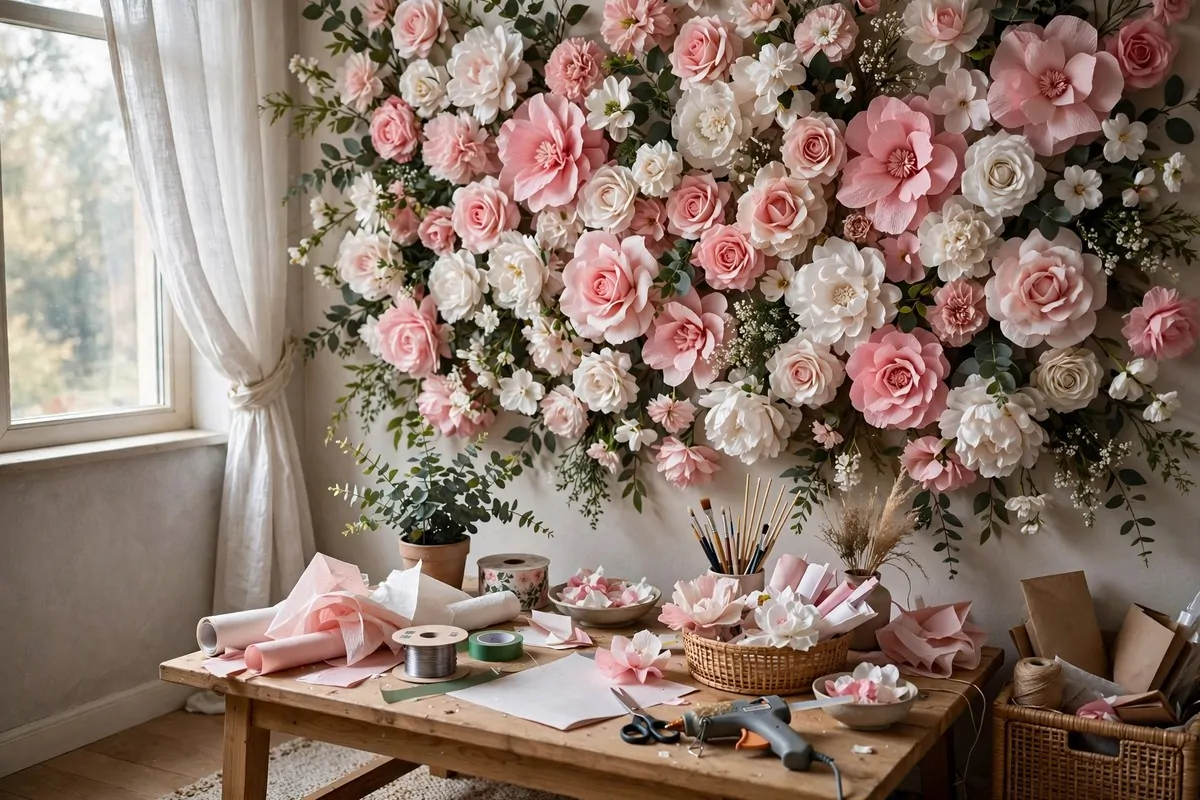
A flower wall looks like a million dollars. You can build one with paper flowers, silk flowers, and a staple gun. It is just patience, not money.
Start with a plywood board or a thick foam board. Cover it in green moss mat or plain fabric first. Then attach flowers from the top down.
Mix big blooms with small fillers. Real flower walls use hundreds of flowers, but you can cheat with clusters and leave some green showing.
Pink and white flowers photograph best. They stay bright under studio lights and flatter every skin tone. Dark flowers can look muddy.
Use it for maternity shoots, birthday portraits, and brand photos. One good flower wall gets used for years.
Start with the biggest flowers first. They set the spacing, then fill gaps with small ones.
Silk flowers from the craft store work great. Mix a few real touches like eucalyptus for scent.
Photograph it straight on first to check for bald spots. Fill any gaps before your shoot day.
9. The Double-Sided Painted Boards
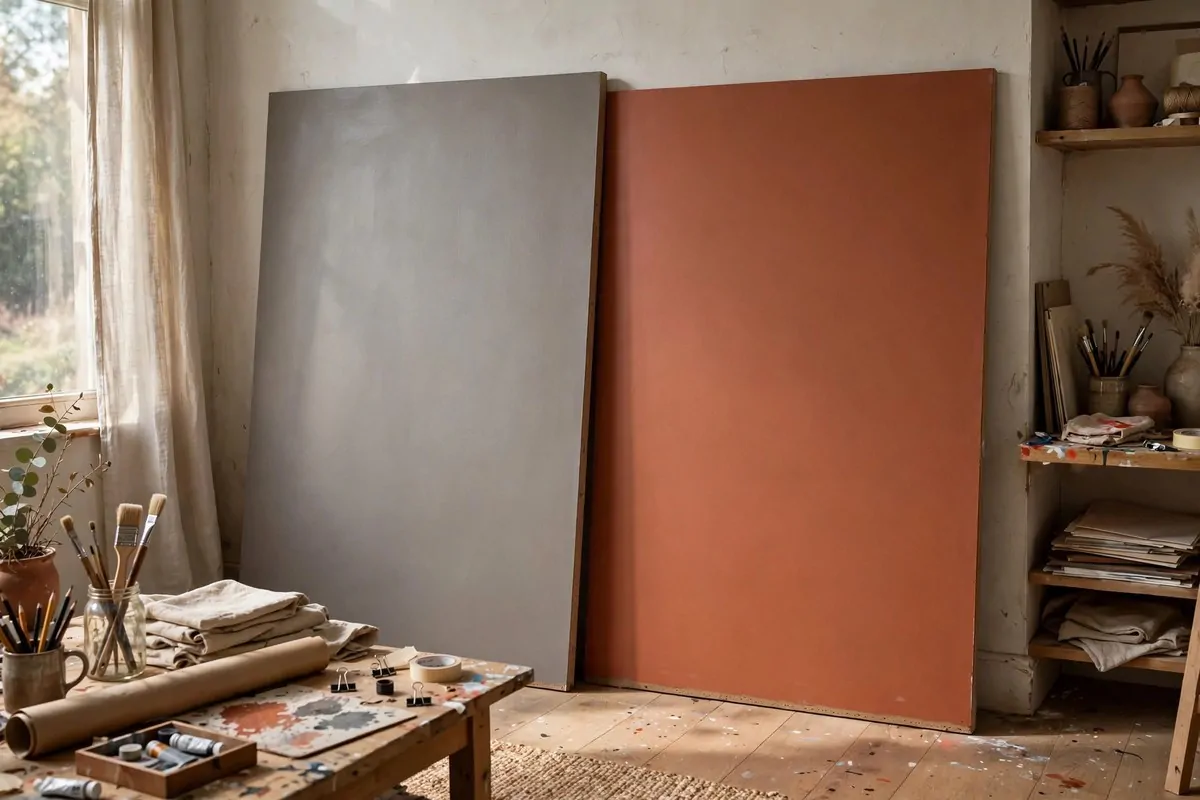
One board, two backdrops. Paint a big MDF board one color on each side. Lean it against the wall and you have an instant studio background.
Hardware stores cut MDF to size for you. A four by six foot board is perfect for half-body shots and product scenes. It stands on its own when leaned.
Paint one side a light neutral, like warm white or soft gray. Paint the other side something bold, like deep green or terracotta. Now you have options.
These boards stack flat against a wall or slide behind a wardrobe. They take up almost no room. I keep three of them and rotate through.
The hard surface looks great for food photography too. A painted board reads as a table and a wall at the same time.
| Side A | Side B | Best use |
|---|---|---|
| Warm white | Charcoal | Portraits |
| Soft gray | Terracotta | Products |
| Cream | Deep green | Food |
Sand the MDF lightly before painting. Paint grips better and the finish looks smoother.
Label the back of each board with the color name. You will forget which is which.
Lean boards at a slight angle, not straight up. They are more stable and catch light nicely.
10. The V-Flat Reflector Duo
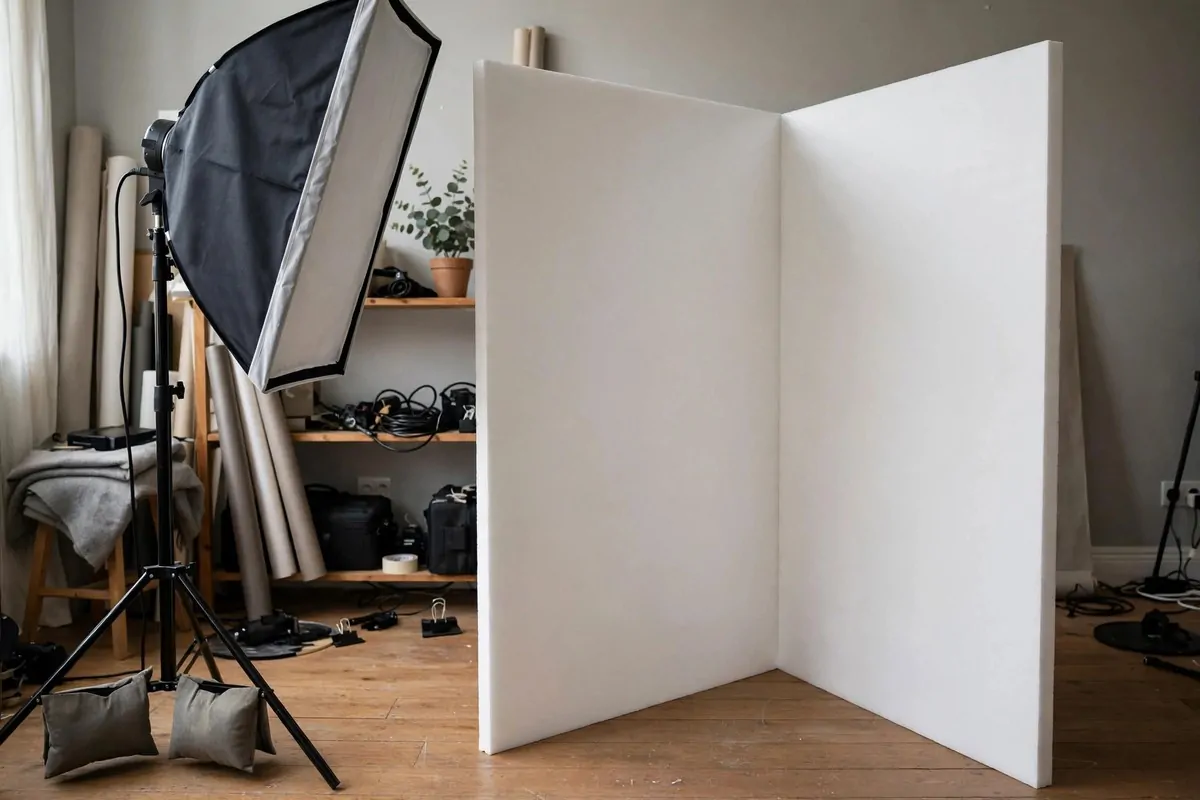
V-flats are the secret tool of pro studios. They are just two big foam boards taped into a V shape. They bounce light and block light at the same time.
Buy two sheets of white foam board, four by eight feet. Tape them together along one long edge with gaffer tape. Stand them up like an open book.
Put one on each side of your subject. One bounces your key light back as fill. The other blocks stray light from hitting the background.
Paint one side of each board black. Now flip them around and they eat light instead of bouncing it. Black V-flats make dramatic, moody portraits.
They fold flat for storage. Two V-flats and one light can light almost any portrait you want to shoot at home.
- White side: soft fill light
- Black side: deep shadows and drama
- Cost: less than thirty dollars for the pair
Gaffer tape holds better than duct tape and removes clean. Worth the few extra dollars.
Stand them close for strong fill light. Pull them back for a softer, gentler effect.
The black sides are amazing for dramatic food photography too. Moody and rich, with almost no effort.
11. The Ring Light Portrait Nook
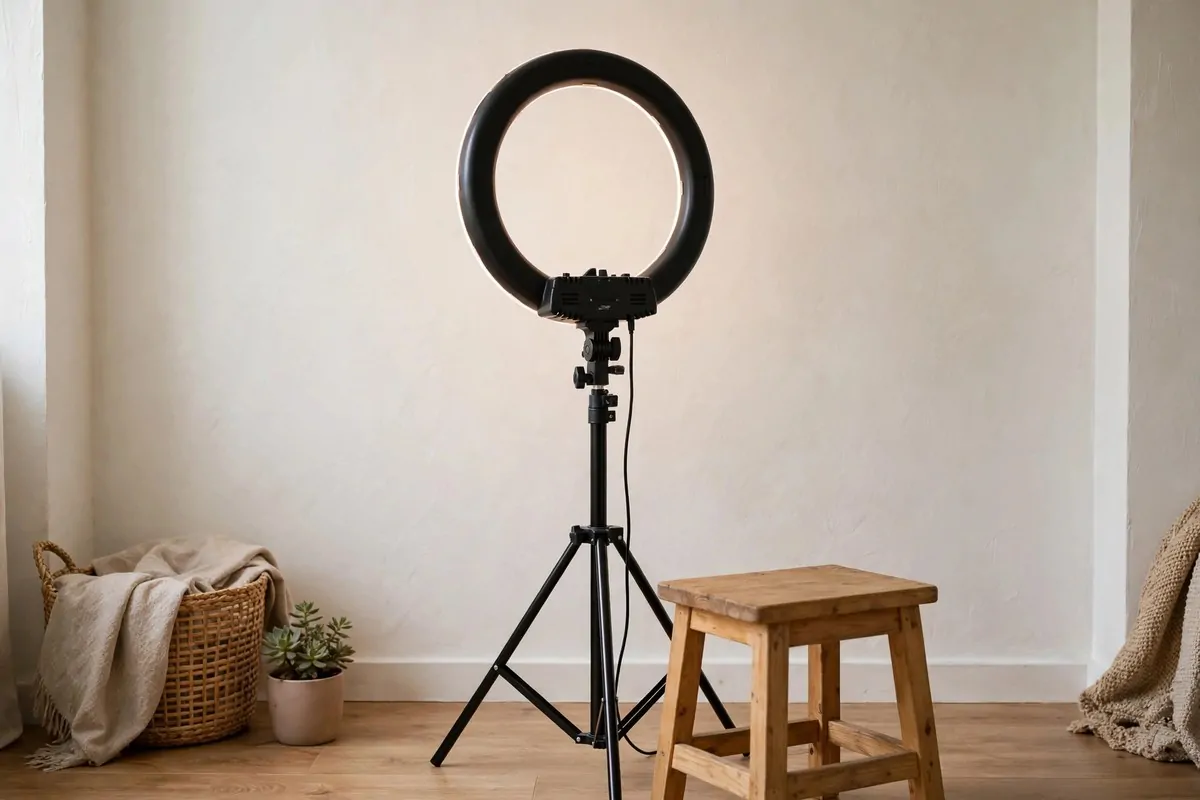
A ring light is the fastest studio you can own. Set it on a tripod, sit in front of it, and you have perfect even light on your face.
Ring lights are loved for a reason. They put a pretty circle of light in the eyes. That catchlight makes portraits look alive and bright.
This setup lives in a corner. Ring light, plain wall, small stool. It takes up two square feet. You can leave it up all the time.
It is perfect for self-portraits, video calls, and content creation. If you film or stream, this nook pays for itself fast.
Get one with adjustable color temperature. Warm for cozy videos, daylight for true colors. A dimmer helps you match the room.
Set the light slightly above eye level. It mimics natural window light and flatters the face.
A phone holder in the center of the ring keeps your framing steady for videos.
Dim it down for evening shoots. Full blast at night looks harsh and washes you out.
12. The Garage Flex Studio
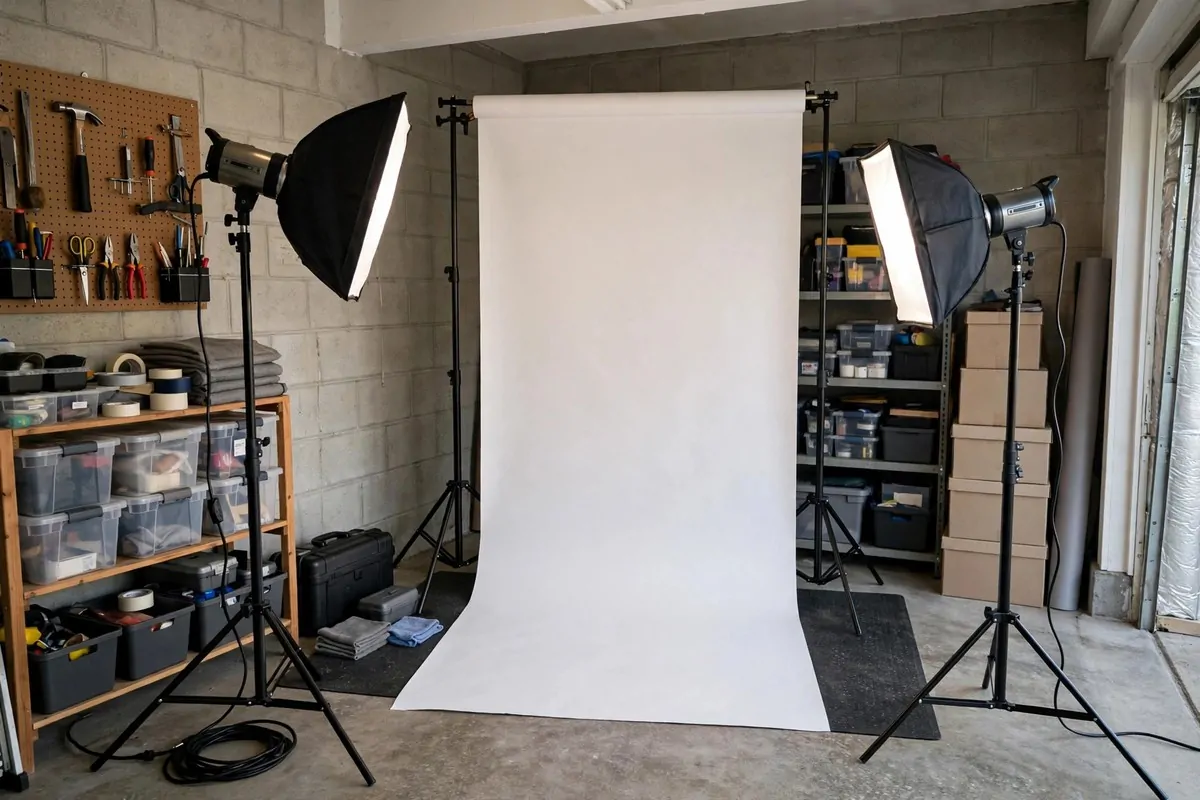
A garage is a studio waiting to happen. It has high ceilings, concrete floors, and big open space. Most of us just never thought of it that way.
Clear one corner. Roll out a paper backdrop on a portable stand. Set up two lights. You have more room here than in any bedroom studio.
The best part is the flex. Shoot Saturday morning, park the car back Saturday night. A collapsible backdrop stand folds down in four minutes.
Concrete floors look great in photos too. They give an industrial edge to portraits and product shots. Lay a rug down if you want it softer.
Watch the light from the garage door. It changes all day. For consistent results, close the door and use only your studio lights.
Mark your light positions with tape on the floor. Next setup takes half the time.
A portable heater makes winter shoots bearable. Garages get cold fast.
Keep a broom handy. Garage floors show every speck of dust in photos.
13. The Balloon Color Theme
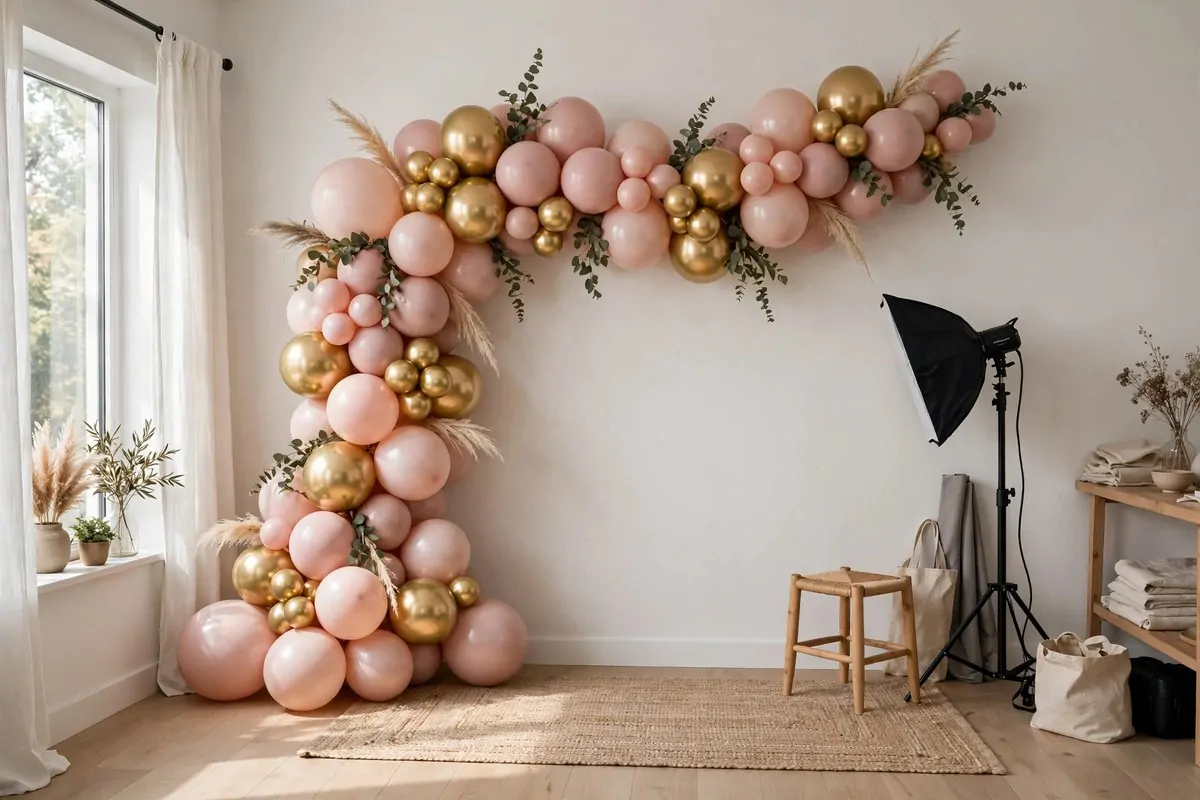
Balloons are not just for parties. A balloon garland in one color family makes a stunning, cheap photo backdrop. Gold, blush pink, or all white.
Buy balloons in three sizes. Blow them up and tie them into clusters. Attach the clusters to a string or a strip of tape on the wall.
Build from the edges inward. Fill gaps with the small balloons. The garland looks full and pro when you cannot see the wall through it.
Match everything to the same color family. Outfit, props, even nail polish. A themed shoot looks planned and expensive in every photo.
This setup shines for birthdays, baby announcements, and brand launches. It takes an hour to build and photographs like a dream.
Blow up balloons the night before. Fresh balloons shrink slightly and the garland loosens.
An electric balloon pump saves your lungs. They cost little and inflate hundreds of balloons.
Add a few clear confetti balloons for sparkle. They catch the light beautifully.
14. The Projector Screen Background
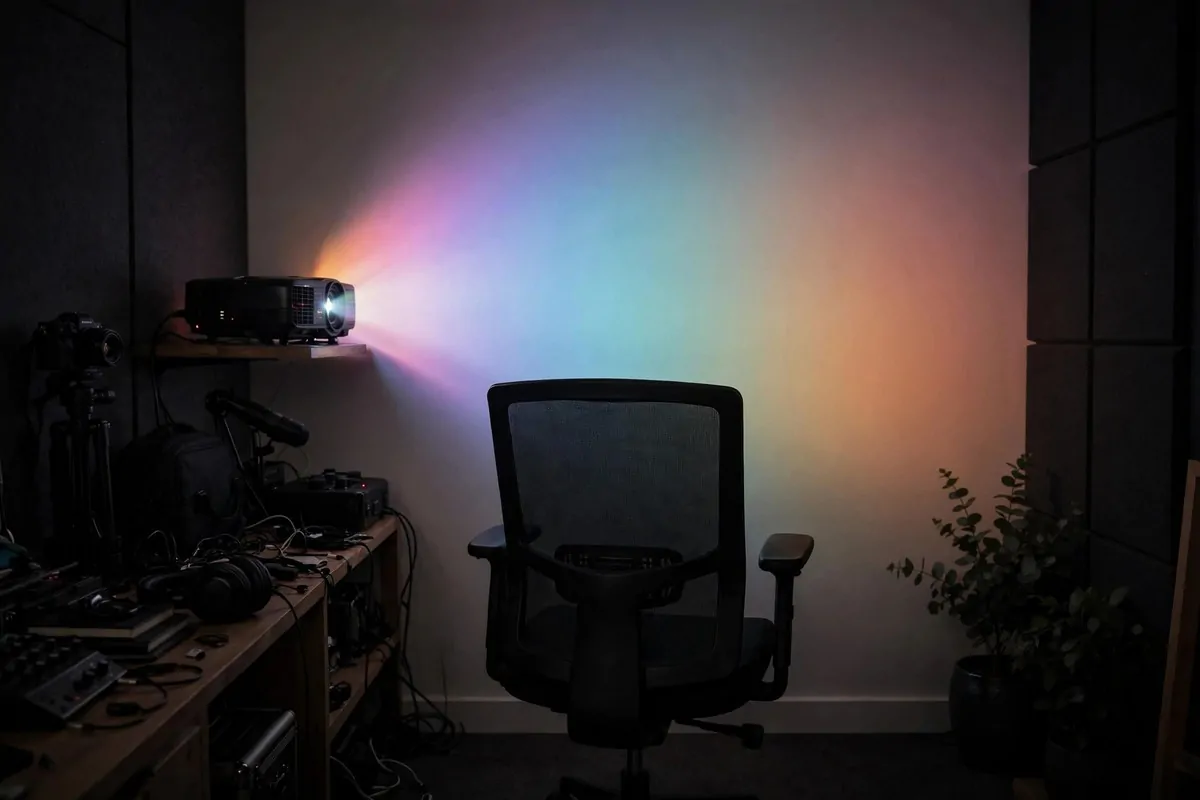
Here is a wild trick. Point a projector at a white wall and you have any background you want. Sunsets, city lights, soft gradients.
Search for free background videos or images online. Project them big behind your subject. The light from the projector even lights the scene a little.
This beats a green screen for most home shooters. No editing needed. What you see is what the camera gets. The photos look real and fun.
Keep the room dark so the projection stays bright. Put your subject a few feet in front of the wall so they do not block the whole image.
You can even use a big TV screen the same way. It is smaller, but it works great for headshots and close portraits.
- Projector: any background you can imagine
- TV screen: easy headshot backgrounds
- Cost: free if you already own one
Turn off image smoothing on the projector. You want crisp backgrounds, not blurry ones.
Test the brightness with your camera first. What looks bright to eyes can look dim on camera.
Keep the projector behind the camera. That way nobody walks through the beam mid-shoot.
15. The Textured Fabric Wall
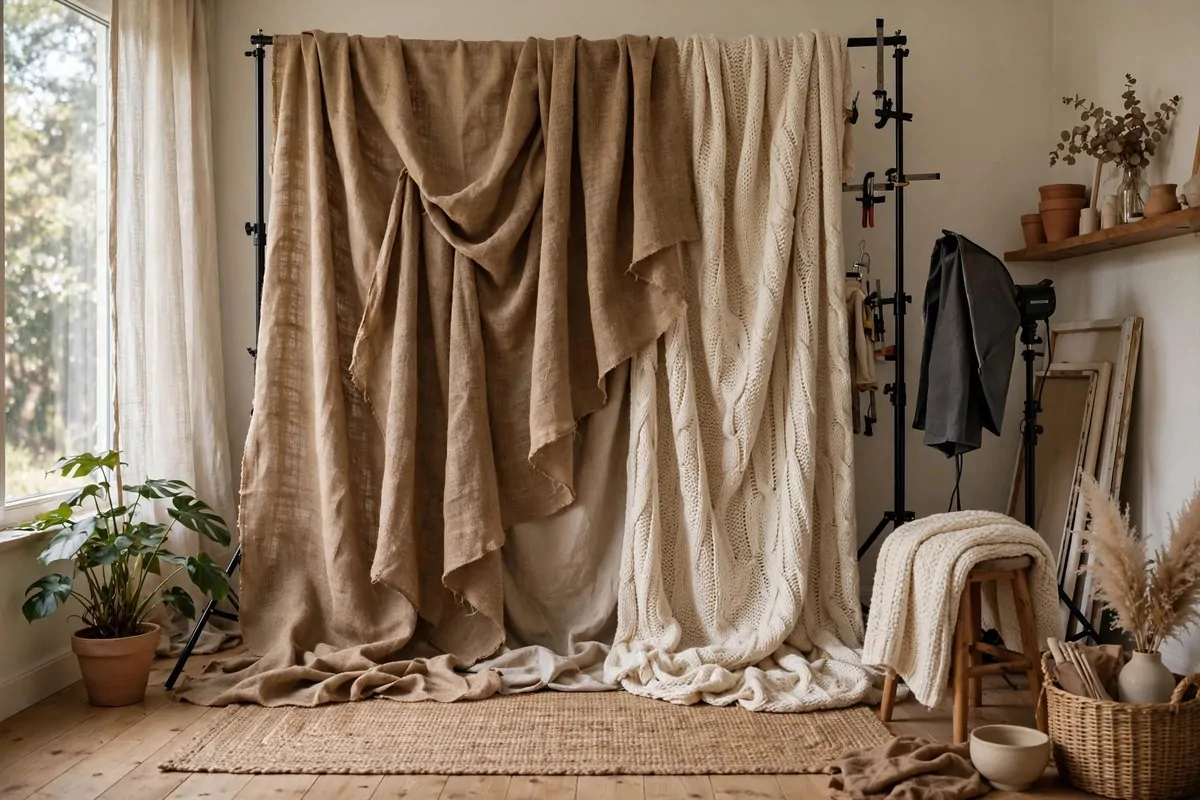
Texture makes photos interesting. Burlap, knit blankets, and linen all catch light in pretty ways. They add depth without any pattern to fight.
Drape the fabric loosely from a curtain rod. Let it fold and hang naturally. Those soft folds create shadows that look rich on camera.
Earthy fabrics work best. Think natural burlap, cream knit, or soft gray linen. They flatter skin and suit rustic, cozy photo styles.
Layer two fabrics for more interest. A sheer white over burlap softens the texture and glows when light hits it from behind.
This backdrop is perfect for newborn shoots, family portraits, and handmade product photos. It feels warm and handmade in the best way.
Wash new fabric before hanging. Sizing chemicals make it stiff and shiny.
Steam out the packing creases. Crisp fold lines look cheap in photos.
Backlight sheer fabrics for a glow effect. The light shining through looks dreamy.
16. The Living Plant Wall
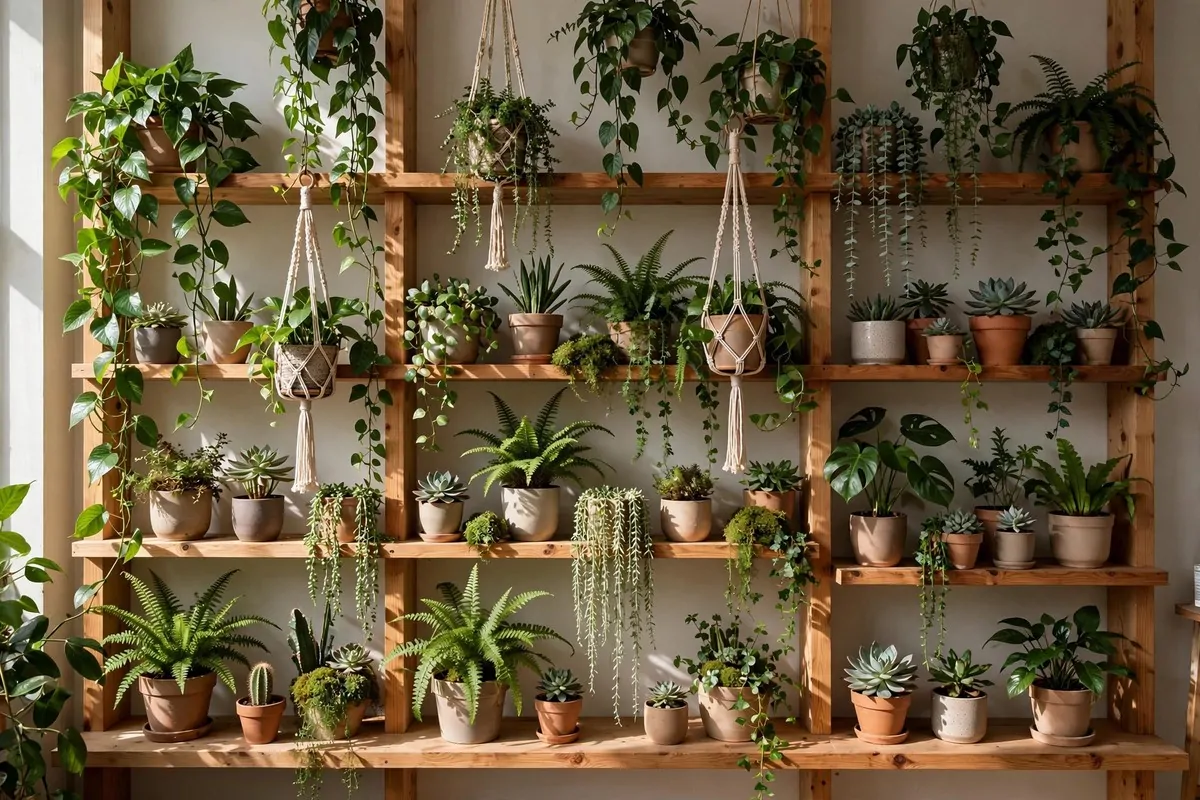
Plants are a backdrop that takes care of itself. A wall of greenery makes every photo feel fresh, alive, and expensive. And it is just your plant collection.
Group your plants together on shelves against one wall. Mix tall plants with trailing ones. Fill the gaps with small pots. Shoot in front of it.
A simple wood shelf unit works as the base. Three shelves of plants read as a full green wall in photos. The camera only sees what is behind you.
Real plants are best, but good fake ones work for the back rows. Nobody can tell in a photo. Mix them and save money.
Brand shoots, wellness content, and lifestyle portraits all love a green wall. It says fresh and natural without saying a word.
Water the plants the day before. Droopy leaves ruin the fresh look.
Wipe big leaves clean. Dust shows up in close-ups more than you think.
Rotate the plants monthly. The ones in back need light too or they fade.
17. The Streamer Ceiling Corner
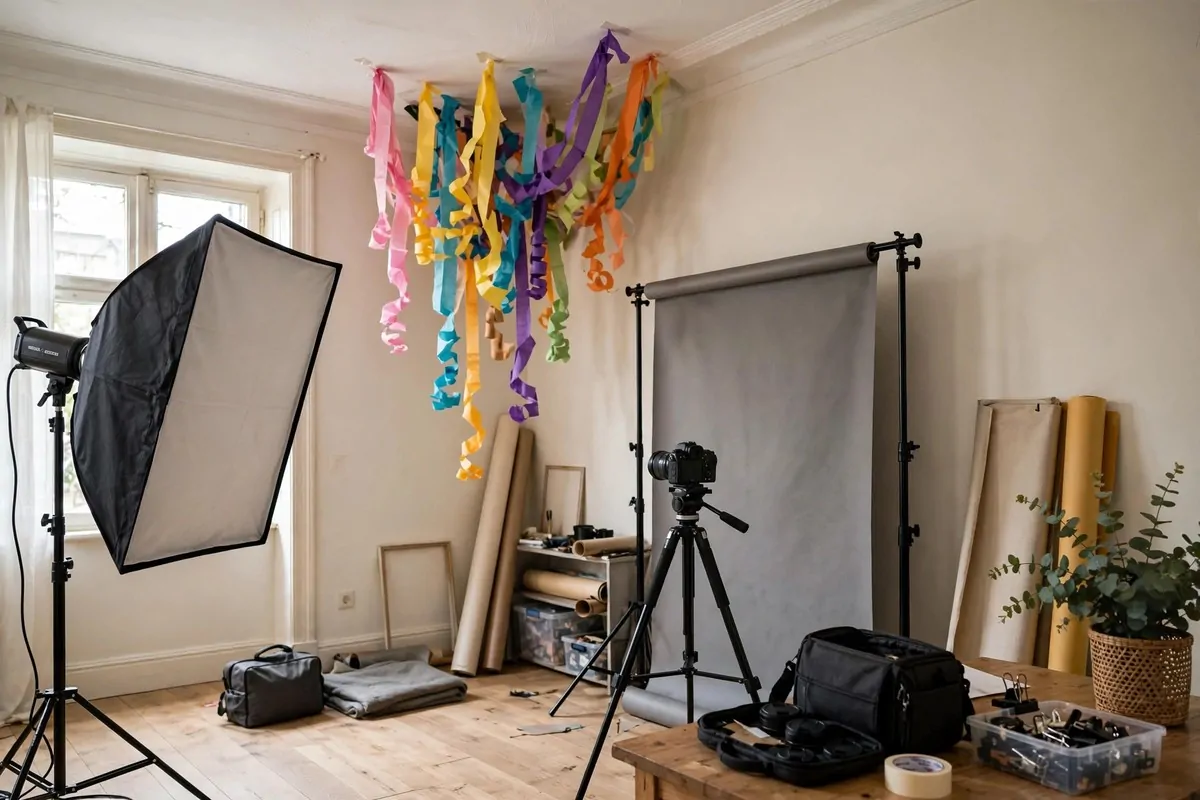
Look up. Your ceiling is a backdrop too. Hanging paper streamers from the ceiling creates a fun, colorful photo corner in minutes.
Tape strips of crepe paper or ribbon to the ceiling in rows. Let them hang down at different lengths. Stand your subject under them and shoot upward slightly.
Metallic streamers catch light beautifully. Gold and rose gold strips sparkle in photos and make simple portraits feel like a party.
This is a great kids birthday setup. It is cheap, it is cheerful, and it comes down in five minutes with no damage to the ceiling.
Use painter’s tape on the ceiling to avoid marks. Test one strip first to make sure it holds. Then go wild with color.
- Crepe paper: soft and matte
- Metallic curling ribbon: sparkle and shine
- Tissue tassels: full and fluffy
Twist the streamers as you hang them. Twisted strips catch more light and look fuller.
Hang them at different lengths for depth. Uniform length looks flat in photos.
Use removable hooks instead of tape on textured ceilings. Tape peels paint.
18. The Moody Black Corner
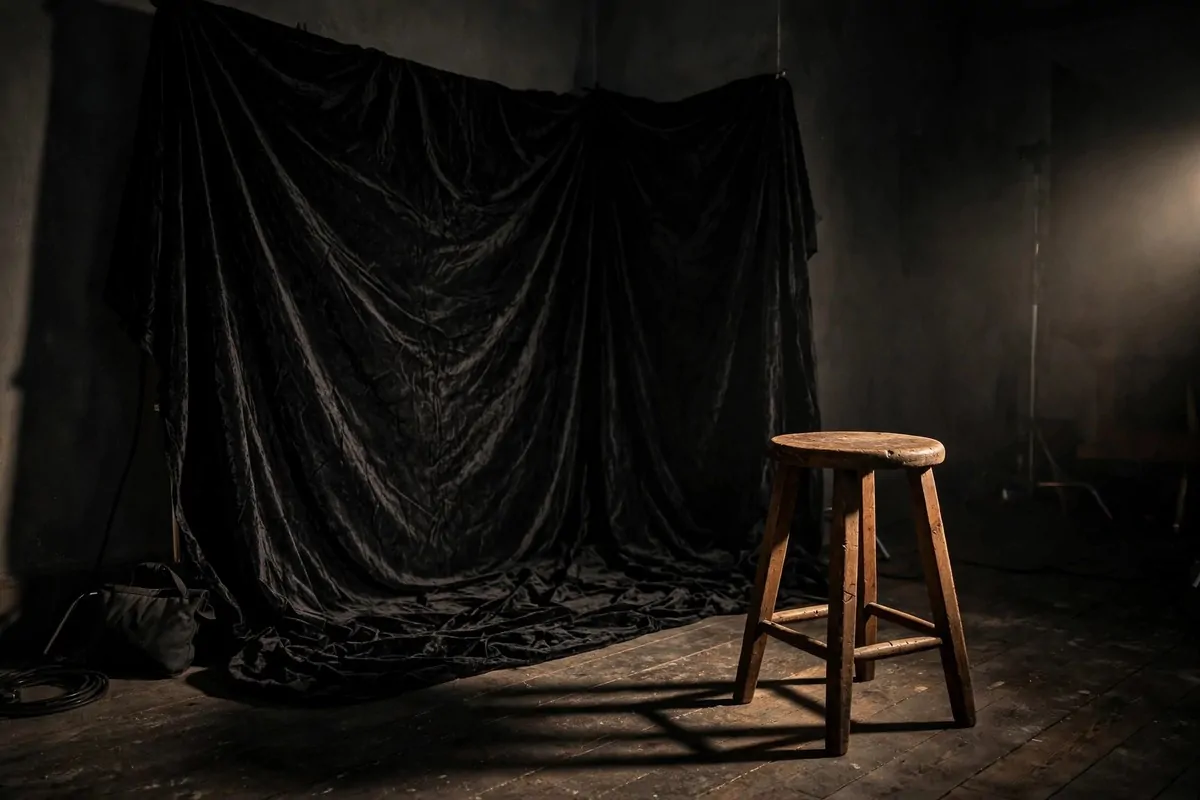
Not every photo needs to be bright. A black backdrop with one dramatic light makes portraits look like fine art. Moody is a whole style.
Hang black fabric or black paper on one wall. Velvet works best because it eats light. The background goes truly black, not dark gray.
Use one light from the side. Keep it off the background. Light only your subject and let everything else fall into shadow.
This setup loves dramatic portraits, musician photos, and product shots with attitude. Black backgrounds make colors pop like nothing else.
Keep the room dark. Any stray light will show on the black backdrop. Close curtains, turn off lamps, and let the one light do all the work.
Wear dark clothes when testing. Light clothes bounce light onto the backdrop.
A hair light from behind separates dark hair from the black background. One small lamp does it.
Keep the backdrop at least six feet behind your subject. Distance keeps it truly black.
19. The Golden Hour Patio
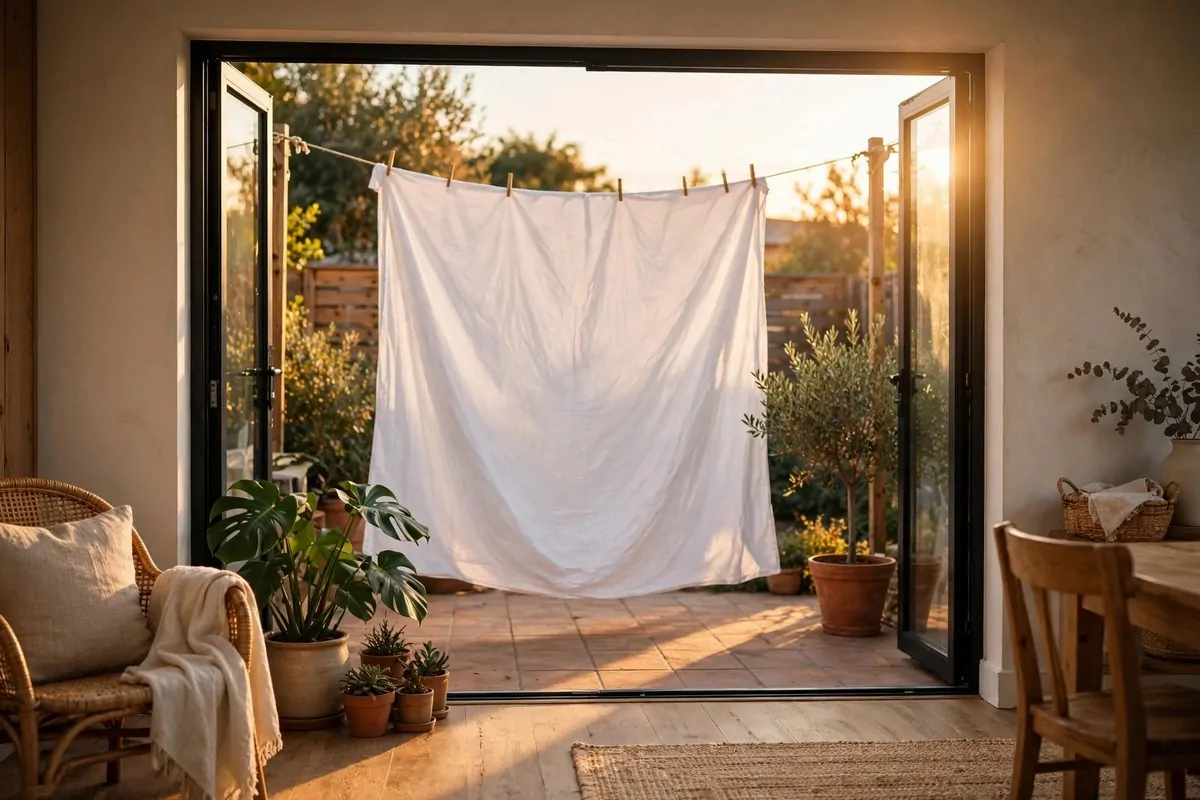
The best studio light is free and it happens every evening. Golden hour, that last hour before sunset, makes everything look beautiful.
Set up a simple backdrop on your patio or balcony. A white sheet on a clothesline works. The warm sun does all the heavy lifting.
Shoot with the sun behind your subject for a glowing halo effect. Use a white reflector in front to bounce light back onto the face.
No lights to buy. No electricity needed. Just timing. Check sunset time and start shooting 45 minutes before. You get about half an hour of magic.
Outdoor portraits, family photos, and fashion shots all glow at golden hour. Some photographers plan their whole business around it.
Scout the spot a day early. Check where the sun actually sets and what is behind you.
Bring a white sheet as a reflector. It bounces golden light back onto faces.
Shoot fast. Golden hour lasts about 40 minutes and the best light is the last 15.
20. The Dressing Mirror Corner
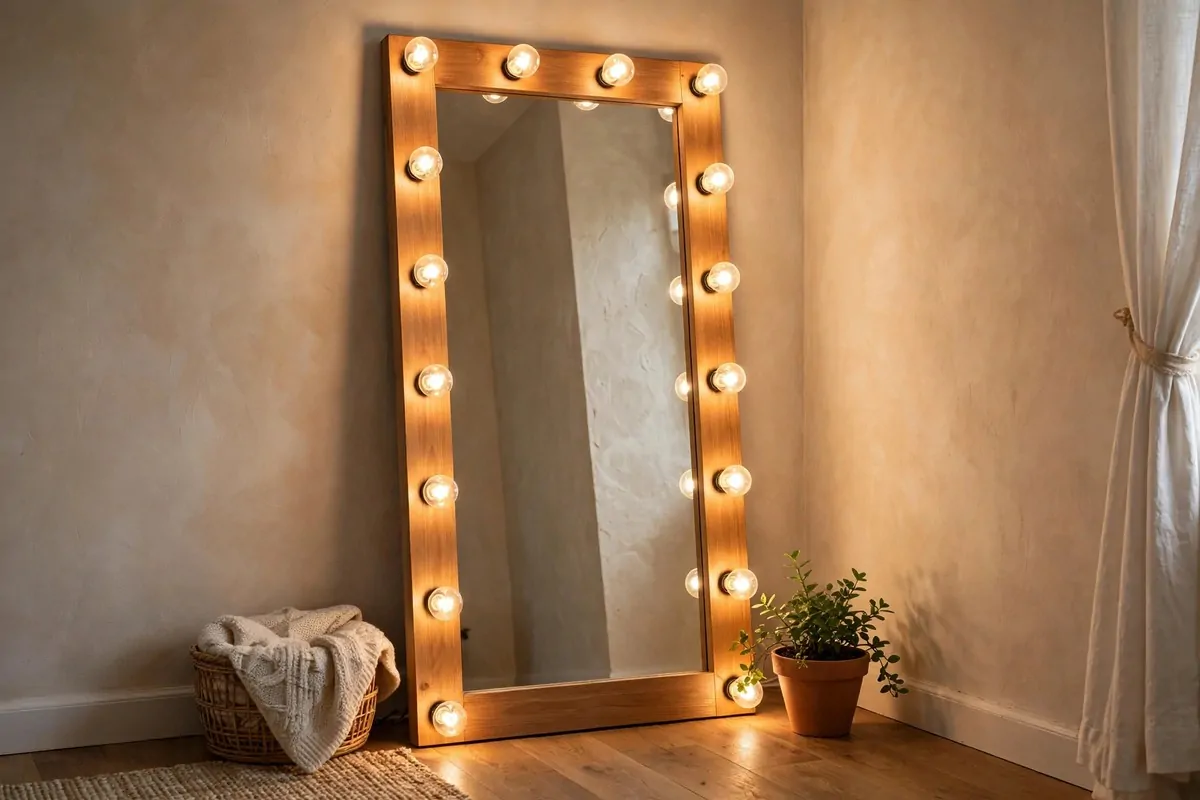
A full length mirror with lights around it is a studio and a backdrop in one. Stand in front of it and shoot your own reflection for creative self portraits.
The mirror doubles your light. Bulbs around the frame give even, flattering light. Your reflection adds depth and story to the photo.
This corner works for outfit photos, beauty shots, and fun creative portraits. Play with angles. Shoot the mirror straight on or from the side.
Keep the area around the mirror tidy. The mirror shows everything behind you. A clean wall and a small plant are all you need.
It is also just a nice corner to have. Good light, a good mirror, and a spot that makes you feel good every morning.
Clean the mirror right before shooting. Every speck shows when lights are bright.
Angle the mirror slightly to avoid flash bounce straight back at the camera.
A small rug under the mirror defines the space. It makes the corner feel intentional.