19 DIY Home Library Projects That Look Custom-Built

Last spring I stood in the lumber aisle with a cart full of pine boards and my phone calculator open in my other hand. The carpenter’s quote for built-in library shelves had been four thousand dollars. My cart of boards, screws and paint came to just under two hundred. That gap between the two numbers is the whole reason I am writing this. You do not need a contractor to get the custom-built look. You need a free weekend, a few basic tools, and the right project. These 19 DIY home library projects are the ones that fooled my own guests. Every single one looks like it was built into the house from day one.
1. Build Floor-to-Ceiling Shelves From Plywood and Pine
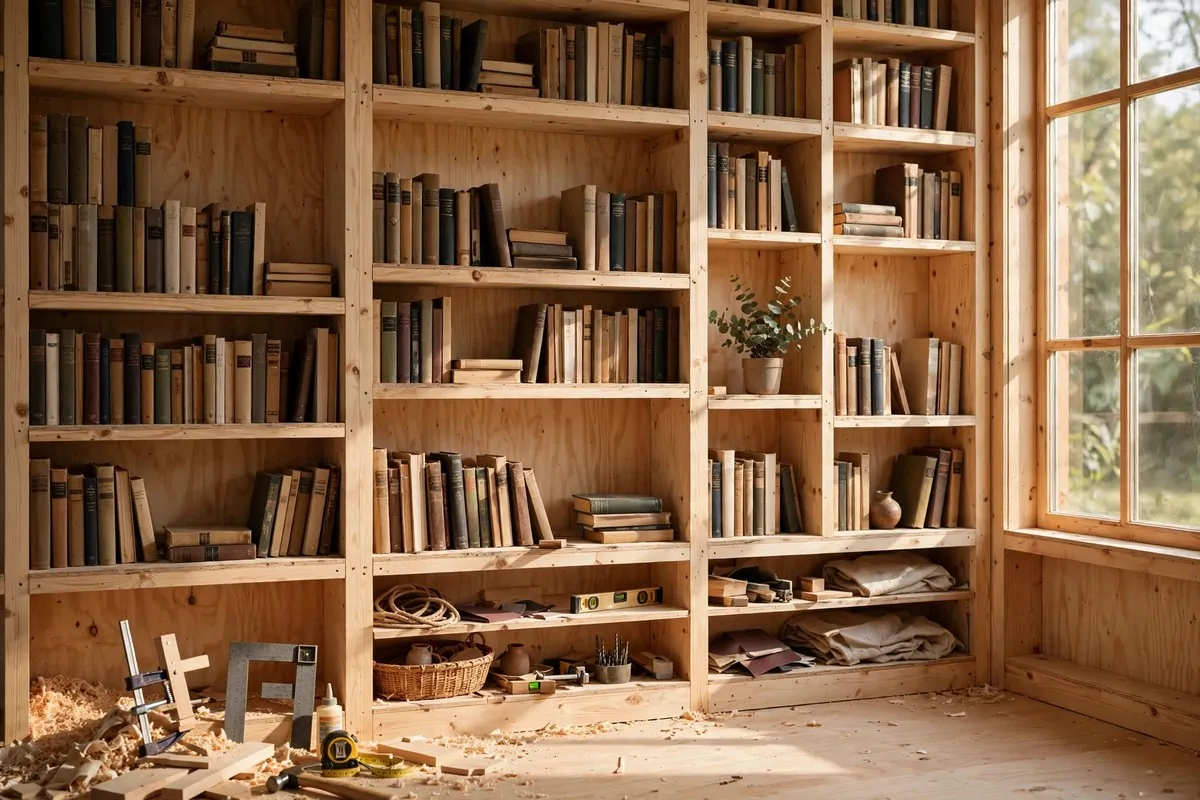
This is the big one. And honestly, it is simpler than it looks.
You build a few open boxes from plywood. You screw pine boards across the front as face frames. Then you stack the boxes floor to ceiling and screw them to the wall studs. That is the whole trick.
The face frame is what sells it. Raw plywood edges look homemade. A clean pine frame over the front makes it look like real cabinetry. Sand it smooth and your eye cannot tell the difference.
Measure your wall first. Cut your plywood sides so the unit stops a finger’s width below the ceiling. A tiny gap gets hidden with a strip of trim later, so do not stress about perfect.
Use 3/4 inch plywood for the sides. Thinner boards sag under heavy books. I learned that the hard way with a wavy middle shelf.
Pocket screws make this easy. You do not need fancy joinery. Just drill, screw, and glue. It holds like iron.
Paint everything one color when you are done. White, cream, or a deep green. One color hides every seam and makes the whole wall read as one built-in piece.
Here is what one wall cost me, roughly:
| Material | Rough cost |
|---|---|
| Plywood sheets (4) | $140 |
| Pine 1×2 boards for face frames | $30 |
| Screws, glue, trim | $25 |
| Paint and primer | $35 |
Guests will touch it and ask who your carpenter was. I let them guess.
2. Bridge a Doorway With a Shelf Header
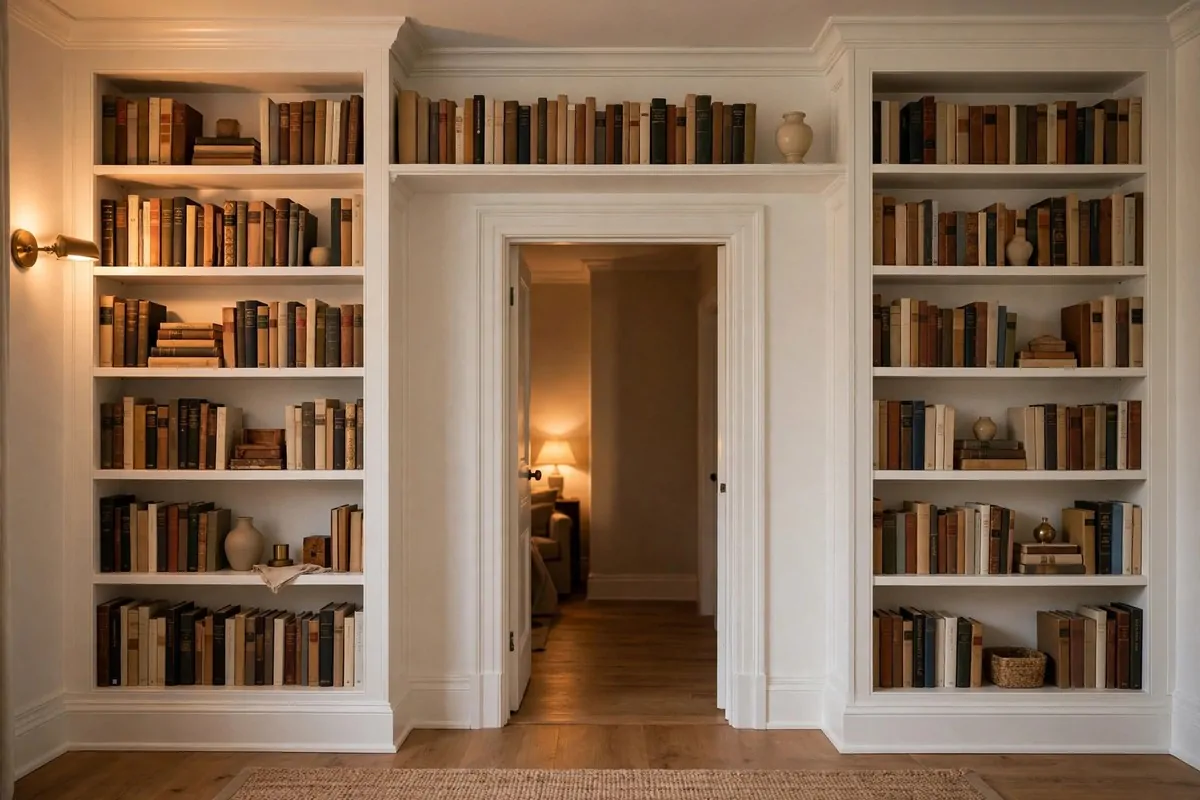
That dead space above a doorway bugs me. It just sits there doing nothing.
So frame the doorway with two tall bookcases, one on each side. Then build a shallow shelf that bridges across the top, right above the door frame. Suddenly the doorway looks planned, like the house was designed around your books.
The bridge shelf is light work. A simple box, maybe ten inches deep. Screw it into the tops of the two bookcases so everything ties together as one unit.
This is where trim earns its keep. Run a strip of molding where the shelf meets the ceiling and where the bookcases meet the wall. Caulk the seams.
Paint it all the same color as your trim. White on white disappears into the house. Your brain reads it as architecture, not furniture.
Keep the bridge shelf shallow. Books you rarely touch go up there. The pretty ones. Nobody wants to fetch a daily read from over a door.
Anchor everything to studs. Tall bookcases tip. This one matters more than most steps.
My friend did this in a hallway and it looks like the hallway was always a library. That is the whole point.
3. Build Shelves That Fit an Awkward Alcove Exactly
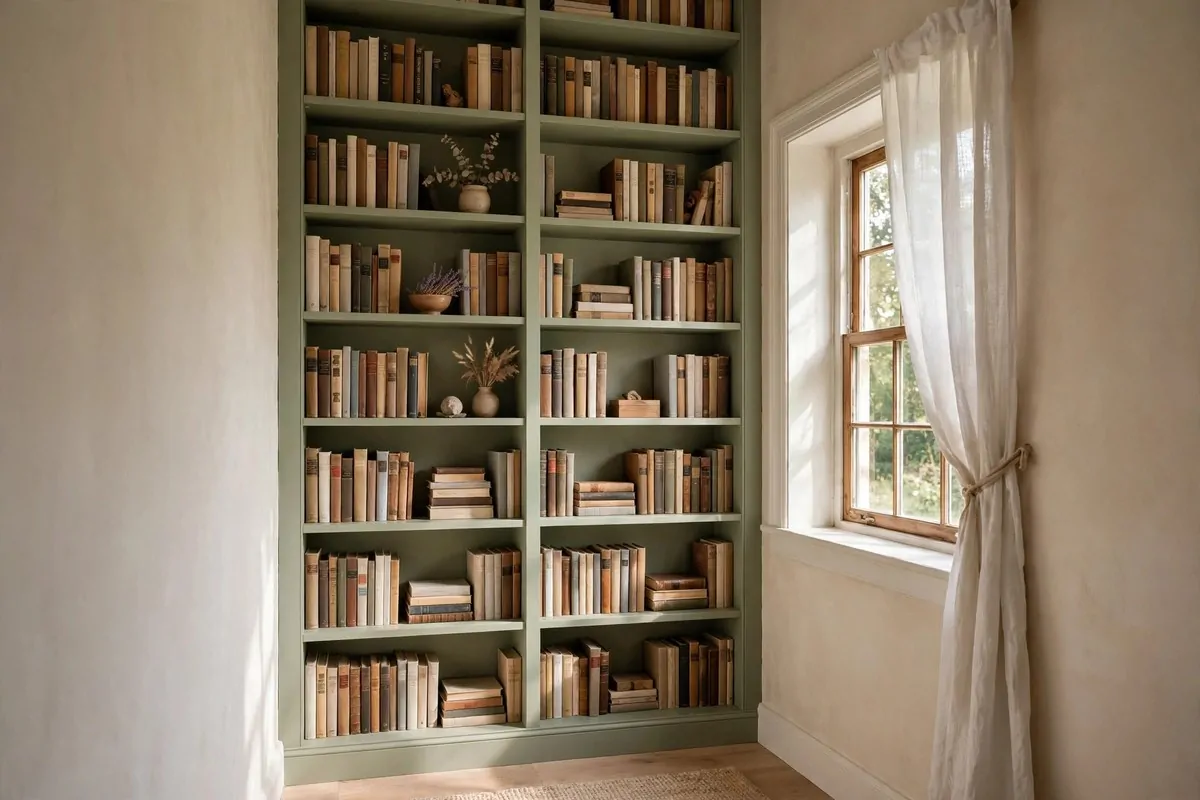
Every house has that one weird nook. Too narrow for furniture. Too deep to ignore.
Measure it. Build simple shelf boxes to fit the exact width. Slide them in. Add a trim board on each side to cover the small gaps. Nobody will ever know it was not built with the house.
Measure twice, cut once. Walls are never straight, so measure the width at the top, middle and bottom. Build to the smallest number.
Leave a quarter inch of wiggle room. You can fill the rest with caulk. Caulk forgives a lot of sins, honestly.
Paint the shelves and the trim the same color. This is the oldest built-in trick there is. One color, one piece of furniture, one wall.
I painted mine sage green. It makes the books pop and the nook looks intentional instead of leftover.
Small nooks hold more than you think. Paperbacks need only six inches of depth. You can fit a whole collection in a space you used to ignore.
This project takes one Saturday. The measuring takes longer than the building, and that is fine.
4. Fake Arched Openings With Store-Bought Corbels
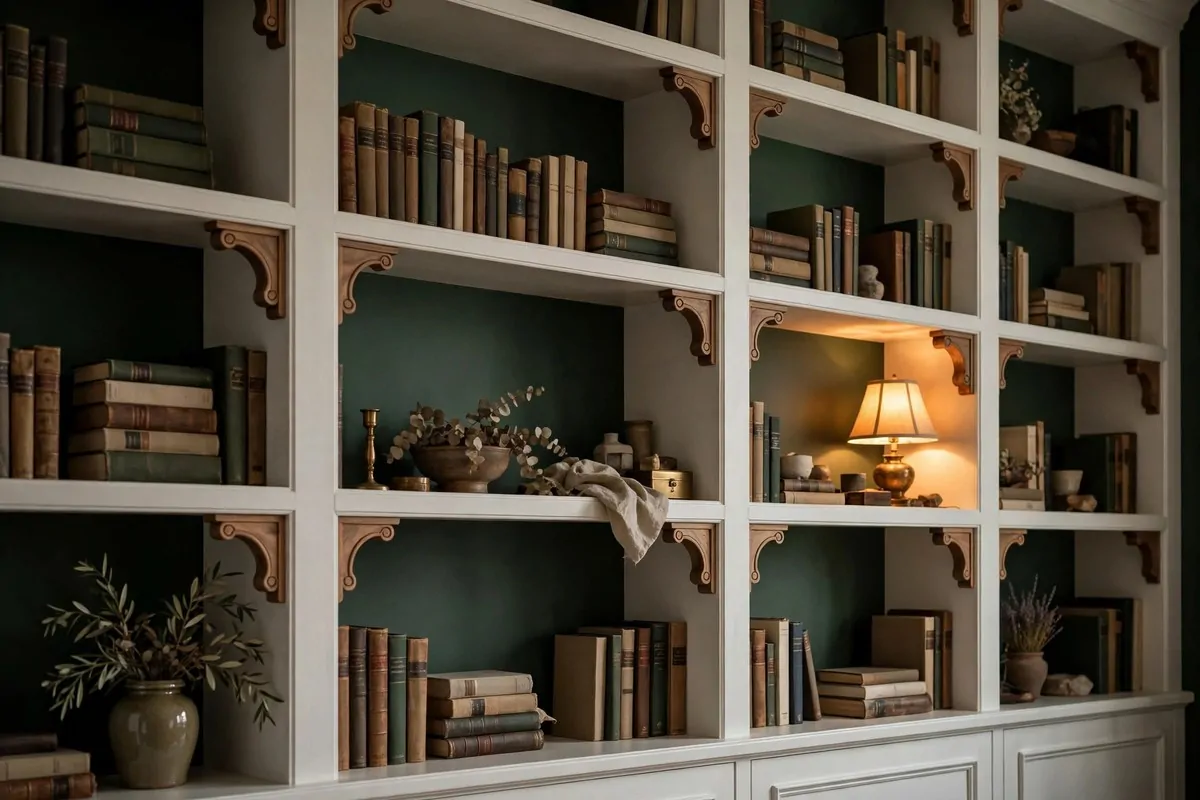
Real arched shelves need a skilled carpenter. This fake needs glue and two dollars.
Buy small curved wooden corbels from the hardware store. Glue one into the top left corner of a shelf opening. Glue another into the top right corner.
The two curves together read as an arch. Your eye fills in the rest. It is a trick, but it works every time.
Clamp them while the glue dries. An hour is enough. Then run a tiny bead of caulk where the corbel meets the shelf to hide the joint.
Paint over everything. The corbels disappear into the shelf. What is left is the soft arched shape, like old European libraries.
Do this on the top row of openings only. That is where eyes land first. The lower shelves can stay square and nobody notices.
I did this on plain white bookcases and a guest asked if they were antique. They cost twelve dollars in corbels.
Small detail, huge payoff. That is my favorite kind of project.
5. Set Your Bookcases on Low Drawer Cabinets
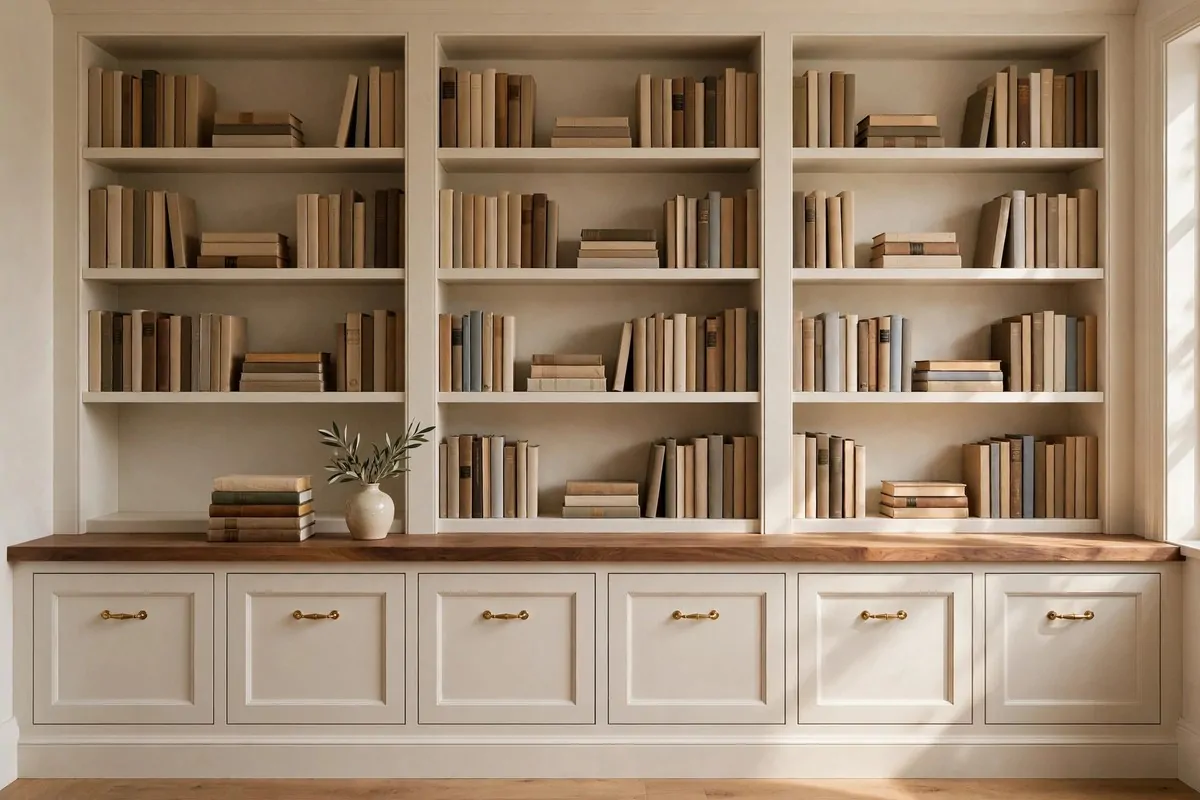
This one borrows a trick from high-end built-ins. They almost always have closed storage at the bottom and open shelves on top.
So build the same thing. Put a row of low drawer cabinets along the wall. Set your bookcases right on top of them. Now you have hidden storage for the messy stuff and pretty shelves for the books.
The cabinets do not have to match the bookcases at first. Paint fixes everything. One color over the whole stack makes two different pieces look like one custom unit.
Add a thick wood board across the top of the cabinets as a counter. It covers the seam between the two pieces. It also gives you a spot for a lamp or a stack of books.
Swap the drawer pulls for something nicer. Brass or black handles cost a few dollars and make cheap cabinets look expensive.
This setup is great for families. Games, chargers, and clutter hide in the drawers. The shelves stay calm and pretty.
Measure your ceiling before you stack. Bookcases on cabinets get tall fast. You want a few inches of breathing room at the top.
Start with the cabinets level. Shim the low spots until the top is dead flat. Everything above depends on that base being right.
6. Cut Shallow Shelves Into the Wall Between Studs
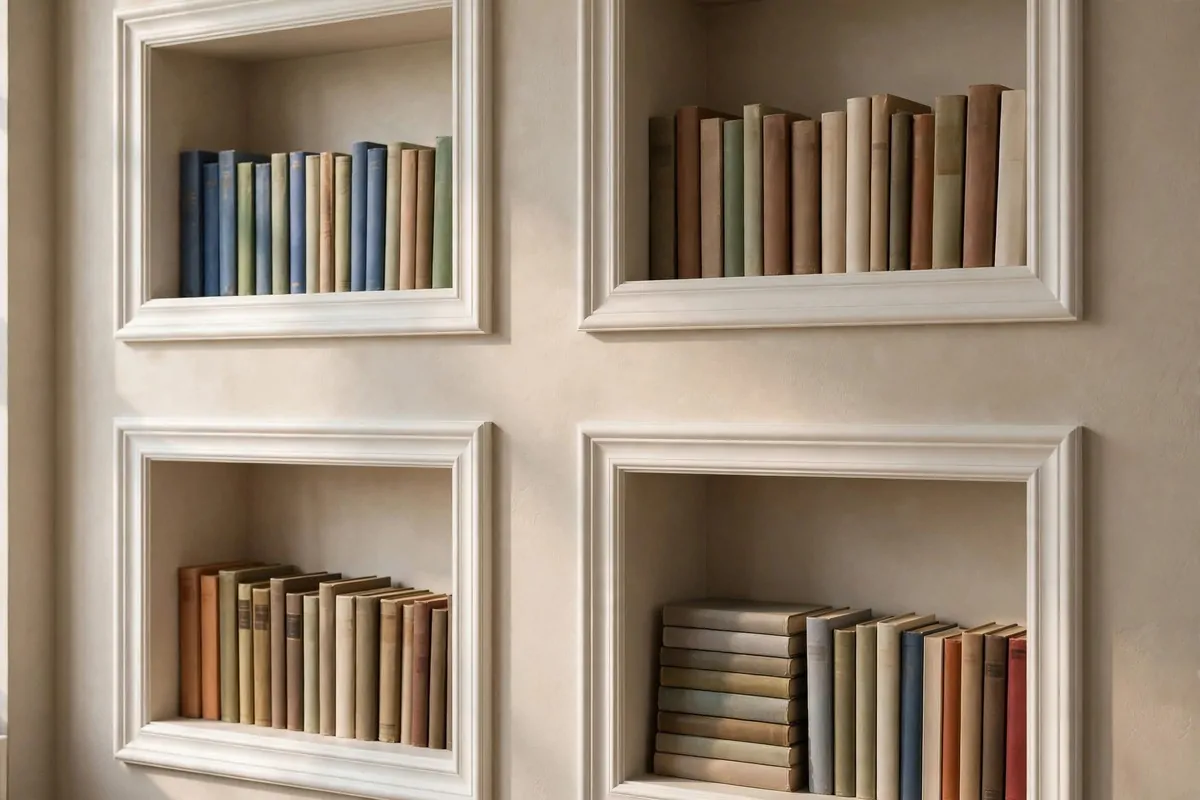
This is the most built-in looking project on the list. Because the shelves are literally inside the wall.
Find the studs with a stud finder. Cut out the drywall between two studs. Build a shallow box that fits the opening. Slide it in and trim the edges with molding.
Check for wires and pipes first. This step is not optional. Poke a small inspection hole and look with a flashlight before you cut big.
Paperbacks fit perfectly in a stud bay. It is about three and a half inches deep, which is exactly right for most books.
Frame each opening with trim like a picture frame. Paint the trim white and the inside of the niche a soft color. It looks like the house was born with it.
This works best on interior walls. Exterior walls have insulation that makes the job messy. Stick to inside walls.
One wall of these niches holds a surprising number of books. And they take up zero floor space. Small rooms love this trick.
Patching is easy if you ever change your mind. A piece of drywall and some spackle, and the wall is whole again.
7. Stack Wooden Crates Into a Bookcase Wall
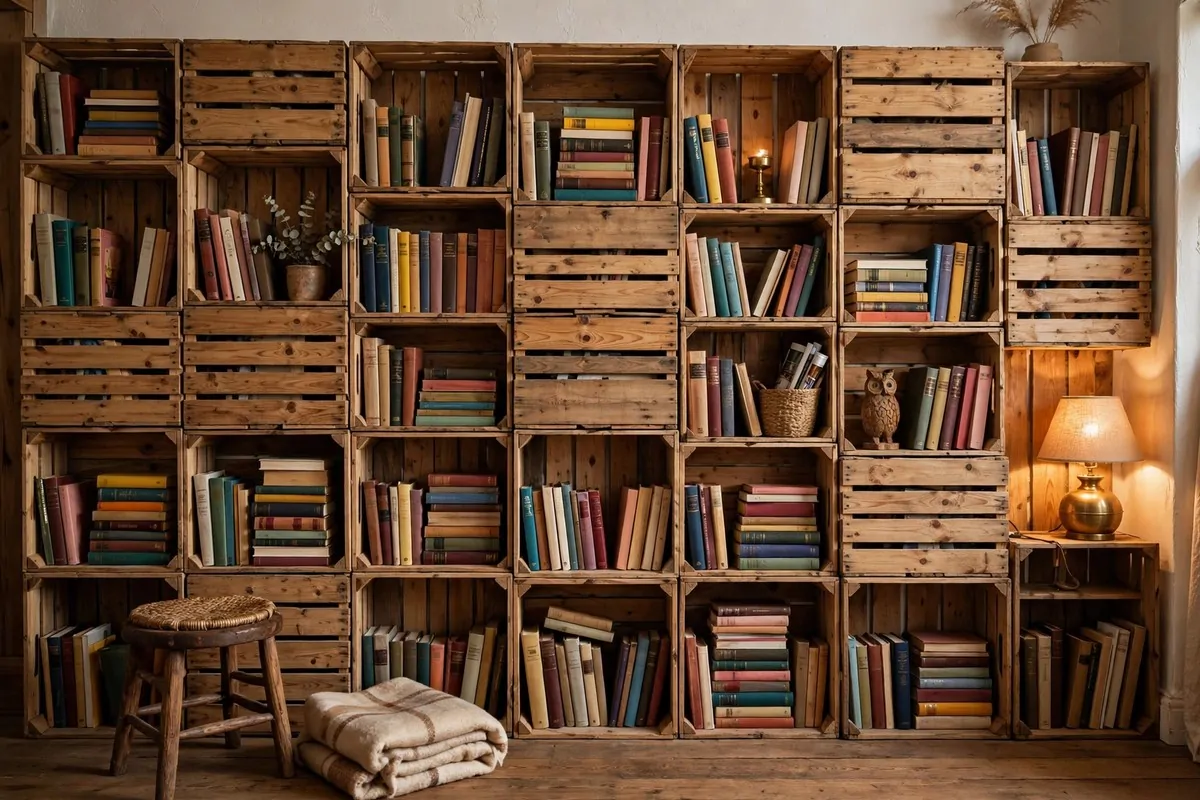
Wooden crates are the cheapest shelving on earth. And stacked right, they look like a designer did it on purpose.
Screw the crates together in a grid. Alternate some sideways for cubbies of different sizes. The mix of orientations is what makes it look designed instead of random.
Sand the rough edges. Crates are splintery. Ten minutes with sandpaper saves your books and your hands.
Stain them or paint them one color. I like a warm walnut stain. It makes cheap pine look rich and old.
Anchor the whole grid to the wall. A stack of crates full of books is heavy. Two brackets into studs keep it safe.
Leave a few crates empty or half full. A styled object here and there, a small plant-free vase, a stack of magazines. Breathing room makes it look styled on purpose.
This is a great first project. No real cutting. Just screws and stacking. A teenager could do it.
When you move, you unscrew the grid and the crates become storage boxes again. Nothing wasted.
8. Build Honeycomb Shelves From 1×3 Boards
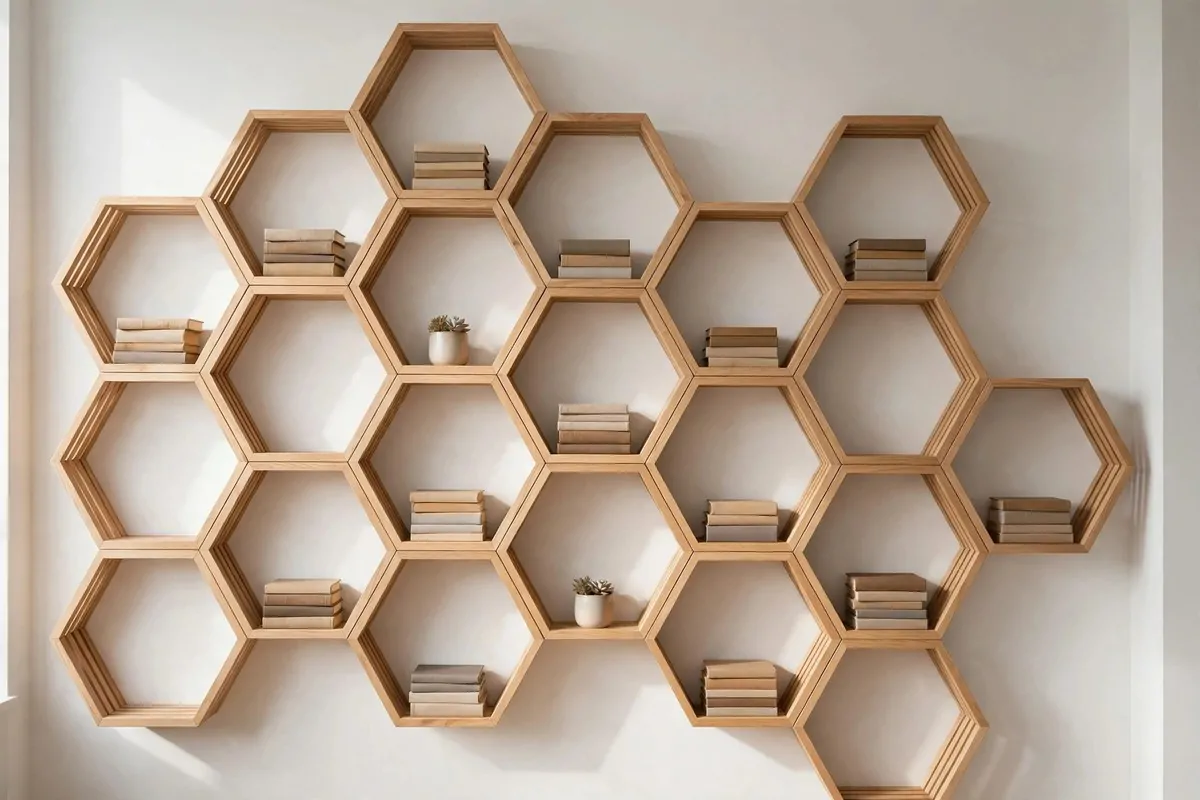
Hexagon shelves look like modern art. They are really just six short boards screwed into a ring.
Cut your 1×3 boards with 30-degree angles on each end. Six pieces make one hexagon. Glue and screw the joints. Sand smooth.
Make a bunch of them in the same size. Hang them on the wall in a honeycomb cluster. Touching edges make the pattern read strong.
Books sit fine inside a hexagon. Lay a few flat in each one. Mix in a small object or two for variety.
Paint them all one color for a clean modern look. Or stain them warm wood for a Scandinavian feel. Both look custom.
Use a level. Crooked hexagons ruin the whole effect. Take your time with the first one and the rest follow.
This is a perfect weekend project. One afternoon of cutting, one morning of hanging. Very satisfying.
Kids love these too. Let them pick the layout. It is like wall Tetris with books.
9. Turn a Thrifted China Cabinet Into a Glass-Front Bookcase
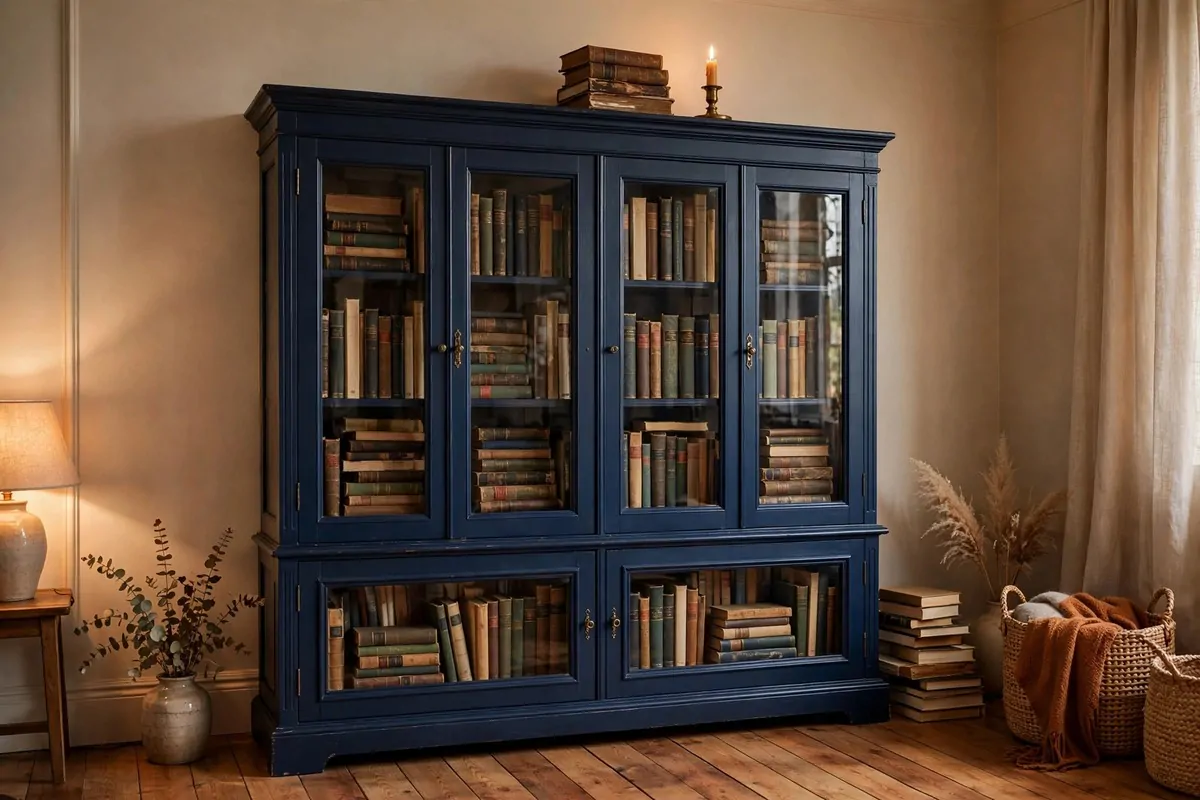
Old china cabinets are all over thrift stores. Nobody wants them for dishes anymore. But they make gorgeous bookcases.
Look for solid wood and glass doors. Wobbly legs can be fixed. Ugly finish can be painted. Bones are what matter.
Clean it well. Old cabinets smell like someone’s attic. A wipe with vinegar water and a day of airing out fixes most of it.
Paint it a rich color. Navy, deep green, or black. Dark paint makes the books inside look like a jewelry display.
Add or keep the glass doors. Glass keeps dust off your books and makes the whole thing look like a real library cabinet. That is a luxury detail you got for thrift store money.
Line the back with removable wallpaper if you want pattern. It peels off later with no damage. Instant custom interior.
Style the shelves with books and a few objects. Leave space. A china cabinet packed edge to edge looks cluttered fast.
This project costs less than one new bookcase and looks ten times more interesting. Thrift stores are treasure for this.
10. Hang Rain Gutters as Kids’ Book Shelves
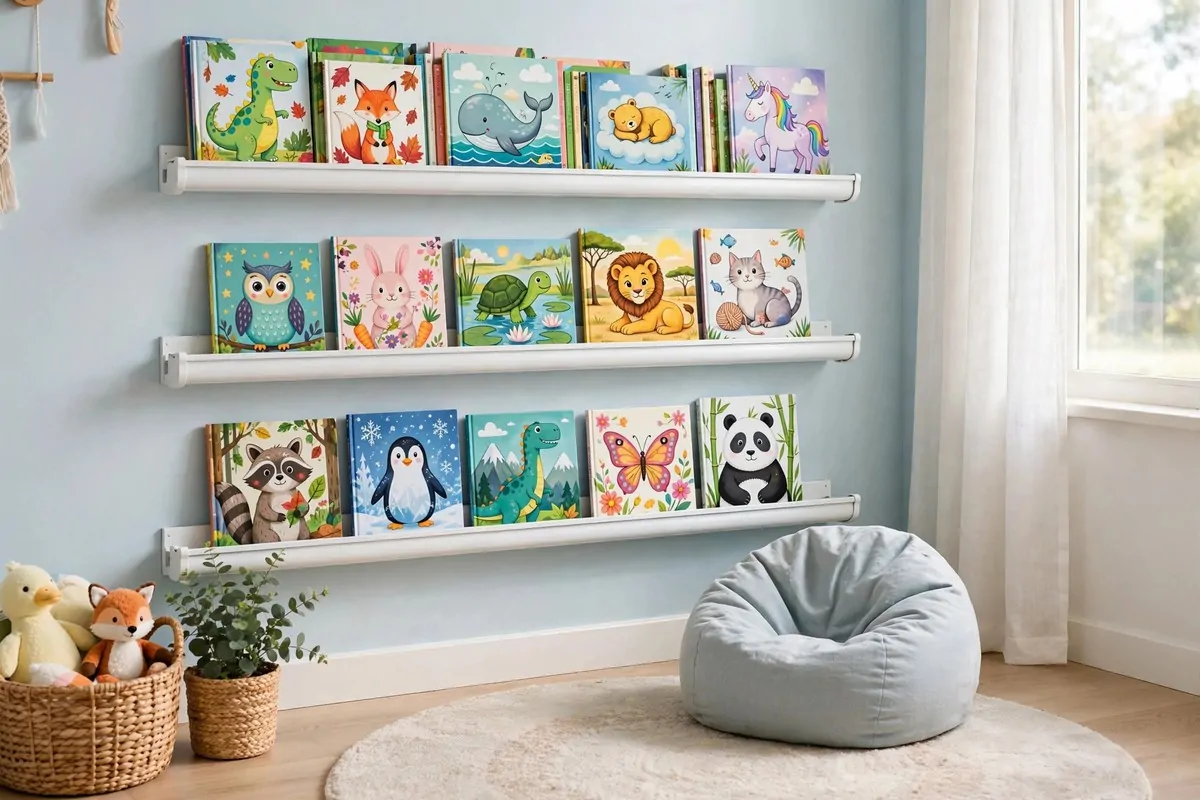
This sounds crazy until you see it. Then you want it immediately.
Buy white vinyl rain gutters from the hardware store. Cut them to length. Mount them on the wall with the open side up. They become perfect front-facing book ledges for kids’ picture books.
Kids pick books by the cover. Regular shelves hide covers. Gutters show every cover like a little bookstore. My niece goes straight to hers every visit.
Paint the gutters the same color as the wall. White on white looks like real built-in ledges. The vinyl disappears.
Mount them low. Kids should reach every book without climbing. Two or three rows at their height is perfect.
Cap the ends. Gutter end caps cost almost nothing and keep books from sliding off the sides. They also make it look finished.
Wipe them clean easily. Vinyl does not care about sticky fingers. A damp cloth and they are new again.
This costs less than dinner out. And it turns a plain wall into a kids’ library that looks totally intentional.
11. Strap a Stack of Books Into a Side Table

Got books you will never read again but cannot throw away? Make them furniture.
Stack large hardcovers into a solid column. Wrap two leather straps or belts around the stack and buckle them tight. Top it with a small tray.
The straps hold everything together. Use real leather belts from the thrift store. They look better than new straps and cost almost nothing.
Pick books with nice spines. Colors that go together. This becomes a piece of decor, so choose the stack like you are styling a shelf.
Make the stack sturdy. Alternate the direction of the books slightly, like bricks. A wobbly tower is not a table.
The tray on top gives you a flat surface for a cup or a candle. A round wooden tray looks best. It hides the top book’s cover.
This takes twenty minutes. It is the fastest project on this list. And guests always ask about it.
When you get tired of it, unbuckle the straps and the books go back on the shelf. Nothing is harmed.
12. Build a Card-Catalog Cabinet From Small Drawers

Old library card catalogs are beautiful and wildly expensive. So build a small version.
Buy a set of small wooden drawers, the craft-store kind. Stack and glue them into one cabinet. Add tiny brass pulls and paper label holders to each drawer front.
The label holders are the magic. They sell the whole library look. You can buy a pack online for a few dollars.
Fill the little drawers with bookmarks, reading glasses, pens, and sticky notes. All the small reading stuff that usually clutters a desk.
Stain the wood warm honey or dark walnut. Old card catalogs were oak. Match that color and the vibe is instant.
Put it on your desk or on a shelf. It is small on purpose. A little hit of vintage library in a modern room.
Handwrite the labels. Your own handwriting makes it personal and charming. Neatness does not matter much.
This project is pure joy. Every drawer you open feels like a tiny treasure chest. Kids go crazy for it too.
13. Build an A-Frame Magazine Rack From Dowels
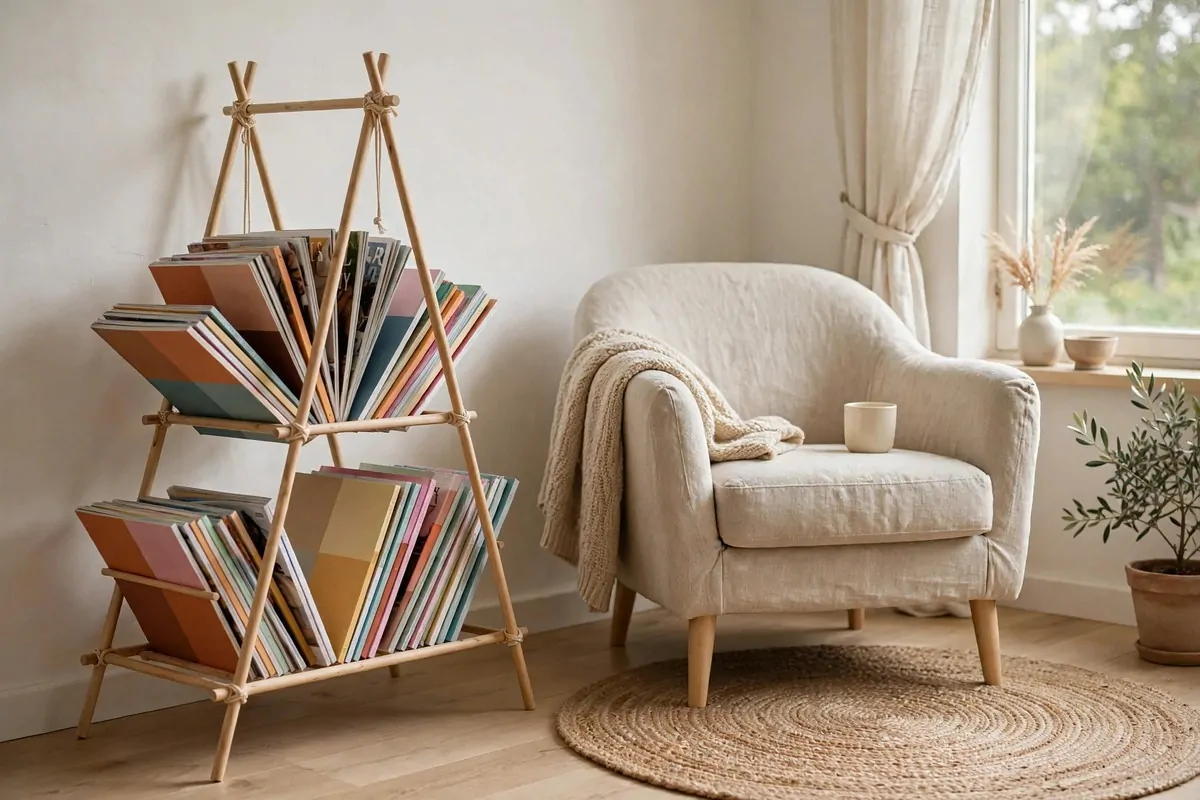
Magazines pile up on coffee tables and look messy. An A-frame rack fixes it and looks like a design store piece.
You need wooden dowels and a little rope or leather cord. Lash two A shapes. Connect them with horizontal dowels. That is the whole build.
No screws needed if you lash it right. The rope joints look intentional and crafty. It is honest construction, and it is pretty.
Sand the dowels smooth. Splinters and magazines do not mix. A quick sand and a coat of oil is enough finish.
Size it for your magazines. Measure your tallest one and add two inches. Too small is the only real mistake here.
Lean it against the wall by your reading chair. It holds a dozen magazines and looks like it cost a hundred dollars.
This is a one-evening project. Cut, lash, sand, done. Very beginner friendly.
It also works for vinyl records if you make it a little wider. Same build, different hobby.
14. Build Shelves From Concrete Blocks and Boards
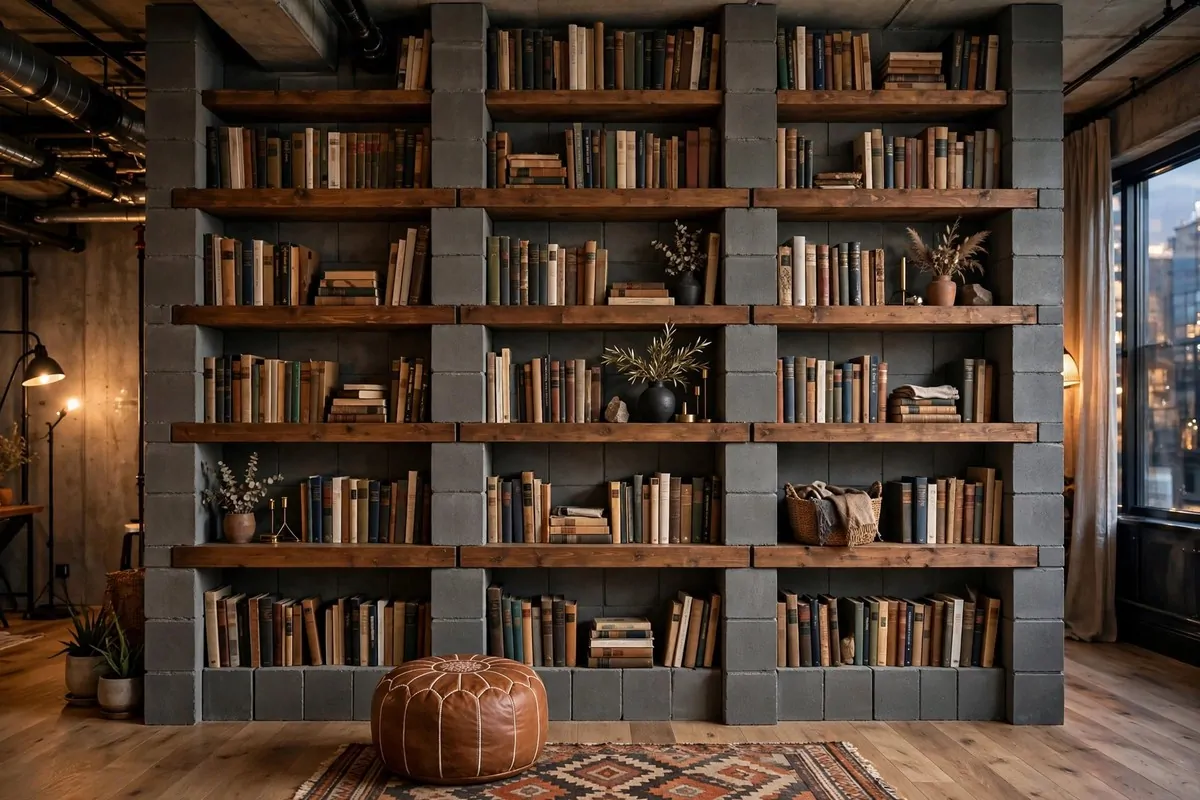
Concrete blocks sound ugly. Painted, they look like modern industrial shelving.
Stack blocks in columns, two high, with wood boards laid across as shelves. Repeat across the wall. The blocks are the uprights, the boards are the shelves.
Paint the blocks. This is the step that changes everything. Matte black or soft white paint turns gray blocks into a design choice.
Use thick boards. Two-inch lumber or doubled 1-inch boards. Long spans sag, so keep each shelf under four feet or add a middle column.
The holes in the blocks are bonus storage. Rolled magazines fit perfectly. So do small baskets.
This shelving is rock solid. Literally. It will hold your heaviest art books without a wobble.
It is also dirt cheap and fast. An afternoon and you have a full library wall. Students and first apartments love this one.
Dress it up with a rug and a lamp. The industrial look goes warm fast with the right soft touches.
15. Build a Pull-Out Bookshelf for the Gap Beside the Fridge
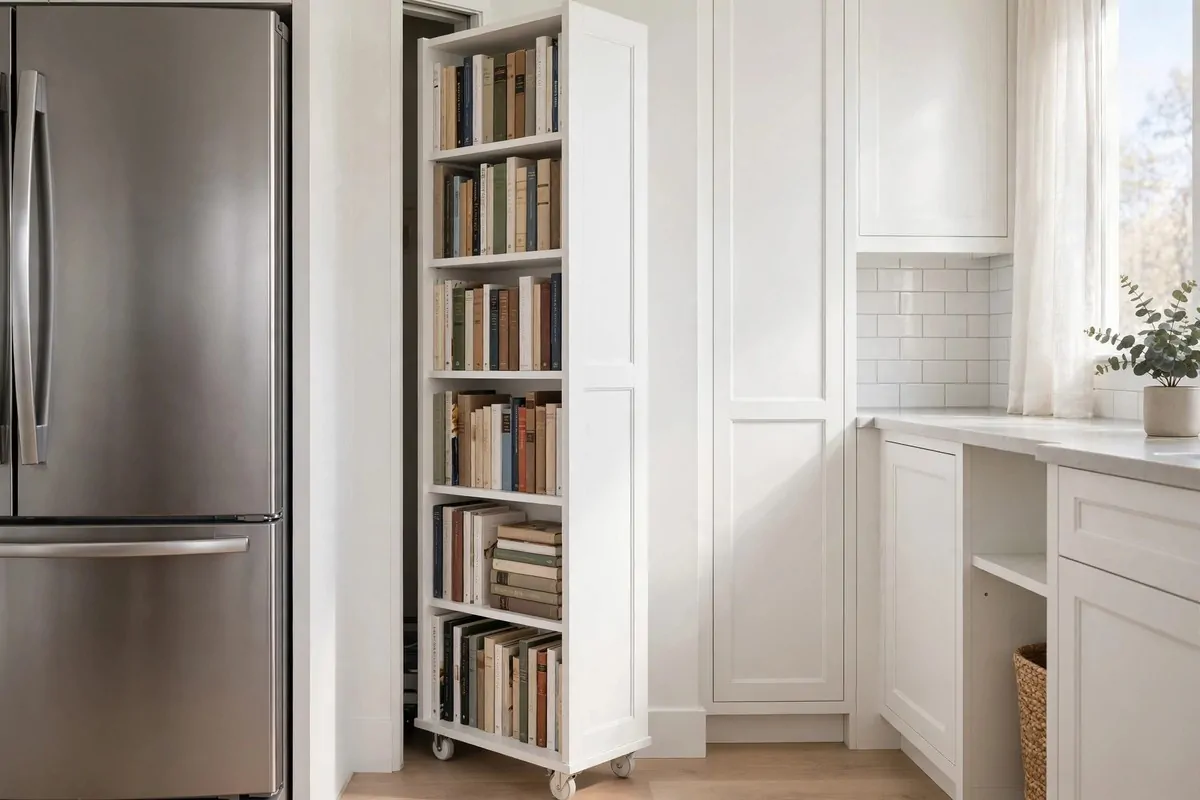
Almost every kitchen has a dead gap beside the fridge. Six inches of wasted space. This project steals it back.
Build a tall narrow shelf tower on small caster wheels. Make it exactly as deep as your fridge and as narrow as the gap. Slide it in. Pull it out when you need a book.
Cookbooks live here perfectly. So do the novels you read while dinner cooks. It is the most-used shelf in my kitchen now.
Paint it to match your cabinets. When it is pushed in, it looks like part of the kitchen. That is the custom-built illusion doing its job.
Add a small handle or a finger pull at the top. You need something to grab. A simple cup pull works great.
Keep it shallow front to back if the gap is tight. Measure the gap in three spots. Kitchens are never square.
The casters must roll smooth. Cheap wheels stick and scratch floors. Spend the extra two dollars on good ones.
This is the project guests open by accident and then stare at. Hidden storage always gets a reaction.
16. Turn a Dated TV Niche Into Built-In Shelves
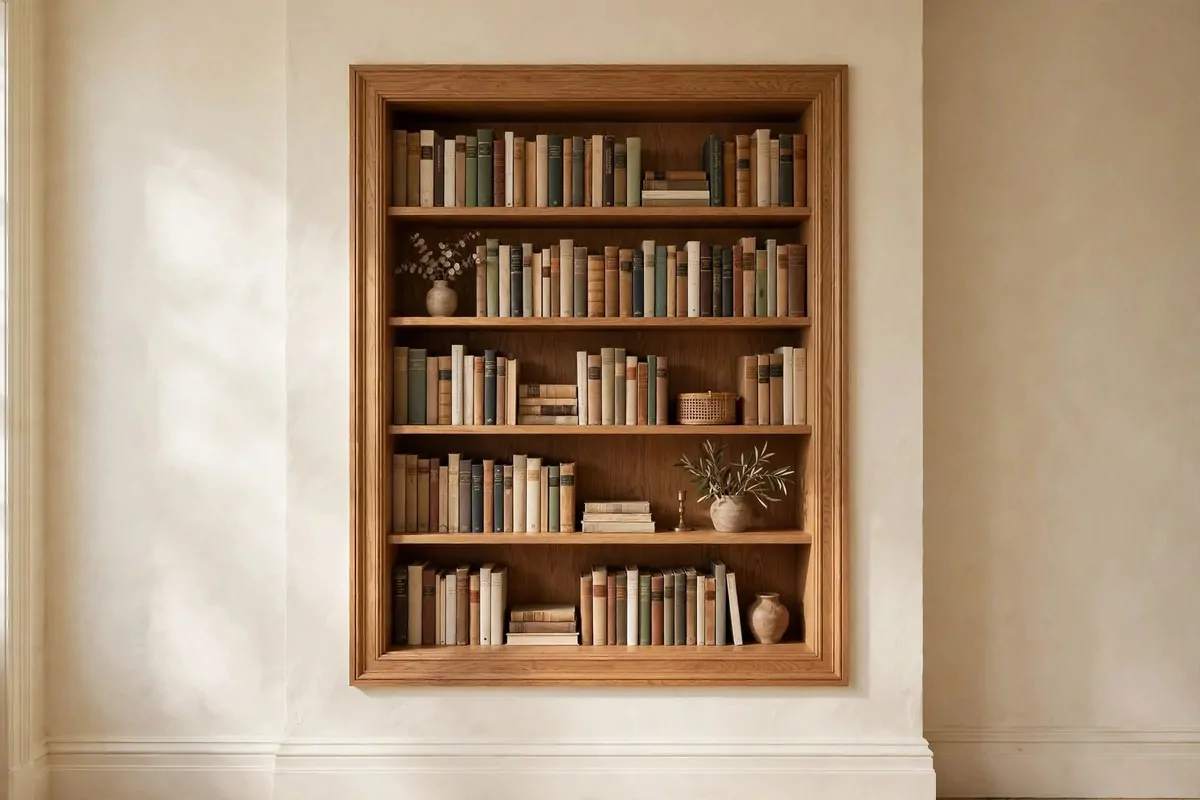
Older homes have those big square TV niches. Boxy holes in the wall made for giant old televisions. They are useless now. Until you fill them with shelves.
Measure the opening. Cut wood shelves to fit snugly inside. Add trim molding around the opening’s edge to frame it like a proper built-in.
The niche already looks like architecture. You are just giving it a better job. That head start is why this project looks so custom.
Paint or stain the shelves to match the room. I like wrapping the inside in the same paint as the wall. It makes the niche feel deeper.
Add small shelf pins so the shelves adjust. Drill rows of holes on the inside walls. Books come in all sizes, so flexibility matters.
Style it like a real library shelf. Books, a small object, some breathing room. Not a storage closet. Give it the same care as any shelf.
This takes one weekend. Most of the time goes to measuring and trimming. The niche does half the work for you.
If you rent, build the shelves as a friction-fit insert with no screws. It lifts out when you leave. Landlord never knows.
17. Build a Bookcase With Exposed Plywood Edges
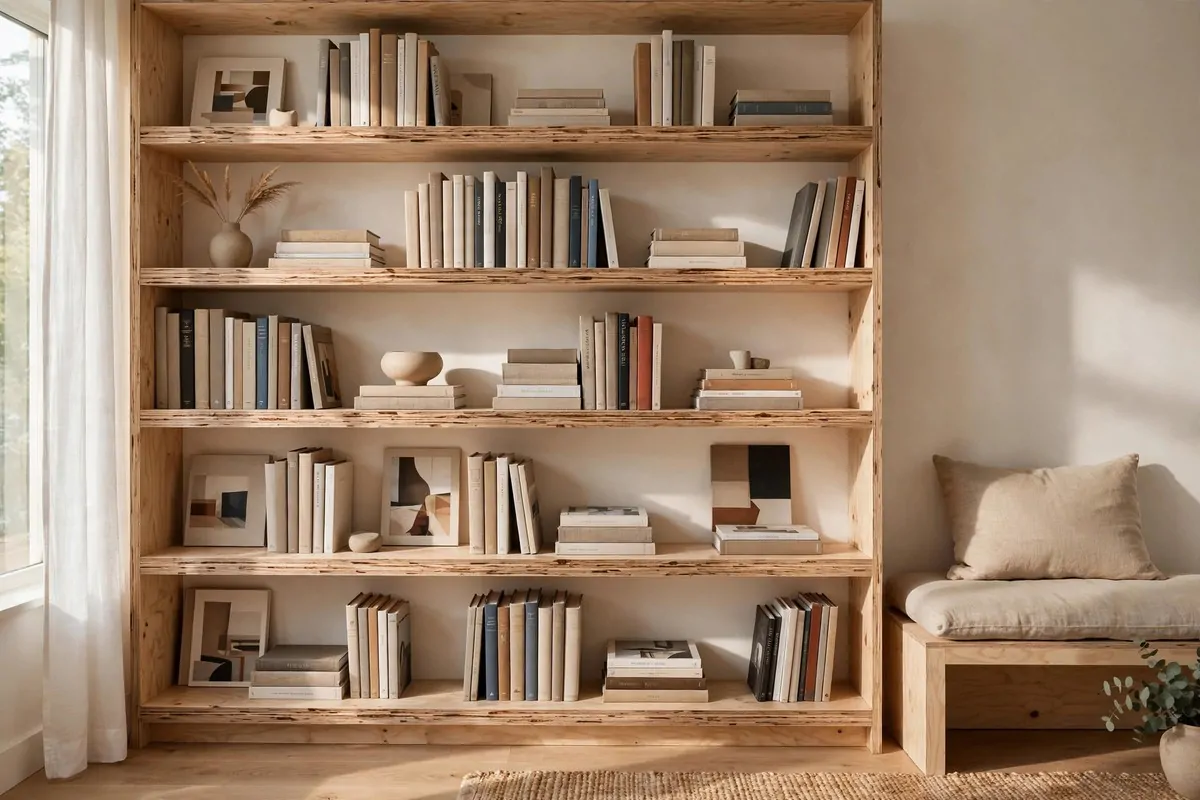
Plywood edges used to be something carpenters hid. Now designers show them off on purpose. The layered stripes look modern and crafted.
Build a simple bookcase from good birch plywood. Do not cover the front edges. Sand them smooth and seal with clear oil.
Buy the good plywood. Baltic birch has clean even layers with no voids. Cheap plywood has gaps that ruin the look. This is worth the upgrade.
Cut carefully. Clean straight cuts make the layers line up beautifully. A sharp blade and a straightedge guide are your friends here.
Finish with clear matte poly or hardwax oil. The goal is to protect the wood, not to hide it. Let those stripes show.
Keep the design simple. A basic box with fixed shelves is perfect. The material is the star, so the shape should stay quiet.
This style fits modern homes perfectly. It looks like something from a design studio, not a weekend project.
Pair it with simple decor. A few art books, one small object per shelf. Less is more with this look.
18. Wrap Plain Bookcase Fronts in Fluted Trim
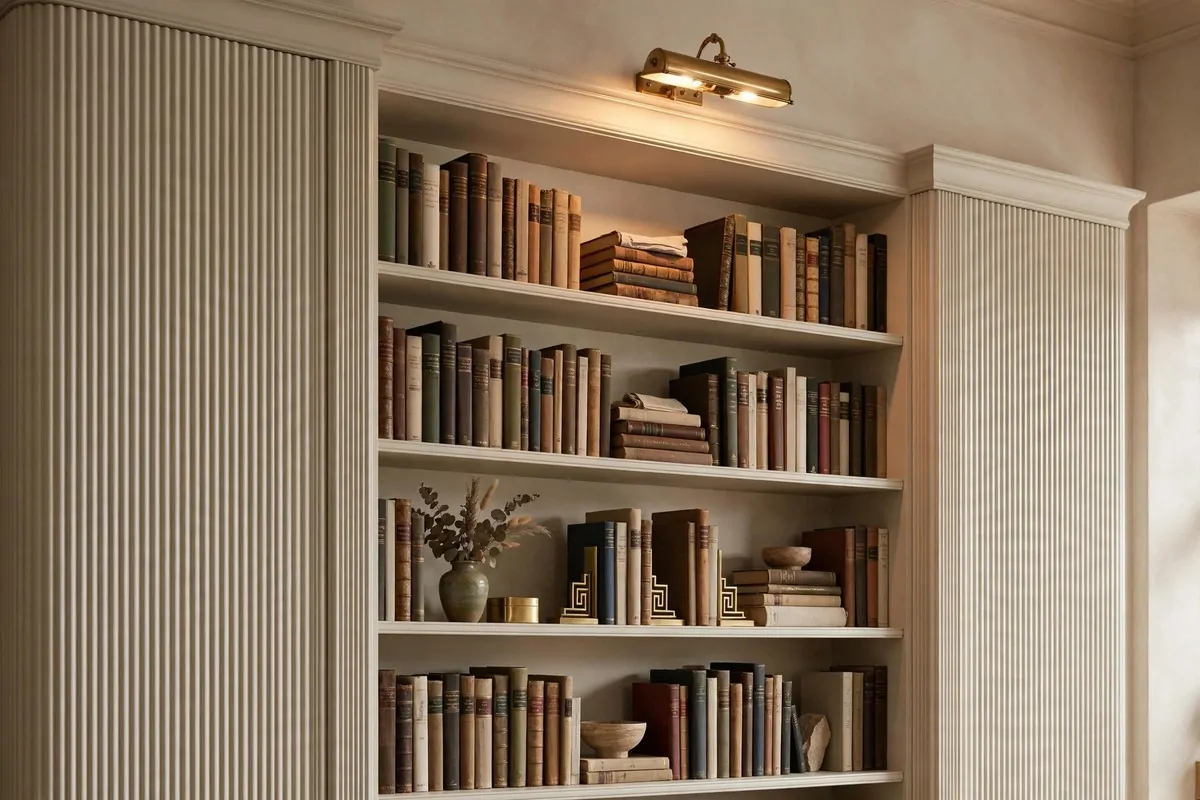
Fluted wood trim is having a moment. Those vertical ribs show up on expensive furniture everywhere. You can add them to a cheap bookcase in an afternoon.
Buy fluted trim boards or pole wrap from the hardware store. Cut to height. Glue them onto the side panels and front edges of a plain bookcase.
Work in sections. Glue, press, and tape each piece while it sets. Painter’s tape holds trim surprisingly well while glue dries.
Fill tiny gaps with wood filler. Sand smooth. Then paint everything one color. The ribs catch light and shadow like real carved wood.
Paint choice matters here. Warm white, soft black, or deep green all look high end with fluting. Pick what your room needs.
This trick works on dressers and nightstands too. Once you see how good it looks, you will want to flute everything.
The before and after is wild. A flat boring bookcase becomes a furniture-store piece. All from glued-on trim.
Take a photo before you start. You will want to show people. I did, and nobody believed the after was the same shelf.
19. Build Rolling Book Drawers Under the Bed
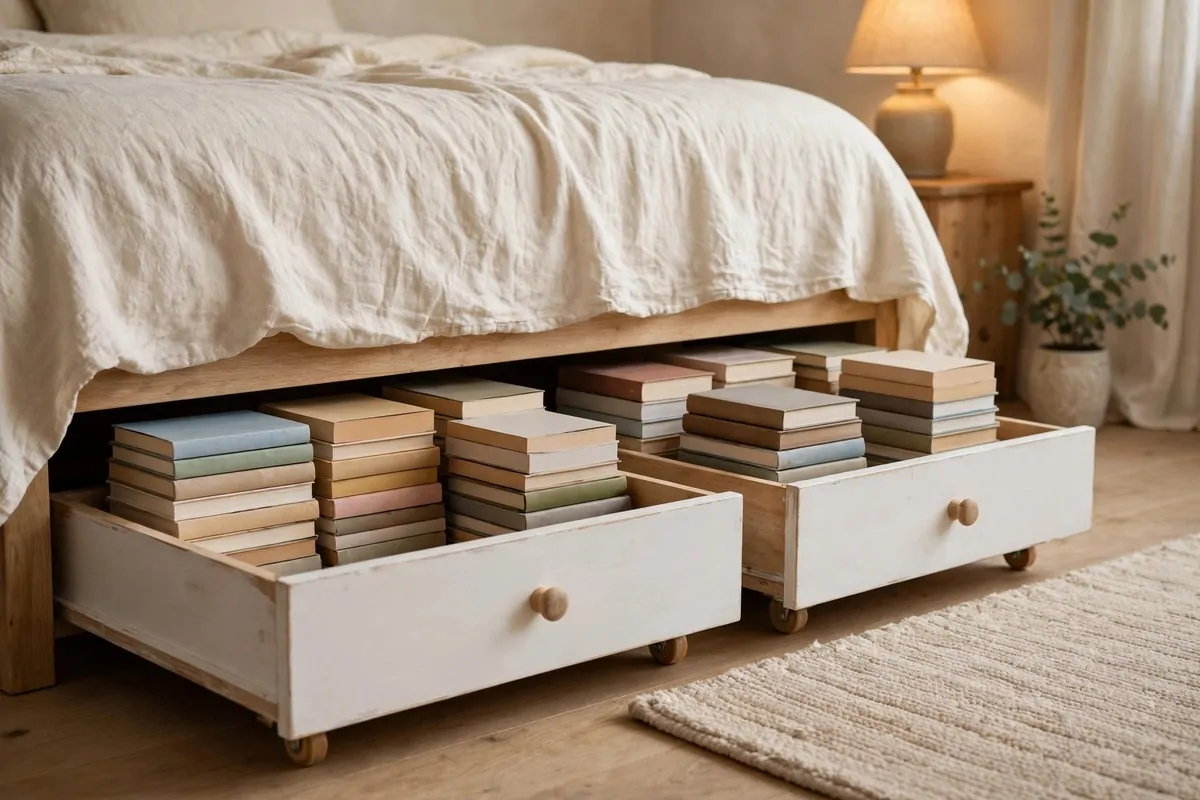
Under the bed is a library waiting to happen. Build shallow rolling drawers and slide your books right under.
Build simple open-top boxes from plywood. Keep them shallow, about six inches tall, so they clear the bed frame. Add small caster wheels to the bottom.
Measure your clearance first. Beds sit at different heights. Measure twice and build to fit with room to spare.
Add a small knob or a cutout handle on the front. You need to grab and pull. A round wooden knob looks sweet and costs pennies.
Paint the drawer fronts to match your bed frame or your wall. When pushed in, they vanish. Pulled out, they are a book display.
Sort by mood. One drawer for sleepy-time reads, one for the to-be-read pile. It makes bedtime browsing actually fun.
Dust them now and then. Under-bed spots collect dust. A quick wipe when you change the sheets keeps books clean.
This is perfect for small bedrooms. Floor space stays clear. Books stay close. Everybody wins.
Keep Reading
If you loved these builds, you will love 30 DIY Home Decor Projects That Look Store-Bought for more weekend projects, 30 Library Ideas That Make Every Book Lover Swoon for the full dream-library plan, 16 Office Reading Room Ideas Cozy Enough to Linger In for a reading corner, and 28 Cozy Home Library Ideas You’ll Never Want to Leave for pure cozy inspiration.