31 Outdoor Storage Ideas for Small Yards and Patios

My small yard used to eat my tools. I would put a trowel down by the fence and then I could not find it five minutes later.
I am not talking about a big yard with room for a huge shed. I mean a small yard and a small patio where every inch counts and stuff piles up fast.
You know the feeling. The cushions get wet. The hose tangles up. The kids toys end up in three different spots and the watering can hides behind a plant.
I tried just stacking things in a corner and it did not work. It looked messy and I still could not find what I needed when I needed it.
So I started testing small storage ideas one at a time. I wanted things that fit tight spots and still looked nice from my back door.
Some ideas cost very little and some cost a bit more. I will tell you the typical cost for each one so you can pick what fits your budget.
This post has all 31 ideas in one place. There is no part two and nothing is split up, so you can read the whole list here and pick your favorites.
1. A Slim Deck Box That Hugs the Rail
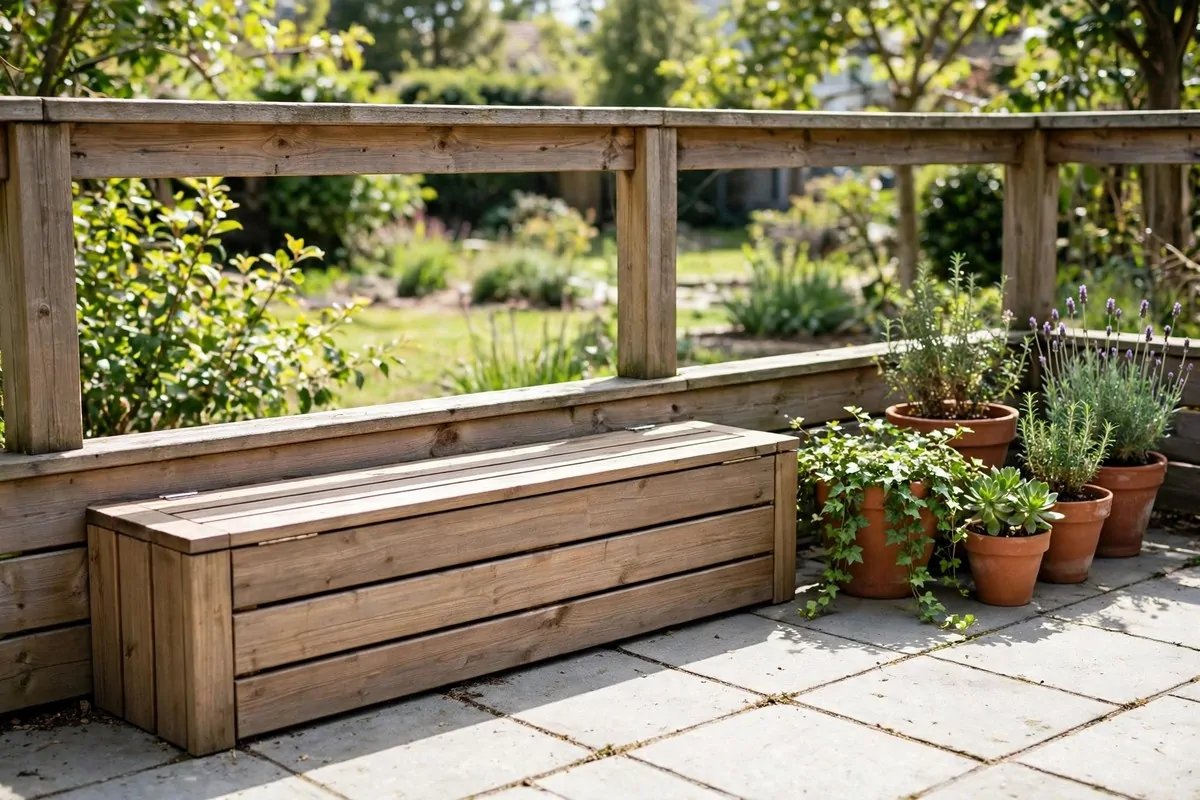
A slim deck box sits close to the rail and it does not eat up your floor space. I like that it holds a lot without looking big.
You can tuck cushions inside it when rain comes. You can also hide pool toys and small garden tools in there.
I put mine right against the rail where I walk past it every day. It is easy to open and I do not have to bend far to reach inside.
Pick a box that is narrow from front to back. That shape is what makes it work on a small deck or a tiny patio.
Typical cost is $60 to $140 for a slim deck box, and the price goes up when the box gets longer or thicker.
Look for a lid that stays open on its own. I learned that the hard way when a lid kept falling on my hand.
You can wipe the outside with a damp cloth and it looks new again. I do that once a week in summer when dust builds up.
If your patio gets a lot of sun, pick a box that will not fade fast. I check the label for weatherproof and sun safe words before I buy.
This one box cleared half my deck in one afternoon. I still smile when I walk out and see a clean floor.
2. A Vertical Tool Rack on the Fence
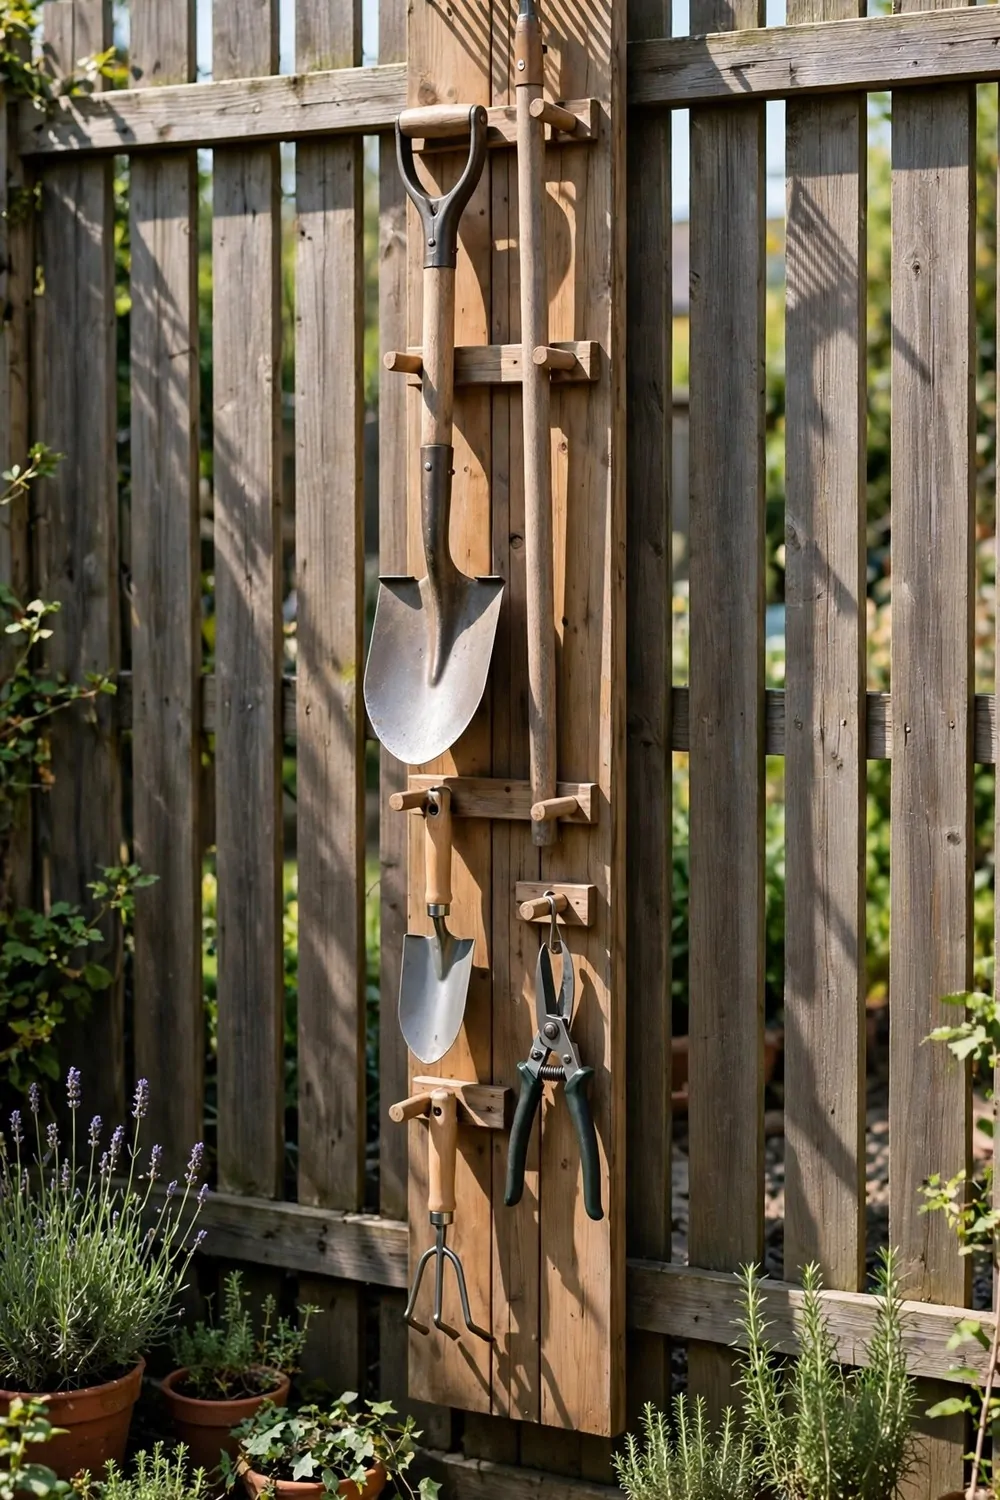
A vertical tool rack turns your fence into storage. Your rakes and shovels stand up straight instead of falling over in a pile.
I hang my long tools by their handles and they stay put. I can see each one at a glance and I grab the right one fast.
You do not need a big fence for this. Even a short run of fence gives you room for four or five tools.
Typical cost is $25 to $60 for a fence tool rack, and simple hook racks cost less than full racks with slots.
Put the rack where you step out most. Mine sits near the back door so I do not walk across the whole yard to get a rake.
Use strong screws and check them once a season. I had one screw work loose after a windy week and I fixed it in two minutes.
Keep the sharp ends pointing down or away from where kids walk. I put my sharp tools on the high hooks and the light tools low.
You can add a small basket on the same rack for gloves and twine. It keeps the little things from getting lost in the grass.
This rack made my yard feel bigger. The tools are off the ground and I can mow right up to the fence now.
3. Stackable Crates Under a Bench
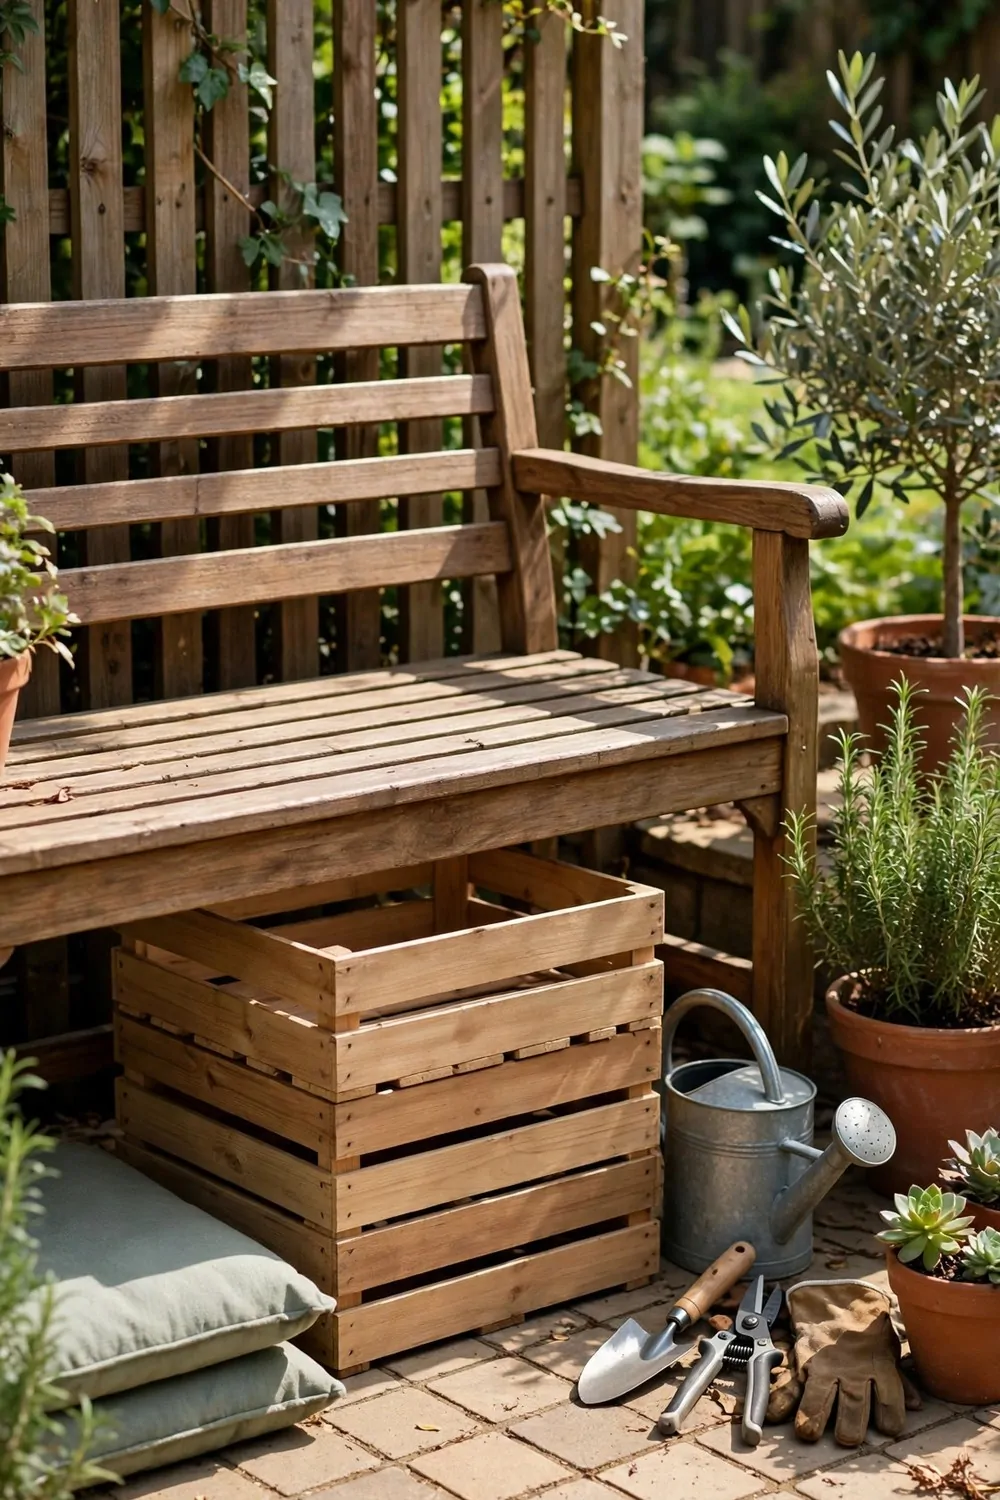
Stackable crates fit under a bench and they turn dead space into storage. I slide them in and out like drawers and it feels so easy.
You can give each crate a job. One holds pots and seed packets. One holds balls and outdoor games.
I label my crates with a bit of tape and a marker. It saves me from opening every crate when I look for one thing.
Typical cost is $8 to $15 for a plastic crate, $12 to $25 for a wooden crate, and $15 to $30 for a metal crate, so you can mix types to fit your budget.
Plastic crates are light and easy to wash. Wooden crates look warm and nice on a patio. Metal crates feel strong and last a long time.
Stack two crates if your bench is tall enough. I stack mine two high and I still have room to slide them out without a fight.
Put the heavy crates on the bottom. I learned that after a top crate tipped and spilled soil all over my patio.
You can paint wooden crates to match your bench. I painted mine a soft green and now they look like part of the bench.
This is one of my cheapest fixes and it works all year. I move the crates around when the seasons change and what I store changes too.
| Crate type | Typical cost | Best for |
|---|---|---|
| Plastic crate | $8 to $15 | A light cheap start |
| Wooden crate | $12 to $25 | A warm natural look |
| Metal crate | $15 to $30 | A strong neat look |
4. A Narrow Shed That Fits a Corner
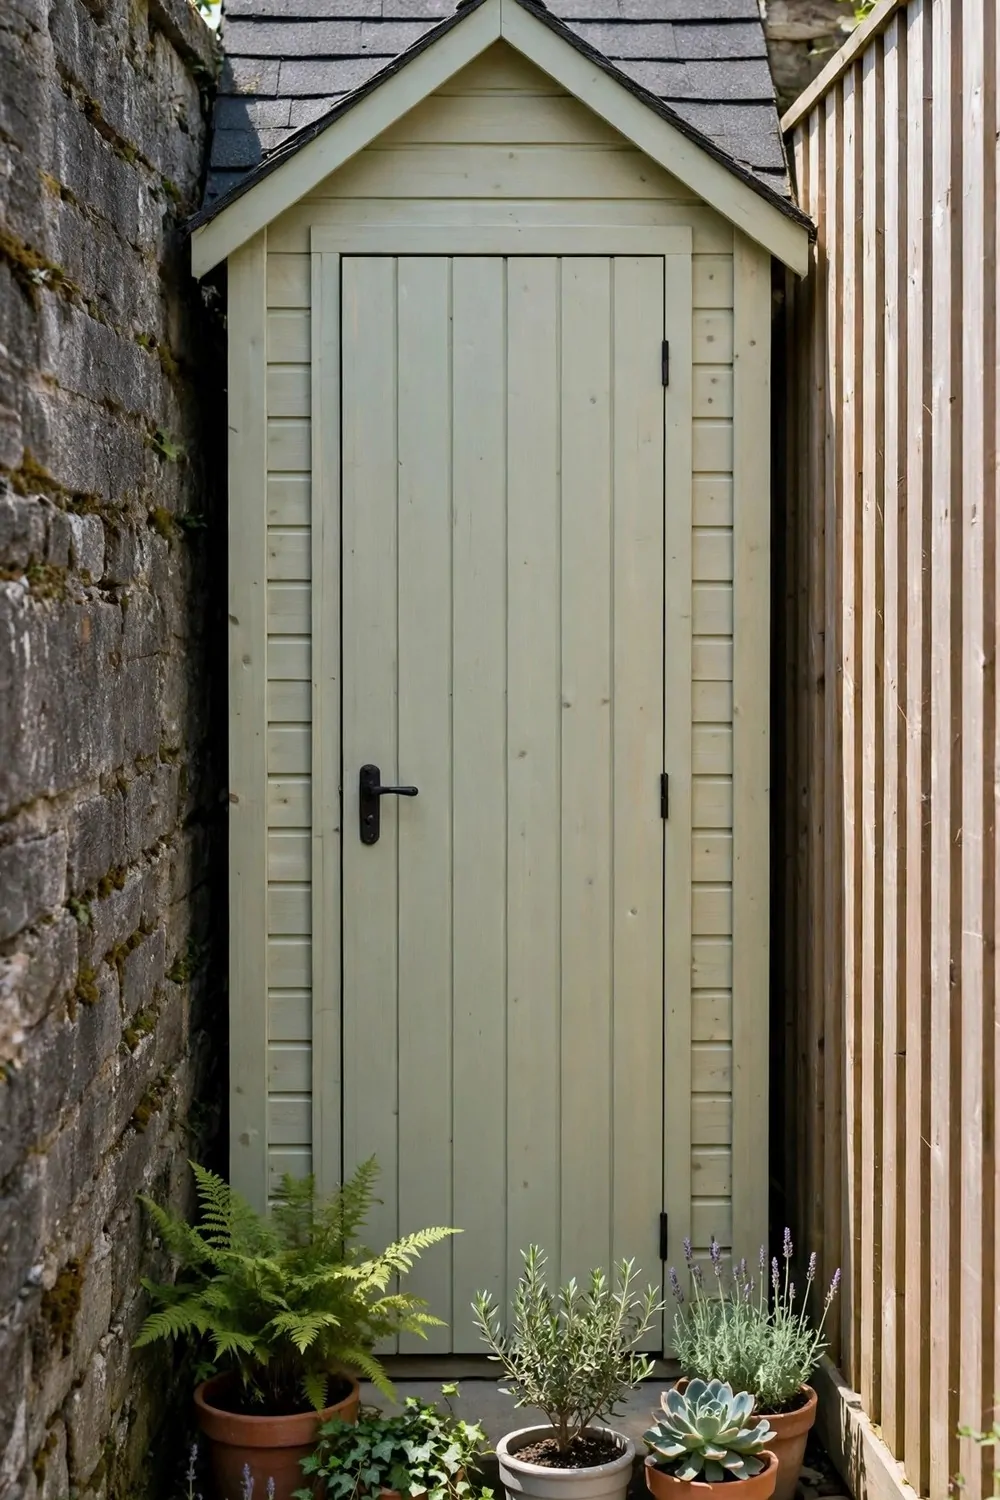
A narrow shed can fit in a corner you thought was too small. I measured my corner first and then I looked for a shed to match it.
You can store a mower, a hose, and a few tools inside. It keeps rain off them and it keeps the yard looking tidy.
I like that a narrow shed does not block my view. It hugs the fence and leaves the middle of the yard open for chairs.
Typical cost is $200 to $600 for a narrow shed, and metal sheds often cost less than wood sheds of the same size.
Pick a door that opens wide enough for your biggest tool. I almost bought a shed with a door too small for my mower.
Add a small shelf inside near the top. I keep spray bottles and gloves up there so they stay dry and easy to reach.
Make sure the base sits level on the ground. I put flat stones under mine and it has not shifted since.
You can add a hook inside the door for your keys and a small flashlight. I do that so I am not stuck in the dark on a late evening.
A corner shed gave me back my patio. The big tools live in the shed now and my patio is just for sitting and relaxing.
5. Wall Hooks for Hoses and Tools
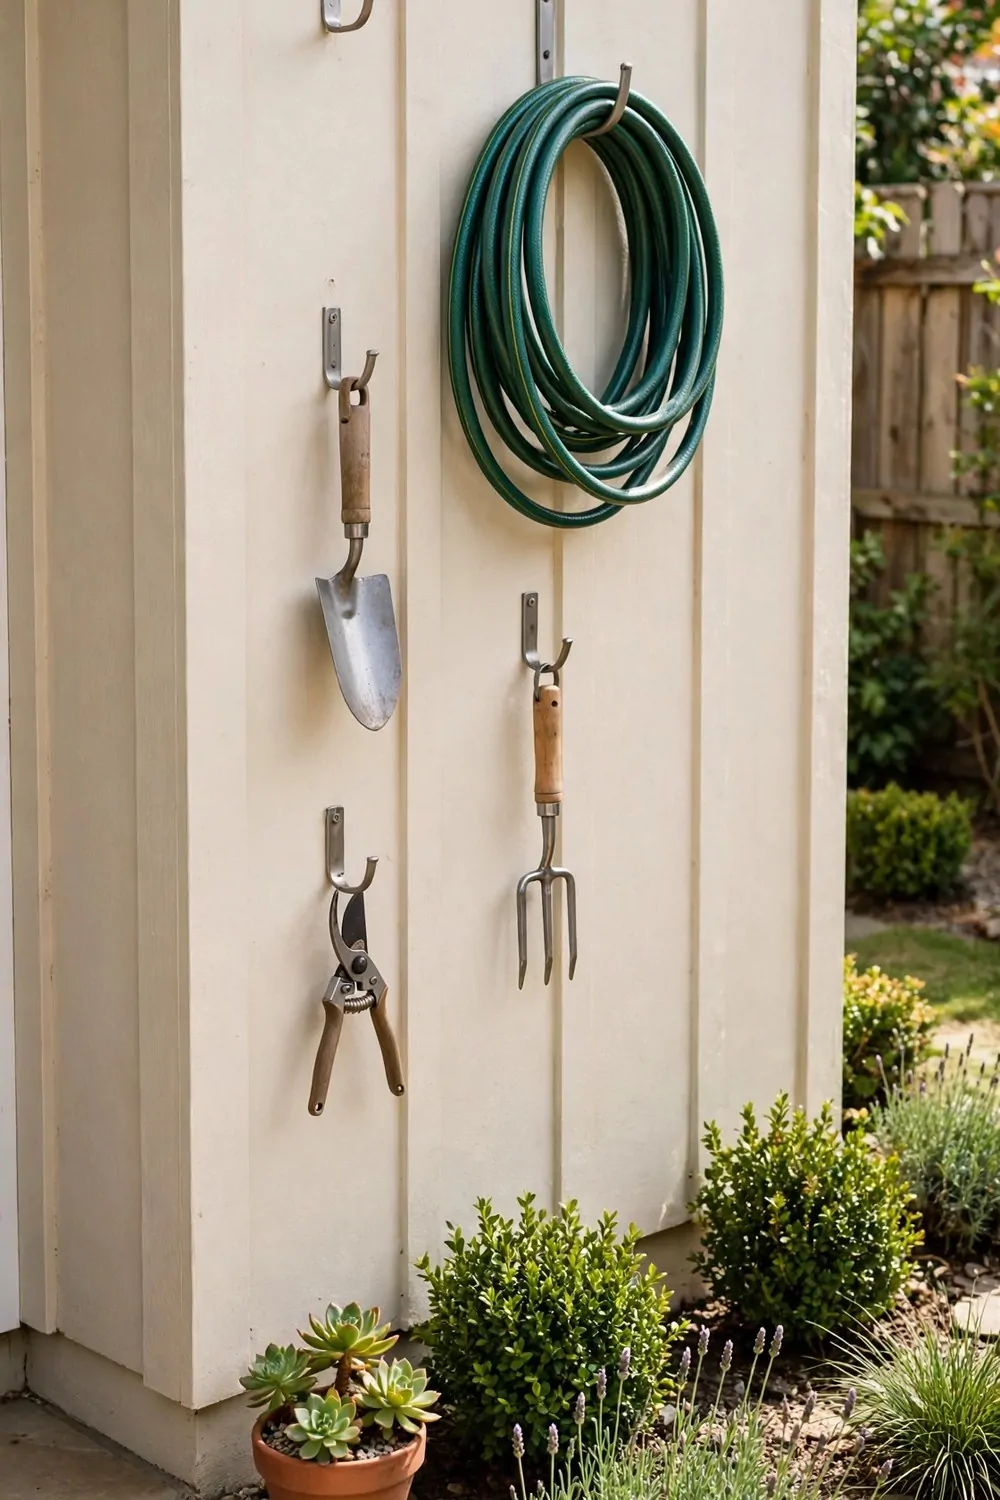
Wall hooks are small but they fix a big mess. I hang my hose, my broom, and my hand tools on the wall and the floor stays clear.
You can put hooks on a fence, a shed wall, or the house wall by the back door. I use the wall closest to where I work most.
I space my hooks a hand width apart. That way the tools do not bump each other when I pull one off the wall.
Typical cost is $10 to $35 for a set of wall hooks, and heavy duty hooks cost a bit more than light ones.
Hang the hose on a big round hook so it does not kink. My old hose used to kink all the time before I got a proper hook.
Put the tools you use most at arm height. I keep my trowel and my shears right there and the rest a bit higher up.
Check the hooks after a storm. I tighten mine once in a while because wind and rain can loosen them over time.
You can paint the hooks to match your wall. I did that and now they blend in instead of standing out.
Hooks are the fastest fix on this list. I put mine up in under an hour and my patio looked neater the same day.
6. A Rolling Cart for Garden Supplies
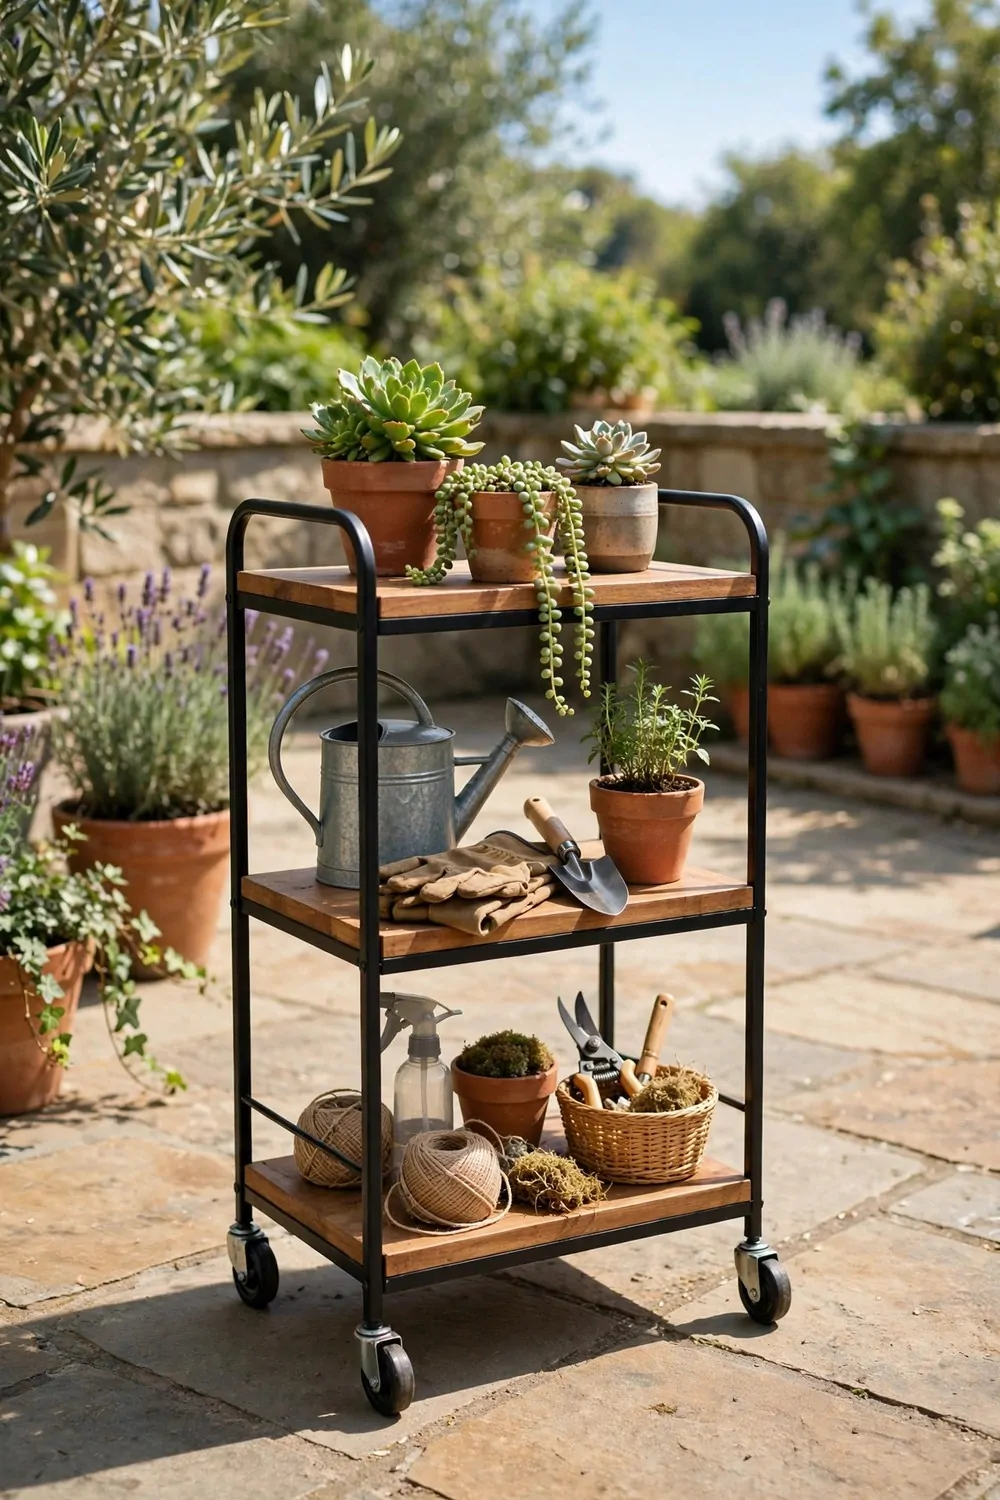
A rolling cart moves where you work. I load it with pots, soil, and tools and I roll it to the sunny spot or the shady spot.
You can park it by the fence when you are done. It takes up very little room and it stays out of the way.
I like carts with two or three shelves. The top holds what I use now and the lower shelves hold the extras.
Typical cost is $50 to $130 for a rolling garden cart, and carts with bigger wheels cost more than small flat carts.
Pick wheels that roll well on grass and patio stones. My first cart had tiny wheels and it stuck every time I hit a stone edge.
Put a small bin on the cart for trash and plant bits. I toss dead leaves in there as I work and I empty it at the end.
Keep a watering can on the bottom shelf so it does not tip. I learned that after I spilled water all over my shoes.
You can use the cart for more than garden work. I roll mine out when I clean the patio and I load it with rags and a bucket.
A rolling cart saves my back and my time. I do not carry armfuls of stuff back and forth across the yard anymore.
7. Hidden Storage Under the Deck Steps
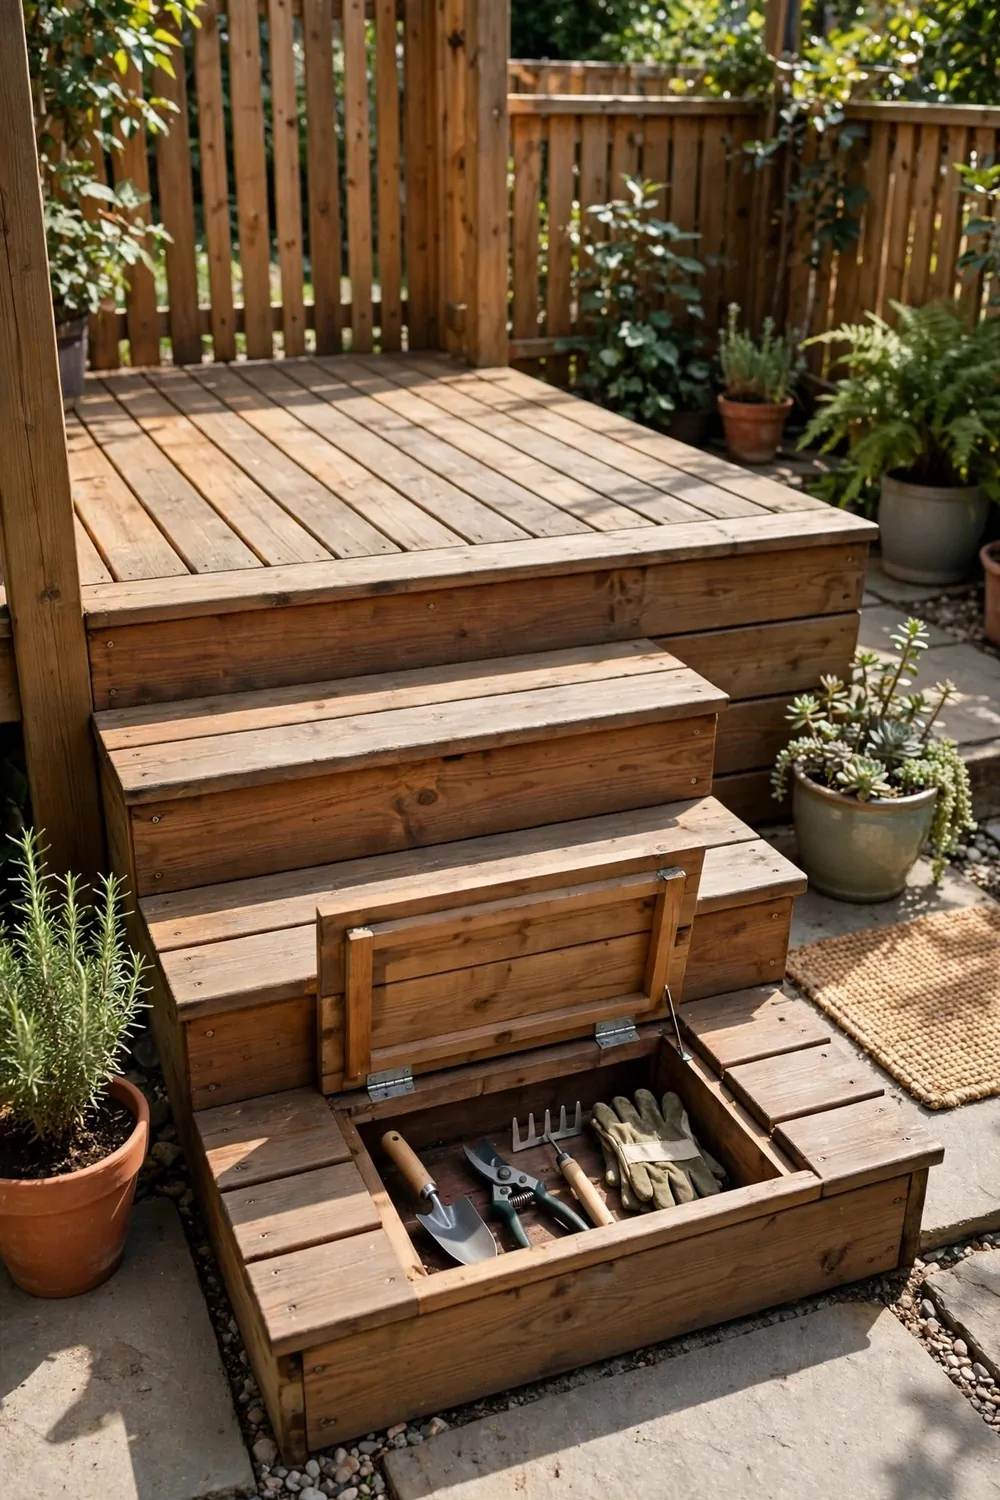
The space under deck steps is easy to miss. I opened mine up and found room for shoes, tools, and a few outdoor games.
You can add a small door or a pull out drawer under the steps. I like a door because it hides everything and keeps rain out.
Measure the space before you build anything. My steps looked deep from outside but the inside was a bit smaller than I thought.
Typical cost is $40 to $120 for a simple under step storage build, and the cost goes up if you add a lock or a full drawer.
Store things you do not use every day in there. I keep spare cushions and a small folding stool under my steps.
Put a mat or a tray at the bottom to catch dirt. I wipe it out once a month and it stays clean and dry.
Add a small light if your steps are dark inside. I stuck a tiny battery light in mine and now I can see everything at night.
Keep the door shut tight in wet weather. I check the seal after heavy rain to make sure water is not getting in.
This hidden spot feels like free storage. No one sees it and my patio stays clear because the clutter lives under the steps.
8. A Bench With a Lift-Up Lid
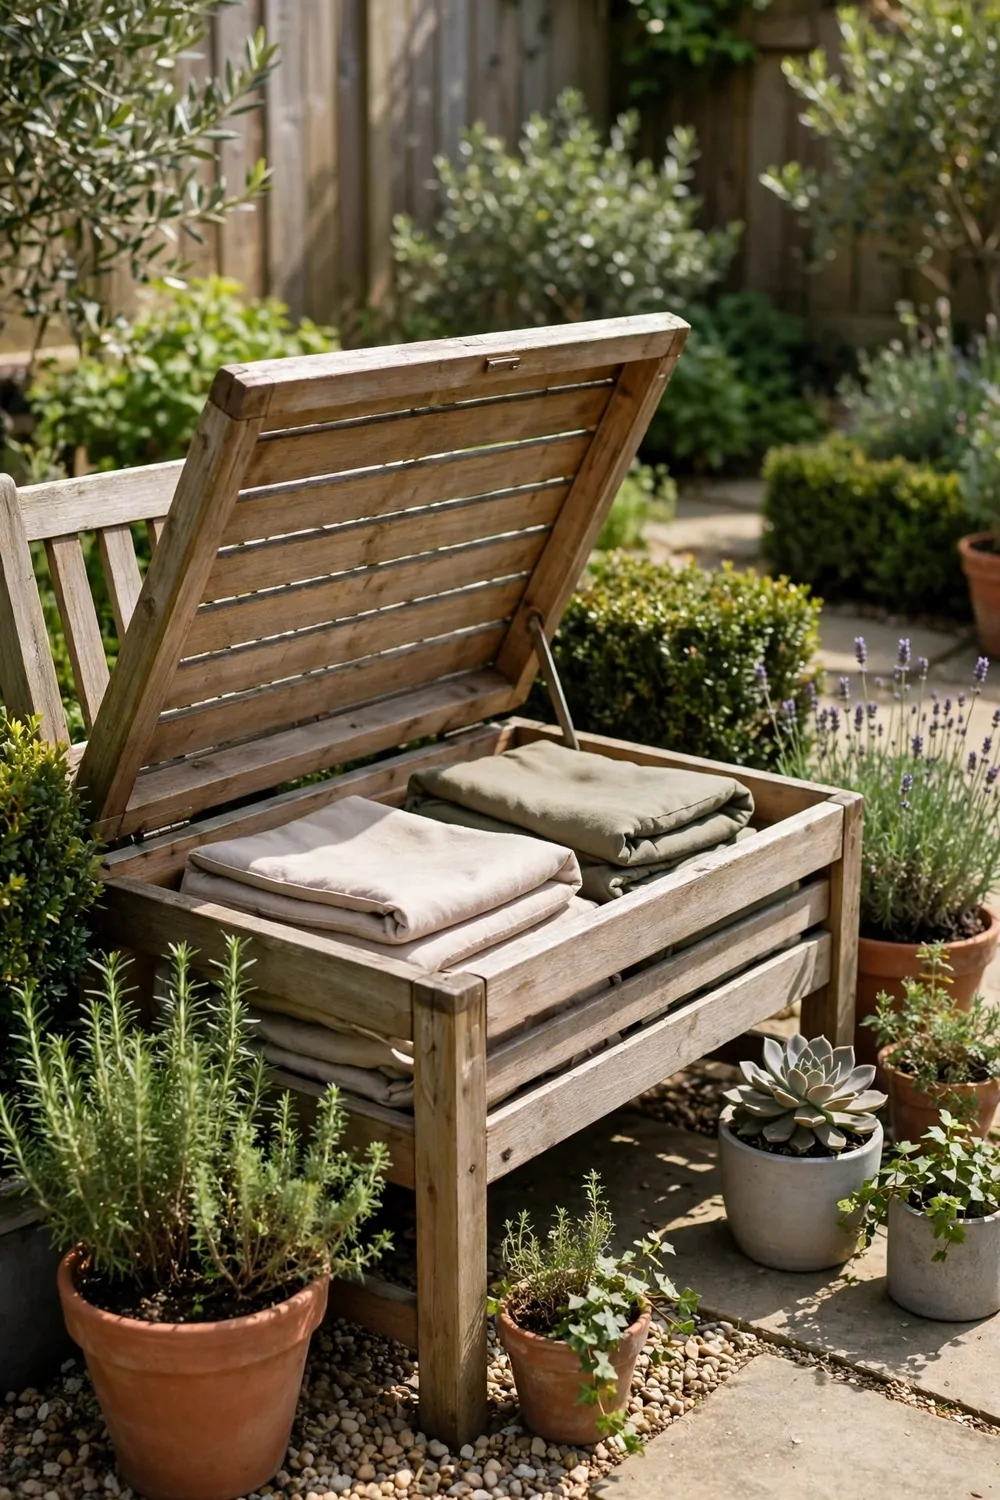
A bench with a lift up lid gives you a seat and a box in one piece. I sit on mine in the morning and I store cushions inside it at night.
You can put it against a wall or at the edge of the patio. It fits in a small spot and it does a lot of work for its size.
I keep outdoor toys, gloves, and a few plant pots inside my bench. The lid keeps rain out and the stuff stays dry.
Typical cost is $40 to $80 for a plastic bench, $70 to $150 for a wooden bench, and $60 to $120 for a metal bench, so you can pick the type that suits your yard and your budget.
Plastic benches are light and easy to move. Wooden benches look nice and feel warm to sit on. Metal benches feel strong and hold a lot of weight.
Look for hinges that hold the lid open. I need both hands free when I load the bench and a lid that stays up helps a lot.
Put a cushion on top if you want a soft seat. I use a thin outdoor cushion and I toss it inside the bench when it rains.
Wipe the inside once in a while to keep it fresh. I air mine out on sunny days so it does not smell damp.
This bench is my favorite seat in the yard. It looks plain from outside but it hides half my patio clutter inside.
| Bench type | Typical cost | Best for |
|---|---|---|
| Plastic bench | $40 to $80 | A light cheap start |
| Wooden bench | $70 to $150 | A warm natural look |
| Metal bench | $60 to $120 | A strong neat look |
9. Hanging Baskets for Small Gear
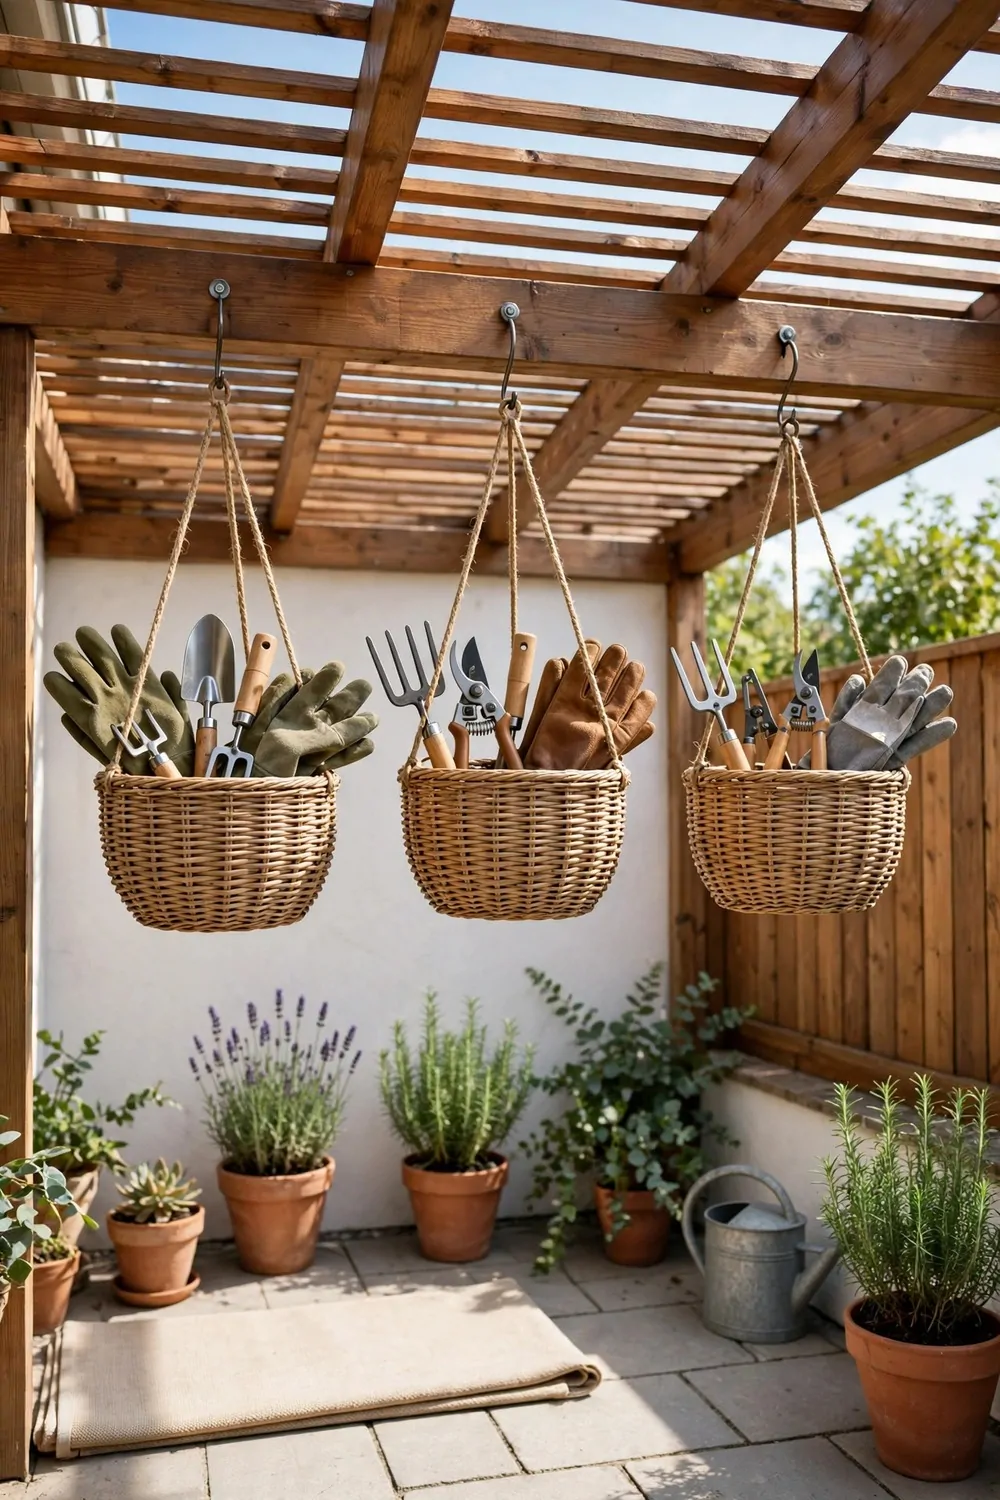
Hanging baskets keep small gear off the ground and in sight. I hang mine from the fence and from hooks under the patio roof.
You can store gloves, seed packets, string, and small tools in them. I group like things together so I find them fast.
I use baskets with tight weave so small bits do not fall through. My first basket had wide gaps and my seed packets kept slipping out.
Typical cost is $12 to $40 for a set of hanging baskets, and larger baskets with strong hooks cost more than small ones.
Hang them at a height you can reach without a stool. I put mine at chest height and I can grab what I need in seconds.
Keep the heavy stuff low and the light stuff high. I put my hand tools low and my seed packets up top.
You can label each basket with a small tag. I write on a bit of card and tie it to the handle with string.
Take the baskets down in a big storm if you can. I do that when the wind picks up so they do not swing and spill.
Baskets add a soft look to a hard fence. They hold my gear and they make the wall look lived in and friendly.
10. A Lean-To Rack for Bikes
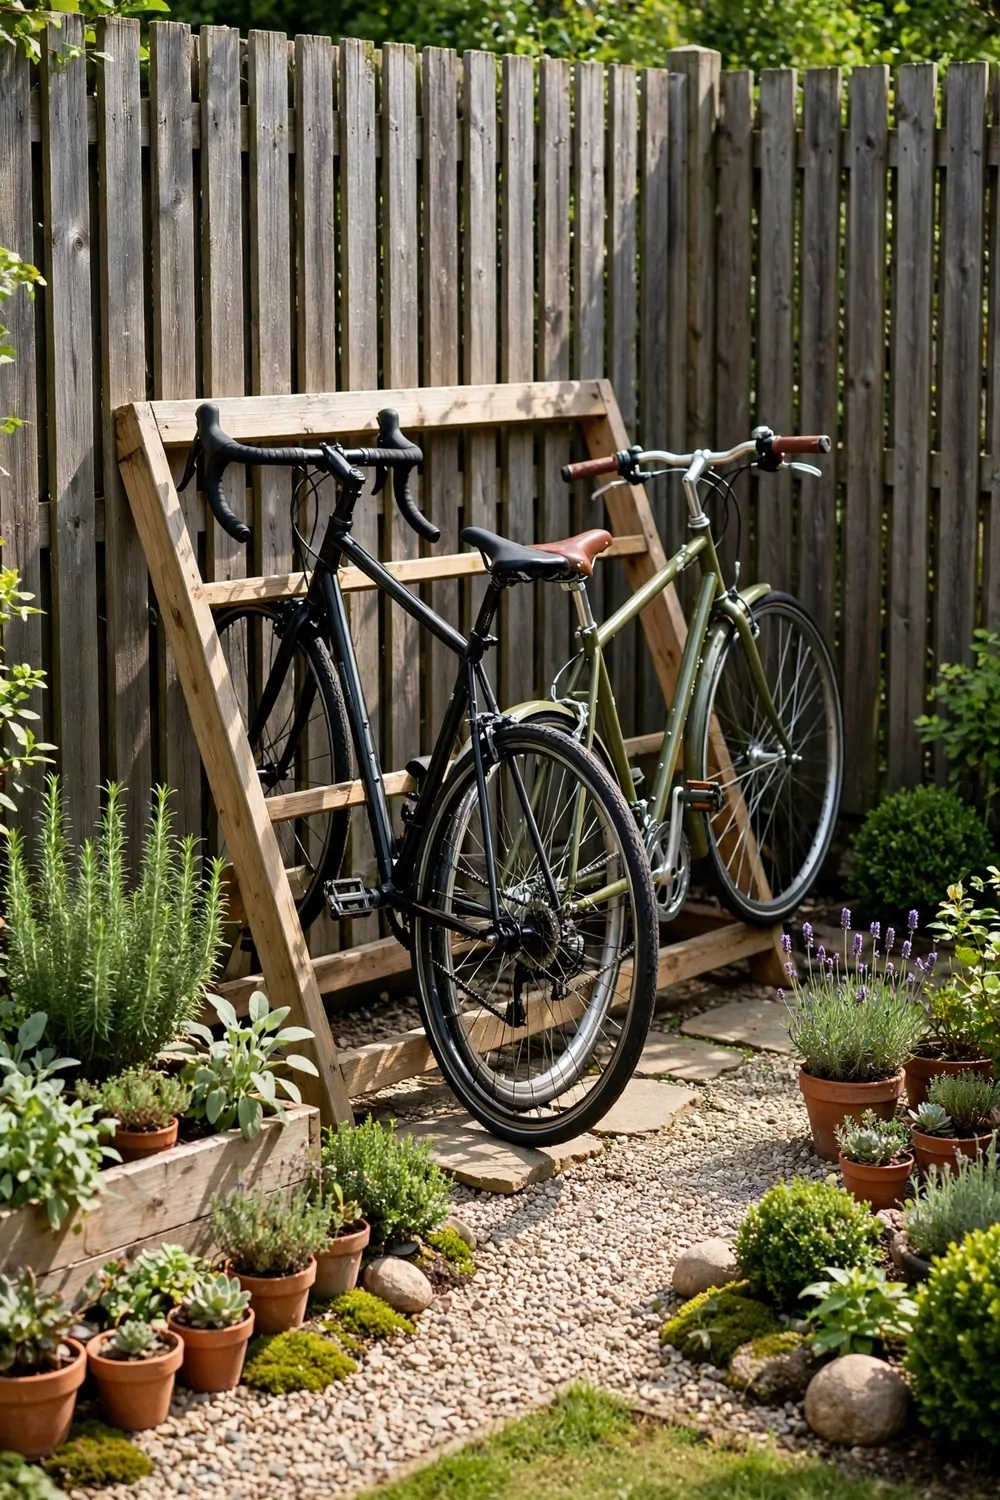
A lean to rack leans against a wall and holds bikes upright. I use one by my fence and my bikes no longer fall on each other.
You can fit two bikes in a small space with this rack. It keeps the wheels straight and the handlebars from tangling.
I like that it does not need a big base. It leans on the wall and it takes up a narrow strip of ground.
Typical cost is $35 to $100 for a lean to bike rack, and racks that hold more bikes cost more than single bike racks.
Pick a rack with soft grips where it touches the bike frame. My old rack scratched the paint and I wish I had checked that first.
Put the rack on flat ground so the bikes stay steady. I moved mine off a slope and it has not tipped since.
Lock your bikes to the rack if you leave them out. I run a lock through the frame and the rack every night.
You can add a small cover over the top for rain. I drape a light cover over mine in wet weeks and the seats stay dry.
This rack freed up my whole patio edge. The bikes have a home now and I do not trip over a wheel when I walk out.
11. Weatherproof Bins Under a Table
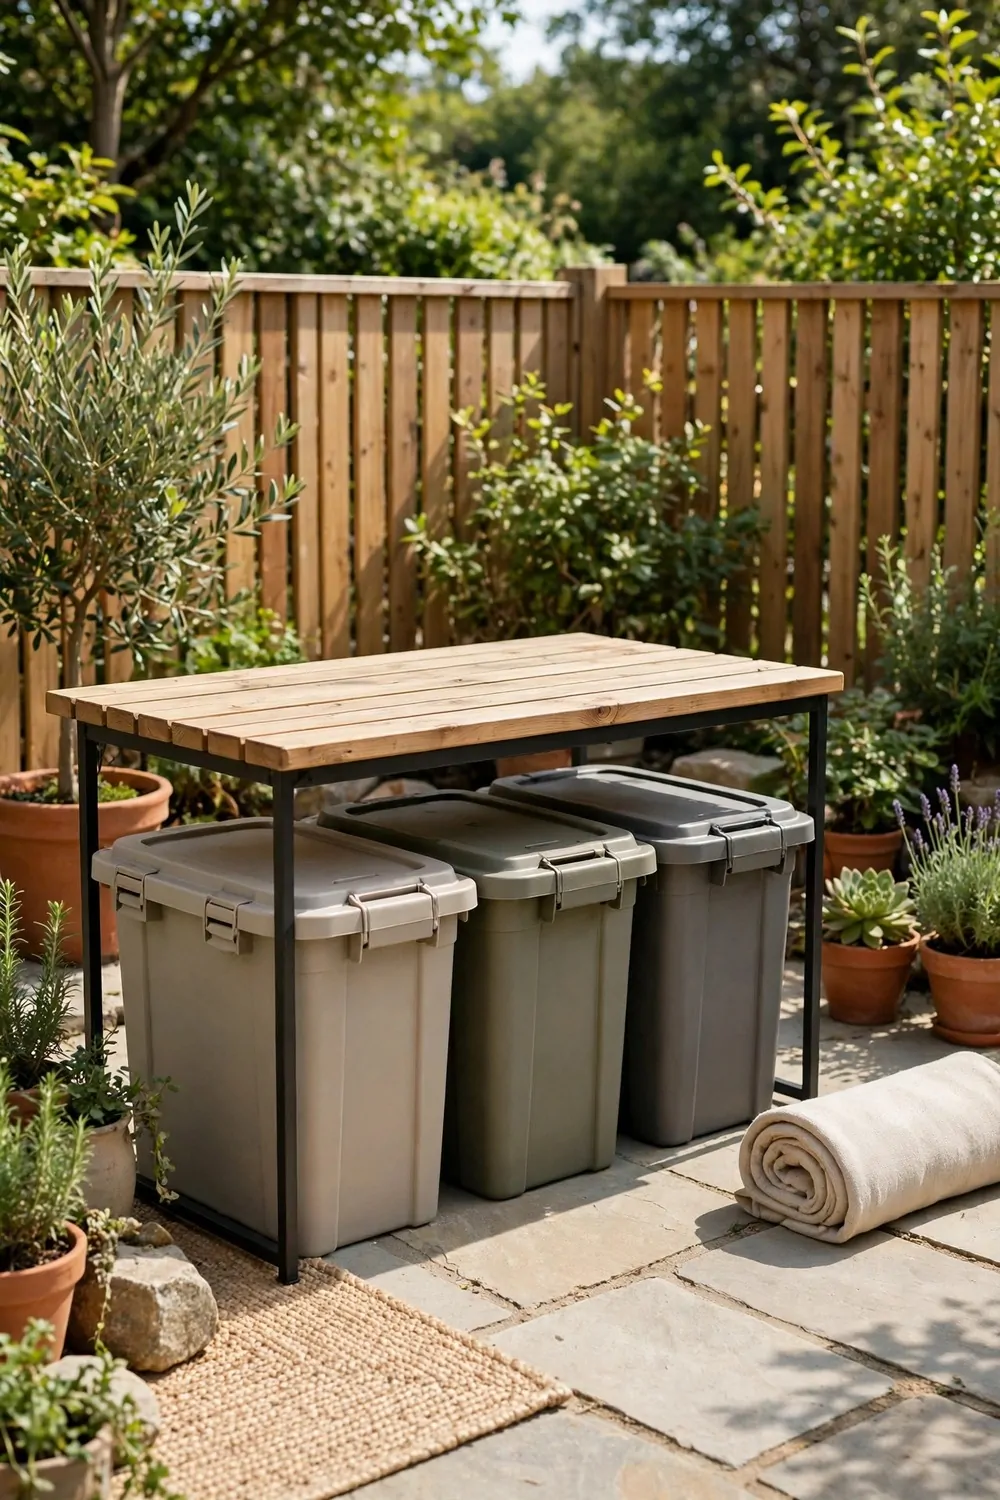
Weatherproof bins slide under a table and use space you already have. I keep mine under my patio table and no one even sees them.
You can store cushions, outdoor games, and cleaning stuff in them. I use one bin for soft things and one bin for hard tools.
I like bins with lids that snap shut tight. Rain stays out and bugs stay out too, which matters a lot in summer.
Typical cost is $20 to $55 for a weatherproof bin, and bigger bins with thick lids cost more than small thin ones.
Measure under your table before you buy. My first bin was too tall and it would not slide under the table at all.
Pick bins with handles on the ends. I pull mine out by the handle and slide them back in one smooth move.
Put the bins you use most at the front. I keep my cushion bin at the front and my spare parts bin at the back.
Wipe the lids after rain so water does not sit on top. I do a quick wipe when I sit down for my morning tea.
Under table bins are a quiet fix. They do not change how my patio looks but they hold a lot of stuff I used to trip over.
12. A Pegboard Wall on the Fence
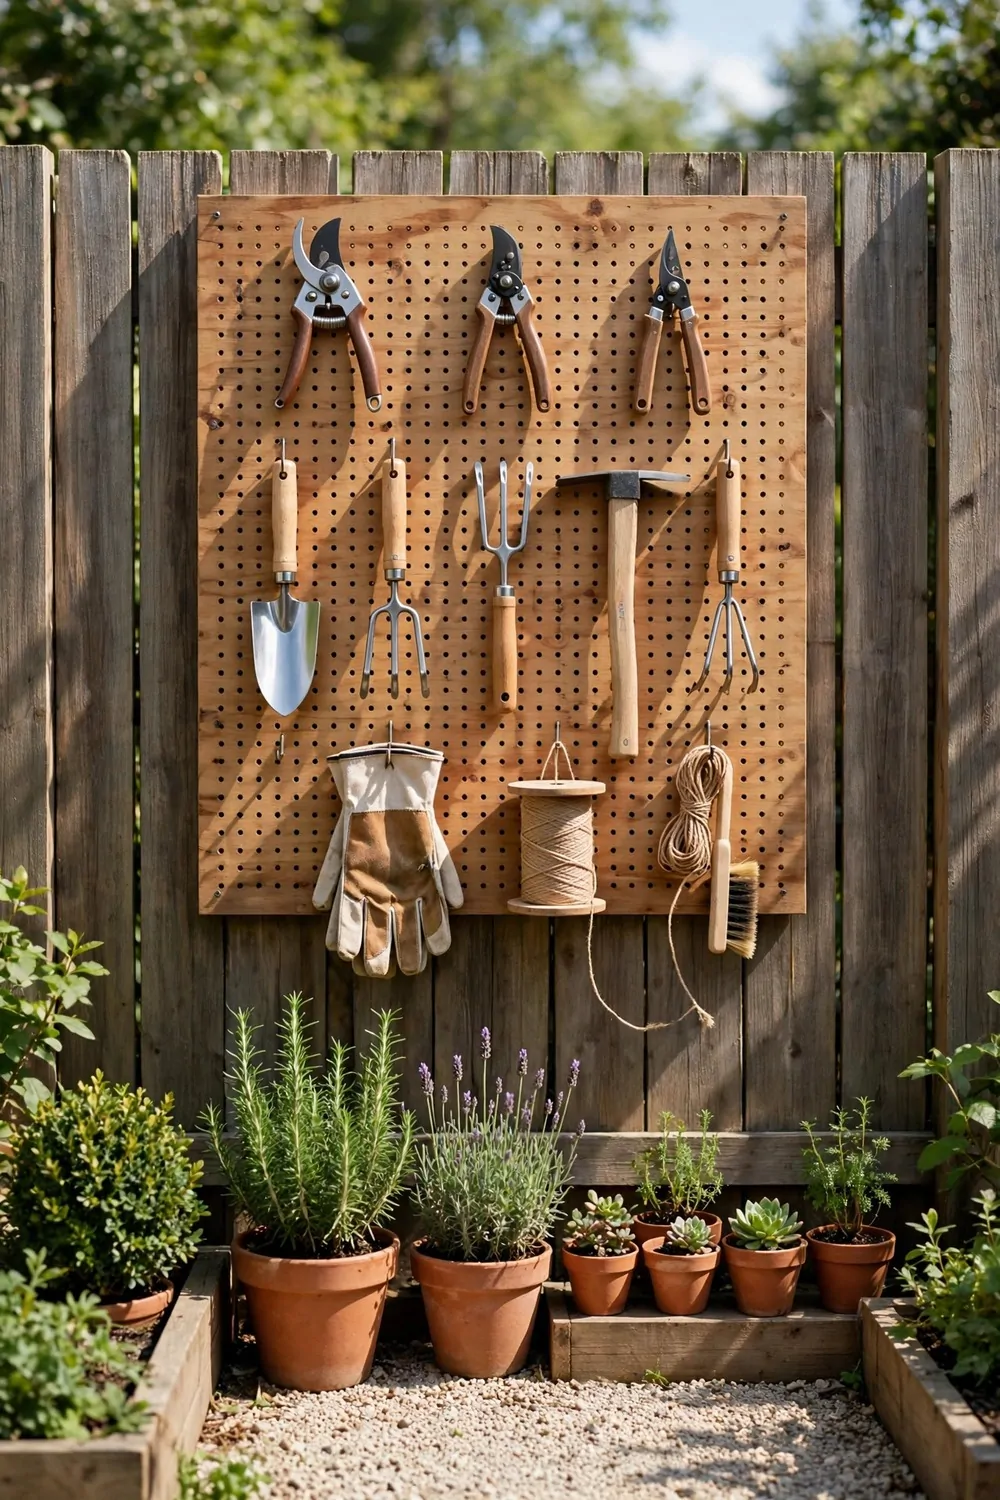
A pegboard wall gives every tool its own hook and spot. I look at mine and I can see where each thing lives.
You can move the hooks around when your tools change. I shift mine in spring when I bring out different tools for the season.
I hang small baskets on the pegboard too. They hold screws, ties, and other tiny bits that get lost in a drawer.
Typical cost is $30 to $90 for a fence pegboard setup, and the cost goes up when you add more hooks and baskets.
Pick a board made for outdoor use. My first board was indoor only and it warped after one wet week.
Mount it on a frame so air can move behind it. I left a small gap and the board has stayed dry and straight.
Outline each tool on the board with a marker if you like. I did that for my most used tools and now I put them back in the right spot every time.
Keep the board out of direct rain if you can. Mine sits under a small roof edge and that helps it last longer.
A pegboard made my fence useful instead of just a wall. It holds my tools and it makes my small yard feel like a real work space.
13. A Small Cabinet by the Back Door
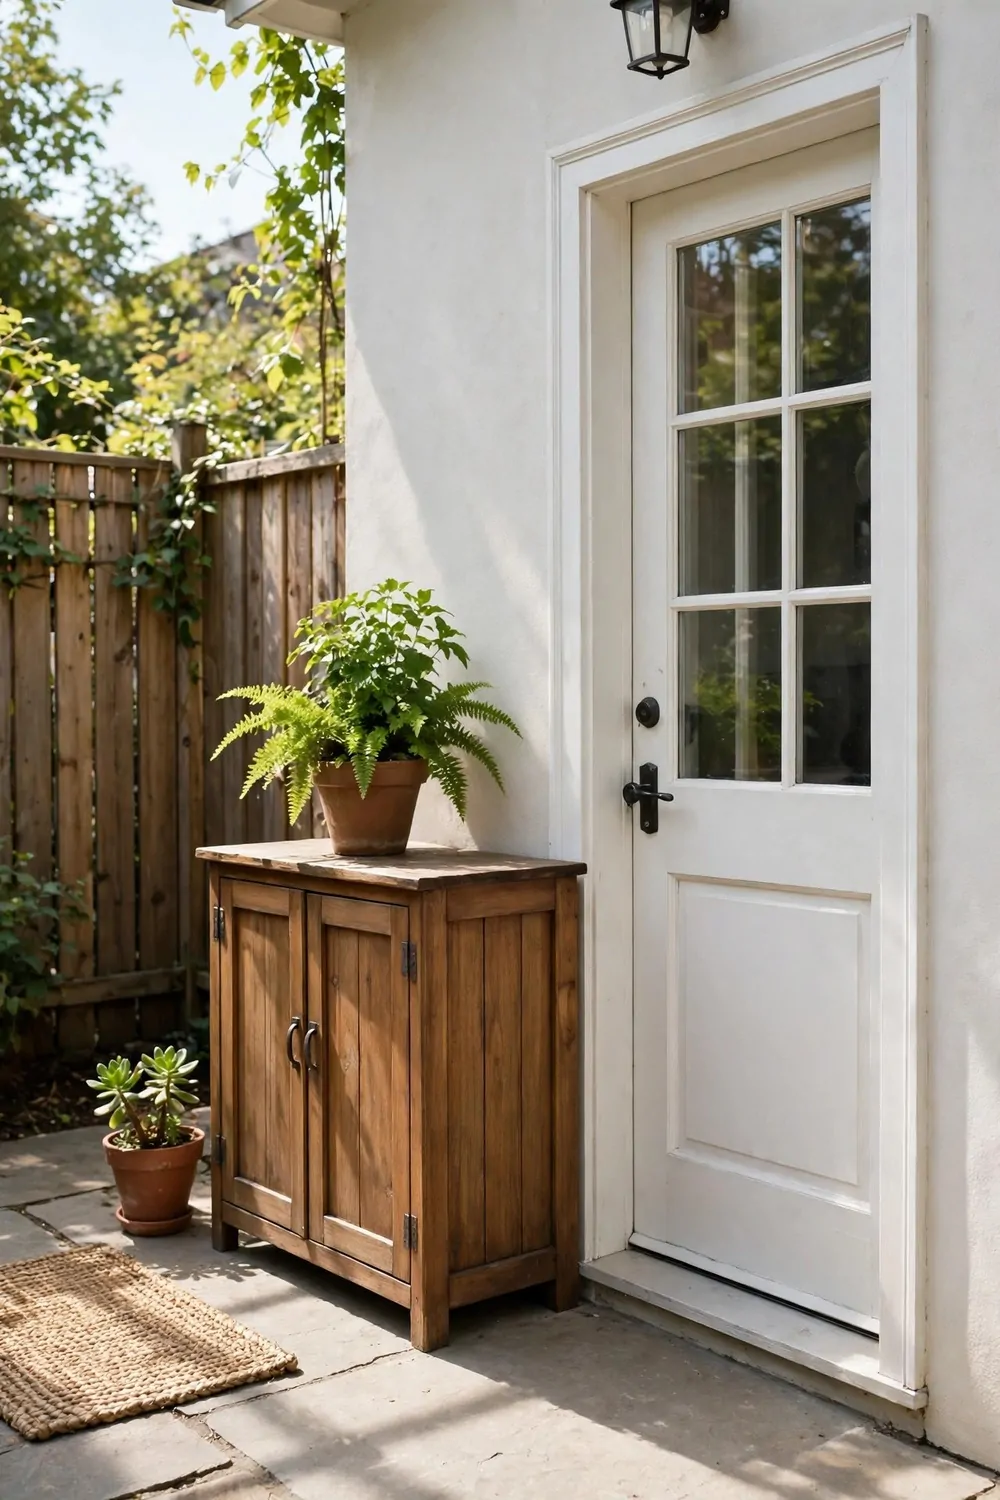
A small cabinet by the back door catches all the stuff I carry in and out. I open it, grab what I need, and I am on my way.
You can store shoes, gloves, a flashlight, and a watering can inside. I keep my most used things at eye level.
I like a cabinet with a door that shuts tight. It keeps dust out and it hides the mess from guests who visit.
Typical cost is $70 to $180 for a small outdoor cabinet, and wood cabinets often cost more than plastic ones.
Pick a cabinet that fits your wall without blocking the door swing. I measured twice because my door opens out and space is tight.
Add a small shelf inside for tiny things. I keep my plant ties and a pair of scissors on that shelf.
Put a hook on the side for a hat or a bag. I hang my sun hat there and I never forget it now.
Wipe the cabinet down after dusty days. I give mine a quick wipe on weekends and it looks neat all week.
This cabinet is the first thing I use each morning. It keeps my back door clear and my patio feels calm when I step out.
14. Tiered Shelves in a Tight Corner
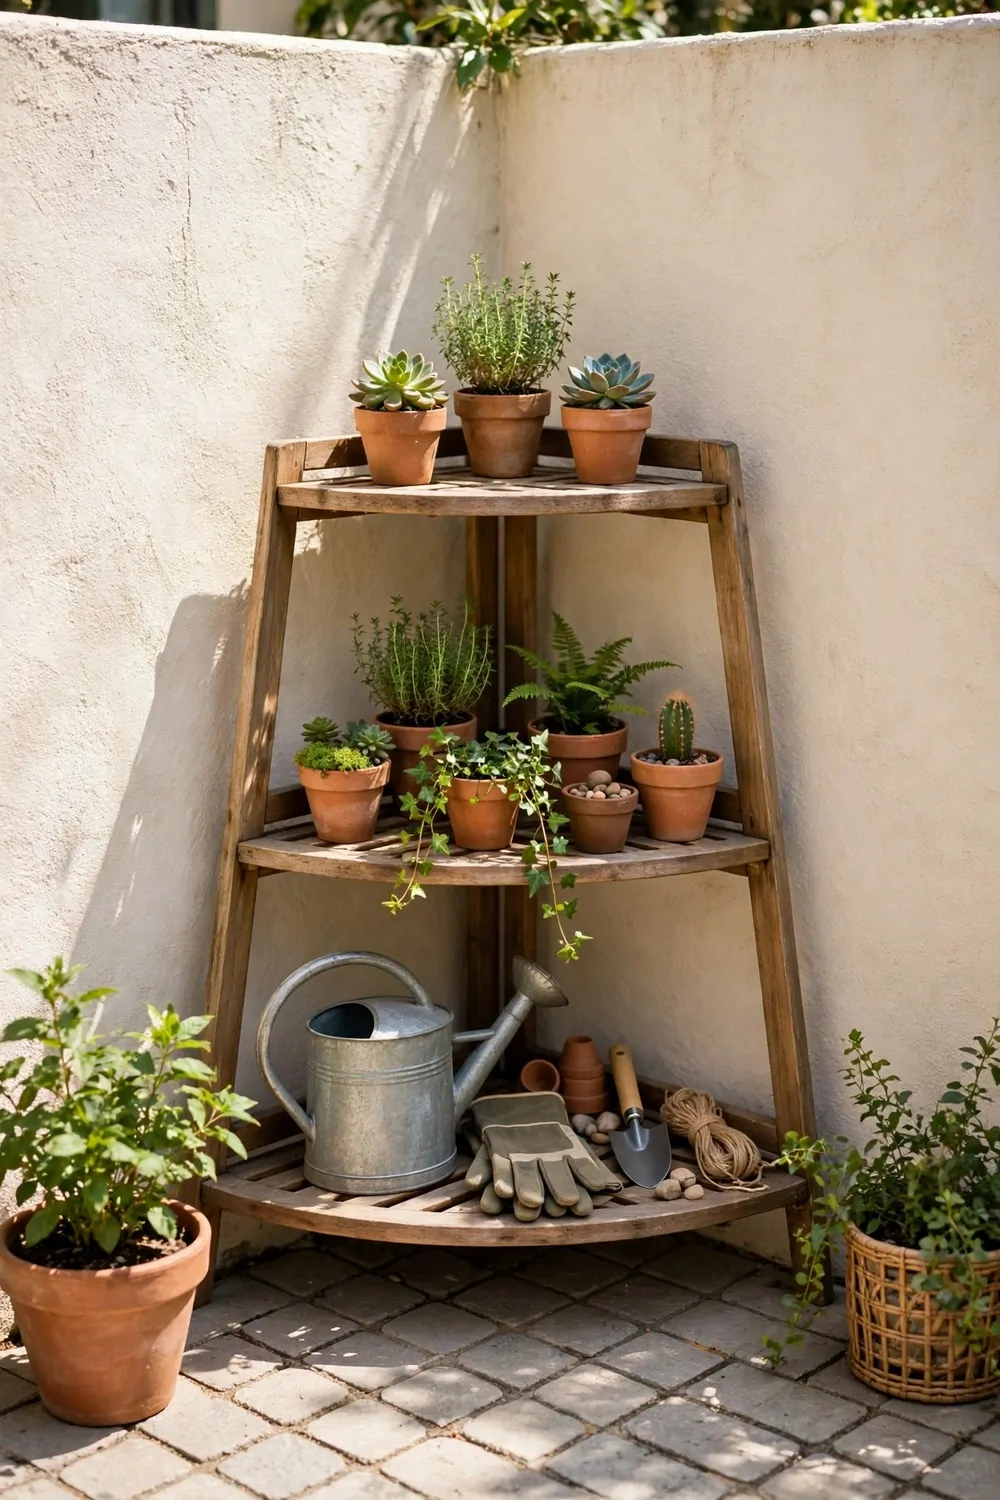
Tiered shelves step up like stairs and they fit in a tight corner. I use mine for pots, plants, and small storage boxes.
You can see everything at once because each shelf sits higher than the one in front. I do not have to move pots to find a small pot.
I put heavy pots on the bottom shelf. The top shelves hold light things like seed trays and empty pots.
Typical cost is $45 to $120 for tiered corner shelves, and wood shelves cost more than simple metal frame shelves.
Pick shelves that will not rust in rain. I check for outdoor paint or a coated frame before I buy.
Leave a little space between pots so air can move. My plants do better when they are not packed tight together.
You can slide small bins on the shelves for tools. I use one bin for twine and one for plant labels.
Anchor the shelves to the wall if they feel wobbly. I fixed mine with two small brackets and it feels solid now.
Tiered shelves turned a dead corner into my favorite spot. It holds a lot and it looks nice from my kitchen window.
15. A Shoe Rack for Muddy Boots
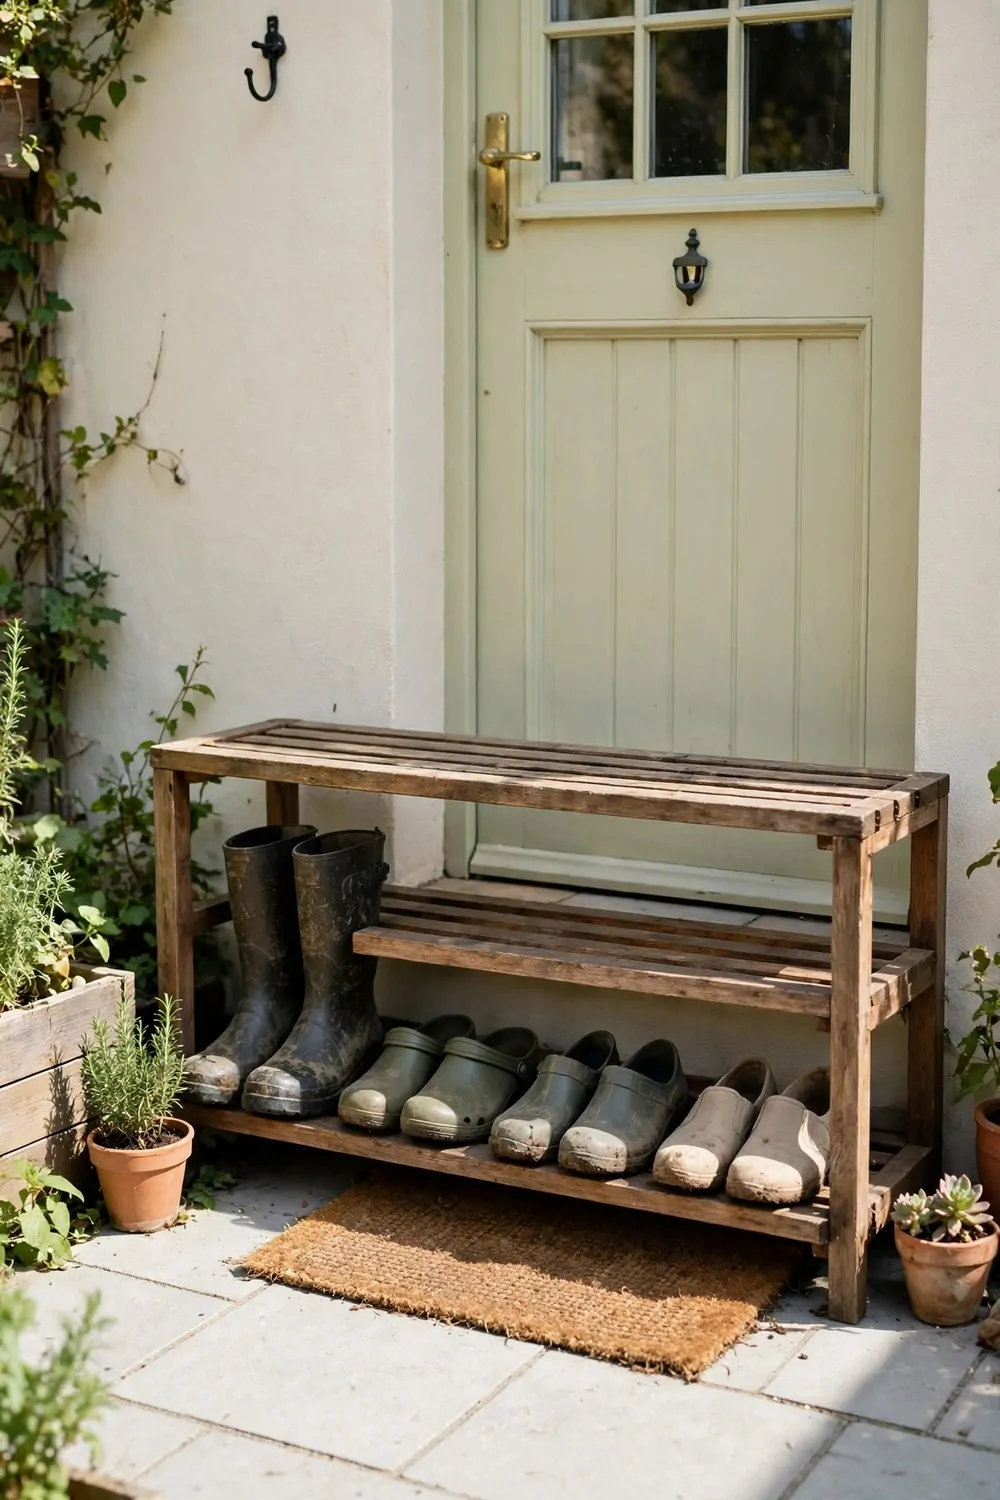
A shoe rack for muddy boots keeps dirt off my patio floor. I kick my boots off at the rack and I step inside clean.
You can put the rack by the back door or near the garden gate. I keep mine right where I come in from the yard.
I like a rack with open slats so mud falls through. I shake the tray under it once a week and it stays tidy.
Typical cost is $20 to $60 for an outdoor shoe rack, and racks with a cover cost more than open racks.
Put the boots you wear most on the bottom row. I keep my work boots low and my spare shoes up top.
Add a small tray under the rack for drips. I use a shallow tray and I empty it after rainy days.
Keep a brush by the rack for quick cleans. I brush my boots before I put them on the rack and it helps a lot.
You can add a second rack if your family is big. I added a small one for guests and now no shoes pile up by the door.
This rack is a small thing but it changed my mornings. I find my boots fast and I do not track mud into the house.
16. A Hose Reel That Mounts on the Wall
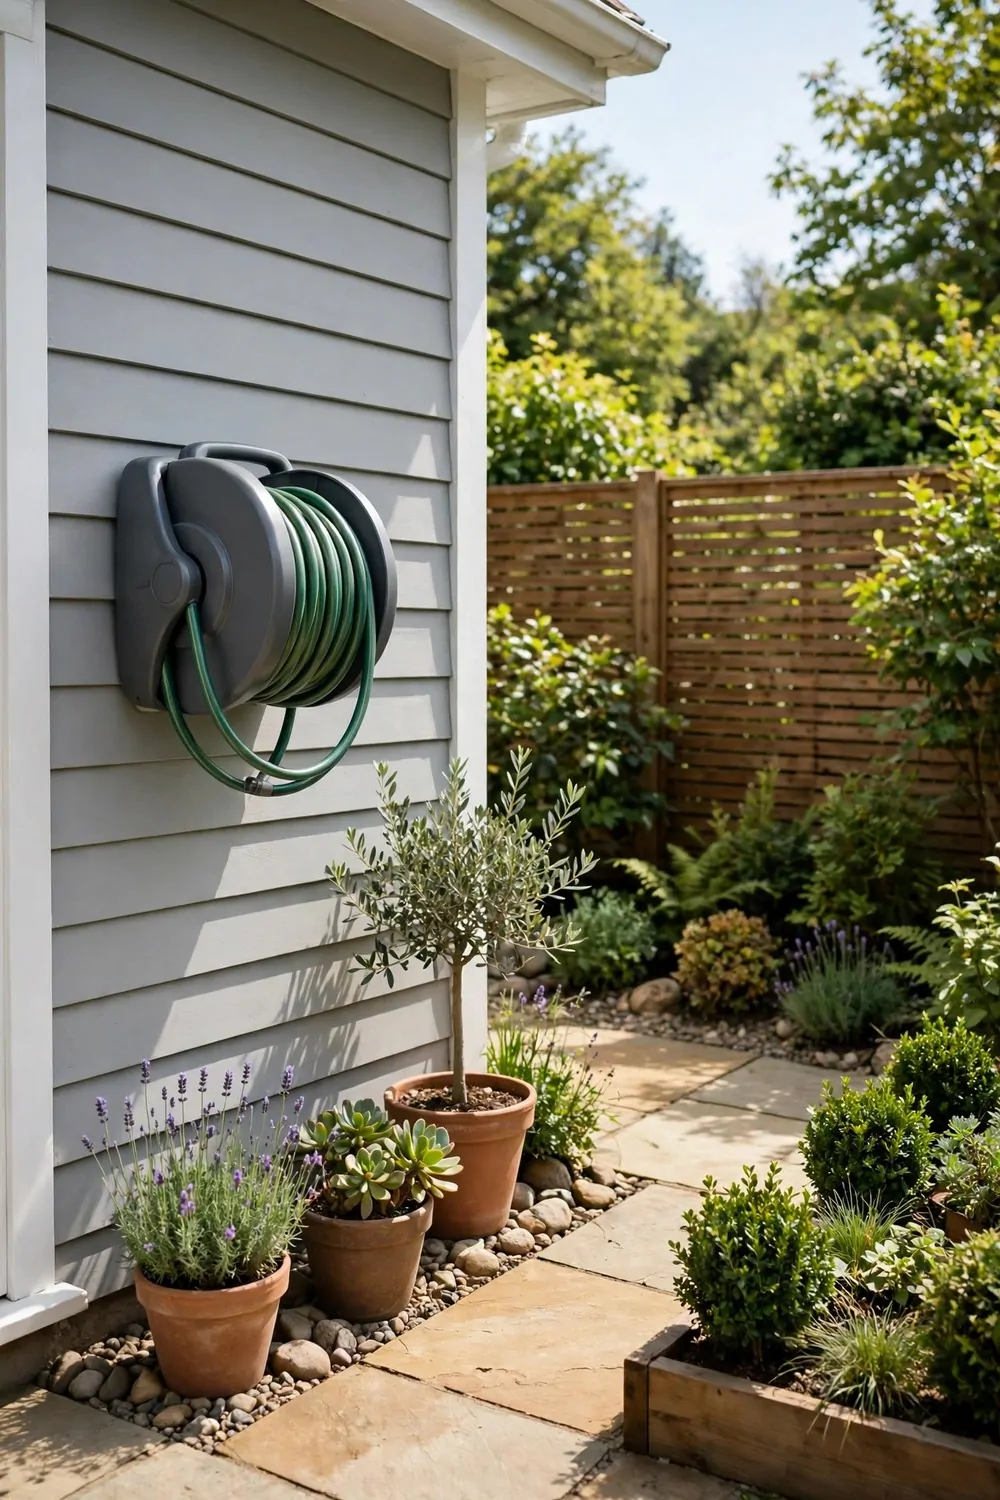
A hose reel that mounts on the wall keeps my hose neat and off the ground. I wind it up after watering and it stays in a tidy coil.
You can mount it near your tap so the hose reaches the whole yard. Mine sits right by the tap and I do not drag a long hose around.
I like a reel that turns smooth and easy. My old reel stuck and I had to fight it every time I watered the plants.
Typical cost is $30 to $80 for a wall mount hose reel, and metal reels cost more than plastic reels.
Choose a reel that suits the length of your hose. I measured my hose first and I bought a reel made for that size.
Wind the hose slow and even so it does not tangle. I take my time and it comes off smooth the next time I use it.
Check the mount screws once a season. I tighten mine in spring because the reel gets a lot of pulls all summer.
Drain the hose before cold nights if your area gets cold. I do that in late fall so water does not sit inside and freeze.
A wall reel made watering simple for me. The hose has a home now and my patio path is clear and safe to walk on.
17. Lidded Baskets for Pool Toys
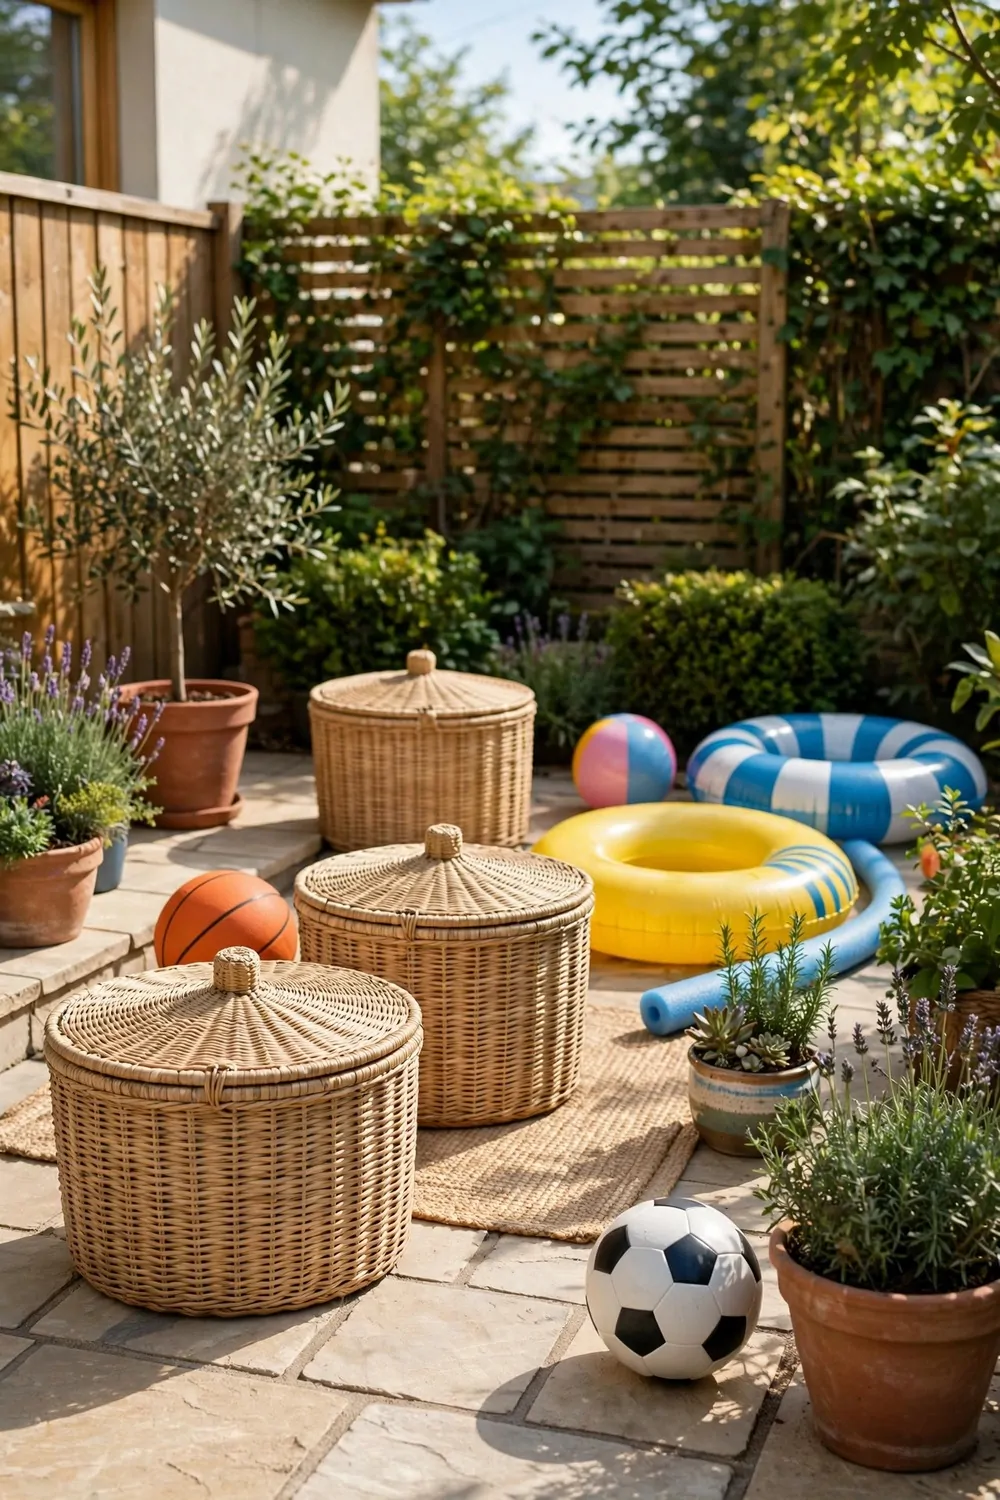
Pool toys end up everywhere in my yard.
A lidded basket gives them one home. You toss them in after a swim and close the lid.
I keep two baskets by the back door. One holds the big float things and one holds the small toys. That little change made my mornings easier.
The lid keeps rain out and keeps the toys from fading in the sun. It also keeps leaves from piling inside.
Typical cost is $20 to $45 for a sturdy lidded basket. Pick one with holes in the sides so wet toys can dry.
Let the toys drip a bit before you close the lid. I shake them off first so the basket stays fresh inside.
You can label each basket with a little tag.
Pick a basket you can lift when it is full. A heavy basket is no fun to drag across the yard.
Your patio will feel tidy in five minutes. The toys are there when you want them and gone when you do not.
18. A Fold-Down Shelf for Potting
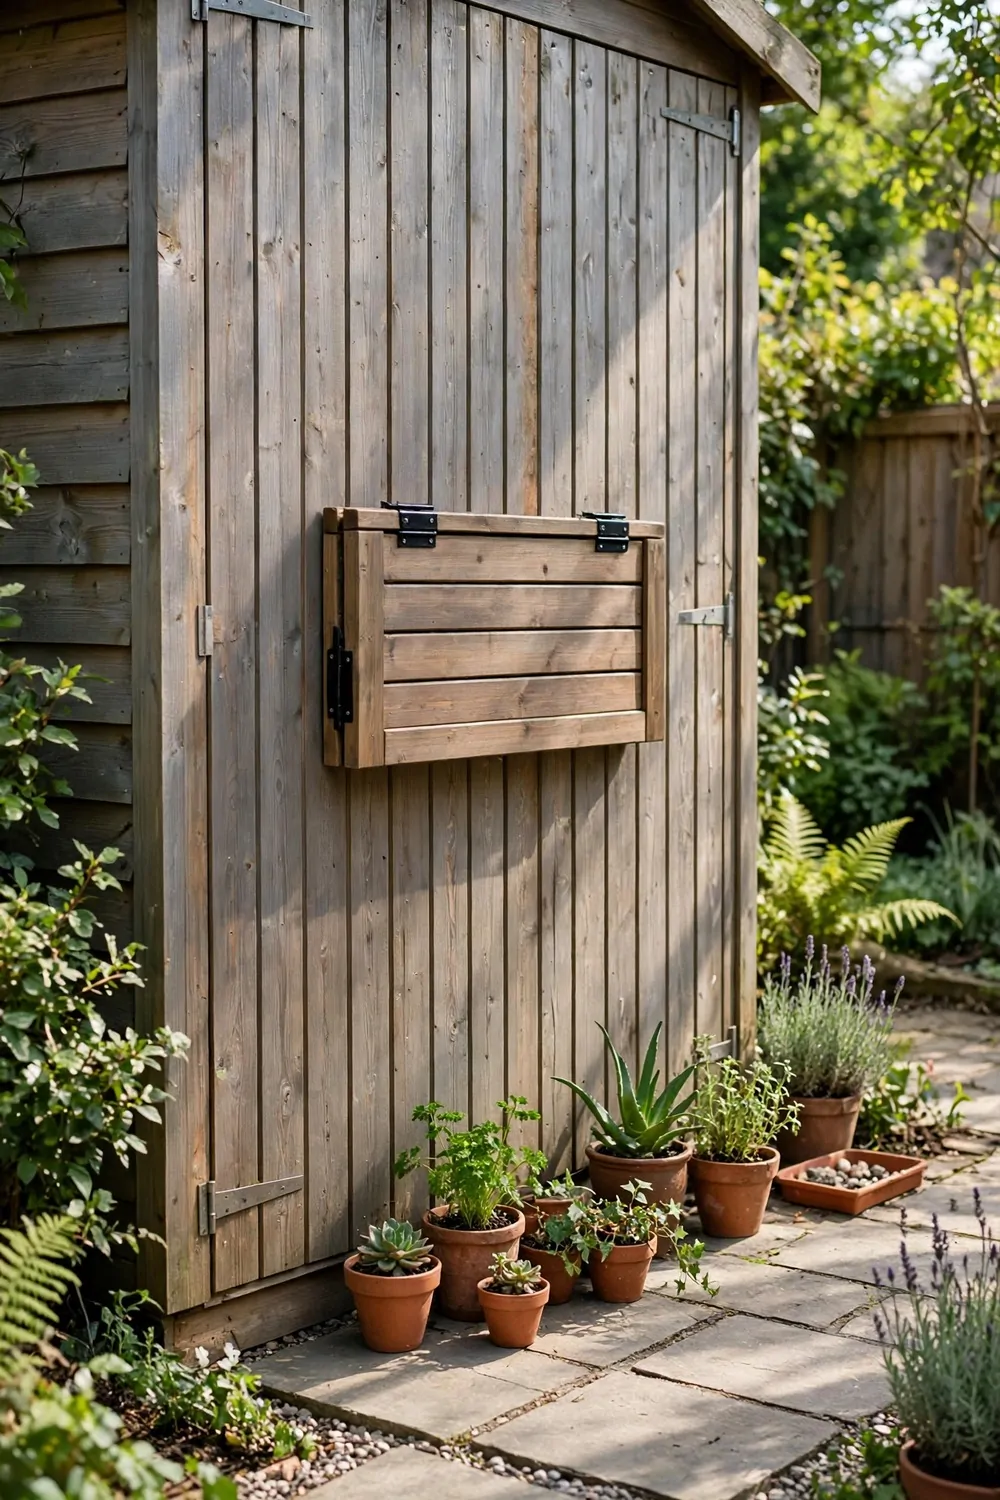
I love to pot plants but I hate the mess on the ground.
A fold-down shelf gives you a little work table on the wall. You pull it down when you need it and fold it up when you are done.
I put mine near my pots and my bag of soil. Everything I need is right there in one spot. I wish I had done it sooner.
You can work standing up, which is kinder on your back. I do not have to kneel on the hard ground now.
Typical cost is $30 to $70 for a fold-down potting shelf. A simple wood one is often the cheapest and looks nice too.
Add a small hook under the shelf for your hand tools. Your trowel and gloves will always be in reach.
Wipe the shelf clean after each use.
Fold it up in bad weather so it stays dry. A shelf that stays wet will wear out much sooner.
This one shelf made potting fun again for me. You get a clean work spot without giving up any floor space.
19. A Tarp-Covered Crate for Cushions
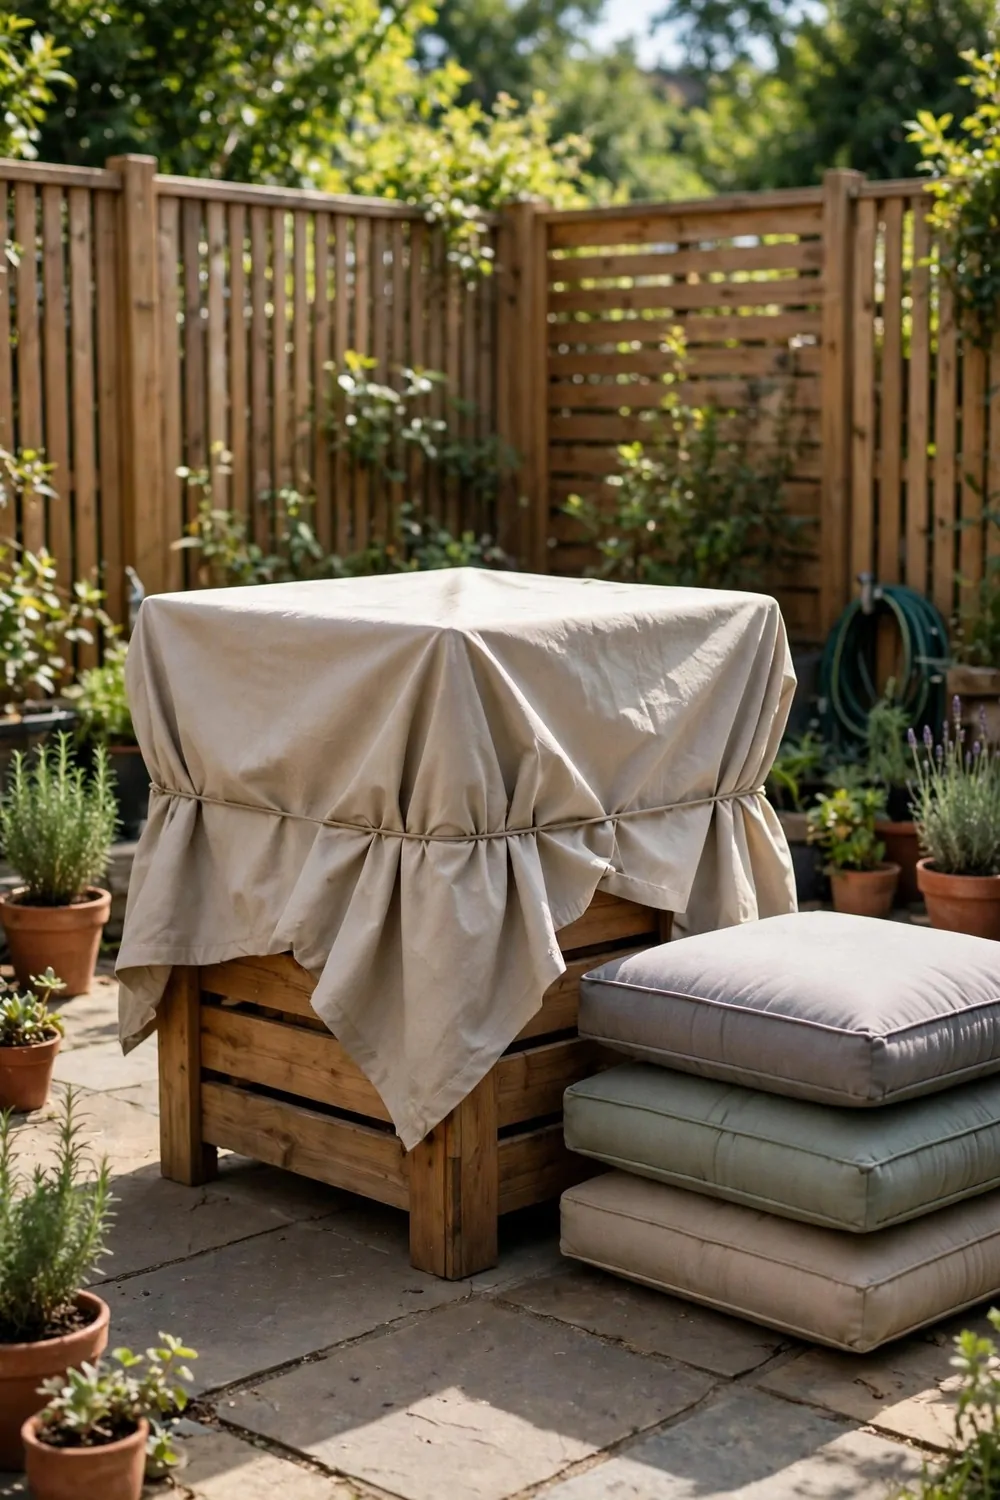
Outdoor cushions get damp fast when rain hits them.
A crate with a tarp cover solves that problem. You stack the cushions inside and pull the cover over the top.
I keep my crate right next to the chairs. It takes me less than a minute to put the cushions away. It is a small fix with a big payoff.
The tarp keeps rain off and keeps dust away too. Your cushions will stay bright and soft for longer.
Typical cost is $35 to $80 for a crate and tarp cover together. You can use a plain crate you already own and just buy the cover.
Make sure the cushions are dry before you close the cover. Damp cushions can smell musty if they sit closed up.
Pick a crate with a flat top if you can.
On sunny days I leave the cover off for a bit. A little fresh air keeps the crate smelling clean.
You will stop dreading rain once you have this crate. Your cushions stay safe and your patio stays neat.
20. A Slim Bin for Trash and Recycling
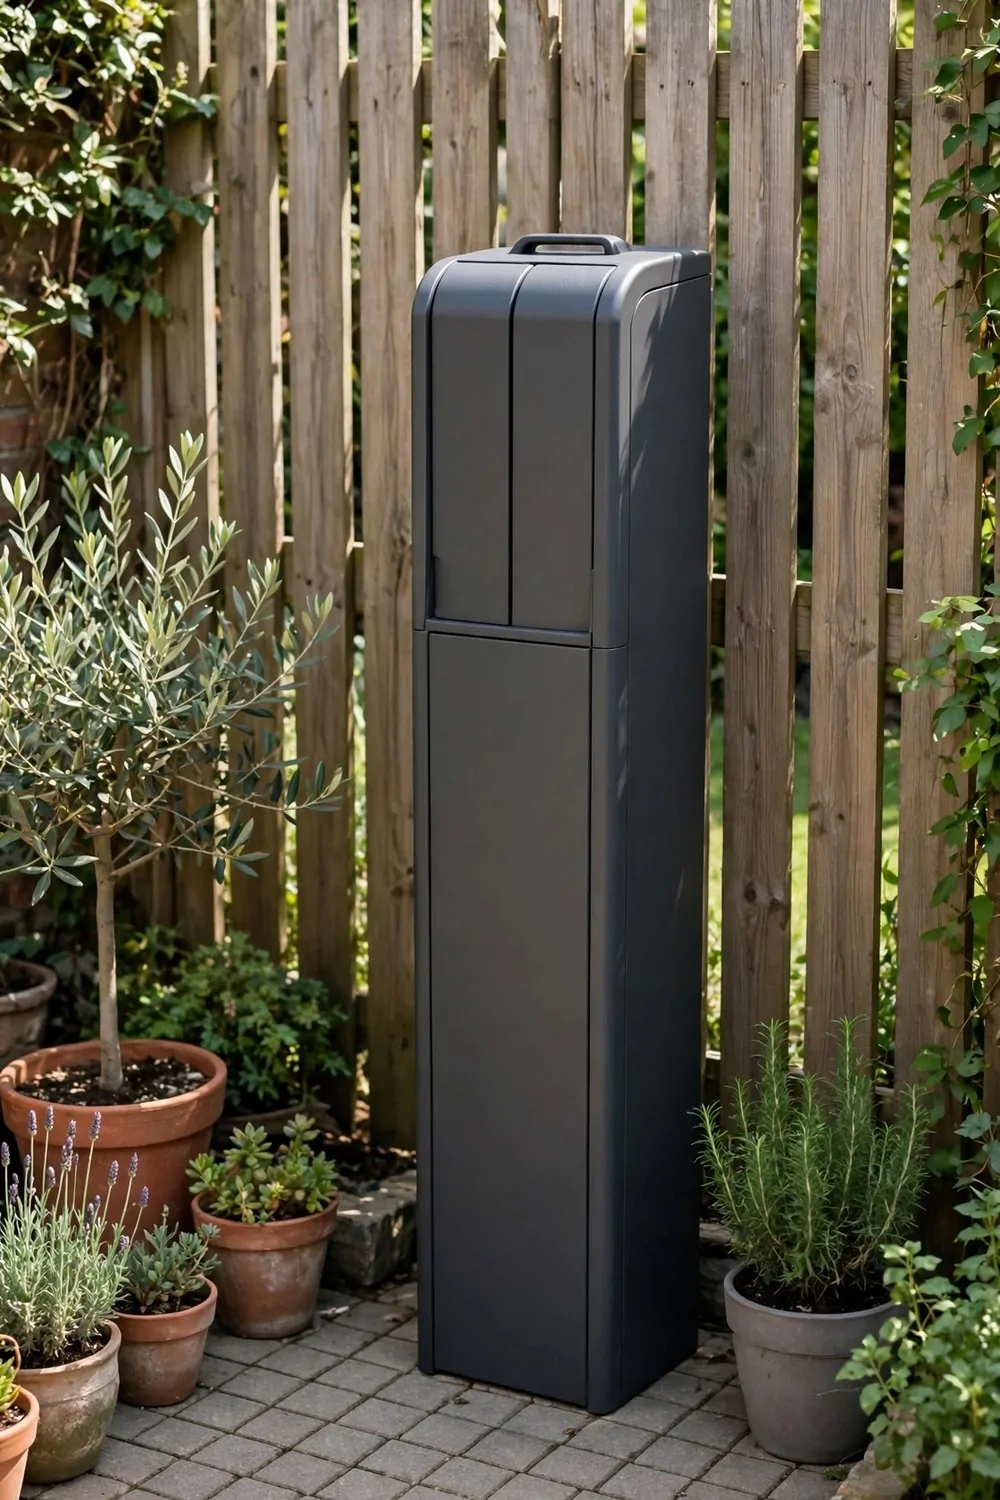
Big bins eat up a small yard fast.
A slim bin fits in a narrow spot instead. You slide it against the fence and it barely sticks out.
I use one slim bin for trash and one for recycling. They sit side by side and look tidy together. My family noticed the change right away.
Pick bins with tight lids that snap shut. A loose lid lets smells out and lets rain in.
Typical cost is $25 to $55 for a slim outdoor bin. Two bins cost more, but they save you sorting later.
Rinse the bins out once a month with the hose. It takes five minutes and keeps them from smelling.
Put a small mat under the bins if your ground is soft.
I keep a bag hook on the side of my bin. Spare bags are right there when I need to swap one out.
Your gate area will feel open again with slim bins. You get the same storage in half the width.
21. A Wall-Mounted Basket for Gloves
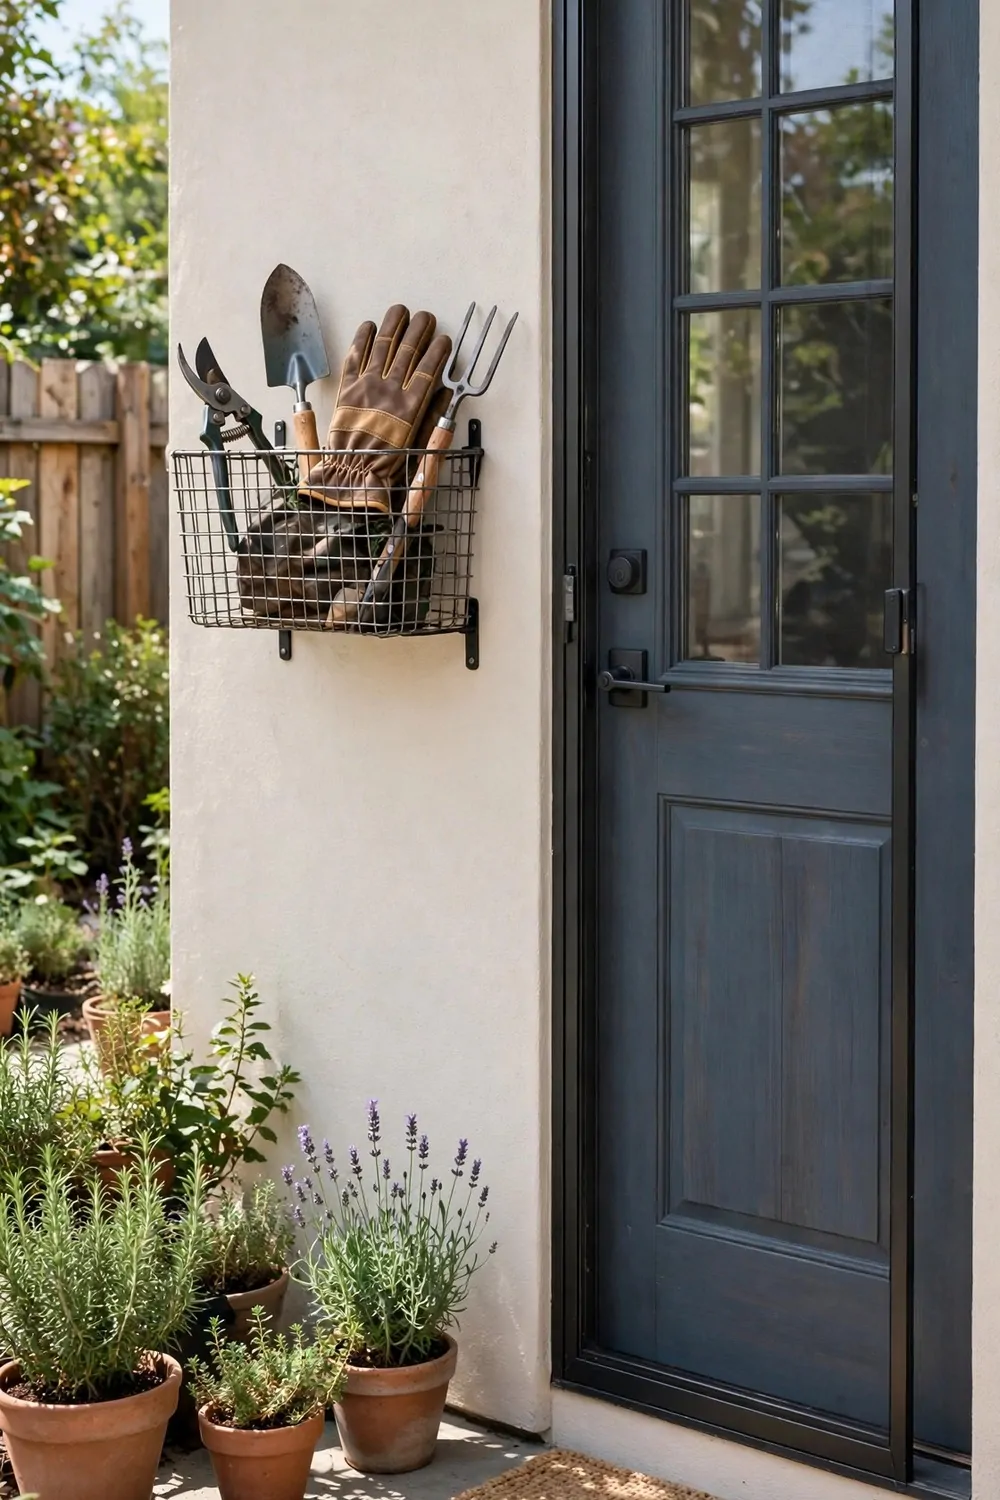
I always lost my garden gloves.
A wall basket keeps both gloves in one place. You drop them in when you come inside and grab them on your way out.
I hung mine by the back door at hand height. It is the first thing I see when I step out to the yard. It just feels calmer out there now.
You can use the basket for more than gloves. I toss in twine, small scissors, and seed packets too.
Typical cost is $12 to $30 for a wall-mounted basket. A wire one dries fast, which is nice for damp gloves.
Hang it where rain cannot hit it straight on. A little cover from the roof keeps the basket dry.
Shake the dirt off your gloves before you put them away.
Give each person their own small basket if you share the yard. No more mixing up gloves that do not fit.
This tiny basket saves me time every single day. I never hunt for gloves now, I just reach and go.
22. A Compact Firewood Rack
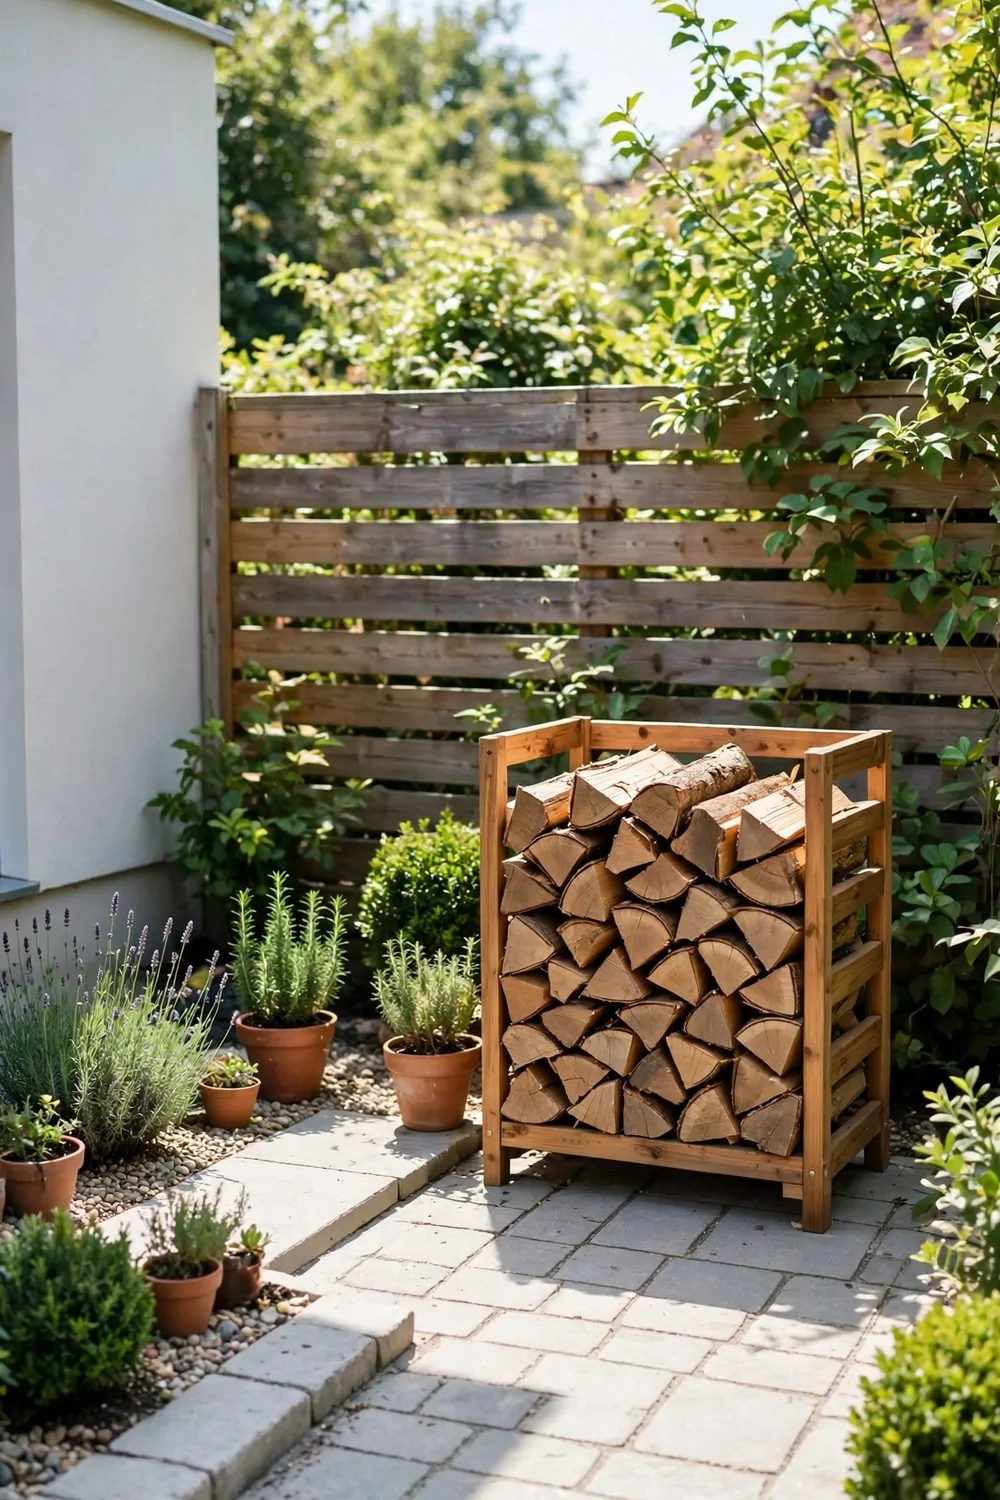
Firewood piled on the ground gets damp and messy.
A compact rack lifts the wood off the ground. Air can flow under it and the wood stays dry.
I keep my rack close to the fire pit but not too close. You want the wood handy, not in the way of the flames. I smile every time I see it tidy.
Stack the logs with the cut ends facing out. It looks neat and you can see how much wood you have left.
Typical cost is $30 to $75 for a compact firewood rack. A small metal rack holds plenty for a few cosy nights outside.
Cover the top of the stack with a small tarp in wet weather. The sides stay open so air can still move through.
Only bring inside the wood you plan to burn that night.
Check the rack legs once in a while to make sure they sit level. A leaning rack can tip when the wood gets low.
Your fire nights will feel easier with a rack like this. The wood is dry, the pile is tidy, and you know just where to reach.
23. A Storage Ottoman for the Patio
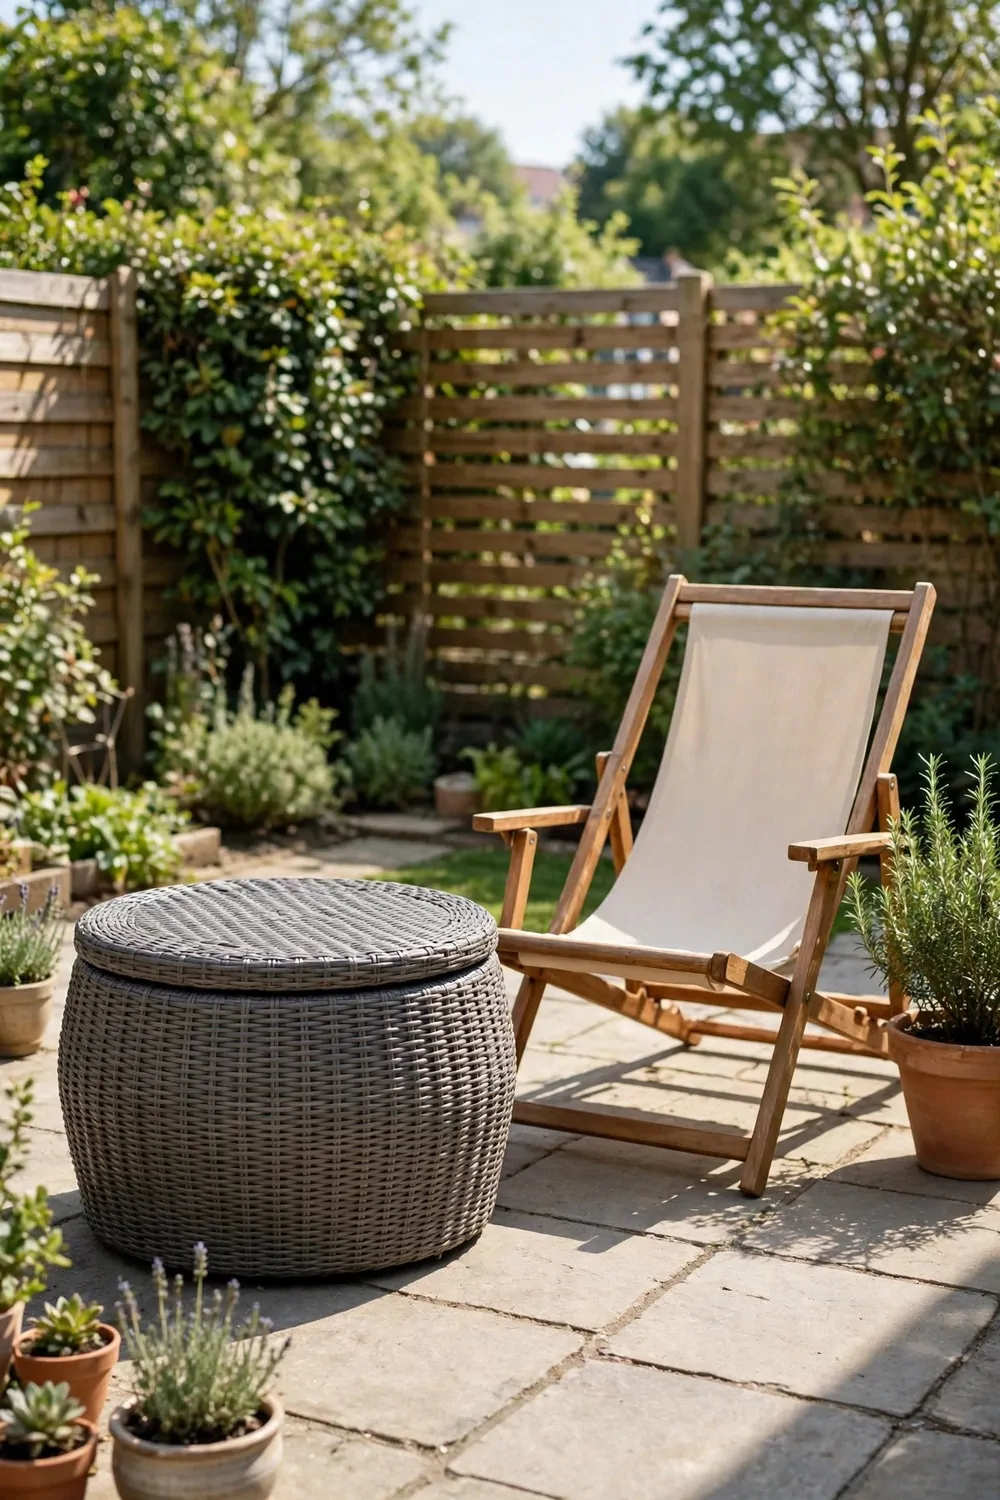
A patio ottoman does two jobs at once.
I keep blankets and small games in mine. When friends come over, I just lift the lid and hand them out.
Pick an ottoman made for outdoor use. Indoor fabric will soak up rain and take forever to dry. It took less time than I expected.
Typical cost is $40 to $90 for a storage ottoman for the patio. A simple one with a firm lid works just fine.
Put the ottoman where you sit most often. Mine lives next to my favourite chair, so it is always in reach.
Keep a small tray on top when you use it as a table. Your drink will sit steady and will not tip over.
Wipe the lid dry after rain before you open it.
I like to swap what I store by season. In warm months it holds swim towels, and later it holds warm throws.
Your patio will feel more comfy with this one piece. It hides the clutter and gives your feet a soft spot to rest.
24. A Rack for Long Tools by the Gate
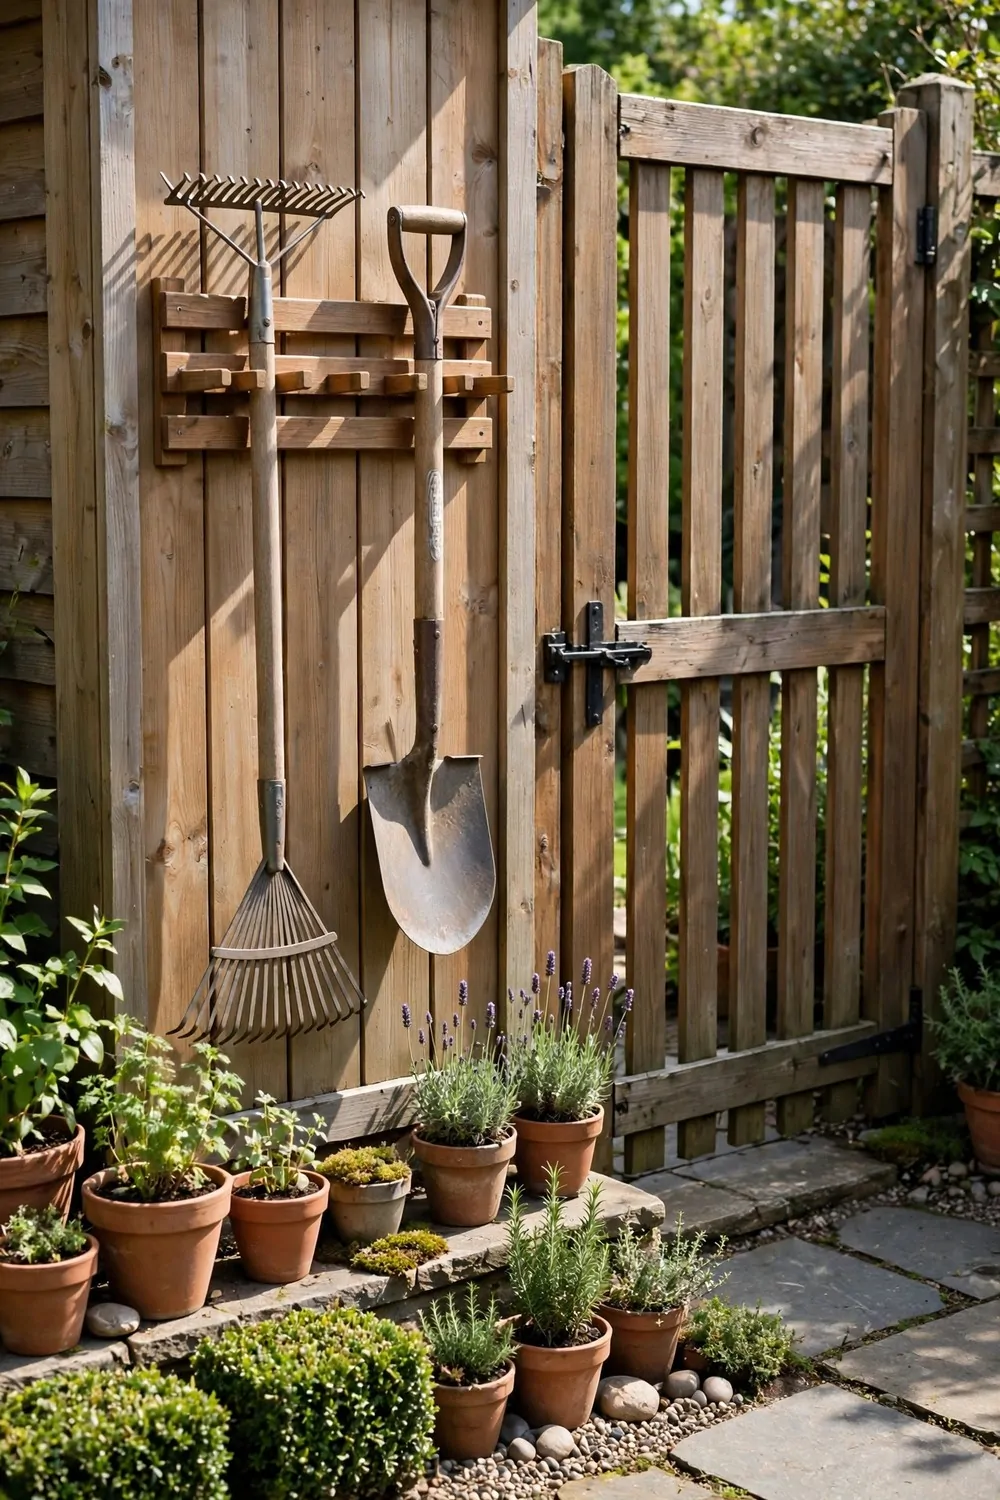
Long tools lean in a messy pile by my gate.
A rack holds each tool upright in its own slot. You can see every handle at a glance and grab the one you need.
I mounted mine on the fence right by the gate. I grab a tool on my way in and put it back on my way out. That is the part I like best.
Hang the tools with the heads up or down, whichever feels safer to you. I keep sharp ends up high and out of the way of little hands.
Typical cost is $20 to $50 for a rack for long tools. A wall rack with slots is often cheaper than a big standing one.
Leave a little space between each tool. Crowded tools tangle together and are hard to pull out.
Wipe mud off the tool heads before you hang them back.
Label the slots if your family shares the tools. Everyone will put each tool back in its own spot.
Your gate area will look calm and ready with this rack. No more leaning pile, no more tools falling on your toes.
25. A Small Greenhouse Shelf for Pots
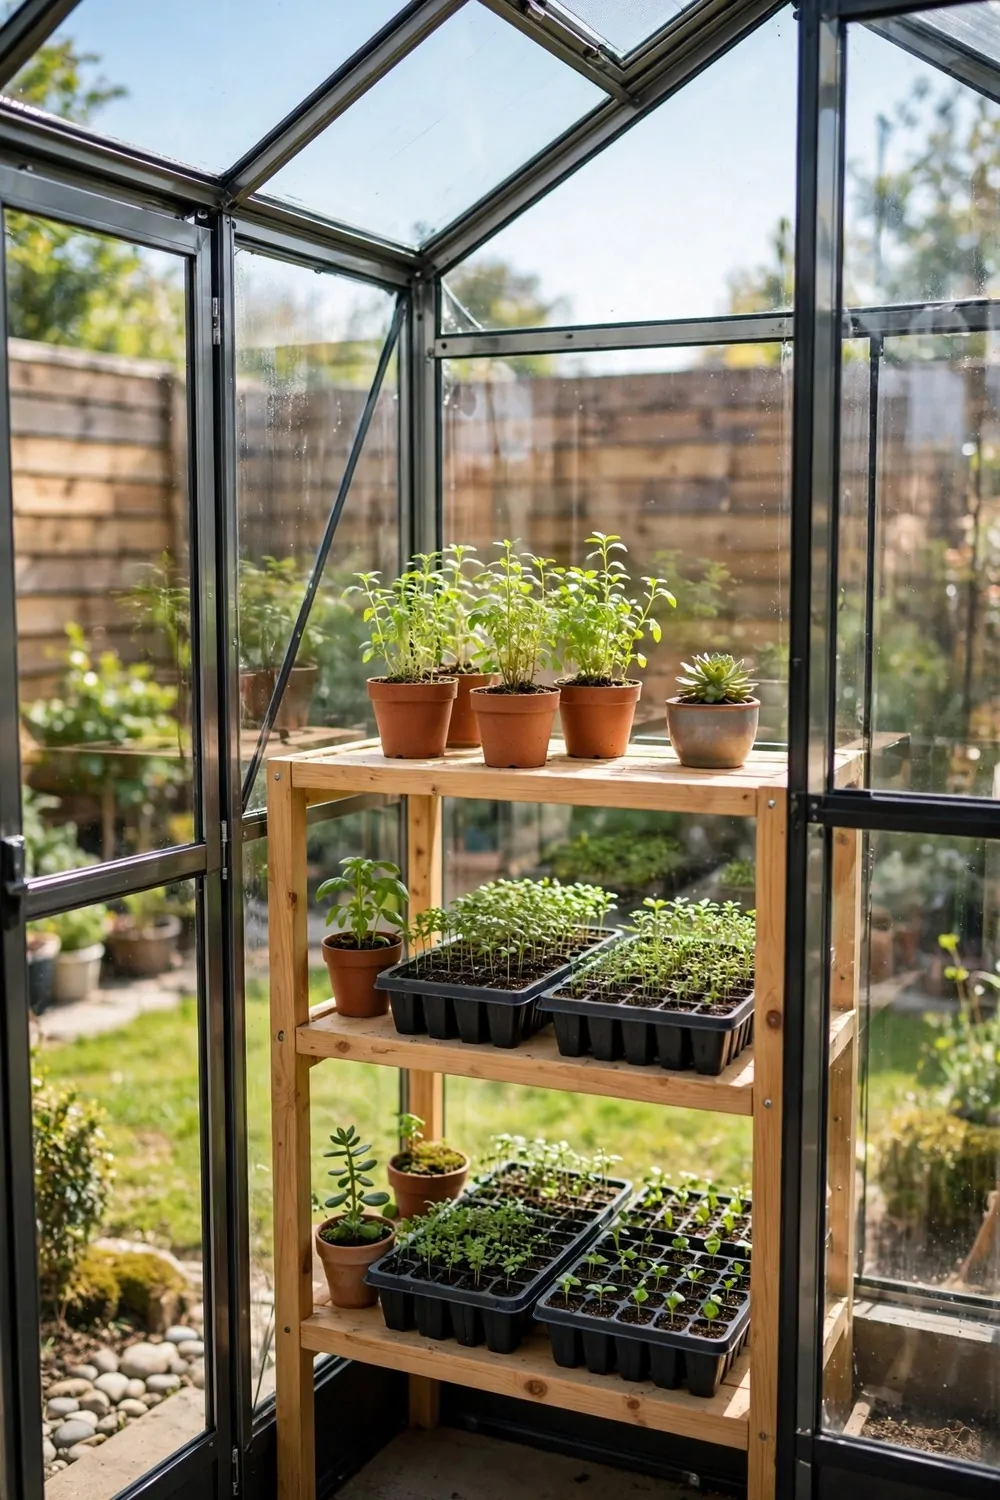
My small greenhouse was a jumble of pots on the floor.
A shelf inside gives every pot its own level. You can see them all and reach them without bending down low.
I put small pots up high and big pots down low. The heavy ones are safer near the floor. It makes the whole yard feel cared for.
Typical cost is $35 to $85 for a small greenhouse shelf for pots. A wire shelf lets water drip through and keeps the pots from sitting in puddles.
Leave space between the pots for air to move. Crowded plants can get damp and unhappy fast.
Keep your seed trays on the top shelf where it is warmest. They sprout faster up there in the light.
Wipe the shelves clean between plantings.
I keep a watering can on the bottom shelf. It is always full and ready when my plants look thirsty.
Your little greenhouse will feel like a real plant room now. Every pot has a home, and you can find it in seconds.
26. A Deck Skirt Storage Nook
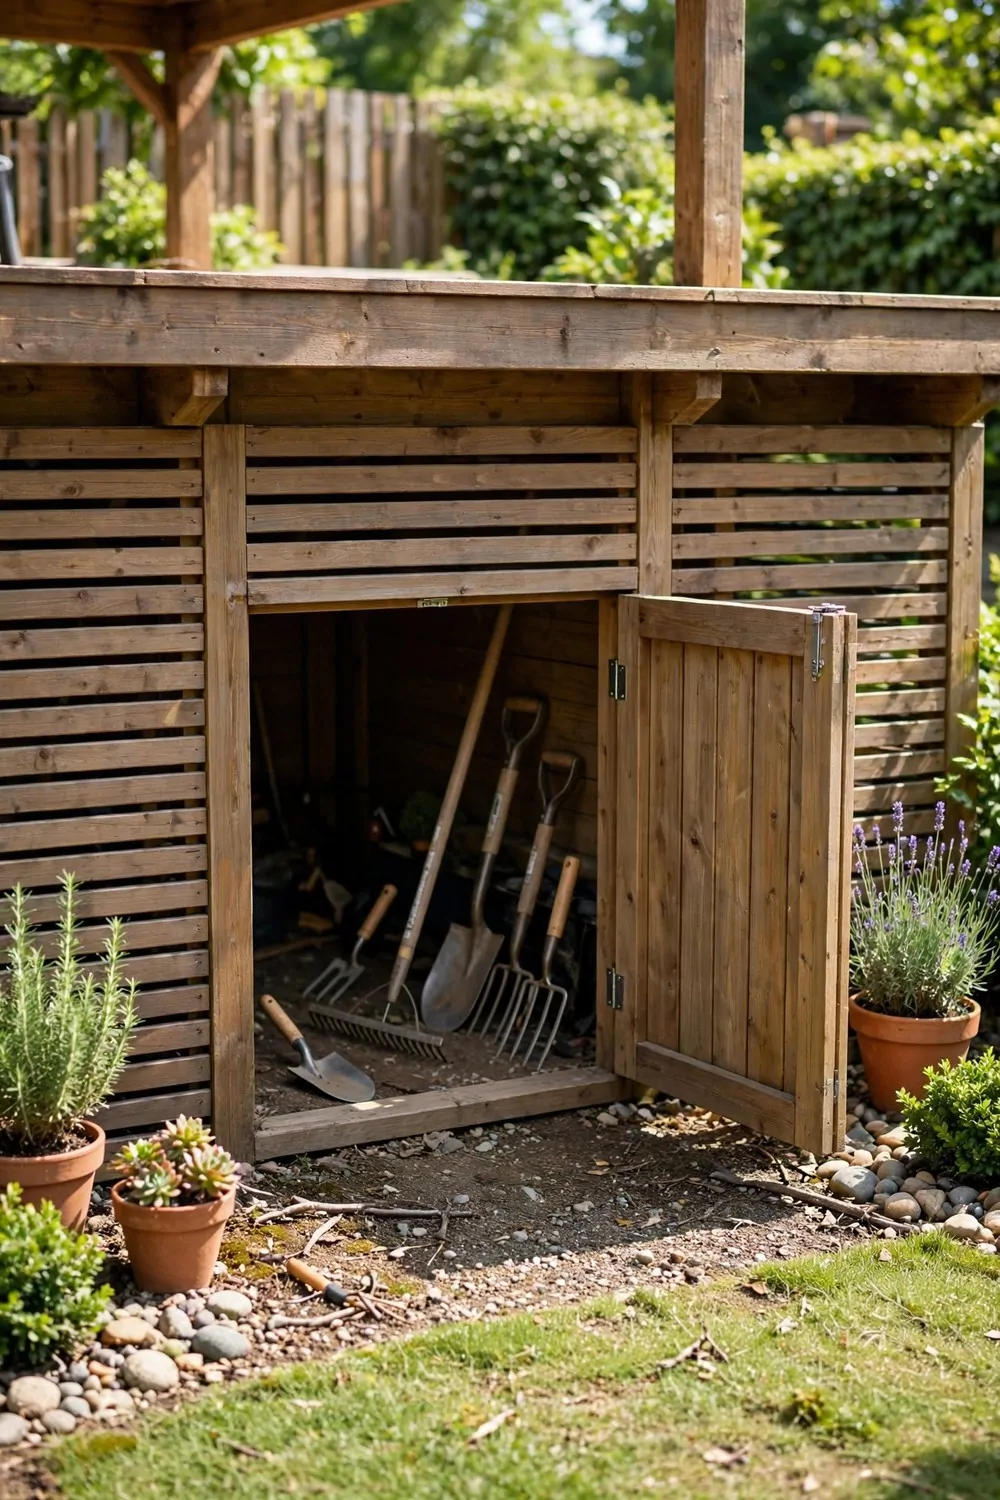
The space under a deck often goes to waste.
A skirt nook turns that dead space into storage. You add a neat door in the skirt and tuck things behind it.
I store my spare chairs and folded tables in mine. They stay out of sight but I can reach them in a minute. I use it more than I thought I would.
Typical cost is $50 to $120 for a deck skirt storage nook. The price depends on the size of the door and the wood you use.
Make sure the door shuts tight so rain stays out. A small latch keeps it closed on windy days.
Keep the floor of the nook dry with a flat stone or a board. Your stored things will not sit in mud that way.
Do not store anything that can get damp and mouldy.
Check inside once a month for leaves and cobwebs. A quick sweep keeps the nook fresh and easy to use.
Your deck will look finished and tidy from the outside. The hidden nook holds the bulky stuff you do not want to see.
27. A Hanging Organizer on the Shed Door
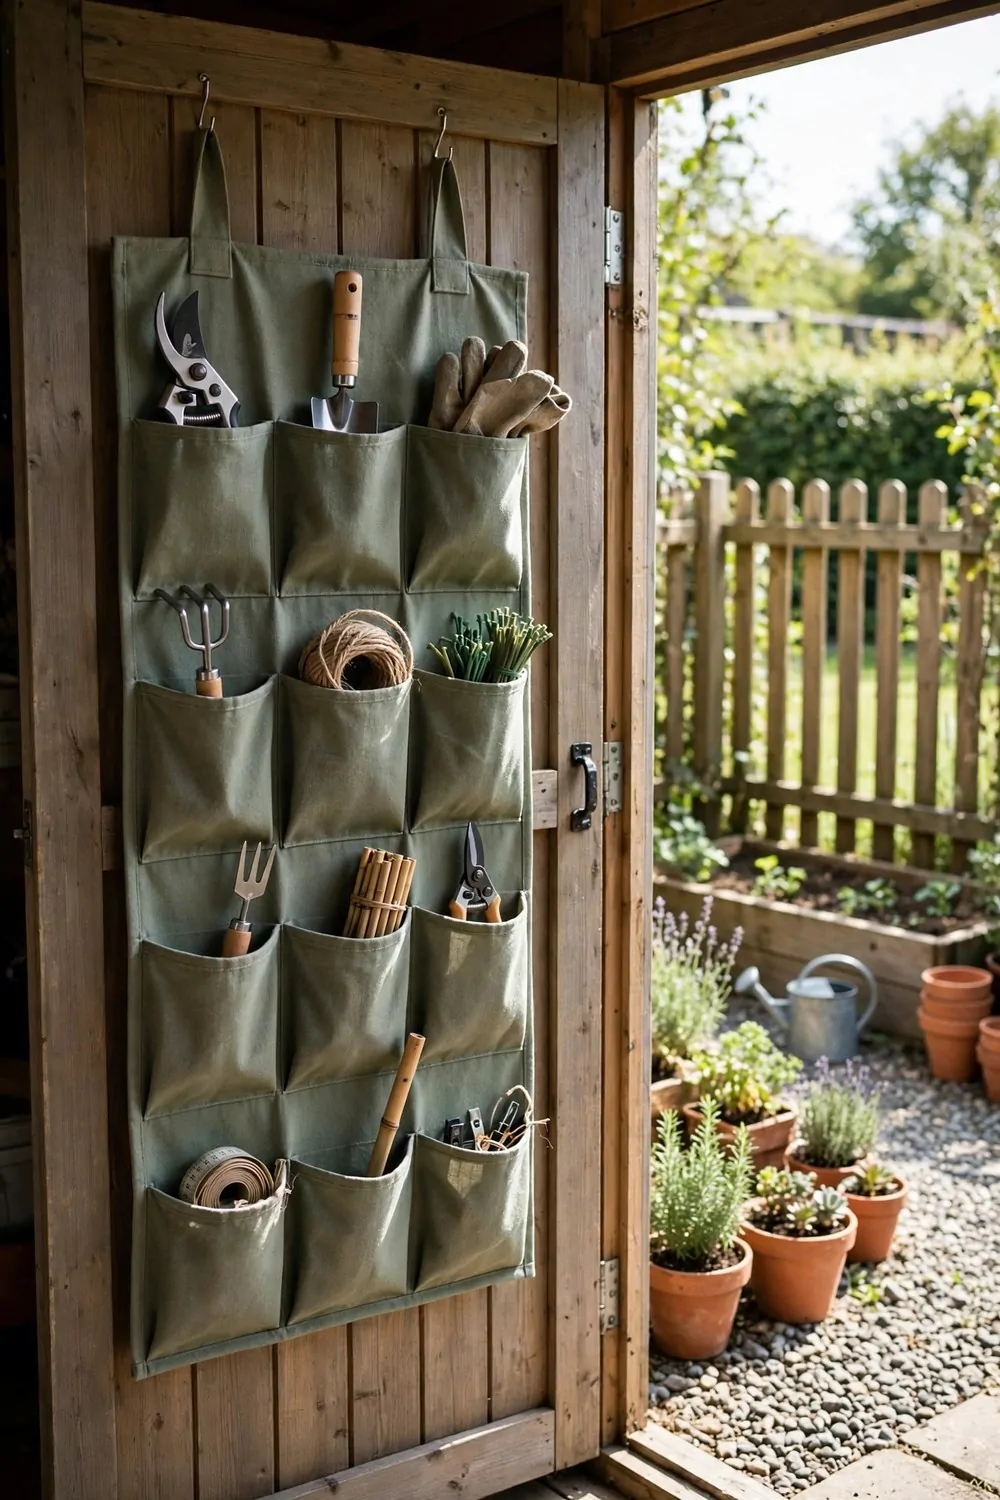
The inside of my shed door was bare and wasted.
A hanging organizer turns that door into storage. Pockets hold screws, gloves, tape, and all the little bits.
I hung mine on the inside of the door so it stays dry. The pockets are clear, so I can see what is in each one. It is simple, but it really works.
Typical cost is $15 to $35 for a hanging organizer on the shed door. A strong fabric one holds up well and costs less than a wood rack.
Put the things you use most at eye level. I keep my tape and markers there, and the rare bits down low.
Do not overload the pockets with heavy tools. A pocket that sags will pull the whole organizer down.
Label the top pockets if you like things extra tidy.
Close the door gently so nothing falls out of the pockets. A hard slam can spill small screws everywhere.
Your shed will feel bigger with this one change. The door does the work, and the floor stays clear for the big tools.
28. A Wheeled Bin for Sports Gear
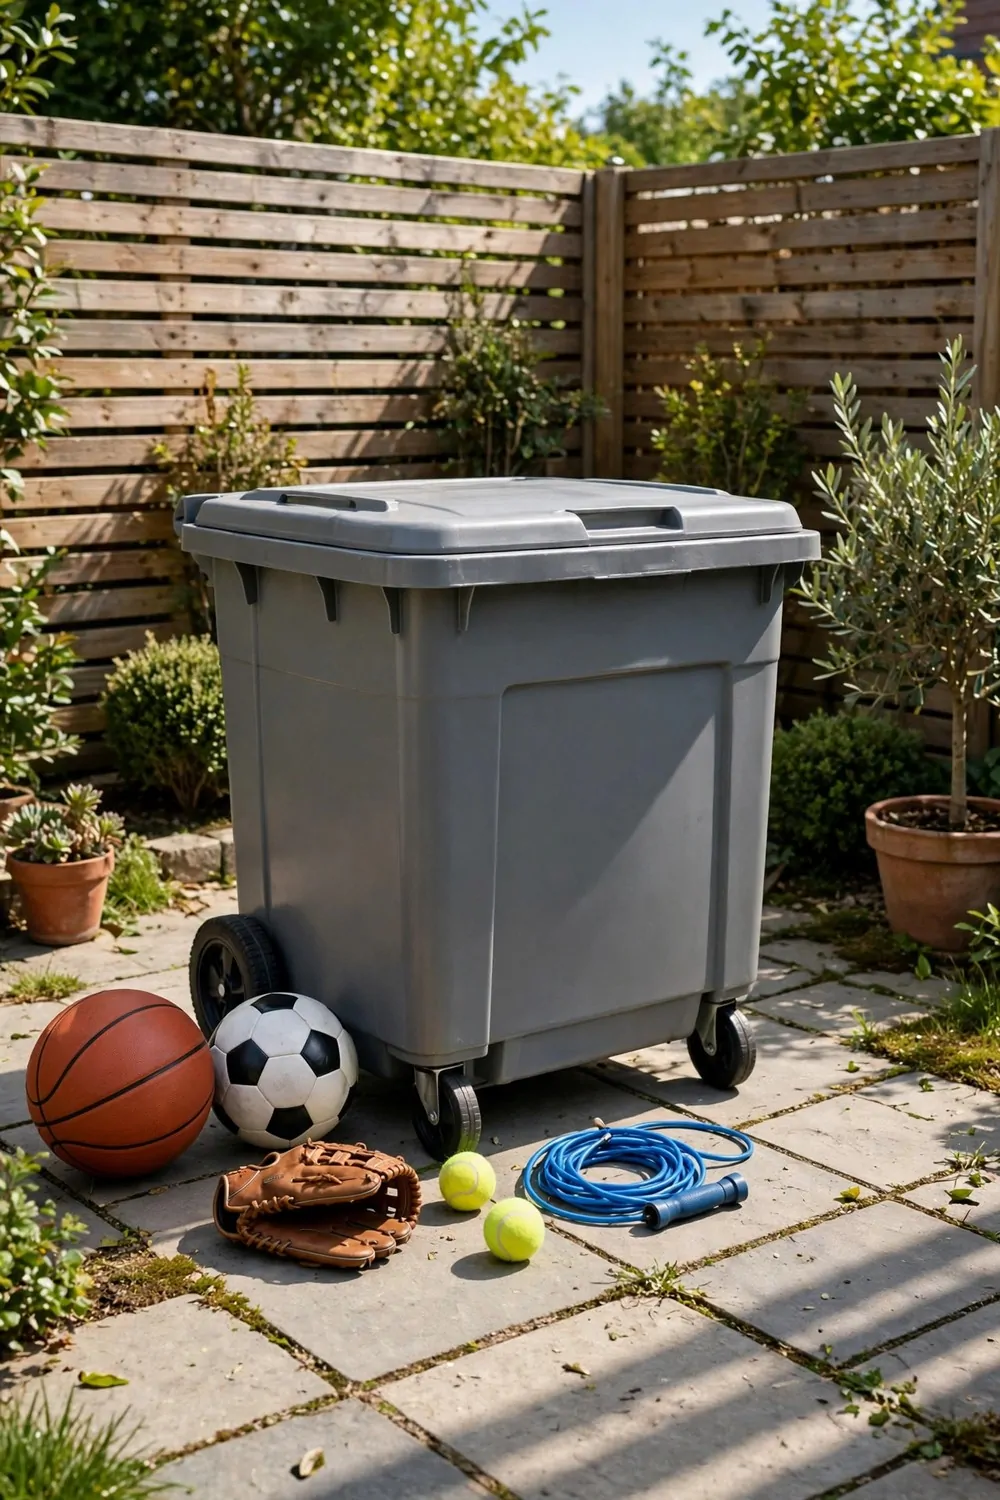
Sports gear rolls all over my yard.
A wheeled bin gathers it all in one rolling box. You push it out to play and wheel it back when you are done.
I keep mine by the side door so the kids can grab it fast. They roll it out themselves now, which I love. That was the moment it clicked for me.
Typical cost is $30 to $65 for a wheeled bin for sports gear. Pick one with big wheels that roll well over grass.
Pick a bin with a lid that stays shut when it rolls. Nothing is worse than balls spilling out on the path.
Let wet gear dry before you close the lid. I leave the lid open for an hour after a rainy game.
Sort the gear by type inside the bin if you can.
Rinse the bin out now and then with the hose. Grass and mud build up fast in a gear bin.
Your yard will stay clear with a wheeled bin like this. Play time starts fast, and clean up is just one easy roll away.
29. A Corner Tower for Plant Pots
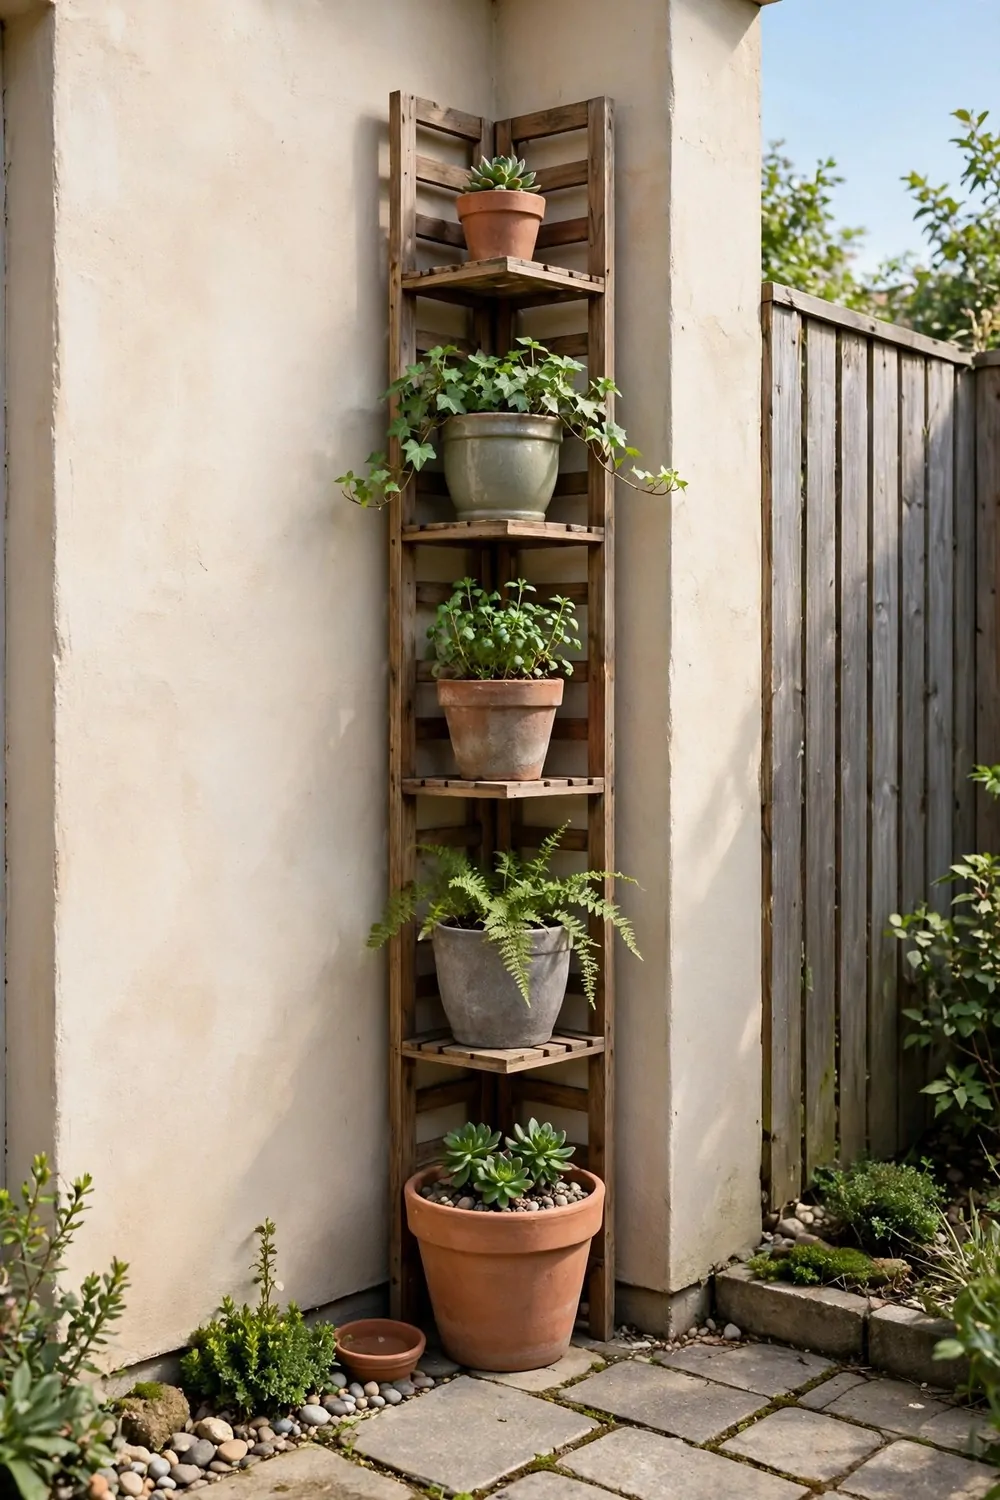
Corners in a small yard often sit empty.
A corner tower fills that spot with pots stacked up high. You get a lot of plants in a very small footprint.
I put herbs on the middle shelves and flowers on top. The tower looks full and pretty from every side. I tell my friends about this one a lot.
Typical cost is $25 to $60 for a corner tower for plant pots. A wood tower feels warm, and a metal one lasts longer in rain.
Turn the tower a little each week so all sides get sun. Your plants will grow even instead of leaning one way.
Water the top pots first and let the extra drip down. The lower pots catch a little water and stay happy.
Use light pots on the top shelves.
Pick plants that like the same amount of sun for one tower. It makes watering and care much simpler for you.
That dull corner is now my favourite spot in the yard. A tower of green pots makes a small space feel alive.
30. A Rope Basket for Soft Gear
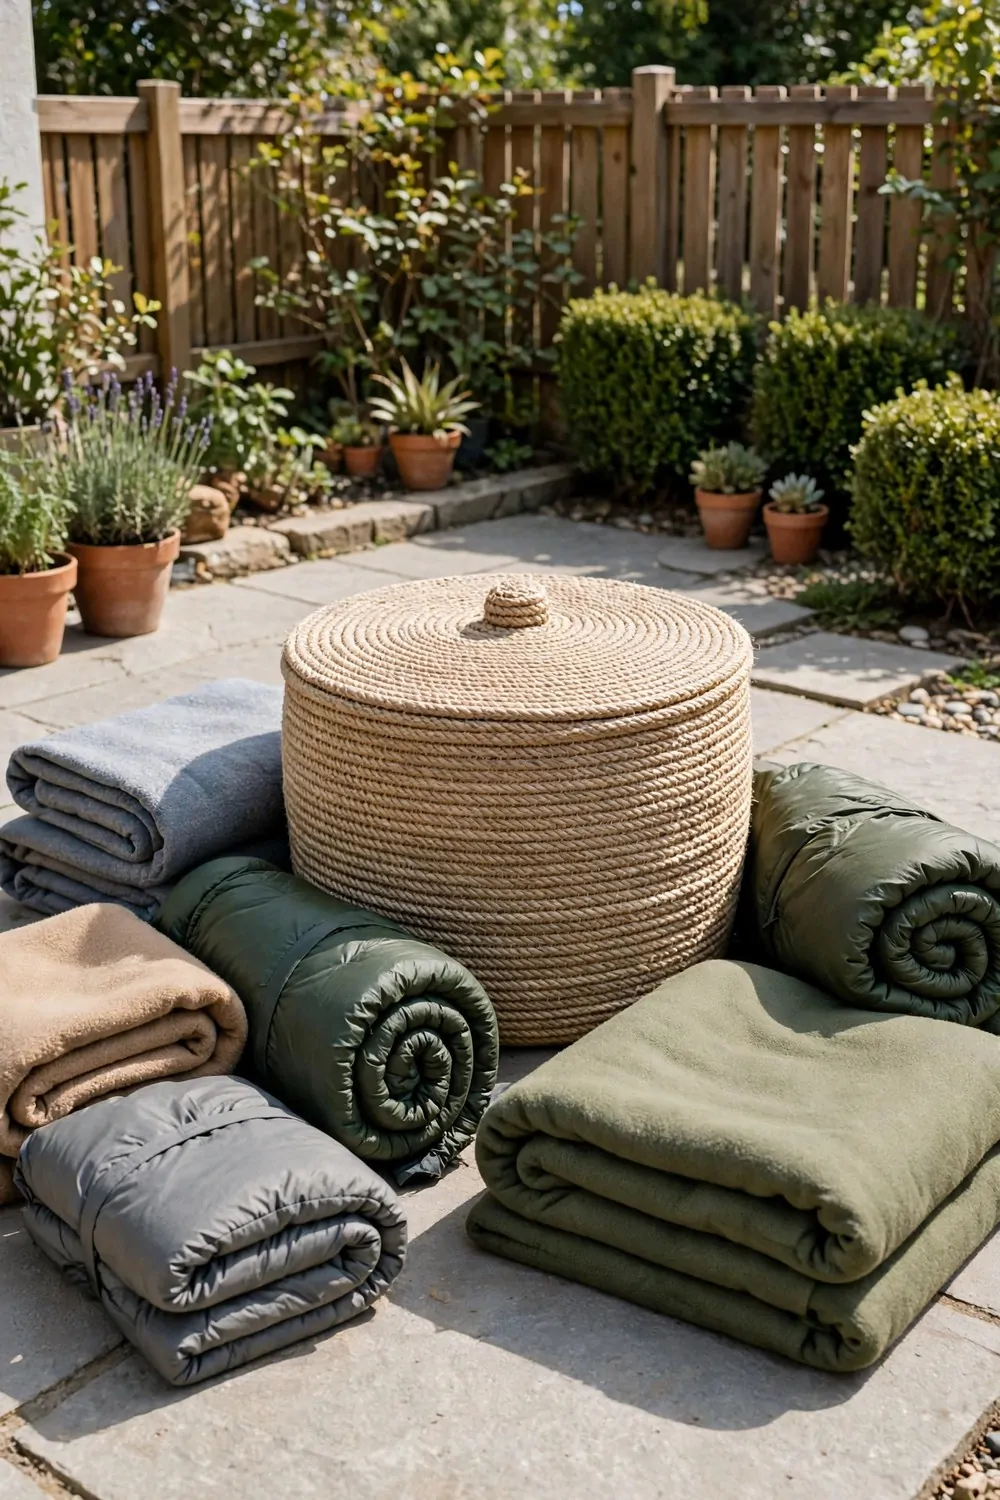
Soft gear is hard to store in a neat way.
A rope basket holds them soft and snug. You fold each piece and stack it in, and the basket keeps its round shape.
I keep my rope basket just inside the back door. It is the first stop for wet towels after a swim or a wash. It is now part of my daily routine.
Pick a basket with a tight weave so small things do not poke through. I like a round one that sits flat on the floor.
Typical cost is $15 to $35 for a rope basket. A big one costs more, but it holds a whole pile of soft gear.
Wash the basket by hand when it gets dusty. I shake it out first, then I wipe it with a damp cloth.
Keep the basket in a dry spot by the door. Wet towels left in a damp basket can smell stale fast.
You can use one basket for towels and one for throws. Two baskets keep clean gear apart from damp gear.
A rope basket is a soft fix for a hard problem. The gear has a home now, and the floor by the door stays clear.
31. A One-Weekend Patio Reset Plan
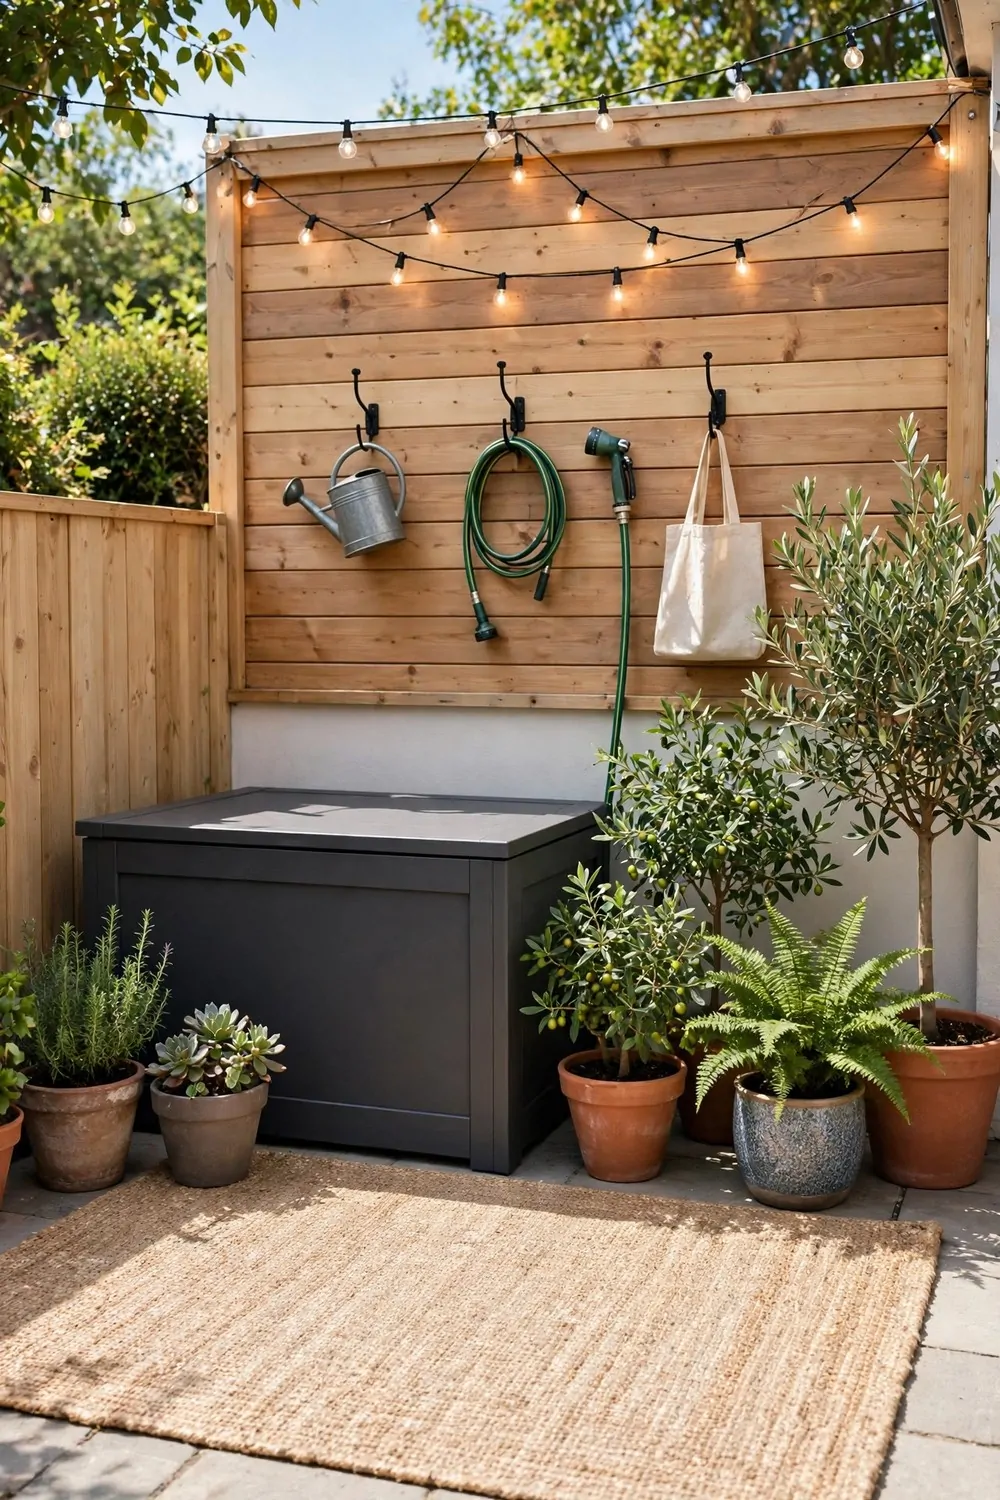
You can reset your whole patio in one weekend. I do this on a Friday and the patio feels new by dinner time.
Start with the seating area and fluff the seat pads and lay out a fresh throw. The seating area costs $15 to $25 for a clean pad and a throw.
Next fix the lights area and hang a few warm string lights. The lights area costs $10 to $20 for a string of lights or a new solar lamp.
Then look at the plants area and add one small pot or a fresh herb plant. The plants area costs $8 to $15 for a pot and a plant.
Do not skip the cushions area. Wash the covers or swap in one bright cushion. The cushions area costs $12 to $25 for washed covers or one new cushion.
Last, tidy the floor area. Sweep it clean and lay down a small mat. The floor area costs $10 to $15 for a mat and a good sweep.
Add it all up and the weekend stays cheap for the change you get. All together, the whole weekend comes to $55 to $100.
I take one small area at a time so the work stays easy. Once one spot looks good, I move on to the next.
Light the lanterns, sit down, and enjoy the patio you just fixed up. You did it in one weekend and it was worth every minute.
| Area | Main change | Typical cost |
|---|---|---|
| Seating | A clean pad and a throw | $15 to $25 |
| Lights | A string of lights | $10 to $20 |
| Plants | A small pot and a plant | $8 to $15 |
| Cushions | Washed covers or one new cushion | $12 to $25 |
| Floor | A small mat | $10 to $15 |
| Total | Whole weekend reset | $55 to $100 |
Keep Reading
If you liked these ideas, you will love these posts too.
- 24 Deck Decor Ideas That Make Outdoor Evenings Better
- 27 Backyard Storage Ideas That Keep Outdoor Gear Tidy
- 26 Vertical Storage Ideas That Make Small Homes Feel Bigger
- 21 Small Entryway Ideas for Apartments With No Foyer
- 30 Apartment Balcony Ideas That Make Outdoor Space Work
- 33 Small Space Living Room Ideas That Feel Open
Pick one small yard idea tonight and try it before the weekend ends. Your patio will feel tidy, soft, and ready for long evenings outside.