18 DIY Library Room Projects You Can Start Today

It was a Saturday morning, the kind where the house goes quiet and your hands get restless. I stood in my spare corner with a coffee and thought, I want to build something today. Not buy something. Build it.
By Sunday night that corner had shelves, a painted wall, and a chair I had rescued from a thrift store. It was not perfect. One shelf sits a little crooked to this day. But it was mine, and I have read more books in that chair than anywhere else in the house.
That is the thing about a Diy Library Room. Nobody else can build your perfect reading spot, because only you know which books matter and where the light falls in your home. So here are 18 projects you can start today. Pick one. Grab your tools. Build something.
1. Hack IKEA BILLY Bookcases Into Built-Ins
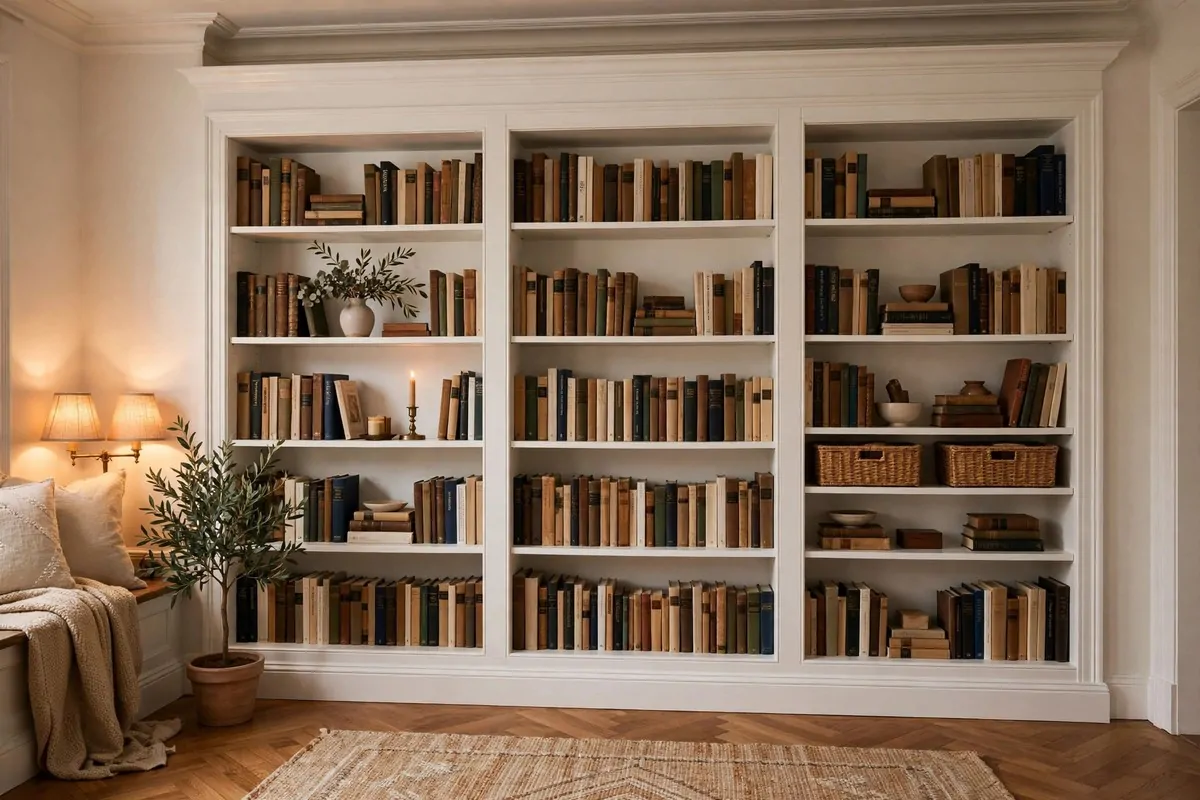
The BILLY bookcase is the most hacked piece of furniture on the internet, and for good reason.
Start with two or three BILLY cases lined up against one wall. Screw them together through the sides. Anchor them to the wall into studs. That takes an afternoon and a drill, and it already looks better than loose bookcases.
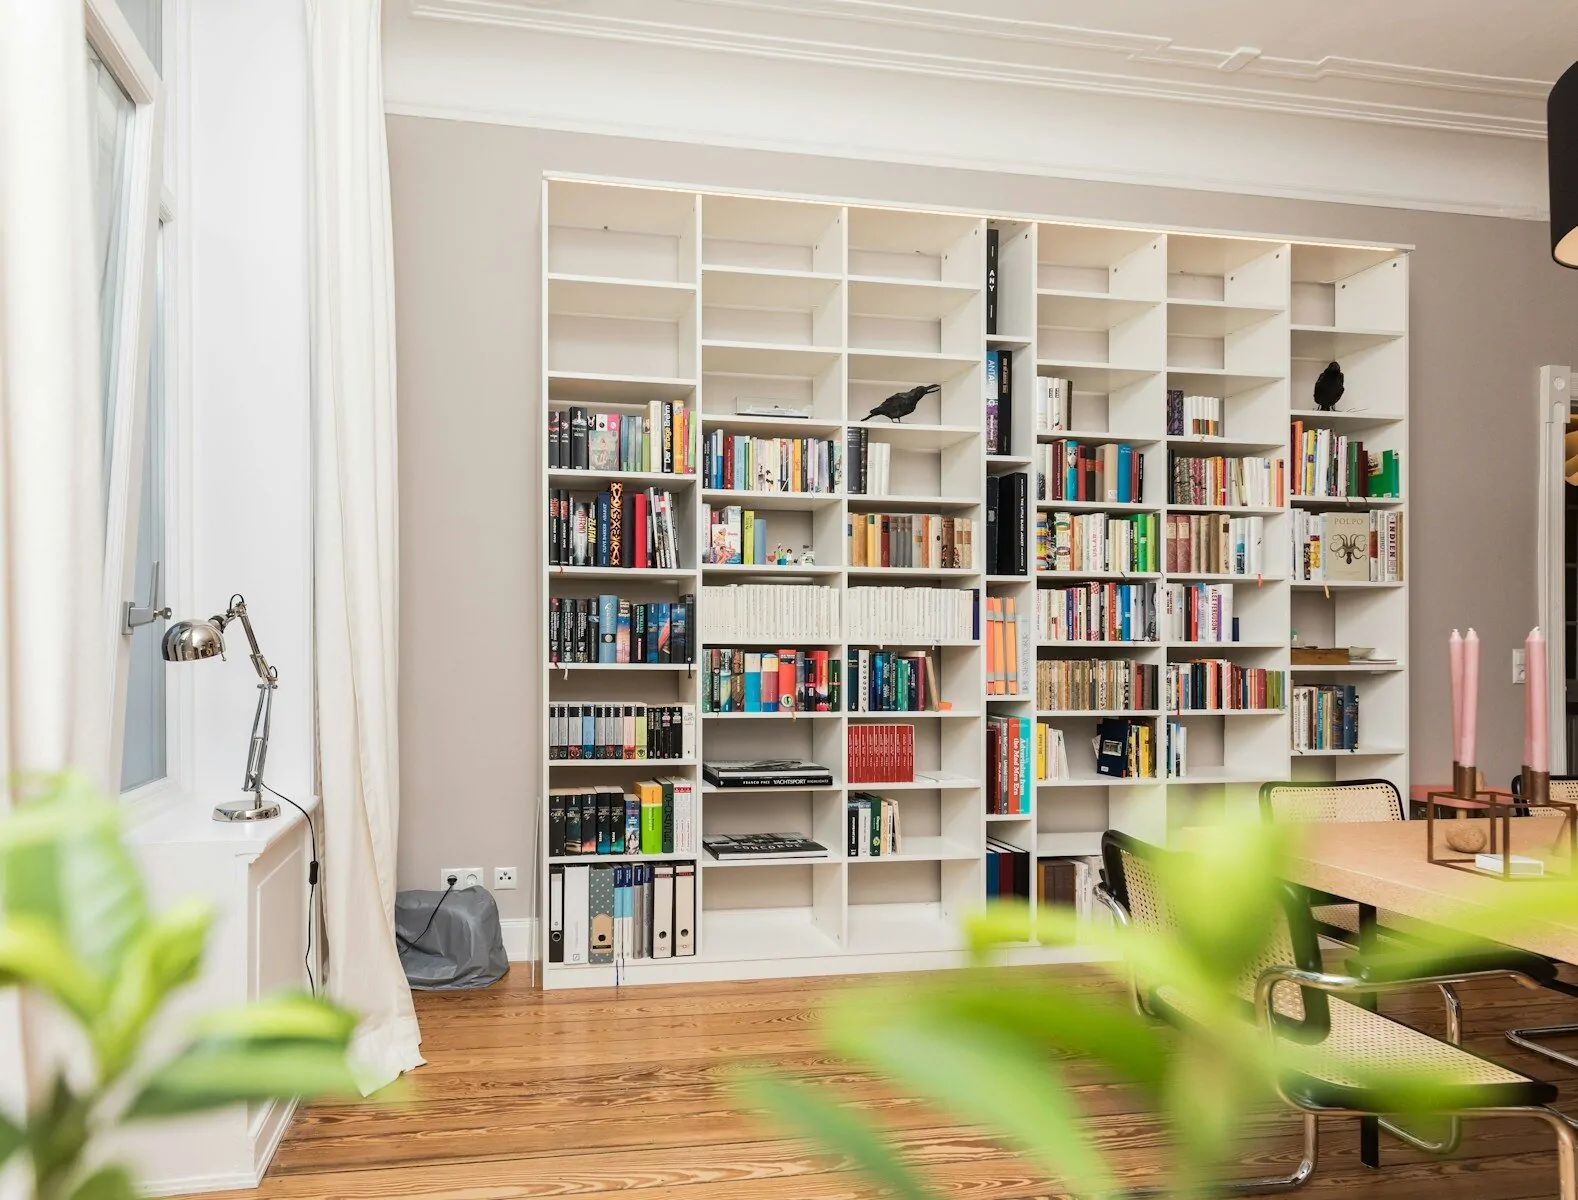
Now comes the magic. Add trim. A strip of crown molding along the top. Baseboard along the bottom. Thin strips of wood covering the seams between cases. Caulk every gap. Paint the whole wall of cases one color.
When the paint dries, nobody will believe it came from flat boxes. The trim hides every joint. The single color makes three cases read as one built-in unit. Guests will ask who your carpenter was. You get to smile.
The tall BILLY with the extra height unit on top reaches near the ceiling. Use the top for display and the lower shelves for books you grab daily. The glass-door versions protect collections from dust beautifully.
This project costs a few hundred dollars in cases plus maybe fifty in trim and paint. A real carpenter would charge thousands for the same look. Your weekend and a caulk gun close that gap.
Measure your wall first and buy cases that fill it edge to edge. The built-in illusion only works when there are no gaps at the ends. Fill side gaps with a filler strip of painted wood.
One warning. BILLY backs are thin fiberboard. If your wall is uneven, shim behind the cases so they sit straight. Crooked built-ins look worse than plain bookcases, and shims take five minutes.
This is the single highest-impact DIY library project there is. Start here if you only do one thing from this list.
2. Build Floating Shelves From Boards and Brackets
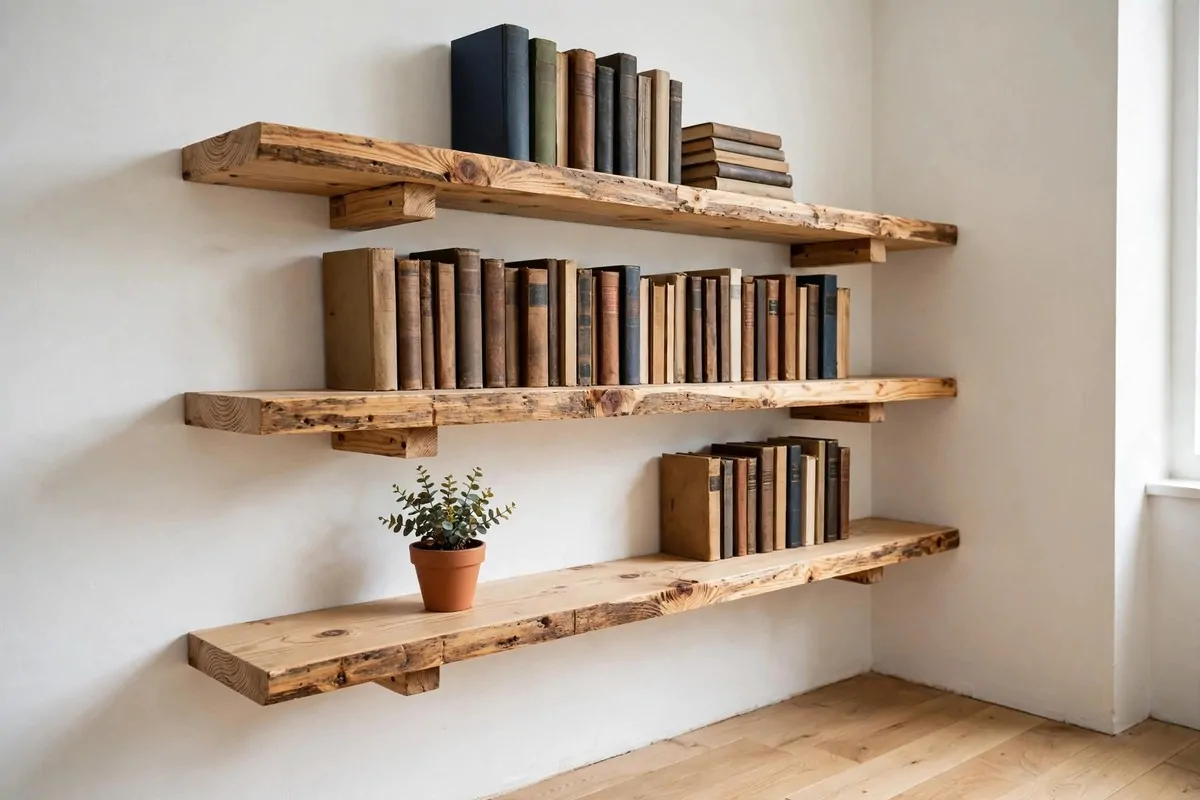
Floating shelves are the fastest way to put books on a wall, and they look like you hired someone.
Buy solid pine boards, at least an inch and a half thick. Cut them to the length you want. Sand the edges smooth. Stain them or paint them. That is the whole build. The brackets do the rest.
Use hidden floating-shelf brackets for the clean look. They are metal rods that slide into holes drilled in the back of the board. Drill straight, slide on, and the shelf floats with no visible support. It feels like magic the first time.
Or use simple L-brackets for a rustic look. Paint them the wall color and they nearly disappear. Black metal brackets against wood shelves look industrial and cool. Pick the style that matches your room.
Screw every bracket into a stud. Books are heavy, and drywall alone will not hold them. A stud finder is the most important tool in this project. Mark the studs, then plan your shelf lengths around them.
Hang the shelves level. A crooked shelf of books looks drunk. Use a long level and check twice before you drill. Painter’s tape on the wall helps you mark lines without making marks.
Stagger three shelves for a modern look, or run one long shelf the full width of the wall for a classic library line. Both work. The staggered version is more forgiving if your walls are not perfectly straight.
Finish the wood before you hang it. Stain and seal on sawhorses, then hang clean dry boards. Your walls stay clean and the finish looks better. This order matters more than people think.
One afternoon, one wall, maybe sixty dollars in wood and brackets. You will wonder why every wall in your house does not have shelves by dinner.
3. Stack Wooden Crates Into a Bookcase Wall
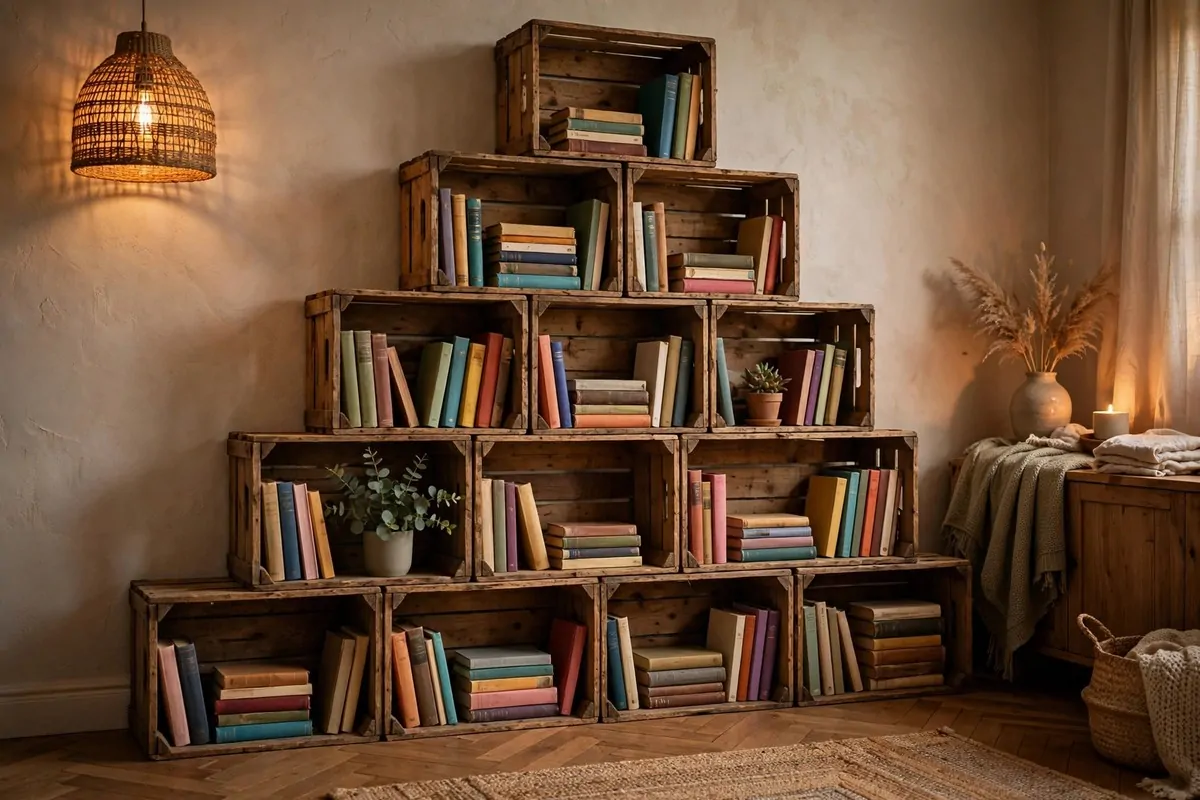
Wooden crates are bookcases that already built themselves.
You can buy unfinished wood crates at craft stores, or rescue old wine crates and apple boxes. Sand them lightly. Stain them if you like. Then stack them into whatever shape fits your wall.
Screw the crates together where they touch. Two screws per joint is plenty. Then anchor the whole stack to the wall. Crates are light, but a full stack of books is not. The wall anchor keeps everything honest.
The beauty of crates is the flexibility. Stack them in a pyramid. A staircase pattern up the wall. A neat grid. An L-shape around a corner. Rearrange them next year when you get bored. Try doing that with a built-in.
Leave some crates empty or half full. The negative space makes the wall look designed instead of stuffed. Put a plant in one. A framed photo in another. Books in the rest.
Mix crate sizes for a collected look. Wine crates are long and low. Apple crates are square. Craft-store crates come in half sizes. The variety is what makes it charming.
Line the inside back of a few crates with wrapping paper or wallpaper scraps. It is a ten-minute job that looks incredibly custom. The pattern peeks out behind the books and surprises people.
This project is perfect if you are nervous about power tools. A screwdriver and sandpaper are all you need. Start with six crates and grow the wall as you find more.
Total cost can be under a hundred dollars if you source crates secondhand. Check local listings and flea markets. Old crates have the best character anyway.
4. Make a Lean-To Ladder Shelf
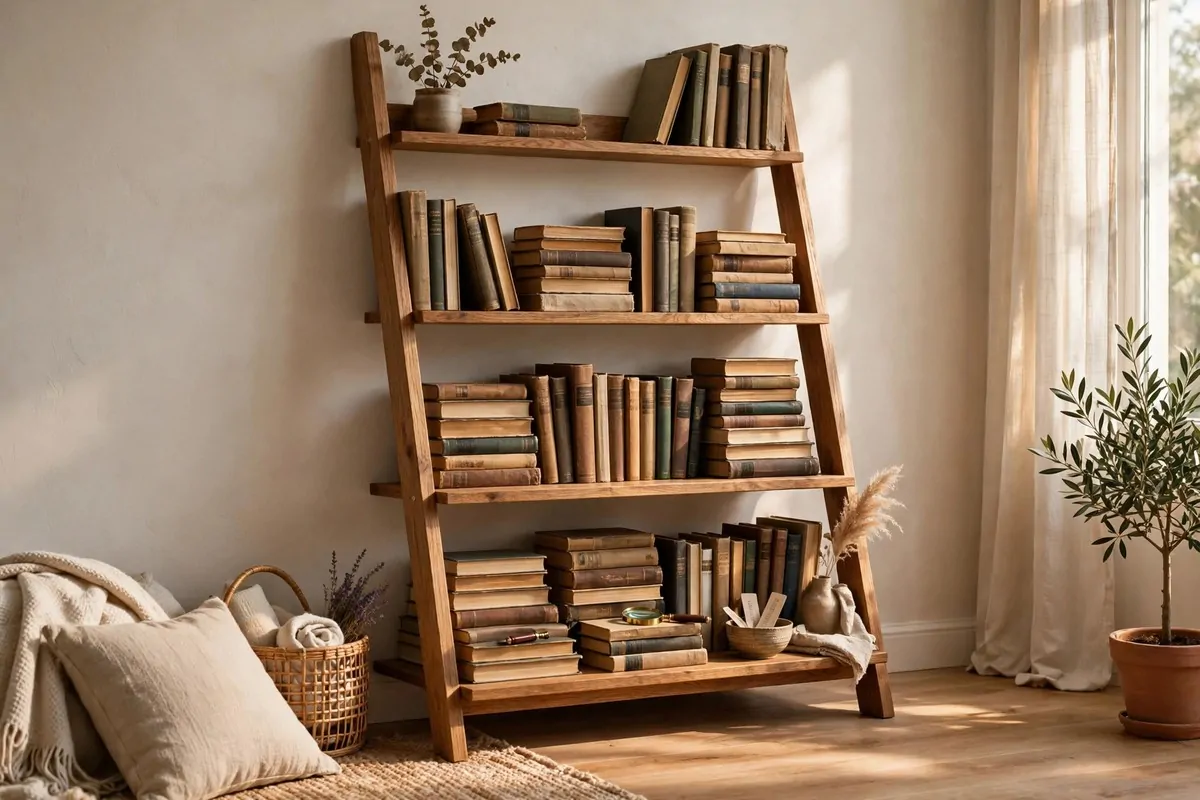
A ladder shelf leans against the wall like it just stopped by for a visit, and it holds a whole library.
You need two side rails and five or six shelves. Cut the rails long, about six feet. Cut each shelf a little deeper than the one above it, so the whole thing slopes back against the wall. That slope is what makes it stable.
Screw the shelves between the rails from the outside. Wood glue plus screws makes joints that last for years. Sand everything smooth so no book snags on a rough edge.
The top shelf is shallow, maybe six inches. The bottom shelf can be fourteen inches deep. This natural gradient is perfect for books. Tall art books go low. Paperbacks go high. It organizes itself.
Anchor the top to the wall with a small bracket. Lean-to shelves are stable by design, but books shift the balance. One bracket takes two minutes and removes all worry.
Finish it however you like. Natural wood with clear sealant looks Scandinavian. White paint looks clean and modern. Dark stain looks moody and library-like. The build is the same either way.
This shelf fits in spots nothing else fits. The narrow wall beside a door. The gap between a window and a corner. Behind a reading chair. Anywhere you can lean a ladder, you can lean a library.
It also moves easily. Tip it forward, walk it to a new wall, lean it back. Renters love this. No holes beyond the one anchor bracket, which patches in seconds.
A weekend, some pine boards, and basic screws. That is all this project asks. It gives back a bookshelf with more personality than anything in a store.
5. Turn Pallet Wood Into Rustic Shelves
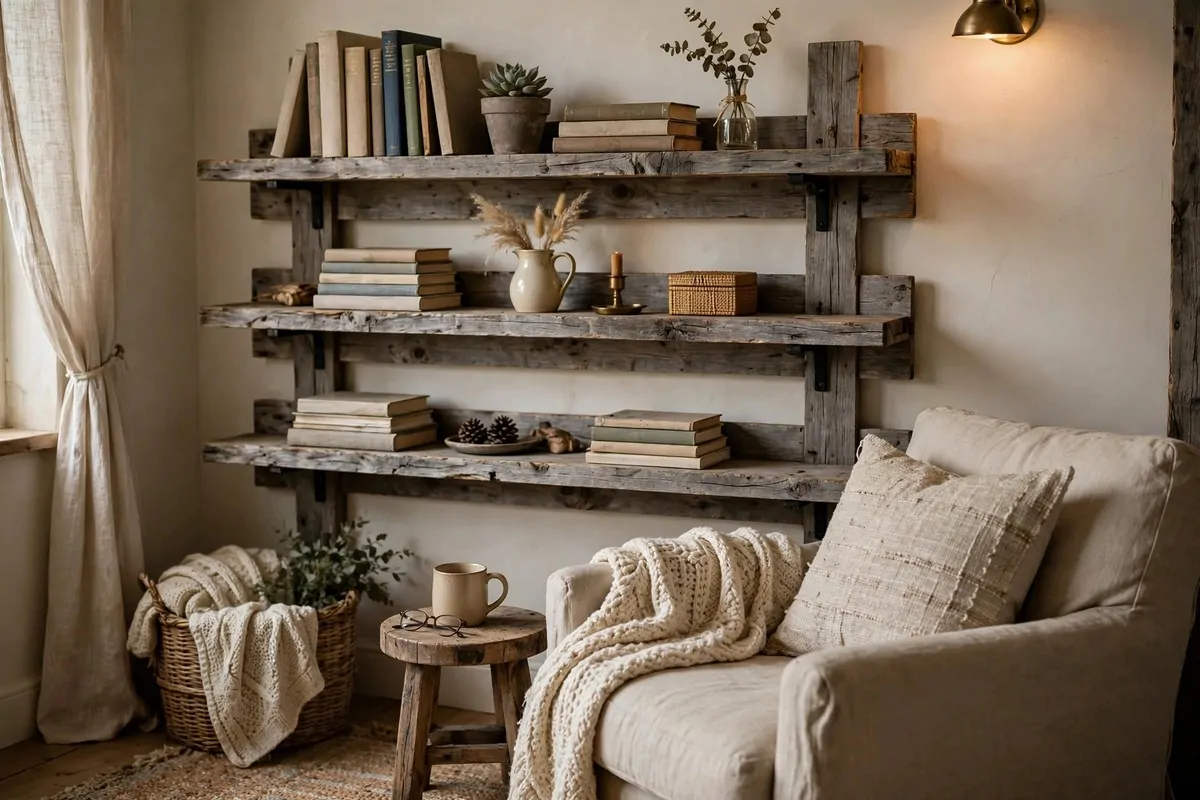
Pallets are free lumber hiding in plain sight, and they make gorgeous rustic shelves.
Find heat-treated pallets, marked with an HT stamp. Avoid chemically treated ones. Many stores give them away or sell them for a few dollars. One pallet makes two or three good shelves.
Pull the pallets apart with a pry bar and a hammer. This is the workout portion of the project. Save the best boards. The weathered gray ones have the most character. Sand off splinters but keep the texture.
Cut the boards to matching lengths. Screw them into simple shelf boxes or mount them as thick floating shelves. The rough wood does all the decorating for you. No stain needed, though a clear sealant protects them.
Rustic shelves love a white or light wall. The contrast between rough gray wood and a clean wall is beautiful. It is farmhouse and library at the same time, and it costs almost nothing.
Check each board for nails before you cut. A metal detector wand is cheap and saves your saw blade. Pull every nail or staple you find. Old pallets hide them well.
Mix pallet shelves with one nicer piece. A small wooden ladder. A painted crate. The mix keeps the room from looking like a barn. One rustic element is charm. Ten is a theme park.
These shelves are strong. Pallet wood is hardwood, usually oak or pine, and it holds books easily. Use good brackets and studs, the same as any shelf, and they will outlast the room.
Wear gloves and a mask when sanding old wood. The dust is not friendly. Work outside if you can. Your lungs will thank you, and the neighbors get a fun show.
Free wood, one Saturday, a library wall with real character. Some of the best projects start in a parking lot behind a store.
6. Build a Window Seat With Book Storage
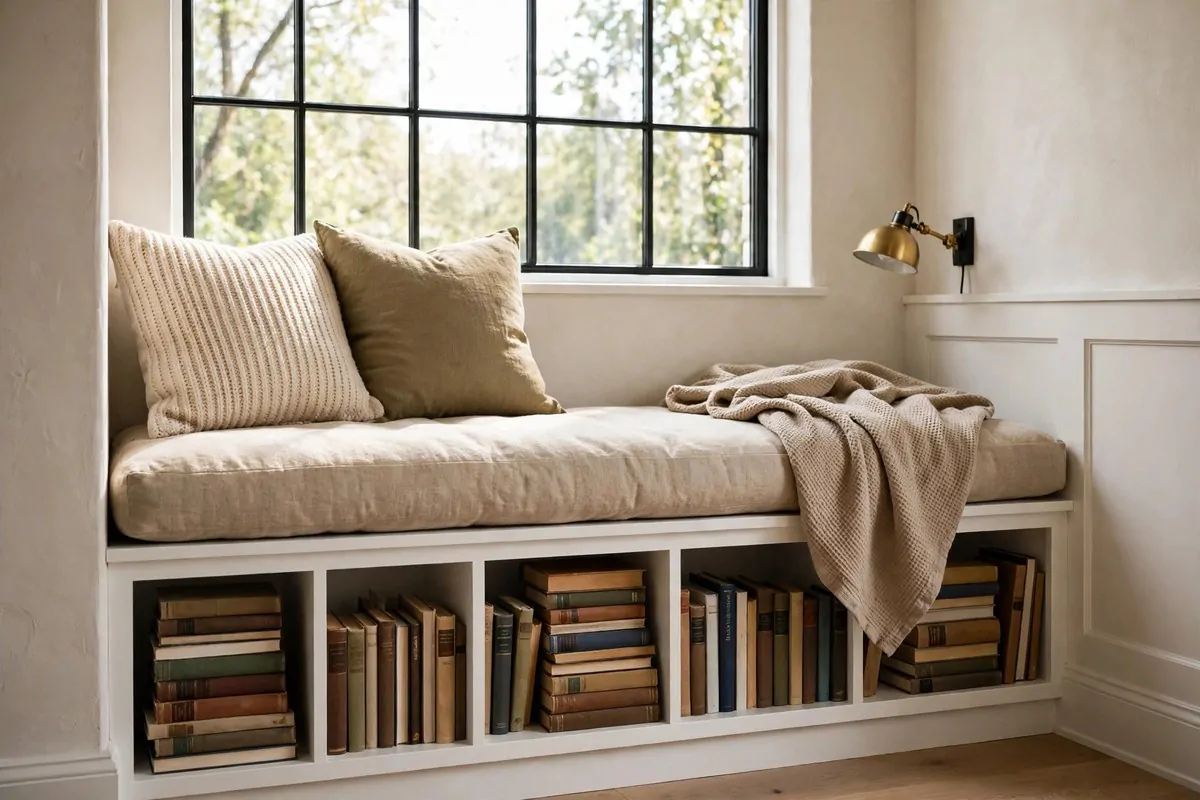
A window seat is a reading spot and a bookcase in one build, and it is easier than it looks.
The simplest version is a plywood box. Build a box the width of your window, about twenty inches deep and eighteen inches tall. That is your seat. Add dividers inside to make cubbies for books.
Face the front with trim to make it look finished. Add a hinged lid or leave the cubbies open. Open cubbies show the books. A lid hides clutter. Pick your personality.
Top it with a cushion. Four inches of foam cut to size, wrapped in fabric you like. A washable cover is smart. This cushion will see a lot of use, and a lot of tea.
Paint the whole thing the trim color of the room. White on white makes it look built-in, like the house came with it. That is the goal. Built, not bought.
Anchor it to the wall and the floor. People will sit on this, lean on it, and kids will climb it. It needs to be rock solid. Brackets into studs and a few floor screws do the job.
Add a small shelf above the window seat on each side. Books within arm’s reach of the reader. A little lamp on one shelf. Now it is not just a seat. It is a reading station.
This project takes a weekend and basic carpentry. A circular saw, a drill, wood glue, and screws. If you can build a box, you can build this. The cushion is the only part you might buy ready-made.
Every home library wants a window seat. Build it yourself and it fits your window exactly, holds your books perfectly, and costs a third of a store-bought bench.
7. Paint One Dramatic Wall
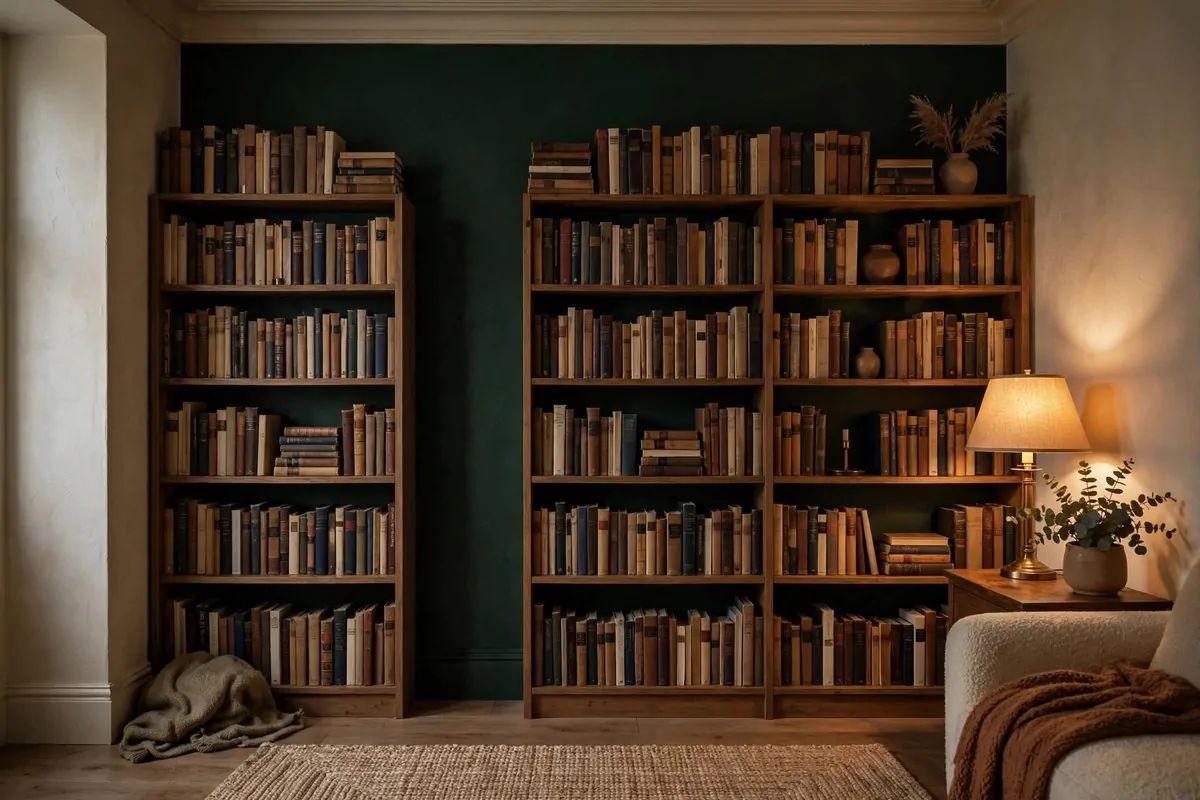
Paint is the cheapest transformation in decorating, and one dark wall changes a library completely.
Pick your wall. The one behind the bookshelves is the classic choice. A deep green, a rich navy, or a warm charcoal. Dark colors make book spines glow and make the room feel like an old private library.
Prep matters more than the painting. Fill holes. Sand rough spots. Tape the edges cleanly. Put down drop cloths. An hour of prep makes the paint job look professional. Skip it and every flaw shows.
Use a good roller and do two coats. Dark colors need two coats to look even. Let the first coat dry fully. Rushing the second coat is how you get patchy walls and sad faces.
Paint the shelves to match, or leave them wood. Matching shelves and wall look custom and expensive. Contrasting wood shelves against a dark wall look warm and collected. Both are right. Pick the one that makes you happy.
Keep the other walls light. One dark wall is drama. Four dark walls in a small room is a cave. The light walls bounce daylight around and keep the room feeling open.
This is a one-day project with instant results. Morning: a plain room. Evening: a library with atmosphere. Few DIY projects pay off this fast.
Test the color first. Paint a big square on the wall and live with it for two days. Colors look different in morning light and lamplight. The test square saves you from repainting, which nobody wants to do twice.
A gallon of good paint, a roller, and a Saturday. That is the whole shopping list. Your library will look like it hired a designer.
8. Build a Rolling Library Ladder
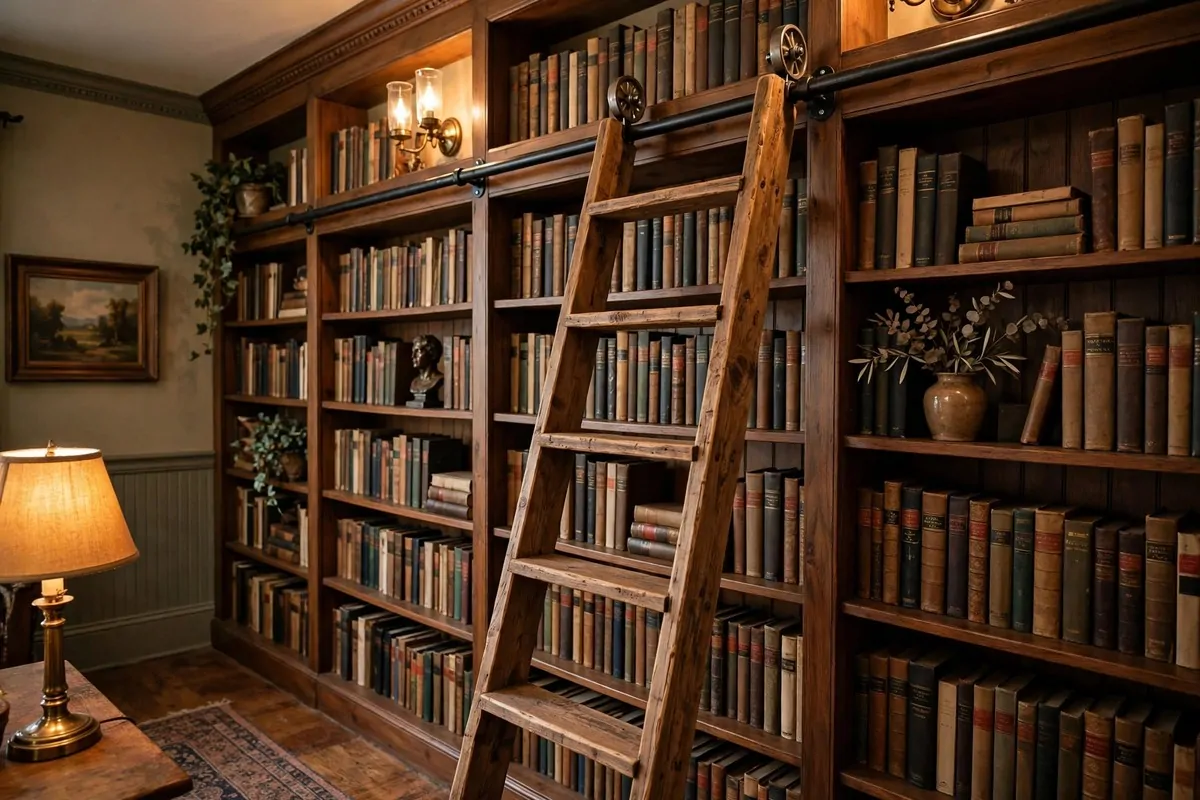
A rolling ladder is the dream piece, and you can build a simple one yourself.
The classic DIY version uses a wooden ladder and a metal pipe rail. Mount a horizontal pipe along the top of your bookshelves on sturdy brackets. The ladder hooks over the pipe with curved hooks and rolls side to side.
Build the ladder from two side rails and five rungs. Hardwood is best. Oak or maple holds up to climbing. Make the rungs wide and flat, not round dowels. Flat rungs are much kinder to bare feet.
Angle the ladder slightly. Library ladders lean at about ten degrees from vertical. That angle makes climbing natural. Too straight feels like a wall. Too angled takes too much floor space.
The rolling hardware is the clever part. Small wheels or rollers on the bottom let the ladder glide along the shelf. Hooks at the top keep it on the rail. Kits for this exist online, or you can make simple wooden hooks.
Safety first, always. The rail must mount into studs, every bracket. Test the ladder with your full weight before you trust it. Keep the rungs dry and clean. No climbing in socks on a polished rung.
If the full rolling build feels like too much, build a simple hook-on ladder. It hooks over a wooden rail and you lift it to move it. Less fancy, still wonderful, and much simpler to make.
Stain the ladder to match your shelves. One finish across shelves and ladder makes the whole wall look like a set. That is the difference between furniture and a library.
This is an advanced weekend project, but the payoff is enormous. Every time you roll that ladder, you will feel like the main character in your own story.
9. Craft Your Own Bookends

Bookends are small, quick, and deeply personal. Nobody else will have yours.
The easiest version starts with L-brackets. Take two metal L-brackets, paint them a fun color, and screw a decorative object on top. A toy dinosaur. A small plant pot. A wooden block you carved. Instant custom bookends.
Wooden bookends are a classic beginner woodworking project. Cut two L-shapes from a thick board. Glue and screw the joint. Sand smooth. Stain or paint. They will hold a whole row of books.
Get creative with materials. Concrete bookends made in small molds look modern and weighty. Clay bookends shaped by hand look artsy. Stacked stone bookends look natural. The only rule is that they are heavy enough to work.
Weight matters more than looks. A pretty bookend that slides is just decoration. Aim for real heft. Fill hollow designs with sand or gravel and seal the bottom. Heavy wins.
Make them in pairs that tell a story. Two halves of one shape. A cat cut in two. Matching colors from your room. Bookends are tiny sculptures, so have fun with the idea.
This is a great project to do with kids. Let them paint plain wooden bookends however they want. Their art holds your books. It is the sweetest shelf in the house.
Seal painted bookends with clear coat. Books slide against them daily, and paint wears. A quick clear coat keeps them looking new for years.
One afternoon, stuff from around the house, and your shelves get jewelry. Small projects, big personality. That is the whole spirit of a handmade library.
10. Hang a Reading Nook Canopy
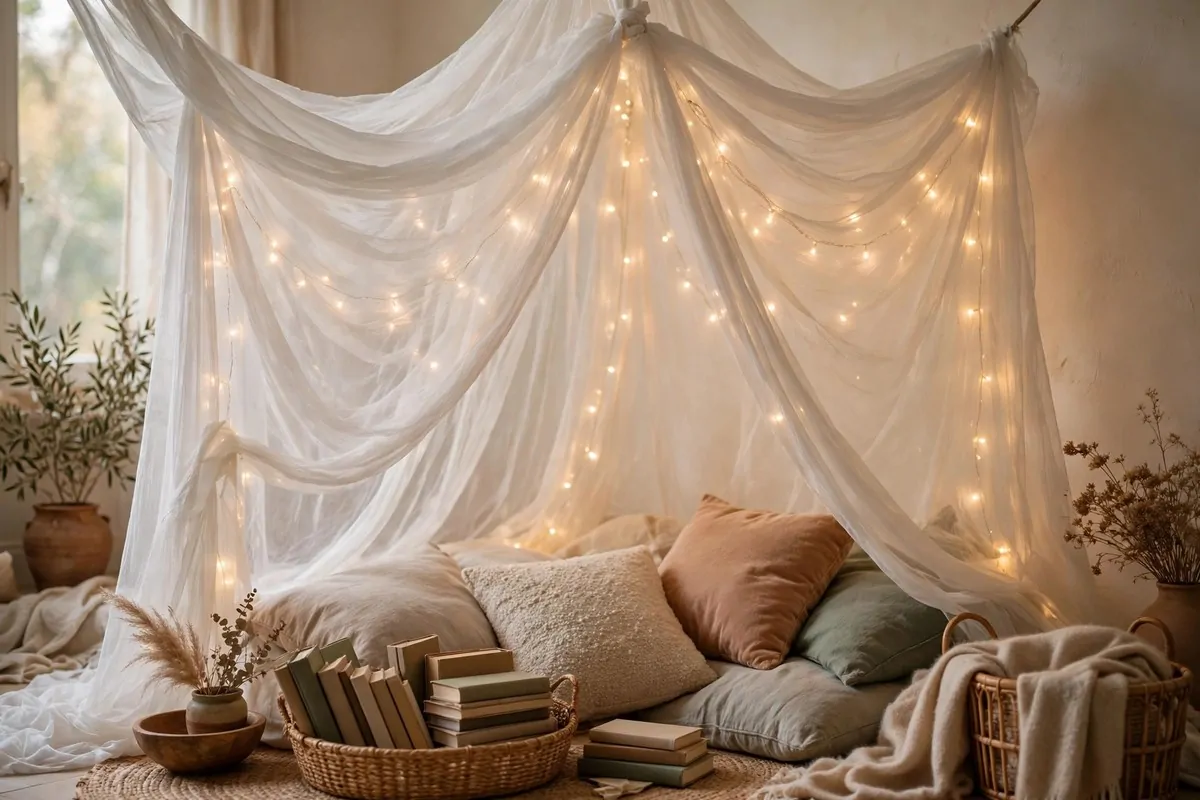
A canopy turns any corner into a hideaway, and it takes about an hour.
You need a ceiling hook, a hoop or an embroidery frame, and fabric. Screw the hook into a ceiling joist. Hang the hoop from it with ribbon or chain. Drape the fabric over the hoop and let it fall. Done.
Sheer white fabric is the classic choice. It glows when light hits it and makes the corner feel dreamy. Muslin is cheap and works beautifully. An old white sheet works too, honestly.
Add fairy lights inside the canopy. Battery-powered strings with a timer are perfect. They turn on at dusk by themselves. The glow through the fabric is pure magic, and kids go crazy for it.
Put the cozy stuff underneath. Floor cushions. A soft rug. A basket of books. A small pillow. The canopy marks the spot, but the cushions make it a reading nook.
This works in a bedroom corner, a living room nook, or a kid’s room. Anywhere you can put a hook in the ceiling, a reading hideaway can hang.
Renters can do this with a heavy-duty adhesive ceiling hook. Check the weight rating. Fabric and lights are light, so most good adhesive hooks hold fine. It all comes down clean.
Wash the fabric first. New fabric has sizing that makes it stiff. One wash makes it drape softly. Hang it slightly damp and let it dry in place for the nicest fall.
An hour, a hook, some fabric, and lights. That is all it takes to build the corner every kid dreams about and every adult secretly wants too.
11. Install Track Shelving on Bare Walls
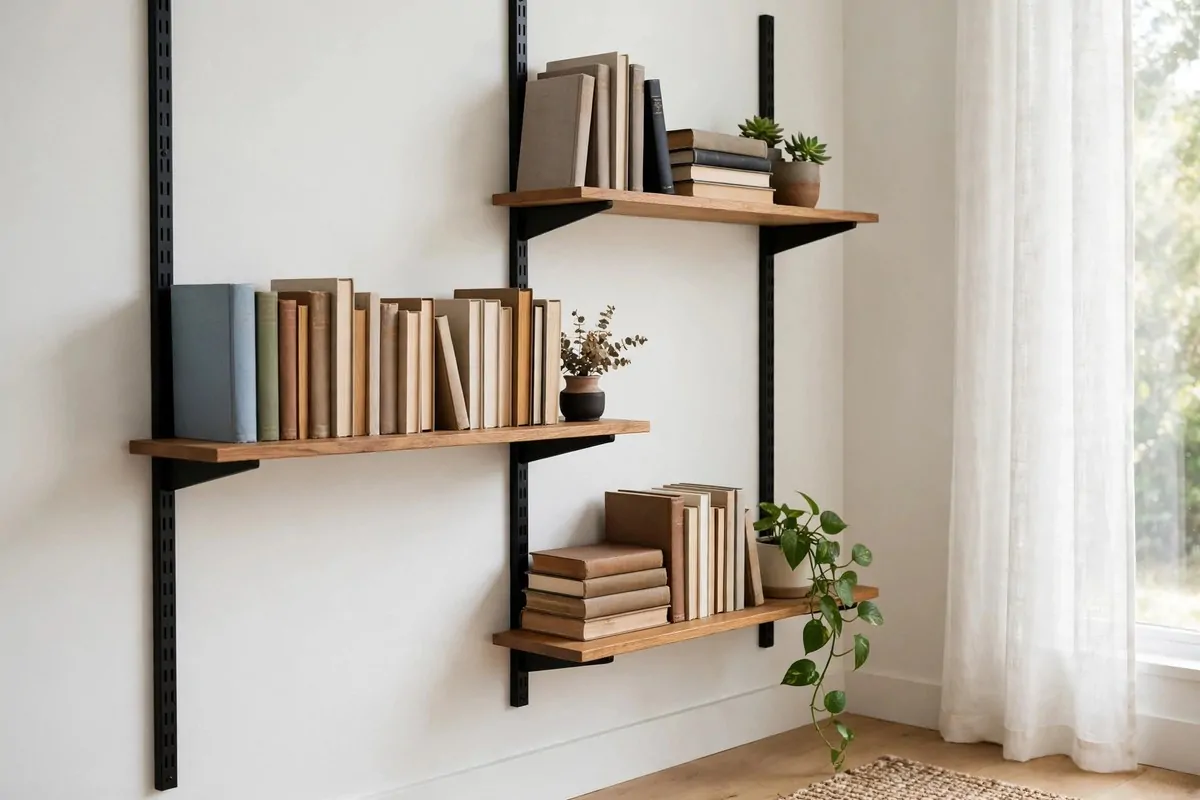
Track shelving is the grown-up version of adjustable, and it looks fantastic in a library.
The system is simple. Vertical metal tracks screw to the wall. Brackets clip into the tracks at any height. Shelves sit on the brackets. Move a bracket, move the shelf. Your library rearranges in minutes.
Mount the tracks into studs, sixteen inches apart to match standard framing. Use a level. Tracks that are not level make shelves that are not level, and books slide. Take your time on this step.
The classic look is brass or black tracks with wood shelves. It reads as intentional and a little industrial. White tracks disappear into white walls for a cleaner look. Pick the metal that matches your room’s hardware.
This system is perfect for mixed storage. Books on one shelf. A plant on the next. Storage boxes on the bottom. Adjust the heights as your needs change. No other shelf system is this flexible.
It is also the best choice for renters who want real shelves. The tracks leave only screw holes, which patch easily. Take the system with you when you move. It reinstalls in the new place in an hour.
Buy shelves a little deeper than you think. Ten inches is the sweet spot for books. The brackets come in matching depths. Everything clicks together like it was designed for you, because it was.
Style the top shelf with lighter items. The eye goes there first. A row of plants or framed art up top, heavy books down low. It looks balanced and feels stable.
Not sure which shelf system fits your room? Here is how the DIY options compare.
| Shelf system | Typical cost | Difficulty | Best for |
|---|---|---|---|
| Track shelving | Low to medium | Easy | Changing layouts often |
| Floating shelves | Low | Easy | Clean modern walls |
| Crate stacks | Very low | Very easy | Renters and beginners |
| BILLY built-in hack | Medium | Medium | Biggest visual impact |
One wall of track shelving holds a whole collection and adapts as the collection grows. It is the most practical shelf you will ever install.
12. Upcycle a Thrifted Reading Chair
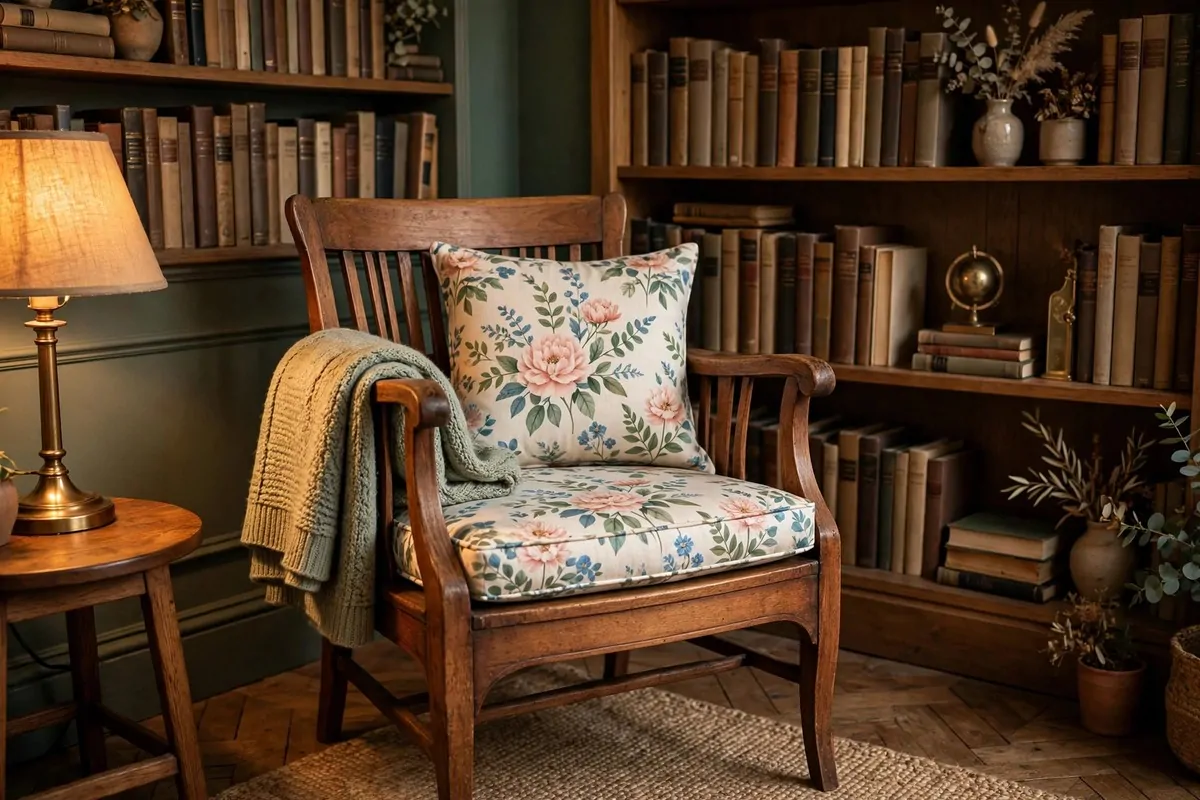
Every library needs a chair, and the best ones have a past.
Hunt thrift stores for a solid wood armchair with good bones. Ignore the ugly fabric. Ignore the wobble. Look at the frame. Solid wood, tight joints, a shape you like. That is all that matters.
Tighten everything first. Wood glue in loose joints. New screws where old ones stripped. A wobbly chair is a sad chair. An hour of repairs makes it solid for another twenty years.
Repaint or restain the frame. Chalk paint sticks to old finishes with minimal prep. Sand lightly, wipe clean, paint two coats. A fresh color erases decades in an afternoon.
Reupholster the seat if you are brave, or cheat like the rest of us. A thick cushion in pretty fabric, tied on with ribbons, transforms any chair. No staple gun required. It looks intentional and it is washable.
Add a small pillow and a throw blanket. Now it is not just a chair. It is a reading chair. The blanket is the uniform. Every reading chair in every good library wears one.
Place it where the light is best. Near the window for daytime reading. Near the lamp for evenings. A beautiful chair in a dark corner is a wasted chair. Light makes the chair, not the other way around.
This project usually costs less than fifty dollars all in. The chair, the paint, the cushion fabric. Compare that to a new reading chair and smile all the way to your bookshelf.
Rescued furniture has soul that new furniture cannot buy. Every scratch tells a story. Now it gets to hold you while you read new ones.
13. Convert a Bar Cart Into a Book Cart
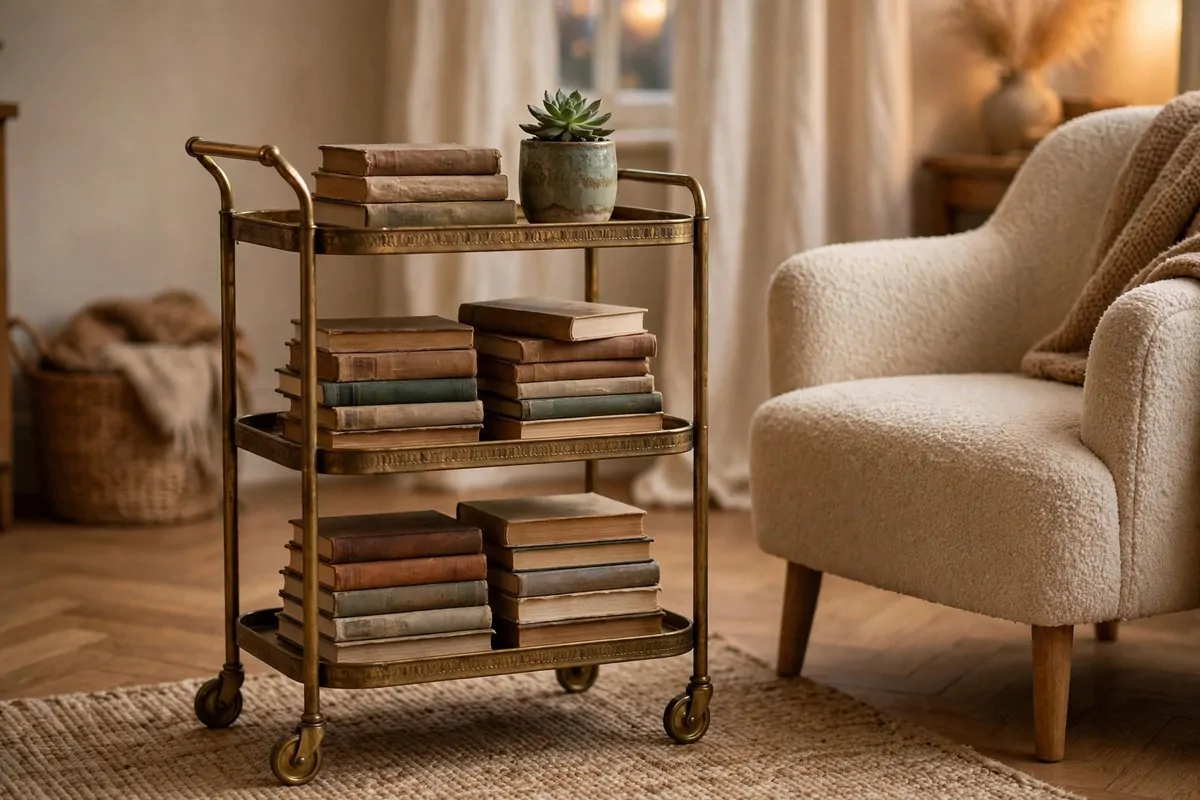
A bar cart on wheels is a library that follows you around the house.
Thrift stores are full of old bar carts. Two or three tiers, brass or wood, wheels that still roll. They were built to hold heavy bottles, so books are easy work for them.
Clean it up first. Polish the metal. Tighten the wheels. A coat of spray paint in a fun color makes an old cart look new. Gold, black, or deep green all look great in a library.
Load it by theme. Current reads on top. The next three books on the middle shelf. Notebooks and a reading journal below. It becomes your personal book station, always within reach.
Roll it where you need it. Beside the reading chair in the evening. Near the window on weekend mornings. Into the corner when guests come. A library on wheels goes where the reading happens.
Style the top like a little display. A small plant. A candle. Your current book lying open face-down, which every reader does even though we know we should not. It should look lived-in, not staged.
Add small bookends or a low rail so books do not slide when you roll. A strip of wood glued along the shelf edge works. So do small tension rods. Rolling should not mean toppling.
This is also perfect for small spaces. A book cart tucks into a gap no bookcase fits. The space between a sofa and a wall. The end of a hallway. Dead space becomes a mobile library.
An afternoon of cleaning and paint, and you have the most flexible piece in your library. It goes where you go. What more could a reader want?
14. Give an Old Bookcase a Paint Makeover
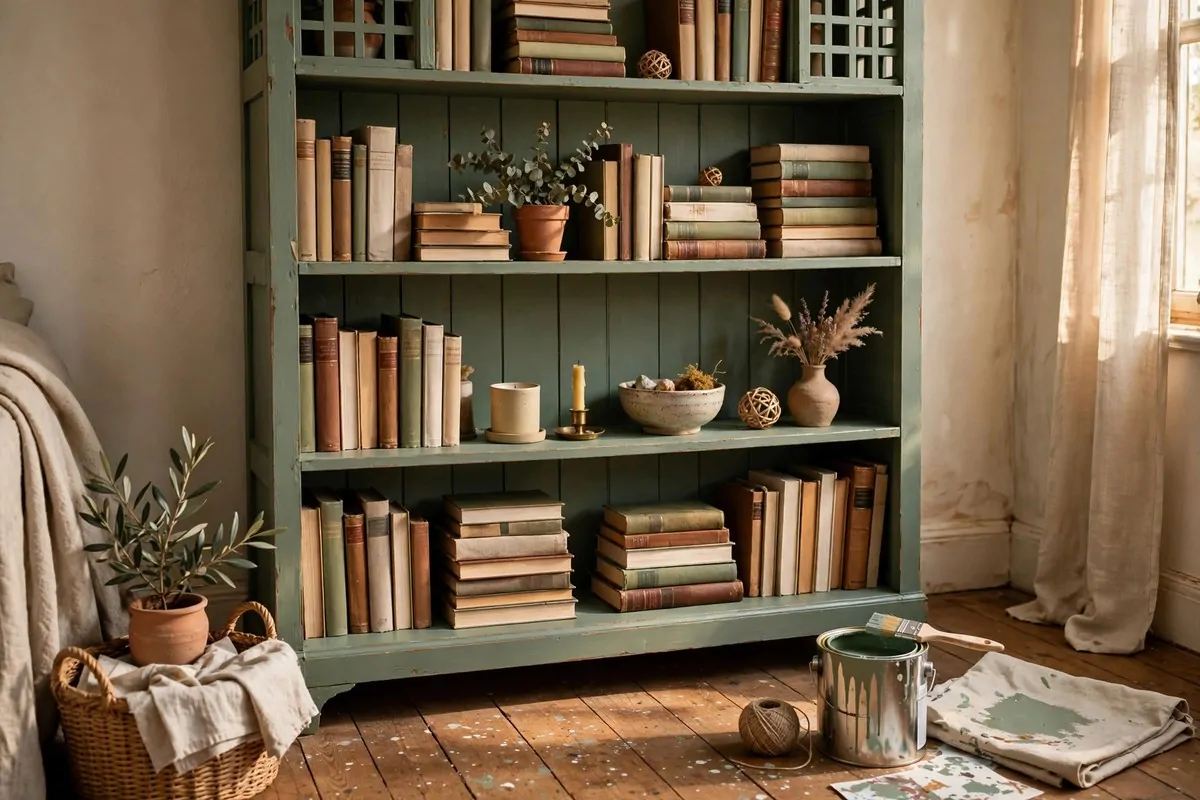
The fastest library upgrade is a paintbrush and a tired old bookcase.
Find a solid wood bookcase. Yours, a thrift store’s, a neighbor’s curb. Solid wood is worth painting. Wobbly particle board is not. Knock on it. Wood sounds solid. Hollow sounds like a drum.
Clean it well. Years of dust and polish live on old shelves. A degreasing cleaner and a good wipe-down give the paint something to grip. This boring step decides whether the paint lasts.
Sand lightly. You are not stripping it to bare wood. You are just roughing up the old finish so the new paint sticks. A quick pass with medium sandpaper, then wipe the dust off.
Prime it. Primer is the difference between paint that lasts and paint that chips by winter. One coat of good primer, especially on dark wood going light. Do not skip this.
Paint two thin coats instead of one thick one. Thin coats dry smooth and hard. Thick coats drip and stay soft. Patience here pays off for years.
Pick a color with courage. Sage green. Deep navy. Warm terracotta. Charcoal. A painted bookcase is a statement piece, so let it make a statement. Safe beige is a missed opportunity.
Paint the back panel a contrasting color for extra style. Dark green case, warm cream back. The books pop against the light back and the whole piece looks custom.
A weekend, a quart of paint, and the ugliest bookcase you own becomes the prettiest. I have done this four times. I would do it forty more.
15. Build Front-Facing Book Display Ledges
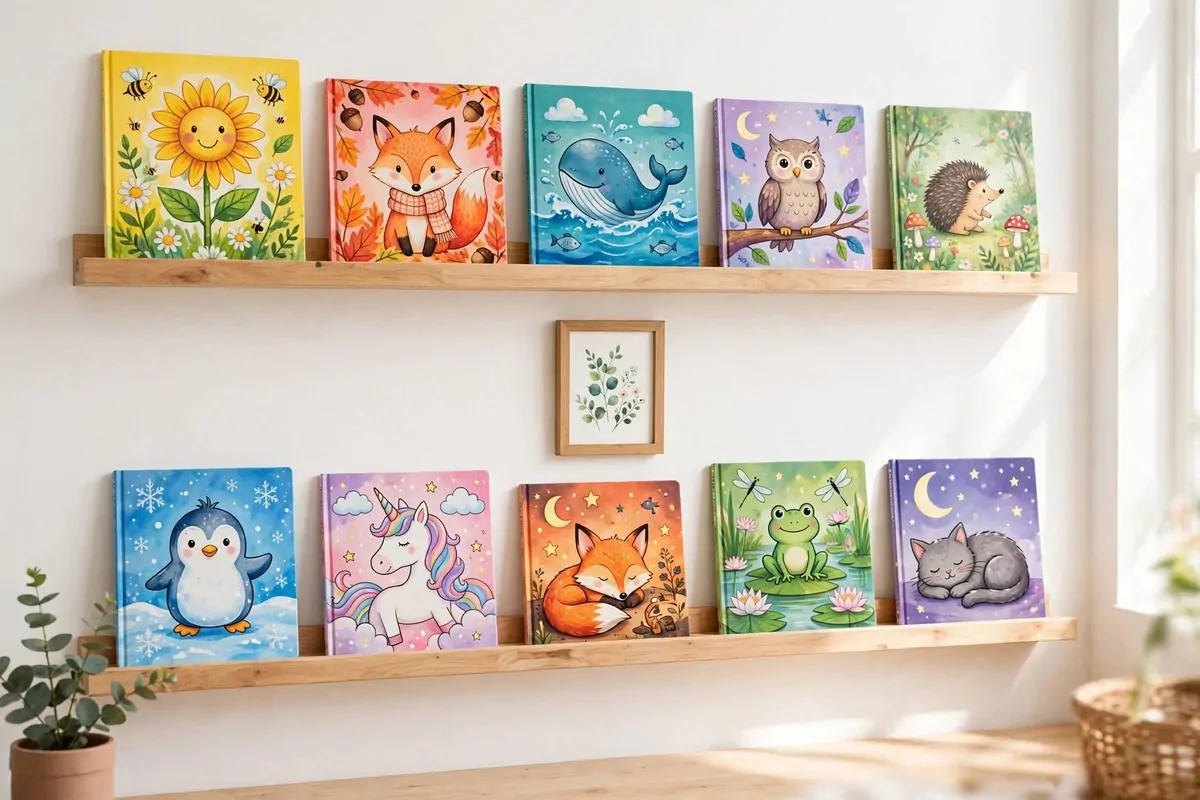
Bookstores face books forward because covers sell books. Your library can steal that trick.
Display ledges are shallow shelves with a small lip at the front. Books lean against the wall, covers facing out. You see art instead of spines. Choosing a book becomes joyful instead of a hunt.
Build them from a flat board and a thin front strip. The board is the shelf. The strip keeps books from sliding off. Two pieces of wood, some screws, and you have a display ledge.
Hang them at eye level and below. Covers need to be seen to work their magic. A grid of ledges on one wall looks like a gallery. A single row above a desk keeps favorites close.
This is the best project for kids’ books. Little readers choose by cover, not by title. Front-facing ledges let them browse like a bookstore. Put them low where small hands reach.
Rotate the display monthly. Swap in new covers, seasonal picks, or books you want to remember to read. The wall stays fresh. Your unread pile gets smaller. Everybody wins.
Mix in small art between the books. A framed print on a ledge. A tiny plant. The ledges hold more than books, and the variety keeps the wall interesting.
Paint the ledges the wall color for a floating look, or stain them to match your shelves. Either way they read as intentional. The lip is the only part that shows, and it is thin and neat.
A few boards, an afternoon, and your wall becomes a bookstore display. You will catch yourself browsing your own shelves like a customer.
16. Build a Free Little Library for Your Yard
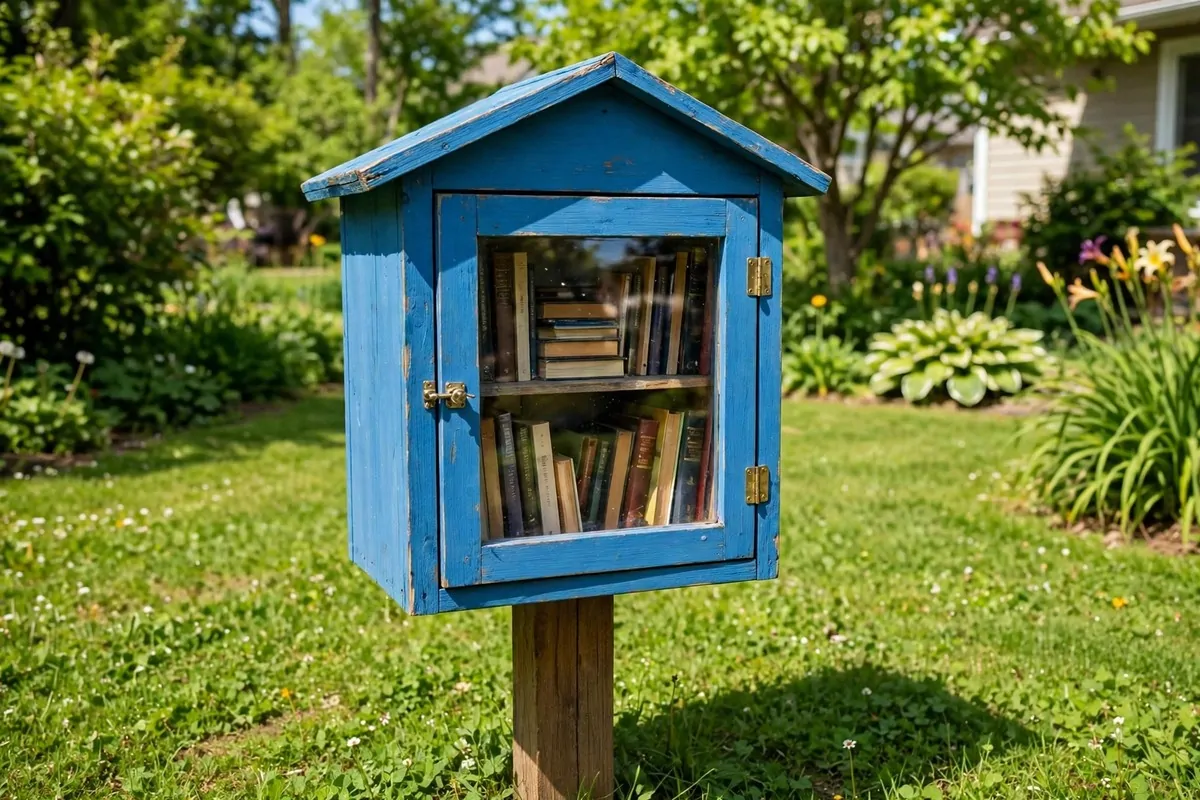
Build a tiny library for your whole street, and watch what happens.
A free little library is a small weatherproof box on a post. You stock it with books. Neighbors take one and leave one. It is the simplest, happiest project on this list.
Build the box from exterior plywood. About two feet wide, eighteen inches deep, two feet tall. A sloped roof sheds rain. A clear door keeps books dry while showing them off. Caulk every seam.
Mount it on a sturdy post set in the ground. Concrete around the base keeps it standing through storms. It should feel solid when you shake it. Wobbly libraries scare away readers.
Paint it a cheerful color. Bright blue. Sunny yellow. A little mural if you are artistic. The box should make people smile from the sidewalk. This is street art with a purpose.
Stock it with a mix. Kids’ books. Mysteries. Cookbooks. A few classics. Leave a little notebook inside for messages. People write the sweetest notes in those notebooks.
Register it if you like, or just build it. The official little free library organization sells charters and signs, but plenty of people build unregistered ones. The books do not care about paperwork.
Maintain it lightly. Check the books monthly. Toss anything ruined by weather. Restock from your own shelves or thrift stores. Ten minutes a month keeps it magical.
This project takes a weekend and maybe a hundred dollars in materials. What it gives back is a street that talks to each other. That is worth more than any shelf indoors.
17. Add DIY Under-Shelf LED Lighting
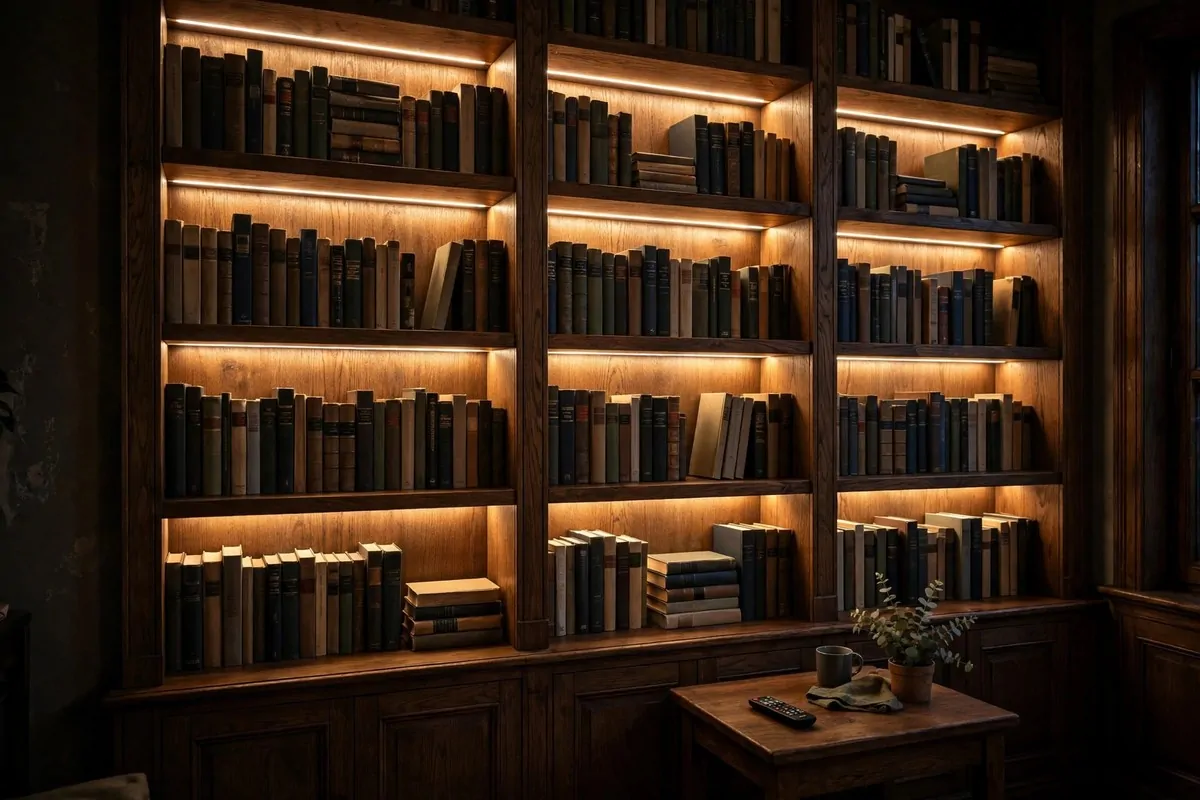
Lighting is what turns shelves into a library, and you can wire it yourself in an evening.
Adhesive LED strips are the easiest option. Peel the backing, stick the strip under the front edge of each shelf, and plug in the power supply. The light washes down over the books. It looks professionally installed.
Plan the power first. One power supply can run several strips if you connect them. Run the thin wires along the back of the shelves where nobody sees them. A little cable clip every foot keeps it neat.
Choose warm white, around 2700K. This is the color of old library lamps and candlelight. Cool white makes books look like a warehouse. Warm white makes them look like treasure. Trust me on this.
Battery puck lights work where plugs cannot reach. Stick one under each shelf and tap to turn on. They are not as elegant as strips, but they need zero wiring and you can install six in ten minutes.
Add a remote or a smart plug. Walking shelf to shelf tapping lights gets old fast. One remote lights the whole library. It feels luxurious and costs almost nothing extra.
Light the top of the bookcase too. A strip along the top edge washes the ceiling with warm light and makes the room feel taller. It is the secret behind those glowing library photos you save online.
Hide the strips behind a small lip. A thin strip of wood along the shelf front hides the LEDs from direct view. You see the glow, not the dots. That one detail makes it look expensive.
An evening, a few strips, and your shelves glow like a bookshop window. This is the project guests notice first, every single time.
18. Convert a Closet Into a Mini Library
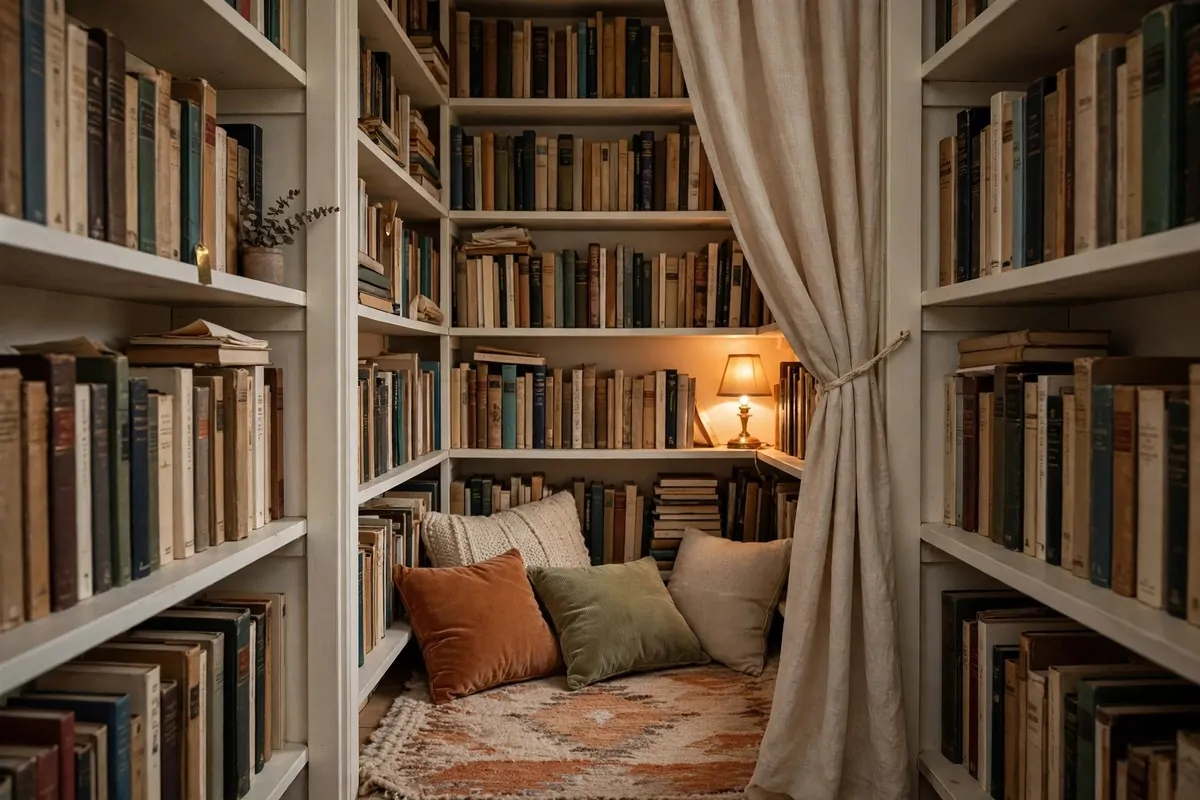
The last project is the biggest transformation, and it starts with a closet you are not using well.
Take the doors off. This one move turns a dark box into an open nook. Store the doors somewhere safe if you rent. The room instantly feels bigger without doors swinging into it.
Clear it out completely. Be honest about what lives in there. If you have not touched it in a year, it does not need closet space. Donate it, move it, or let it go.
Line the walls with shelves. Simple boards on brackets, cut to fit the closet width. Paint everything one light color first. A bright closet feels twice as big as a dark one, and books deserve light.
Add lighting. Closets have no windows, so you bring the sun. Battery puck lights under each shelf. A small plug-in lamp on one shelf. A string of warm fairy lights along the top. Layer it like a real room.
Put something soft on the floor. A thick rug. Big floor cushions. A small ottoman. Now it is not storage. It is a reading cave. Hang a curtain on a tension rod across the front for extra coziness.
Organize the shelves by mood, not by author. Happy books here. Cozy mysteries there. The big beautiful ones you show off up top. A closet library is personal, so organize it your way.
This project takes a weekend and costs very little. Boards, brackets, paint, lights. Maybe a hundred dollars if you shop smart. The result is a secret library hiding in your wall.
You started Saturday morning wanting to build something. Now you have eighteen projects to choose from. Pick the one that made your heart beat a little faster. That is always the right one to build first.