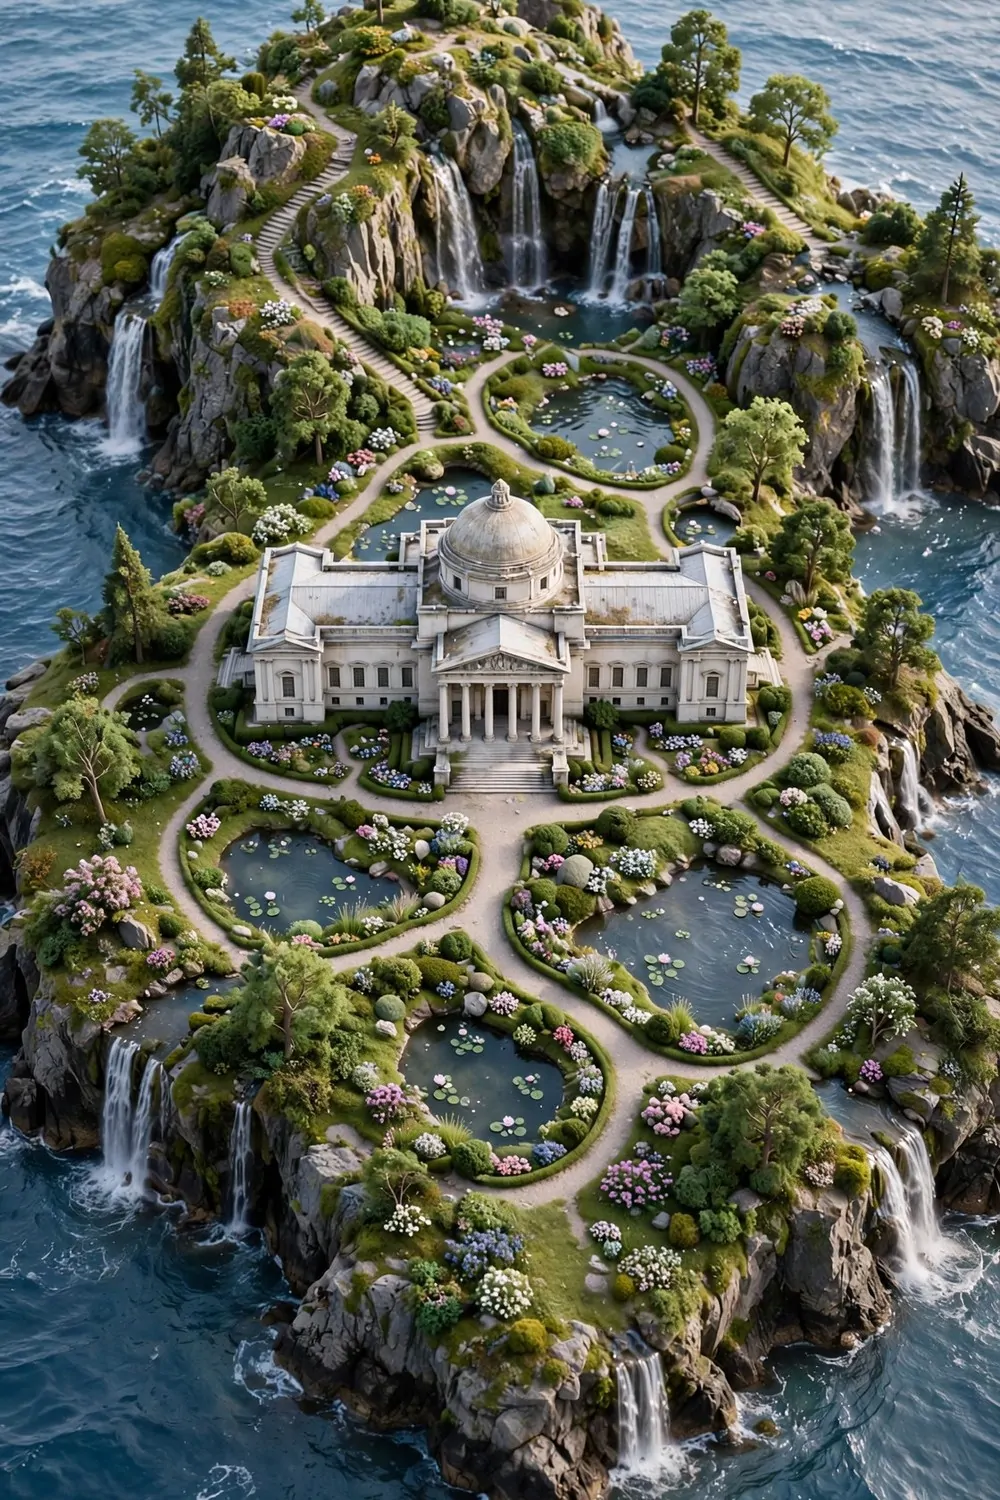
15 Museum Animal Crossing Ideas for Dreamy Island Displays

Nobody designed your museum. Think about that for a second.
You picked the spot for your house. You laid every path on your island with your own hands. You chose the flowers, the fences, the little benches by the pond. But the museum? It just showed up one day. Big and white and very sure of itself, sitting in a patch of plain grass like it did not get the memo.
Blathers is doing his best inside. The fish are swimming. The fossils are standing tall. But outside, most museums on most islands look a little lonely. I think that is a shame, because the museum is the biggest building on your island. It should have the best yard.
So I went looking. I spent a few evenings visiting dream islands and reading what real players build around their museums. Fossil dig sites. Butterfly gardens. Grand staircases that make you feel like you are walking into a real gallery.
Here are 15 Museum Animal Crossing ideas for dreamy island displays. Every one of them is something a real player built. Pick the ones you love and give your museum the home it deserves.
1. The Fossil Dig Site
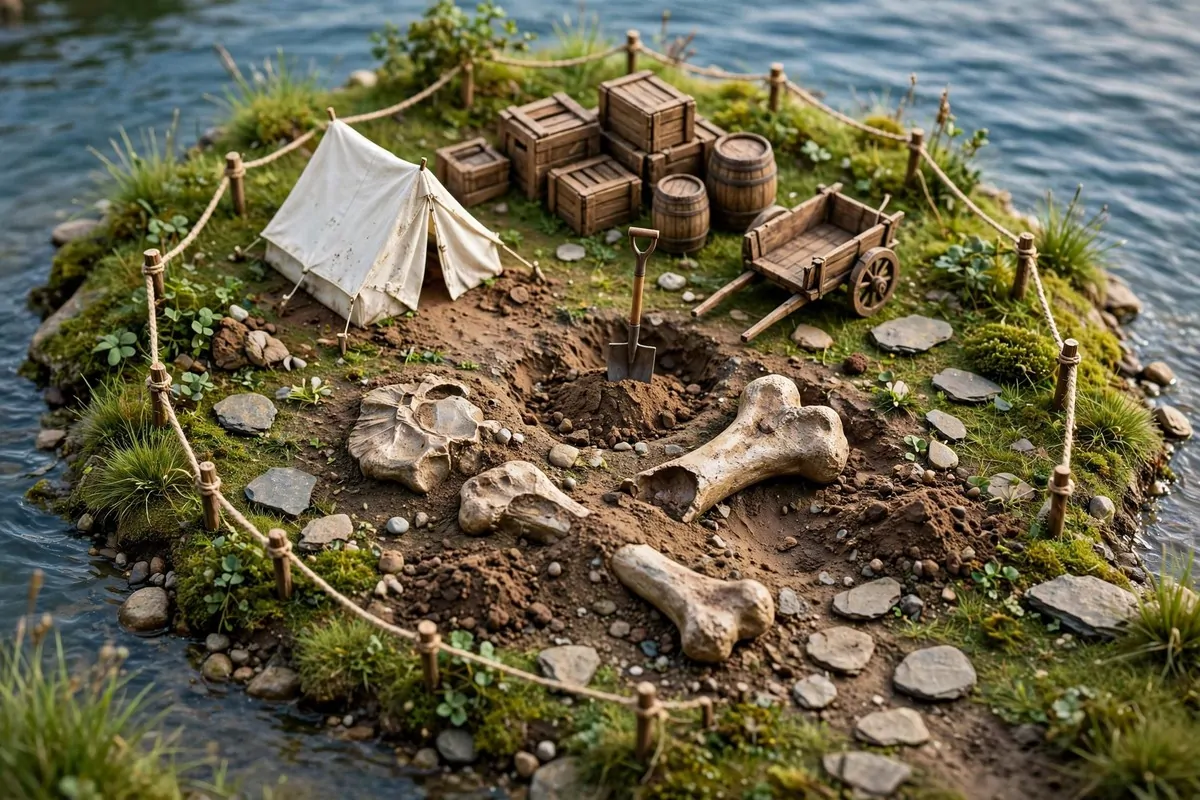
This is the most popular museum build I found, and I get why. It turns the patch of grass next to your museum into an active dig site, like the museum staff are still out there finding things.
The trick is the ground. Players pave the area with dirt or dark dirt paths and add a few cliffs, so it looks freshly dug and a little wild.
Then you drop in a small white tent. That tent is the star of the whole build. It says research camp louder than anything else you own.
Around it, place wooden crates, a handcart, log stakes, and a shovel stuck into the dirt. A campfire with cookware nearby makes it feel like the team eats lunch there.
Now the fun part. Pull out fossils Blathers already has in the museum. A big skull up front. Some bones half buried near the tent. A creepy skeleton if you are feeling dramatic.
Rope fences around the edge finish the look. They keep the dig site feeling like a work zone, which is exactly the point.
I love this build because it uses the ugly items. The dirty crates. The plain pots. The stuff that does not match the rest of your island finally has a home.
One tip. Keep the path to the museum door clear. The dig site can spill everywhere, but visitors still need a clean walkway to get inside.
And water the flowers around it. A little green next to all that dirt makes the whole thing look real instead of messy.
| Item | Why it works |
|---|---|
| Kid’s tent (white) | Reads as a research camp in one glance |
| Wooden crates and barrels | Storage for the “finds” your team digs up |
| Shovel | Stuck in the dirt, the site looks active |
| Fossil skulls and bones | Show the progress of the dig |
| Rope fence | Marks the work zone border |
| Handcart and log stakes | Small props that sell the story |
2. The Grand Staircase Entrance
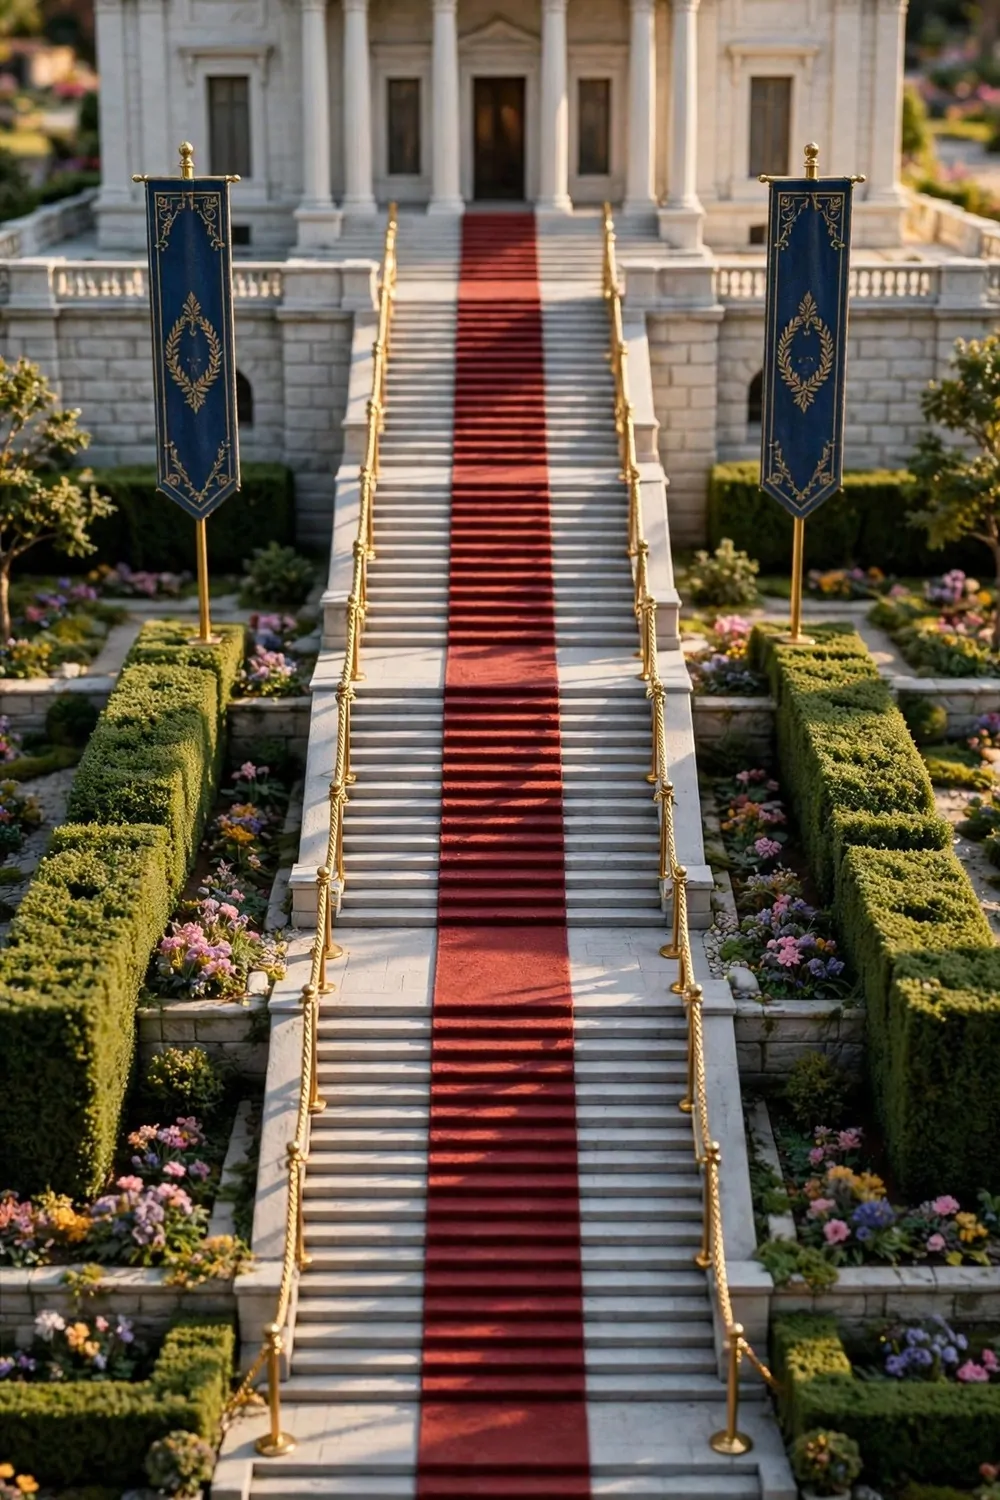
Some players do not decorate around the museum. They decorate the walk up to it. And honestly, this might be the classiest build on the list.
The idea is simple. A long staircase leads up to the museum doors, and the path down the middle looks like a red carpet.
You make it with the custom design app on your NookPhone. Paint a simple carpet pattern and lay it down the center of your stairs.
Rope fences on both sides turn the walkway into a real entrance. It feels like a movie premiere, but for fossils.
Add tall banners on each side. The museum already has banners on the building, so two more at the bottom of the stairs pull the whole thing together.
Statues at the corners of the stairs are a nice touch. One on each side, facing the path, like they are guarding the door.
A few trimmed hedges or flower beds along the edges keep it from feeling too hard and gray.
What I like most about this one is how fast it is. You can lay the carpet path and the fences in one evening.
Stand at the bottom and look up. That is the view your visitors get. It never gets old.
Your staircase checklist:
- Custom carpet path down the middle of the stairs
- Rope fences on both sides, evenly spaced
- Tall banners at the bottom of the stairs
- One statue at each bottom corner
- Hedges or flower beds along the outer edges
3. The Statue Garden
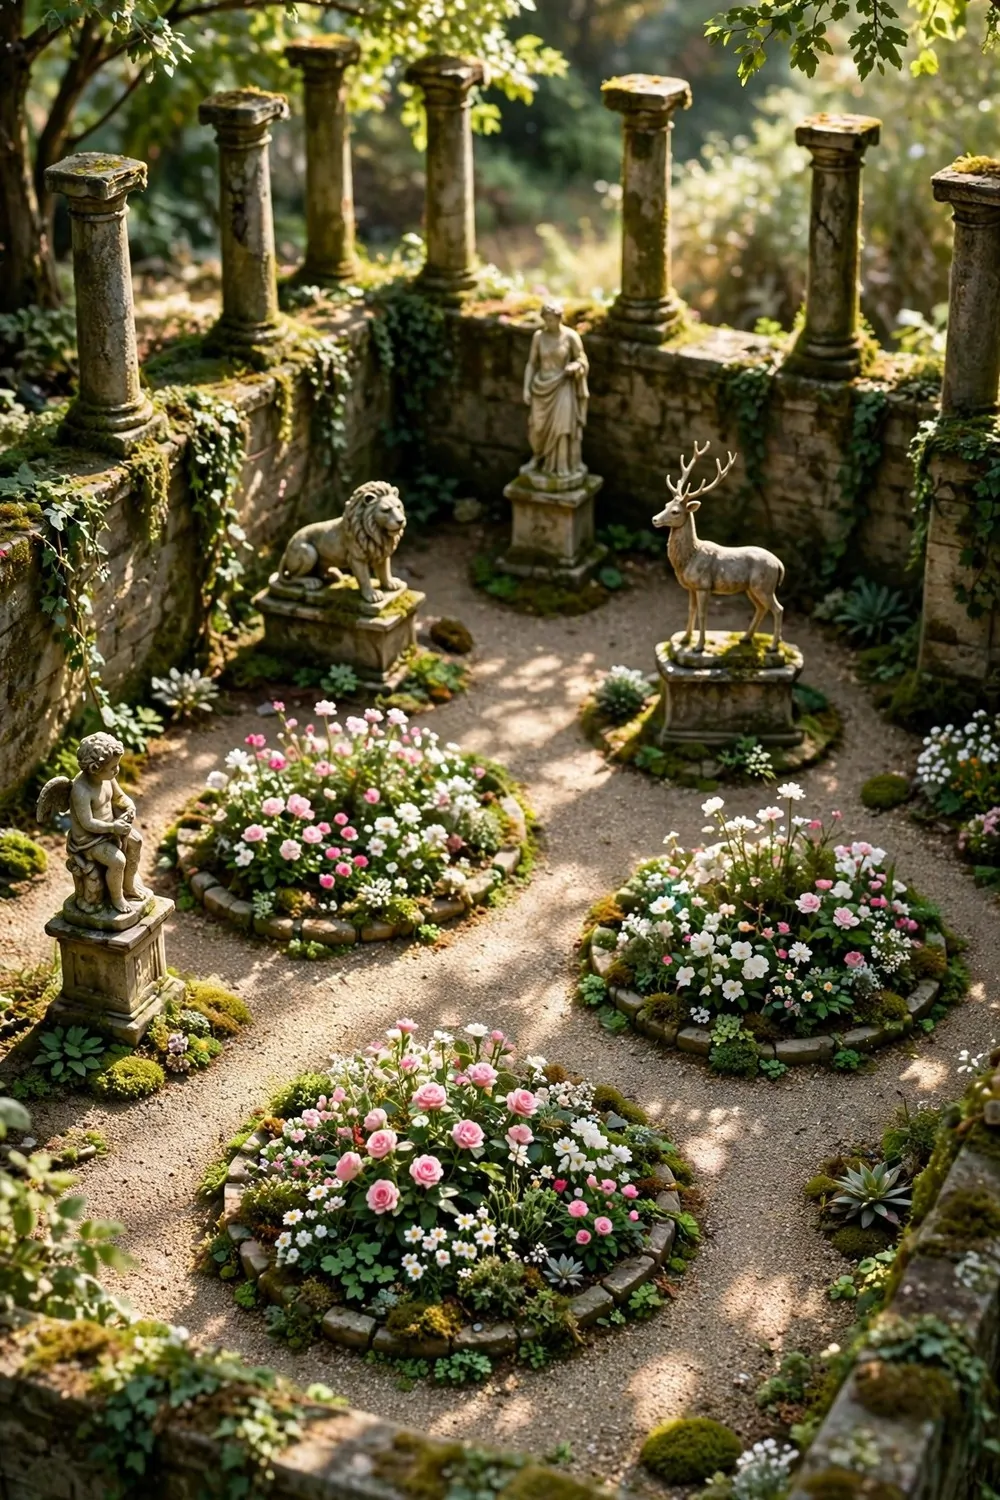
The museum is a work of art on the outside. So why not answer it with more art?
This build surrounds the museum with statues. The same kind of statues you would donate to the art wing, only out in the open air.
Place them on small pedestals around a circular garden. A few pillars between them give the whole thing a gallery feel.
Flowers do the heavy lifting here. Lush beds in pink, white, and red around the stone make the statues pop.
Ivy on a low stone wall adds age. It makes a new garden look like it has been there for years.
This one is perfect if your art wing is full. All those statues had to come from somewhere, right? Now the outside tells the same story.
Keep the middle of the garden open. A gravel circle where you can stand and turn around slowly is the whole point.
Benches help too. Sit down. Look at the museum through the statues. It is a lovely view.
One warning. Statues are big, so measure your space first. You want a garden, not a storage yard.
4. The Butterfly Garden
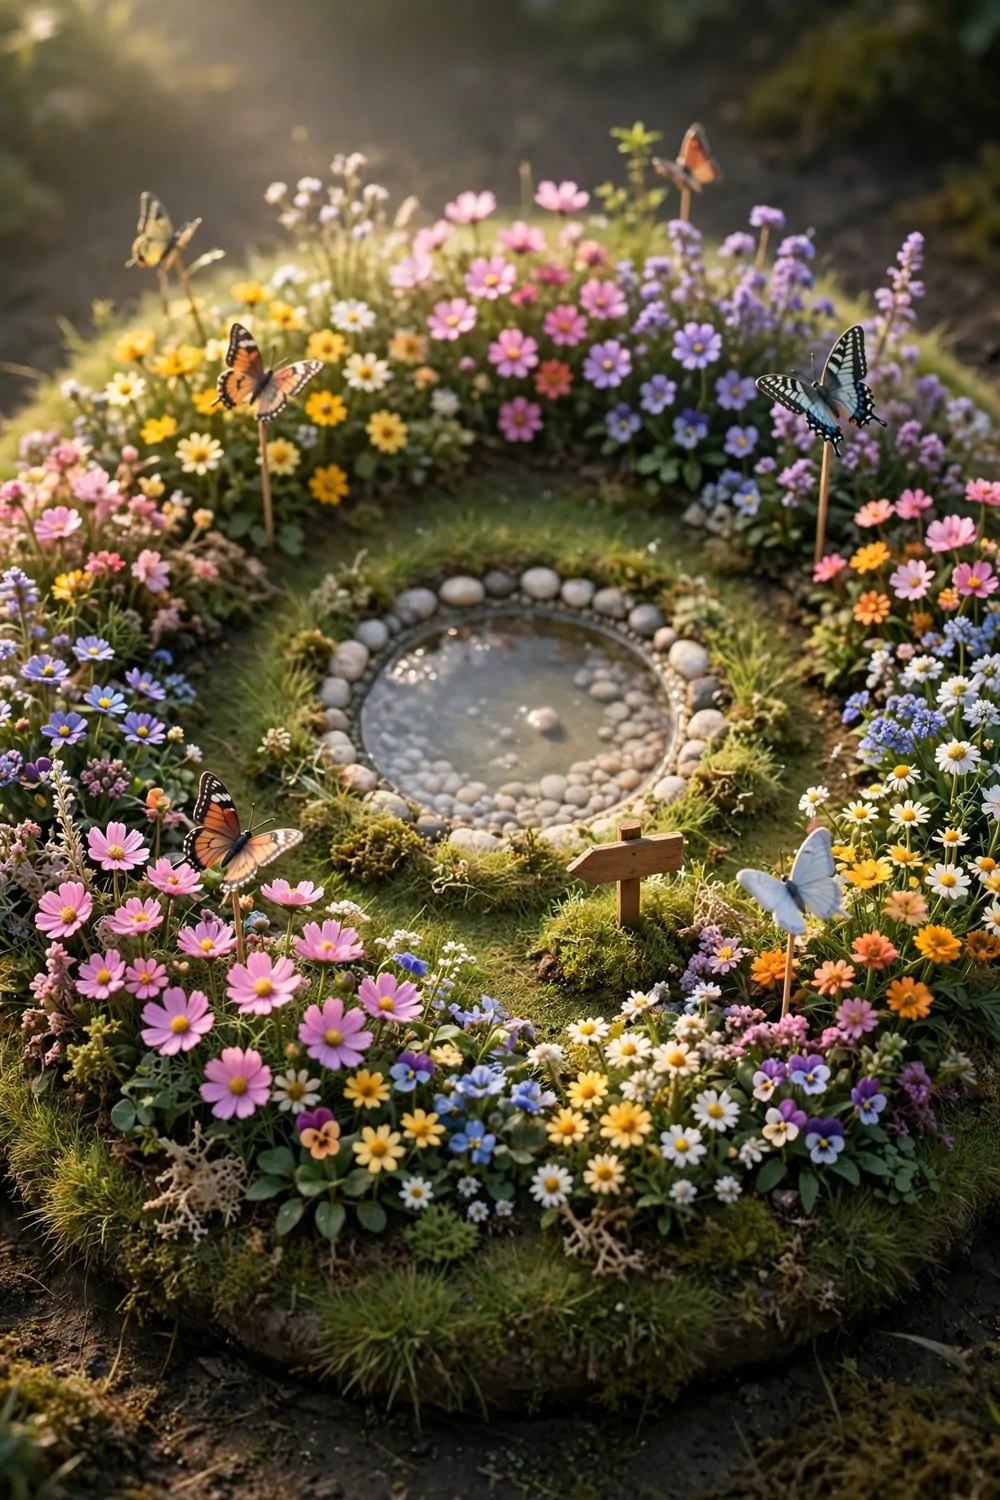
You know the butterfly room inside the museum? The one with the fountain and the flowers all around? This build brings that room outside.
Plant a big ring of flowers near the museum. Mix the colors. Butterflies only visit when there are flowers to land on.
Then add butterfly models on little stands around the beds. This part is my favorite. It is like the garden is showing off your collection.
A small pond in the middle finishes it. The butterfly pond designs players share online are adorable, all soft edges and pale stones.
Add a wooden sign pointing toward the museum door. It makes the garden feel like part of the museum, not just a random flower patch.
This build changes with the seasons, which I love. Different butterflies show up in different months, so the garden never looks the same twice.
Keep some space between the beds. You will want to walk through with a net, and you do not want to crush your own flowers.
Morning is the best time here. The light is soft and the butterflies are out. It is my favorite spot for a slow island walk.
And it is cheap. Flowers, a pond, some models. That is the whole shopping list.
What goes in the butterfly garden:
- A wide ring of mixed-color flowers
- Butterfly models on stands between the beds
- A small stone pond in the center
- A wooden sign pointing to the museum
- A bench for slow mornings
5. The Outdoor Study Corner
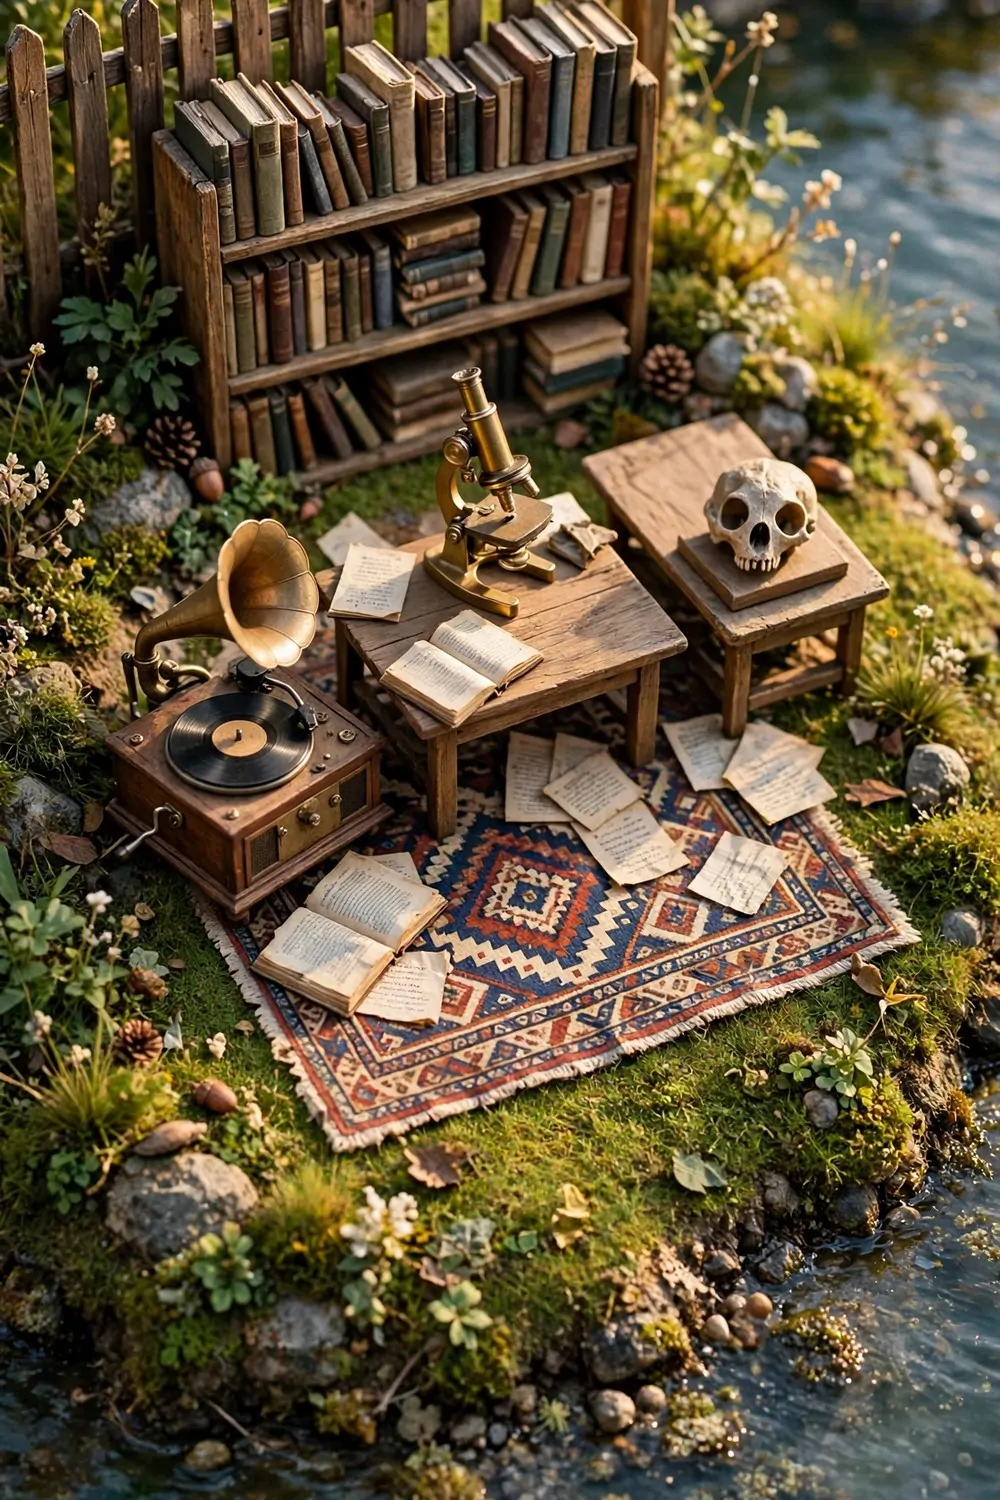
Blathers is a researcher. So give him a research corner outside his own front door.
This is a small build, and that is its charm. A wooden bookshelf against a fence. A table with a microscope on it.
Add a fossil skull on a little stand. A record player for the mood. Maybe a trophy or two, like Blathers won something.
Players love putting a study space right in front of the museum. It fills that awkward flat ground between the door and the path.
Scatter some books and papers on the table. An open book left on a chair says somebody works here better than any sign.
A rug under the whole setup pulls it together. It turns a pile of items into a room.
I like this one for small islands. You do not need much space. One little corner is enough.
Change it with the seasons if you want. A warm drink on the table in the cold months. Fresh flowers on the shelf in spring.
It is also a great photo spot. Stand behind the table like you are the curator. Very official.
6. The Waterfall Frame
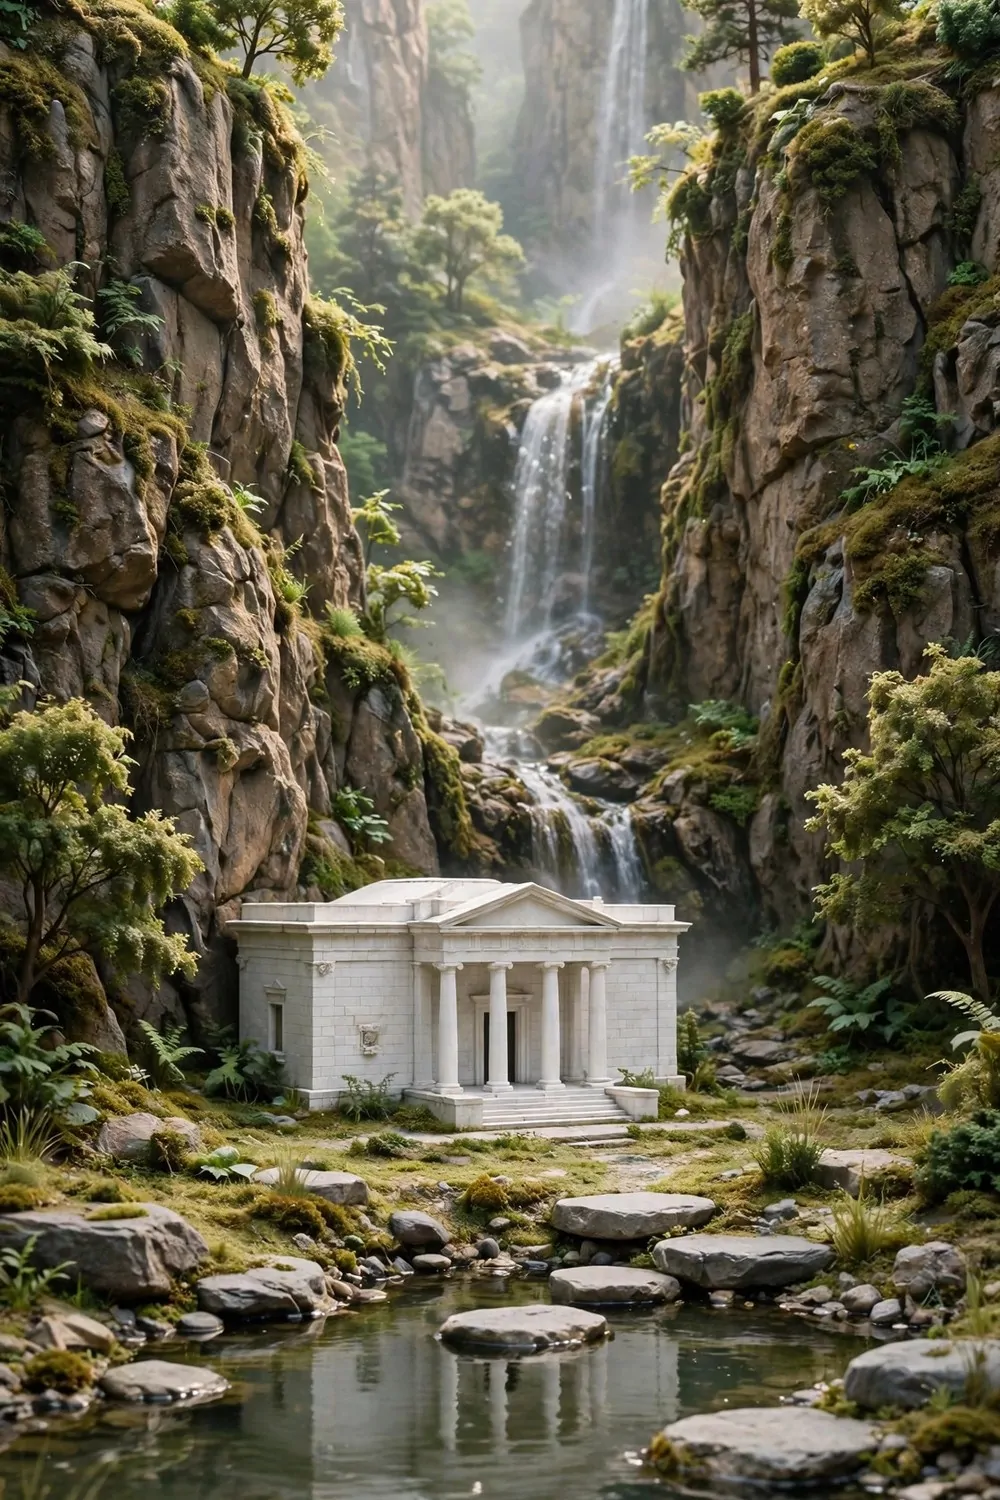
The museum looks good on flat ground. It looks amazing in front of a waterfall.
The build is simple in theory. Raise cliffs behind the museum and cut a waterfall into them. The white building against the falling water is unreal.
A pond at the base catches the water. Put a few flat stones around it and it looks like a natural spring.
This one needs terraforming, so it is a bigger project. But the payoff is huge. The museum goes from nice building to landmark.
Plant trees on top of the cliffs. Green on top, white water, white building. Three layers that just work.
At night the waterfall keeps moving and the museum windows glow. Walk up the path after dark sometime. You will see what I mean.
Keep the sides of the cliffs clean. One or two bushes are fine. Too many and you hide the waterfall.
If you have the space, add a small bridge over the pond. It gives visitors a place to stand and stare.
I think this is the most dramatic build on the list. It takes work, but it changes your whole island map.
7. The Lantern-Lit Night Path
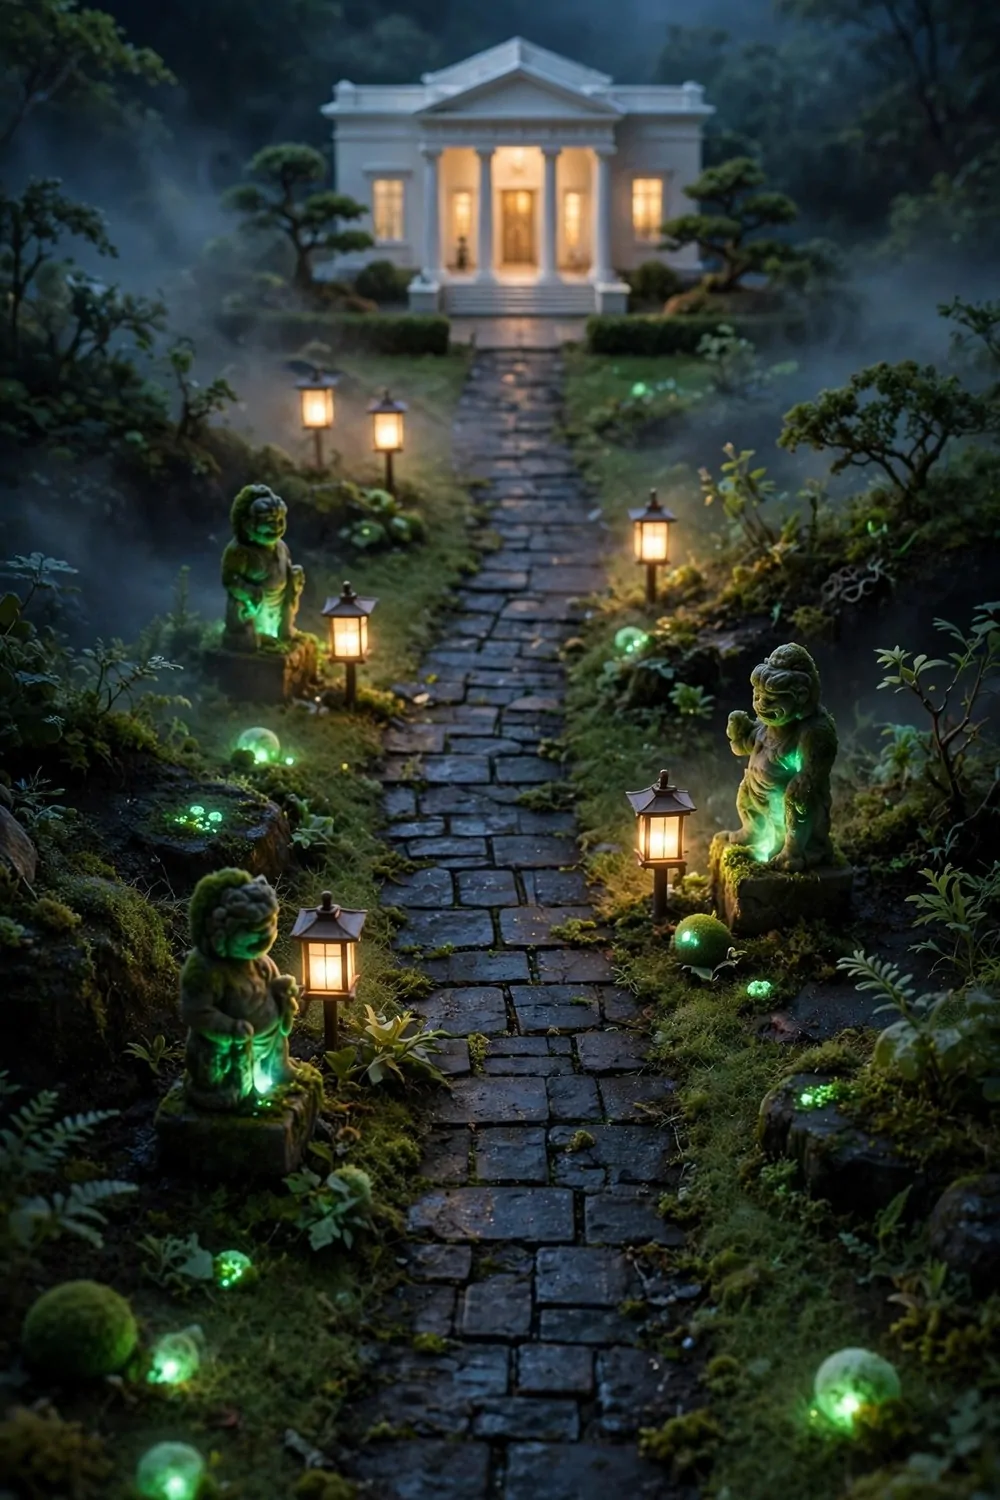
Most people decorate for the day. This one is for the night.
Line the path to the museum with lanterns. Garden lanterns, tall lanterns, any lanterns you have. Space them evenly and let them glow.
Glowing moss statues between the lanterns are the secret weapon. They give off a soft green light that looks like magic.
Keep the path itself simple. A dark stone path makes the lights stand out more.
This build is best if you play in the evenings. Walk to the museum at 9pm and the whole path feels like a secret.
In summer the fireflies join in. You cannot place them, but the island provides. Lanterns plus fireflies is almost too pretty.
A few glowing moss balls on the grass edges finish it. Like the ground itself is lit.
Do not overdo the bright white lights. Warm and green is the mood. One color story, not five.
Your visitors will take photos here. Everybody does.
What lights the night path:
- Garden lanterns spaced evenly on both sides
- Glowing moss statues between the lanterns
- A dark stone custom path so the lights pop
- Glowing moss balls along the grass edges
8. The Temple Staircase
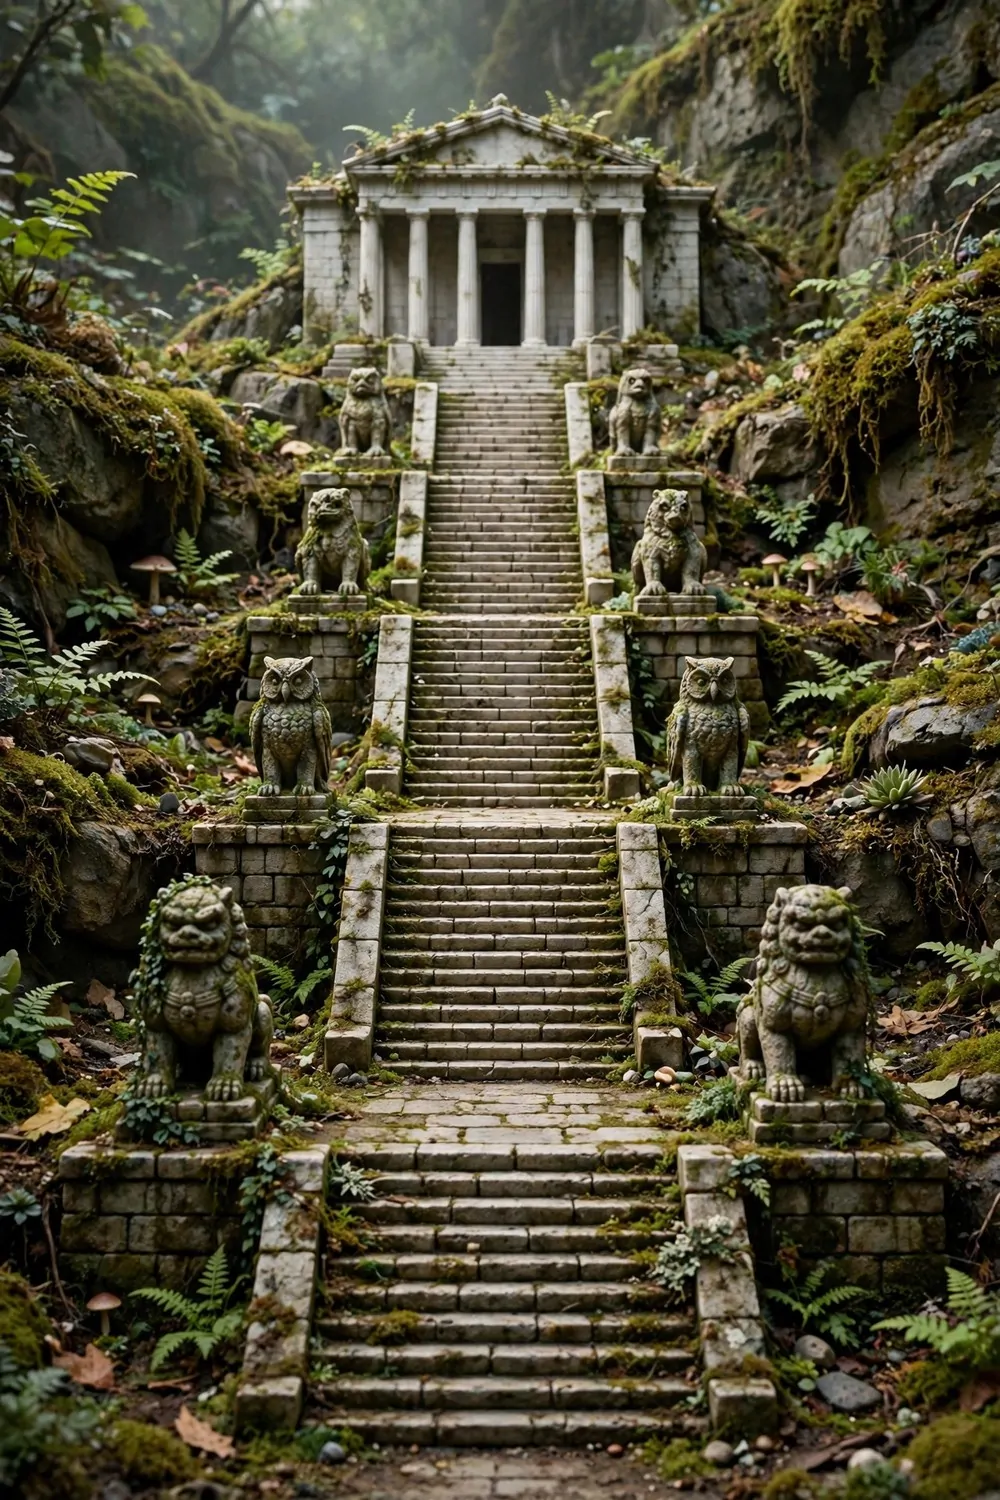
This is the boldest build I found. Some players turn their museum entrance into a temple.
The trick is custom stair designs. Long, wide steps painted with stone patterns, stacked so the museum looks like it sits on top of a pyramid.
You can find the design codes online. Search for temple or pyramid stairs and you will find players sharing theirs.
Multiple sets of stairs make it work. Two or three short flights instead of one long one. It gives the climb some rhythm.
Stone statues at each landing. Big ones. This is not the build for small cute items.
Keep the colors earthy. Gray stone, green moss, brown dirt. The temple look falls apart if you add bright pink flowers everywhere.
This build takes the most planning. Measure twice, terraform once. Moving a staircase is a pain.
But when it is done, wow. The museum looks ancient and important, like it has been there a thousand years.
Fair warning. Your villagers will look tiny next to it. That is kind of the point.
9. The Cottage Flower Garden
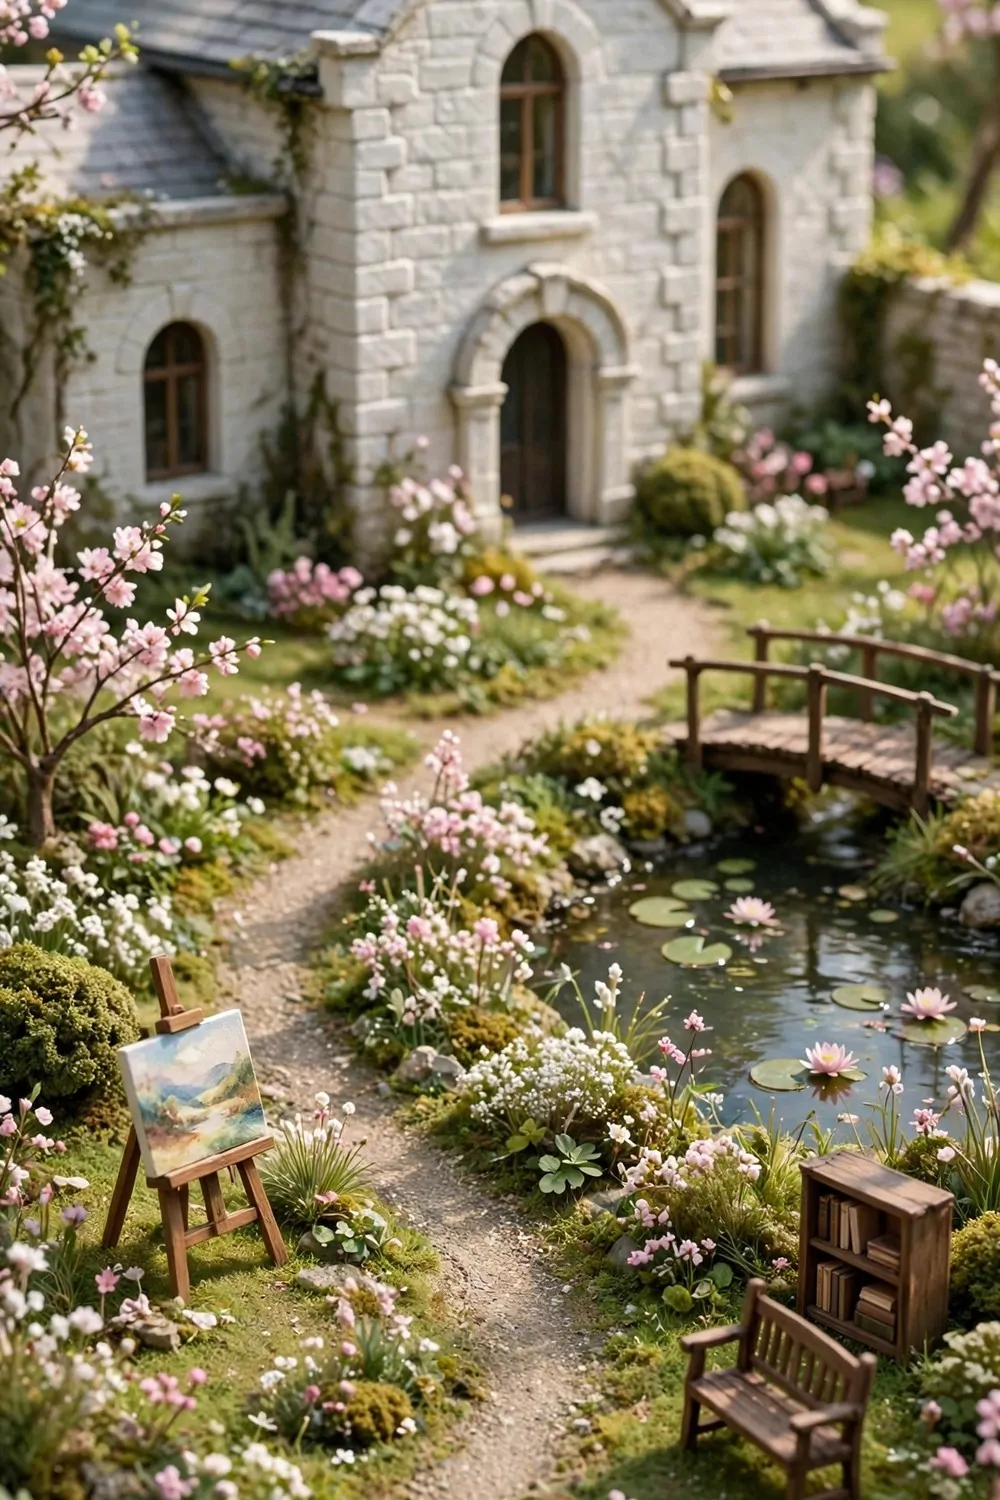
Not every museum needs to be grand. Some islands go the other way, and it works beautifully.
This build keeps the museum natural and earthy. Think cottage garden, not city gallery.
Pink flowers line the path to the door. Not in neat rows. In soft, messy drifts, the way they grow in real gardens.
A small pond off to one side with lily pads. A little wooden bridge if you are feeling fancy.
A painting area on the grass is a cute touch. An easel, some paint, a finished canvas. Like an artist comes here to paint the museum.
The study areas stay too. A bench, a bookshelf, some fossils. It all fits the gentle mood.
This style is forgiving. If your flowers spread, it only looks better. Messy is the plan.
I love this one for spring. Everything blooms at once and the whole front of the museum feels alive.
It is also the easiest build to live with. No big terraforming. Just flowers, a pond, and patience.
| Flower colors | Mood they give |
|---|---|
| Pink and white | Soft and dreamy |
| Red and yellow | Bold and happy |
| Purple and blue | Calm and cool |
| Orange and pink | Warm and bright |
10. The Aquarium Courtyard
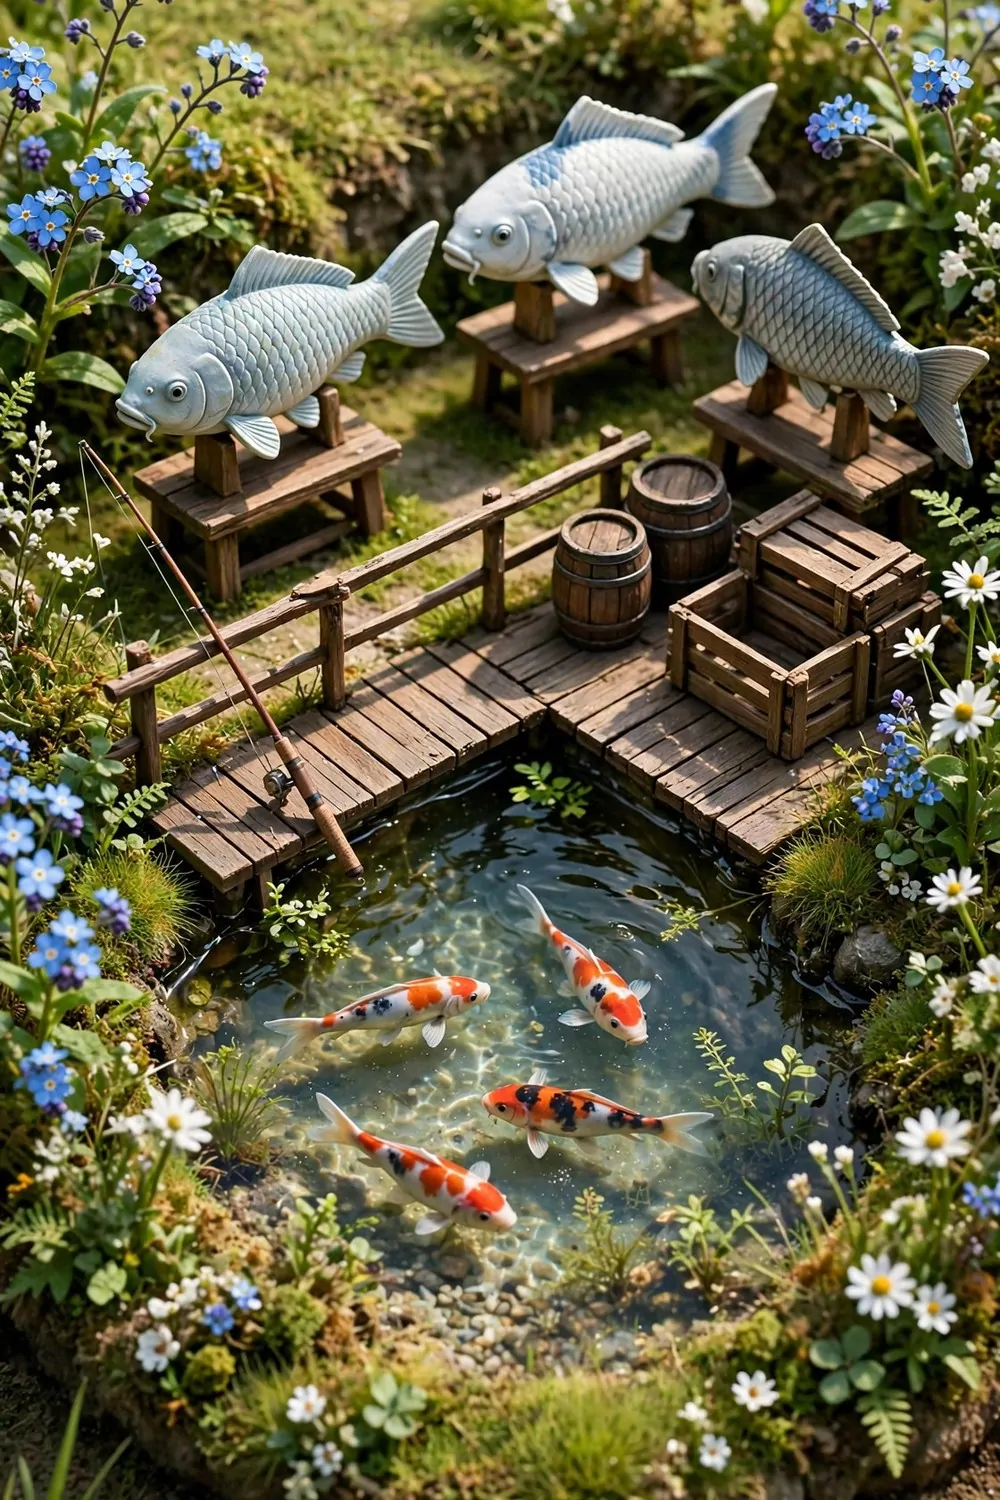
The fish wing is the most loved part of the museum. Ask around. Everybody says the aquarium.
So give the fish their own courtyard outside. A pond, a wooden deck, some barrels. Like a little fishing dock that grew into a display.
Place fish models around the pond edges. The big ones. A shark model on the dock gets attention every time.
Barrels and crates make it feel like a working dock. A fishing rod leaning on the railing is the perfect detail.
Blue and white flowers around the water keep it fresh. They match the water without trying too hard.
This build is great near a river or the beach. Let the real water sit next to your pond and the whole area feels bigger.
Add a bench facing the pond. Sit down and watch the fish. It is the outdoor version of the big tank inside.
Keep the deck simple. Wood planks, clean edges. The fish are the stars here.
I think this one suits players who fish a lot. Your hobby finally gets its own corner.
11. The Picnic Reading Lawn
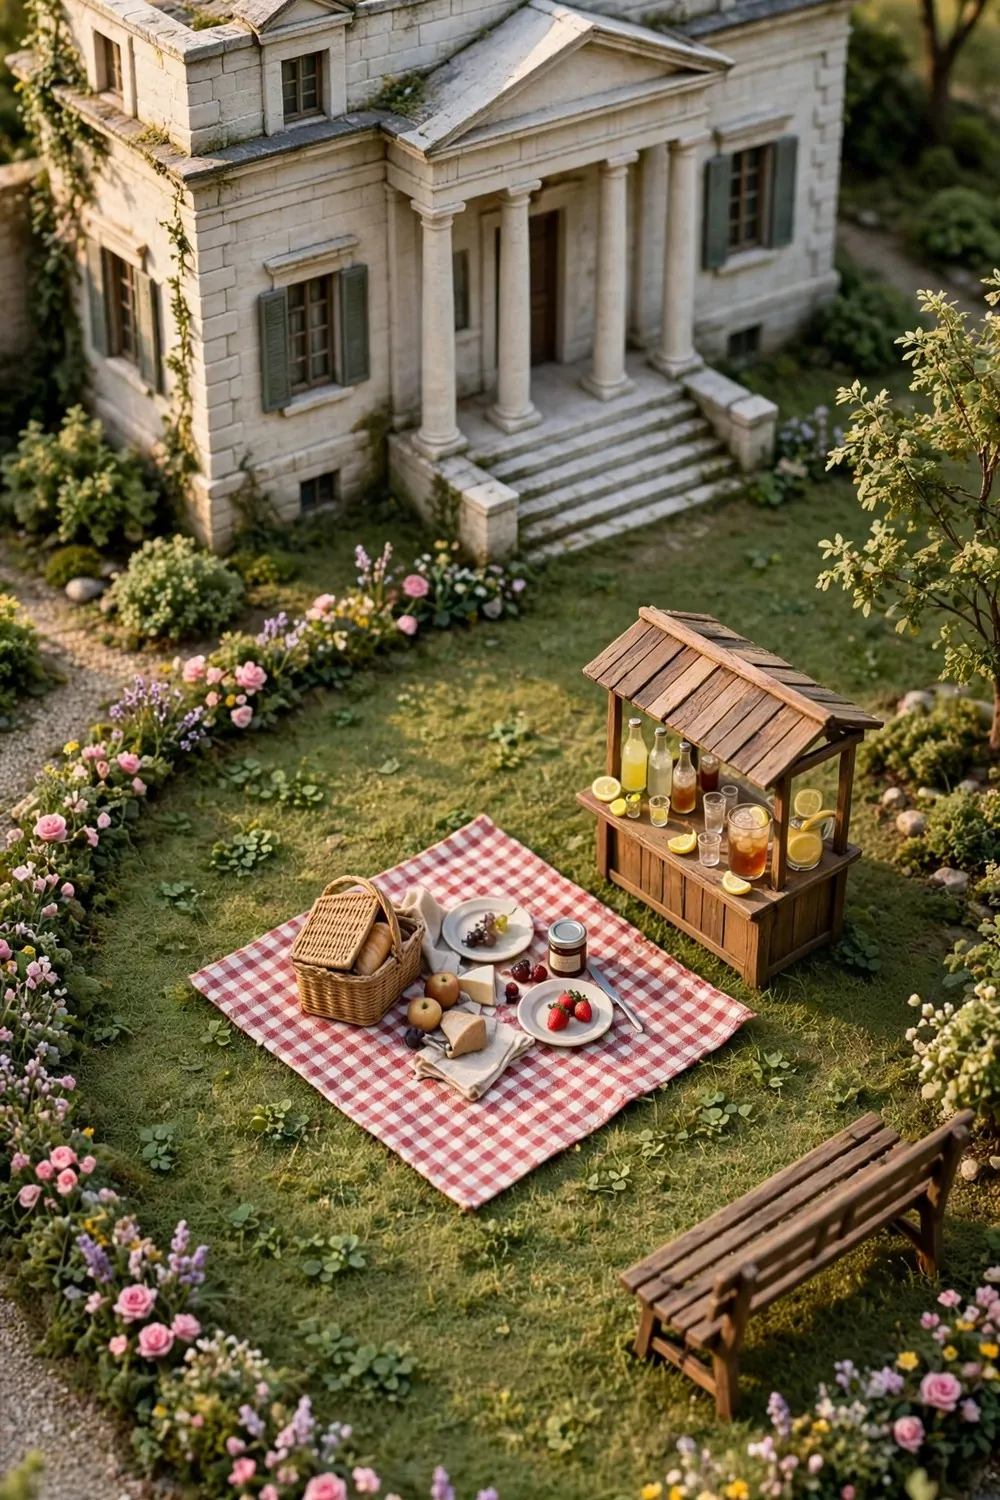
Museums have cafes. Yours can have a picnic lawn.
Spread a picnic blanket on the grass near the museum. A basket, some plates, a sandwich or two. It looks lived in right away.
A bench nearby for readers. Some players add a little free library box, which is adorable next to a museum.
A drink stand or vending machine is a fun touch. Museums have gift shops. Yours has cold drinks.
This build is about people, even though the photos are empty. It imagines the islanders actually using the space.
Flowers around the edges keep it pretty. Low ones, so you can see over them to the museum.
It is also the cheapest build on this list. A blanket and a basket. Done.
Host a pretend opening day. Invite a friend over, sit on the blanket, eat virtual sandwiches. Silly and perfect.
I like this one because it is warm. All the stone and statues are lovely, but a picnic says come and stay a while.
What goes on the picnic lawn:
- A picnic set with blanket, basket, and plates
- A bench for readers and daydreamers
- A small drink stand for cold drinks
- Low flower borders around the edges
- A wooden sign that says “museum lawn”
12. The Ancient Ruins Walk
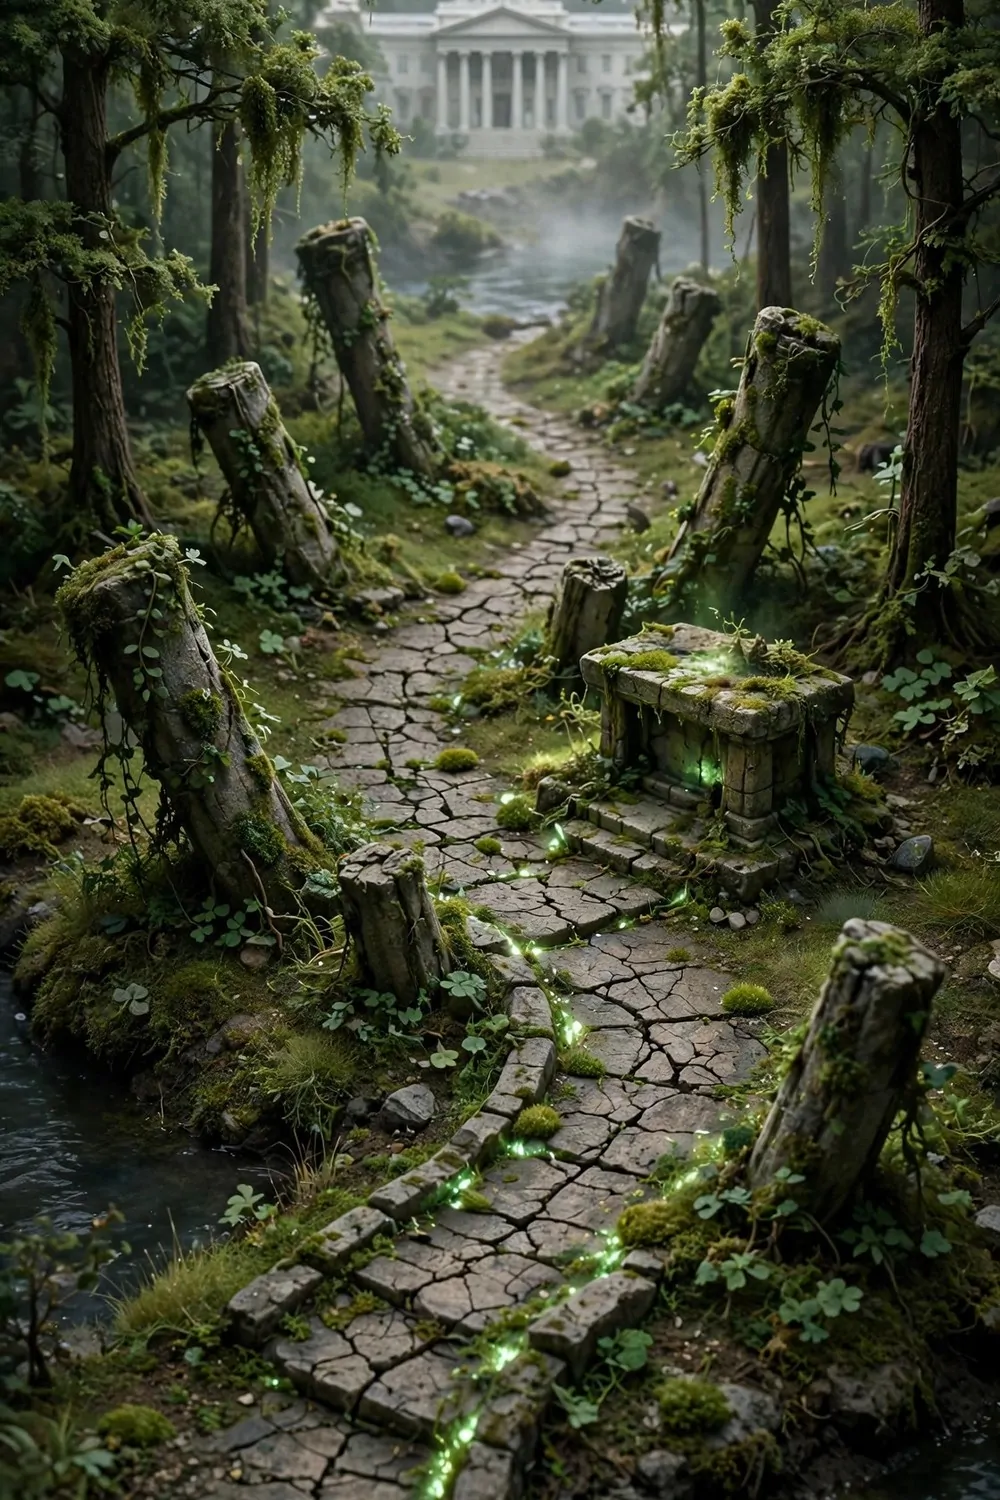
If the temple staircase is bold, this one is mysterious.
The idea is a worn stone path leading to the museum, lined with broken pillars and old ruins. Like the museum was built on top of something ancient.
Ruined pillars are the key item. The broken ones, half sunk in the grass. Place them crooked. Ruins are not supposed to be straight.
Glowing moss on the stones adds age and a little magic. A stone altar at the turn of the path is a great focal point.
Use a worn tile custom path. Cracked and faded. It sells the whole story.
Green vines on the pillars help too. Nature taking the ruins back, one leaf at a time.
Keep it a little dark. Tall trees on both sides make the path feel like a discovery.
This build photographs amazingly. The crooked pillars frame the museum in the background.
It is not for neat freaks. The whole point is that it looks old and a little wild.
13. The White Flower Path
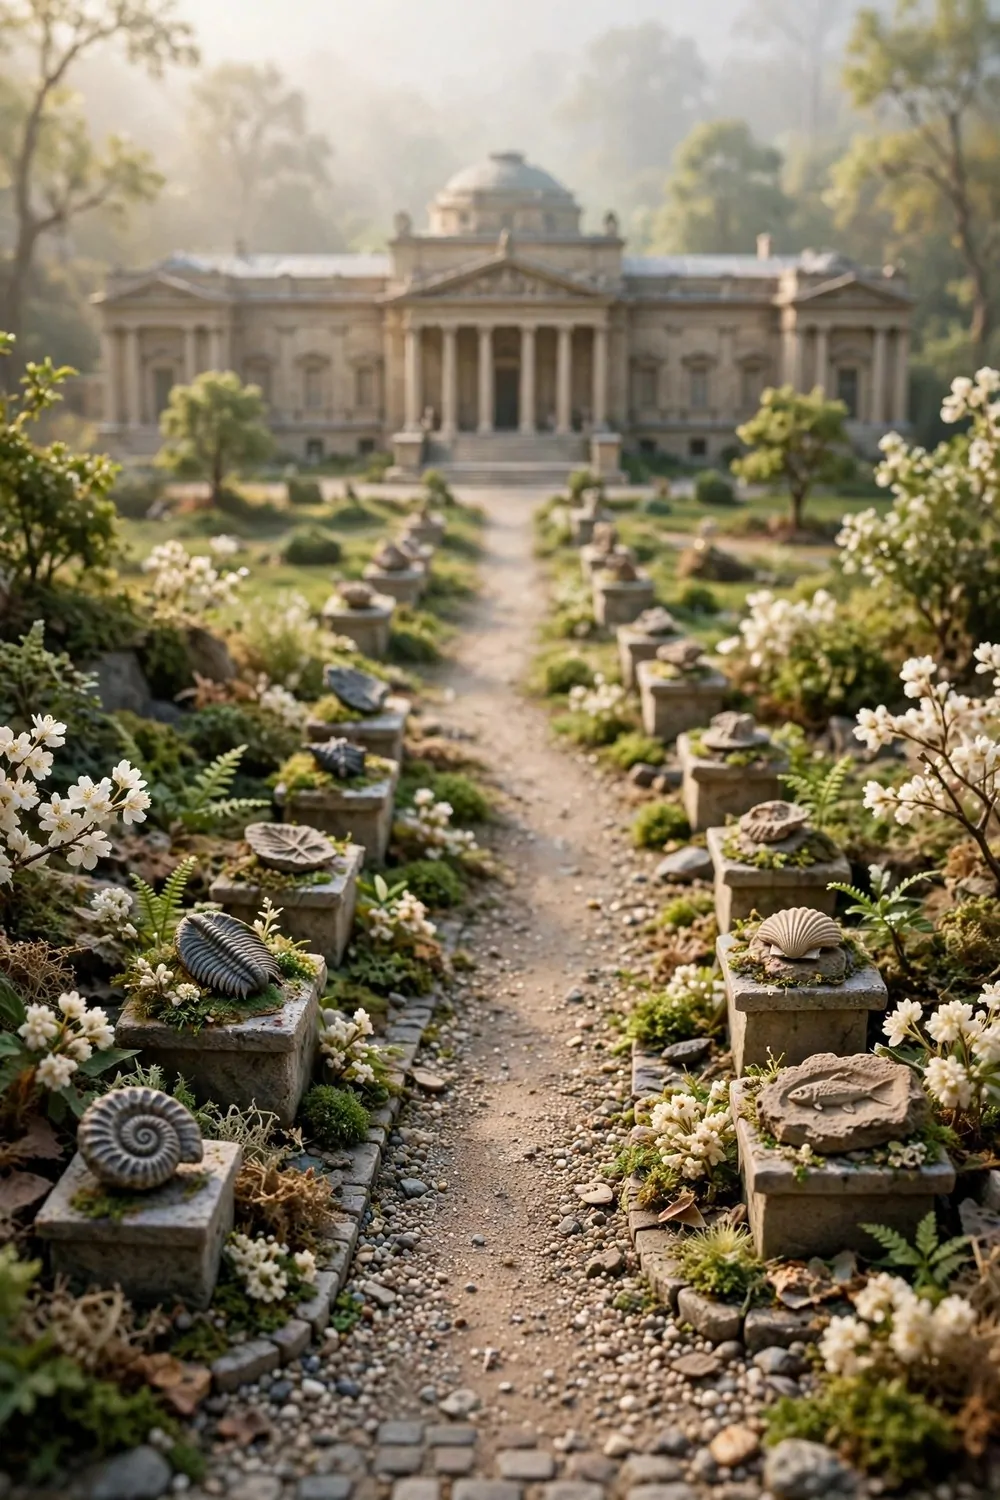
Sometimes the simplest build wins.
This one is just a path to the museum lined with white flowers. Both sides. All the way.
White flowers glow a little at dusk. The path looks like it is lit from the ground up.
A few fossils along the way break up the green. Small ones. Skulls and shells placed like markers.
Signs pointing to the door are a nice touch. Wooden signs with a hand painted feel.
This build is calm. No statues shouting for attention. No waterfalls. Just flowers and a door.
It works on any island theme. White goes with everything.
The upkeep is real though. Flowers spread. You will be digging up extras every few days.
But that is also the charm. The path grows with you. It never looks finished, in the best way.
14. The Little Cafe Terrace
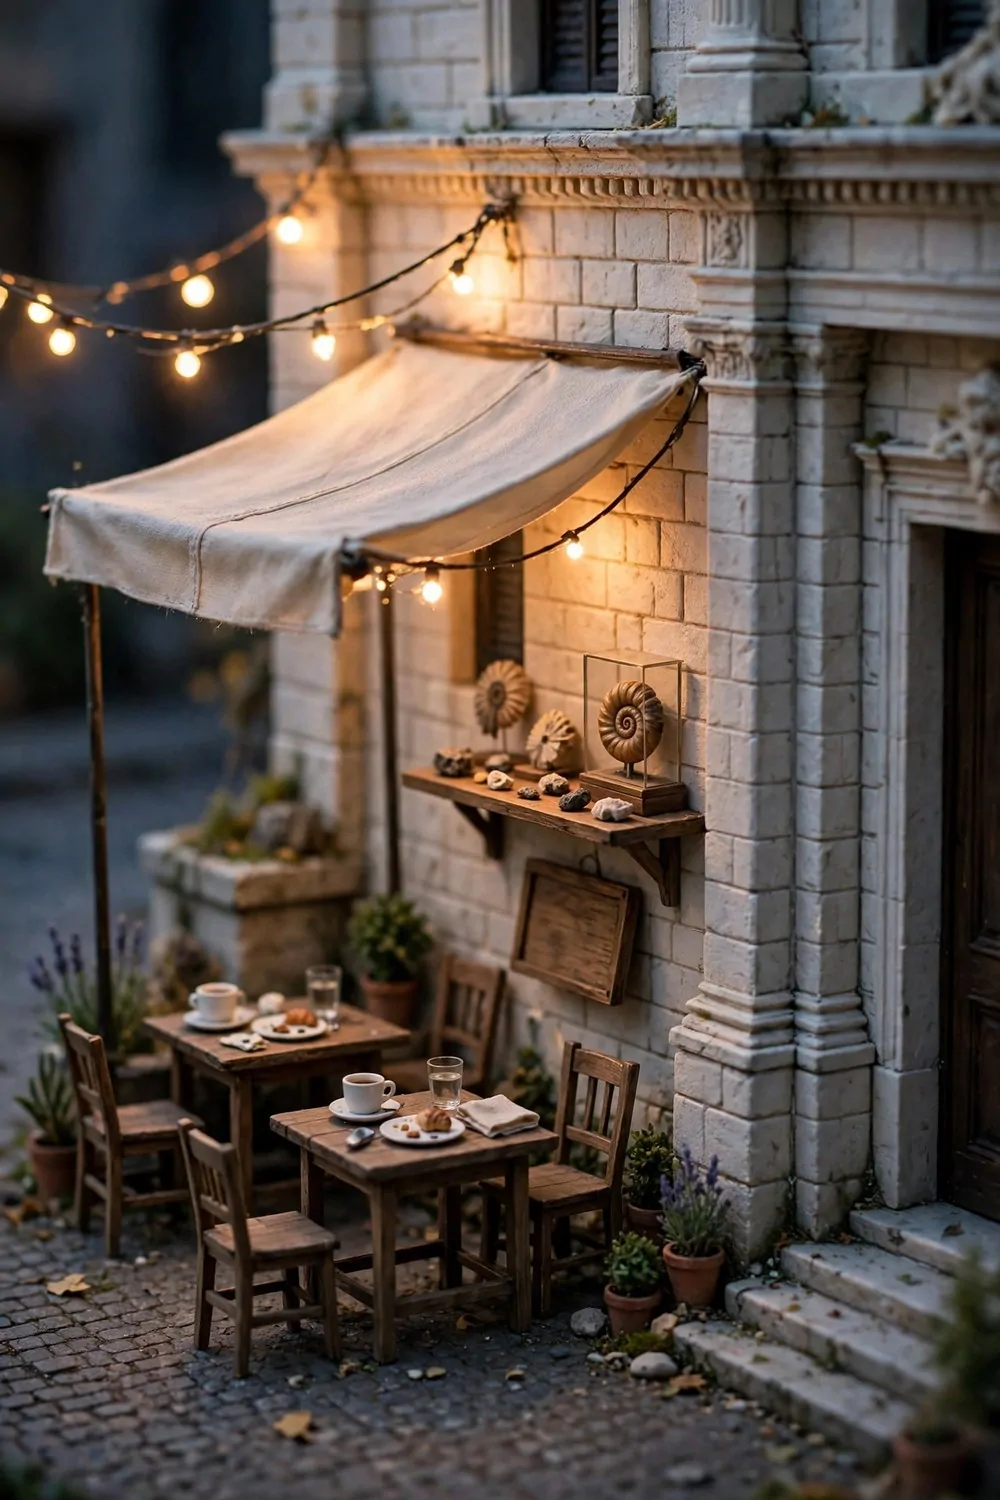
Every good museum day ends with a coffee. Or starts with one. Or both.
This build puts a tiny cafe terrace next to the museum. Two tables, four chairs, an awning for shade.
Cups and plates on the tables. A menu board by the door. It does not need to be big to feel real.
Keep the furniture green or natural wood. Bright colors fight with the white museum.
A few fossils on the cafe shelves tie it to the museum. This is not a random cafe. It is the museum cafe.
String lights overhead if you have them. A cafe glows differently at night.
This is a great build for the side of the museum. The front gets the grand entrance. The side gets the coffee.
Your villagers will wander in on their own. It is fun to find them sitting there.
I love a build that gives you something to do. Sit down. Have a coffee. Watch the island go by.
What the cafe terrace needs:
- Two tables with chairs under an awning
- Cups, plates, and little desserts on the tables
- A menu board by the museum wall
- A shelf with small fossils for the theme
- String lights for the evening glow
15. The Cliff Painting Gallery
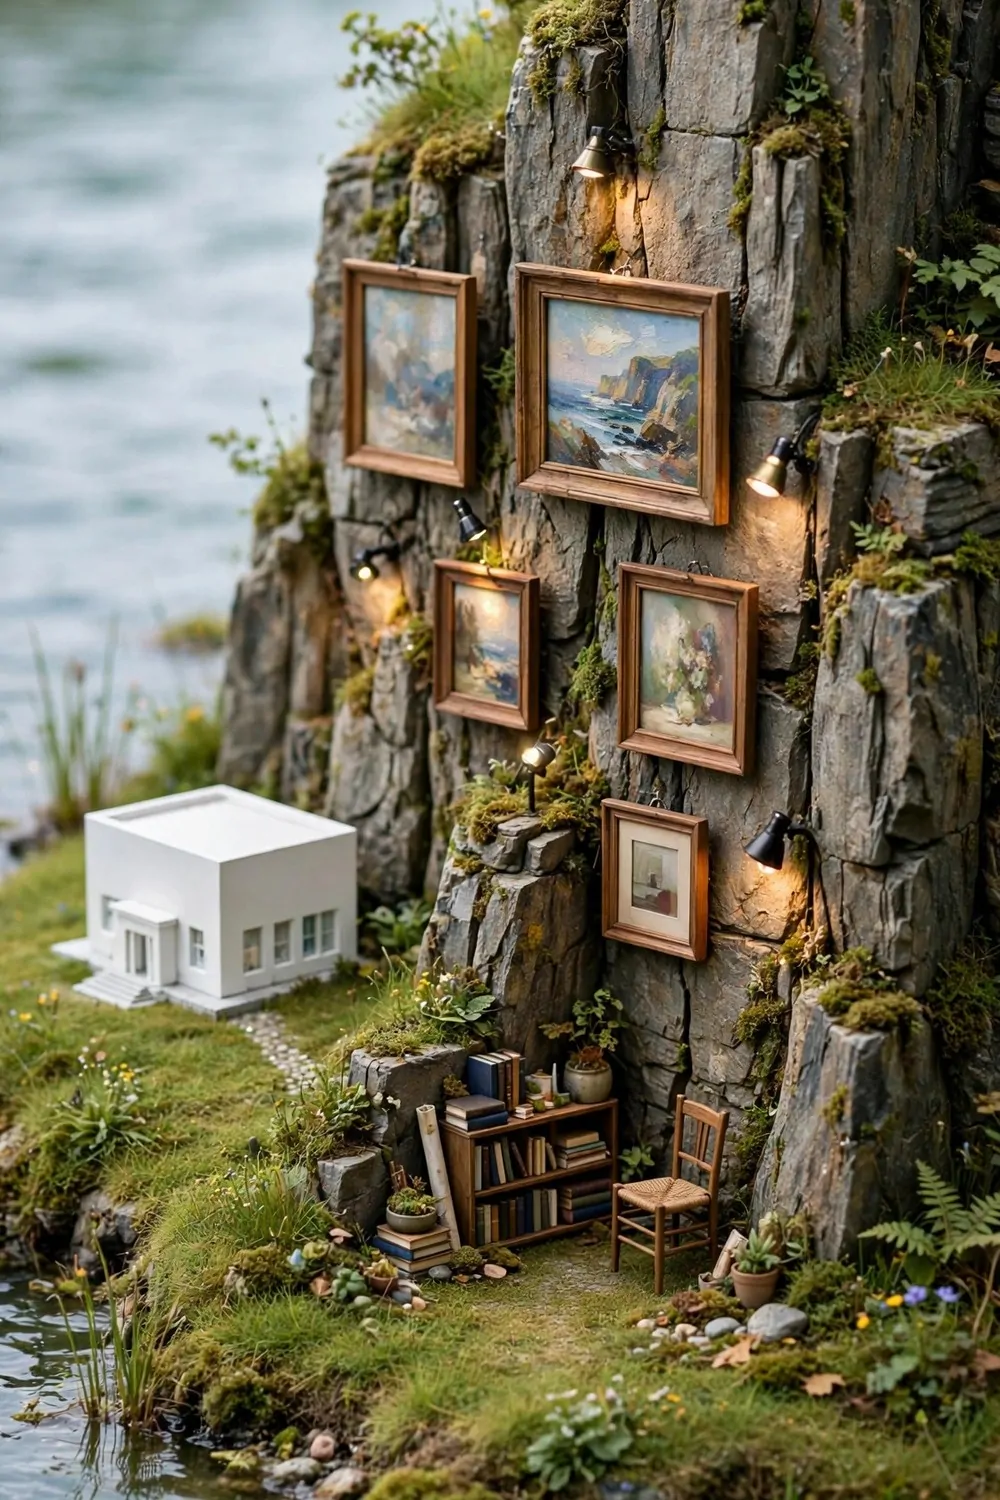
Save the weirdest for last. This one hangs art on a cliff.
Raise a rock face behind or beside the museum. Hang framed paintings right on the stone.
It sounds strange. It looks incredible. Like an outdoor gallery that grew out of the island.
Mix big and small frames. A little crooked is fine. Galleries in the real world are never perfect either.
A study space at the base ties it together. Bookshelf on the rock, a chair, a lamp.
This build is perfect for extra art. The art wing fills up fast, and the spares need a home.
Keep the cliff face clean otherwise. The paintings are the whole show.
Spotlights help at night. A few garden lights aimed at the frames turn it into a real evening gallery.
It is the most creative build on the list. Your dream visitors will stop and stare. I promise.
And there you have it. Fifteen real ideas from real islands. No plain grass required.
Your museum is the biggest building on your island. Now it can have the best yard too. Start with one idea this weekend. See how it feels. Then add another.