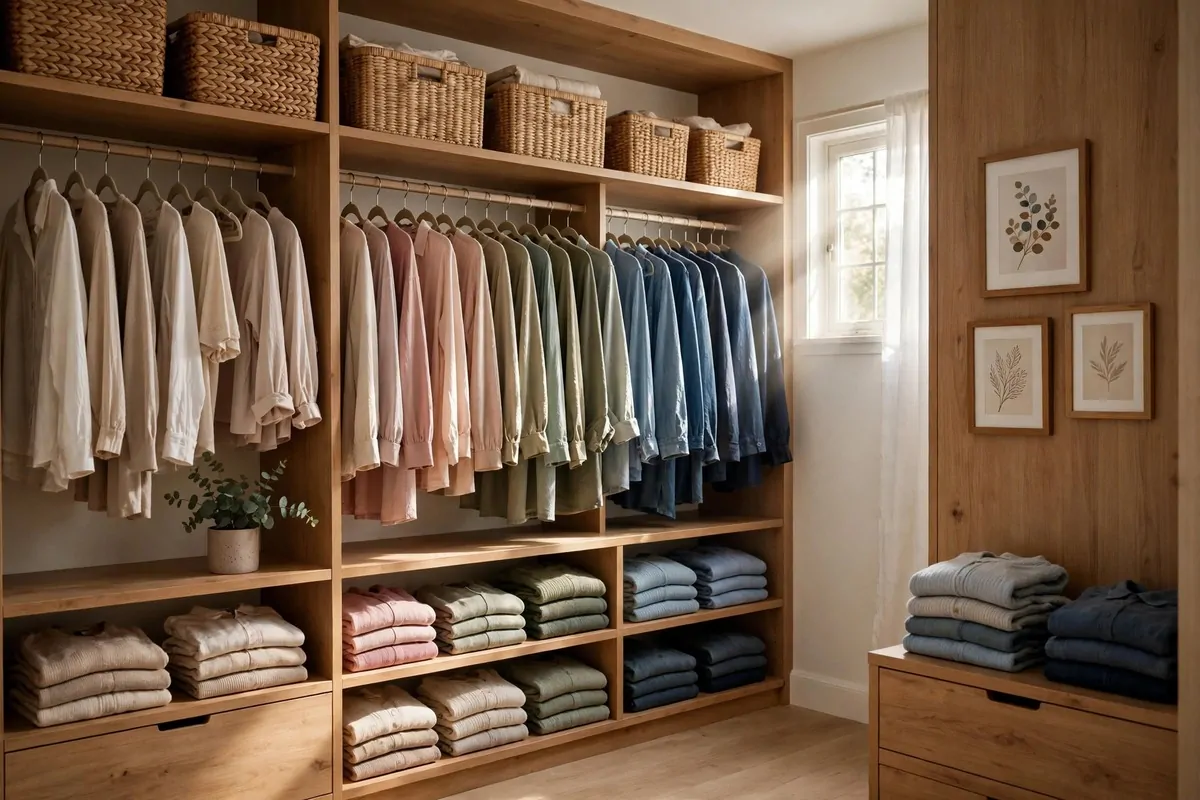
29 Built-In Wardrobe Ideas for Small and Large Bedrooms

My bedroom had one wall that did nothing. No window, no door, just a flat stretch of paint with a plug socket halfway up.
I looked at that wall for months and I kept thinking it was wasted space. My clothes were in a tall chest that never quite shut right. My shoes lived in a pile by the door. I knew a built-in wardrobe could fix it, but I had no idea where to start.
That is what these 29 built-in wardrobe ideas are for. They work for small bedrooms with odd corners and for large bedrooms with lots of space to fill. You will find ideas for tight budgets, for kids, for sloped ceilings, and for walls that seem too awkward to use.
Before you pick a style, grab a tape measure and check your wall twice. Note the plug sockets, the skirting boards, and any pipes or slopes. A good built-in fits the room you have, not the room in a photo, and these ideas will help you plan one that feels made just for you.
1. A Wardrobe Built Into the Alcove
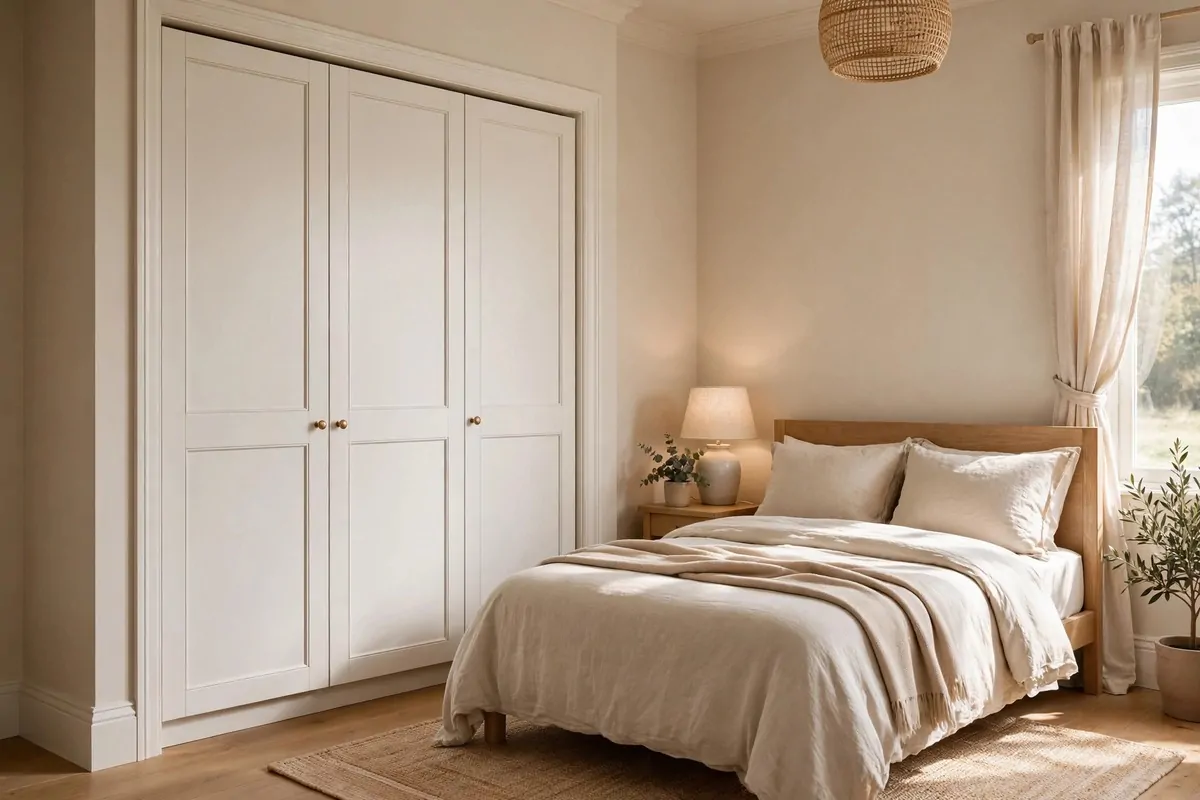
An alcove is that little dip in the wall next to a chimney breast. I used to think it was just dead space. Now I think it is the best spot in the room for a wardrobe.
You do not need to build a big box that sticks out into the room. You fill the gap that is already there. The front of the wardrobe sits flat with the wall, and the room still feels open.
Measure the alcove in three places. I mean top, middle, and bottom. Old walls are rarely straight, and the width can change by a few centimetres.
Take the smallest width you find and work from that number. It is better to have a small gap you can fill than a frame that will not fit at all.
I like a simple painted finish here. It blends with the wall and the room looks calm. You can match the wall colour or go one shade darker for a soft frame effect.
Think about what goes inside before you pick the inside layout. Long coats need height. Folded jumpers need shelves. You can mix both in one tall space.
Leave a little room at the top for a box or two. I keep out of season clothes up there in a plain box with a label. It keeps the main part tidy.
A small alcove wardrobe can hold a lot more than you think. I was shocked the first time I filled one. It took all my everyday clothes and still had space left.
If the alcove is near the bed, put the things you reach for in the morning at eye level. You will thank yourself on busy days when you just want to grab and go.
2. Floor-to-Ceiling Storage for Tiny Bedrooms
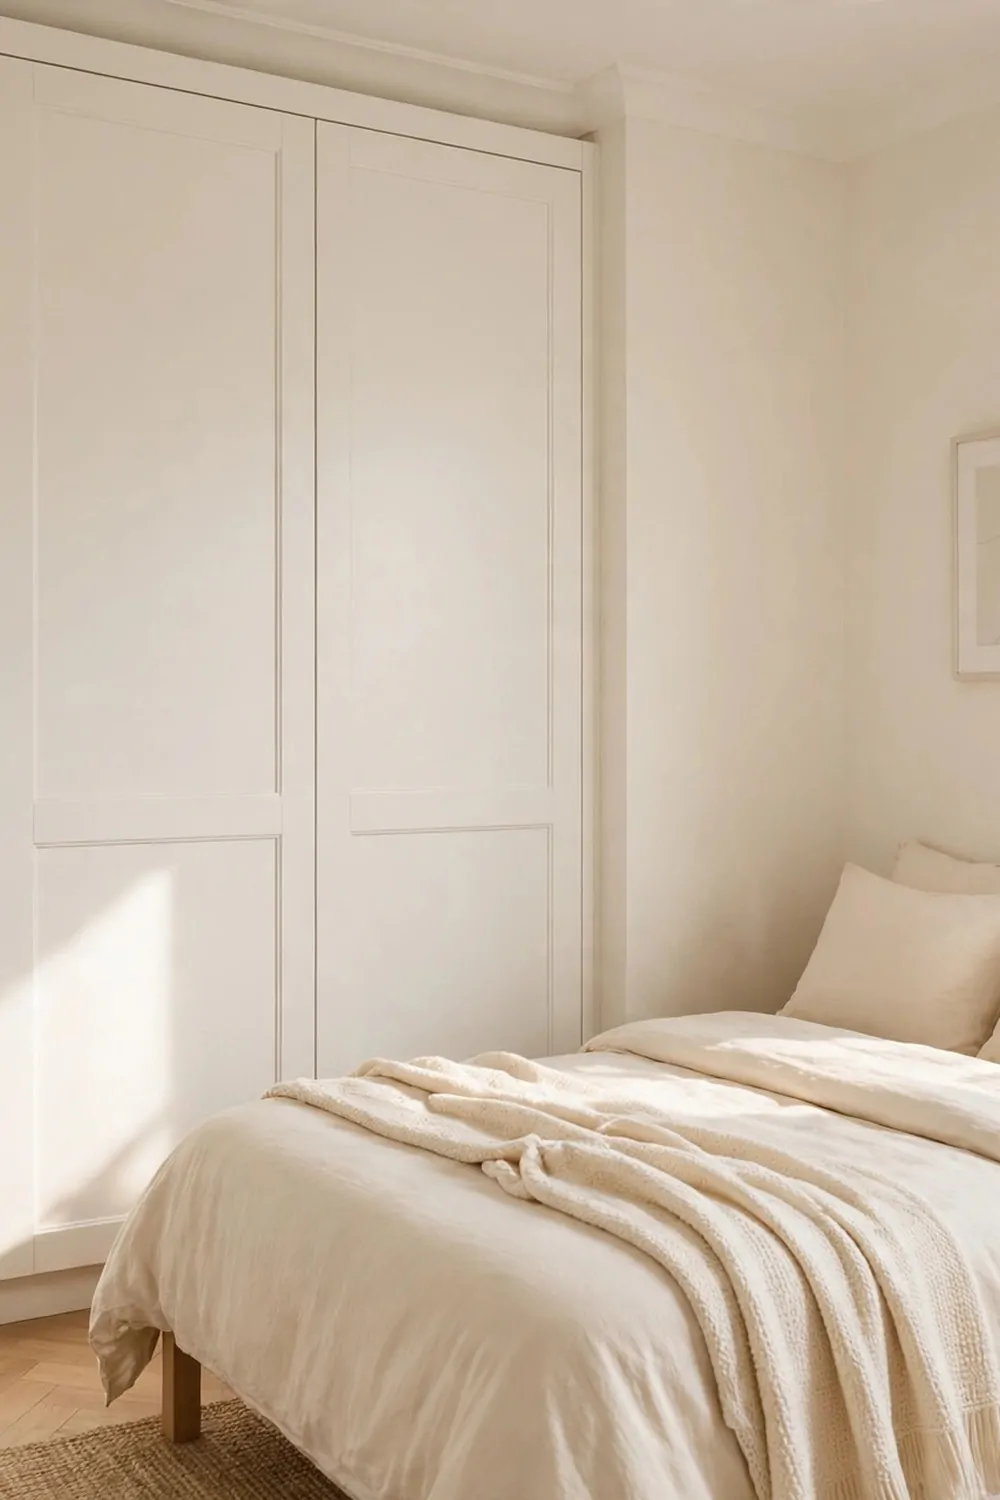
Small bedrooms make me think up, not out. When the floor is full, the wall above your head is still free.
A wardrobe that goes right up to the ceiling uses every bit of height. It looks neat too, because there is no dusty gap on top.
I know it sounds tall and hard to reach. That is why I plan the top part for things I use once in a while. Spare bedding, bags, and winter coats live up there.
Keep a small step stool close by. I keep mine tucked behind the door. It takes two seconds to grab it, and then the top is easy to reach.
For the middle part, put your daily clothes where your hands fall naturally. You should not have to stretch or bend for a shirt you wear all the time.
Low drawers work well at the bottom. I use them for socks, tees, and soft things that fold flat. They slide out and you can see all of it at once.
Paint it the same colour as the wall if you want it to feel light. A tall dark wardrobe can feel heavy in a tiny room. A pale colour just fades into the wall.
Ask for a good fit at the ceiling line. A thin strip of trim can hide a small gap and make it look like the wardrobe grew there.
I love how calm a tiny room feels when the clothes are all behind closed doors. The floor is clear, the bed is the star, and you can breathe a bit more.
3. A Built-In Wardrobe Around a Window
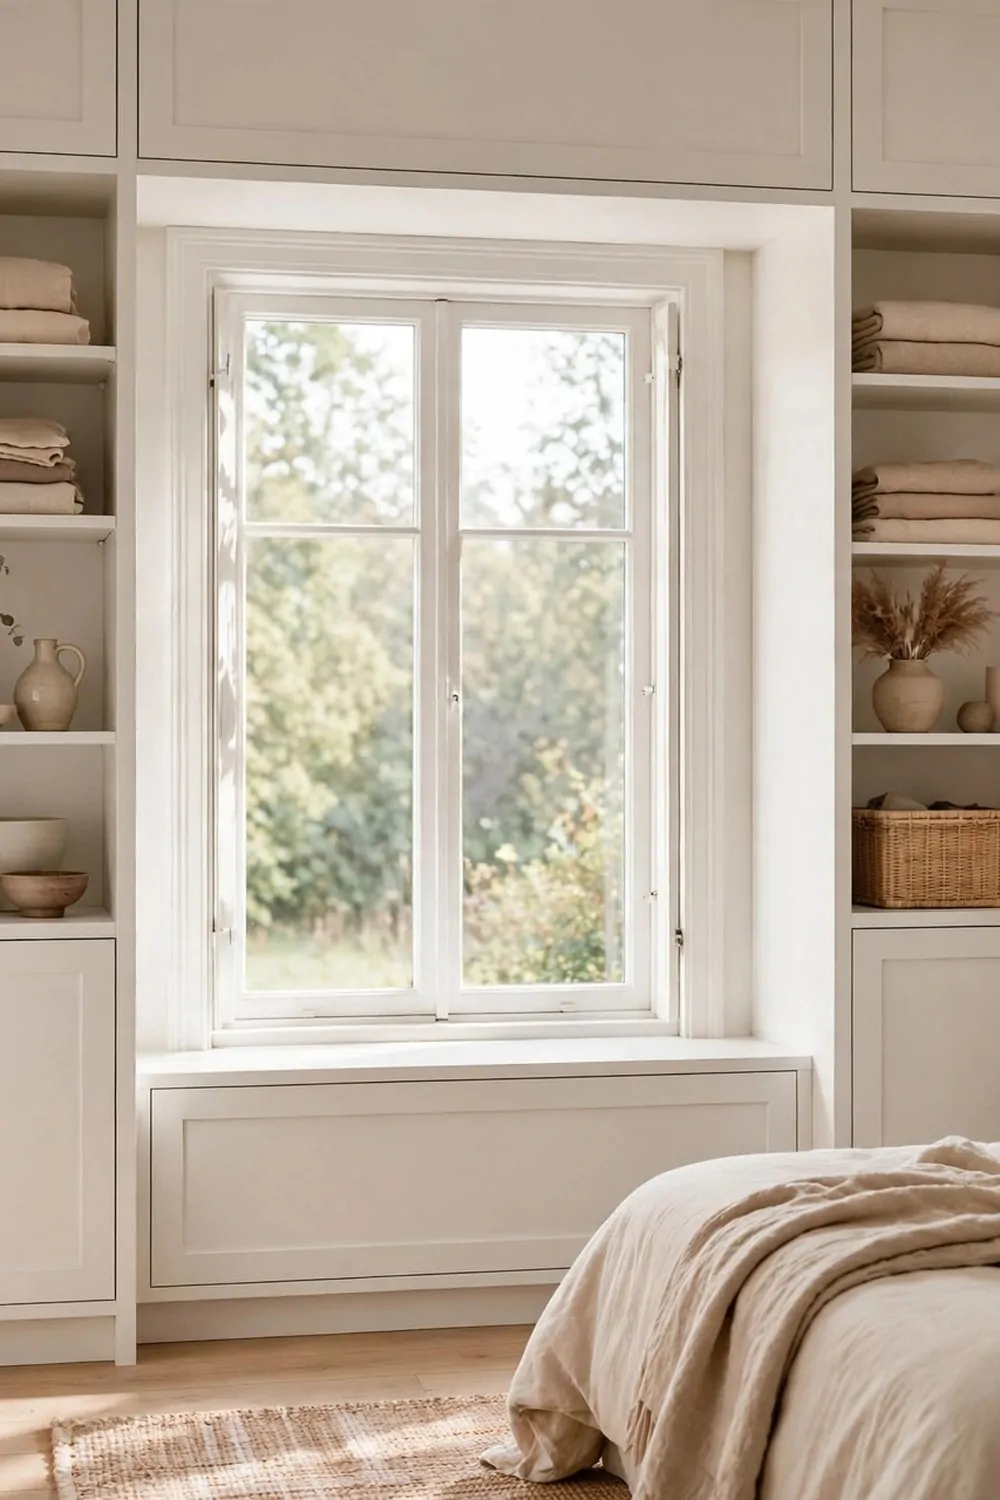
A window wall often feels tricky. You want light, but you also want storage. You can have both if you build around the glass.
I like low units under the window and tall units on each side. The light still comes in, and the sides hold all the hanging clothes.
Keep the top of the low unit clear or use it for a few books. It becomes a little seat or a shelf for a plant. It is a nice spot to sit and put your shoes on.
Measure the window frame first. You need space for the curtains or blinds to move. Nothing should rub or catch when you open them in the morning.
The tall side units can be different inside. One side can hold long dresses. The other side can hold shelves and drawers for folded things.
I would pick a light finish here. The window brings in sun, and a pale wardrobe will bounce that light around the room. It makes the whole bedroom feel fresh.
Think about the sill depth. If the sill sticks out, the low unit needs to sit back a little. A good fitter will shape the back edge to fit around it.
Do not block the window handle. I have seen that mistake and it is so annoying. You need to open the window on a warm day without moving boxes.
This idea works best when the wardrobe looks like part of the wall. Simple doors, no fuss, and the window stays the main feature of the room.
4. Shallow Wardrobes for Narrow Bedrooms
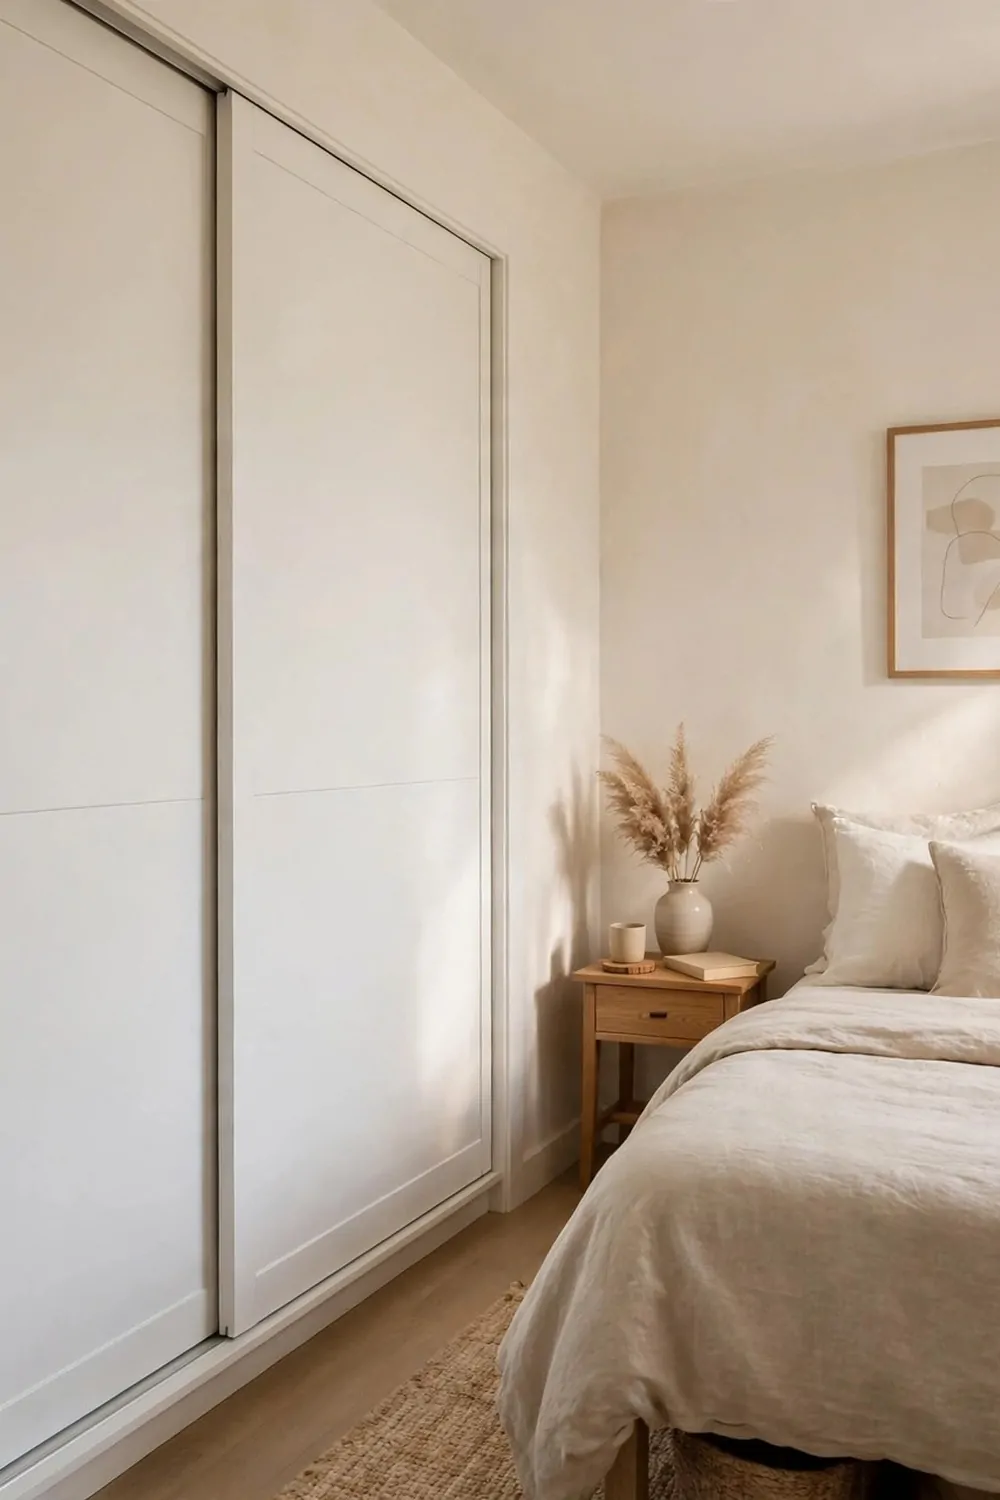
Some bedrooms are so narrow you can almost touch both walls. A deep wardrobe would eat the whole room. A shallow one fits just right.
Shallow means the clothes sit close to the door. Hangers still work, they just sit a bit tighter. I use slim hangers here and they make a real difference.
Folded clothes love shallow shelves. You can see everything in one row. Nothing gets lost at the back, because there is no deep back to lose it in.
I plan the inside in short runs. A rail for tops, a stack of shelves for jumpers, and a small drawer for bits and bobs. It sounds plain, but it works every day.
Keep the doors flat and simple. A flat door does not stick out into the room. It also looks neat when you walk past it in a tight space.
Light colours help a lot in a narrow room. White, cream, or pale grey will make the wall feel further away. Dark colours can close the room in.
Check the door swing before you build. If the wardrobe door hits the bed, you need a different door or a different spot. I always test this with tape on the floor first.
You can still fit a lot in a shallow wardrobe. I counted mine once and it held a full week of outfits, plus coats, plus spare bedding on the top shelf.
The best part is the floor stays clear. You can walk past the bed without turning sideways. That small bit of space makes the room feel much bigger.
5. Deep Wardrobes for Big Bedrooms
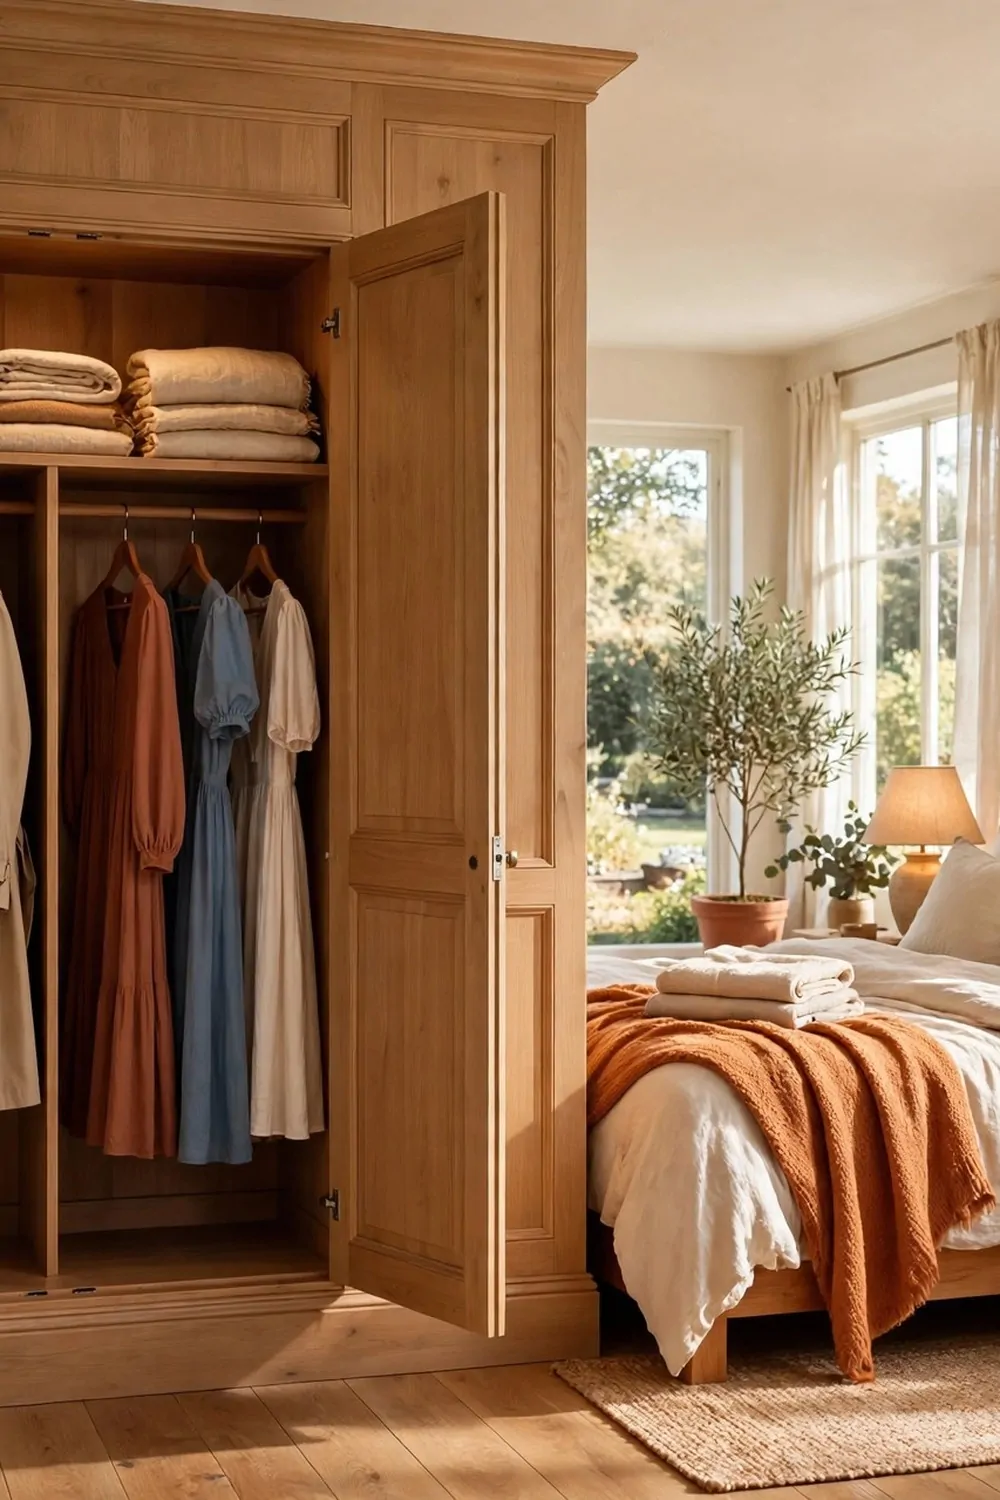
Big bedrooms give you room to go deep. A deep wardrobe can hold bulky coats, big boxes, and all the extra stuff that never fits in a small one.
I like to use the depth in zones. The front zone is for daily clothes. The back zone is for things I use less, like spare quilts and bags.
Pull out baskets help a lot here. You can slide a basket out and see what is inside. Without them, things at the back just get forgotten.
Long hanging space is a joy in a deep wardrobe. Dresses and coats hang straight and do not bunch up. They stay neat and ready to wear.
Put a shelf high up for boxes with labels. I write what is inside on the front in big letters. It saves me pulling every box down to find one thing.
Deep wardrobes can get dark inside. I add a small light near the top so I can see the back corners. It does not need to be fancy, just bright enough to see.
Leave a bit of air between the clothes. If you pack it too tight, the clothes crease and you cannot find anything. A little space makes it easy to use.
Think about the floor in front too. You need room to stand and open the doors wide. In a big room you have that space, so use it and enjoy it.
A deep built in wardrobe feels like a little room of its own. I step in, pick what I need, and step out. It keeps the rest of the bedroom calm and clear.
6. A Wardrobe That Follows a Sloping Ceiling
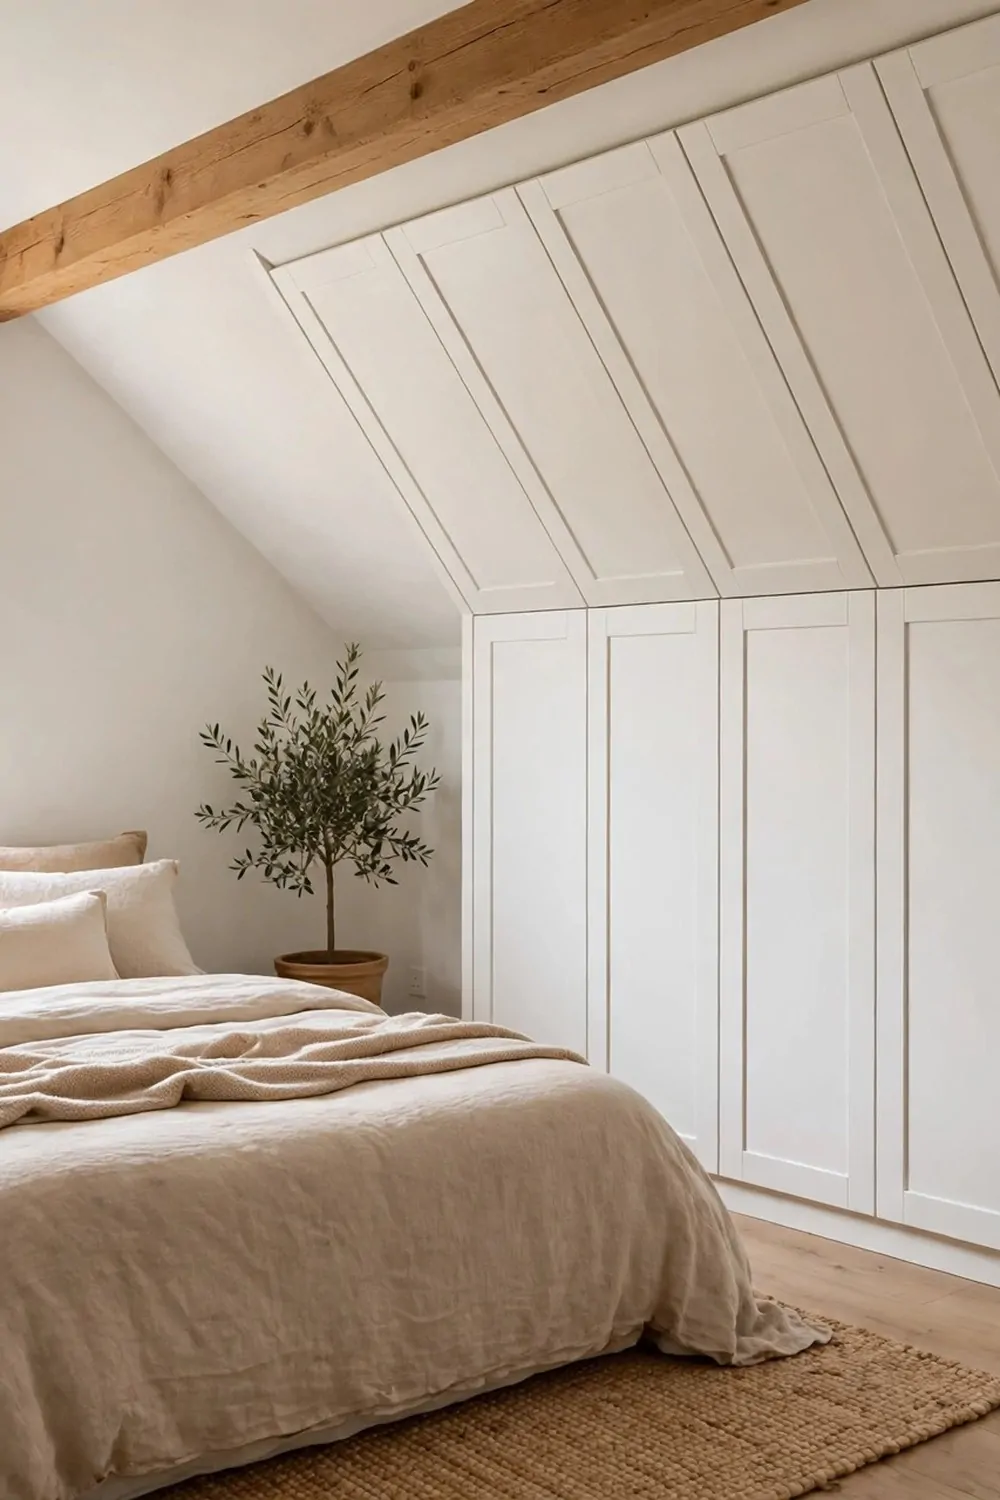
Sloping ceilings look lovely, but they make storage hard. A normal wardrobe leaves a big triangle gap at the top. A built in one can follow the slope instead.
I start by measuring the height at lots of points along the slope. The ceiling drops a little at a time, and each point matters for the fit.
The tall side holds the long clothes. The low side holds drawers and shelves for folded things. It sounds odd, but it uses the shape really well.
Do not try to force a straight top edge. Let the fitter cut the top to match the slope. A snug fit looks like the wardrobe was always part of the room.
Short hanging rails work in the middle height. I use them for shirts and tops. They fit where a long rail would hit the ceiling.
Keep the doors in step with the slope too. Short doors on the low side, tall doors on the high side. It looks neat and it feels right when you open them.
I like open shelves in the lowest corner. You can see shoes or folded jumpers at a glance. It also stops that low corner from becoming a dark hole.
Paint the wardrobe the same as the ceiling if you want it to blend in. The slope will just flow down into the doors and the room will feel calm.
This is one of my favourite fits. It turns a tricky corner into the best storage in the house. No wasted space, no awkward gap, just a wardrobe that fits the room.
7. Sliding Doors on a Built-In Frame
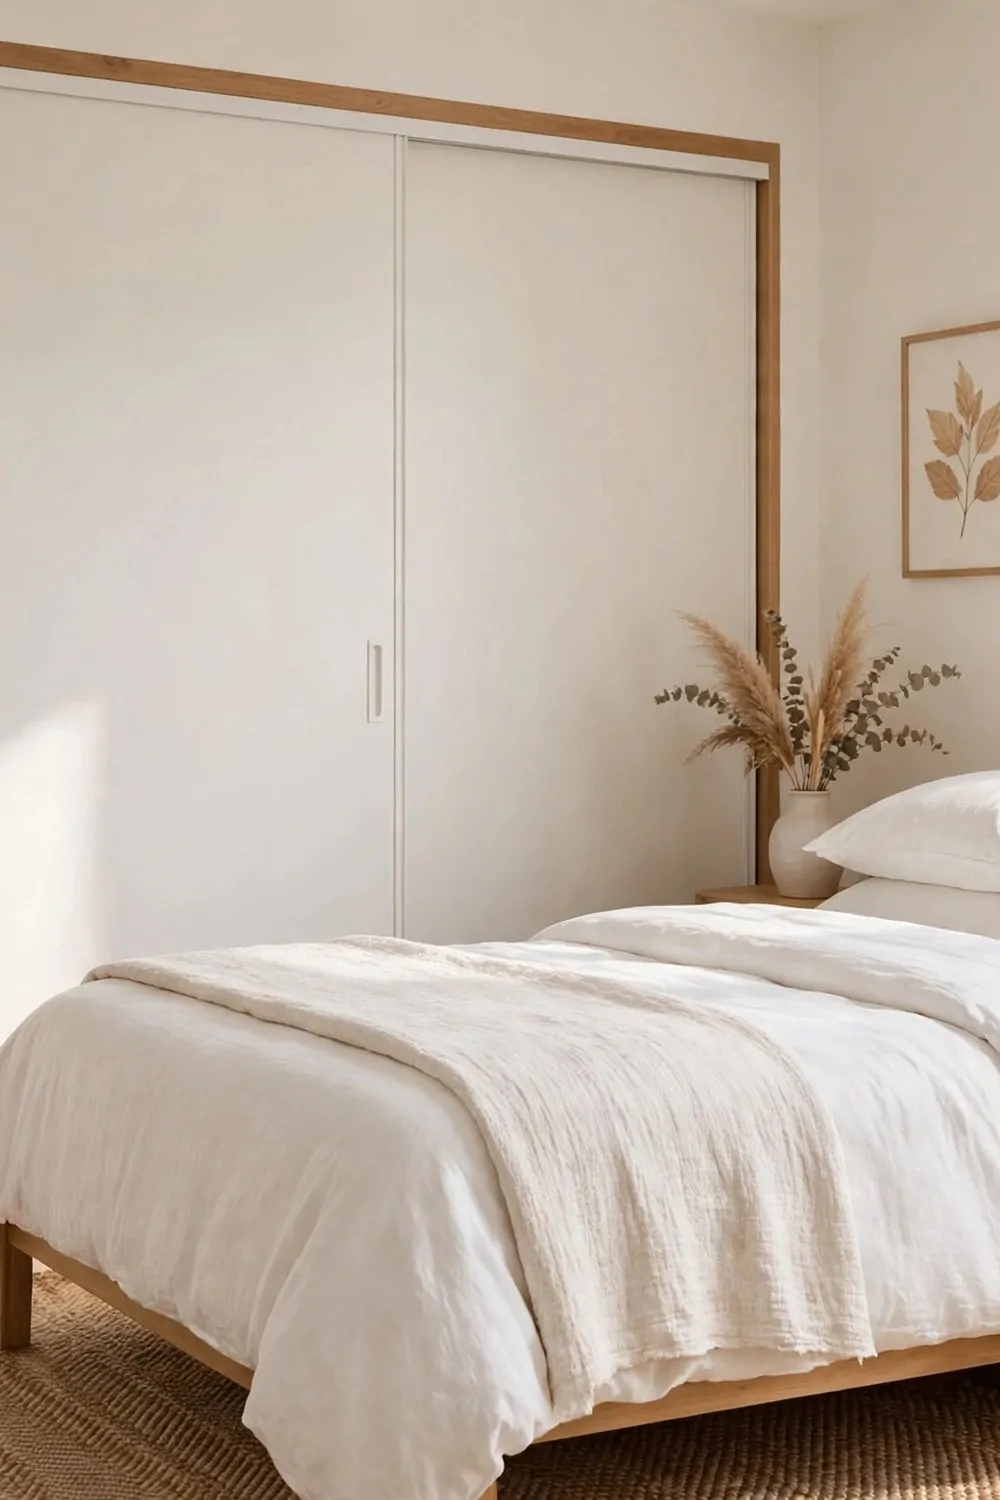
Sliding doors run on a track, so they glide side to side. I like them when the bed sits close to the wardrobe and a door that swings out would hit it.
The frame matters more than the door here. A strong frame keeps the track level and the doors glide smooth for years. A wobbly frame makes the doors stick.
Ask for a track you can clean. Dust builds up in tracks and then the doors drag. A quick wipe once a month keeps them moving like new.
I plan the inside so each door covers one half at a time. You open one side, pick what you need, and slide it shut. It becomes a habit fast.
Plain panels look best on a sliding frame. Too much detail can look busy when the doors move. I pick a flat panel and let the colour do the talking.
Check the floor is level before the frame goes in. If the floor dips, the track will dip too. A good fitter will pack the track up until it sits true.
Handles should sit flat or in a small cut out. A handle that sticks out can catch on clothes as the door slides past. I learned that one the hard way.
You can split the inside by person or by type. One side for hanging, one side for shelves. The doors just hide it all when you slide them closed.
I love the quiet feel of a sliding door. No bang, no swing, just a soft glide. It suits a calm bedroom and it keeps the walkway clear.
8. Hinged Doors With a Shaker Frame
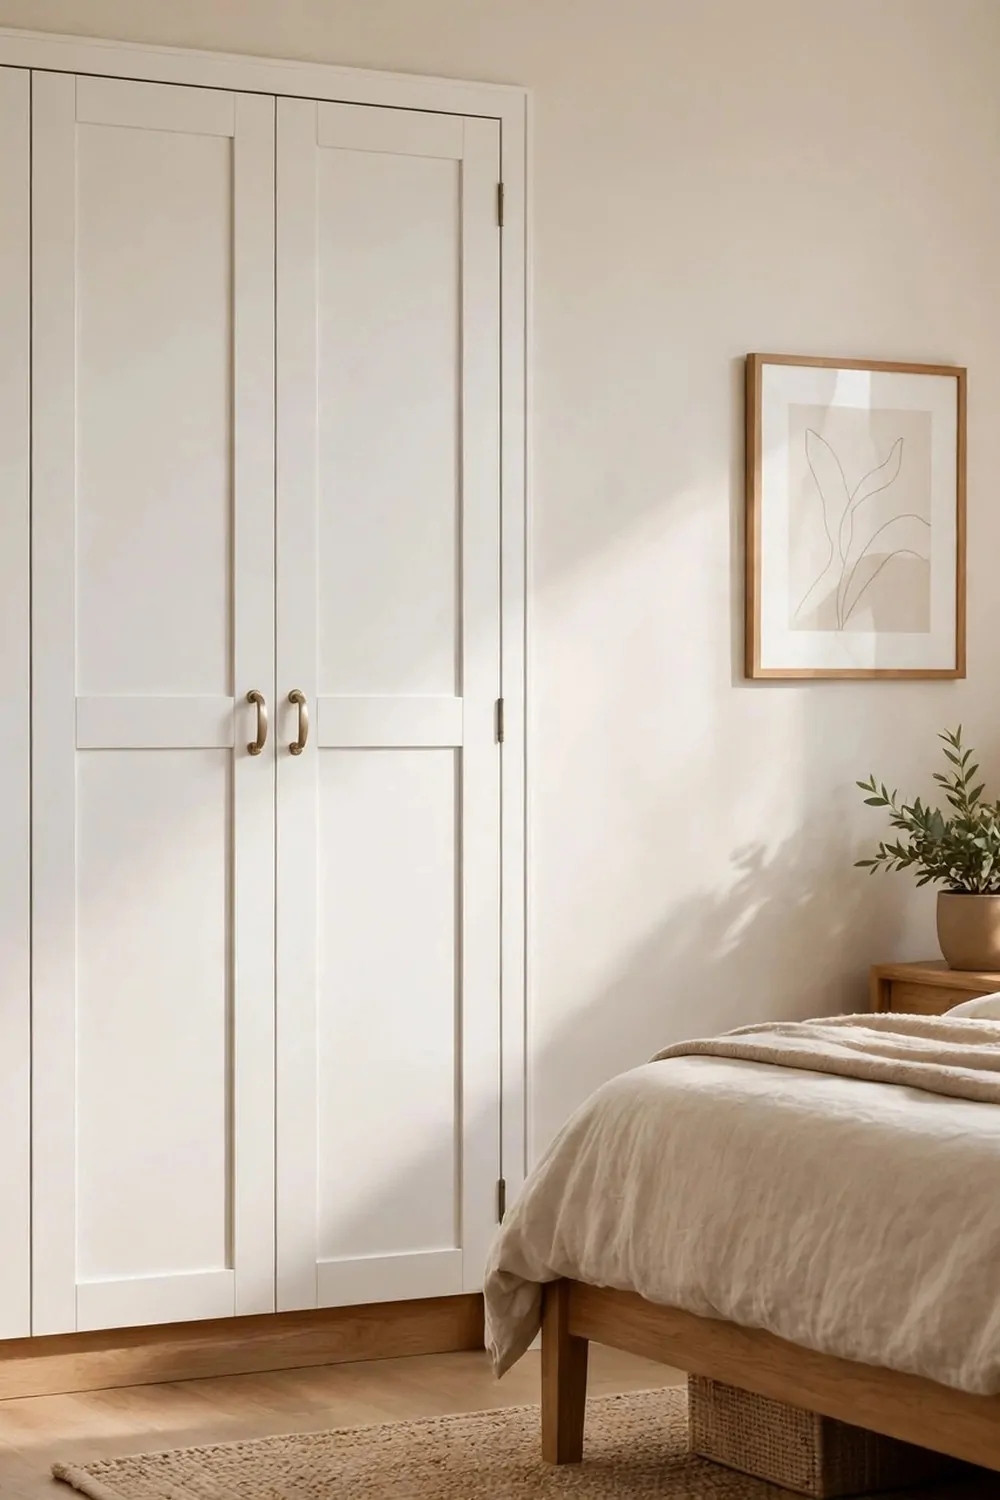
Hinged doors open out on small hinges. I like them because you can open both doors wide and see the whole inside at once.
A Shaker frame has a flat panel with a simple border around it. It is not fussy. It suits old houses and new houses, and it never looks dated to me.
Pick a hinge that lets the door open wide. Some hinges stop at a right angle. A wide hinge lets you reach the corners without a struggle.
I like a small knob or a cup handle on a Shaker door. It feels nice in the hand and it fits the simple style. Big modern handles can look wrong here.
Painted Shaker doors are easy to live with. If a mark shows up, you can touch it up with a small brush. It takes five minutes and looks fresh again.
Think about the gap between the doors. A thin even gap looks smart. A wide uneven gap looks like a mistake. Ask the fitter to set it with care.
Inside, I keep the layout simple. A rail, some shelves, and a drawer or two. The plain outside hides a very useful inside, and that is the point.
Shaker doors work well in a pair or in a long run. I have seen four doors in a row and it still looks calm. The same frame repeats and the eye just rests.
If you want a classic bedroom, this is my pick. It is simple, sturdy, and it will still look good in ten years. I would choose it again and again.
| Wardrobe depth | What fits | Best for |
|---|---|---|
| 45 cm shallow | Shirts and folded clothes on short rails | Narrow bedrooms and hallways |
| 60 cm standard | Coats, dresses and hangers that turn freely | Most bedrooms, small and large |
| 70 cm deep | Bulky coats, storage boxes and shoes | Large bedrooms with room to spare |
9. Bi-Fold Doors for Tight Corners
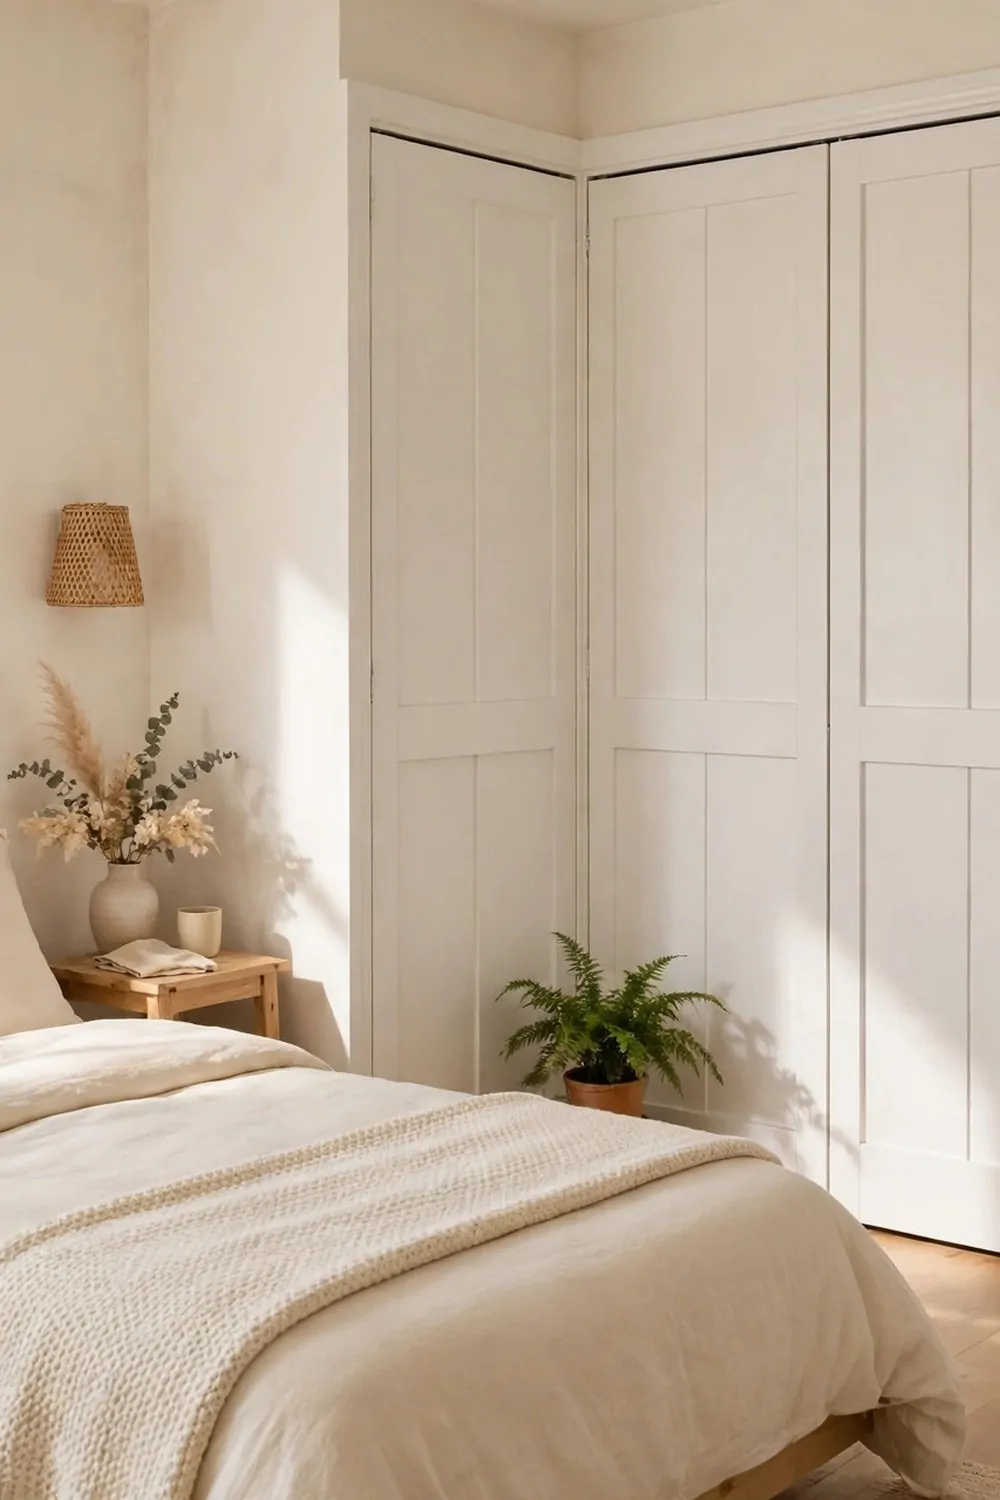
Bi-fold doors fold in the middle like a book. I like them in a tight corner where a full door would hit the wall or the bed.
Each door folds back on itself, so it takes up half the space when open. You can stand close and still reach inside without stepping back.
The track at the top guides the fold. It needs to be straight and strong. If the track bends, the doors will catch and fold badly.
I use bi-fold doors in a corner wardrobe a lot. The corner is deep and hard to reach, and a wide fold opening helps you see right into it.
Keep the fold parts light. Heavy doors can sag on the track over time. A light panel with a simple frame folds easy and stays true.
Handles should sit near the fold line. That is where your hand naturally goes to pull the door. Put them too far out and the fold feels awkward.
Inside, put the things you use most near the opening. The deep back corner is for spare stuff. That way you are not reaching past daily clothes every morning.
Bi-fold doors suit a small room because they do not need a big swing space. I can open them in a narrow gap and still get dressed in peace.
They look neat when closed too. The fold line makes a soft vertical line down the front. It adds a little detail without being loud.
10. A Built-In Wardrobe in a Bay Window Nook
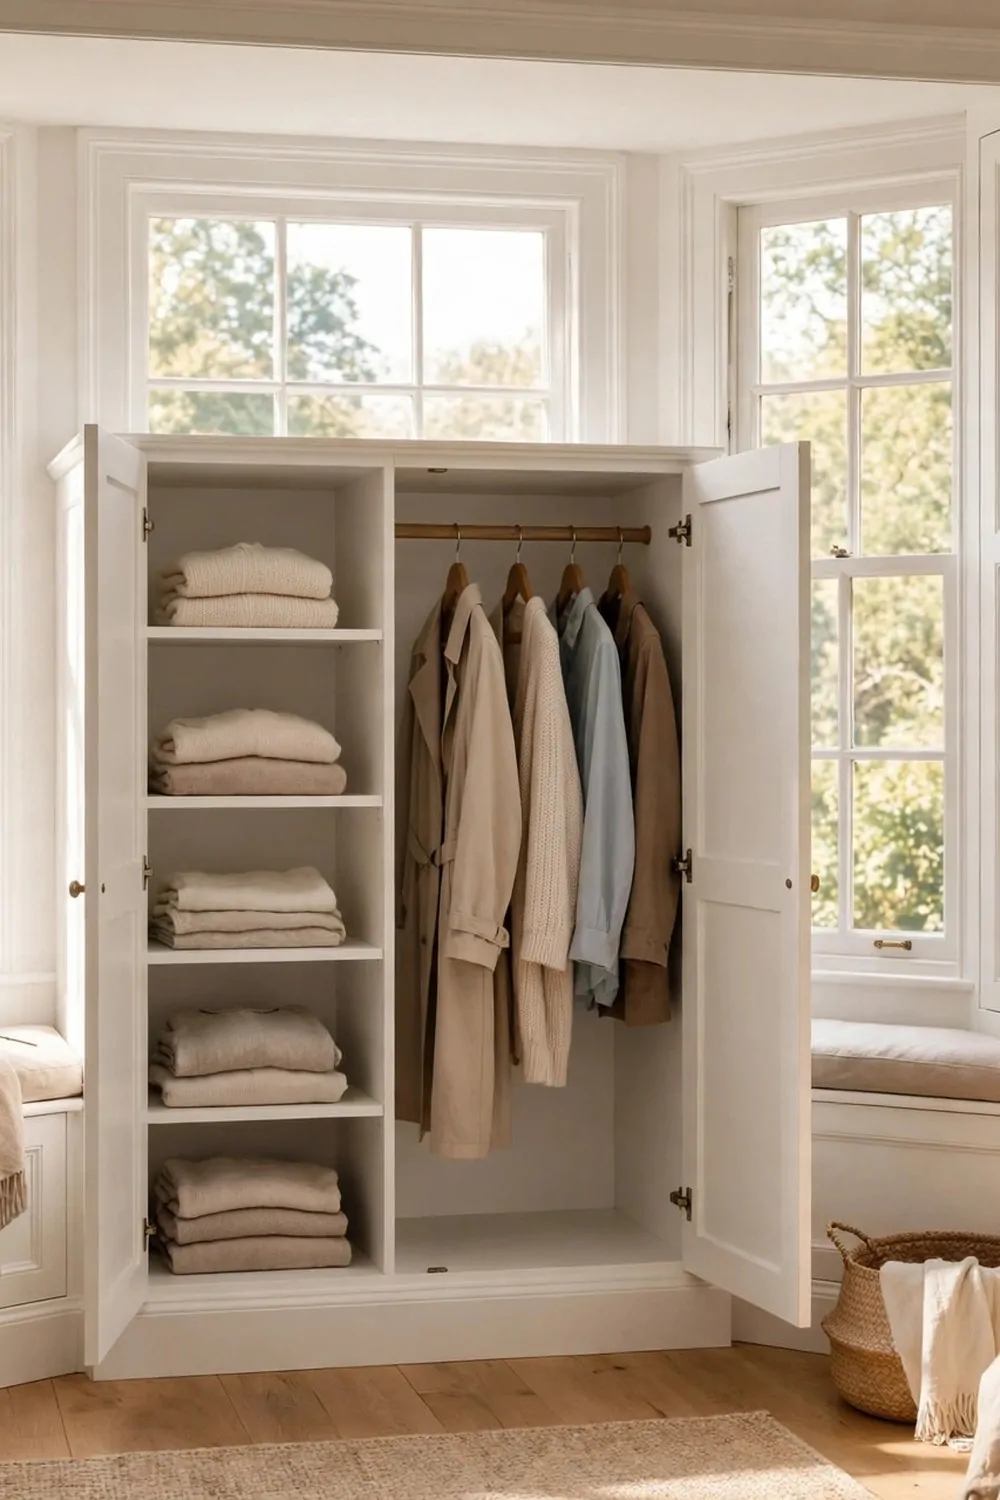
A bay window makes a lovely nook. The walls angle out, the light pours in, and there is often a dead space on each side that begs for storage.
I build low wardrobes into the sides of the bay. They sit under the window line and leave the glass clear. The bay still feels open and bright.
The angles are the tricky part. Bay walls are rarely at a neat right angle. I measure each angle with care and let the fitter cut the ends to match.
Use the low units for folded clothes and shoes. They are easy to reach from the bed and they keep the floor free. I put a cushion on top sometimes and it becomes a seat.
Tall units can sit on the flat wall next to the bay. That gives you hanging space without blocking the window. The mix of low and tall works really well.
Keep the finish pale in a bay. The light hits it all day and a pale colour will glow a little. A dark finish can look heavy next to all that glass.
Watch the radiator if there is one under the bay window. Clothes need air flow and the heat needs somewhere to go. Leave a gap and do not block the vents.
I love sitting in a bay nook with a cup of tea. When the storage is built in, the seat is clear and the room feels like a calm retreat.
This fit turns a pretty window into a useful one too. You get light, a seat, and storage in one spot. That is a win in any bedroom.
11. Two Wardrobes With a Dressing Table Between Them
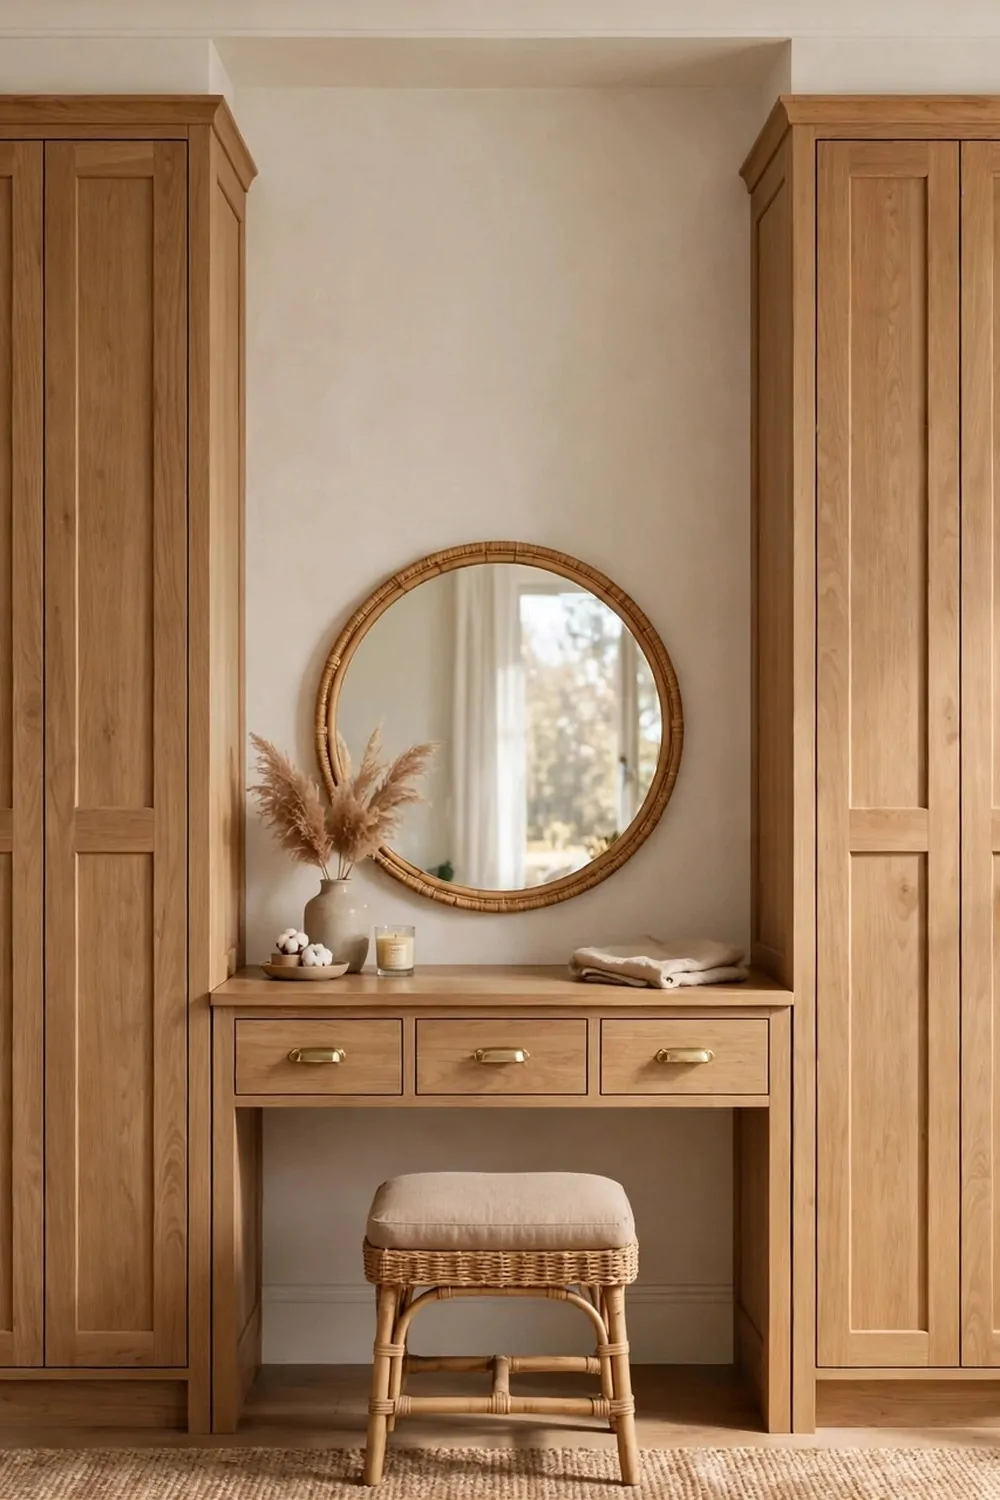
Two tall wardrobes with a dressing table in the middle feels so balanced. I love the symmetry. It looks planned and it works hard too.
The middle gap is your getting ready spot. A small table, a mirror, and a stool fit right there. You sit down, do your hair, and pick your clothes without walking across the room.
Keep the table height right for sitting. Too high and your arms ache. Too low and you hunch. I test it with a chair before the build starts.
Use the wardrobes on each side for different things. One side can hold hanging clothes. The other side can hold folded clothes and drawers for small items.
A mirror above the table bounces light into the room. I pick a simple frame that matches the wardrobe doors. It ties the whole wall together.
Small drawers in the table are gold. I keep brushes, clips, and little bits in them. The top stays clear and I can see what I am doing.
Make sure there is a plug near the table. A hair dryer needs power, and a trailing lead across the room is a trip hazard. I ask for a plug at table height.
The whole wall can be one colour for a calm look. Or you can paint the table a soft contrast colour to make it stand out a little. Both look lovely.
This setup saves so much time in the morning. Clothes, mirror, and table are all in one place. I get ready, close the doors, and the room is tidy again.
12. His and Hers Sides in One Big Wardrobe
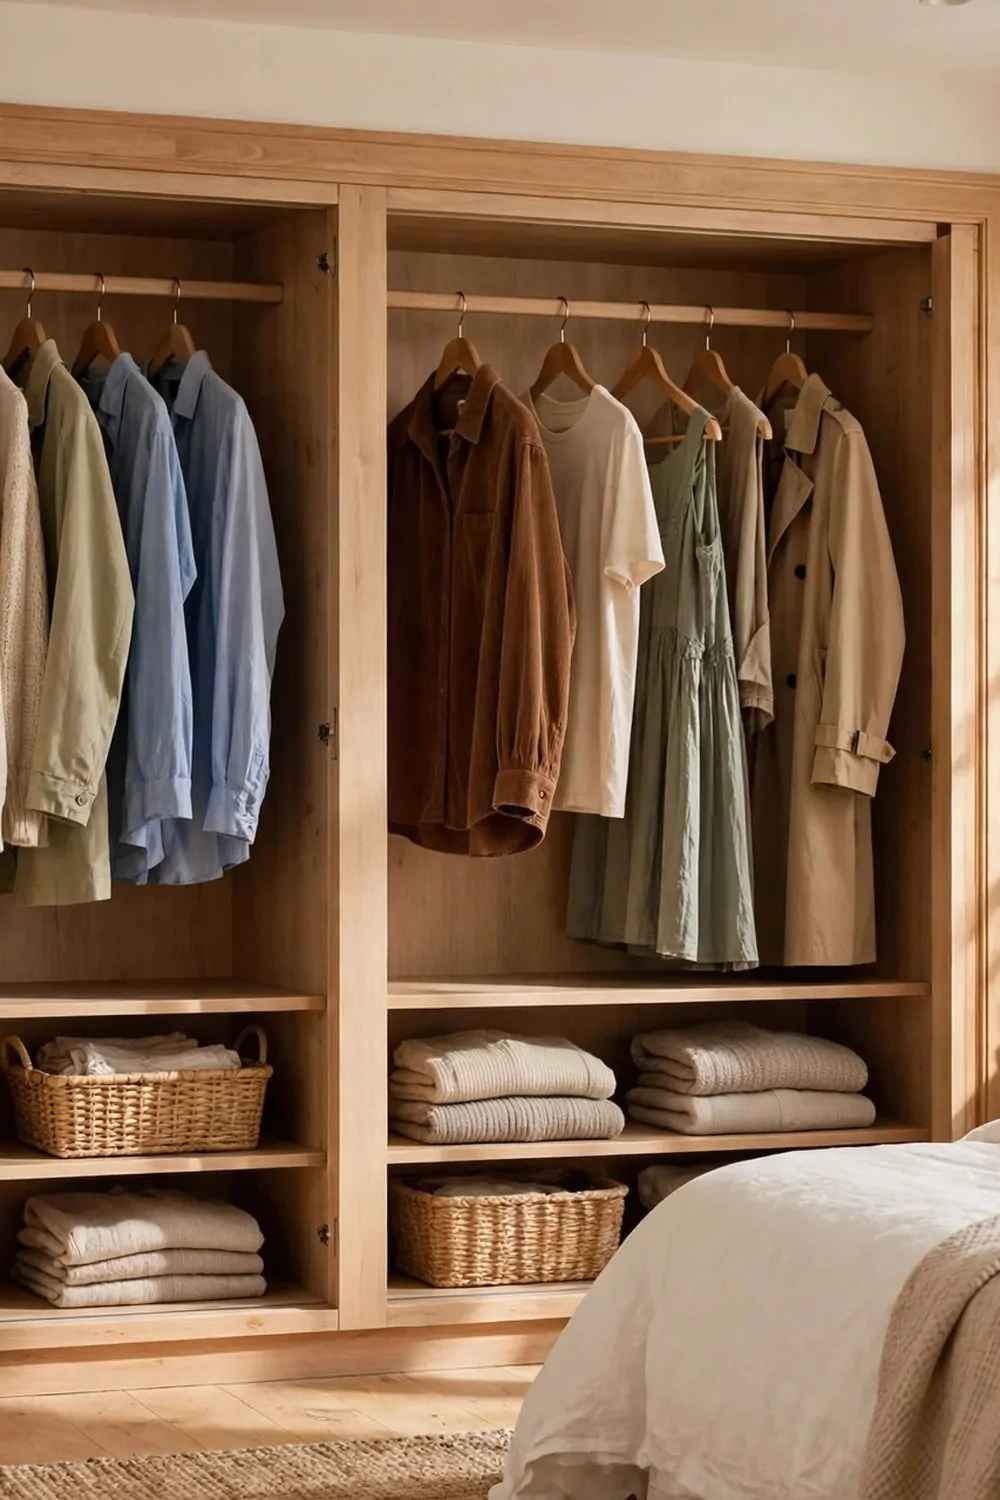
Sharing a wardrobe can cause little rows. His shirts end up on her side. Her dresses take over his rail. A split inside fixes that fast.
I draw a line down the middle and give each person their own half. It sounds simple, but it stops the daily mix up. Each side is yours to keep as you like.
The halves do not need to match inside. One side may need more hanging space. The other side may need more shelves. Build each half for the person who uses it.
Labels help at first. I put a tiny label inside each door until we both knew our side. After a week, we did not need them any more.
Shared drawers in the middle can work if you agree the split. I use one drawer each at the bottom and a shared top drawer for bits we both use.
Keep the doors the same on the outside. The wardrobe looks like one calm piece from the room. The split is just a smart secret inside.
Talk about heights before you build. A tall person needs a higher rail. A shorter person needs shelves they can reach. It is worth a quick chat first.
I like a small divider in the middle that goes all the way up. It stops clothes sliding across. It also makes each side feel like its own little wardrobe.
This idea is less about style and more about peace. When each person has their own space, mornings are calmer. And a calm morning is worth a lot.
13. A Built-In Wardrobe Around the Bed
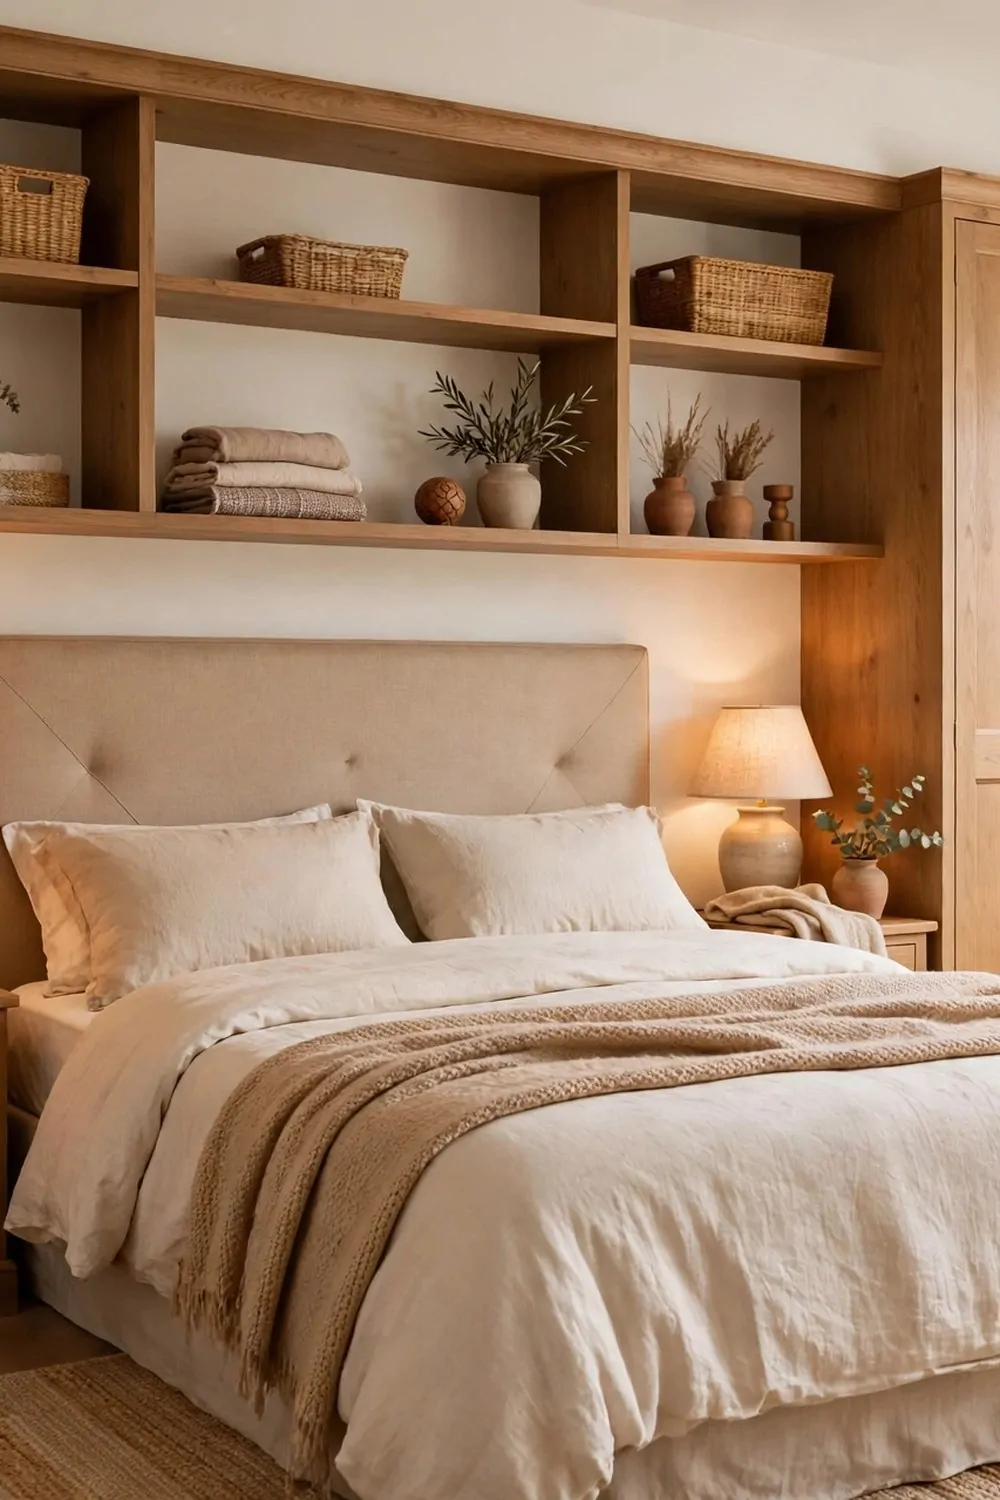
Building a wardrobe around the bed sounds bold. I was nervous the first time I saw it. But when it is done well, it feels cosy, not closed in.
The trick is to keep the bed as the centre. Tall units sit on each side, and a bridge unit goes over the top. The bed stays the star of the room.
Leave plenty of headroom above the bed. You need to sit up without bumping the bridge unit. I measure sitting height and add a good bit extra.
Use the side units for clothes you wear a lot. They are right there when you wake up. You can reach a jumper without getting out of bed on a cold morning.
The bridge unit is perfect for spare bedding and out of season clothes. I use labelled boxes up there. They are out of sight but easy to pull down.
Keep the front faces flat and pale. A flat pale front will not loom over the bed. A dark busy front can feel heavy when you lie down at night.
Think about the bedside tables too. You still need a spot for a glass of water and a book. I leave a small gap or build a little shelf at bed height.
This fit works best in a room with a high ceiling. If the ceiling is low, the bridge can feel too close. I always check the height twice before I say yes.
I love how snug this feels at night. The bed sits in its own little nook, the clothes are close, and the room feels warm and safe.
14. Pull-Out Trouser Racks and Tie Rails
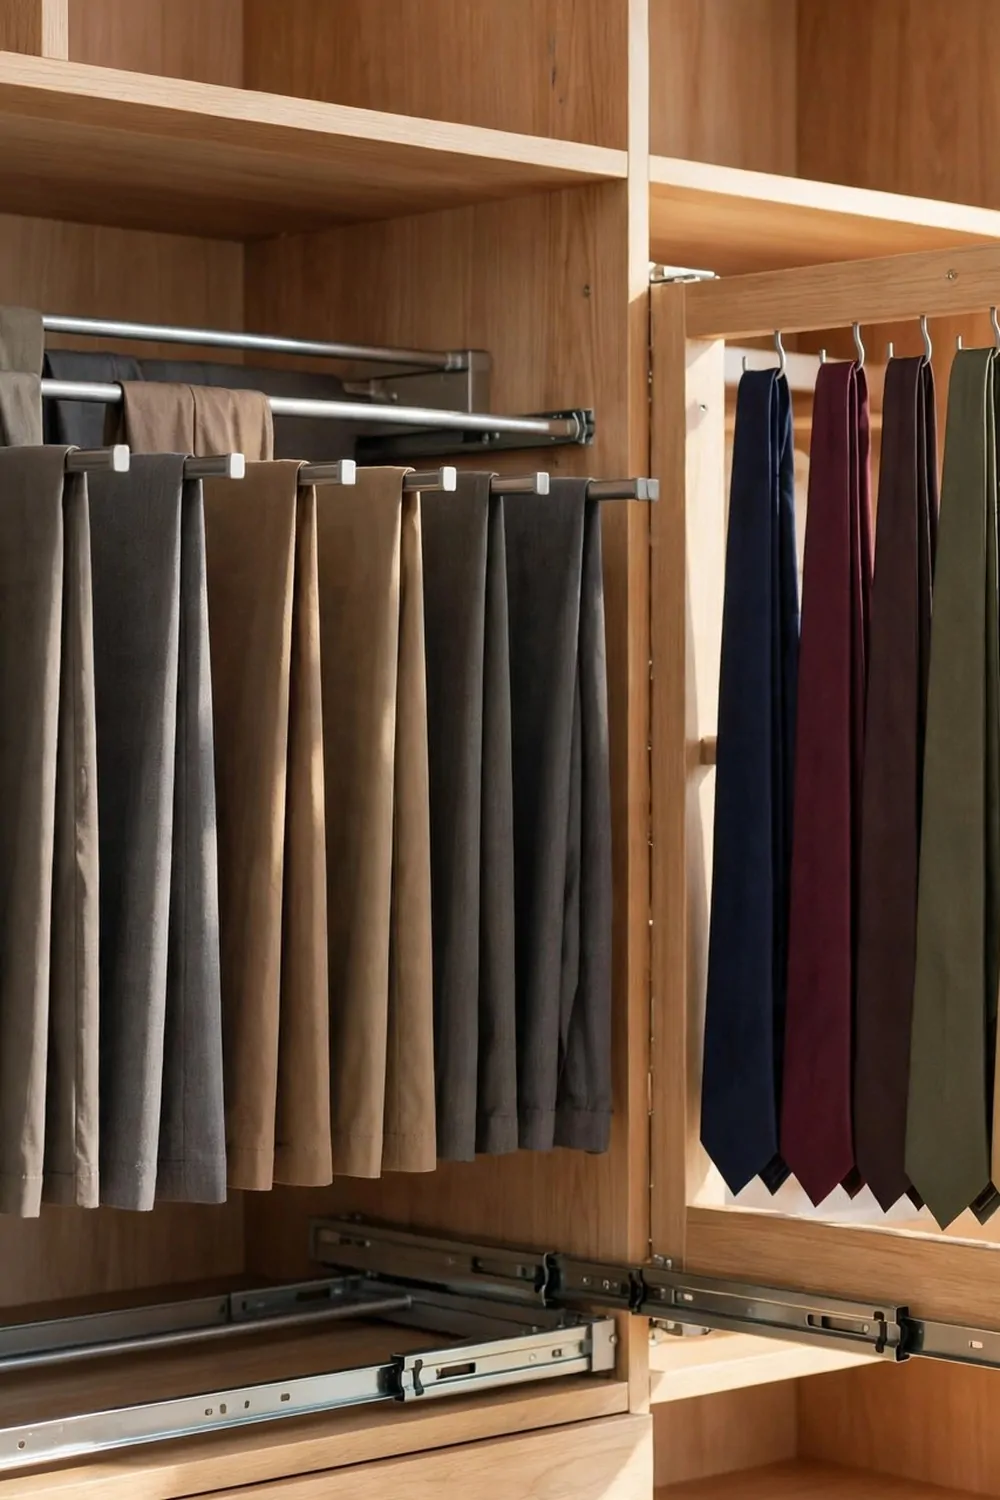
Trousers crease so easily when they are folded in a pile. A pull out rack keeps each pair hanging straight. I pull it out, pick a pair, and push it back.
The rack slides on runners, just like a drawer. I like smooth runners that do not stick. A sticky rack is annoying every single morning.
Hang each pair over its own bar. They do not touch each other, so they stay neat. I can see all the colours at once and pick fast.
Tie rails work the same way. A small rail pulls out and holds ties in a neat row. No more tangled ties in a drawer, no more hunting for the right one.
Put these pull outs at waist height if you can. That is the easy reach zone. Too high and you cannot see the ties. Too low and you bend every time.
I keep the rack near the shirts. Trousers and shirts go together in the morning, so it makes sense to keep them side by side. It saves steps.
Measure the depth before you order the rack. A rack that is too long will hit the back of the wardrobe. A rack that is too short wastes space.
Belts can hang on a small hook at the end of the rail. I added one hook and it holds three belts. It is a tiny thing, but it keeps the drawer clear.
These small pull outs make a wardrobe feel smart. They are not showy, but they make getting dressed so much easier. I would not build a wardrobe without them now.
15. A Shoe Wall Inside a Built-In Wardrobe
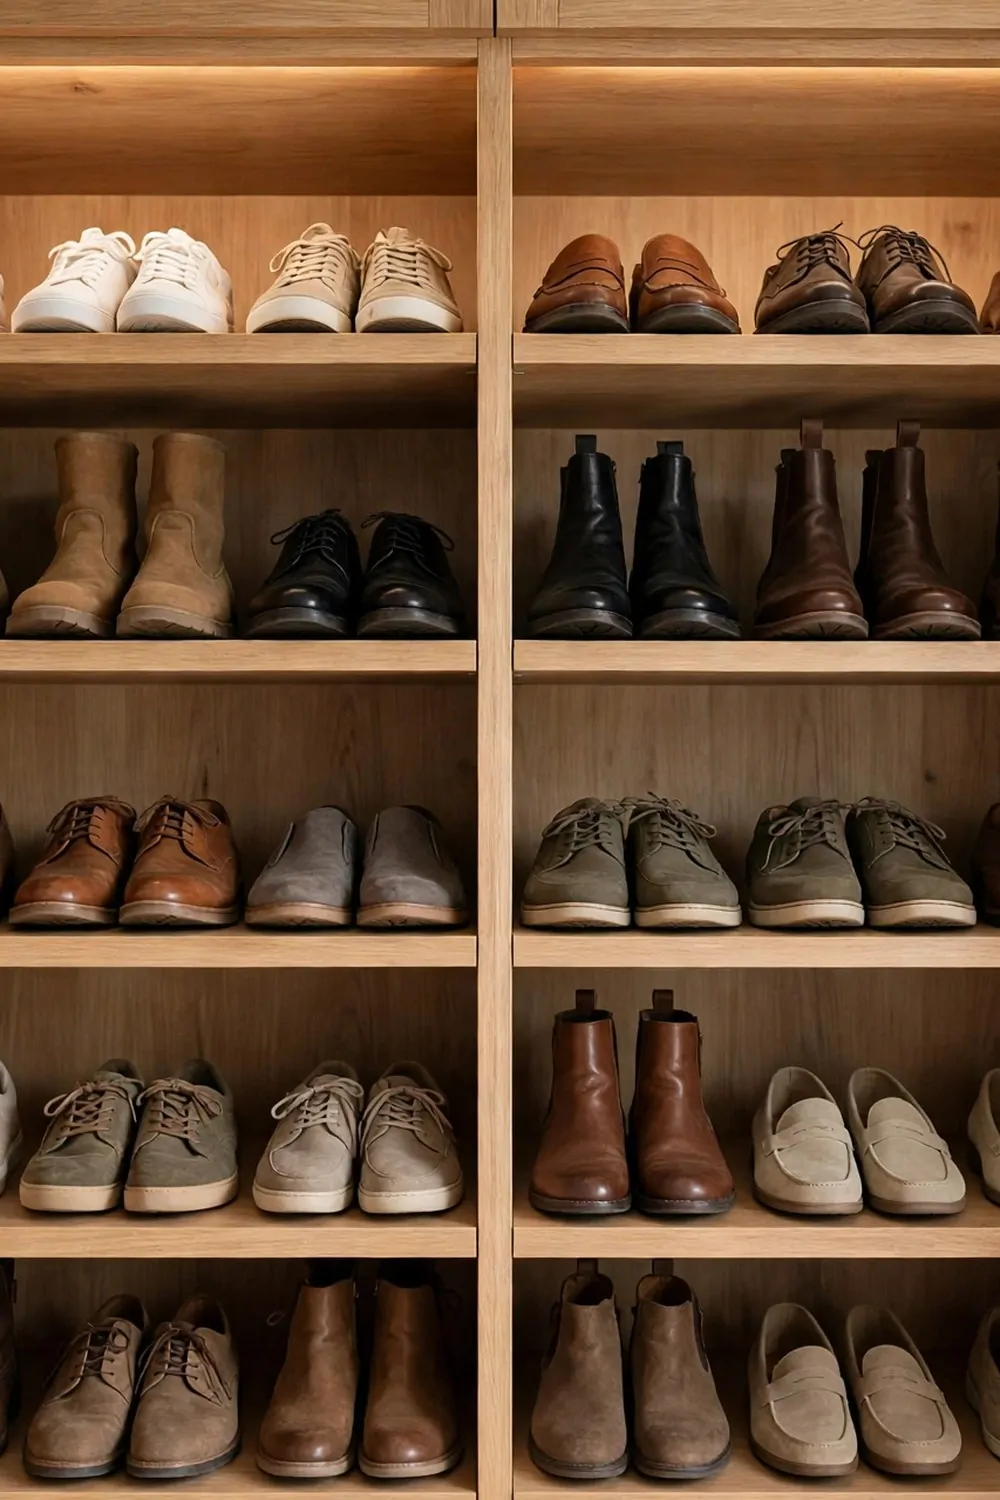
Shoes end up everywhere if they have no home. A shoe wall inside the wardrobe gives each pair its own spot. I open the door and I can see them all.
I build the shoe wall as a tall narrow run. Each pair sits on its own ledge, toe in or toe out. I can scan the rows and pick in seconds.
Angled ledges help me see the shoes better. A flat ledge hides the pair behind it. A slight angle lifts the front pair up so I can see the colour and style.
Keep everyday shoes at the middle height. Boots and heels you wear less can go higher or lower. Your feet will thank you for not bending for trainers every day.
Leave a space at the bottom for tall boots. I keep mine standing straight with a boot shaper inside. They do not flop over and they keep their shape.
A shoe wall needs air. I leave small gaps between the ledges so air can move. Damp shoes dry faster and the wardrobe stays fresh.
I wipe the ledges once a week. It takes two minutes with a damp cloth. Dust builds up fast near shoes, and a quick wipe keeps it tidy.
Count your pairs before you build. I counted mine and was shocked. Knowing the number helps you plan enough rows without guessing.
This wall changed how I get dressed. I pick shoes to match the outfit, not just the pair on top of the pile. It feels like a little shop, just for me.
16. Open-Frame Built-Ins for a Boutique Feel
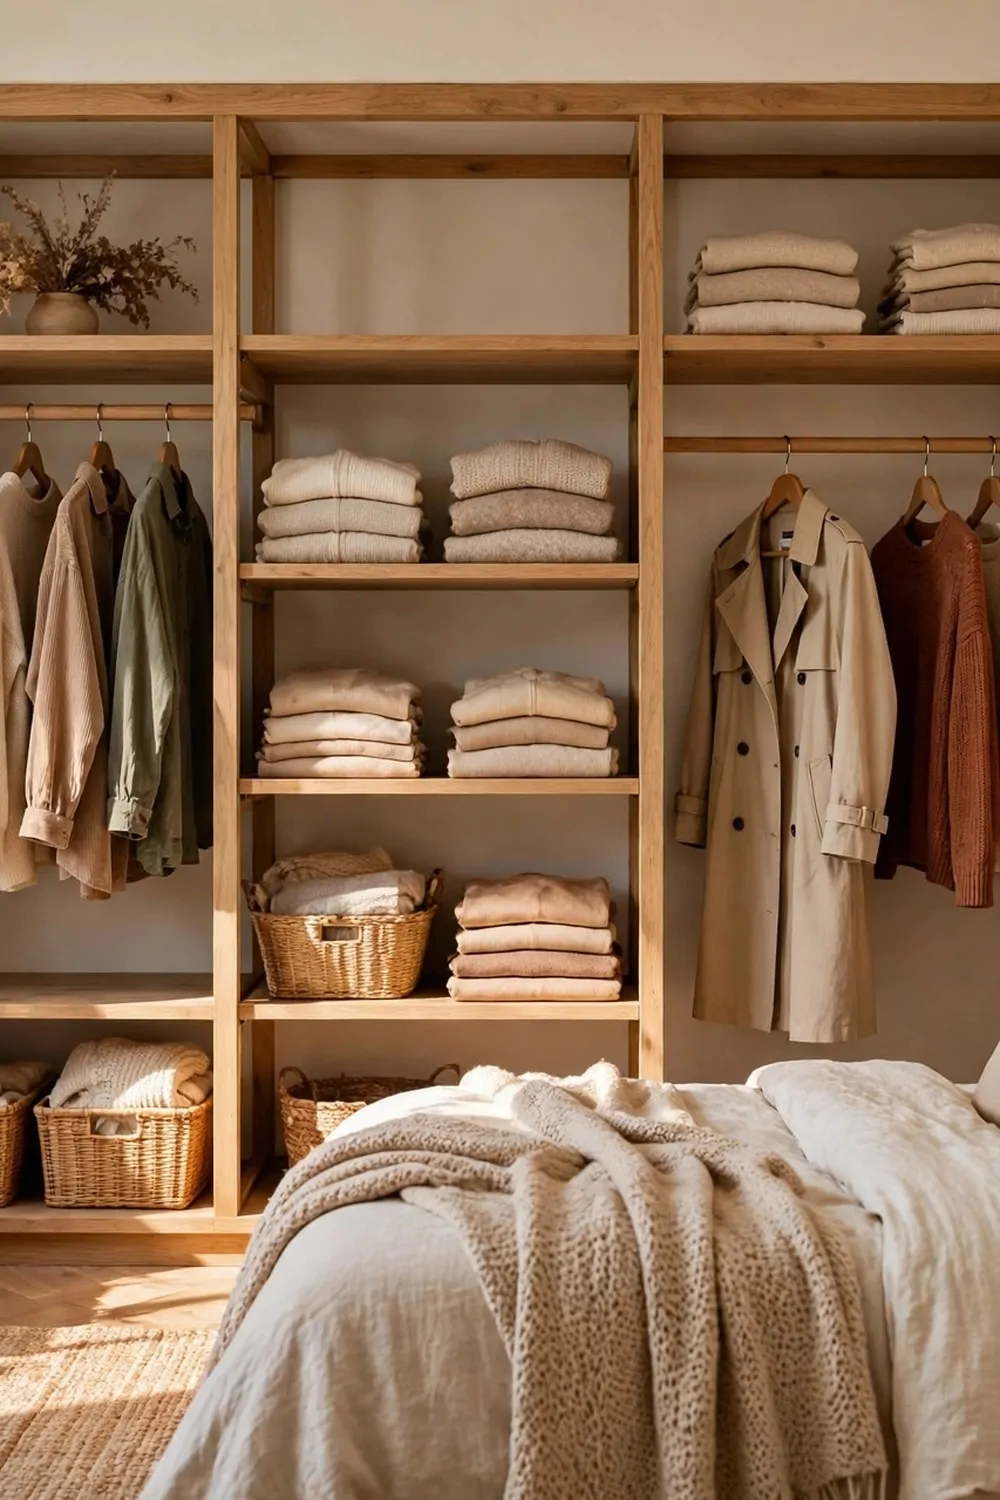
I love how an open-frame built-in makes a bedroom feel like a small shop. You see your clothes, your bags, and your shoes all in one neat row. It feels light and airy, not heavy like a big closed cupboard.
Start with a simple frame fixed to the wall. You can use painted wood or pale MDF for the uprights and shelves. Keep the frame slim so it does not eat up floor space.
Hang a rail at a height you can reach with ease. I put my most worn tops and dresses on the top rail. I keep jeans and skirts on a lower rail so I can see them all at once.
Add open shelves for folded jumpers and T-shirts. I fold mine in neat stacks of four or five. It stops the pile from toppling over when I pull one out.
Use baskets on the bottom shelf for socks, scarves, and belts. I like woven baskets because they hide the small messy bits. You can pull one out like a drawer and put it back in seconds.
Leave a little empty space on purpose. I know it sounds odd, but a gap here and there makes the whole thing look calm. A packed frame feels busy, and a frame with breathing room feels smart.
Add a small mirror on the side of the frame if you have room. I check my outfit in it each morning. It saves me walking to the hall mirror with my shoes half on.
Keep the colours soft and simple. I use white, cream, and light wood in my open built-in. Your clothes add the colour, so the frame does not need to shout.
Dust it once a week with a dry cloth. Open shelves do catch dust faster than closed doors. A quick wipe keeps it fresh, and it only takes a few minutes.
17. A Built-In Wardrobe With a Window Seat
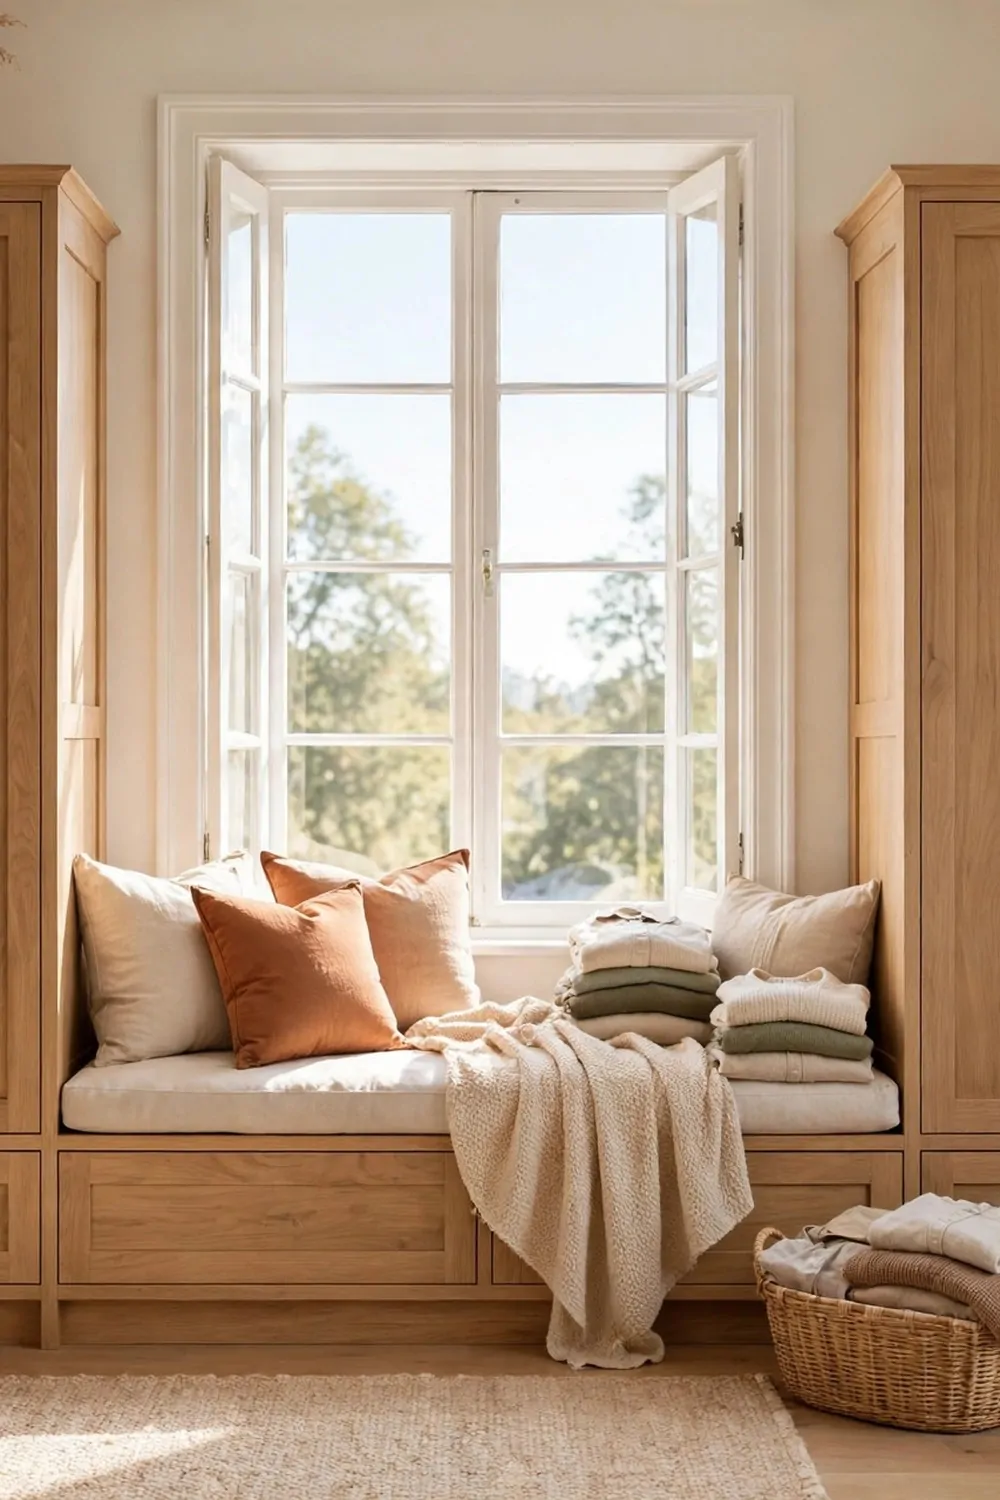
A window seat built into your wardrobe turns a plain wall into my favorite spot in the room. You get storage under the seat and a cosy place to sit. I read there in the morning with a cup of tea.
Build the seat low and wide, right under the window. I made mine deep enough to sit cross-legged. A cushion on top makes it soft and warm.
Put drawers or lift-up lids under the seat base. I keep spare bedding and out-of-season shoes in mine. The lids lift up with ease, and the stuff stays out of sight.
Run the wardrobe on one or both sides of the seat. I have hanging space on the left and shelves on the right. It frames the window and makes the whole wall look planned.
Keep the seat cushion in a fabric you can wash. I picked a pale cotton cover with a zip. I wash it when it gets dusty, and it looks new again.
Add a small shelf or a ledge above the seat for books. I keep two books and a tiny plant there. It makes the nook feel lived in, not just built for show.
Check the light before you pick your colours. I used a soft white paint near the window so the daylight bounces around. Dark paint can make a window wall feel smaller.
Make sure the seat does not block the radiator or the window handle. I left a small gap behind the cushion for air to move. You still need to open the window with ease on a warm day.
This idea works well in a small bedroom too. The seat gives you a place to put on shoes without a chair taking up floor space. It feels like extra furniture, but it is part of the wall.
18. Built-In Wardrobes for Kids That Adjust as They Grow
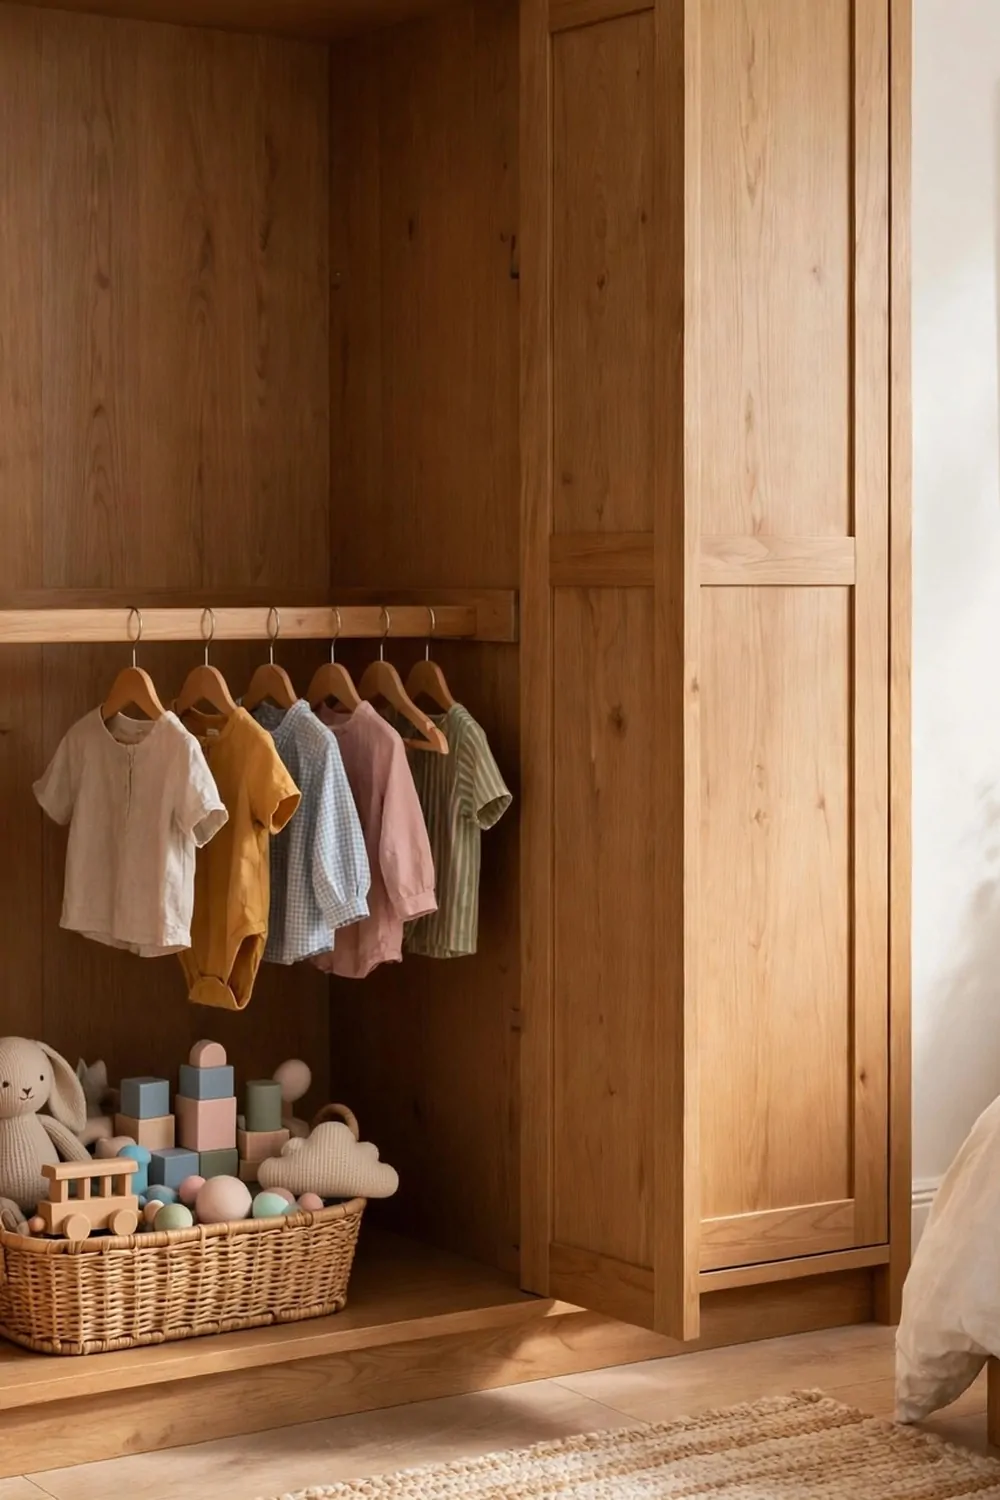
Kids grow fast, and their wardrobes need to keep up. I built my child’s wardrobe with rails and shelves I can move. It saves me from starting again every two years.
Use holes or slots down the side panels for the shelf pins. I can lift a shelf up or drop it down in a few minutes. It sounds small, but it changes how the space works.
Put one rail low so your child can reach their own clothes. I set mine at my child’s shoulder height. They pick their own top in the morning, and I get a few calm minutes.
Add a second rail higher up for clothes they will grow into. I keep next-size coats and party outfits up there. They stay clean and out of the daily rush.
Use clear boxes or open baskets for toys and small bits. I label each box with a simple picture. My child knows where the socks go and where the hats go.
Leave room at the bottom for shoes and boots. I put a low tray there for muddy shoes. It keeps the floor clean and the shoes easy to find.
Pick strong hinges and soft-close doors if you use doors. I wanted doors that would not slam on small fingers. Soft close costs a little more, but it feels safer.
Paint the inside a light colour so you can see everything. I used pale blue inside and white outside. It makes the wardrobe feel bright, even on a dull day.
Plan one empty shelf for the next stage. I leave a gap for school bags or sports kit as they get older. A wardrobe that can change is a wardrobe that lasts.
19. A Laundry Chute Inside the Wardrobe
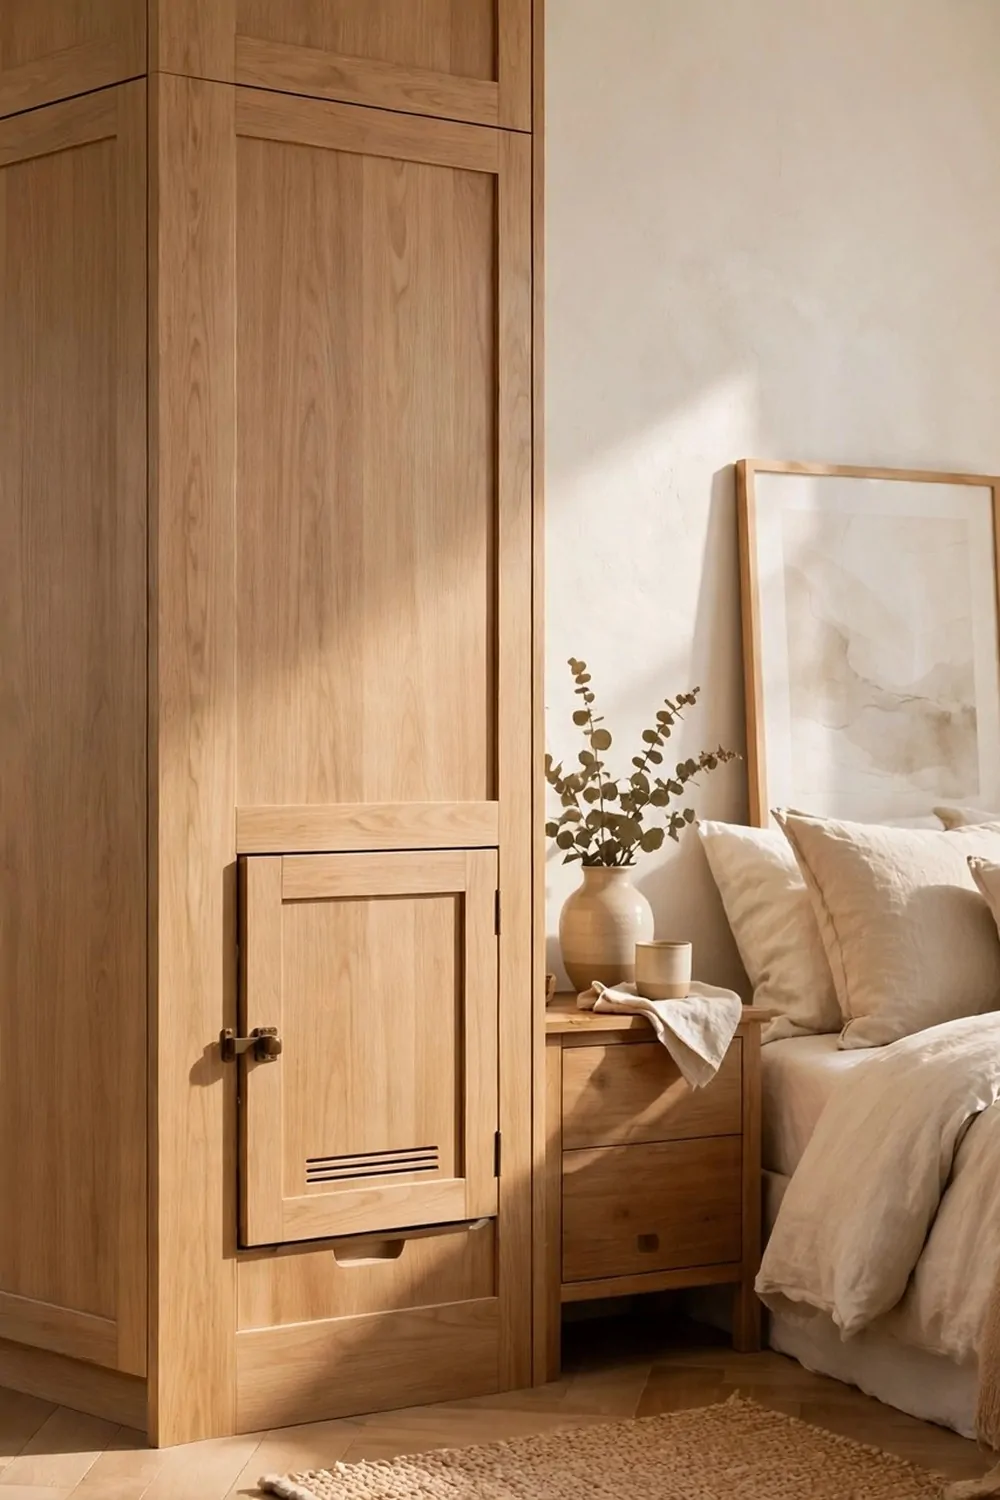
A laundry chute inside the wardrobe sounds fancy, but it is really just a smart hole with a plan. You drop dirty clothes in at the top and they land in a basket below. I wish I had added one years ago.
Build the chute as a tall narrow shaft inside one end of the wardrobe. I line mine with smooth painted wood so clothes slide down with ease. Rough wood can snag a jumper, so keep it smooth.
Put the opening at waist height or a little higher. I use a small hinged flap that shuts flat when I am done. It keeps the chute hidden and stops smells from drifting up.
Place a basket or a pull-out bin at the bottom. I use a big canvas bag on a frame. When it is full, I lift the bag out and carry it to the machine.
This works best if your laundry room or bathroom sits below the bedroom. I checked the floor plan first with my builder. A short straight drop works much better than a long bendy one.
If you have no room below, use the chute into a cupboard on the same floor. I have seen a short chute that drops into a basket behind a low door. It still saves you carrying a pile down the hall.
Keep the chute away from clean clothes. I put a thin divider between the chute and the hanging rail. Clean shirts stay fresh, and dirty socks stay on their own side.
Add a small sign or a hook for the wash bag. I hang a mesh bag on a hook by the flap. Small bits like socks go in the bag so they do not get lost on the way down.
Clean the chute once a month with a damp cloth on a long handle. I wipe the flap and the inside edge. It takes five minutes and stops dust from building up.
20. Sensor Lights That Switch On When You Open the Door
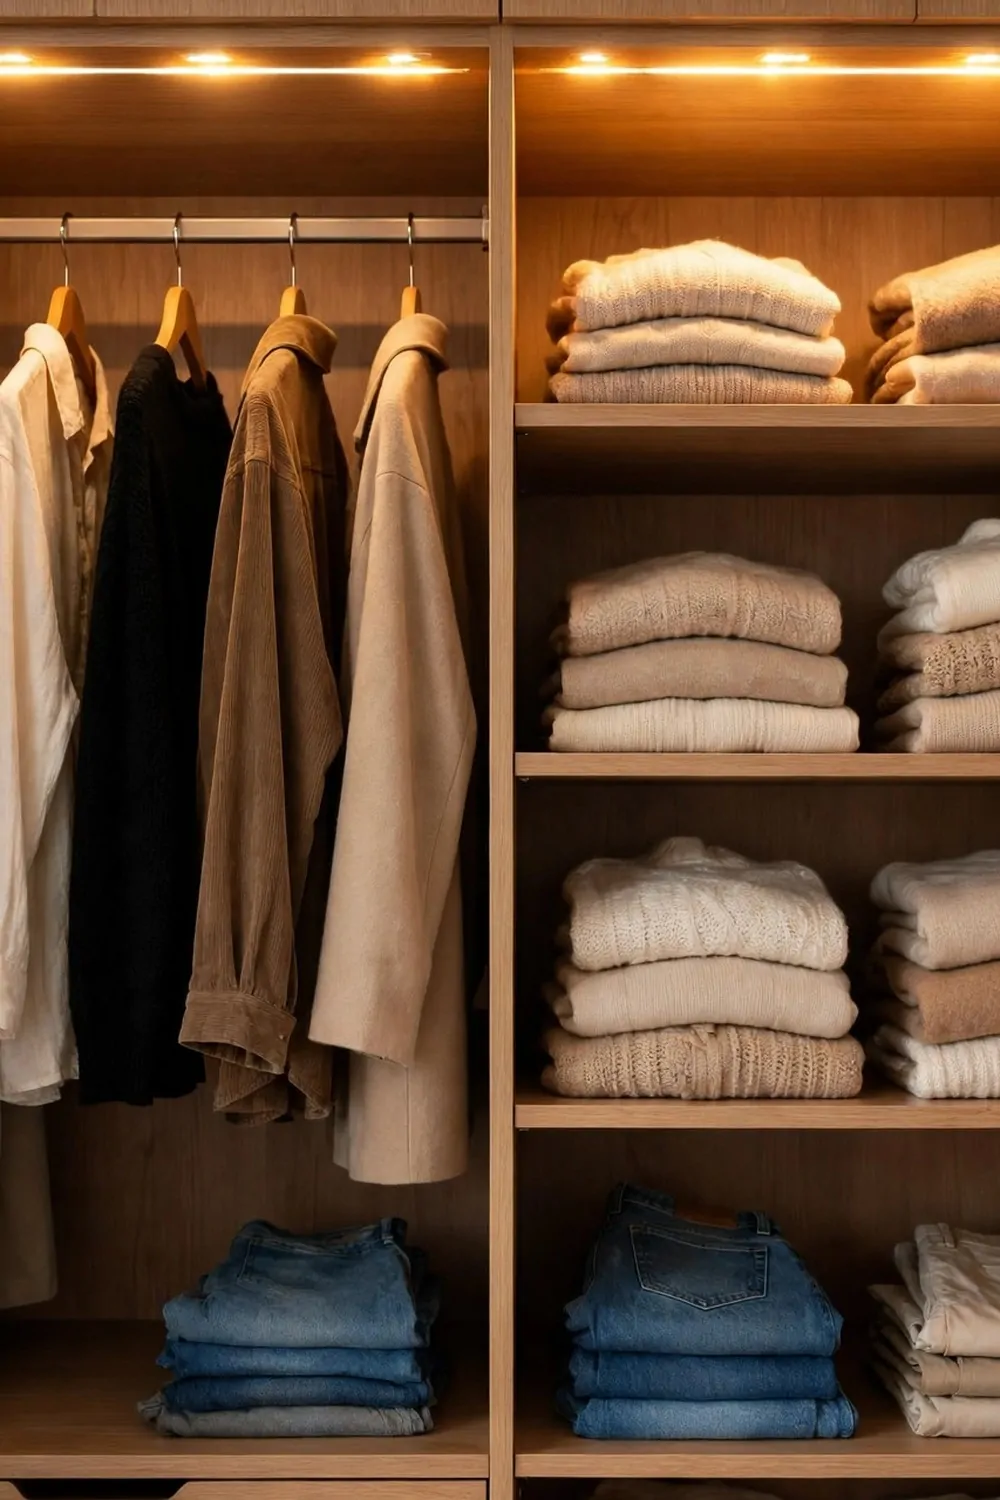
I used to fumble in my dark wardrobe every winter morning. Then I added a sensor light, and now the light pops on the second I open the door. It feels like a small bit of magic.
Pick a battery light if you do not want wires. I stuck mine to the top frame with strong tape. I change the batteries every few months, and it just works.
Pick a wired light if you want it to last for years. I had an electrician fit a slim strip under the top shelf. It turns on with a sensor and off when I shut the door.
Put the sensor where your hand or the door will pass it. I placed mine near the hinge side. It picks up the door movement fast and does not stay on all day.
Use warm white light, not cold blue light. I find warm light shows the true colour of my clothes. Cold light can make a navy jumper look black.
Add a strip under each shelf if your wardrobe is deep. I did this in my tall unit, and the bottom shelf is no longer dark. I can see my folded jeans without pulling them all out.
Keep the light out of direct sight. I hide the strip behind a small lip on the shelf edge. You see the glow on your clothes, not the bright strip itself.
Test the light at night before you finish the job. I opened and shut the door ten times just to check it. It sounds silly, but it caught a loose wire before the paint went on.
Sensor lights also help kids and older family members. I added one to my mum’s wardrobe, and she loves it. She can find her cardigan without switching on the big room light.
| Light type | How it works | Best spot |
|---|---|---|
| LED strip | A slim strip that glows along the shelf edge | Under each shelf |
| Sensor light | Switches on when the door opens | Top of the wardrobe frame |
| Spot light | A small round light aimed at one area | Over the hanging rail |
21. Ventilation Gaps That Stop Damp Smells
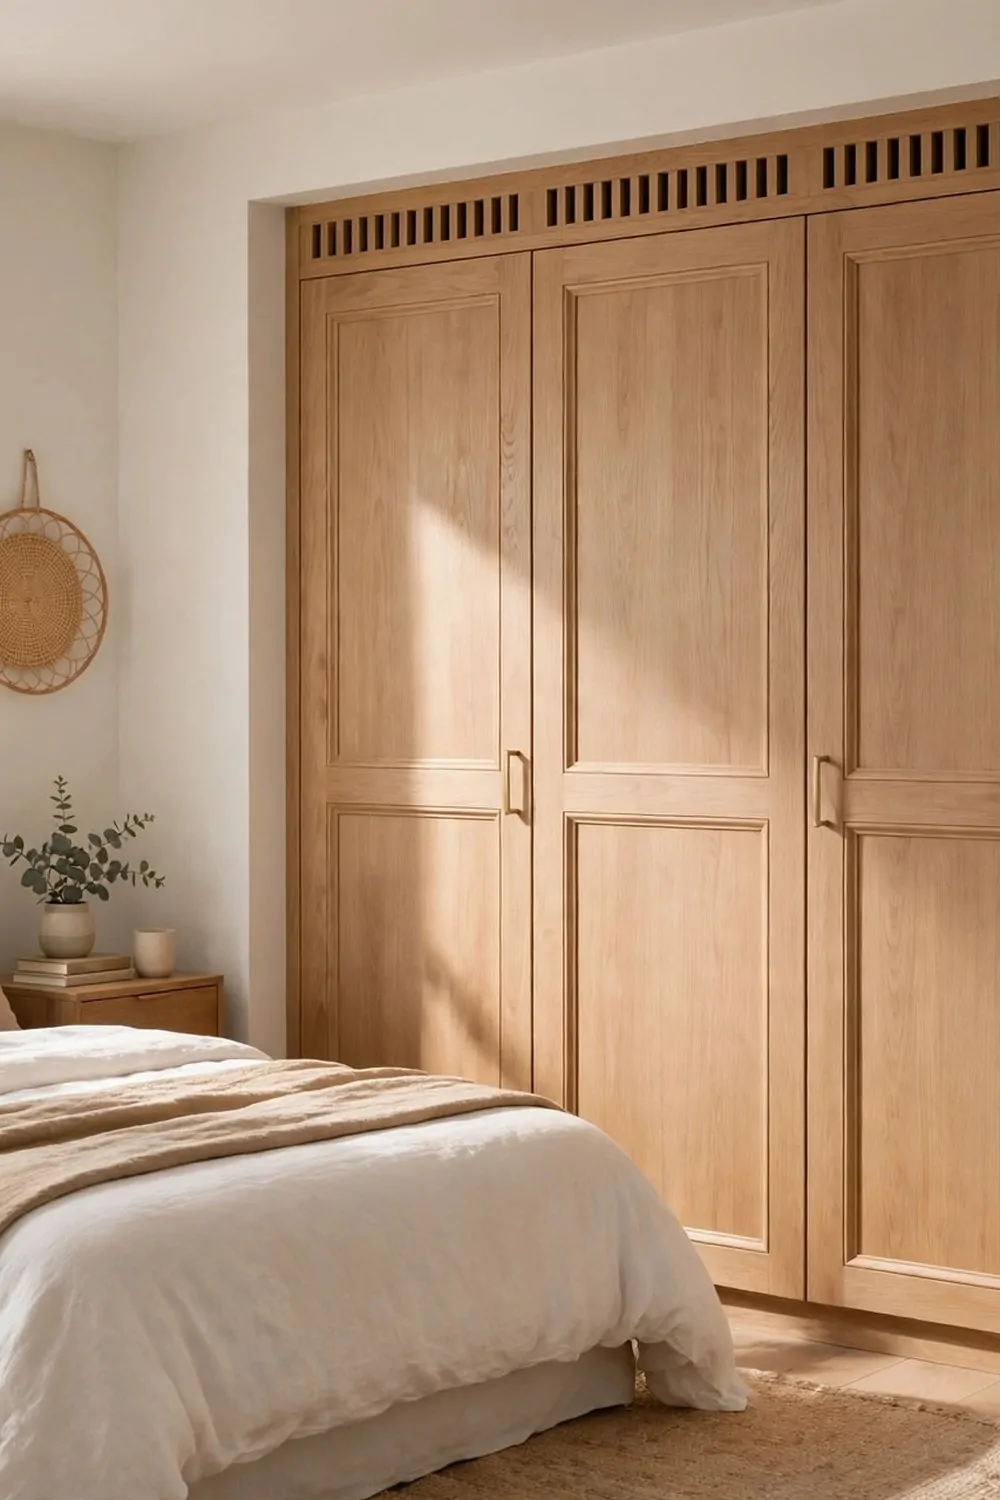
A built-in wardrobe can smell damp if air cannot move inside it. I learned this the hard way in an old house with a cold outside wall. A few small gaps fixed it, and the smell went away.
Leave a small gap at the top and bottom of the back panel. I leave about a finger width at each end. Air can drift in at the bottom and out at the top.
Do not push the wardrobe tight against a cold outside wall. I leave a slim space behind the back panel. It stops cold air from sitting on your clothes.
Use slatted shelves instead of solid boards in a damp room. I use slats in my back bedroom, and air moves through them. Folded clothes stay dry and fresh.
Add small round vents in the side panel if you can. I fitted two near the top of mine. They are neat, they are cheap, and you hardly notice them.
Keep the wardrobe doors slightly open on a damp day if you have no vents. I open mine for an hour while I air the room. It helps more than any spray.
Do not pack clothes in so tight that air cannot pass. I leave a small space between hangers. Your coats need room to breathe, just like you do.
Put a small moisture absorber on the bottom shelf. I use a simple tub that pulls damp from the air. I empty it once a month, and it keeps the shelves dry.
Check the back panel each season for dark spots. I look behind the shoes each spring. If I see a spot, I dry the wall and check the gap before it grows.
22. A Built-In Wardrobe on a Tight Budget
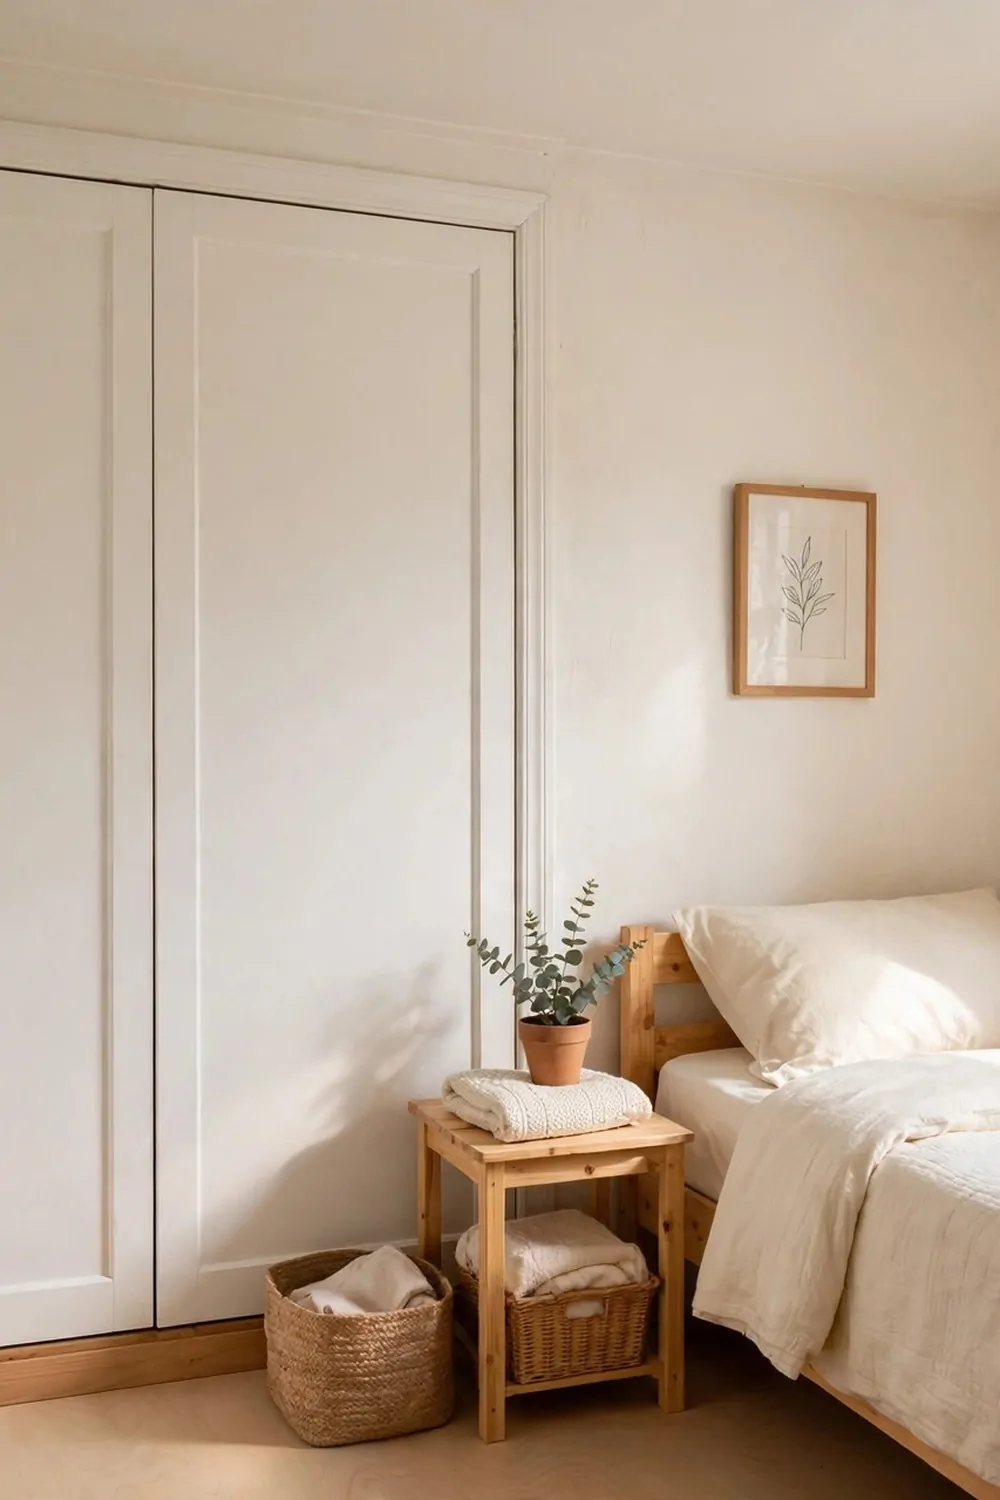
You do not need a big budget to build a wardrobe into your wall. I built my first one with painted MDF, a rail, and two ready-made doors. It cost far less than I feared.
Start with the frame only and add doors later. I lived with open shelves for three months while I saved. The frame did the hard work, and the doors came when I could pay for them.
Use ready-made doors from a home store. I found plain shaker doors that fit my frame with a small trim. They look made to measure once they are painted the same colour.
Paint everything one colour for a built-in look. I used the same white as my skirting boards. The eye reads it as one piece, not a mix of bits.
Skip fancy handles at first. I used simple round knobs in a soft brass tone. They cost little, and I can swap them later if I want a new look.
Use a single rail and a stack of shelves inside. I keep hanging clothes on the left and folded clothes on the right. It is simple, and simple is easy to keep tidy.
Buy second-hand baskets and boxes for the inside. I found sturdy baskets at a local market. They hide socks and scarves, and they cost a fraction of new ones.
Measure twice and cut once, even on a budget job. I wrote every size on a scrap of paper and checked it again. A wrong cut wastes wood and money.
Do one wall well instead of two walls badly. I focused all my money on one good built-in. It looks smart, and I can add a second run next year if I need it.
23. A Built-In Wardrobe That Looks Like Wall Panelling
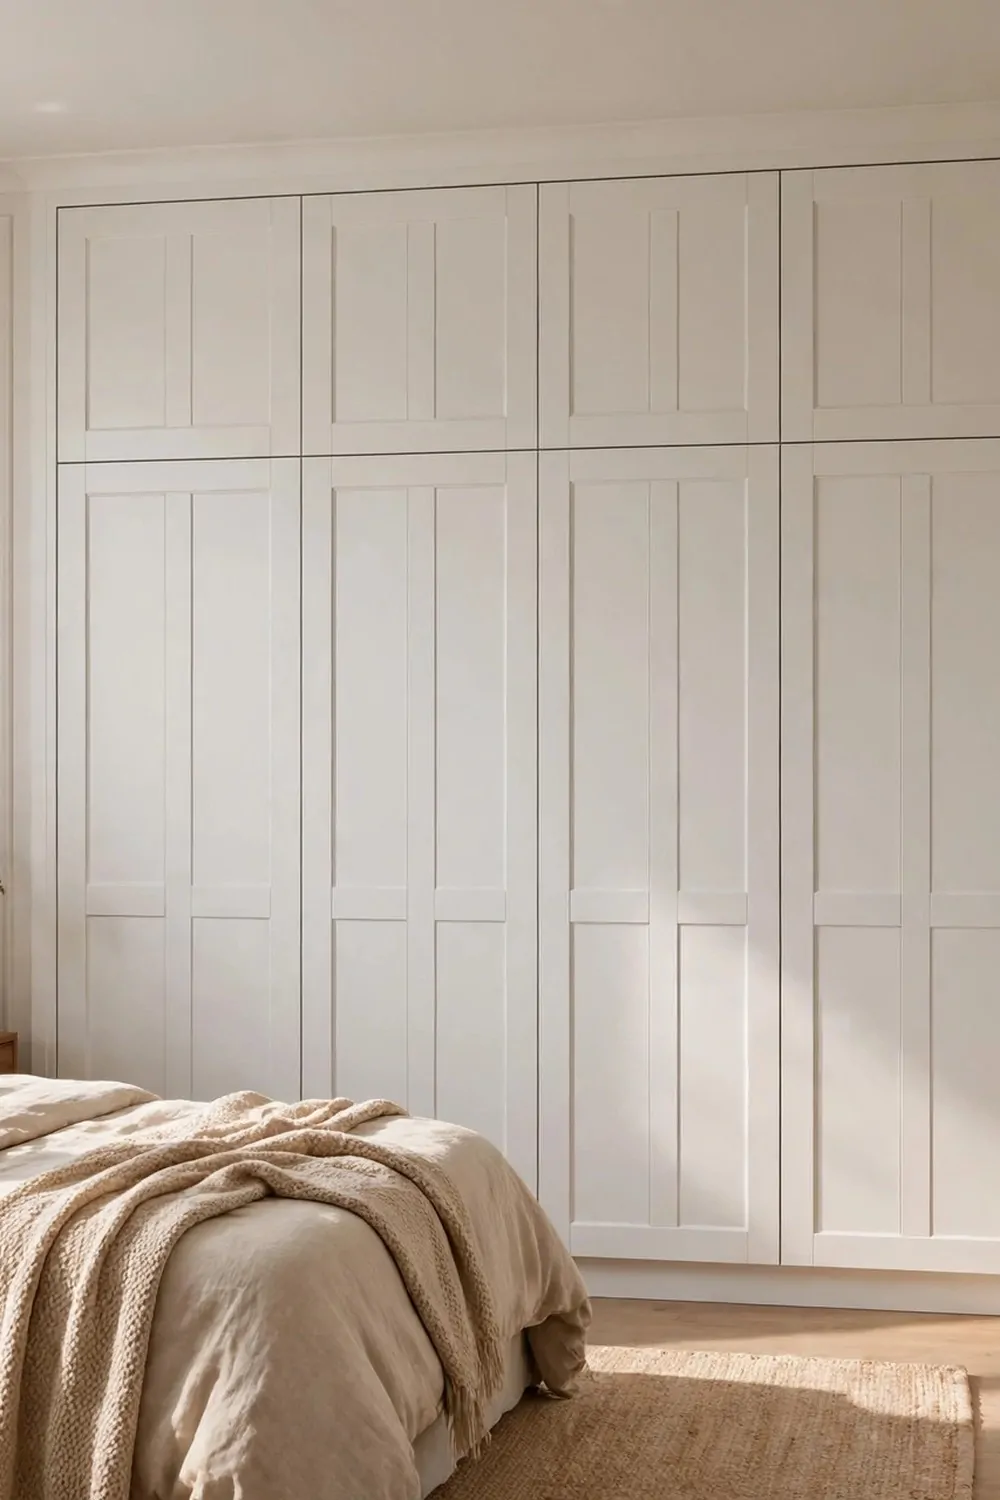
I love a wardrobe that hides in plain sight. From across the room, mine looks like wall panelling. You only see the doors when you look close.
Use the same trim and panels on the wardrobe doors as on the wall. I matched the beading on my doors to the panels beside them. The join lines blend in, and the room feels calm.
Paint the doors and the wall in the exact same shade. I used a soft sage green on both. It makes the whole wall read as one long panelled run.
Use push-to-open catches instead of handles. I did this on my panelled doors, and there is nothing to give them away. A gentle push opens the door, and a soft click shuts it.
Keep the panel sizes even across the wall. I drew the layout on paper first. Each panel is the same width, so the wardrobe doors sit in the same rhythm as the wall.
Add a slim cornice or a skirting line across the top and bottom. I ran the skirting board right across the wardrobe base. It ties the whole wall together.
Hide the hinges inside the frame. I used hidden hinges that sit flush when the door shuts. From the front, you see clean panels and nothing else.
This works best in a large bedroom with a long flat wall. I used it on a wall with no windows or plugs. A plain wall gives you a clean canvas for the panels.
Keep the inside simple and bright. I painted the inside white so I can find things fast. The outside is calm and panelled, and the inside is bright and practical.
24. Mirrored Panels on a Built-In Wardrobe
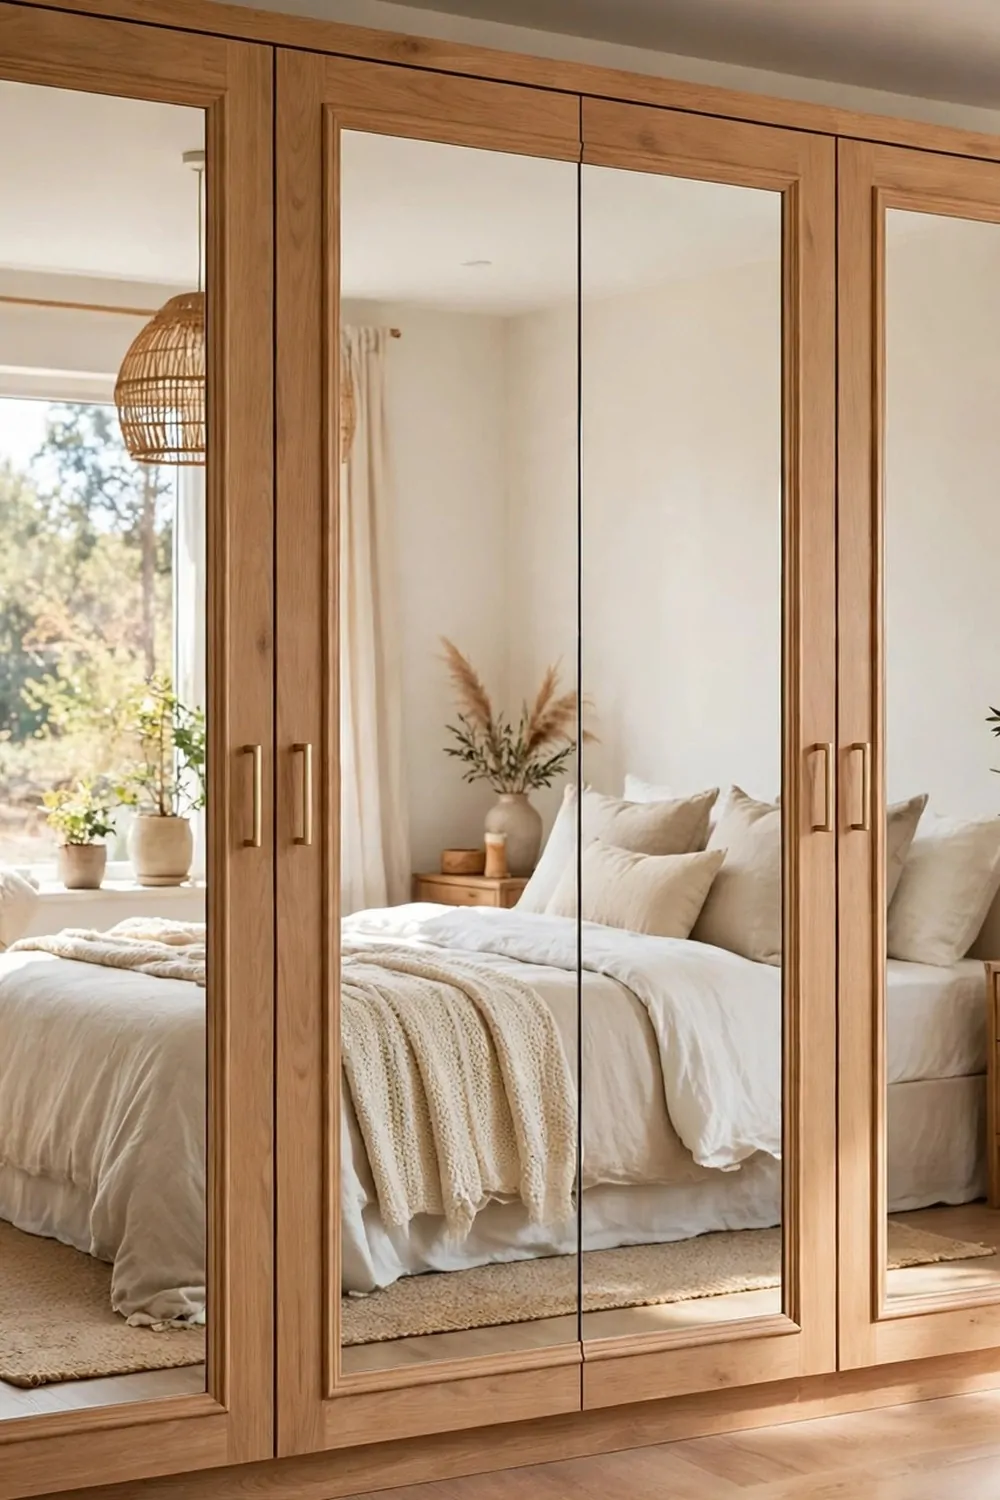
Mirrored panels on a built-in wardrobe make a small bedroom feel twice as big. I added them to my narrow room, and the light now bounces right across the floor. It feels fresh each morning.
Use full-height mirror panels on the doors. I picked two tall panels with slim frames. They reflect the window light and make the wall seem to go on.
Keep the mirror clean with a soft cloth and a little spray. I wipe mine once a week. Finger marks show fast on a mirror, but a quick wipe fixes them.
Place the mirror where it reflects something pretty. I face mine toward the window and a small plant. It doubles the view, and the room feels lighter.
Use safety-backed mirror glass for wardrobe doors. I asked for toughened glass with a safety film. If it ever cracks, it stays in one piece.
Mix mirror with a solid panel if full mirror feels too much. I have a friend who used mirror on the middle doors and wood on the ends. It looks smart and less like a dance studio.
Keep the frame slim and simple. I used a thin dark frame that matches my bedside lamps. A thick frame can make a mirror door look heavy.
Check what the mirror will reflect at night. I moved a lamp so it did not shine straight into the mirror. A soft glow is nice, but a bright glare is not.
Mirrored doors also save you buying a standing mirror. I sold my old floor mirror after the build. The floor feels bigger, and I still check my outfit with ease.
25. A Wardrobe Built Around a Radiator
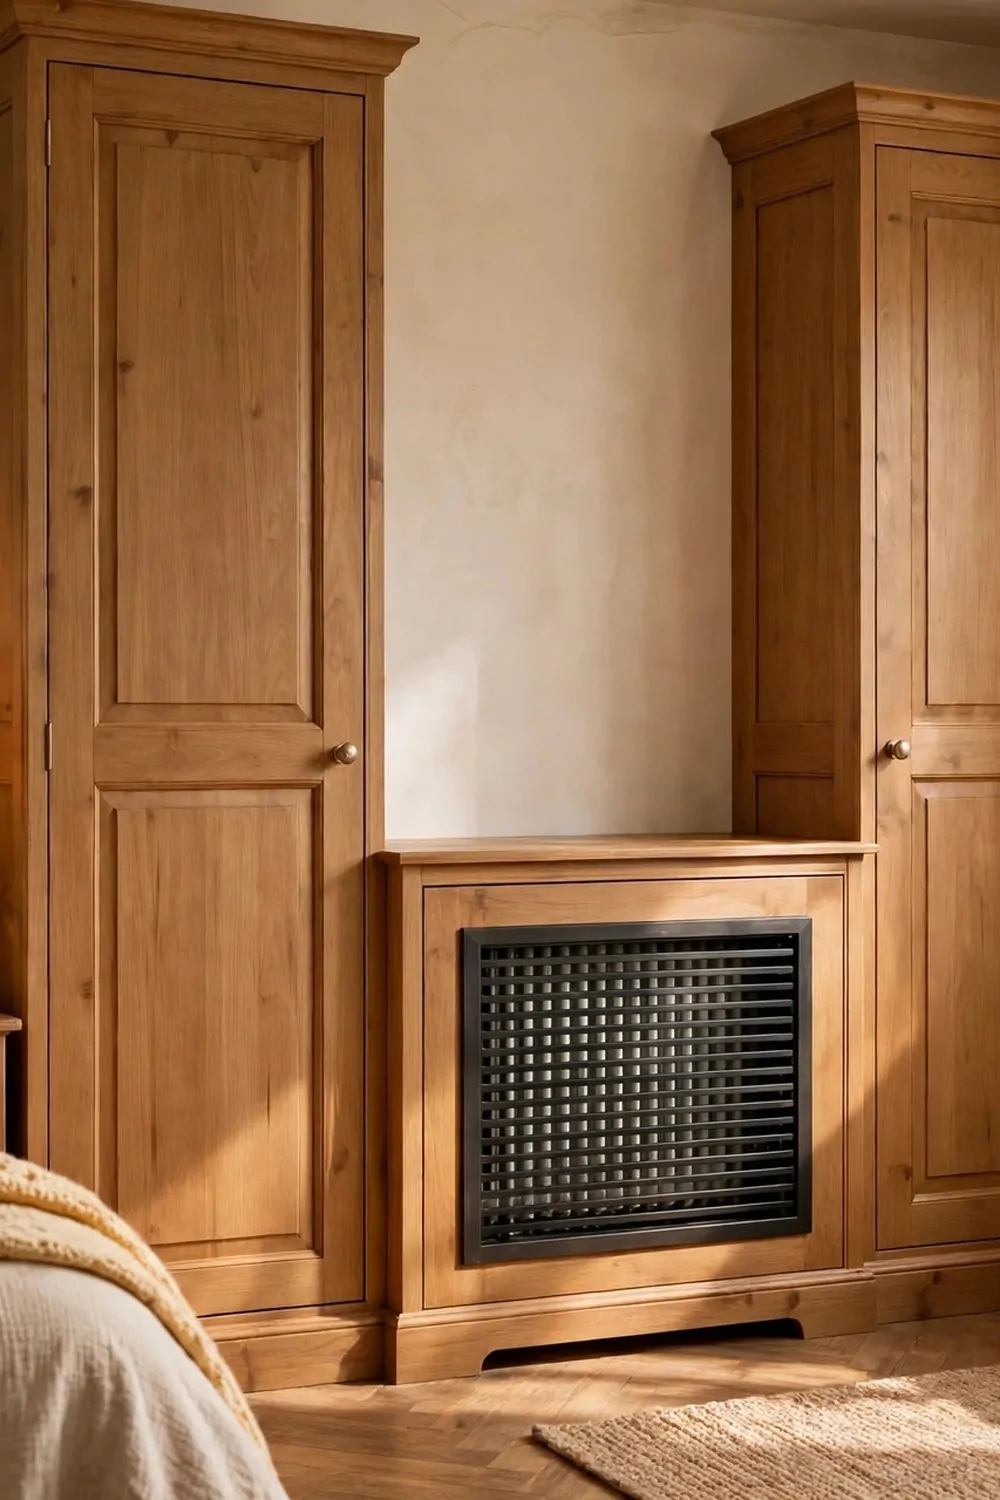
A radiator in the middle of your wardrobe wall can feel like a problem. I thought mine would ruin the plan. Then I built around it, and now it looks like it was meant to be there.
Measure the radiator first, including the pipes and valves. I wrote down the width, height, and depth. You need those numbers before you cut any wood.
Build a low cover or a seat over the radiator base if you have space. I built a slatted bench over mine. Warm air still rises through the slats, and I gained a seat.
Use slatted fronts or vents near the radiator. I fitted a slatted panel in front of mine. Heat moves out into the room, and the wood does not get too hot.
Do not box a radiator in with solid boards. I learned this from a plumber friend. A sealed box traps heat, wastes energy, and can warp the wood.
Keep clothes away from the hot surface. I leave a clear gap between the radiator cover and the hanging rail. Coats stay safe, and nothing dries out or fades.
Leave an access panel for the valve. I made a small hinged flap on the side. I can turn the heat up or bleed the radiator without pulling the wardrobe apart.
Paint the cover the same colour as the wardrobe. I used the same cream paint on both. The radiator blends in, and the wall looks like one neat built-in run.
Ask a plumber before you move any pipes. I kept my pipes where they were and built around them. Moving pipes costs more and can cause leaks if it is done wrong.
| Budget level | What you get | Best for |
|---|---|---|
| Low | Painted MDF frame and ready made doors | A first built-in on a small budget |
| Middle | Shaker doors, soft close hinges and drawers | A family bedroom that gets daily use |
| Higher | Oak veneer, glass panels and sensor lights | A large bedroom dressing area |
26. Top Boxes for Out-of-Season Clothes
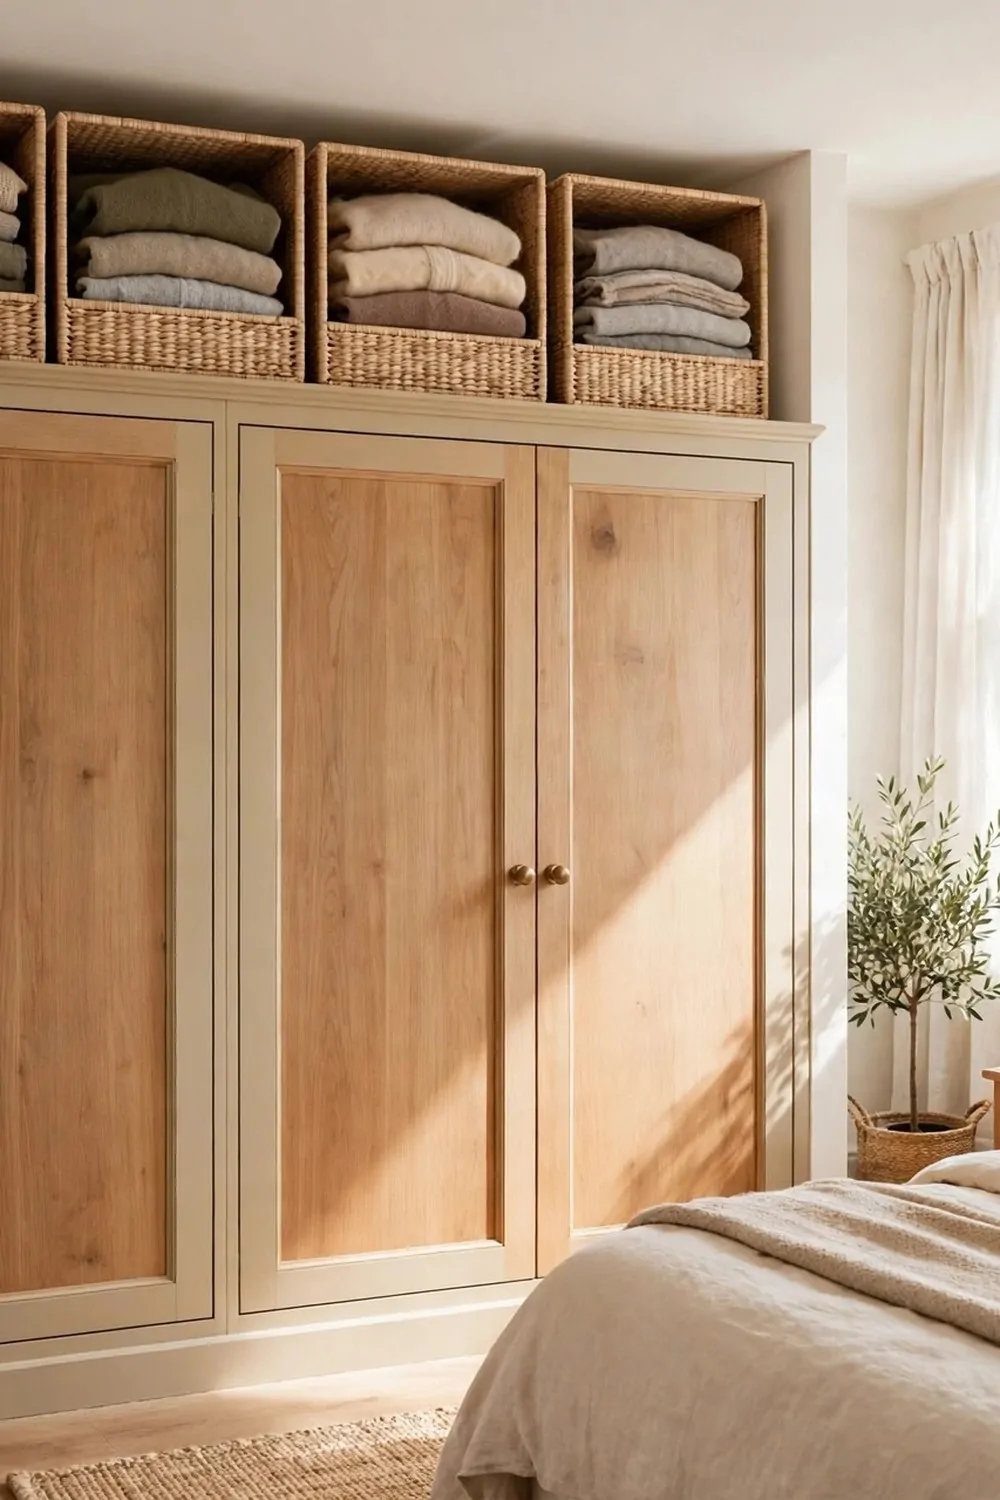
Top boxes are the high shelves where out-of-season clothes go to rest. I keep my thick winter coats up there in summer. They stay clean, and my daily rail stays clear.
Build the top boxes right up to the ceiling. I use the full height so no space is wasted. A tall box holds more than you think.
Use boxes with lids, not open piles. I use clear lidded boxes with a label on the front. I can see what is inside without pulling the box down.
Put a small step stool nearby for safe reach. I keep a folding stool in the corner of the room. I never stand on a chair to reach the top, as that is not safe.
Pack clothes clean and dry before you store them. I wash and fold each piece first. Clean clothes do not smell stale when you open the box months later.
Add a small lavender bag or a cedar block in each box. I drop one in with my wool jumpers. It keeps moths away and leaves a soft fresh smell.
Label each box by season and by person. I write “Mum – Winter” on mine in big letters. It saves me opening three boxes to find one scarf.
Keep one empty top box for the swap-over day. I use it as a holding box when I change seasons. I move summer clothes up and winter clothes down in one calm hour.
Check the top boxes twice a year. I check mine when the clocks change. I pull out what no longer fits and pass it on, so the boxes never get too full.
27. A Built-In Wardrobe With a Fold-Down Desk
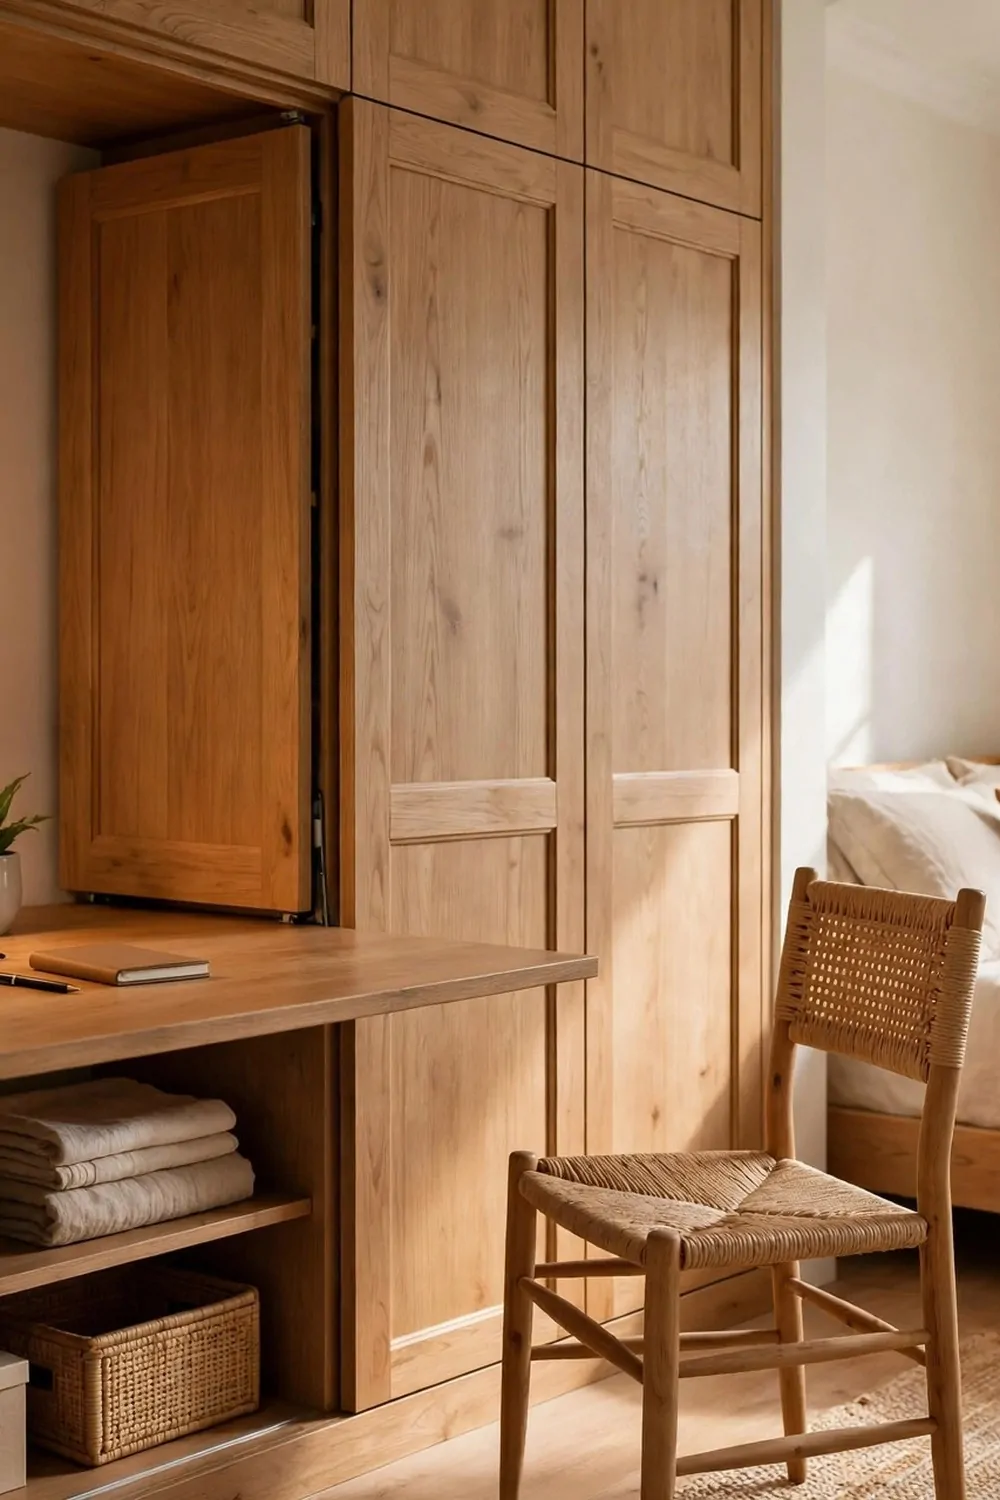
A fold-down desk inside your wardrobe gives you a work spot without a desk taking up the room. I fold mine down in the morning and fold it away at night. The bedroom stays a bedroom.
Build the desk into a mid-height section of the wardrobe. I set mine at elbow height when I sit on a small stool. It feels just right for writing and for my laptop.
Use strong hinges and a fold-out leg or a chain support. I picked heavy hinges that hold the weight with ease. A wobbly desk is no good for work.
Add a shelf above the desk for books and chargers. I keep my notebook, a pen pot, and a phone charger there. Everything is in reach, and the desk top stays clear.
Fit a small light above the desk space. I use a slim LED strip under the shelf. It lights my work without lighting the whole room at night.
Keep cables tidy with a small hole and a clip. I run my charger cable through a round hole in the back. It stops wires from tangling with my clothes.
Shut the wardrobe doors to hide the desk when you are done. I love this part most. Work is gone in one move, and the room feels calm again.
Pick a chair or stool that fits inside when folded. I use a low stool that slides under the desk ledge. It stays out of the way until I need it.
This idea suits a small bedroom or a shared room. I built one for my teen, and it works well for homework. The desk is there when needed and gone when it is not.
28. Matching Bedside Tables Built Into the Wardrobe Run
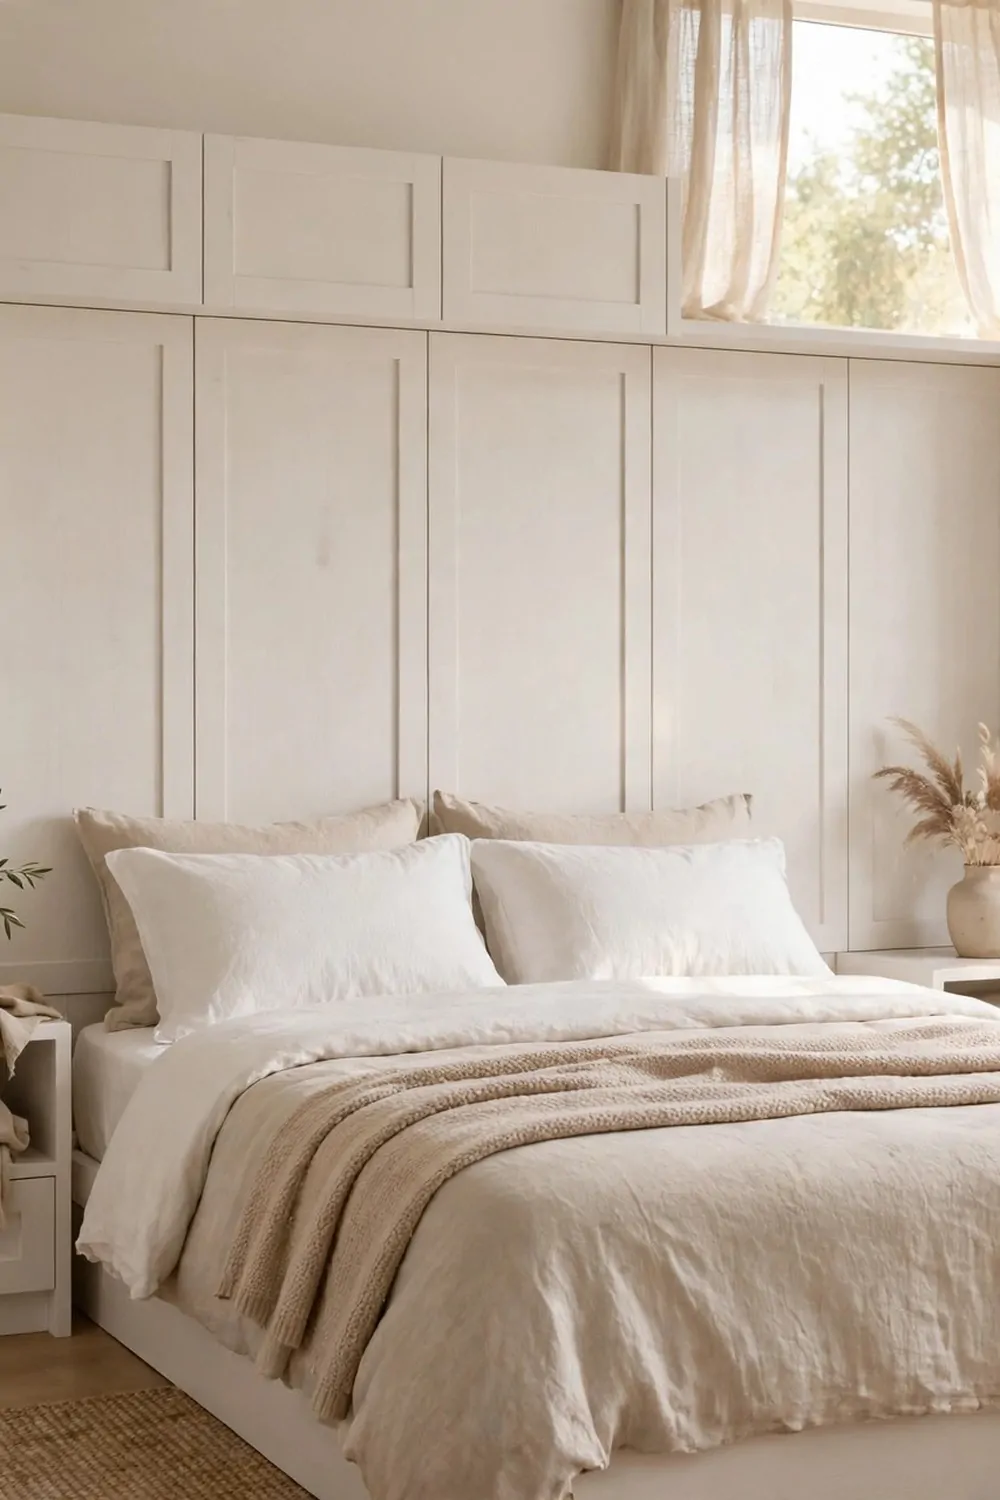
Matching bedside tables built into the wardrobe run make the whole wall feel like one piece. I love how the bed sits in the middle with matching tables on each side. It looks calm and planned.
Run the wardrobe along the wall behind the bed. I built mine from one side of the room to the other. The bedside tables sit in the same run, at the same height.
Keep the table tops clear and low. I keep a lamp, a book, and a glass of water on mine. A clear top feels restful at night.
Add a drawer in each bedside table for small bits. I keep my phone charger, lip balm, and a notepad in mine. They are close at hand but out of sight.
Use the same doors and handles across the run. I matched the table fronts to the wardrobe doors. The eye moves along the wall and sees one neat line.
Leave a gap for plug sockets behind the tables. I cut a small notch in the back panel for the plug. My lamp and phone charge with ease, and no wires hang loose.
Build a small open shelf above each table if you have room. I use mine for a photo and a tiny plant. It adds a soft touch without cluttering the table.
Measure the bed width before you build. I checked mine twice, as a wide bed needs wider gaps. The tables should sit snug to the bed, not far away.
This idea works best on a long straight wall. I used it in a large bedroom with space on both sides of the bed. In a small room, one table may be enough.
29. A Wardrobe That Fits Under the Eaves
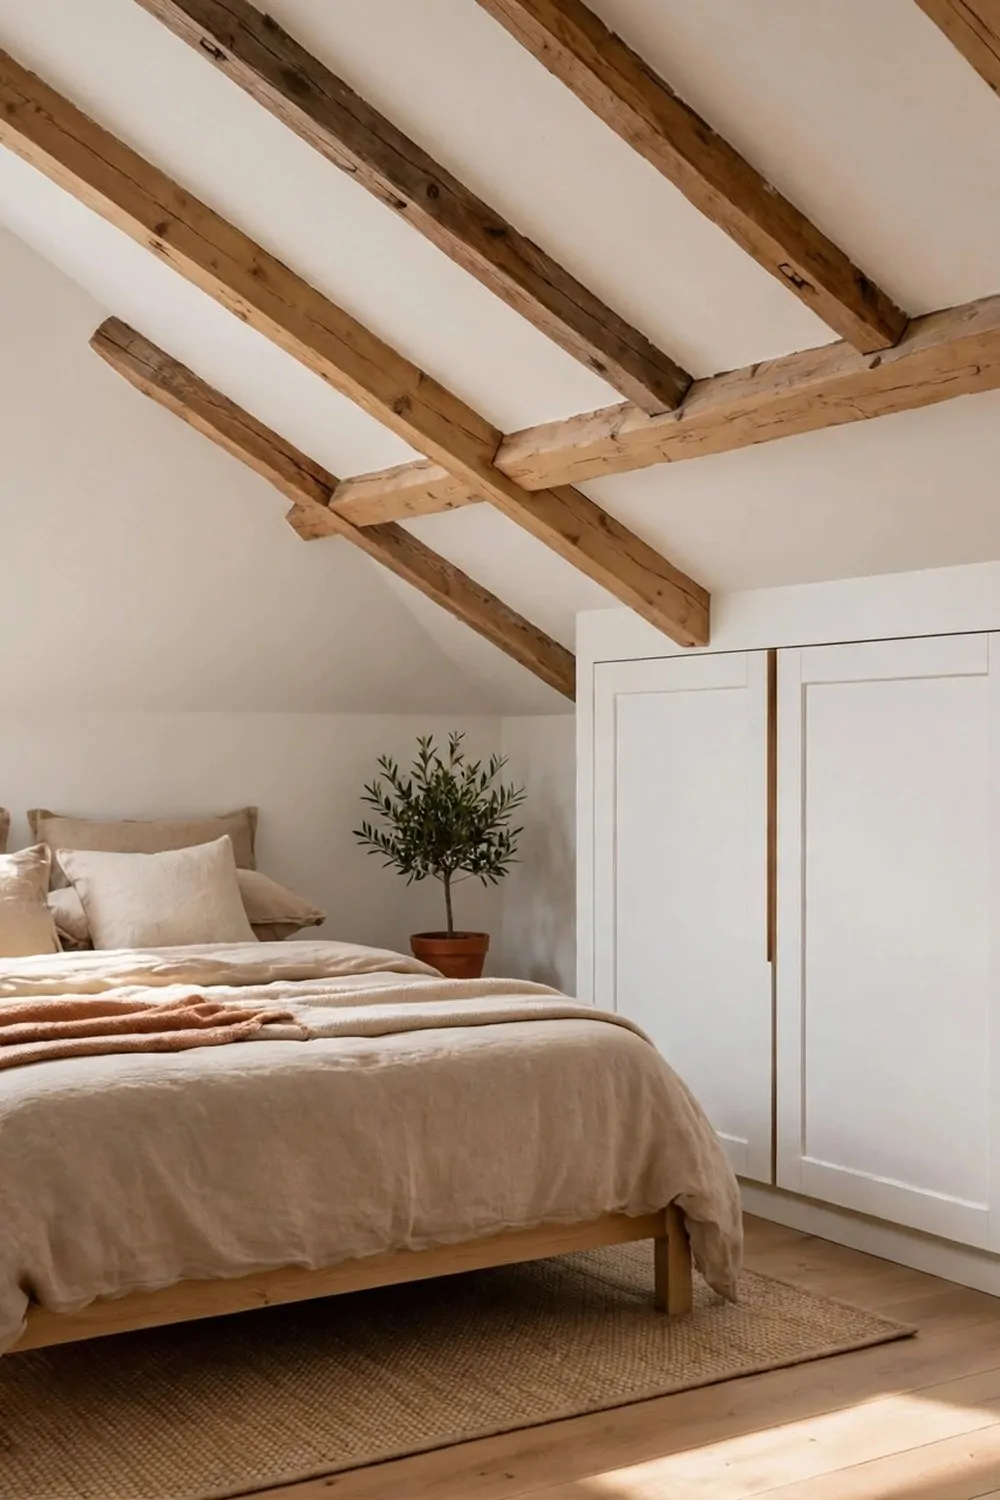
A wardrobe under the eaves uses the low sloped space that most people waste. I built mine into the slope of my attic bedroom. It turned a dead corner into my best storage.
Measure the slope at three points, not just one. I measured the high end, the middle, and the low end. Slopes are rarely straight, and each point matters.
Use the tallest part for hanging clothes. I put a short rail in the middle where the roof is highest. Shirts and tops hang there with ease.
Use the lowest part for drawers and shoe racks. I built low drawers that slide out under the slope. They fit where a rail never could.
Build the doors to follow the slope. I used angled doors that match the roof line. They look made for the space, not cut to fit in a hurry.
Keep the back panel close to the wall but leave a small air gap. I left a finger width behind mine. It stops damp from sitting on the wood.
Add a light inside, as eaves can be dark. I fitted a sensor strip along the top edge. It pops on when I open the door, and I can see every shelf.
Use pull-out baskets for the deep low corners. I pull a basket out like a drawer to reach the back. Nothing gets lost in the dark corner now.
Finish the front in the same colour as the room. I painted mine soft white to match the ceiling. The wardrobe blends in, and the room feels taller than it is.
Keep Reading
If you liked these built-in wardrobe ideas, you will enjoy more storage ideas for the rest of your home. I picked a few of my favorite posts for you to read next.
Each one shares simple ways to keep your spaces neat and pretty without a lot of fuss. You can save the ones you love and try them one at a time.
- 31 Luxury Walk-In Closet Ideas With Custom Built-In Storage
- 26 Walk-In Closet Island Ideas That Make Dressing Rooms Look Expensive
- 19 Girl Closet Ideas for a Neat Pretty Space
- 41 Custom Kitchen Cabinet Organization Ideas Worth Stealing
I hope your bedroom feels calmer and easier to use after these ideas. Start small, keep it simple, and enjoy the fresh neat shelves every day.