41 Custom Kitchen Cabinet Organization Ideas Worth Stealing

Last spring I picked the worst cabinet in my kitchen. The one under the sink where everything falls over.
Inside I found a sponge bag I forgot I bought, three half used bottles of dish soap, a flashlight with dead batteries, and a scrub brush with no handle left. The pipes took up most of the room. The rest was a pile of things I had shoved in and hoped I would never need to find again.
Cabinets get messy even in a tidy kitchen. You put things away fast after dinner. You slide a new jar in front of an old one. You buy a second bag of rice because you forgot the first one was in the back. Nobody means to make a mess. It just happens one small shove at a time.
These 41 ideas are simple and they use what you already have. You do not need a big budget or a full weekend. Pick one idea, try it today, and your cabinets will start to feel calm. Let us start with the first 14.
Sort Your Cabinets Into Four Zones
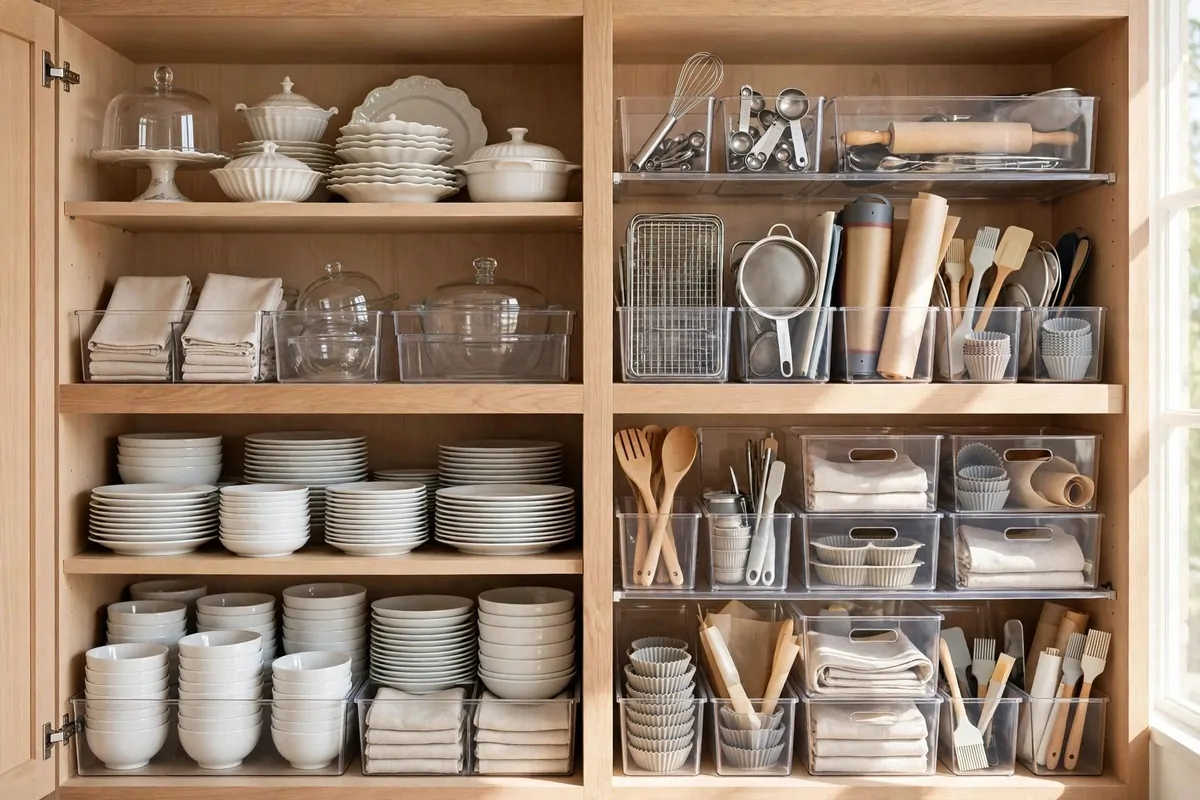
I sort my cabinets into four zones now. It sounds fancy. It is not. It just means each cabinet has one job, and the things inside match how often I use them.
Daily things live where my hands reach without thinking. Plates, bowls, cups, and the cereal boxes go here. If I touch it every day, it earns the best spot in the kitchen.
Weekly things sit one step away from the daily zone. The baking pans, the big salad bowl, the blender. I use them often enough to keep them close, but not every single day.
Monthly things go higher up or further back. The holiday cookie cutters, the big soup pot, the food processor. They are fine waiting there because I only reach for them now and then.
Rare things live on the very top shelf. The turkey roaster. The giant punch bowl. The waffle maker I use twice a year. They are out of the way and that is the whole point.
When I first did this, I moved about half of my stuff. My daily cabinet felt lighter right away. I stopped stacking bowls on top of bowls just to make room.
The table below shows how the four zones work. Read it once and you will know where almost everything in your kitchen belongs.
| Zone | What goes there | How often you touch it |
|---|---|---|
| Daily | Plates, bowls, cups, cereal, coffee mugs | Every day |
| Weekly | Baking pans, big salad bowl, blender | Once or twice a week |
| Monthly | Soup pot, food processor, cookie cutters | A few times a month |
| Rare use | Turkey roaster, punch bowl, waffle maker | A few times a year |
Zones also stop the same mess from coming back. When everything has a home that fits how often you use it, you stop piling things on top of each other.
Try it with just one cabinet first. Pick the one you open most. Move the rare stuff out and the daily stuff in. You will feel the change the next morning.
Empty Every Cabinet Before You Buy Anything
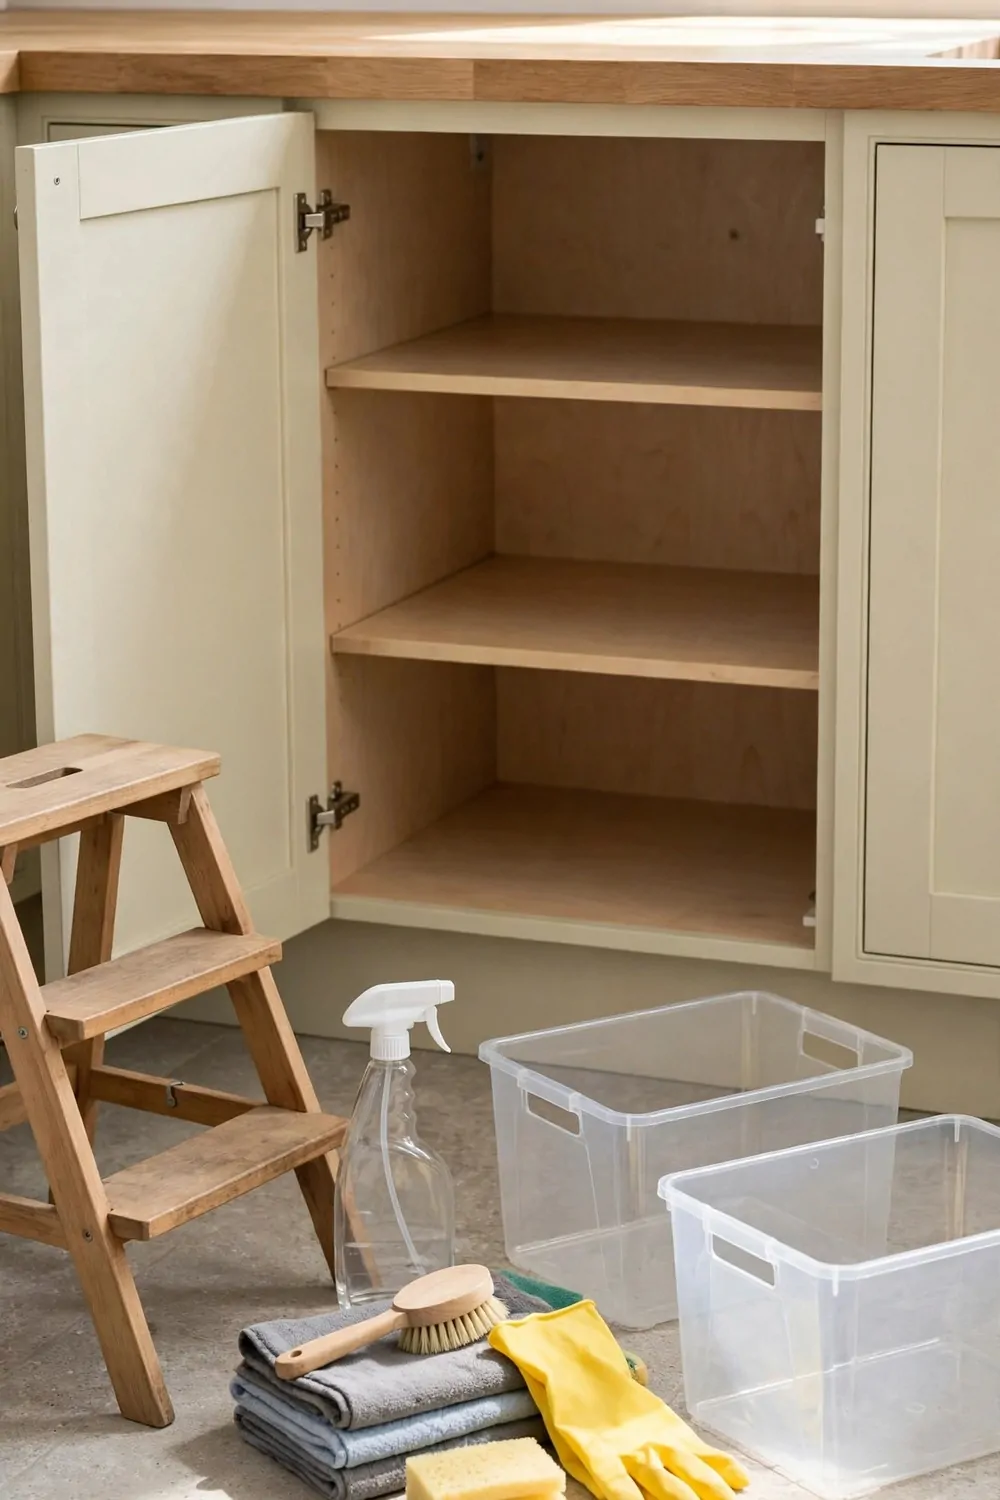
I used to buy bins and racks before I even looked inside my cabinets. Then I ended up with bins that did not fit and racks I never used. Now I empty everything first.
Take it all out. Yes, all of it. Put it on the counter or the table so you can see what you really own. It looks like a lot. That is normal.
When I did this, I found three spatulas and two of the same spice. I also found a lid with no pot and a pot with no lid. You cannot fix a mess you cannot see.
Once it is all out, sort it into four piles. This part is fast if you do not stop to think too long about each thing.
- Keep: things you use and love, put them back in their zone
- Move: things that belong in a different cabinet or room
- Toss: broken, chipped, or dried out things that are done
- Donate: good things you never use, give them to someone who will
Be honest about the donate pile. That bread machine you used once in 2022 is not going to get a second chance. Let it go.
After the sort, wipe the empty shelves. Crumbs hide in corners. A damp cloth takes two minutes and makes the whole cabinet feel fresh.
Now you know exactly what you own and how much room you have. If you still want a bin or a riser, you will buy the right size. You will not guess.
This step takes about half an hour for one cabinet. Do one cabinet a day if the whole kitchen feels like too much. Slow is fine.
I promise this step saves money. I have not bought a wrong sized bin since I started emptying first. My cabinets thank me.
Measure the Inside Before You Shop
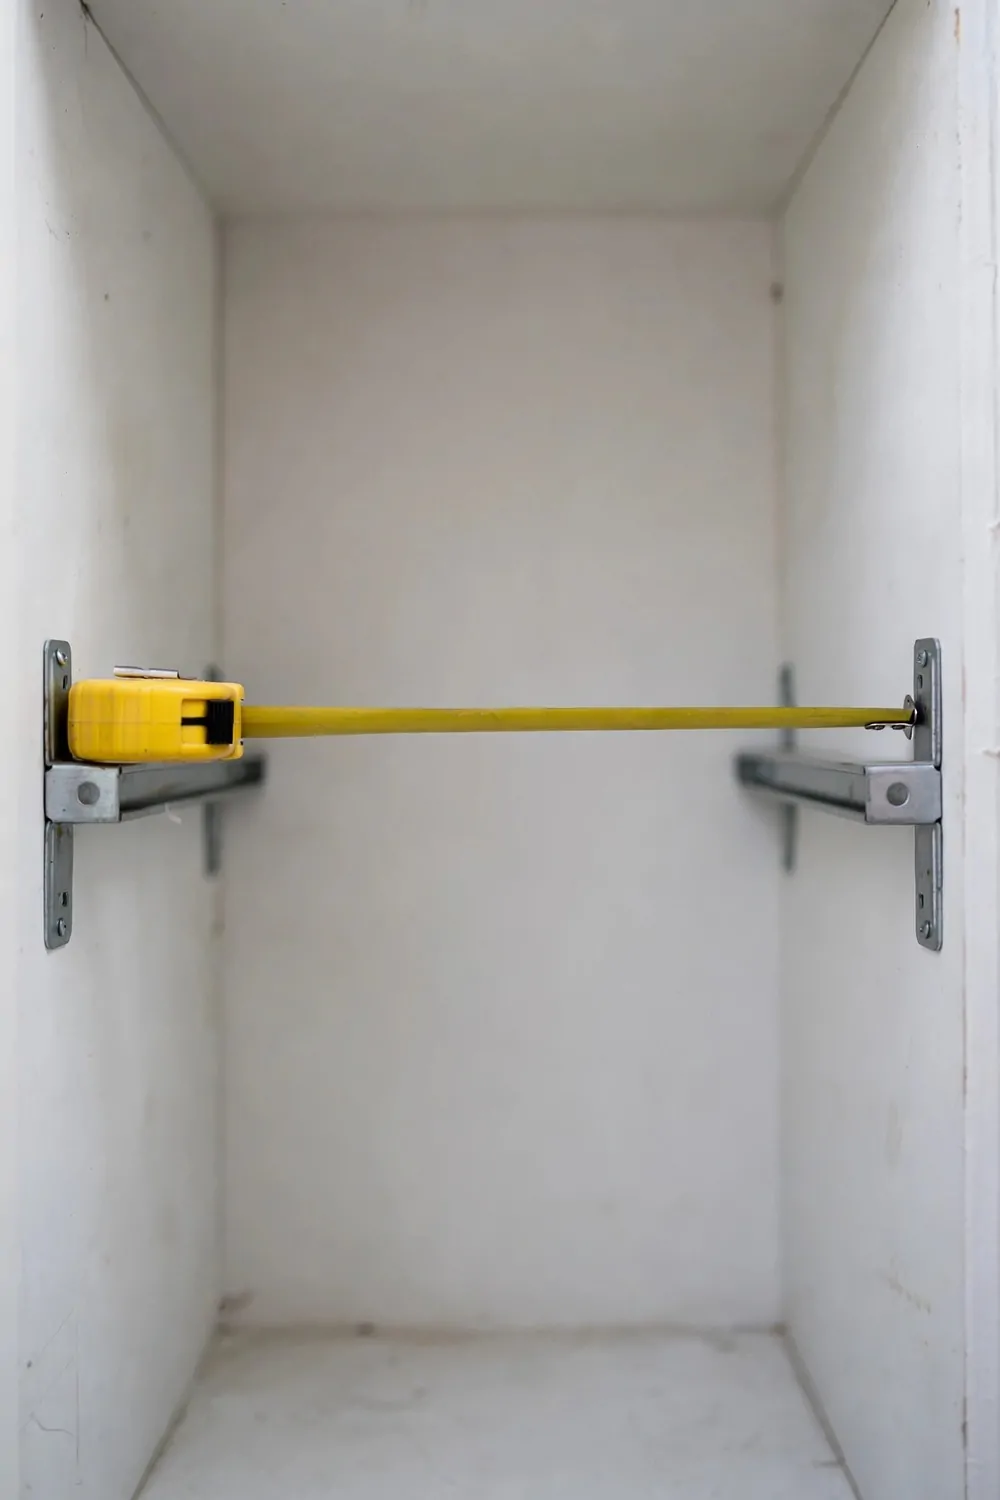
A cabinet looks big from the outside. Inside it is smaller than you think. The sides eat up space. The hinges take a little too. Measure first or you will bring home things that do not fit.
Grab a tape measure and write the numbers down. Measure the width from one side wall to the other. Measure the depth from the front edge to the back wall. Measure the height from the shelf to the shelf above it.
Write all three numbers on a small card and keep it in your purse or your phone. I keep mine in my phone notes. It saves me every time I am at the store and I see a nice rack.
Do not forget the gap between shelves. That gap is what decides if a tall bottle fits or if a stack of plates fits. Measure it twice if the shelf is not level.
Check the door swing too. Some racks sit on the door and swing with it. If a rack is too deep, the door will not close all the way. I learned this the hard way with a spice rack that stuck out half an inch.
Measure the inside of the door as well if you plan to hang anything there. The door has its own width and its own flat space. Hinges and handles can get in the way.
Odd cabinets need extra care. Corner cabinets are deep and dark. Cabinets under the sink have pipes in the middle. Measure around the pipes so you know what space is really free.
These numbers take five minutes to get. They save you a trip back to the store and a pile of returns on the kitchen table.
Once you have the numbers, shopping gets easy. You look at a bin, you check your card, and you know in seconds if it fits. No guessing at all.
Add a Shelf Riser to Double One Shelf
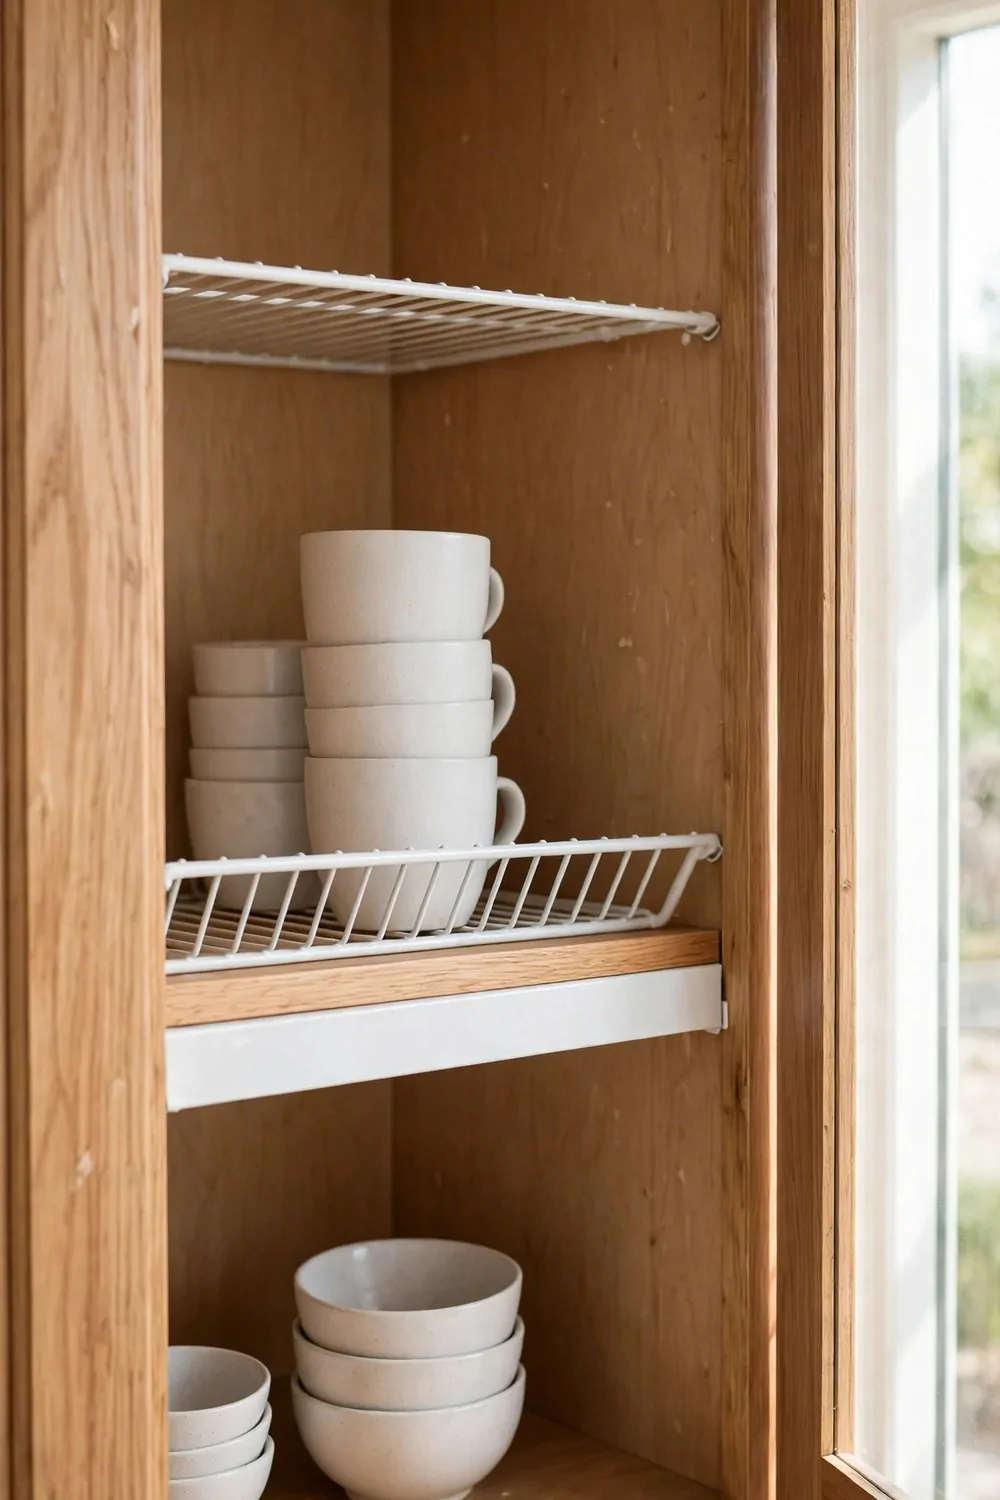
A shelf riser is a small shelf that sits on top of your shelf. It gives you a second level in the same space. It is one of the cheapest fixes I know.
Most cabinets waste the air above short things. Mugs are short. Small bowls are short. Cans are short. A riser uses that empty air.
Put the riser on the shelf, then set mugs on top of it and small plates under it. Now one shelf holds two rows of things. You can see both rows without moving anything.
I use risers in my dish cabinet and in my pantry cabinet. The dish cabinet holds twice as many bowls now. The pantry cabinet holds spice jars on two levels.
Risers come in wire, wood, and plastic. Wire ones are light and cheap. Wood ones look nicer if your cabinet is open or glass fronted. Pick what fits your budget.
Make sure the riser fits your measurements. Check the width and the height. A riser that is too tall will not fit under the shelf above it.
Do not put heavy things on a cheap wire riser. Plates are fine. A stack of heavy pots is not. Keep the heavy stuff on the real shelf.
One riser is often enough to fix a crowded shelf. You do not need to fill every cabinet with them. Start with the worst one and see how it feels.
This is a five minute job. No tools, no screws, no drilling. You just set it down and start using it. I wish I had tried it years ago.
Stand Baking Sheets Up With Vertical Dividers
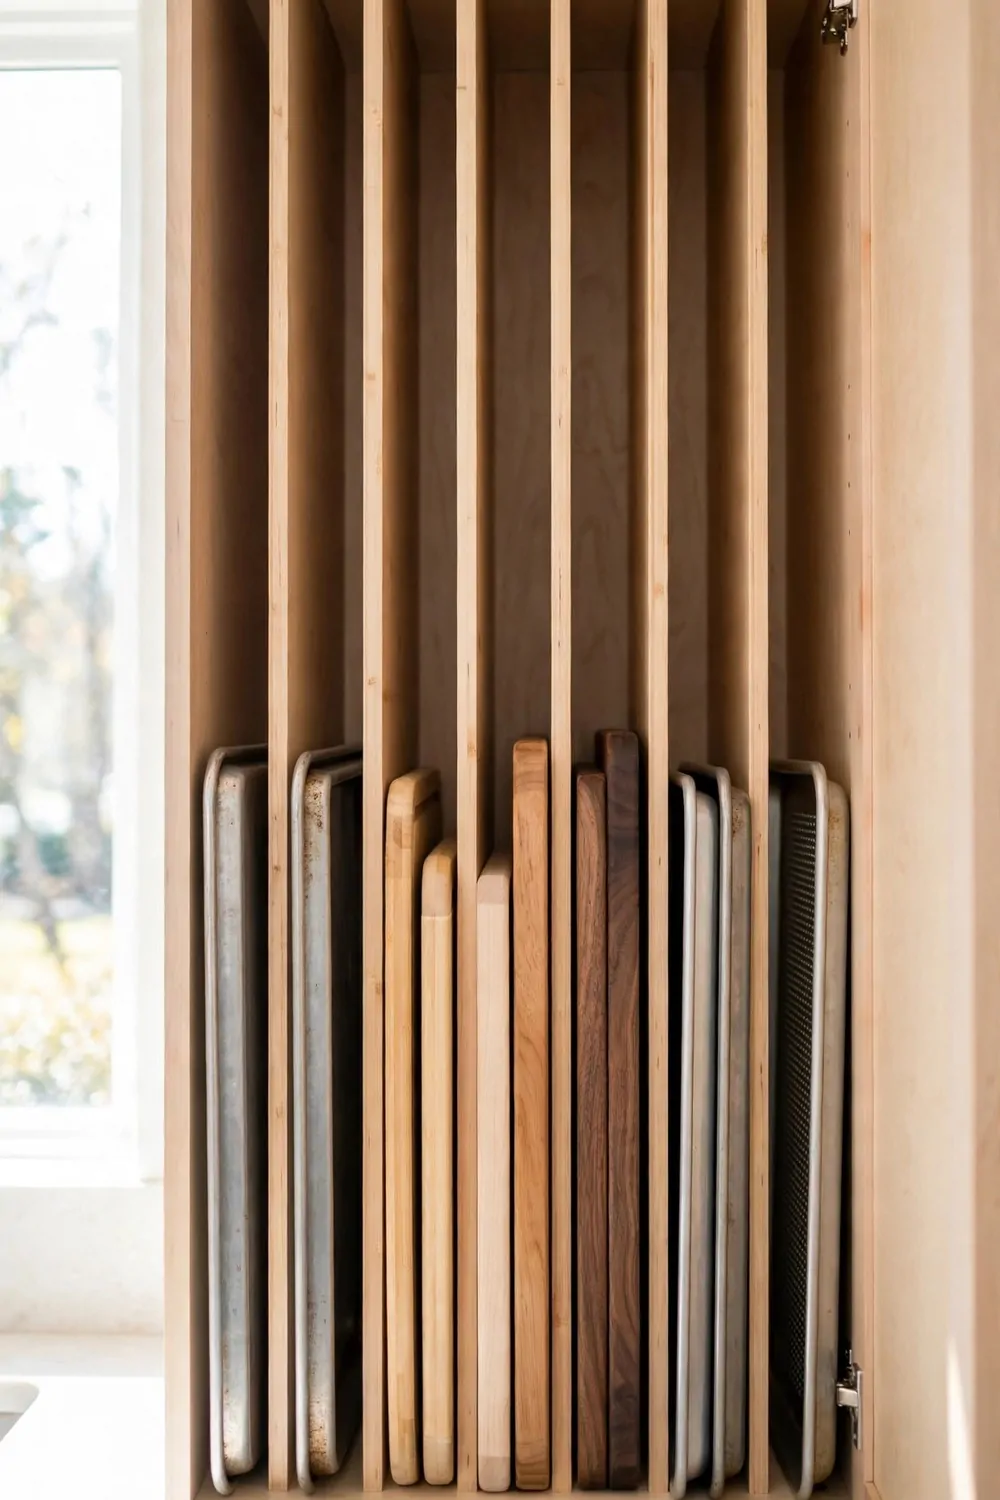
Baking sheets are flat and wide. When you stack them flat, the one on the bottom is always the one you need. You pull the whole stack out and it slides everywhere.
Stand them up instead. Put them on their sides like books on a shelf. Then you can slide out just the one you want.
A vertical divider holds them in place. It can be a wire rack, a wood divider, or a small tension rod. The divider keeps each sheet standing tall.
I keep my cookie sheets, muffin tins, and cutting boards in one tall stack like this. They live in the narrow cabinet next to the oven. It is the best use of a skinny cabinet I have found.
Cutting boards work the same way. Stand them up next to the baking sheets and they stop falling over every time you open the door.
Measure the height of your tallest sheet before you buy a divider. The divider needs to be tall enough to hold it but short enough to fit under the shelf above.
If you do not want to buy anything, a small tension rod across the cabinet works too. The sheets lean against it and stay put. It costs almost nothing.
This idea also works for lids. Big pot lids stand up nicely between dividers. They stop sliding around and clanging every time you reach in.
Once you stand things up, you will wonder why you ever stacked them flat. Your baking cabinet will feel twice as big.
Put a Lazy Susan in the Corner Cabinet
Corner cabinets are dark and deep. Things go in and never come out again. I once found a jar of jam back there that had expired two years before.
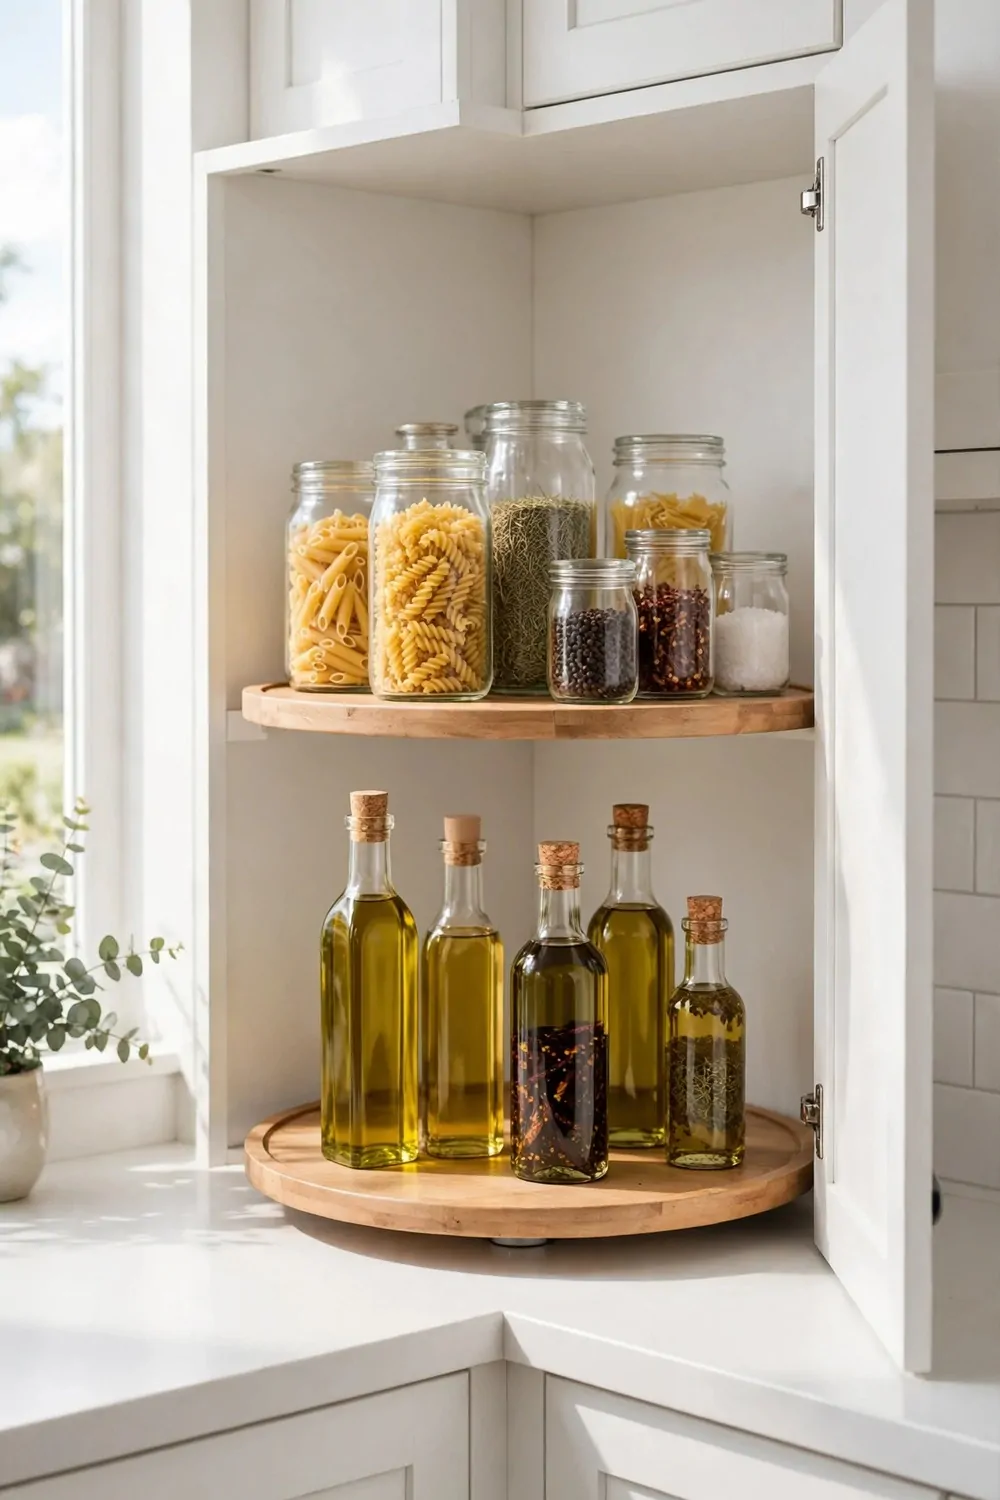
A lazy susan fixes that. It is a round tray that spins. You turn it and the thing you want comes to the front. No more reaching into the dark.
Put one in the bottom of your corner cabinet. Load it with oils, vinegars, sauces, and spice jars. Give it a spin and you can see everything at once.
Two tier lazy susans work even better. The top tier holds small jars. The bottom tier holds tall bottles. You use the full height of the cabinet instead of just the floor.
Measure the corner before you buy one. Corner cabinets come in odd shapes and sizes. A tray that is too wide will not spin. A tray that is too small wastes space.
Keep the heavy things near the middle of the tray. Heavy bottles on the edge can make it tip or spin hard. Lighter jars go on the outside edge.
I also use a small lazy susan in my regular pantry cabinet. It holds my vitamins and my tea boxes. One spin and I can see them all.
Kids like lazy susans too. My niece spins ours every time she visits. She can find the peanut butter herself now. That is a win for everyone.
A lazy susan costs less than a pizza and it lasts for years. It turns the worst cabinet in the kitchen into one of the easiest ones to use.
Hang a Rack on the Inside of the Door
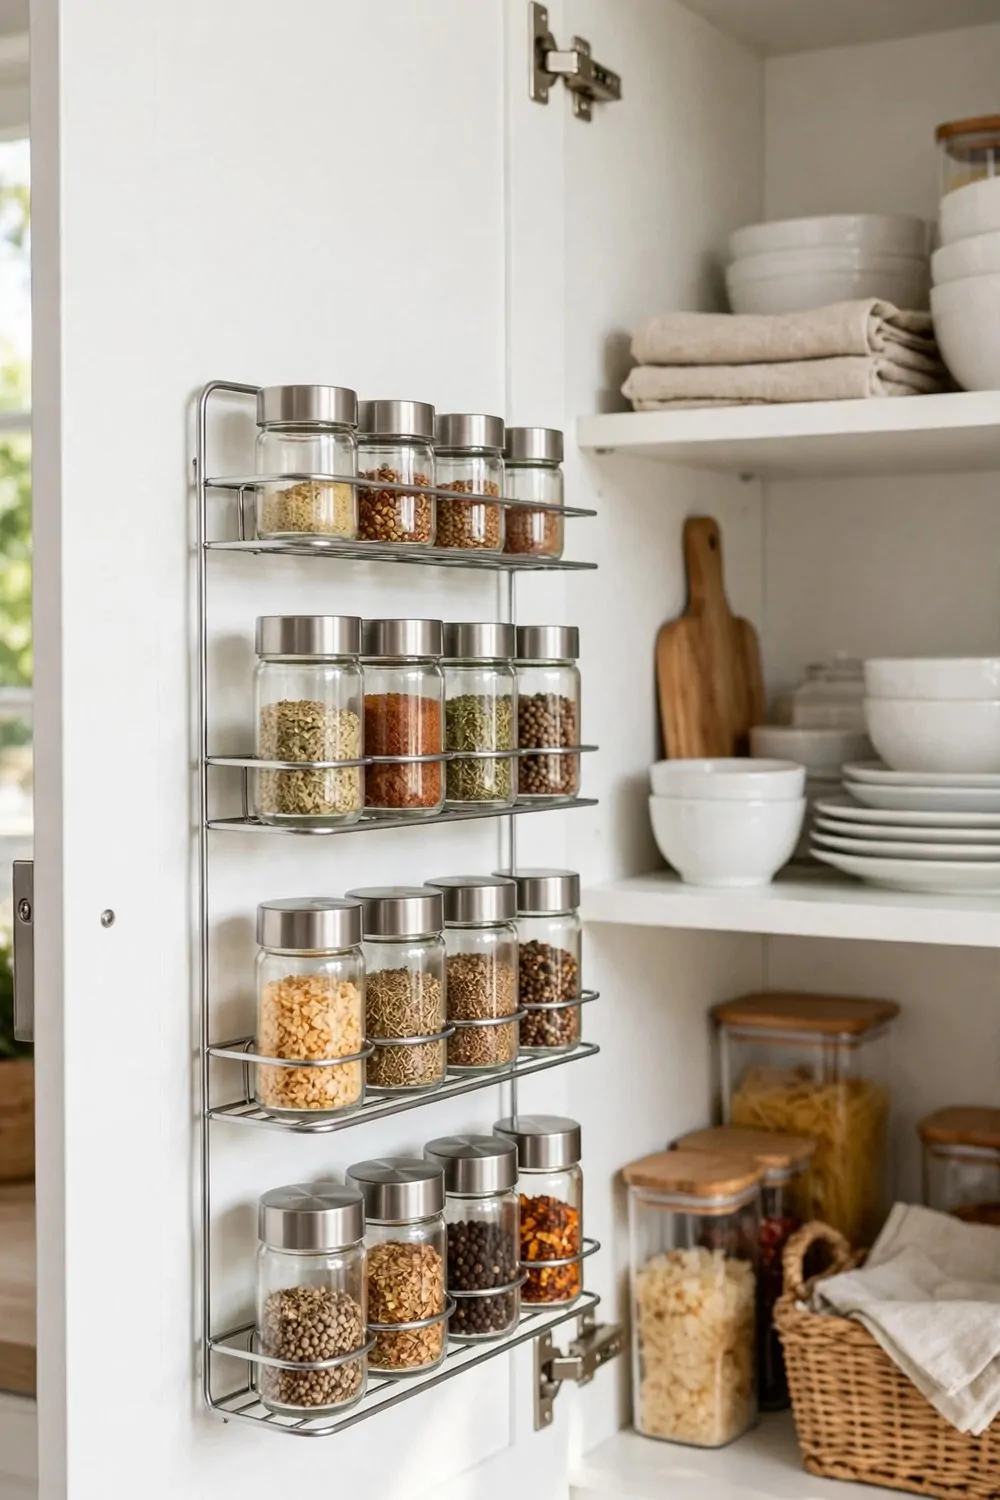
The inside of a cabinet door is free space. It is flat, it is empty, and it is right there every time you open the cabinet. Use it.
A small rack on the door holds things you reach for a lot. Measuring cups, small spice jars, cleaning sprays, or a roll of foil. They hang right where your hand already is.
I hang my measuring cups on the door of the cabinet above the stove. I cook a lot and I grab them three times a day. They used to live in a drawer and I could never find the right size.
Door racks come in two kinds. Some hook over the top of the door. Some screw into the door. The hook kind is easier because you can move it later. The screw kind holds more weight.
Check the thickness of your door before you buy a hook rack. A hook that is too loose will slide around. A hook that is too tight will not fit at all.
Keep the rack shallow. If it sticks out too far, it will bump into the things on the shelf when you close the door. Measure the gap first.
Do not overload a door rack. A few light things are perfect. A rack full of heavy cans will pull the door out of line over time.
This is a great spot for things you use while you cook. Spices, oils, or a small towel. They are right there when your hands are busy.
The door is the most wasted space in most kitchens. One small rack changes that in about two minutes. Try it on one door and see.
Store Lids on the Door With a Small Rack
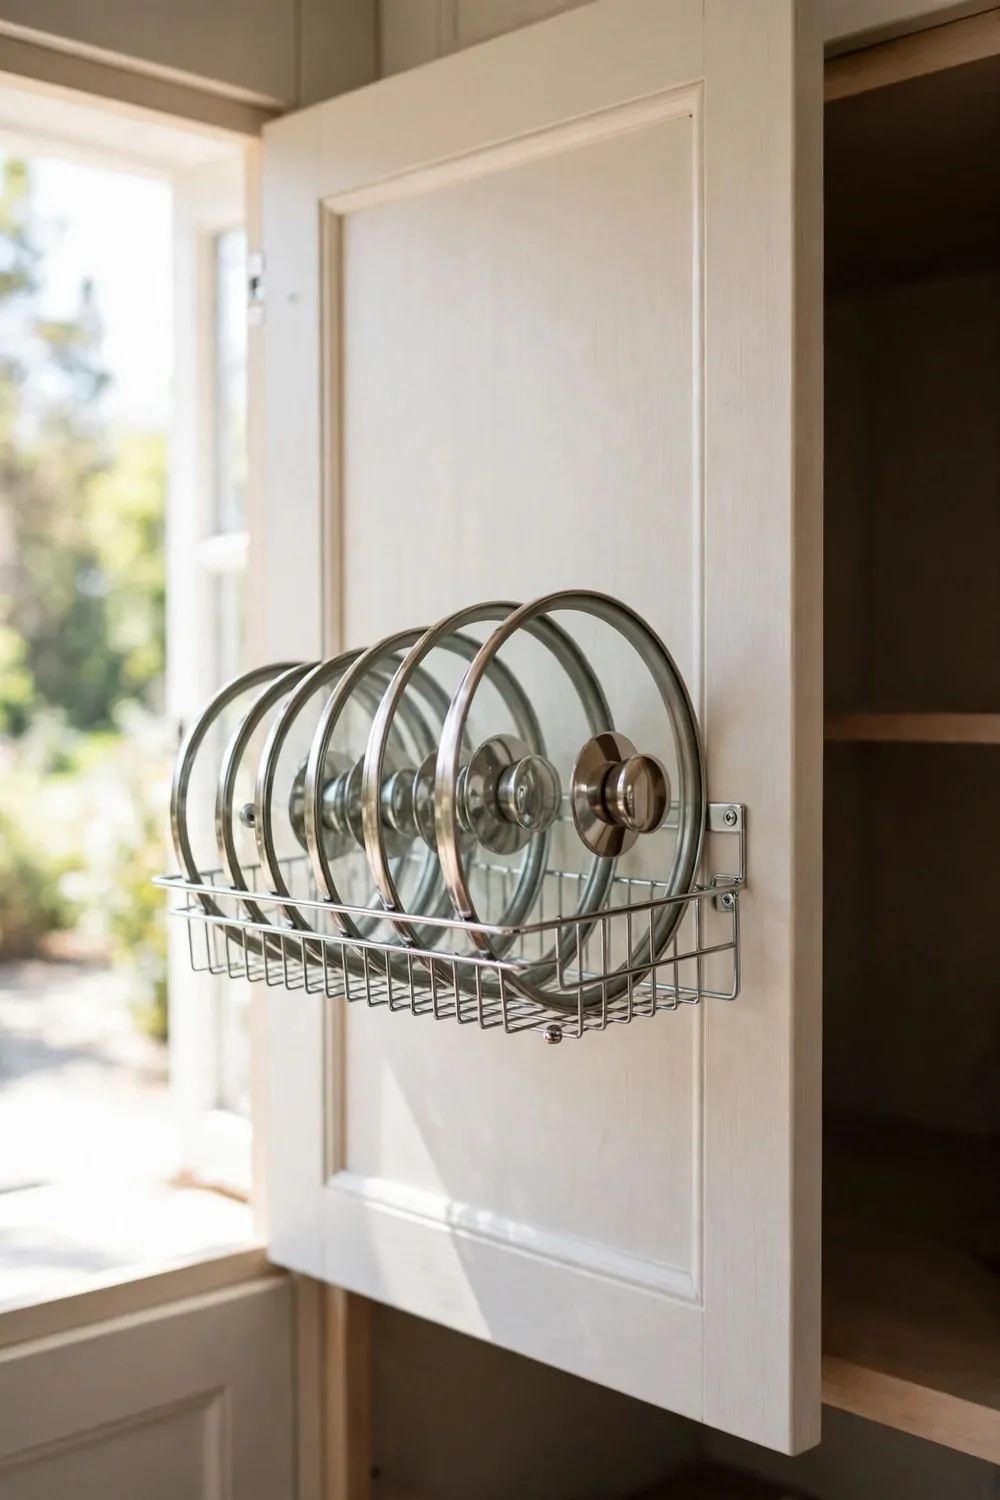
Pot lids are the hardest thing in a kitchen to store. They are round, they are wide, and they never stack neatly. They slide off piles and bang around.
Put them on the door. A small rack on the inside of the cabinet door holds each lid by its handle. They hang flat and they stay put.
I use a wire rack with slots for the lids. Each lid slides into its own slot. I can see all of them at a glance and I can grab the right one without moving a pot.
This works best on the door of the cabinet where you keep your pots. The lid and the pot live close together. You are not walking across the kitchen with a lid in each hand.
Measure your lids before you buy a rack. A rack made for small lids will not hold a big stock pot lid. Check the widest lid you own.
If the rack is too small, lids will fall out when you close the door. If it is too big, it wastes space. The right size holds the lid snug but lets it slide out easy.
Some people use a tension rod on the door instead of a rack. The lids lean against the rod. That works too if your lids all have handles that hook over it.
Keep the heaviest lid at the bottom of the rack. Glass lids are heavy and they pull more. Light metal lids can go at the top.
Once the lids move to the door, your pots stack much better. The cabinet feels calmer and quieter. No more clanging when you open it.
Use Clear Bins So You Can See Everything
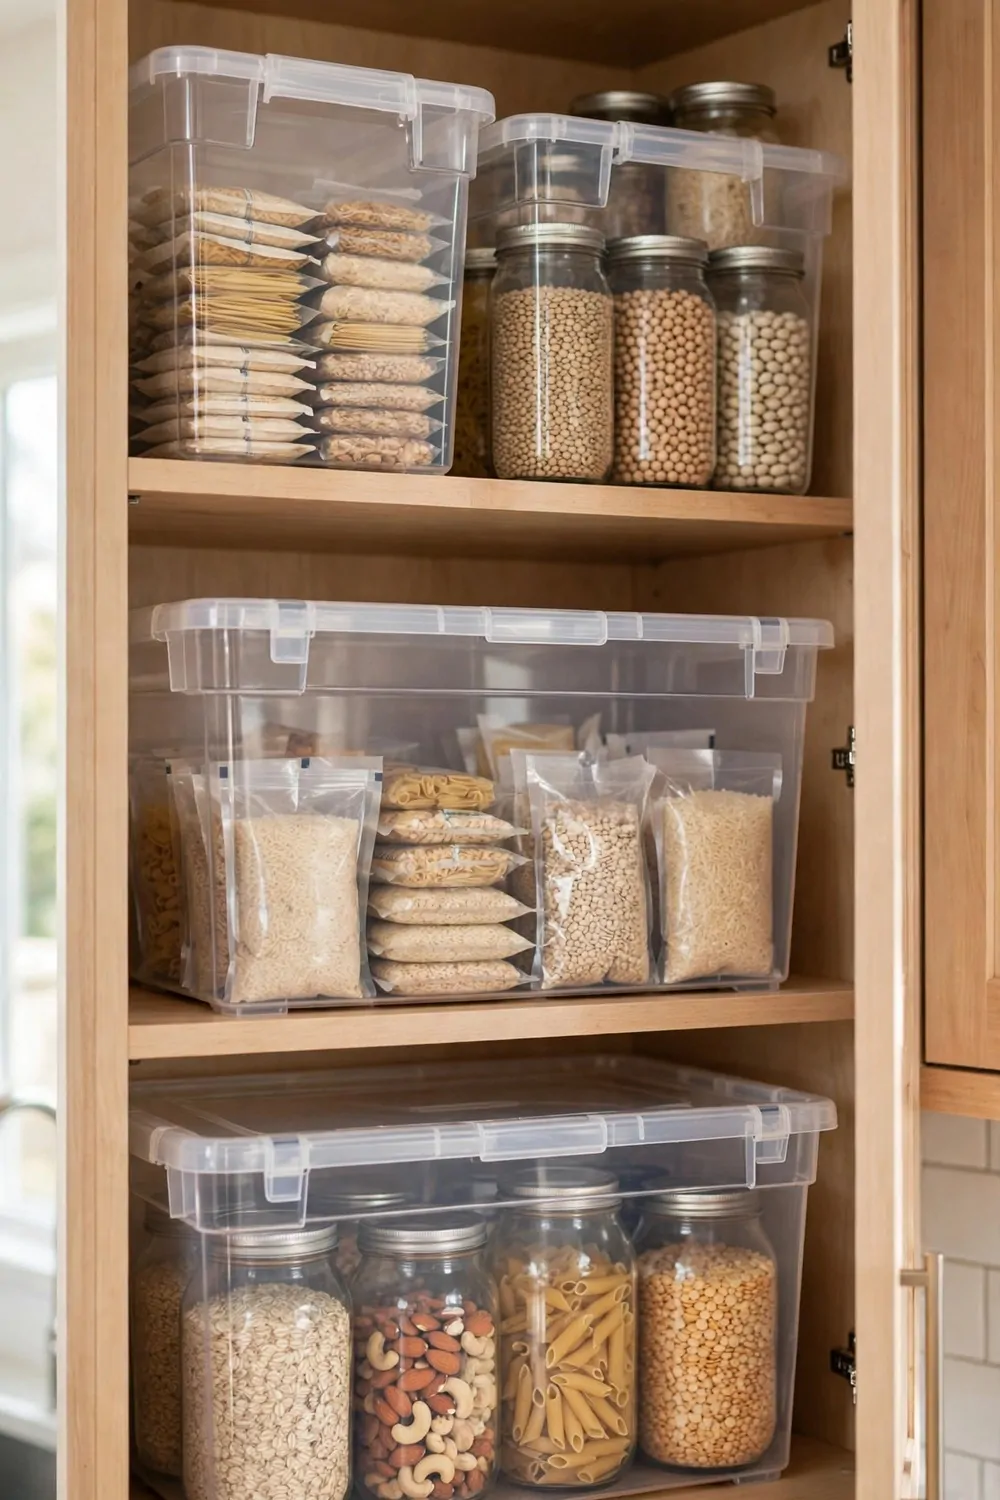
Clear bins are my favorite thing in the kitchen. You can see what is inside without pulling the bin out and digging through it. That saves time every day.
Put snacks in one bin, pasta in another, and baking things in a third. When you open the cabinet, you see all the bins at once. You grab the one you need.
Clear bins also stop small packets from falling over. Granola bars, sauce packets, and spice bags all stay upright in a bin. They do not slide to the back anymore.
I use them in my pantry cabinet and under my sink. Under the sink they hold sponges, gloves, and extra soap. I can see when I am running low without emptying the whole cabinet.
Pick bins with handles if you can. Handles make it easy to pull a bin out with one hand when the other hand is holding something. It is a small thing that matters a lot.
Do not buy bins that are too tall. A tall bin hides what is at the bottom. A short bin lets you see everything inside from above. Short and wide is best.
Wash the bins once a month. Crumbs and sticky spots build up. A quick rinse in the sink keeps them clean and clear.
Clear bins work in any cabinet. Food, dishes, cleaning stuff, or pet treats. If it is small and loose, a bin will tame it.
You do not need a lot of them. Three or four bins in one cabinet can change the whole feel of it. Start there and add more only if you need them.
Label Every Bin in Plain Words
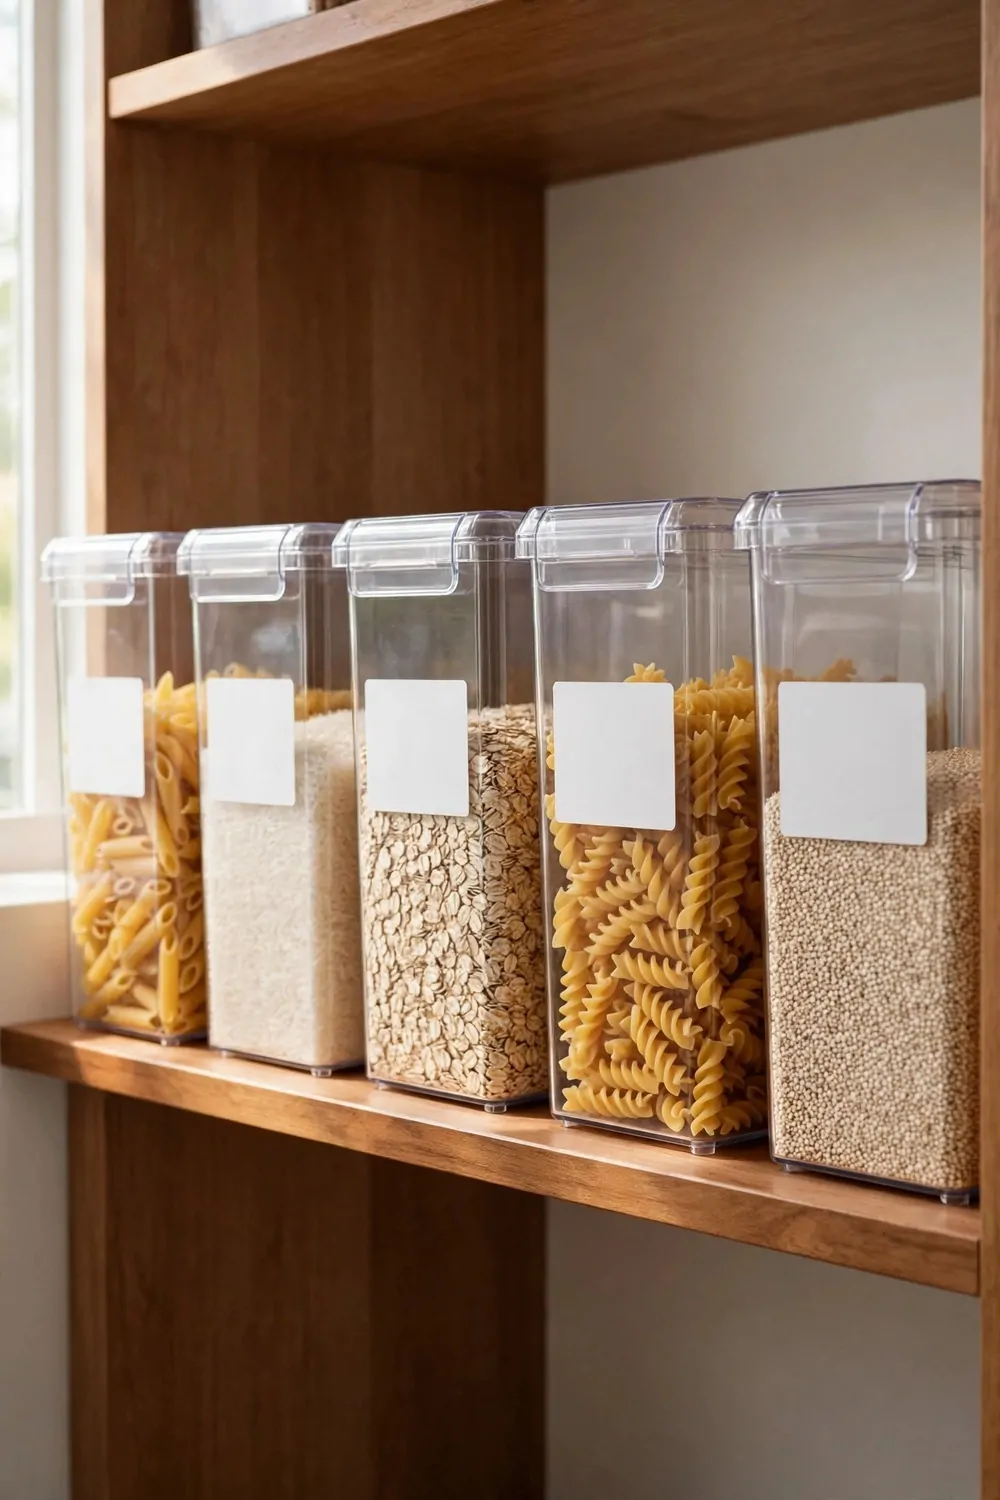
A bin without a label is a mystery box. You have to pull it out and look inside every time. A label fixes that in seconds.
Use plain words that anyone in your house can understand. Snacks. Pasta. Baking. Cleaning. Do not write fancy words. Simple is better.
I label the front of each bin where I can see it when the door opens. The label faces out. I never have to move the bin to read it.
Chalk labels work well because you can change them. If a bin changes from snacks to tea, you wipe the chalk and write the new word. No peeling or sticky mess.
Sticker labels are good too. A simple white sticker and a black marker is all you need. Keep the words big enough to read from a step back.
Labels help everyone else in the house too. My husband puts things back in the right bin now. Before the labels, everything went in the first bin he saw.
Kids can read labels and help put groceries away. My niece knows where the crackers go. She feels proud when she gets it right.
Label the shelf too if it helps. A small note on the shelf edge can mark where the daily dishes go and where the weekly things go.
Labels take ten minutes and they make the whole system work. Without them, bins slowly turn back into junk boxes. With them, order sticks.
Group Food by Meal, Not by Type
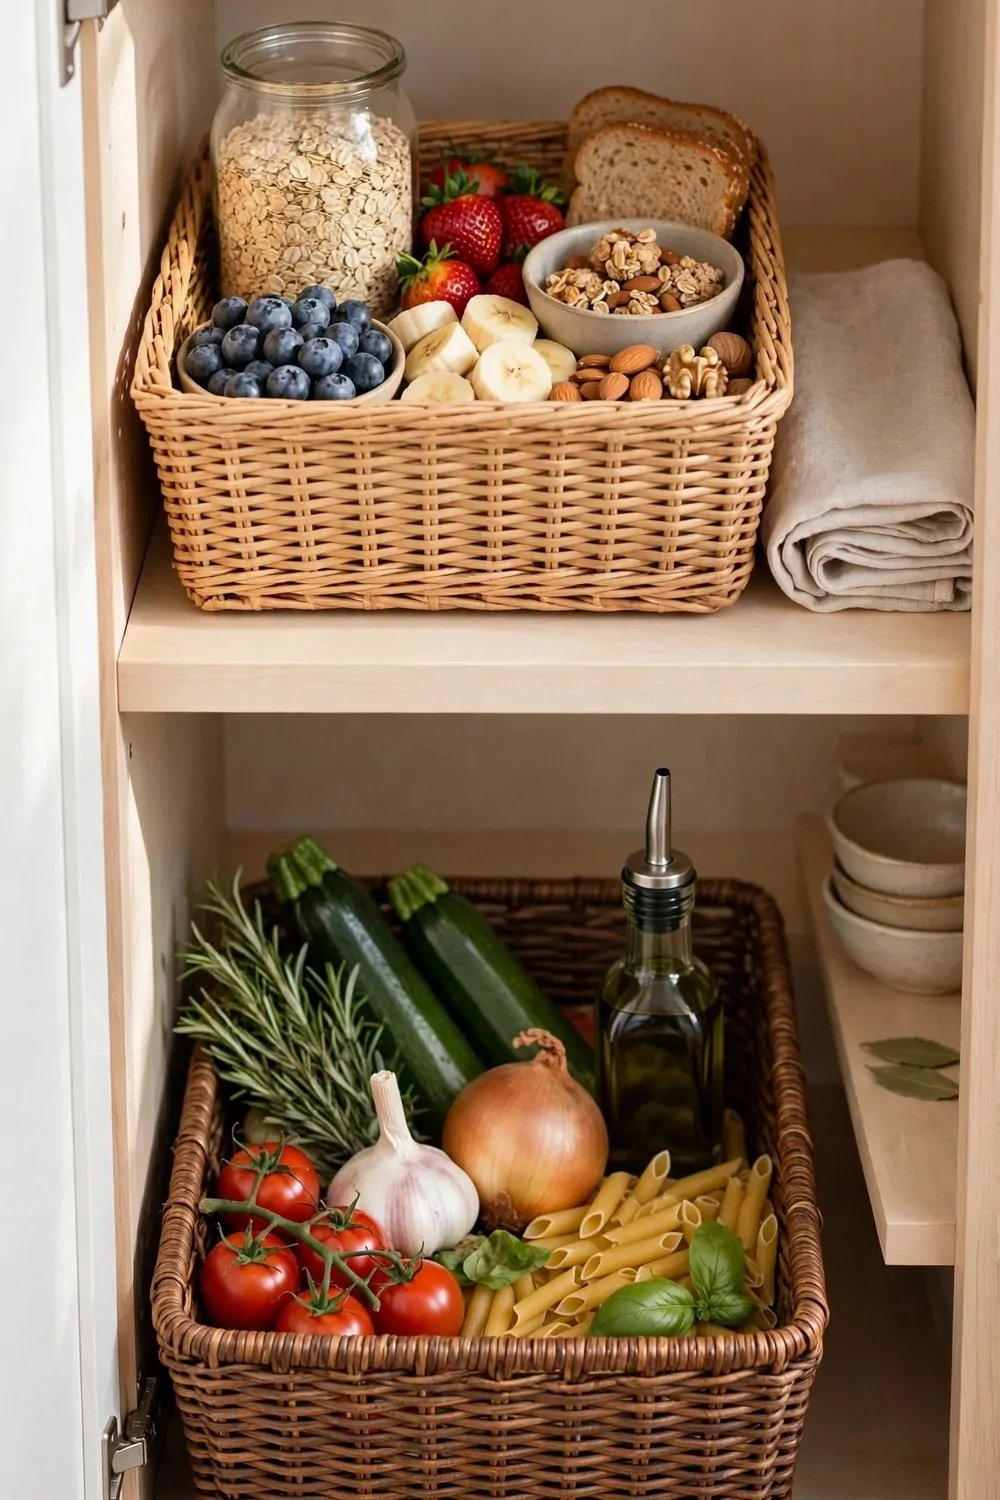
Most people sort food by type. All the cans together. All the boxes together. That sounds neat but it does not match how you cook.
Try sorting by meal instead. Put breakfast things together. Oats, cereal, honey, and jam in one spot. Put dinner things together in another spot.
When you make breakfast, you open one cabinet and everything is there. You do not open three cabinets and hunt for the honey.
I keep a breakfast bin with oats, tea bags, and peanut butter. In the morning I pull out one bin and I am done. It takes me half the time it used to.
Lunch stuff gets its own spot too. Crackers, canned tuna, and soup mix live together. When I pack a lunch, I grab from one shelf.
Dinner ingredients sit together as well. Pasta, pasta sauce, rice, and dried beans share a shelf. I can see a whole meal at a glance.
This works for snacks too. Put the kids snacks in one bin and the grown up snacks in another. No more digging past pretzels to find the nuts.
Grouping by meal also shows you what you are missing. If the breakfast bin is empty, you know to buy oats. You stop buying a third jar of jam by mistake.
It feels odd at first because it breaks the old type habit. Give it one week. Most people never go back to sorting by type.
Keep Everyday Dishes at Eye Level
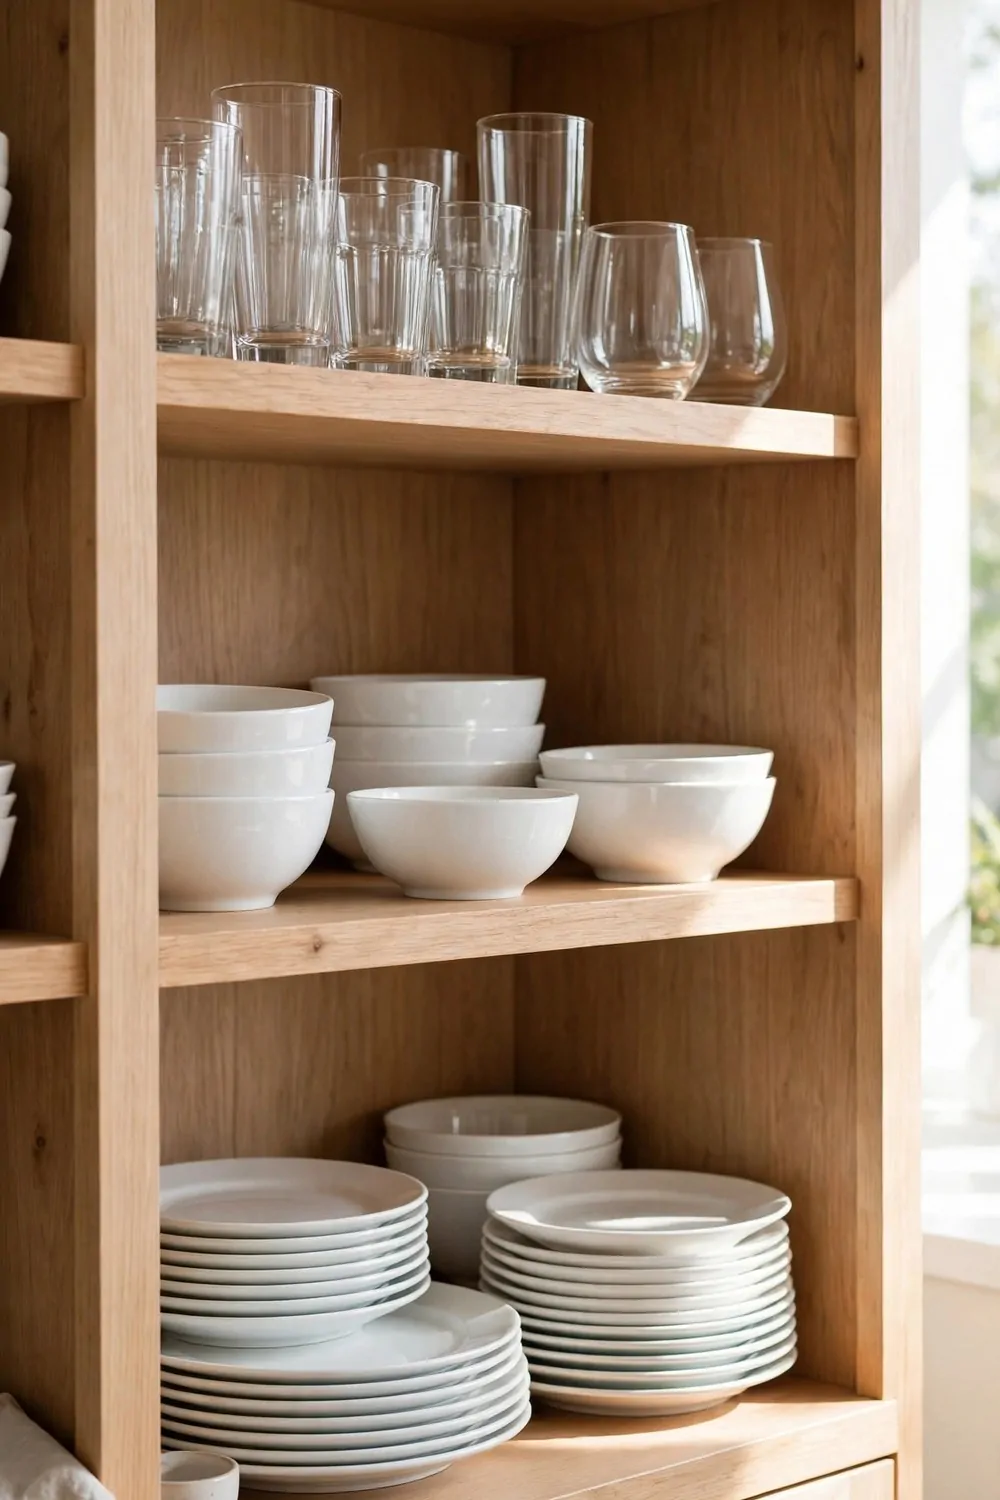
Your eyes land at the same height every time you open a cabinet. That height is the best real estate in your kitchen. Give it to the dishes you use every day.
Plates, bowls, and cups belong at eye level. You reach for them at every meal. You should not have to bend down or stretch up for them.
I moved my plates to the middle shelf and my mornings got easier. I used to reach up high for a plate and hope I did not drop it. Now I just take one.
Put the things you use less often above or below. The fancy serving plates can go up high. The big mixing bowls can go down low.
Think about who uses the dishes too. If you have kids, put their cups and bowls on a lower shelf they can reach. They can help set the table themselves.
Heavy dishes should never live on a high shelf. A stack of heavy plates up high is hard to lift and easy to drop. Keep heavy things low and light things high.
Eye level is different for everyone. If you are tall, your eye level shelf is higher than mine. Use your own height as the guide, not a rule from a book.
One shelf of everyday dishes is enough for most families. You do not need every plate you own at eye level. Keep the daily set there and store the rest.
This one change makes the kitchen feel easier to use. You notice it at every meal, three times a day. That is a lot of small wins.
Move Rarely Used Things to the Top Shelf
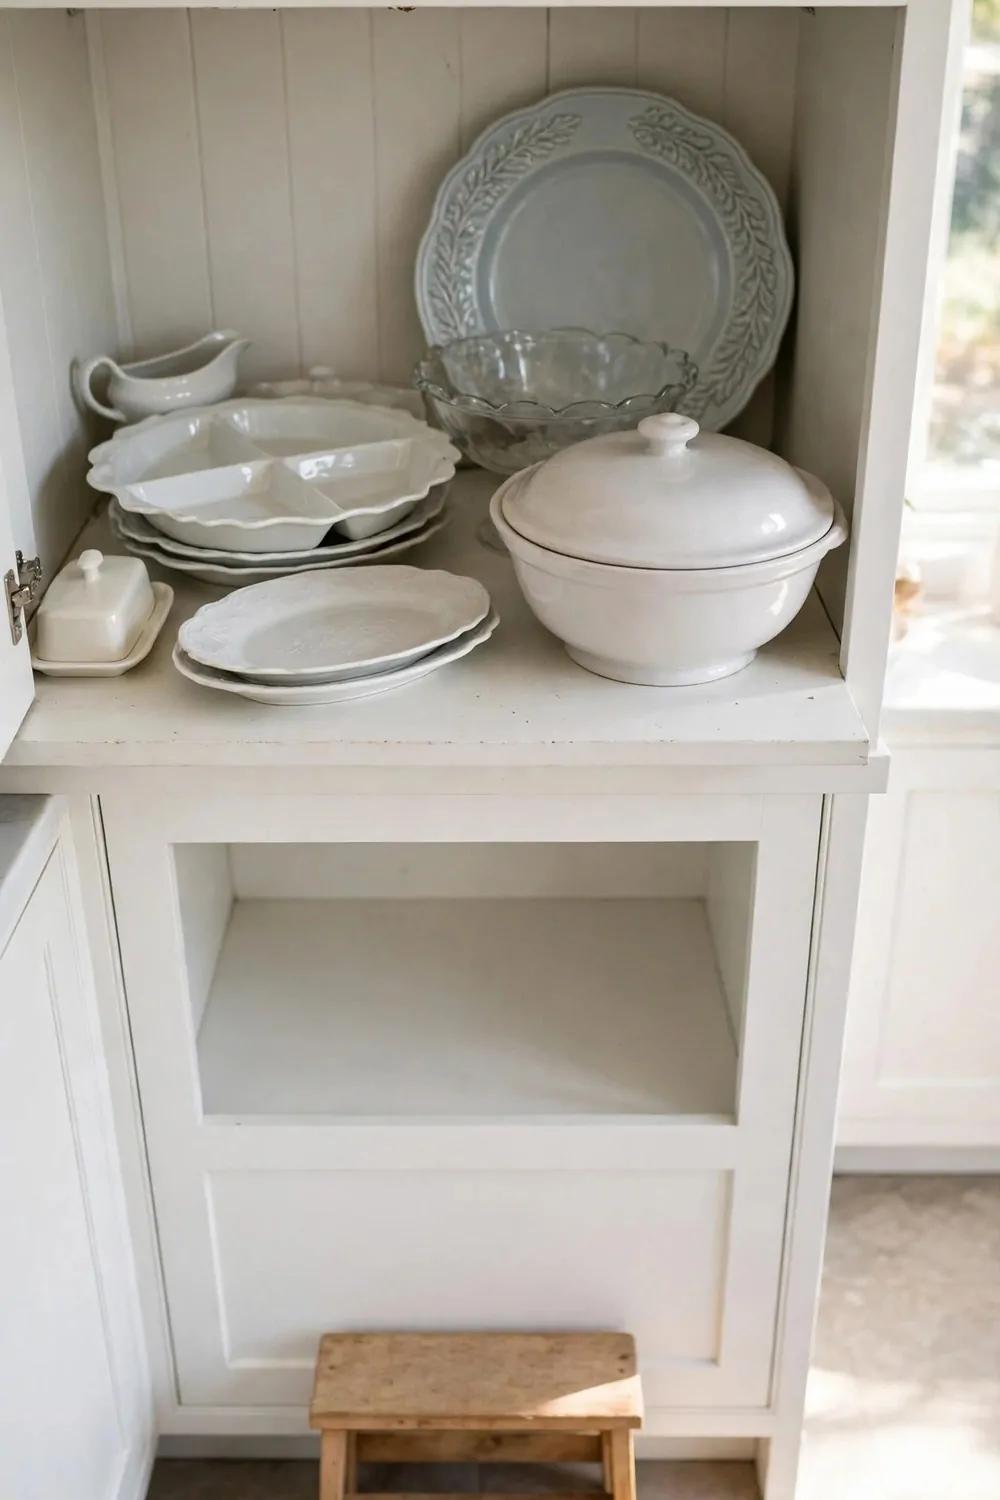
The top shelf is the hardest to reach. That makes it the perfect home for things you almost never use. It is not wasted space. It is just slow space.
My turkey roaster lives up there. I use it once a year. It would be silly to keep it at eye level where it blocks the plates I use daily.
The big punch bowl goes up top too. So does the extra set of holiday dishes. They are safe there and they are out of my way.
Use a small step stool to reach the top shelf. Keep the stool nearby so it is not a big job. I keep mine in the corner by the fridge.
Do not put heavy things on the top shelf if you can help it. A heavy roaster up high is hard to lift down. Put heavy rare things on a low shelf in a far cabinet instead.
Light and bulky things are best up top. Big plastic containers, the extra salad bowl, the cake carrier. They are light to lift down and they fill the tall space well.
Put things in bins on the top shelf so they do not fall when you reach up. A bin keeps a stack of lids or small bowls together. You pull the bin down, not one loose thing at a time.
Write a small list of what lives up top and tape it inside the door. You will forget what is up there. The list saves you from buying a second punch bowl.
The top shelf is not a junk shelf. It is a storage shelf with a job. Give it the things you love but rarely need, and your daily shelves will breathe.
Use Stackable Shelves for Short Items
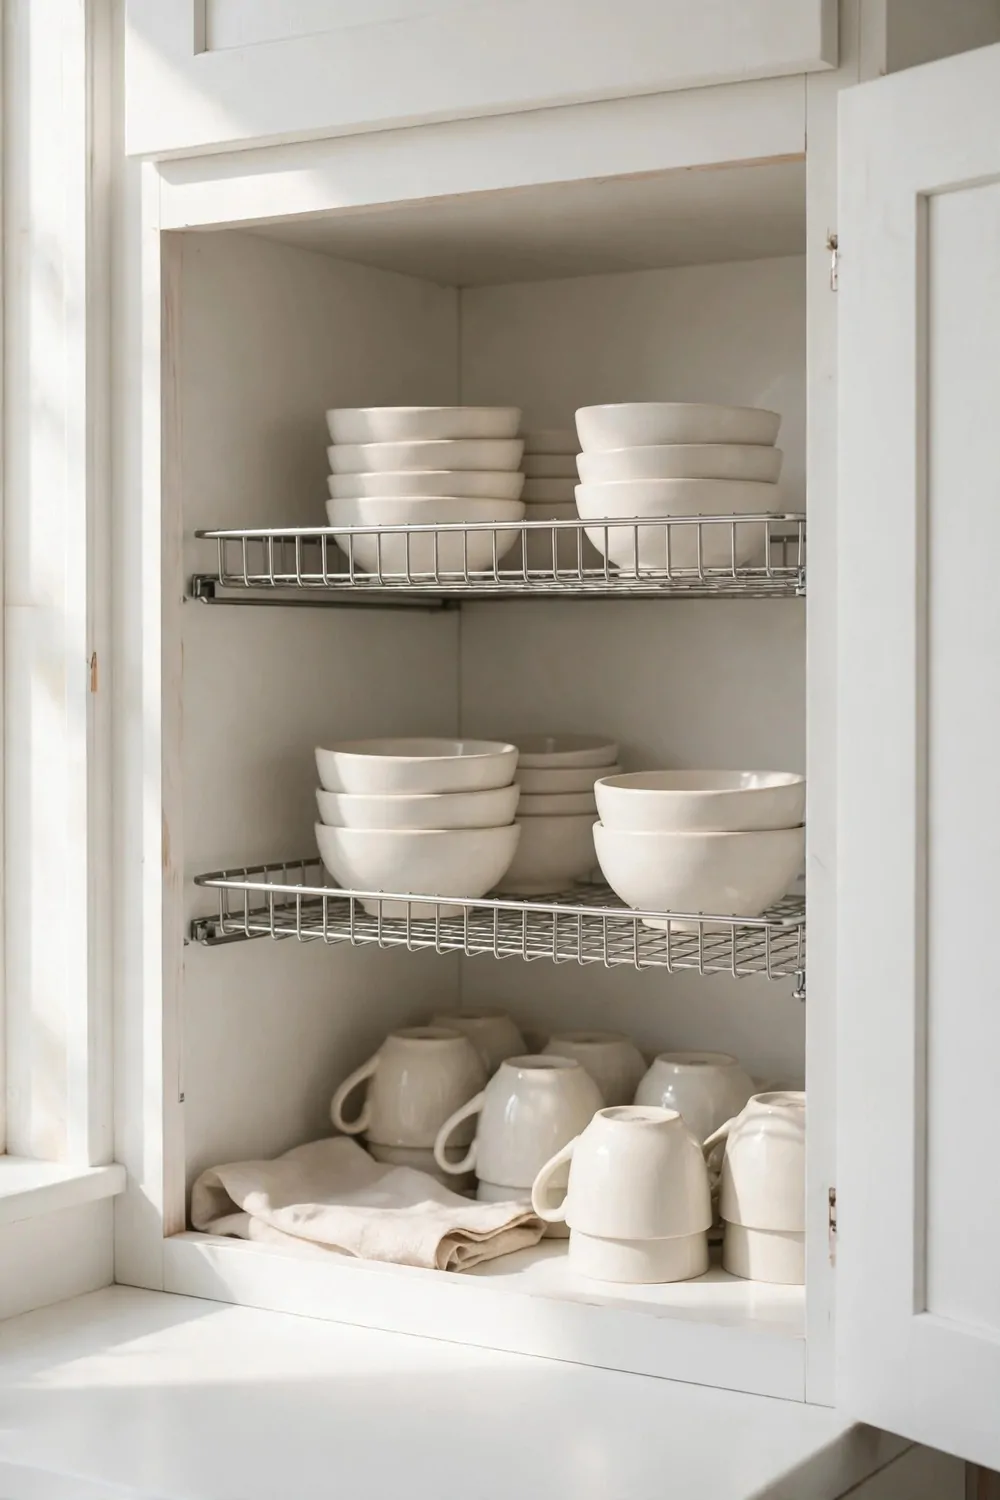
Short items waste a lot of cabinet height. Small bowls, spice jars, and tiny cups sit low while a foot of empty air sits above them. Stackable shelves fix that.
A stackable shelf is a small platform you set inside the cabinet. You put short things on top of it and short things under it. One shelf becomes two levels.
I use them for my spice jars. The jars are short and the shelf is tall. Now I have two rows of spices and I can see every label.
Small bowls and ramekins love stackable shelves too. Put the small bowls on the platform and the tiny cups underneath. Nothing gets buried.
You can stack two of these platforms if your cabinet is tall enough. Just make sure the top one is stable and the things on it are light.
Wire stackable shelves are cheap and they let light through. You can see the things underneath without pulling the shelf out. Wood ones look nicer in open cabinets.
Measure before you buy. The platform has to fit the width and depth of your cabinet. A platform that is too wide will not sit flat.
Do not put tall things on a stackable shelf. It is made for short items. Tall bottles will not fit under the shelf above and they will tip over.
These little shelves are one of the easiest wins in the whole kitchen. No tools, no fuss, just set them down and enjoy the extra room.
Put Spices on a Tiered Riser
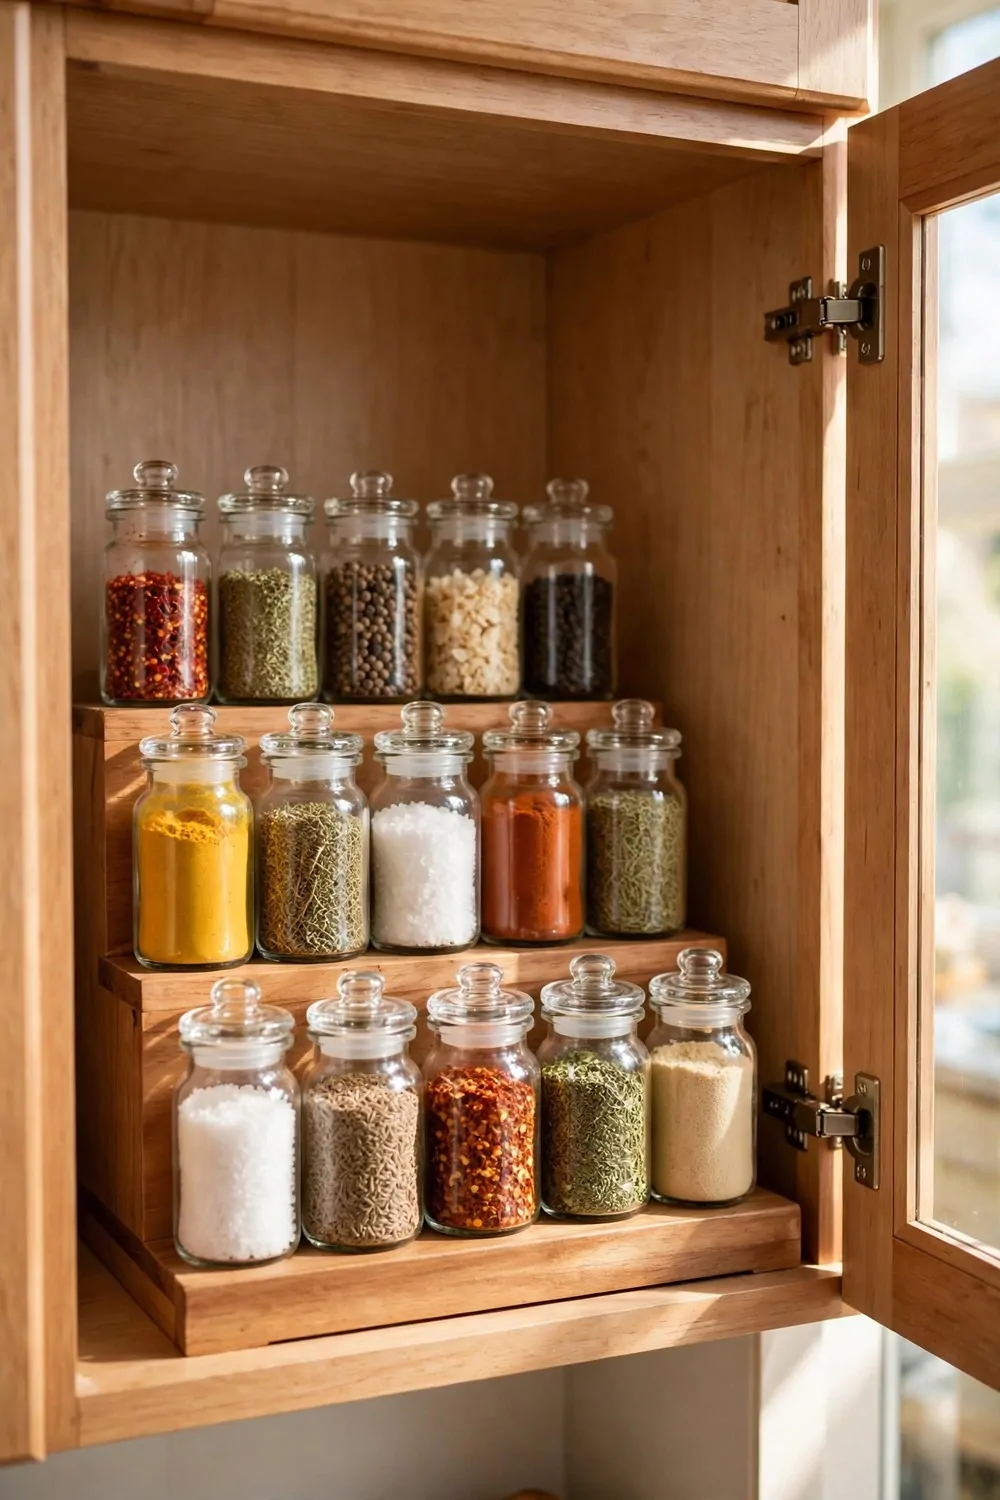
I used to lose my spices in the back of the cabinet. I would buy the same jar twice because I could not see what I already had. A tiered riser fixed that in one afternoon.
A riser is just a small set of steps that sits on your shelf. Each step lifts the jars behind it a little higher. Now you can see every label at one look. It sounds small, but it changes how fast you cook.
Put your most used spices on the front row. Salt, pepper, and garlic powder live there for me. The less used ones go on the back steps. You still reach them easy, you just grab them a little less often.
Keep the jars all the same size if you can. It looks neat, and it makes the rows line up better. I moved mine into small matching jars and it felt like a whole new cabinet.
If your shelf is deep, a two step riser works best. A three step riser is better for a tall cabinet with room to spare. Measure the height first, because a riser that is too tall will hit the shelf above it.
You can find risers in wood, plastic, or metal. I like wood because it feels warm and it does not slide around much. Plastic is fine too, and it wipes clean in seconds.
Here is how three common spice spots compare, so you can pick what fits your kitchen.
| Spot | Best for | Watch out for |
|---|---|---|
| Tiered riser on a shelf | Seeing every jar at once | Needs enough shelf height |
| Door rack | Small kitchens with no spare shelf room | Heavy jars can pull the door down |
| Turntable | Deep cabinets where things hide | Tall jars can tip when it spins |
Label the lids too, not just the jars. When you look down at a riser, you see lids first. A little label on top saves you from picking up five jars to find the paprika.
Check your spices twice a year and toss the ones that smell like nothing. Old spices just take up room. A riser full of fresh spices makes cooking feel easy again.
Store Spices on the Door
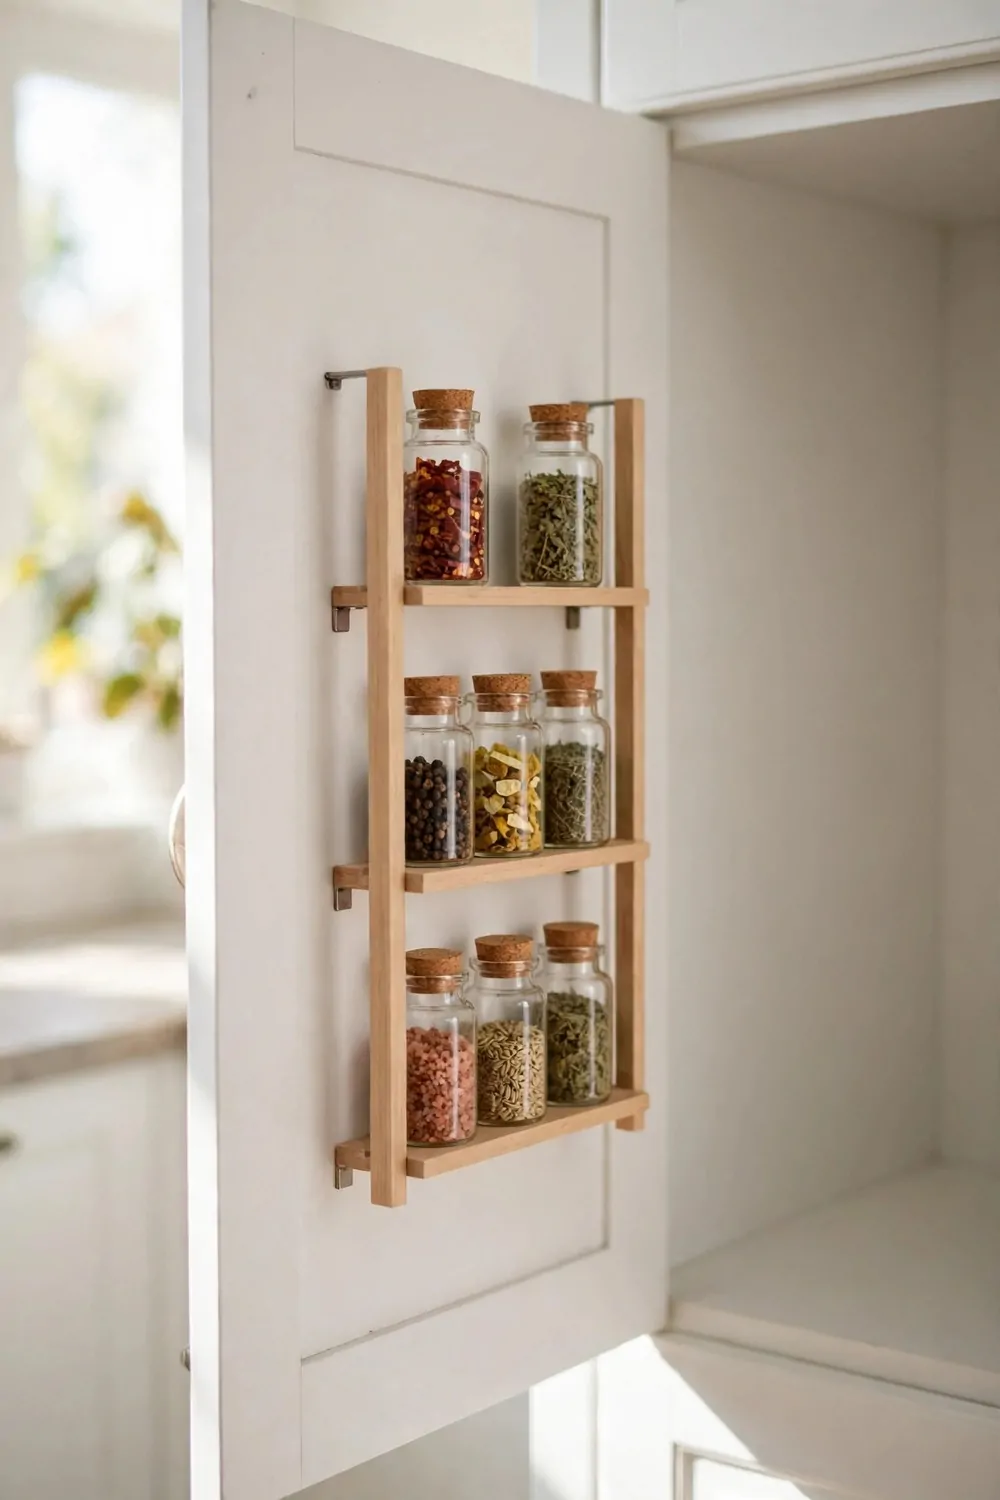
The inside of your cabinet door is free space. Most people never use it. A small spice rack on the door can hold a dozen jars without taking one inch of shelf room.
I put my door rack on the cabinet right next to the stove. Now I open the door, grab the cumin, and I am back to cooking in seconds. It is the closest my spices have ever been to where I use them.
Pick a rack that screws in if your door is solid wood. The screw in kind holds heavy jars without any worry. If you rent, look for a strong stick on rack instead, and test it with one jar before you load it up.
Keep the jars small. Big jars are heavy, and they swing every time you close the door. Small jars stay put, and you can fit more of them in a row.
Put a little lip or rail on each row of the rack. That rail is what stops the jars from sliding off when the door swings shut. I learned this the hard way after a jar of chili flakes hit the floor.
Only store spices you use a lot on the door. The ones you use once a month can stay on a shelf. The door is your fast lane, so keep it for the regulars.
Check the door closes flat after you load the rack. If the jars stick out too far, they will bump the shelf edge. Move the rack a little lower or use shorter jars until the door shuts clean.
Wipe the rack once a month. Spice dust gets everywhere, and a quick wipe keeps the jars from getting sticky. It takes two minutes and the whole cabinet feels fresh after.
If you have kids who love to open doors, put the hot spices up high on the rack. The mild ones can live low where little hands can reach. It is a small change that keeps dinner safe.
Hang Mugs on Hooks Under a Shelf
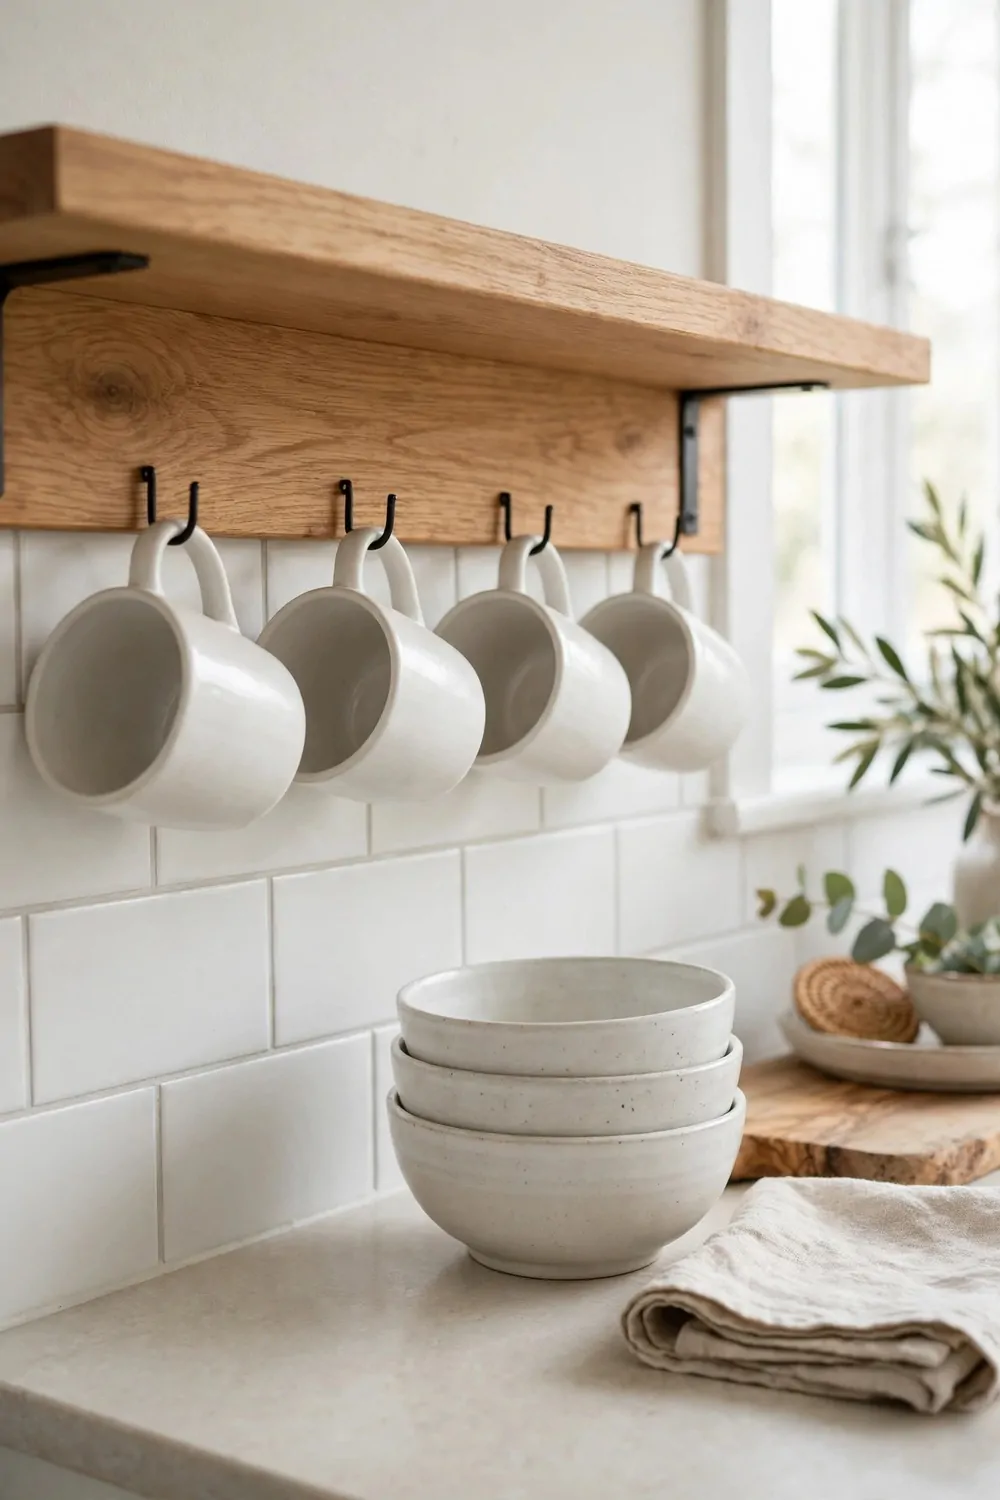
Mugs take up so much shelf room. They are wide, they are tall, and they never stack well. Hooks under a shelf turn that dead space into mug storage.
You screw a row of small hooks into the underside of a shelf. Then each mug hangs by its handle. I did this in one cabinet and freed up a whole shelf for plates.
Space the hooks far enough apart so the mugs do not knock together. About three inches between hooks works for most mugs. Big chunky mugs need a little more room.
Hang your favorite mugs at the front. The ones you grab every morning should be the easiest to reach. The holiday mugs and the ones guests use can hang further back.
Use hooks made for cabinets, not the thin sticky kind. Sticky hooks fall off when a heavy mug pulls on them. Screw in hooks hold strong, and you only install them once.
If you are worried about holes in your shelf, use a hook rail that screws into the side of the cabinet instead. It holds the same way and leaves the shelf itself alone. I have seen both work great.
Keep the mugs you hang under a shelf away from the stove side. Steam can make them feel damp. A cabinet near the coffee maker or the sink is a better home for them.
Wash the hooks now and then, because dust settles on them. A damp cloth does the job. Clean hooks mean clean mug handles, and that matters more than you think.
This trick also works for small measuring cups. Hang them by their handles in a row and you will never dig through a pile to find the half cup again.
Keep Cleaning Supplies in One Caddy
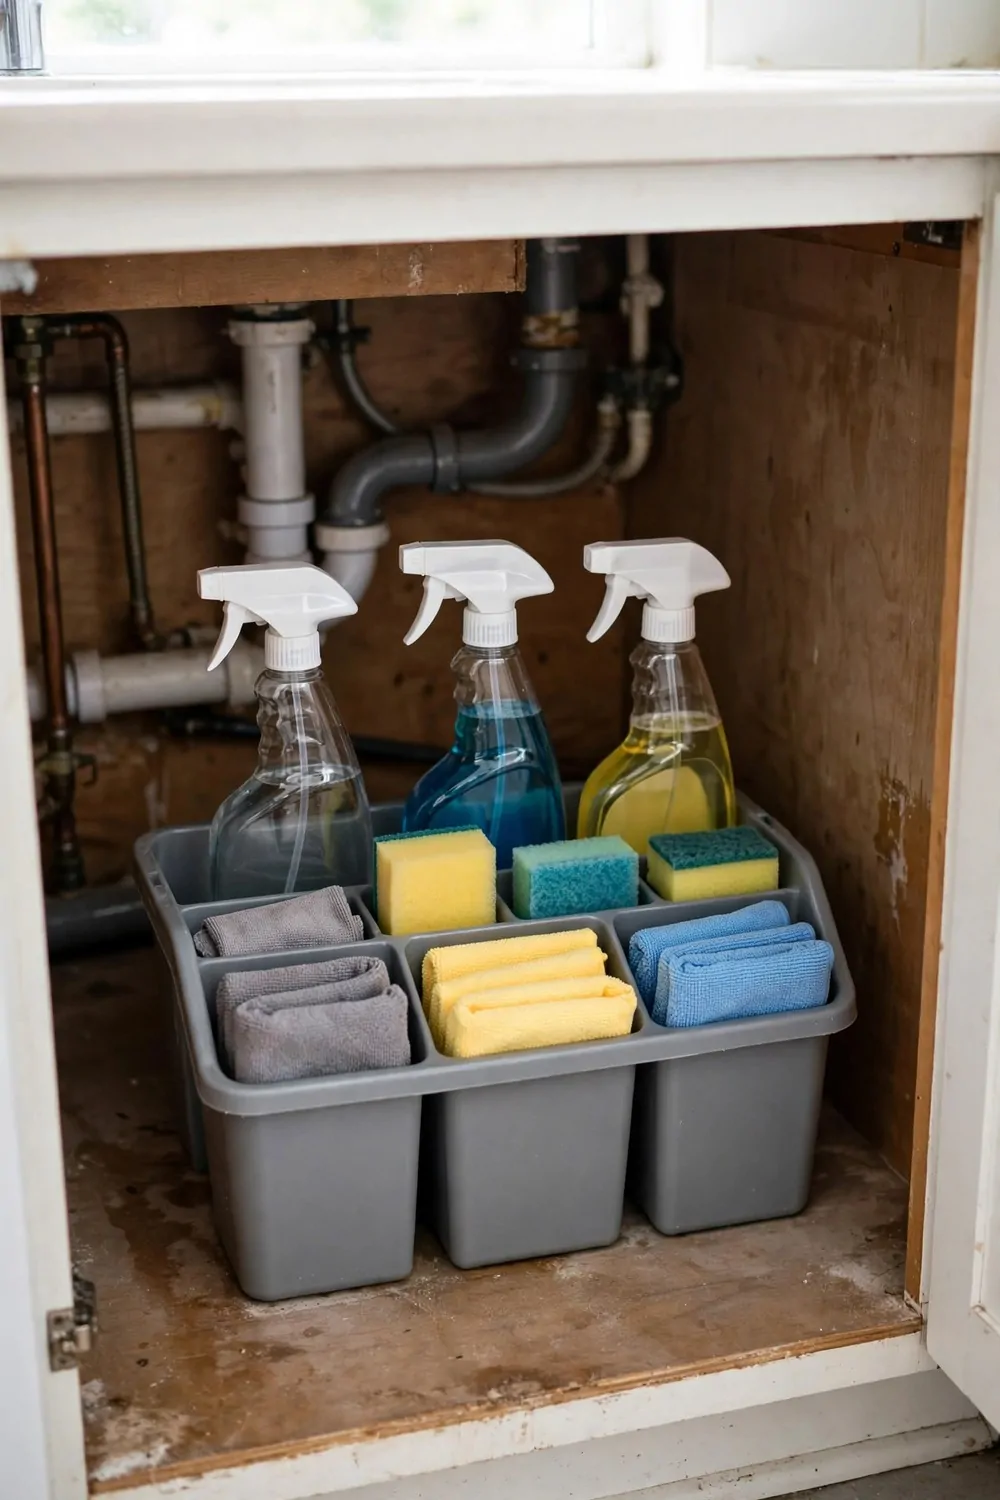
Cleaning supplies spread out fast. One bottle under the sink, one on a shelf, one lost behind the trash bags. A caddy pulls them all into one place you can carry.
I use a plain plastic caddy with a handle. It holds everything I need for the kitchen, and I can lift it out, clean the counter, and put it back in seconds. No more hunting.
Pick a caddy that fits your cabinet with room to spare. If it is too wide, it will catch on the door frame every time you pull it out. Measure first, then shop.
Put the bottles you use most at the front of the caddy. The all purpose spray and the dish soap live there for me. The stuff you use once a week can sit at the back.
Here is what goes in my caddy.
- All purpose spray
- Dish soap
- Sponge and a spare sponge
- Small scrub brush
- Microfiber cloths
- Baking soda for tough spots
- Rubber gloves
Keep a small towel in the caddy too. You will want it for wiping up spills right away. I fold one flat at the bottom so it does not take up much room.
Do not overfill the caddy. If you have to shove bottles in, you will stop using it. Leave a little empty space so each bottle lifts out easy.
Check the bottles once a month for leaks. A leaky bottle can make a sticky mess at the bottom of the caddy. I wipe the inside out on the first of every month and it stays clean.
If you have little kids, store the caddy on a high shelf or add a child lock to that cabinet. Cleaning bottles are not toys, and a locked door is the safest choice.
Use a Tension Rod to Hold Spray Bottles
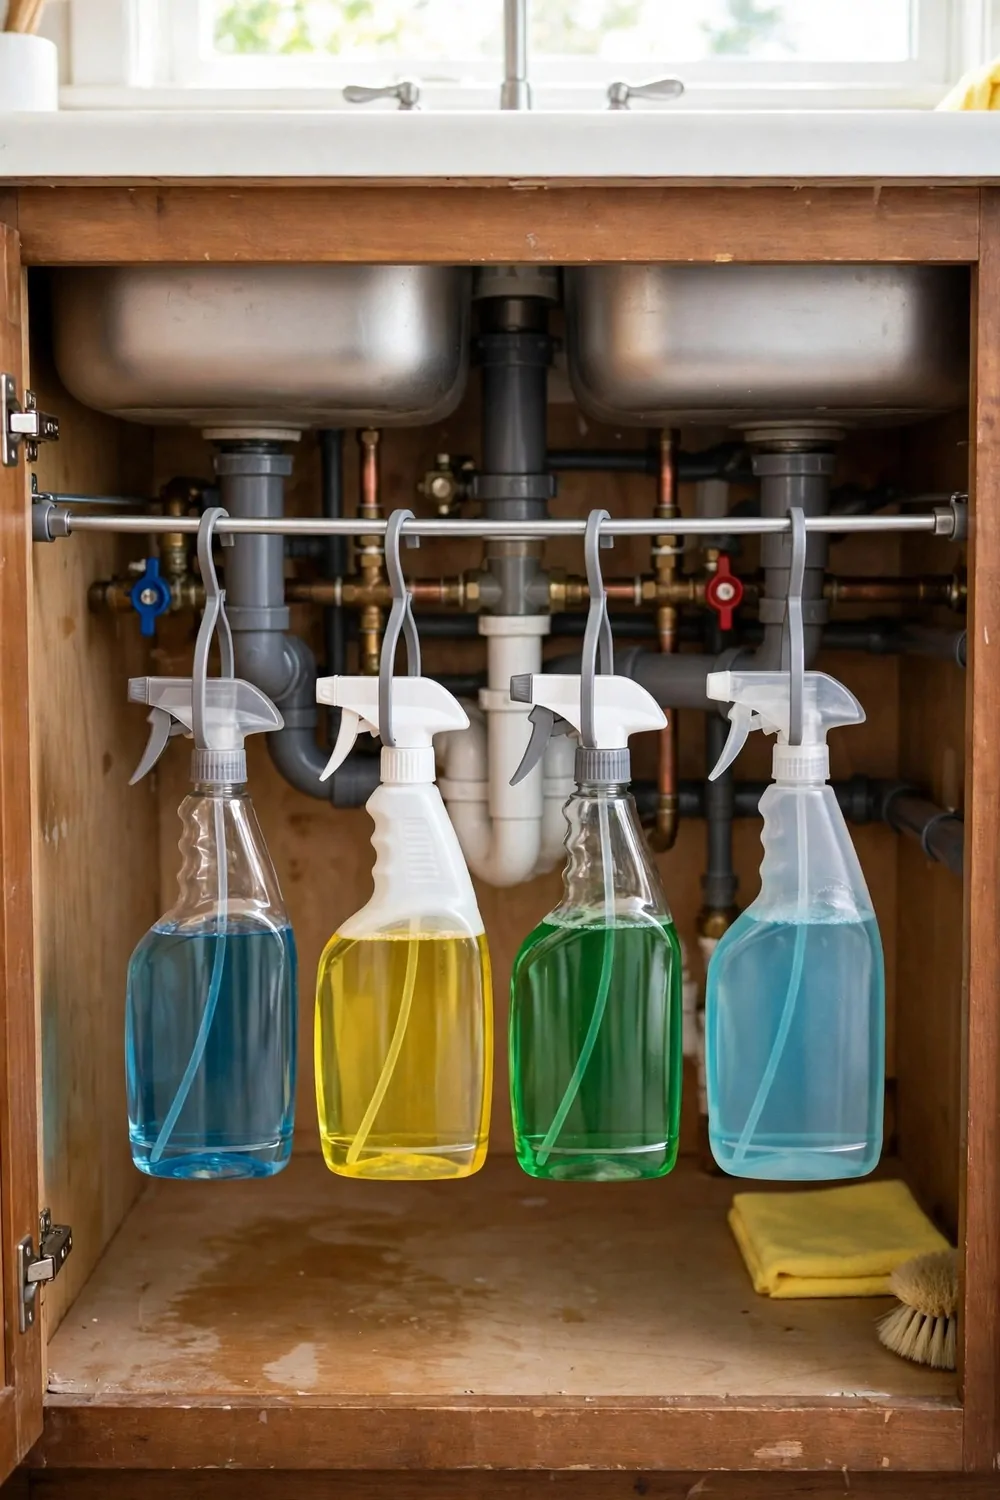
A tension rod is one of the cheapest tricks in this whole list. It costs a few dollars, it needs no screws, and it holds your spray bottles up where you can see them.
You wedge the rod across the inside of the cabinet, near the top. Then you hang each spray bottle by its trigger from the rod. The bottles hang in a row like shirts on a closet rod.
This works best under the sink. That cabinet is usually a mess of bottles lying on their sides. Hanging them up frees the whole floor of the cabinet for other stuff.
Measure the width of your cabinet before you buy the rod. Tension rods come in sizes, and you want one that fits snug. Twist it until it feels tight, then give it a little tug to test it.
Hang the bottles you use most in the middle. The ones you use less can go near the ends. I keep my all purpose spray right in the center so I grab it without thinking.
Do not hang bottles that are too heavy. A full big bottle can pull a weak rod down. If a bottle feels heavy, keep it on the floor of the cabinet and hang the lighter ones instead.
You can hang a small basket from the rod too. I hang one with extra sponges and gloves in it. It swings a little, but it stays out of the way and easy to reach.
Wipe the rod now and then. It can get a little grimy under the sink. A quick wipe keeps it from slipping, and a dry rod holds tighter than a wet one.
If the rod keeps sliding, wrap a bit of rubber shelf liner around each end. The extra grip holds it in place. This tiny fix saved my setup from falling down twice.
Add a Blind Corner Pull-Out
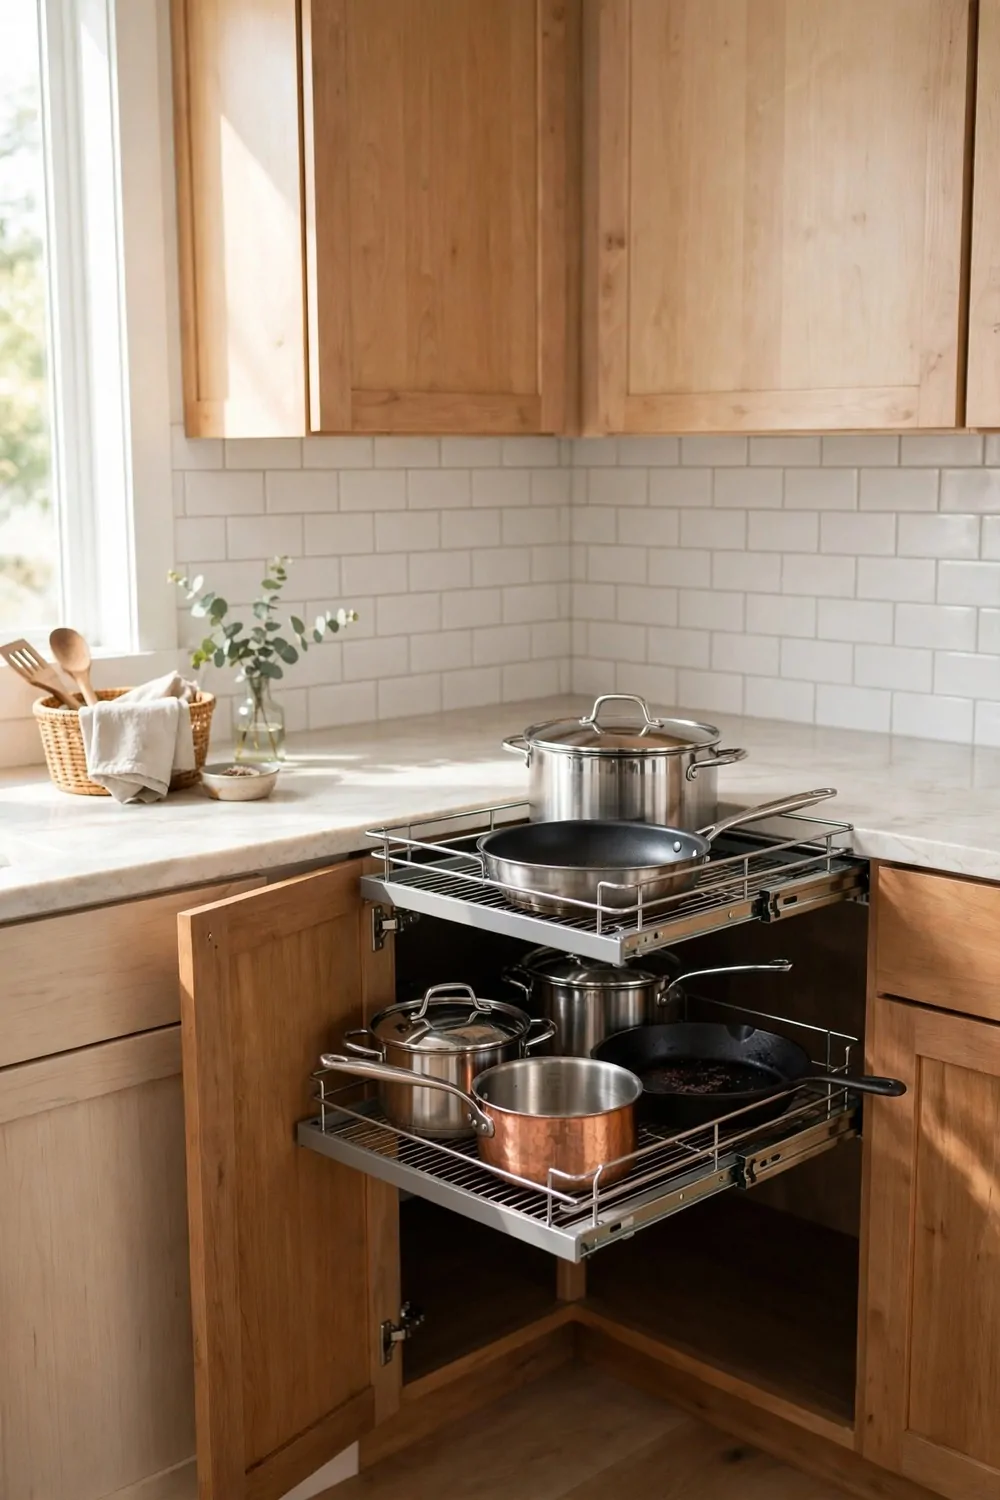
Blind corners are the worst spot in a kitchen. You know the place, deep in the corner where things go in and never come back out. A pull-out made for that corner changes everything.
A blind corner pull-out is a set of shelves that swing or slide out when you open the door. You pull the first shelf toward you, and the back shelf follows it out. Nothing stays hidden anymore.
I put pots in my corner pull-out. Big pots that used to sit in a dark pile now slide out into the light. I can see every pot and pick the right one without moving five others.
Measure your corner before you order one. These pull-outs come in sizes for different cabinet widths. A wrong size will jam, and a jammed pull-out is worse than no pull-out at all.
Load the heavier stuff on the bottom shelf. The pull-out moves smoother when the weight sits low. Light stuff like lids and small pans can go up top.
Do not cram the shelves full. If things stick out past the edge, the shelf will catch when you push it back in. Leave a little space around each item so it slides in clean.
Wipe the tracks twice a year. Crumbs and dust get in the runners and make the pull-out stiff. A quick wipe and a drop of oil on the track keeps it gliding like new.
If you rent and cannot install one, a simple half moon turntable works almost as well. It spins inside the corner and brings the back stuff to the front. It is not perfect, but it is much better than digging.
A blind corner pull-out costs more than most ideas on this list. But if you use that corner every day, it pays for itself in saved time and saved temper.
Use an Under-Sink Pull-Out Caddy
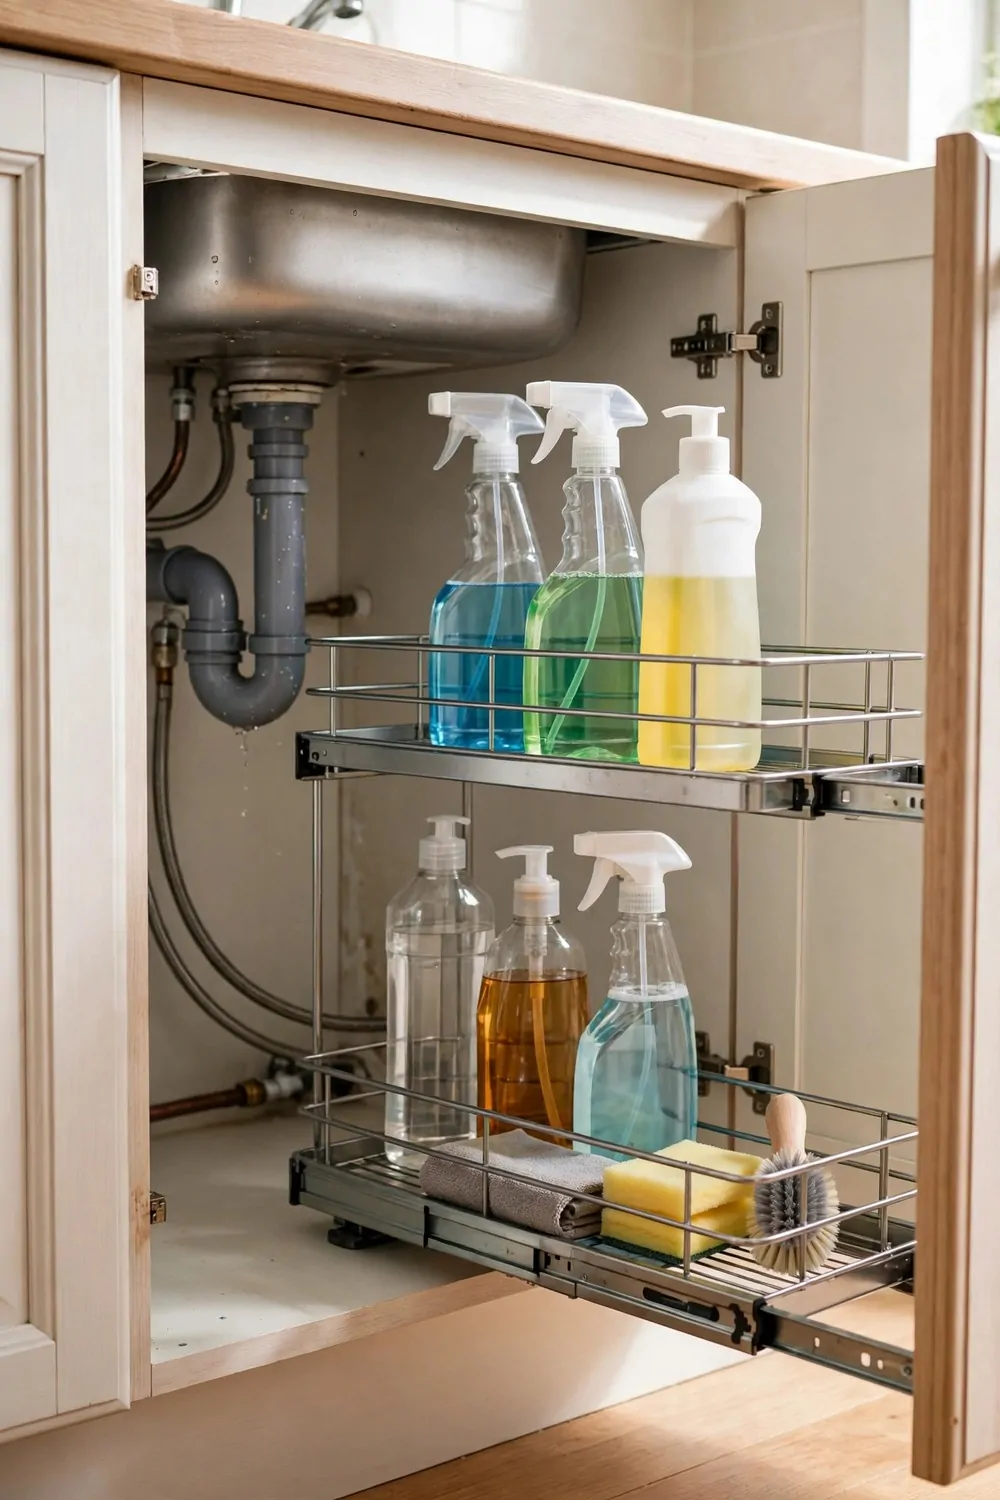
Under the sink is where kitchen stuff goes to hide. Pipes take up the middle, and everything else piles around them. A pull-out caddy gives that space some order.
A pull-out caddy is a narrow tray or basket on runners that slides out toward you. You mount it to the floor of the cabinet, and it rolls out smooth when you pull the handle. I keep mine right under the sink for sponges and soap.
Pick a caddy that fits around your pipes. Some caddies are U shaped so they slide around the pipes. Measure the space on both sides of the pipes before you buy.
Put your daily stuff in the caddy. Dish soap, sponge, gloves, and the scrub brush live there for me. The back of the cabinet can hold the extras you use once a month.
Use small bins inside the caddy to keep things from sliding around. A sponge loose in a caddy will end up in a corner. A little bin holds it in place and keeps it dry.
Check for leaks under the sink once a month. A slow drip can ruin a wood caddy fast. I run my hand along the pipes when I do my monthly wipe, and it takes less than a minute.
If your cabinet floor is uneven, shim the caddy level before you screw it down. A tilted caddy rolls back on its own and drives you crazy. A level caddy stays where you leave it.
Keep a trash bag roll in the caddy too. You use trash bags every day, and having them right there means you never hunt for a new one. I tuck a roll in the side pocket of mine.
Do not store food under the sink, even in a caddy. The damp and the cleaning bottles do not mix with food. Keep that cabinet for cleaning stuff only.
Slide a Narrow Cart Into the Gap
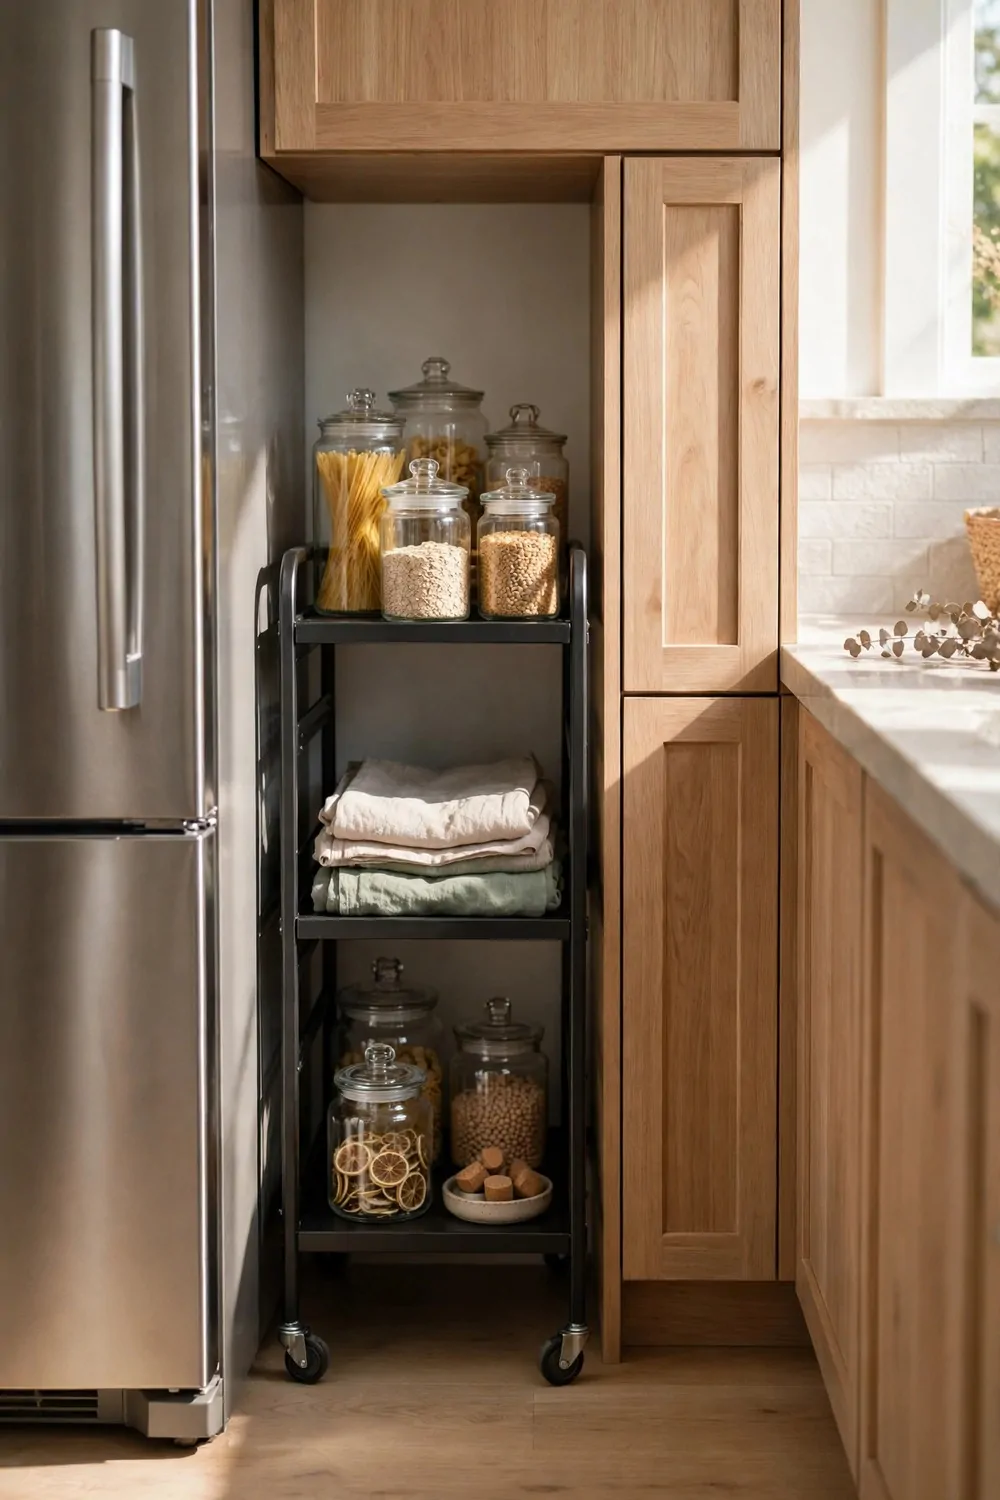
Almost every kitchen has a thin gap somewhere. Between the fridge and the cabinets is the most common one. It looks useless, but a narrow cart turns it into real storage.
A narrow cart is a tall thin shelf on wheels, usually about four to six inches wide. You roll it into the gap and pull it out when you need something. It is like a secret pantry.
I keep oils and sauces on my cart. The bottles stand upright in rows, and I can see every label when I pull it out. It holds more than you would think for such a skinny thing.
Measure the gap before you buy. You need a little wiggle room on each side so the cart rolls free. If it is too tight, it will scrape the fridge every time you move it.
Put the tall bottles on the bottom shelf. The cart is more stable when the weight sits low. Short jars and spice bottles can live on the upper shelves.
Use the top of the cart too. A small tray on top holds the salt and pepper you grab at every meal. Just do not stack things too high or they will tip when you roll it.
Wipe the cart wheels now and then. Kitchen floors get sticky, and sticky wheels make the cart hard to pull. A damp cloth on the wheels keeps it rolling smooth.
If the gap is next to the stove, do not store anything that melts there. The heat from the oven can warm that gap more than you expect. Oils and canned goods are fine, but keep chocolate and butter somewhere cooler.
A narrow cart is also great for baking sheets and cutting boards. Stand them upright in the cart and they slide out easy. It beats digging through a deep cabinet every time.
Keep Pots and Pans in One Deep Cabinet
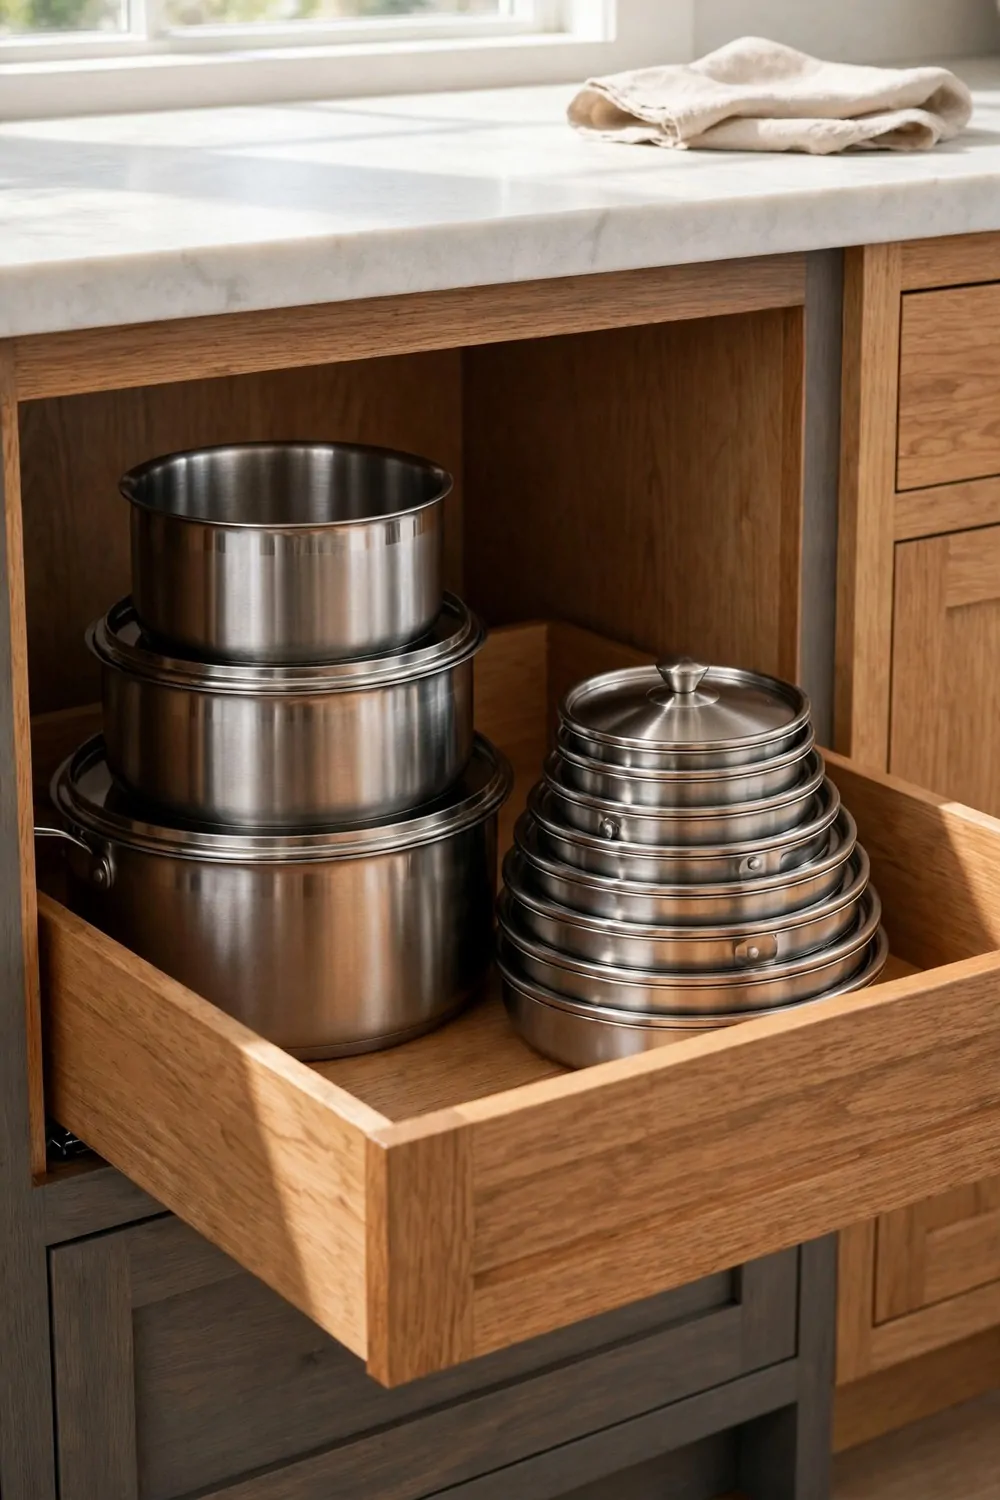
Pots and pans belong together in one deep cabinet. When they are spread across three cabinets, you waste time walking back and forth. One home for all of them makes cooking calmer.
Pick the deepest cabinet you have, close to the stove. Mine is right next to the oven, and I can reach in and grab a pot without taking a step. That short walk matters when dinner is already on the stove.
Stack pots inside each other by size. The biggest pot goes on the bottom, and the smaller ones nest inside it. Put a cloth or a paper towel between them so they do not scratch.
Keep the lids separate from the pots. Lids stacked on pots just slide off and clatter. A lid rack or a small bin next to the pots works much better, and you will find the right lid in seconds.
Put your most used pan on top of the stack. For me that is the big frying pan I use almost every day. The roasting pan I use twice a year lives at the very bottom.
Do not keep pots you never use. If you have not touched a pot in a year, give it away. That space is too good to waste on a pot that just sits there collecting dust.
Wipe the cabinet floor once a month. Grease drips down from pots more than you think. A quick wipe keeps the cabinet from getting sticky and smelly.
If the cabinet has no shelf, that is fine. Pots are tall and heavy, and they do better with open space. One big open area beats two cramped shelves for pots every time.
Label nothing here. Pots are easy to tell apart by size and shape. Save your labels for the spice jars and the bins where things actually look the same.
Stack Pans With a Pan Organizer Rack
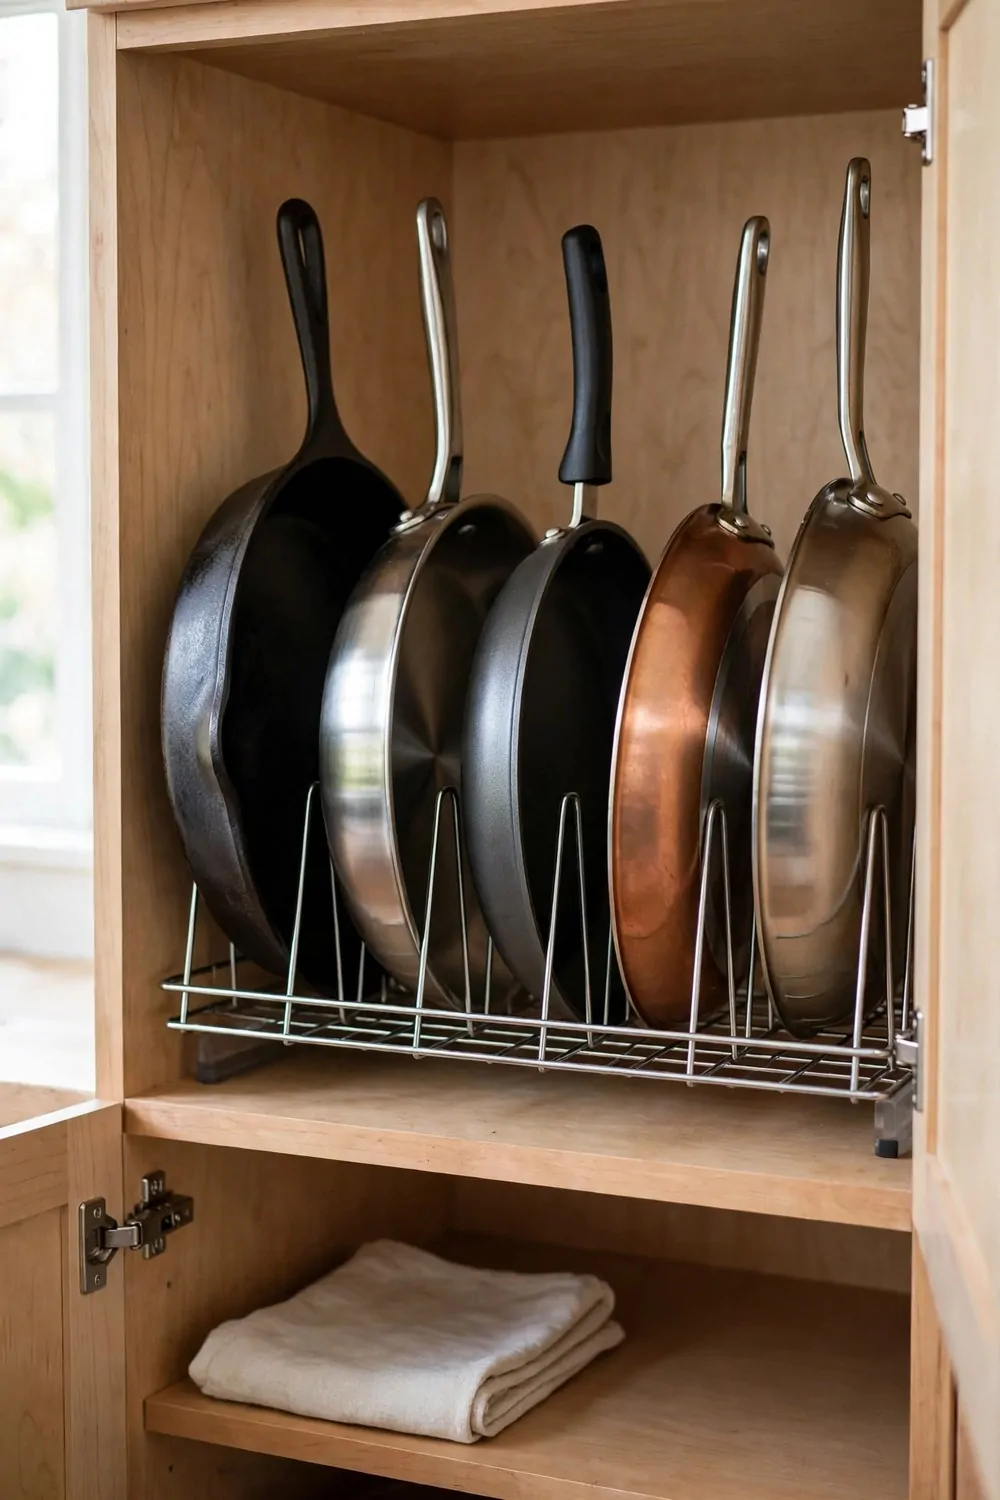
A pan organizer rack stands your pans up on their sides. Instead of a tall stack you have to lift apart, you get a row of pans you can slide out one by one. It is a small change with a big payoff.
I put a rack in my deep cabinet and it stopped the daily crash. Before the rack, pulling out the bottom pan meant lifting three pans and listening to them bang. Now I just slide one out.
Racks come in two kinds, vertical and horizontal. A vertical rack stands pans upright like books on a shelf. A horizontal rack stacks them with a divider between each one. I like vertical because I can see every pan at once.
Measure your pans before you buy a rack. A rack made for small pans will not hold a big cast iron skillet. Check the width of your widest pan and buy a rack that fits it with room to spare.
Put the heavy cast iron pans at the end of the rack. They are the hardest to lift, so keep them where you can slide them straight out. Light nonstick pans can go in the middle.
Do not force a pan into a slot that is too tight. A tight slot scratches the coating and makes the pan hard to pull out. If a pan does not fit easy, move it to another slot or another spot.
You can use a pan rack for baking sheets too. Stand them upright in the slots and they stay neat and easy to grab. I keep my cookie sheets in the same rack as my pans and it works great.
Clean the rack when you clean the cabinet. Grease builds up on the bars over time. A hot soapy wipe once a month keeps it from getting sticky.
If you have a lot of pans, you may need two racks. That is fine. Two small racks side by side hold more than one big rack, and you can move them around when your pans change.
Store Cutting Boards Upright in a File Holder
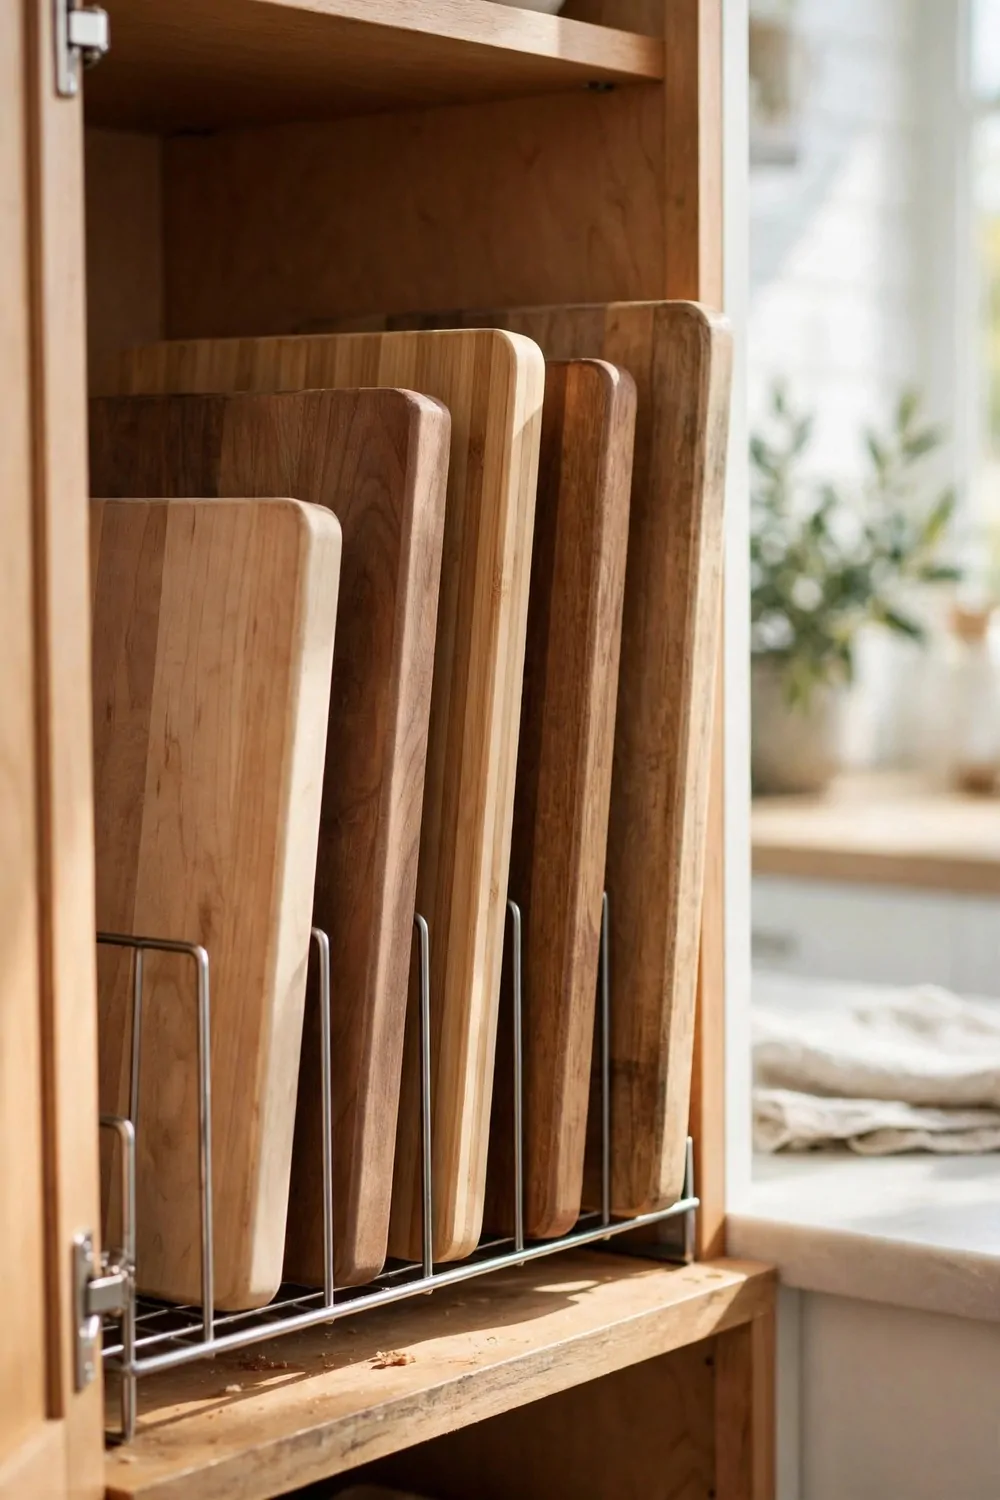
Cutting boards are flat and awkward. Lay them flat in a stack and you have to lift them all to get the bottom one. Stand them upright and you can grab any board in one second.
A metal file holder does this job perfectly. It is made for office files, but it holds cutting boards just as well. The slots keep each board standing straight and separate.
I keep my file holder inside a cabinet near the sink. That is where I wash vegetables, so the boards are right where I use them. The big board goes in the back slot and the small ones in front.
Pick a file holder wide enough for your thickest board. Wood boards are thicker than plastic ones. If the slots are too tight, the boards will wedge in and be hard to pull out.
Stand the boards with the handles up if they have handles. That way you can grab the handle and lift the board straight out. It sounds obvious, but it saves a lot of fumbling.
Let the boards dry before you put them away. A wet board in a closed cabinet can get a musty smell. I lean mine on the dish rack for a few minutes first, then slide them into the holder.
You can use the same trick for baking sheets and cooling racks. A file holder keeps them upright and sorted. I have one holder for boards and one for sheets, and both live in the same cabinet.
Wipe the file holder out once a month. Crumbs fall down between the boards and collect at the bottom. A quick shake over the trash and a wipe keeps it clean.
If your cabinet is deep, push the holder to the front. A holder buried at the back is just as hard to reach as a flat stack. Keep it where your hand lands first when you open the door.
Use Magazine Holders for Foil and Wrap
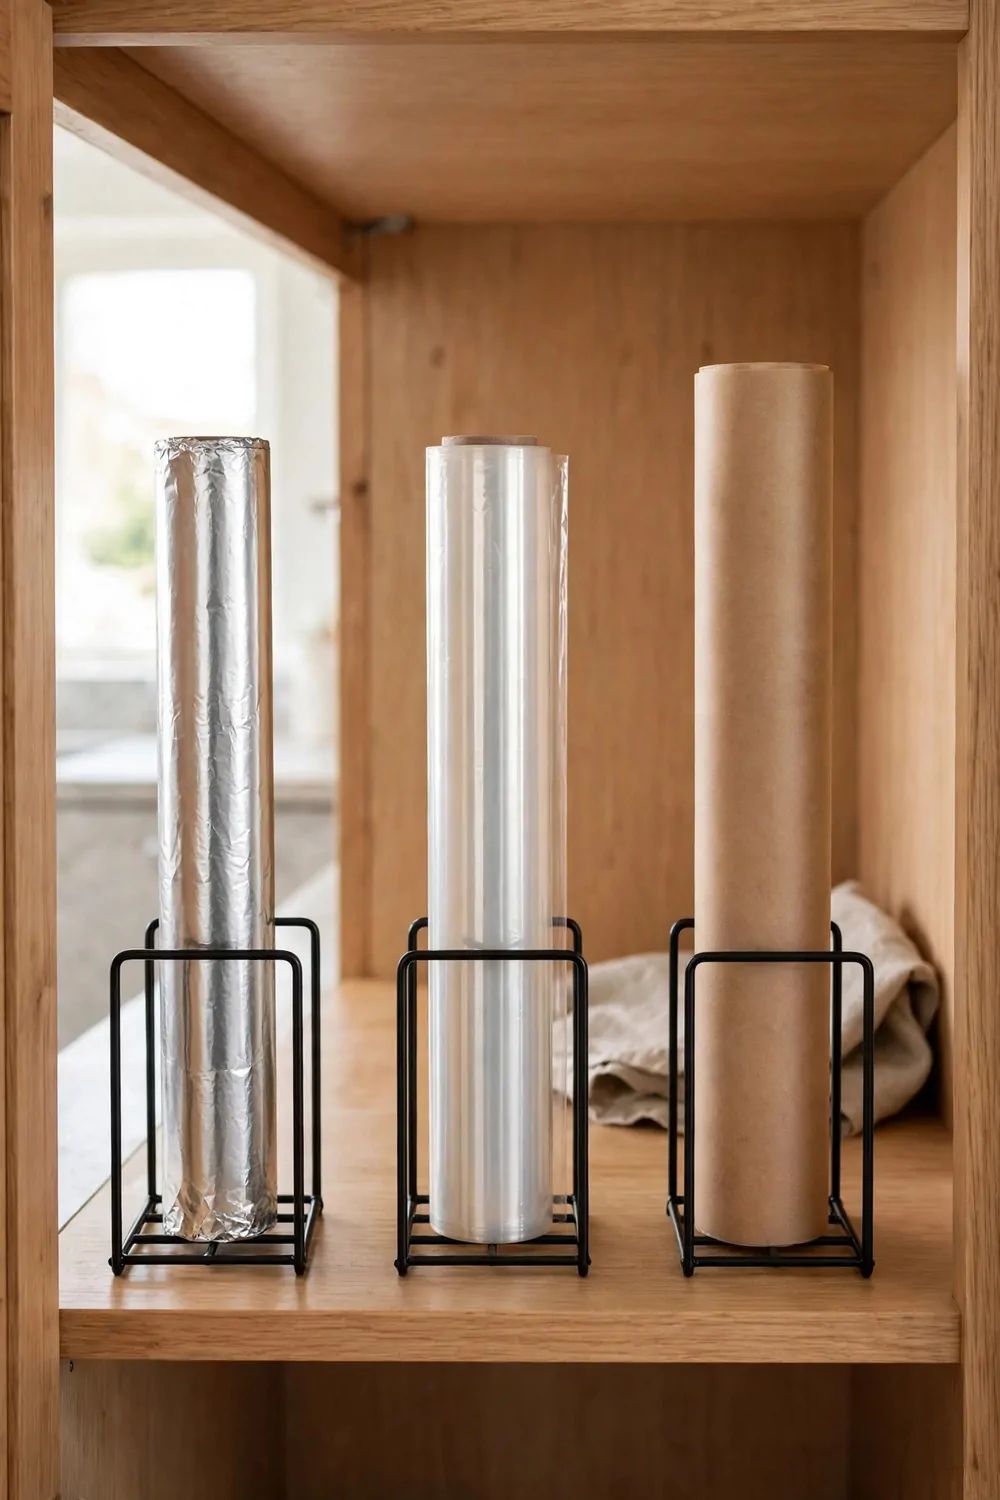
Foil, plastic wrap, and parchment paper come in long boxes that never fit right. They roll around in a drawer or fall over on a shelf. A magazine holder stands them up and keeps them in one place.
I screwed two magazine holders to the inside of a cabinet door. Each one holds two boxes upright. Now I open the door and pull out the wrap I need without moving anything else.
You can also set the holders on a shelf instead of the door. Stand them upright and slide the boxes in like books. This works well if your door is too thin to hold screws.
Label each holder if you have more than one. Foil in one, plastic wrap in the other, parchment in the third. A little label on the front saves you from pulling out the wrong box.
Keep the boxes with the cutter edge facing up. That way you can tear off a sheet without taking the whole box out. I learned this after pulling the box out fifty times a day.
Do not cram too many boxes into one holder. Three boxes is about the limit for a normal holder. If you force a fourth one in, the boxes will bulge and the holder will tip over.
Store the extra rolls in the back of the cabinet. The holder is for the rolls you use every day. The spares can wait behind them until you need a refill.
Plastic magazine holders work fine, but metal ones last longer. The boxes are heavier than magazines, and a cheap plastic holder can crack over time. I switched to metal and never looked back.
This trick also works for zip bags. Stand the bag boxes upright in a holder and they stay neat. I keep my sandwich bags and freezer bags in a holder right next to the foil.
Put a Small Bin for Lids Next to the Pots
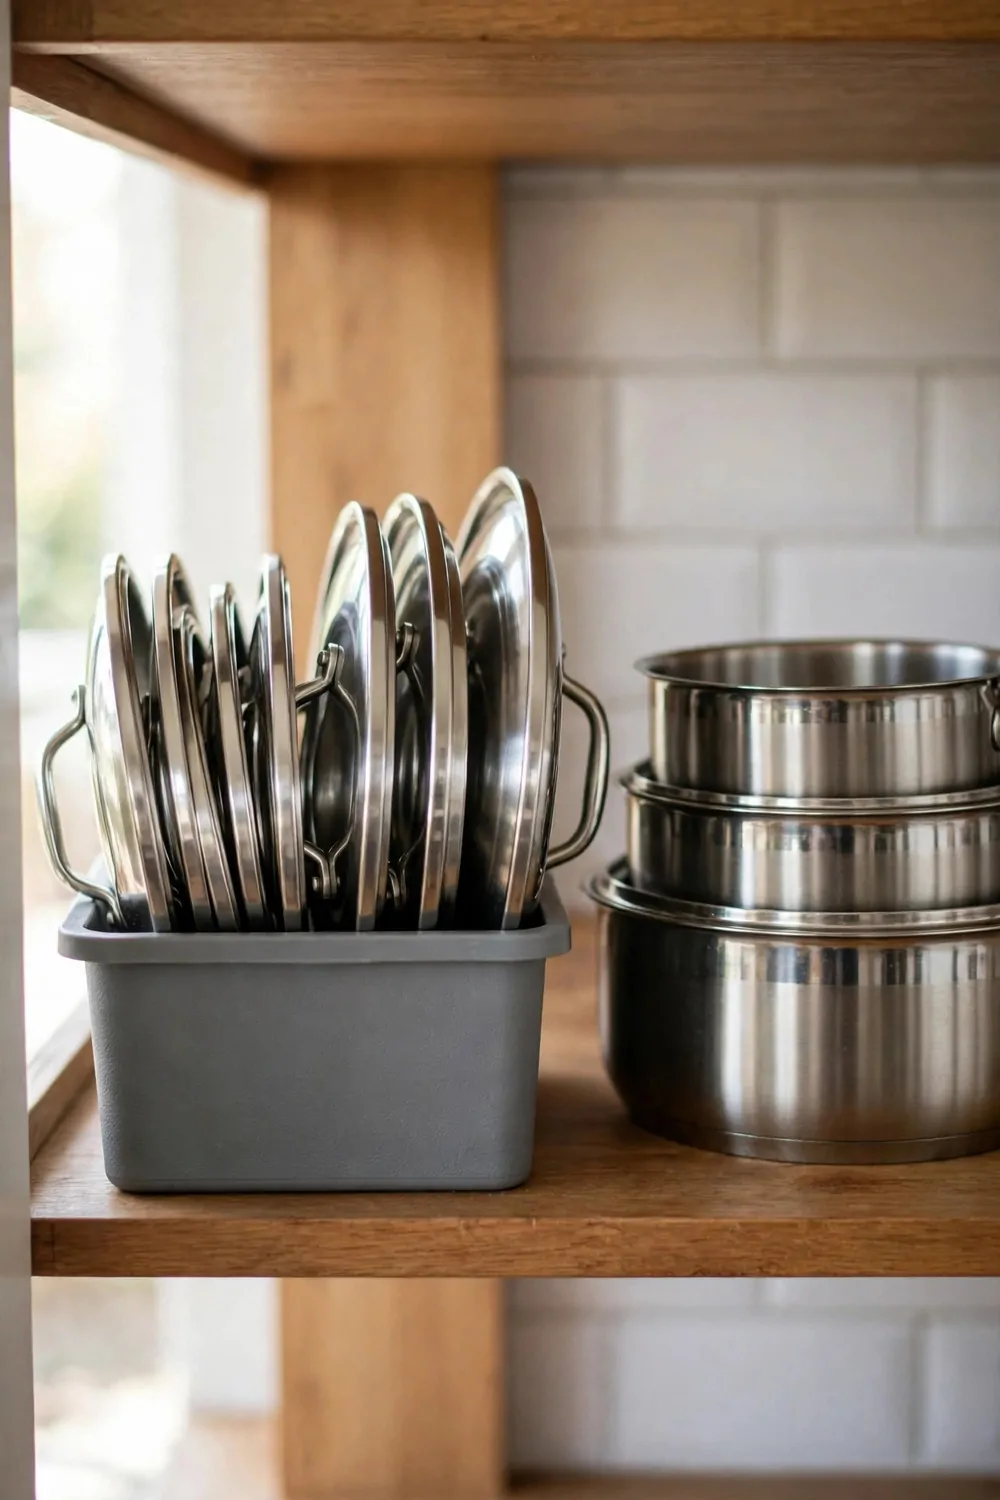
Lids are the hardest thing to store in a kitchen. They are round, they slide, and they never stack neatly. A small bin just for lids solves the whole problem.
I keep a plain plastic bin in the same cabinet as my pots. Every lid goes in the bin, standing upright like plates in a rack. I can flip through them and find the right size in seconds.
Pick a bin that fits the space next to your pots. It should be tall enough to hold the lids upright but short enough to fit under the shelf. Measure the space before you shop.
Sort the lids by size, biggest at the back and smallest at the front. It sounds fussy, but it means you grab the right lid first time instead of trying three wrong ones.
Use a bin with straight sides, not slanted ones. Straight sides hold the lids upright without them leaning over. A slanted bin lets the lids slide into a pile, and then you are back where you started.
Keep the glass lids in the middle of the bin. They are the ones that break if they fall. The metal lids can go on the outside where they take the bumps.
If a lid has no matching pot anymore, toss it. Orphan lids just take up room in the bin. I do a lid check twice a year and the bin always feels lighter after.
Wipe the bin out when you clean the cabinet. Grease and dust settle at the bottom over time. A quick wipe keeps the lids clean and the bin smelling fresh.
A lid bin also works for small baking pans. Stand the loaf pans and muffin tins upright in the bin and they stay sorted. One bin, two jobs, and no more digging.
Keep Baking Supplies Together in One Bin
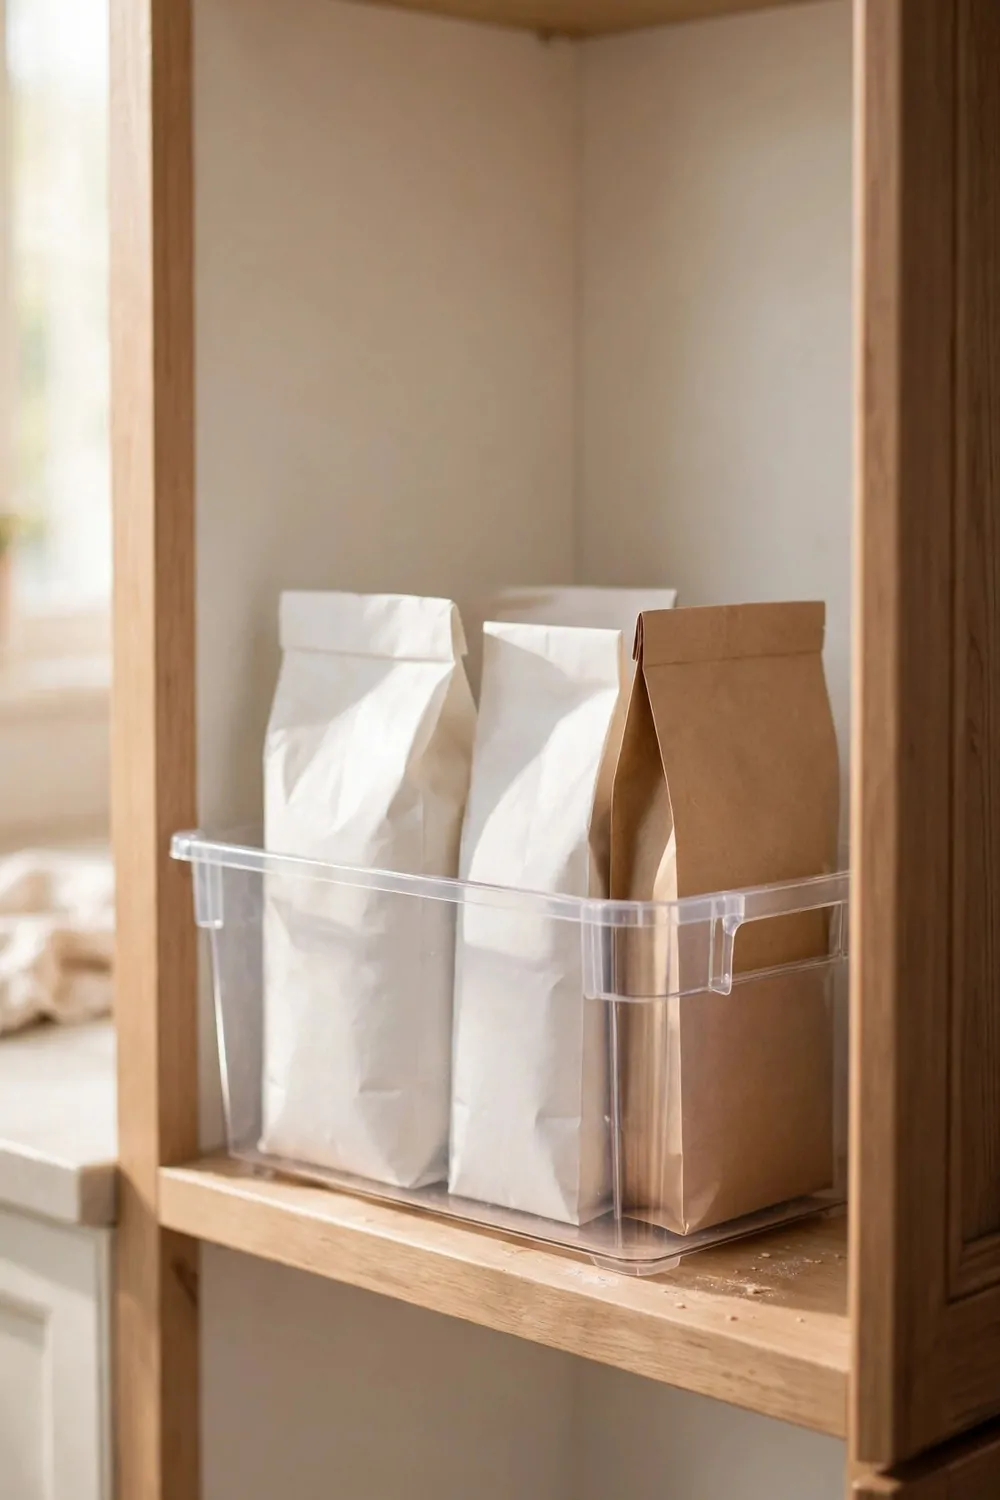
Baking supplies spread out fast. Flour in one cabinet, sugar in another, baking powder lost behind the cereal. One bin pulls them all together so baking feels fun again.
I use a big clear bin for my baking stuff. Clear matters, because I can see what is inside without opening it. When I want to bake, I pull out one bin and everything is right there.
Put the flour and sugar in sealed containers inside the bin. Bags tear and spill, and a spill inside a bin is still a mess. Sealed containers keep everything fresh and the bin clean.
Keep the small stuff in a little bag or cup inside the bin. Baking powder, baking soda, vanilla, and yeast are tiny and easy to lose. A small pouch holds them together at one end of the bin.
Store the bin on a low shelf if you can. Baking supplies are heavy, and lifting a full bin down from a high shelf is no fun. Mine lives on the bottom shelf where I can slide it out easy.
Label the bin on the front. A simple label that says baking makes it easy for anyone in the house to find it. My kids know where the baking bin lives now, and they pull it out themselves.
Check the dates on your baking powder and yeast twice a year. Old baking powder does not rise, and flat cookies are a sad thing. Toss anything past its date and write the new one on the list.
Do not mix baking supplies with regular cooking stuff. Keep the bin just for baking. When everything has its own home, you stop buying flour you already have.
After you bake, put everything back in the bin right away. It takes two minutes and it means the next time you bake, you start from a clean setup. Your next baking day will feel so much easier.
Use a Turntable for Oils and Sauces
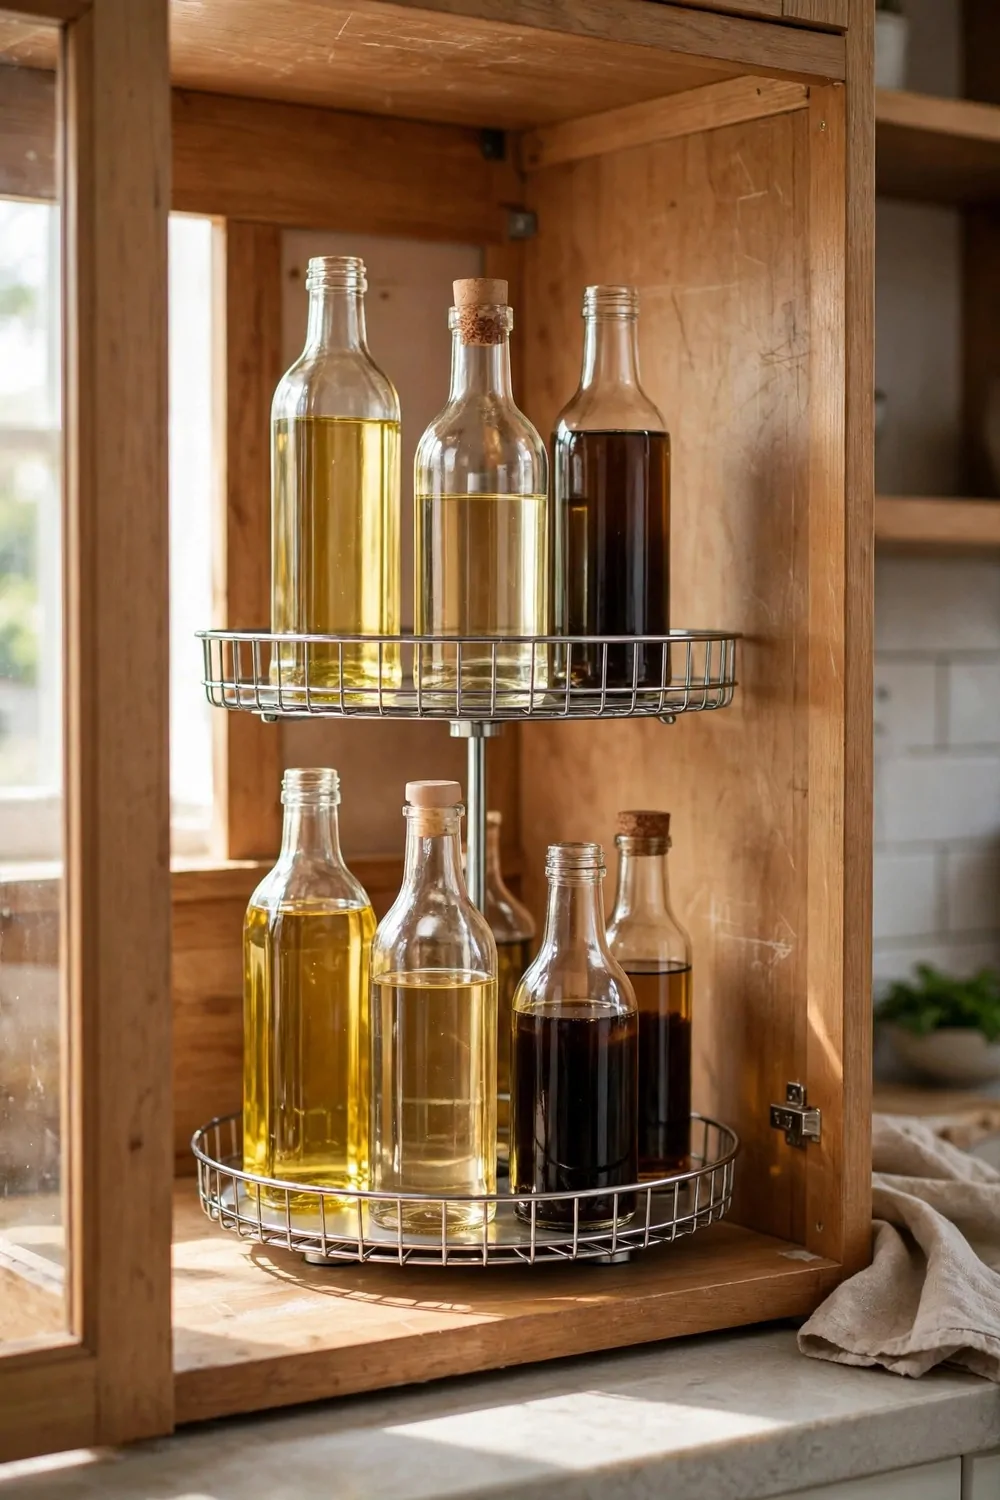
I used to lose bottles at the back of my cabinet. I would buy a new one because I thought I was out. Then I would find two more hiding behind the big jar.
A turntable fixed that for me. You put your oils and sauces on it and give it a spin. Everything comes to the front in one second.
Pick a turntable that fits your shelf. Measure the shelf first so it does not stick out. A flat one works best for tall bottles.
I keep my cooking oil, soy sauce, and hot sauce on mine. They are the ones I grab almost every day. The rest stay in a second turntable next to it.
Put the heavy bottles in the middle. Light ones can go near the edge. That way it spins smooth and nothing tips over.
Kids love to spin it too, so keep the glass bottles toward the back of the turntable. It is a small thing, but it saves you from a spill.
Wipe the turntable once a week. Oil drips happen, and a sticky turntable stops spinning well. A damp cloth takes ten seconds.
If your cabinet is deep, a turntable is almost a must. You stop reaching into the dark and knocking things over. You just spin and pick.
Try it with one shelf first. You will wonder why you waited so long to do it.
Store Canned Food in a Can Dispenser Rack
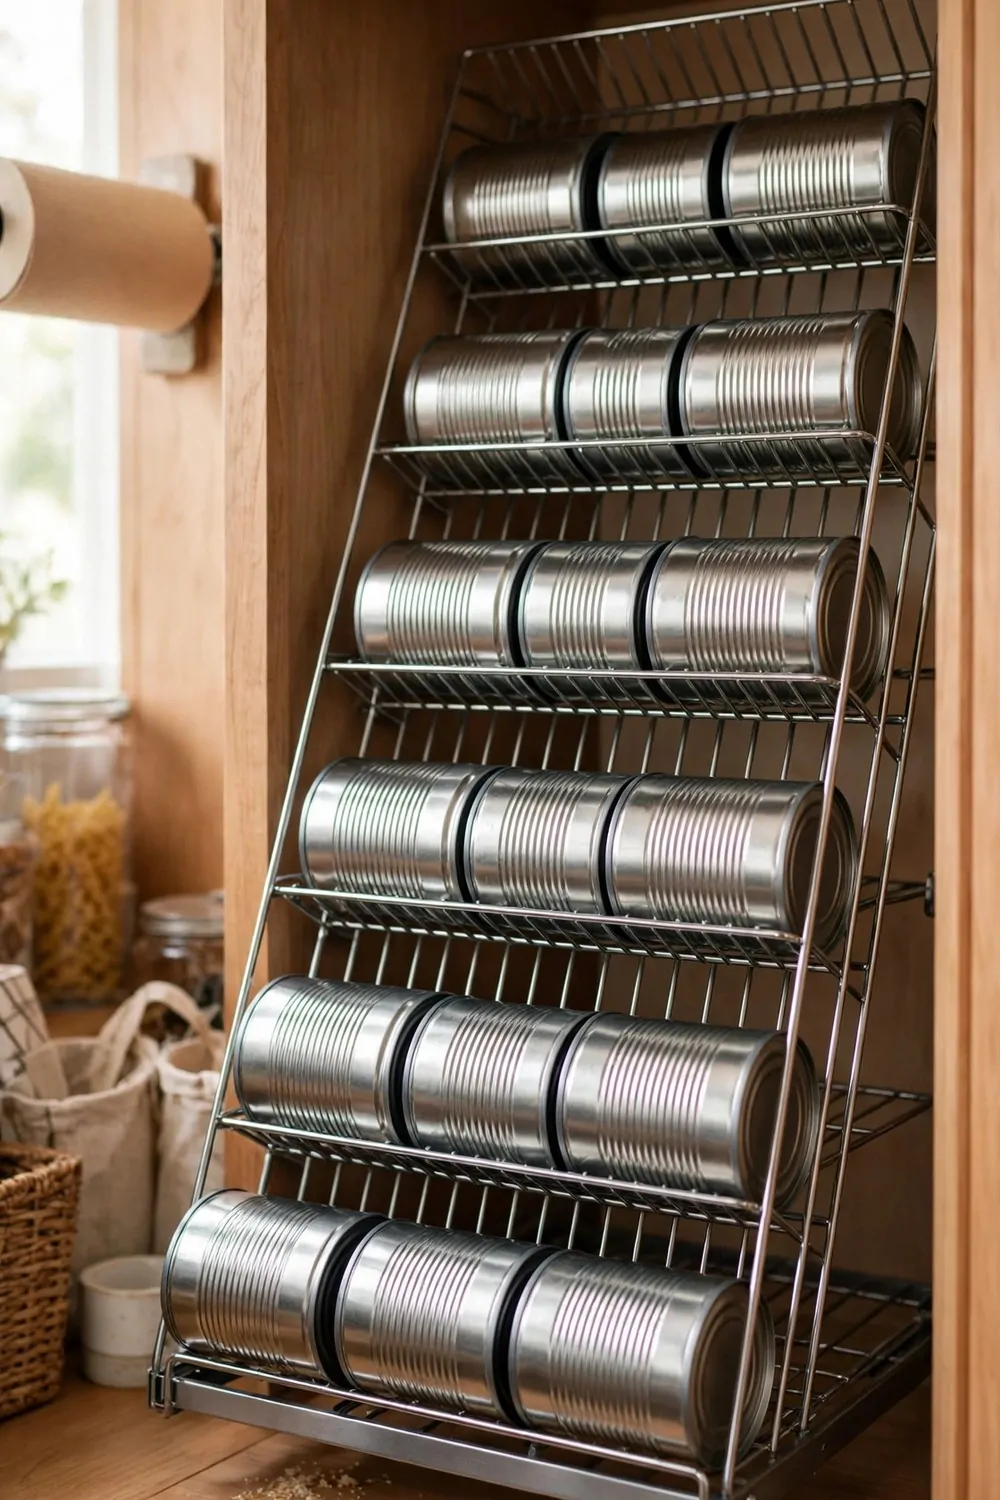
Cans roll around in my cabinet all the time. They fall over when I reach for one. Then I have to pick them all up again.
A can dispenser rack stops that mess. You load the cans at the top and they roll down to the front. You always grab the oldest one first.
That matters because cans do expire. The one at the back can sit there for years. With a rack, nothing gets forgotten.
I sort mine by type. Soups in one rack, beans in another, tomatoes in a third. It takes two minutes to set up, and it stays that way.
Pick a rack that fits your shelf height. Some racks are made for small cans, some for big ones. Check the size before you buy.
Put the rack near the front of the shelf if you can. That way you can see the labels without pulling the whole rack out.
When you come home from the shop, add new cans at the back of the rack. The old ones stay in front, ready to use. It is a simple habit.
My cans used to take up a whole shelf and still look messy. Now they sit in neat rows and I can count them at a glance. I know when I need more.
If you have a lot of cans, start with just the ones you use most. You can add a second rack later when you see how well it works.
Use Shelf Liners to Stop Sliding
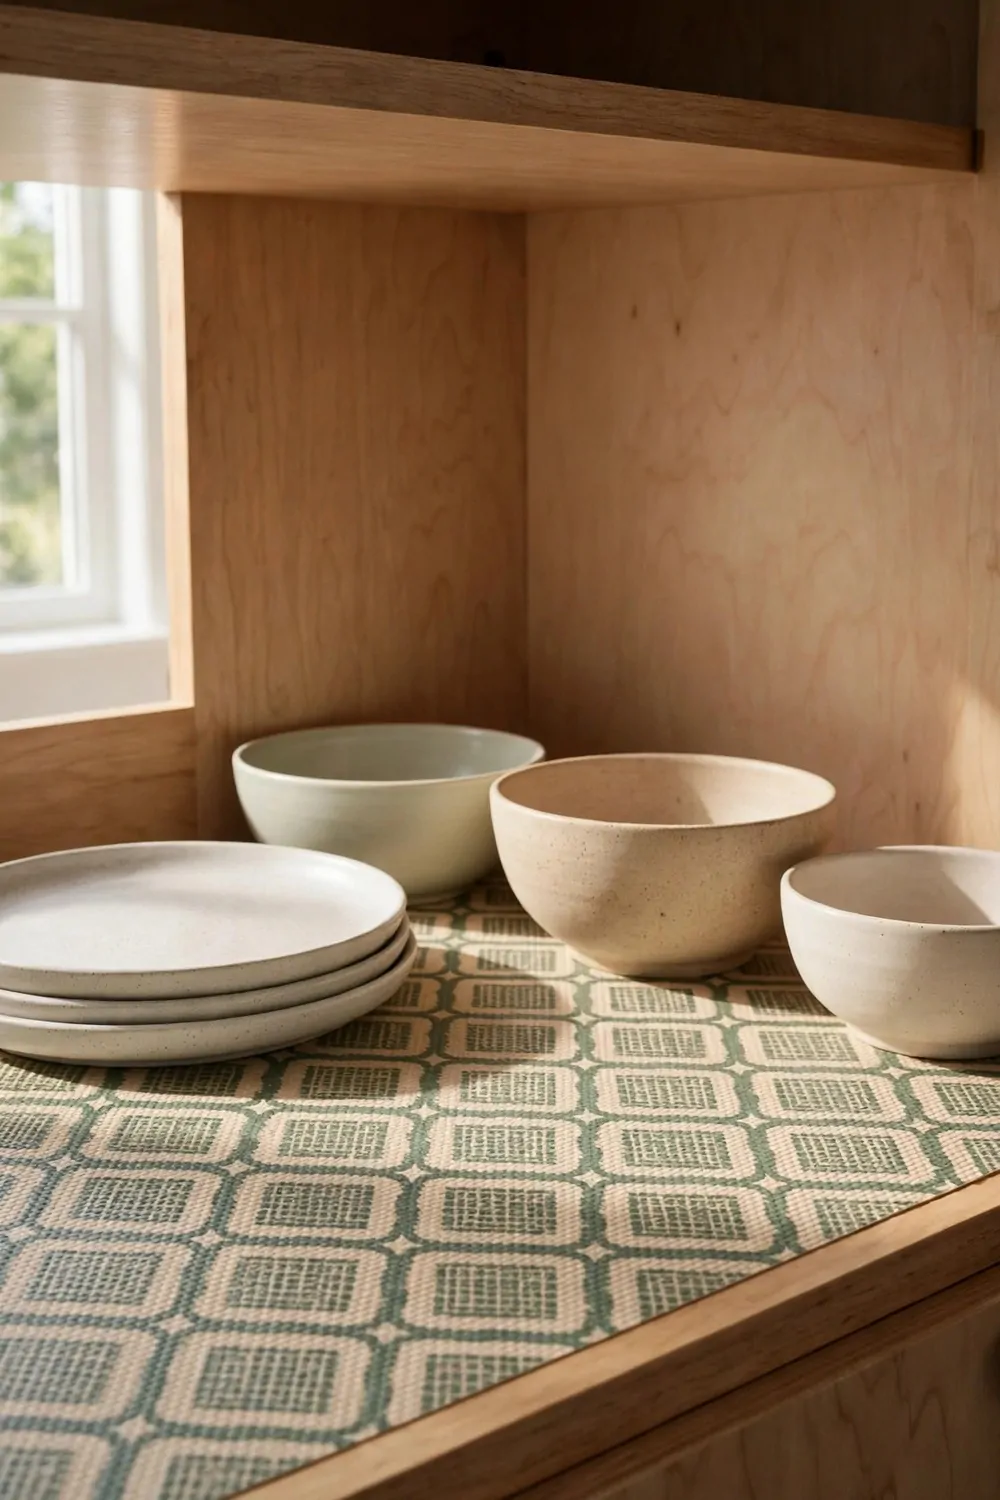
Things slide around in my cabinets more than I would like. A jar moves every time I open the door. A stack of bowls shifts a little each day.
Shelf liners fix that. They are thin mats that grip the shelf and grip your stuff too. Nothing slides unless you pick it up.
They also protect the shelf. Spills stay on the liner instead of soaking into the wood. You just lift the liner out and wash it.
Cut the liner to fit your shelf. Leave a tiny gap at the edges so air can move. A pair of scissors is all you need.
I like the rubber kind with small holes in it. It grips well and it lets air through. The smooth plastic kind works too, but it can feel slippery when wet.
Put liners under your dishes and your glasses first. Those are the things that slide and chip the most. Then do the food shelves.
Change them or wash them every few months. Crumbs and dust collect under them. A quick shake outside does the job.
If a liner starts to curl at the corners, flip it over. That usually flattens it out again. If it stays curled, cut a new piece.
This is one of the cheapest fixes in the whole kitchen. A roll costs very little, and your cabinets feel calmer right away.
Add Battery Lights Inside Dark Cabinets
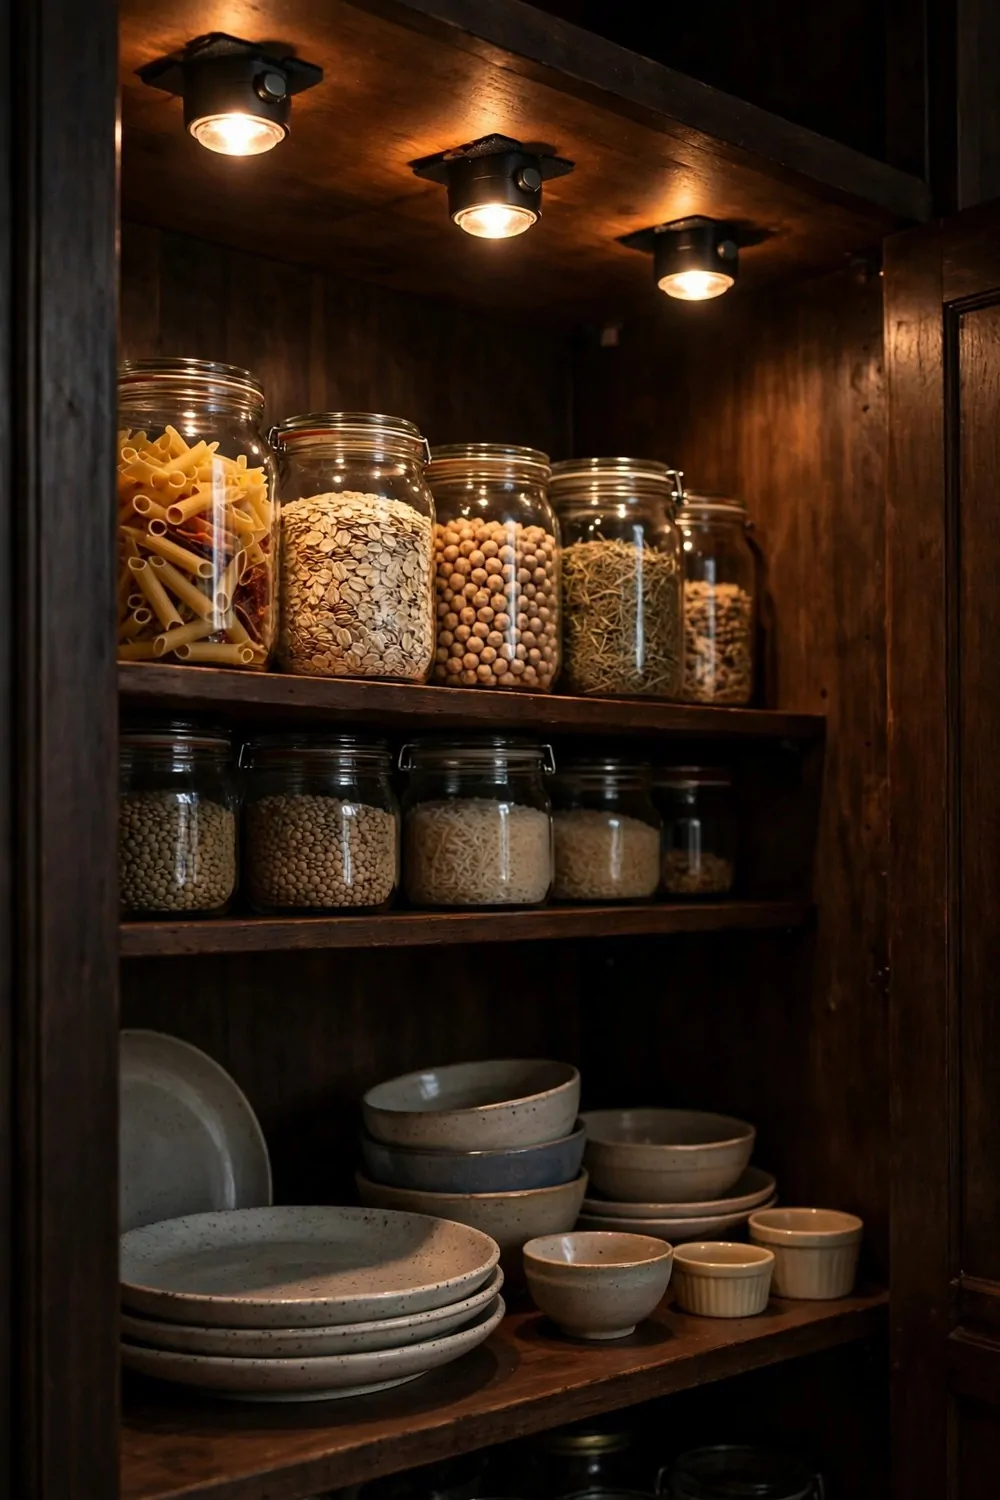
My back cabinets are so dark I can barely see inside. I have to use my phone light just to find a jar. It gets old fast.
Battery lights fix that in minutes. You stick them inside the cabinet and tap them on. No wires, no electrician, no fuss.
Put one light at the top of the cabinet so the glow falls down over everything. If the cabinet is wide, add a second one on the other side.
I like the ones with a motion sensor. They turn on when you open the door and turn off when you close it. You never have to think about them.
Check the batteries every few months. When the light gets dim, swap them out. Keep spare batteries in a small box nearby so you are ready.
Warm light looks best in a kitchen. Bright white light can feel harsh in the morning. Pick warm if you have the choice.
Stick the light where it will not get knocked by tall bottles. The top front edge of the shelf works well. It stays out of the way there.
Once you have light in one cabinet, you will want it in all of them. Start with the darkest one and see how much easier it feels.
It is a small change, but it makes cooking at night so much nicer. You can see what you have, and you stop buying things twice.
Hang Measuring Cups on the Inside Wall
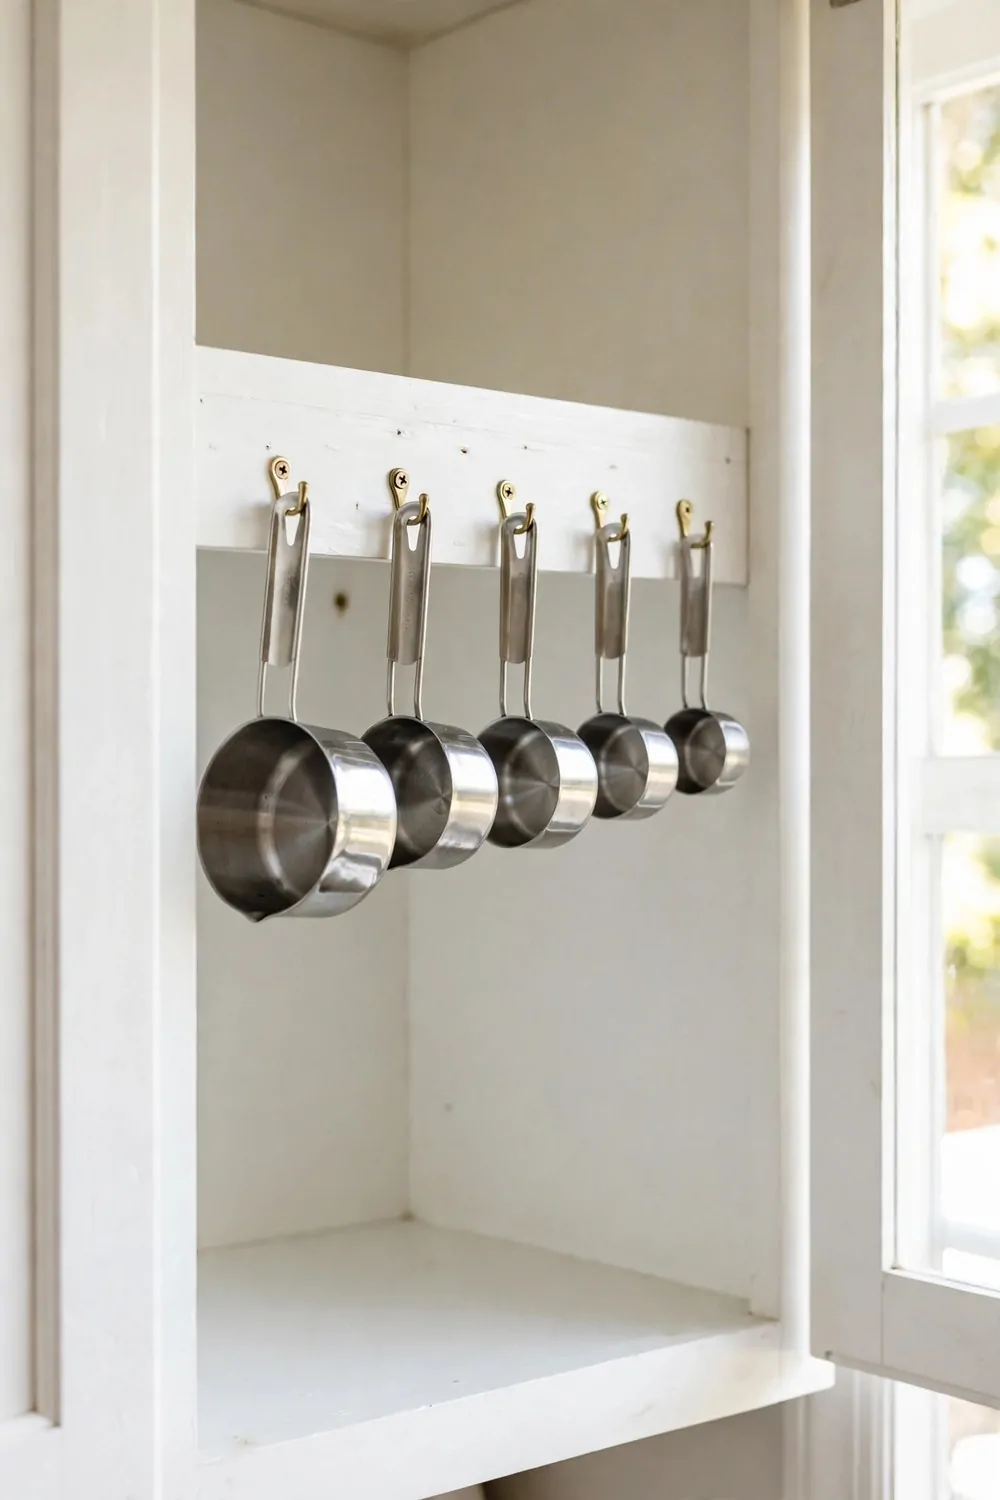
My measuring cups used to live in a pile at the back of a drawer. I could never find the one I needed. I would dig through the whole pile.
Now they hang on the inside wall of my cabinet. I stuck a row of small hooks there. Each cup has its own hook, and I can see them all at once.
Use hooks that stick on strong, or screw in small ones if your cabinet wall allows it. The sticky kind works fine for light plastic cups.
Hang them from biggest to smallest. That way you grab the right size without thinking. It also looks neat, which I love.
Keep them on the inside of the door or on the side wall. Do not hang them where they block the shelves. You want them out of the way but easy to reach.
If you bake a lot, hang your measuring spoons next to them. They are small and easy to lose, and a hook keeps them together.
Wipe the cups before you hang them back up. Wet cups drip onto the shelf below. A quick dry with a towel takes five seconds.
This trick frees up a whole drawer too. That drawer can hold something else now. It feels like you gained space for free.
Try it this weekend. It takes ten minutes, and you will use those cups way more often when you can see them.
Keep a Step Stool Near the Tall Cabinets
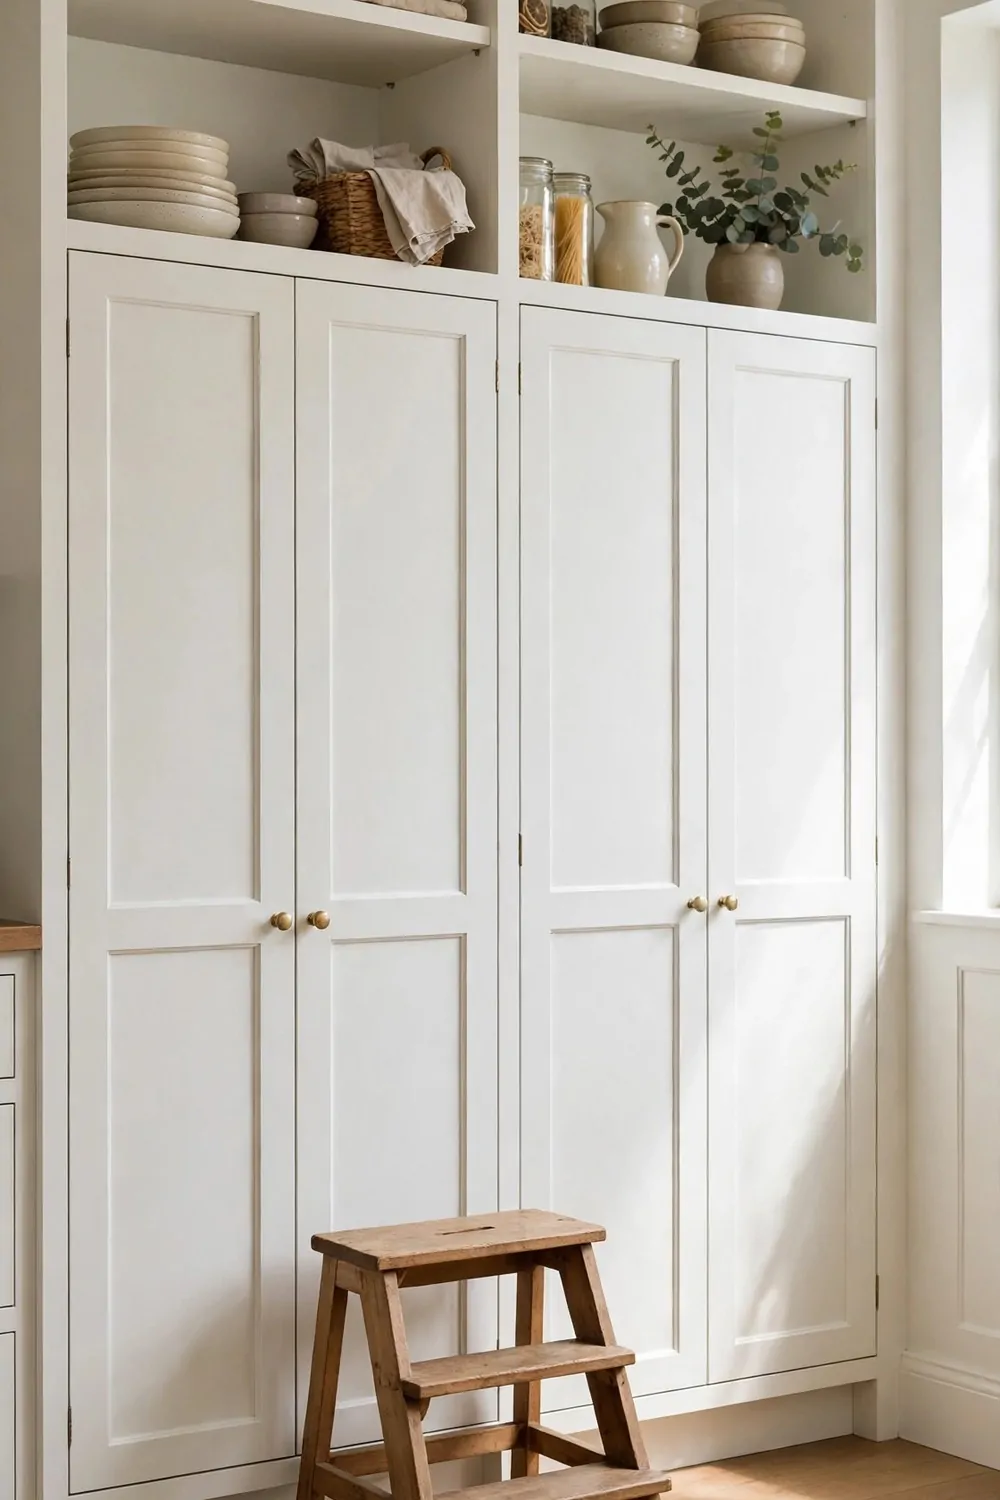
My tall cabinets hold the stuff I do not use every day. The problem is I cannot reach them without climbing on a chair. That is not safe.
A small step stool fixes it. I keep mine right next to the tall cabinets. I can grab it with one hand and step up in seconds.
Pick a stool that folds flat. It can lean against the side of the fridge or slide into a gap. It stays out of the way until you need it.
Make sure the stool has rubber feet. It should not slide on a smooth floor. Test it before you trust it with your full weight.
I keep the stool on the same side as the tall cabinets. If it lives in another room, I will not bother to fetch it. Then I will climb on a chair again.
Teach the kids to use the stool too, and only for the low shelves they are allowed to reach. It is much safer than a wobbly chair.
If your stool has a handle, even better. You can carry it with one hand while you hold a bowl in the other. Small details like that matter.
When you put things up high, place them toward the front of the shelf. That way the stool trip is quick and you are not stretching far.
A step stool costs little and lasts for years. It turns the top shelf from a dead zone into real storage you actually use.
Use Matching Containers for Dry Food
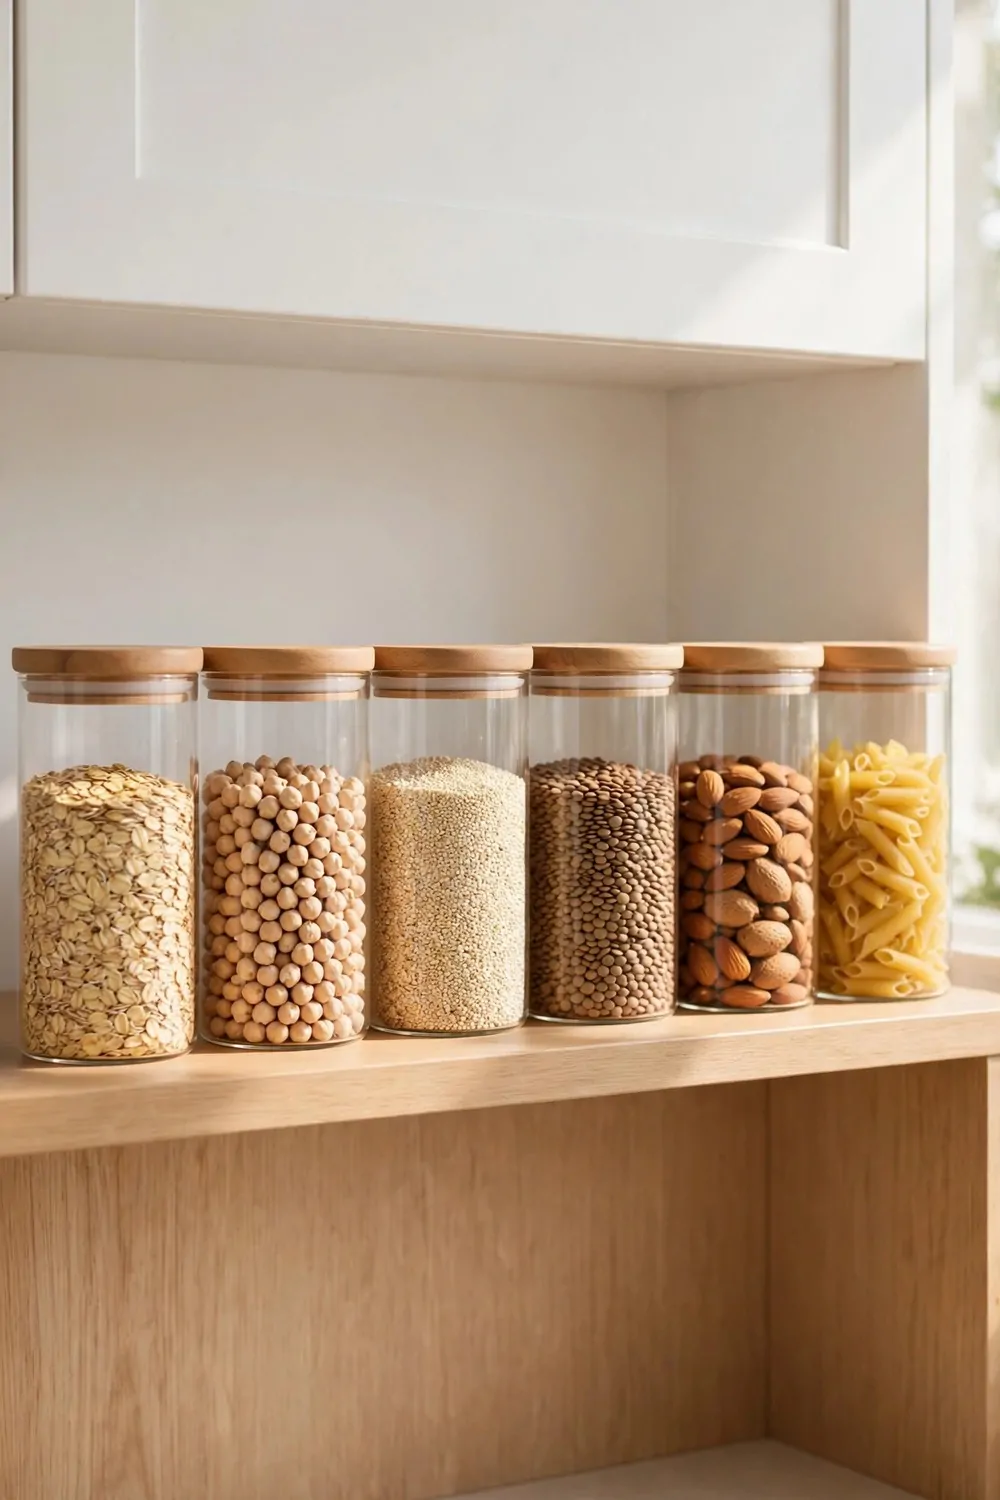
My dry food used to live in a mix of bags and boxes. Some were torn, some were half open, and the shelf always looked messy.
Matching containers changed the whole look. Same size, same shape, same lids. They stack neat and the shelf feels calm now.
Pick containers that are clear if you can. You see how much is left without opening the lid. That saves you from running out mid recipe.
Label each one with what is inside. A small piece of tape and a pen works fine. Plain tape and a pen do the job just fine.
Keep the containers you use most at eye level. Pasta, rice, and oats go there in my kitchen. The rest can go higher up.
Make sure the lids seal tight. Dry food goes stale fast in a loose box. A good seal keeps it fresh for weeks longer.
When you buy a new bag, pour it into the container right away. Do not leave the bag open on the shelf. That is how spills start.
Wash the containers when they are empty, before you refill them. Old crumbs at the bottom can make the fresh food taste off.
Start with five or six containers for your most used foods. You do not need to buy twenty at once. Add more as you go.
Decant Flour and Sugar Into Clear Jars
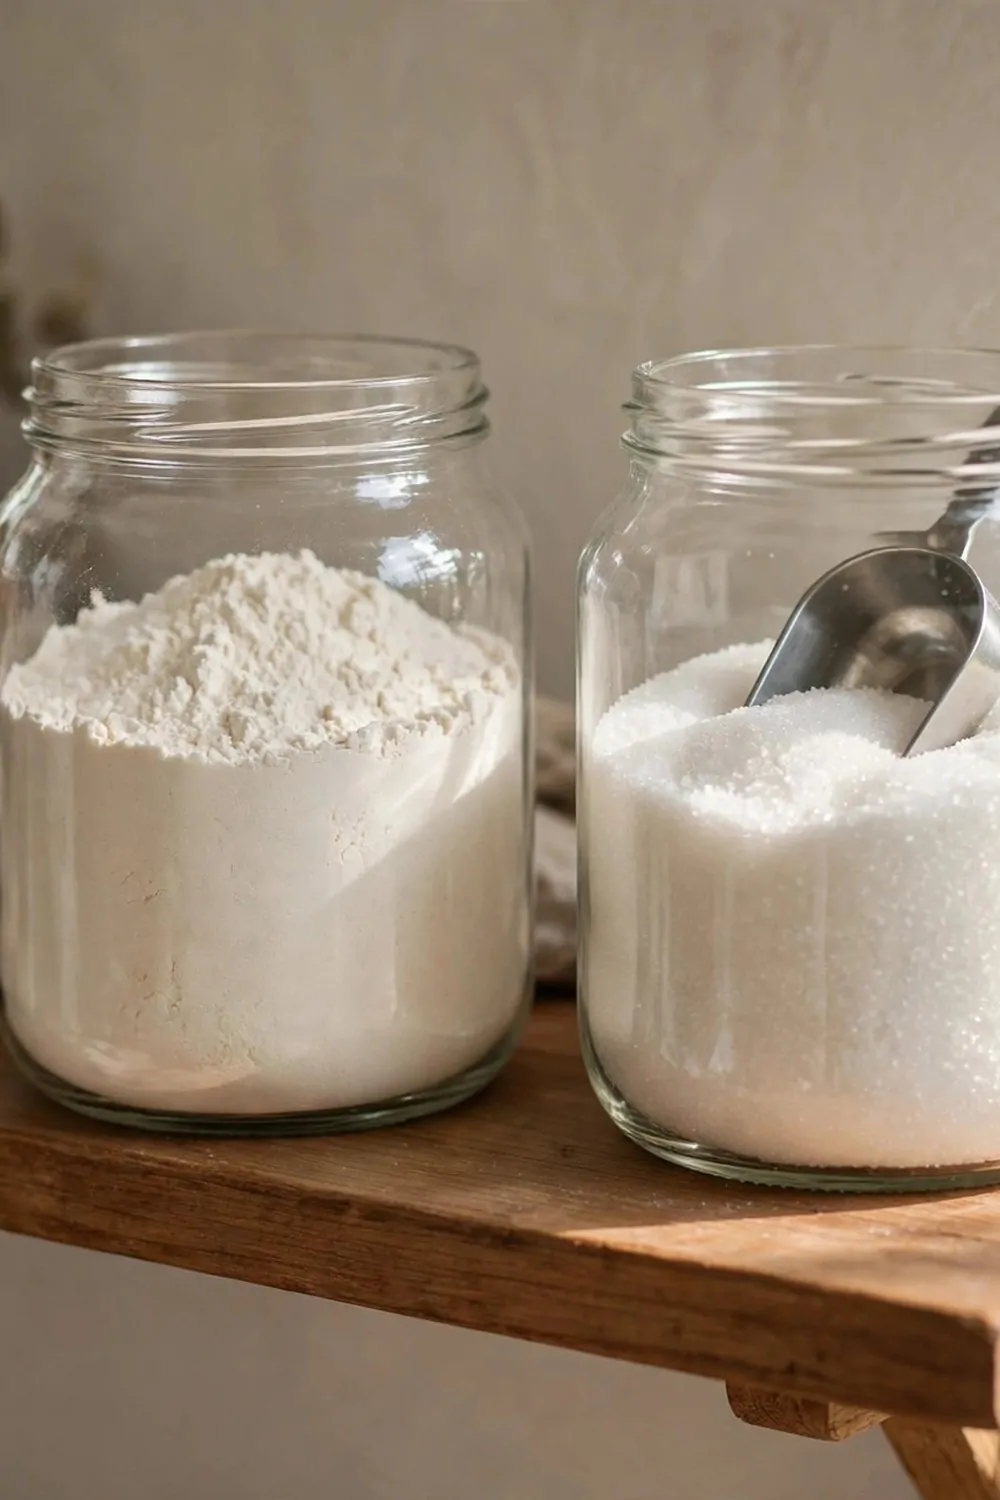
Flour bags tear. Sugar bags spill. I have cleaned up white powder from my shelf more times than I can count.
Clear jars end that mess. You pour the flour and sugar in once, and the bag goes in the bin. No more torn corners, no more spills.
Pick wide mouth jars so you can fit a scoop inside. A narrow jar looks pretty but it is hard to use when you are baking.
I use big glass jars with a clip lid. They seal tight and I can see the level at a glance. I know when it is time to buy more.
Label the jars, even if the contents look clear. Flour and powdered sugar look the same in a jar. A label saves you from a bad mix up.
Keep a scoop in each jar if you have room. It makes baking faster, and you are not hunting for a spoon with floury hands.
Put the jars at the front of the shelf. They are heavy when full, so you do not want to reach past other things to grab them.
Wash and dry the jar fully before you refill it. A damp jar makes flour clump. Let it air dry upside down for a bit.
This is a tiny habit that makes baking feel easier. Everything is ready, everything is visible, and your shelf stays clean.
Do a Quick Cabinet Check Every Month
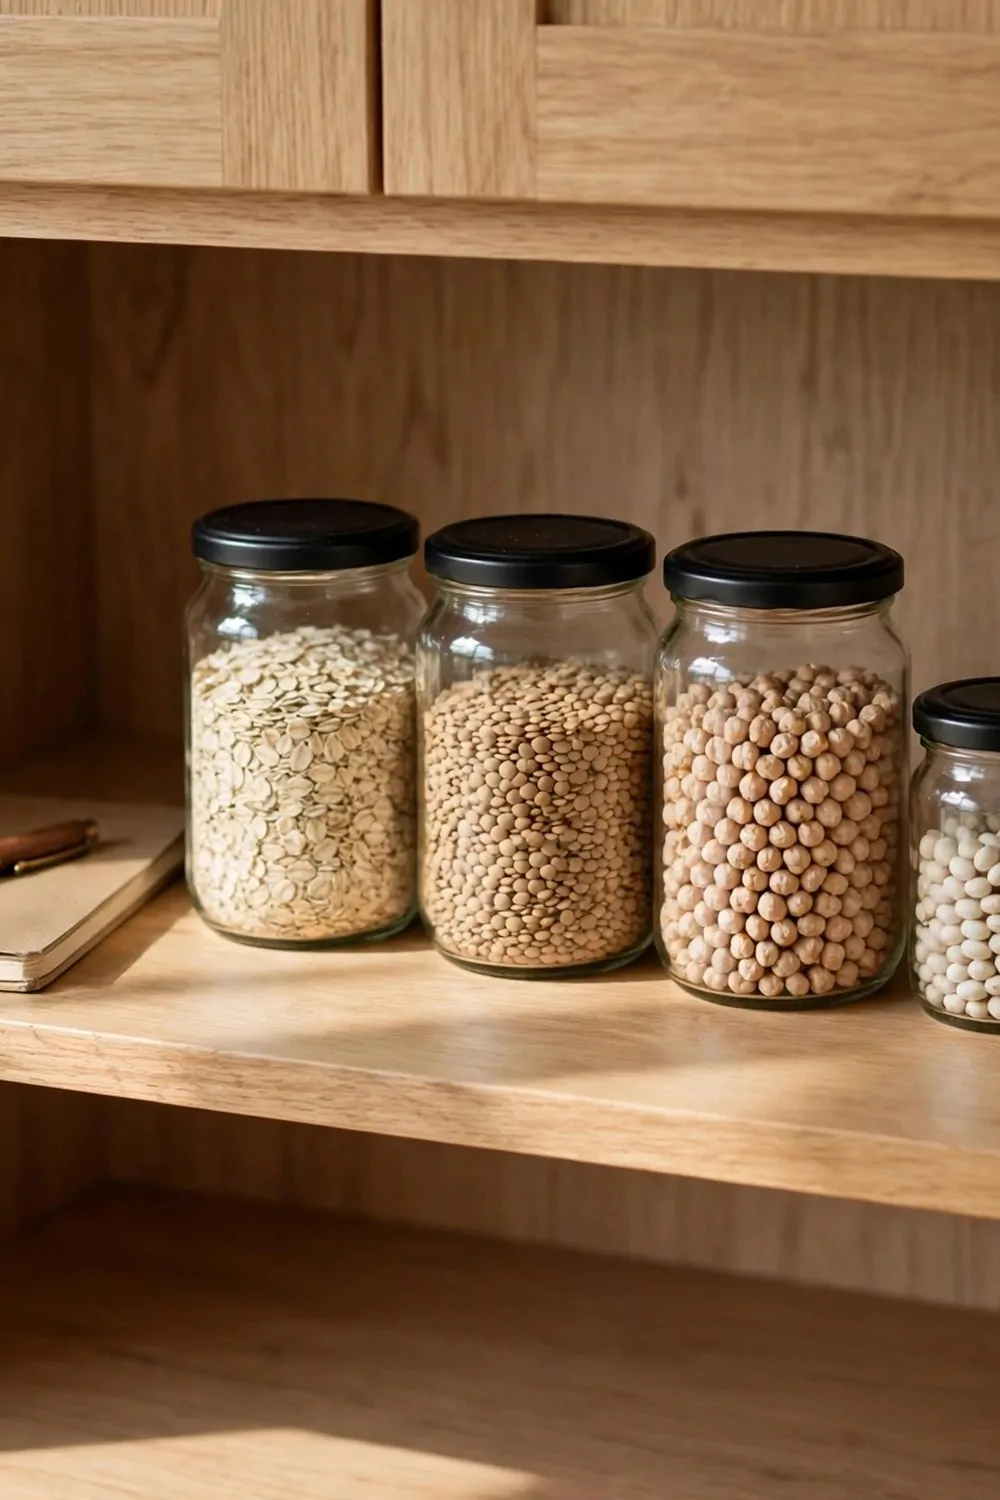
Cabinets get messy slowly. One extra jar here, one old spice there. Then one day you open the door and it is a mess again.
A monthly check stops that. Pick one day each month, like the first Saturday. Spend ten minutes looking inside each cabinet.
Set a timer if it helps. Ten minutes is enough for a quick check. You are not deep cleaning, you are just catching small problems early.
Look for food that is past its date. Check the back corners where old stuff hides. Toss what is stale and move the rest forward.
Check for drips and sticky spots too. A small spill now is easy to wipe. A spill left for a month turns into a hard crust.
Use this little list to guide your check. It covers the main things to look for and how fast each fix takes.
| Check | What to look for | Fix in minutes |
|---|---|---|
| Expired food | Old dates, stale smells, open bags | 3 |
| Sticky shelves | Drips, crumbs, and rings under jars | 2 |
| Loose lids and broken jars | Cracked glass, lids that do not seal | 2 |
| Things in the wrong spot | Items that drifted to another shelf | 3 |
Write the check day on your calendar so you do not forget. A reminder on your phone works too. Once it is a habit, you will not need the reminder.
Do the check with your kids if they are old enough. They can spot expired snacks fast, and it teaches them to look after their own stuff.
Ten minutes a month is all it takes to keep the whole kitchen calm. Skip a month and the mess creeps back, so keep the habit going.
Keep One Shelf Empty on Purpose
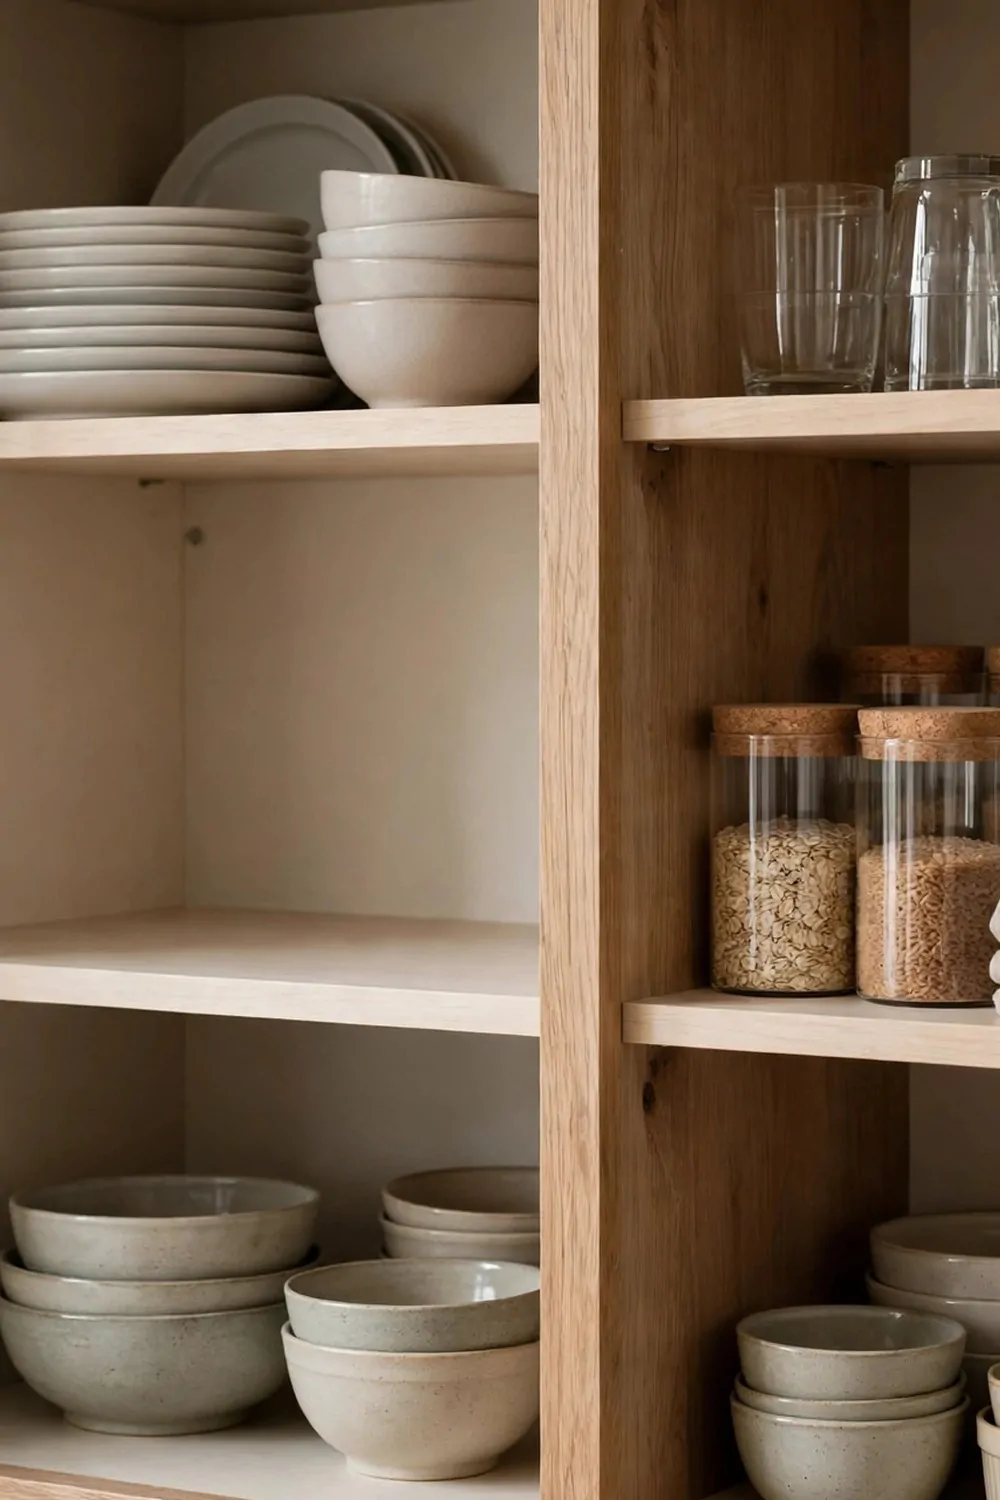
This one sounds strange, but it works. Keep one shelf empty on purpose. Do not fill it just because it is there.
An empty shelf gives you room to breathe. When you come home with new food, you have a place to put it. You are not shoving things into a full shelf.
It also gives you a landing spot when you are cooking. You can pull out a jar, use it, and set it on the empty shelf while you work.
Pick a shelf that is easy to reach. A middle shelf works best. The top shelf is too high for a quick landing spot.
It is hard at first. You will want to fill it. Give it a week and you will see how handy it is.
If your kitchen is small, use a half shelf instead of a full one. Even a small empty space helps more than you think.
When guests come over, the empty shelf is a gift. You can stash a dish there for a minute while you clear the counter. No stress.
This shelf also makes cleaning faster. You can move things to the empty shelf, wipe the dirty one, and move them back. Easy.
Think of it as a spare room for your kitchen. Every home needs one, and every cabinet does too.
Put Kids’ Snacks on the Lowest Shelf
Kids ask for snacks all day. If the snacks are up high, they climb or they call you every time. Neither one is fun.
Put their snacks on the lowest shelf. They can reach them on their own. You get fewer calls, and they feel proud doing it themselves.
Pick snacks you are happy for them to grab any time. Fruit, crackers, and small packs work well. Keep the sweets up high, out of easy reach.
Use a small basket or bin for their snacks. It keeps them in one spot. Kids can pull the basket out, pick one, and push it back.
Label the basket if your kids can read. A simple word or a small picture helps younger kids too. They learn where things belong.
Refill the basket once a week. That is your job, not theirs. Check what is left and add fresh snacks on Sunday night.
Keep the snack shelf tidy and the kids will keep it tidy too. Kids copy what they see. A neat shelf teaches them without a lecture.
If you have a baby in the house, keep choking hazards off this shelf. Small hard snacks stay up high. Safety comes first, always.
This little change gives kids freedom and gives you peace. They snack when they are hungry, and you are not the snack guard all day.
Store Party Dishes in a Labeled Box Up High
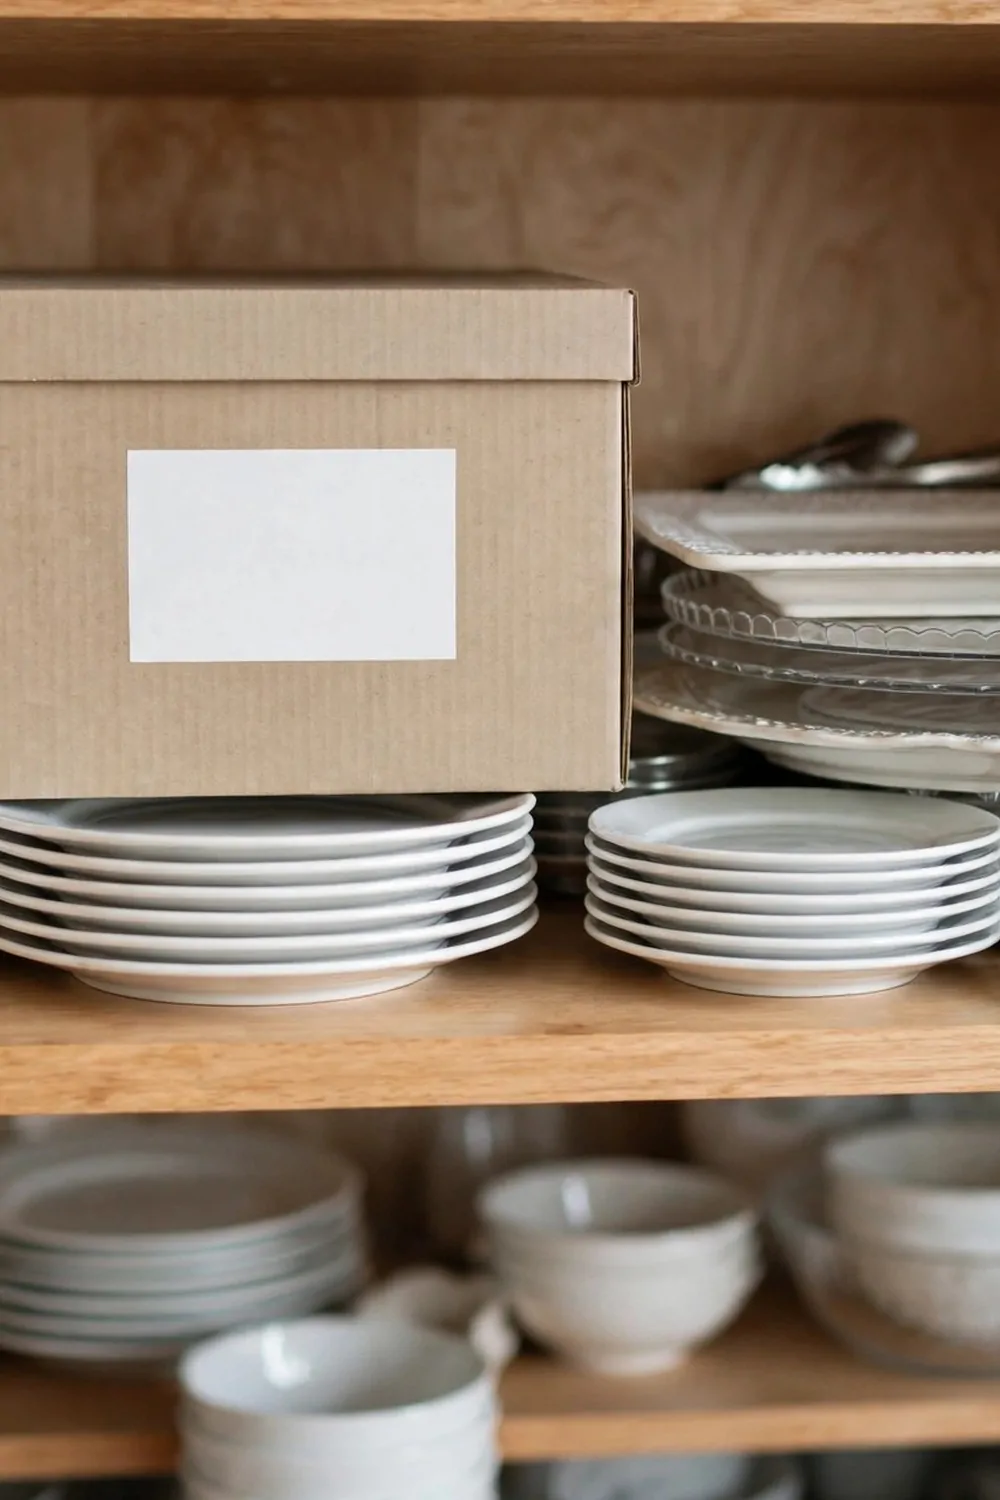
Party dishes come out a few times a year. The rest of the time they just sit there taking up space on a good shelf.
Put them in a box and store it up high. A labeled box on the top shelf keeps them safe and out of your daily way.
Pick a strong box that fits your shelf. A clear box is best because you can see what is inside. If it is not clear, label it big.
Write the label in big clear letters. “Party dishes” is enough. Add “plates and cups” if you want more detail.
Wrap the dishes in soft paper before you pack them. They can chip if they knock together. A little paper goes a long way.
Put the heavy plates at the bottom of the box and the light cups on top. That way nothing gets crushed when you lift the box down.
Use your step stool when you need the box. Do not stand on a chair to reach it. The box is light, but a fall is not worth it.
When the party is over, wash the dishes and pack them back in the same box. Put it back in the same spot. Next time you will know right where it is.
This frees up a whole shelf for the stuff you use every day. Your daily dishes get the good spot, and the party dishes wait up high until you need them.
Start With One Cabinet This Weekend
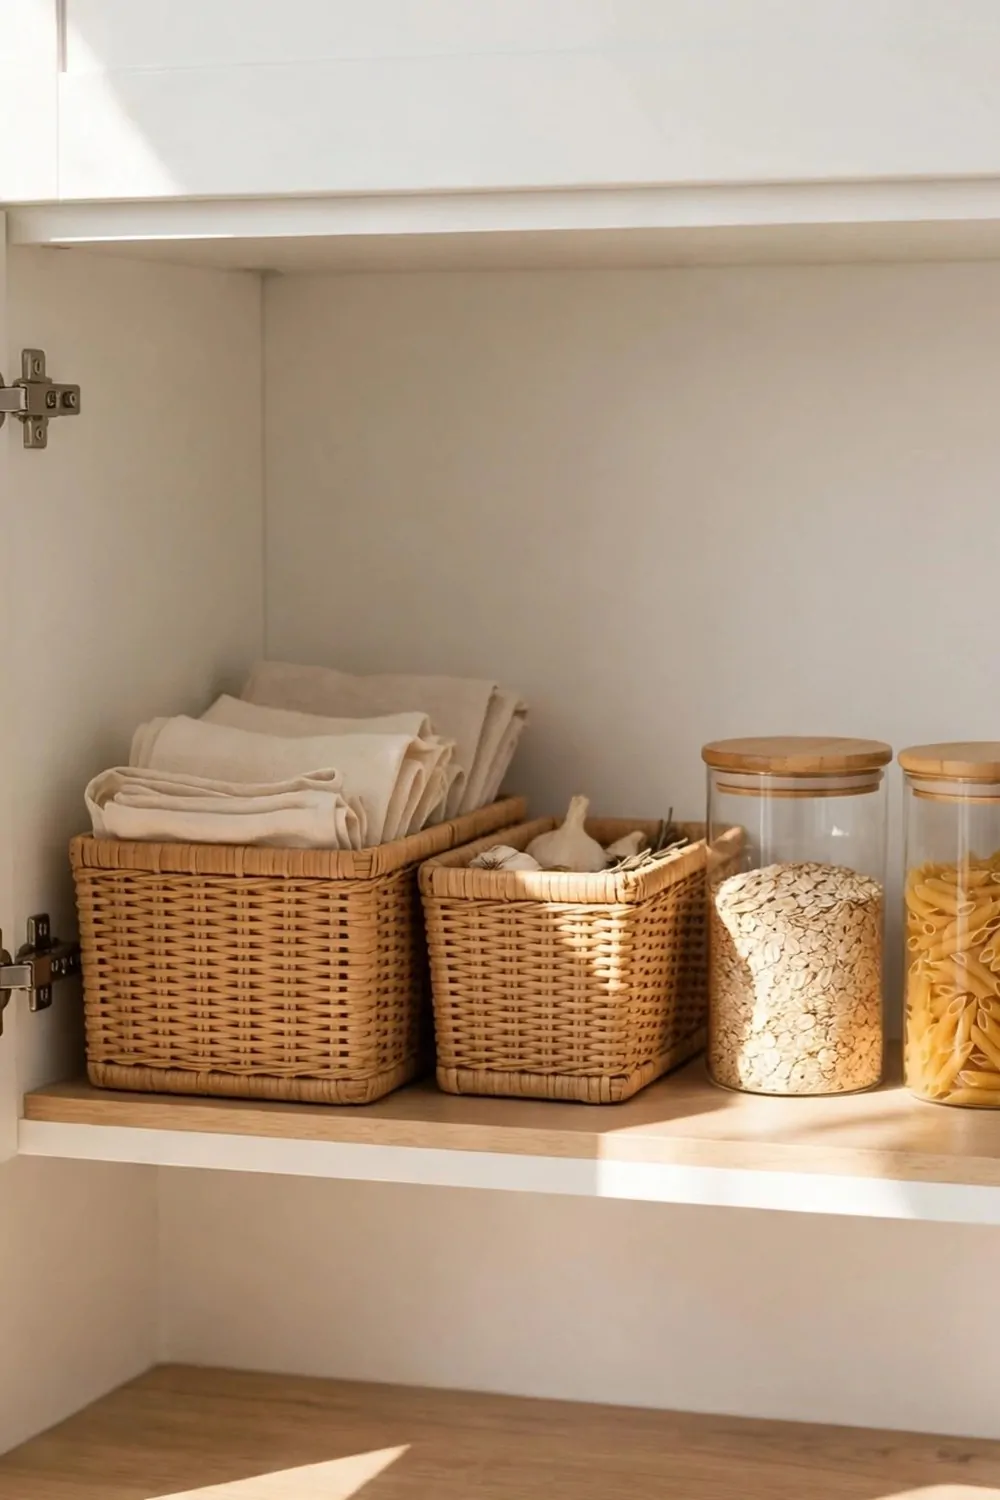
You have read 41 ideas now. That is a lot. Do not try to do them all at once, because that is how people give up.
Start with one cabinet this weekend. Pick the worst one, the one that makes you sigh every time you open it. That is your first win.
Empty it out first. Take everything out and set it on the counter. It looks worse for a minute, and that is normal.
Sort what you took out into three piles. Keep, toss, and move somewhere else. Be honest with yourself about the keep pile.
Wipe the shelf clean while it is empty. It takes two minutes and it feels so good to put things back on a clean shelf.
Now put back only what you use. Use one or two ideas from this list, like a turntable or matching containers. Do not buy everything at once.
Stand back and look at it when you are done. One tidy cabinet makes the whole kitchen feel different. It really does.
Next weekend, do the next one. One cabinet at a time is how a calm kitchen happens. One small step at a time gets it done.
You do not need a perfect kitchen. You just need a kitchen that works for you. Start this weekend, and enjoy the small win.
Keep Reading
If you liked these cabinet ideas, you will love these next. They are full of the same simple kitchen feeling, just in different corners of the room.
- 25 Small Kitchen Ideas You’ll Wish You Knew Sooner
- 26 Kitchen Design Layouts That Look Stunning and Work Hard
- 27 Home Decor Ideas Living Room and Kitchen Looks That Match
- 26 Modern Home Decor Updates That Look Instantly Fresh
Pick one cabinet and start there. Just one. Empty it, sort it, and put back only what you use. Your kitchen will feel calmer before you know it.