35 Appliance Garage Ideas to Hide Kitchen Clutter in Style

My toaster lived on my kitchen counter for two years. It sat right next to my coffee maker, and the two of them took up most of the space I had for making breakfast. I kept moving them around, but there was never really a good spot for either one.
Then a friend showed me her kitchen, and I saw a little cabinet with a door that rolled up. Her toaster and coffee maker were tucked inside it, plugged in and ready to go. When she closed the door, her counter looked clean and calm, like no one even cooked there.
That little cabinet is called an appliance garage. It sits on your counter, usually under your upper cabinets, and it hides your small appliances behind a door. You can open it in the morning, make your coffee, and close it again when you are done.
In this list, I will walk you through 35 ideas for your own appliance garage. You will find door styles, smart spots to put one, and stations for coffee, breakfast, and baking. Pick the ones that fit your kitchen and your habits, and your counter will feel bigger right away.
Start With the Classic Roll-Up Door
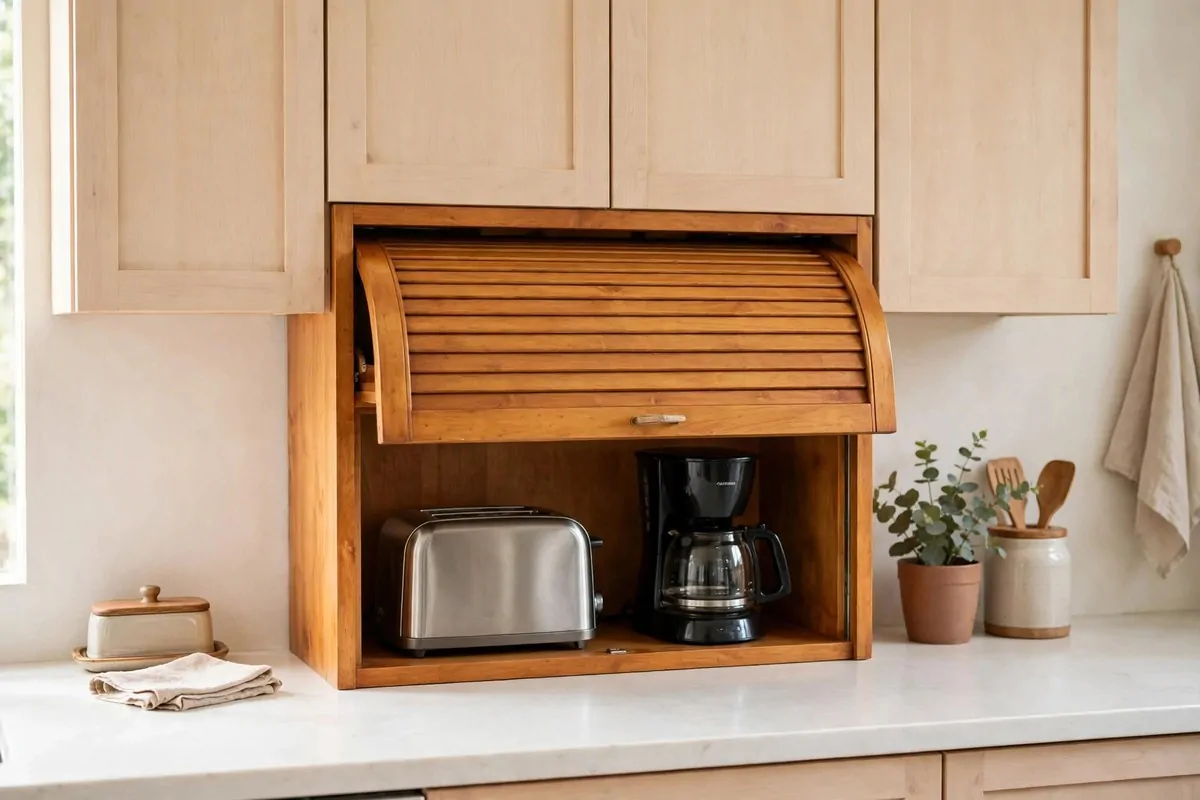
This is the style most people picture when they hear the words appliance garage. The door is made of thin slats, and it slides up into the top of the cabinet. It feels a bit like an old roll-top desk.
I like this style because it does not need any room to swing open. You just lift the door, and it rolls away out of sight. Your hands stay free for your coffee mug.
It works well in a tight spot between your fridge and your stove. There is no door banging into anything when you open it. That alone makes mornings feel calmer.
Keep the inside simple at first. A toaster and a coffee maker fit side by side in most roll-up garages. You do not need to cram in every gadget you own.
| Door style | How it opens | Best for |
|---|---|---|
| Roll-up tambour | Slides up and tucks away | Tight spots with no swing room |
| Lift-up | Swings up and stays open | Wide openings you use a lot |
| Slides back into the sides | A clean open work zone | |
| Bi-fold | Folds out in two parts | Simple low-cost builds |
The slats can be wood, and they can match your cabinets. That makes the whole thing look like it was always part of your kitchen. It does not shout, look at me.
One thing to watch is crumbs. Toast crumbs can fall into the track at the bottom, so wipe it out now and then. A quick wipe once a week keeps the door sliding smooth.
Leave the door open while your toaster runs. Heat needs a way out, and the open door lets it escape. Then close it when the toast pops up.
If you are just starting out, this is a safe first pick. It is simple, it looks good, and it hides the clutter without any fuss.
Try a Lift-Up Door That Swings Out of the Way
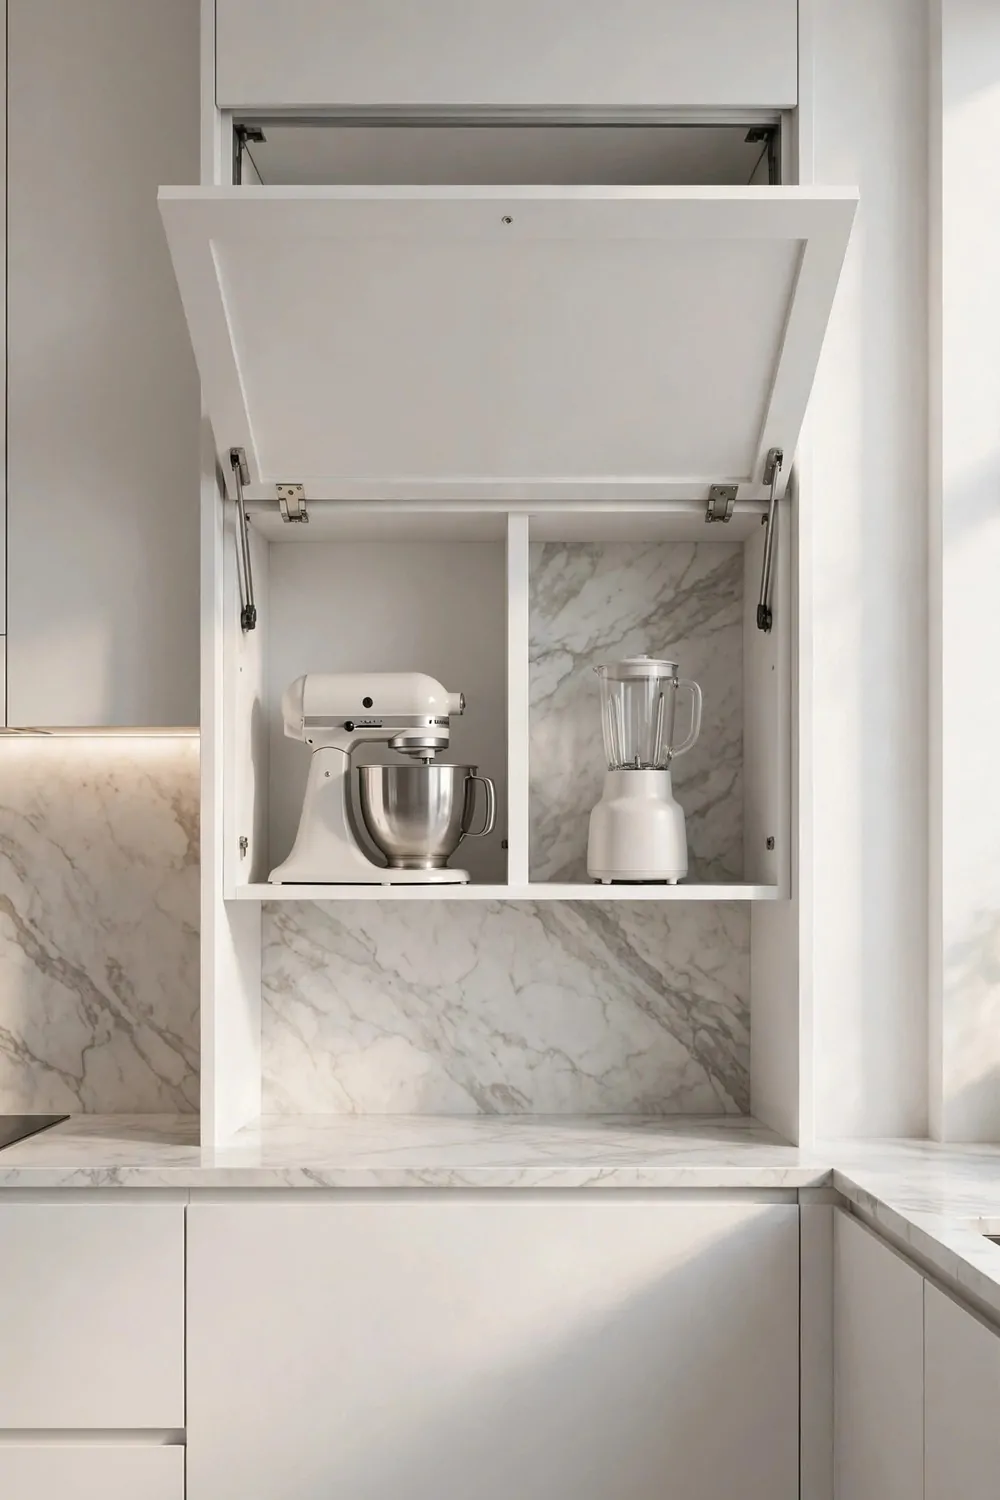
A lift-up door swings up on hinges and stays open above the counter. It is a bit like the hood of a car, but much lighter and easier to move. You push it up, and it holds itself in place.
This style is great when you use your appliances a lot during the day. You lift the door once in the morning, and it stays out of your way until you are done. No sliding, no folding.
It also gives you a wide open front. You can reach in with both hands and pull out a heavy blender without bumping the door. That matters when your hands are full.
Pick hinges that hold the door up on their own. Cheap hinges can droop, and a drooping door is no fun at all. Good hinges make the whole thing feel solid.
The open door can act like a little shelf in a pinch. I would not put heavy things on it, but it is handy for a recipe card while you work. Just keep it light.
This door needs room above it to swing. If your upper cabinets sit very low, measure first. You want the door to open all the way without hitting anything.
It suits wide garages best, where one big door covers a lot of space. A narrow garage does not need this much door. A wide one does.
I like how this style looks in a modern kitchen. The clean flat door matches flat cabinet fronts, and the whole wall looks neat when it is closed. It is simple and tidy.
Hide Everything Behind Pocket Doors
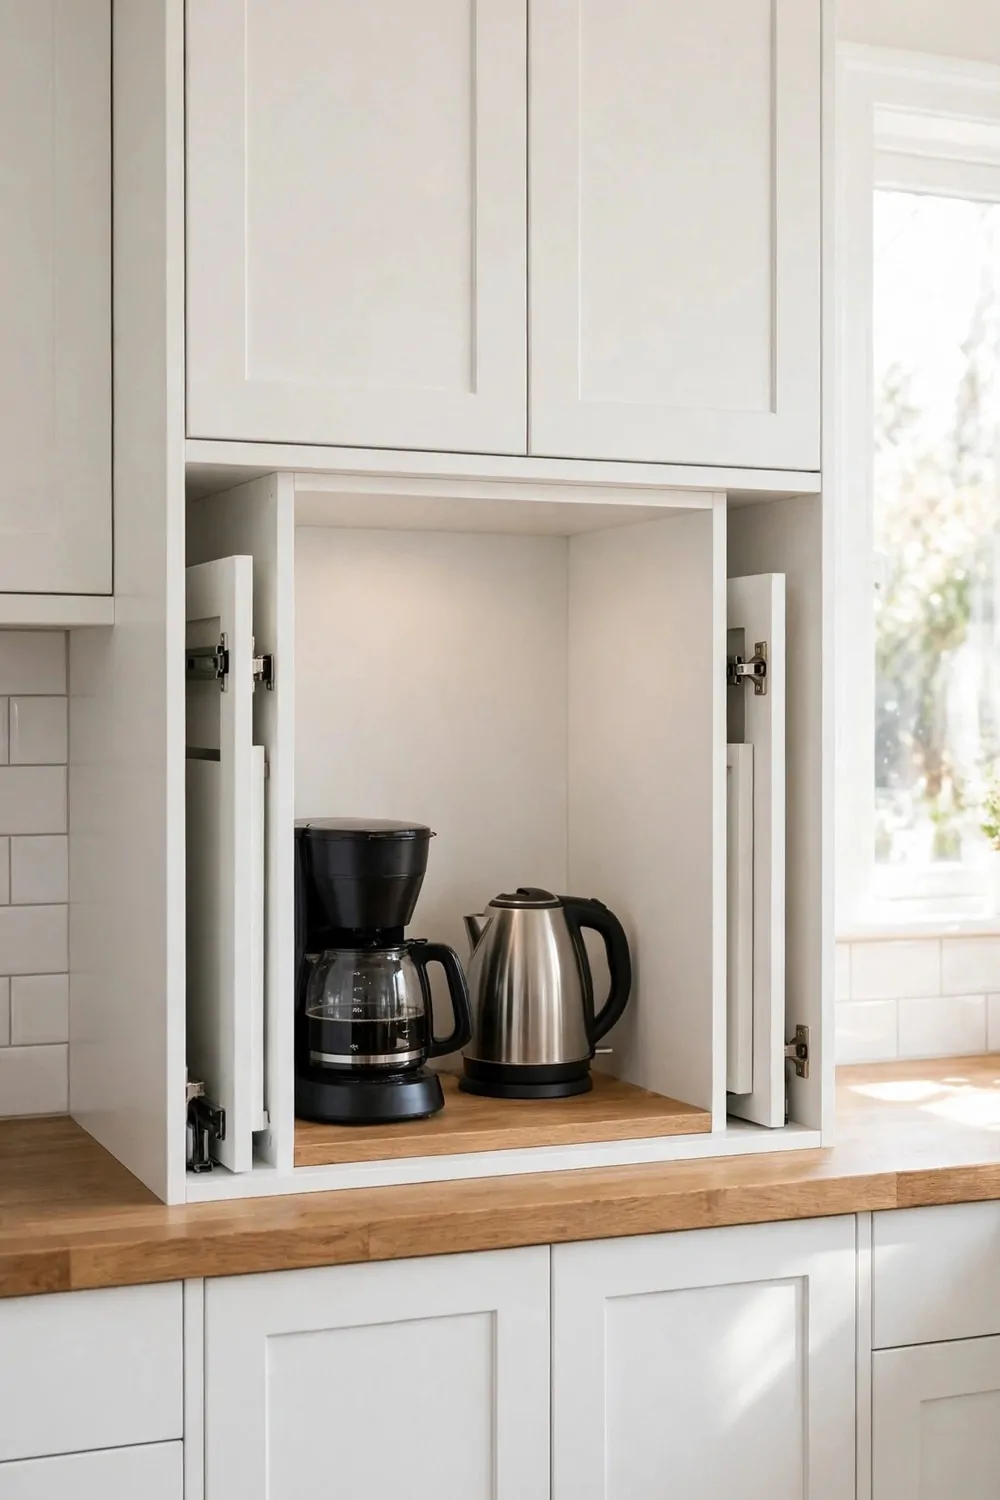
Pocket doors slide back into the sides of the cabinet, so they vanish when you open them. Nothing sticks out, and nothing blocks your work zone. It feels a bit like magic the first time you see it.
This is my favorite style when you cook a lot. You open the doors in the morning, and they are gone until you push them back. Your counter feels wide open all day.
It works well above a coffee station. You slide the doors away, make your coffee, and the doors stay tucked in the sides. No door edge to bump your elbow on.
The cabinet needs a little extra width on each side for the doors to slide into. That is the trade off. You lose a bit of storage on the sides, but you gain a clean open front.
Keep the tracks clean, just like with a roll-up door. A bit of dust in the track can make the doors stick. A damp cloth once a week is enough.
Pocket doors look best when they match the rest of your cabinets. When they are closed, you would never guess there are appliances behind them. The wall just looks like plain cabinets.
They are a good pick if you hate doors that swing toward you. There is no swing at all here. The doors go sideways, and your space stays yours.
If you want the tidiest open look, this is the one to ask your cabinet maker about. It costs a bit more to build, but the open feel is worth it.
Go Simple With Bi-Fold Doors
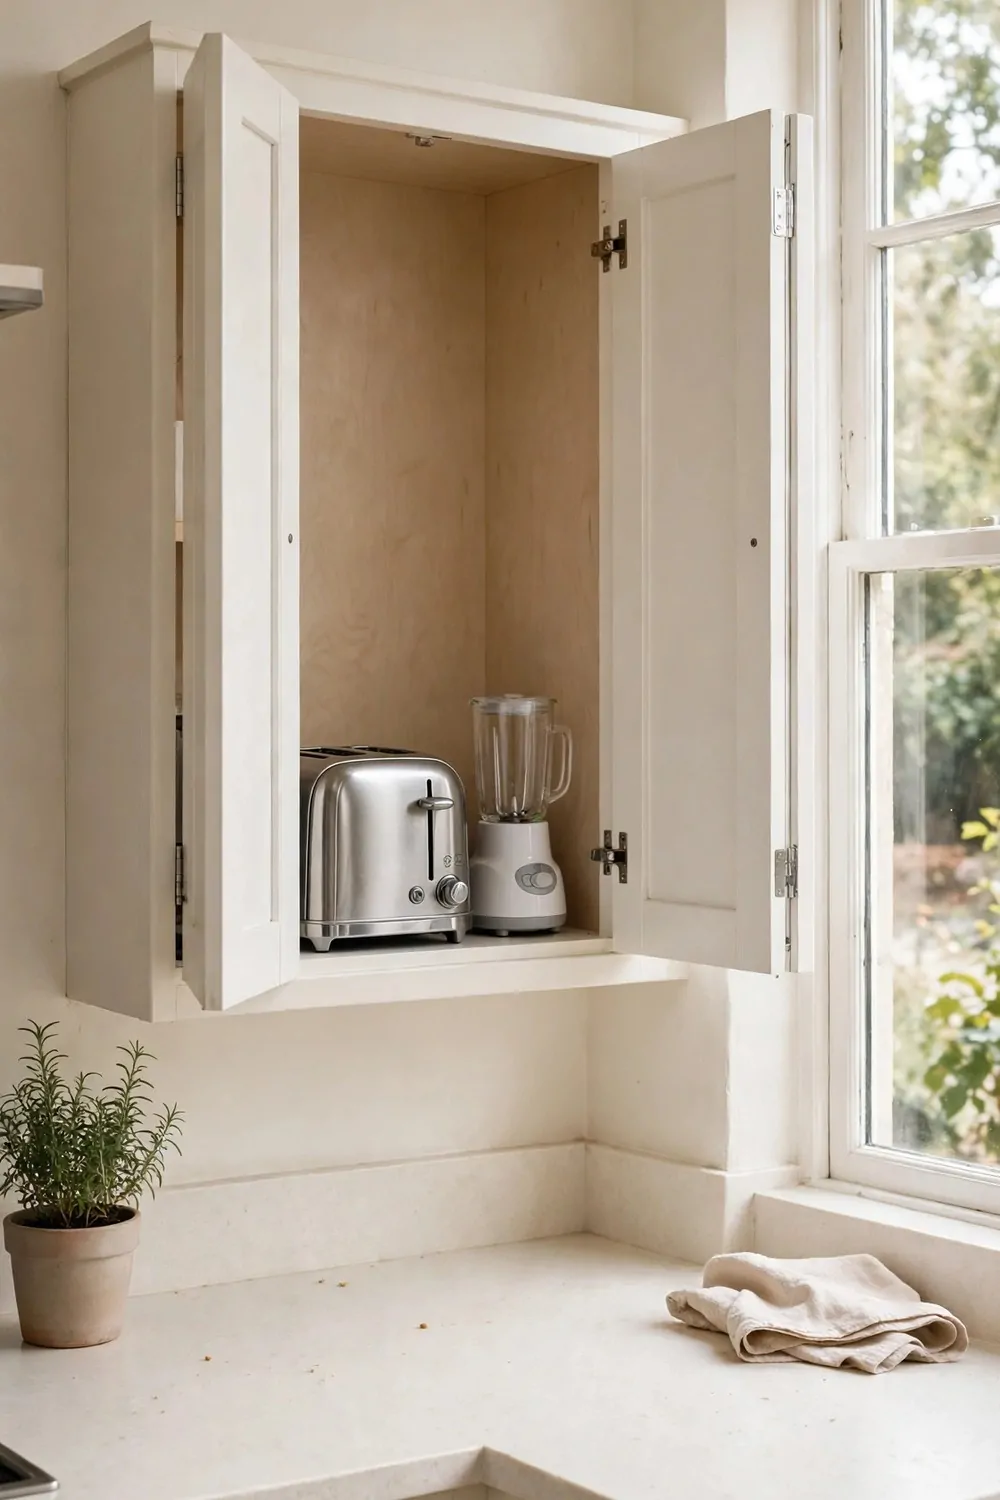
Bi-fold doors fold in the middle and open out in two parts. You pull them toward you, and they fold flat against the sides. It is a simple idea, and it works.
This is often the lowest cost door style. The parts are simple, and most cabinet makers can build it without special hardware. That keeps the price down.
It suits a garage that you open once or twice a day. You fold the doors out, use your appliances, and fold them back. It takes two seconds.
You do need clear space in front of the garage. The doors swing out toward you when they fold, so do not put a stool or a fruit bowl right in front. Give them room to move.
I like bi-fold doors on a garage that holds just one or two things. A toaster and a kettle fit fine, and the doors are small and light. Big heavy doors would feel clumsy here.
You can paint the doors the same color as your cabinets. When they are shut, the garage blends right in. No one will know your blender is hiding in there.
Check the hinges now and then. Bi-fold doors have more moving parts than a plain door, so a loose screw can make them sag. A quick tighten fixes it fast.
If you want simple and low cost, start here. It is not fancy, but it does the job, and it does it well.
Tuck It Into the Corner
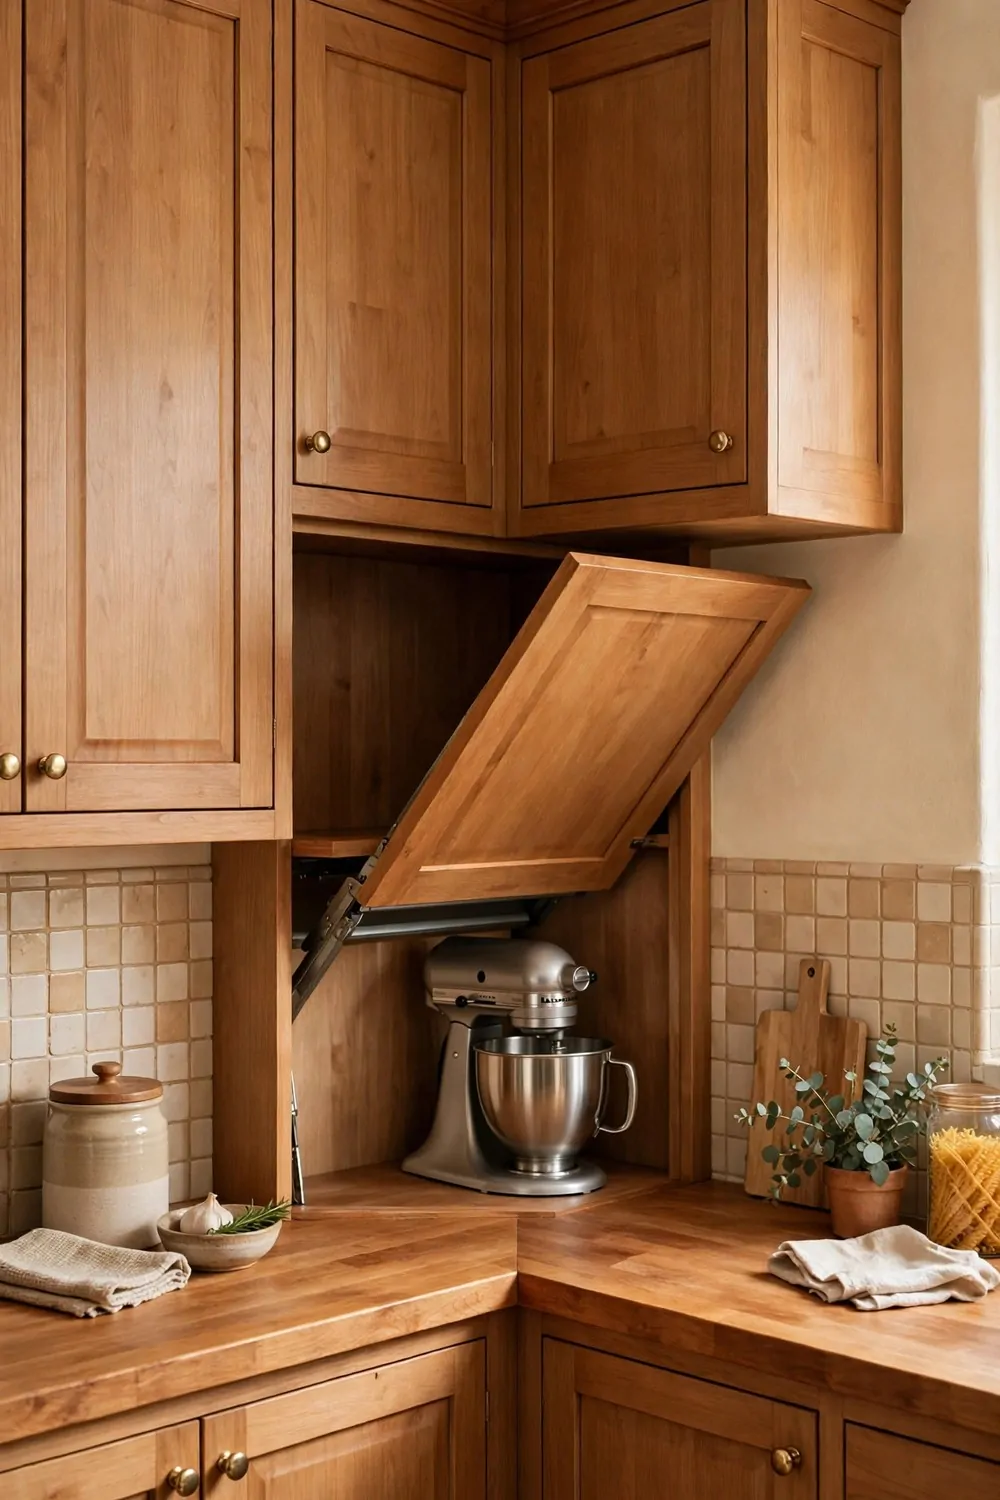
Kitchen corners are hard to use, and that makes them a great spot for an appliance garage. The garage sits in the corner, and it turns dead space into useful space. Your toaster finally has a home.
A corner garage is often shaped to fit the corner, with a door that faces out at an angle. It looks a bit odd at first, but it works so well. You reach in from the front, and everything is right there.
Give it enough depth for your biggest appliance. A stand mixer needs about 14 to 16 inches of depth to fit with room to spare. Measure your mixer before you build anything.
The corner is also a good spot because it is out of the main work path. You are not blocking the stove or the sink when you open it. Traffic flows past without a bump.
Put your most used things in the corner garage. If you make coffee every morning, the coffee maker belongs here. The things you use once a month can live in a cupboard instead.
Light helps a lot in a corner, because corners can feel dark. A small light inside the garage makes it easy to see what you are reaching for. I will talk more about lights later on.
Keep the counter in front of the corner clear. You need a little landing space to set down a hot mug or a plate of toast. A clear patch of counter right in front makes it all work.
If your kitchen has a corner that never gets used, this is the fix. It turns a dead spot into the busiest little cabinet in the room.
Double Up When You Have Lots of Gadgets
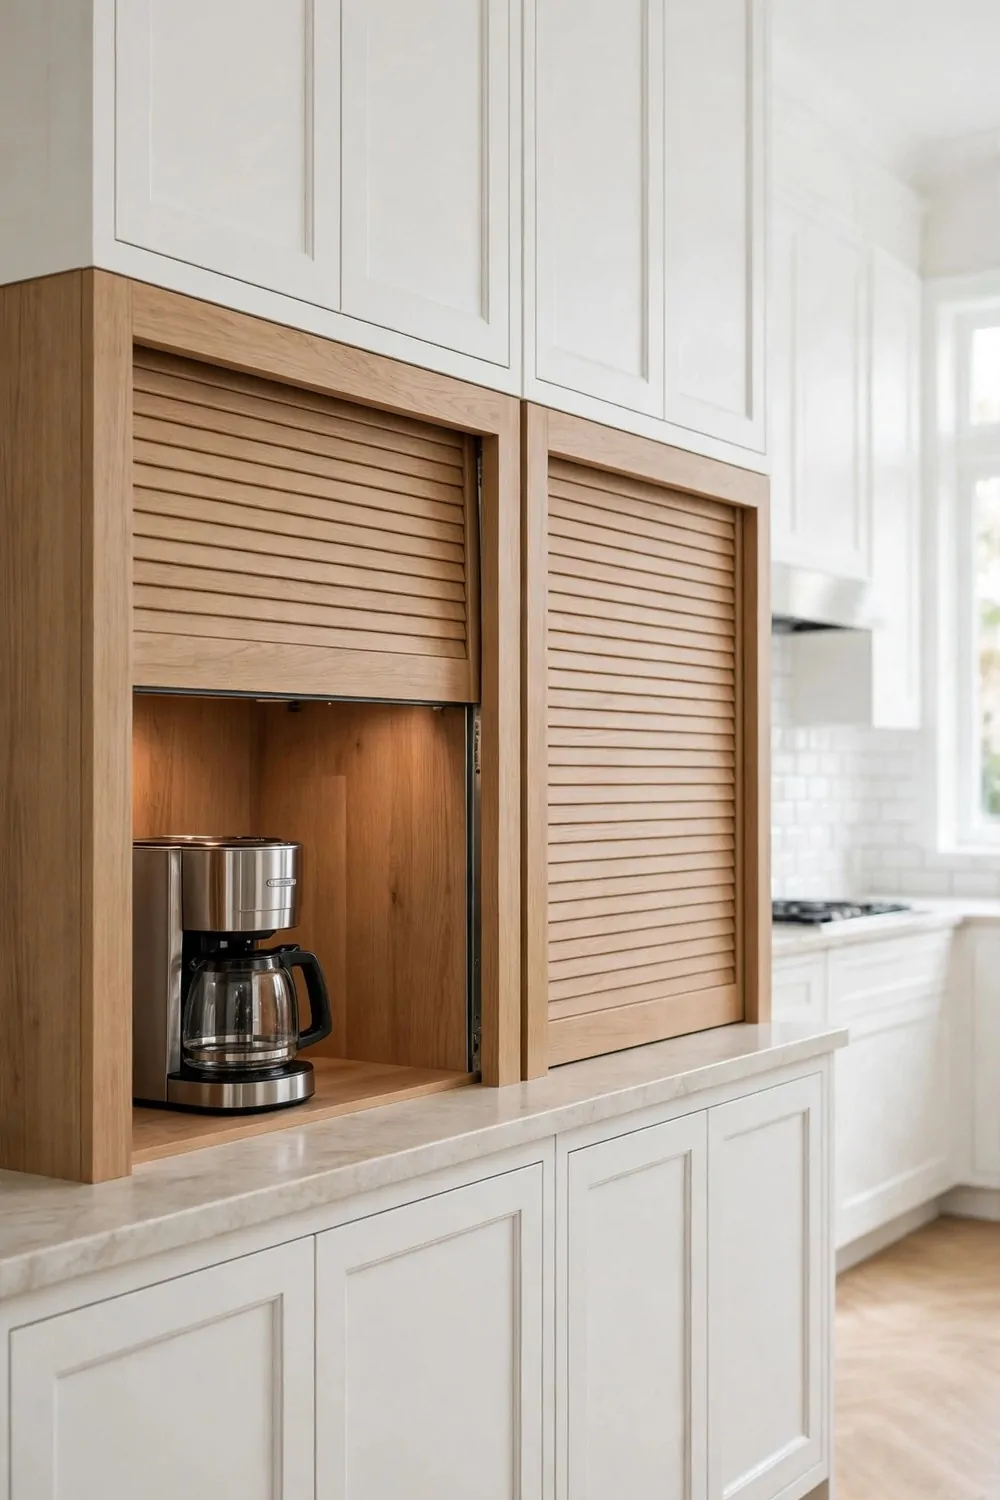
Some of us have a lot of gadgets, and one small garage is not enough. A double garage gives you two doors side by side, or one wide garage with two sections inside. It holds a lot without looking messy.
This suits a big kitchen with a long stretch of counter. You can put the coffee stuff on one side and the breakfast stuff on the other. Each side has its own job.
I would split it by time of day. Morning things go on the left, and evening things go on the right. That way you only open the side you need, and the other side stays shut and tidy.
A double garage can also hold taller things. A stand mixer is tall, and it needs headroom. A wide garage gives it that room without crowding the toaster next to it.
Keep a little space between the appliances inside. If they are packed tight, you will bump them when you pull one out. A finger width of space on each side is enough.
Two doors also mean you can leave one side open and one side closed. That looks neat, and it keeps the dust off the things you are not using. It is a small thing, but it helps.
Do not buy a double garage just because it looks impressive. If you only own a toaster and a kettle, a single garage is fine. A double garage is for people who really use a lot of gadgets.
When it fits your kitchen and your habits, though, a double garage is a joy. Everything has a spot, and the counter stays clear all day long.
Put It Right Next to the Fridge
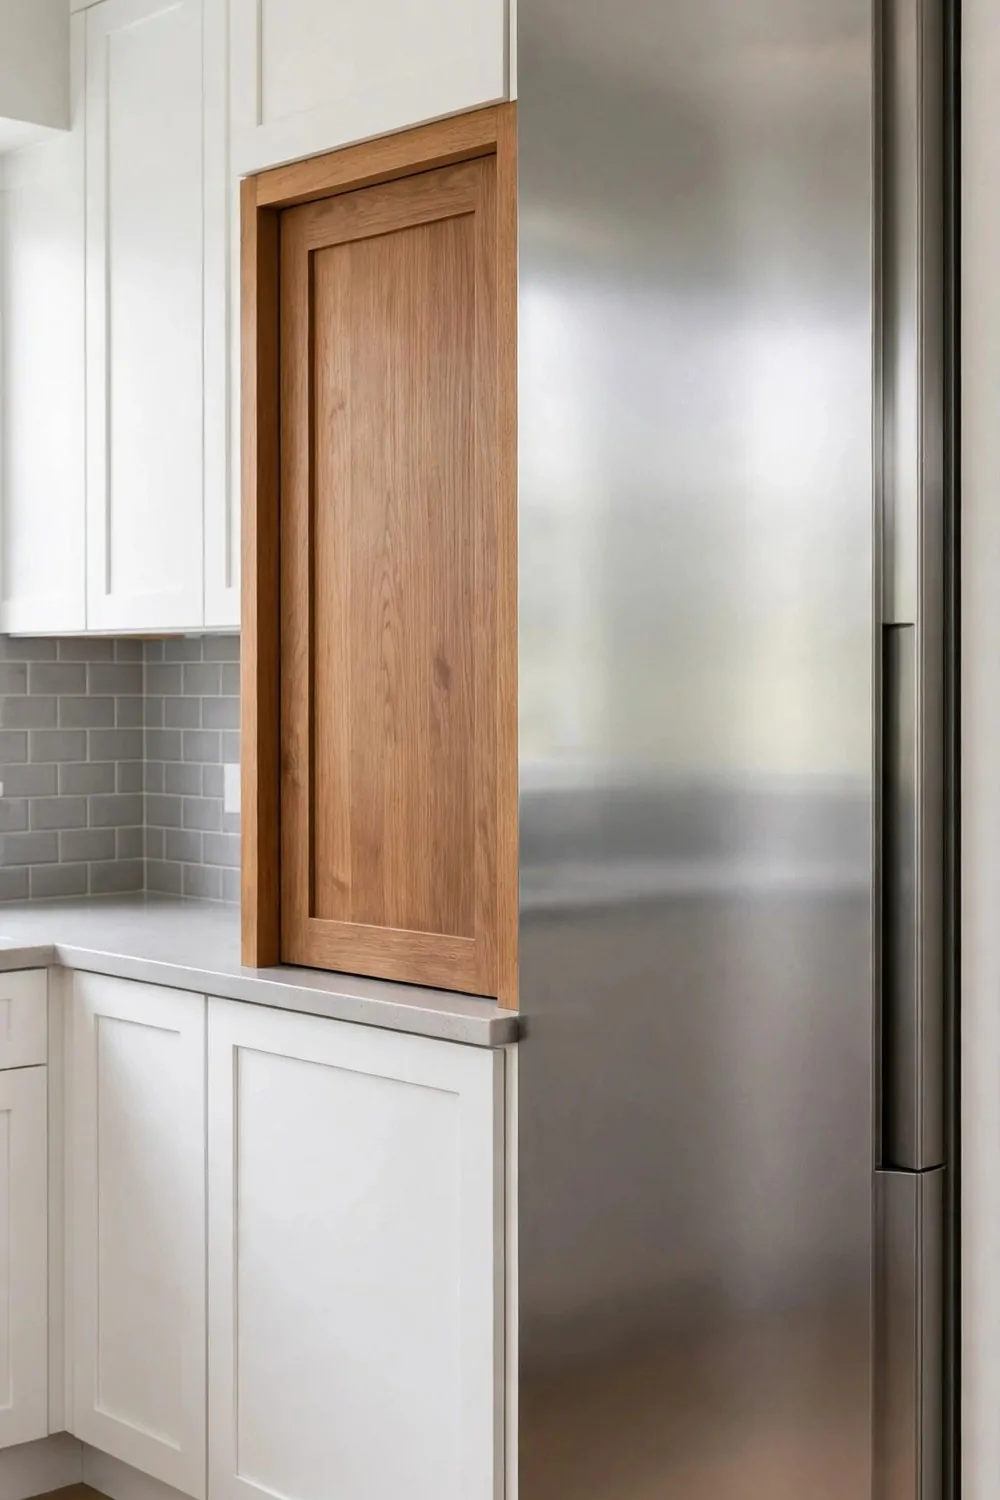
A garage next to the fridge looks planned, like it was part of the kitchen from the start. The fridge is tall, the garage is short, and the two sit side by side in a neat line. It just looks right.
This spot is handy too. You grab milk from the fridge, and your coffee maker is right there next to it. You do not walk across the kitchen with a cold carton in your hand.
It also works well for a breakfast station. The fridge holds the butter and jam, and the garage holds the toaster. Everything you need for toast is in one little zone.
Watch the fridge door swing. Make sure the fridge door does not hit the garage door when it opens. A few inches of gap is all you need, but you do need it.
If your fridge has a tall cabinet next to it, the garage can sit under that cabinet. The whole run looks like one built-in unit. It feels custom, even if it is simple.
Keep the top of the garage clear. It is tempting to stack things on top, but that just moves the clutter up instead of hiding it. A clear top looks calm.
This is a good spot for renters too, if your landlord allows a small cabinet. A countertop garage next to the fridge does not need a full remodel. It just needs a flat spot and an outlet.
When you plan your kitchen layout, save a spot by the fridge. It is one of the easiest wins in this whole list.
Build a Full-Height Coffee Station
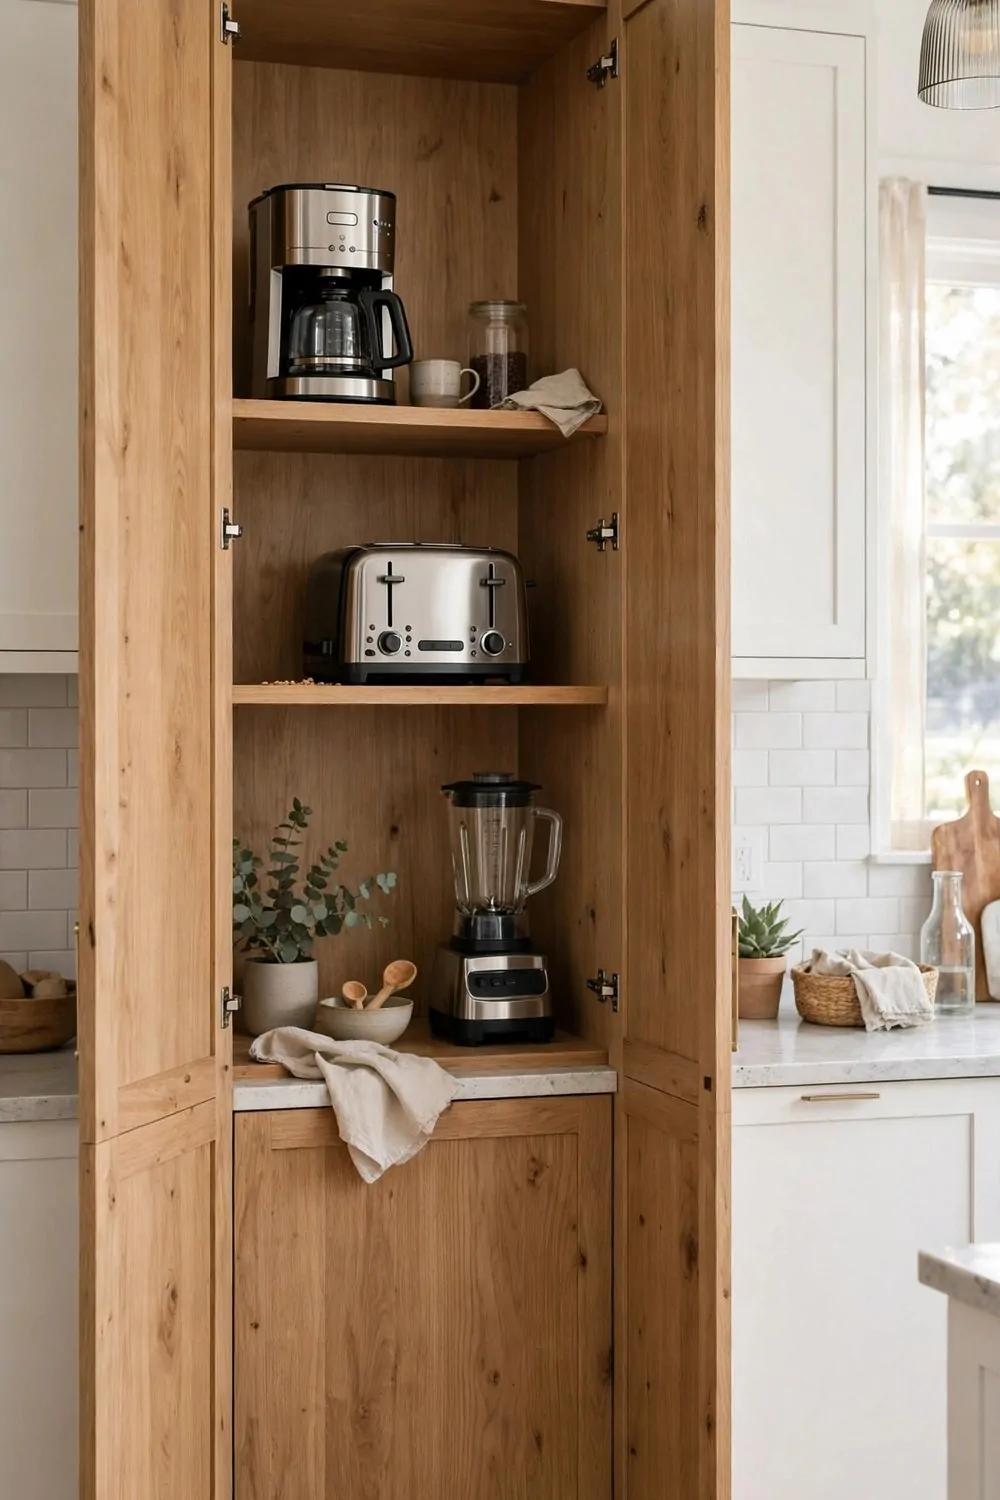
A full-height coffee station is a tall cabinet that goes from the counter up to the top of your upper cabinets. It holds your coffee maker, your mugs, and your coffee beans all in one place. It is a little coffee shop in your kitchen.
I love this idea because it keeps everything together. You open the doors, and your mugs are on a shelf above the coffee maker. You do not hunt through three cupboards for a mug.
Put the coffee maker at counter height, where it is easy to reach. Mugs go on the shelf just above it. Beans and filters go higher up, where you only reach once in a while.
A roll-up or pocket door works well here. The tall opening needs a door that gets out of the way fast. A door that swings out would block the whole kitchen.
Leave room for steam. Coffee makers let off steam, and steam needs somewhere to go. Do not seal the cabinet tight. A little gap at the back helps a lot.
Add a small tray under the coffee maker. Spills happen, and a tray catches them before they stain the wood. You can pull the tray out and wash it in the sink.
This station can be the prettiest part of your kitchen. A few nice mugs on display, a jar of beans, and a clean counter below it. It looks like you planned it, because you did.
If coffee is your morning ritual, give it a full-height home. It will make every morning feel a little more special.
Lift Your Mixer Up From a Lower Cabinet
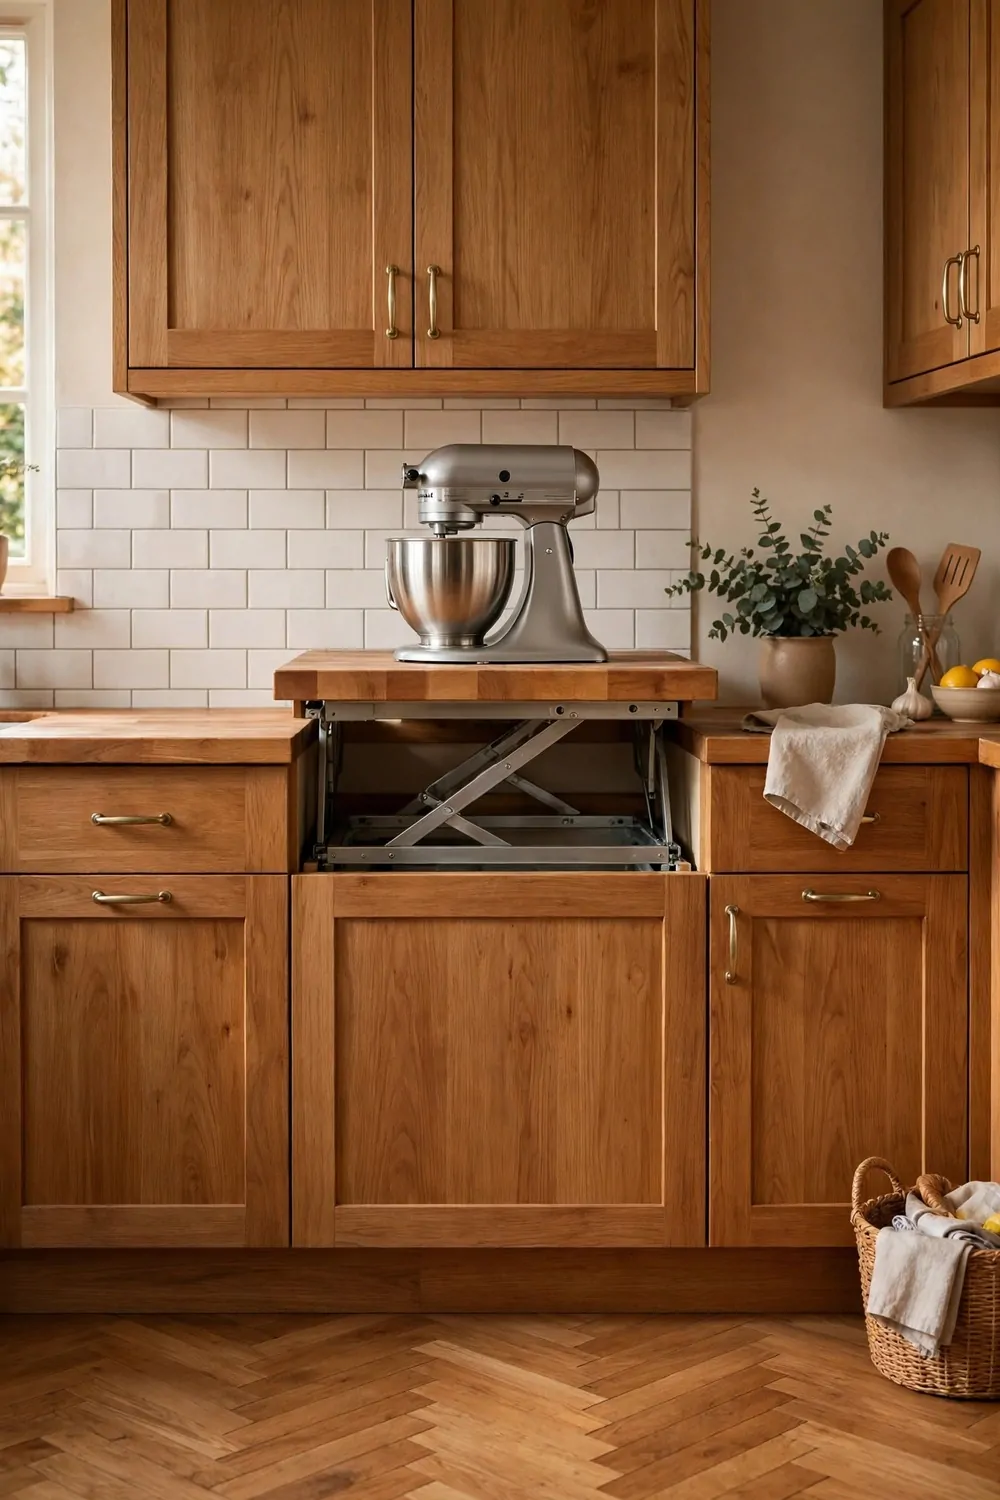
A stand mixer is heavy, and lifting it out of a low cupboard is hard on your back. A mixer lift fixes that. It sits in a lower cabinet, and it raises the mixer up to counter height on springs when you need it.
You pull the shelf up, and the mixer rises with it. It locks in place at counter height, and you can bake right there. When you are done, you push it back down and close the door.
This is not quite the same as a countertop garage, but it works the same way. Your mixer is hidden when you are not using it, and it is ready in seconds when you are. Your counter stays clear.
Make sure the lift is rated for your mixer. Mixers are heavy, and a weak lift will sag or stick. A good lift feels smooth and holds the mixer steady while you mix.
Keep the area above the lift clear. The mixer needs room to rise, so do not put a shelf right above it. Measure the full height of the mixer plus the lift before you build.
This is a great pick if you bake once a week. You do not want a heavy mixer sitting on your counter all week, but you do not want to haul it out of a deep cupboard either. The lift is the middle ground.
Ask your cabinet maker to show you the lift in action before you buy. Push it up and down a few times. It should feel easy, not like a workout.
Your back will thank you for this one. A mixer lift turns a heavy chore into a simple pull.
Add a Roll-Out Tray Inside
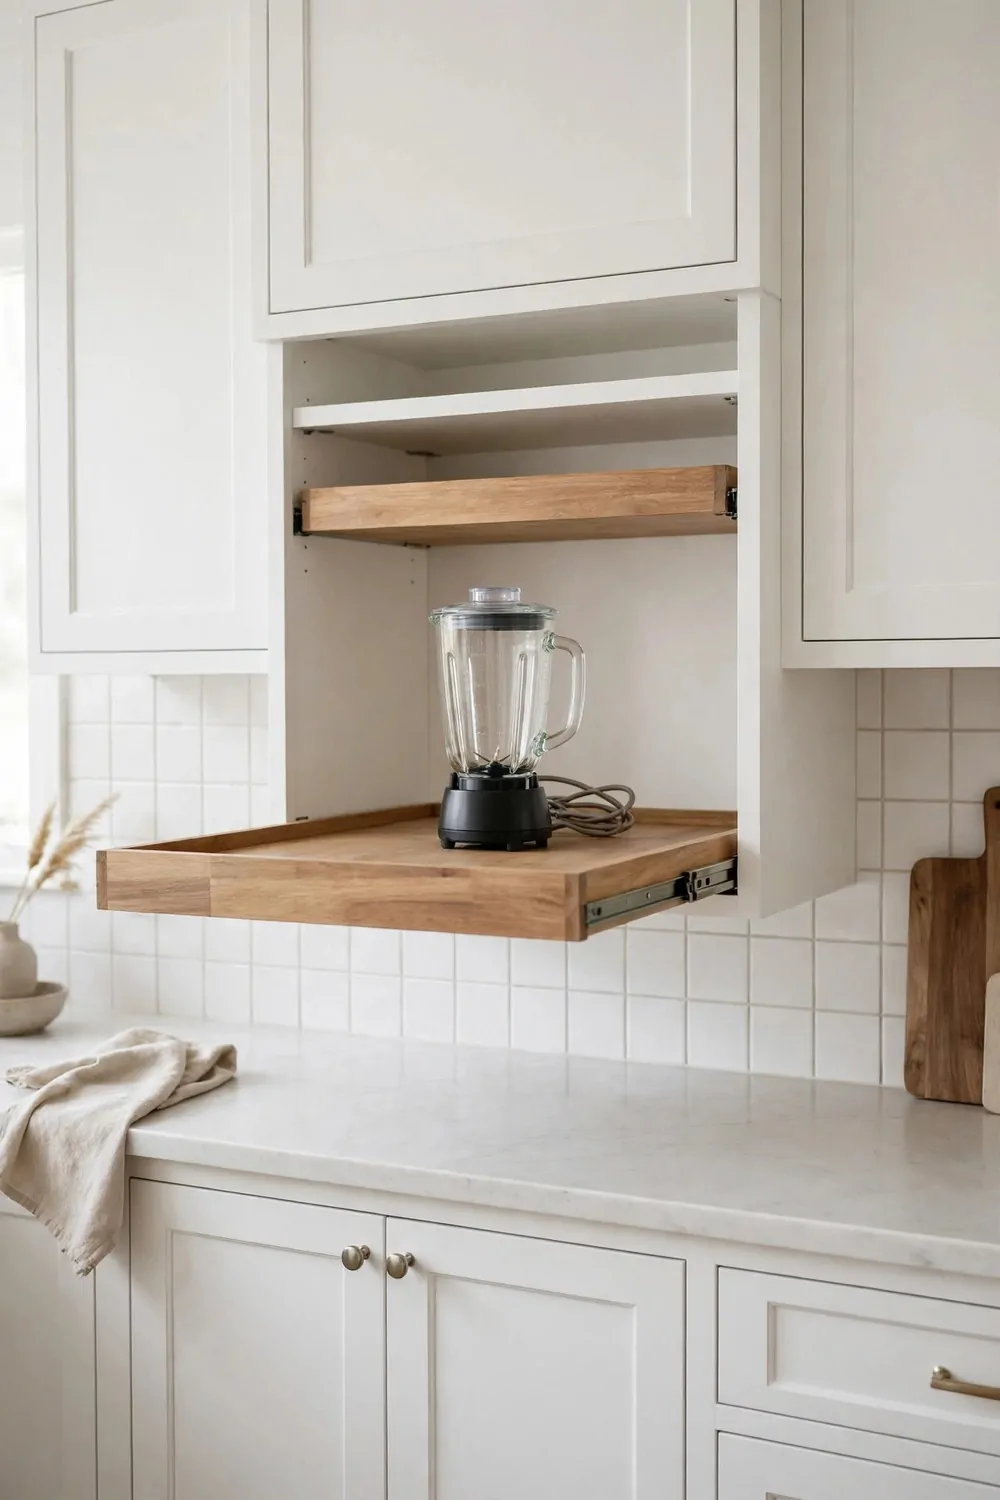
A roll-out tray is a small shelf on runners that slides out of the garage toward you. You put your appliance on the tray, and you pull it out when you want to use it. It is like a drawer for your toaster.
This helps a lot with heavy appliances. A blender is much easier to use when it slides out to you, instead of you reaching deep into a dark cabinet. Your arms stay relaxed.
It also keeps the counter clean. Crumbs and drips land on the tray, not on the counter. You can wipe the tray in seconds, and the counter stays spotless.
Pick runners that can hold the weight. A cheap runner will wobble under a stand mixer, and a wobbling mixer is no good. Strong runners cost a bit more, but they last.
The tray should slide all the way out, so you can reach the back of the appliance too. Halfway is not enough. Full extension runners are the ones to ask for.
Keep the cord tidy on a roll-out tray. The cord needs slack to move with the tray, but it should not dangle or catch. A small cord clip on the side keeps it neat.
This is a simple add-on that makes any garage better. If you already have a garage and it feels hard to reach into, a roll-out tray is the fix.
Once you try a roll-out tray, you will wonder why every garage does not have one. It is that useful.
Make a Coffee Station Garage
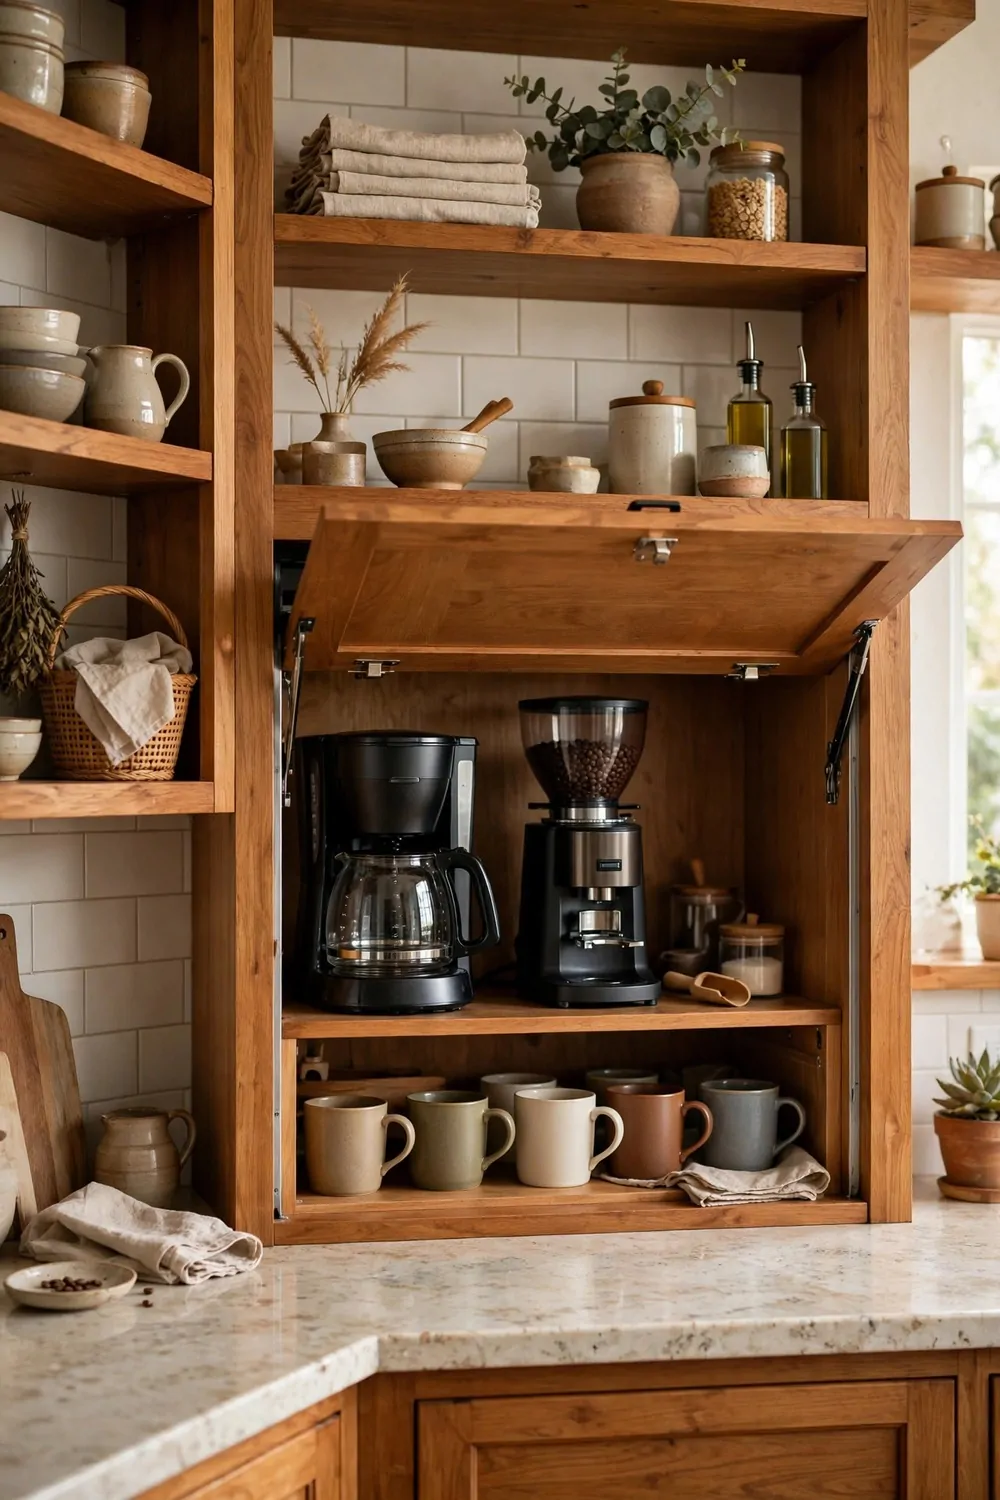
A coffee station garage is a small garage built just for coffee. It holds the coffee maker, the mugs, and maybe a small grinder. Nothing else goes in there. It has one job, and it does it well.
This is different from the full-height station I talked about before. That one is tall and holds a lot. This one is short and simple, and it sits on your counter like a normal garage. It just has a clear purpose.
Put it near the sink if you can. You fill the coffee maker with water, and the sink is right there. No drips across the kitchen floor.
Keep only coffee things inside. The moment you add a toaster or a blender, it stops being a coffee station and becomes a junk drawer with a door. Be strict with yourself here.
A small shelf inside can hold two or three mugs. That saves you a trip to the mug cupboard every morning. The mugs are right above the coffee maker, waiting for you.
Use a heat-safe mat under the coffee maker. Coffee makers get warm, and a mat protects the wood below. It also catches drips, which is a bonus.
Open the door while the coffee brews. Steam needs to escape, just like with a toaster. Close it when the pot is done, and your kitchen looks tidy again.
If coffee is the first thing you do each morning, this little garage will make your day start smoother. It is a small change with a big payoff.
Set Up a Breakfast Station
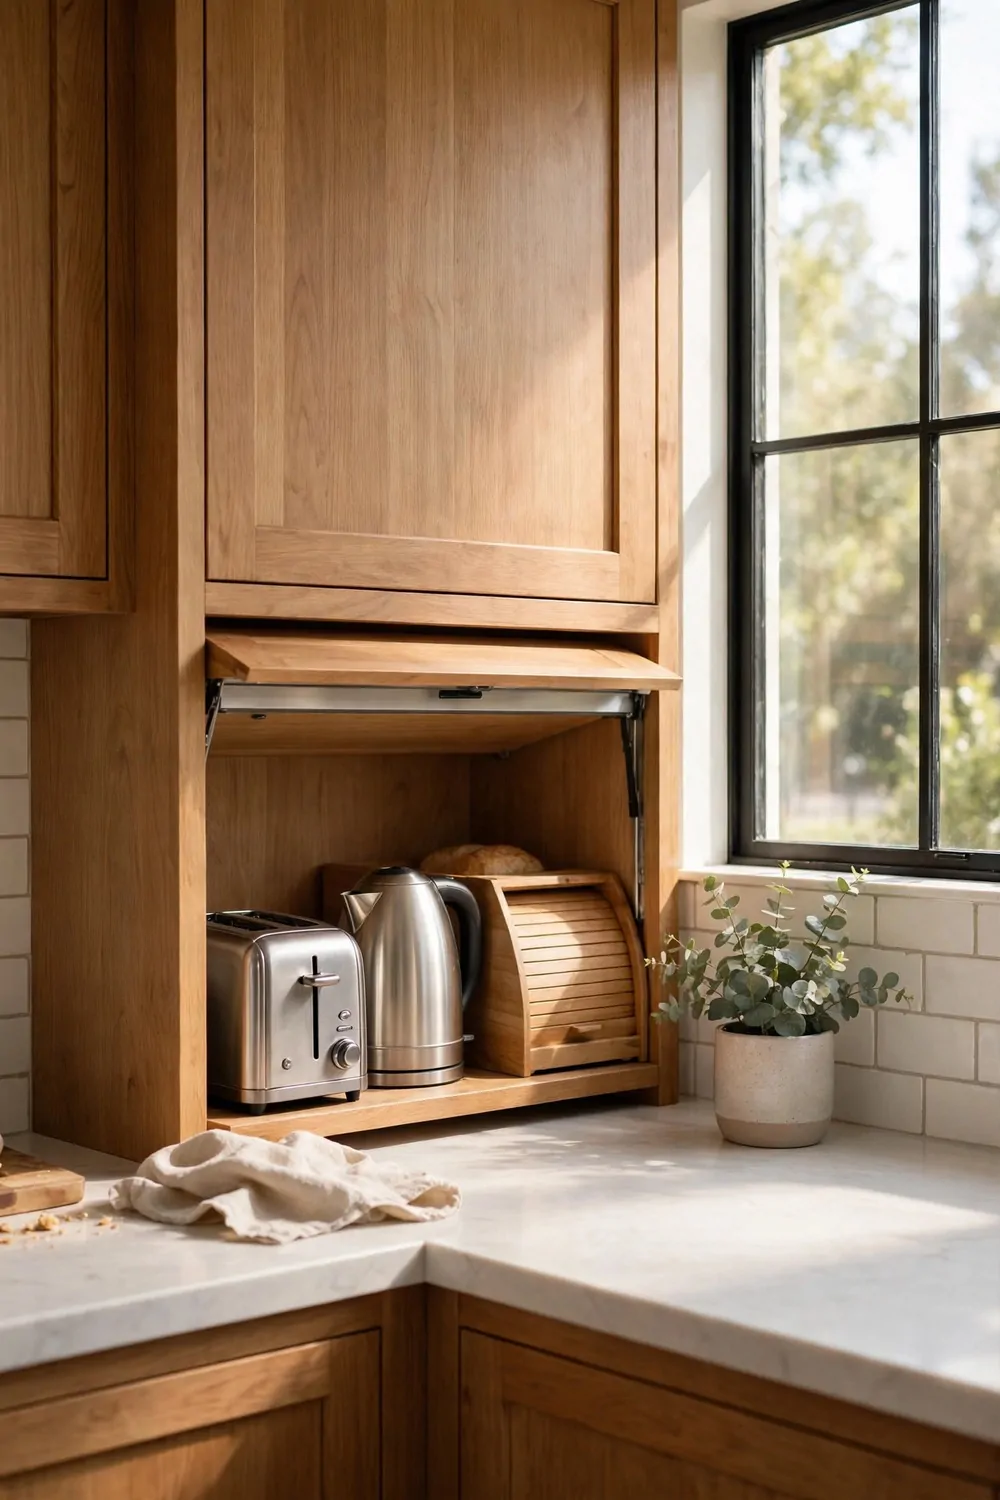
A breakfast station garage holds everything you need for the first meal of the day. Toaster, kettle, and maybe a small egg cooker all live in one spot. You open one door, and breakfast is ready to start.
I like this idea for busy families. Everyone knows where the breakfast things are, and no one hunts through cupboards half asleep. The kids can make their own toast without help.
Put it near the plates and bowls. Toast needs a plate, and the plate cupboard should be close by. A few steps saved in the morning add up fast.
Keep the bread nearby too, but not inside the garage. Bread goes stale faster in a warm cabinet. A bread box on the counter next to the garage is a better home.
This station gets used hard every day, so build it tough. Good hinges, a solid door, and a wipe-clean inside will last much longer than flimsy parts. Cheap parts wear out fast here.
Teach everyone to close the door when they are done. It is a small habit, but it keeps the kitchen looking neat all day. One open door can make the whole kitchen look messy.
Leave a little space on the counter in front for plates. You need room to butter toast and pour tea without juggling. A clear patch right in front is a must.
A breakfast station turns a rushed morning into a calm one. Everything is in one place, and you can see it all at a glance.
Build a Baking Station
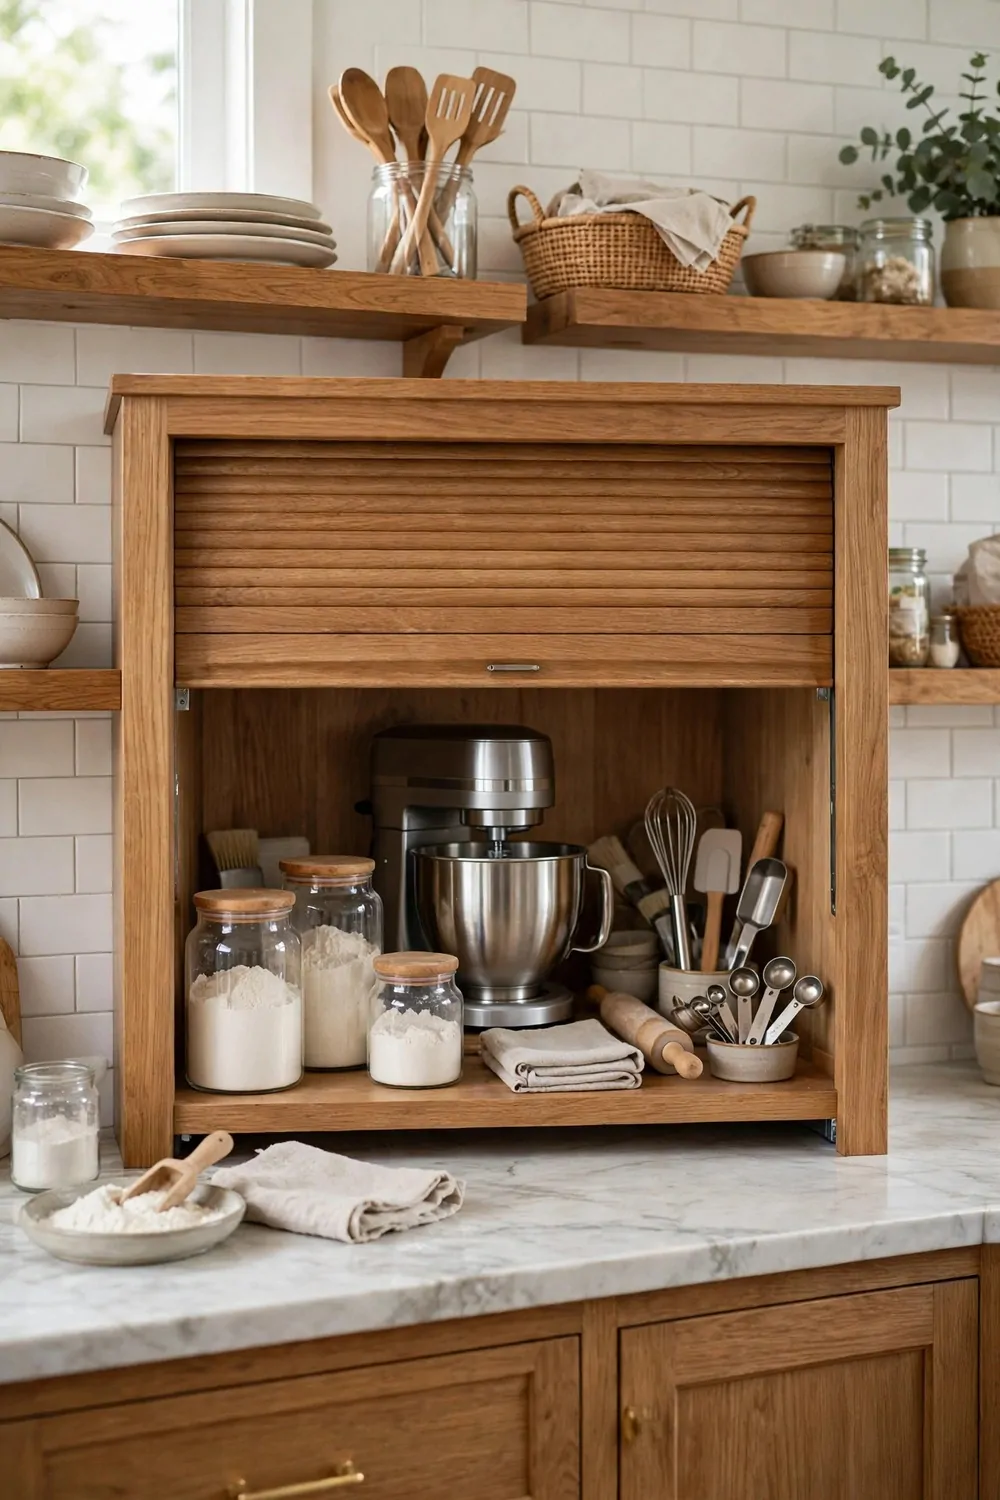
A baking station garage is built for bakers. It holds the stand mixer, the measuring cups, and the small tools you reach for when you bake. It is your baking corner, hidden behind a door.
The stand mixer is the star here. Give it the deepest spot in the garage, with room to spare on all sides. You need space to tilt the head back and add flour without a mess.
Keep the mixer plugged in and ready. That is the whole point of the garage. If you have to plug it in every time, you will bake less. Ready to go means you bake more.
Store your most used tools on a small shelf inside. Measuring cups, a spatula, and a whisk fit on one shelf. The big bowls can live in a cupboard below, since you only grab them once per bake.
Flour gets everywhere, so pick an inside finish you can wipe clean. A smooth painted inside wipes down in seconds. Rough wood holds flour dust, and that is no fun to clean.
Open the door wide while you bake. You need elbow room, and a half-open door gets in the way. Pocket doors or a lift-up door work well here, since they stay out of your path.
If you bake with kids, this station is a treat. They open the door, see the mixer, and know it is baking time. It makes the whole thing feel like an event.
A baking station does not need to be big. It just needs to hold your mixer and your tools, and keep them ready. That is enough to make baking feel easy.
Make a Smoothie Station
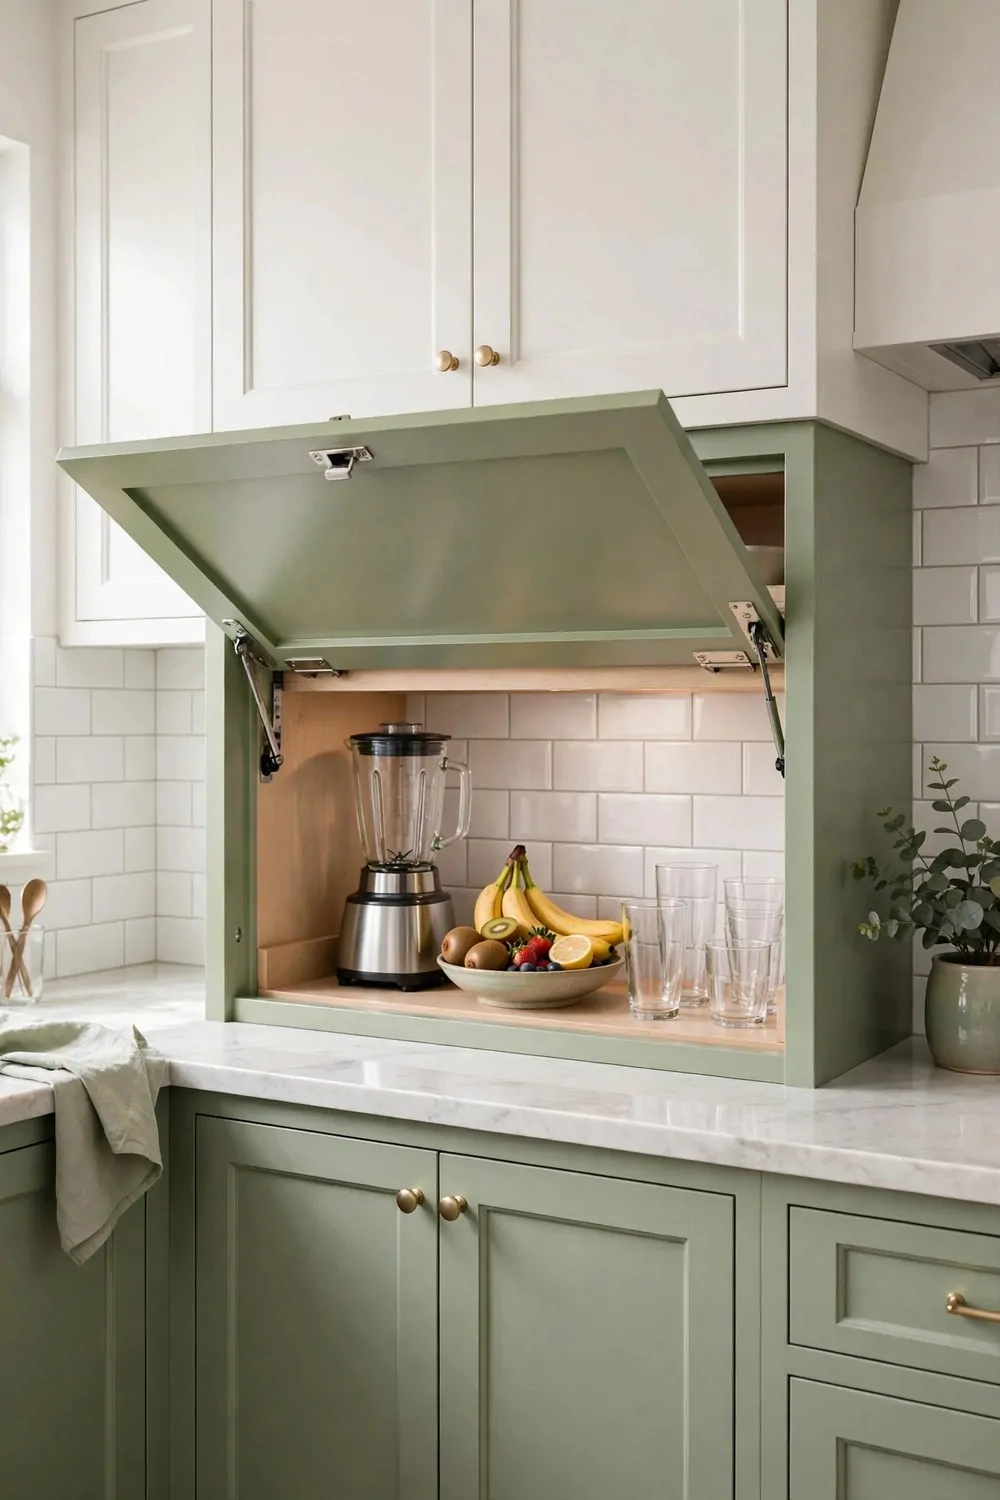
A smoothie station garage holds your blender and your smoothie extras in one spot. Blender, protein powder, and a few cups all live behind one door. You open it, blend, and close it again.
Blenders are tall, so measure before you build. The blender needs to fit with the lid on, and you need room to lift the jug off the base. A garage that is too short is useless here.
Keep the blender plugged in. A smoothie station only works if the blender is ready in seconds. If you have to drag it out and plug it in, you will skip the smoothie.
A small shelf inside can hold your powders and seeds. Little jars on a shelf look tidy, and you can see them all at once. No more digging through a pantry for the protein powder.
Put a towel or mat under the blender. Smoothies splash, and a mat catches the drips before they reach the wood. You can toss the mat in the wash when it gets messy.
This station works best near the fridge. Your fruit and yogurt are in the fridge, and the blender is right next to it. Grab, blend, pour, done.
Clean the blender right after you use it. Rinse the jug with warm water and a drop of soap, and it is clean in a minute. A clean blender is a blender you will use again tomorrow.
If you make smoothies most days, give them their own station. It turns a healthy habit into an easy one.
Give Your Air Fryer Its Own Home
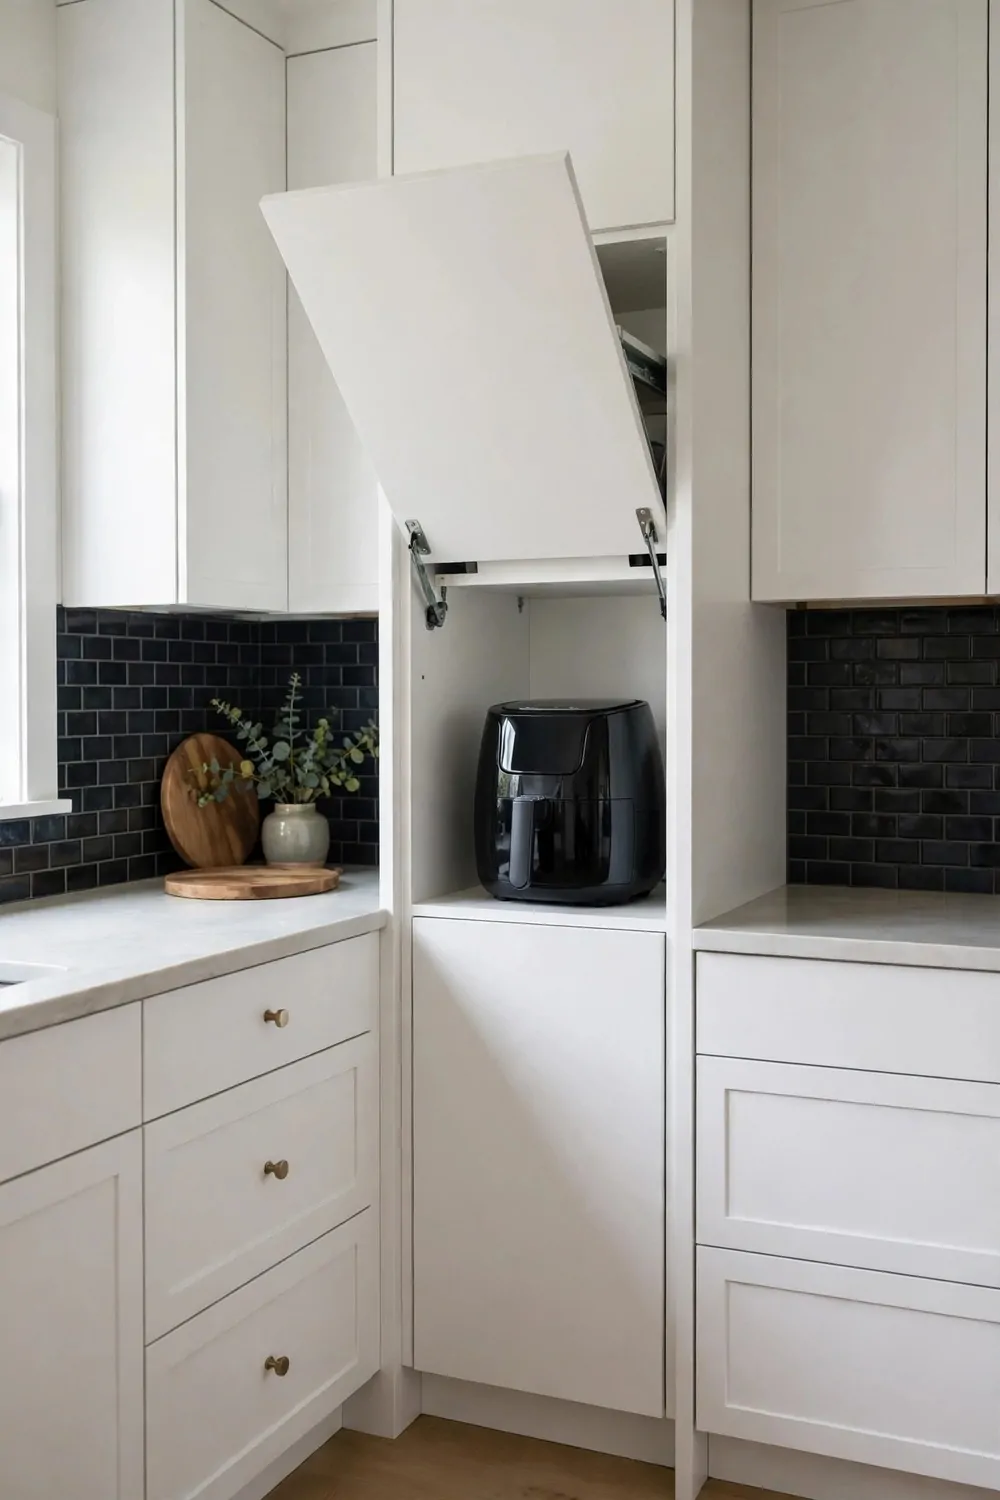
Air fryers are popular now, and they are also big and bulky. They need their own home, or they will sit on your counter all day and take up space. A garage built for an air fryer fixes that.
Measure your air fryer first, because they come in many sizes. You need width, depth, and height, with a little extra room on each side for air to move. A tight fit will trap heat, and that is not safe.
Pull the air fryer out onto the counter when you use it. Air fryers let off a lot of hot air, and they need open space around them while they run. The garage is for storage, not for cooking inside.
A roll-out tray is a great help here. You pull the tray out, and the air fryer slides out with it. No heavy lifting, no dragging it across the counter. It just glides out.
Keep the basket and the drip tray inside the garage too, if they fit. It is nice to have all the air fryer parts in one place. You will not lose the basket in a drawer somewhere.
Wipe the inside of the garage after you use the air fryer. A bit of grease can drift in, and a quick wipe keeps it from building up. It takes ten seconds.
Put the garage near an outlet, and keep the cord short and tidy. A long cord dangling across the counter is a trip hazard and it looks messy. Tuck it behind the fryer.
Your air fryer is a workhorse, so give it a proper home. It will last longer, and your counter will thank you.
Keep It Slim for Just a Toaster
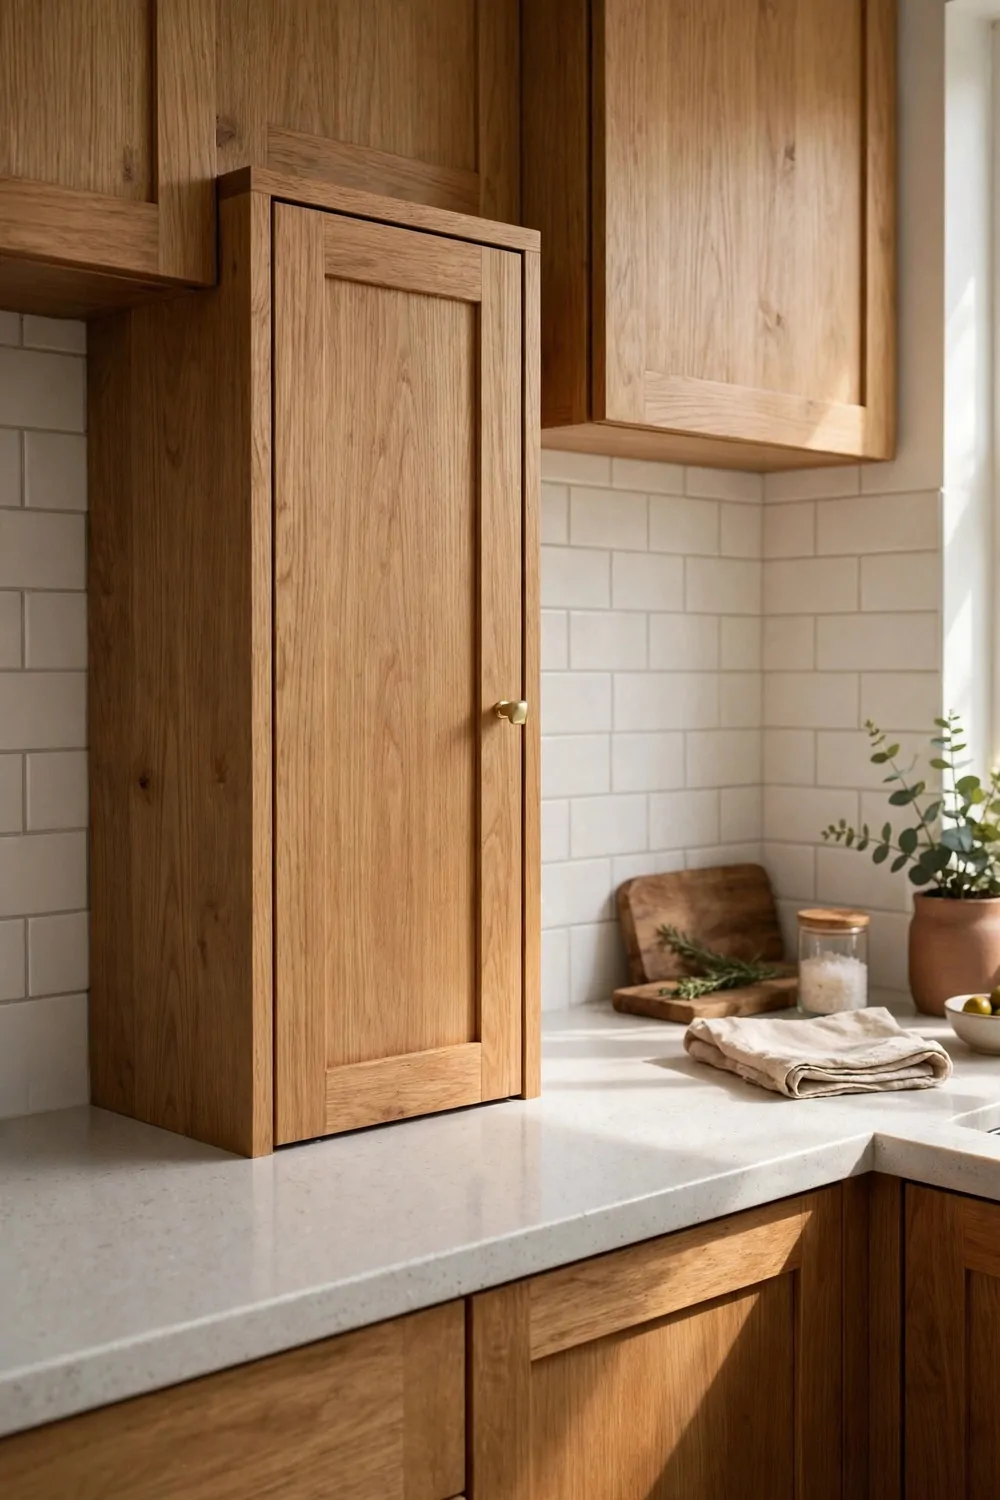
Not every garage needs to hold five appliances. A slim garage built just for a toaster is perfect for a small kitchen. It is about 12 inches deep, and it holds one toaster and nothing else.
This is a great pick when your counter is short. You do not have room for a wide cabinet, but you do have room for a slim one. A slim garage fits where a big one cannot.
Keep it simple inside. One toaster, one outlet, and a little space for crumbs to fall. You do not need shelves or trays in here. Simple is better.
Leave the door open while the toaster runs. I said this before, and it matters most in a slim garage. Heat builds up fast in a small space, so let it out while the toast cooks.
Clean the crumb tray often. Toasters make crumbs, and crumbs in a small garage add up fast. Pull the tray out once a week and empty it over the bin.
A slim garage can match your cabinets and vanish into the wall. When it is closed, it looks like a narrow cabinet door, nothing more. That is the whole charm of it.
It is also a good starter project. If you are not sure you want a full garage, try a slim one first. It is low cost, and it teaches you how you like to use the space.
One toaster, one slim garage, one clean counter. Sometimes that is all you need.
Put Outlets Inside the Garage
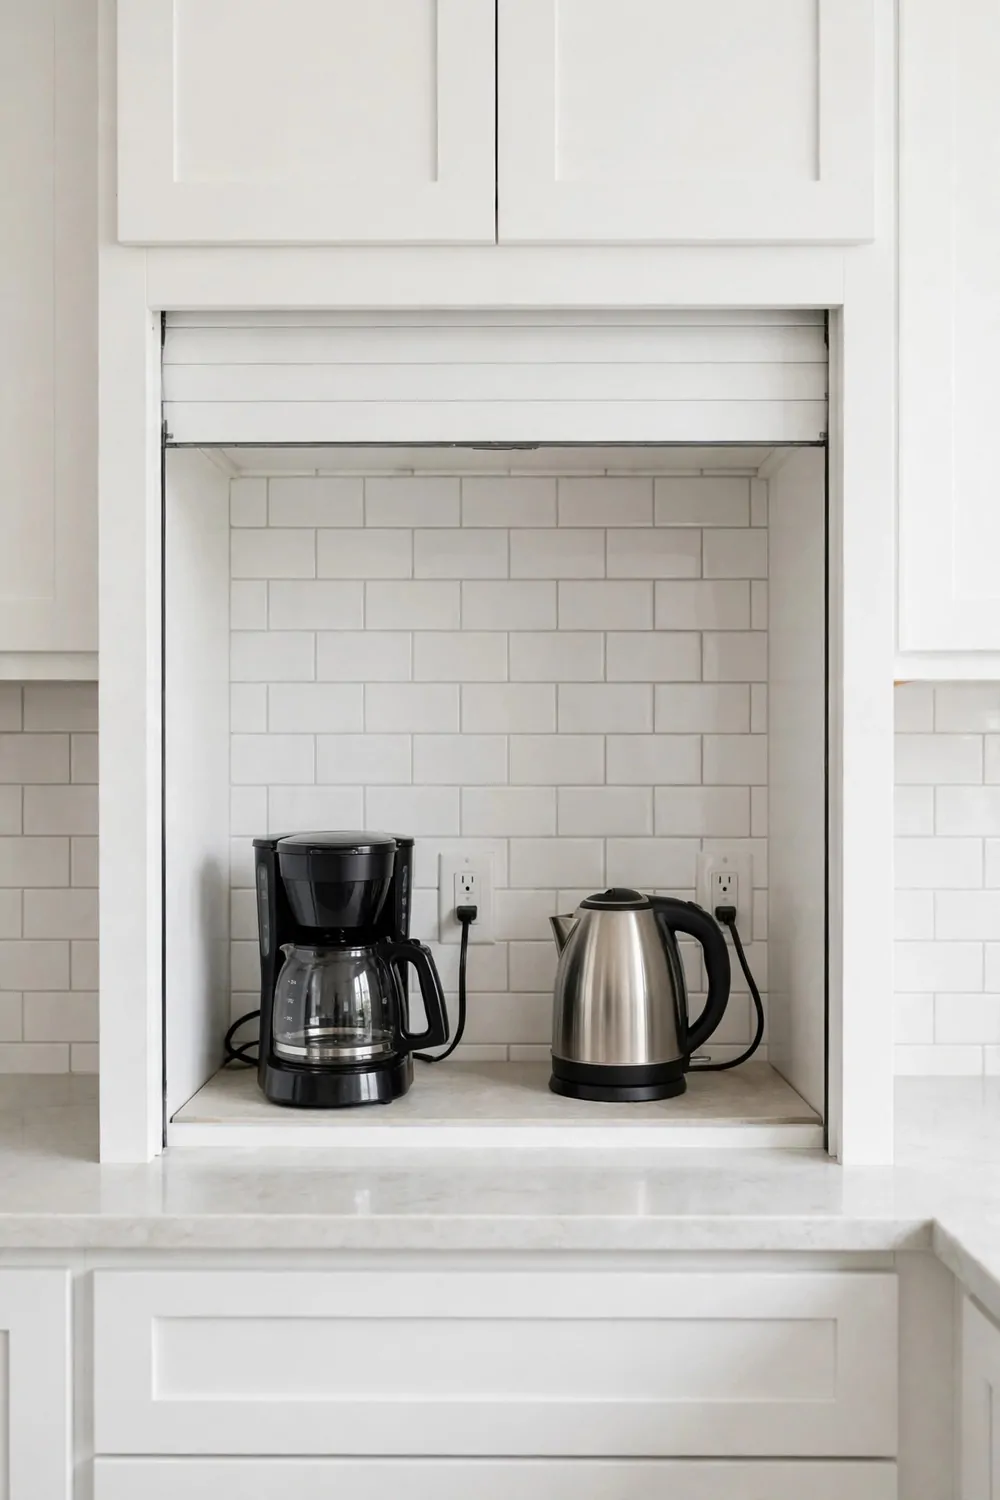
An appliance garage without an outlet inside is useless. You would have to pull every appliance out and plug it in each time, and that defeats the whole point. Put the outlets inside.
Ask an electrician to add one or two outlets on the back wall of the garage. It is a small job, but it needs a pro. Do not try to wire it yourself unless you know what you are doing.
Two outlets are usually enough for a small garage. A bigger garage might need three or four. Count your appliances, and add one spare outlet for the next gadget you buy.
Keep the cords short and neat inside. Long cords tangle, and tangled cords are hard to move around. A short cord for each appliance keeps the inside tidy.
These appliances are worth keeping plugged in inside the garage:
- Coffee maker, so your morning cup is ready in seconds
- Toaster, so breakfast starts with one push
- Kettle, so hot water is always a switch away
- Blender, so a quick smoothie is never a chore
- Stand mixer, so baking starts the moment you lift the lid
Use a power strip inside only if it is rated for kitchen use. A cheap strip can overheat, and that is not safe in a closed cabinet. When in doubt, ask your electrician.
Check the outlets now and then. Plug something in and make sure it works. A dead outlet in a garage is easy to miss, since you do not see it every day.
Outlets inside turn a plain cabinet into a real appliance garage. Without them, it is just a box. With them, it is the hardest working spot in your kitchen.
Add a Little Light Inside
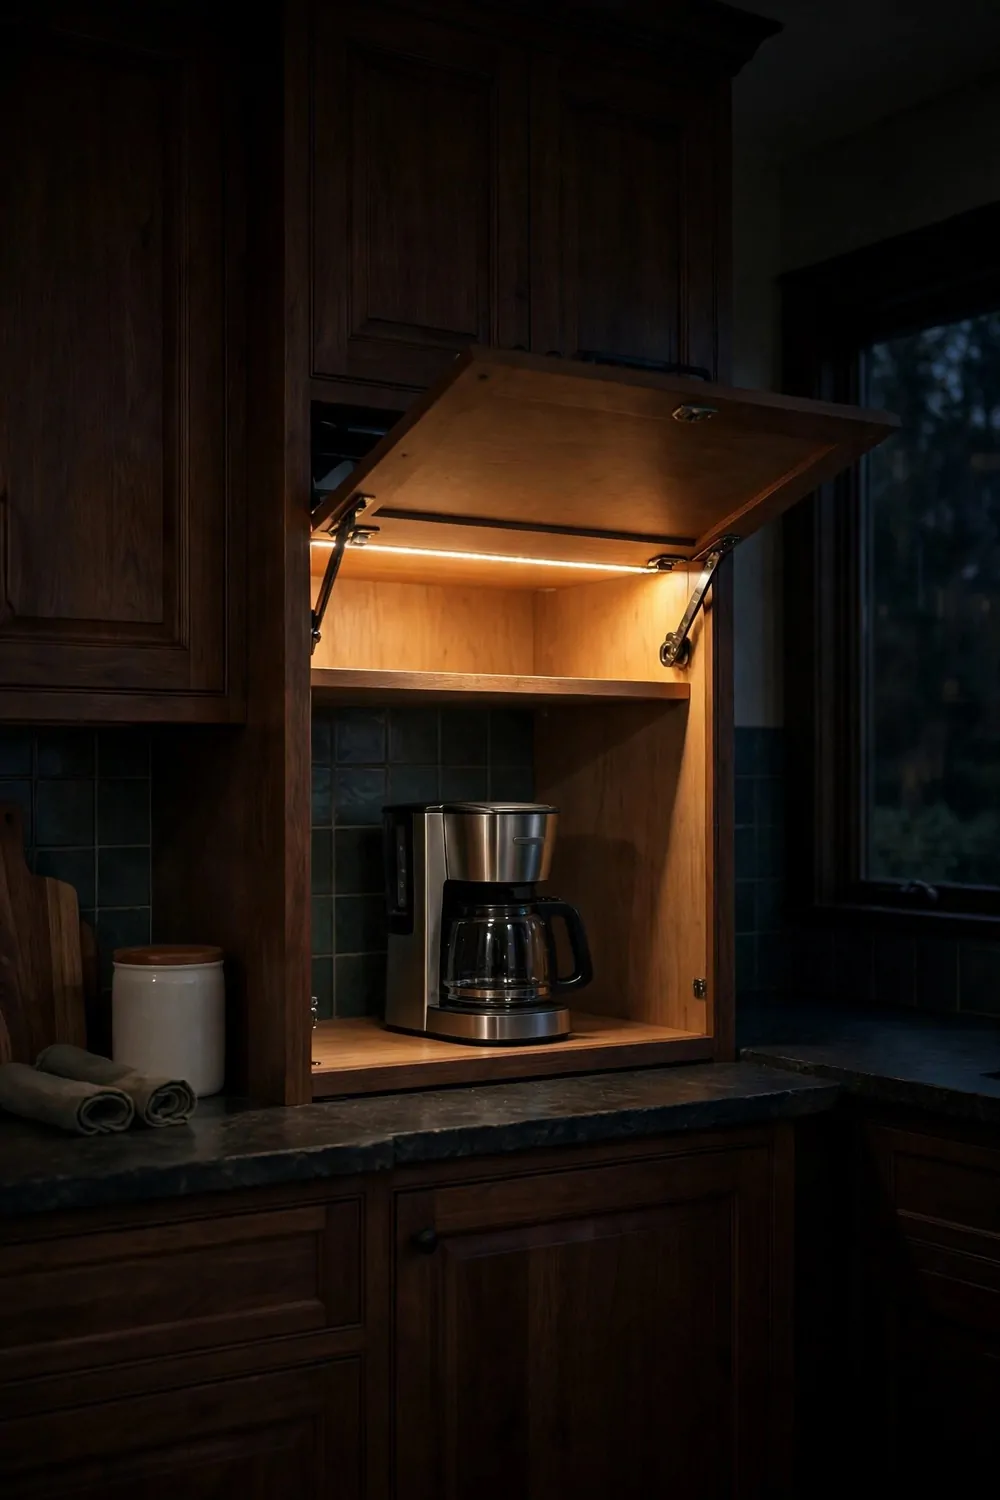
A garage can be dark inside, and a dark garage is hard to use. You reach in and fumble for the coffee maker switch. A little light fixes that in seconds.
LED strips are the easiest light to add. They stick to the top inside edge of the garage, and they give off a warm glow. They use very little power, and they last a long time.
Pick a warm white light, not a harsh blue one. Warm light feels cozy, and it matches the rest of your kitchen. Blue light can make food look odd, and it feels cold.
A light that turns on when you open the door is a nice touch. You open the garage, and the light comes on by itself. You close it, and the light goes off. No switch to remember.
Battery lights work too, if you do not want to wire anything. Stick one inside the top, and change the batteries now and then. It is not as neat as a wired light, but it is simple.
Keep the light away from steam and heat. Do not put it right above the toaster or the coffee maker. The top front edge is a safer spot, and it still lights the whole inside.
A light also shows off the inside of your garage. If you keep it tidy, the light makes it look like a little display. It is a small detail that makes the whole thing feel finished.
Light is the last touch, but it makes a big difference. A lit garage is a garage you will actually use, every single day.
Add a Pull-Out Shelf Below
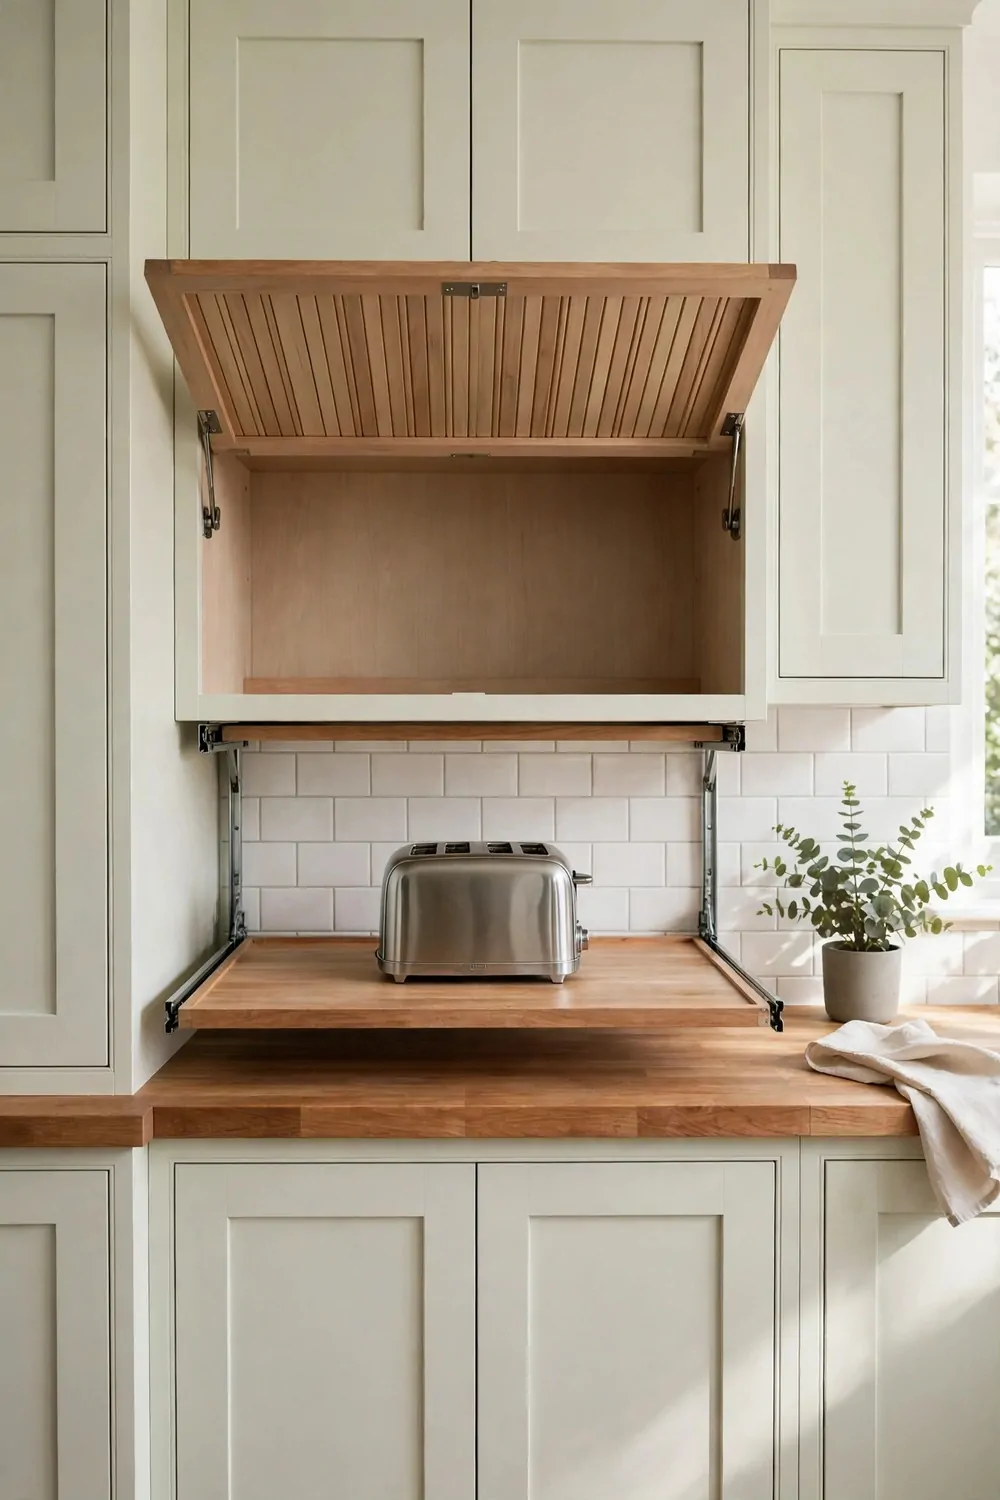
I love a pull-out shelf under my appliance garage. It gives you a bit more room right when you need it.
You pull the shelf out, set your mixer on it, and you have space to work. Then you push it back in when you are done.
It feels like your counter got bigger for a few minutes. That helps a lot in a small kitchen.
I use mine most for my stand mixer. It is heavy, and I do not want to lift it far.
The shelf slides out to a good height for mixing. My arms do not get tired so fast, and I can see the bowl clearly.
You can also use it for your blender. Pouring is easier when the blender sits a little lower and out in the open.
Just make sure the shelf locks in place when it is out. You do not want it to slide back while you are pouring.
Wipe it clean after each use. A quick wipe keeps crumbs from building up in the track.
It is a small change, but it makes the whole garage feel more useful. I wish I had added mine sooner.
Use a Freestanding Hutch With No Building Work
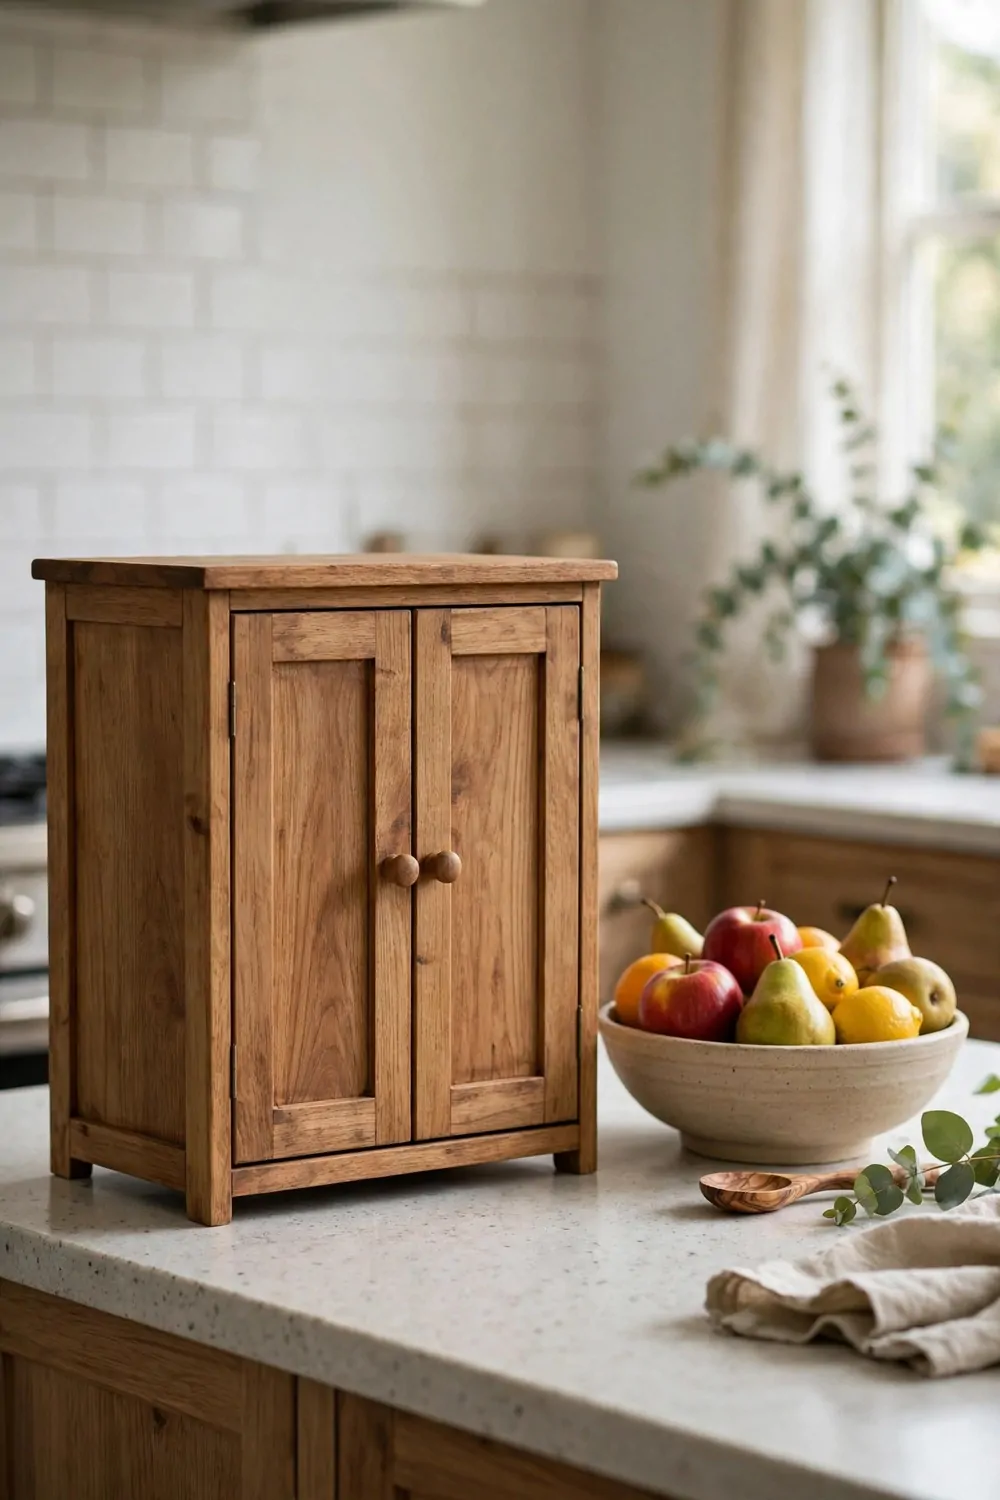
You do not need to build anything to hide your appliances. A freestanding hutch can do the job for you.
You just set it on the counter, plug your things in behind it, and close the doors. That is all there is to it.
I like this idea because you can move it if you change your mind. Nothing is fixed to the wall, so you are not stuck with one spot.
Look for one that fits your counter depth. You want it to sit flat and not hang over the edge.
A hutch with two small doors works well for a coffee maker and a toaster. They stay out of sight, but they are still easy to reach.
You can pick a wood tone that matches your kitchen. Or you can paint it a soft color that fits your style.
Leave a little gap at the back for the cords. I learned that the hard way when my cord got pinched the first week.
Put a small tray inside for sugar and spoons. Then your morning coffee spot is all in one place.
If you rent your home, this is a great pick. You take it with you when you move, and you leave no holes behind.
Try a Roll-Top Bread Box
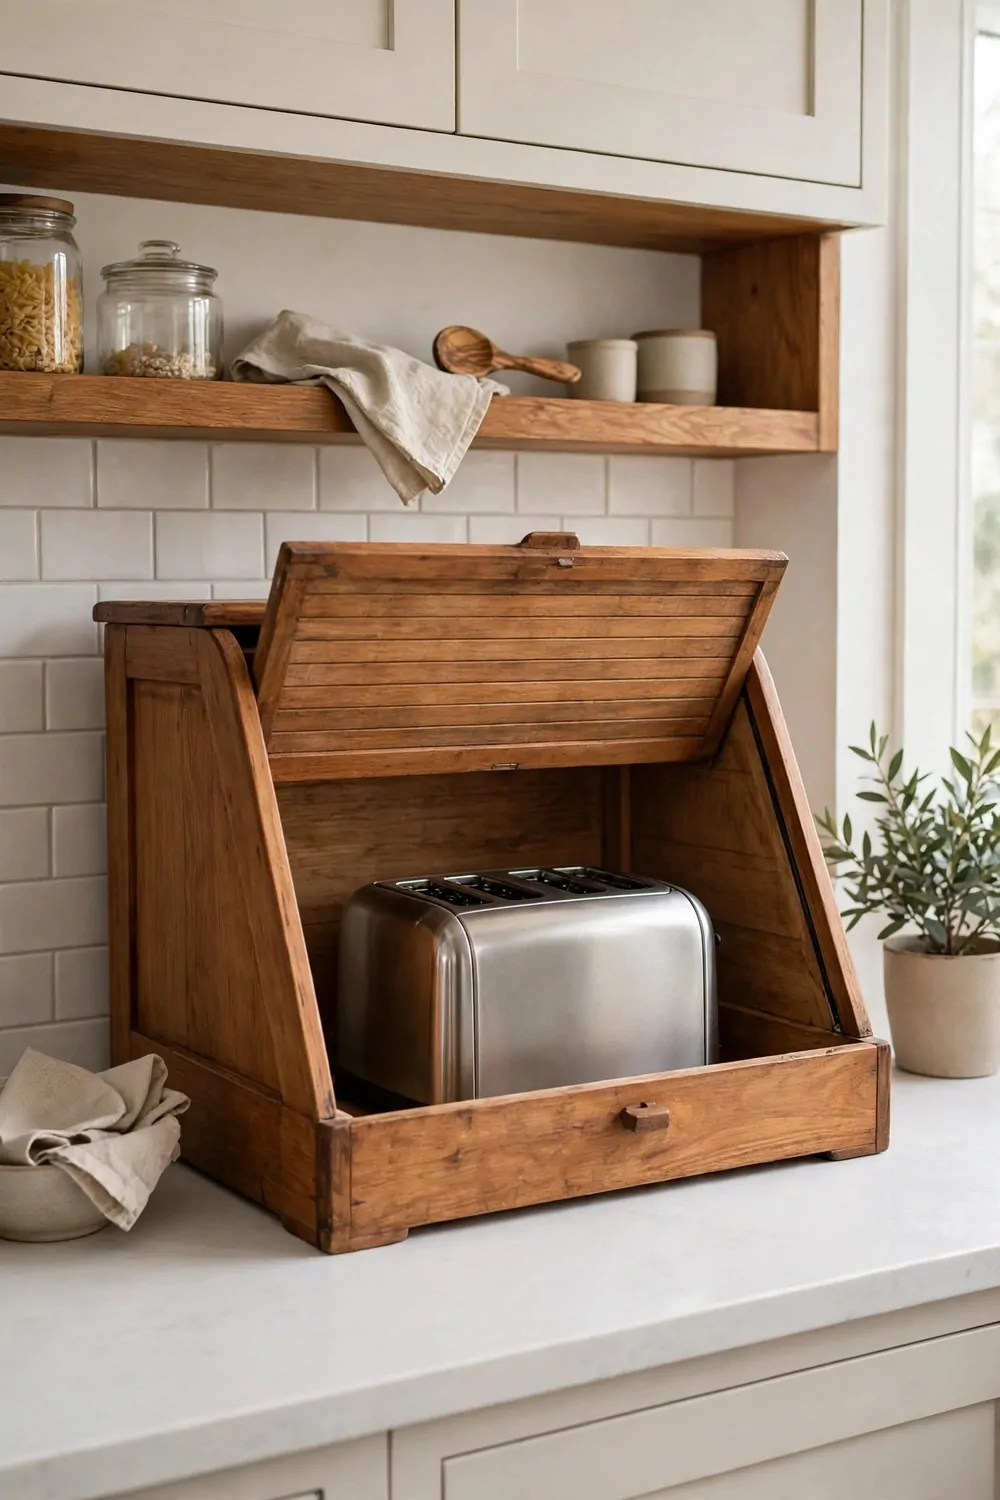
A big roll-top bread box is one of the simplest appliance garages you can try. It is cheap, and it works right away.
You roll the top up, use your toaster or coffee maker, and roll it back down. The clutter is gone in one move.
I keep mine near the corner of the counter. It holds my toaster and a few small jars, and it still looks neat.
Pick a box that is wide enough for what you use most. Measure your toaster first so you do not guess.
Wood boxes feel warm and homey to me. Metal ones feel clean and modern, and they wipe down fast.
Make sure the roll top moves smooth. If it sticks, a little rub of wax on the track can help it glide.
You can also use it for bread and snacks when the toaster is not in there. It is a handy little box to have around.
Just keep it away from the sink splash zone. Water spots show up fast on wood, and I like to keep mine dry.
This is a good first step if you are not sure about a built-in garage yet. Try it for a month and see how it feels.
Retrofit the Cabinets You Already Have
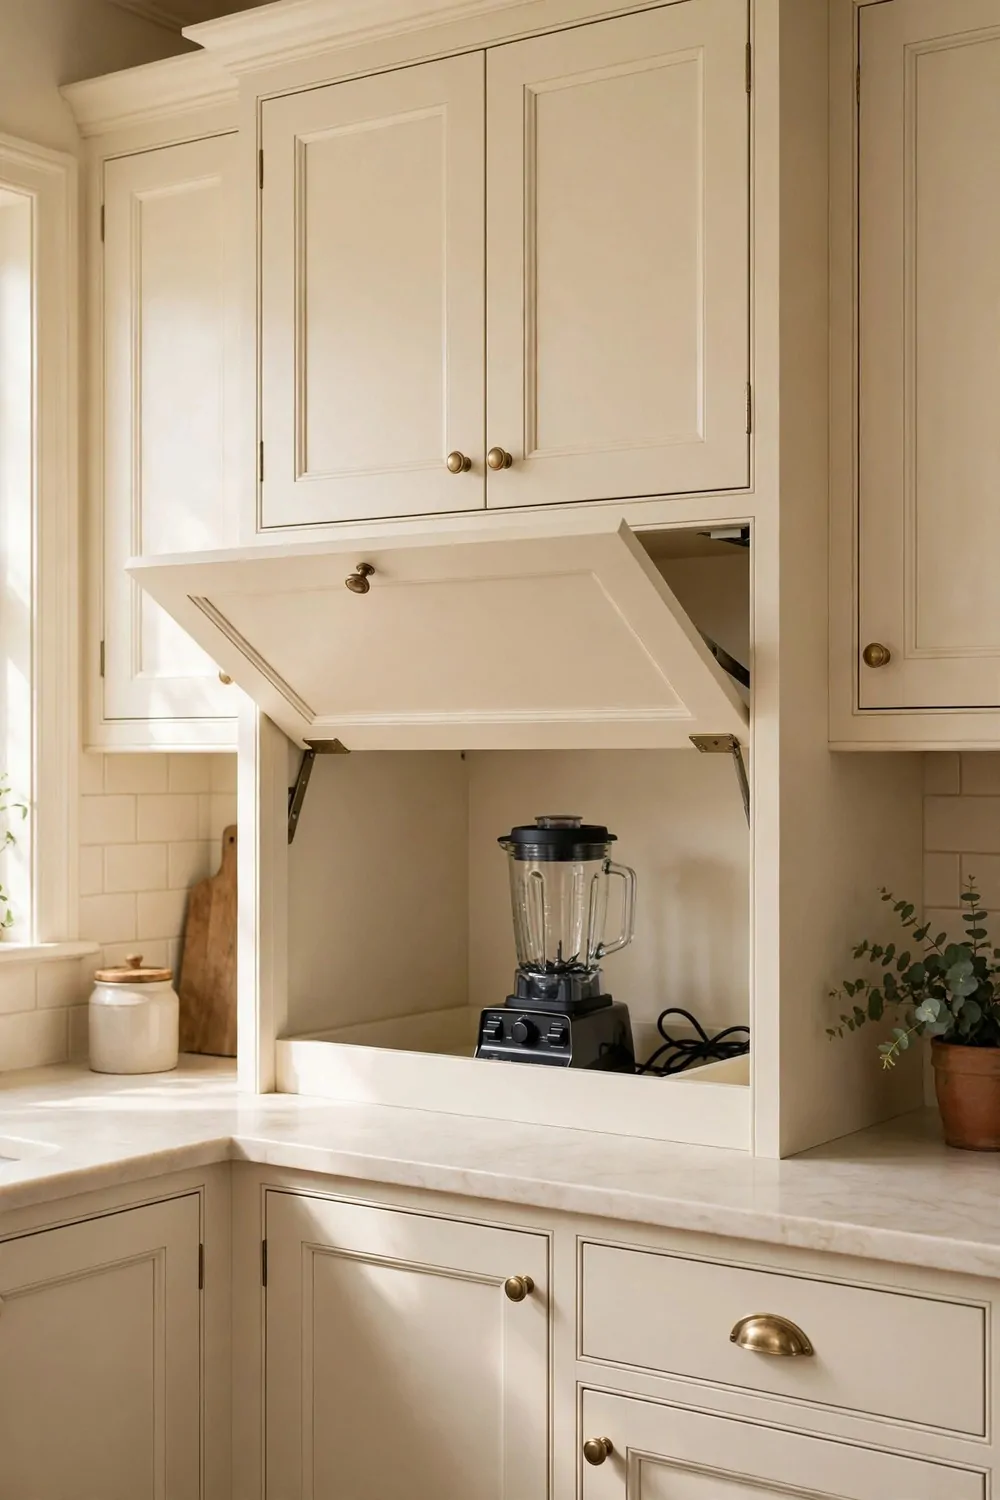
You may not need new cabinets at all. You can turn the ones you have into a garage with a little work.
The idea is simple. You build a small box that matches your cabinets and runs from the upper cabinet down to the counter.
It fills that open gap where your appliances sit now. Then you add a door, and the mess is hidden.
I like this because it looks like it was always there. The color and the trim match, so your eye just skips past it.
Ask a handy friend or a local carpenter if you are not sure how to start. They can measure the space and cut the pieces to fit.
Pick a door style that matches your other cabinet doors. A roll-up door saves space, and a lift-up door is easy to open.
Do not forget the outlet inside. You want your coffee maker to stay plugged in, so you do not have to move it each morning.
Leave a small gap at the back for air. Appliances get warm, and a little airflow keeps things safe.
It costs less than a full remodel, and it changes how your kitchen looks. That is a win in my book.
Turn a Pantry Shelf Into a Garage
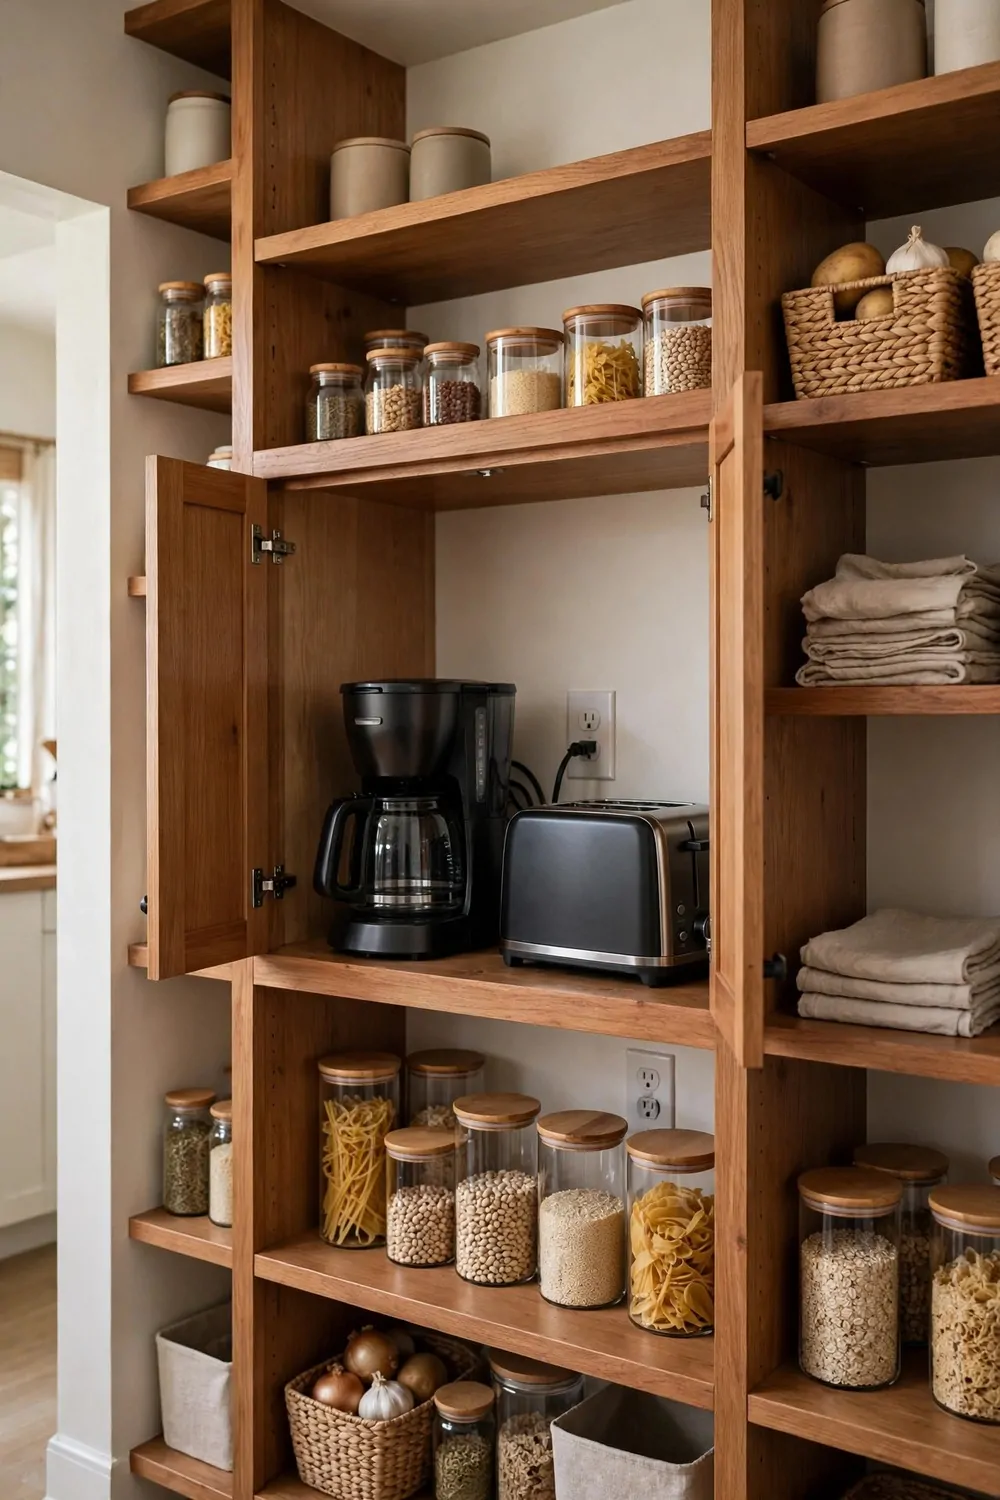
Your pantry can hold more than food. One shelf near your prep area can become a handy appliance garage.
I like this spot because it is close to where I cook. I can grab the blender, use it, and put it right back.
Pick a shelf at counter height if you can. Bending down low for a heavy mixer is no fun at all.
You will need an outlet on that shelf. An electrician can add one for you, and it makes the whole idea work.
Keep the shelf clear of tall food boxes. Give your appliances their own space so the door can close with no fuss.
A small lift-up door or a curtain can hide the shelf. It keeps the pantry looking tidy when guests peek in.
Put your most used appliance on that shelf. For me, it is the coffee maker, because mornings are busy enough already.
Wipe the shelf often. Flour and crumbs find their way everywhere, and a clean shelf feels better to use.
This idea works well if your counter is already full. It moves the clutter off the counter and into a spot you already have.
Put It Under the Window
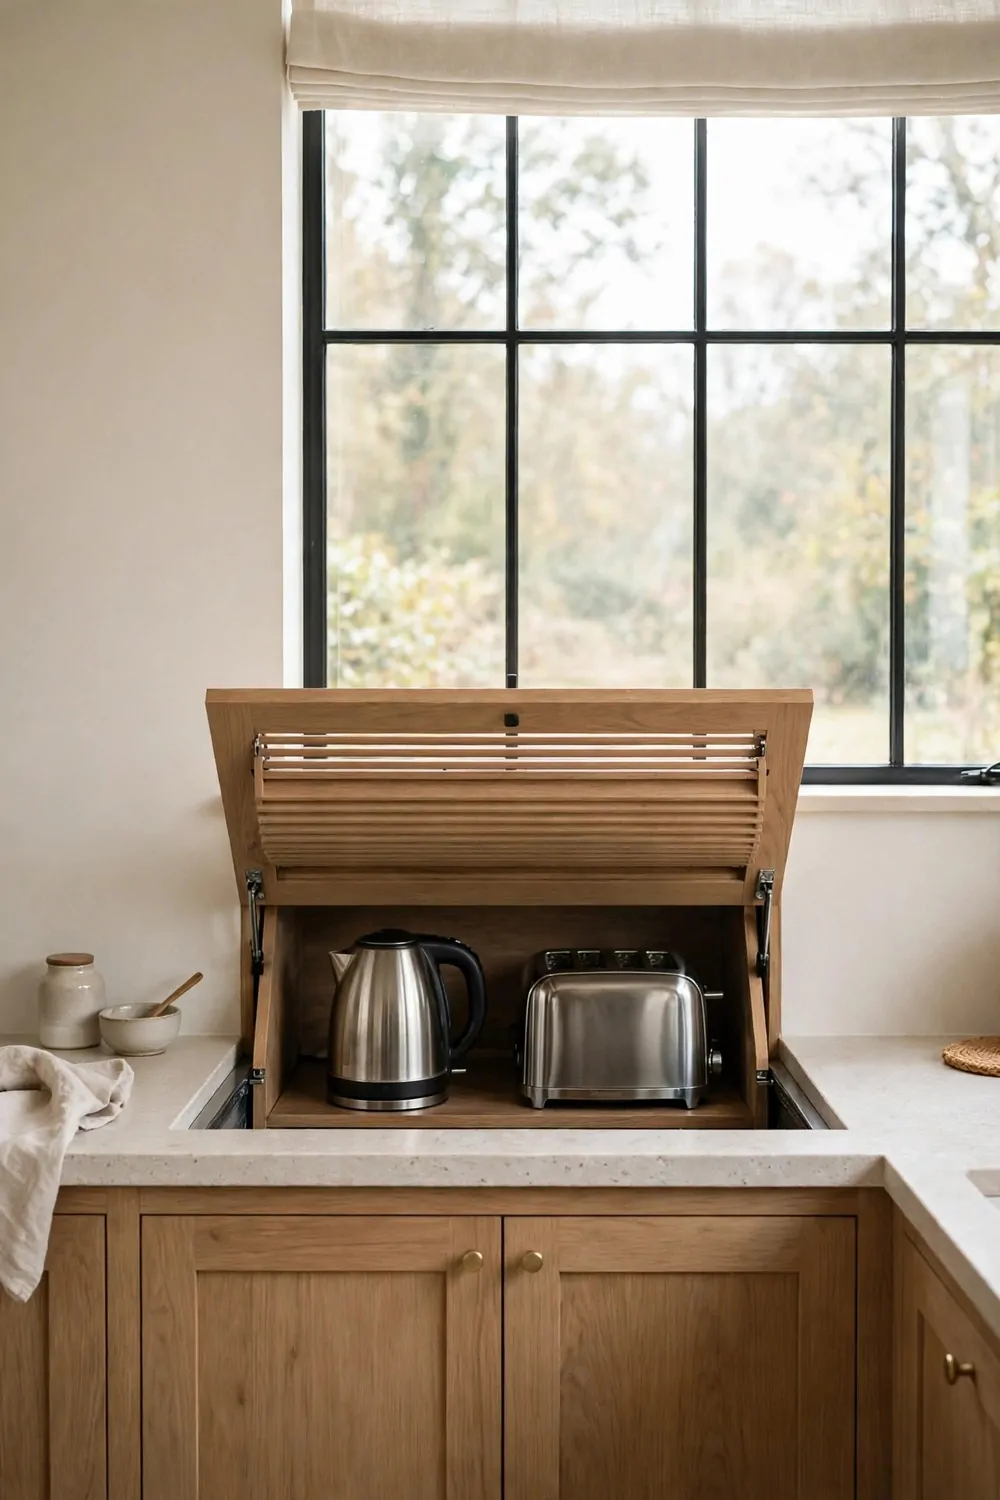
Under a window is a smart spot for an appliance garage. There are no upper cabinets there, so you have room to work with.
You can build a low cabinet right under the sill. It sits on the counter and hides your small appliances in a neat row.
I love the light in this spot. You can see what you are doing, and the kitchen feels bright while you make breakfast.
Keep the top of the garage below the window sill. You do not want to block the light or the view outside.
A lift-up door works well here. It opens up and out of the way, and you can still reach the window if you need to.
Make sure the sill is sealed well. You do not want rain or steam to drip down onto your appliances.
Put your toaster and kettle in this garage. They are the two things I reach for most in the morning, and they fit nicely side by side.
Add a small plant on top if you like. It makes the spot feel fresh, and it does not get in the way of the door.
This is a good pick for a kitchen with a big window and not much wall space. You use a spot that was just sitting empty before.
Use the End of Your Island
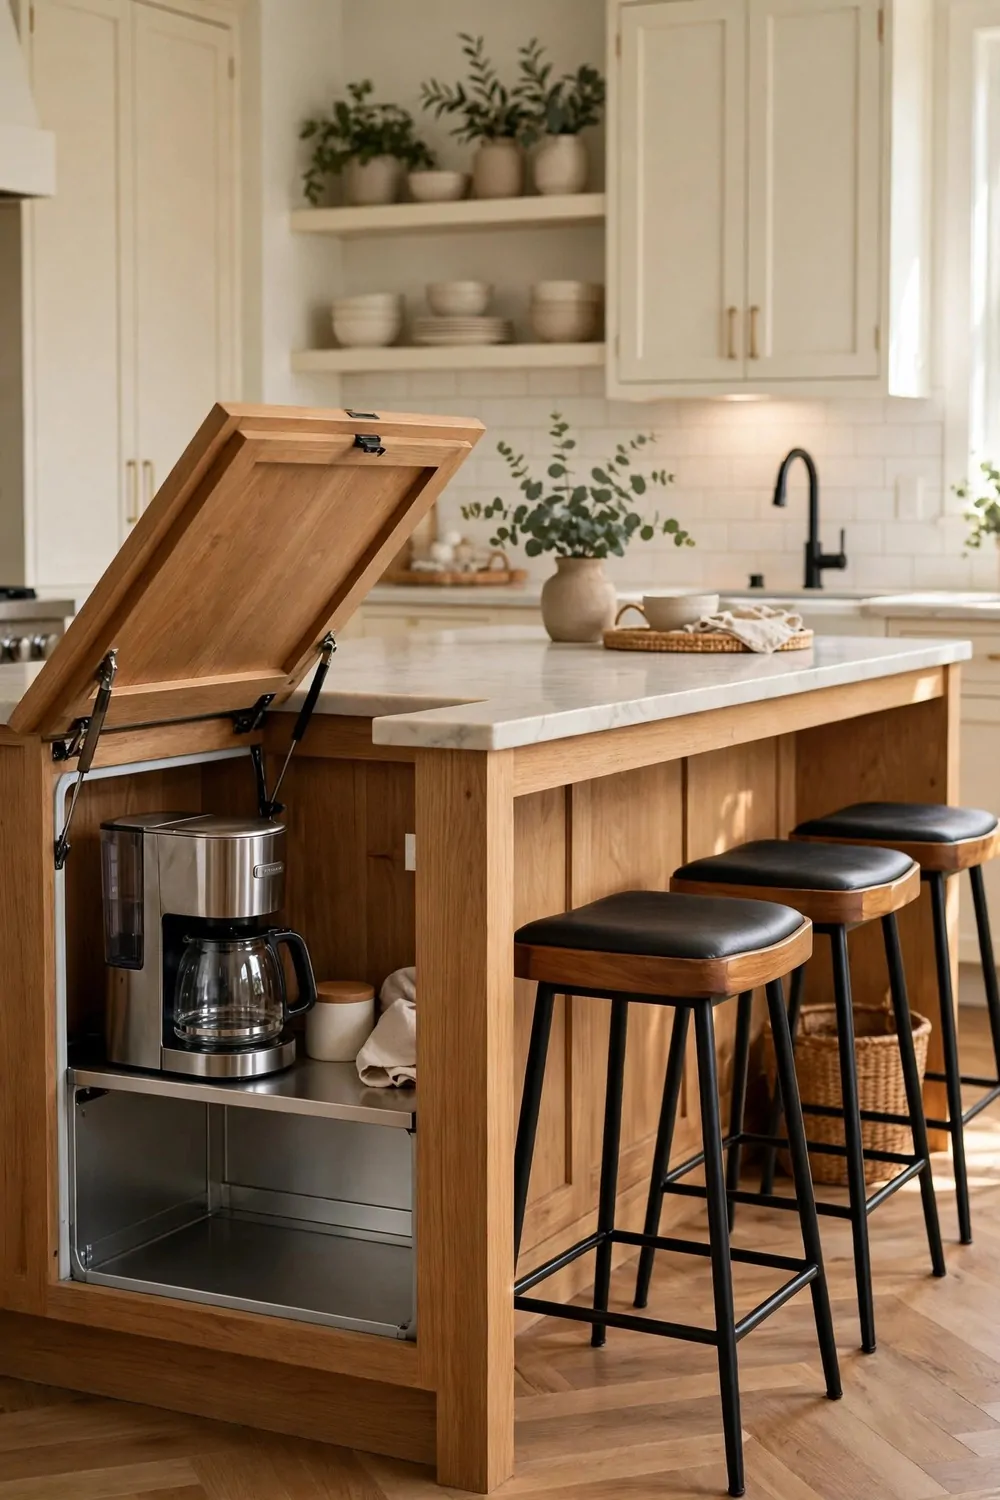
The end of your island is a spot many people forget. It can hold a small appliance garage and keep your main counter clear.
Put the garage on the end that faces away from your seats. Then guests see a clean island, not a row of appliances.
I like this because it keeps the cooking tools close but out of the main view. You can still reach them in a few steps.
Make sure there is an outlet at that end of the island. Without one, you will be moving things back and forth all day.
A pocket door works well here. It slides back into the cabinet, so it never blocks the walkway around the island.
Keep the garage shallow so it does not eat up your island storage. You still need room inside the island for pots and pans.
Use it for the appliances you use at the island most. For me, that is the blender and the hand mixer.
Wipe the island top near the garage each night. Crumbs tend to gather at the ends, and a quick wipe keeps it looking good.
This idea is great if your island feels crowded. One small garage at the end can calm the whole space down.
Use the Far End of a Galley Kitchen
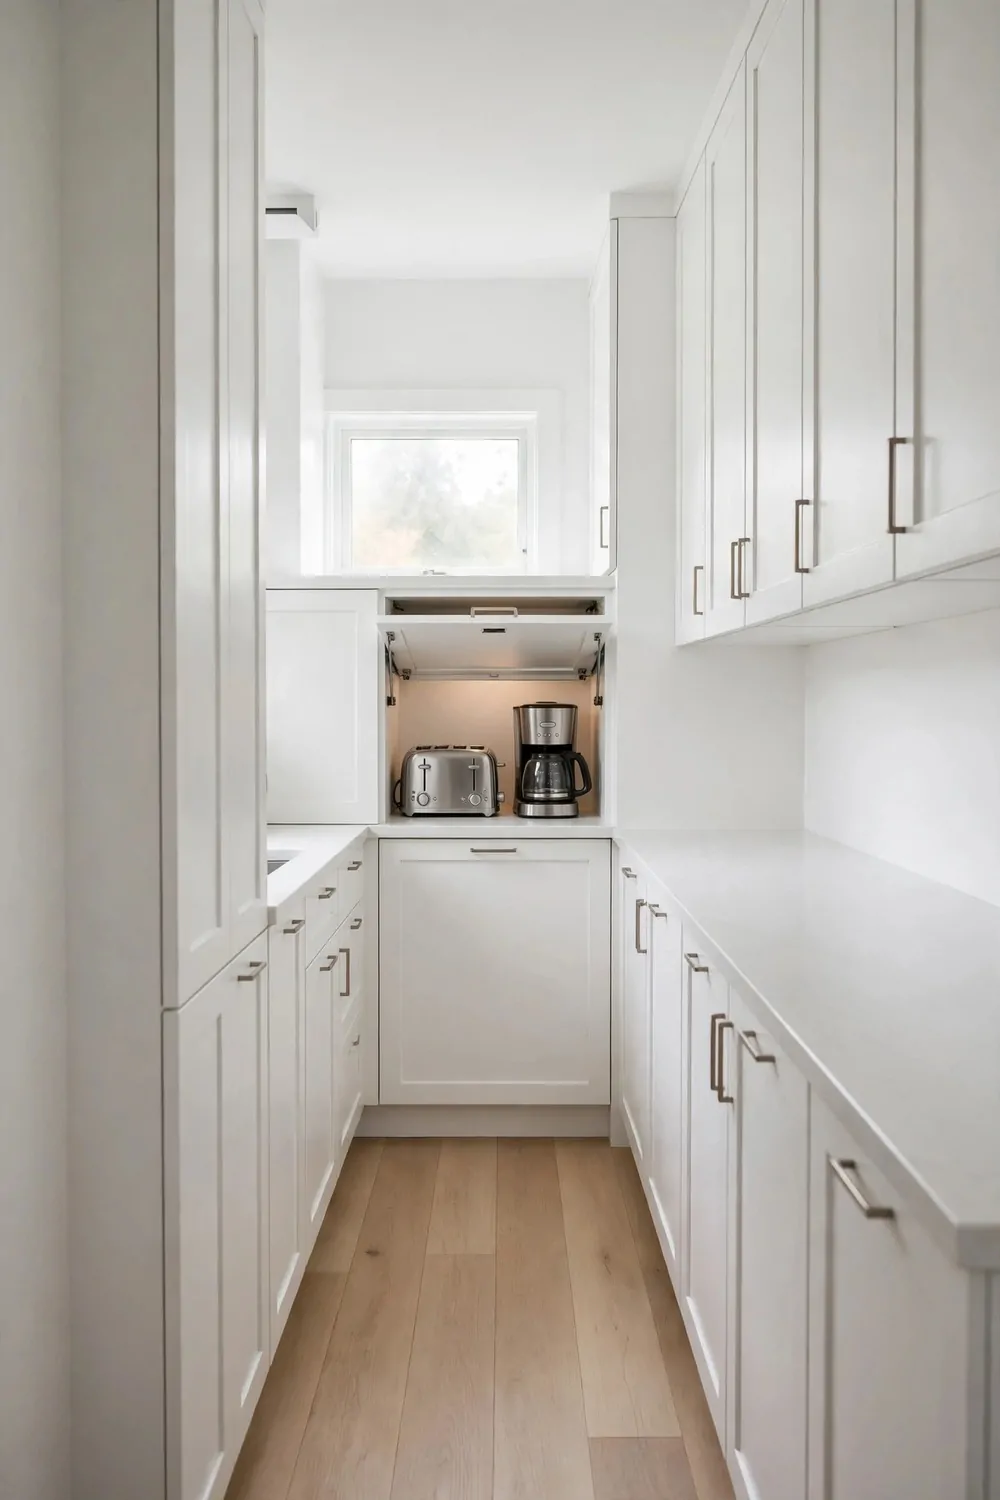
In a galley kitchen, the far end is often the best spot for a garage. It frees up the middle where you do most of your prep.
You walk to the end, use what you need, and walk back to your main counter. It keeps the busy zone clear for chopping and mixing.
I like this layout because the middle stays open. You are not squeezing past a toaster and a coffee maker while you cook.
Put your morning appliances at the far end. Coffee maker, toaster, and kettle all live there, and mornings feel calmer.
Make sure the door opens without hitting the other side. In a narrow galley, a roll-up door is often the safest pick.
Add a light inside if the far end feels dark. A small stick-on light helps you see the buttons in the early morning.
Keep the counter in front of the garage clear. You need a little space to set a mug down while the coffee brews.
This spot also works for a tall garage. You can stack two small appliances and still close the door with ease.
If your galley feels tight, try this first. Moving the clutter to the far end can make the whole kitchen feel wider.
Match the Finish So It Disappears
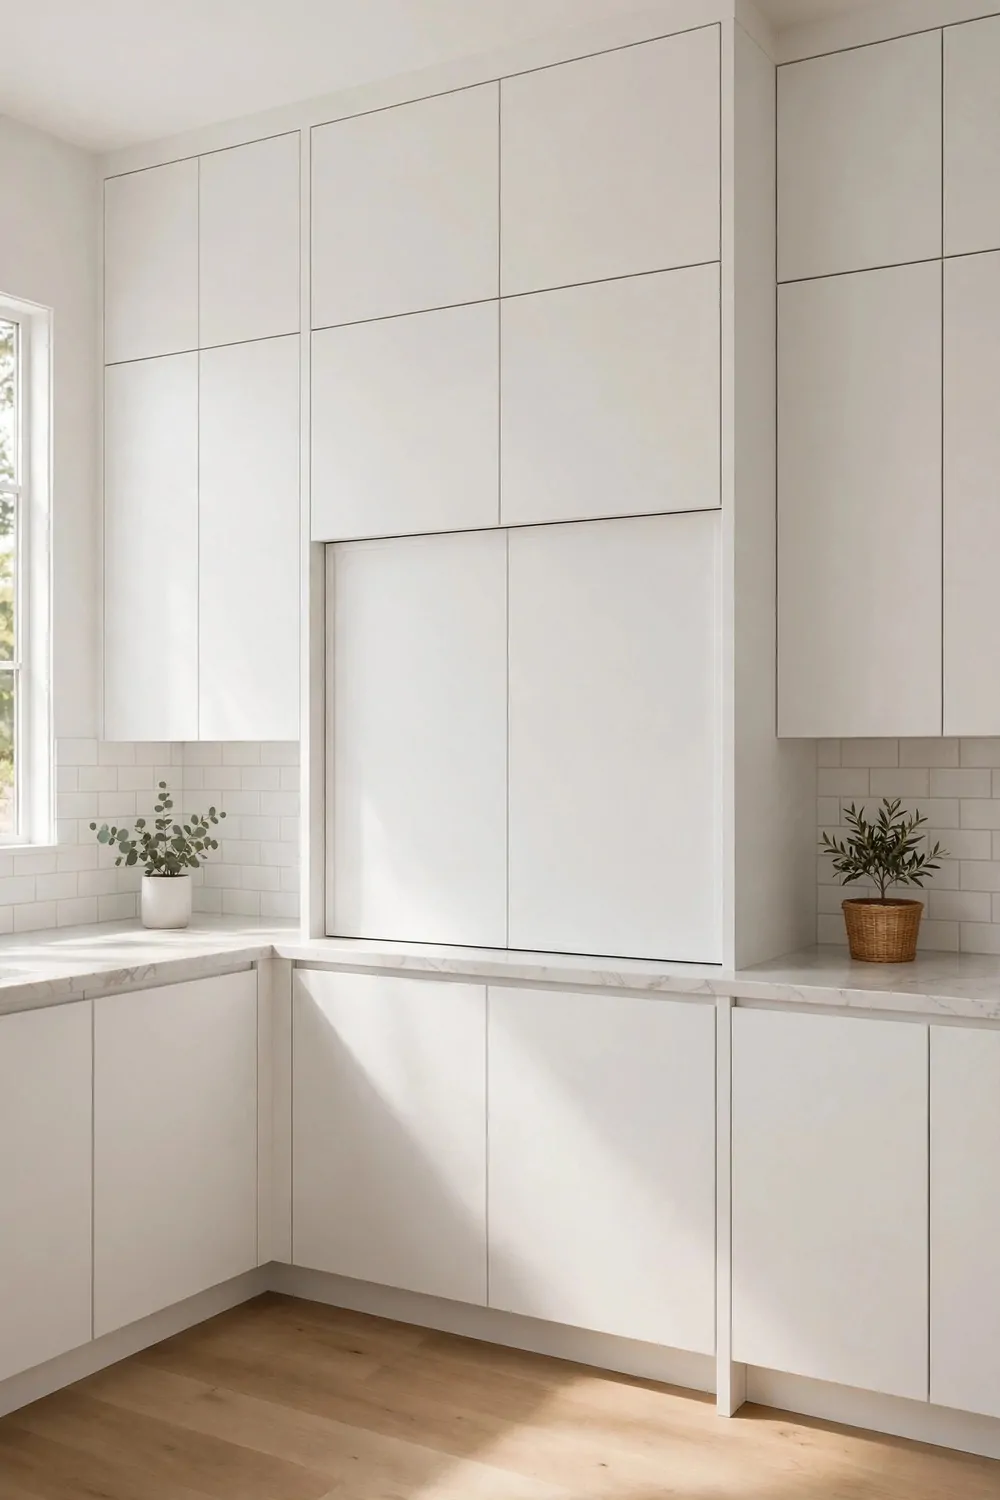
The best appliance garage is one you barely notice. When the finish matches your cabinets, it just blends right in.
Use the same paint color and the same wood tone. Your eye will pass over it, and the kitchen will look calm and tidy.
I made this mistake once with a box that was close but not quite right. It stood out every time I walked in, and it bugged me.
Take a cabinet door to the paint shop if you can. They can match the color much better than a guess from memory.
Match the handles too, if your garage has a handle. A small detail like that makes a big difference in how it looks.
If your cabinets are white, use the same white. If they are wood, use the same stain and the same sheen.
Even the inside can match. A light inside makes it easy to find things, and it feels neat when you open the door.
Step back and look at the whole wall when you are done. The garage should feel like part of the kitchen, not an add-on.
This trick works in any style of kitchen. Matching the finish is the fastest way to make clutter disappear.
Try It in a Shaker Kitchen
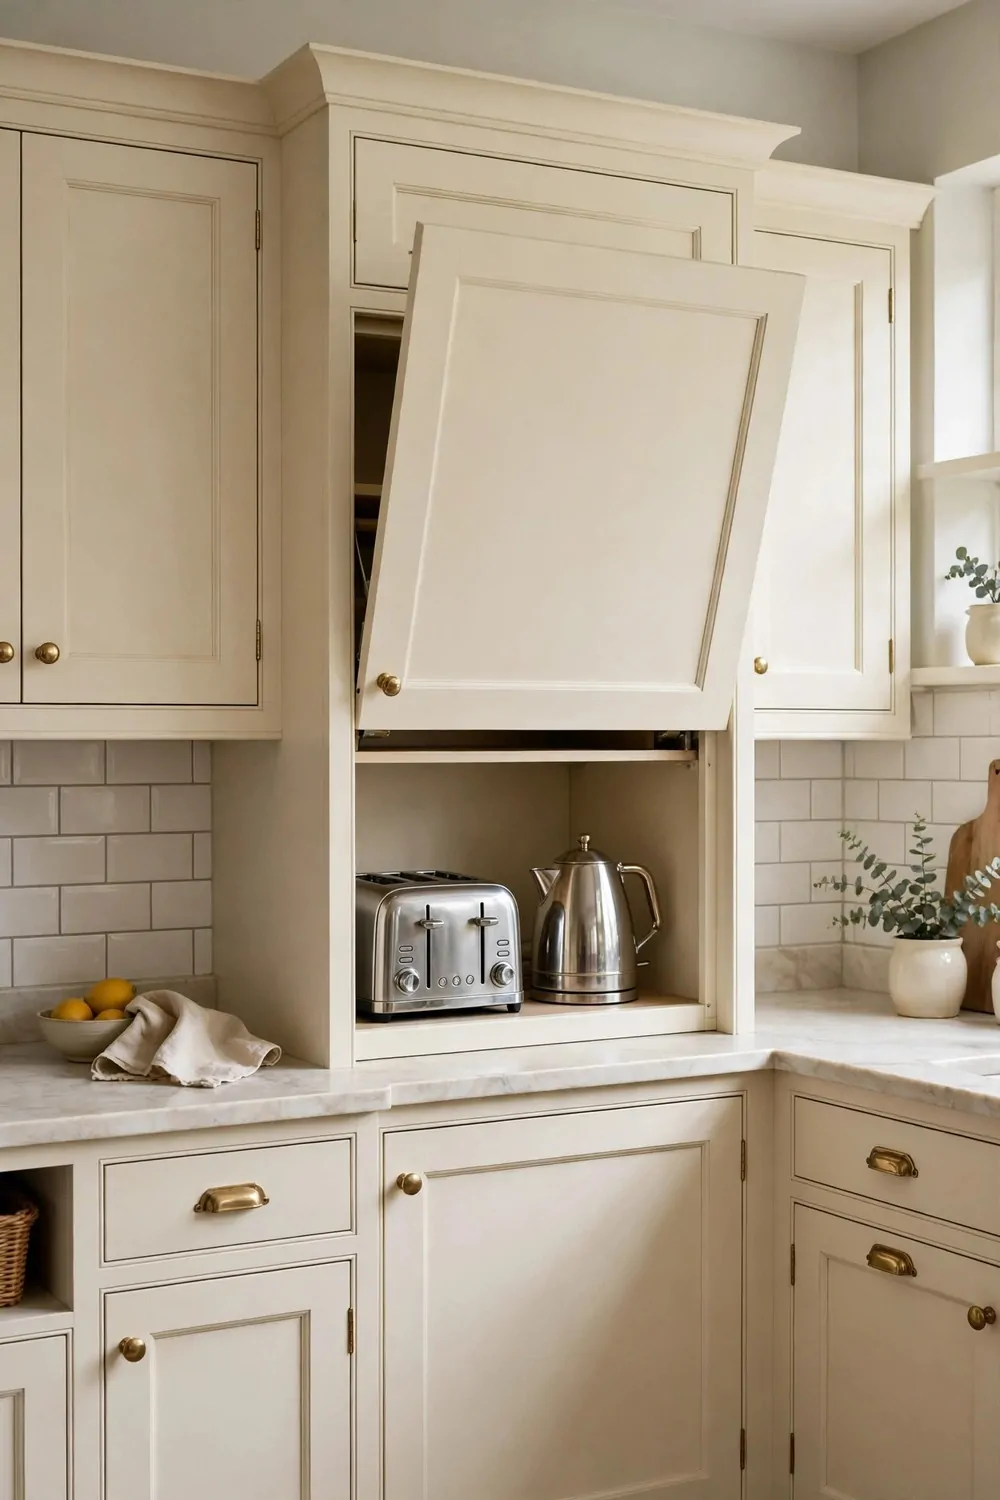
Shaker kitchens have a classic look, and an appliance garage fits right in. The framed doors suit this style so well.
Use a door with a simple frame and a flat center panel. It will match your other cabinet doors and look like it belongs there.
I love how tidy a Shaker garage looks when it is closed. The lines are clean, and nothing feels fussy or overdone.
Pick a soft paint color for the door. White, cream, or a pale sage all work well in a Shaker kitchen.
A small knob in the same finish as your other knobs ties it all together. It is a tiny detail, but your eye notices it.
Keep the inside simple too. One shelf and a clear spot for your coffee maker is often all you need.
You can add a roll-up door if you want a modern touch. Just keep the frame style the same so it still feels Shaker.
Wipe the framed door often. The edges of the frame can catch dust, and a quick wipe keeps it looking fresh.
If you love a calm, classic kitchen, this is a great fit. The garage hides the clutter and keeps the Shaker charm front and center.
Try It in a Modern Handleless Kitchen
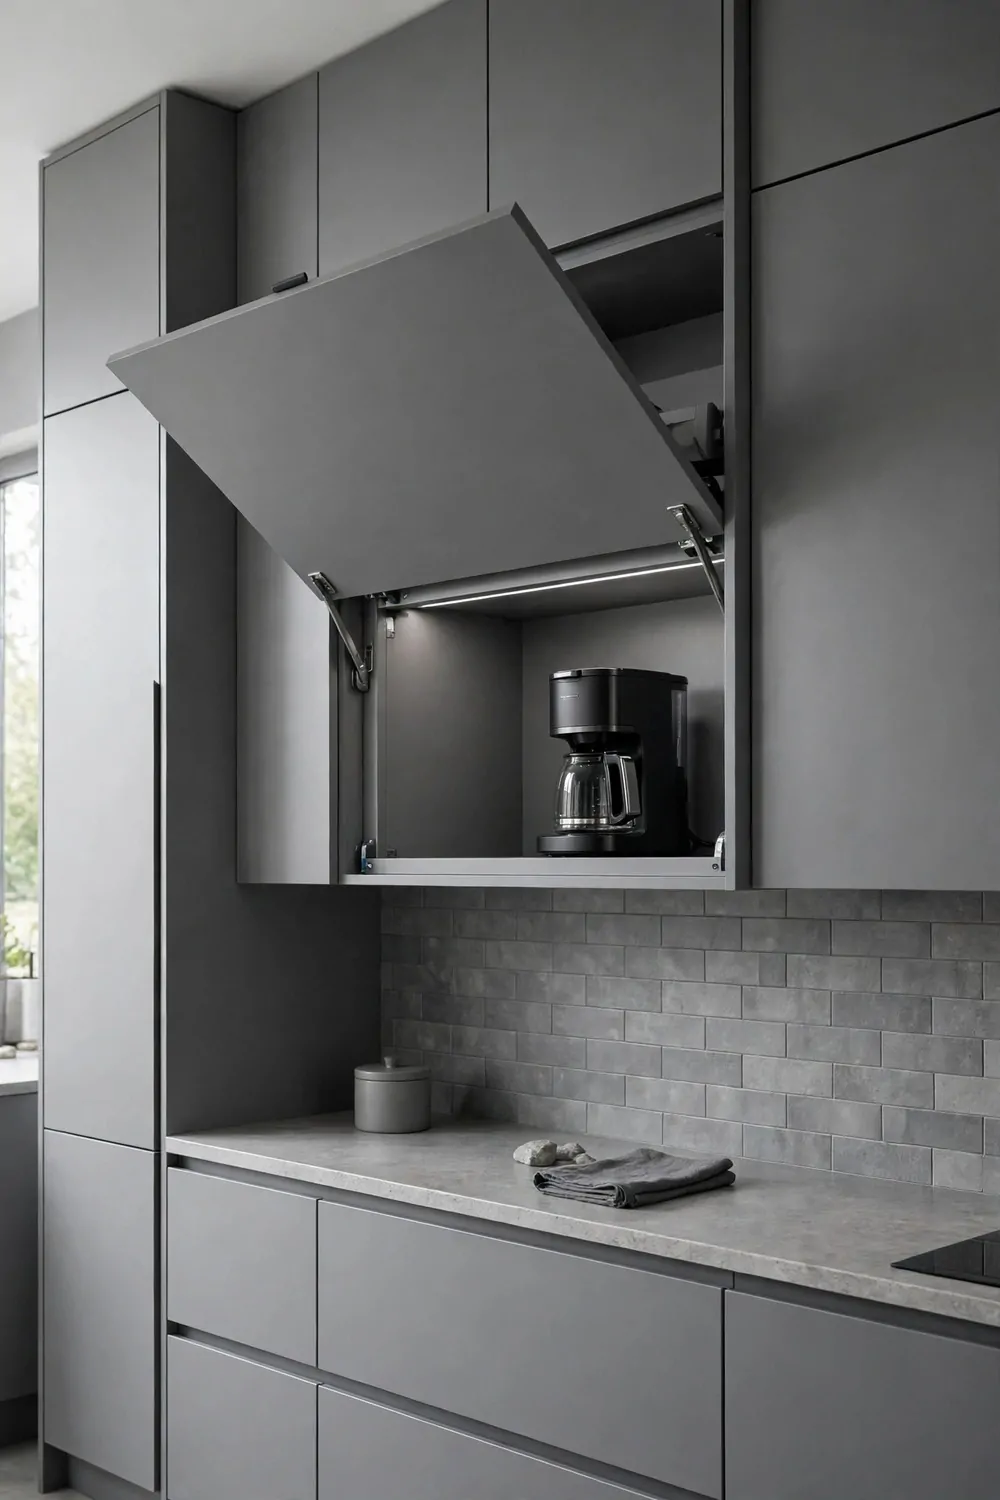
A modern handleless kitchen looks best when the lines stay smooth. An appliance garage can keep that clean look going.
Use a flat door with no handle at all. A push-to-open catch lets you tap the door and it pops open with ease.
I like this style because there is nothing to catch on your clothes. You can walk past the garage and nothing sticks out.
Pick a flat slab door in the same color as your cabinets. The garage will blend in, and the wall will look like one smooth run.
A lift-up door also works well here. It opens up and stays out of the way while you make your coffee.
Keep the gap around the door even and neat. In a handleless kitchen, a crooked gap stands out more than you would think.
Use the inside well. A coffee maker and a toaster fit side by side, and the flat door hides them both in one move.
Clean the door with a soft cloth. Fingerprints show up fast on flat matte doors, and a quick wipe brings back the smooth look.
This is a good pick if you love a simple, modern kitchen. The garage keeps the clutter hidden and the lines clean.
Use Glass Doors for a Pretty Look
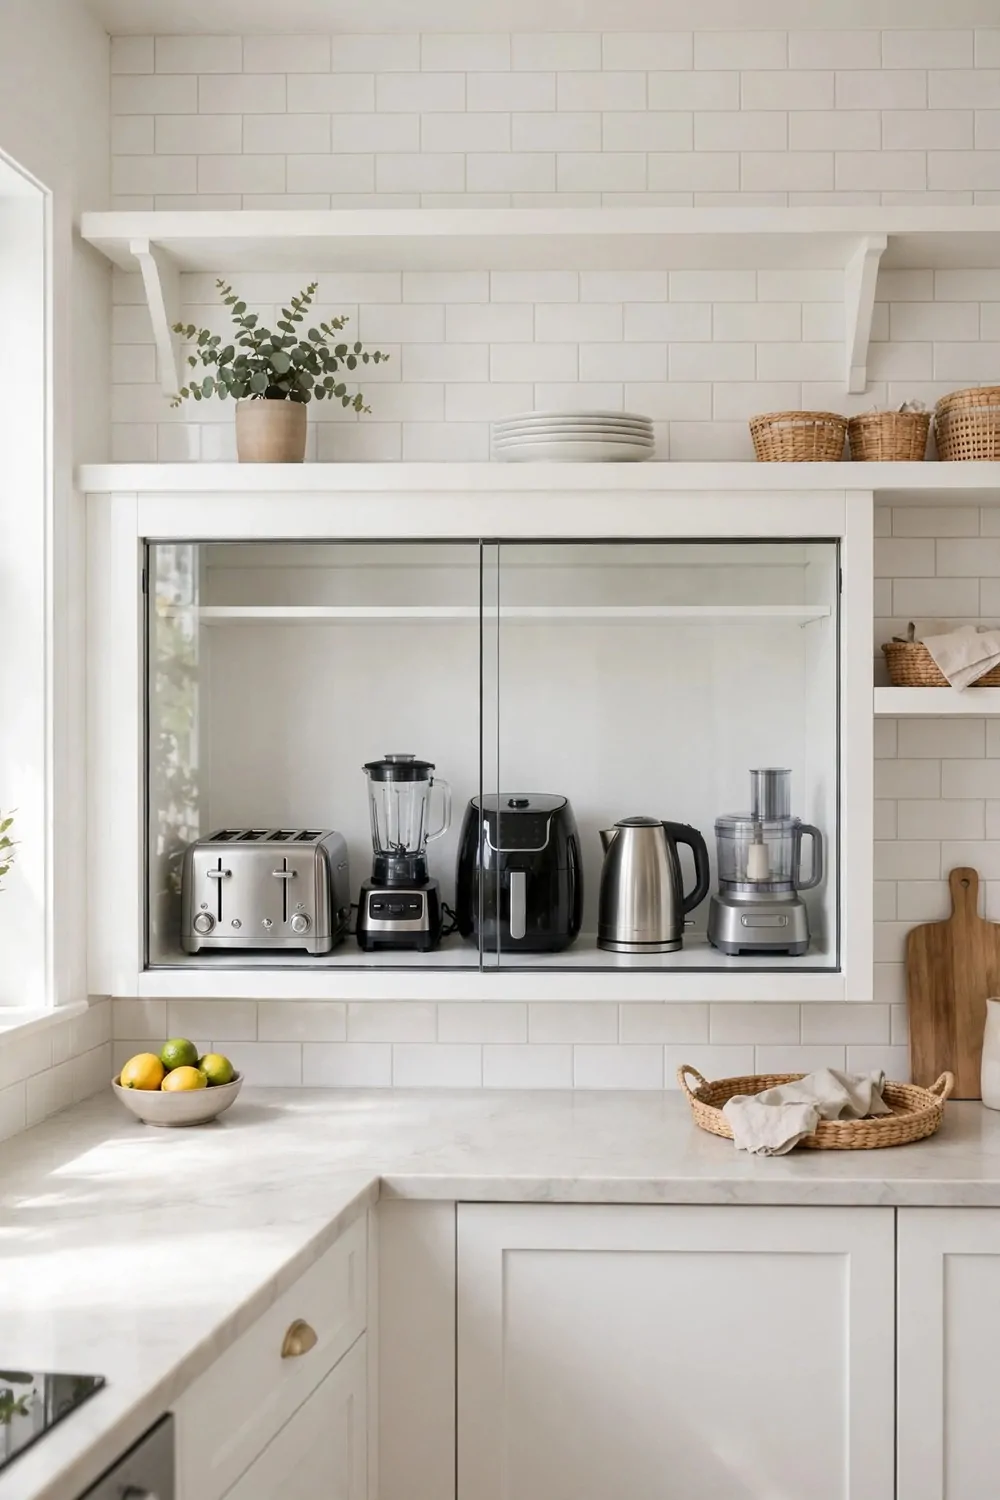
Glass doors give you a pretty middle ground. They hide the mess a bit, but they still let you see what is inside.
I like glass when my appliances look neat. A pretty kettle and a tidy coffee maker can look good behind glass.
Pick frosted glass if you want more cover. It softens the view, so cords and small bits do not jump out at you.
Clear glass works best when you keep the inside tidy. If the inside is a jumble, clear glass will show every bit of it.
Use a slim frame around the glass. A thin black or wood frame keeps the look light and modern.
Add a small light inside the garage. The glow through the glass makes the kitchen feel warm in the evening.
Keep the glass clean with a quick spray and wipe. Smudges show up fast, and clean glass makes the whole kitchen look brighter.
Put your prettiest appliances behind the glass. Save the worn-out ones for a solid door garage if you have one.
Glass doors are a nice pick if you want to hide clutter but not hide everything. They give you a soft, open feel.
Hang a Curtain for a Rental Kitchen
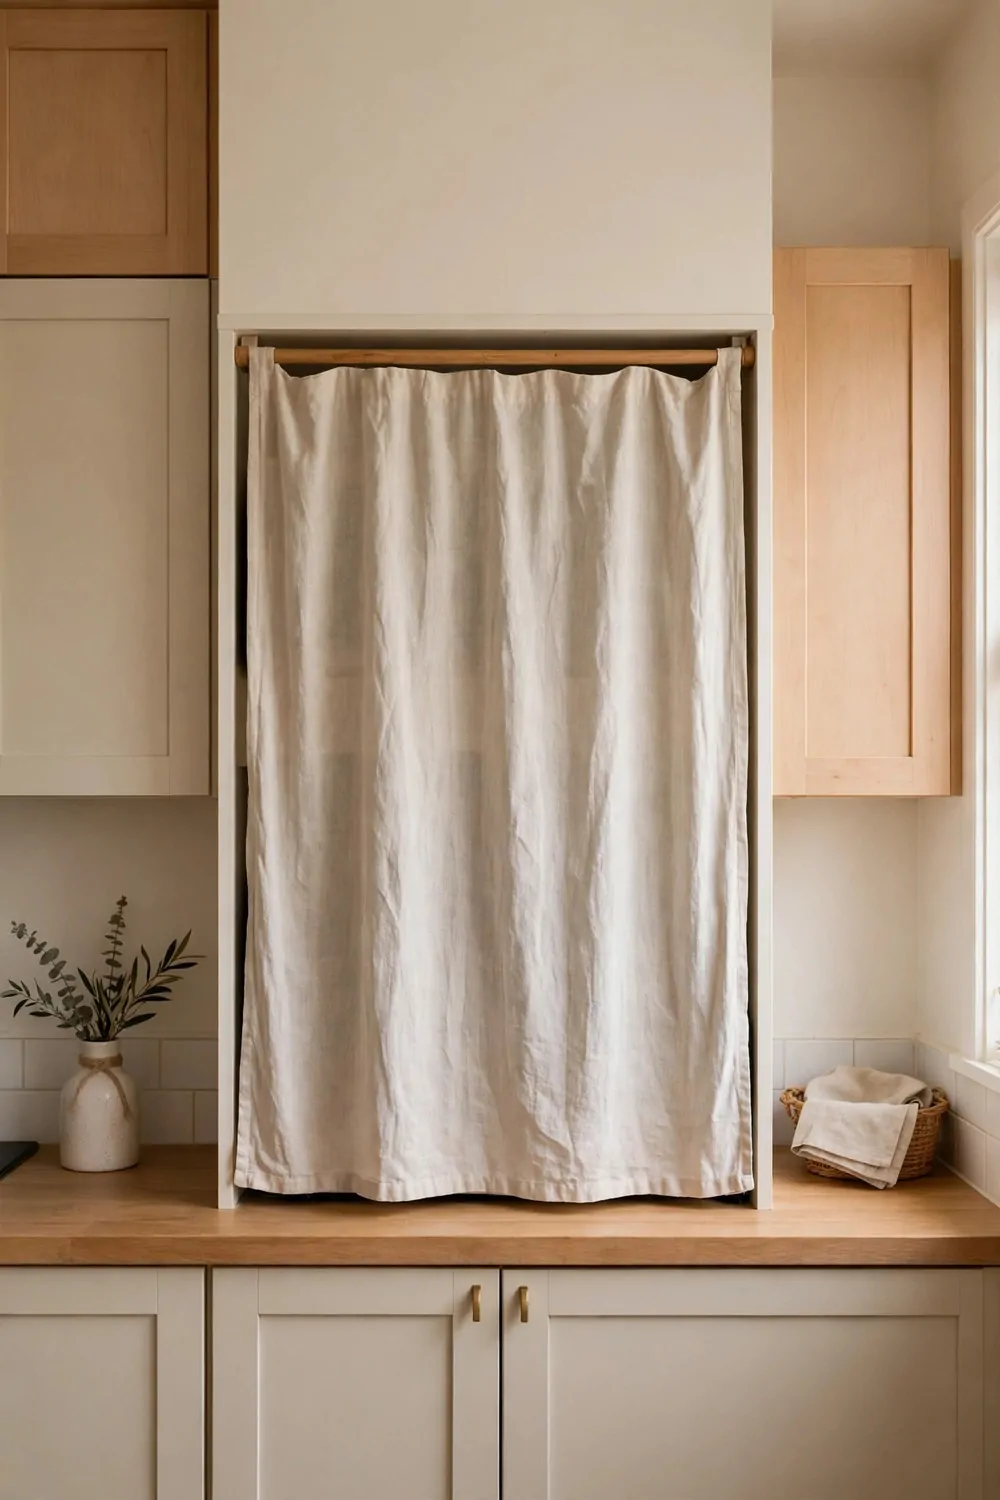
If you rent, you can still hide your appliances. A simple curtain can do the job with no drilling and no building.
Hang a small tension rod under your upper cabinet. Then hang a short linen curtain from the rod, and it covers the counter below.
I love this idea for rentals because you can take it down in minutes. No holes, no damage, and your landlord stays happy.
Pick a fabric that fits your kitchen. Linen looks soft and homey, and cotton is easy to wash when it gets dusty.
Make the curtain just long enough to cover the appliances. Too long, and it will drag on the counter and get in your way.
You can pull the curtain to one side when you cook. Then you push it back when you are done, and the clutter is gone.
Wash the curtain now and then. Kitchen steam and cooking smells settle into fabric, and a fresh wash brings it back to life.
Here are a few renter-friendly options that need no drilling or building at all.
- Freestanding hutch
- Roll-top bread box
- Curtain on a tension rod
- Portable caddy
- Microwave cart
Try the curtain first if you are on a tight budget. It is cheap, it is quick, and it makes a big change in how your kitchen looks.
Add Air Holes So Heat Can Escape
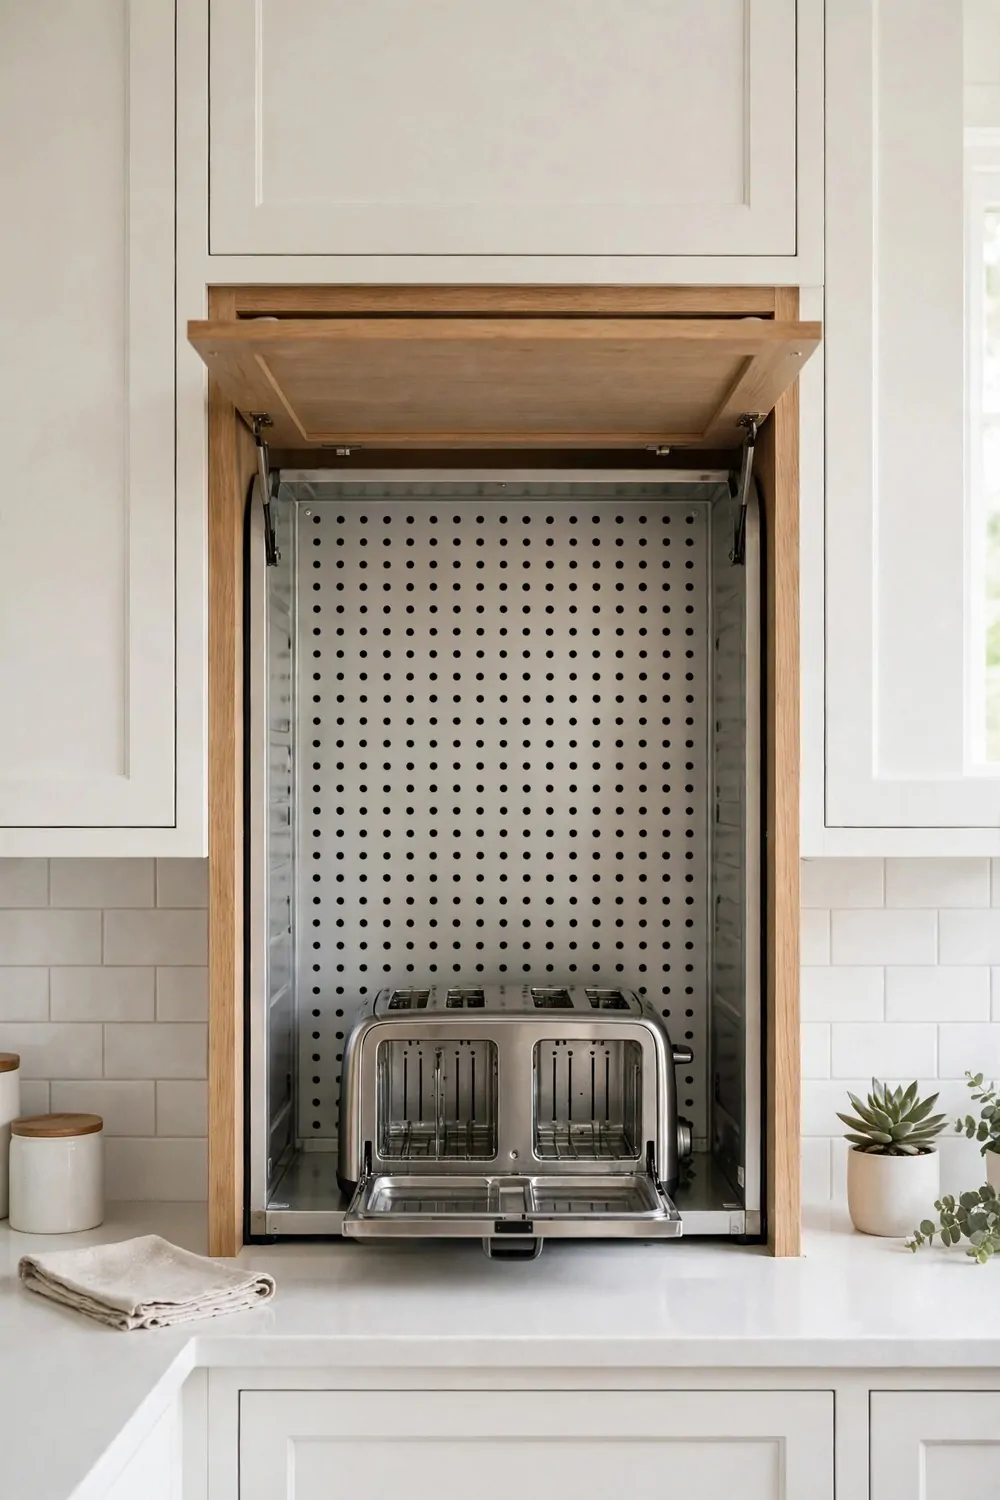
Appliances get warm when they run, and heat needs a way out. A few small air holes can keep your garage safe and fresh.
I learned this after my toaster made the inside of my garage feel hot. A little airflow fixed it right away.
Drill a few small holes near the top of the back panel. Hot air rises, so holes up high let it out with ease.
You can also leave the back panel open a bit. A small gap at the back works just as well as holes, and it is easier to do.
Air holes also help with crumbs and smells. Fresh air keeps the inside from feeling stuffy or stale.
Make the holes small and neat. You do not need big holes, just enough for air to move through.
Put a small mesh cover over the holes if you worry about dust. It keeps bugs out and still lets air pass through.
Check the holes now and then for dust build-up. A quick wipe keeps the air flowing well.
This is a small step, but it matters a lot. Good airflow keeps your appliances happy and your garage safe to use.
Use Adjustable Shelves Inside
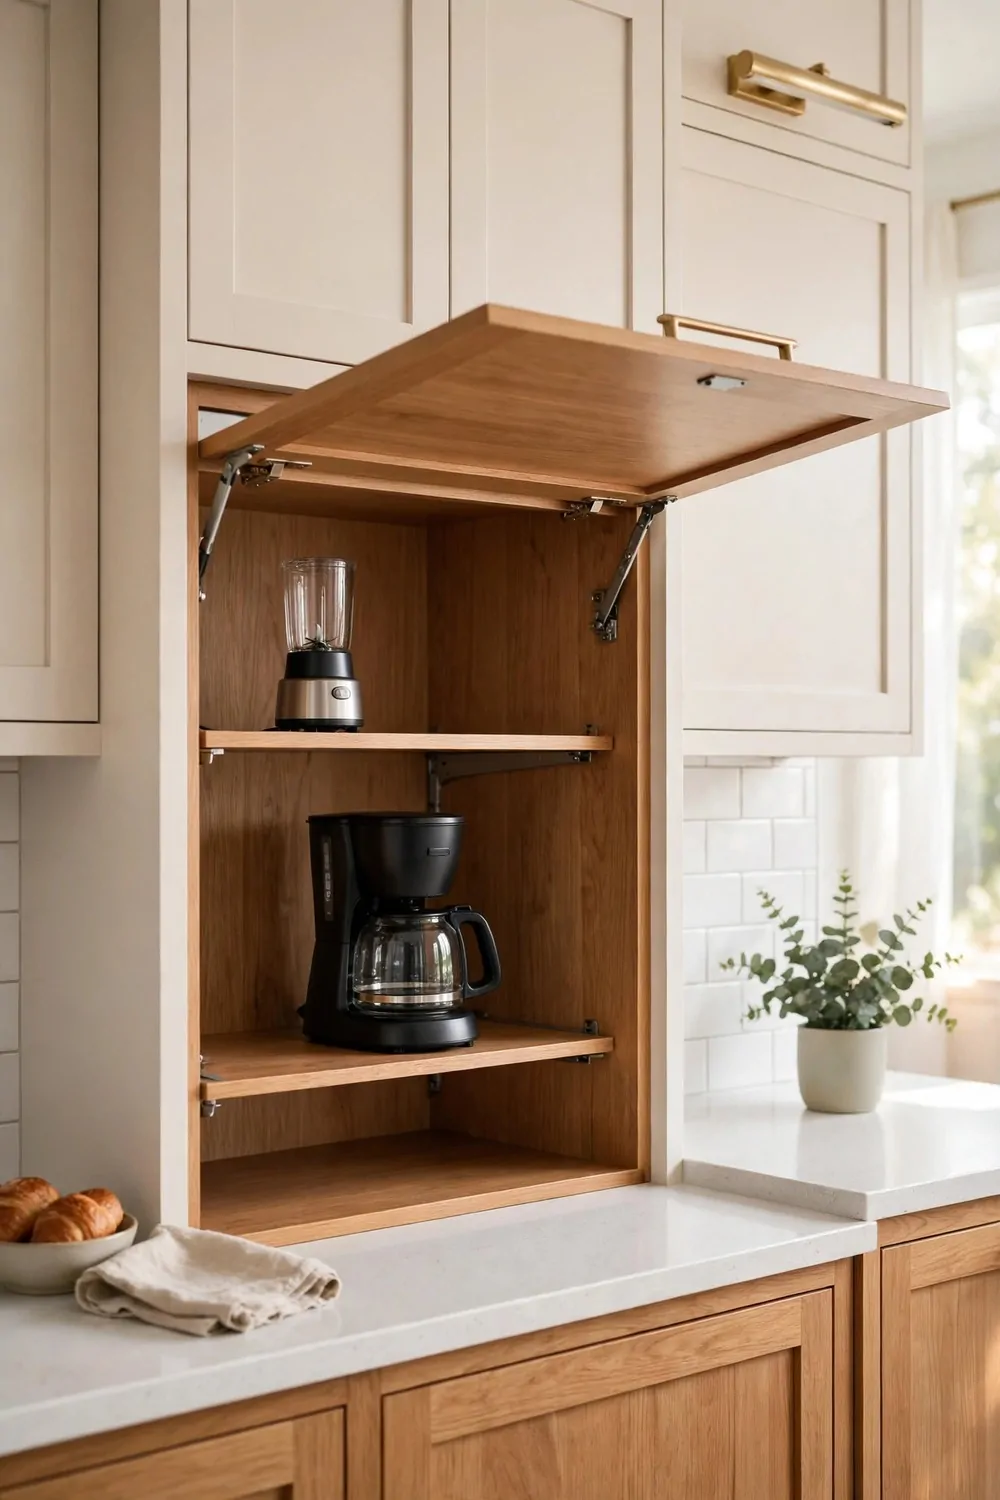
Appliances come in all shapes and sizes. Adjustable shelves help you fit them all in one garage with no wasted space.
You can move a shelf up for a tall coffee maker. Then you can move it down for a short toaster, and it all fits just right.
I like shelves with small peg holes on the sides. You pull the pegs out, move the shelf, and pop the pegs back in.
Measure your tallest appliance before you set the shelves. That way you know how much room you really need.
Keep the heavy things low. A mixer on a low shelf is easier to lift, and it feels safer too.
| Shelf spot | What to put there | Why it works |
|---|---|---|
| Top shelf | Light things you grab rarely | Keeps them out of the daily rush |
| Middle shelf | Coffee maker and kettle | Right at hand height for mornings |
| Bottom shelf | Heavy mixer or blender | Low down so lifting is easy |
Leave a little space above each appliance. You need room to open lids and pour water without bumping the shelf.
You can add a shelf later if your needs change. A new blender or a new kettle might need a new spot, and that is fine.
Wipe the shelves when you move them. Dust settles in the peg holes, and a clean shelf holds things better.
Adjustable shelves make your garage grow with you. As your appliances change, your garage can change too.
Keep It Shallow in a Small Kitchen
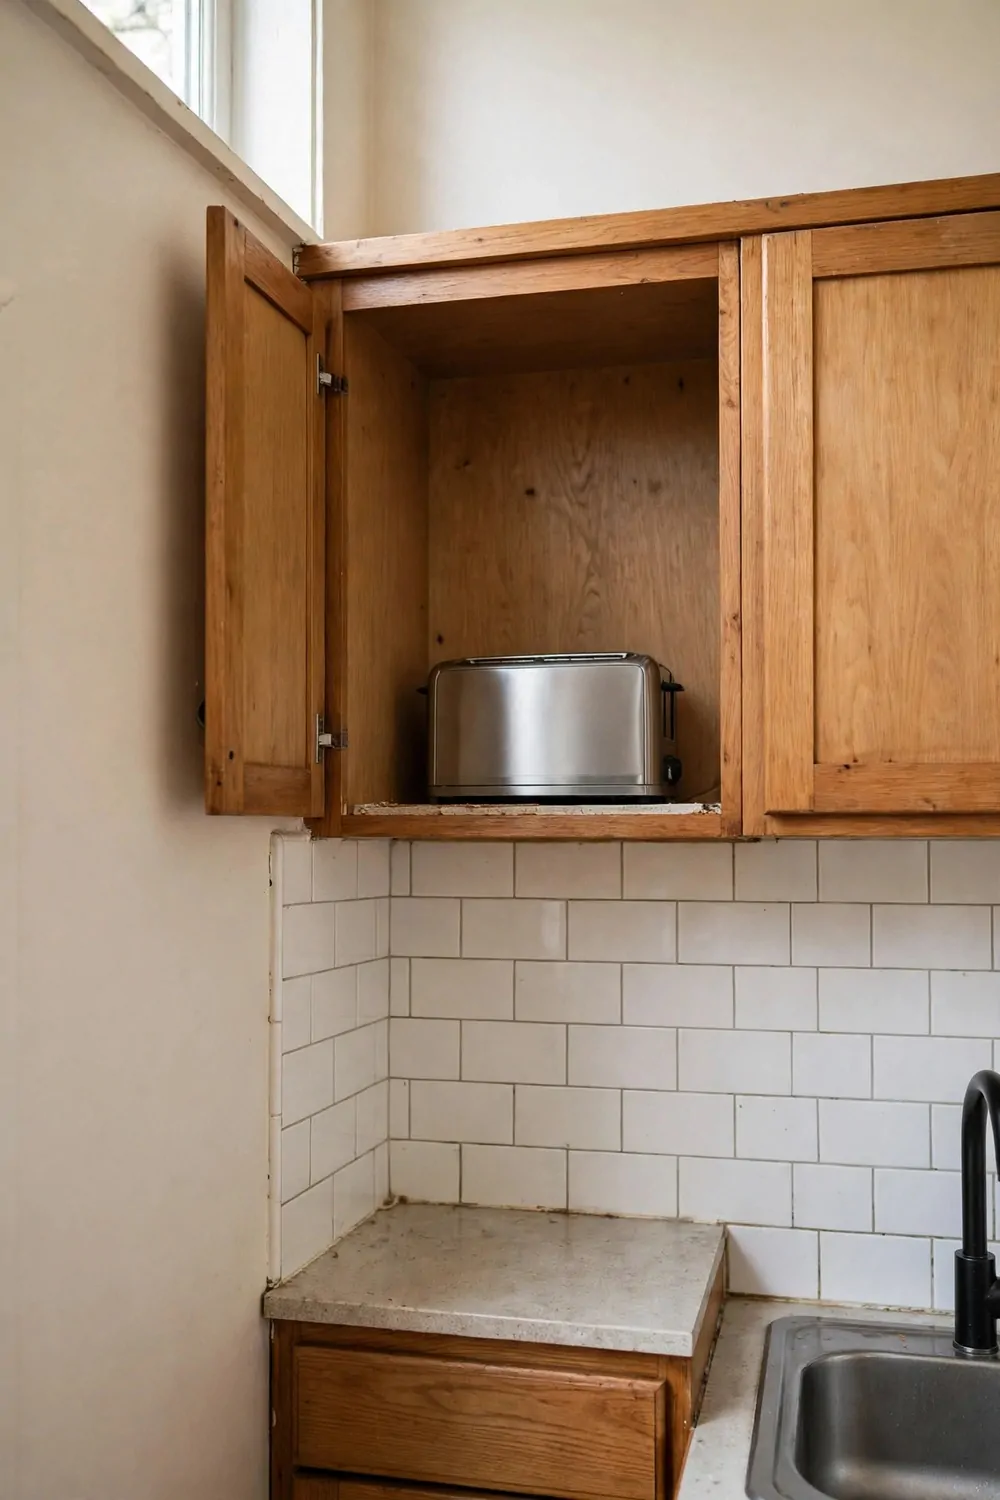
In a small kitchen, a deep garage can eat up too much counter. A shallow one, about 12 inches deep, is often just right.
It still hides your toaster and coffee maker. But it leaves you more counter space in front for prep work.
I like a shallow garage because it feels light. It does not crowd the kitchen or make the counter feel closed in.
Measure your appliances before you build. Most small appliances fit in 12 inches, but a big mixer might need a bit more.
Put the shallow garage against the wall. That way the front of your counter stays open for cutting and mixing.
A roll-up door works well in a shallow garage. It takes up very little room when it opens, and it never swings out at you.
Keep only the daily items in a shallow garage. Store the things you use once a month in a cupboard instead.
Use the top of the garage for a small plant or a jar. It adds a nice touch without taking up your work space.
Small kitchens need smart picks like this. A shallow garage hides the clutter and still gives you room to cook.
Build a Simple Wooden Box Yourself
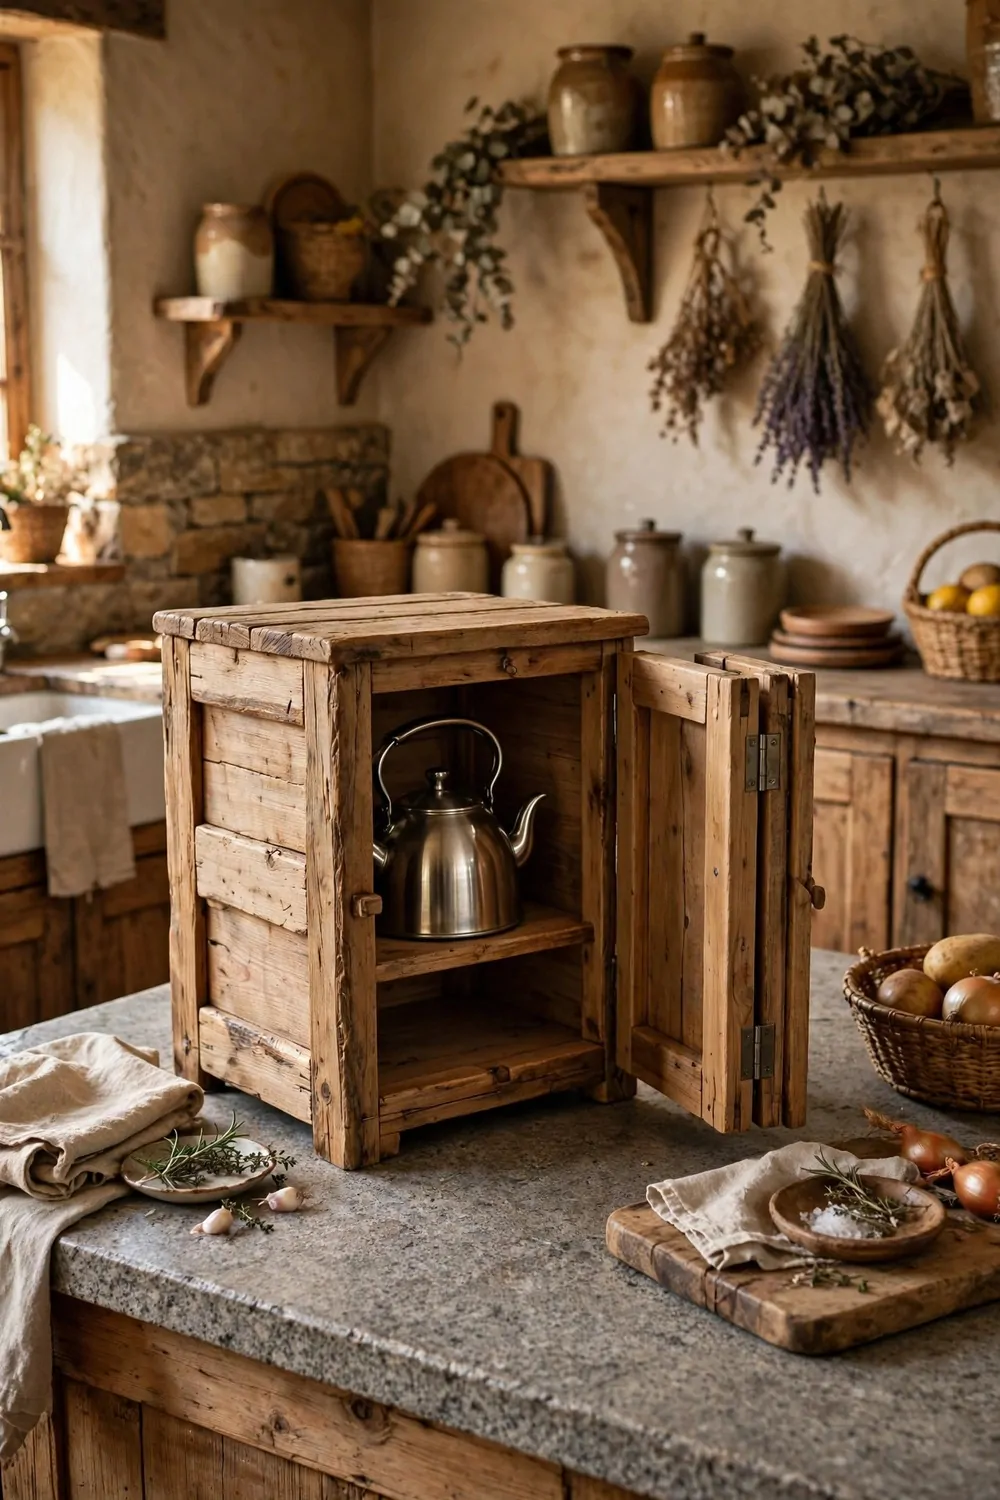
If you like to build things, you can make your own appliance garage. A simple wooden box is a great weekend project.
You start with a box that sits on your counter. It needs a back, two sides, a top, and a door on the front.
I built one with my brother last year, and it was easier than I thought. We measured twice, cut once, and it fit just right.
A bi-fold door is a good pick for a DIY box. It folds in the middle, so it opens wide without swinging far out.
You can also use a small tambour door kit. It rolls up like a garage door, and it feels smooth to open.
Sand the edges well before you paint. Smooth edges look neat, and they feel nice when you open the door each day.
Paint or stain the box to match your cabinets. That one step makes a plain box look like part of your kitchen.
Here is what you need to build the box.
- A sheet of plywood
- A small bi-fold or tambour door kit
- Hinges
- Wood screws
- Paint or stain to match your cabinets
Take your time and enjoy the build. When you close that door for the first time, you will feel proud every time you see it.
Keep Reading
If you liked these ideas, you will love more kitchen storage ideas that help you keep your counters clear and your cooking calm.
- 21 Small Kitchen Pantry Ideas That Make Cooking Easier
- 18 Kitchen Island Decor Ideas for a Warm Gathering Spot
- 27 Home Decor Ideas Living Room and Kitchen Looks That Match
- 23 Bathroom Storage Ideas That Hide the Clutter
Pick one idea from this list and try it this week. Start small, see how it feels, and enjoy a kitchen that looks tidy every day.