20 Content Creation Studio Designs That Boost Your Videos

Watch your last video with the sound off. That is the real test of a studio design.
No words to save it. No music to cover it. Just a room, a light, and a frame. Your eyes tell you in five seconds if it looks good or not.
I did this test on my own videos last winter, and honestly, it hurt a little. My background looked messy. My light made one side of my face bright and the other side dark. The room behind me had a cable hanging down like a vine, and I had never even noticed it.
The fix was not money. I moved my desk two feet to the left. I put one lamp closer. I tidied one shelf. Small moves, and the next video looked like a different room.
A studio design is not about a big fancy room. It is about what the camera sees. The camera only sees one small square. So you build that square on purpose, and you let the rest of the room stay normal.
Here are 20 content creation studio designs that boost your videos. Each one works in a real home. A corner, a spare room, half a bedroom. Pick the ones that fit your space, and watch your videos start to look like a real show.
1. The Window Wall Studio
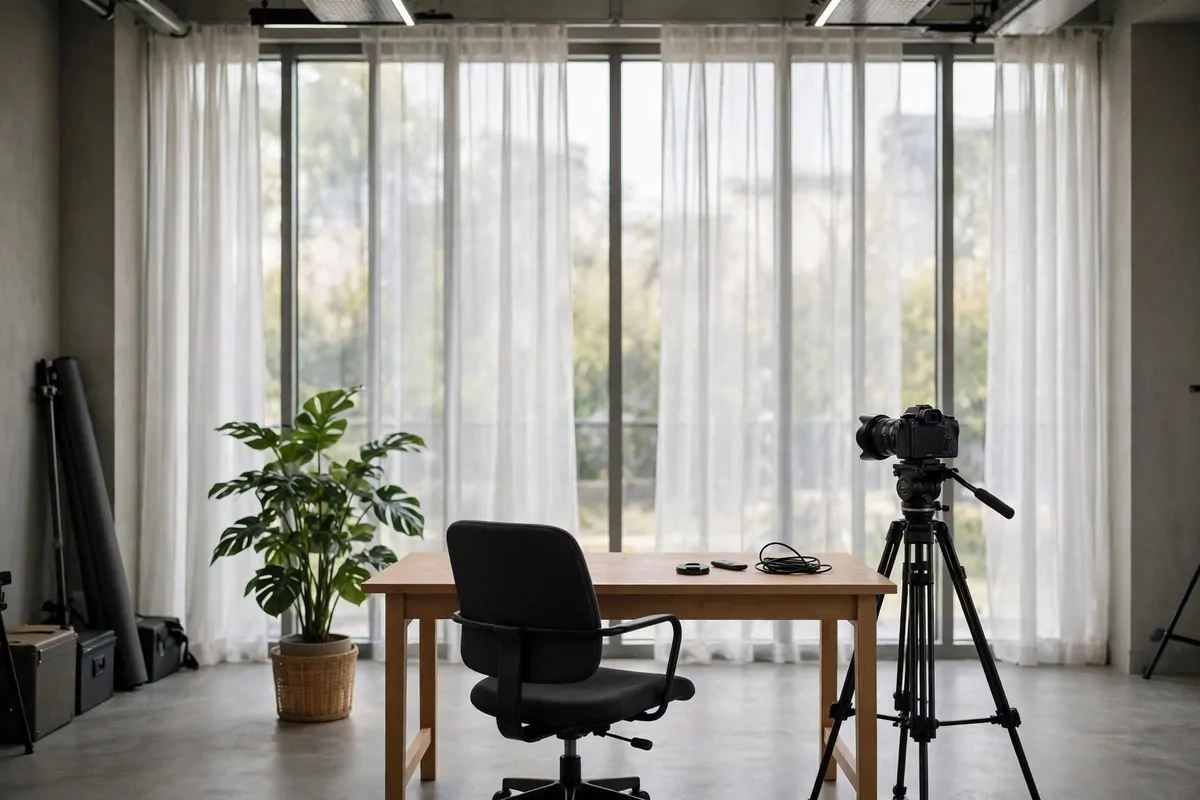
A wall of windows is the best backdrop money cannot buy. You already own it, if your room has one good window.
Face the window when you film. Light should fall on your face, not on your back. Light from behind turns you into a dark shape on screen.
Put your desk about three feet from the glass. Too close and the light hits one side of your face too hard. Too far and the room eats the light before it reaches you.
Sheer curtains are the secret here. They spread the daylight out so it falls evenly across your face. A bare window on a bright day can blow out one side of the frame, and a thin white curtain fixes that in one move.
Keep the window wall tidy. The camera sees the glass, the frame, and a little bit of the wall around it. Wipe the glass once a week. Dusty glass dulls every color in the shot.
Here is how window light changes through the day, and what each direction gives you on camera:
| Window direction | Light through the day | Best for filming |
|---|---|---|
| North | Soft and even, almost no glare | Long filming days |
| East | Bright mornings, calm afternoons | Early filming |
| South | Strong light most of the day | Winter filming |
| West | Soft mornings, golden evenings | Late filming |
Film in the morning if you can. Morning light is steady. Afternoon light moves fast and changes color every half hour, and your camera notices.
Add one plant near the window. Green against bright glass is a combination that never fails. One plant is enough. Three plants start to block the light.
A window wall studio costs nothing to build. It costs a little thought about where you sit. Sit facing the light, keep the glass clean, and the camera will love you.
2. The Dark Backdrop Studio
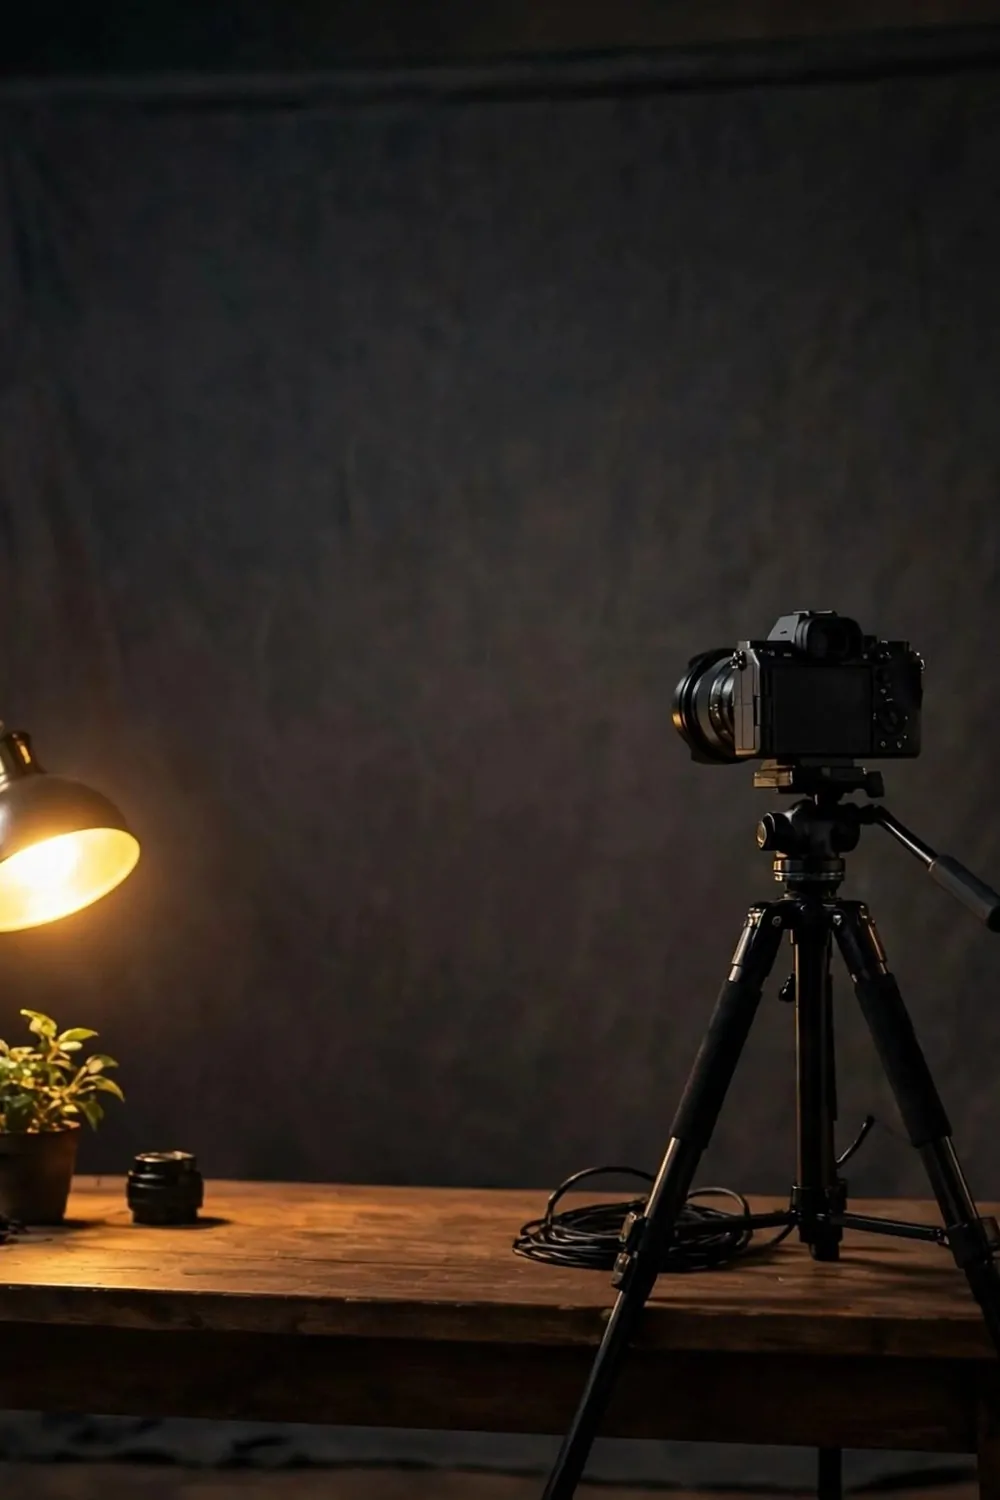
A dark backdrop makes you the brightest thing in the frame. The viewer has nowhere else to look. That is the whole point.
Paint the wall behind you charcoal, deep green, or inky blue. Dark walls blur the corners on camera. The frame feels deeper, and your face comes forward.
One warm lamp is the whole lighting plan. Place it to one side, about face height. One pool of light, one face. Two lamps make two shadows, and shadows argue on camera.
Warm bulbs only, around 2700K on the box. Cool white light on a dark wall looks cold and flat. Warm light makes the dark feel like evening.
Wear a lighter top. A dark top on a dark background makes you disappear from the neck down. A cream or mustard top keeps you visible. The camera needs contrast to find you.
Keep the desk dark too. A black desk or a dark cloth stops the frame bouncing light where you do not want it. A pale desk in a dark room glows like a second screen.
Check the edges of the frame before you record. A dark wall shows every mark and scuff when the lamp hits it. A quick wipe and one coat of touch-up paint keep it looking rich.
Work this setup in the evening on purpose. It does its best work after sunset, when the lamp is the only light in the room. Save your most serious videos for the dark hours.
Dark, warm, and focused. If bright rooms leave you cold, this backdrop was built for you, and your videos will look like a late night show.
3. The Bookshelf Set Studio
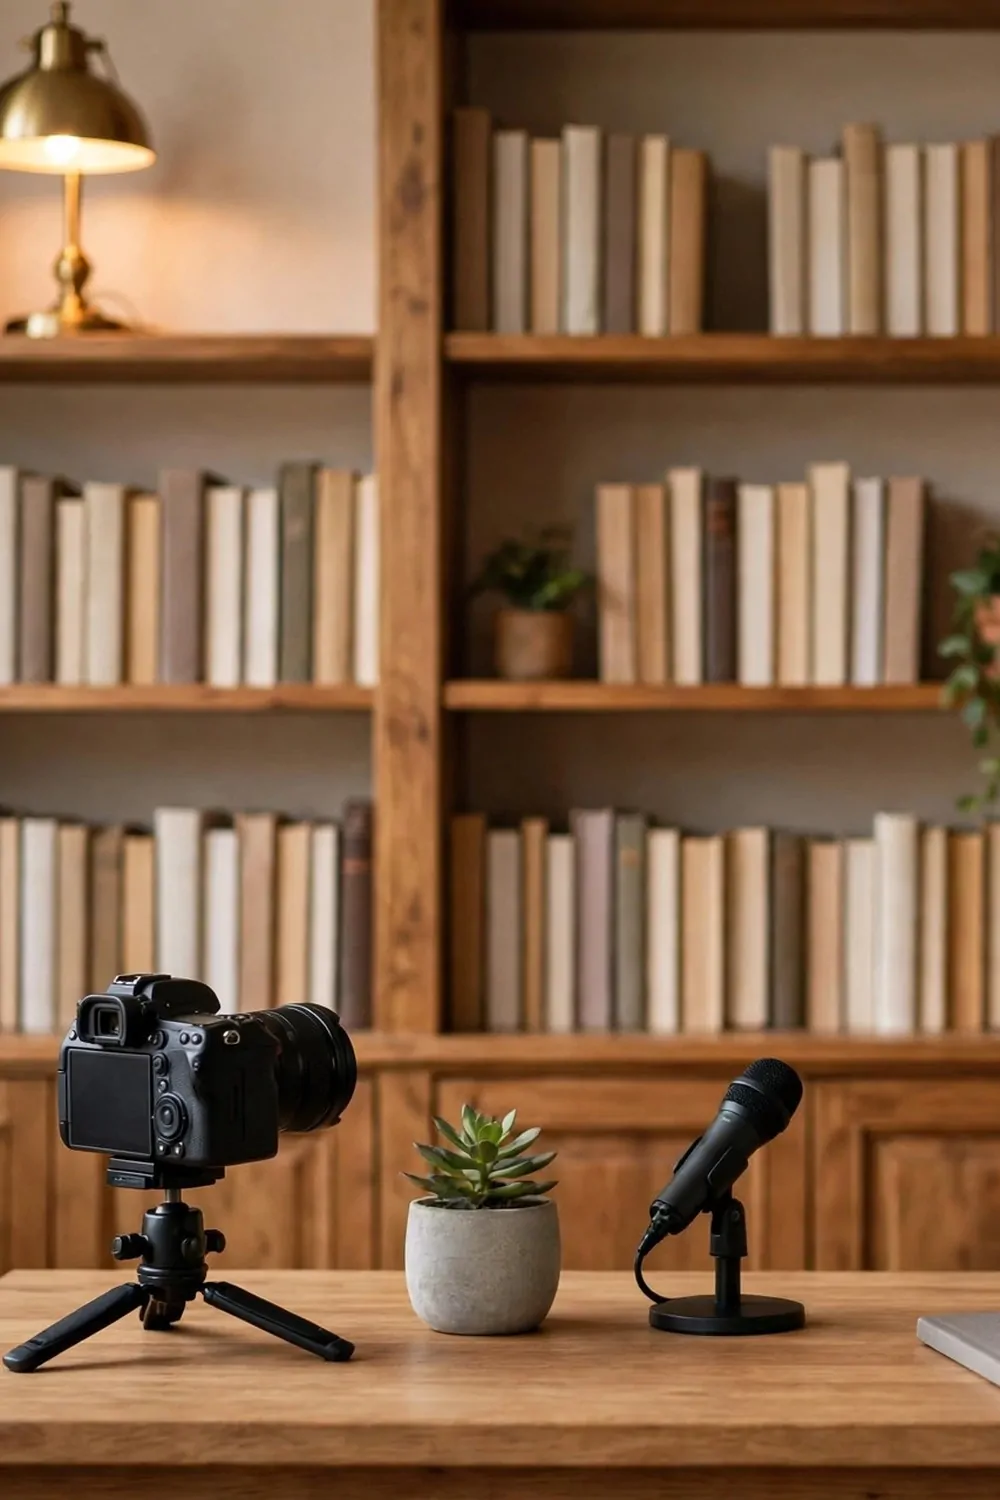
A bookshelf behind you says you read, you think, and you have taste. It is the most trusted background on the internet.
The secret is a shelf that looks used, not staged. Books standing up, a few stacked sideways, one small plant, one framed photo. A shelf that looks lived in feels honest.
Leave some air on the shelves. A shelf packed edge to edge reads as clutter on camera. A shelf with space between groups reads as a collection. Air is part of the design.
Sort the books by height, tallest in the middle and shorter at the ends. It sounds fussy, and it is fussy. But the camera loves a shelf with a gentle shape.
Keep the shelf slightly out of focus if your camera allows it. The books stay readable as books, but they stop competing with your face. Your face wins, and the shelf still tells its story.
Dust the shelves before you film. The camera sees dust on book spines faster than your eyes do in the room. A quick wipe keeps the shelf looking loved.
One shelf is enough. You do not need a whole wall of books. One tidy shelf right behind you fills the frame and does the job.
Add one personal thing. A mug from a trip. A small trophy. One object that is yours. Viewers remember the shelf with one real thing on it.
A bookshelf set works for almost any video topic. It looks smart without trying too hard, and viewers trust a room full of books.
4. The Neon Frame Studio
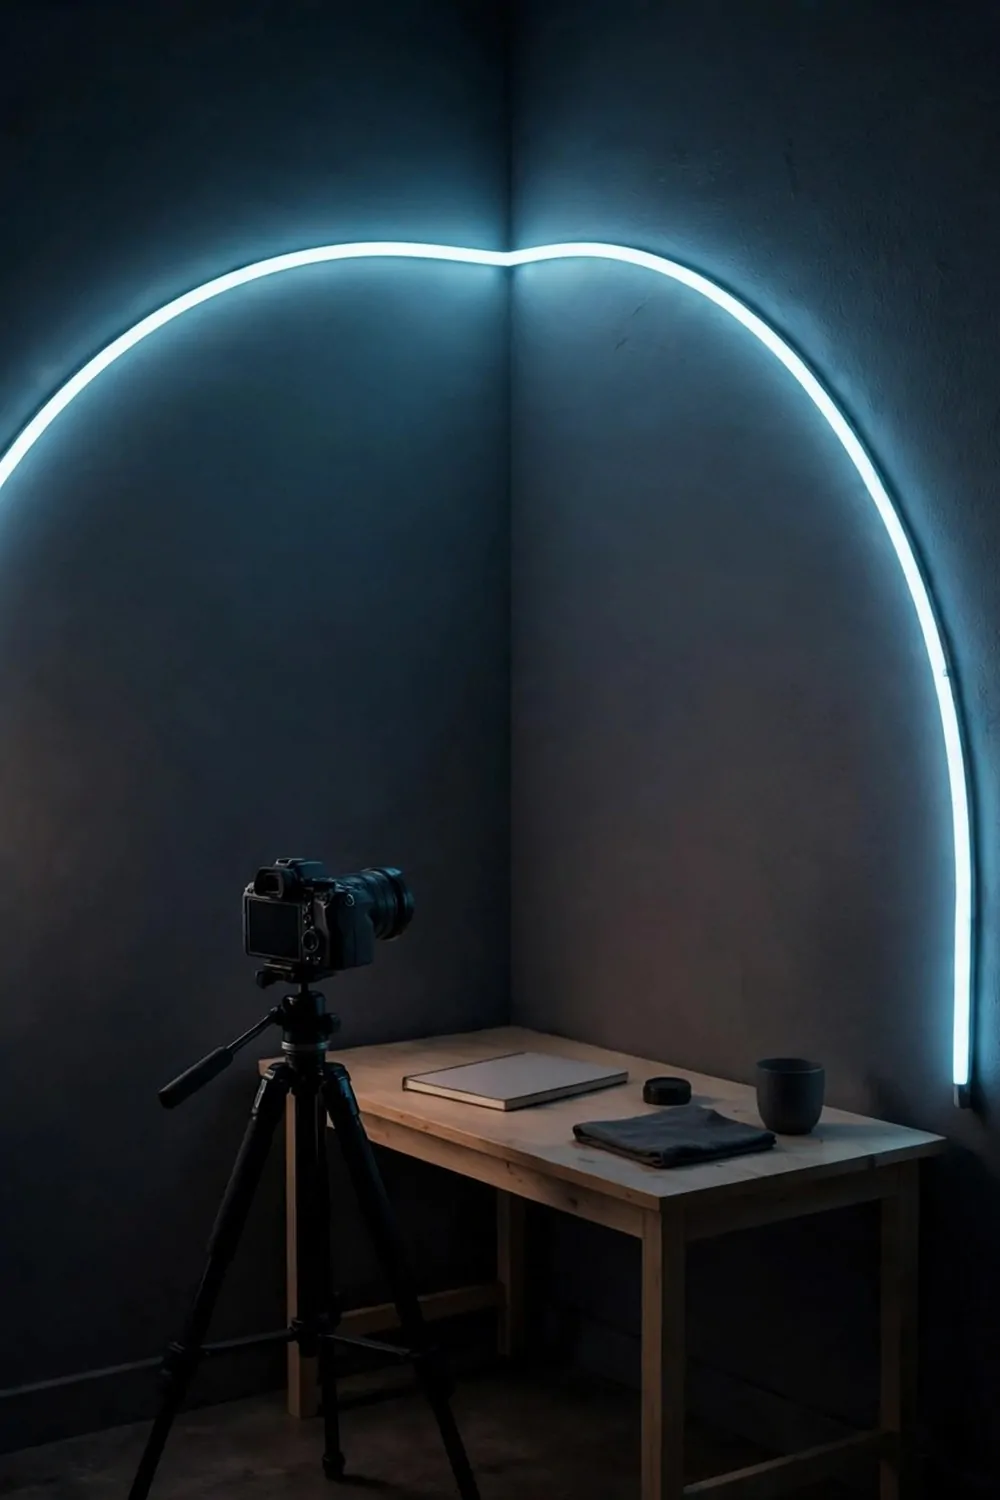
A neon frame is the fastest way to make a video look modern. One glowing shape on a dark wall, and the whole shot feels like it belongs to a creator who knows what they are doing.
You do not need real glass neon. LED tubes bend into the same shapes, use far less power, and stay cool to the touch. They come in warm white, pink, amber, and ice blue.
Pick one shape. A curve, a star, a wave. One shape reads clearly on camera. Five shapes tangled together read as a mess of light.
Mount the glow on a dark wall. Light needs dark behind it to shine. A neon tube on a white wall looks washed out. The same tube on a charcoal wall looks like evening magic.
Keep the rest of the frame calm. The glow is the star, so the desk stays plain and the shelves stay tidy. Nothing shiny should compete with the light.
Put the glow on a timer. It should switch itself on before you film, every time, without you thinking about it. A studio that glows on time looks professional.
Warm colors feel friendly on camera. Cool colors feel modern. Pick the feeling that matches your videos, and stick to one color family. Mixed colors fight.
Check the glow from the camera, not from the room. Stand where the camera stands and look. The frame is the truth. The room can lie to you.
One tube, one dark wall, one calm frame. That is the whole trick, and it is enough to make a viewer stop scrolling.
5. The White Cyclorama Corner
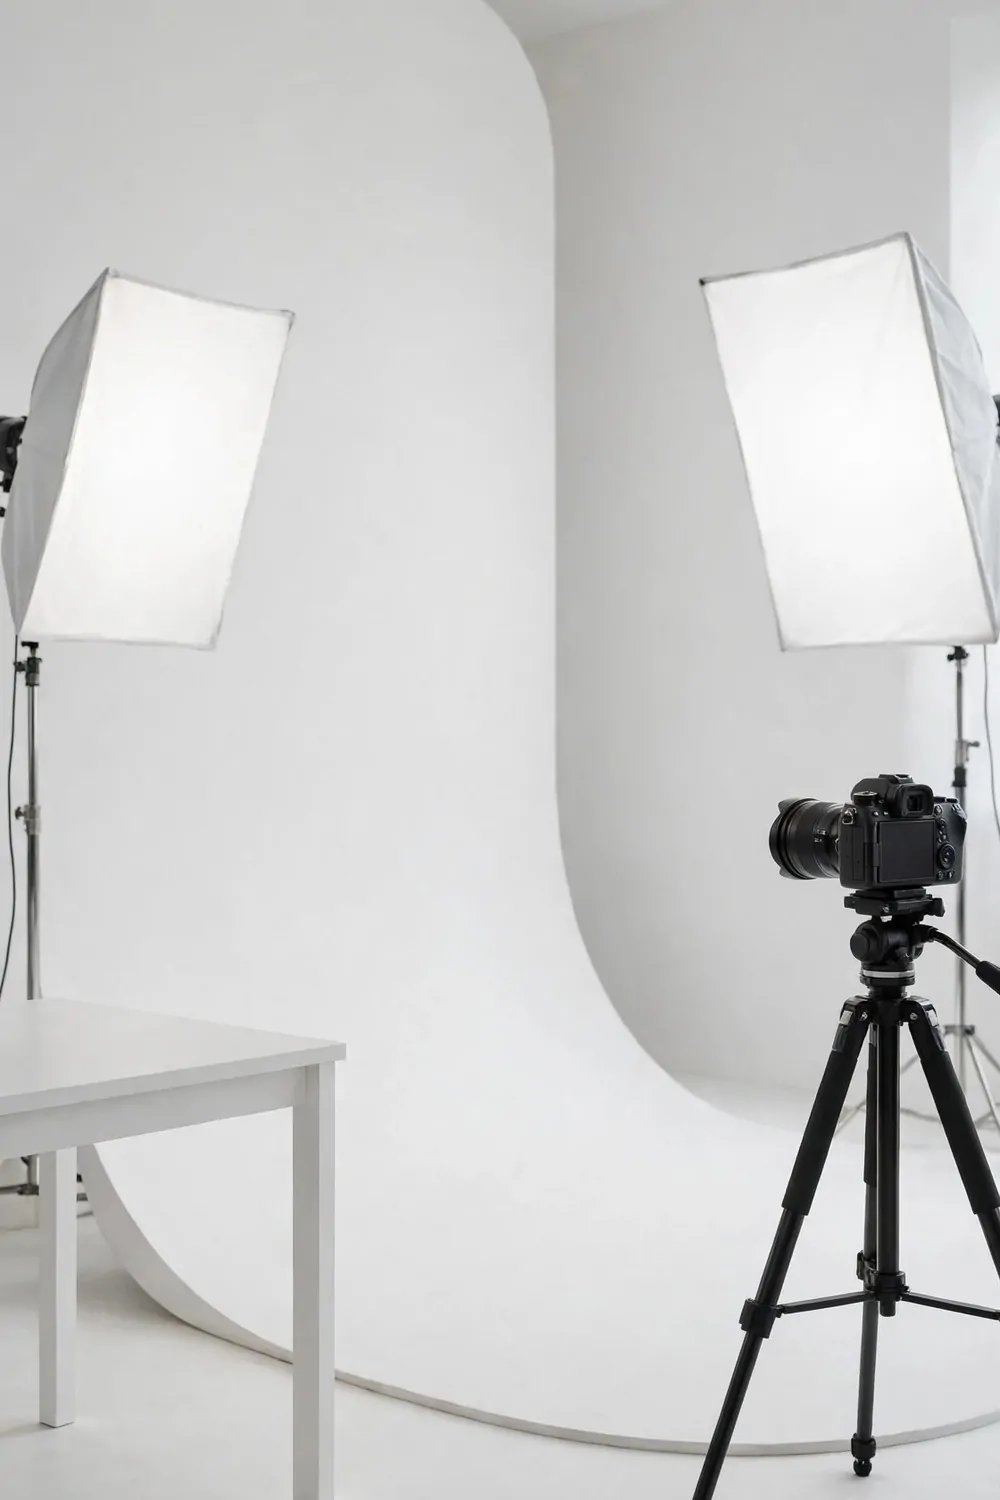
A cyclorama corner is a wall that curves into the floor. No corner line, no seam, nothing to distract. Your subject floats in clean white.
You can fake one with a big roll of white paper. Curve it from the wall to the floor and tape it down. The camera cannot see where the wall ends and the floor begins.
White bounces light around the room. That bounce fills in shadows on your face without a second lamp. A white corner is a light box, and light boxes are kind to cameras.
Keep the white clean. White shows every scuff and footprint. Wipe the floor part before every shoot. Sweep it, and keep a spare strip of paper to roll down when the old one gets marked.
Light the wall a little, not just yourself. A small lamp aimed at the curve stops it going gray on camera. Cameras darken white walls that are not lit.
Wear color against the white. Navy, green, rust, mustard. A white top on a white wall makes you float like a head with no body. Color fixes it in one move.
A white corner photographs well for thumbnails too. Your face pops against the white, and the thumbnail reads clearly even on a tiny phone screen.
Keep props to one or two. A small stool, one plant just outside the curve. The curve is the star. Props are the backup singers.
A cyclorama corner turns a spare corner into a real studio. One roll of paper, one curve, and every video looks clean and bright.
6. The Plant Layer Studio
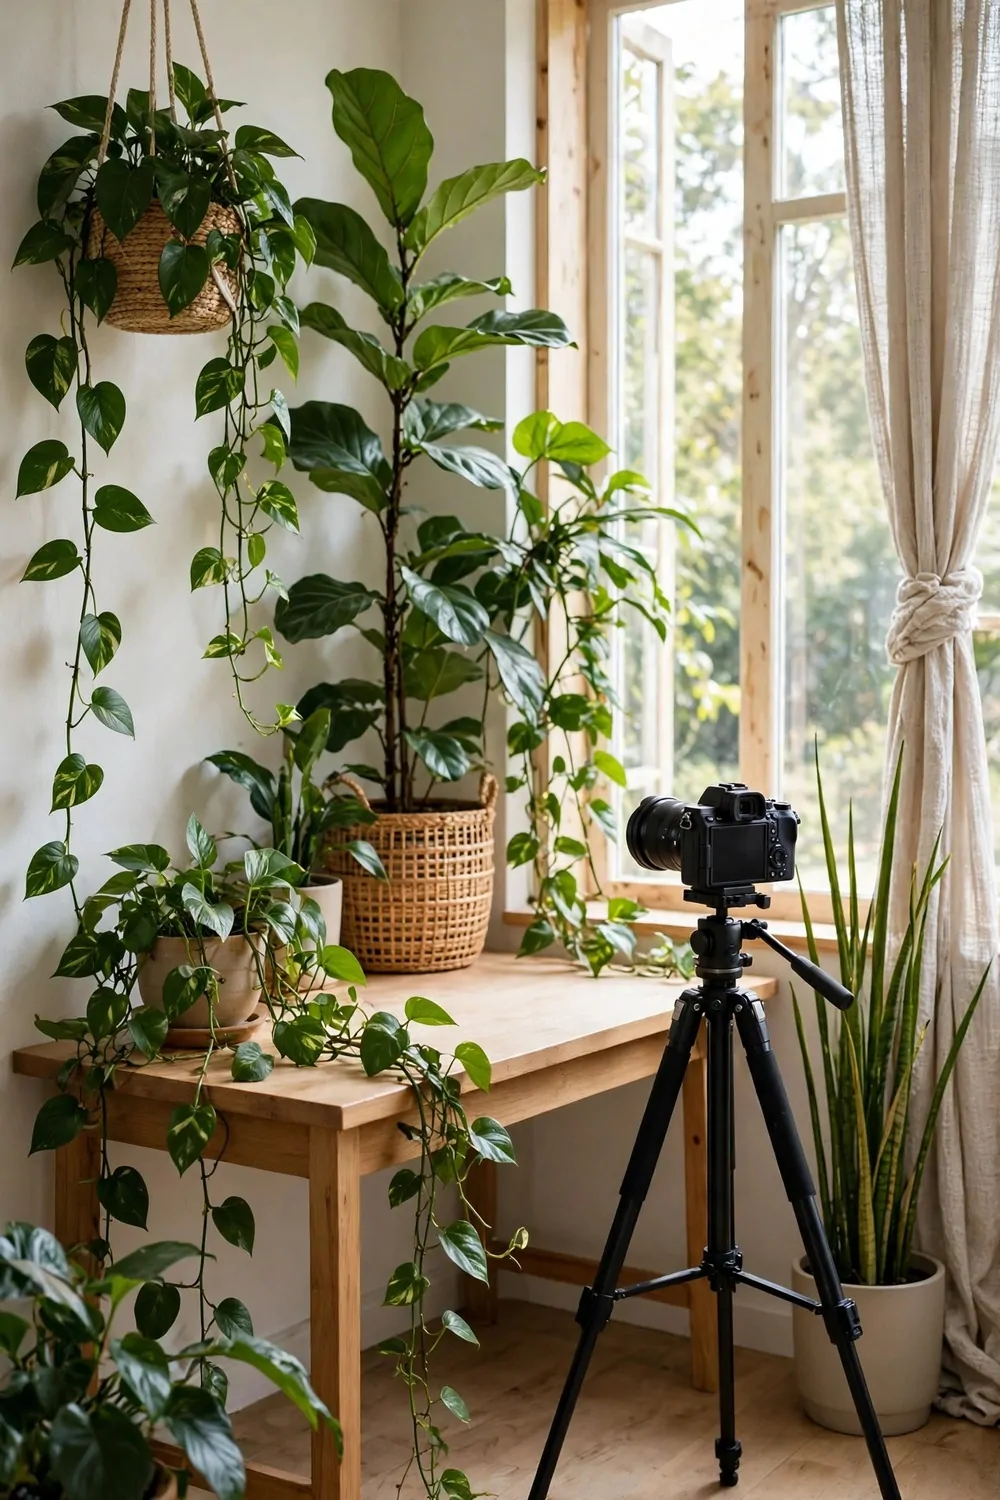
Plants make a video frame feel alive. They move a little in the air, they catch the light, and they tell the viewer the room is cared for.
Layer them at three heights. One tall plant on the floor, one medium plant on a stool, one trailing plant on a high shelf. Three heights give the frame depth.
Put the tallest plant just behind your shoulder. Height is what makes a plant read on camera. Small plants on the floor just look like decoration that wandered off.
Choose matching pots. Same color, same material, two or three of them. Matching pots turn separate plants into one deliberate look.
Keep the leaves clean. Dusty leaves look dull on camera. Wipe the big leaves with a damp cloth once a week. Shiny leaves catch the light and glow.
Water on the same day each week. Plants on camera get looked at a lot, and a drooping plant is sadder on video than in real life.
Do not let a leaf block your face. Check the frame before you press record. A leaf poking out of your head is funny once and distracting forever.
Green is the color eyes rest on. A layered frame gives the viewer somewhere soft to look, and your videos feel calmer for it.
One plant is a decoration. Three plants at three heights is a design. That is the difference between a corner with a plant and a plant layer studio.
7. The Pegboard Gear Wall
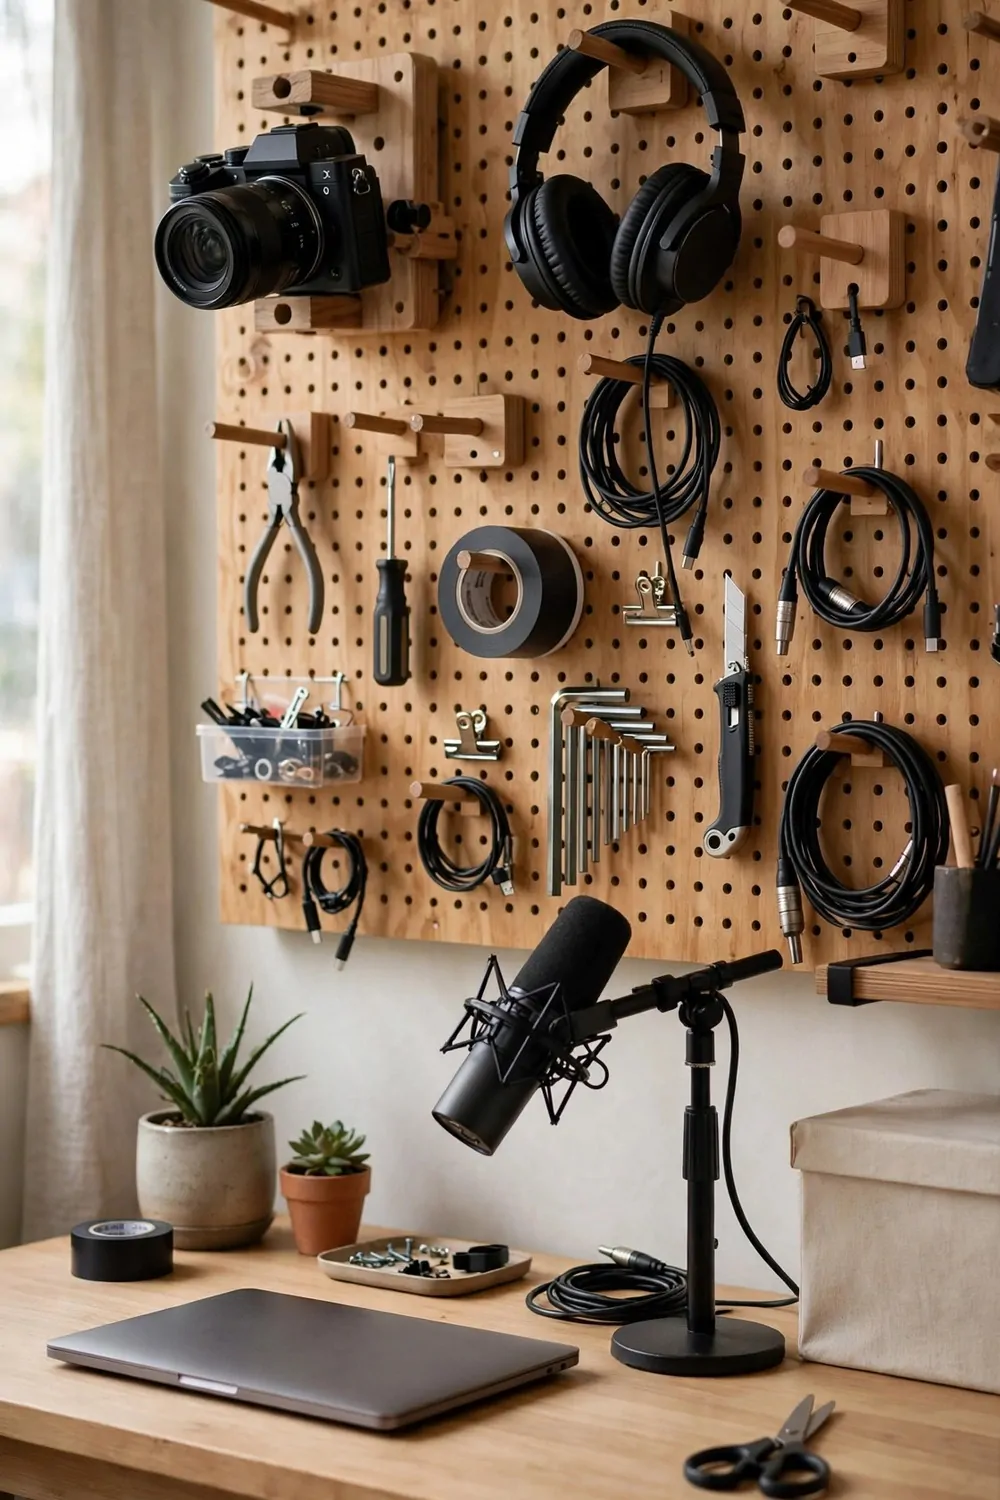
A pegboard wall turns your gear into the backdrop. Cameras, headphones, cables, tools, all hung where the viewer can see them. It says you make things.
Hang the pegboard on the wall behind you, at eye level and a little above. The camera should see the board, not the empty wall above it.
Use hooks and small shelves. Hang the things you actually use. A pegboard full of gear you never touch looks like a shop display. A pegboard with your real tools looks honest.
Keep the board tidy. Every hook should hold one thing. Two things on one hook looks messy on camera. Space between items is part of the look.
Paint the pegboard one color. Charcoal, deep green, or natural wood. One color makes the gear pop. A raw brown board with colorful gear can look busy.
Here is the kit that makes a pegboard wall work:
- A pegboard panel, fixed solid to the wall
- Assorted hooks, short and long
- Two small shelves for boxes and jars
- Cable clips to keep cords neat
- One small lamp to light the board
Light the board. A small lamp aimed at the pegboard stops it going dark on camera. Gear in shadow looks like clutter. Gear in light looks like a collection.
Change the board when your gear changes. A new camera, a new mic, a new tool. The wall grows with your work, and regular viewers will notice.
A gear wall is your studio’s resume. It shows what you use, what you love, and that you take your craft seriously, without a single word of sales talk.
8. The Acoustic Felt Studio
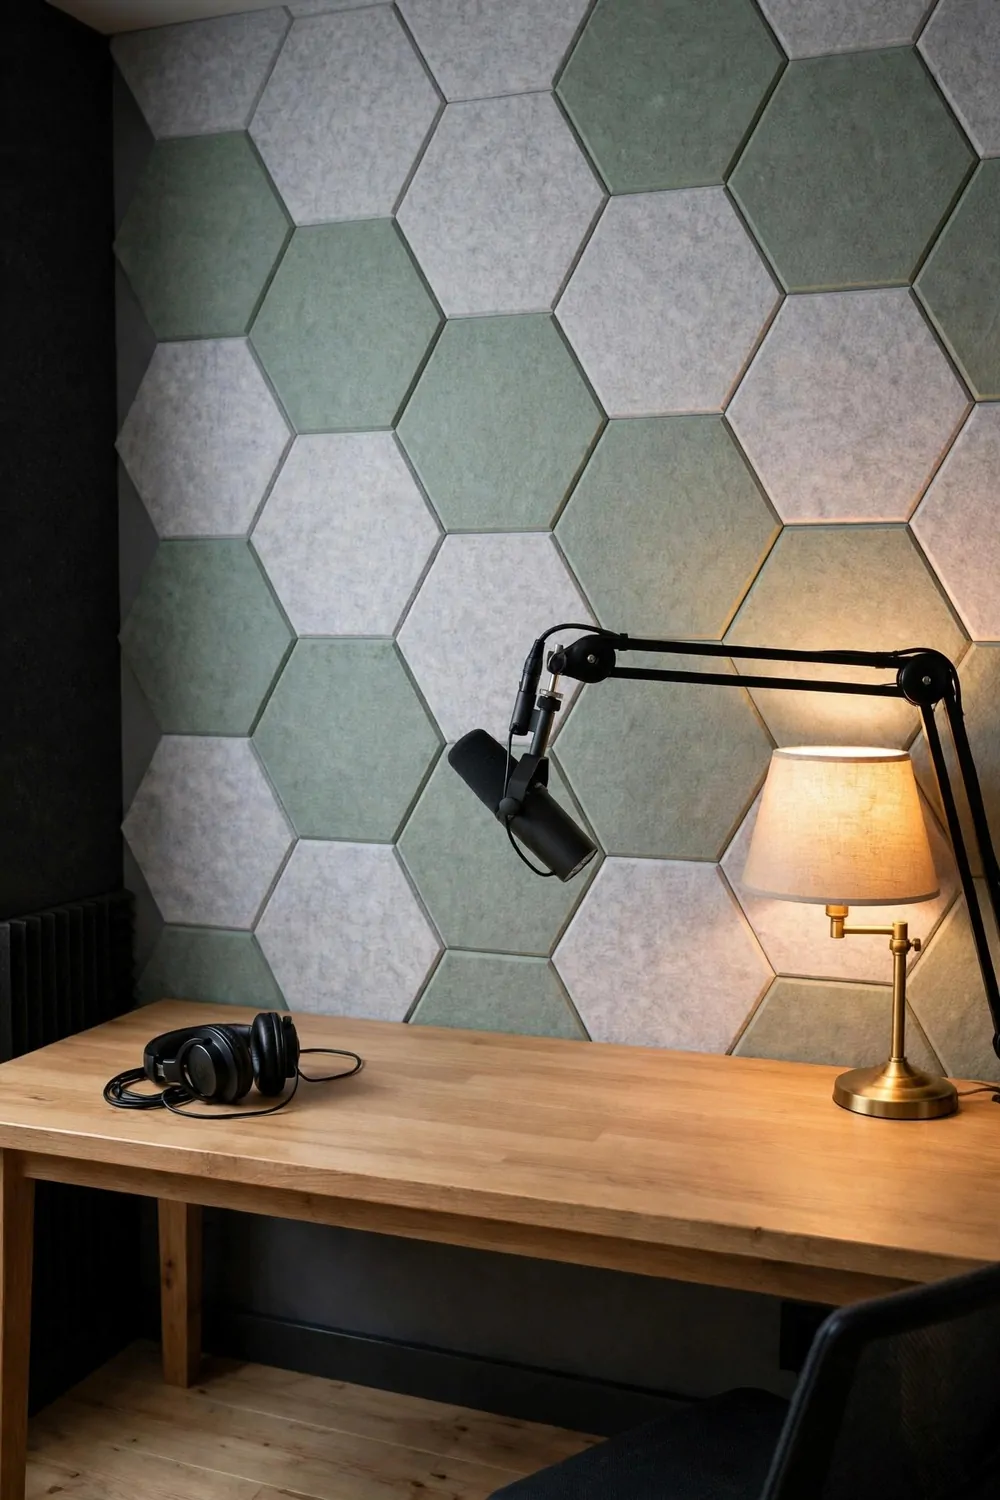
Bad sound ruins good video faster than bad light. Echo makes you sound far away, even when the camera is close. Felt panels fix the echo, and they look great too.
Panels are soft rectangles that hang on the wall and soak up sound. They come in felt, foam, and fabric. Felt looks the best on camera.
Arrange them in a pattern, not a solid block. A grid with gaps, a diagonal row, a scattered layout. A pattern reads as design. A solid block reads as a padded cell.
Put panels on the wall behind you and the wall beside you. Sound bounces off every hard surface. Two treated walls cut the echo more than one wall ever will.
Pick panel colors that match the room. Charcoal, cream, sage, dusty blue. Panels that match the wall look like art. Panels that clash look like an afterthought.
Here is how the main panel types compare:
| Panel type | Look on camera | Cost |
|---|---|---|
| Felt panels | Smart, many colors | Higher |
| Foam panels | Plain, like a recording booth | Lowest |
| Fabric panels | Softest look, custom colors | Highest |
Keep the panels dust free. Felt and fabric collect dust, and dusty panels look gray on camera. A lint roller once a week keeps them sharp.
Test the sound before you commit. Clap once in the room before the panels go up, and once after. Your ears will hear the difference right away.
A felt wall says you care about sound. Viewers may not know the word acoustic, but they feel it. Your voice sounds close and clear, and they stay to listen.
9. The Loft Brick Studio
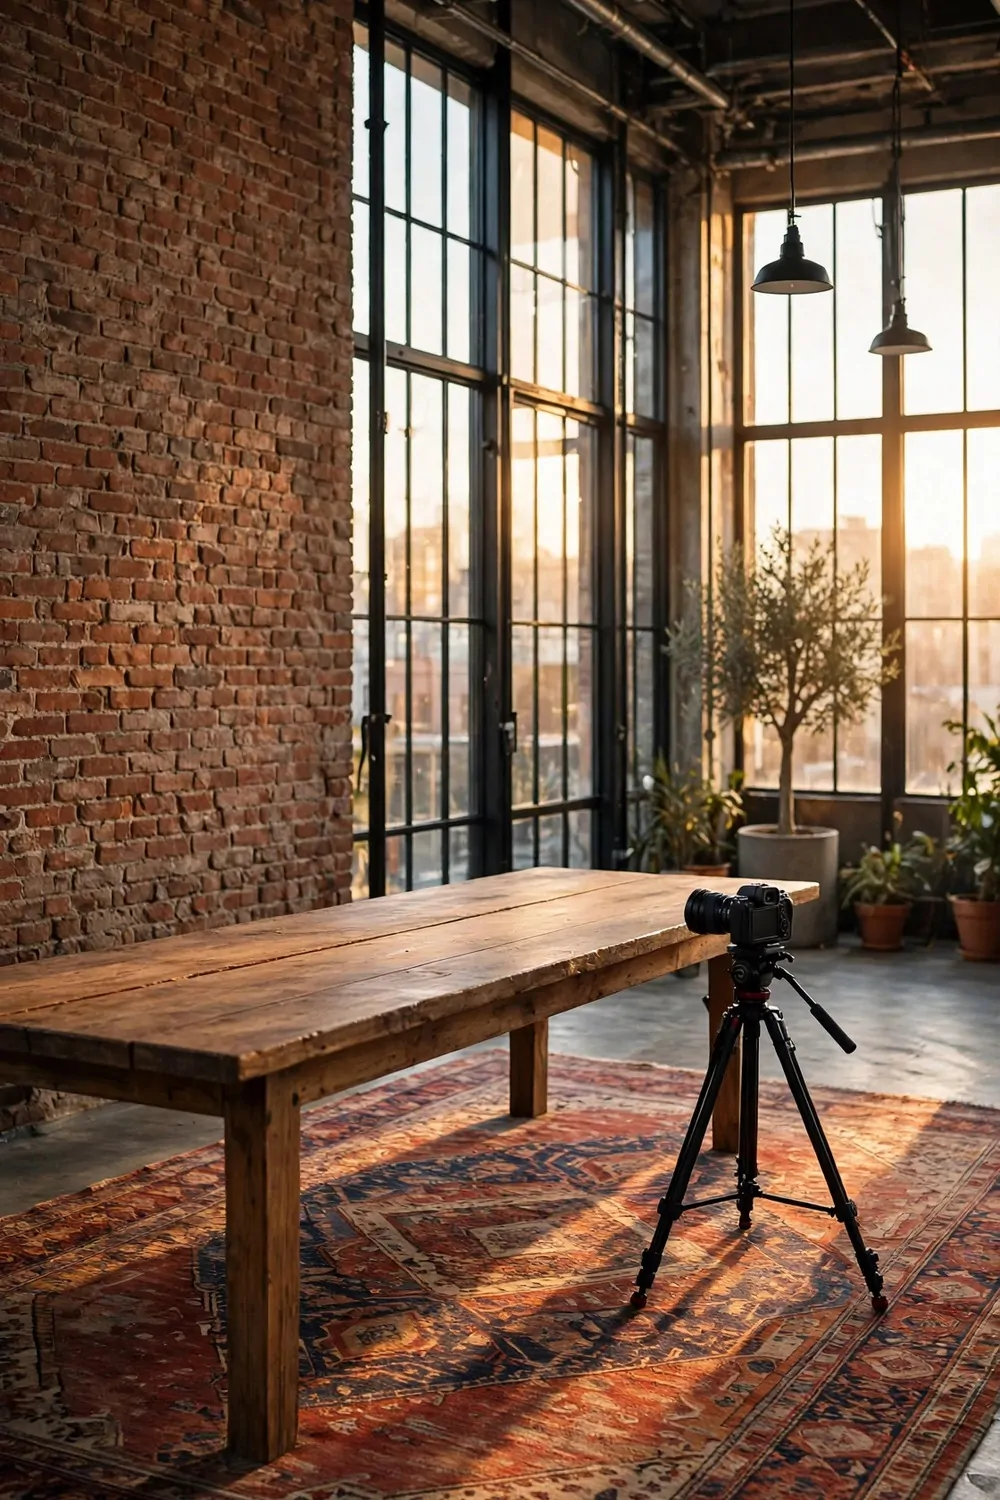
A loft-style frame feels open and creative. High ceilings, big windows, a long table. It looks like the kind of place where big ideas happen.
You do not need a real loft. One brick wall, or one wall of exposed wood, gives you the same feeling. The camera reads texture as loft, even in a normal house.
Let the brick show. Do not cover it edge to edge with posters. The texture of old brick is decoration enough. Leave most of it bare.
Put the long table near the window, not against the back wall. Daylight is the best lamp you will ever own. Your footage looks true in color.
Use stools that tuck fully under the table. Stools save floor space, and they keep the frame feeling airy. Pick ones with a footrest.
Hang one big thing on the wall. A mood board, a large print, a row of color swatches. In a tall frame, small pictures get lost. One big piece gives the eye a place to land.
A rug under the table softens the sound. Loft floors are hard, and sound bounces everywhere. One big flat rug under the filming zone makes your voice sound calmer.
Warm lamps finish the look. Bare bulbs on long cords, hung at different heights. The warm glow against brick feels like evening, even at noon.
A loft frame is not about size. It is about light, one long table, and room to breathe. Give your videos the window, and the window will give you the look.
10. The Pastel Two-Tone Studio
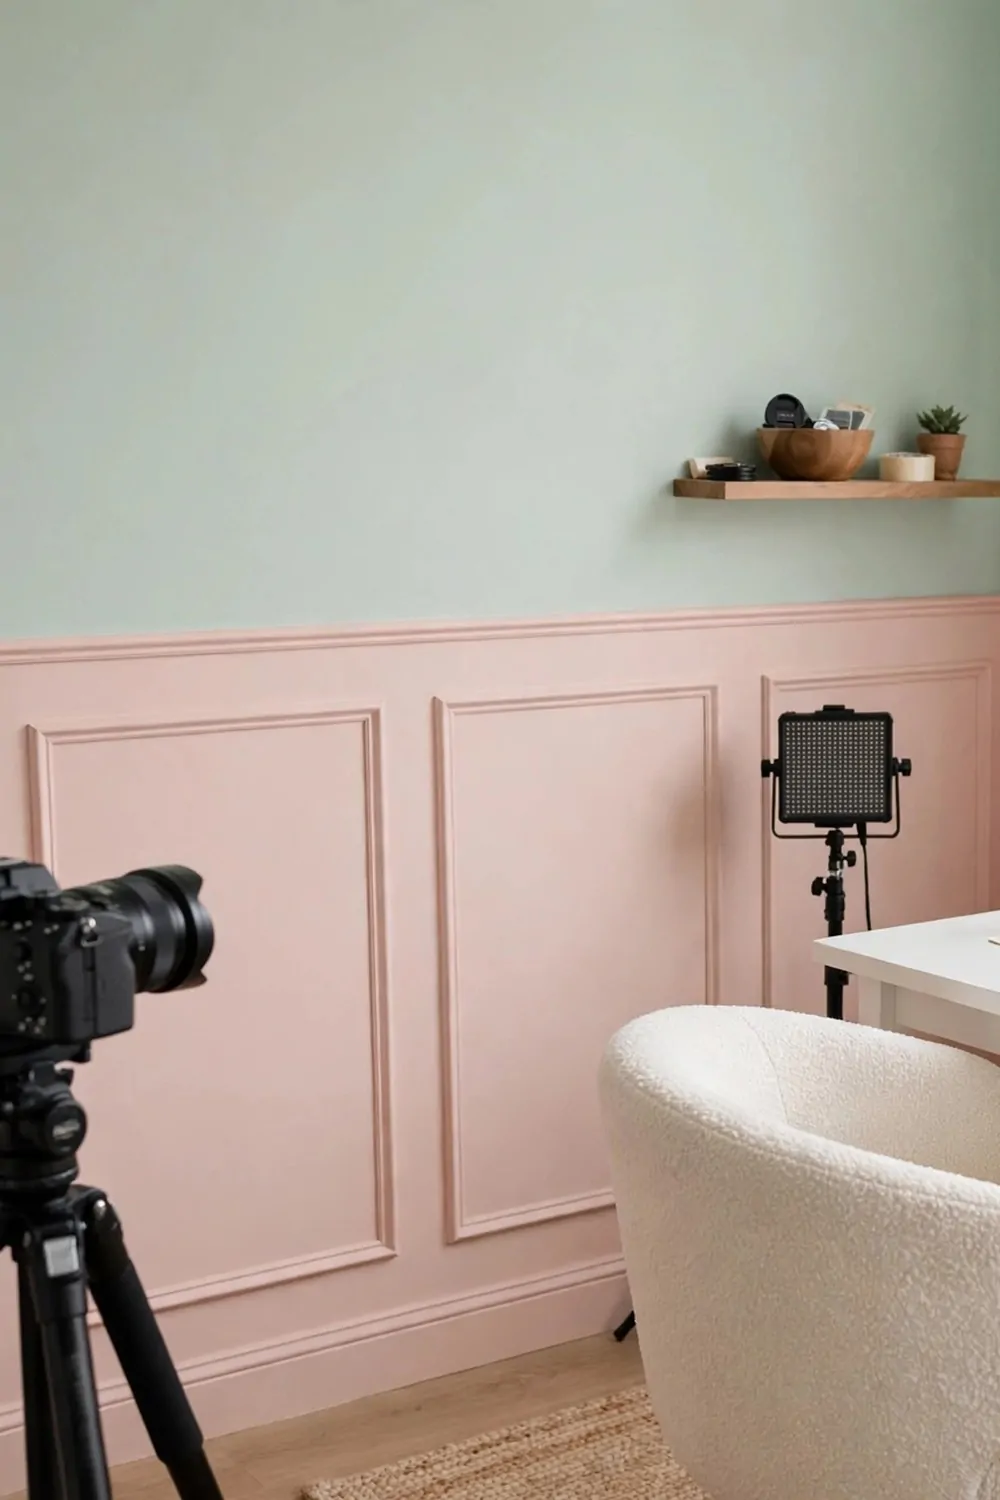
Two pastel colors on one wall make a frame feel gentle and modern at the same time. Blush below, mint above. Or lilac and butter yellow. The split is the design.
Paint the split at picture rail height, about two thirds up the wall. A clean straight line matters here. Use painter’s tape and take your time. A wobbly line shows up on camera.
Pick two pastels, not five. Two soft colors play nicely together on camera. Five pastels in one frame turn into a candy shop.
Keep the big furniture white. A white desk and white shelves let the two-tone wall do all the talking. When the furniture competes, the frame gets noisy.
Curves soften everything on camera. A round rug, a curved chair, a vase with a round belly. Sharp corners in a pastel frame feel like a mistake.
Light should be soft and diffused. Sheer curtains, a paper shade, no bare bulbs. Pastel walls glow in soft light and go washed out in harsh light.
Keep the desk almost empty. One notebook, one pen, one small plant. A pastel frame with a cluttered desk looks like a messy bedroom.
Fresh flowers help if you film often. One small vase on the desk, changed weekly. Flowers in a pastel frame look like they grew there.
Soft, calm, and kind. A two-tone pastel wall is proof that gentle frames can hold serious videos, and viewers stay longer in gentle rooms.
11. The Floating Shelf Gallery
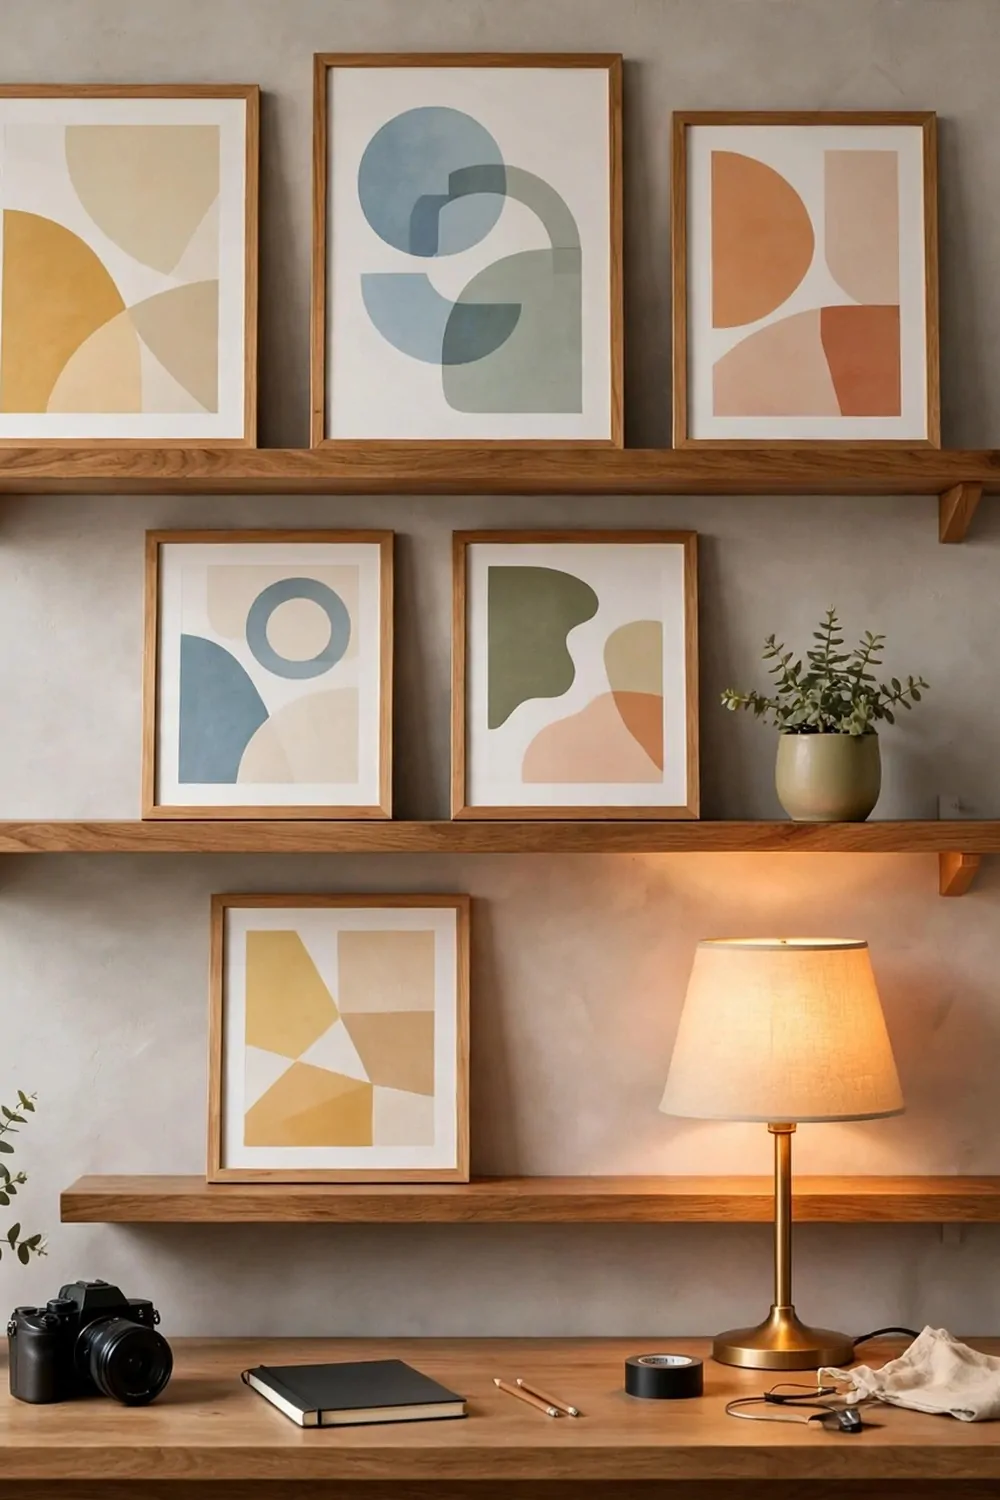
Floating shelves give your videos a backdrop with personality. Framed prints, small objects, and art, hung in a neat group behind you.
Hang the shelves at eye level, in a tight group. A group with even gaps reads as one display. Shelves scattered across the wall read as leftovers.
Use matching frames on the shelves. Same color, same thickness. Matching frames turn a mixed set of prints into one deliberate collection.
Keep the prints simple. Bold shapes, big color blocks, one strong image each. Busy prints fight each other on camera. Simple prints sit quietly and look good.
Style each shelf with three things. A frame, a small object, a plant. Three things per shelf is the sweet spot. One thing looks empty. Five things look crowded.
Light the shelves, not just yourself. A small picture light or a lamp aimed at the frames stops them going dark on camera. A dark gallery wall looks like a cave.
Change one frame now and then. Swap a print when a season changes, or when you finish a project. A gallery that changes stays fresh.
Keep the shelves dusted. The camera sees dust on frames faster than your eyes do in the room. A quick wipe before filming keeps the gallery honest.
One wall, one group, one set of matching frames. A floating shelf gallery is the easiest way to make a plain room look like a creator lives there.
12. The Warm Wood Slat Studio
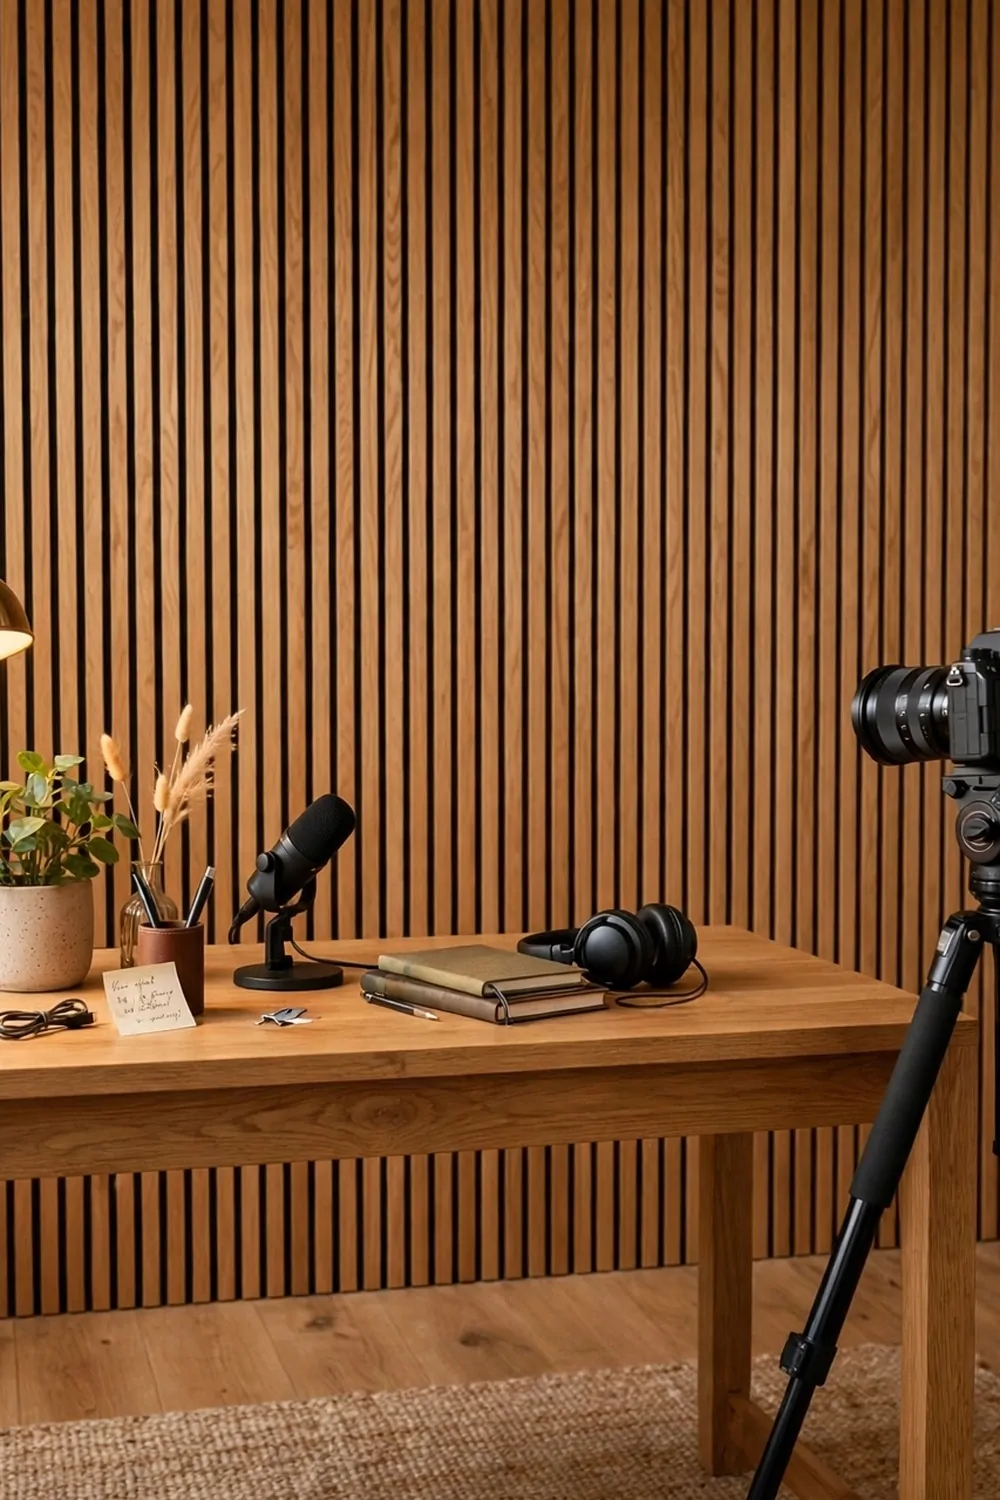
Vertical wood slats make a wall look expensive. Thin strips of oak, spaced evenly, floor to ceiling. The camera reads the rhythm of the lines, and the frame feels calm and modern.
You can buy slat panels ready-made, or fix thin battens to the wall yourself. Ready-made panels cost more and go up in an afternoon. Battens cost less and take a weekend.
Keep the slats in one wood tone. Honey oak is the safest choice. Mixed tones fight, and the fight shows up on camera even when you cannot name it in the room.
Put a warm lamp in front of the slats. Light raking across the strips makes shadows between them, and the shadows are half the look. Flat light kills the effect.
Keep the desk simple. A plain oak desk and one brass lamp. The slat wall is doing the work. A busy desk in front of it makes the frame noisy.
A plant softens the lines. One trailing plant on a shelf, or one tall plant in the corner. Green against honey wood never fails.
Sit a little forward from the wall. The camera needs to see the slats behind you, not the back of your chair touching them. A foot of space keeps the depth.
Wood ages well on camera. Scratches read as character, not damage. A slat wall gets prettier the longer you use it.
Warm, lined, and calm. A wood slat wall turns a flat room into a studio that looks designed, and it never goes out of style.
13. The Corner Desk Command Studio
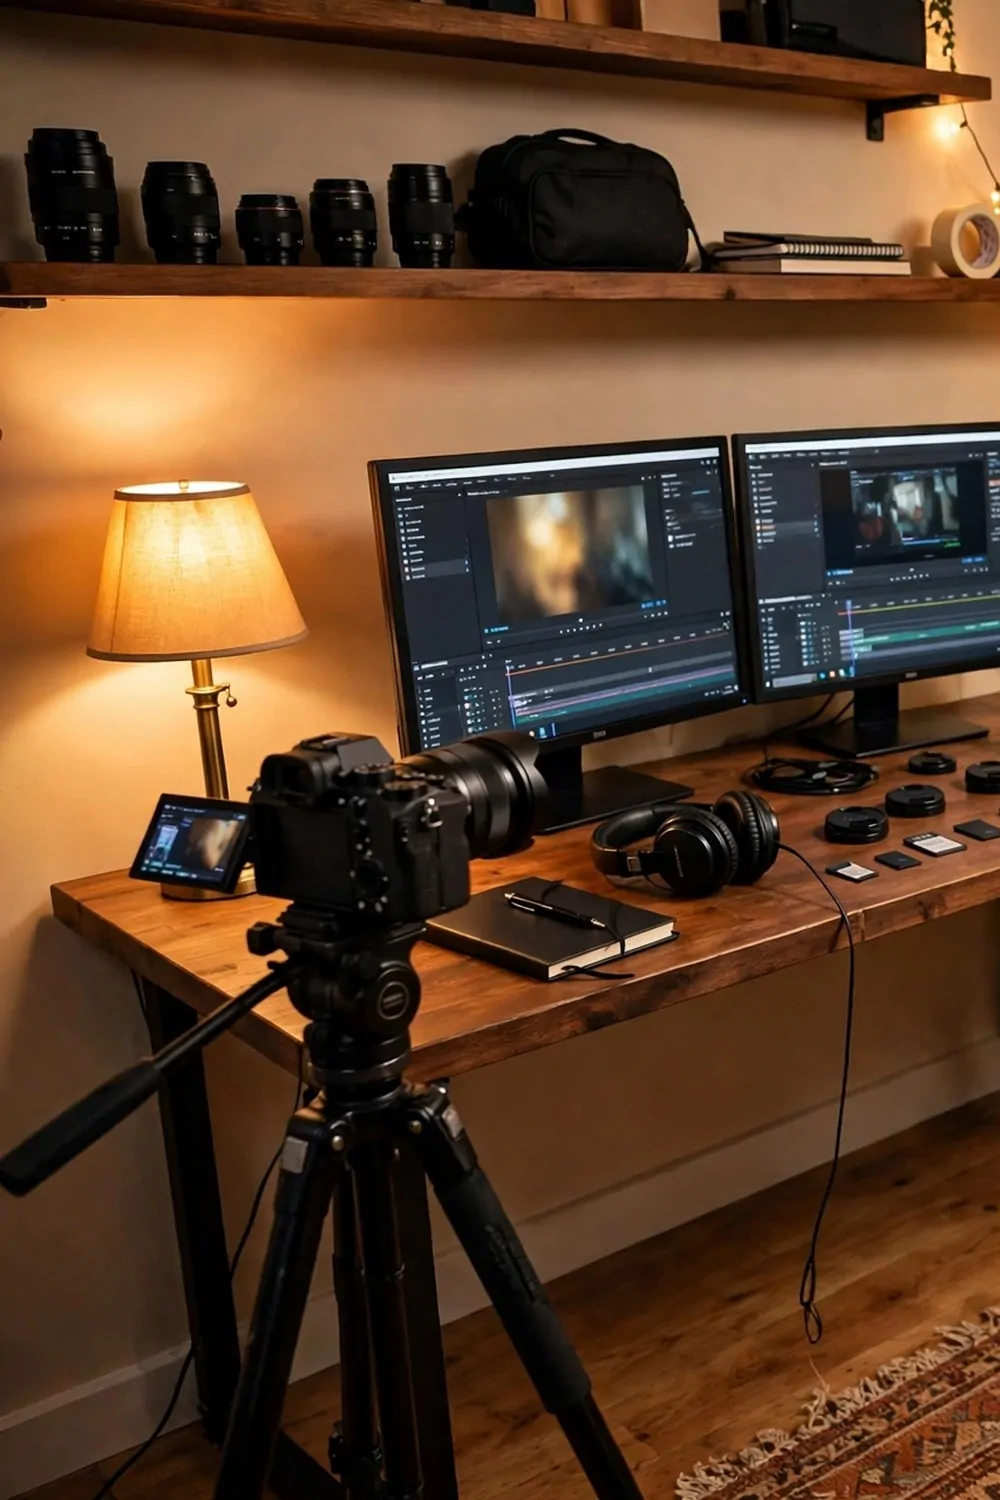
An L-shaped desk in a corner gives you two camera angles for the price of one room. Film facing one wall, then turn the chair and film facing the other. Two looks, no moving furniture.
Put the desk tight into the corner, both arms touching the walls. No gaps. A desk that touches both walls reads as built-in, even when it is just boards on brackets.
Set one camera on each side. A main camera for talking, a second camera for close-ups and cutaways. Two angles make editing easy, and easy editing means more videos.
Keep cables off the floor. Corner desks have more cables in shot, and tangled cables read as chaos. Run them along the desk legs with clips.
Light both sides. One lamp for each angle, matched in color. Two different lamp colors make the two angles look like two different rooms.
Here is the corner kit in one list:
- L-shaped desk, both arms wall to wall
- Two cameras, or one camera and one phone
- Two matched warm lamps
- Cable clips on both desk legs
- One rug to mark the corner
The rug matters. It marks the corner as a place, and it softens the sound. A bare floor in a corner bounces your voice around.
Keep one side tidy at all times. When you film angle one, angle two is out of shot, but it still needs to be ready. Tidy both sides before you start.
A corner command desk is a studio with options. Two angles, two lamps, one corner, and your videos never look the same twice in a row.
14. The Ring Light Halo Studio
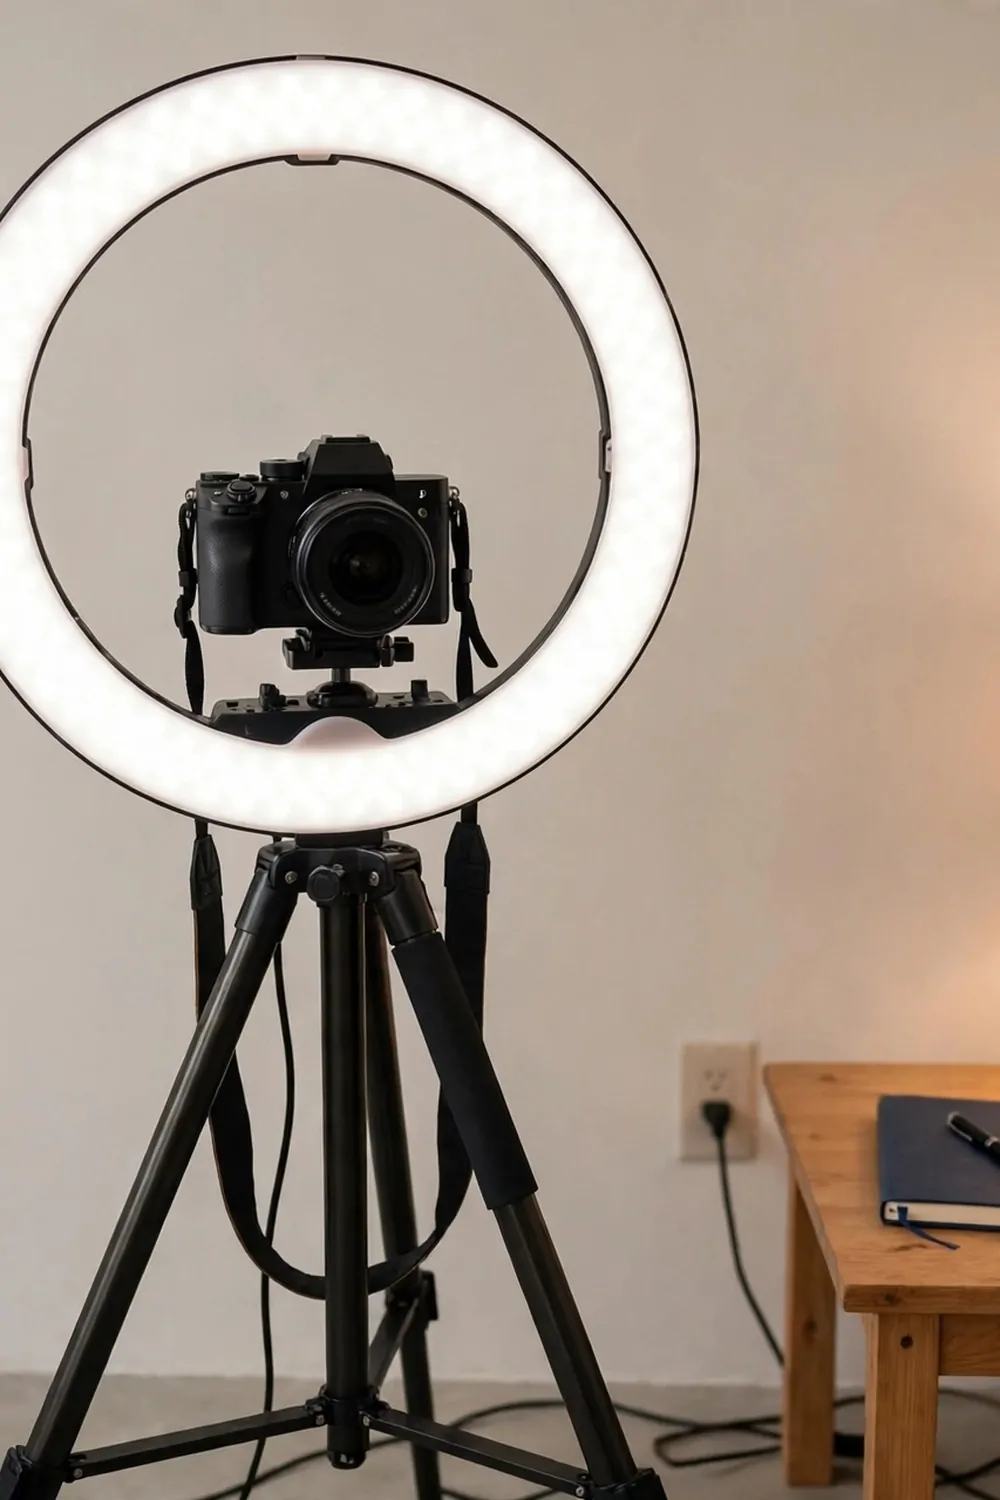
A ring light is the one piece of gear almost every creator owns. It puts a soft circle of light right around the camera, and it flatters faces like nothing else in its price range.
Place the ring light directly in front of you, with the camera in the middle of the ring. The light should sit at eye level, about an arm’s length away.
Too close and it flattens your face. Too far and it stops helping. An arm’s length is the sweet spot in most rooms.
Use the ring light as your main light, not your only light. One small lamp behind you stops the background going dark. A lit background and a lit face together look like a real studio.
Dim the ring light a little. Full power washes out skin and makes eyes look glassy on camera. Three quarters power is the sweet spot for most rooms.
Keep the ring light out of your glasses if you wear them. Tilt the light a few inches up or down until the reflection moves off the lenses. Check the frame before you record.
A plain wall works best with a ring light. The even light shows every mark on a busy wall. A calm wall lets the light do its work.
Ring lights are cheap, small, and kind. One ring, one lamp behind you, one plain wall. That is a studio that fits in a corner and films like a pro.
A ring light corner fits in the smallest room. One corner, one ring, one lamp, and you have a studio that is ready in two minutes.
15. The Green Screen Cove
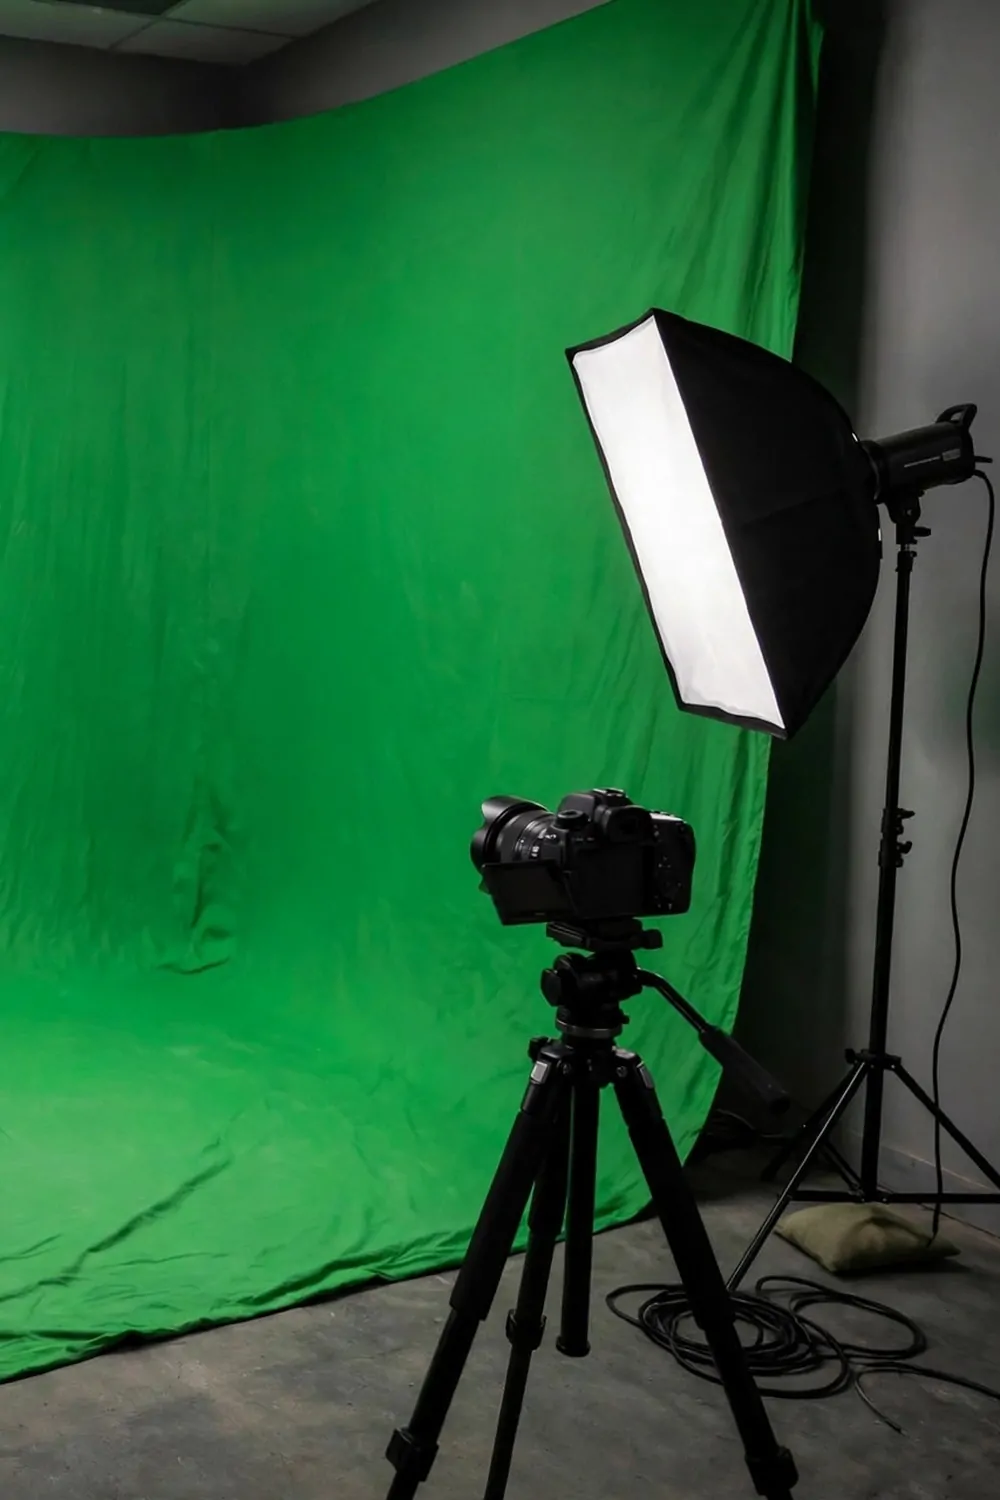
A green cove lets your background be anything. A beach, a city, a graphic, a photo of your dream office. The camera sees green, and the software swaps it for whatever you choose.
A cove is a corner with no sharp edge. The wall curves into the floor, so there is no line for the software to trip over. Curves key cleanly. Corners do not.
Hang the green fabric flat and tight. Wrinkles are the enemy. A wrinkled screen casts shadows, and shadows break the key. The edge around you goes fuzzy.
Light the screen on its own, apart from yourself. Two soft lights aimed at the fabric, one from each side. An evenly lit screen keys cleanly.
Stand three feet in front of the screen. Too close and green light spills onto your hair and shoulders. Green spill makes your edges glow, and no setting fixes it fully.
Wear no green. Not a green top, not green jewelry, not a green logo. The software removes green, and it will remove your shirt too. Blue, red, and cream are safe.
Keep the screen wider than your shoulders by a good margin. The frame should show green edge to edge behind you. If the wall shows at the edges, the illusion breaks.
A green cove is a studio with no limits. One curved screen, two even lights, three feet of space. Your background can change every video.
A green cove is easy to store too. Fold the fabric, lean it in a corner, and the room goes back to normal until the next video.
16. The Vintage Film Studio
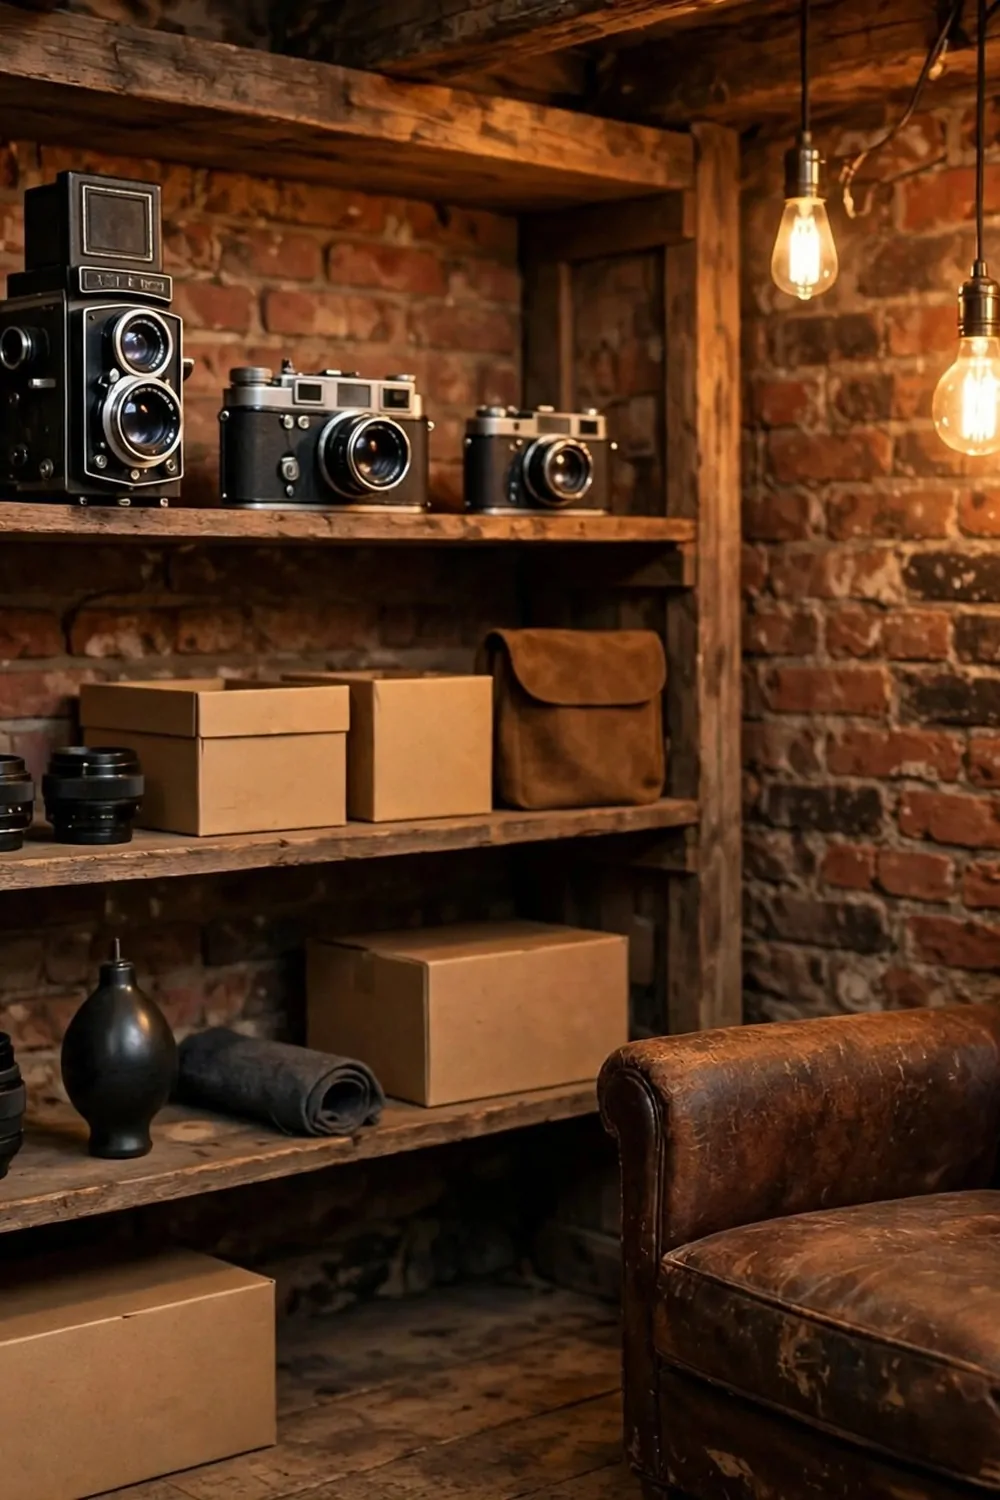
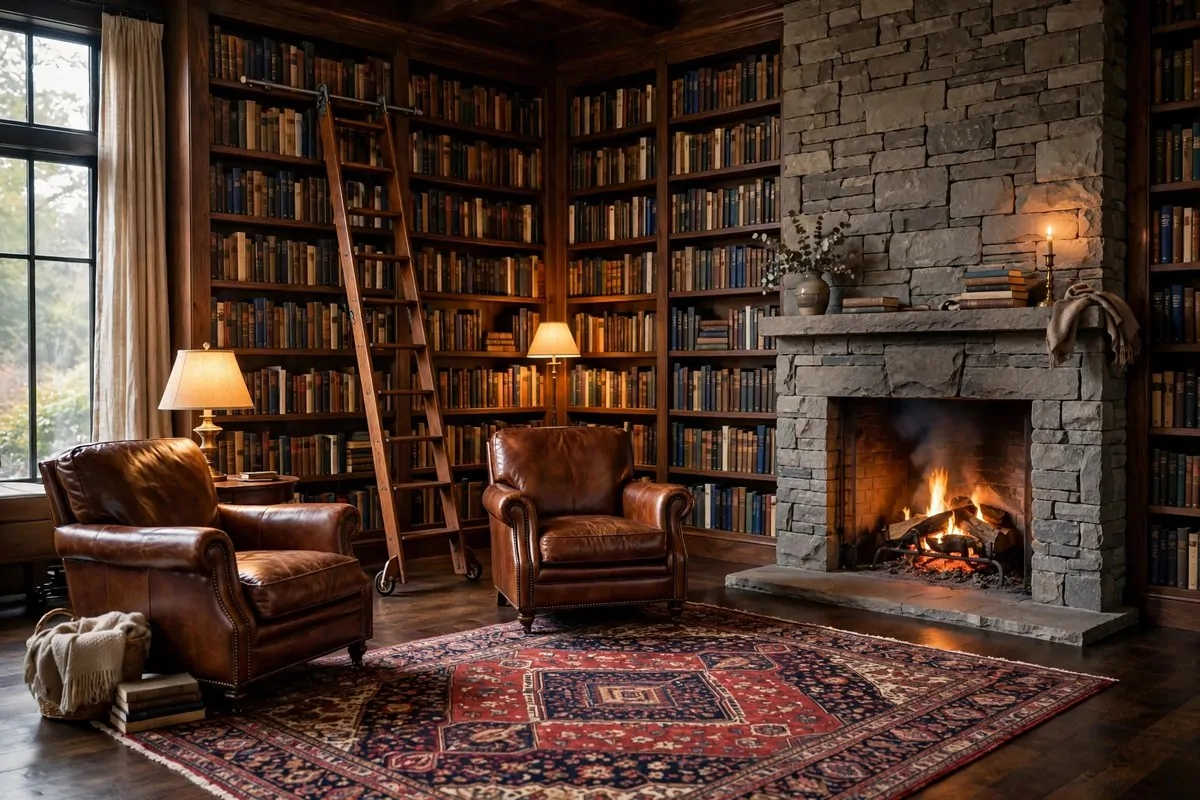
A vintage corner on camera feels like a story. Old cameras, warm lamps, a worn leather chair. It tells the viewer you have been around and you have taste.
Start with one old piece. A film camera on a shelf, a brass lamp, an old projector. One real old object anchors the whole frame.
Warm light is everything here. Edison bulbs on long cords, a bench lamp with a green shade. The warm glow against old wood feels like evening in a workshop.
Keep the modern gear hidden. A laptop is fine, but a tangle of chargers is not. Hide the chargers in a wooden box. The camera should see the vintage corner, not the power strip.
Group small old things in threes. Three tins, three lenses, three books. Threes look collected on camera. Rows look like a shop shelf.
Dust the old things before you film. Vintage rooms collect dust fast, and dusty shelves look abandoned on camera. A weekly wipe keeps the corner feeling loved.
One modern touch saves the frame from feeling like a museum. A clean plant, a new notebook, a fresh mug. The mix of old and new makes it feel alive.
Keep the background a little dark. Vintage looks best in warm low light. Bright white light makes old things look washed out and tired.
Old cameras, warm light, worn leather. A vintage corner borrows the past to make your videos feel solid, and solid is what makes viewers trust you.
17. The Minimal Monochrome Studio
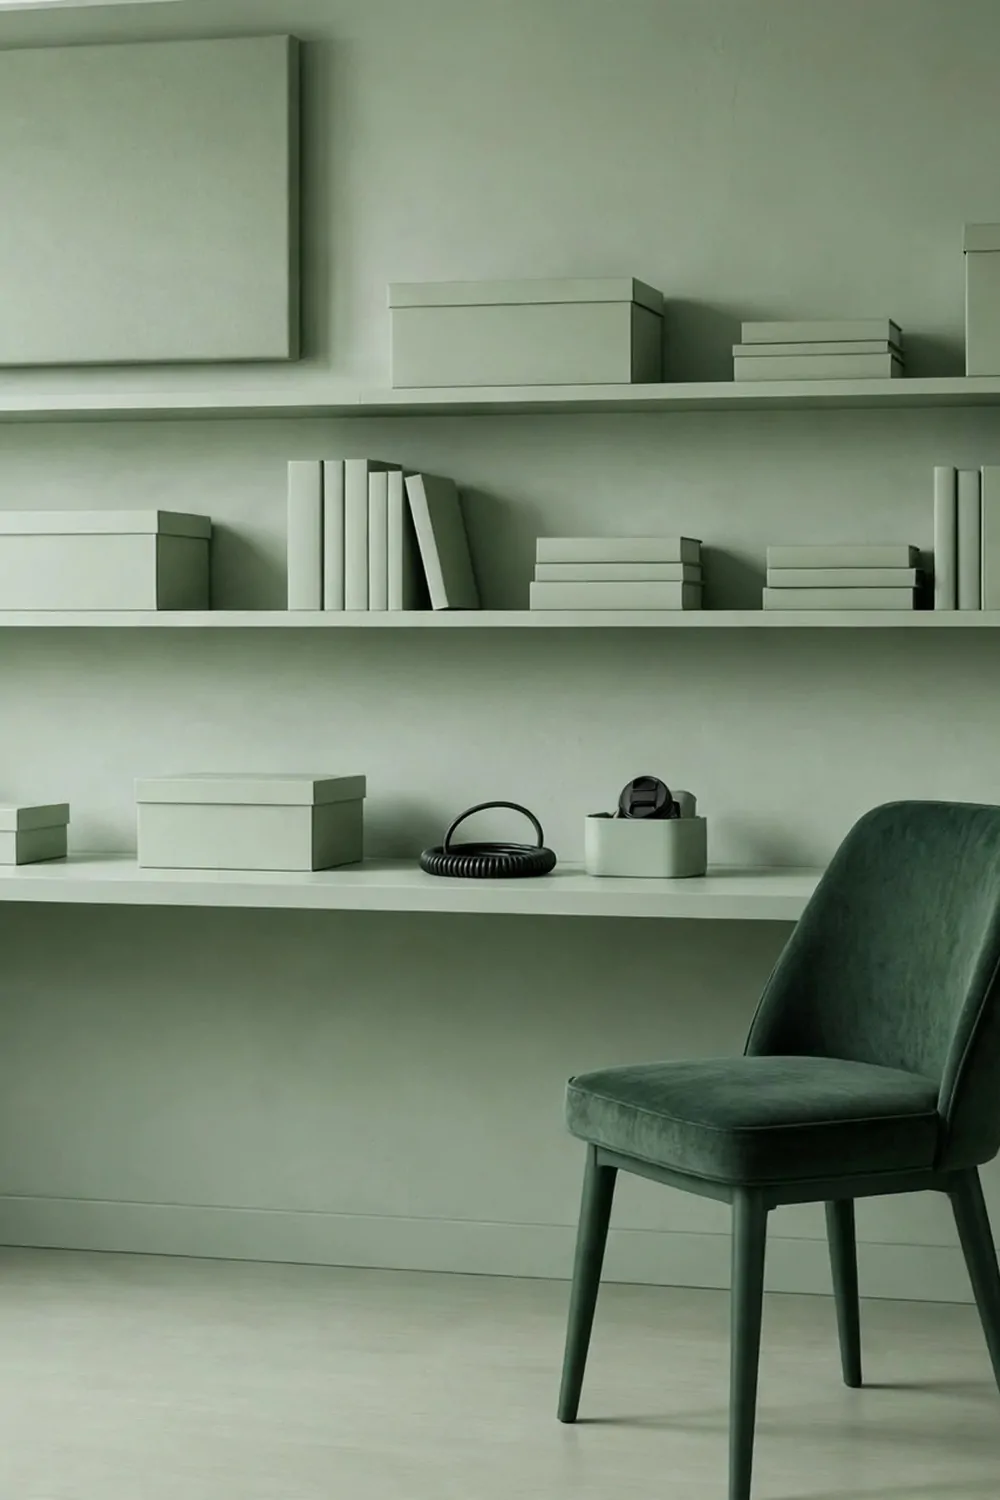
A monochrome studio is one color, everywhere. Walls, desk, shelves, all in the same family. Sage green, warm cream, dusty blue. The frame feels calm because nothing fights.
Pick one color and stay in its family. Light sage on the walls, deeper sage on the chair, soft sage on the shelves. Same family, different depths. That is the whole trick.
Texture does the work that color usually does. Felt, wood, linen, matte paint. Different textures in one color keep the frame interesting without breaking the calm.
Keep the desk almost empty. One laptop, one notebook, one vase. In a monochrome frame, one object carries more meaning than ten.
Cables are the enemy here. One dark cable across a pale green desk ruins the whole look. Run cables down the back leg, clipped tight.
Light the room evenly. Harsh shadows break the calm. Soft diffused light from a window and one paper lamp keeps the single color looking smooth.
Sit with good posture. A monochrome setup shows your whole upper body, and slouching shows too. Sit tall, and the frame looks confident.
One accent is allowed. One chair a little darker, one lamp a little warmer. One break in the color is a focal point. Two breaks is a pattern, and patterns need a plan.
Minimal and monochrome never go out of style. One color, well done, looks more expensive than five colors done halfway.
18. The Standing Set Studio
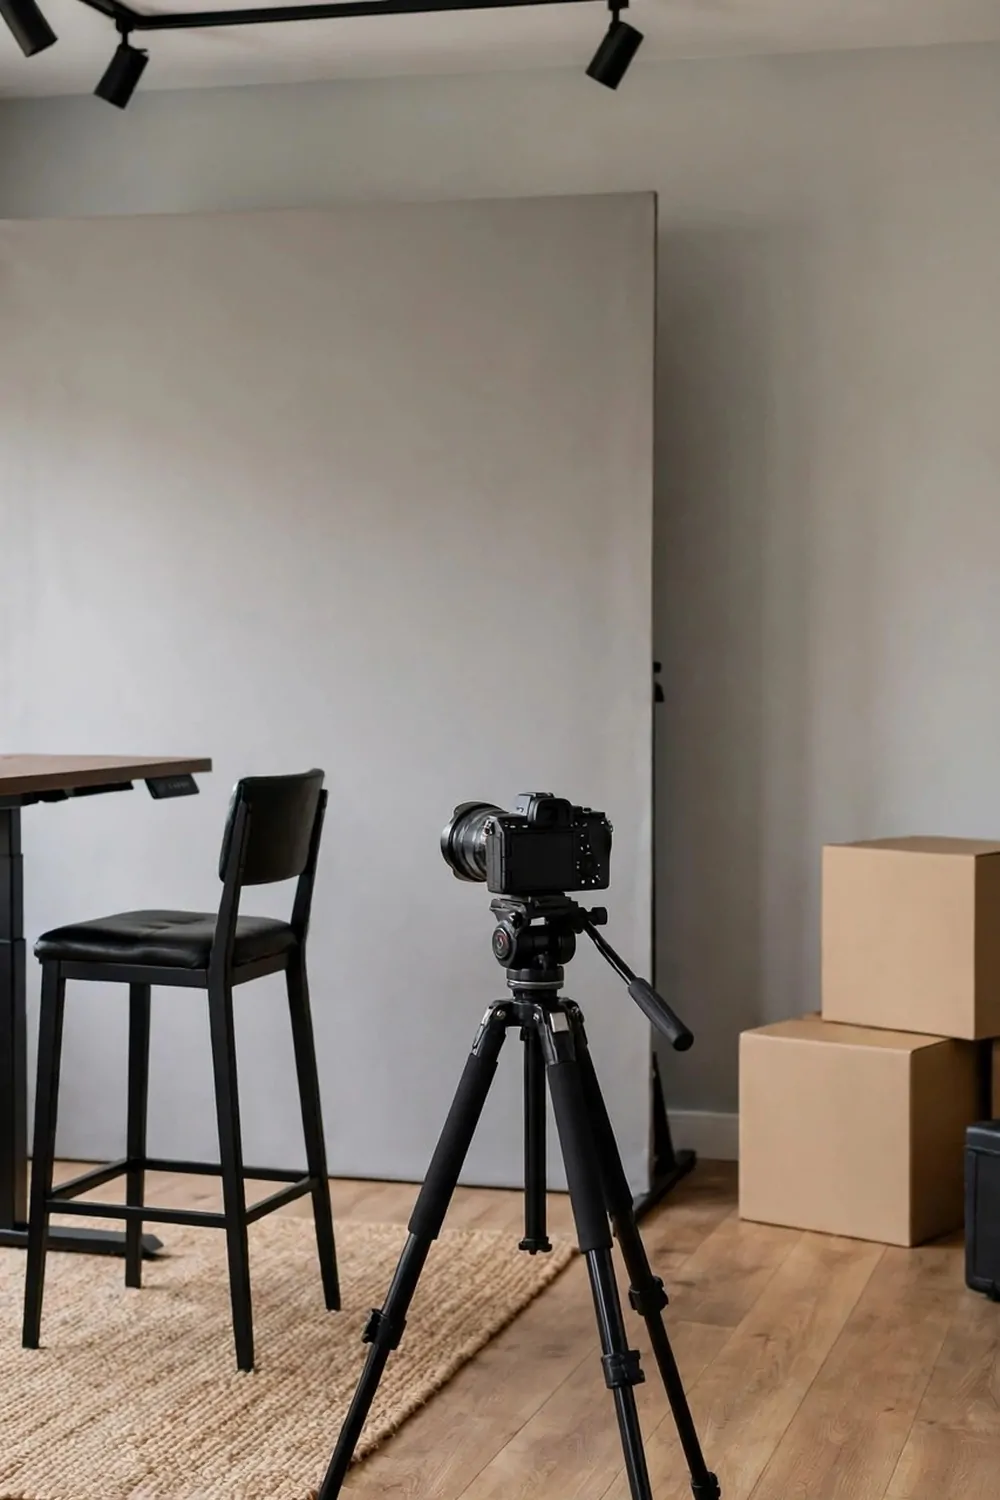
Standing on camera changes your energy. You move more, you gesture more, and your voice sounds more awake. Viewers can feel the difference.
The desk height matters more than the desk itself. Your elbows should rest at a right angle, and the camera should sit at eye level. A camera looking up at you is a bad angle for everyone.
A tall backdrop panel behind the standing desk keeps the frame tidy. One plain panel, taller than you are, in a calm color. The panel hides the rest of the room.
Here is a simple setup guide for a standing set:
| Part of the setup | Set it like this |
|---|---|
| Desk surface | Level with your elbows when you stand tall |
| Camera lens | Level with your eyes, never below your chin |
| Backdrop panel | Top edge a hand’s width above your head |
| Microphone | A fist below your chin, just out of frame |
Use a tall stool, not a chair. A stool lets you perch between takes without leaving the frame. A chair invites you to sink down, and sinking changes the angle mid-video.
Keep cables off the floor. Standing setups have more cables in shot. Run them up the desk leg with clips, and keep the power strip in one box.
A rug under the desk softens the sound. Hard floors bounce your voice around. One flat rug under the standing zone calms the echo.
Film in short blocks. Standing is tiring, and tired shows on camera after twenty minutes. Ten minute blocks, a sit down, and go again.
A standing set is a studio with energy. Stand up, set the camera at eye level, and watch your videos wake up.
19. The Cozy Nook Studio
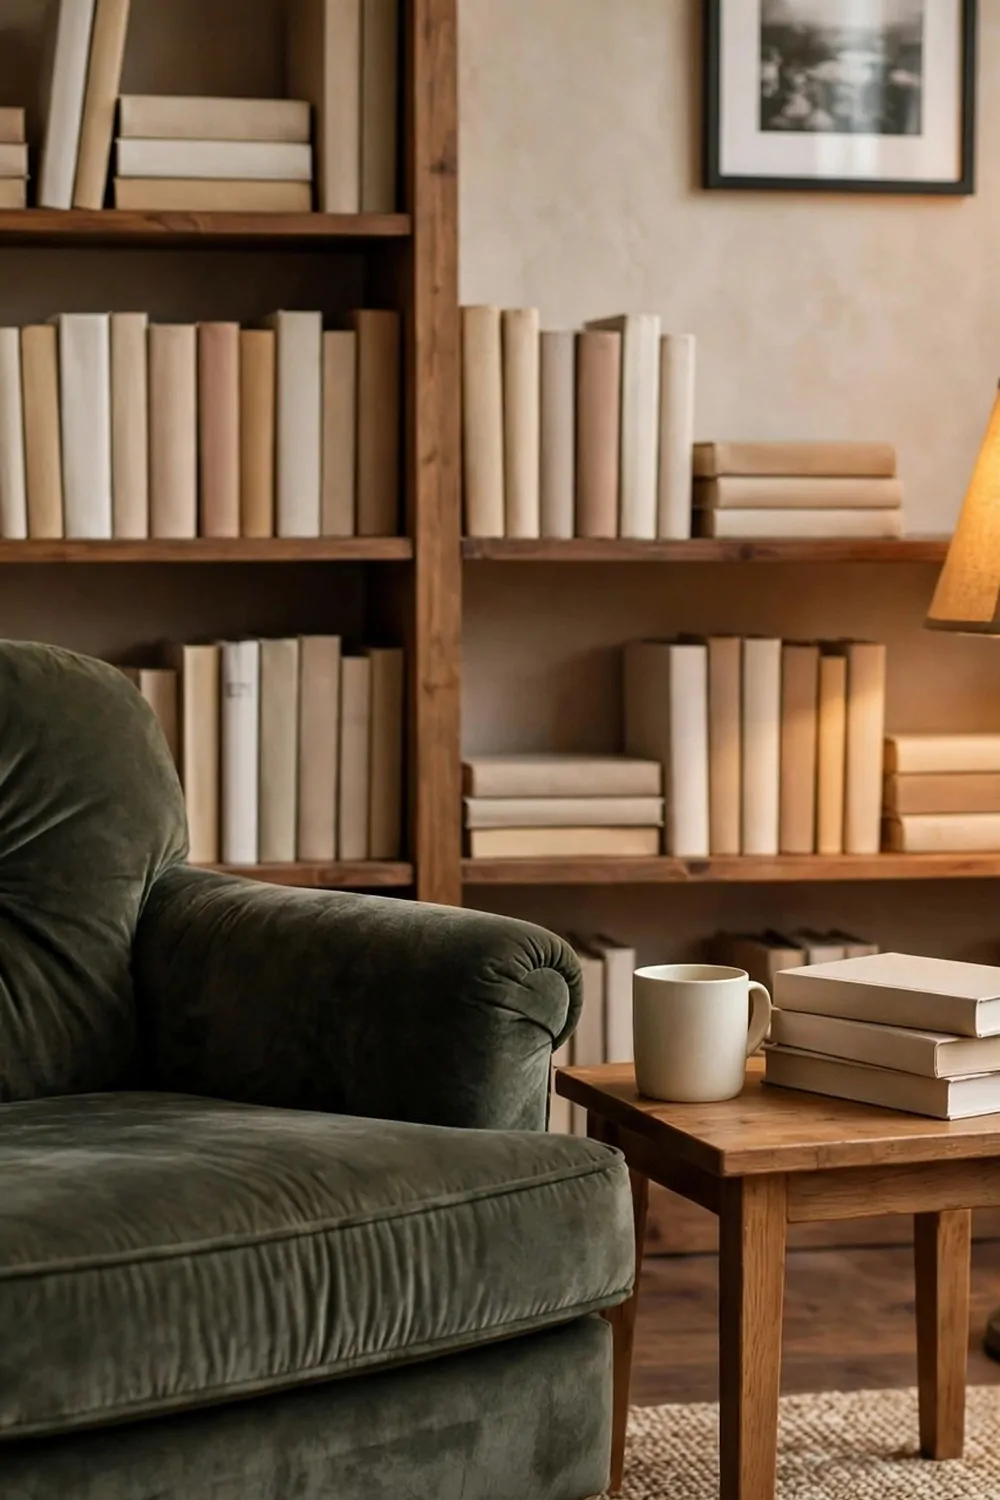
A cozy nook on camera feels like a warm invitation. A soft chair, a lamp, a shelf of books. The viewer wants to sit down and listen.
The chair is the star. A deep armchair with soft cushions, placed at a slight angle to the camera. Straight on looks stiff. A slight angle looks natural.
Put a warm lamp beside the chair. A lamp with a fabric shade, at shoulder height when you sit. The lamp lights your face from the side, which is flattering.
Keep a small side table in the frame. A mug, one book, one small plant. Three objects is the sweet spot. An empty table looks cold. A crowded table looks messy.
A soft throw over the chair arm adds texture. Wool, chunky knit, or soft fleece. Texture reads beautifully on camera.
Keep the nook tidy behind the chair. The camera sees over your shoulder, and a pile of laundry behind a cozy chair ruins the illusion.
Here is the nook checklist I run before every interview-style video:
- Chair angled, not straight on
- Lamp warm and at shoulder height
- Side table with three things only
- Background tidy to the edges of the frame
- One throw, one cushion, nothing more
Film nook videos in the evening if you can. Lamplight and a dark window make the nook feel like the coziest corner in the house.
A cozy nook setup invites the viewer to slow down. Soft chair, warm lamp, one good book, and the video feels like a chat by the fire.
20. The Night Glow Studio
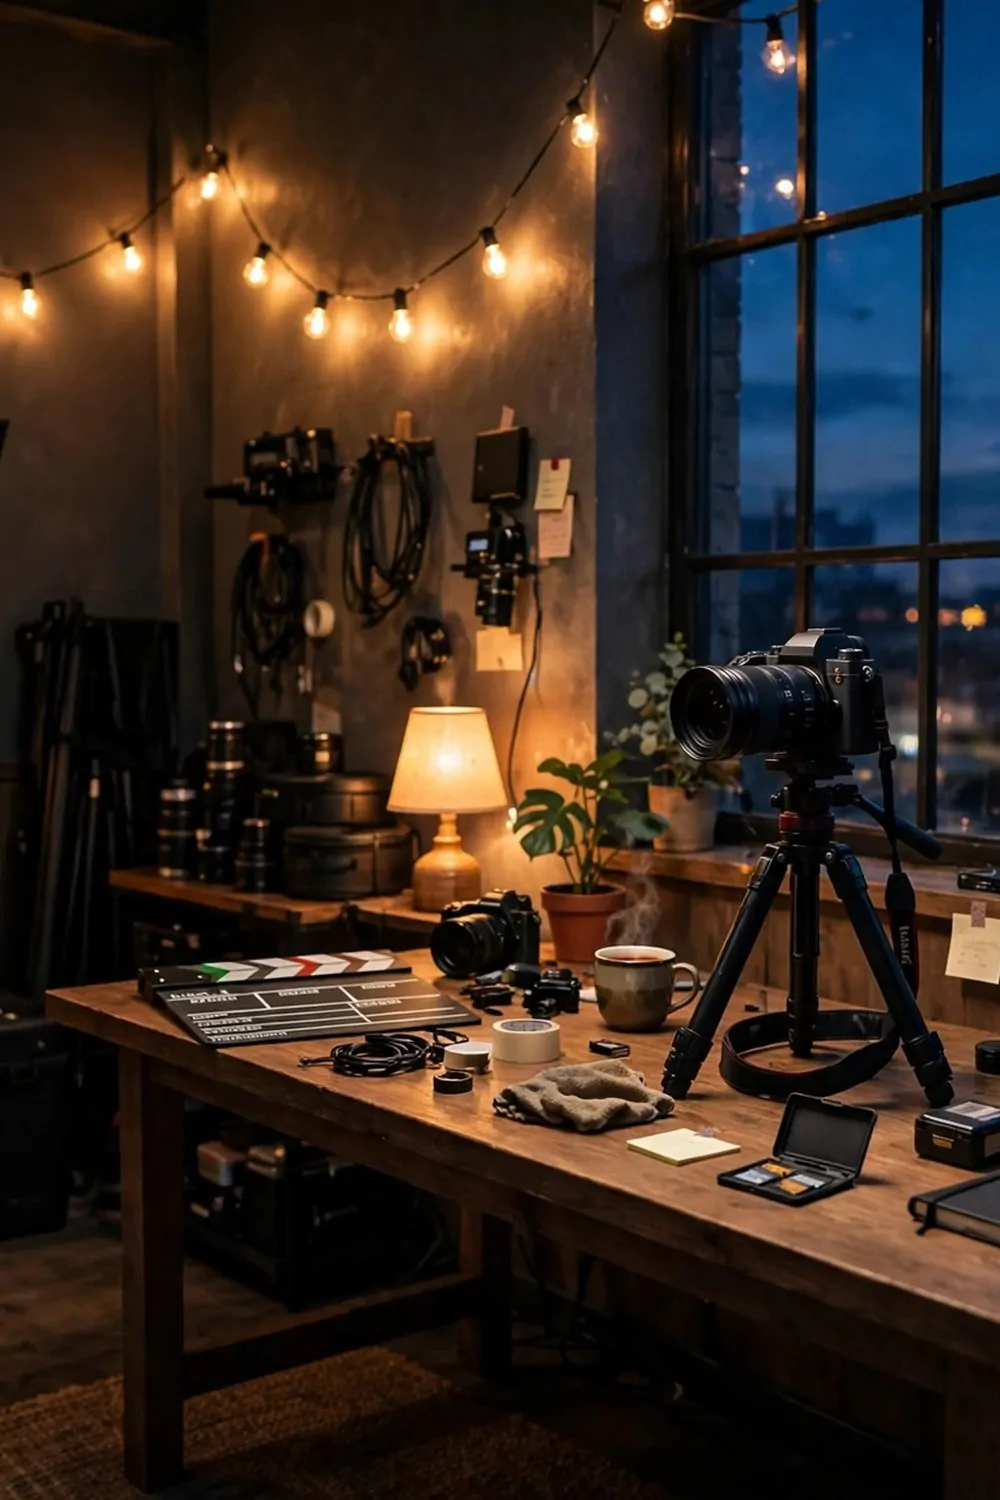
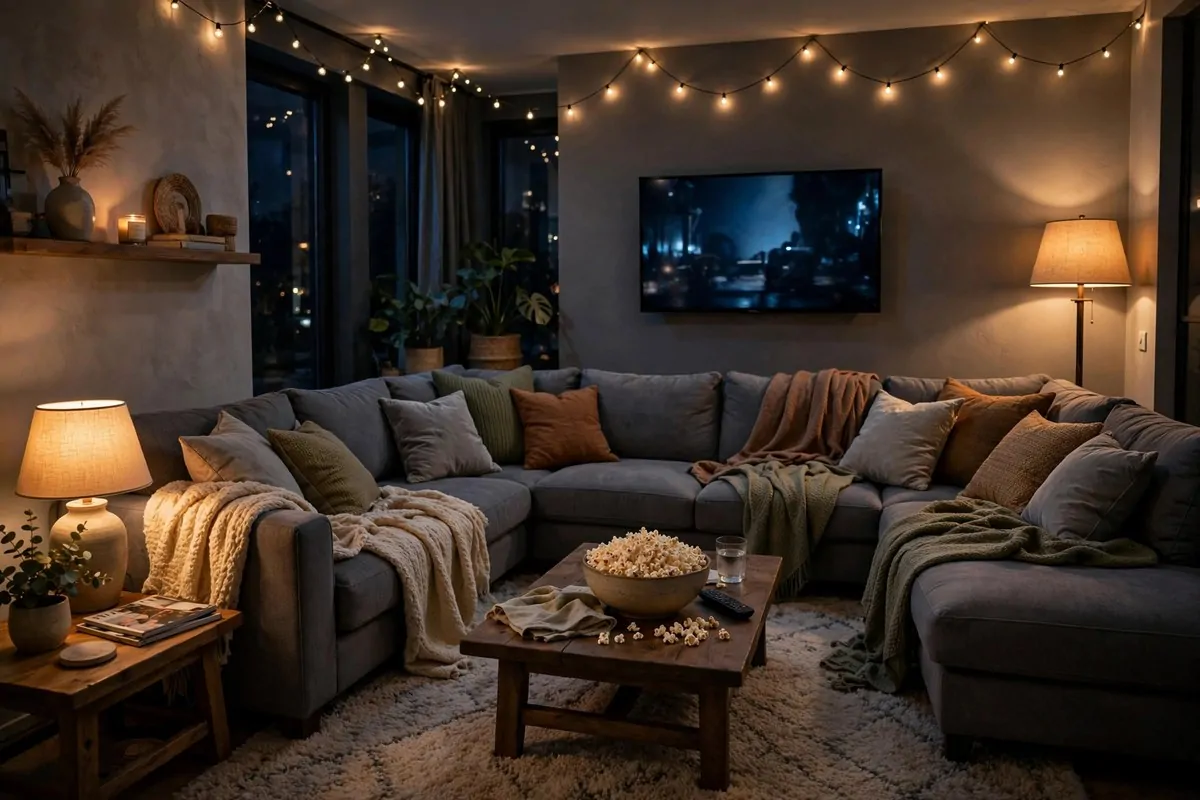
By day this setup is plain and practical. By night it turns into the prettiest frame on your channel. Warm lamps, string lights, and a window full of evening sky.
The big ceiling light is the enemy here. It flattens everything and kills the mood. Turn it off at sunset and film by lamp light alone.
Layer three kinds of light, and the frame changes its mood with one click:
- A floor lamp beside your chair, for warm side light
- A small table lamp on the desk, for close glow
- A string of warm lights along a shelf, for pure magic
Warm bulbs, always. Around 2700K on the box. Warm light makes skin look good, and rooms feel like evening. Cool white light at night feels like an office that forgot to close.
Put one lamp on a timer. A lamp that switches itself on at dusk means you sit down to a glowing room, not a dark box.
Dim your screen before you film. A glowing laptop fights the lamps and wins. Lower the brightness, and the frame keeps its glow.
Keep the window uncovered after dark. The evening sky and the distant lights are part of the look. A curtain drawn at dusk hides the best view the setup owns.
Check the frame for reflections. Lamps reflect in windows and glossy screens. One reflection is charm. Five reflections is a mess. Move one lamp and check again.
A night glow setup welcomes viewers in. Turn the big light off tonight, let the lamps do their work, and watch your videos feel warmer.
That is all twenty. Twenty designs, twenty ways to prove the same thing. A video that looks great does not need a big room or a big budget. It needs one good corner, one good light, and a background that stays calm.
You do not need to copy a whole studio. Steal one idea. The window seat. The plant layers. The felt wall. One small change this weekend, and your videos will look different on Monday.
Then steal one more next weekend. Slow design beats fast design every time, because slow design stays. Fast design ends up in a box in the storage room by winter.
Save the looks you love. Start with the one that made you stop scrolling. Your dream studio is not a different house. It is the room you already have, with a little more care in it.