19 DIY Tiny Home Ideas You Can Start This Year

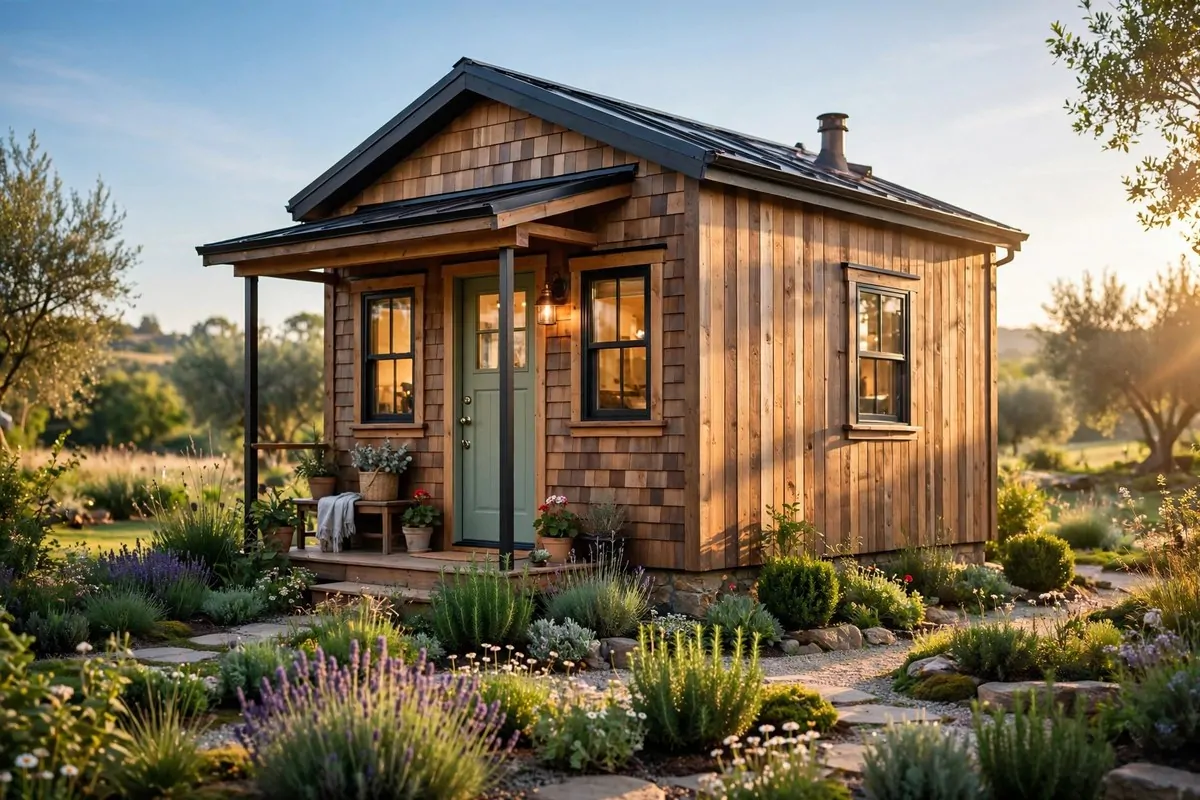
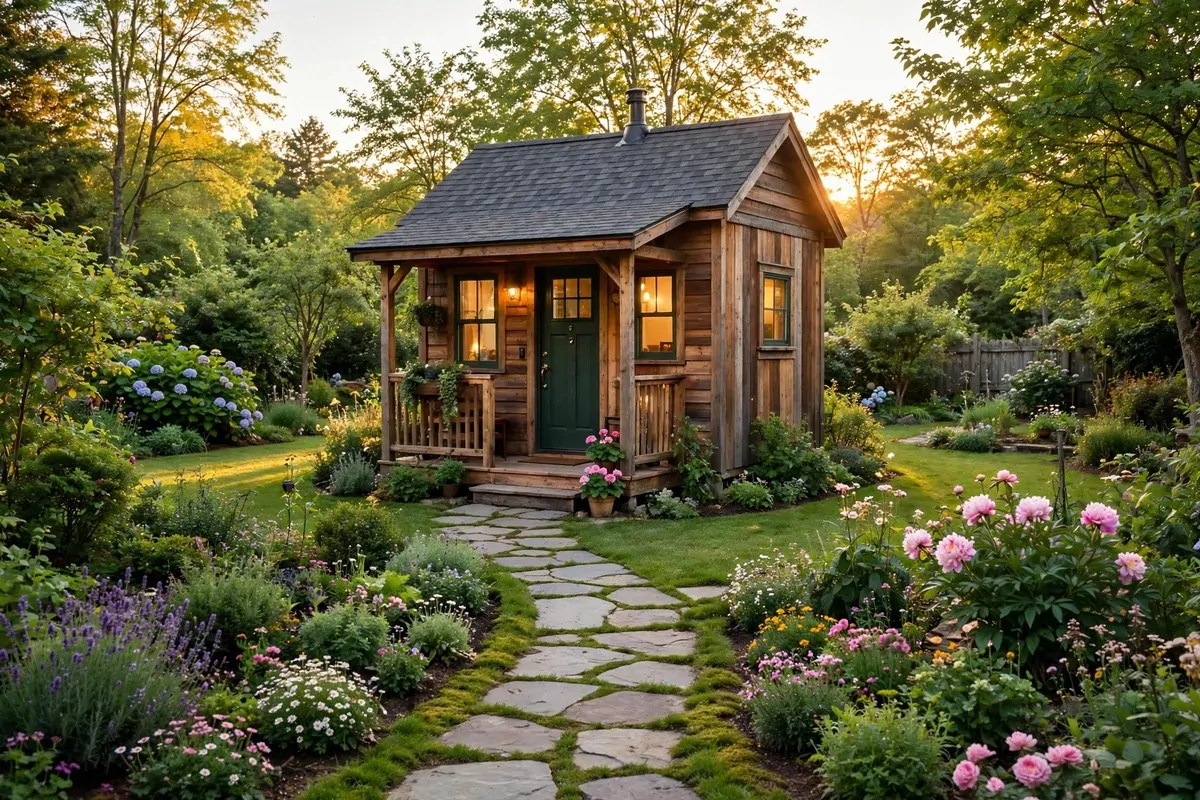
My phone has a whole folder of tiny home photos. Little cabins on wheels. Kitchens the size of a closet that somehow look amazing. Loft beds wrapped in warm lights. I saved them for years and never built a single thing.
This year I stopped just saving. I picked up a drill, and I started with one small project. Then another. And here is what I learned the fast way.
Tiny homes reward people who make things with their own hands more than any other kind of home. Every inch matters, so every little project you finish actually changes how the place feels. A new shelf is not just a shelf. It is breathing room.
These 19 Diy Tiny Home Ideas are all things you can start this year. No contractor. No huge budget. Just simple projects, basic tools, and a free weekend here and there. Most of them came straight from what real tiny home owners are already doing.
Some add storage. Some add light. Some just make you smile when you walk in the door. Pick the one that makes your hands itch, and start there.
Build a Drop-Leaf Table That Doubles as a Wall Shelf
A full dining table eats a shocking amount of floor space. In a tiny home, that is space you do not have to spare.
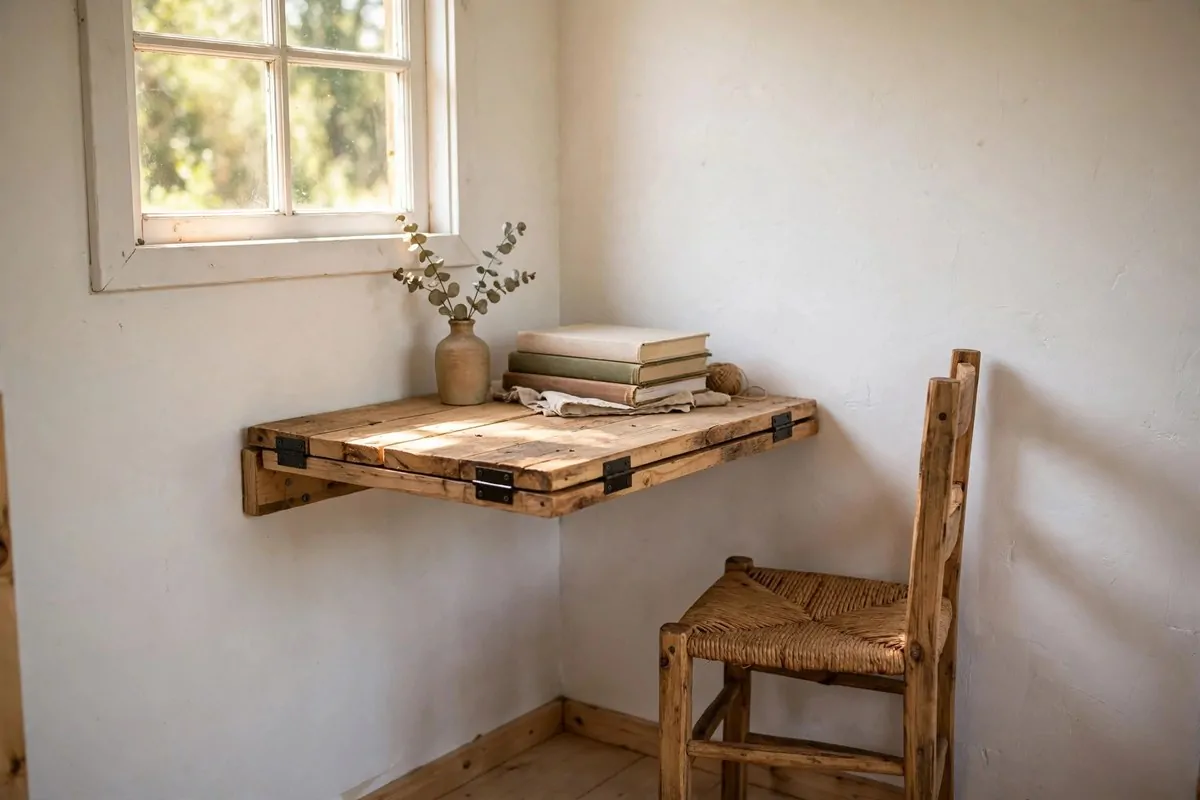
A drop-leaf table fixes this in the cleverest way. The table hangs on the wall, and one side folds down flat when you are not eating. When it is folded, it looks like a slim shelf.
I love this project because it gives you two pieces of furniture for the work of one. Down flat, it holds a little vase and your cookbooks. Flipped up, it seats two people for dinner.
You start with a solid wood board, the size you want your table to be. Add two folding brackets from any hardware store. Screw the brackets to wall studs, and attach the board on top.
Studs matter here. A table that only holds into drywall will sag or rip out the first time someone leans on it. Find the studs with a cheap stud finder, or knock on the wall and listen for the solid sound.
Sand the board smooth before you mount it. Nobody wants splinters with their dinner. A light stain or a coat of paint makes it match the rest of your room.
Here is a small tip I wish I knew sooner. Put a little chain or folding support leg under the far edge if your board is wide. It stops the wobble when you set down a hot plate.
What I like most is how it changes the room. With the leaf down, the whole corner feels open and calm. With it up, it feels like a real dining spot. Two moods, one wall.
- Measure your wall space before you buy the board
- Use folding brackets rated for the weight of dishes
- Screw into studs, never just drywall
- Sand and seal the wood so it wipes clean
- Add a small lip on the shelf side so things do not slide off
If you are nervous about drilling, practice on a scrap piece of wood first. And honestly, even a slightly crooked table works fine. You will be too busy eating at it to notice.
Make a Pallet Coffee Table With Hidden Storage
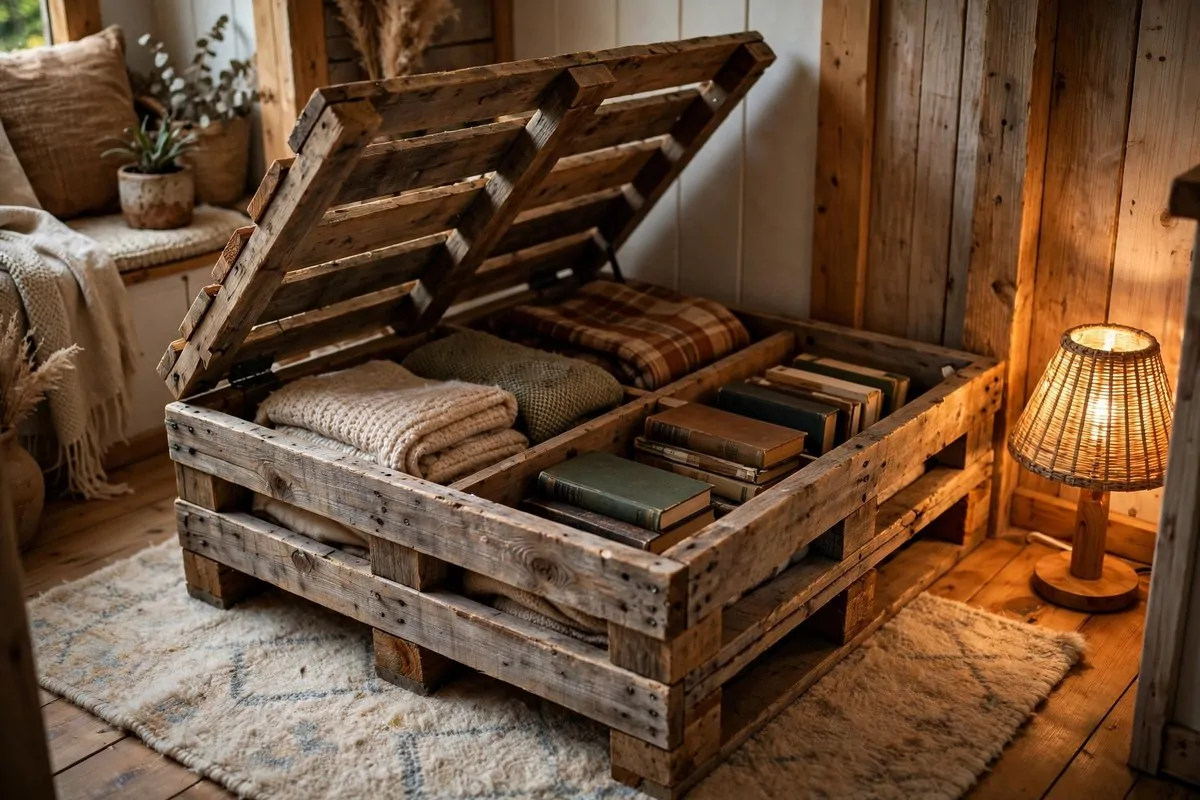
Shipping pallets are one of the best free building materials on earth. Stores throw them out. Warehouses stack them by the door. And they turn into the sturdiest little coffee table you have ever seen.
The trick is to build the table with a lift-off or hinged top. Underneath, you get a big shallow box for blankets, books, board games, all the stuff that clutters a tiny living room.
First, find clean, dry pallets. Look for ones stamped with HT, which means heat treated. Skip any that smell like chemicals or look stained with oil.
Take the pallet apart carefully with a pry bar and a hammer. Pull the nails or knock them through. You will break a few boards. That is normal. It happens to everyone.
Sand every board well. Pallet wood is rough, and rough wood plus bare feet is a bad mix. An electric sander makes this fast, but sandpaper and patience work too.
Build a simple box frame from the longest boards. Then lay slats across the top, leaving tiny gaps for that rustic look. Hinge the top on one side, or just let it lift off and rest on the frame.
The inside of the box is your secret storage. I keep throw blankets in mine. In winter they are right there. In summer I swap them for magazines and chargers.
Stain it or paint it to match your room. White paint makes pallet wood look surprisingly modern. A dark stain makes it look like an expensive farmhouse piece.
This is one of those Diy Tiny Home Ideas that looks harder than it is. One weekend, basic tools, and you get a table that stores half your living room.
- Choose HT-stamped pallets only
- Sand every surface until smooth
- Hinge the top for easy access
- Line the inside with fabric for a finished look
- Add small caster wheels if you want to move it easily
My table wobbles a tiny bit on one corner. I shimmed it with a folded coaster. It has been fine for two years. Perfect is overrated.
Turn Wooden Crates Into Wall Shelves
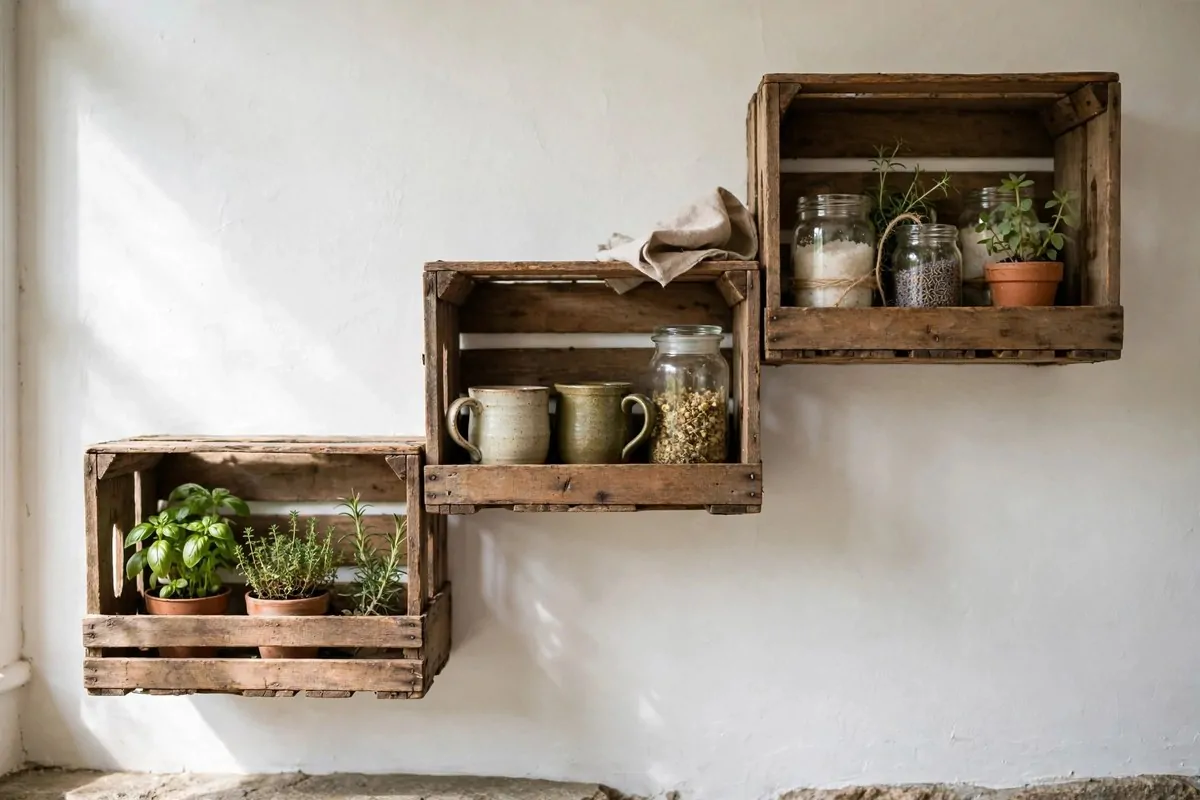
Wooden crates are the unsung heroes of tiny home storage. They cost almost nothing secondhand, they look great with zero effort, and you can mount them on any wall in an afternoon.
I have seen people stack them into bookshelves, mount them sideways as cubbies, and line them up as a full pantry wall. The look is warm and a little rustic, which suits tiny homes perfectly.
Start by hunting for solid crates. Fruit crates, wine crates, old storage boxes from thrift stores. Make sure the wood is not cracked through and the corners feel tight.
Clean them with a damp cloth and let them dry fully. Then sand the rough spots. Old crates can have splinters hiding in the corners, so do not skip this.
Now decide your layout on the floor first. Lay the crates out the way you want them on the wall. Staggered looks more interesting than a straight grid. Take a photo so you remember the plan.
Mount them with L-brackets screwed into studs. Crates full of books get heavy fast, so do not trust drywall anchors alone for the big ones. A level is your best friend here.
Paint or stain them to match your style. I left mine natural with just a clear seal, and they glow in the morning light. White paint makes them look clean and modern.
Style the shelves with things you actually use. Mugs, small plants, jars of rice and pasta. In a tiny home, your storage should be part of your decor.
What I love is that you can change the layout anytime. Unscrew a crate, move it, done. Your shelves grow with you.
- Test the layout on the floor before drilling
- Always screw brackets into wall studs
- Keep heavy items on the lower crates
- Seal the wood so it resists kitchen steam
- Leave one crate empty for the things you buy later
Create a Magnetic Spice Rack Inside a Cabinet Door
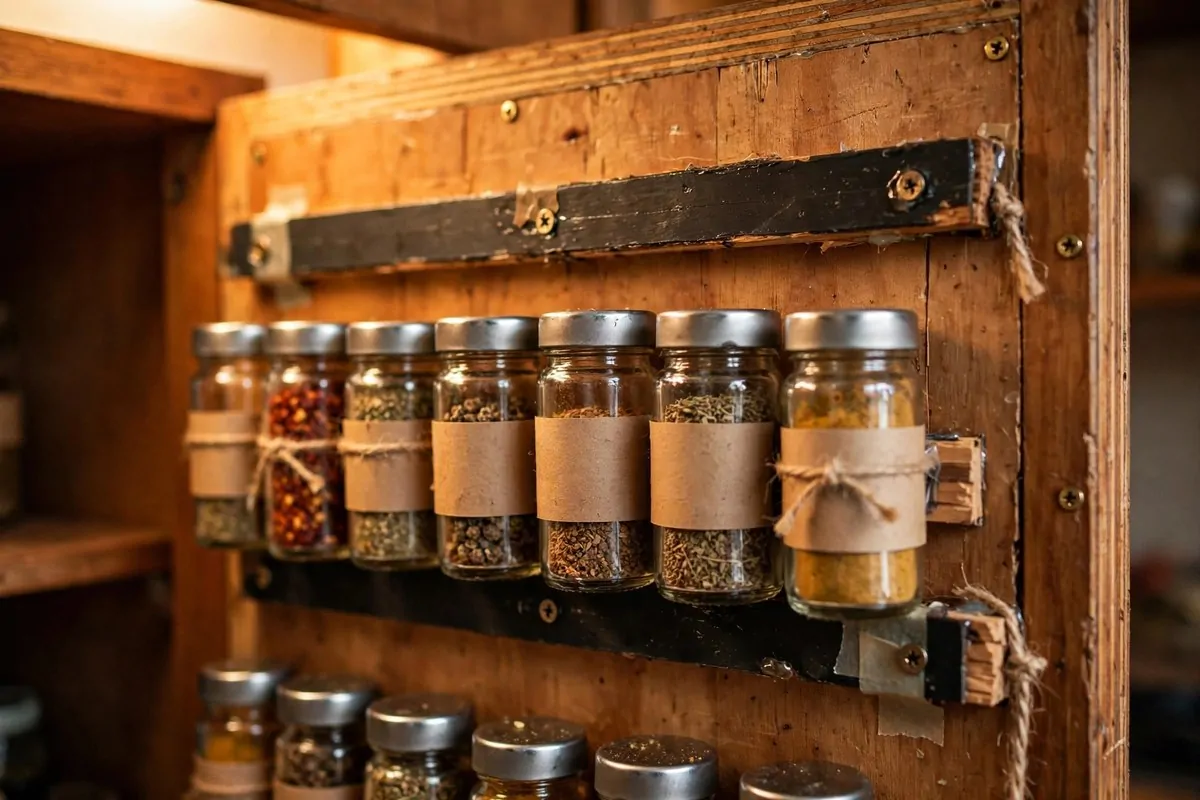
Spice jars are the enemy of tiny kitchens. They take over the counter. They fall out of the cabinet. You buy paprika twice because you cannot find the first one.
A magnetic spice rack inside a cabinet door solves all of it. The jars stick to the door, up off the shelves, and you can see every single one at a glance.
You need small glass jars with metal lids, strong little magnets, and some glue. Stick a magnet inside each lid, or glue magnets to a thin metal strip and mount the strip on the door.
The inside of a cabinet door is dead space in most kitchens. This project wakes it up. And because the door closes, your spices stay out of the light, which keeps them fresh longer.
Use jars that are all the same size. It looks tidier, and they sit flat against the door. Baby food jars work great if you have them saved up.
Label the lids, not the jars. You see the lids when the door is open, so that is where the names go. A paint pen or small round stickers both work fine.
Test the magnet strength before you fill every jar. Close the door a few times and make sure nothing slides. Cheap weak magnets are the one thing that ruins this project.
I did this in my own kitchen last spring. It took one evening. Now I open that door and smile every single time. Small win, big mood.
- Use strong neodymium magnets for a firm hold
- Keep jars small and light so they stay put
- Label the lids for easy reading
- Mount the strip with screws, not just glue
- Leave a little gap at the door edge so it still closes
One warning. Do not hang the rack on a door right next to the stove. Heat is not kind to spices. Pick a cooler cabinet and your paprika will thank you.
Add a Mirrored Wall to Bounce the Light Around
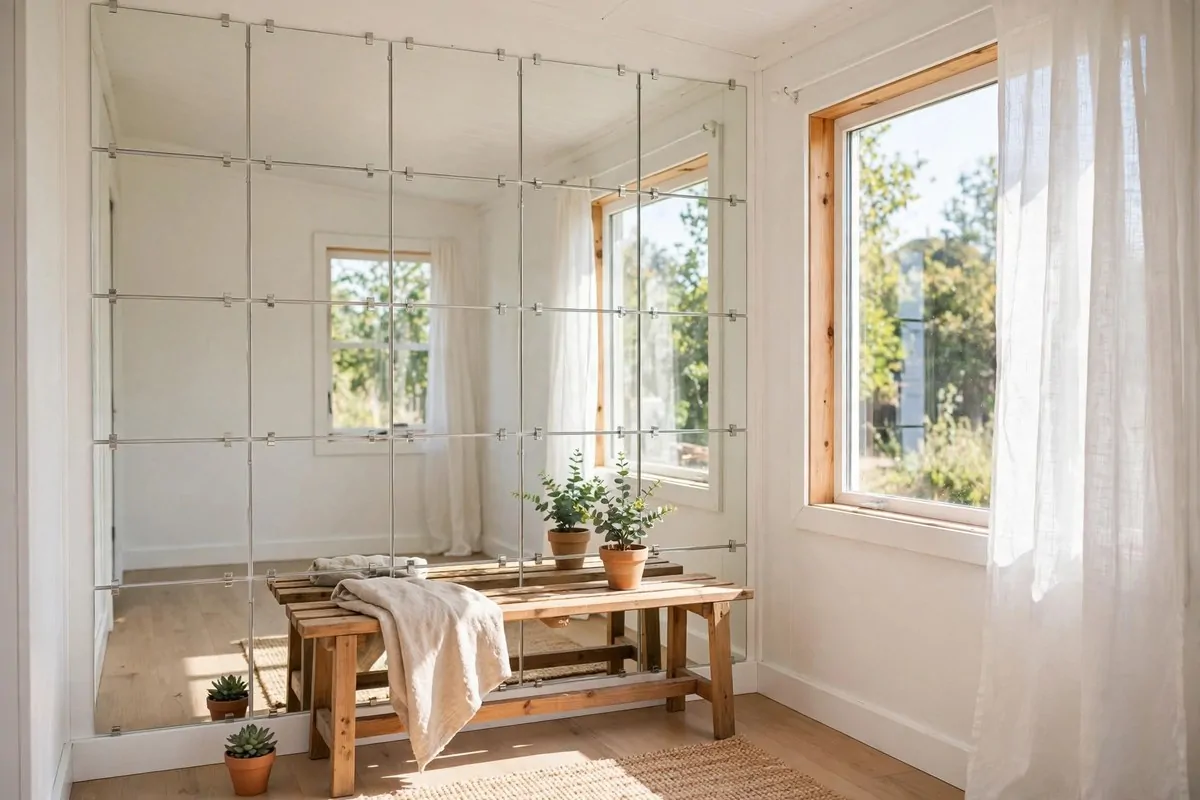
This is the oldest tiny space trick in the book, and it still works like magic. Mirrors bounce light around the room and fool your eyes into seeing twice the space.
You do not need a fancy custom mirror. A set of inexpensive square mirror tiles from a home store does the job. Stick them in a grid on one wall, and the whole room changes.
Pick the wall across from your biggest window. That way the mirrors catch the daylight and throw it deep into the room. Dark corners suddenly feel bright.
Clean the wall first. Dust and grease stop the adhesive from holding. A quick wipe with a damp cloth and a dry one after is enough.
Lay the tiles out on the floor in your grid pattern. Leave a tiny gap between each tile. That gap is what makes it look intentional instead of random.
Most mirror tiles come with sticky pads on the back. Press each one firmly for a good thirty seconds. Start from the bottom row and work up so the top tiles rest a little on the ones below.
Stand back and look. The room will feel bigger instantly. It is a strange feeling the first time. You keep glancing over because something feels different but you cannot name it.
Keep the mirrors clean with a simple glass spray and a soft cloth. In a tiny home, one smudged mirror shows more than you would think.
If a full wall feels like too much, try a smaller version first. A grid of four tiles over the sofa gives you most of the effect with a quarter of the work.
This is one of my favorite Diy Tiny Home Ideas because it needs no skill at all. No drilling. No sawing. Just stick, press, and enjoy.
- Place mirrors across from windows for max light
- Clean the wall before sticking anything
- Leave small even gaps between tiles
- Press each tile firmly for thirty seconds
- Clean with glass spray and a soft cloth
One thing to watch. Do not put a mirrored wall where it faces your bed directly. Waking up to your own reflection at 3am is not as fun as it sounds.
Build Rolling Drawers That Slide Under Your Bed
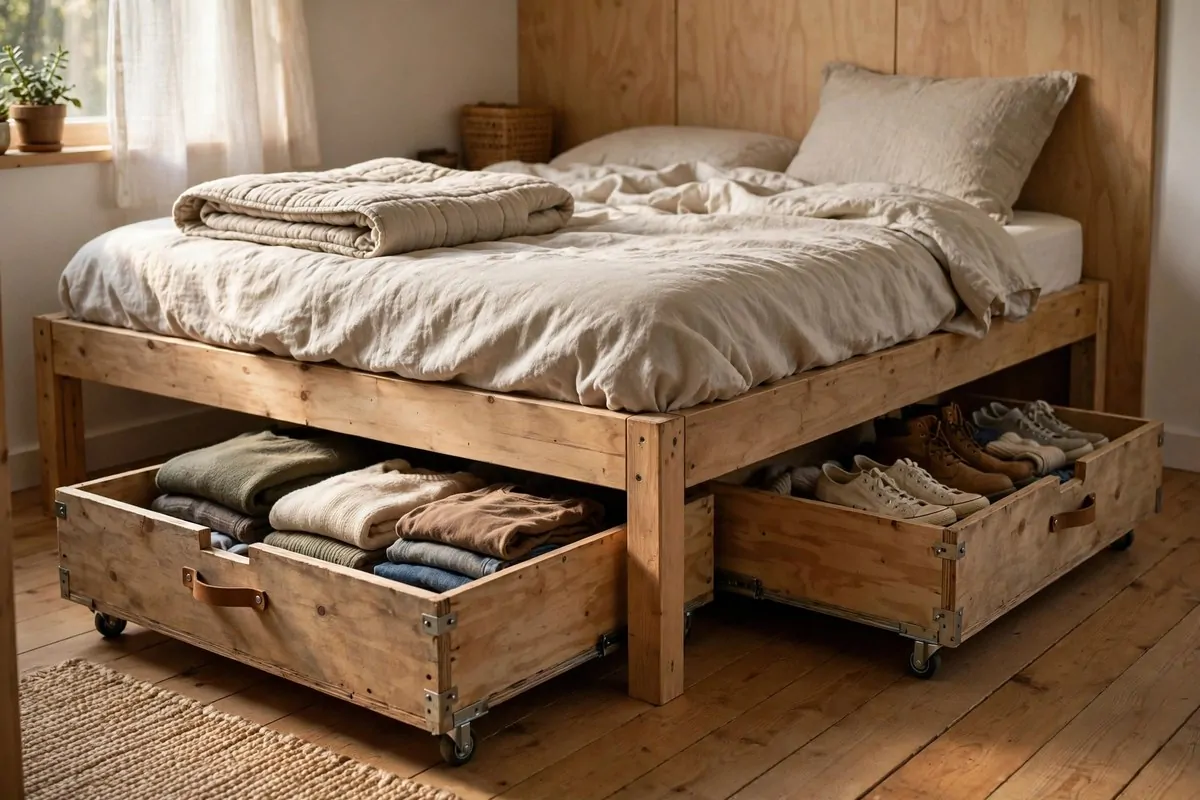
The space under your bed is probably the biggest empty box in your whole home. In a tiny home, leaving it empty is like throwing away a closet.
Rolling drawers turn that dead space into real storage. Build simple wooden boxes, screw on caster wheels, and slide them under the bed. Clothes, shoes, spare sheets, all hidden away.
Measure first. Measure the height from the floor to the bottom of your bed frame, then subtract a little for the wheels. Nothing is sadder than a drawer that does not fit.
Build each drawer as a simple open box. Four sides, a bottom, no lid needed. Keep the design plain. These live under the bed, not on display.
Caster wheels screw right into the bottom corners. Get the kind with brakes if your floor is smooth, so the drawers do not roll out on their own at night.
Sand everything smooth. Rough wood snags clothes and scratches floors. A coat of paint on the outside makes them look neat when they peek out.
I label the front of each drawer with a little tag. Winter clothes. Shoes. Gift wrap. It saves me from pulling out three drawers to find one scarf.
The best part is how much calmer the bedroom feels. When the clutter has a home under the bed, the whole room breathes easier. You sleep better too, or at least I do.
If building from scratch feels big, start with one drawer. One is enough to prove the idea works. You will build the second one the next weekend, I promise.
- Measure bed clearance before you cut any wood
- Use caster wheels with brakes on smooth floors
- Sand all edges to protect clothes and floors
- Label each drawer front
- Paint the outsides for a tidy look
Dust the drawers out every few months. Under-bed storage collects dust bunnies like it is their job. A quick wipe keeps everything fresh.
Hang Your Pots and Pans on a Simple Wall Rail
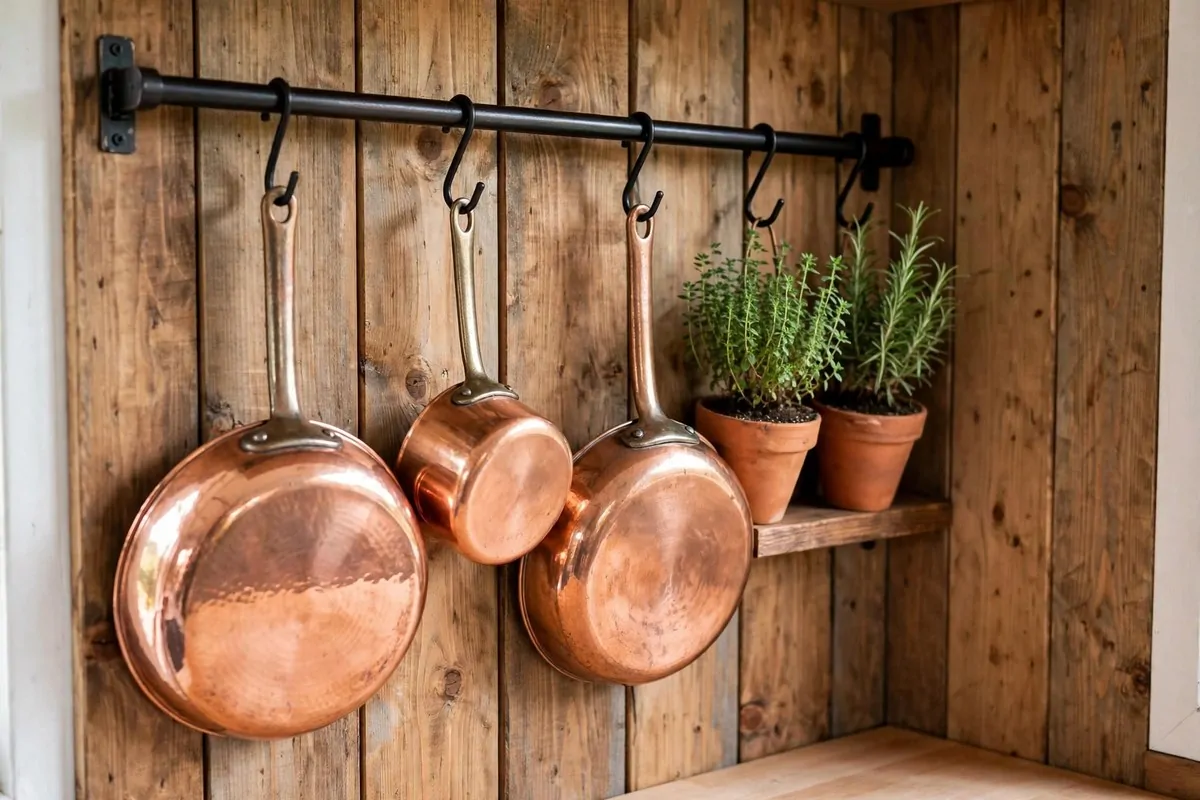
Tiny kitchens never have enough cabinet space. Pots and pans are bulky, they stack badly, and digging through a deep cabinet for the right lid is a daily annoyance.
A wall rail fixes it beautifully. One sturdy rail, a set of S-hooks, and your cookware hangs in the open where you can grab it. It looks like a proper chef’s kitchen too.
Pick a free stretch of wall near the stove. Not right over it, because grease splatter is real. A side wall or the backsplash area works best.
Use a solid metal rail, not a flimsy curtain rod. Pans are heavy. Mount the rail into studs with strong screws. Give each hook a little tug before you hang anything valuable.
S-hooks come in different sizes. Get ones big enough to slide over the rail and hold a pan handle. Stainless steel hooks last longest in a steamy kitchen.
Hang your most used pans at easy reach. The big stockpot you use twice a year can live in a cabinet. Daily tools earn the rail spots.
This does more than save space. It turns your cookware into decor. Copper and cast iron look gorgeous hanging in a row. Guests always comment on mine.
Wipe the rail and hooks now and then. Kitchen air leaves a film on everything. A damp cloth once a month keeps it all shiny.
I was worried my kitchen would look cluttered. It did the opposite. Everything has a spot now, and the cabinets hold food instead of pans. It feels calmer.
- Mount the rail into wall studs
- Keep the rail near the stove but not over it
- Use strong stainless S-hooks
- Hang daily pans at easy reach
- Wipe down monthly to fight grease film
Start with a short rail if you are unsure. You can always add a second one later. Most people do, once they see how handy the first one is.
Braid a Rag Rug From Old Clothes
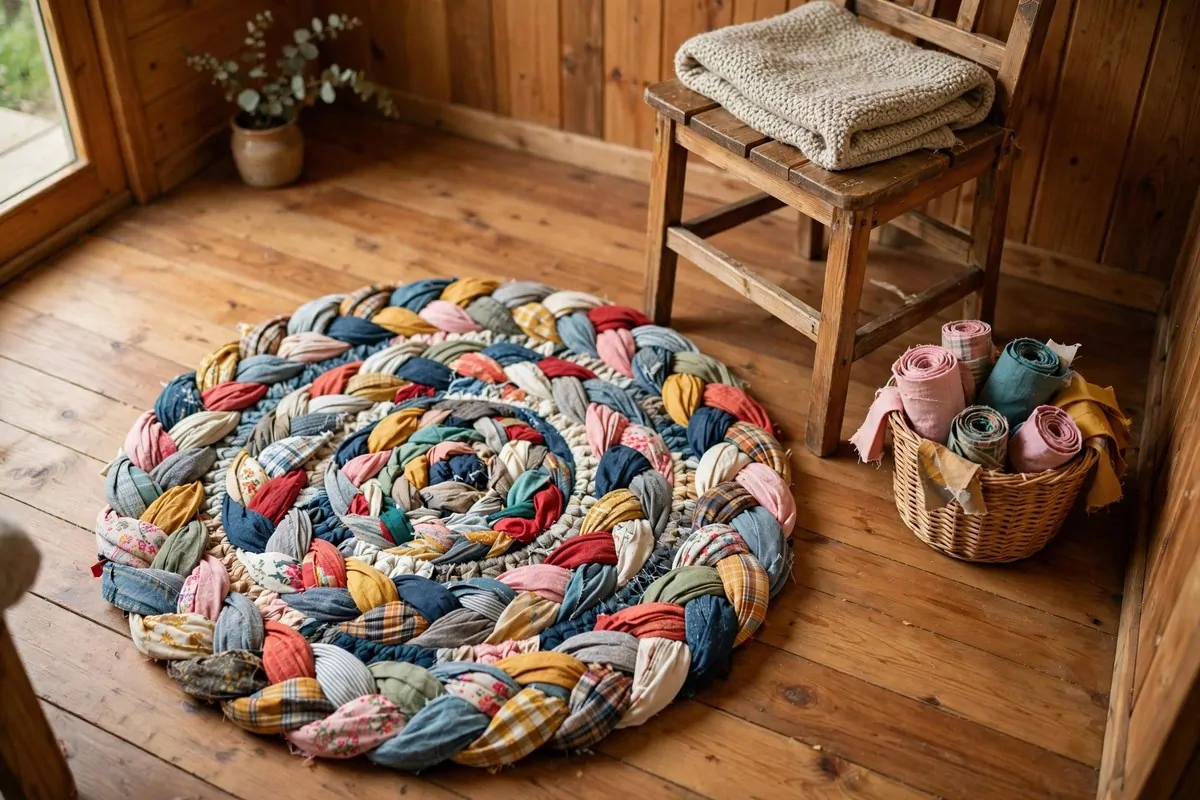
Every closet has a bag of old clothes waiting for donation. Before you haul it away, pull out the soft cotton tees and worn-out sheets. They are about to become a rug.
A braided rag rug costs nothing, uses up fabric that would be thrown away, and adds the softest handmade touch to a tiny home floor. Mine sits by my bed and I love it.
Cut the fabric into long strips, about two inches wide. Old t-shirts are perfect because they do not fray much. Cotton sheets work well too.
Tie three strips together at the top and braid them like hair. Keep the braid snug but not tight. When you run out of strip, knot on a new one and keep going.
Coil the long braid into a flat spiral on the floor. Sew the coils together with strong thread as you go. This part is slow but peaceful. Put on a show and settle in.
Keep the rug flat as you sew. If the edges start to cup upward, your braid is too tight. Loosen up a little and it will lie flat again.
The finished rug is thick, soft, and machine washable. Mine has been through the wash many times and still looks great. The colors fade a little, which only makes it prettier.
This project needs no special tools. Scissors, a big needle, strong thread. That is the whole list. It is a perfect rainy weekend project.
I made mine from my kids old shirts and a sheet with a torn corner. Every time I step on it, I see those fabrics again. A store rug could never do that.
- Use soft cotton fabrics that do not fray
- Cut strips about two inches wide
- Braid snug, not tight, to keep it flat
- Sew coils together as you go
- Wash on gentle when it needs it
Make it round for a bedside spot, or oval for a hallway. The shape is up to you. There is no wrong way to coil a rug.
Frame Pressed Leaves for Free Wall Art
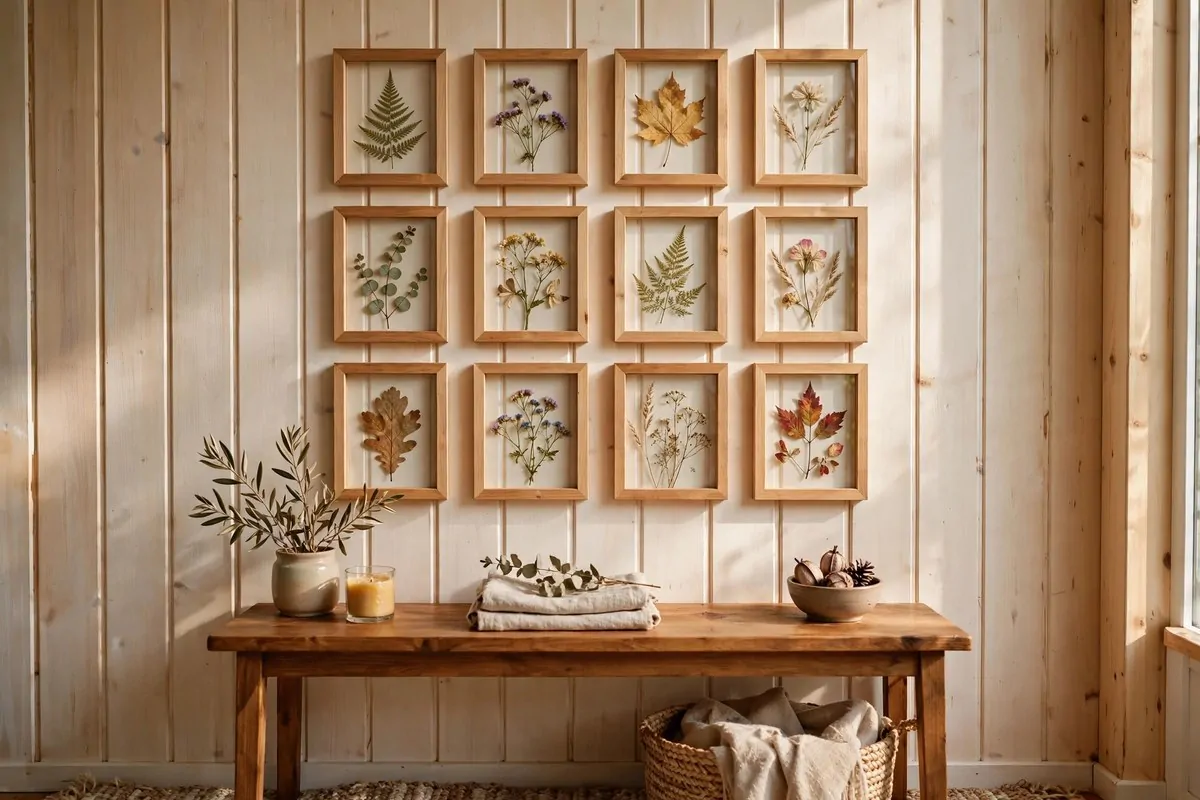
The prettiest wall art for a tiny home might be growing outside your door right now. Pressed leaves and wildflowers, framed simply, look like something from an expensive boutique.
This project is free. A walk outside, a heavy book, some simple frames. That is genuinely all it takes. Nature does the designing for you.
Pick leaves and flowers on a dry day. Wet plants press badly and can mold. Look for flat shapes with interesting edges. Ferns, maple leaves, and small wildflowers all press beautifully.
Press them between sheets of plain paper inside a heavy book. Stack more books on top. Leave them alone for two to three weeks. Patience is the whole technique.
Check them after a couple of weeks. They should feel dry and papery. If they still feel soft or damp, give them another week. Rushing this step is the main way it goes wrong.
Arrange them on a plain background inside simple frames. White or cream paper makes green leaves pop. Keep the layout simple. One leaf per frame looks very classy.
Hang them in a grid for a modern look, or scatter a few singles around the home. I have a small one in my bathroom and it makes me happy every morning.
The best part is that this art is truly yours. Nobody else has these exact leaves from that exact walk. It is personal in a way store art never is.
Kids love helping with this one. Let them pick the leaves and choose the frames. Their pride when it goes on the wall is the sweetest thing.
- Pick plants on a dry day
- Press between plain paper for two to three weeks
- Make sure they feel fully dry before framing
- Use simple frames and plain backgrounds
- Hang in a grid or as singles
Swap the leaves with the seasons if you like. Spring flowers, summer ferns, autumn maple leaves. Your walls change with the year, for free.
String Warm Lights Along Your Ceiling Beams
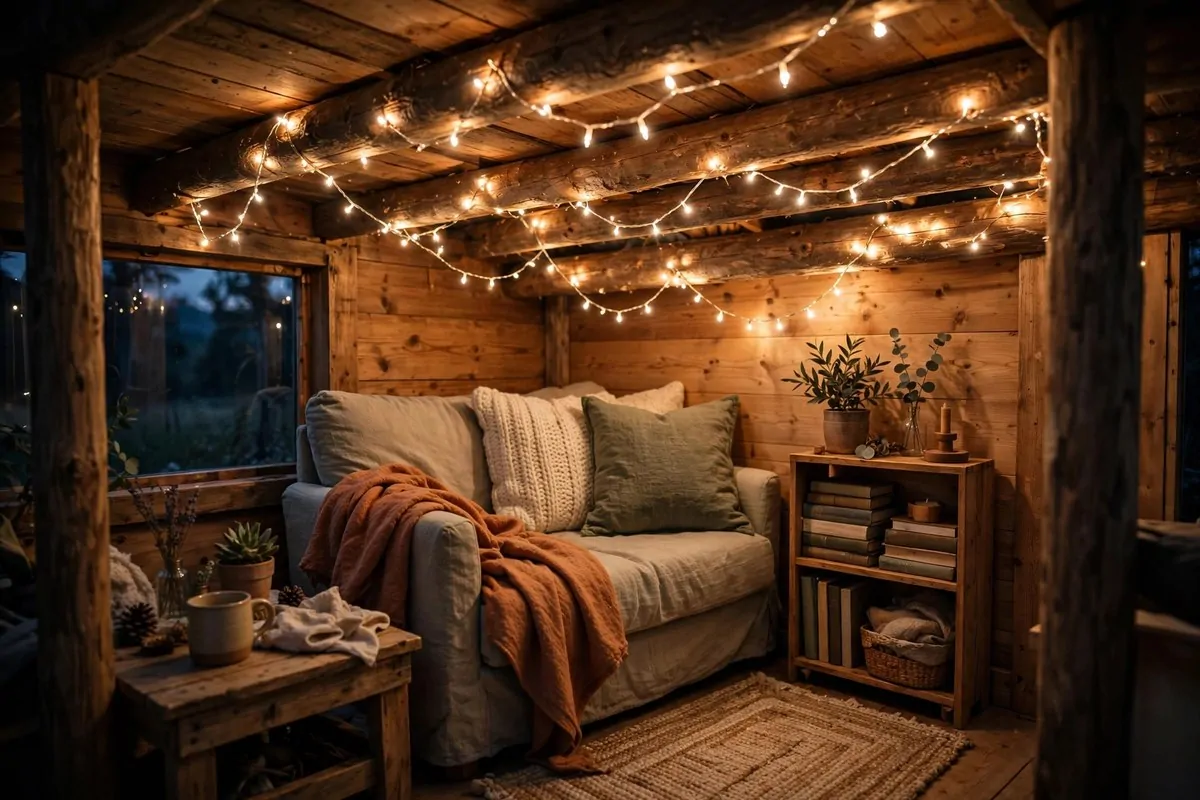
Overhead lights in tiny homes can feel harsh. One bright bulb in a small room makes everything look flat and a little cold.
String lights fix the mood completely. Draped along ceiling beams or around a window, they give off a soft warm glow that makes the whole home feel cozy at night.
Use warm white lights, not the cool blue kind. Warm white feels like candlelight. Cool white feels like an office. This one choice makes all the difference.
Drape them loosely, not in tight straight lines. A gentle sag between anchor points looks natural and pretty. Tight lines look like you tried too hard.
Small adhesive hooks hold the wire without drilling. Stick them along the beam, wait a day for the glue to set, then hang the lights. Easy and renter friendly.
Plug them into a timer so they switch on at sunset by themselves. Coming home to a softly lit tiny home after a long day is a small joy I never get tired of.
I have mine along the main beam in my living area. In the evening I turn off the big light and just let the strings glow. The whole room feels like a hug.
They cost very little and take an hour to hang. For the amount of coziness they add, this might be the best value project on the whole list.
- Choose warm white, not cool white
- Drape loosely with a gentle sag
- Use adhesive hooks to avoid drilling
- Put them on a timer for sunset
- Keep a spare string for when one burns out
One safety note. Do not drape lights where they touch fabric curtains or paper decor. Warm bulbs are safe, but give everything a little breathing room anyway.
Build a Mason Jar Chandelier Over the Table
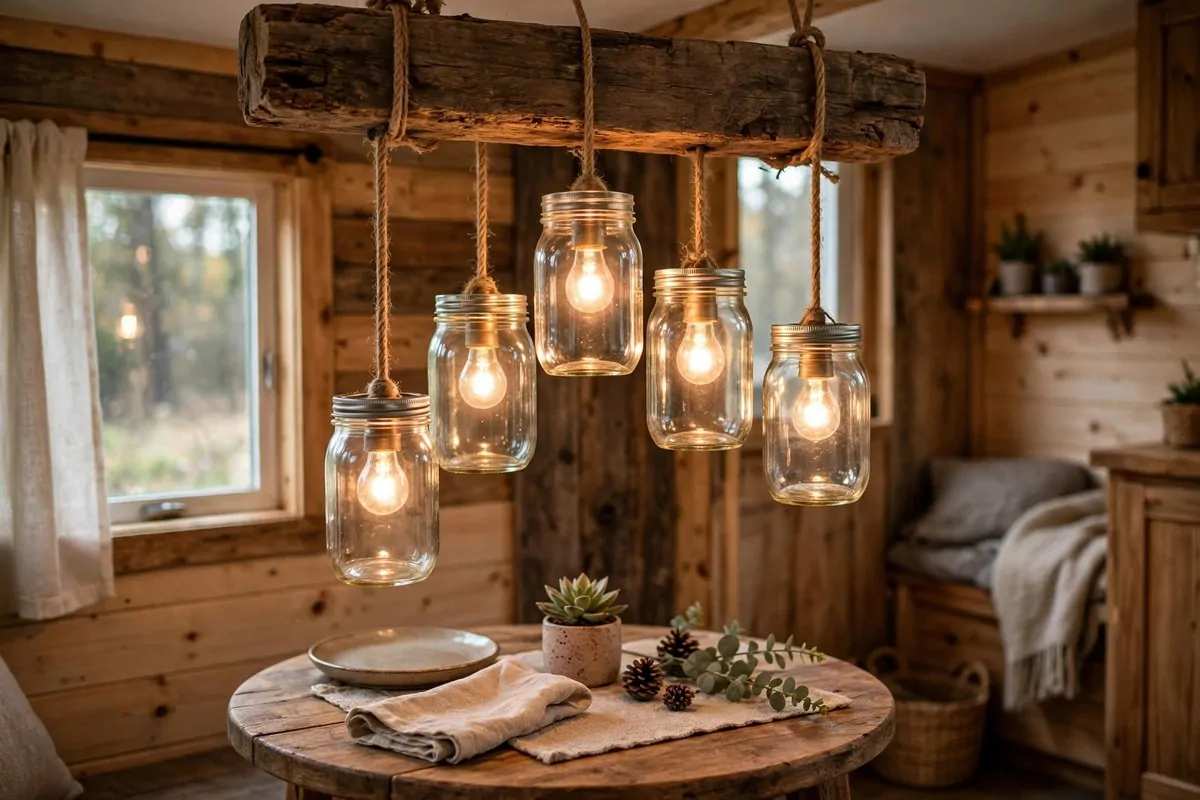
A chandelier sounds fancy and expensive. A mason jar chandelier is neither. It is a weekend project that looks like a million dollars over a tiny dining table.
You need a reclaimed wood board or beam, some mason jars, pendant light kits, and warm bulbs. Hang the jars at different heights from the board for that collected-over-time look.
Start with the wood. An old fence board or a chunk of barn wood works great. Sand it smooth and seal it. This is the backbone of the whole fixture.
Drill a hole in each jar lid, wide enough for the light socket. This is the fiddliest part. Go slow, wear gloves, and keep the lid steady while you drill.
Thread each pendant cord through a lid, attach the socket, and screw the jar on. The jar becomes the shade. It softens the light in the prettiest way.
Mount the wood board to the ceiling with strong anchors into a joist. This thing has real weight once the jars are on. Do not trust it to drywall alone.
Hang the jars at staggered heights. Three inches of difference between jars looks intentional and charming. All exactly even looks a bit stiff.
Screw in warm Edison-style bulbs. The glow through the glass jars is pure magic at dinner time. Every meal feels a little more special under it.
I built mine with five jars over our little round table. Guests always ask where I bought it. My favorite part is saying I made it myself.
If wiring makes you nervous, use battery puck lights inside the jars instead. No wires at all. You still get the look with zero electrical work.
- Sand and seal the wood board first
- Drill jar lids slowly with gloves on
- Mount the board into a ceiling joist
- Stagger jar heights for charm
- Use warm bulbs for the glow
Check your local rules about electrical work if you hardwire it. When in doubt, the battery light version is just as pretty and much simpler.
Paint Your Ceiling a Soft, Happy Color
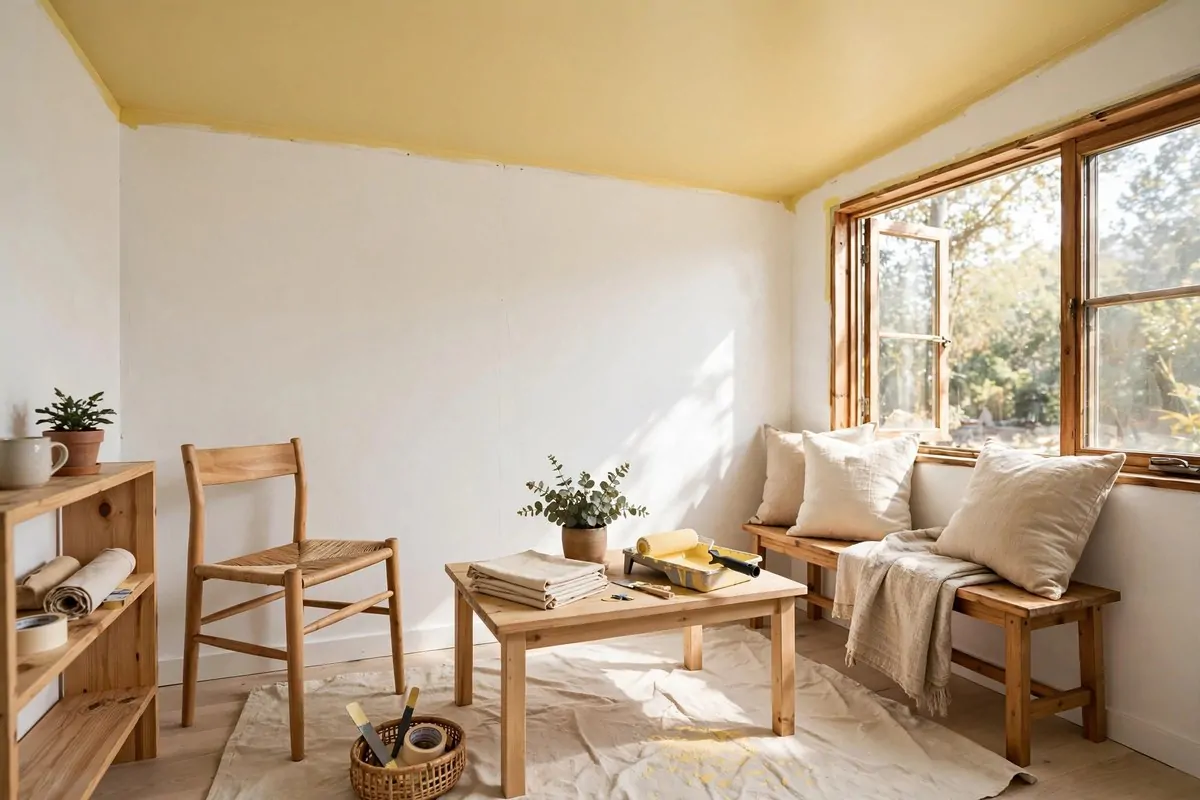
Everyone paints walls. Almost nobody paints the ceiling. In a tiny home, that ceiling is a whole blank canvas you are ignoring.
A soft color overhead changes the entire feeling of the room. Buttery yellow feels sunny even on gray days. Pale blue feels airy, like the sky came inside.
This is one of the cheapest Diy Tiny Home Ideas on the list. One can of paint, a roller, and a free afternoon. The payoff is wildly out of proportion.
Prep matters more than the painting. Move furniture to the middle and cover it. Tape the top edge of the walls. Lay drop cloths on the floor. Boring work, but it saves tears later.
Use ceiling paint or a flat matte finish. Shiny paint on a ceiling shows every bump and roller mark. Flat paint forgives almost everything.
Cut in the edges with a brush first, then roll the big middle area. Work in small sections and keep a wet edge so you do not get lap marks.
Two thin coats beat one thick coat every time. Let the first coat dry fully. It feels slow, but the finish looks so much better.
I painted mine a soft buttery yellow last year. Now when I wake up and look up, the room feels warm before I even get out of bed. Best paint decision I ever made.
If color on the whole ceiling scares you, try it in the smallest room first. A tiny bathroom or hallway is a low-risk test. You will probably love it and do the rest.
- Move and cover furniture before you start
- Tape wall edges and use drop cloths
- Choose flat or matte paint, never glossy
- Cut in edges, then roll the middle
- Do two thin coats, not one thick one
Pick your color in daylight. Paint chips look different under store lights. Tape a few swatches to the ceiling and live with them for a day before you commit.
Give Your Kitchen Cabinets a Fresh Coat of Paint
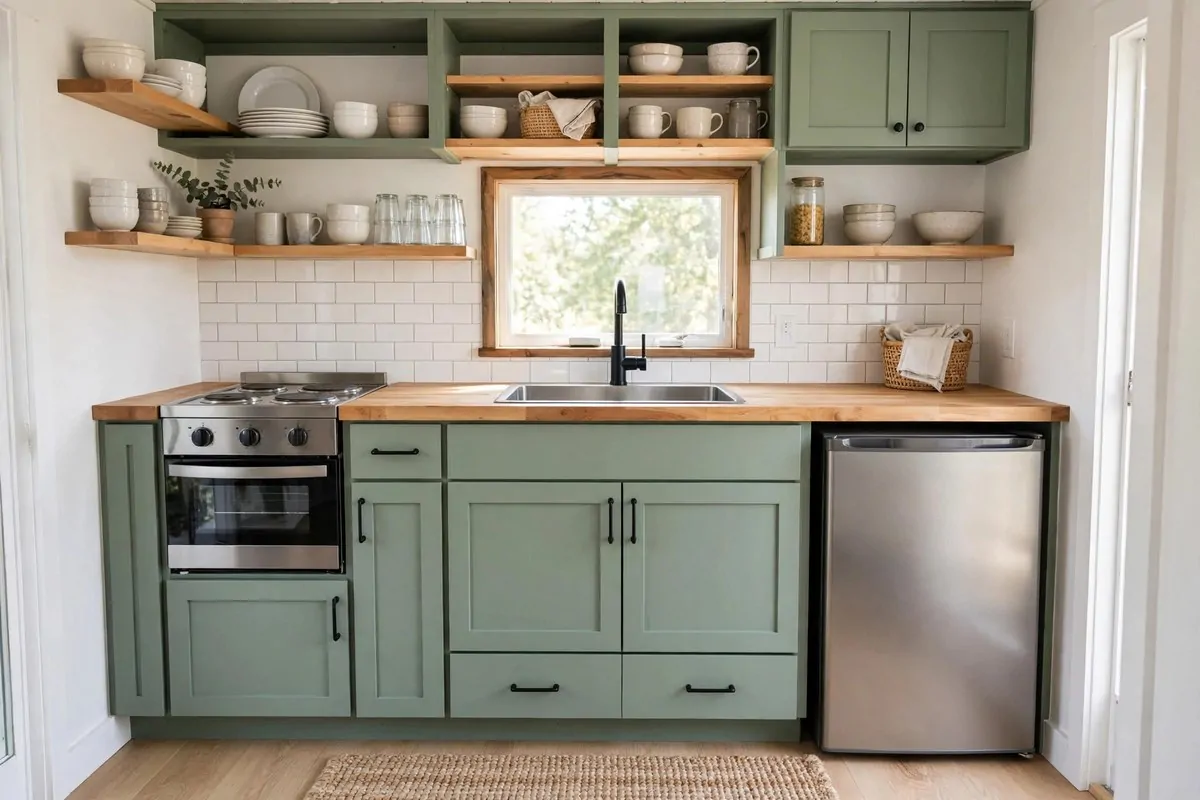
New kitchen cabinets cost a fortune. A can of paint and a free weekend gives you eighty percent of the new-kitchen feeling for a tiny fraction of the effort.
In a tiny home the kitchen is always visible, so tired cabinets drag down the whole space. Fresh paint lifts everything. It is the highest impact project per dollar I know.
Pick your color carefully. Soft sage green, warm white, and light gray all work beautifully in small kitchens. Dark colors can work too, but they shrink the feeling of the room.
Take the doors off before you paint. Label each door with tape so you know where it goes back. Paint doors flat on sawhorses or a table for the smoothest finish.
Clean the cabinets first with a degreasing cleaner. Kitchen cabinets collect a sticky film over the years. Paint will not stick to grease, no matter what the can promises.
Lightly sand everything with fine sandpaper. You are not stripping the old finish, just roughing it up so the new paint grips. Wipe the dust off with a damp cloth.
Use a primer made for cabinets, then two coats of a durable paint. Cabinet paint needs to survive daily touching, steam, and the occasional bumped pot.
New hardware is the cherry on top. Simple black pulls or brass knobs change the whole personality of the doors. It is a small extra step with a big payoff.
My cabinets went from dated orange wood to soft sage in one weekend. I still catch myself smiling when I walk into the kitchen. It feels like a different home.
- Remove doors and label them
- Degrease before you do anything else
- Sand lightly so paint grips
- Prime, then apply two durable coats
- Finish with new knobs or pulls
Let the paint cure fully before you rehang the doors. A week of patience now saves you from chips and fingerprints later. It is worth the wait.
Label Your Canisters With Chalkboard Paint
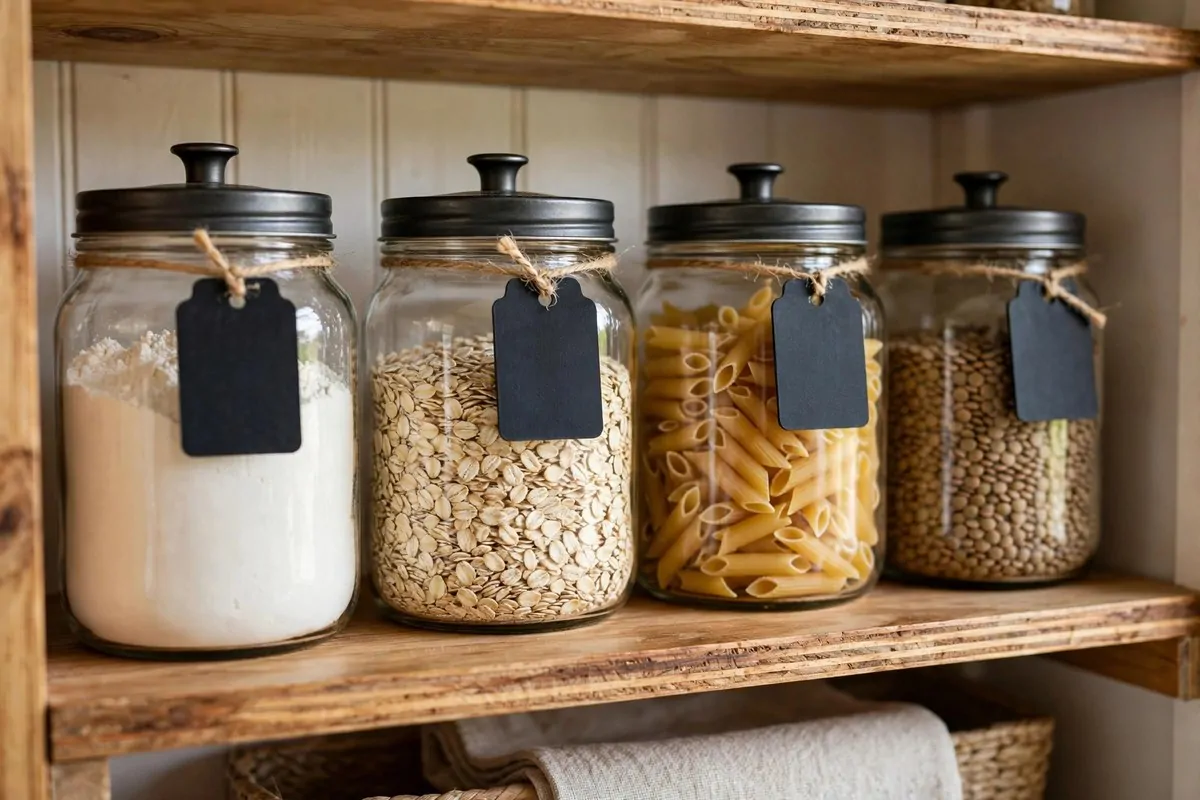
Open shelving looks great in tiny kitchens until you cannot tell the flour from the powdered sugar. Labels fix that, and chalkboard labels look adorable doing it.
Chalkboard paint turns any small surface into a writable label. Paint it on jar tags, on the jars themselves, or on little wooden plaques tied with string.
You can buy small chalkboard labels ready made, but painting your own is cheaper and more fun. A tiny jar of chalkboard paint goes a very long way.
Brush on two thin coats and let it dry fully between them. Then season the surface by rubbing chalk all over it and wiping it off. This stops your first writing from staining.
Write the contents with a chalk marker for crisp lines. Regular chalk works too but smudges more. Let the marker dry before you handle the jars.
The beauty of chalk labels is that they change. When the oats jar becomes the rice jar, you just wipe and rewrite. No peeling off sticky labels ever again.
I labeled everything in my pantry last winter. Flour, sugar, lentils, pasta, the works. Cooking got faster because I stopped opening five jars to find one thing.
This little project also makes open shelves look intentional. A row of matching jars with neat labels looks like a styled photo. Guests think you hired someone.
- Apply two thin coats of chalkboard paint
- Season with chalk before first use
- Write with a chalk marker for crisp text
- Let labels dry fully before handling
- Wipe and rewrite when contents change
Keep a damp cloth nearby in the kitchen. Chalk labels wipe clean in seconds, which is the whole point. Easy on, easy off, easy to love.
Make a Photo Table With Glass Over the Top
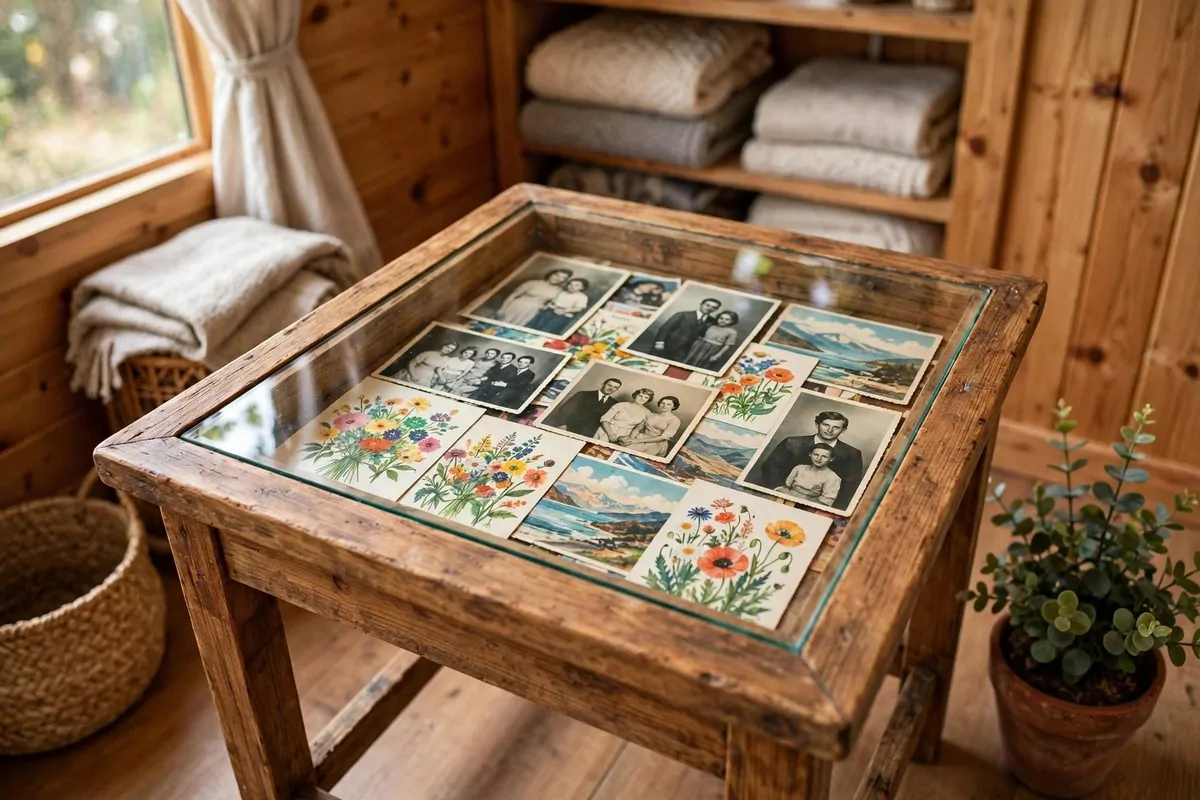
A side table is useful. A side table that holds your favorite memories is something else entirely. This project turns a plain tabletop into a little museum of your life.
The idea is simple. Lay photos, postcards, and printed fabric flat on the tabletop. Cover it all with a piece of glass cut to fit. Your memories stay safe underneath, and you see them every day.
Start with a small sturdy table. A thrift store side table is perfect. Sand and paint it if the finish is rough. This is the base of your display.
Arrange your photos and postcards on top. Mix sizes and angles for a casual scrapbook feel. Leave small gaps so the table color peeks through. Step back and look before you commit.
Print copies of precious photos instead of using originals. Sunlight fades prints over time, and copies are replaceable. Your originals stay safe in an album.
Order a piece of glass or clear acrylic cut to the exact size of the top. Acrylic is lighter and safer if you have kids or pets. Glass looks a touch clearer.
Lay the glass over your arrangement. It holds everything flat and protects it from coffee cups and dust. Tiny clear bumpers under the corners stop it from sliding.
I made one with postcards from every trip I have taken. My morning coffee happens next to those memories now. It is my favorite piece of furniture in the house.
This is a lovely gift project too. Make one for a parent with old family photos under the glass. You will make them cry, in the good way.
- Use printed copies, not original photos
- Arrange everything before adding the glass
- Choose acrylic for safety, glass for clarity
- Add clear bumpers so the top does not slide
- Keep it out of harsh direct sun to slow fading
Dust under the glass every few months. A little dust sneaks in at the edges. Lift, wipe, replace. Five minutes and it looks new again.
Build a Fold-Down Wall Desk for Tiny Workdays
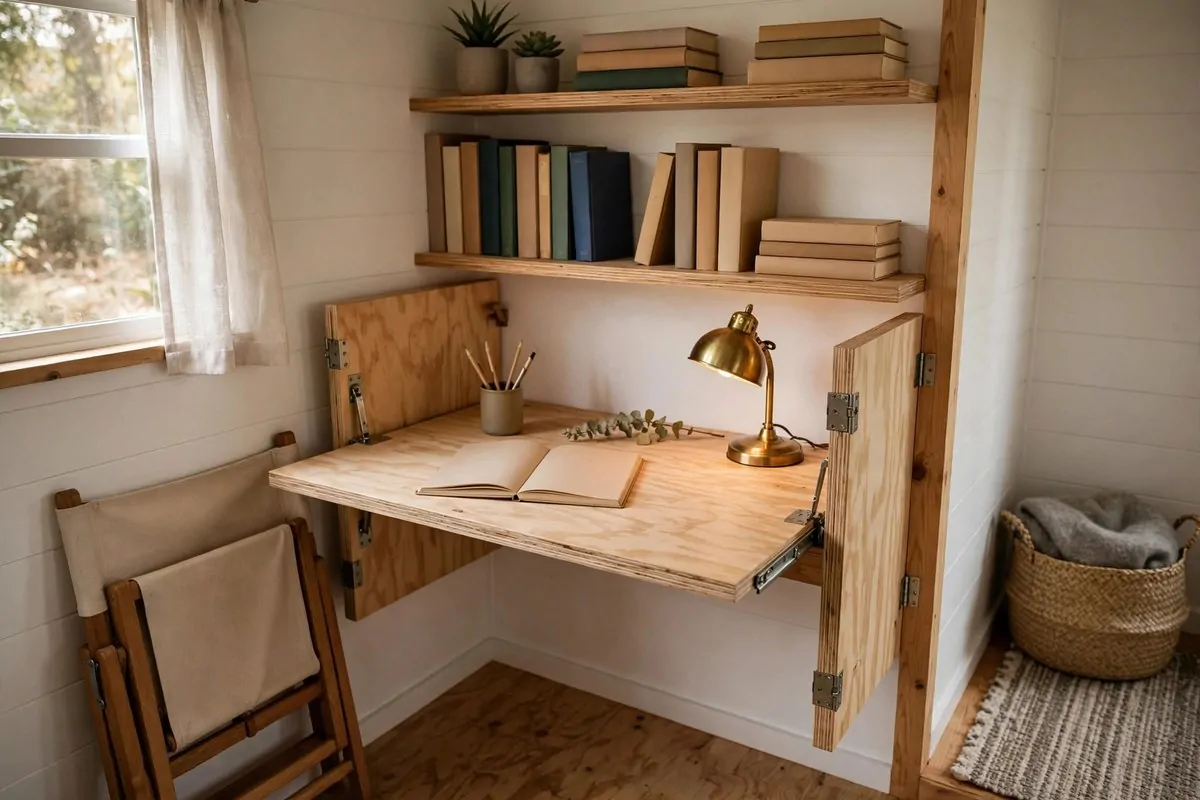
Working from a tiny home usually means working from the dining table. That gets old fast. Your laptop lives next to the cereal bowls, and work never really ends.
A fold-down wall desk gives you a real workspace that vanishes when the day is done. Fold it up and the wall looks clean. Fold it down and you are in business.
Build a shallow box that mounts to the wall, with a hinged front panel that drops down to become the desktop. Inside the box, add small shelves for notebooks and pens.
Mount it at a comfortable height. Sit in your chair, rest your arms like you are typing, and have someone mark the wall. Getting the height right matters more than perfect woodworking.
Use strong hinges and a pair of folding brackets or chains to hold the desktop level. A wobbly desk ruins the whole idea. Test it with some weight before you trust it with your laptop.
The inside of the box is bonus storage. Shallow cubbies hold chargers, notebooks, and pens. When you fold the desk up, all of it hides away neatly.
Paint it to match the wall and it nearly disappears when closed. Mine looks like a slim cabinet. Guests never guess there is a desk inside until I open it.
This project changed my workdays. When the desk folds up, work is over. That little ritual of closing it feels like leaving the office. In a tiny home, that boundary is gold.
If you are short on wall space, mount it in a hallway or even a large closet. A desk does not need a whole room. It needs a wall and a chair.
- Mount at a comfortable typing height
- Use strong hinges and support brackets
- Test with weight before trusting it
- Add shallow cubbies inside for supplies
- Paint it to match the wall so it blends in
Cable management keeps it tidy. A small clip on the side holds your charger cord. Little details like that make a tiny desk feel professional.
Turn Your Stair Steps Into Pull-Out Drawers
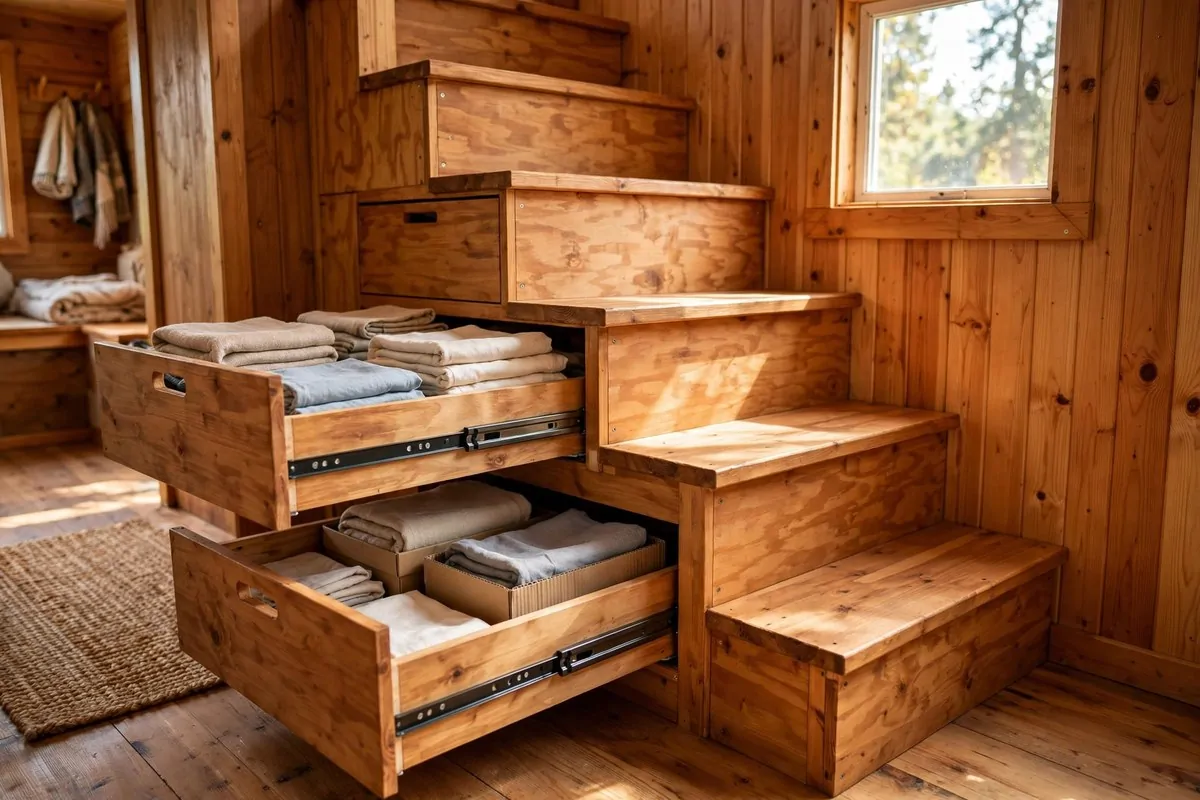
If your tiny home has a loft, you have stairs. And inside those stairs is a shocking amount of empty space doing absolutely nothing.
Turning stair steps into pull-out drawers is one of the smartest Diy Tiny Home Ideas I have ever seen. Each step becomes a deep drawer. A whole staircase becomes a dresser.
This project needs more care than the others. Stairs carry weight, so you cannot just hollow them out randomly. Plan it like a carpenter, not like a treasure hunt.
The safest approach is to build drawer boxes that fit into the open space under each tread. The stair structure stays intact. The drawers simply slide into the gaps.
Measure each space carefully. Stairs are rarely perfectly even, so measure every single opening. A drawer that is a quarter inch too wide will not fit, and you will be sad.
Build the drawer boxes from sturdy plywood. Add full extension slides if you can. They cost a bit more, but they let you reach all the way to the back of a deep drawer.
Add simple pulls or cut finger grooves into the drawer fronts. The fronts can match your stair wood so the whole thing looks seamless when closed.
Use the drawers for things you reach for daily. Socks and shirts in the lower steps. Sheets and towels higher up. It becomes the most convenient dresser you own.
I helped a friend build these in her tiny home last year. We did it over two weekends. Now she points at her stairs every time someone visits. She is very proud, and she should be.
- Keep the stair structure intact
- Measure every opening separately
- Use sturdy plywood for drawer boxes
- Install full extension slides
- Match drawer fronts to the stair wood
If the carpentry feels beyond you, hire a handy friend for the structural part and do the finishing yourself. There is no shame in getting help with stairs.
Add a Slide-Out Cutting Board for Extra Counter Space
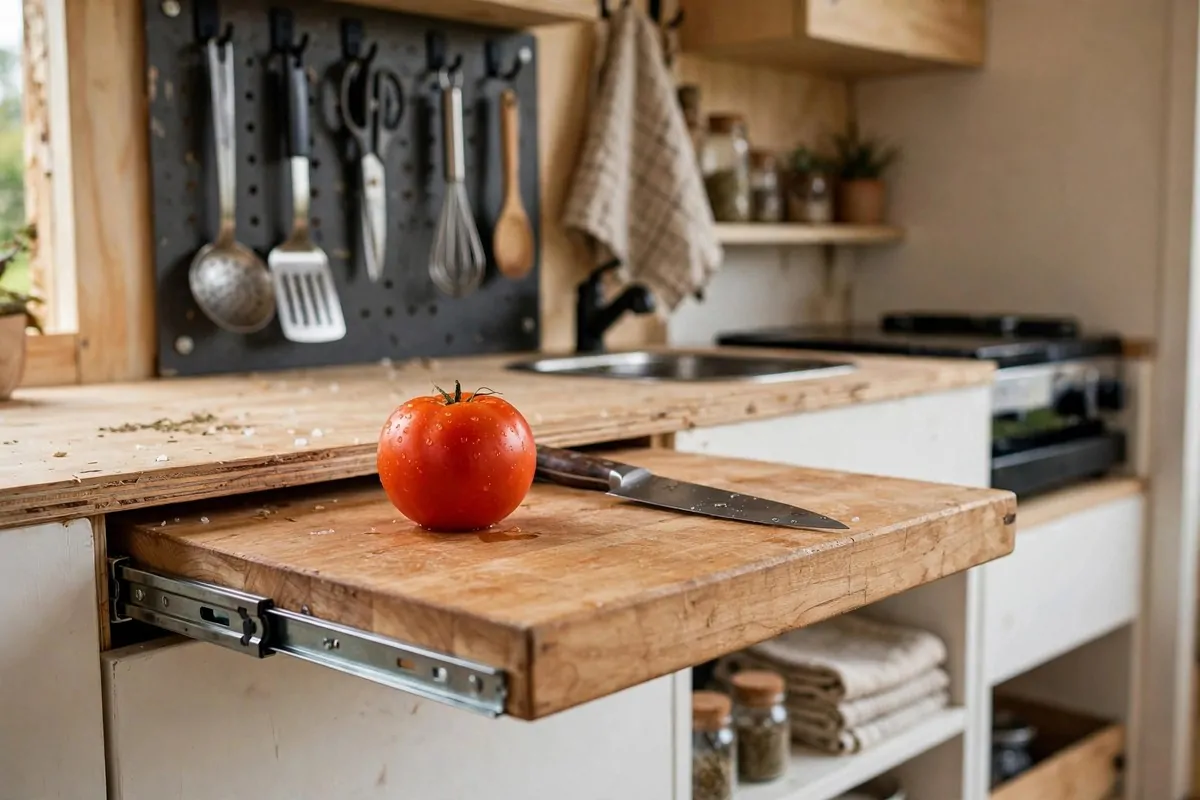
Tiny home kitchens have one big problem. There is never enough counter space. You chop vegetables in shifts, moving things around like a puzzle.
A slide-out cutting board hides under your counter and pulls out when you need it. Instant extra workspace. Push it back and it disappears completely.
Find a gap under your countertop, above a drawer or a cabinet. Many kitchens have a false drawer front right under the counter. That is the perfect spot.
Build or buy a flat wooden board that fits the gap. Attach it to simple drawer slides mounted inside the cabinet. The board should glide in and out smoothly.
Use a hardwood board like maple. Soft woods scar too fast under a knife. Oil the board with food-safe mineral oil so it resists stains and moisture.
The board doubles as a serving tray. Pull it out loaded with cheese and crackers when friends visit. It feels fancy, but it is just your cutting board doing double duty.
I use mine every single day. It holds the cutting board, then it holds the chopped vegetables, then it slides away with the crumbs. My main counter stays clear for actual cooking.
This is a small project with a daily payoff. Most of these Diy Tiny Home Ideas are like that. A little work once, and your kitchen is better forever.
If you rent, check that you can modify the cabinet first. Some landlords are fine with it since it is hidden. Others are not. Always ask before you drill.
- Find the gap under your countertop
- Use hardwood like maple for durability
- Mount on smooth drawer slides
- Oil with food-safe mineral oil
- Confirm with your landlord if you rent
Wipe the board down after each use and re-oil it monthly. A well cared for board lasts for years. Neglect it and it will crack. You have been warned.
Build a Pallet Deck and Claim an Outdoor Room
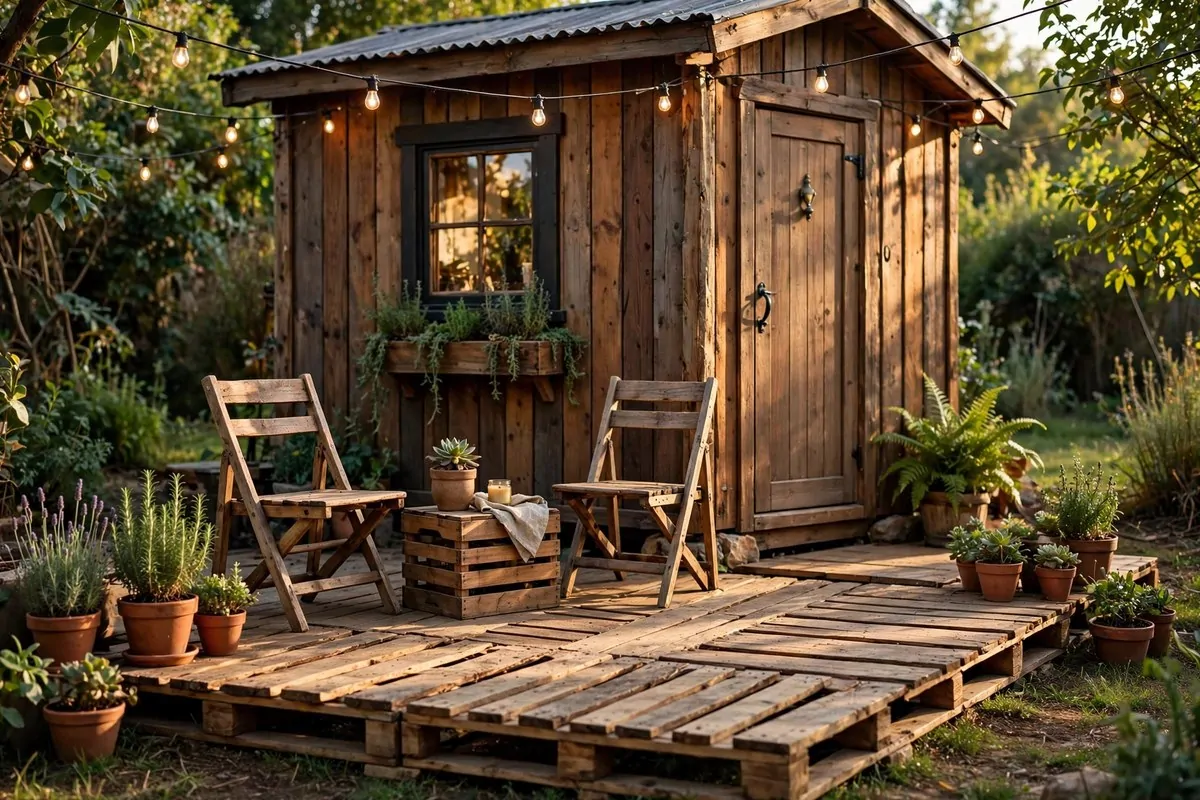
Here is a secret about tiny homes. Your home does not end at the front door. The patch of ground outside is extra living space waiting to happen.
A pallet deck turns that patch into an outdoor room. Morning coffee spot. Evening reading corner. Dinner under the stars. All from free pallets and a weekend.
Level the ground first. This is the least fun step and the most important one. An unlevel deck wobbles and rots faster. Take the time to get it flat.
Lay the pallets in your chosen shape and screw them together. Deck screws hold better than nails for outdoor use. Leave small gaps between pallets for rain to drain through.
Sand the top surfaces well. Bare feet and splinters do not mix. This is the step everyone wants to skip, and it is the step that matters most for comfort.
Seal the wood with an outdoor wood sealer. Pallets are not treated for weather, so sealing is what keeps your deck alive through rain and sun. Reapply once a year.
Furnish it simply. Two chairs, a small crate table, some potted plants. String lights overhead if you want the magic. It does not take much to feel like a resort.
My deck is where I drink my morning coffee from spring to fall. It doubled my living space for the cost of some screws and sealer. Best trade I ever made.
Check local rules before you build. Some areas have rules about structures, even small ones. A quick check now beats a headache later.
This is the perfect last project on the list. Finish your indoor projects, then step outside and build yourself one more room. You earned it.
- Level the ground before you start
- Screw pallets together with deck screws
- Sand top surfaces smooth for bare feet
- Seal with outdoor wood sealer yearly
- Check local rules about structures
| Project | Best weekend | Skill level |
|---|---|---|
| String lights, mirrors, labels | Any rainy Saturday | Beginner with a drill |
| Pallet table, under-bed drawers, deck | A full weekend | Confident DIYer |
| Stair drawers, chandelier wiring | Two weekends | Get a handy friend |
You made it to the end of the list. Nineteen projects, and every one of them is startable this year with tools you probably already own or can borrow.
Here is my advice. Do not try to do all nineteen. Pick one. The one that kept popping into your head while you read. Start that one this weekend.
A tiny home gets better one project at a time. That is the whole beauty of it. Small space, small projects, big changes. Your hands can do more than you think.
Now close this tab, find your tape measure, and go make something. Your tiny home is waiting.