34 Small Space Vegetable Garden Ideas That Grow a Lot

I measured our little yard with my feet one morning, and it took me just nine steps to cross it. I stood there and laughed a little, because I still wanted fresh food from that small patch.
I had no big field and no wide beds, so I had to think in a new way.
My pots sat close to the wall, my tray sat by the step, and my tall plants reached up toward the light. I learned that a small place can still feed a family a little each week.
I made lots of small mistakes at first. I put a thirsty plant in a dry corner. I put a tall plant where it blocked the light for the short ones.
Little by little, I found what works in a tight spot.
I kept the plans that were easy, cheap, and kind to a busy week. I left out the plans that took too much room or too much work.
You will find all 34 ideas right here in this one post, from start to finish, so you can read them all today and pick your favourites now.
1. Grow Up a Sunny Wall
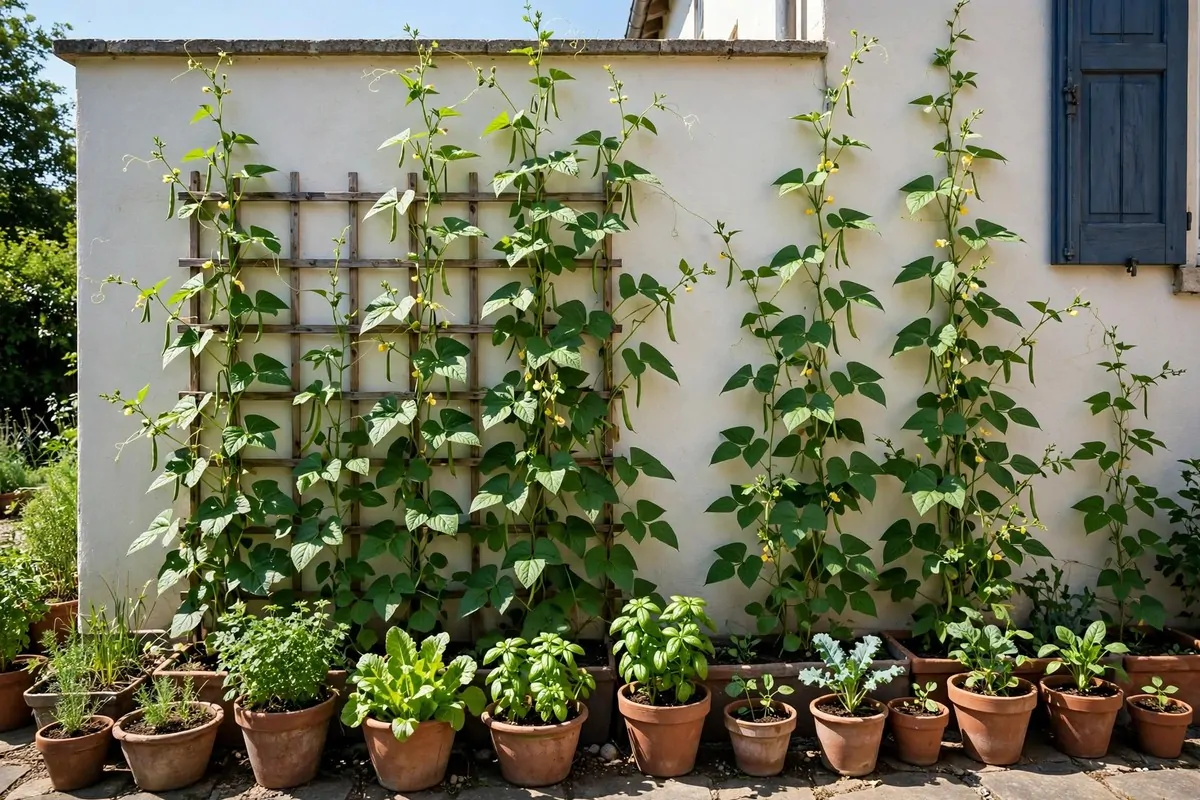
A sunny wall is like a free shelf that is already there. I looked at ours and saw room for pots, one above the other.
I picked the wall that gets sun for most of the day.
I fixed small pots in a row, and I left a gap between them for air. The plants could breathe, and I could reach each pot with my watering can. I watered in the morning, when the soil was cool.
A wall garden saves floor space for chairs and a path.
I used strong hooks and a light frame, and I tied each pot so it would not slip. You can expect to pay about $18 to $35 for the frame, pots, and soil to start this wall.
I planted leafy greens and small herbs near the top, where the light is best.
I kept the heavy pots low, so the frame stayed safe. I checked the hooks each week, and I moved a pot if it looked too dry. I liked how the green wall made our small yard feel full and alive.
I picked a few leaves when I needed them for lunch. The plants kept growing back, and I felt proud each time I used them.
A wall like this turns a plain wall into a small farm.
2. Stack Pots on a Plant Stand
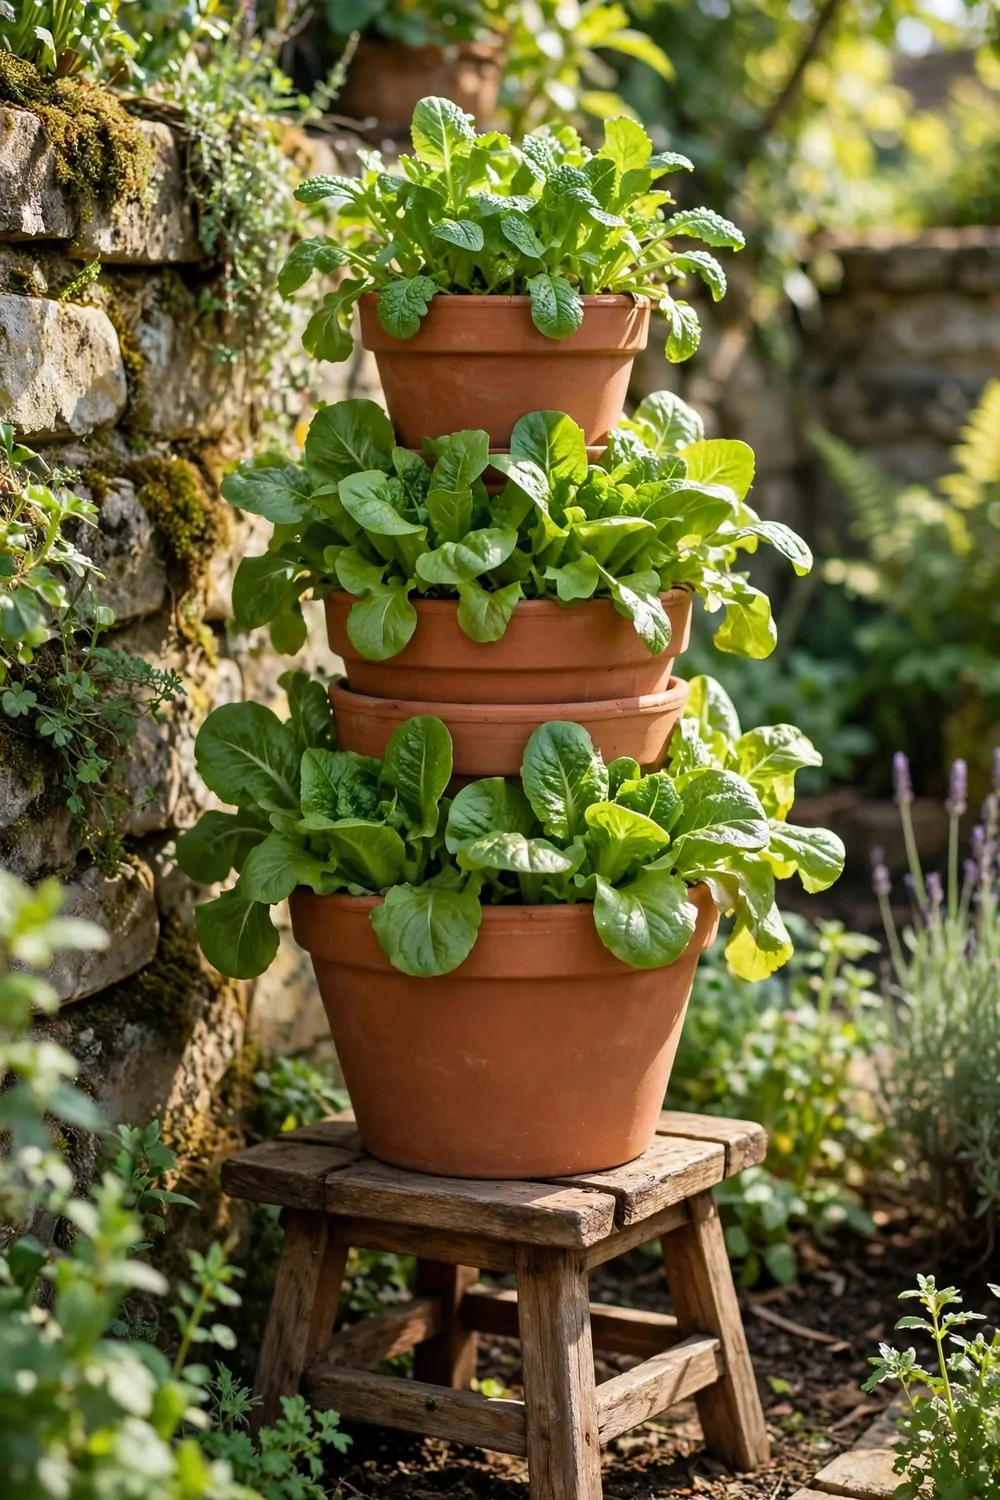
A plant stand lifts small pots up where I can see them. I bought a simple wooden stand with room for three pots, and it fit in a corner by the door.
I put the biggest pot at the bottom, where it sits firm.
The small pots went on top, where they could get light. I watered from the top, and the extra water dripped down to the pots below. I wiped the stand dry after watering, so it stayed clean.
This plan is good for a balcony or a small patio.
I filled each pot with light soil and one small plant. A stand like this often runs $22 to $40 for the stand, pots, and soil together.
I turned the stand a little each week, so no plant stayed in shade for too long.
I grew salad leaves in one pot and small herbs in the next. The leaves stayed soft, and the herbs smelled fresh when I brushed past them. I used a small pair of kitchen scissors to snip what I needed.
I liked that I could move the whole stand if the sun moved. I just slid it a few steps to the side, and the plants were happy again.
A stand keeps pots tidy, and it stops me from tripping over pots on the floor.
3. Fill a Narrow Raised Bed in a Sunny Spot
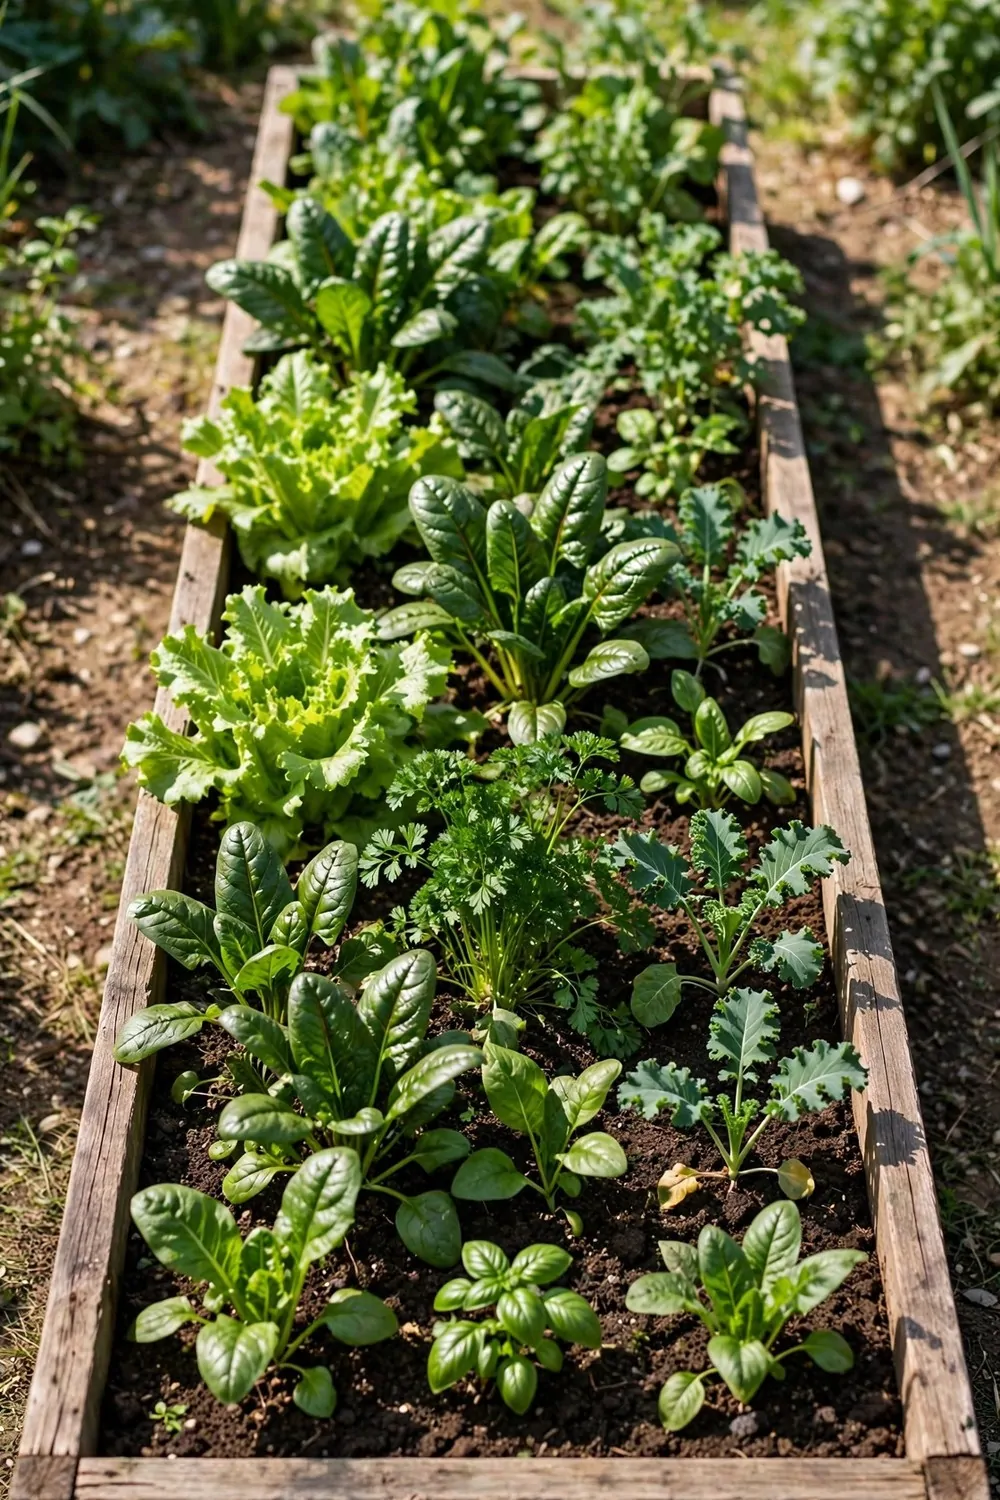
A narrow raised bed fits where a wide bed never could. I built one along the sunny side of our yard, and it was only as wide as my arm.
I used plain wood boards and a few screws to make the frame.
I filled it with soil up to the top edge, and I patted it down with my hands. The bed stayed neat, and the soil stayed soft for roots. I planted in straight rows, so I could see each row clearly.
Seeds went in from a plain packet with no words on it at all. The packet was completely blank, and I wrote nothing on it.
I planted carrots in one row and salad leaves in the next. A narrow bed like this usually costs $30 to $55 for wood, soil, and seeds to get going.
I watered the bed slowly, so the water sank in and did not run off.
I picked weeds with my fingers when I saw them. The bed was so narrow that I could reach the middle from one side. I never had to step on the soil, and that kept it soft.
In a few weeks, the leaves were tall enough to pick. I took a small pick each week, and new leaves grew in their place.
A narrow bed gives you a real garden feel, even in a tiny yard.
4. Grow Salad Leaves in One Big Pot
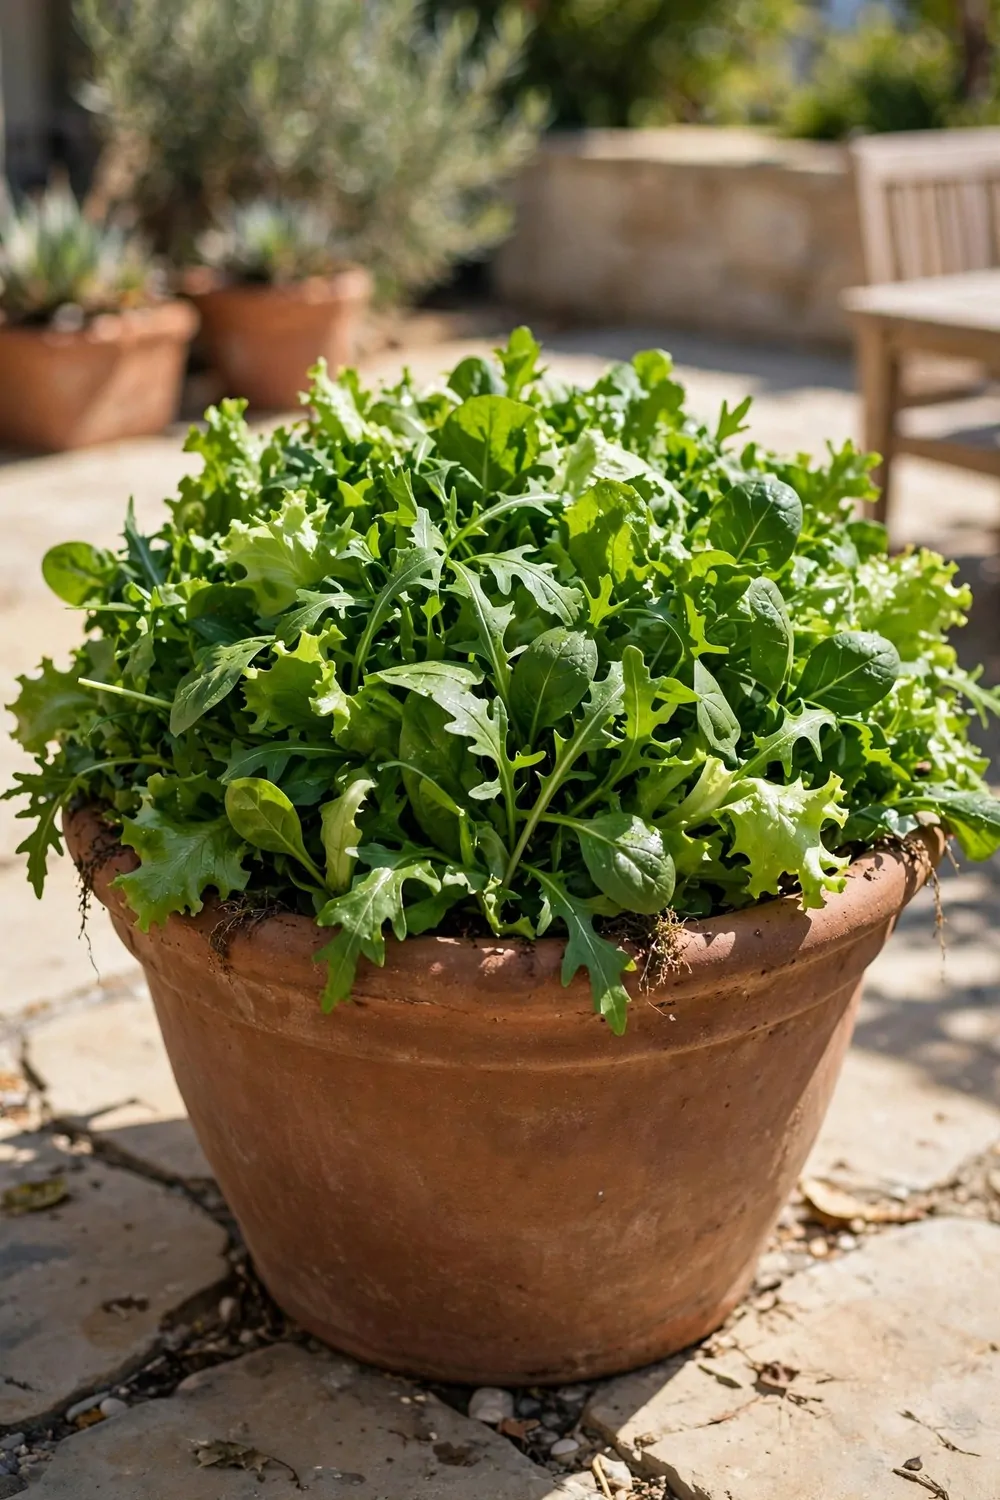
One big pot can hold a whole salad patch. I placed ours by the kitchen door, so I could grab leaves while I cooked.
I chose a wide pot, not a tall thin one.
The wide top gave the leaves room to spread out. I filled it with soft soil and pressed the seeds in gently. I covered them with a thin layer of soil, and I watered them with a soft spray.
I kept the pot in a spot that gets sun in the morning.
The leaves grew fast, and I picked the outer leaves first. A big pot set up like this tends to cost $12 to $25 for the pot, soil, and seeds.
I left the small leaves in the middle to keep growing.
I watered when the top of the soil felt dry. I did not let the pot sit in a puddle, because the roots do not like wet feet. I tipped out extra water after rain, and the leaves stayed fresh.
I mixed two kinds of leaves in the same pot. One was soft and green, and one was a little crisp. They looked nice together in a bowl, and they tasted fresh.
One big pot is the easiest start I know, and it fits almost anywhere.
5. Hang a Pocket Planter by the Door
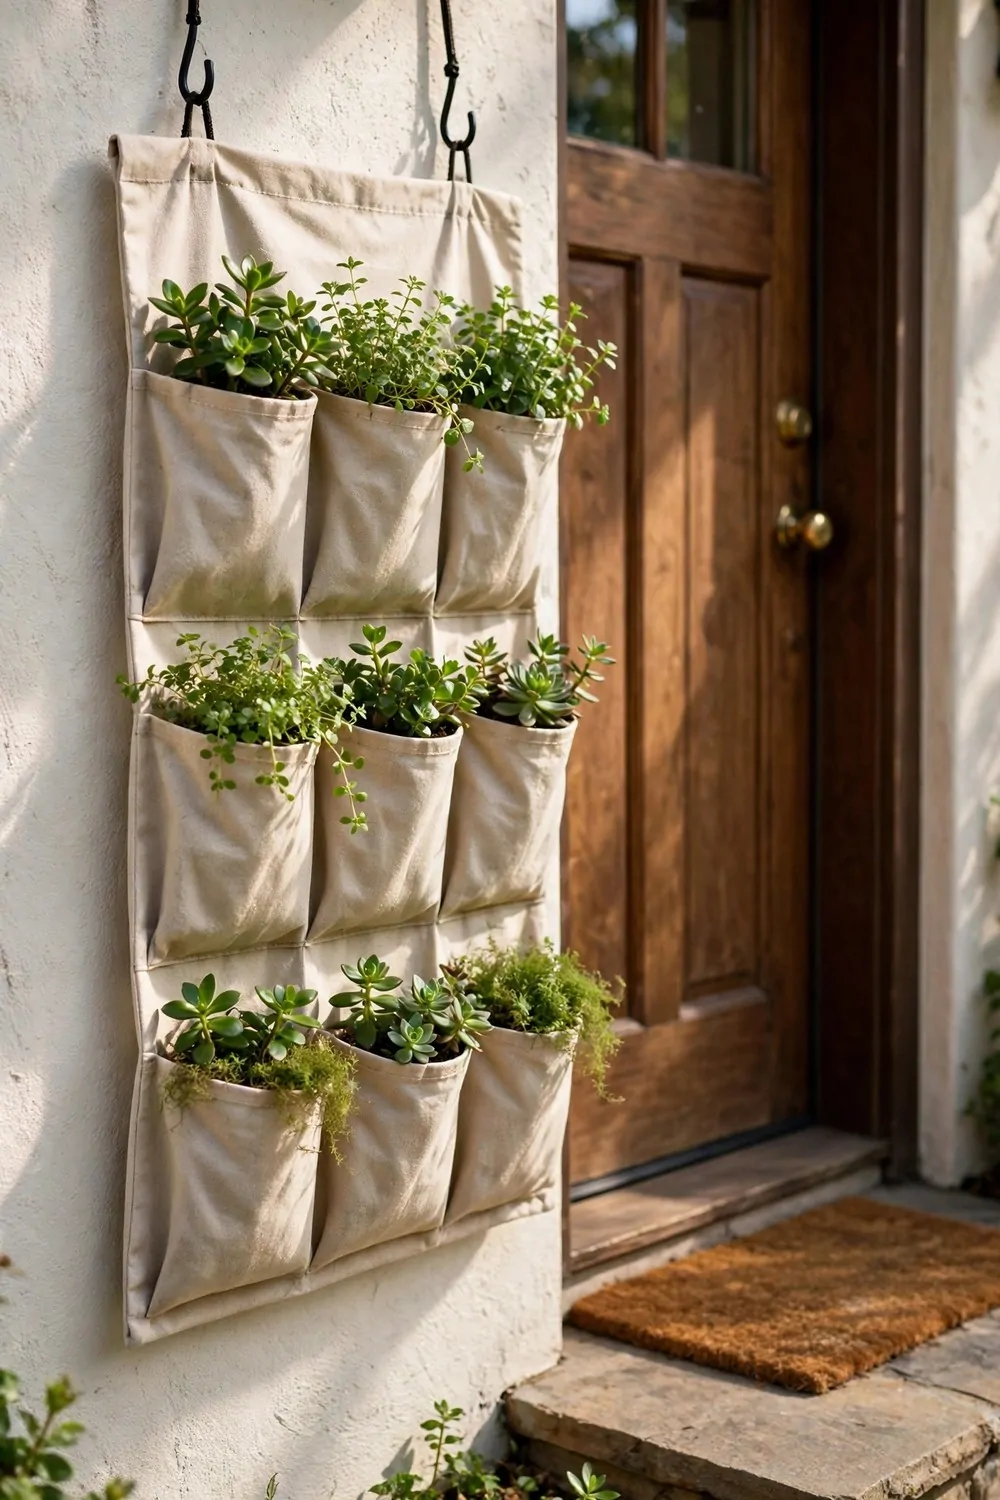
A pocket planter hangs flat on a wall or a fence. I hung ours by the back door, where I pass it many times a day.
Each pocket holds one small plant.
I filled the pockets with soil and tucked a small plant into each one. The planter looked like a green curtain when the leaves grew. I watered with a small jug, pocket by pocket, and I went slow so the water stayed in.
This is a good plan for a wall with no floor space at all.
I put herbs in the top pockets and salad leaves lower down. You will often spend $15 to $30 for the planter, soil, and plants to start.
I checked the top pockets first, because they dry out fast in the sun.
I moved the planter a little to the side on very hot days. The plants stayed fresh, and the wall stayed dry. I liked seeing green leaves each time I opened the door.
I snipped herbs for dinner right from the door. The plants kept growing, and I only took a little at a time.
A pocket planter turns a blank wall into a small green patch.
6. Turn a Wooden Crate into a Bed
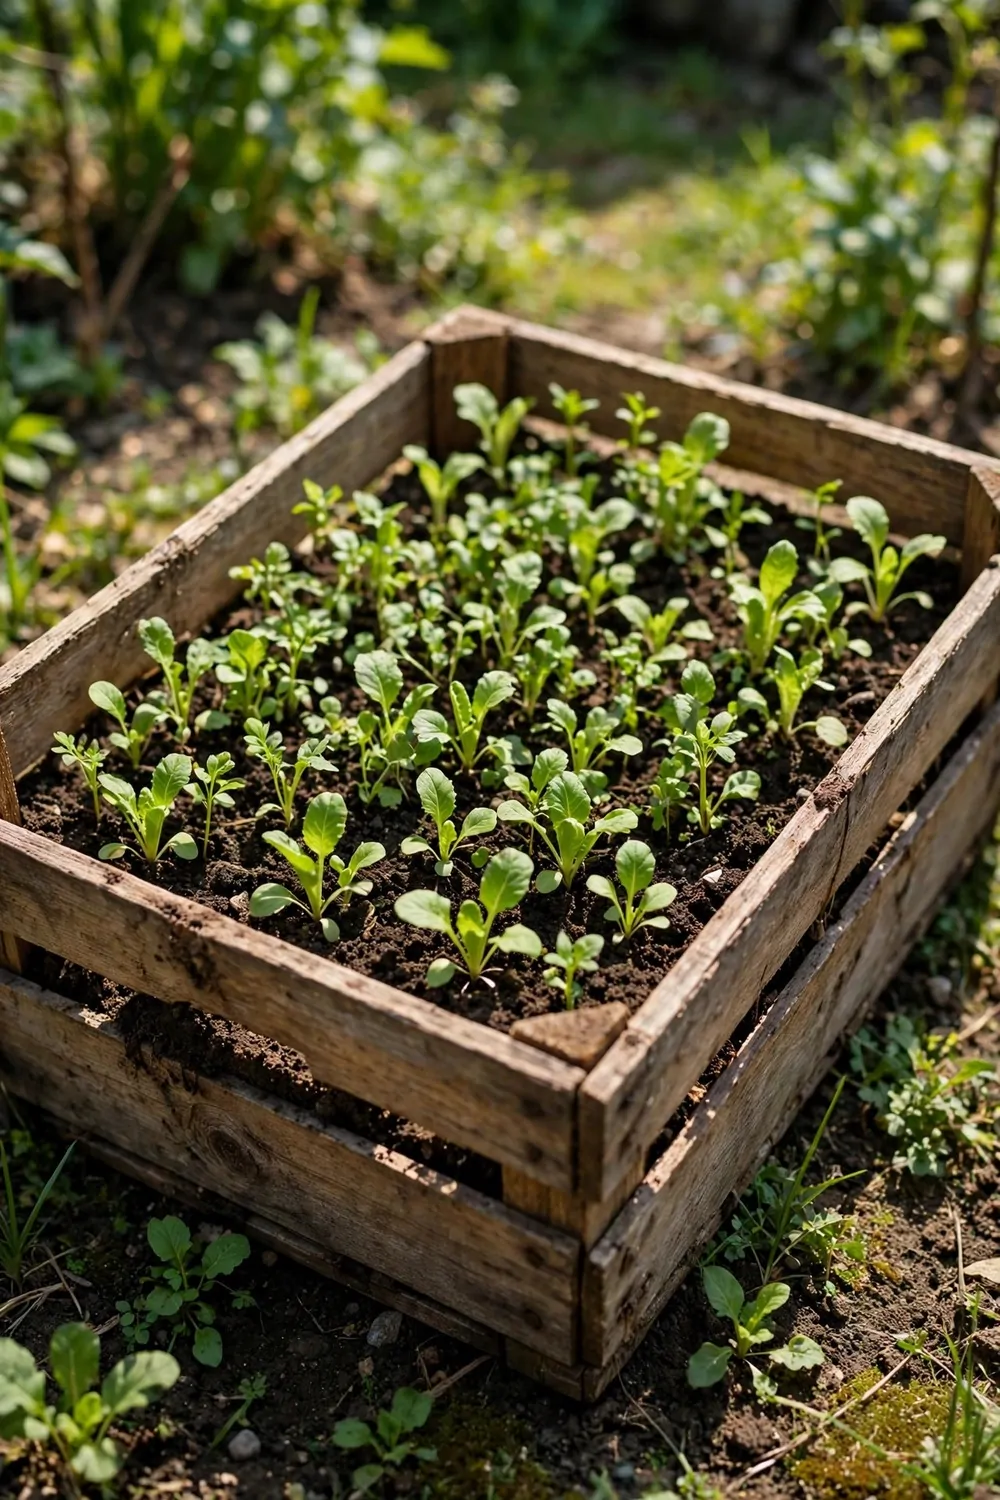
An old wooden crate can turn into a small garden bed. I found a strong crate, and I lined it with a plain cloth to hold the soil in.
I set the crate on the soil in a sunny spot, so water could drain out below.
I filled it with soil and smoothed the top with my hand. The crate looked like a small farm box, and it fit in a sunny corner of the yard. I planted salad leaves in one half and small onions in the other half.
A crate garden is easy to move if you need the space.
I pushed it into the sun in the morning and back to the shade in the hot part of the day. A crate bed often costs $10 to $22 for the crate, lining, soil, and seeds.
I watered it with a small can, and I went slow.
The wood stayed firm, and the soil stayed damp but not wet. I checked the bottom each week to make sure the water could drain. I liked that the crate used wood I already had at home.
In a few weeks, I had leaves to pick and small onions to pull. I took a small pick each week, and the crate kept giving more.
A crate bed is simple, cheap, and full of charm.
7. Grow Spring Onions in a Small Pot
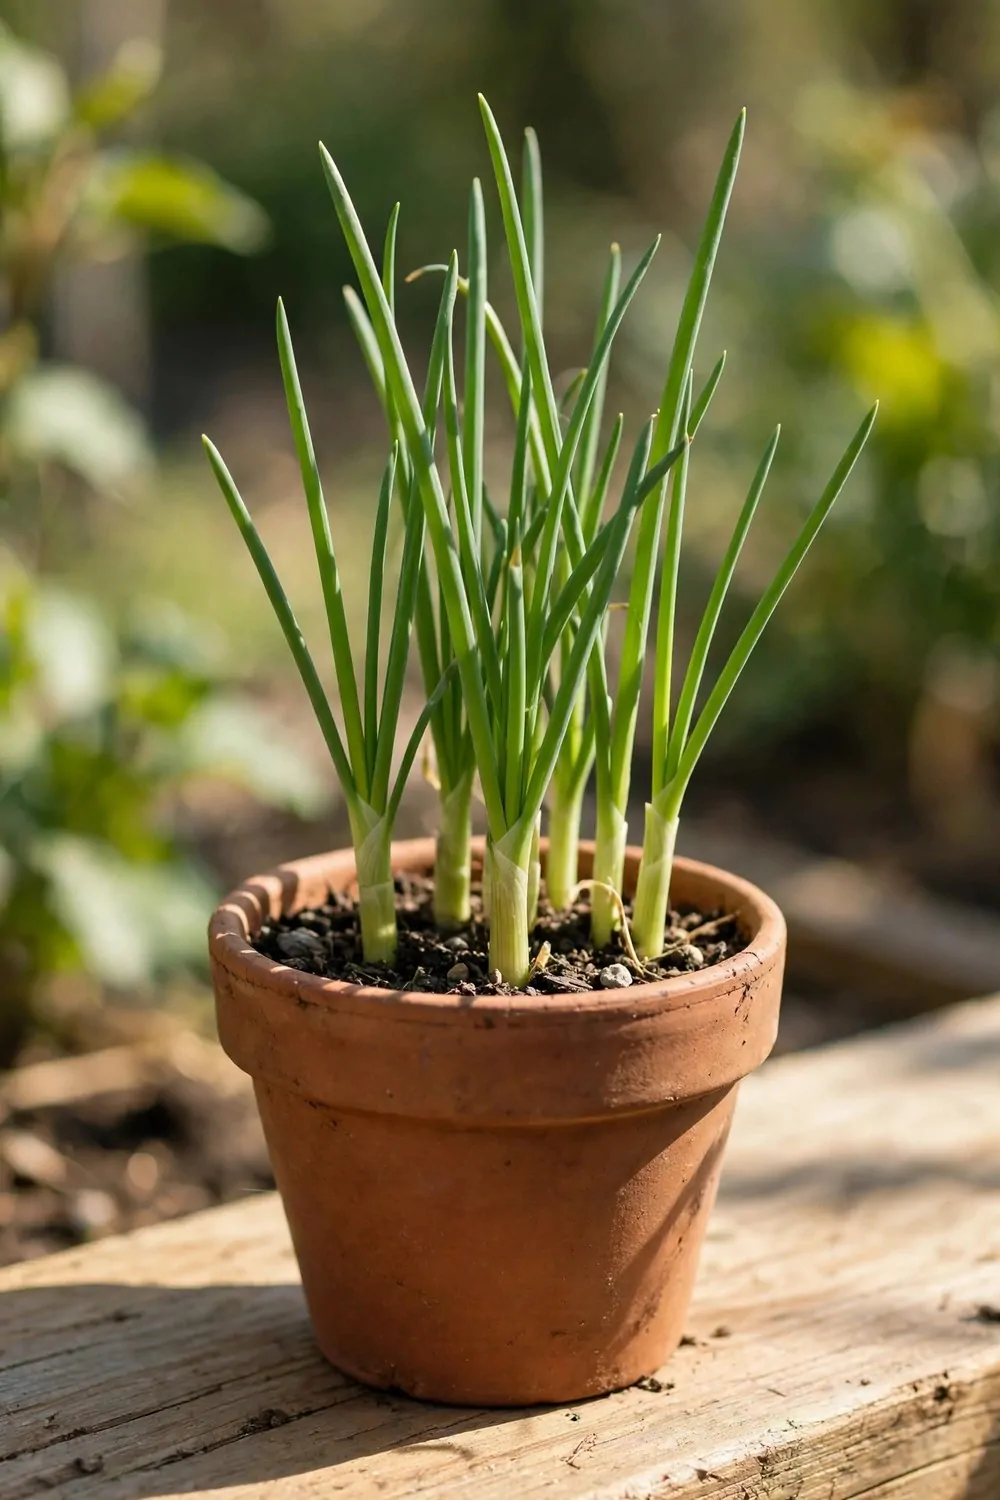
Spring onions are kind to a small pot. I grew them in a pot no bigger than a soup bowl, and they stood up tall and green.
I filled the pot with soft soil and made small holes with my finger.
I dropped one seed in each hole and covered it with soil. The seed packet was plain and completely blank, with no words on it at all. I watered the pot gently, and I put it on a sunny windowsill.
Spring onions do not need a lot of room to grow.
I kept the soil damp, but I did not flood it. A small pot of spring onions usually costs $6 to $14 for the pot, soil, and seeds.
I thinned the plants when they were crowded.
I pulled out the weakest ones and left space for the strong ones. The strong ones grew thicker, and their green tops reached up. I snipped the tops for soup and salads, and the bulbs kept growing below.
I liked how fast they grew, and how little work they asked for. I checked them each morning, and I smiled when I saw new green shoots.
A small pot of spring onions is a good first plant for a new grower.
8. Grow Tomatoes in One Tall Pot
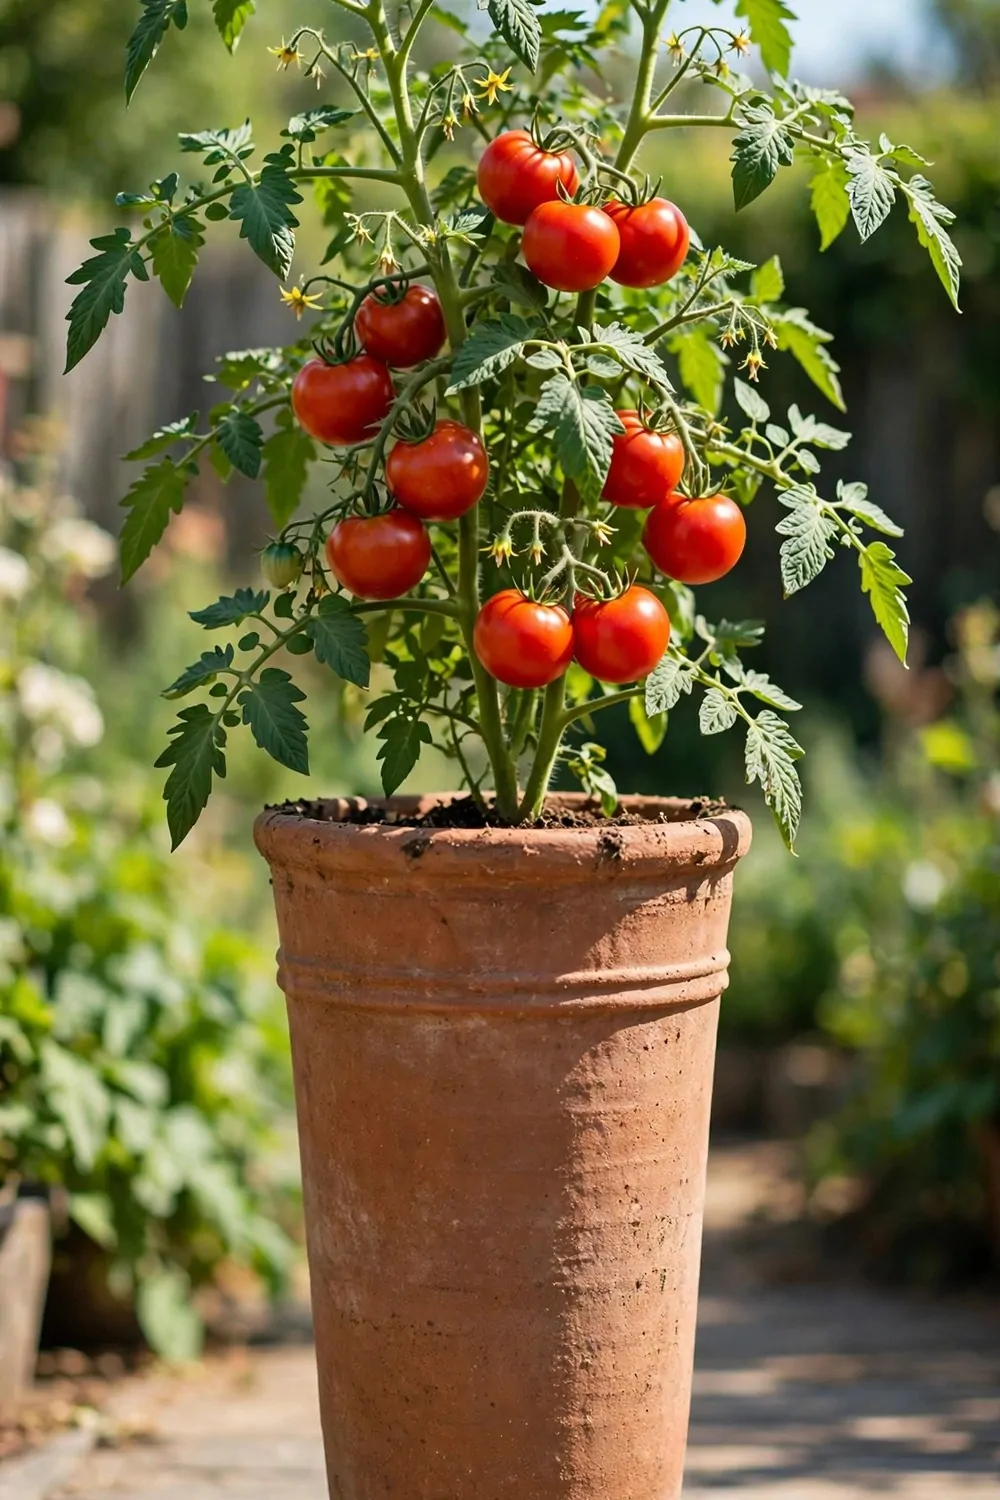
One tall pot can hold one strong tomato plant. I placed ours in the sunniest corner we had, where it got light all day.
I chose a deep pot with holes in the bottom.
I filled it with rich soil and set the plant in the middle. The plant grew strong and upright on its own. I gave it room to spread as it grew taller.
Tomatoes love sun and warm soil.
I watered the base of the plant, not the leaves. A tall pot set up often costs $20 to $38 for the pot, soil, and plant.
I fed the plant with plain water and gave it time.
The plant grew tall, and small yellow flowers came first. Then small green fruits formed, and they grew bigger each week. I picked them when they turned red and felt soft in my hand.
I used them in salads and sauces, and they tasted fresh and sweet. I only picked a few at a time, and the plant kept making more.
One tall pot gives you a lot of fruit from a very small floor space.
9. Roll a Cart of Pots into the Sun
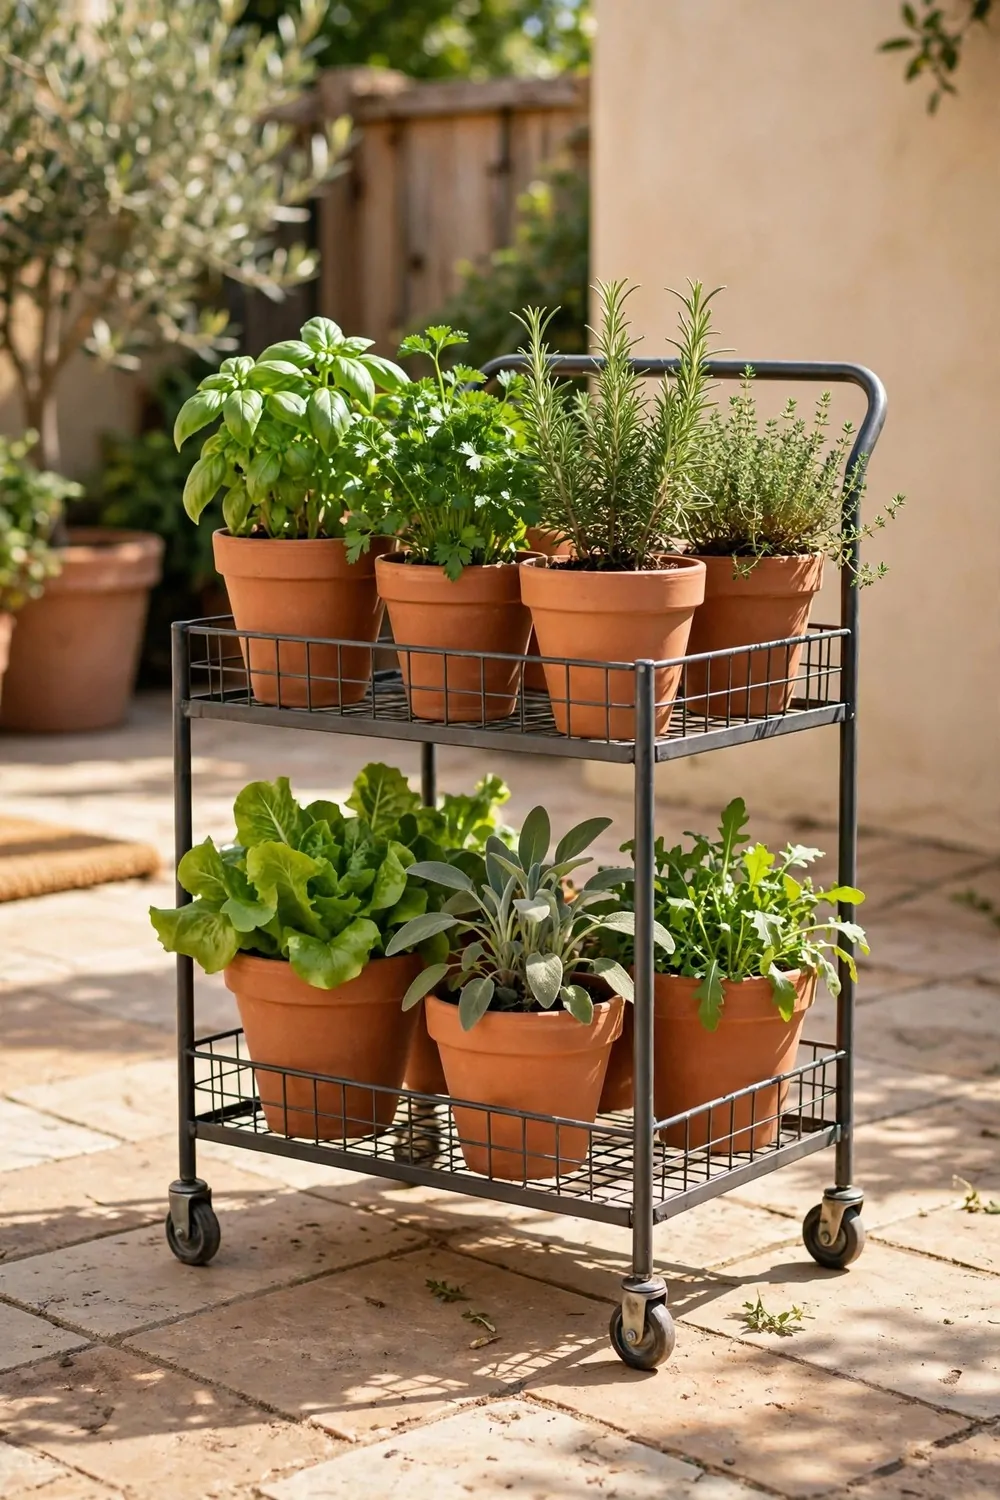
A cart on wheels lets me chase the sun. I loaded ours with small pots, and I rolled it to the sunny side in the morning.
The cart had a flat top and a low shelf below.
I put sun loving plants on the top and shade happy plants below. I rolled the cart back to the wall in the evening, so it was safe at night. The wheels made it easy, and I never had to lift a heavy pot.
This plan works well on a patio or a flat balcony.
I kept the pots close together, so they held water longer. A rolling cart set up tends to cost $35 to $60 for the cart, pots, and soil.
I watered the pots before I moved the cart.
I checked that no pot was tipping over as I rolled it. The plants stayed steady, and the soil stayed in place. I liked that I could move the whole garden in one push.
I grew herbs, salad leaves, and small peppers on the cart. I picked a little each week, and the cart looked like a small moving garden.
A cart is a smart trick when your sunny spot moves through the day.
| Idea | Typical Cost |
|---|---|
| Sunny wall | $18 to $35 |
| Plant stand | $22 to $40 |
| Narrow raised bed | $30 to $55 |
| Big salad pot | $12 to $25 |
| Pocket planter | $15 to $30 |
| Wooden crate | $10 to $22 |
| Spring onions | $6 to $14 |
| Tall tomato pot | $20 to $38 |
| Rolling cart | $35 to $60 |
10. Build a Slim Bed Along the Fence
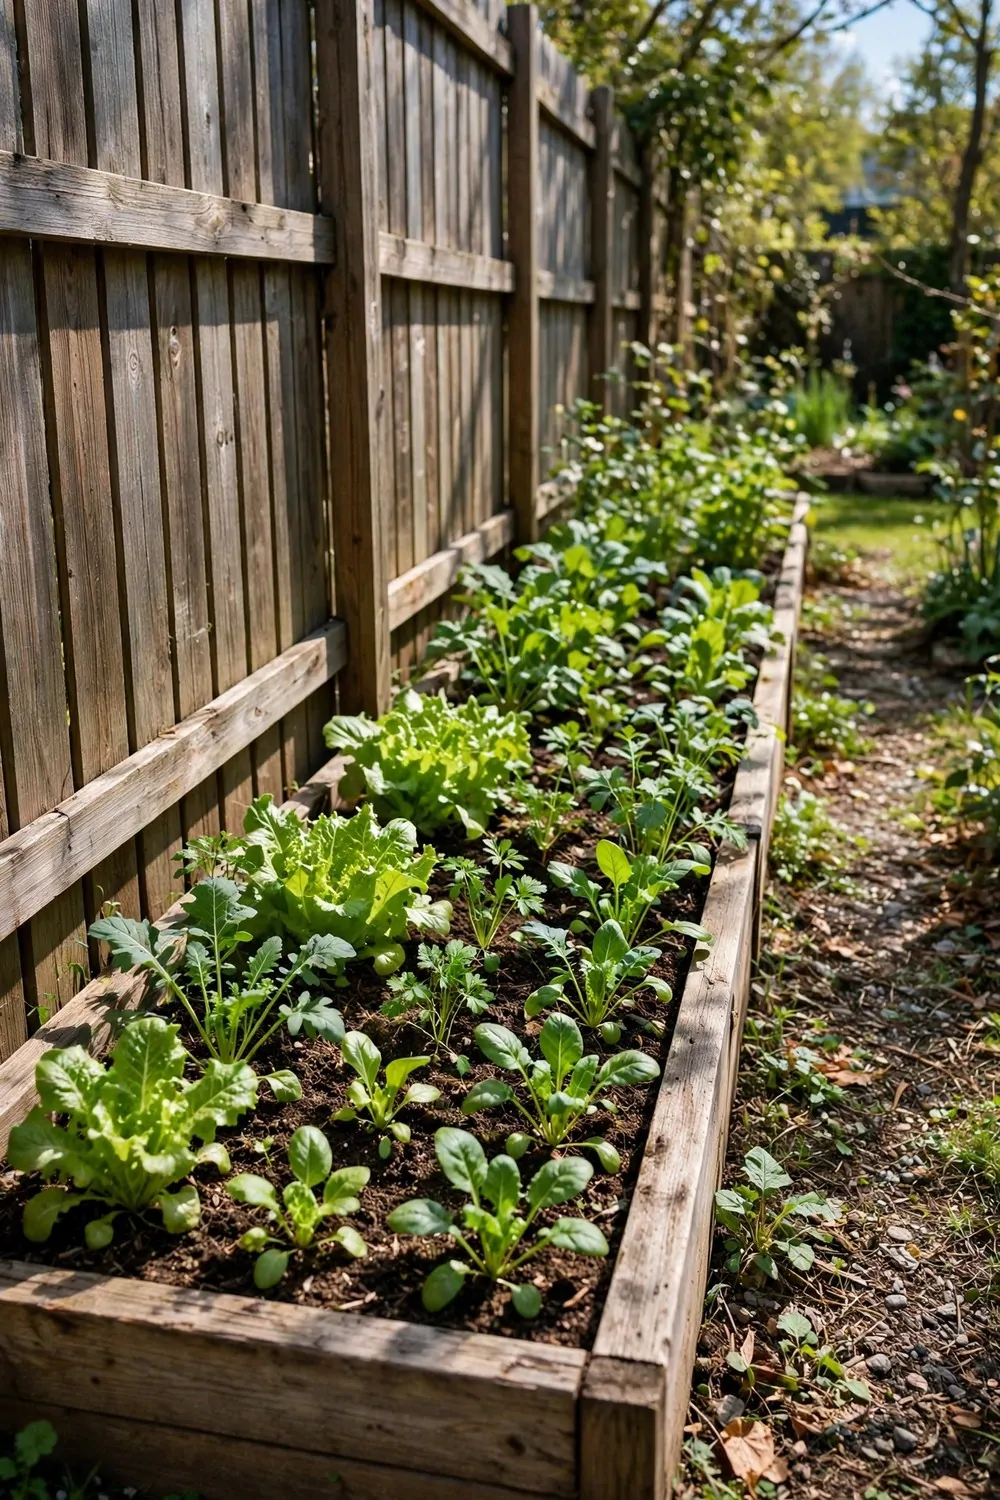
A slim bed along the fence uses space that is often left empty. I built ours with two long boards and a back board against the fence.
The bed was long but very narrow.
I could reach every plant from the front, and I never stepped in the bed. I filled it with soil and planted in one long row. The fence gave the plants a little shelter from wind, and the sun reached them over the top.
A fence bed is good for plants that climb a little.
I planted leafy greens along the row, and they grew fast in the sun. A slim fence bed often costs $28 to $50 for wood, soil, and seeds to build.
I watered along the row with a long spout can.
The soil stayed soft, and the plants grew straight up. I weeded the bed each week, and it took only a few minutes. I liked how tidy the long bed looked against the fence.
In a few weeks, I had leaves and beans to pick. I took a small pick each week, and new growth came after each pick.
A slim fence bed turns a dead edge into a working garden.
11. Grow Beans Up a Small Trellis
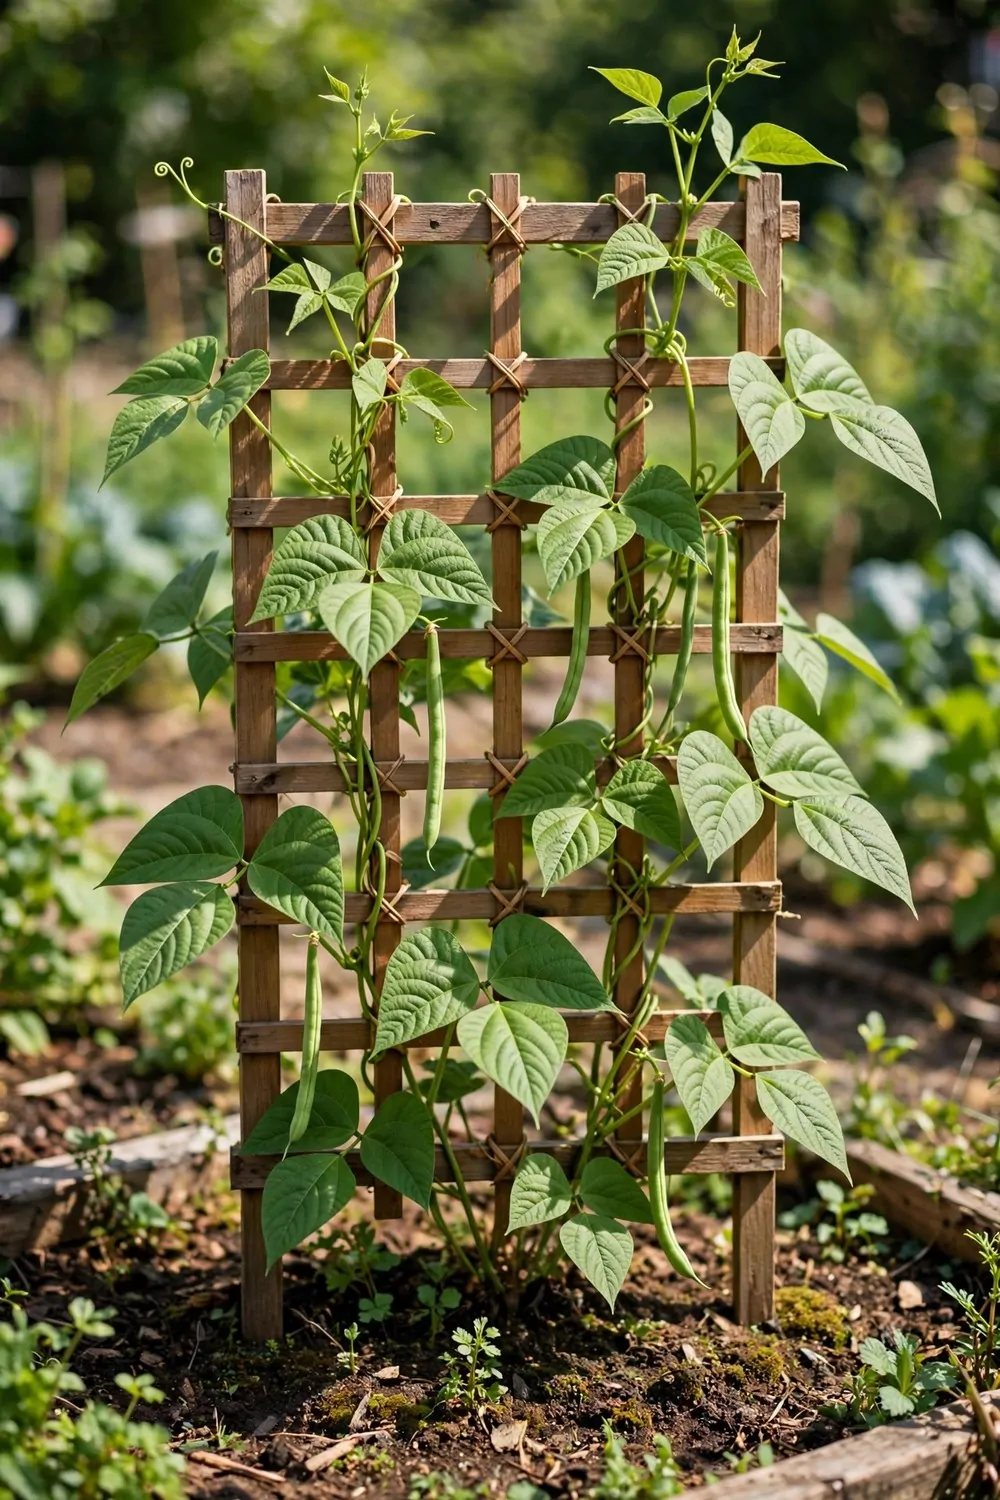
Beans love to climb, and a small trellis gives them a place to go. I set a trellis in a sunny bed, and the beans reached up fast.
I planted the beans at the base of the trellis.
I pressed each seed into soft soil and watered it in. The seed packet was plain and completely blank, with no words on it. The beans sprouted in a few days, and their thin stems curled round the trellis bars.
A trellis saves floor space, because the plant grows up.
I tied the stems loosely at first, so they could find their own way. A small trellis set up usually costs $16 to $32 for the trellis, soil, and seeds.
I watered the base each morning, when the air was cool.
The leaves grew thick, and the flowers came in soft white bunches. Then small pods formed, and they grew long and green. I picked the pods when they felt firm and looked bright.
I cooked them the same day, and they were crisp and fresh. I picked a small handful each week, and the plant kept making more pods.
A trellis of beans is a tall green curtain that also feeds you.
12. Hang a Basket of Strawberries
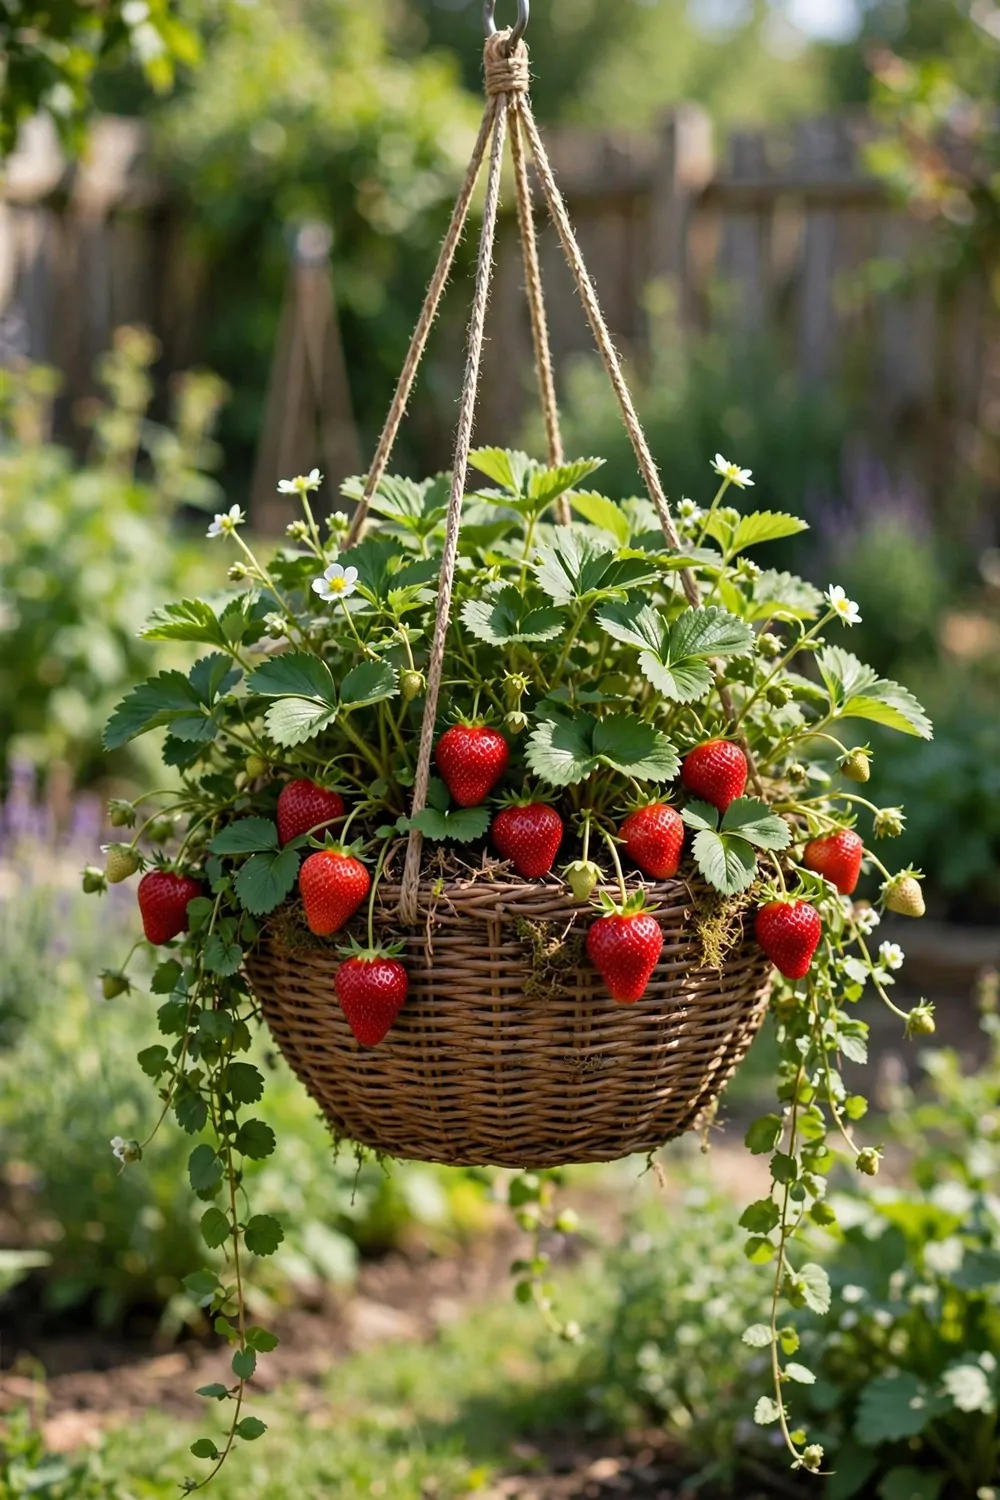
A hanging basket keeps strawberries off the ground. I hung ours from a strong hook by the sunny wall, where I could reach it easily.
The basket was wide and shallow, with room for three small plants.
I filled it with light soil and tucked the plants round the edge. The leaves spilled over the sides, and the fruit hung down where I could see it. I watered it slowly, so the soil stayed damp and did not drip too much.
Hanging fruit stays clean and is easy to pick.
I checked the hook each week to make sure it was firm. A hanging basket set up often costs $14 to $28 for the basket, hook, soil, and plants.
I moved the basket a little when the sun was too strong.
The plants liked the morning sun best, and they rested in light shade later. I picked the fruit when it was red all over and smelled sweet. I only took a few at a time, and more fruit ripened after each pick.
I liked eating them fresh from the basket. They were soft, red, and full of juice, and my family asked for them each day.
A basket of strawberries is a sweet treat that hangs in the air.
13. Plant in a Galvanised Trough
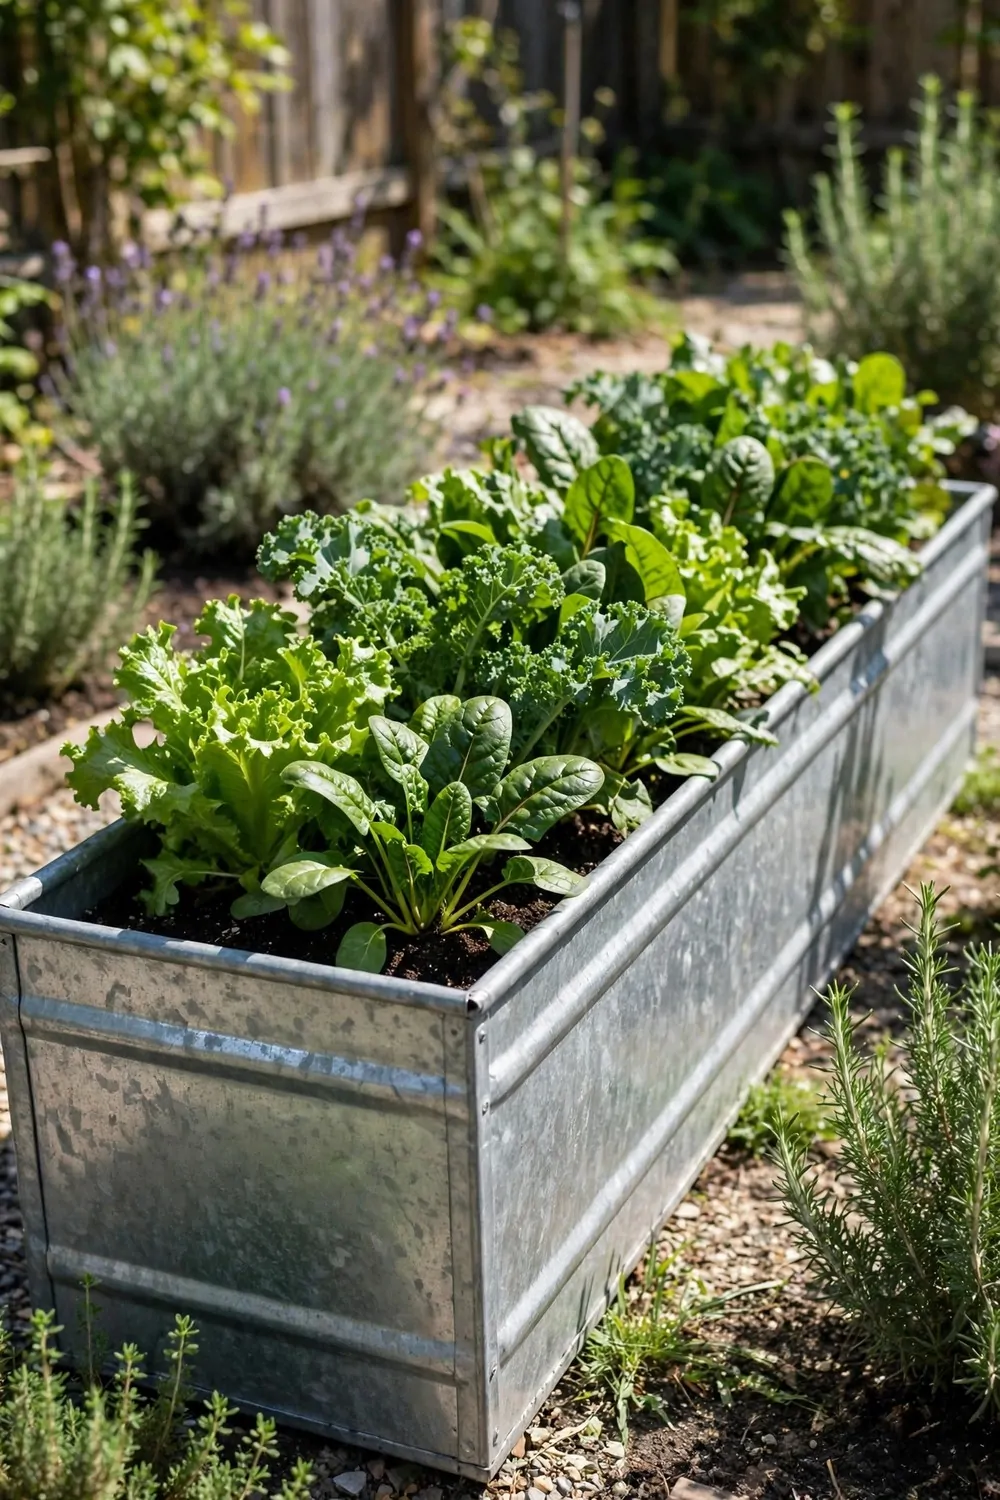
A galvanised trough is a strong metal tub that holds a lot of soil. I placed ours in a sunny corner, and it became a small bed of its own.
The trough was long and not too deep.
I filled it with soil and left a small gap at the top. The metal stayed cool in the morning and warm in the sun. I planted salad leaves at one end and small herbs at the other end.
A trough is good because it keeps the soil in one neat place.
I watered it with a can, and the water spread out evenly. A trough garden tends to cost $40 to $70 for the trough, soil, and plants to start.
I checked the drain holes at the bottom each week.
The holes let extra water out, so the roots did not sit in water. I liked that I could weed the trough while standing up, with no bending to the ground. The plants grew fast, and the leaves stayed bright green.
I picked leaves for lunch and herbs for dinner. I took a small pick each week, and the trough kept growing more.
A trough turns a plain corner into a neat little farm.
14. Grow Leafy Greens in a Shallow Tray
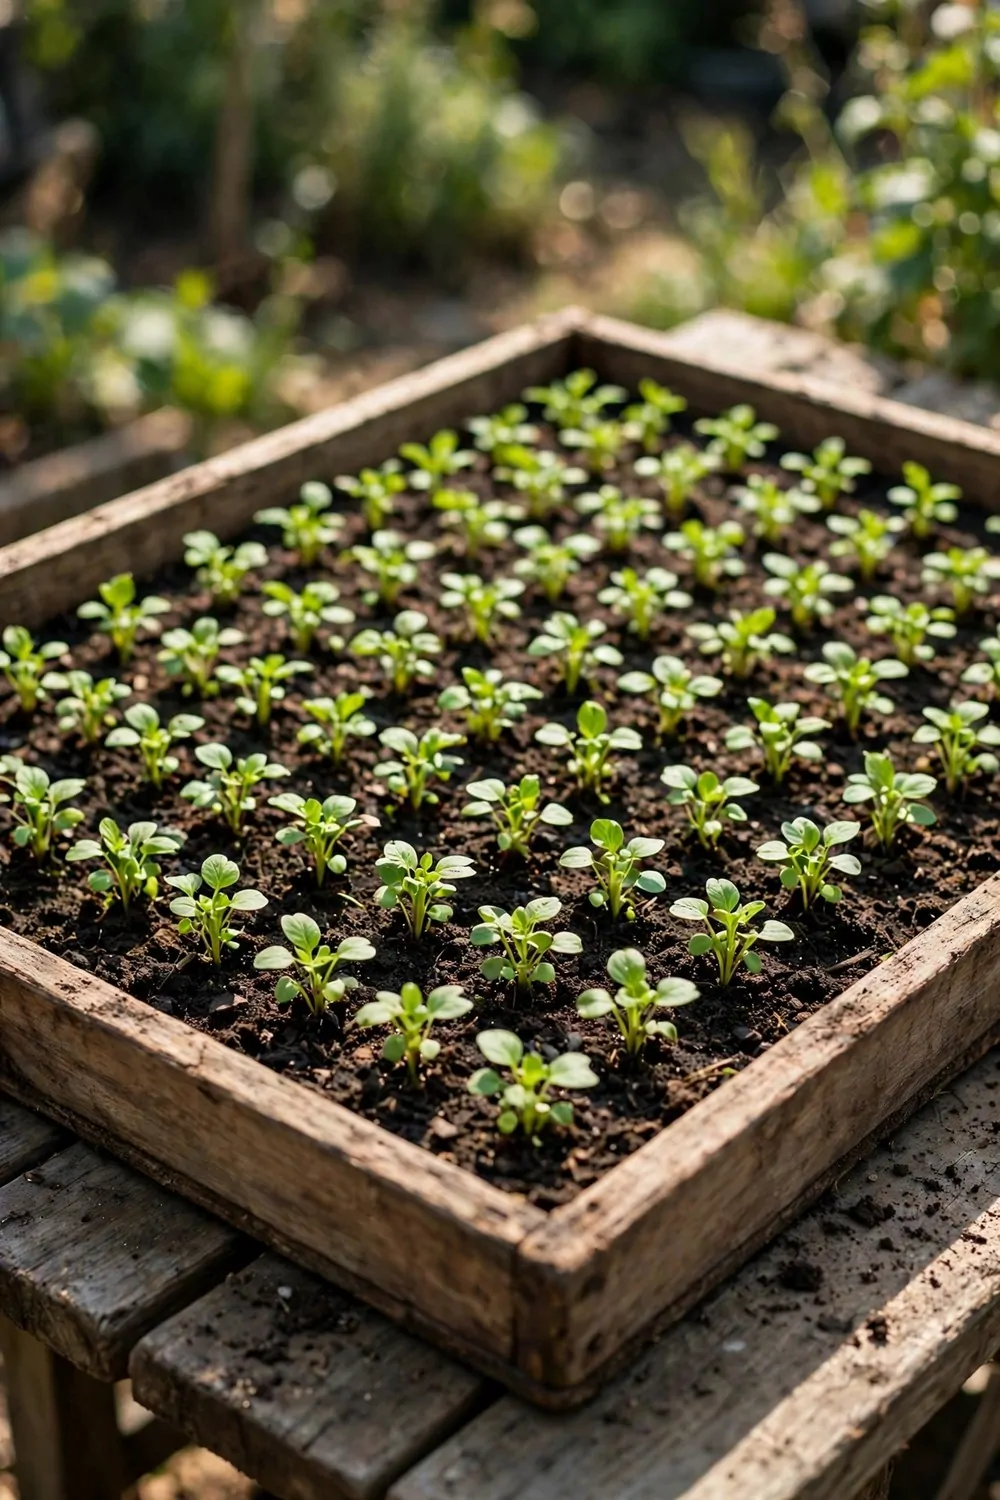
A shallow tray is perfect for leafy greens. I set ours on a table by the window, where it got soft morning light.
The tray was wide, flat, and easy to lift.
I spread soil in a thin layer and pressed the seeds in. The seeds came in a plain packet that was completely blank, with no words on it at all. I misted the soil with water, and I covered the tray for a few days to keep it damp.
Leafy greens grow fast in a shallow tray.
I took the cover off when the first green shoots came up. A shallow tray set up usually costs $9 to $18 for the tray, soil, and seeds.
I watered with a light spray, so the soil did not wash away.
The leaves grew close together, like a green mat. I snipped the outer leaves first, and the middle leaves kept growing. I liked how the tray looked on the table, fresh and green each morning.
I used the leaves in salads and sandwiches. I took a small pick each week, and new leaves came up in their place.
A shallow tray is a fast and easy way to grow greens indoors or out.
15. Use a Tiered Planter for Small Plants
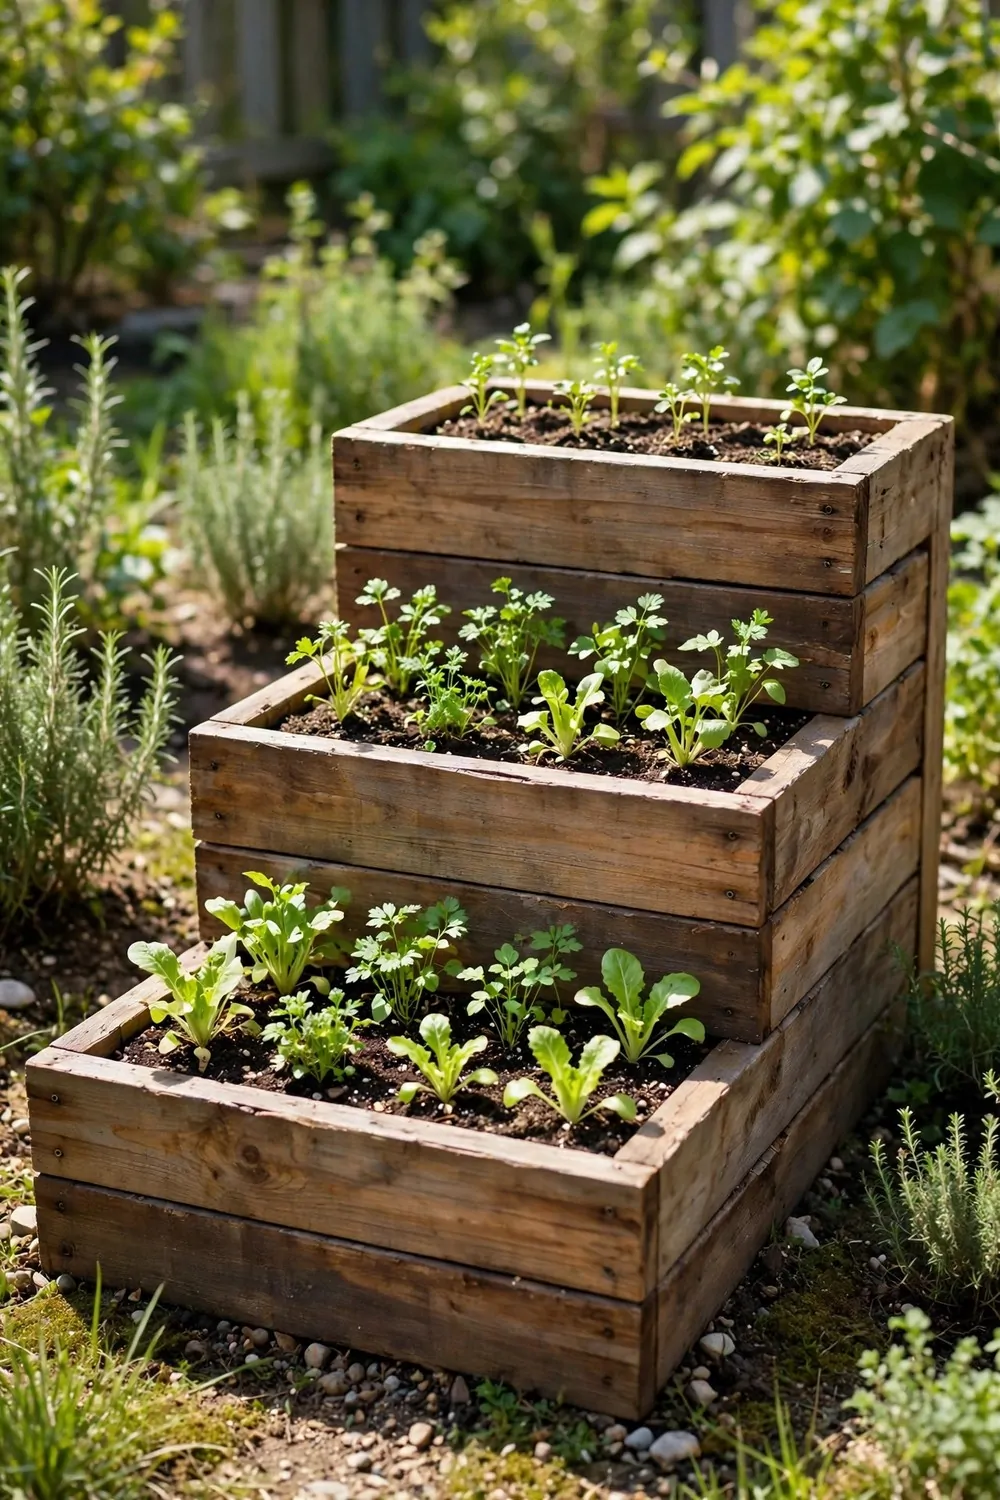
A tiered planter has steps, like a small staircase for plants. I placed ours in a sunny spot, and each step held a different plant.
The top step gets the most sun.
I put small herbs on the top step and leafy greens below. The water from the top step dripped down to the steps below, so I watered less often. I used light soil, so the planter was not too heavy to move.
A tiered planter fits many plants in a small floor space.
I turned it a little each week, so each side got sun. A tiered planter often costs $25 to $45 for the planter, soil, and plants together.
I checked the soil on each step with my finger.
The top step dried first, so I watered it first. The lower steps stayed damp longer, and I watered them less. I liked how neat the steps looked, with green plants on every level.
I picked herbs from the top and leaves from the lower steps. I took a small pick each week, and the plants kept growing back.
A tiered planter is like a small garden tower that fits in a corner.
16. Grow Carrots in a Deep Bucket
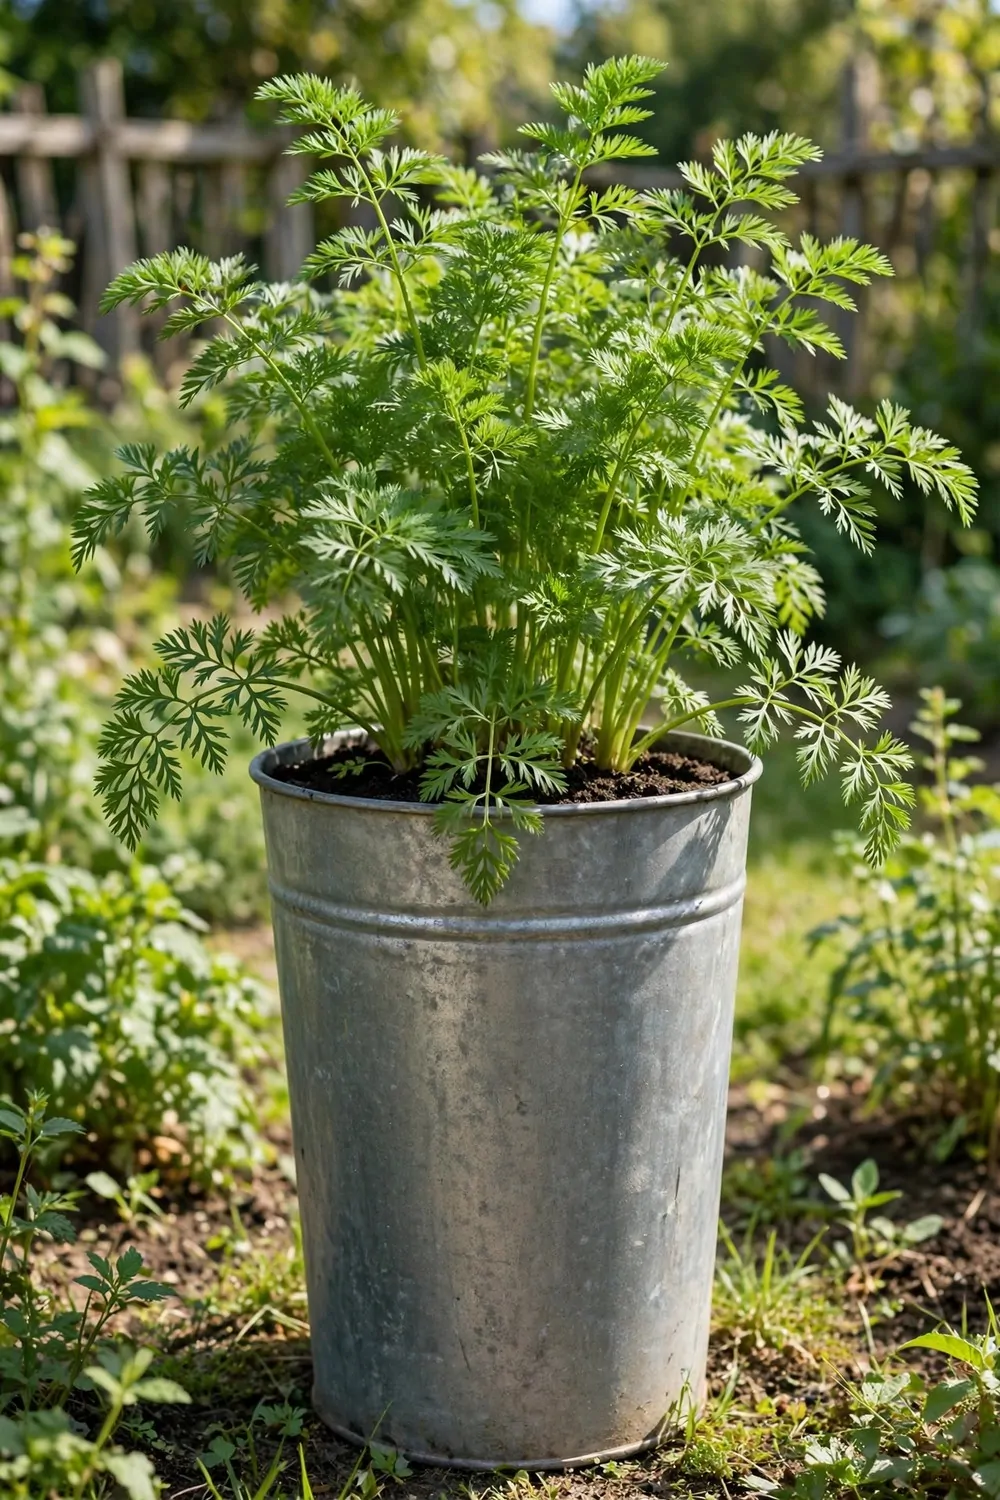
Carrots need deep soil to grow long and straight. I used a deep bucket, and it worked better than a shallow pot.
I drilled small holes in the bottom of the bucket for water to drain.
I filled it with soft, loose soil, with no stones in it. The soil had to be soft, so the roots could push down easily. I pressed the seeds in a thin row across the top, and I covered them lightly.
The seed packet was plain and completely blank, with no words on it.
I watered the bucket gently, so the seeds did not wash away. A deep bucket set up tends to cost $11 to $20 for the bucket, soil, and seeds.
I thinned the plants when they were crowded.
I pulled out the small ones and left space for the rest. The ones left behind grew thicker and longer. I waited a few weeks, and then I pulled one to check its size.
I pulled carrots when they were as thick as my finger. They were orange, crisp, and sweet, and I washed them before I ate them. I took a small pick each week, and the bucket kept giving more.
A deep bucket is a simple home for carrots in a small space.
17. Grow Peppers in a Sunny Corner
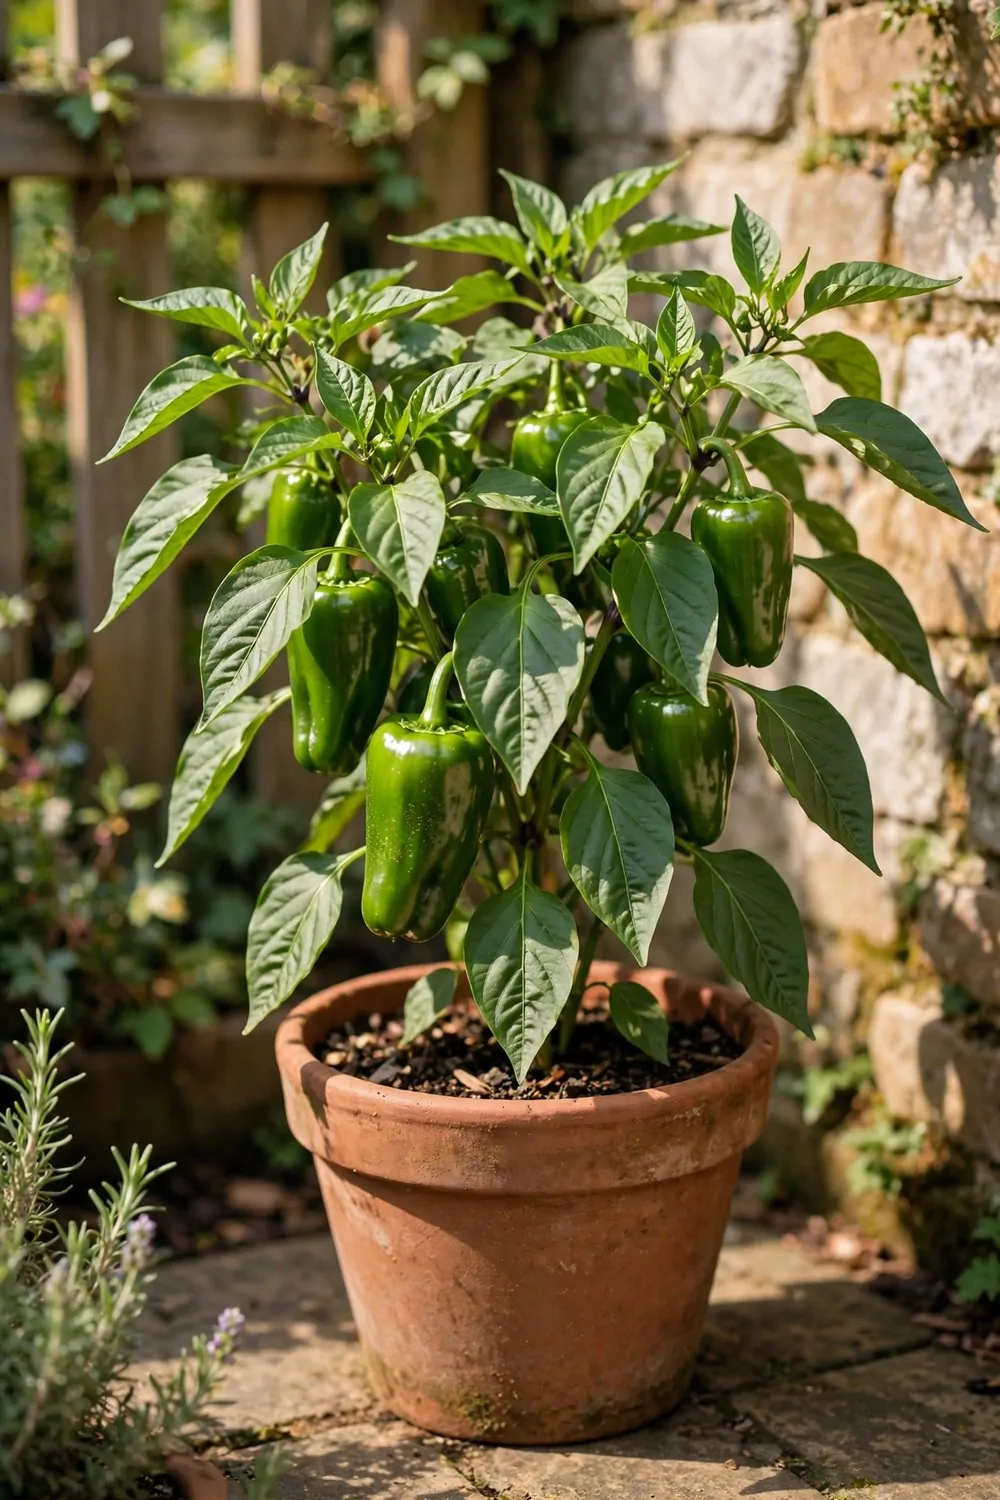
Peppers love a warm, sunny corner. I placed a pot in the corner where the sun stays longest, and the plant grew strong there.
I chose a medium pot with good drainage.
I filled it with rich soil and set one small plant in the middle. The plant stood strong on its own in the warm corner. The corner gave the plant shelter from wind, and the walls held the warmth.
Peppers need sun, warmth, and steady water.
I watered the base in the morning, and I did not wet the leaves. A sunny corner pepper pot usually costs $13 to $26 for the pot, soil, and plant.
I watched for small white flowers first.
The flowers turned into small green fruits, and the fruits grew bigger each week. I picked them when they were firm and bright. I used them in salads and cooked dishes, and they added a fresh taste.
I liked how the plant kept making new fruit all through the warm weeks. I picked a small handful each week, and new flowers came after each pick.
A pepper in a sunny corner is a bright and tasty plant for a small space.
18. Use a Ladder Shelf for Pots
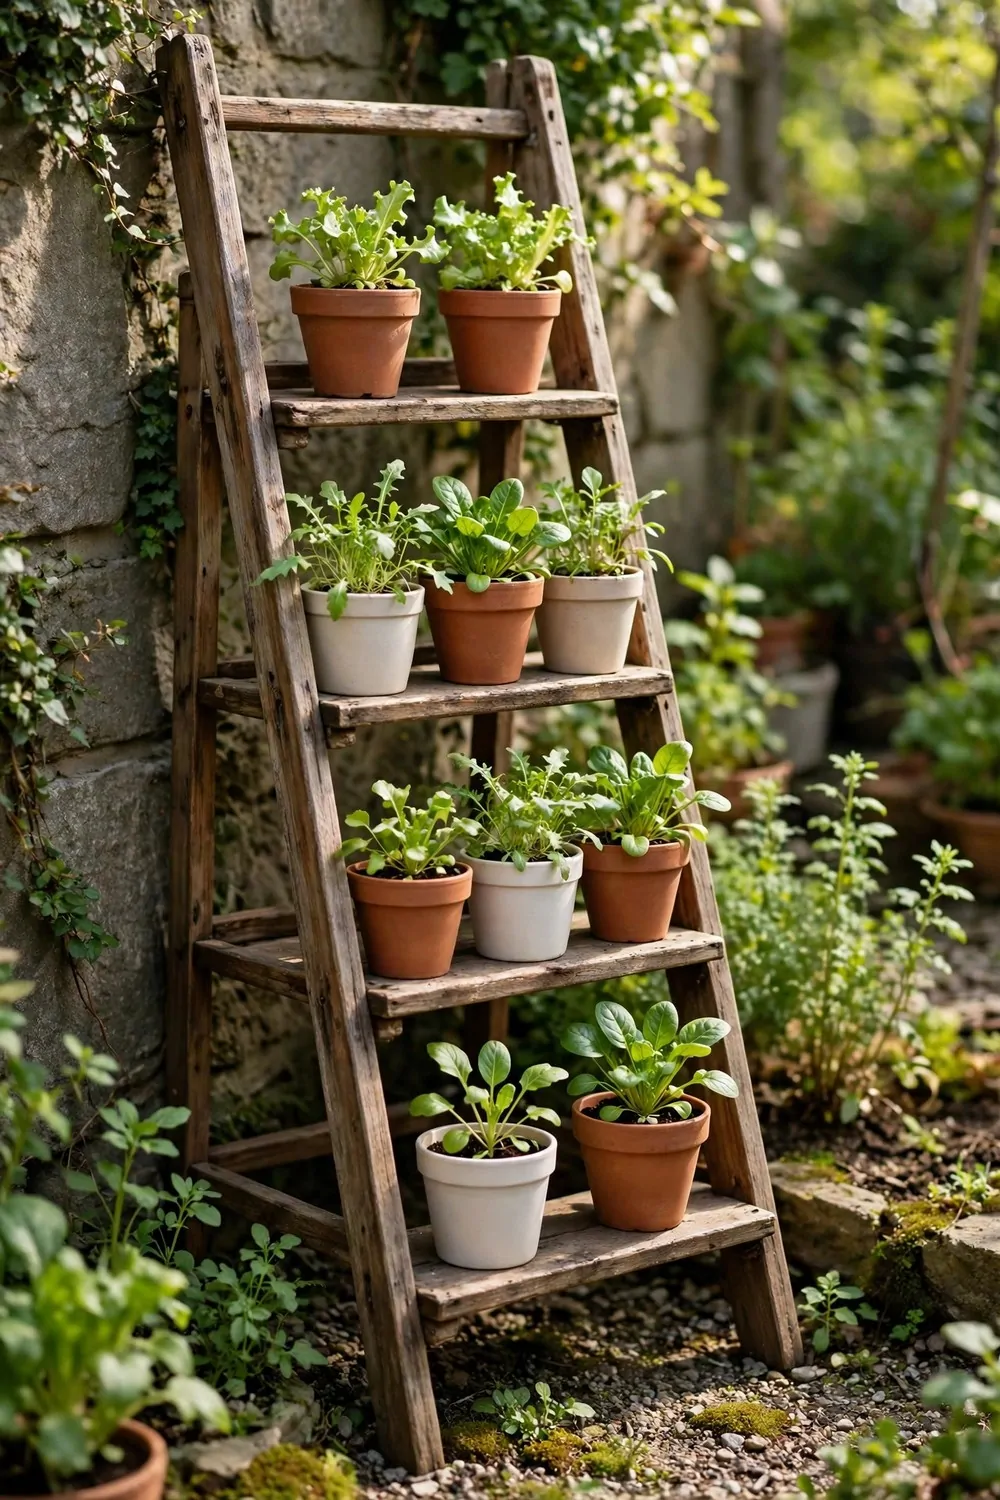
I put a small ladder shelf by my back door last spring. It holds ten pots and it takes up almost no floor space at all.
The top shelf gets the most sun. I put my sun loving herbs up there. The lower shelves suit leafy greens that like a bit of shade.
Pick a shelf that feels steady when you push it. I test mine with a full watering can on the top shelf. If it wobbles, I move it to a flat spot.
Small pots work best on a ladder shelf. Big heavy pots can tip the shelf over. I use pots that I can lift with one hand.
I start with the pots on the top shelf. The extra water drips down a little and helps the pots below. I still check each pot with my finger before I water again.
You can find a simple wooden ladder shelf for $28 to $52 in most garden shops. I bought mine on sale and it has lasted two full seasons.
I move my shelf a little through the year. In summer it sits where the morning sun hits it. In the cooler months I pull it closer to the wall for shelter.
A ladder shelf makes a bare wall look cared for. My pots sit in neat rows and I can see every plant at a glance. It feels like a tiny garden shop right outside my door.
If this is new to you, begin with just three pots. Add more pots when you feel sure about watering. A small start grows into a full shelf fast.
| Idea | Typical Cost |
|---|---|
| Slim fence bed | $28 to $50 |
| Bean trellis | $16 to $32 |
| Strawberry basket | $14 to $28 |
| Galvanised trough | $40 to $70 |
| Shallow tray | $9 to $18 |
| Tiered planter | $25 to $45 |
| Deep carrot bucket | $11 to $20 |
| Sunny corner peppers | $13 to $26 |
| Ladder shelf | $28 to $52 |
19. Grow Cucumbers Up a Net
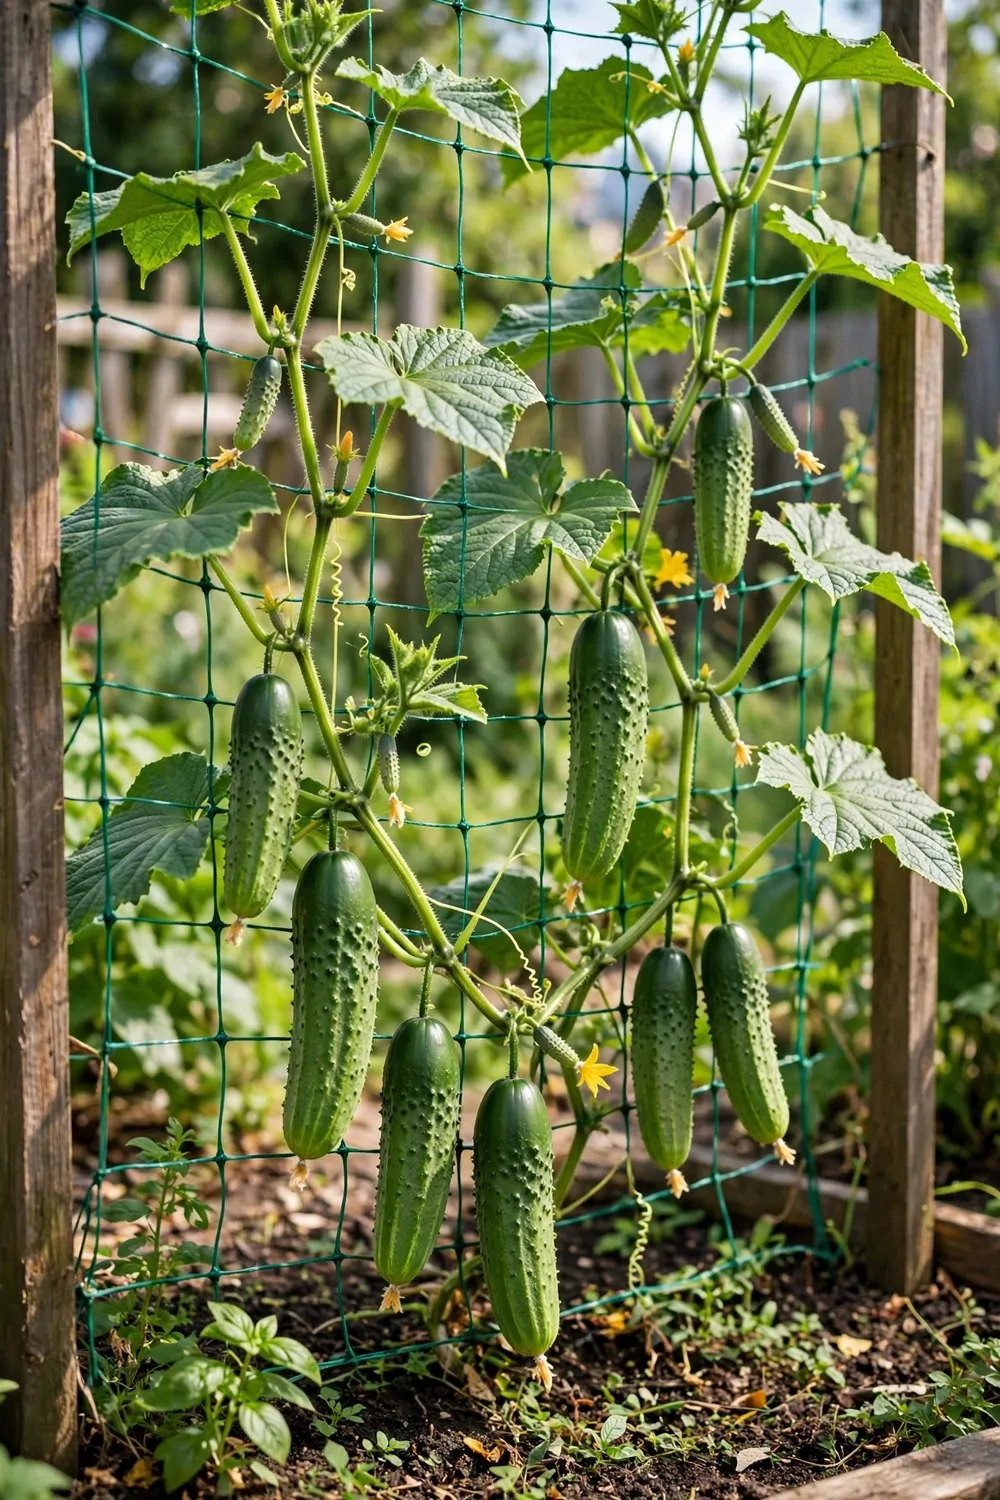
Cucumbers love to climb. I give mine a net and they grow up instead of spreading all over the floor.
I fix the net between two tall sticks pushed into the soil at the edge of the bed. I tie the top of the net to the sticks. It stays firm even on windy days.
Young cucumber stems reach out with thin curls. I guide each curl to the net with a soft tie. After a few days the plant holds on by itself.
Climbing cucumbers get more air around their leaves. That helps them stay dry after rain. Dry leaves stay happy for longer.
Pick the fruit when it feels firm and looks a good size for your hand. I pick a few each week in the warm months. Fresh cucumbers taste crisp and cool.
A net, two sticks and a few soft ties cost about $16 to $30 for one net. I reuse my net each year after a quick wash.
Give the bed a deep water in the morning. Cucumbers drink a lot when the sun is hot. I check the soil each day in summer.
Keep the bottom leaves clear of the soil. I snip off any leaf that touches the ground. It keeps the plant tidy and easy to pick from.
A net turns one small bed into a tall green wall. It saves floor space and it looks lovely too. I smile every time I see the first small fruit hanging there.
20. Grow in a Soft Fabric Bag
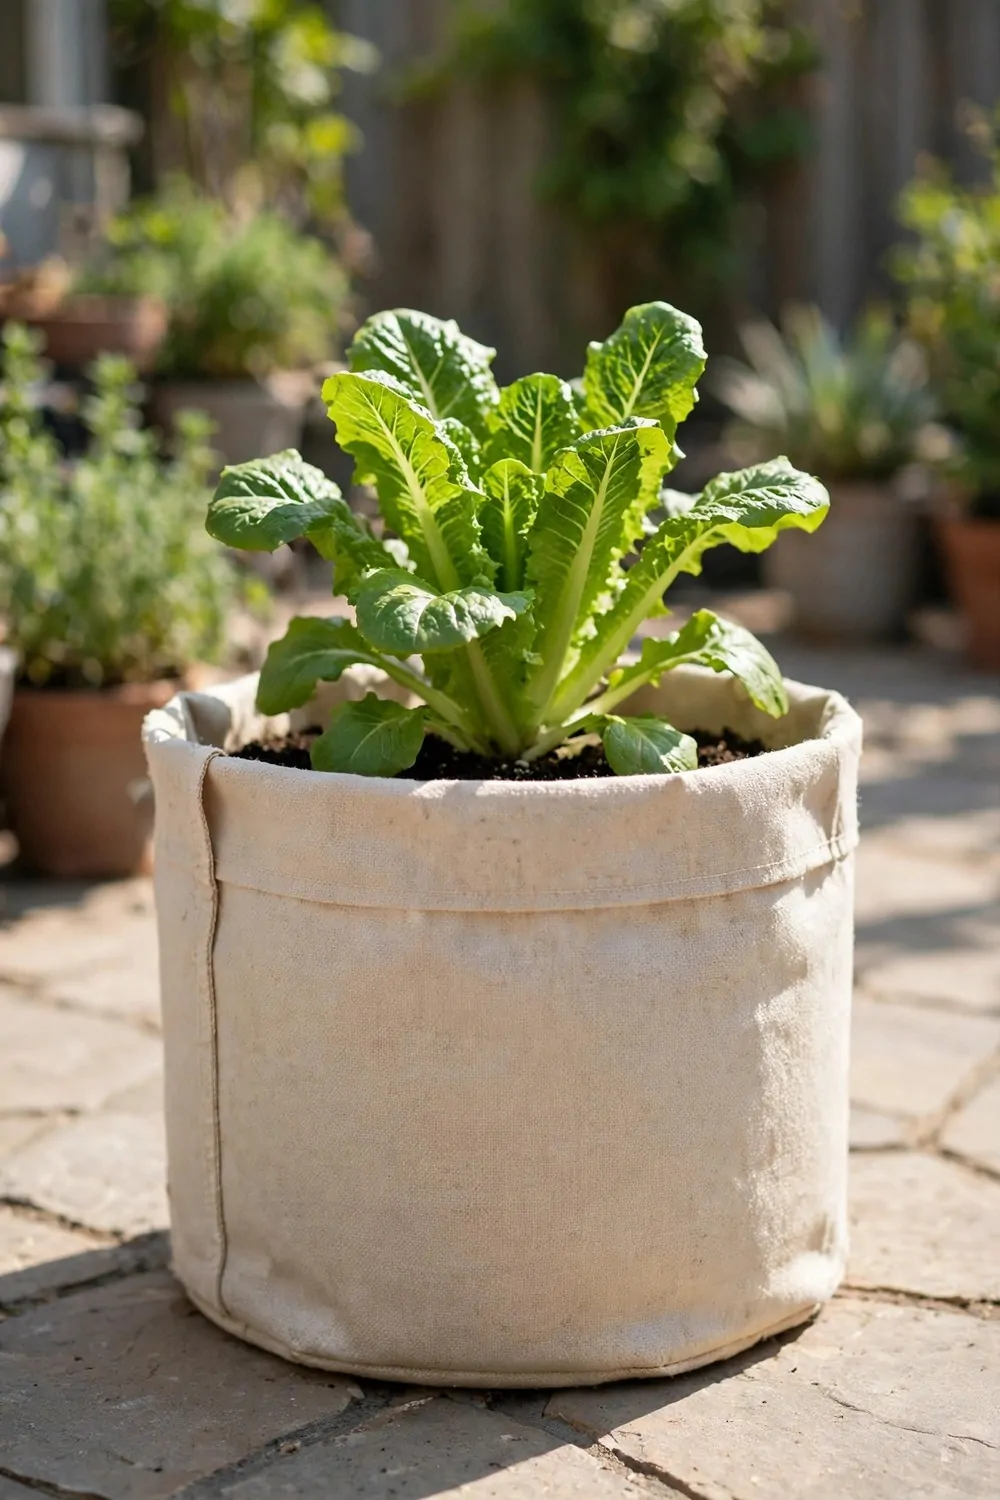
A soft fabric bag is one of my favourite ways to grow food in a small place. It is light, it folds away, and it fits on a step or a balcony floor.
I fill the bag with loose compost and I press it down gently. The sides let extra water drain out. Roots get air and they grow strong.
Fabric bags come in many sizes. I use a small one for herbs and a wide one for salad leaves. A wide bag suits plants that spread out a little.
You can move a fabric bag with two hands when the soil is damp. I shift mine to follow the sun in spring. It is much easier than moving a heavy clay pot.
Water slowly so the water soaks in. If you pour too fast it runs out of the sides. I water in two short goes with a pause in between.
A set of three fabric bags costs $18 to $34 in most shops. I bought a set two years ago and I still use all three.
In the cold months I fold my empty bags flat. They sit on a shelf and take up no room at all. That is a big help in a small home.
Fabric bags work well for beans, salad leaves and herbs. I plant a few seeds in each bag and I thin them when they grow tall. A small pick each week keeps the plants going.
Try one bag first if you are not sure. Fill it, plant it, and watch it for a few weeks. You will soon want a second one beside it.
21. Turn an Old Pallet into a Vertical Bed
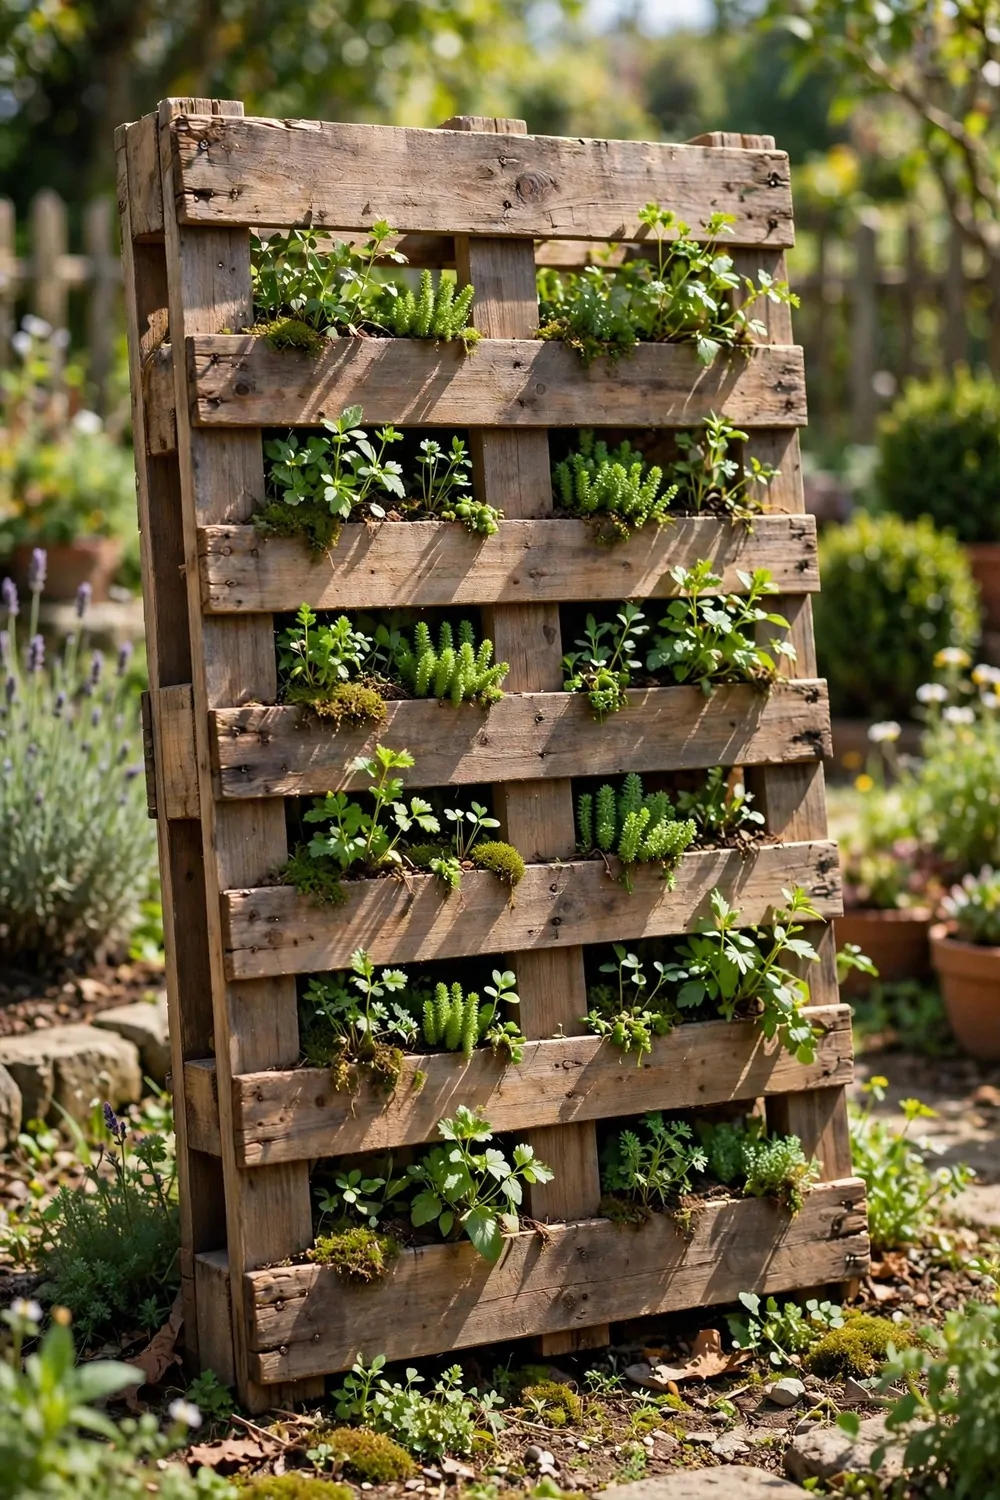
An old pallet can turn into a neat vertical bed. I stand mine in a sunny spot and I fill the gaps with compost.
First I check the pallet is clean and dry. I brush off dust and I pull out any loose nails. A safe pallet makes a safe garden bed.
I line the back and the sides with thick cloth. The cloth holds the compost in place. I leave the front open so the plants can grow out.
Herbs and salad leaves suit a pallet bed best. Their roots stay small and they do not need deep soil. I plant one small plant in each gap.
Water from the top and let it trickle down. The top row dries first so I check it most often. The bottom row stays damp for longer.
A clean pallet and a roll of lining cloth cost $22 to $44 to set up. I found my pallet for free and I spent a little on the cloth and compost.
Stand the pallet where it gets morning sun. A sunny spot helps the plants grow fast. I keep mine in easy reach so I can pick leaves fast.
A pallet bed looks full and green in a few weeks. I love how it turns one flat board into a living wall. It feels like a small farm on one flat board.
Start with the top two rows only. Add plants to the lower rows when you feel sure. A slow start gives you a full bed by mid season.
22. Grow Zucchini in a Big Tub
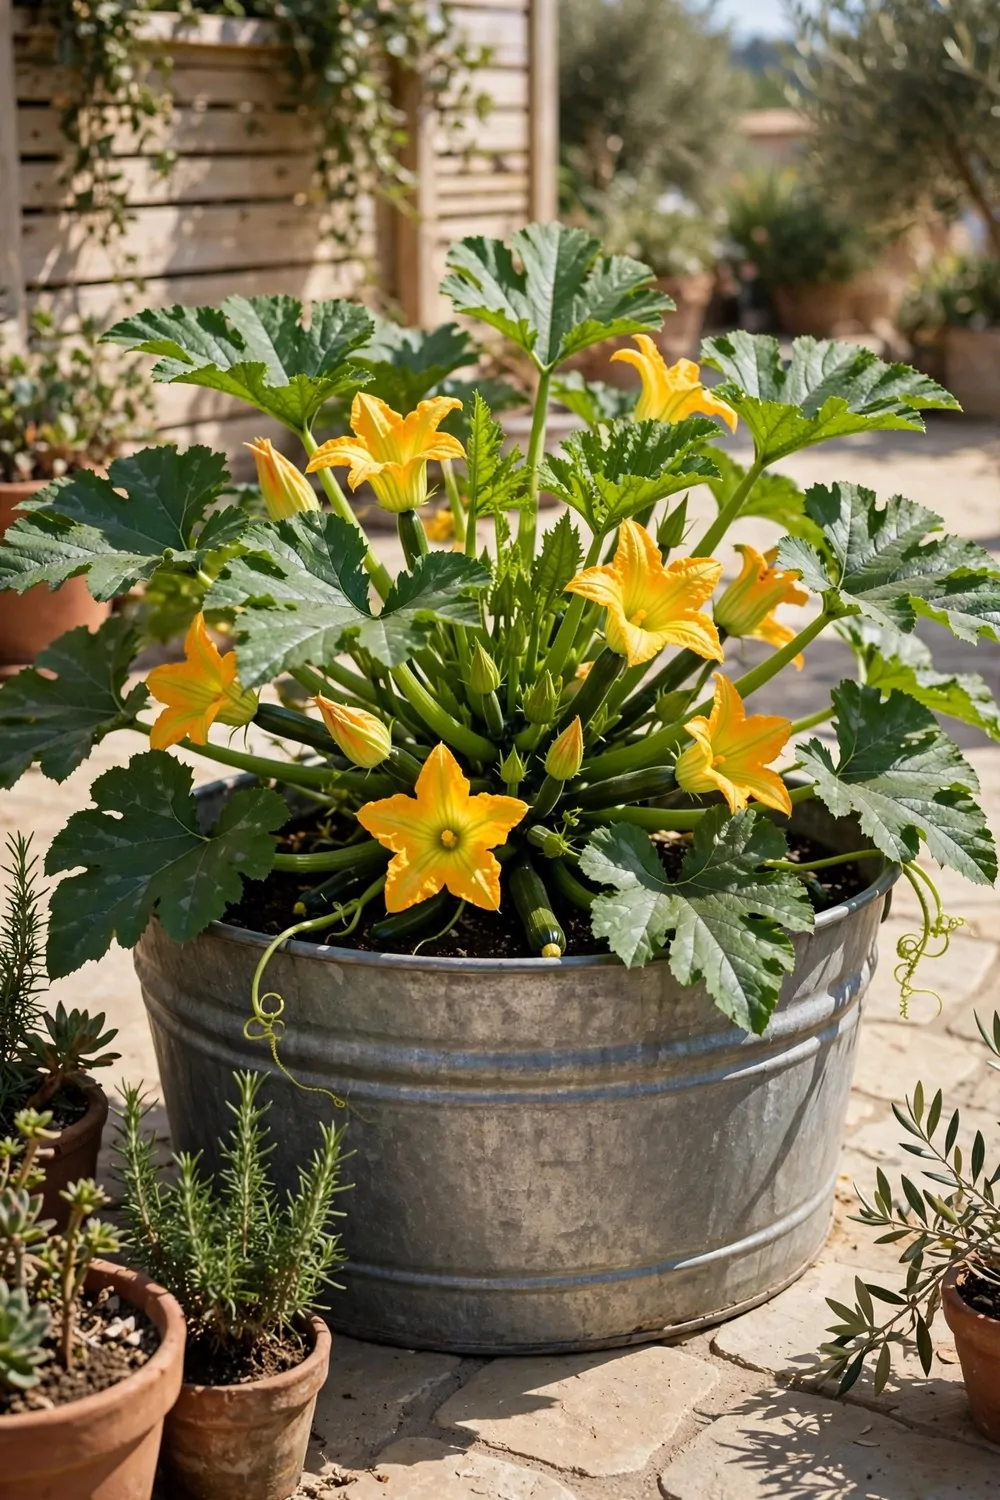
Zucchini needs room to grow. I give mine one big tub all to itself and it rewards me with fruit for weeks.
Pick the widest tub you can fit. A tub about as wide as your arms spread suits one plant well. Deep soil helps the roots spread out.
I fill the tub with rich compost and I mix in a little old leaf mould. The soil stays soft and it holds water well. Zucchini roots like soft soil.
One plant in one tub is my rule. Two plants in one tub fight for food and water. One strong plant gives more fruit than two weak ones.
Water at the base of the plant in the morning. Try to keep the leaves dry. Wet leaves in the evening can spot and fade.
A big tub and a bag of compost run $30 to $58 for one plant. I reuse my tub each year and I top it up with fresh compost.
Pick zucchini when it is about as long as your hand. Small fruit tastes tender and the plant makes more. I pick every few days in summer.
Big leaves shade the soil and keep it cool. That helps the tub dry out less fast. I love the bold green look of the plant in its big tub.
Give zucchini sun, space and steady water. It grows fast and it is easy to see your progress. One tub can feed your table for weeks.
23. Grow Onions in a Narrow Box
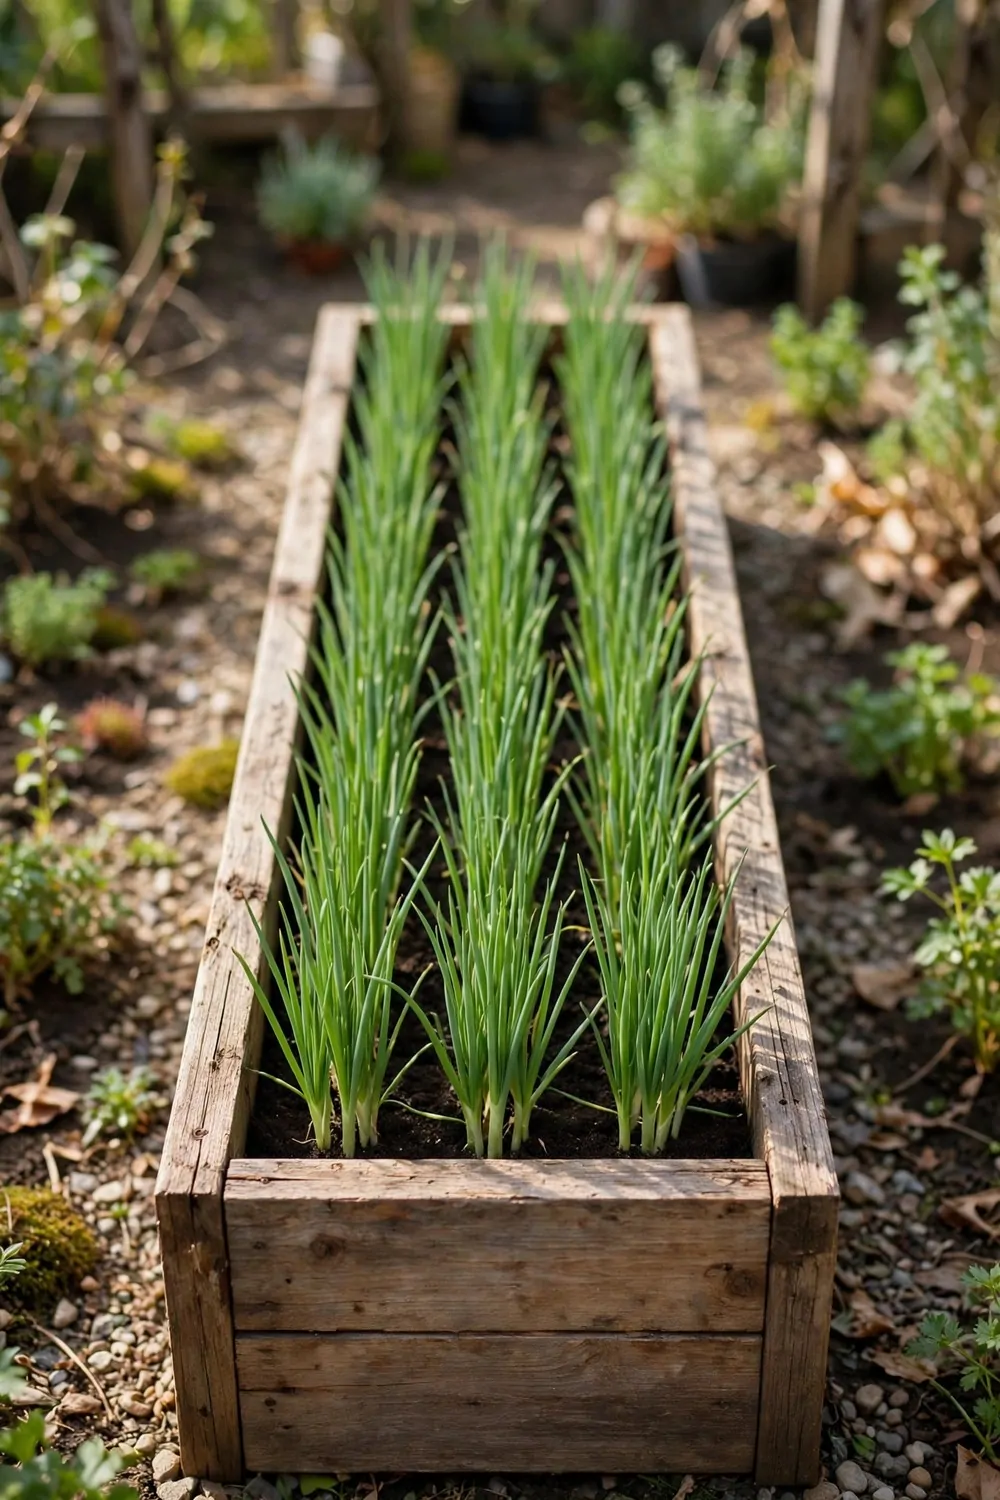
Onions suit a narrow box on a sunny ledge. They grow straight up and they need very little width at all.
I fill a long narrow box with loose sandy compost. Onions hate wet feet so the soil must drain well. I press the soil down lightly with my palm.
I plant small onion sets about a hand width apart. I push each one in so just the tip shows. They root fast in warm soil.
Thin green shoots appear in a few weeks. I pull out any weak shoots so the strong ones get more room. A little space makes bigger bulbs.
Water lightly and let the soil dry a bit between waters. Too much water can rot the bulbs. I water in the morning so the tops dry by night.
A narrow box, compost and a bag of onion sets cost $19 to $36 in total. I grow a full row of onions for less than a weekly shop run.
Onions like sun all day if you can give it. I keep my box on the brightest ledge I have. The green tops grow tall and straight.
When the tops bend over and turn pale, the bulbs are nearly ready. I lift them gently and I let them dry in the sun for a few days. Dry onions store well in a cool dark place.
A narrow box of onions is a quiet joy. It needs little care and it gives you a full harvest. I use mine in soups and salads for weeks.
24. Use a Cold Frame on the Balcony
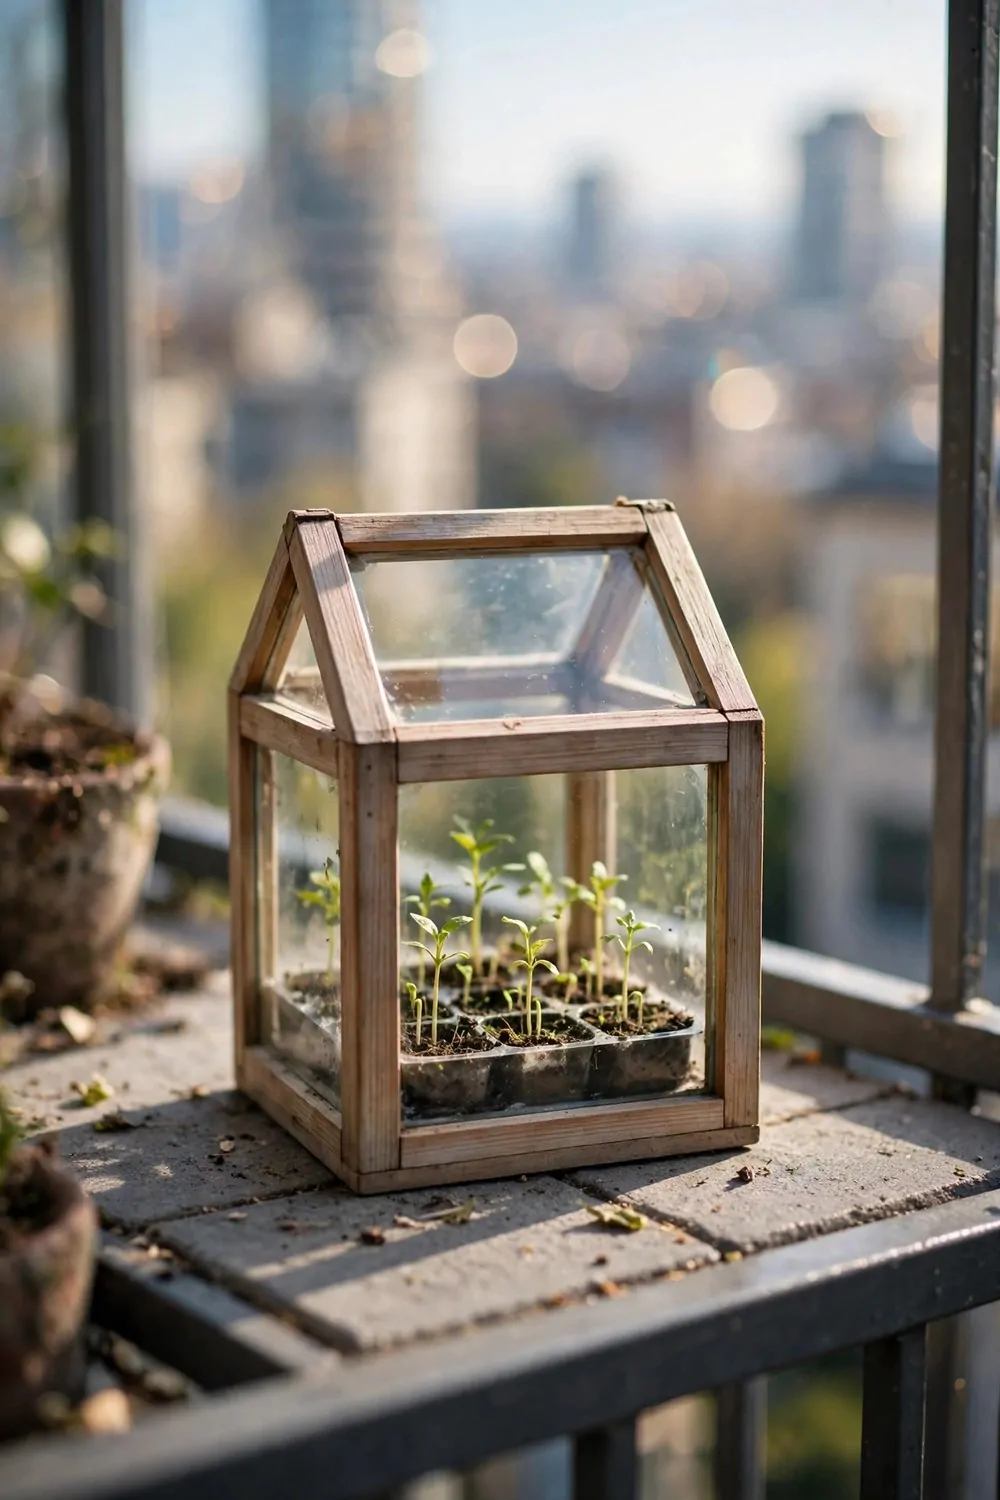
A cold frame is a low box with a clear lid. It warms the soil and it shields young plants from cold wind.
I put my cold frame on the sunniest part of the balcony. The lid lets light in and it traps warmth inside. Plants grow a little earlier in spring.
Open the lid on warm days. Young plants need fresh air or they get too hot. I prop the lid open with a small stick in the afternoon.
Close the lid before night falls. The closed lid holds the day warmth in. It guards tender leaves from a cold snap.
Salad leaves, herbs and young peas all like a cold frame. I start seeds in it in early spring. They sprout faster than seeds left out in the open.
A small cold frame costs $45 to $85 depending on size and build. I saved for mine and I use it for most of the year.
Water inside a cold frame with care. The soil dries slower under the lid. I check with my finger before I add more water.
A cold frame stretches your growing season by weeks. It lets you plant early and pick late. I love opening the lid and finding fresh green leaves inside.
Try one small frame on your balcony this spring. It is simple to use and it pays you back fast. Your first early salad will make you smile.
25. Grow Radishes in a Small Box
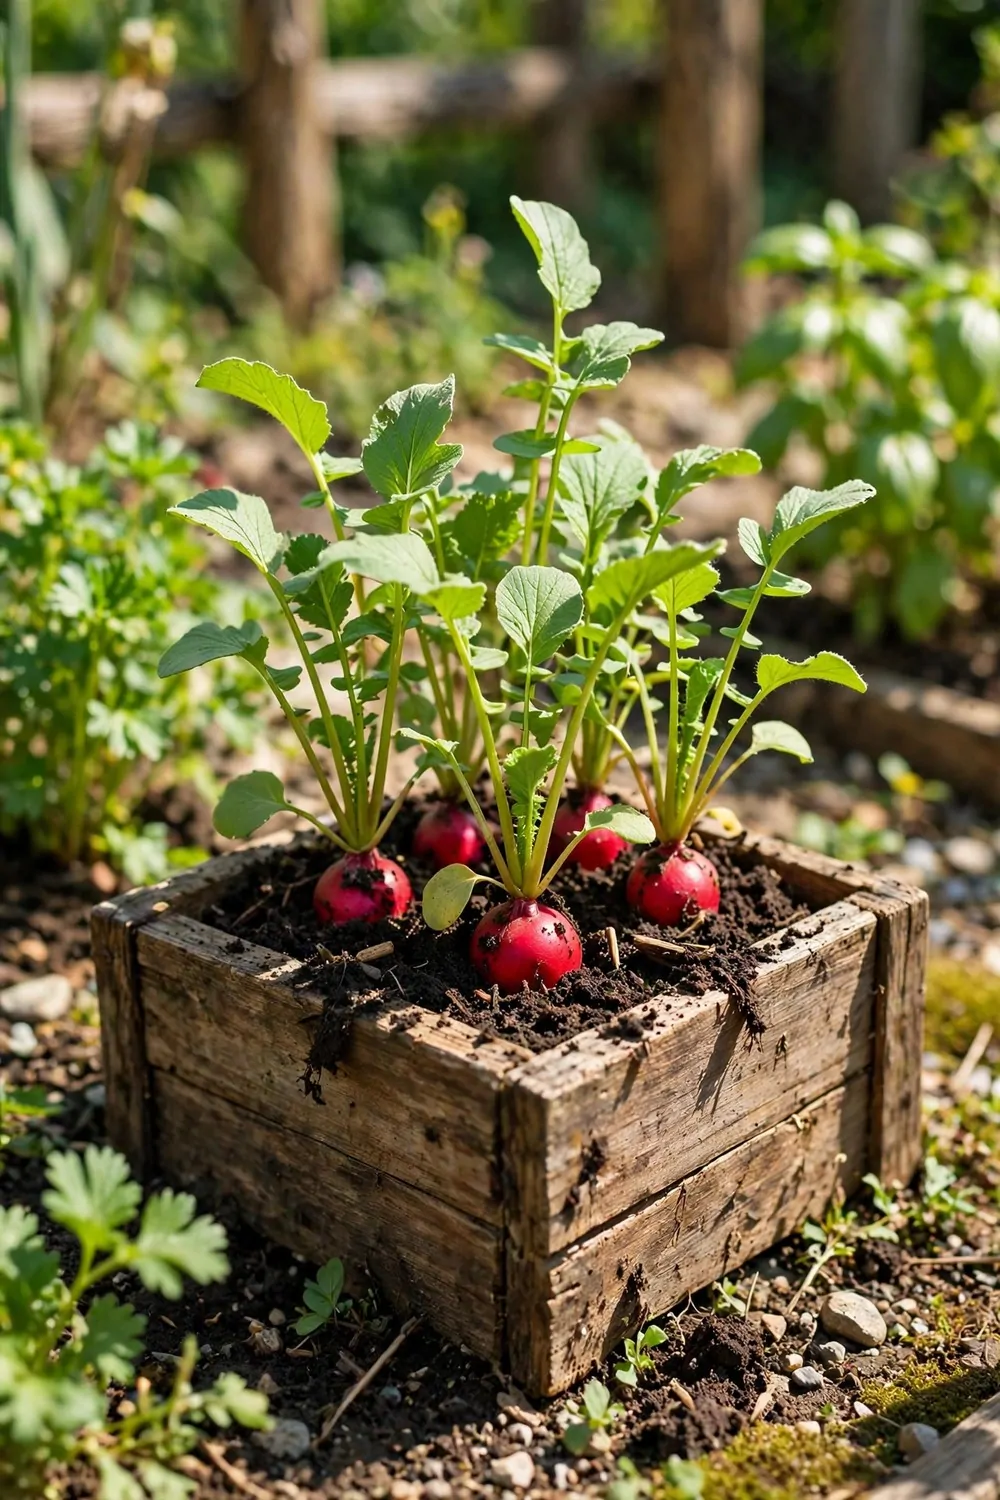
Radishes are fast and fun. I sow them in a small box and I pick them in a few weeks.
I fill a shallow box with fine soft compost. Radishes need loose soil to swell into round roots. Hard soil makes thin roots.
I sow seeds in neat rows with a finger width between each seed. I cover them with a thin layer of compost. Then I water gently with a fine spray.
Thin the seedlings when they have two small leaves. I pull out the weak ones and I leave the strong ones with room to grow. Thinning gives you crisp round radishes.
Radishes like cool days and steady water. I water a little each morning in warm spells. Dry soil can make the roots tough.
A small box, compost and a packet of seeds cost $12 to $24 to start. The seeds are plain blank packets with no words on them at all.
Pick radishes when the tops push up out of the soil. I pull one to test the size first. If it feels firm and round, the rest are ready too.
Sow a fresh row once every two weeks to keep the supply going. I keep a small row going all spring. Fresh radishes add crunch to salads and sandwiches.
Radishes are a great first crop for a new gardener. They grow fast and they show you quick results. A small box can give you a big smile.
26. Grow Lettuce in a Gutter Planter
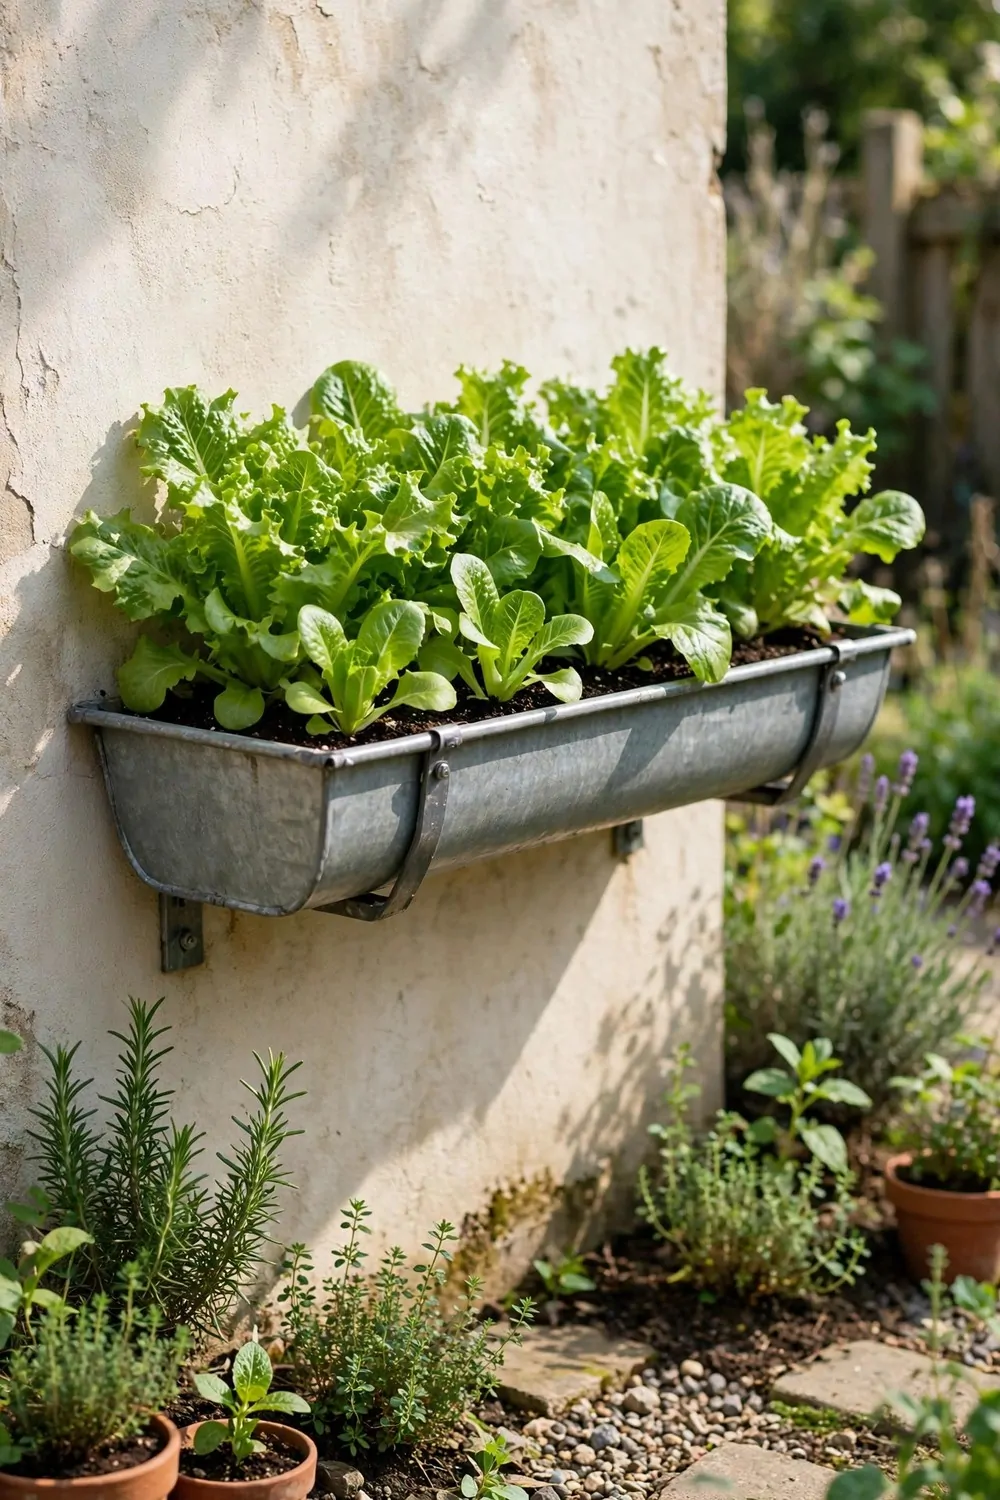
A gutter planter is a long half pipe fixed to a wall. It holds a neat row of lettuce and it uses no floor space.
I fix my gutter at waist height so I can pick without bending. I drill small holes in the base for drainage. Water must run out freely.
I fill the gutter with light compost and I level it with my hand. Lettuce roots stay shallow so a gutter suits them well. I sow seeds in a straight line.
Thin the seedlings when they crowd each other. I leave a hand width between plants. Room to grow makes big soft leaves.
Water the gutter a little each day in hot weather. A shallow planter dries fast in the sun. I check the soil each morning before breakfast.
A length of gutter, end caps and compost cost $21 to $40 to set up. I fixed mine to the wall with two strong brackets.
Pick outer leaves first and let the centre keep growing. That way one plant gives you leaves for weeks. I pick a small handful each day for lunch.
Lettuce likes a spot with morning sun and afternoon shade. Too much hot sun can make the leaves bitter. I move my shade cloth over it at midday in summer.
A gutter of lettuce turns a blank wall into a salad bar. It is easy to reach and easy to keep tidy. I love snipping fresh leaves right by the door.
27. Turn a Wheelbarrow into a Bed
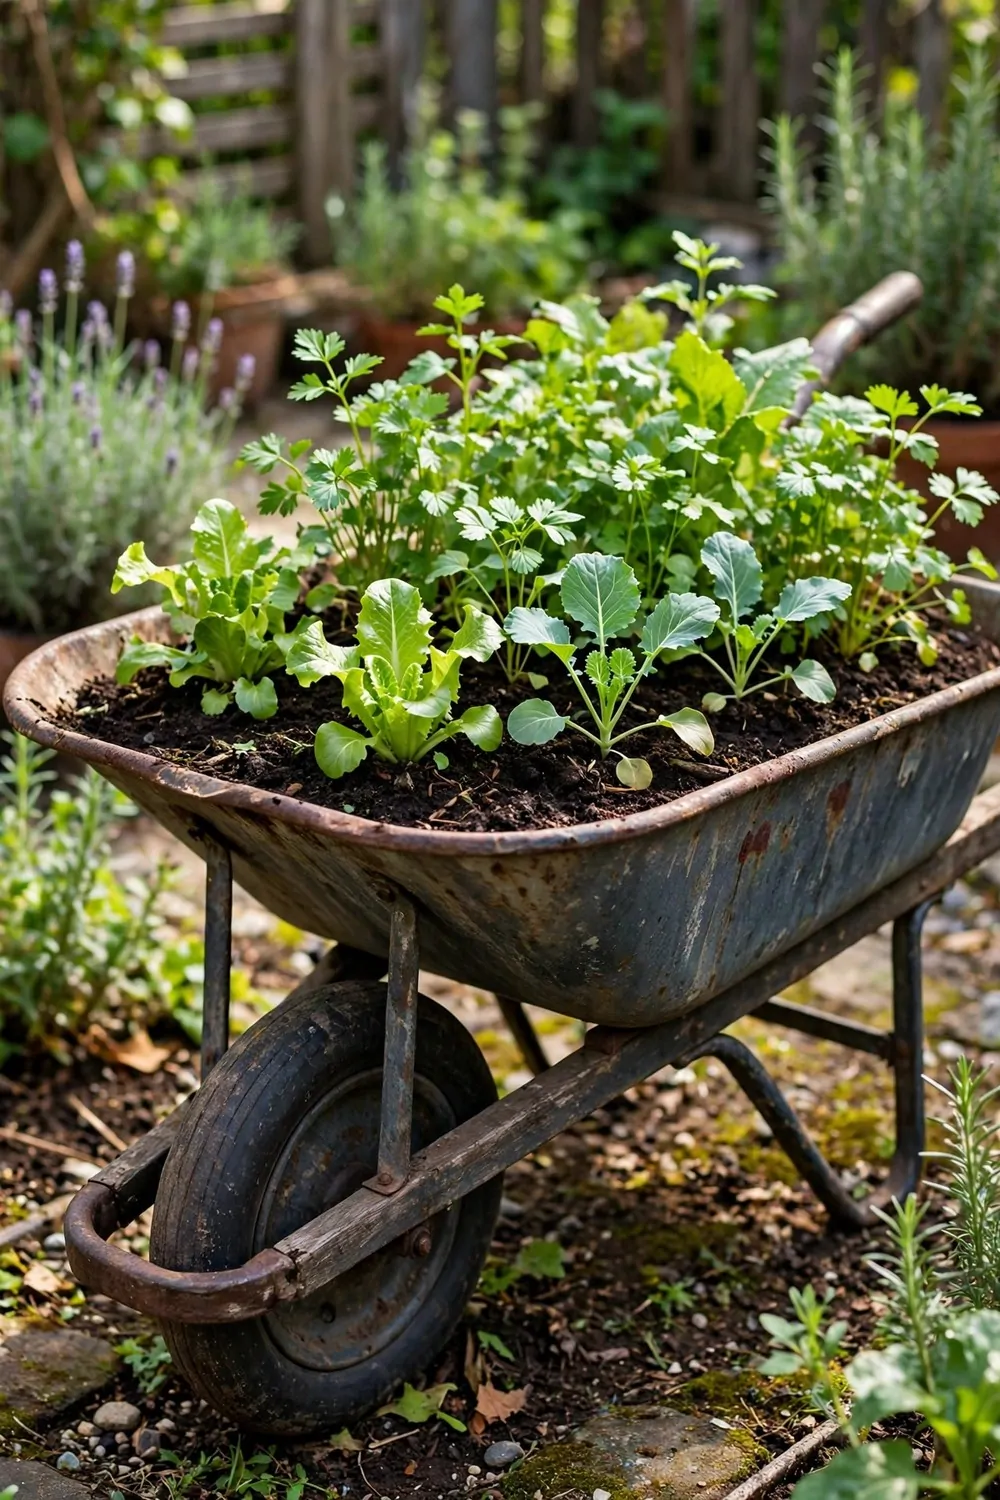
An old wheelbarrow makes a fine garden bed. It has wheels, it has depth, and it looks full of charm.
I clean my wheelbarrow well before I plant in it. I scrub out old dirt and I rinse it with clean water. Then I drill a few holes in the base for drainage.
I fill it with compost up to a few fingers below the rim. The soil stays warm in the metal sides. Plants grow fast in that warmth.
Herbs, salad leaves and small flowers suit a wheelbarrow bed. I plant tall herbs at the back and low leaves at the front. It looks like a tiny mixed garden.
You can wheel the bed to a sunny spot in spring. In summer I wheel it into a bit of shade. Moving it is easy when the soil is damp.
A used wheelbarrow and compost cost $35 to $68 to set up as a bed. I found mine at a local sale and it has lasted for years.
I water the bed first thing in the morning so the leaves dry out before night. The metal sides warm up in the sun. I check the soil with my finger each day.
A wheelbarrow bed is a talking point. Friends ask about it every time they visit. It shows that a garden can start with what you already have.
Try this if you have an old barrow lying around. Clean it, fill it, and plant it up. You will have a moving garden in one afternoon.
28. Grow Potatoes in a Sack
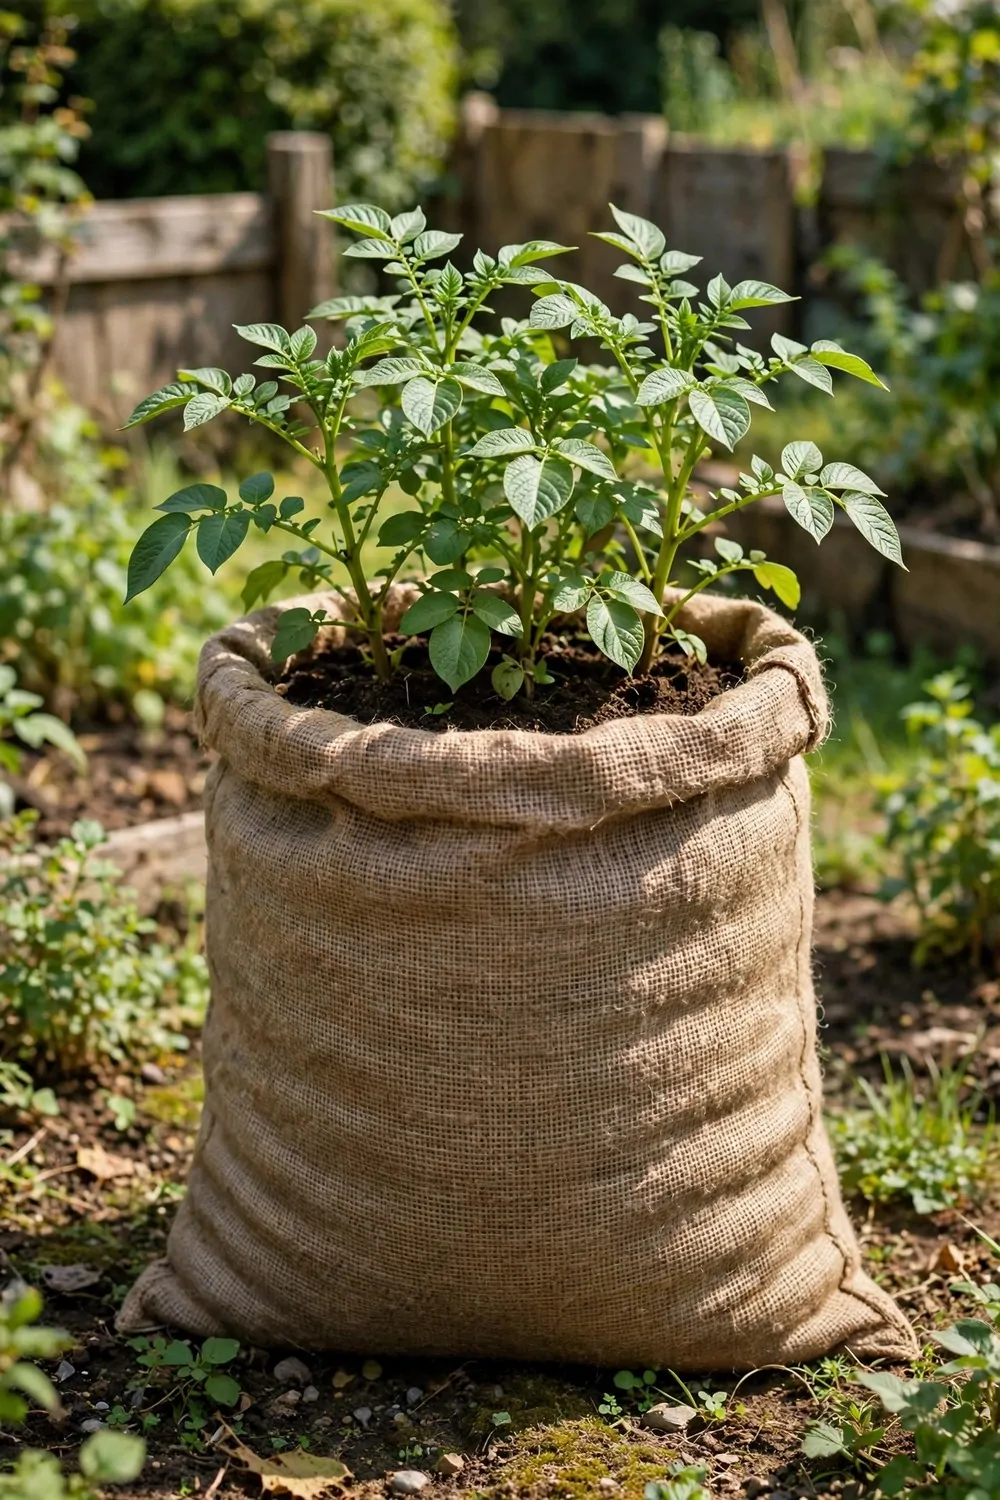
Potatoes grow well in a sack. I roll the sides down, I fill it part way, and I add more compost as the plant grows.
I put a few seed potatoes at the base of the sack. I cover them with a hand depth of compost. Shoots push up in a few weeks.
As the stems grow tall I add more compost around them. I roll the sack sides up a little each time. New potatoes form along the buried stems.
Keep the sack damp but not wet. I water slowly so the water soaks right through. Dry sacks give small potatoes.
A sack, compost and seed potatoes cost $17 to $32 for one sack. I grow two sacks each year and that is plenty for my table.
Put the sack where it gets sun for most of the day. Potatoes need light to grow strong tops. I keep mine by the sunniest wall.
When the tops turn yellow and flop over, the potatoes are ready. I tip the sack out onto a sheet and I pick out the potatoes by hand. It feels like a treasure hunt.
Let the potatoes dry in the shade for a day. Then store them in a cool dark place. They keep well for weeks.
Growing potatoes in a sack is simple and fun. It needs little space and it gives a real harvest. I love tipping out that first sack of the year.
29. Grow Peas on a Small Frame
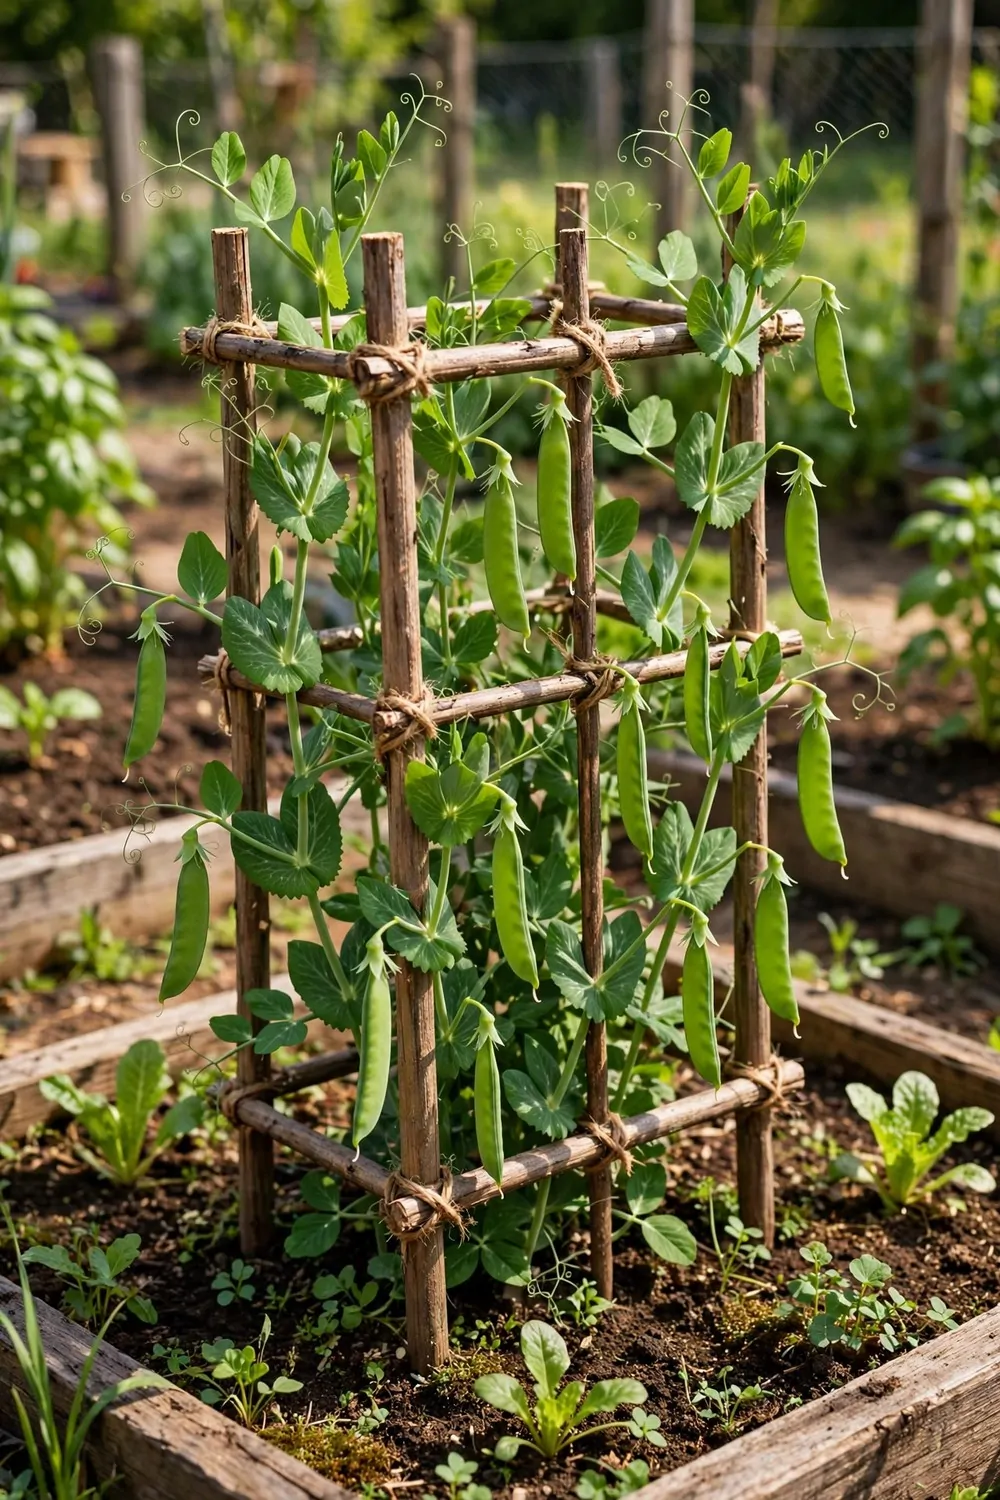
Peas love to climb a small frame. I give mine a light frame and they cover it with green in a few weeks.
I push four sticks into the soil and I tie crossbars between them with string. The frame is light and it fits in a small bed. Peas grip the frame with thin curls.
I sow pea seeds in a circle around the base. I cover them with a thin layer of compost. Shoots appear fast in warm soil.
Guide the young stems to the frame when they are a few fingers tall. I tuck each stem in gently. After a few days they hold on alone.
Peas like cool days and steady water. I water at the base in the morning. Wet leaves can spot in the evening.
A small frame, string and a packet of pea seeds cost $14 to $26 to set up. The seed packet is completely blank with no words on it.
Pick pea pods when they feel full and plump. I pick a few each day in the picking season. Fresh peas taste sweet straight from the pod.
Peas fix their own food from the air in a quiet way. I plant them early and I enjoy the green cover they make. They leave the soil richer for the next crop.
A small frame of peas is a joy on a balcony. It gives shade, it gives food, and it looks lovely. Try it this spring and pick your own peas.
30. Fix a Wall Rail for Pots
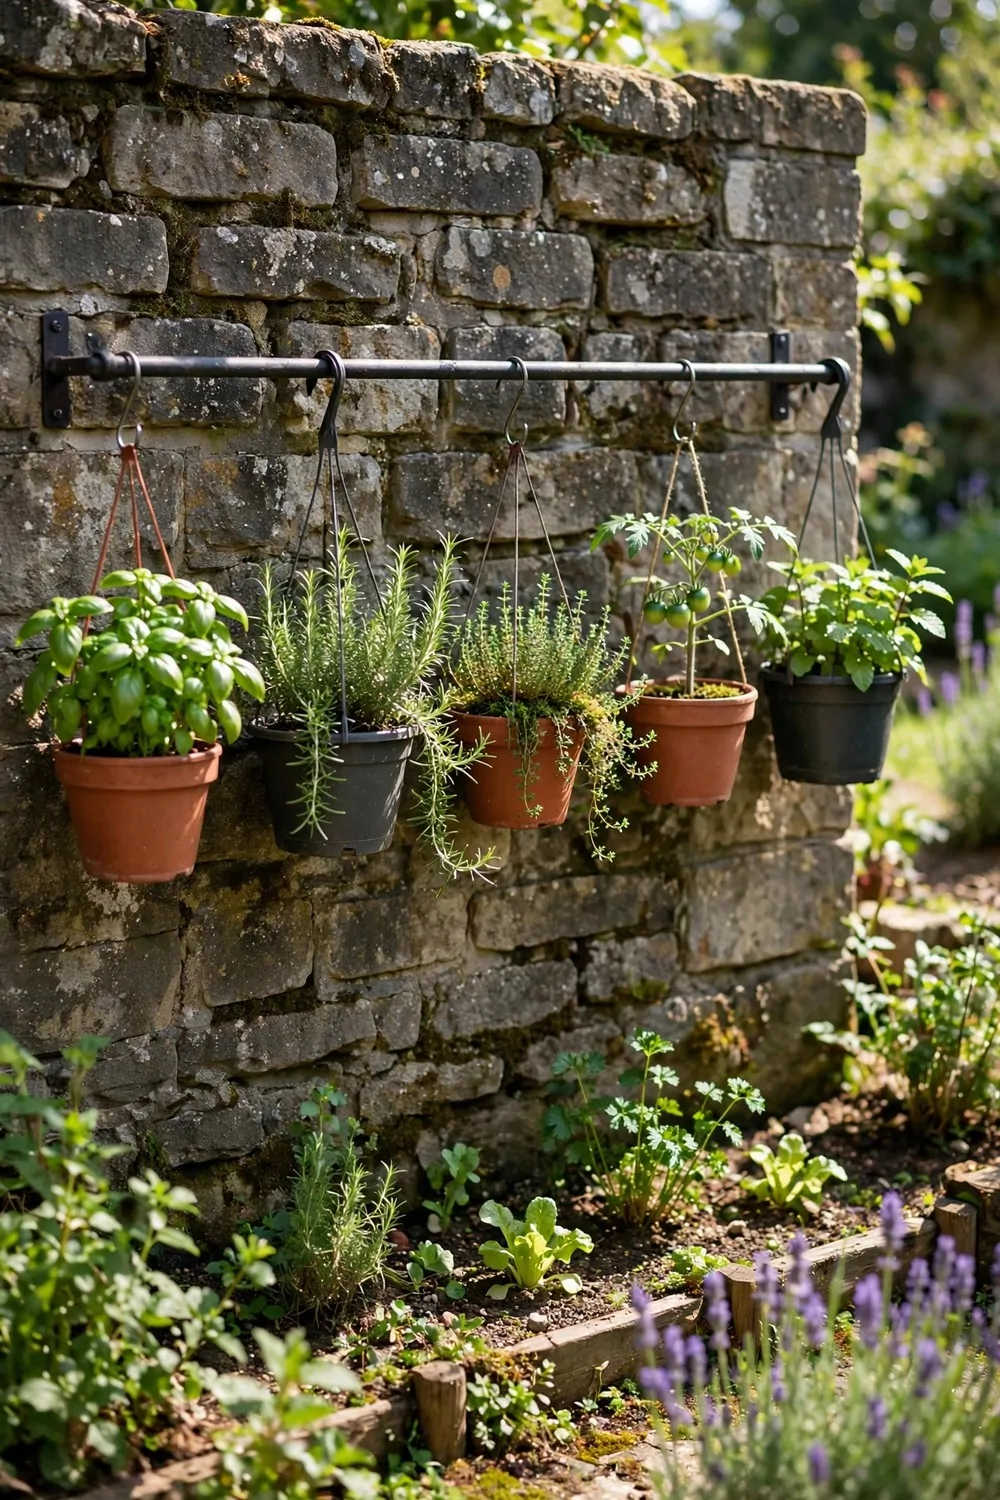
A wall rail holds pots up off the floor. It turns a bare wall into a row of green.
I fix a strong metal rail to the wall with good screws. I check it can hold a full pot before I hang more. A firm rail is a safe rail.
I hang small pots from hooks on the rail. Herbs suit this best because they stay small. I keep the heavy pots on the floor.
Space the pots so each plant gets light. Crowded pots shade each other out. I leave a hand width between each pot.
Water each pot slowly so it does not drip on the wall. I hold a small jug under each pot as I water. It keeps the wall clean and dry.
A metal rail, hooks and five small pots cost $26 to $48 to set up. I bought my rail in one trip and I fitted it in an afternoon.
A wall rail works well by a kitchen door. I snip herbs while I cook and I pop them straight into the pan. Fresh herbs make simple food taste bright.
Check the screws each season. Rain and sun can loosen fixings over time. I tighten mine in spring before I hang the pots out.
A wall rail is simple, tidy and useful. It saves floor space and it puts green at eye level. I love seeing my herbs lined up in a row.
31. Cluster Clay Pots on a Step
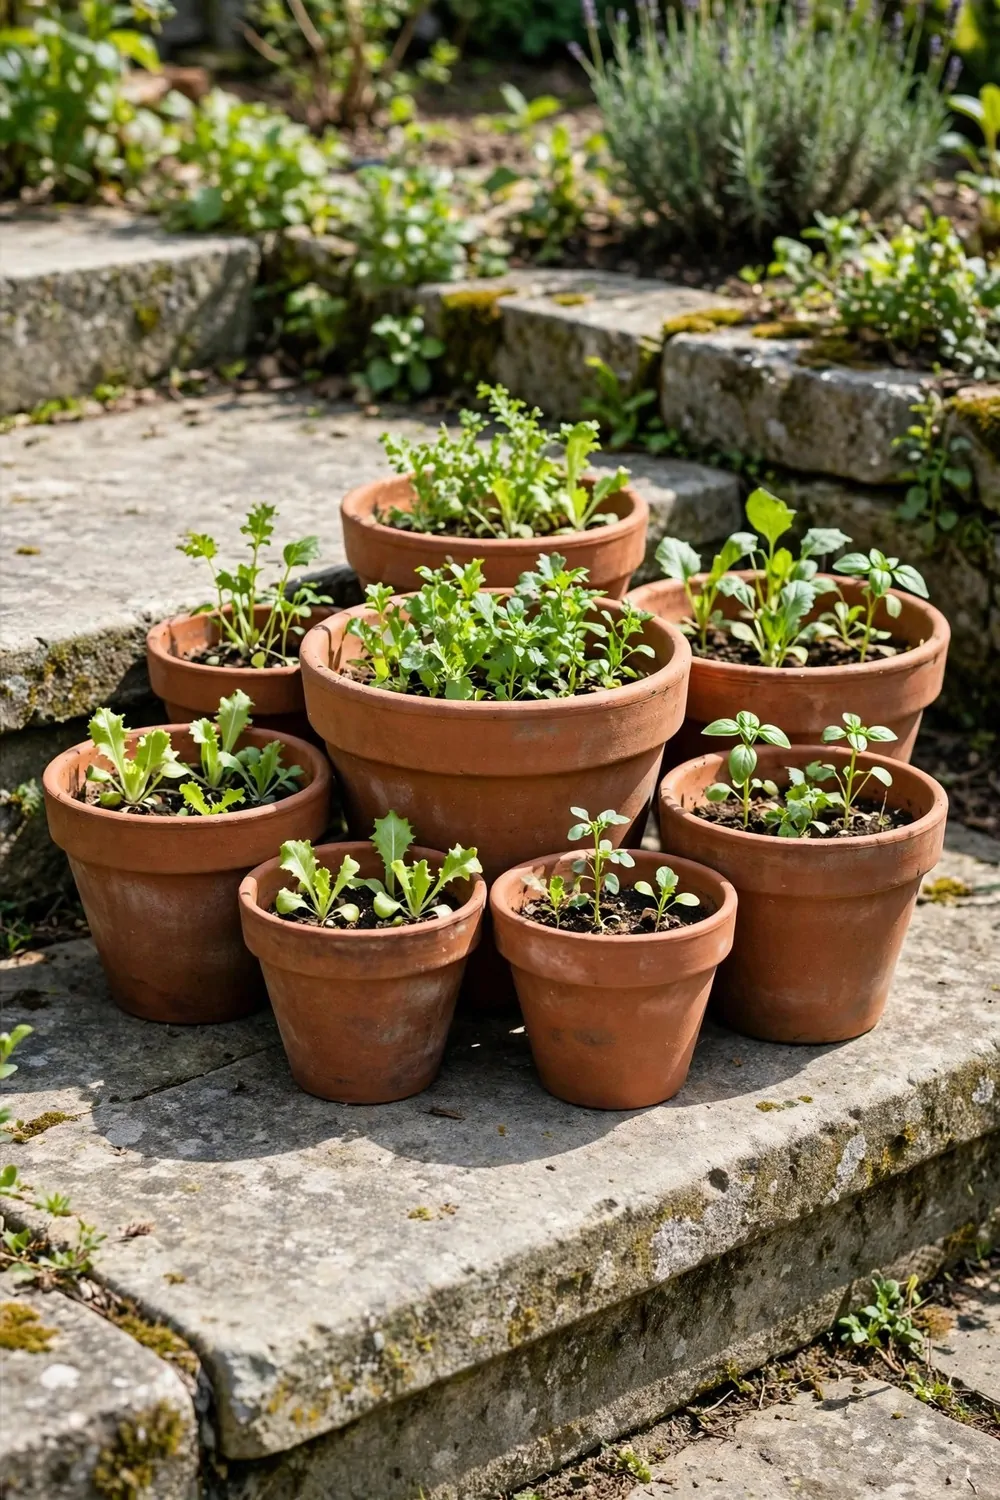
Clay pots on a step look warm and simple. I cluster mine in a group and they make a dull step feel alive.
I use pots in three sizes for a natural look. Tall pots sit at the back and short pots sit at the front. The group looks full without feeling crowded.
Clay dries out faster than plastic. I check the soil each morning in summer. A quick finger test tells me if water is needed.
Herbs and small salad leaves suit clay pots well. Their roots like the air that clay lets through. I plant one herb in each pot.
Water slowly until a little water runs out of the base. Then stop and let the pot drain. Too much water can sit in the saucer and rot the roots.
A cluster of eight clay pots and compost costs $24 to $46 to set up. I add one pot at a time when I find a shape I like.
Move the pots a little through the year. In hot months I shift them into morning sun only. In cool months I move them to the brightest step.
Clay pots age well and they look better each year. A little pale mark on the side is normal. I like the soft worn look they get.
Start with three pots on your step. Add more when you feel ready. A small cluster can grow into a lovely little garden.
32. Grow Beets in a Deep Pot
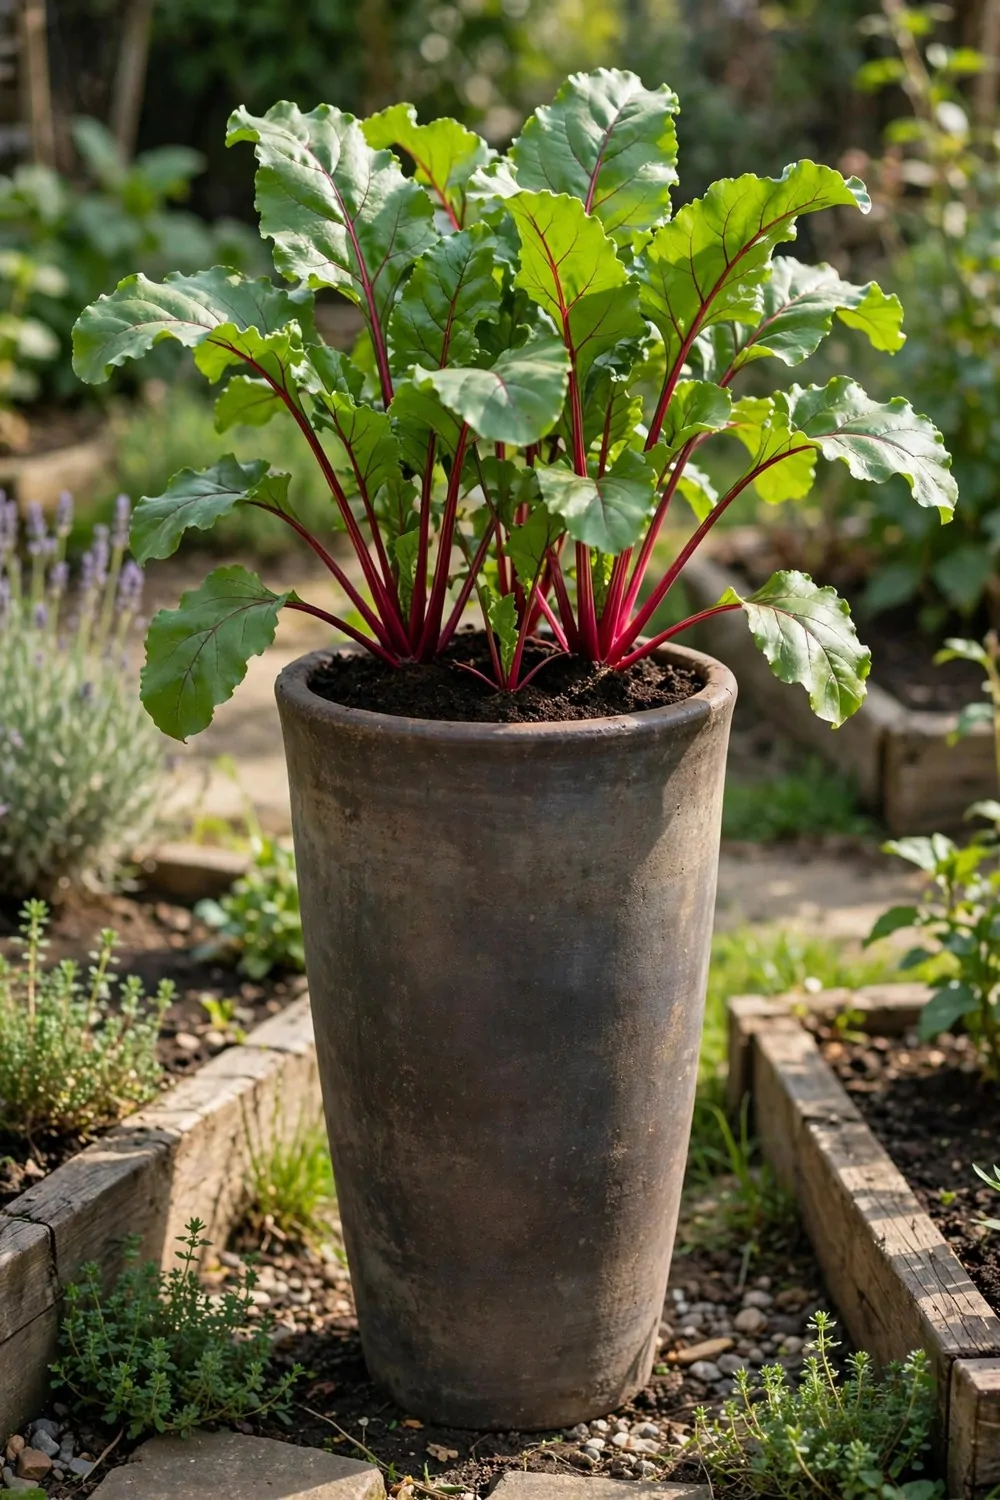
Beets need a deep pot to grow round roots. I give mine a tall pot and they swell well below the soil.
I fill a deep pot with loose soft compost. Beets hate hard lumps in the soil. I break up every clump with my hands before I sow.
I sow seeds in a ring near the edge of the pot. I thin the seedlings to a hand width apart. Room to grow makes round firm roots.
Water steady and even through the season. Dry spells can make the roots tough. I water a little each morning in dry weeks.
A deep pot, compost and a packet of beet seeds cost $18 to $33 to start. The seed packet is completely blank with no words on it at all.
Beet leaves are good to pick young too. I snip a few outer leaves for salads. The plant keeps growing after a light pick.
Beets take a few weeks to size up. I pull one to test when the top pushes out of the soil. If it feels firm, the rest are close behind.
Lift beets gently with a small fork. Do not pull hard or the root can snap. I loosen the soil first and then lift each beet out.
A deep pot of beets is a quiet success. It needs little fuss and it gives you roots and leaves. I roast mine and I add them to salads.
33. Tuck Pots Around a Small Tree
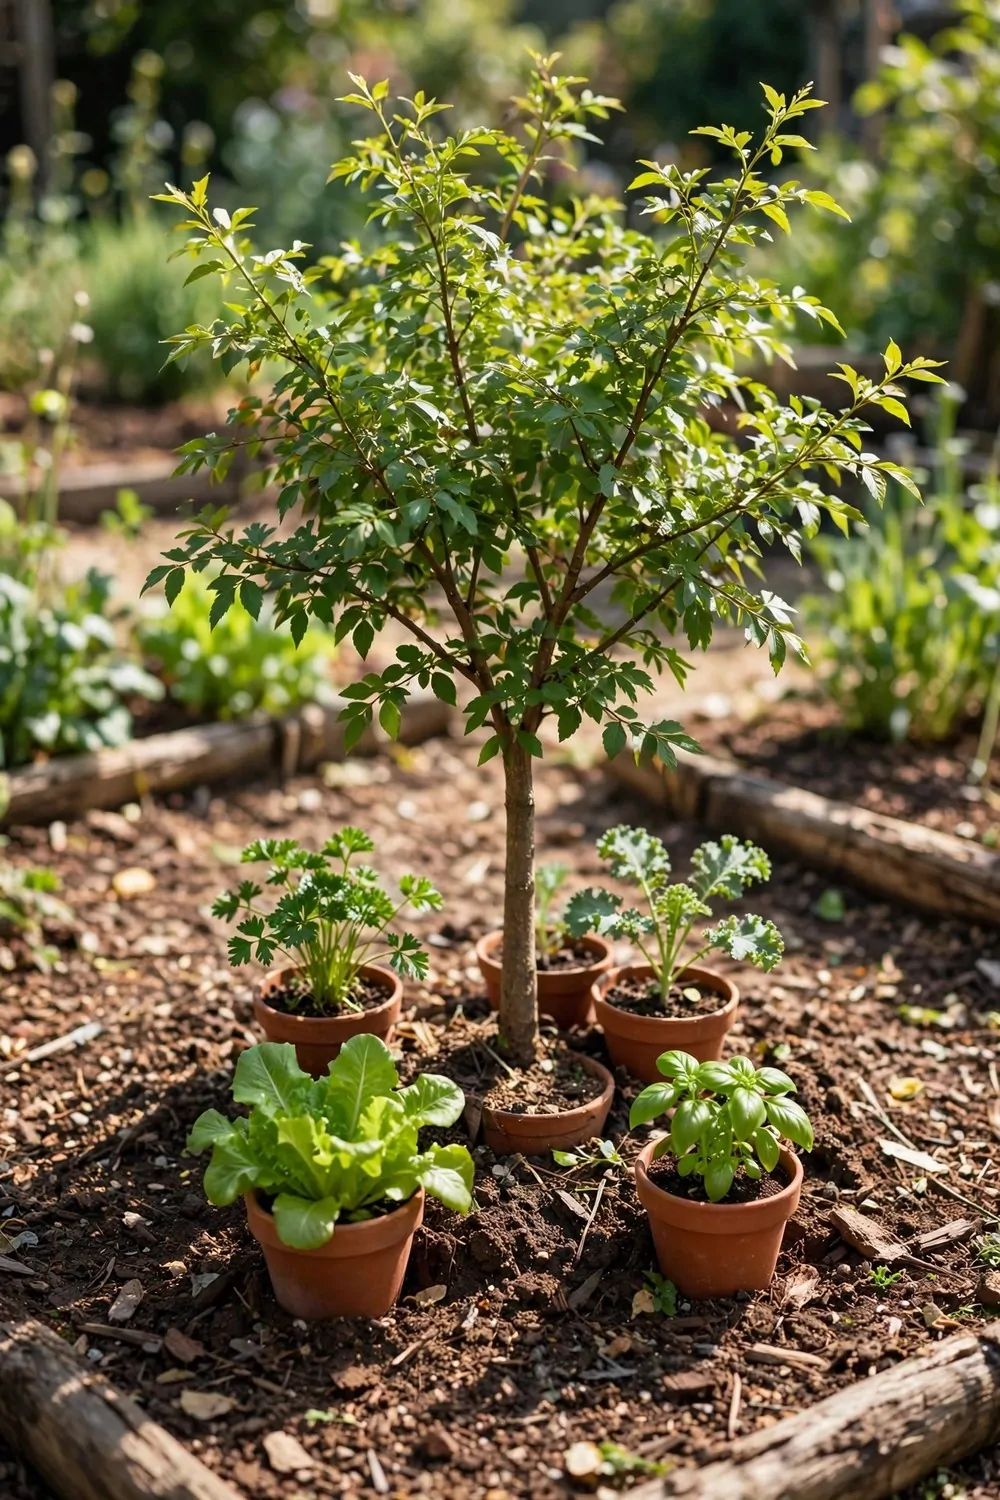
Pots around a small tree make a shady green corner. I tuck mine in a ring and they share the cool shade.
I pick pots that suit shade loving plants. Leafy greens and herbs do well under a tree. Sun loving plants would sulk in the shade.
Leave a gap between the pots and the trunk. The tree needs air around its base. I keep a hand width of clear soil all round.
Water the pots more often in dry spells. A tree drinks a lot of water from the soil. I check my pots each day in summer.
Small pots, compost and shade plants cost $23 to $42 for a ring of pots. I built my ring over two weekends with pots I already had.
The tree gives shelter from wind and harsh sun. My pots stay cooler under its branches. Leaves stay soft and green for longer.
Move the pots out a little as the tree grows. Roots spread and shade shifts through the year. I check the ring each spring and I adjust it.
A ring of pots under a tree feels calm and green. It turns a bare patch into a place to sit and rest. I love the soft light that falls through the leaves.
Try this if you have a small tree in a yard. Tuck a few pots around it and watch them settle in. A shady corner can grow a lot of food.
34. Plan a Small Space Garden for All Year
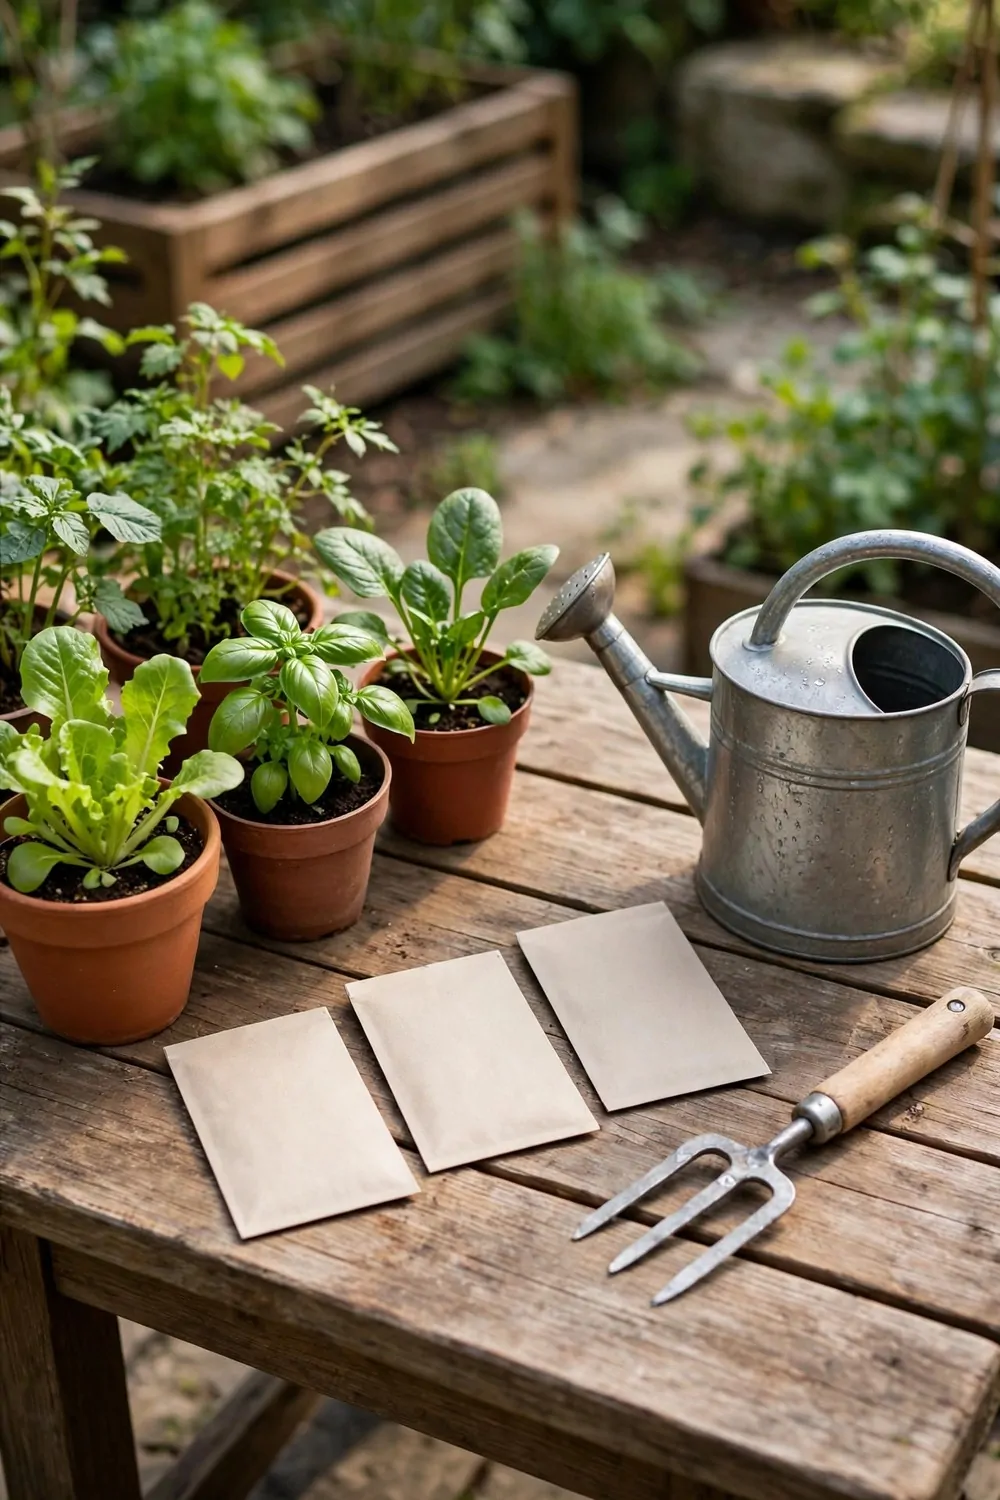
A small space garden can feed you all year if you plan it in simple steps. I sit down with a notebook and I list what I want to grow each season. A short plan saves time and it saves money too.
Start with seed packets $6 to $11 for the whole year. Pick a few kinds you love to eat and sow a little at a time. The seed packets are completely blank with no words on them at all.
Add compost bags $14 to $24 to feed your pots through the seasons. Fresh compost helps roots grow strong and it holds water well. I top up my pots with a scoop each month.
A small fork $7 to $12 helps you loosen soil and lift roots without harm. I keep mine by the back door so it is always at hand. A good fork lasts for years.
I buy plant ties and canes $6 to $11 to hold tall plants up through wind and rain. I tie stems loosely so they can still move a little. Soft ties stop stems from snapping.
A watering can $11 to $19 makes watering slow and even. I water in the morning so leaves dry by night. A can with a fine rose suits small pots best.
The total $44 to $77 covers the basic kit for a year of growing. I buy a little at a time and I spread the cost over the seasons. A small spend can grow a lot of food.
Plan your sowing in small batches through the year. Sow salad leaves in spring, beans in summer, and greens again in autumn. A few seeds each month keeps fresh food coming.
Keep a simple note of what worked and what did not. I write one line after each harvest in my notebook. Next year I plant more of what grew well and less of what did not.
| Area | Main change | Typical Cost |
|---|---|---|
| Seed packets | A few kinds you love to eat, sown a little at a time | $6 to $11 |
| Compost bags | Fresh compost to feed your pots through the seasons | $14 to $24 |
| Small fork | Loosen soil and lift roots without harm | $7 to $12 |
| Plant ties and canes | Hold tall plants up through wind and rain | $6 to $11 |
| Watering can | Slow and even watering with a fine rose for small pots | $11 to $19 |
| Total | Basic kit for a year of growing | $44 to $77 |
Keep Reading
If you liked these ideas, you will love these posts too.
- 25 No Dig Garden Ideas That Save Your Back
- 29 Kitchen Herb Garden Ideas for Fresh Flavor All Year
- 22 Vertical Garden Ideas That Grow Up Not Out
- 33 Vegetable Garden Ideas for First Time Growers
- 26 Container Garden Ideas for Patios and Small Spaces
- 24 Balcony Vegetable Garden Ideas That Actually Work
Your smallest corner can grow the most food, so start with one pot this week and see what it gives you.