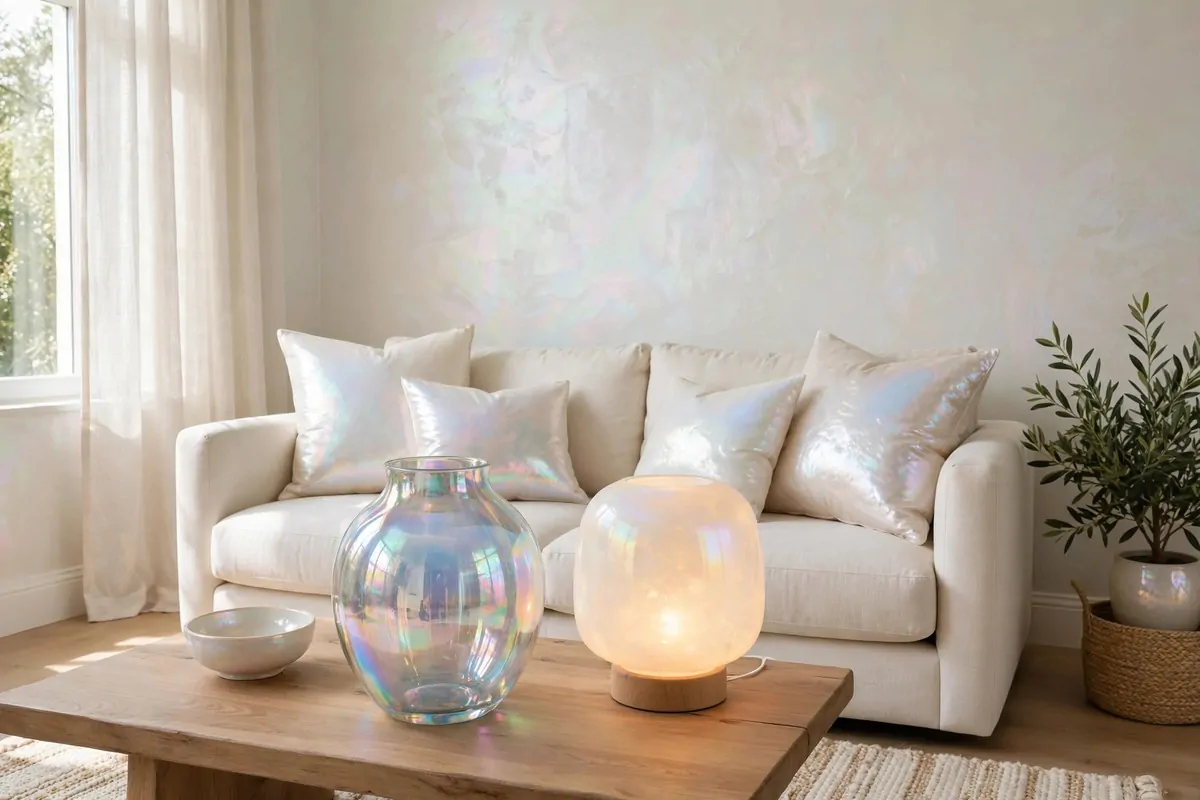
30 Crafted Gift Ideas That Look Store-Bought

The first gift I ever made was a card with a crooked star, and my mum still keeps it in a drawer. I was small then, and I still smile when I think of that day.
Here are 30 crafted gift ideas that turn plain paper, wood, and fabric into gifts that look like they came from a shop.
A gift you make with your own hands feels warm in a way a shop gift never can. It says you took time, and that time means a lot to the person who gets it.
These ideas suit mum and dad, and they suit a close friend or a teacher too. You can pick one that fits the person, not just the season.
You do not need fancy tools for any of these gifts. A few plain bits from home or a small shop are all you need to start. Most of the ideas use things you may already have in a drawer.
Start with just one gift, and take your time with it. One small gift made with care beats a pile of rushed ones.
Think about what the person likes, then pick the idea that feels right for them. If you get stuck, pick the simplest one and make it your own.
1. Wrap a Plain Jar with Twine and a Blank Tag
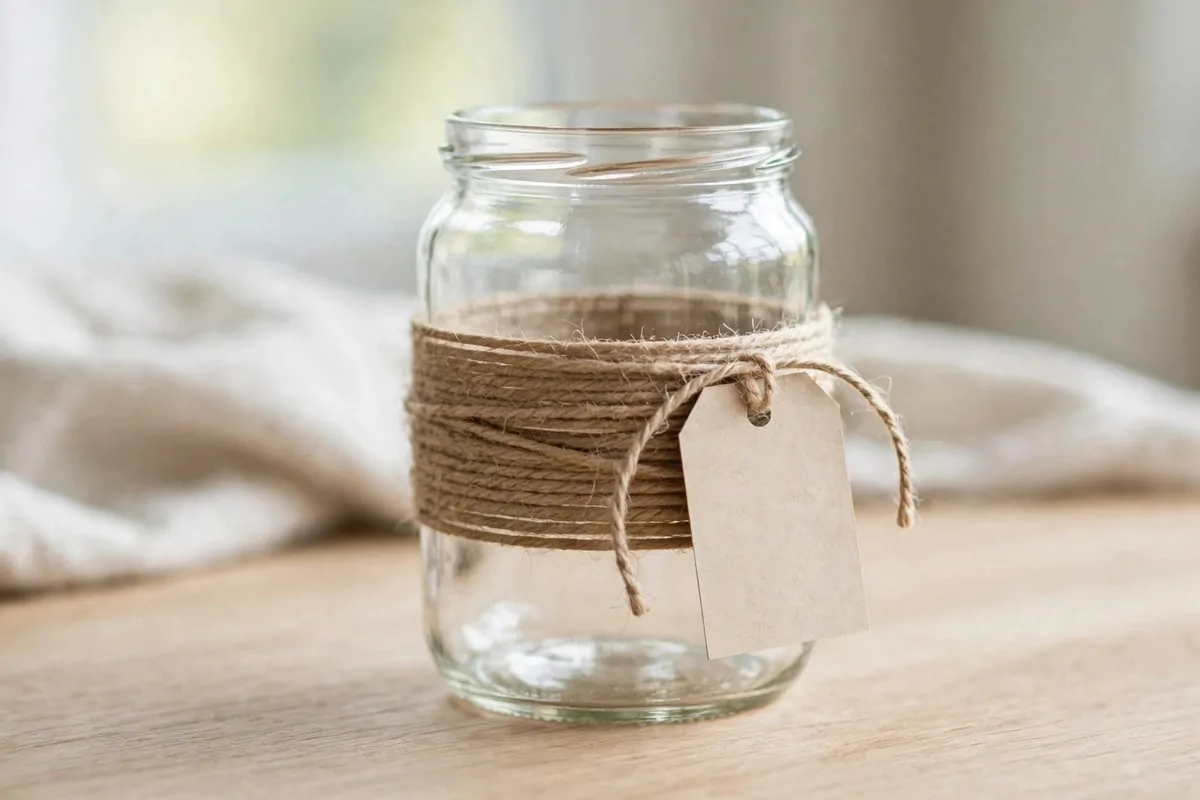
I start with a clean jar, and I dry it well first. A dry jar holds the twine much better than a damp one.
I wrap the twine round the middle of the jar, slow and snug.
I tie a small knot and tuck the loose end under the last loop. Then I add a blank tag with a short note in my own hand. I keep the words short, so they feel warm and true.
You can fill the jar with small treats your friend likes best.
I like this gift for a teacher, as it feels kind and plain at the same time. You can make it in one quiet evening, with no rush at all.
Typical cost $2 to $4.
If the twine slips, I start again and pull it a bit tighter. A slow start saves you from a loose wrap later on.
This jar suits anyone who likes plain, useful gifts.
I keep a spare tag by my side, in case I want to change the words. A fresh tag takes a minute, and it makes the gift feel new again.
2. Paint a Wooden Photo Frame in Soft Colours
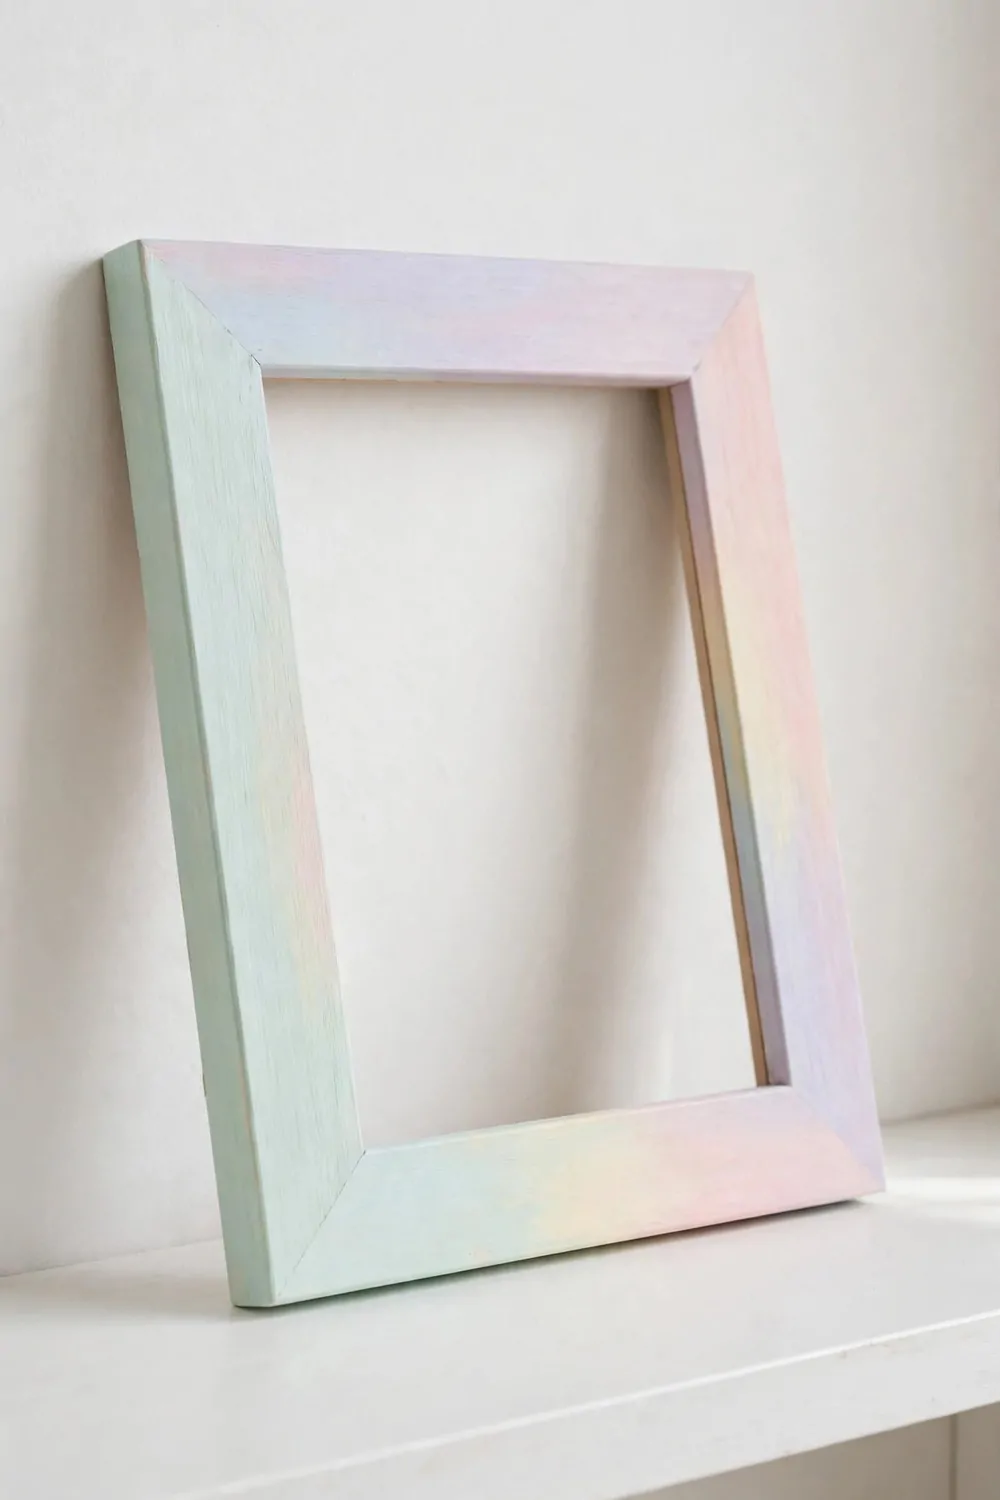
I pick a plain wooden frame and wipe the dust off it first.
I brush on a thin coat of paint and let it dry right through. A thin coat looks smooth, and it dries much faster too.
I add a second thin coat once the first one feels dry to touch. A light coat looks smooth and dries fast.
Typical cost $3 to $5.
I slip a photo in once the paint feels hard and dry. I pick a photo that means a lot to the person who gets it. A plain frame lets the photo do all the talking.
This gift suits mum and dad, and it suits a close friend too.
I wash my brush well when I finish, so I can use it again.
If paint gets on your hands, soap and warm water take it off fast. I keep a damp cloth near me while I paint, just in case.
You can make this frame in an afternoon and give it the same day.
3. Sew a Small Fabric Pouch for Little Treasures
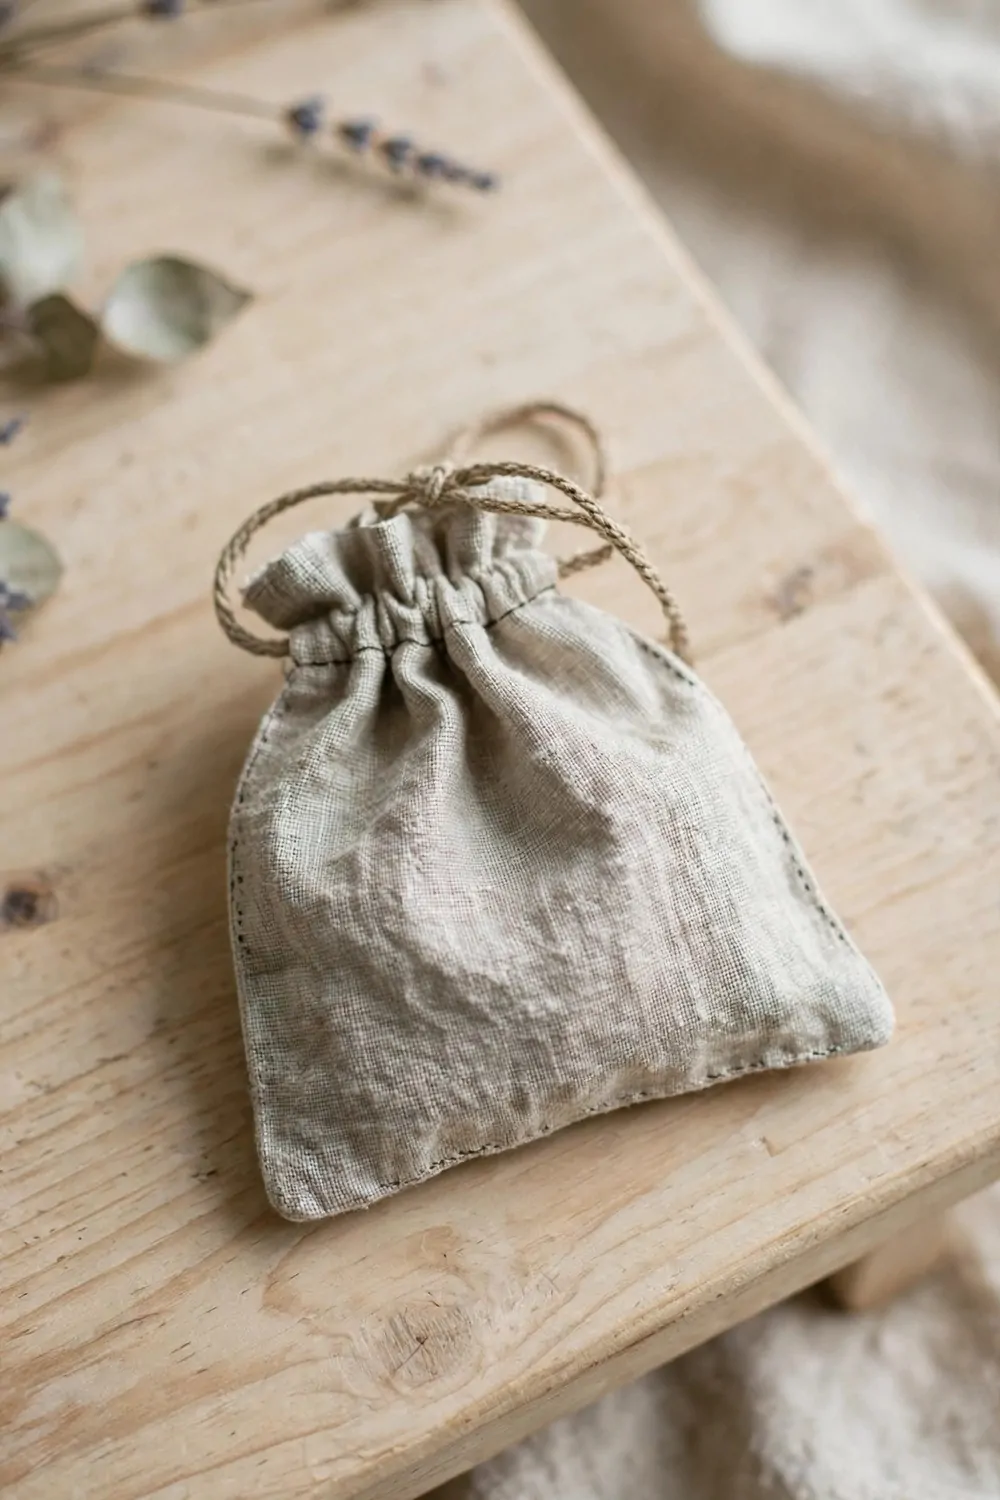
I cut a plain piece of fabric and fold it in half. I pin the edges so the cloth stays still while I sew. A slow stitch keeps the seam straight and neat.
I sew round the edges and leave the top open for now.
I turn the pouch the right way out and push the corners out soft. A pencil helps me reach the small corners with care.
I fold the top edge in and stitch it flat, so it looks neat. Then I add a cord or a tie to pull the top shut.
This pouch holds little bits like beads, coins, or a small note.
Typical cost $2 to $4.
I like this gift for a friend who keeps small things safe. You can pick a fabric that suits their taste and style. A pouch made by you feels close and kind each time they use it.
Take your time with the seam, and do not rush the stitch.
If the seam wobbles, I unpick that bit and sew it again. A fresh stitch takes a minute, and the pouch looks better for it.
4. Make a Paper Flower Bouquet That Never Wilts
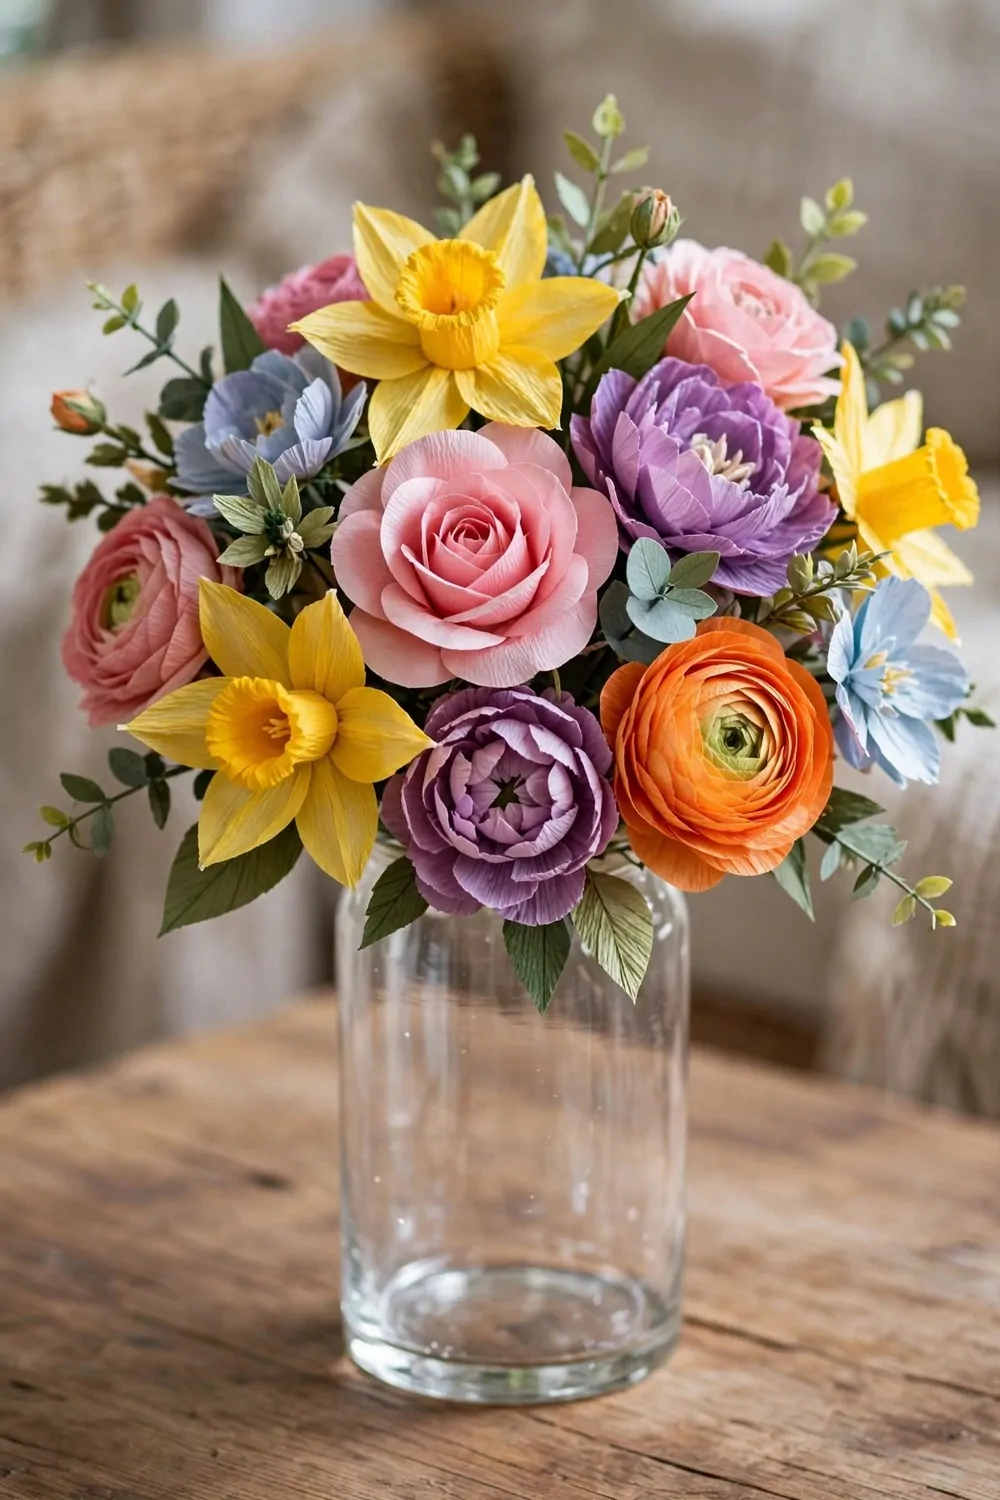
I cut plain paper into flower bits with my scissors.
I curl each flower bit round a pencil, so it bends soft and fair. Then I fix the bits to a thin stick with a dab of glue. I hold each one till the glue grabs and stays put.
You can make as many blooms as you like for one bunch.
I mix plain paper with a bit of patterned paper for a soft look. The mix keeps the bunch from looking flat and dull.
This bunch suits a teacher or a friend who loves plain, kind gifts.
I tie the sticks firm with twine and trim the ends neat. A snug tie keeps the bunch close and easy to hold.
Typical cost $1 to $3.
Paper blooms last for weeks with no water and no fuss. I like that they stay fresh while real blooms fade fast. You can give them any time of year, and they still feel kind.
If a flower bit tears, I cut a fresh one and glue it on.
5. Fill a Glass Jar with Layers of Dry Treats
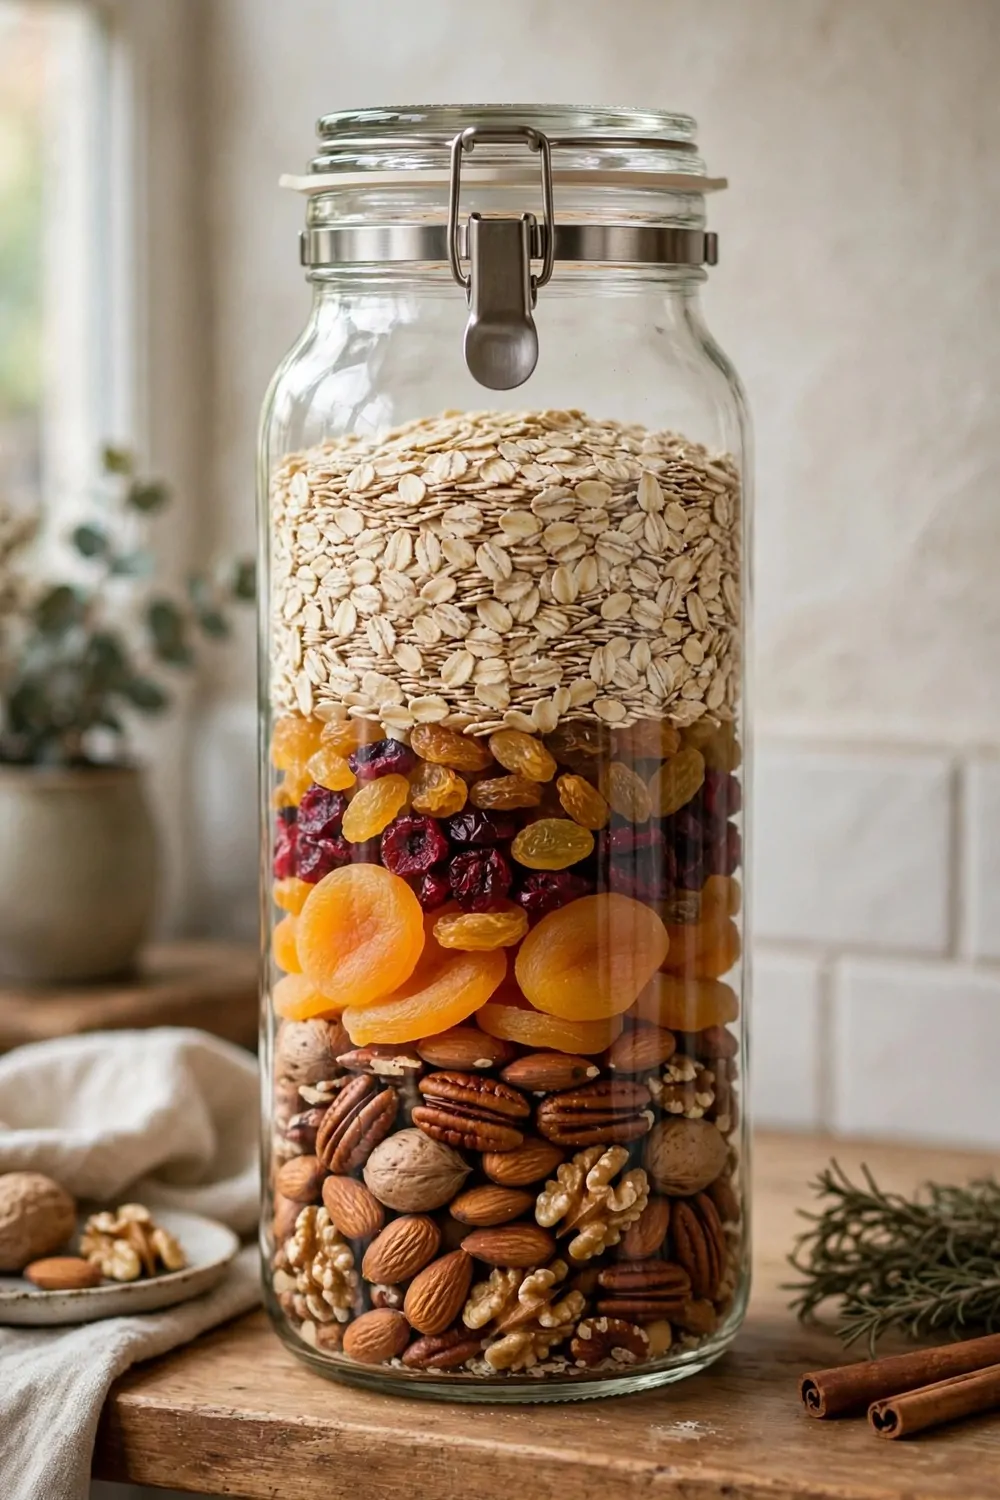
I start with a clean, dry jar and set out my dry bits in small bowls. Oats, dried fruit, and a few sweet bits work well for this gift.
I spoon in one layer at a time and pat it flat with the back of a spoon. A flat layer shows off the next layer that sits on top.
Typical cost $3 to $5.
I keep going till the jar feels full but not packed too tight. I leave a bit of room at the top, so the lid fits on well. Then I screw the lid on firm and wipe the jar clean.
You can tie a tag on with the steps to use the mix at home.
This jar suits a friend who likes to bake on a cold day.
I pick dry bits that keep well and do not need a cold box. Dry bits last for weeks, so the gift stays good till it gets used.
If a layer looks muddled, I scoop it out and start that layer again.
I love making this jar, as it feels warm and useful at once. A plain jar of dry treats suits a cold day at home. You can make one in an afternoon, with bits from your own cupboard.
6. Knit a Simple Scarf in One Colour
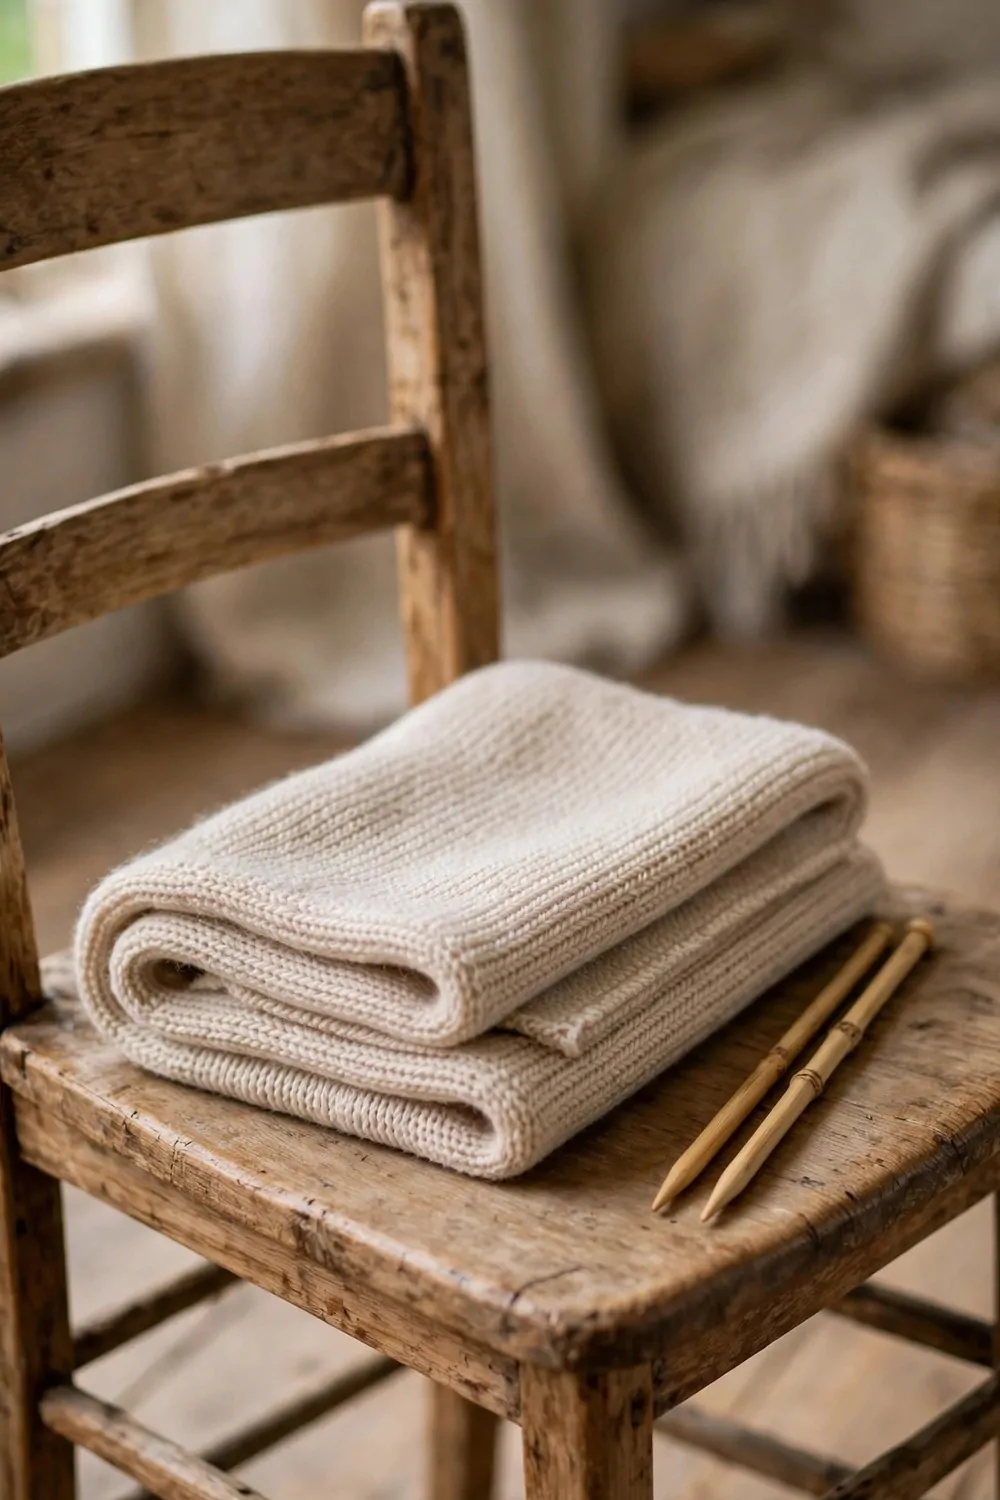
I pick a soft ball of yarn and a pair of plain needles to start.
I cast on my stitches and keep them loose and even.
I knit one row, then I purl the next row back. I keep the same stitch all the way down the scarf. A plain stitch looks neat, and it is easy to learn too.
I work a bit each night, so the scarf grows slow and steady. Short, calm turns beat one long, tired turn at the yarn.
Typical cost $4 to $6.
If I drop a stitch, I pick it up with care and knit on. A small fix now saves a big tangle later on.
I like this gift for mum or dad, as it feels warm in more than one way. You can make it while you sit and rest in the evening. A scarf you knit yourself carries your time in each row.
I cast off loose at the end, so the edge stays soft and fair.
Give the scarf with a warm note, and it will mean even more.
7. Press Dried Flowers into a Glass Frame
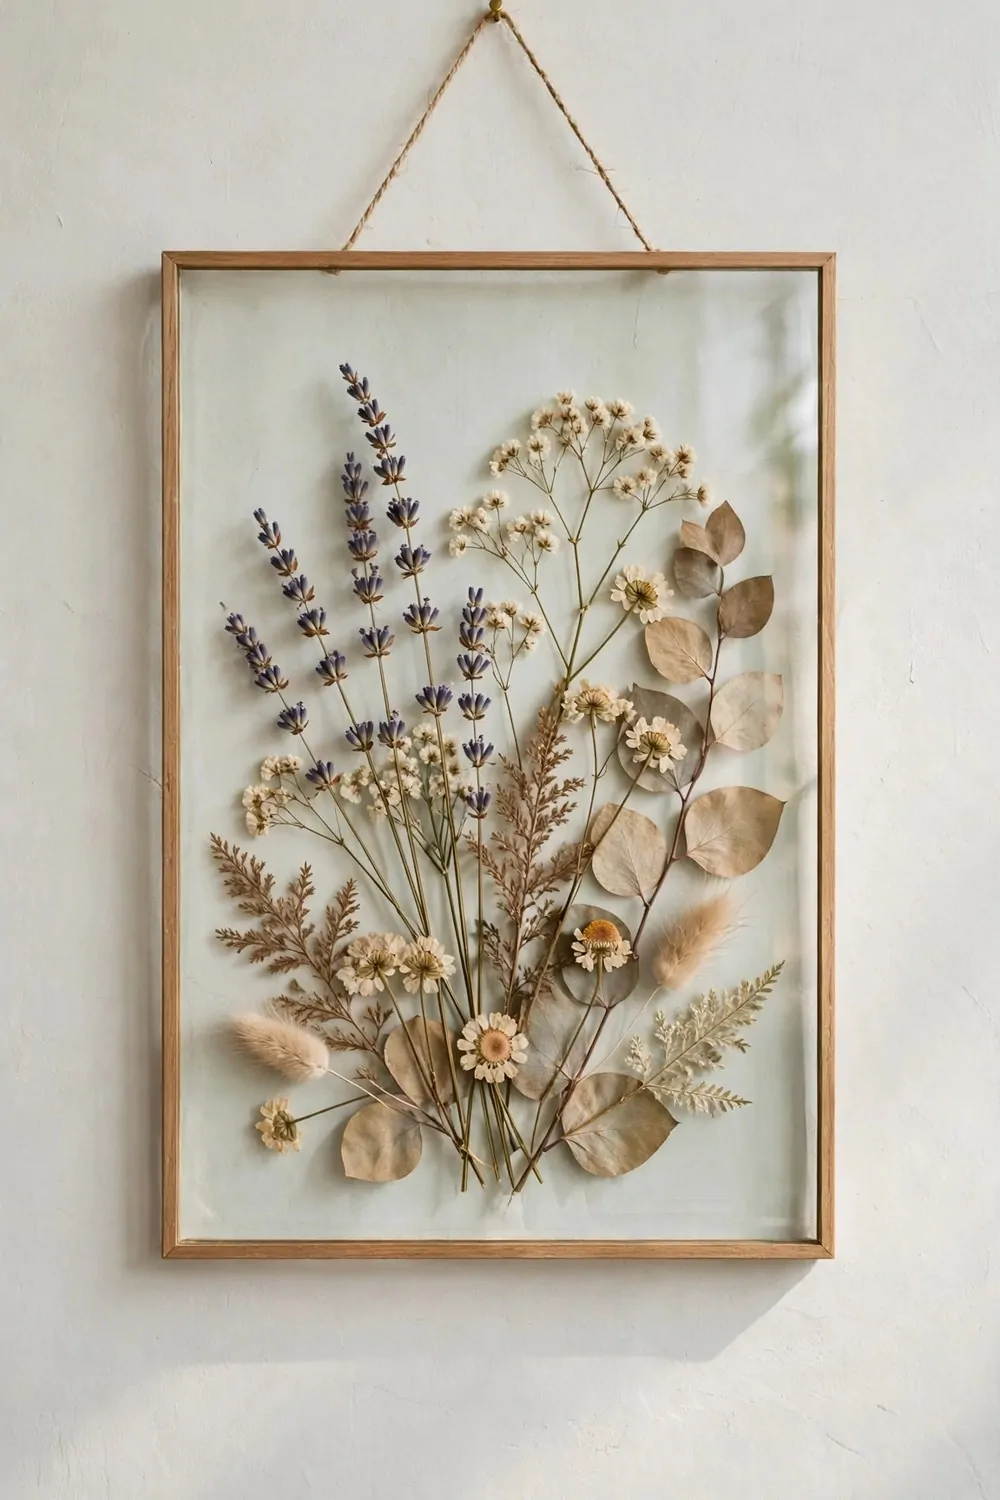
I pick small blooms and leaves from my garden on a dry day. I lay them flat between sheets of plain paper for a week or so. A heavy book on top helps them press flat and dry.
I check the blooms now and then, till they feel dry and papery. Wet blooms can stain the paper, so I wait till they feel right.
I lift the pressed blooms out with care, as they feel soft and thin.
Typical cost $2 to $4.
I set the blooms on the glass in a loose, plain way that I like. Then I close the frame and fix the back in place.
This gift suits a friend who loves quiet, plain things from nature.
I give it with a short note about where the blooms came from.
Pressed blooms last for a long time in a frame. I like that a gift from the garden lasts past one season. You can make one with blooms from a walk or your own yard.
If a bloom breaks, I use the bits that are left and press on. A small gap is fine, and the gift still feels kind.
8. Paint a Set of Plain Mugs with Simple Shapes
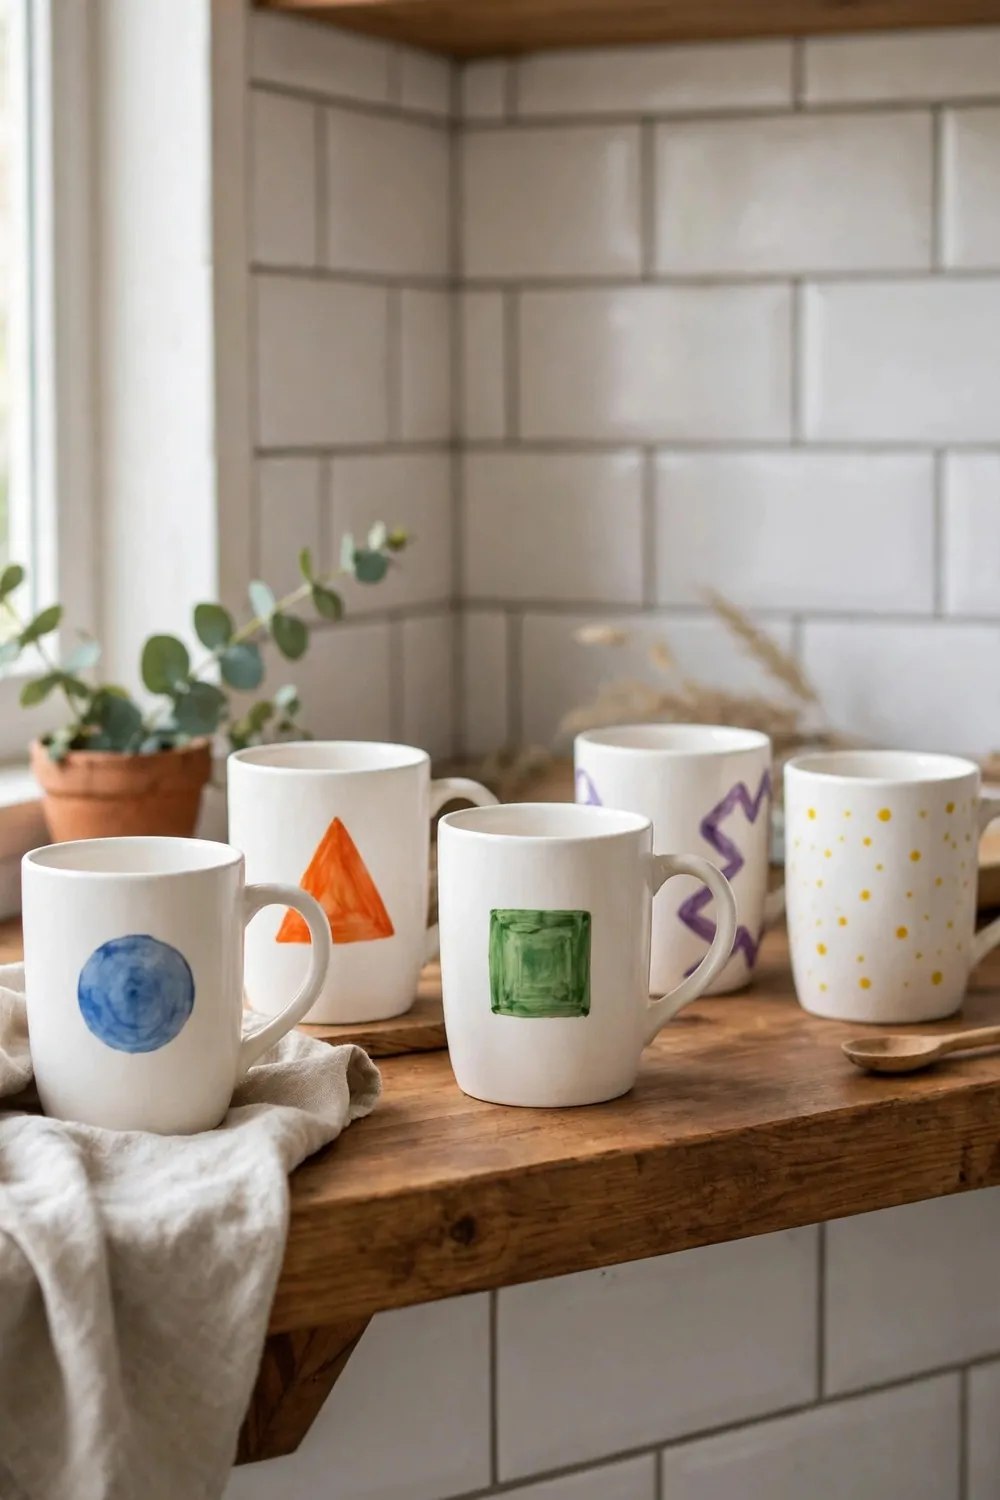
I wash plain mugs and dry them well before I start to paint. A clean mug takes the paint much better than a dusty one.
I pick a paint made for mugs and cups, so it stays on well.
I paint a plain mark on each mug with a small brush.
I keep my marks plain and let the brush do the work. I leave a bit of space round each mark, so it stands out clear. A light hand beats a hard press with the brush.
I let the paint dry right through before I touch the mugs again. Wet paint smudges fast, so I give it time and leave it be.
Typical cost $4 to $6.
I heat-set the paint in my oven as the paint pack says to do. I let the mugs cool right down before I lift them out. Cool mugs hold the paint firm, and the marks stay put.
This gift suits a friend who loves a warm drink in the morning. You can make it in one afternoon, with no fuss at all.
If a mark goes wrong, I wipe it off fast and paint it again.
9. Make a Sugar Scrub Jar for Soft Hands
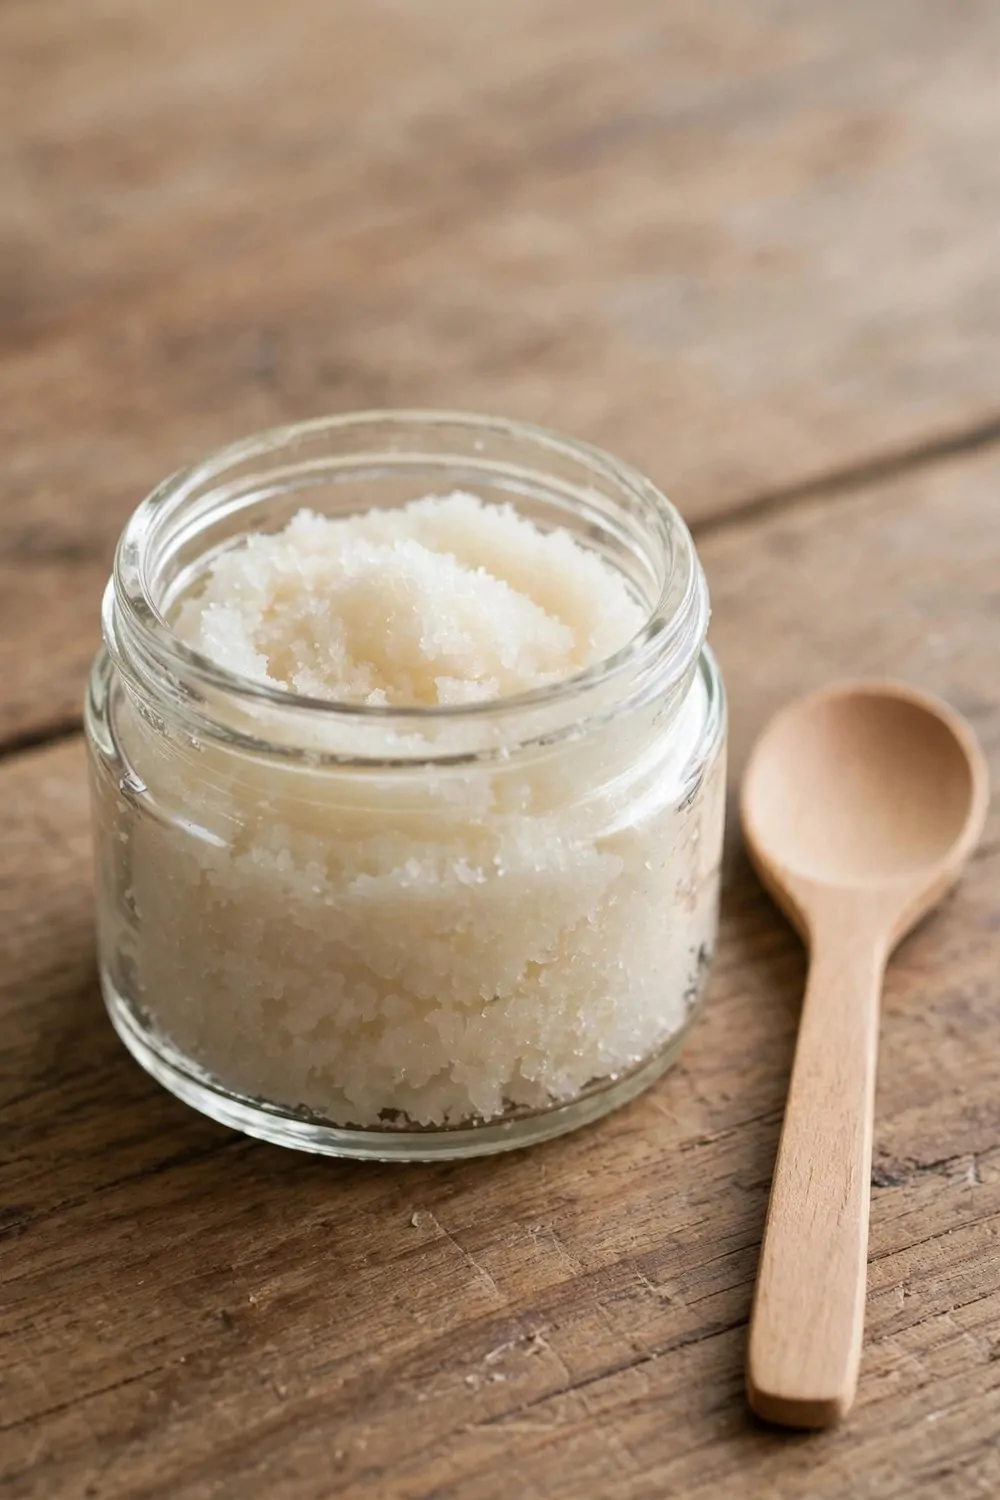
I like this gift because it feels kind and it is simple to make. You stir a few plain things together and you get a soft scrub for hands.
You start with sugar and a mild oil from your kitchen cupboard. You mix them in a bowl till the mix feels damp and soft. You can add a drop of vanilla for a sweet smell.
I keep the mix a bit coarse so it can rub away dry skin with care.
You spoon the mix into a small jar and press it down with the back of a spoon. You wipe the rim so the lid can close in a clean way.
- plain sugar
- mild kitchen oil
- a small jar with a lid
- a spoon for mixing
I tie a bit of twine for a soft touch and I add a plain tag with a short note.
This gift suits a mum who likes plain care for her hands. It suits a friend who works with her hands all day too. You can make it in a short sitting and it still feels thoughtful.
Tell your friend to rub a small spoonful over damp hands and then rinse. Tell her to pat her hands dry and enjoy how soft they feel.
Typical cost $2 to $4.
10. Fold a Paper Star Garland for the Window
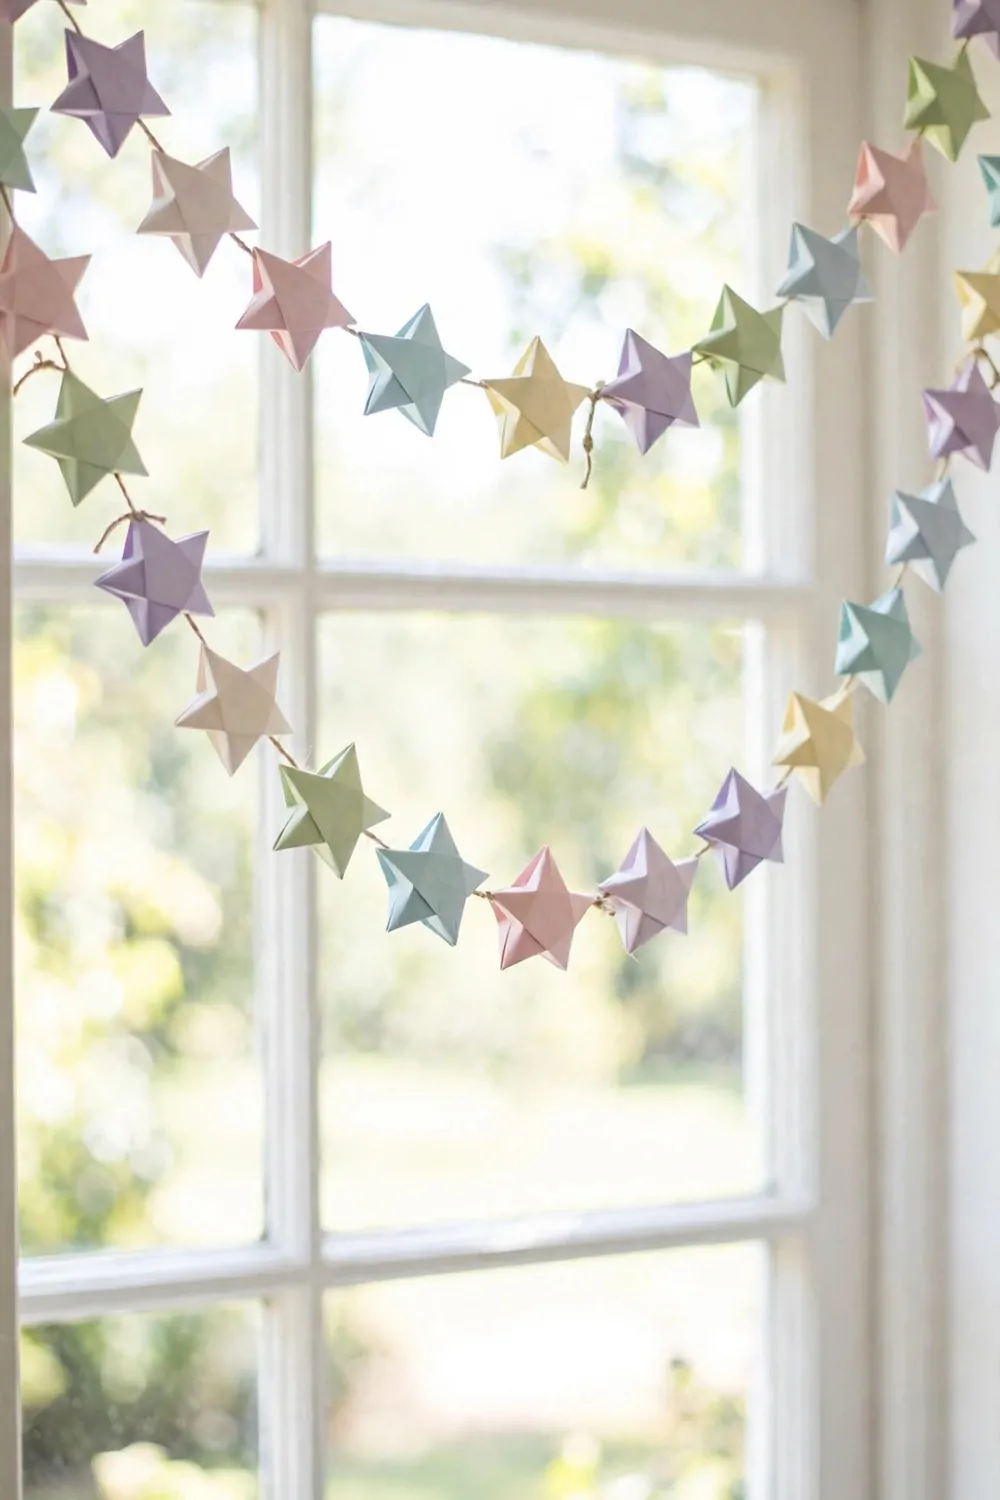
I fold this garland from plain paper and each fold feels calm and slow. You do not need fancy tools for this one. You just need paper, thread, and a bit of patience.
I crease each fold with my nail so the edges stay crisp and neat.
You fold a star, then you fold again, and soon you have stars to string together. I like to take my time here and fix a fold that looks off.
I thread a needle with care and I pull the thread through each star in turn.
You can mix plain paper with patterned paper for a soft mix of looks. I leave a bit of thread at each end so the garland is easy to tie. You can make the thread long or short to suit your own taste.
- plain paper
- patterned paper
- thread and a needle
- scissors
This gift suits a friend who loves simple paper crafts. It also suits a dad who likes a calm project on a quiet day.
I keep my folds slow and I check each star before I string it.
Typical cost $1 to $3.
| Idea | Main change | Typical cost |
|---|---|---|
| Wrap a Plain Jar with Twine and a Blank Tag | wrap a plain jar with twine and a blank tag | $2 to $4 |
| Paint a Wooden Photo Frame in Soft Colours | paint a wooden photo frame in soft colours | $3 to $5 |
| Sew a Small Fabric Pouch for Little Treasures | sew a small fabric pouch for little treasures | $2 to $4 |
| Make a Paper Flower Bouquet That Never Wilts | make a paper flower bouquet that never wilts | $1 to $3 |
| Fill a Glass Jar with Layers of Dry Treats | fill a glass jar with layers of dry treats | $3 to $5 |
| Knit a Simple Scarf in One Colour | knit a simple scarf in one colour | $4 to $6 |
| Press Dried Flowers into a Glass Frame | press dried flowers into a glass frame | $2 to $4 |
| Paint a Set of Plain Mugs with Simple Shapes | paint a set of plain mugs with simple shapes | $4 to $6 |
| Make a Sugar Scrub Jar for Soft Hands | make a sugar scrub jar for soft hands | $2 to $4 |
| Fold a Paper Star Garland for the Window | fold a paper star garland for the window | $1 to $3 |
| Total | $24 to $44 |
11. Stitch a Felt Heart Ornament
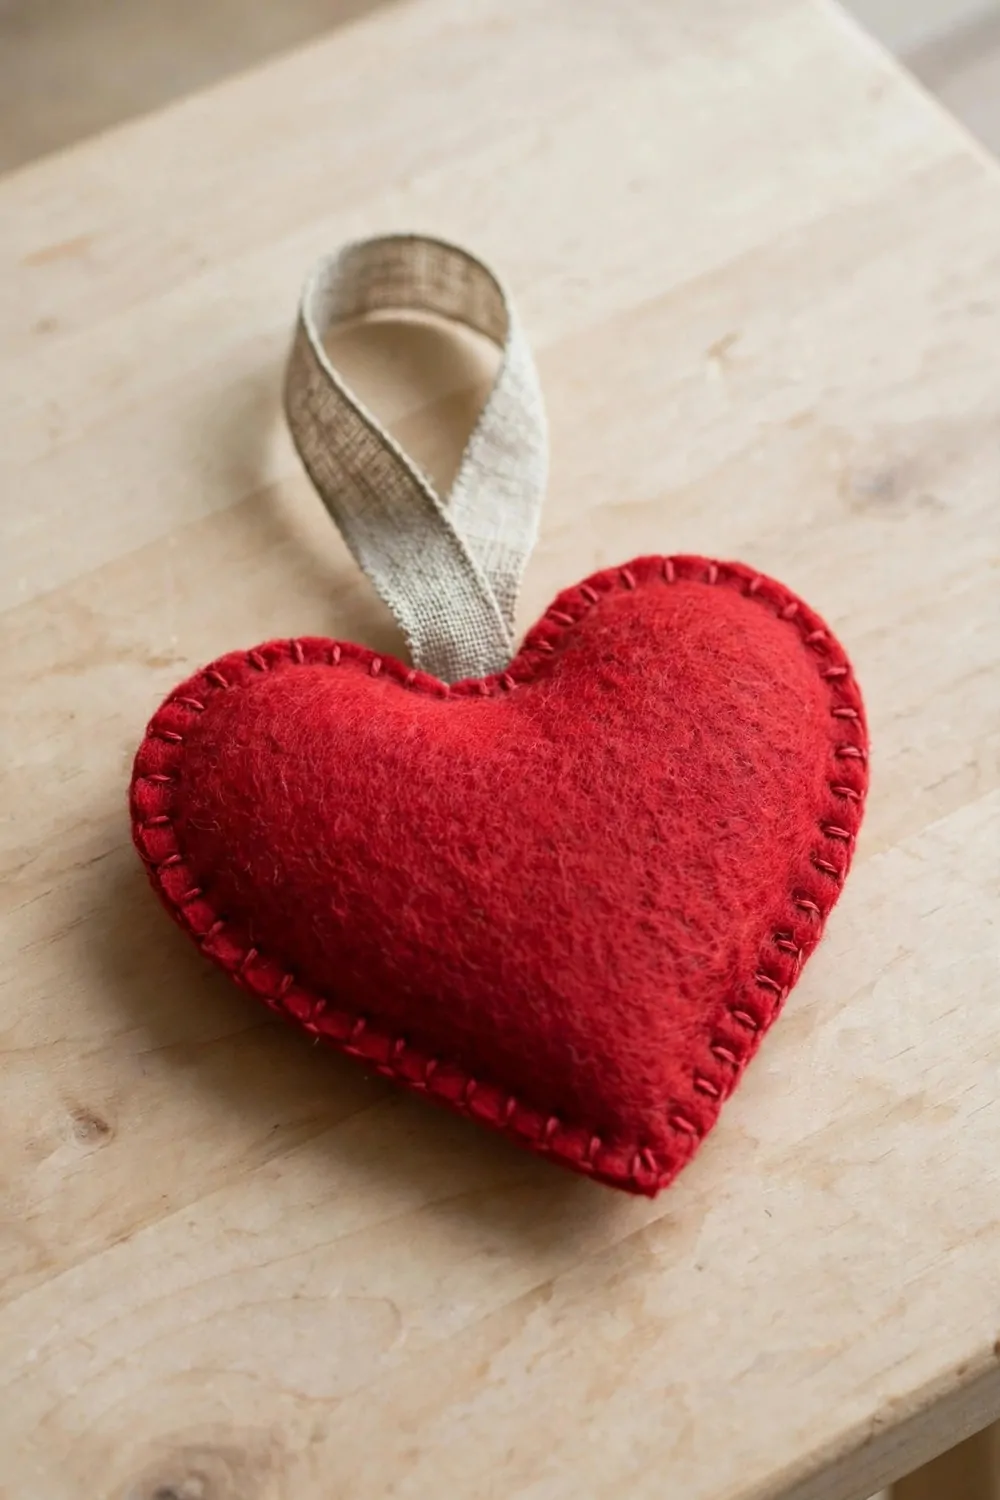
I love this small heart because it is soft to hold and simple to stitch.
You cut the felt with care and you keep your cuts slow and even. I pin the sides together before I start to stitch.
You stitch near the edge with small stitches and you leave a small gap. You tuck a bit of soft fill inside through the gap. You stitch the gap shut and you knot the thread at the end.
You can add a loop of thread so the heart can hang up. I like to keep the loop short so it sits neat and tidy.
I check my stitches as I go and I fix a loose one right away.
- felt
- thread and a needle
- soft fill
- scissors
This gift suits a mum who likes soft things made with care. It suits a friend who wants a small keepsake too. You can stitch it in a short sitting and it still feels warm and kind.
I keep my stitches small and I take my time with each one.
Typical cost $1 to $3.
12. Make a Wooden Coaster Set from Cork
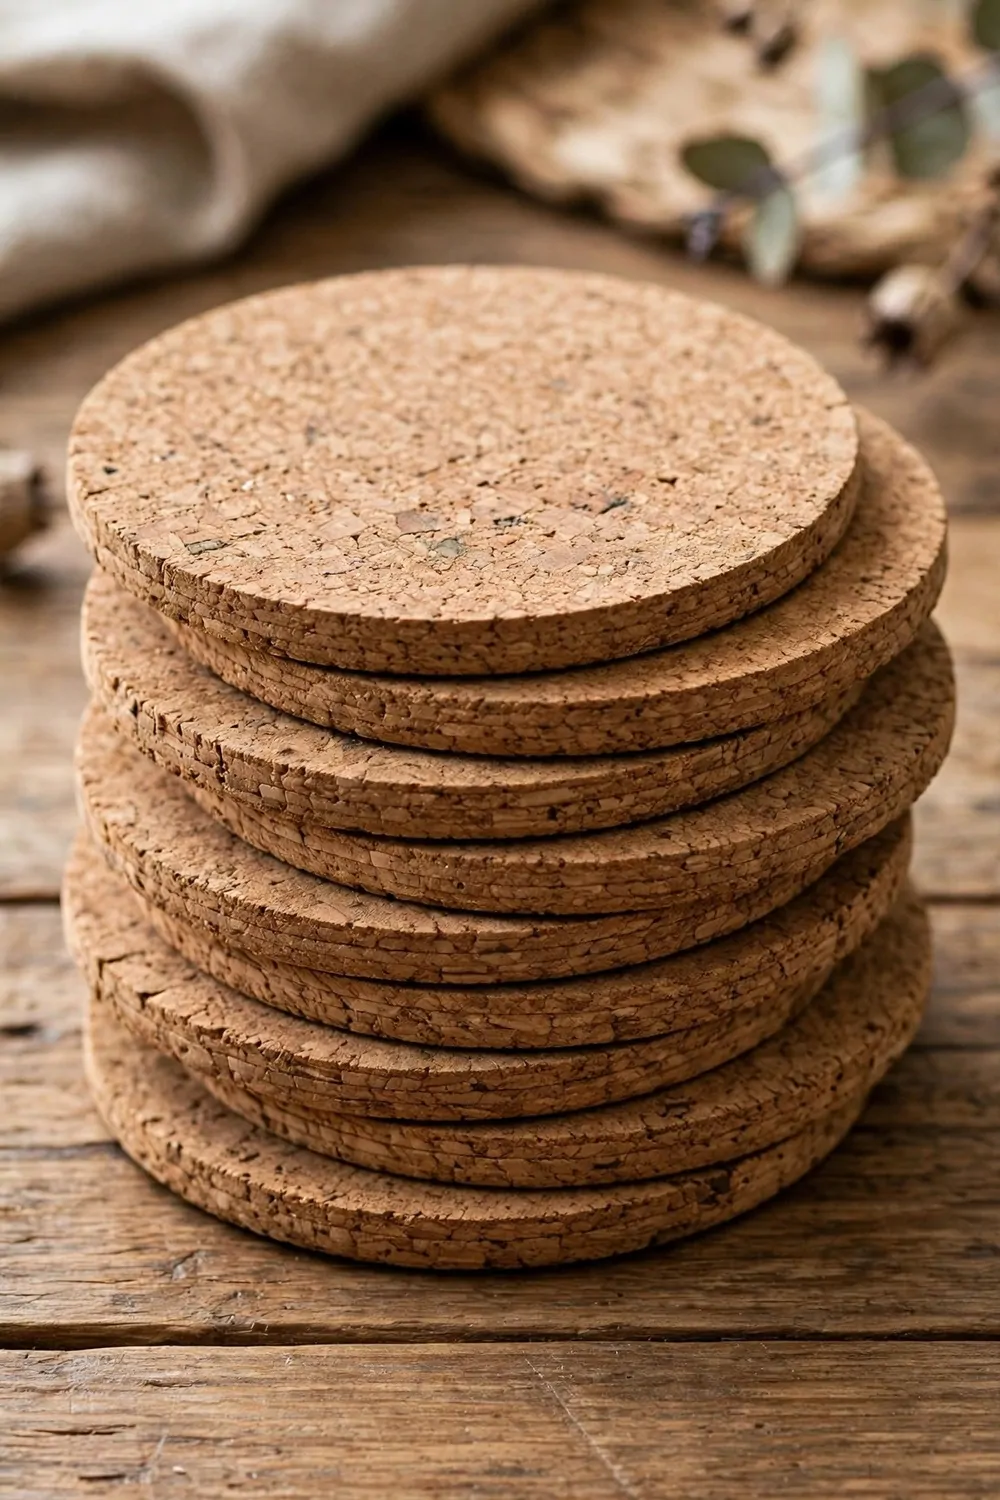
I like this gift because it is plain and it gets used a lot. You cut cork into pieces and you soon have a useful set for cups.
I mark my cuts with a pencil so each piece comes out even.
You cut slow and steady and you let the blade do the work.
You smooth each edge with sandpaper till it feels soft to touch. You wipe away the dust with a dry cloth. You can seal the top with a coat to keep it safe from spills.
This gift suits a dad who likes plain things that work well. It suits a friend who has just moved and needs small bits for her home.
- cork sheet
- a pencil
- sandpaper
- a dry cloth
I test a piece with a cup to see that it sits still and safe.
You can make this set in a short sitting with tools you may have already. I like to keep the cuts simple and the finish plain. You can tie the set with twine and add a plain tag for a kind touch.
Typical cost $2 to $4.
13. Paint a Terracotta Pot for a Small Plant
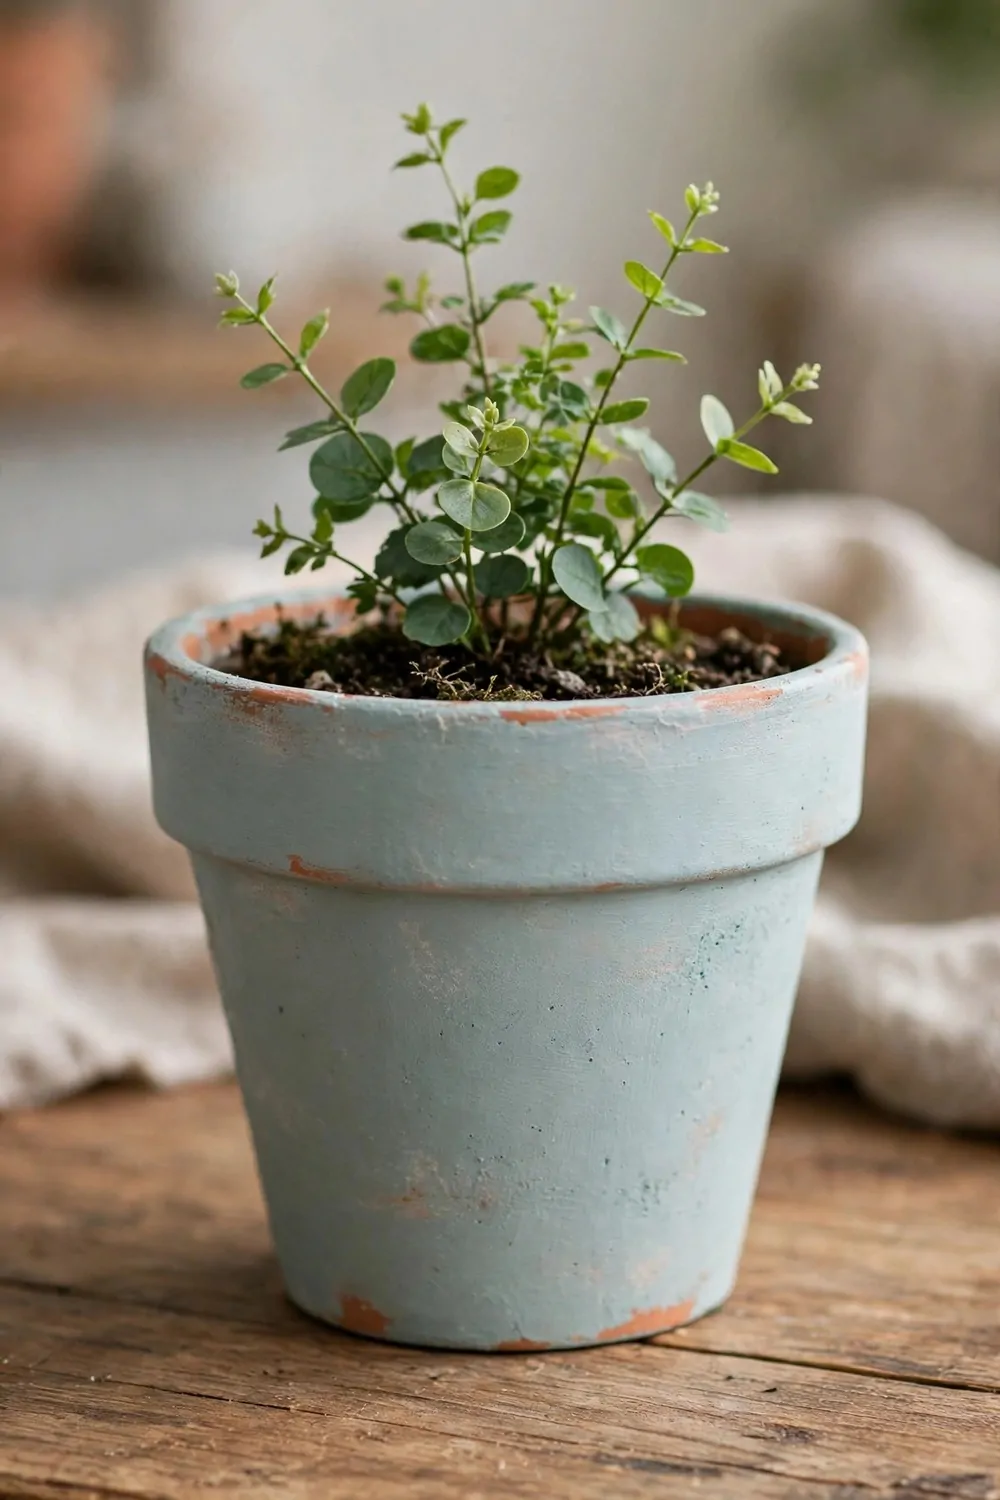
I like this gift because a plain pot can turn into a kind gift with a bit of paint. You wash the pot first and you let it dry all the way. You paint slow and you let each coat dry before you add more.
You can paint in your own style to suit your own taste. I keep my marks simple so the pot still looks calm and neat.
I use a small brush for the rim and a soft brush for the sides.
You seal the paint when it feels dry so the pot can hold up to daily use.
This gift suits a friend who likes plants and plain pots. It suits a mum who likes a small gift with a kind thought behind it.
- a terracotta pot
- paint
- brushes
- a seal coat
You pop a small plant in the pot when the paint feels fully dry. You can add a bit of soil and pat it down with care. I like to give this gift with a short note about plain care for plants.
I check the paint for bare spots and I touch up a spot that needs more paint. You can keep the finish plain and it still looks warm and kind.
Typical cost $3 to $5.
14. Make a Beaded Bracelet on Stretch Cord
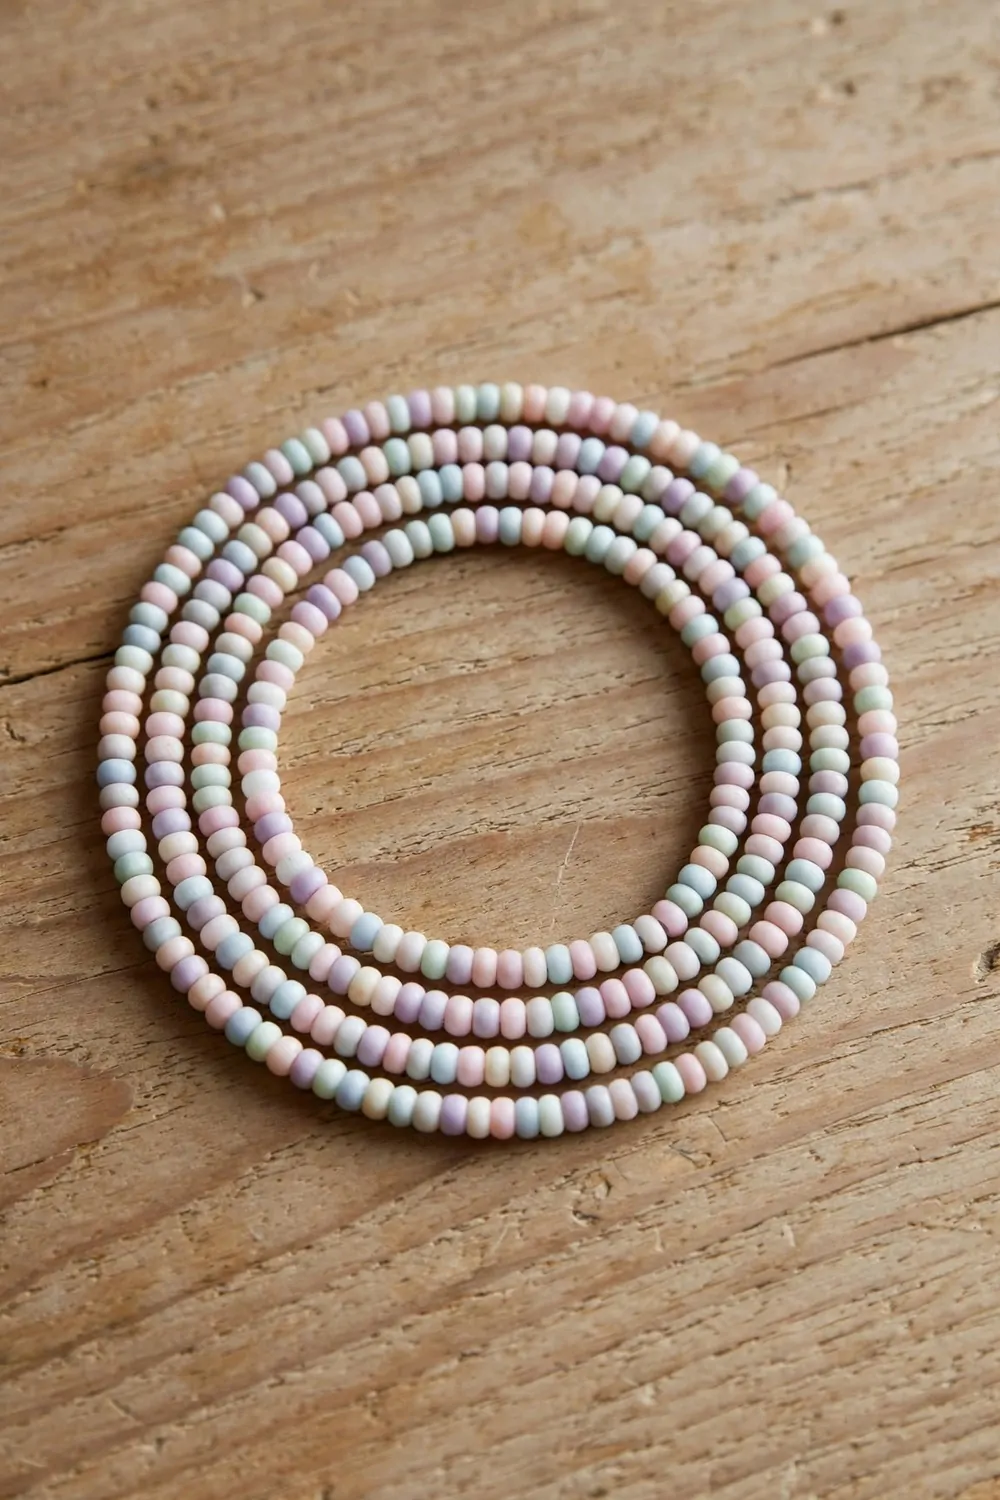
I love this bracelet because it is quick to make and fun to wear.
You pick beads that feel good in your hand and suit your own taste. You hold them in your hand to see how they feel and look together. You can swap beads till the mix feels right to you.
You cut a length of stretch cord and you tie a loose knot at one end. You thread the beads with care and you keep the cord soft in your hand.
You test the fit on your wrist before you tie it off for good. You tie a firm knot and you tuck the ends in with care. You can add a drop of glue to the knot so it stays shut.
I check the knot with care and I give the cord a soft tug to test it.
- beads
- stretch cord
- scissors
- glue
This gift suits a friend who likes plain jewellery for daily wear. It suits a mum who likes a small gift made with care.
You can make this bracelet in a short sitting and it still feels thoughtful. I like to make it while I sit and chat with a friend. You can pick beads to suit the person you plan to give it to.
Typical cost $2 to $4.
15. Sew a Lavender Pouch for a Drawer
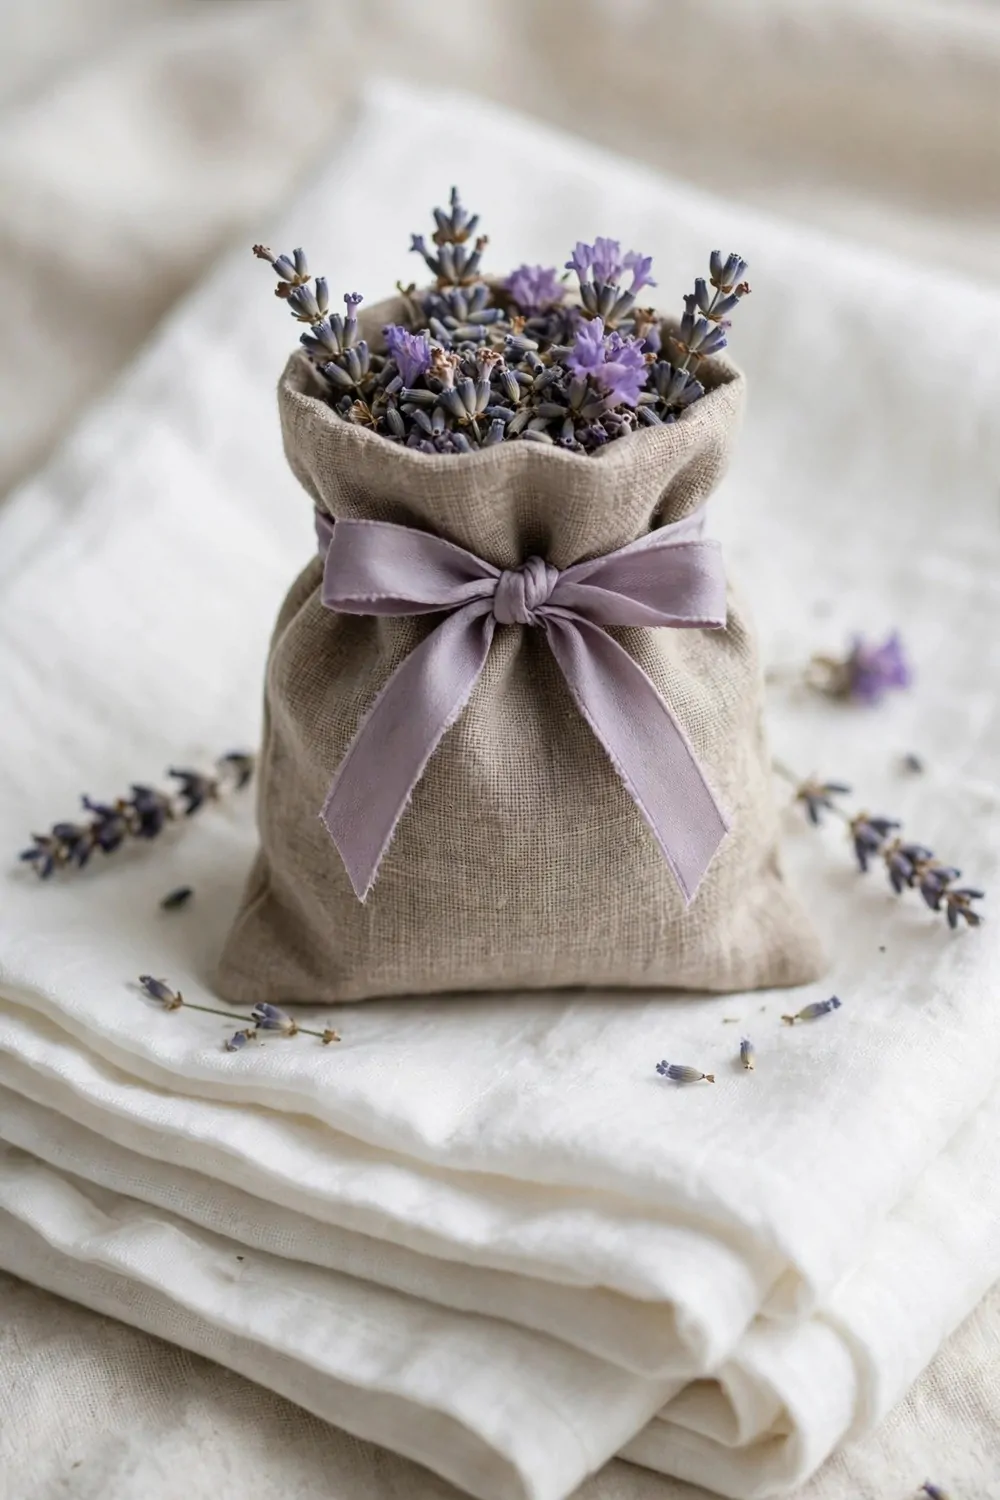
I like this pouch because it smells soft and it is simple to sew. You fill it with dried lavender and it gives a calm smell to clothes.
You cut the fabric with care and you keep your cuts slow and even. You sew the sides with small stitches and you leave a small gap. You turn the pouch the right way out and you press it with your hands.
You spoon dried lavender inside through the gap. You can add a bit of rice to help the pouch stay full and soft. A few small stitches close the gap, and a firm knot at the end keeps it shut.
A ribbon bow round the top gives it a soft touch.
I test the seam with a soft tug to see that it holds well.
- fabric
- dried lavender
- thread and a needle
- ribbon
This gift suits a mum who likes soft smells in her clothes. It suits a friend who likes plain sewn gifts too.
You can sew this pouch in a short sitting and it feels kind from the start.
Typical cost $2 to $4.
16. Make a Photo Magnet Set from Small Prints
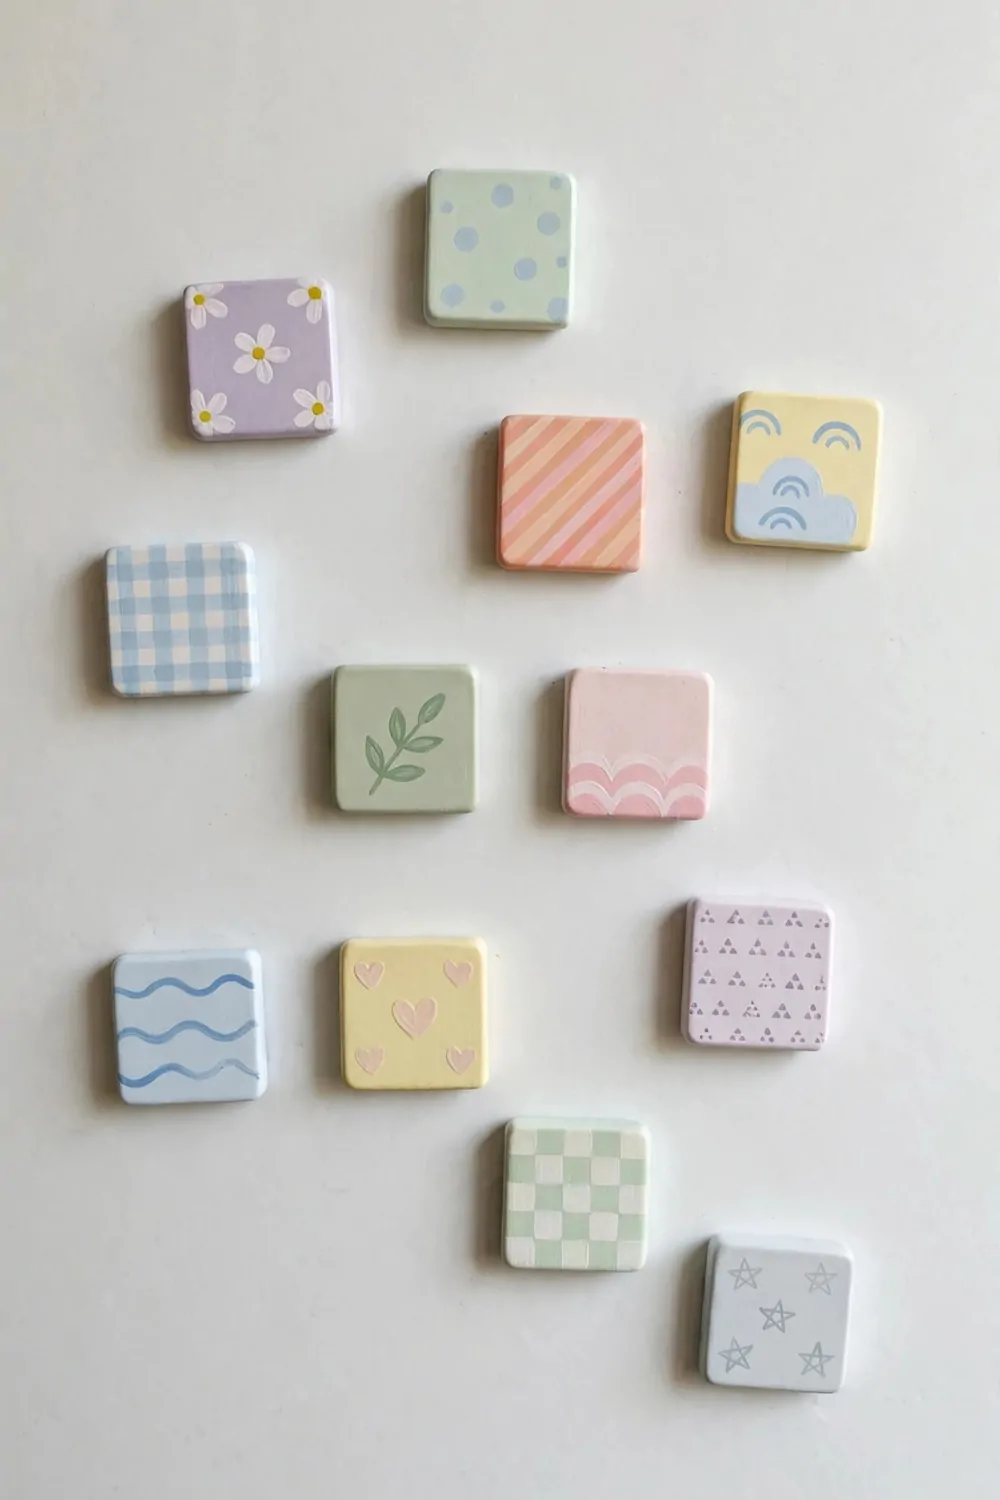
I love this gift because it turns small prints into a daily joy. You pick photos that mean a lot to you and to the person you plan to give them to. You trim each print with care so it fits the magnet base.
I use a strong glue and I press each print down with care.
You let the glue dry all the way before you move the magnets. You can seal the front with a coat to keep the print safe from marks. I like to wipe the front with a dry cloth when the seal feels dry.
This gift suits a mum who likes photos of her family close by. It suits a friend who has just moved and wants a kind touch for her home.
You pick prints with plain scenes that suit the person you give them to. I like to mix a flower print with a stripe print and a dot print. You can add a short note with the set so the gift feels warm and kind.
- small prints
- magnet bases
- strong glue
- scissors
I check each magnet to see that the print sits firm and neat.
You can put this set together in a short sitting and it feels kind from the start. I like to keep the trim simple and the finish plain.
Typical cost $2 to $4.
17. Paint a Wooden Keepsake Box
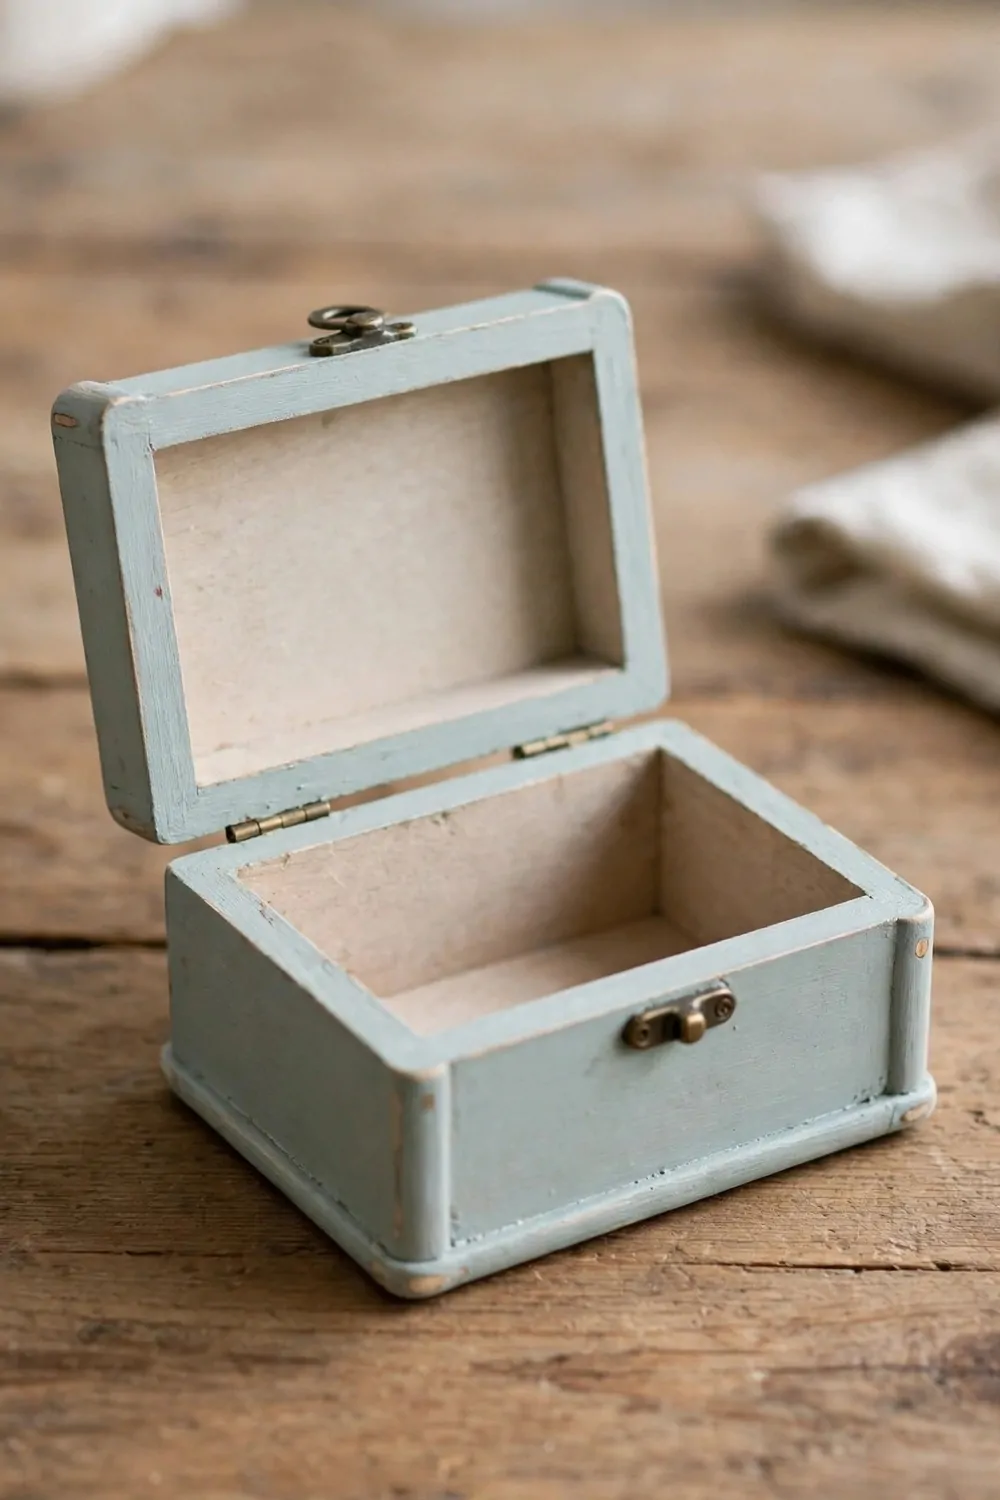
I start with a plain wooden box and a soft brush. I wipe the dust off first so the paint sits smooth.
I paint one thin coat and let it dry all the way. Then I add one more thin coat for a neat cover. I take my time here because paint can drip and dry lumpy.
I keep the brush strokes all in one way so the top looks calm and tidy. I work slow so I do not rush the coat.
- a plain wooden box
- a soft brush and a small pot of paint
- a clean cloth for dust
I let the box dry in a spot with fresh air. I do not touch it till it feels dry all over.
You can give it to mum or a friend for small keepsakes and notes.
I check the lid opens and shuts with ease. I run my finger along the rim to feel for rough spots. I smile when it feels done because it looks like a shop gift.
I wrap it in plain paper with a bow of string. It makes a sweet gift for a birthday or a thank you.
Typical cost $4 to $6.
18. Decorate a Plain Jar with Tissue Paper Shapes
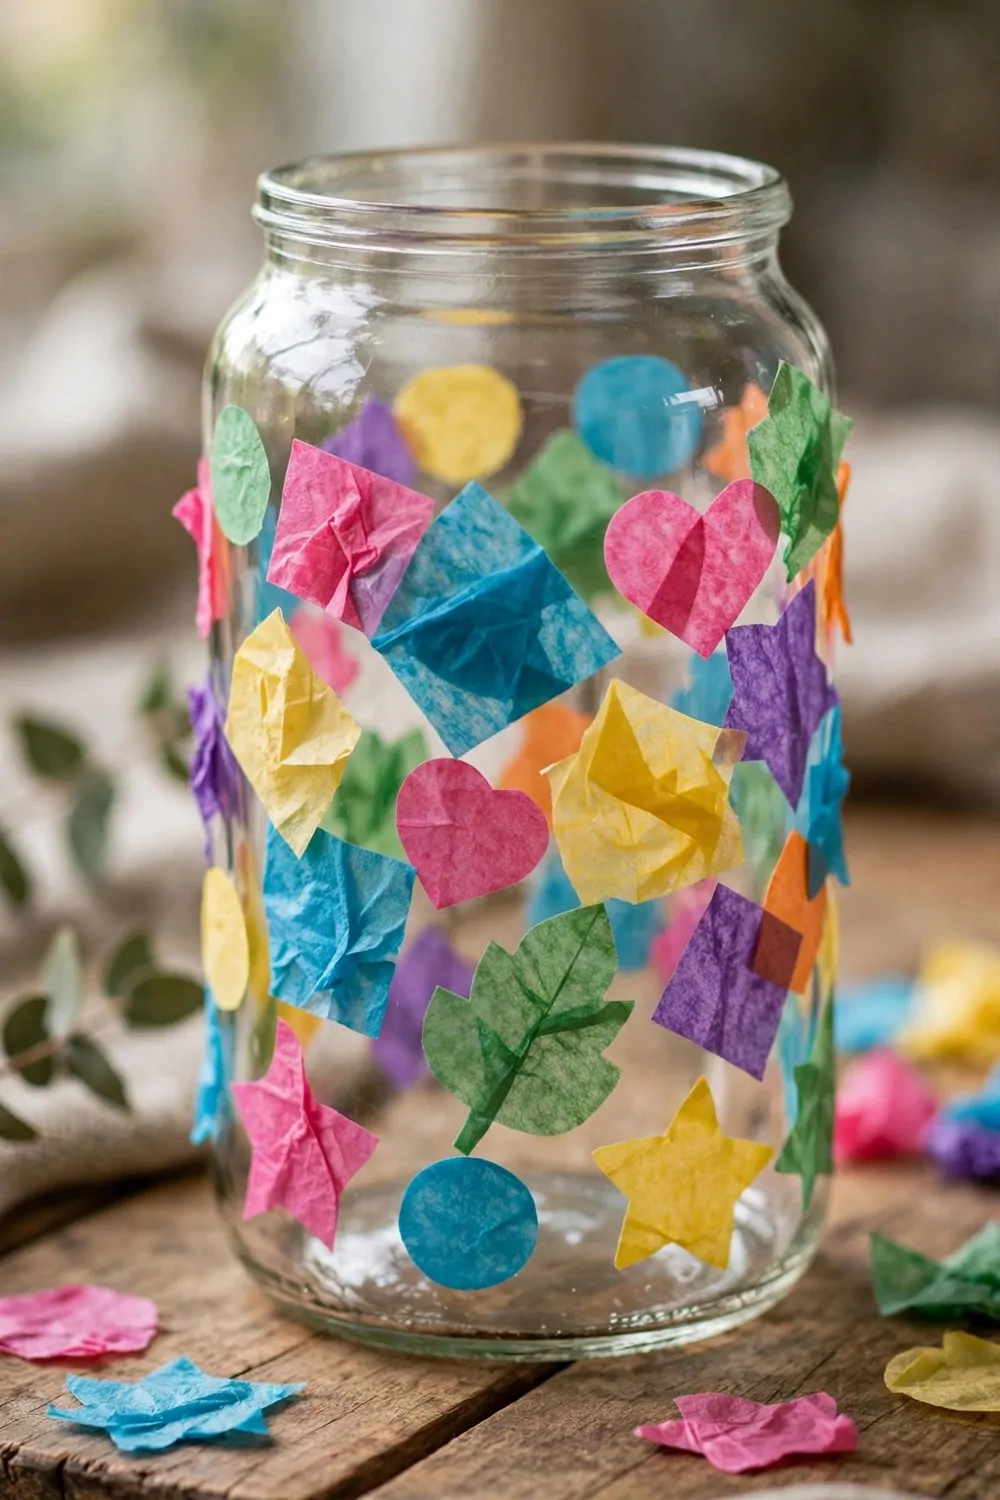
I pick a clean plain jar and wash it till it feels smooth. I set it down and let it dry all the way.
I tear tissue paper into soft bits with my hands. I like the torn edge more than a cut edge because it blends in soft.
I brush a thin layer of glue on one patch of the jar. I press a paper bit down and smooth it with my finger. I keep going till the jar has bits all over it in a loose way.
I let each patch dry a bit before I add the next one. That stops the paper from sliding off while I work.
- a clean plain jar
- tissue paper and a brush
- a small pot of glue
You can use it to hold pens and small bits.
I add one more thin coat of glue on top when the paper feels dry. This seals the bits down so they stay put. I let it dry all the way before I move it.
I give jars like this to friends who like bright things for their home.
Typical cost $1 to $3.
19. Crochet a Small Basket for Bits and Pieces
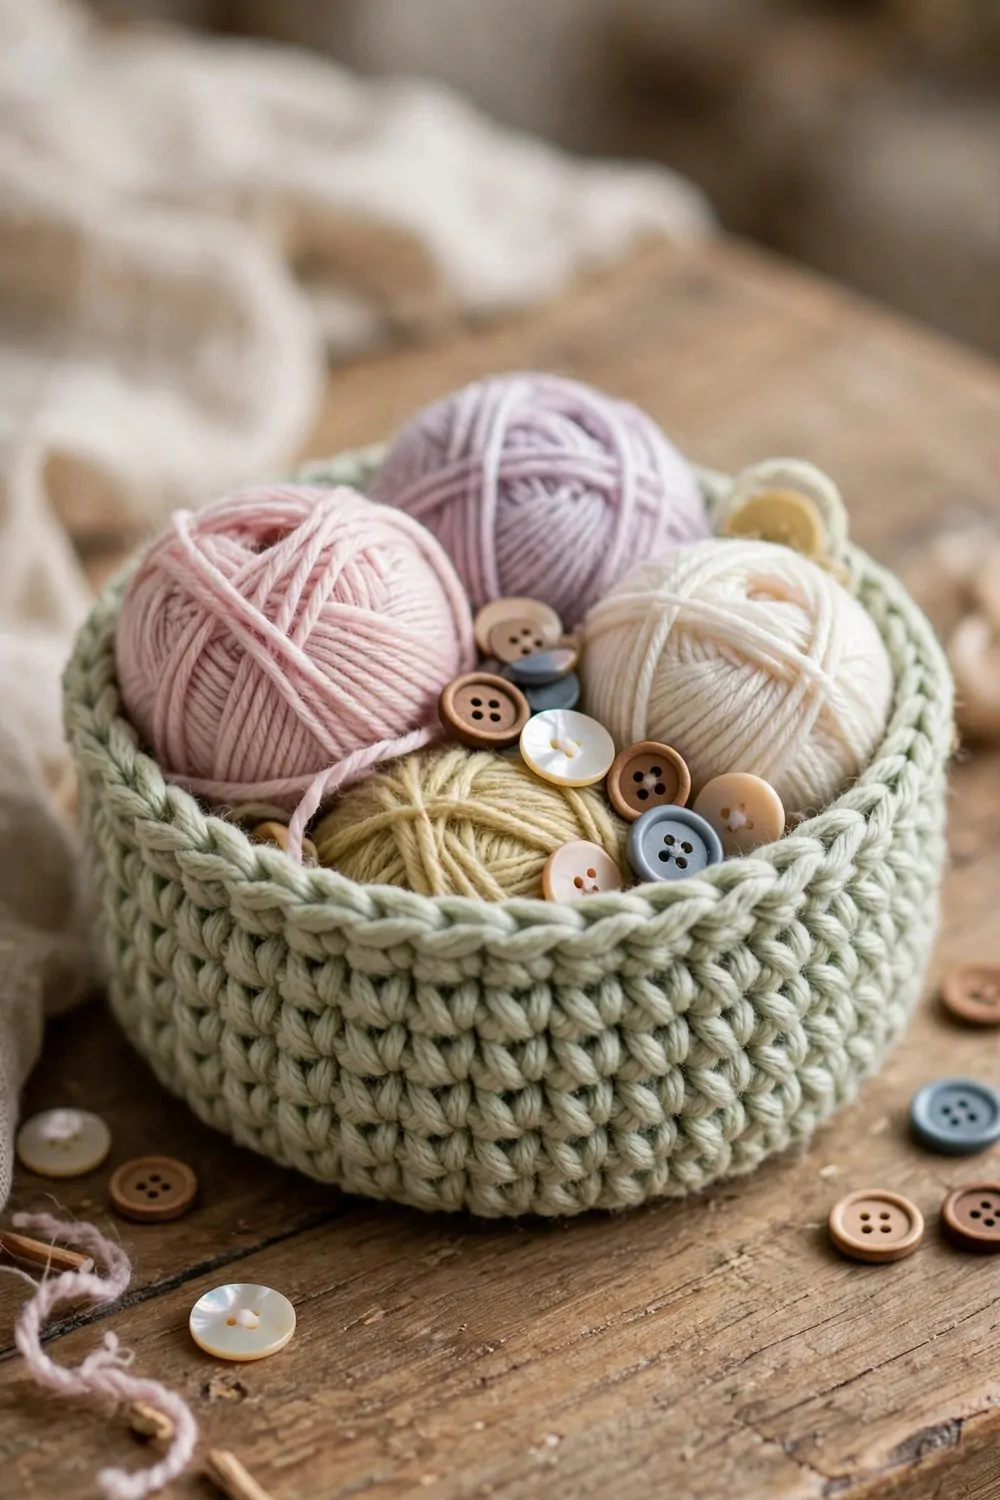
I start with a ball of yarn and a hook that feels good in my hand. I make the base first with slow even loops. I count my loops as I go so the base stays even.
I work up the sides one step at a time. I take my time and enjoy the slow work.
I keep my loops loose so the hook slides in with ease. Tight loops make my hand ache and the sides pull in.
I check the sides as I go and fix a wobbly loop right away.
I finish the top edge with one more row of loops. I tuck the yarn end in with my hook so it stays put. I pat it soft and call it done.
- a ball of yarn
- a hook that fits the yarn
- scissors for trimming ends
You can use it for hair ties and small bits that get lost. It suits a teen who likes to keep bits in one place.
I made one for my cousin and she uses it each day.
Typical cost $3 to $5.
20. Make a Bookmark from Pressed Leaves
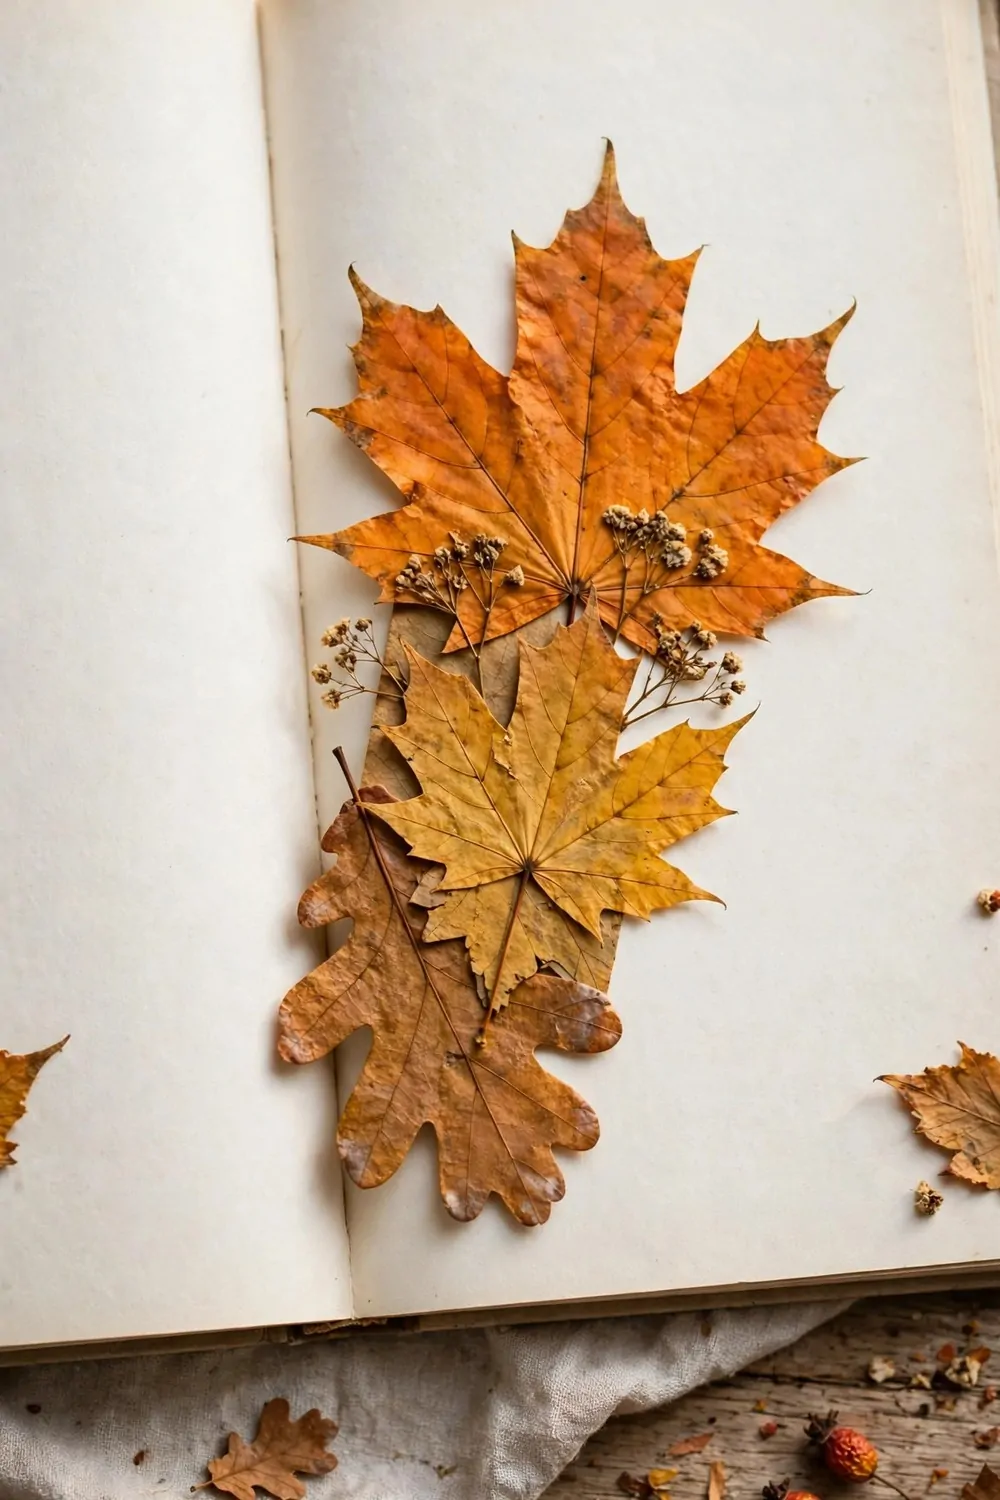
I pick leaves from the garden on a dry day. I look for leaves that feel firm and look fresh.
I press them flat in a heavy book for some days till they dry.
I use card I already have at home, so I pay nothing for it.
I lay leaves on the card and press them down soft. I add strips of clear tape across the stems to hold them. I trim the card ends neat with scissors so it fits in a book.
The leaves cost nothing because I pick them from the garden. The card was already at home from an old pack.
I like to give this to a friend who reads a lot. It feels kind to make a gift from things you already own. It also feels good to spend no money and still give a sweet gift.
- leaves pressed flat
- a piece of card from home
- clear tape and scissors
You can make one in an afternoon with things you already have.
Typical cost $0 to $1.
| Idea | Main change | Typical cost |
|---|---|---|
| Stitch a Felt Heart Ornament | stitch a felt heart ornament | $1 to $3 |
| Make a Wooden Coaster Set from Cork | make a wooden coaster set from cork | $2 to $4 |
| Paint a Terracotta Pot for a Small Plant | paint a terracotta pot for a small plant | $3 to $5 |
| Make a Beaded Bracelet on Stretch Cord | make a beaded bracelet on stretch cord | $2 to $4 |
| Sew a Lavender Pouch for a Drawer | sew a lavender pouch for a drawer | $2 to $4 |
| Make a Photo Magnet Set from Small Prints | make a photo magnet set from small prints | $2 to $4 |
| Paint a Wooden Keepsake Box | paint a plain wooden box with thin coats and a smooth finish | $4 to $6 |
| Decorate a Plain Jar with Tissue Paper Shapes | cover a plain jar with tissue paper bits and a glue seal | $1 to $3 |
| Crochet a Small Basket for Bits and Pieces | crochet a small basket with even loops and a neat top edge | $3 to $5 |
| Make a Bookmark from Pressed Leaves | press leaves flat on card from home at no cost | $0 to $1 |
| Total | $20 to $39 |
21. Paint a Set of Wooden Spoons for the Kitchen
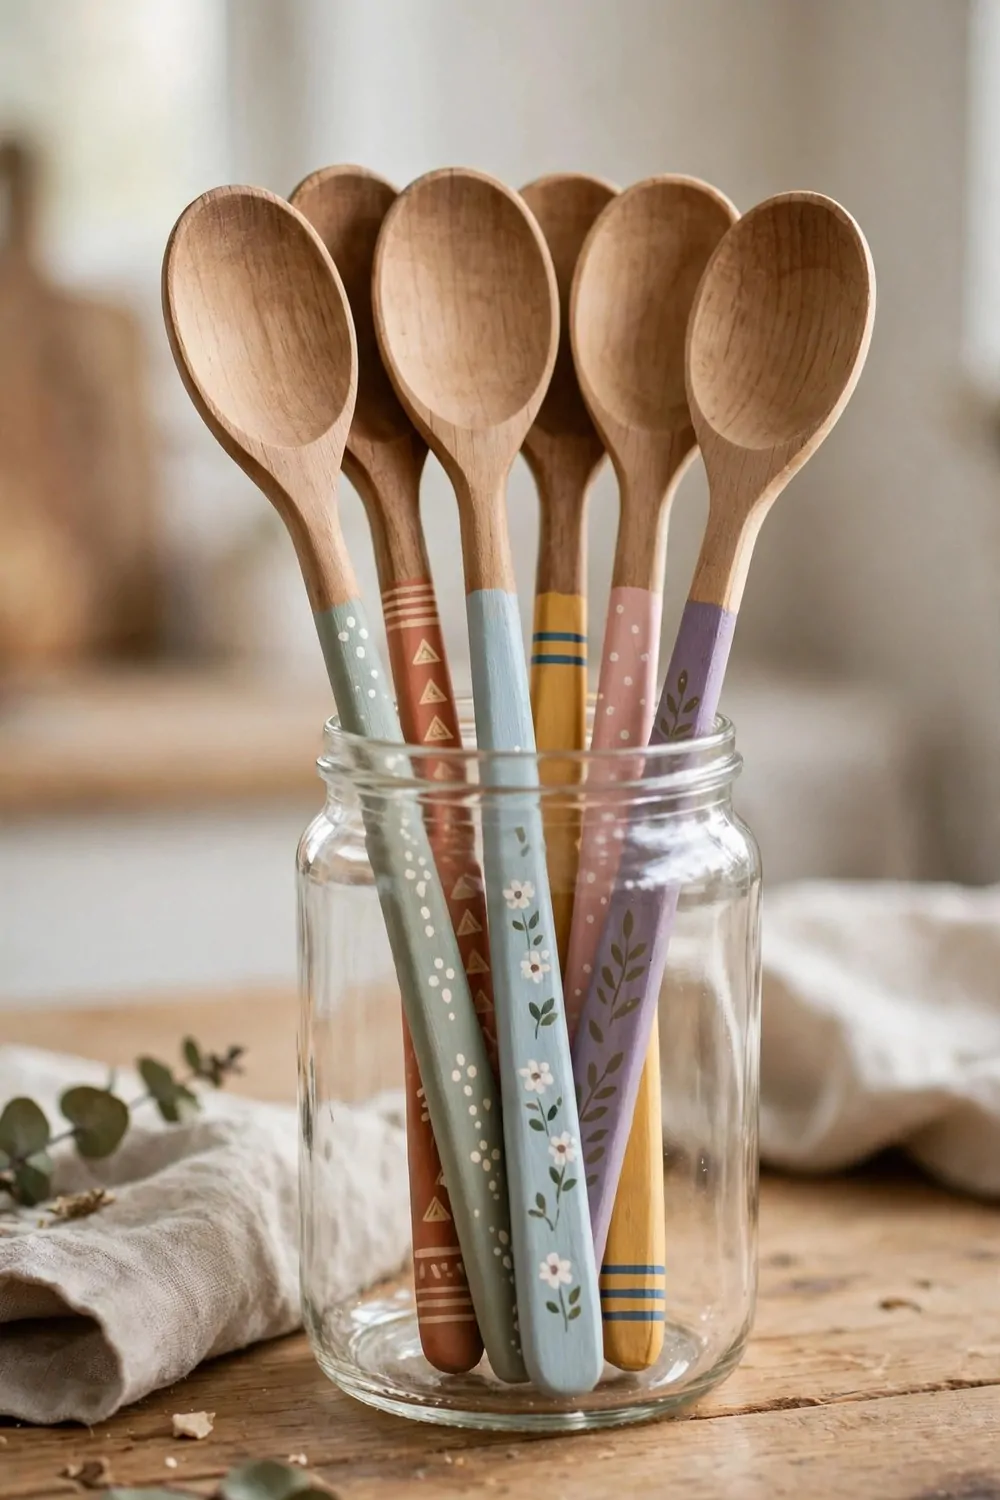
I pick plain wooden spoons and give them a quick sand till they feel smooth. I wipe the dust off with a soft cloth.
I paint the handles with thin coats and let each one dry. I hold the spoon by the bowl end while I paint so my fingers stay clean. I turn it slow as I work so the paint goes on even.
I let the spoons dry with fresh air around them. I do not stack them while they dry because the paint can stick.
I add a second thin coat if the first one looks patchy. I check the ends for drips and smooth them with my brush. I let them dry all the way before I use them.
They make a sweet gift for a friend who likes to cook.
I keep one set for myself and give one set away. My mum loves hers because each spoon feels soft in her hand.
- plain wooden spoons
- a soft brush and paint
- fine sandpaper for a smooth feel
I wash them soft by hand when they get dirty. I dry them right away so the wood stays nice. I smile each time I stir with one because I made it myself.
Typical cost $3 to $5.
22. Make a Fabric Bookmark with a Ribbon Tail
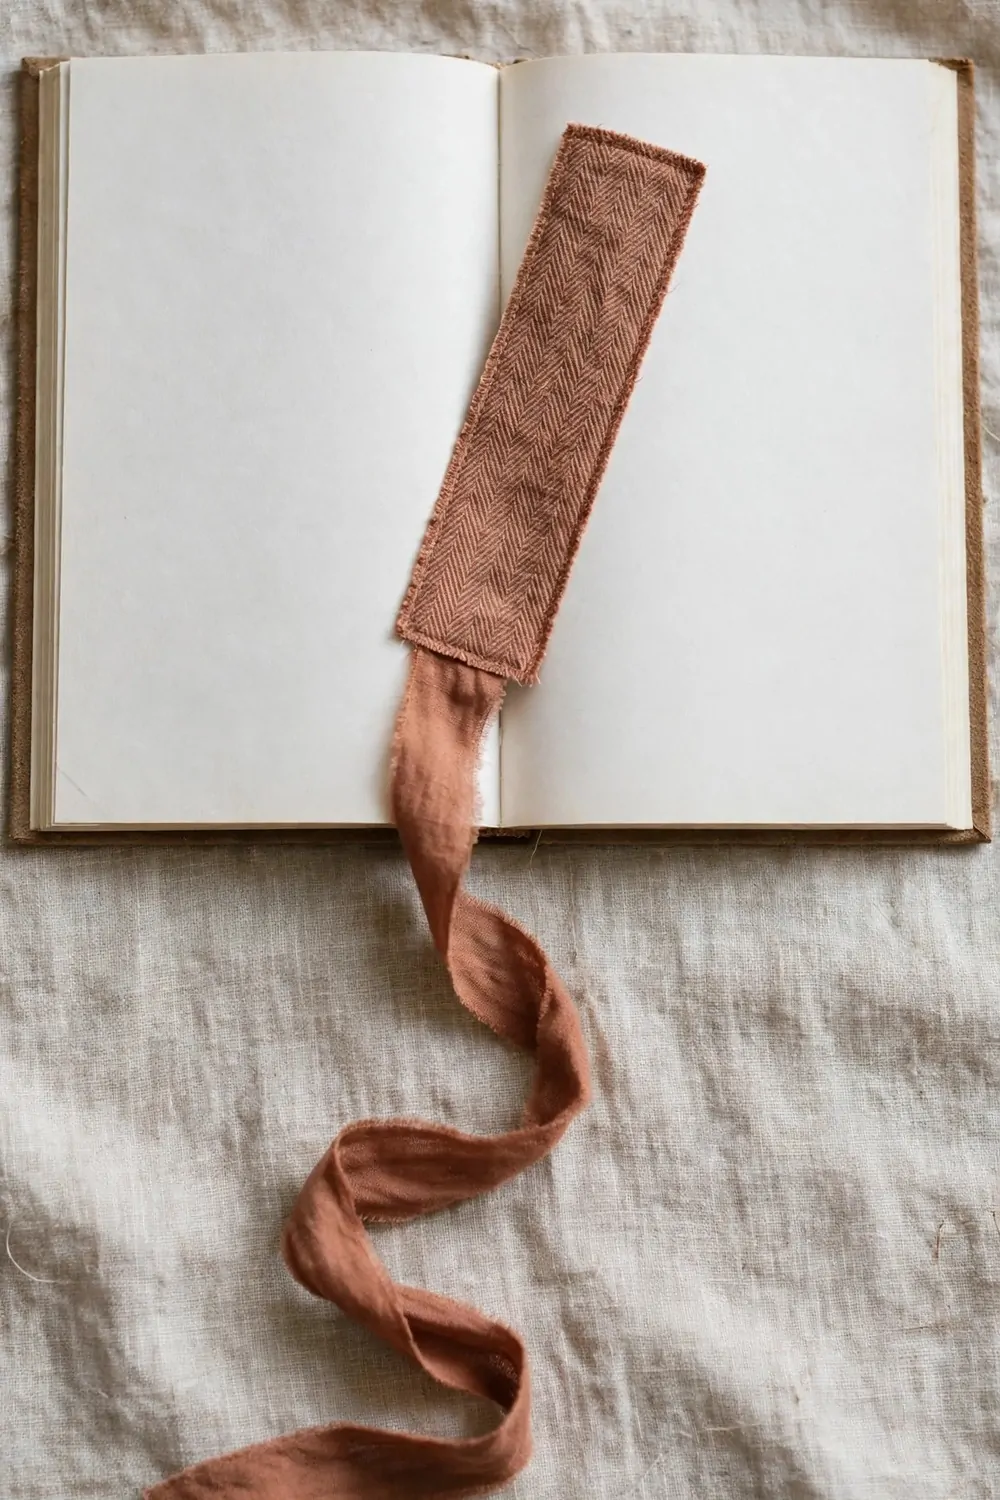
I pick a scrap of fabric I already have in my sewing box. I cut it to fit a book page. I fold the edges in and press them with my fingers.
I stitch along the edges with small even stitches. I go slow so the stitches stay even.
I add a ribbon tail at the end for a soft finish.
I knot the ribbon twice so it stays put. I trim the ribbon ends neat with scissors.
You can use any scrap fabric you have at home.
I made one for my dad and he uses it each night. It feels kind to give a gift you stitched yourself. It also uses up scraps that would sit in a box.
I keep mine in my book so I never lose my page. It makes reading feel a bit more sweet.
- a scrap of fabric
- a needle and thread
- a bit of ribbon
Typical cost $1 to $3.
23. Sew a Simple Tote Bag from Plain Cotton
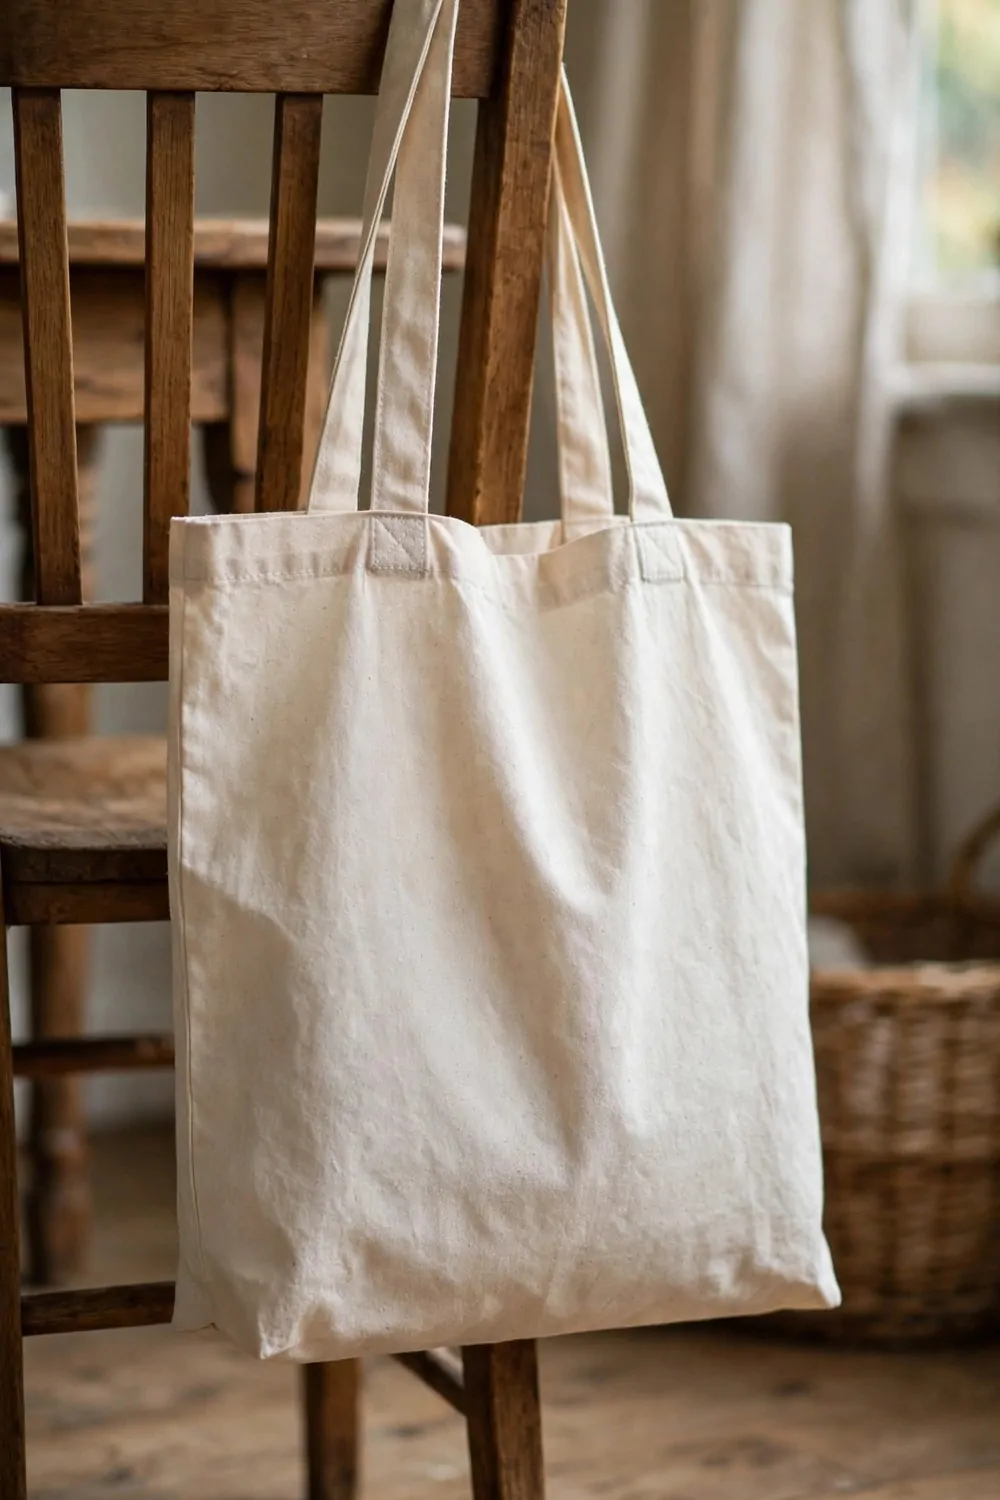
I pick plain cotton I already have and smooth it out. I cut matching pieces for the front and back.
I stitch the sides and the base with a plain seam. I go slow and keep the seam even all the way. I turn the bag the right way out and press the seams soft.
I fold the top edge down twice and stitch it to make a hem. I cut strips for handles from the same cotton. I stitch each handle on with strong stitches so it holds.
I check the handles by tugging them soft before I call it done.
You can use it for books and bits when you go out. It folds up soft for storage when you do not need it.
- plain cotton fabric
- thread and a needle
- scissors for cutting
I made one for my friend Sara and she uses it for her library books.
It feels good to sew a bag you can use each day. It also saves you from buying a new bag for small trips.
Typical cost $3 to $5.
24. Make a Clay Trinket Dish with a Thumb Print
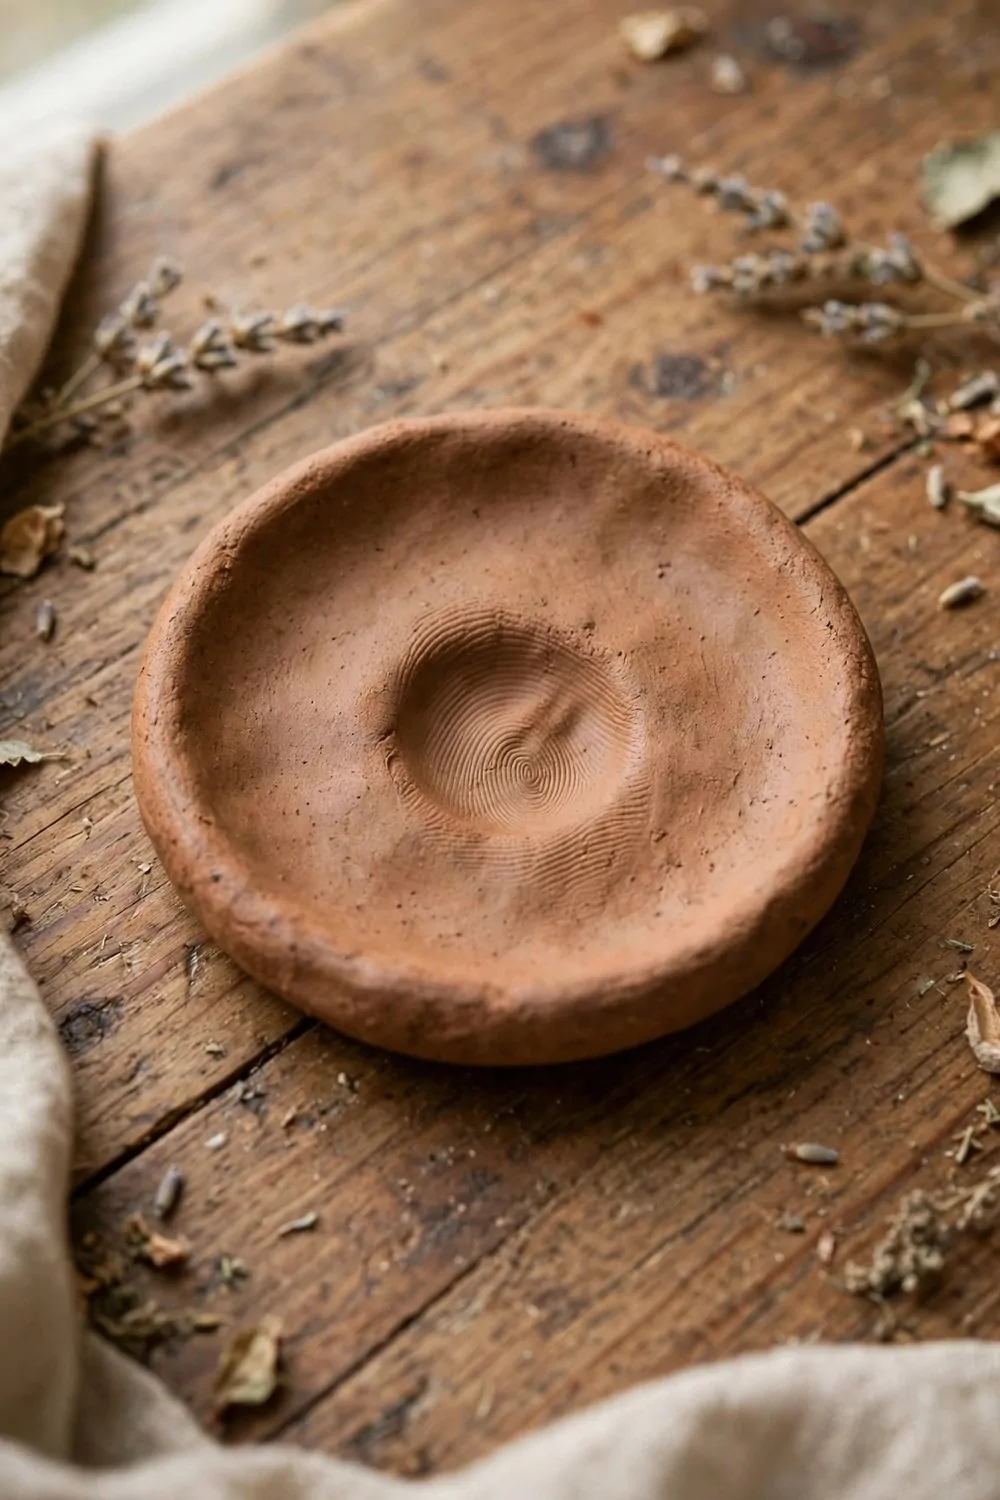
I take a lump of air dry clay and knead it till it feels soft.
I press it into a dish with my fingers. I smooth the rim with a damp finger so it feels neat.
I press my thumb down soft in the middle to make a dent. That dent is the mark that makes each dish your own.
I let the dish dry all the way in fresh air. I do not move it while it dries because it can crack. I check it the next day and it feels hard and light.
- a lump of air dry clay
- a small bowl of water
- a board to work on
You can use it to hold rings and small bits. It suits a friend who likes tiny treasures. It makes a sweet gift for a birthday or a thank you.
I made one for mum and she keeps her rings in it.
I love how the thumb dent gives it a soft personal touch. I reach for it each time I take my rings off.
Typical cost $2 to $4.
25. Paint a Stone Paperweight with a Simple Scene
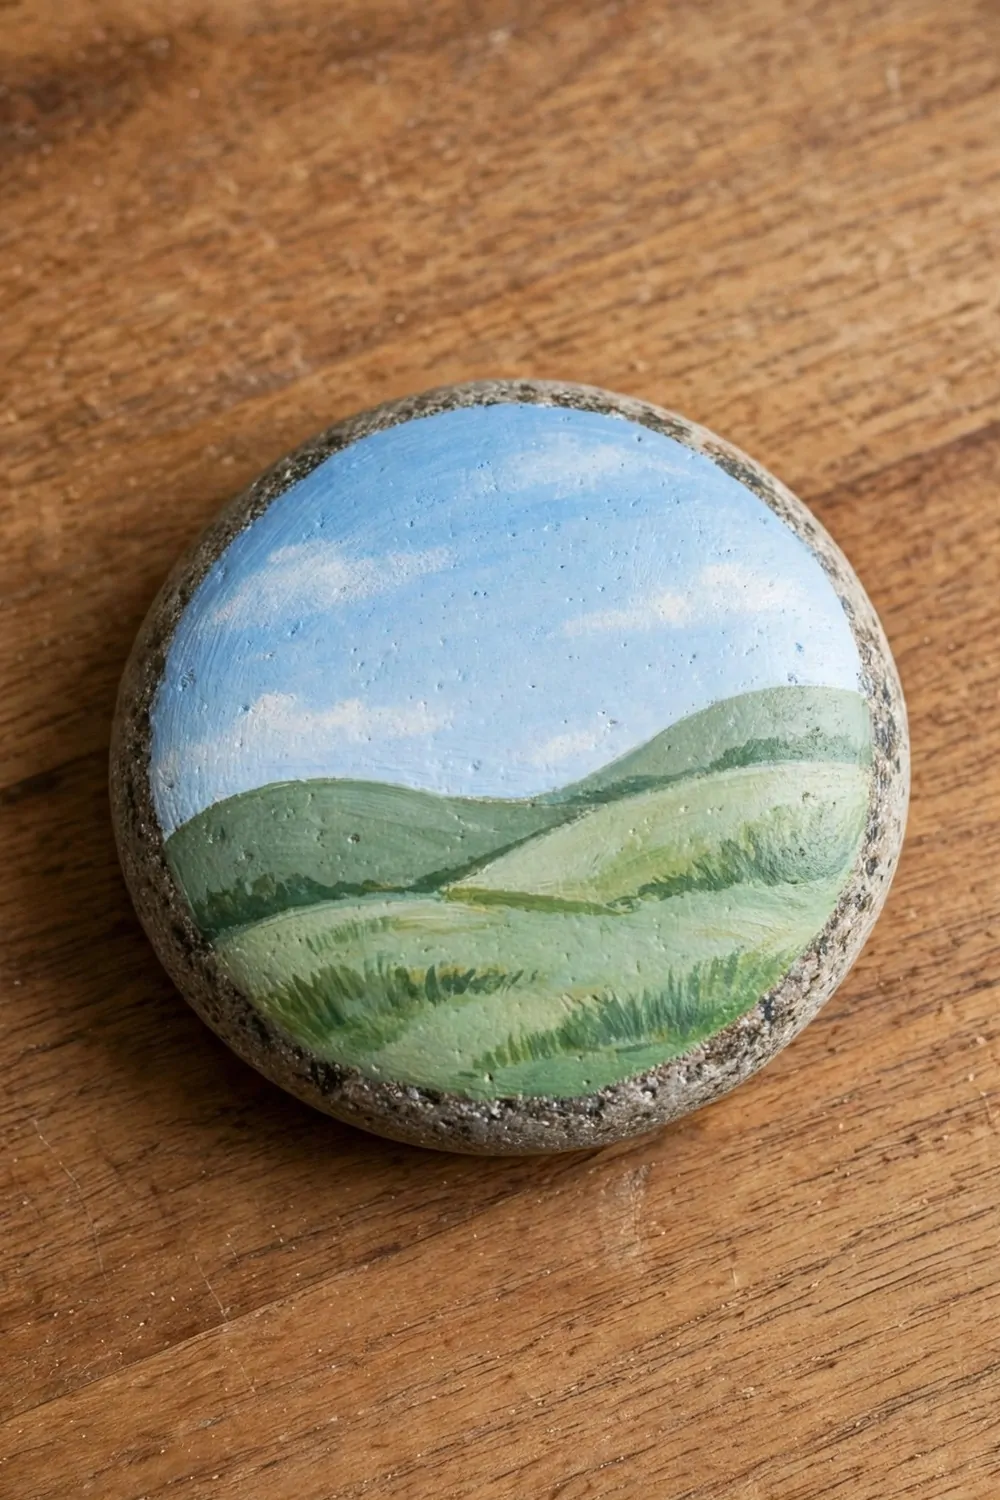
I found my stone in the garden one morning. I washed it well and let it dry in the sun.
I picked a plain brush from my cupboard and a pot of paint I already had. I kept my first marks very simple and slow. I let one side dry before I turned the stone over.
A plain scene feels calm and kind to look at.
- a plain stone from the garden
- a brush you already own
- a pot of paint from your cupboard
- a sheet of old paper to rest it on
I made this one for my mum and she liked it a lot. You can make one for a friend who likes quiet gifts.
Typical cost $1 to $3.
The stone cost me nothing at all. I picked it up free in the garden. The paint was already in my cupboard from an old project.
If a mark goes wrong, wait for it to dry and paint over it. A slow hand makes the work look neat and soft.
It is a gift with a big heart behind it. I hope it makes her smile each time she sees it.
26. Make a Ribbon-Wrapped Notebook for Notes
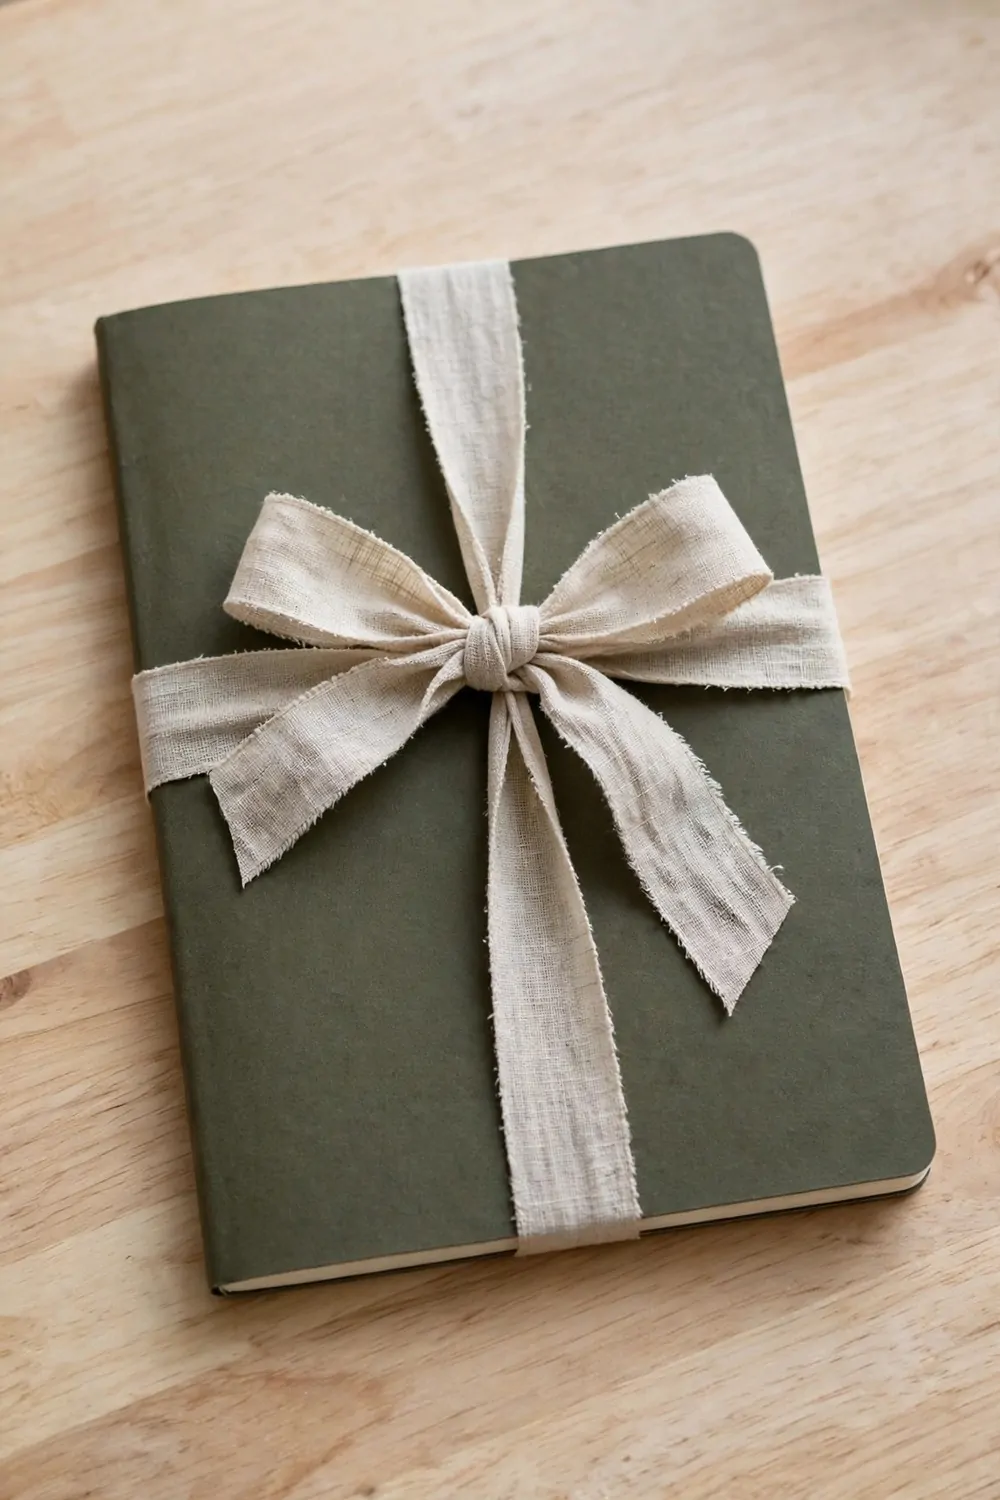
I love a notebook that feels dressed up for notes and lists.
I took a plain notebook from my drawer and a length of ribbon from my box. I wrapped the ribbon round the cover and tied it in a soft bow.
- a plain notebook
- a length of ribbon
- a pair of plain scissors
- a dab of glue to hold the knot
I trim the ends of the ribbon short and neat. I press the knot flat with my thumb. I write the name of my friend on the first page in my best hand.
This gift suits a friend who loves to write things down. It also suits a teacher who keeps notes all day.
Typical cost $2 to $4.
You can change the ribbon each time you make a new one.
I keep my ribbon box near my craft things so I can reach it fast. I pick a ribbon that feels soft in my hand. I test the bow once before I tie it for real.
A plain notebook turns into a gift in a short time. Your friend will smile when she opens it.
27. Fill a Small Tin with Spiced Tea Mix
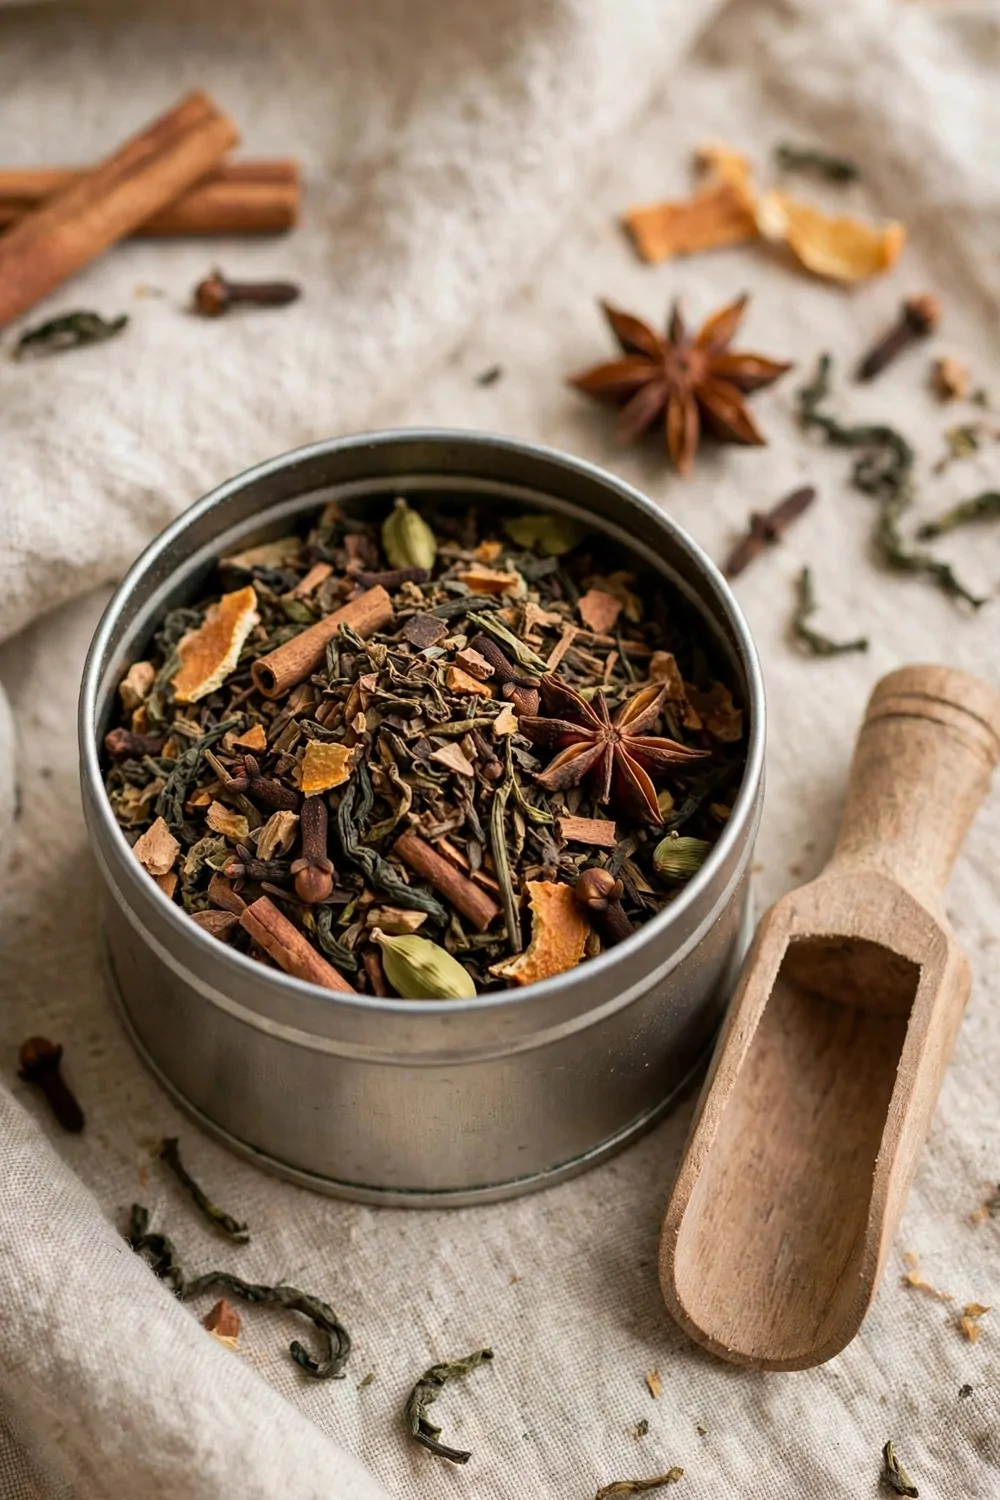
I love to mix a warm tea blend for a friend in winter. I start with plain tea leaves from my kitchen jar. I add a pinch of spice and stir the mix well.
The smell fills my kitchen while I work.
I taste a small cup first to check the mix. I add a bit more spice if the taste feels too plain.
I spoon the mix into a small tin and leave the lid off while I work.
I write the steep time on a plain tag for my friend. I tell her to use one spoon for each cup. I add a short note that says enjoy it slow.
- a small tin with a tight lid
- plain tea leaves
- a pinch of spice
- a plain tag and a pen
This gift suits a friend who loves a quiet cup in the morning. It also suits a mum who likes a warm drink after a long day.
Typical cost $3 to $5.
I keep my tin dry and away from strong smells. I make a fresh batch each time I give one away. Your friend can keep the tin and fill it again later.
28. Make a Wooden Key Ring from a Smooth Slice
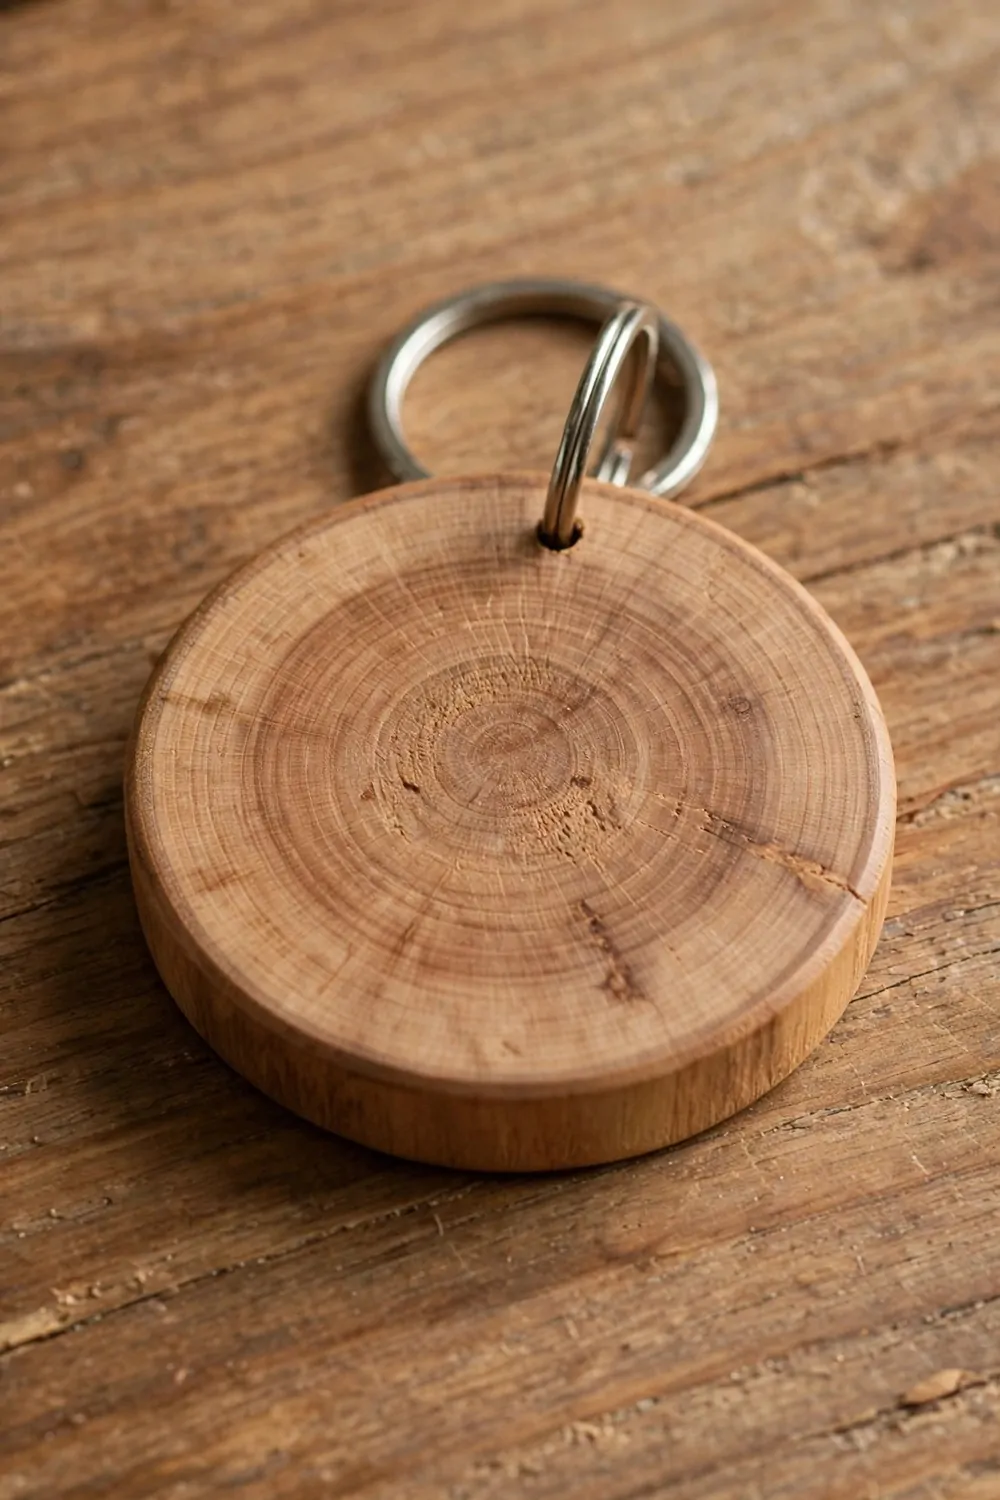
I found a smooth slice of wood in my craft box. I sanded the edge soft with a scrap of sandpaper.
- a smooth slice of wood
- a scrap of sandpaper
- a metal ring from my craft box
I drill a neat hole near one edge for the ring.
I slip the metal ring through the hole with care. I tug it twice to check it holds.
Typical cost $1 to $3.
This gift suits a dad who always loses his keys. It also suits a friend who has just moved to a new home.
I keep the wood plain so the grain can show. I rub the slice with a soft cloth till it feels smooth. I check the ring once more before I wrap the gift.
A plain key ring can still feel made with care.
You can make one in an afternoon with things you already have. Your friend will think of you each time she picks up her keys.
29. Paint a Canvas Pouch for Pencils and Pens
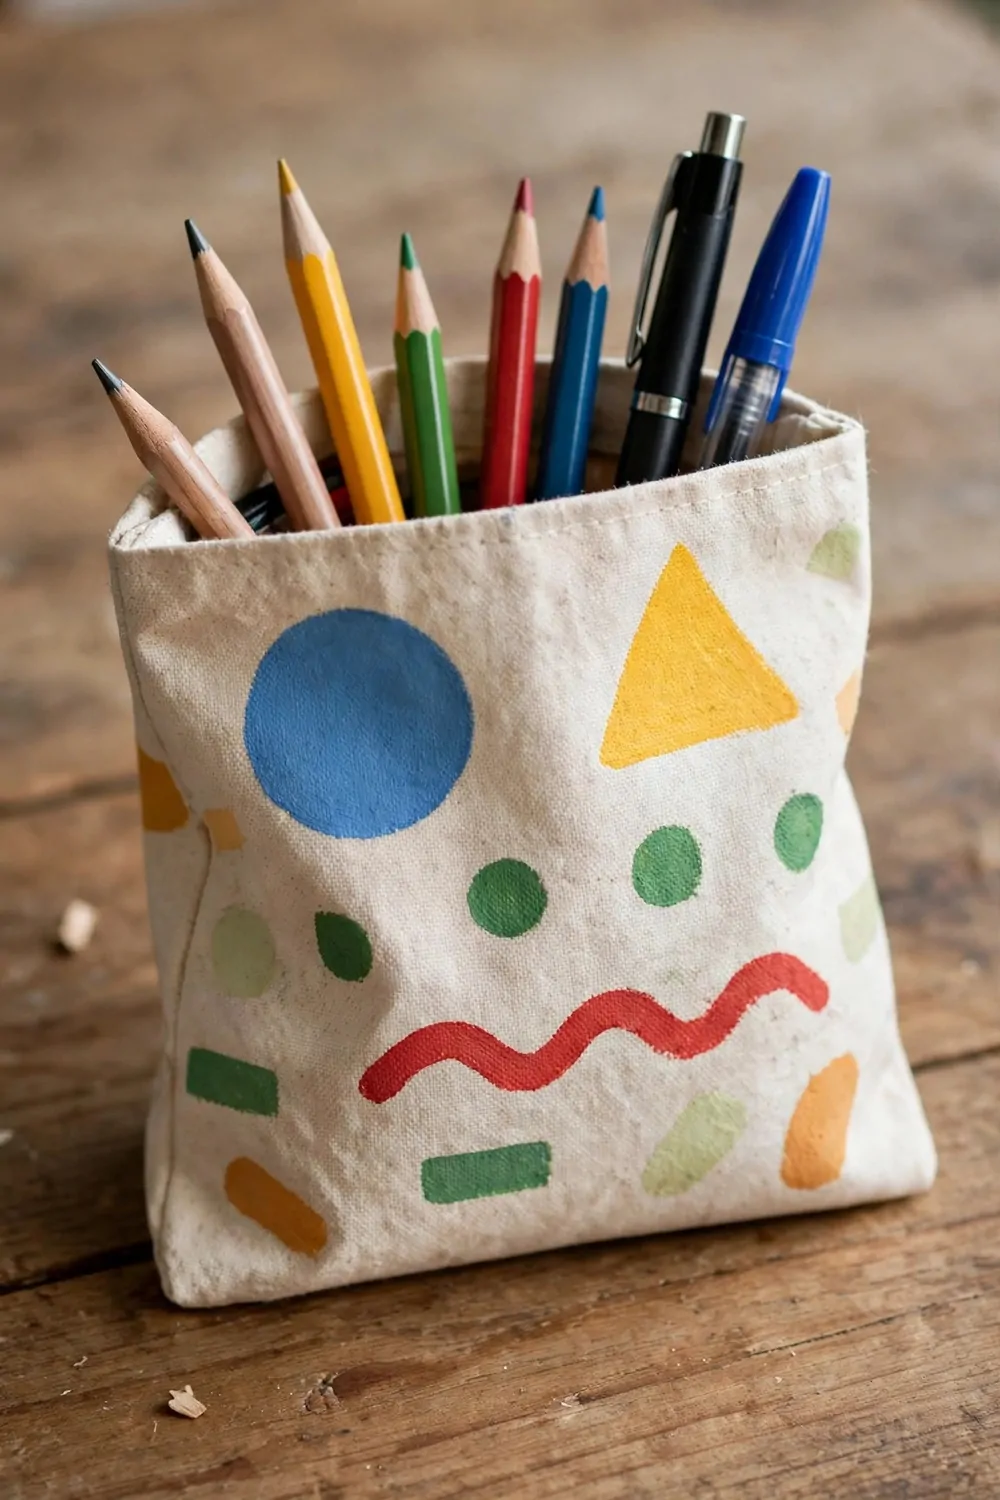
I love a pouch that holds pens and pencils in one place.
I took a plain canvas pouch from my drawer. I picked a brush and a pot of fabric paint I already had. I drew a plain mark and let it dry.
I kept my marks big and simple so they look clear. I let each mark dry before I add the next one.
I test the paint on a scrap of cloth first. I wipe my brush on a rag between marks. I wash my hands when I finish.
This pouch suits a friend who draws or writes a lot.
Typical cost $3 to $5.
- a plain canvas pouch
- a brush and fabric paint
- a scrap of cloth to test on
- a rag for wiping the brush
You can fill the pouch with pens before you give it away. Your friend can use it at home or take it out with her.
I love gifts that get used each day. A pouch like this one gets used a lot. It reminds your friend of you each time she opens it.
30. Lay Out Your Gift-Making Kit the Night Before
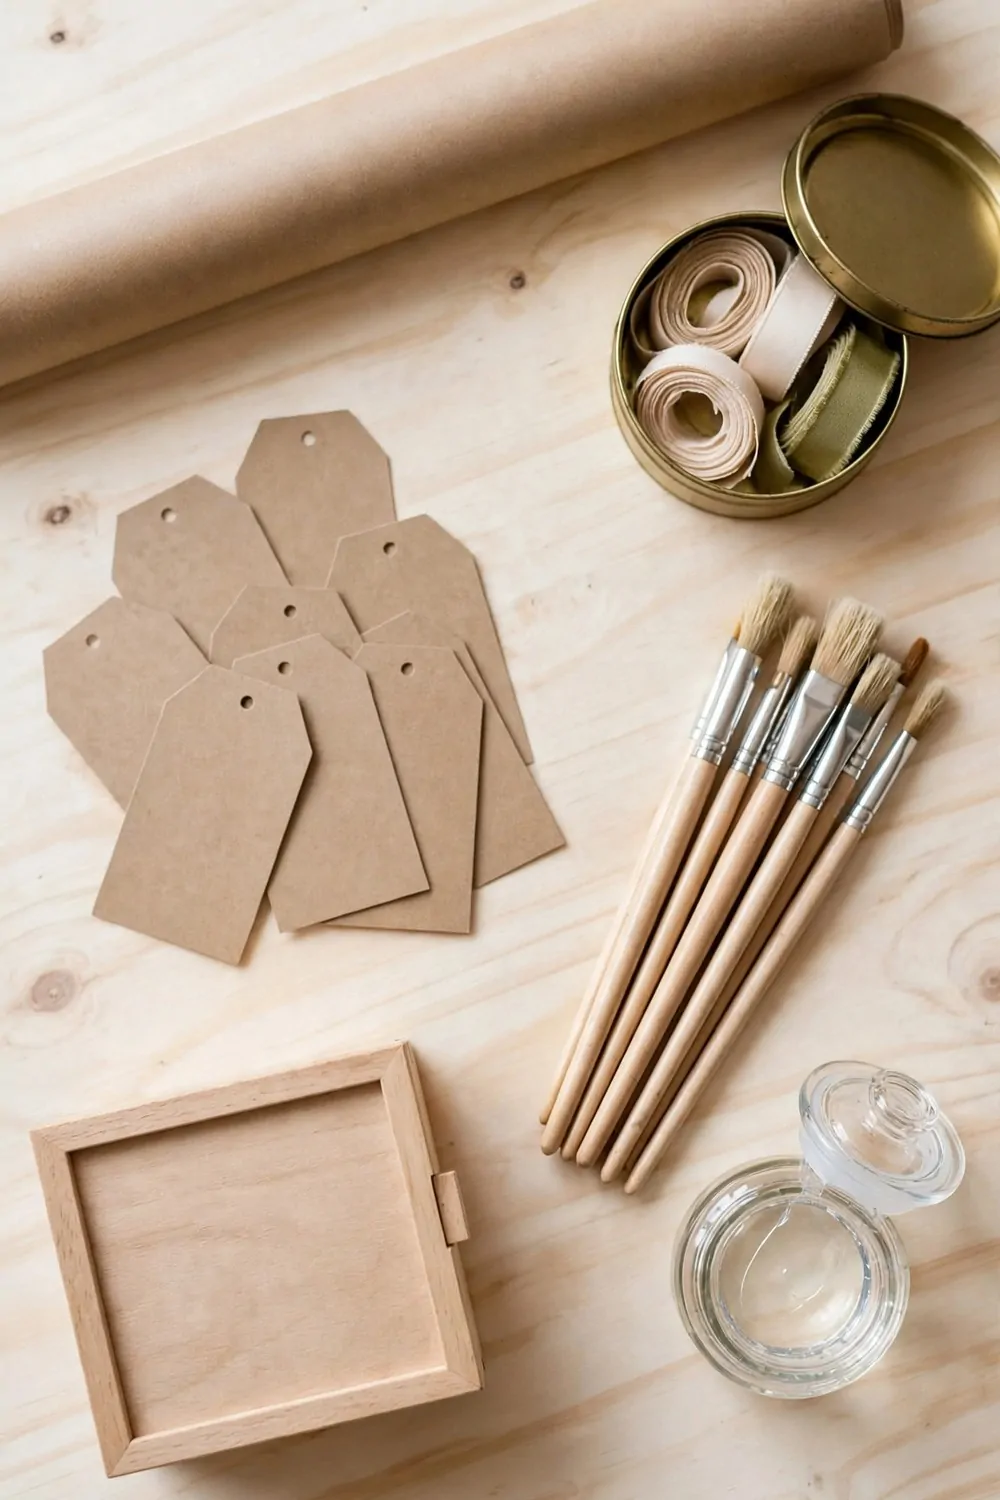
I lay out my kit the night before I make gifts. I check that I have all six things on my list. I put them in one place so I can start fast in the morning.
I check the box and the tags and the paper too. I check the ribbon and the brushes and the glue pot as well.
The small wooden gift box costs $3 to $5, the plain paper gift tags cost $1 to $3, the roll of plain kraft wrapping paper costs $2 to $4, the small tin of plain ribbon costs $2 to $4, the set of plain paint brushes costs $3 to $5, and the small glass glue pot costs $2 to $3, for a total of $13 to $24.
I write my list on a plain tag so I miss nothing.
- a small wooden gift box
- plain paper gift tags
- a roll of plain kraft wrapping paper
- a small tin of plain ribbon
- a set of plain paint brushes
- a small glass glue pot
I like to start my gift day with no rush and no search. A kit laid out the night before makes the morning feel calm.
I keep a pen with my tags so I can write notes fast. I keep my scissors close by for the ribbon. I check the glue pot lid so it stays shut.
Some prep tonight saves a lot of fuss tomorrow.
Your kit will wait for you through the night, all set for tomorrow. You can wake up and start your gifts with a smile.
| Idea | Main change | Typical cost |
|---|---|---|
| Paint a Set of Wooden Spoons for the Kitchen | paint wooden spoon handles with thin coats and let them dry | $3 to $5 |
| Make a Fabric Bookmark with a Ribbon Tail | stitch a fabric bookmark with a ribbon tail | $1 to $3 |
| Sew a Simple Tote Bag from Plain Cotton | sew a plain cotton tote with handles and a hem | $3 to $5 |
| Make a Clay Trinket Dish with a Thumb Print | press clay into a dish with a thumb print dent | $2 to $4 |
| Paint a Stone Paperweight with a Simple Scene | paint a plain stone with a simple scene | $1 to $3 |
| Make a Ribbon-Wrapped Notebook for Notes | wrap a plain notebook with ribbon for notes | $2 to $4 |
| Fill a Small Tin with Spiced Tea Mix | fill a small tin with spiced tea mix | $3 to $5 |
| Make a Wooden Key Ring from a Smooth Slice | make a wooden key ring from a smooth slice | $1 to $3 |
| Paint a Canvas Pouch for Pencils and Pens | paint a canvas pouch for pencils and pens | $3 to $5 |
| Lay Out Your Gift-Making Kit the Night Before | lay out your gift-making kit the night before | $13 to $24 |
| Total | $32 to $61 |
| Idea | Main change | Typical cost |
|---|---|---|
| small wooden gift box | pack a gift in a small wooden gift box | $3 to $5 |
| plain paper gift tags | write a kind note on plain paper gift tags | $1 to $3 |
| roll of plain kraft wrapping paper | wrap a gift in a roll of plain kraft wrapping paper | $2 to $4 |
| small tin of plain ribbon | tie a bow with a small tin of plain ribbon | $2 to $4 |
| set of plain paint brushes | paint with a set of plain paint brushes | $3 to $5 |
| small glass glue pot | stick paper with a small glass glue pot | $2 to $3 |
| Total | $13 to $24 |
Keep Reading
If you liked these ideas, you will love these posts too
Each post has more simple ideas you can try at home this weekend.