22 Vertical Garden Ideas That Grow Up Not Out

Our yard is so small that the only way left to grow was up, so I started fixing pots to the wall.
I had a tiny patch of ground and a big blank wall. The wall was doing nothing at all, so it felt like wasted space to me.
I wanted fresh leaves for cooking. I also wanted a green view from my kitchen window in the morning.
Going up gave me room for beans, herbs, and trailing plants. It also left the ground free for my chair and my watering can.
I made plenty of small mistakes at first, like hanging pots too high and picking plants that did not like the shade at the bottom. I learned from each one, and the wall looks much better now.
This post shares what I learned, step by step, so you can skip those mistakes and start with a wall that works.
You will find all 22 ideas right here in this one post, from wall pots to balcony rails, so you can read through and pick the ones that fit your space.
1. Wall-Mounted Planters for a Bare Wall
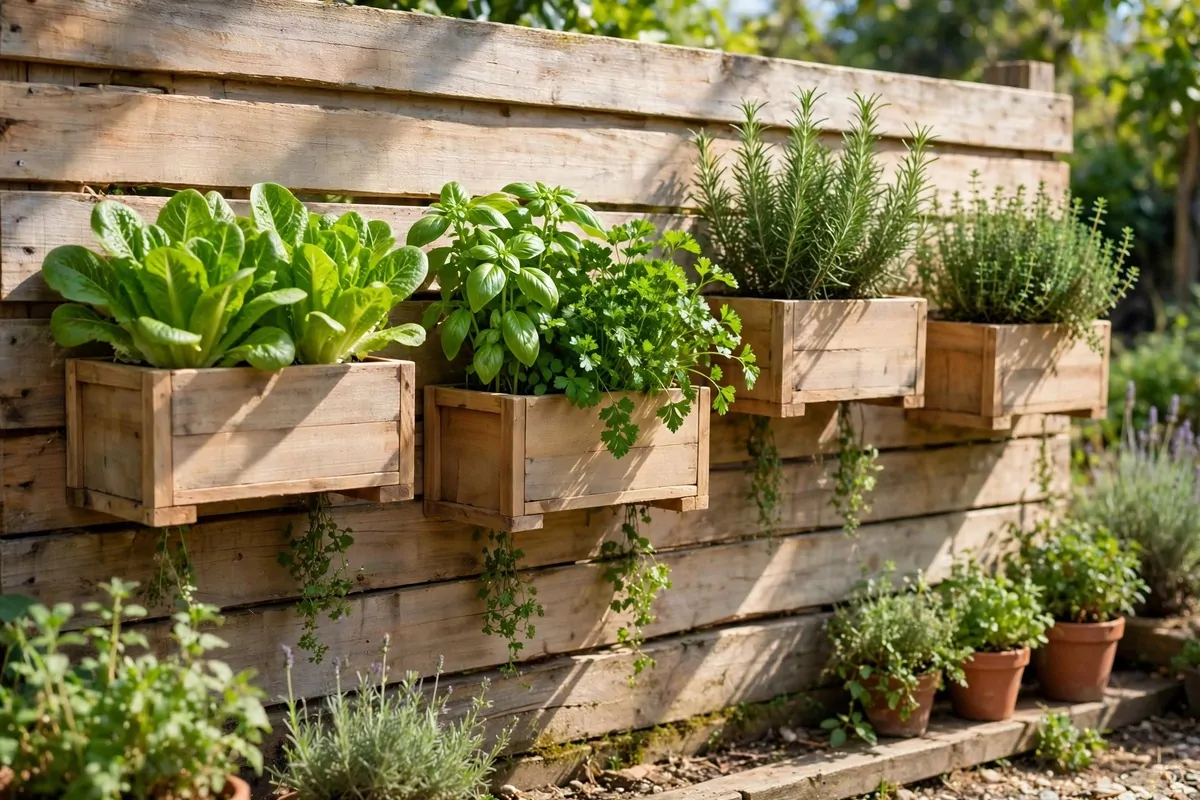
A bare wall can hold a whole row of green if you fix the pots the right way. I start by looking for the studs or the solid brick behind the plaster, because a pot full of wet soil is much heavier than it looks.
I use strong screws and wall plugs that suit the wall type, and I test each bracket with a firm tug before I add any soil. If the bracket moves at all, I move it to a stronger spot.
I keep the top row at a height where I can still reach the soil with my hand flat, not on tiptoe. For me that is just above my head, and anything higher is hard to water and hard to pick.
I leave a small gap between pots so air can move and leaves do not stay damp for too long. Damp leaves in a tight row can turn yellow fast, and I learned that the hard way.
I water from the top row down, and I let the extra water drip into the pots below. That saves water and it means the lower plants get a drink too, but I still check the bottom pots so they do not sit in a puddle.
Herbs like basil and mint do well here, and small leafy plants love a wall that gets morning sun. I keep the plants that need full sun at the top, and the ones that like a bit of shade lower down.
I spent $28 to $64 on the pots, brackets, and screws for my first wall. Most of that went on the brackets, and I reused old pots to keep the rest low.
I check the screws once a month, just a quick wiggle with my hand. Wet soil and wind can loosen a fix over time, and a quick check stops a pot from falling.
A wall like this turns a dull corner into a green spot you see every day. Start with three pots, see how they do for a few weeks, and add more only when you feel sure about the fixings.
2. Hanging Baskets That Trail Down
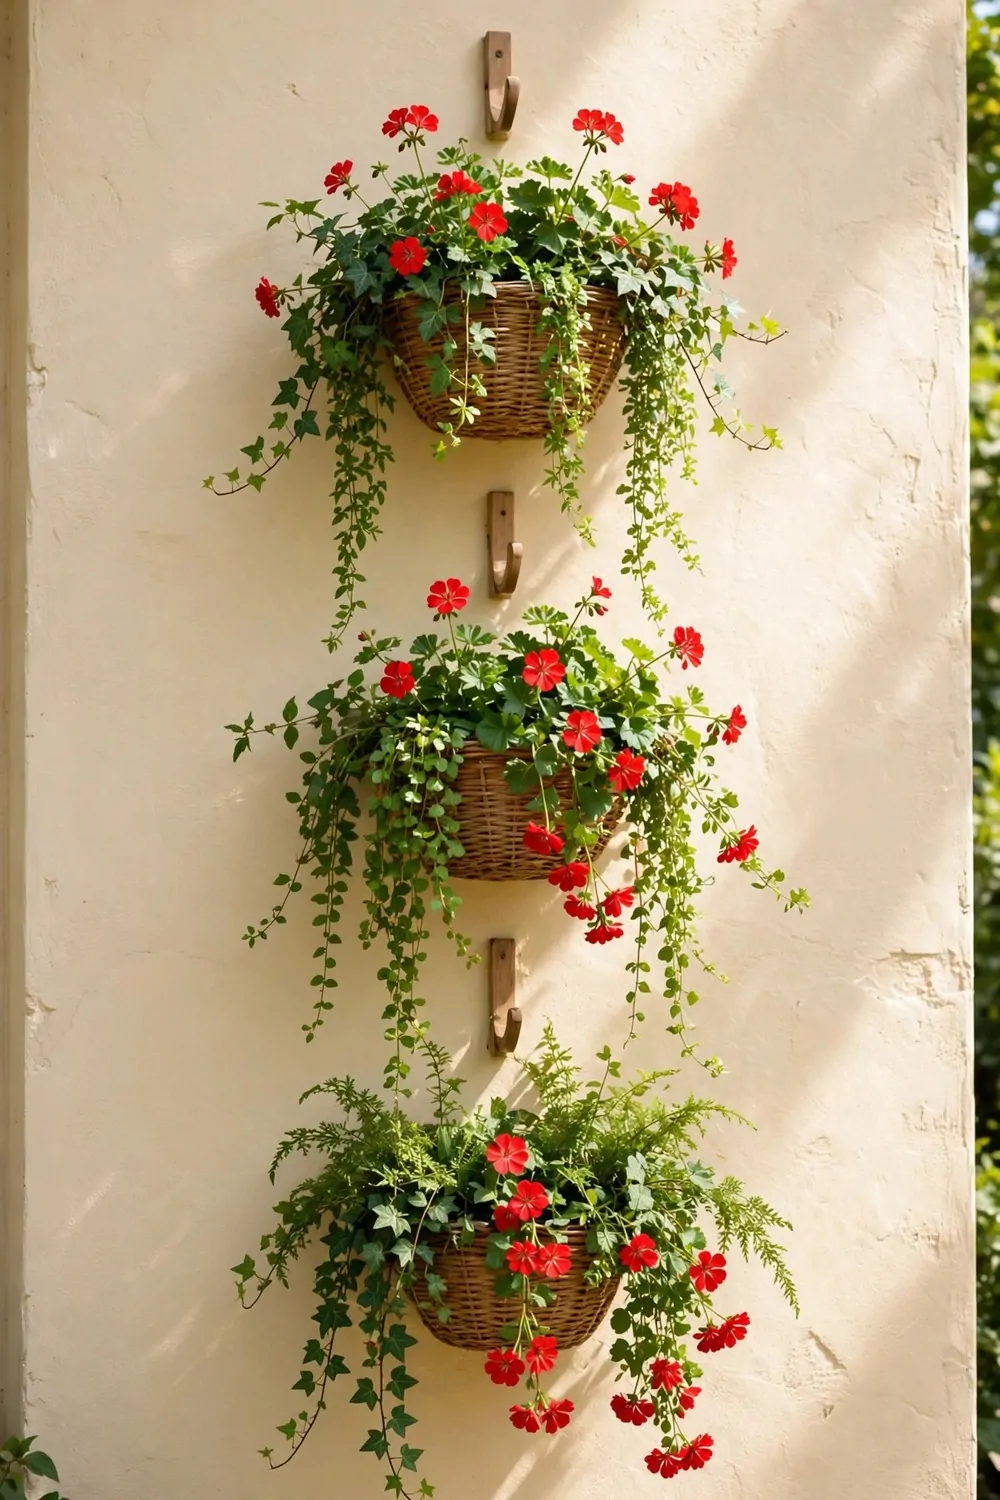
Hanging baskets are my favourite way to fill the air above a path. They trail down in soft green lines, and they leave the ground clear for walking.
I hang each basket from a strong hook screwed into a beam or a solid bracket, never from a thin nail. A wet basket is heavy, and I do not want it to drop on my head.
I keep the bottom of the basket at about my chin height so I can reach in to water and pick leaves. If it hangs lower, I keep bumping into it, and if it hangs higher, I need a step stool every day.
Trailing plants with long stems and leafy vines look best here, and they spill over the edge in a natural way. I plant three small plants in each basket so it fills out fast without getting crowded.
I water baskets slowly, a little at a time, so the soil can soak it up. If I pour too fast, the water runs straight through and the soil stays dry in the middle.
I put a small tray or a spare pot under a new basket for the first week to see how much water drips out. That tells me if I am giving too much or too little, and it keeps the path dry.
A set of three baskets with chains and hooks came to $16 to $38 at my local garden shop. I lined them with coir and filled them with light compost so they stayed light enough to lift.
Sun moves across the day, so I watch where the light falls at noon and in the late afternoon. Baskets on a sunny side dry out fast, and I water those first on hot days.
I trim the longest trails once a month so they do not tangle or drag on the ground. A quick trim keeps the shape neat, and the plant grows fresh shoots near the top.
3. A Trellis for Climbing Beans and Peas
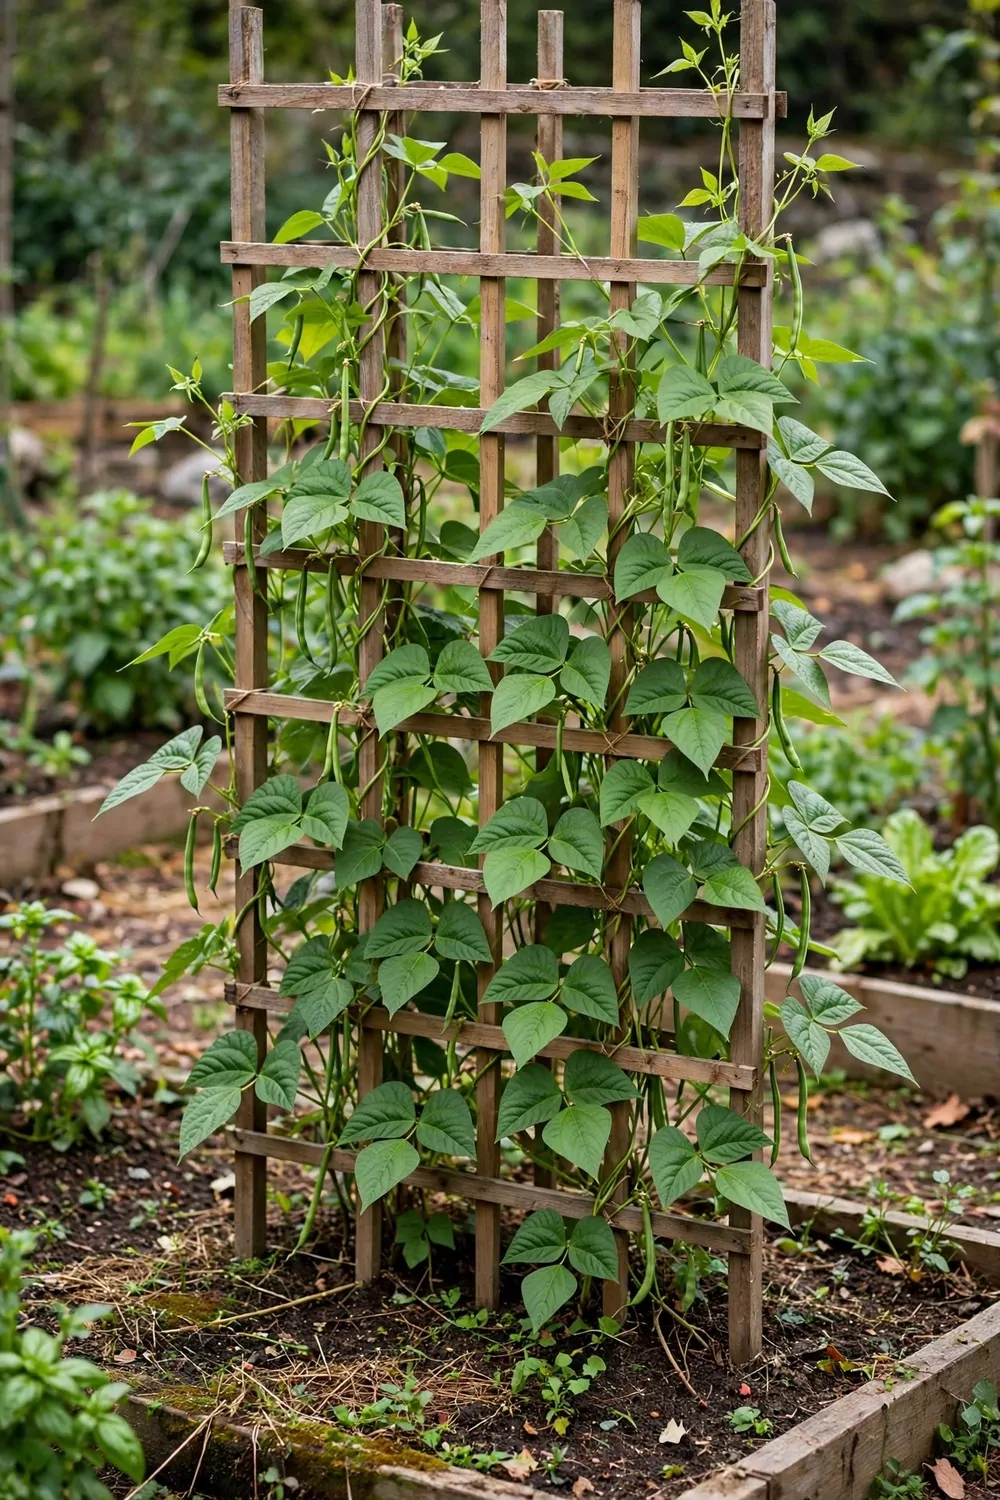
A trellis gives climbing plants something to hold on to, and it turns a flat fence into a green wall. I lean mine at a slight angle so the plants get sun on the front and air can move behind them.
I fix the trellis to the fence with screws and small blocks so there is a gap behind it. That gap lets the stems wind through, and it keeps the wood dry after rain.
Beans and peas climb by curling around thin sticks and strings, so I tie soft twine in a loose grid for them to grab. I check the ties each week and add new ones as the stems grow taller.
I plant the seeds at the base in spring, a few inches apart, and I water the soil, not the leaves. The young shoots find the trellis on their own, and I only guide the ones that wander off to the side.
I keep the trellis no taller than I can reach with both arms up, so I can pick the pods without a ladder. A tall trellis looks grand, but picking from the top is no fun at all.
The top of the trellis gets more sun and dries faster, while the bottom stays cooler and damper. I plant the sun-loving beans at the top and keep peas, which like it cooler, a little lower down.
My trellis, ties, and a bag of compost added up to $22 to $55, and I already had the seeds at home. I picked a simple wooden frame because it was strong and easy to fix to the fence.
I pick the pods often, every two or three days once they start. Picking often tells the plant to make more, and you get enough for a few meals across the season.
At the end of the season I pull the old stems off and let the trellis dry in the sun. I store it flat in a dry spot, and it is ready to use again next year.
4. Stacked Pots on a Sunny Step
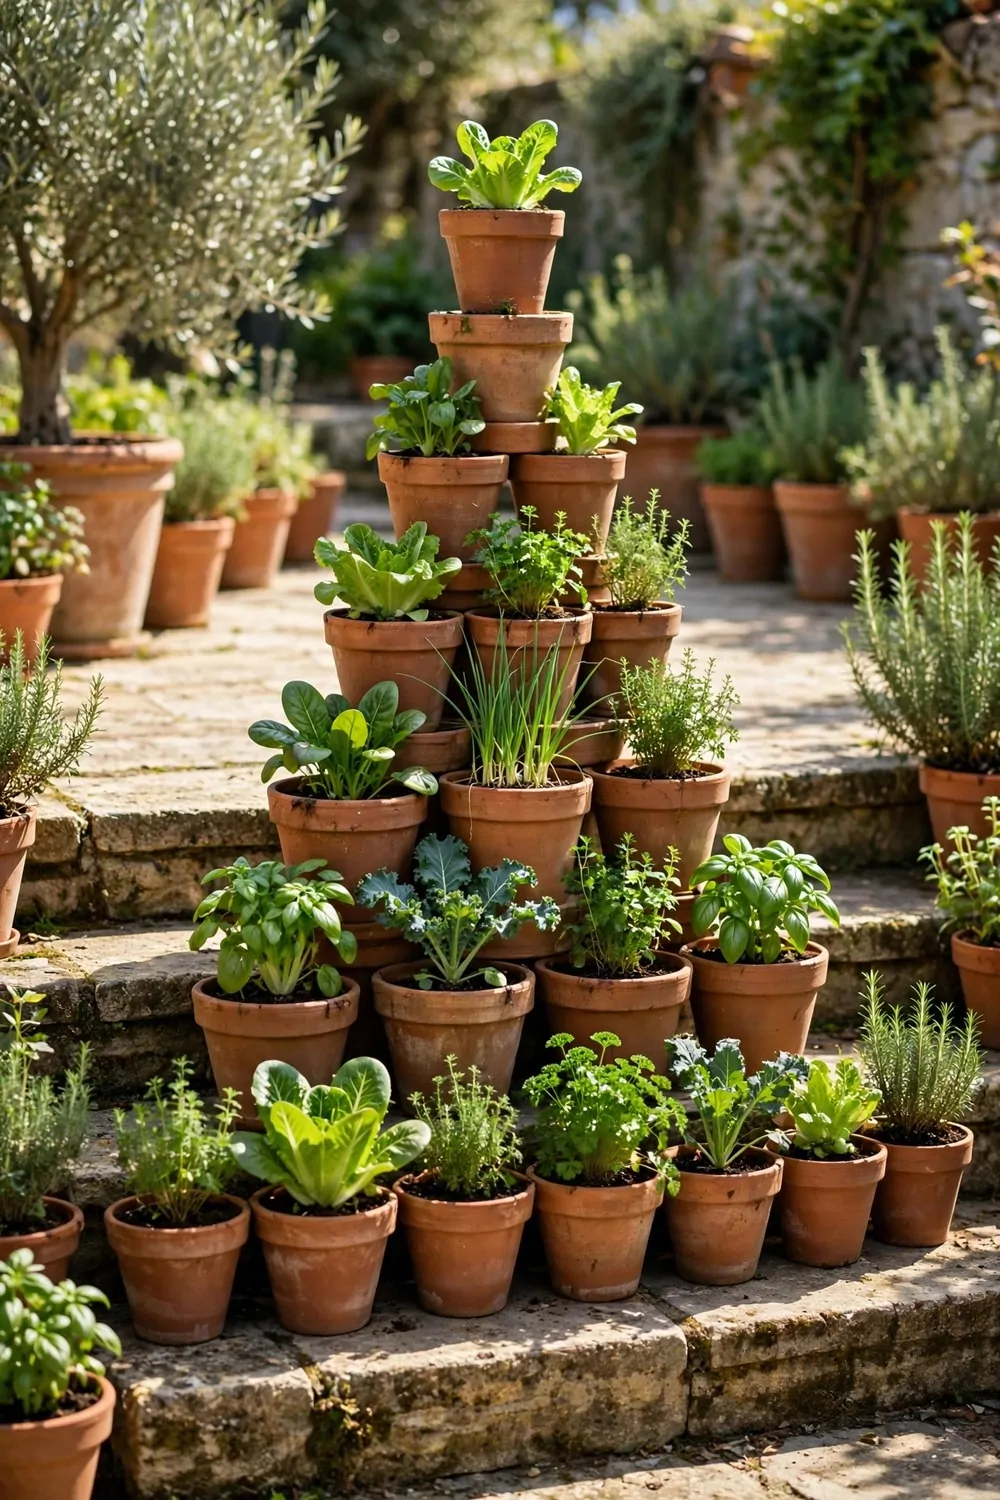
Stacked pots turn one sunny step into three or four levels of green. I use pots that sit steady on each other, with the biggest at the bottom and the smallest at the top.
I put the stack where it gets morning sun and shade in the hottest part of the day. The top pot dries first, so I check it before the others, and I water it a little more on hot days.
I fill the bottom pot with heavy soil and a few stones so the stack does not tip in the wind. The top pots get lighter mix, so the whole tower stays steady and easy to move if I need to.
Leafy herbs do well on the middle levels, and I keep trailing plants on the top so they can spill down over the sides. That mix looks full, and each plant still gets its own light.
I water from the top and let it trickle down, but I stop before the bottom pot gets soggy. I lift the top pot once a week to check that the soil below is damp, not wet.
I turn the stack a quarter turn every few days so all sides get sun. Plants lean toward the light, and a small turn keeps them growing straight instead of bending to one side.
All four pots, the soil, and the small stones cost me $19 to $47 in total. I found two of the pots at a yard sale, which kept the price down a lot.
I keep the stack away from the edge of the step so no one knocks it with a foot. A small gap from the edge is all it takes, and the pots stay safe when people walk past.
This is a good first try if you have never grown up before. It needs no screws, no holes in the wall, and you can move it in a minute if the sun shifts with the season.
5. A Pallet Planter on the Fence
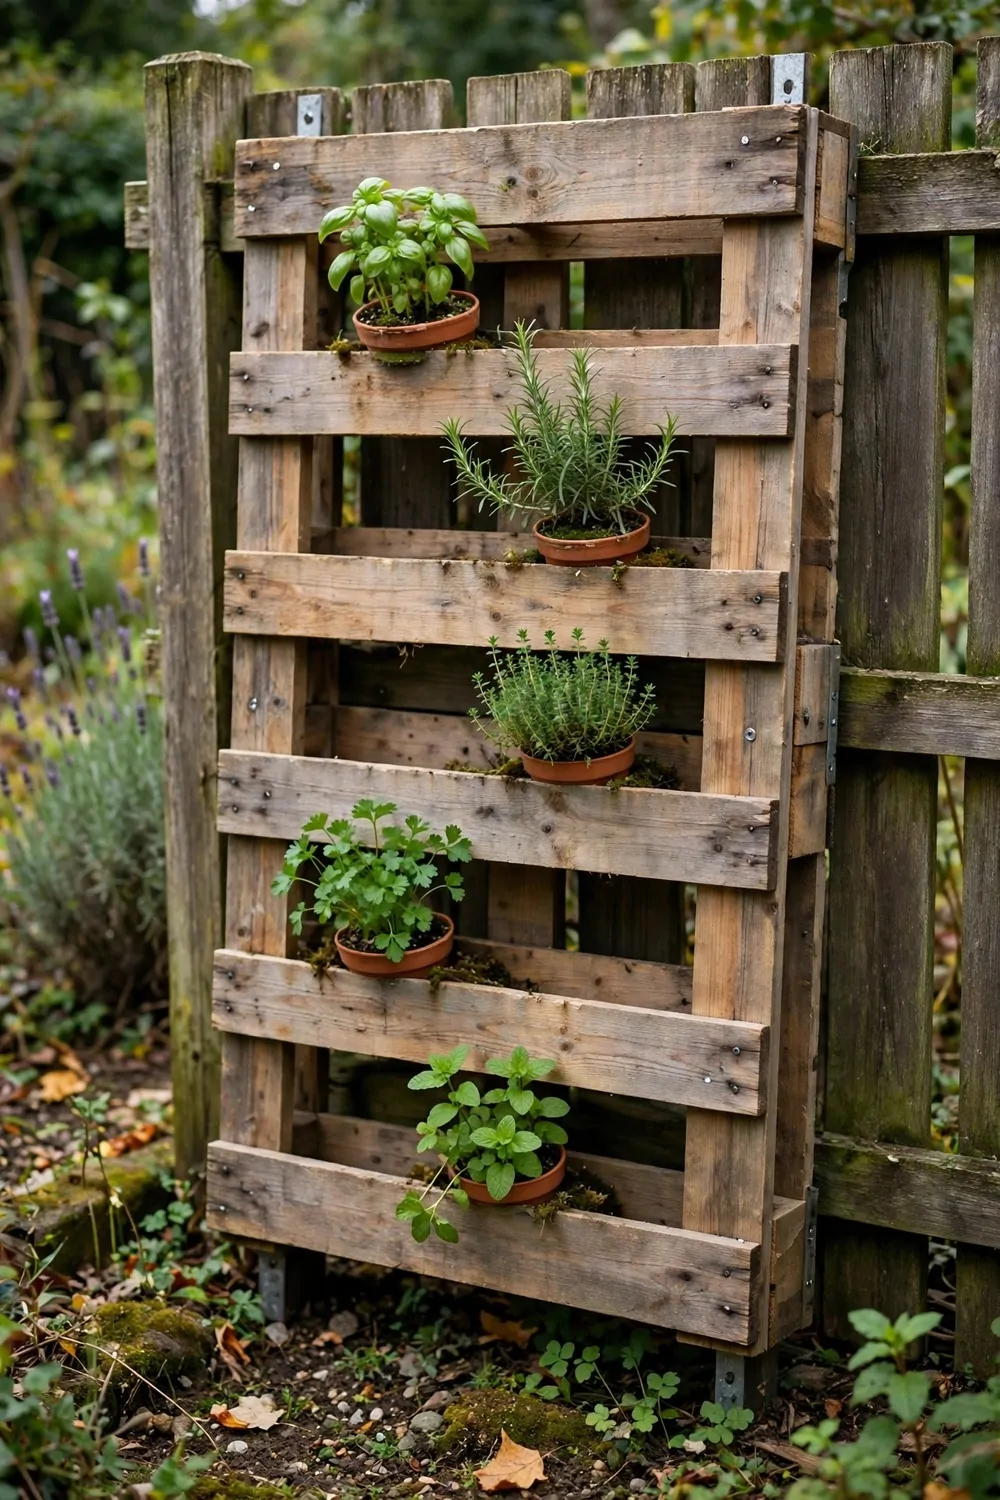
An old pallet can hold a row of small pots along a fence, and it uses space that was just bare wood before. I sand the rough edges first so I do not get splinters when I water.
I fix the pallet flat to the fence with strong screws, and I check that it does not wobble when I push it. The pots add a lot of weight once they are full of wet soil, so the fix has to be firm.
I line each gap with a small pot or a cloth pocket filled with soil, and I press the plants in gently. Small herbs and leafy greens fit best, because their roots do not need a deep pot.
I keep the pallet at chest height or lower, so I can reach every plant without stretching. The top row is for plants I pick often, and the bottom row is for plants that like a bit more shade.
I water the top row first and let the drops fall to the rows below, a little at a time. I watch the bottom row so it does not stay too wet, and I skip a day if the soil still feels damp.
Sun hits the top of the pallet first, so I put sun-loving plants up there. The lower rows get shade from the plants above, which suits leafy greens that wilt in strong sun.
The pallet was free from a local shop, and the screws, soil, and small pots ran $24 to $58 for me. I cleaned the pallet with plain soap and water and let it dry in the sun before I planted.
I check the wood after rain to make sure it dries out between waterings. If the wood stays wet for days, I move the pots out a little so air can get behind them.
A pallet planter gives you a full herb shelf in the space of one fence panel. You can snip a few leaves for pasta or rice, and the plants keep growing back all season.
6. Ladder Shelves Full of Pots
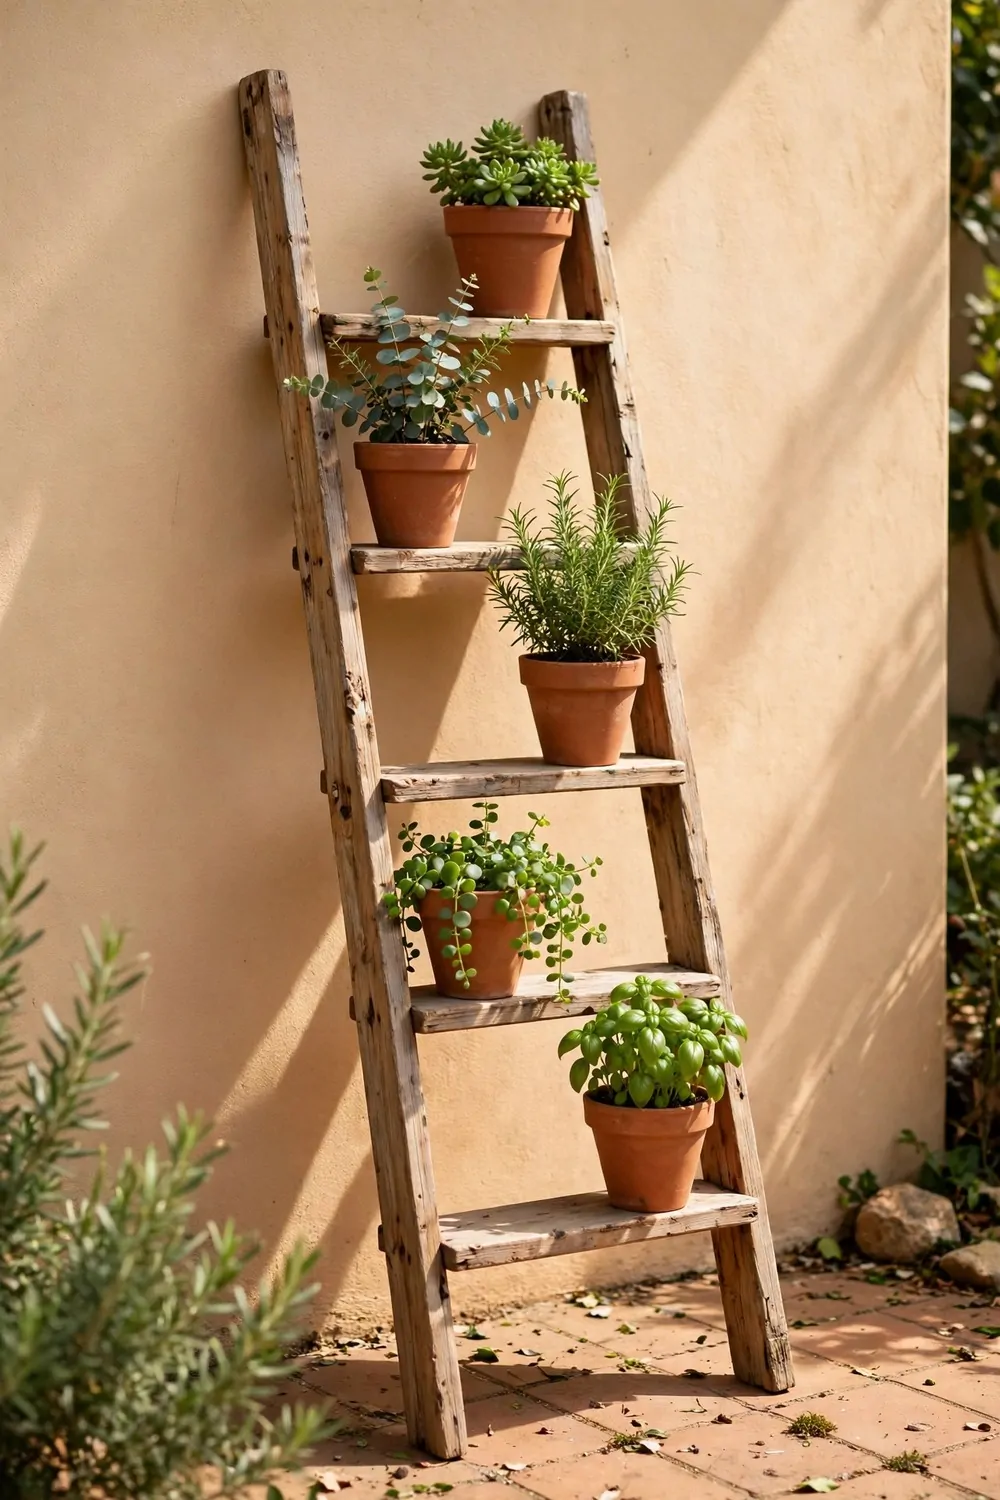
An old ladder makes a lovely shelf for pots, with each step holding a row of green. I lean it against a wall at a safe angle and fix the top to the wall so it cannot slip.
I check that the ladder feet sit flat on the ground and do not rock. If the ground is uneven, I pack a flat stone under one foot until the ladder stands still.
I put the heaviest pots on the lowest steps, and the lightest pots on the top. That keeps the weight low, and the ladder feels steady when I water or pick leaves.
I keep the top shelf low enough to reach without a stool, about shoulder height for me. Higher shelves look nice in photos, but they are hard to water every day.
I water the top shelf first, then work my way down, and I wipe any drips off the steps so they do not get slippery. A dry ladder is a safe ladder, and I keep a cloth nearby for this job.
Each shelf gets a different amount of sun, with the top getting the most and the bottom the least. I put herbs that love sun on top, and leafy plants that like shade on the lower steps.
I paid $35 to $82 for the ladder, the pots, and the soil to fill them. The ladder itself was the biggest part of that price, and the pots were simple and cheap.
I move the pots around once a month to see which spot each plant likes best. A plant that looks pale on a low shelf often perks up with more sun on a higher step.
A ladder shelf is easy to change with the season, and you can swap a pot in a minute. It turns a plain wall into a green display, and it takes up almost no floor space at all.
7. Pocket Planters on a Garden Wall
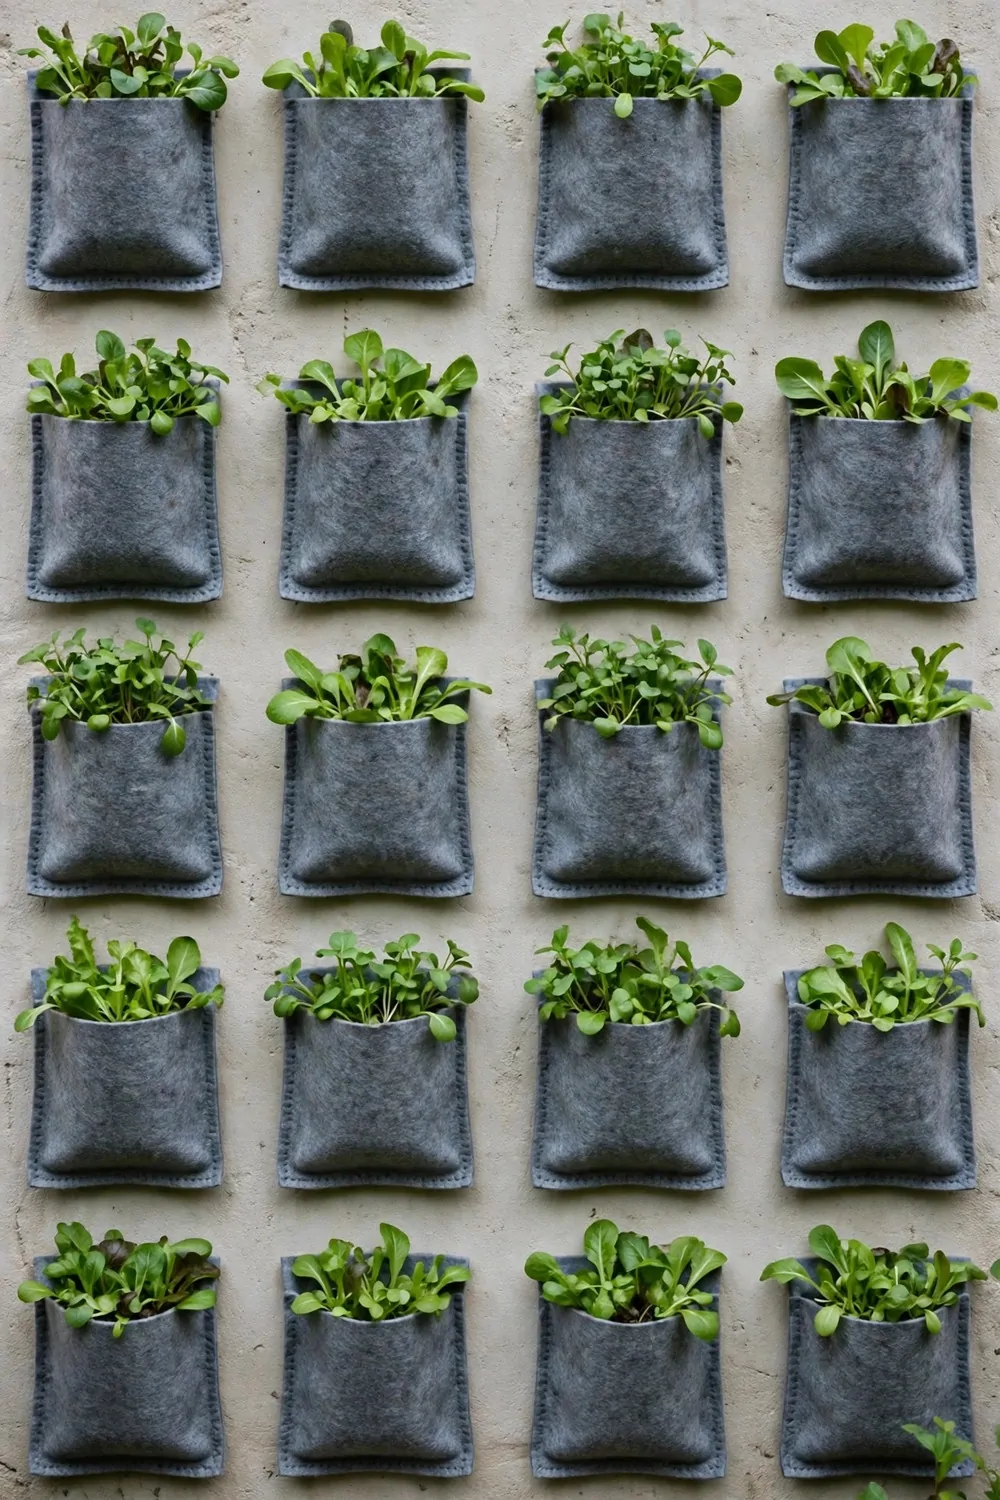
Pocket planters are soft pouches that hang in rows on a wall, and each pocket holds one small plant. They are light, they need no heavy pots, and they fit on a wall that cannot hold much weight.
I hang the pockets from a rail or a row of hooks, and I make sure the rail is fixed into solid wall. I test it with a pull before I add soil, because wet pockets get heavy fast.
I fill each pocket with light compost and one plant, and I leave room at the top so water does not spill out. Small herbs, leafy greens, and trailing plants all do well in a pocket.
I water slowly with a small can that has a thin spout, pocket by pocket from the top down. The pockets dry out fast in sun, so I check them every day in hot weather.
The top pockets get the most sun and wind, so they dry first. I put tough herbs up there, and I keep the soft leafy plants in the middle rows where it stays a bit cooler.
I keep the bottom pockets a little higher than the ground so they do not sit in rain water. A small gap lets air move under them, and the leaves stay clean and dry.
My rail, pockets, and compost totalled $21 to $49, which felt fair for twelve growing spots. I bought the pockets in a set, and they came with the hooks I needed.
I feed the plants with a little liquid plant food once a month, mixed as the pack says. I do not overfeed, because too much food makes soft leaves that flop over the pocket edge.
Pocket walls are perfect for a renter or a small yard, because you can take the whole rail down in minutes. Roll it up, move it to a new spot, and hang it again when you are ready.
8. Railing Planters for a Small Balcony
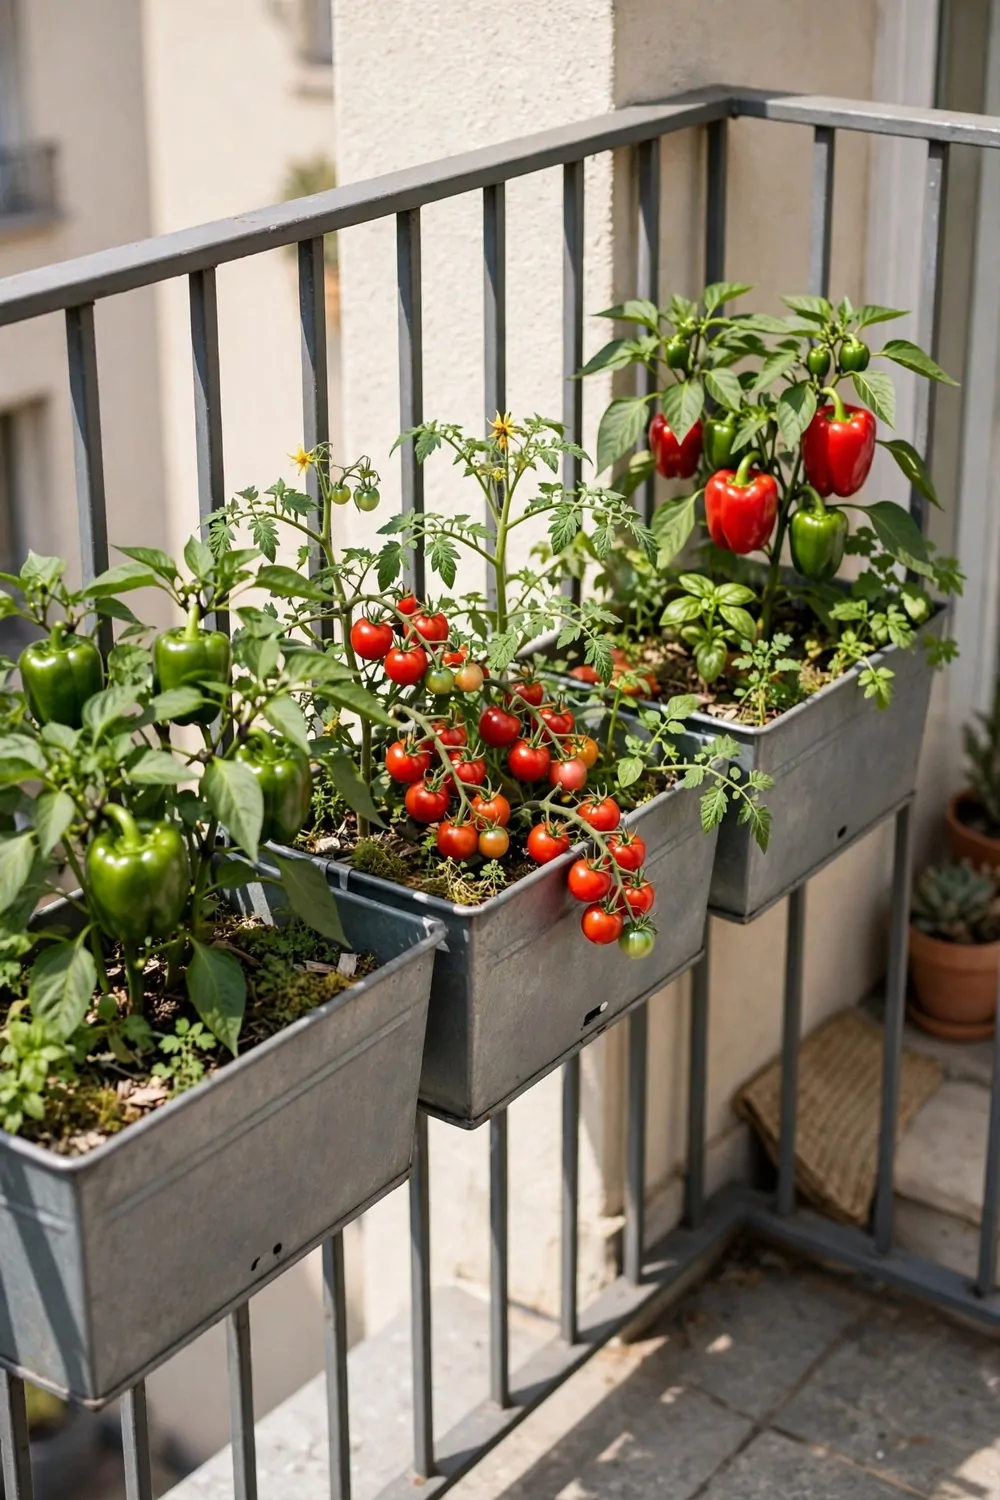
Railing planters clip onto a balcony rail and turn the edge into a growing space. They hang outside the rail or sit on top of it, and they leave the floor free for a chair.
I check the rail first to see how strong it is and how wide the top is. A thin rail needs a planter with a deep hook, and a wide rail needs one that sits flat and does not rock.
Weight matters a lot on a balcony, so I use light pots and light soil mix. I never fill a railing planter to the brim with wet soil, because the extra weight can strain the rail and the fixings.
I fix each planter with its brackets and a safety tie, so it cannot slip off in wind. I tug each one hard before I add plants, and I check the ties again after a storm.
I keep the planters at a height where I can reach the soil from inside the balcony. If I have to lean over the rail to water, the planter is too far out for me.
The rail gets sun at different times than the floor, so I watch it for a day before I plant. Morning sun suits herbs, and a rail that gets hot afternoon sun suits tough plants that like heat.
Two railing planters with brackets, soil, and plants set me back $26 to $61 all together. I picked planters that matched my rail width, so they sat firm without any wobble.
I water in the morning so the leaves dry before night, and I use a tray to hold the drips if my neighbour below has washing out. A tray keeps the balcony dry and keeps things friendly downstairs.
A few railing planters give you fresh herbs right where you cook, and they make a small balcony feel green. Start with one planter, see how it holds in the wind, and add a second one when you feel sure.
| Idea | Typical Cost |
|---|---|
| Wall-Mounted Planters for a Bare Wall | $28 to $64 |
| Hanging Baskets That Trail Down | $16 to $38 |
| A Trellis for Climbing Beans and Peas | $22 to $55 |
| Stacked Pots on a Sunny Step | $19 to $47 |
| A Pallet Planter on the Fence | $24 to $58 |
| Ladder Shelves Full of Pots | $35 to $82 |
| Pocket Planters on a Garden Wall | $21 to $49 |
| Railing Planters for a Small Balcony | $26 to $61 |
9. Window Boxes Stacked High
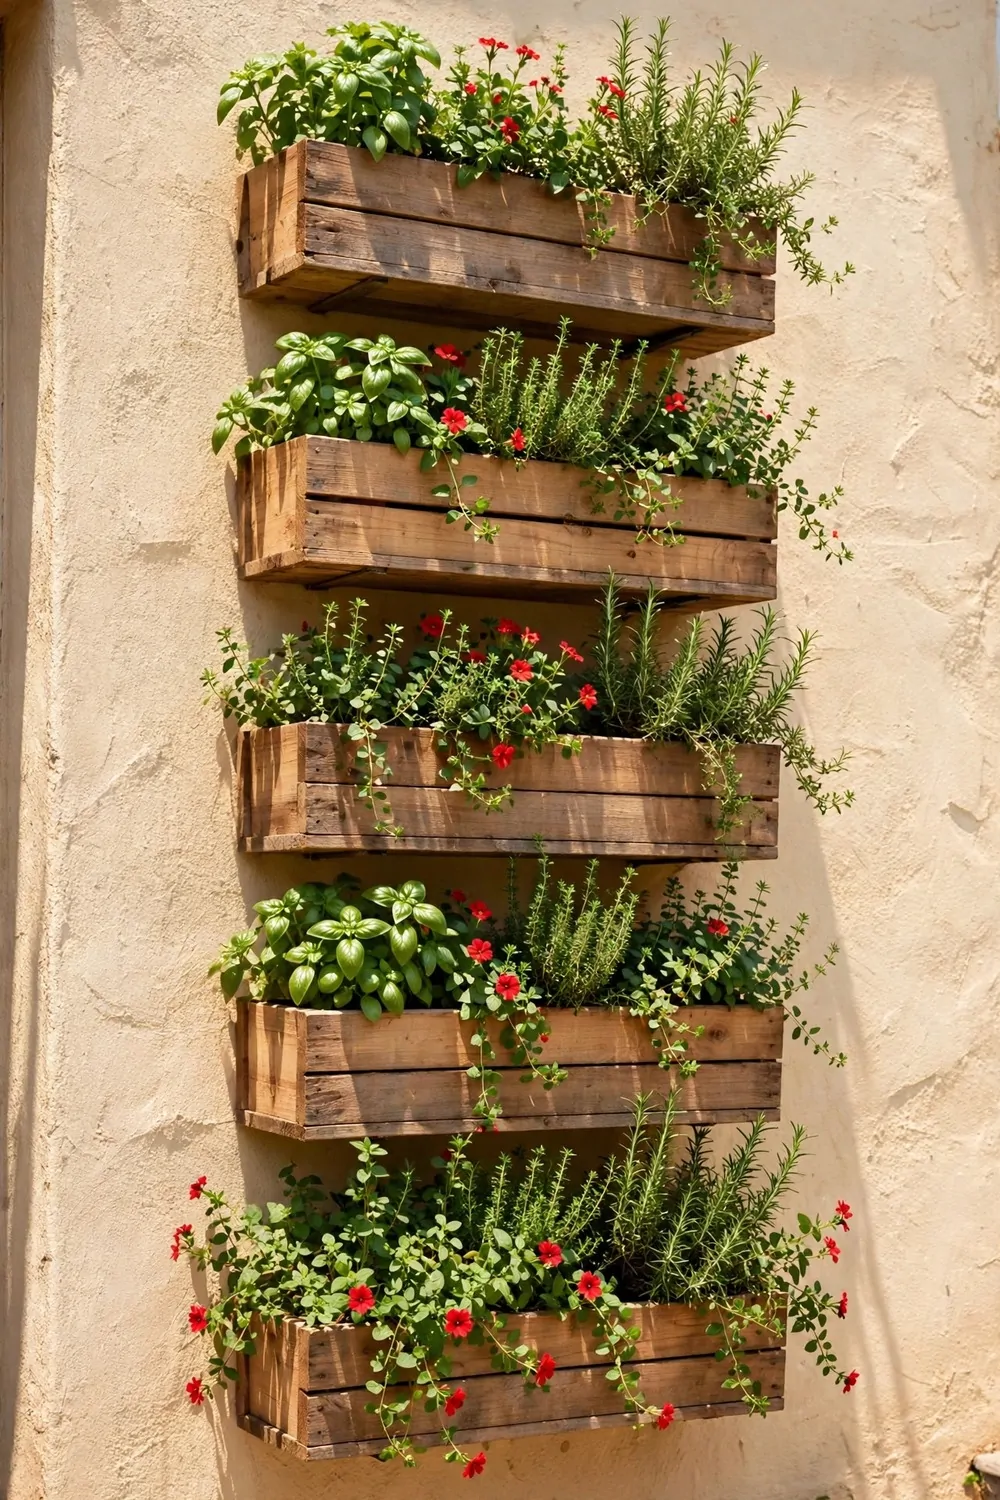
I stack my window boxes in rows up the wall, and it turns one small wall into a whole garden. You get more plants without losing any floor space at all.
Start with the lowest box first, because that is the one you will water and pick from most.
Fix each box with strong brackets and screws that go deep into the wall. A full box of wet soil is heavy, so weak hooks will bend or pull out. I always tug each bracket hard before I fill the box.
Leave a small gap between each row so the plants below still get sun. If the boxes sit too close, the top row shades the bottom row all day. A hand width of space is enough.
Put trailing plants in the top boxes so they spill down over the boxes below. Put short upright plants in the bottom boxes where you can reach them easily. That mix looks full without hiding anything.
Water from the top box and let the extra drip down to the boxes below. That saves time and keeps the soil damp all the way down. A set of three boxes and brackets runs from $40 to $85, and that covers the fixings too.
Do not stack higher than you can reach with both feet on the ground. If you need a ladder to water it, the boxes are too high.
I keep a small step stool nearby for the top row, but I never stand on a wobbly chair.
Check the brackets again after a heavy rain, because wet soil is at its heaviest then. Tighten any screw that feels loose, and your boxes will stay safe all season.
10. A Tower Planter for Salad Leaves
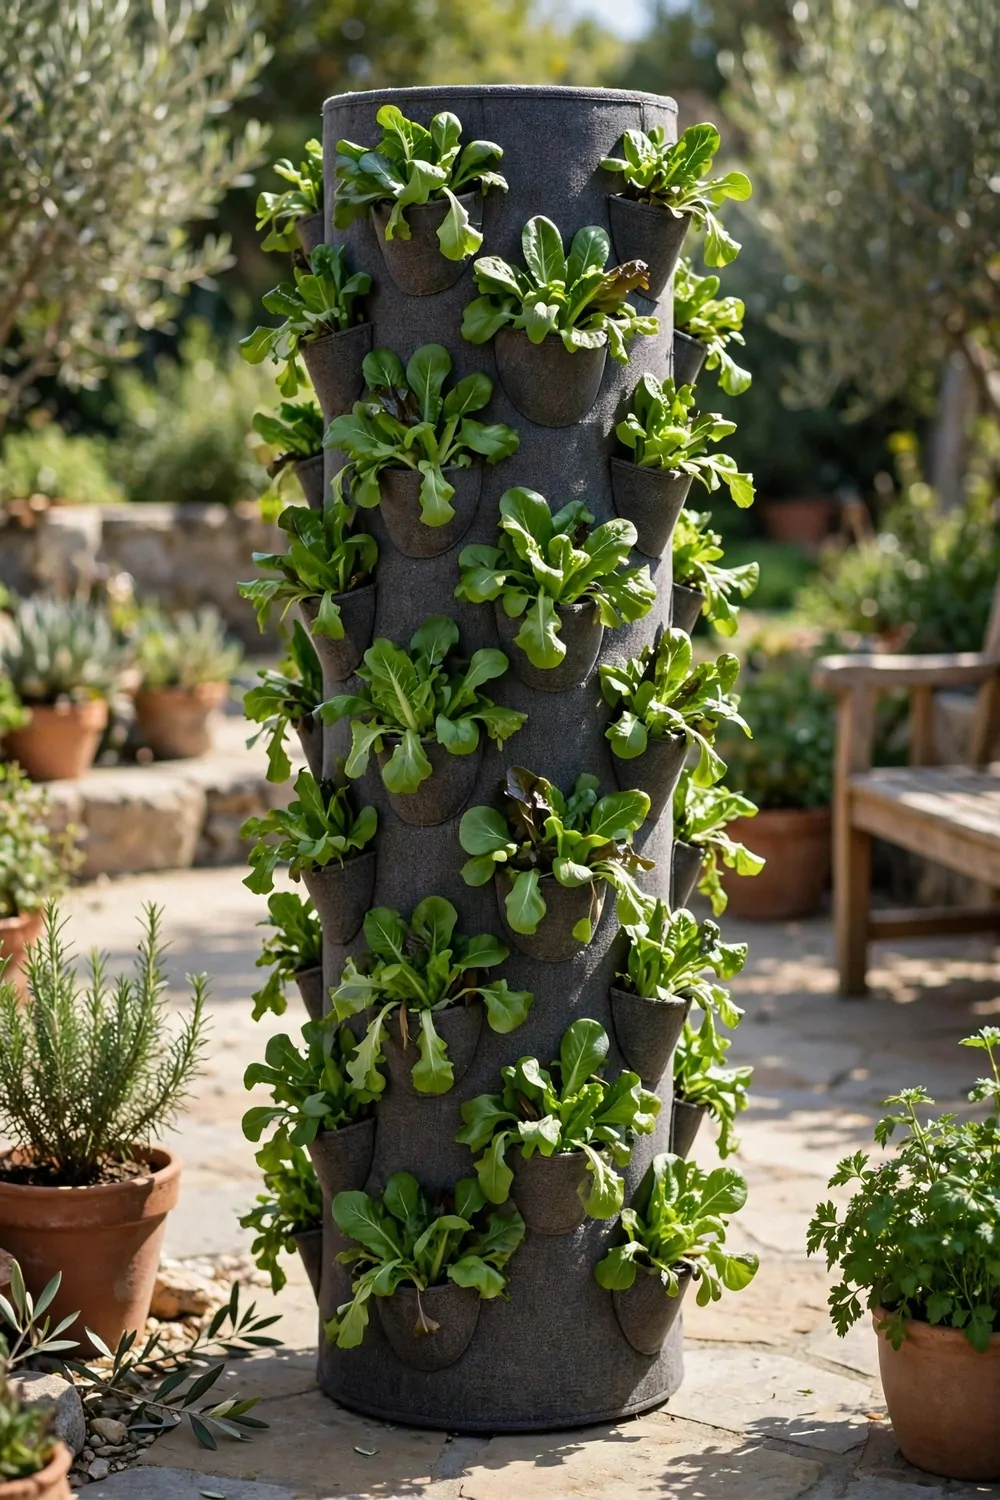
A tower planter is one tall pot with pockets all the way up, and it grows a lot of salad in a tiny spot. I keep mine by the back door so I can snip leaves while I cook.
Fill the tower from the bottom up, and press the soil in gently around each pocket.
Plant the leaves that grow fast in the top pockets, where the sun hits first. Put slower leaves lower down, where they get a little shade in the afternoon. That way you always have something ready to pick.
Water slowly from the top and let it soak down through the whole tower. If you pour too fast, the water runs straight out of the bottom pockets. A slow pour keeps every level damp.
Give the tower a small turn every few days so each side gets its share of sun.
Salad leaves like loose soil, so I mix in a little compost before I plant. The roots spread fast and the leaves stay soft and sweet. A tower planter with soil and seeds comes to $35 to $70 for the whole set-up.
Take the outer leaves first and let the centre keep growing for the next pick. That gives you a few handfuls each week for many weeks. One tower can fill a small bowl of salad again and again.
Keep the tower out of strong wind, because a tall pot can tip over when the soil dries out.
I put a heavy saucer under mine to hold it steady. If your spot is windy, push the tower against a wall so it has something to lean on.
11. Gutter Gardens Along the Wall
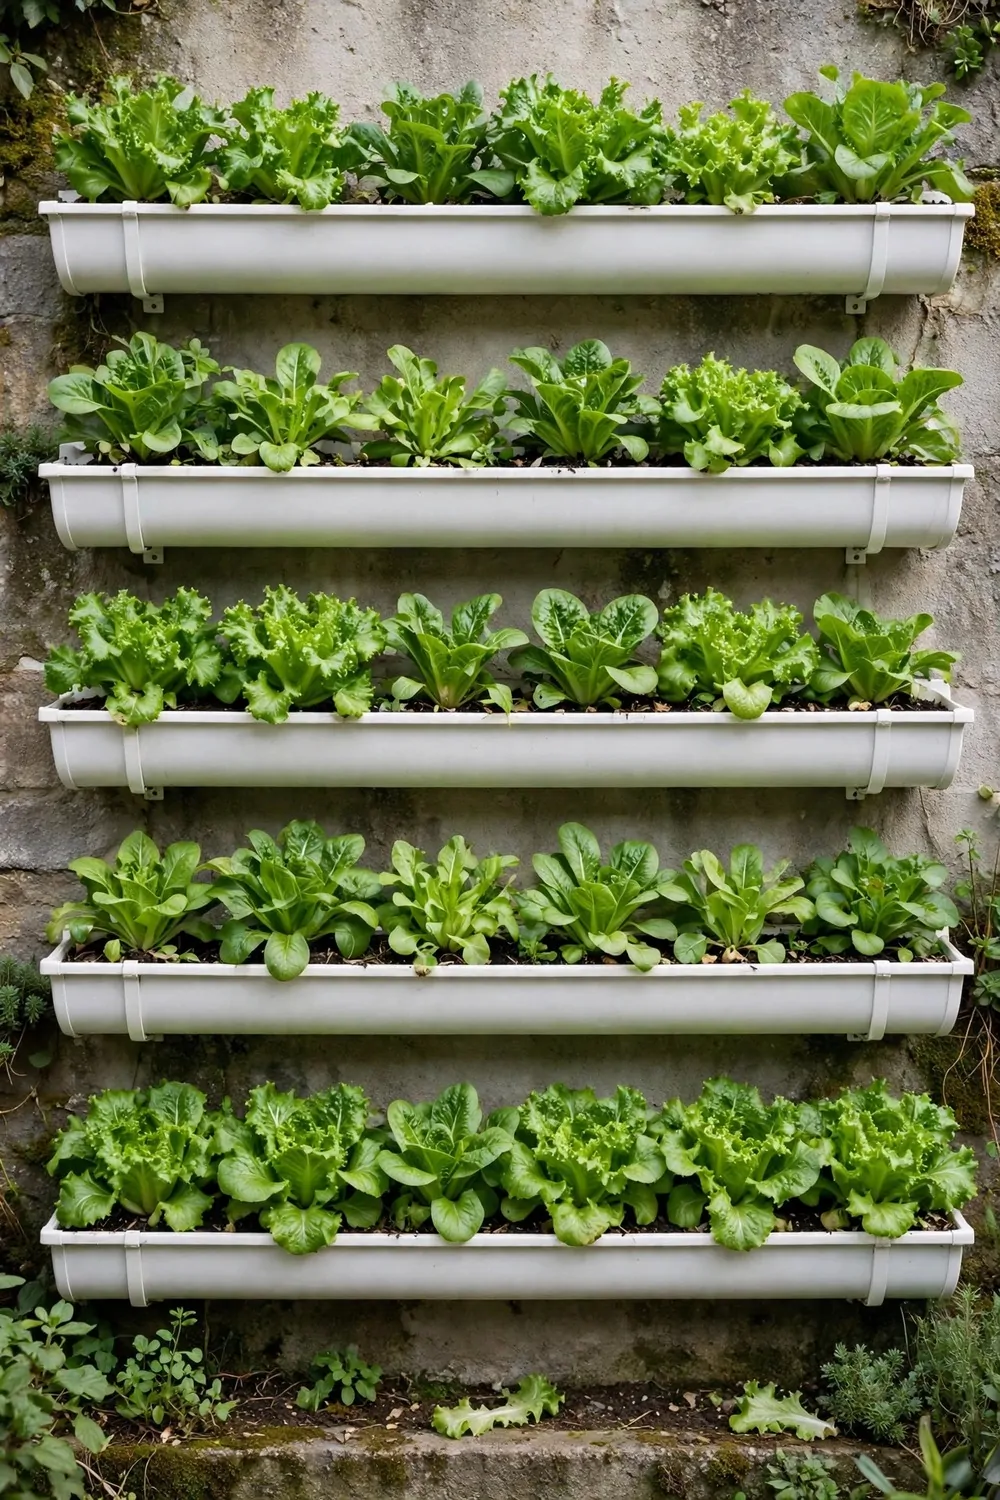
Old gutters make great shallow planters, and they fit flat against a wall. I fixed two rows along my fence, and they grow more than I thought they would.
Cut the gutter to the length you need, and cap both ends so the soil stays in.
Drill small holes along the bottom so extra water can drain out. Shallow soil dries fast, so these rows need water more often than deep pots. I check mine every morning in hot weather.
Fix the gutter with brackets every couple of feet so it cannot sag in the middle. Wet soil is heavy, and a sagging gutter spills over the edge. Strong brackets keep the row level.
Herbs and small salad leaves do best here, because their roots stay shallow.
Stagger the rows so the top gutter does not drip straight into the plants below. A small offset lets rain and sun reach every row. Two gutter lengths, end caps and brackets work out at $55 to $110 all in.
Keep the top row at shoulder height or lower, so watering stays easy. Anything above your head is hard to water and hard to pick. I use a small watering can with a long spout for the top row.
Line the inside with a little cloth if the soil washes out through the drain holes.
I grow herbs on the top row and salad leaves below, and I snip a few leaves for dinner most nights. It is a small garden, but it feeds my cooking for weeks.
12. Vines Climbing a Sunny Fence
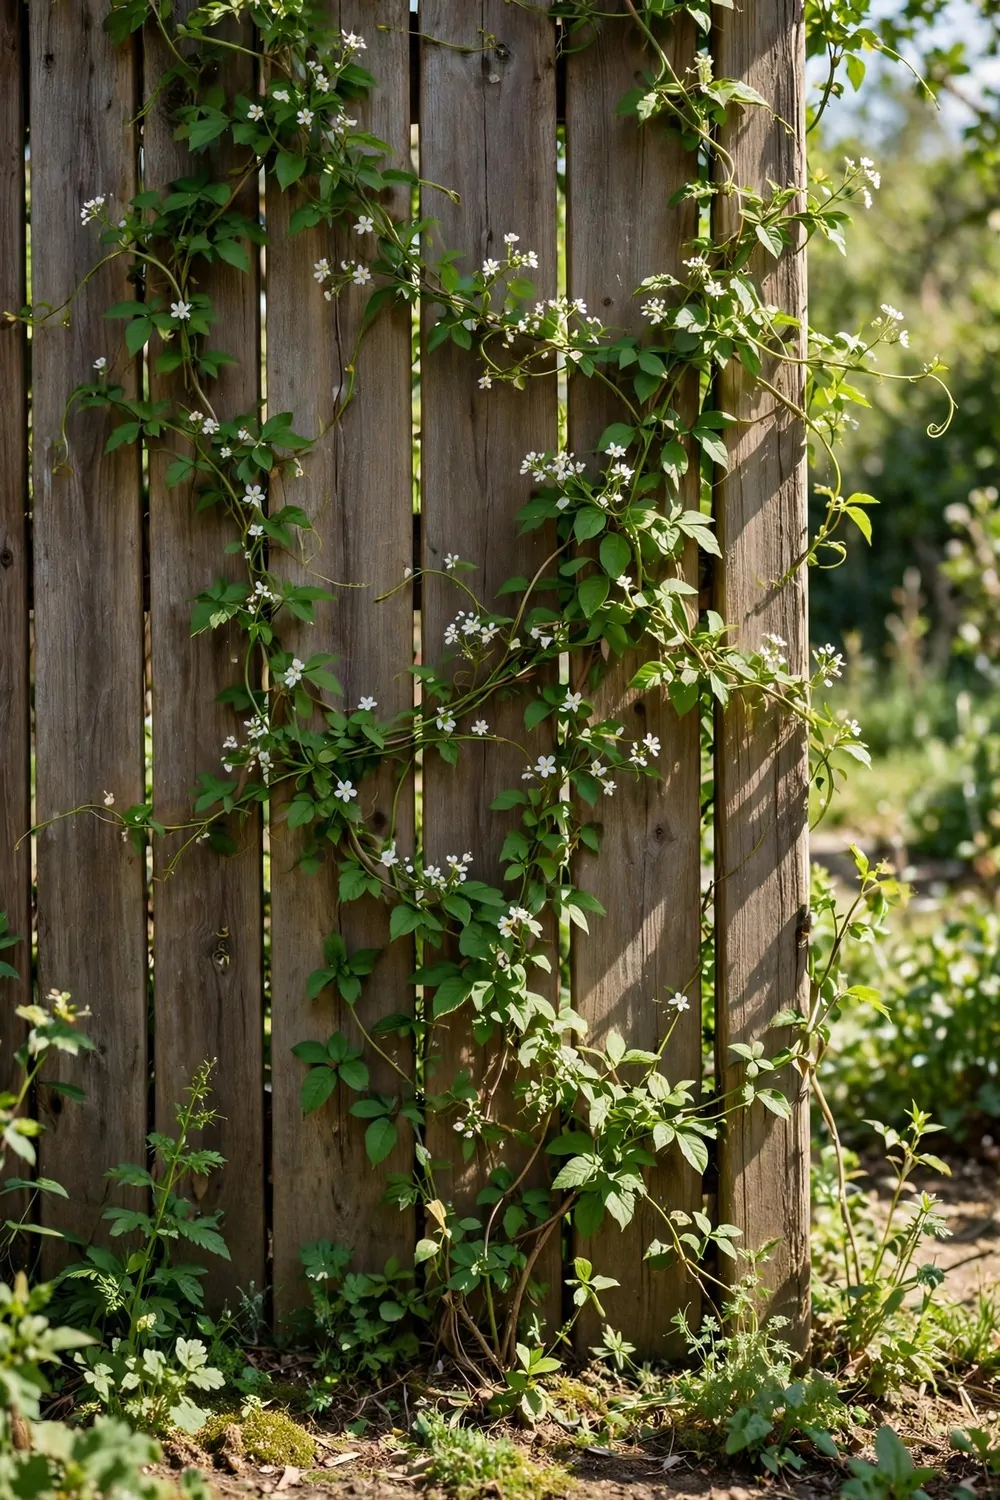
Vines are the easiest way to fill a fence, because they climb up by themselves. I planted two at the base of my fence, and by summer they covered half of it.
Pick a sunny fence, because most climbing plants need sun to grow fast.
Give the vines something to hold, like wires or a simple trellis fixed to the fence. Young stems need a gentle tie to point them up. I use soft cloth ties so the stems are not cut or bruised.
Water at the base, right where the roots sit, and not all over the leaves. Wet leaves in hot sun can scorch, and damp leaves at night can rot. A slow soak at the roots works best.
Train the stems sideways as well as up, so the fence fills in evenly.
Beans climb fast and give you pods to pick through the summer. A few handfuls each week is normal from one strong vine, and that is enough for a few meals. Wires, ties and two young plants add up to $30 to $65.
Check the ties every few weeks, because thick stems grow fast and tight ties can bite in. Loosen any tie that looks snug, and retie it with a little slack. It takes two minutes, and it saves the plant.
Cut back any stem that grows past the top of the fence so it does not flop over.
I keep the bottom of the fence clear of weeds so the young vines get all the water. A little mulch around the base keeps the soil damp longer. That one step makes a big difference in dry weeks.
13. Herbs Growing on the Wall
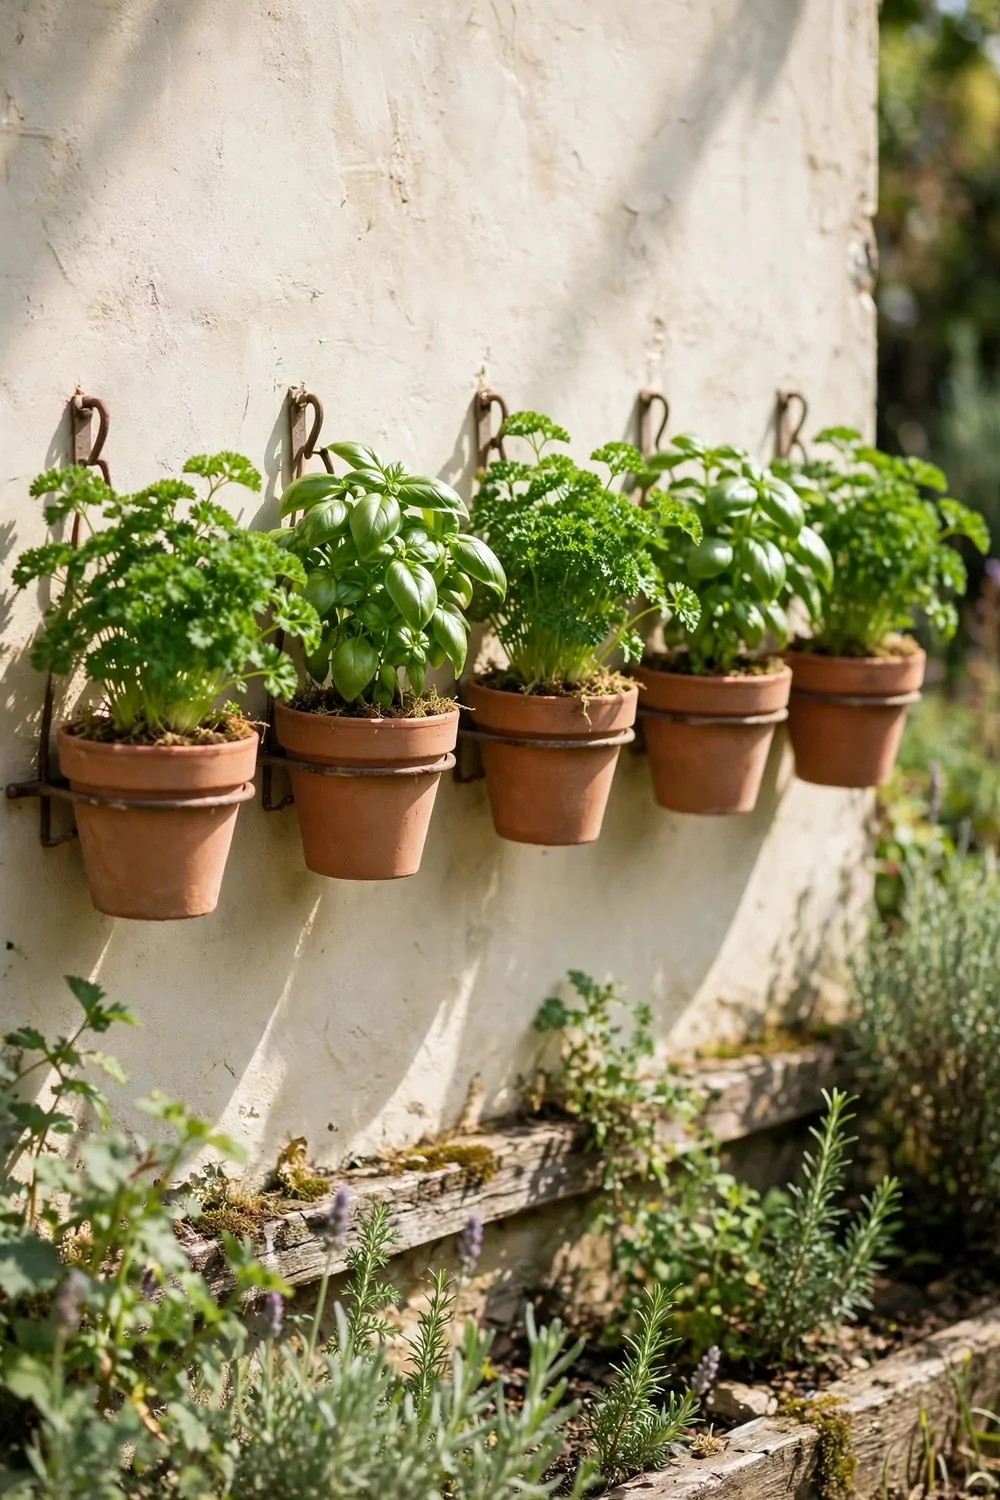
Herbs on the wall keep my cooking fresh, and they sit right where I need them. I hung small pots in a row by the kitchen door, and I snip what I need while I cook.
Small pots dry out fast, so check the soil with your finger every day.
Fix a rail or a board to the wall first, then hang the pots from it. That is much safer than fixing each pot on its own. If one hook fails, the rail still holds the rest.
Put the herbs you use most at chest height, where you can reach them without stretching. Keep the ones you use less often higher up. I keep my daily herbs low and the rest above.
Most herbs love sun, so pick the sunniest wall you have.
Water early in the day so the leaves dry off before the evening comes. Wet leaves overnight can turn soft and spotty, and that spoils the flavour. A rail, hooks and six small pots with soil total $25 to $60.
Snip a little from each plant instead of stripping one plant bare. The plant grows back bushier when you pick lightly. I take a few leaves from the top and let the sides fill out.
Bring the pots inside or under cover if a hard frost is coming.
I grow herbs for chicken, pasta and bread, and a pinch of fresh leaves changes a plain dish. You do not need a big garden for that. A sunny wall and a few pots are enough.
14. A Green Wall with Pockets
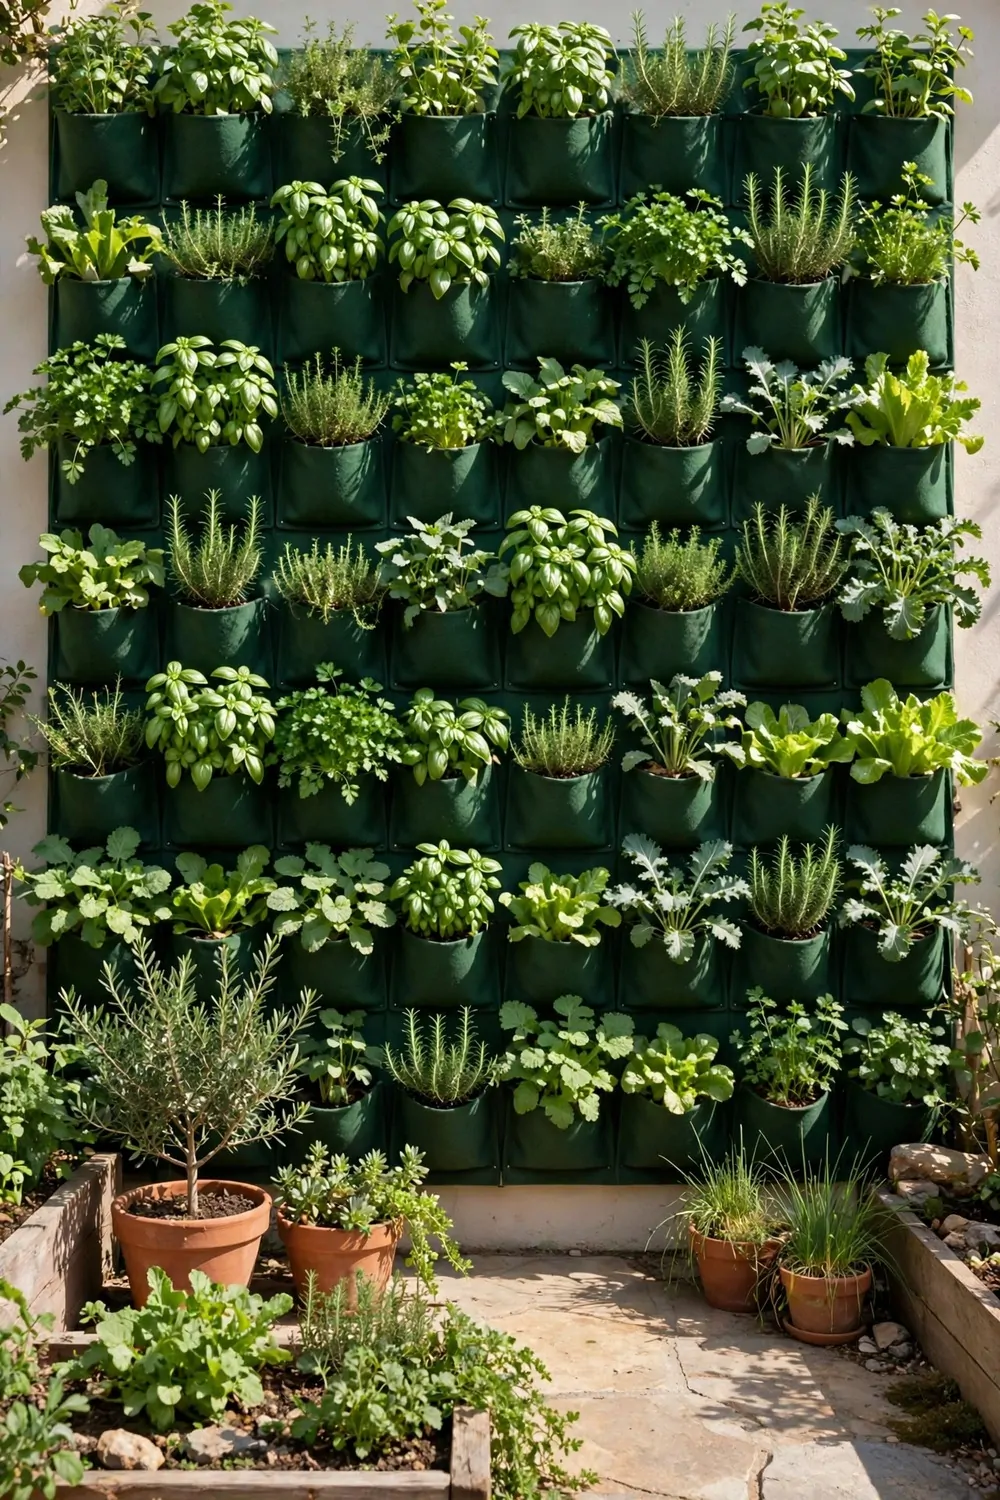
A green wall is a sheet of pockets fixed to a wall, and each pocket holds one plant. It turns a bare wall into a living picture, and it takes up no floor space at all.
Start small, because a full green wall is heavy once every pocket is wet.
Fix the frame to the wall with long screws that bite into brick or solid wood. Plaster alone will not hold the weight, so find the solid part of the wall first. I test each screw by pulling on it before I hang anything.
Put a tray at the bottom to hold the extra water that runs down. That keeps the floor dry and stops the wall from staining.
Water from the top pockets and let it soak down to the lower ones.
The top pockets dry first, so check them every day in hot weather. The bottom pockets stay damp longer, so water them less. A pocket panel, frame, fixings and plants run about $60 to $140.
Mix trailing plants at the top with upright plants in the middle. The trailers spill down and hide the pockets, and the upright plants fill the gaps. That mix looks full from the first week.
Leave a gap behind the panel so air can move and the wall stays dry.
I check my wall once a week and swap out any plant that looks tired. A fresh plant in one pocket lifts the whole wall. It only takes a few minutes, and it keeps the wall looking new.
15. A Small Balcony Vertical Set-Up
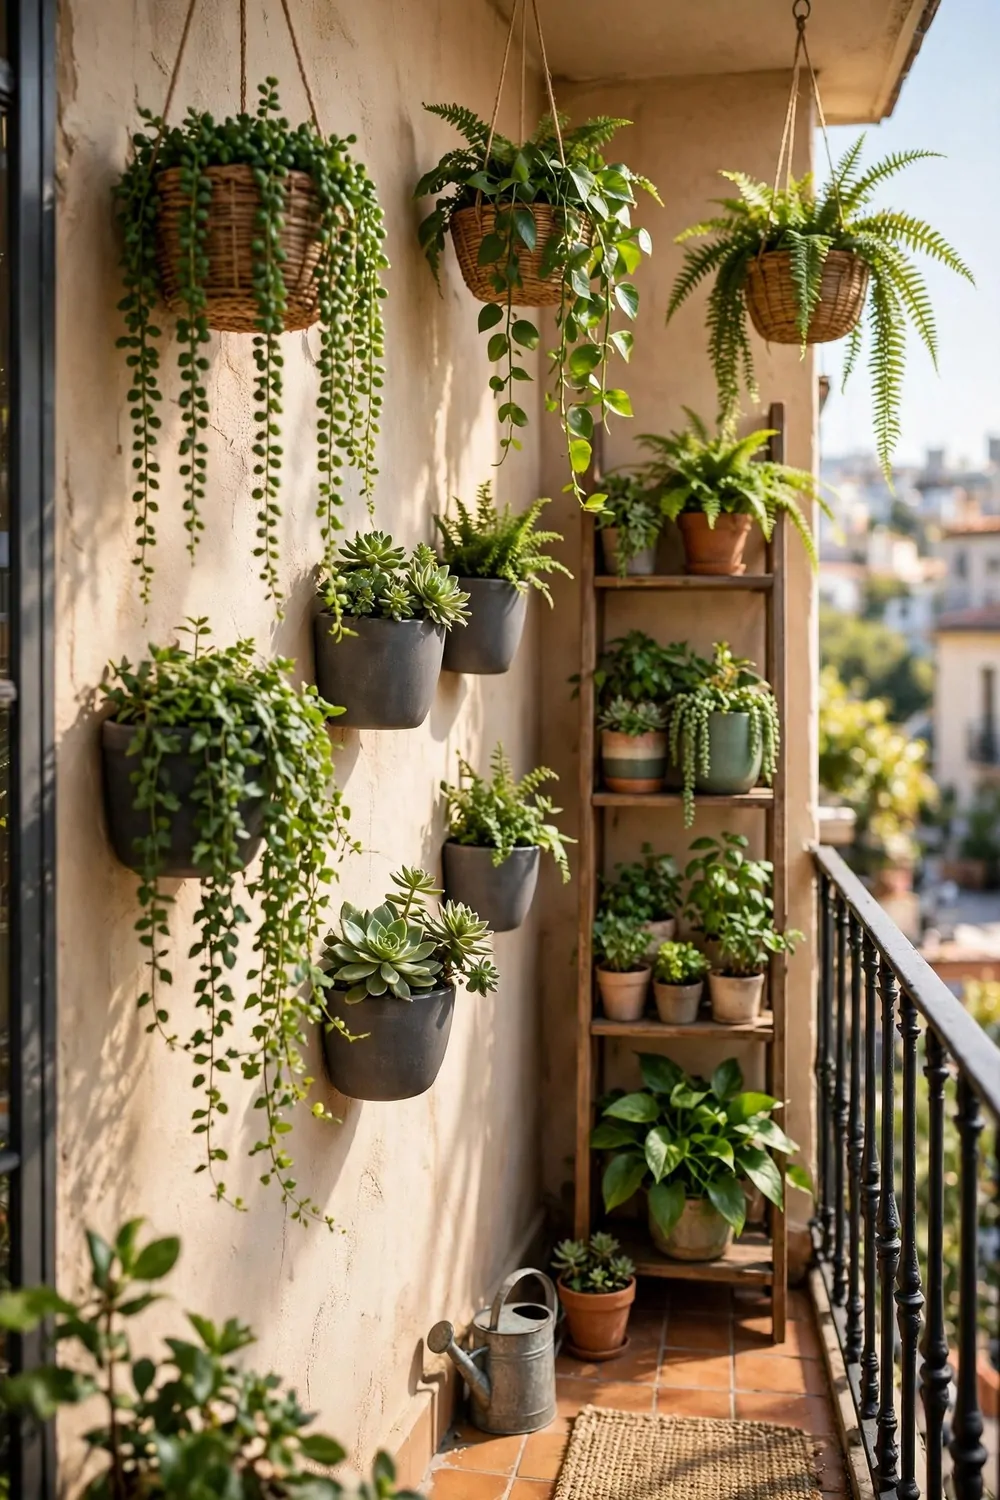
A small balcony can still grow a lot if you go up instead of out. I fixed pots to the wall and the railing, and my tiny balcony now grows food for my kitchen.
Check the weight first, because wet soil in many pots adds up fast.
Keep the heavy pots on the floor and the light ones on the wall. A railing can hold a few light pots, but it is not made for rows of heavy planters. I ask the building rules first when I am not sure.
Use light soil and small pots on the railing so the weight stays low. A pot that feels light when dry can feel twice as heavy after watering. That is why I test each pot by lifting it after a good soak.
Sun on a balcony shifts through the day, so watch where the light falls.
Put sun lovers on the bright side and shade lovers on the dim side. That one move keeps more plants alive than any fancy feed. A rail planter, wall pots and soil for a small balcony set you back $90 to $180.
Water over a tray so drops do not fall on the neighbours below. I water slowly in the morning, and I stop when the tray starts to fill. That keeps everyone happy.
Tie tall plants to the railing so a gust of wind cannot knock them over.
I grow salad leaves, herbs and beans on my balcony, and I pick a few handfuls for rice and vegetables through the week. It is not a big harvest, but it is fresh. A small balcony garden can still feed a few meals.
| Idea | Typical Cost |
|---|---|
| Window Boxes Stacked High | $40 to $85 |
| A Tower Planter for Salad Leaves | $35 to $70 |
| Gutter Gardens Along the Wall | $55 to $110 |
| Vines Climbing a Sunny Fence | $30 to $65 |
| Herbs Growing on the Wall | $25 to $60 |
| A Green Wall with Pockets | $60 to $140 |
| A Small Balcony Vertical Set-Up | $90 to $180 |
16. A Sunny Stair-Step Planter
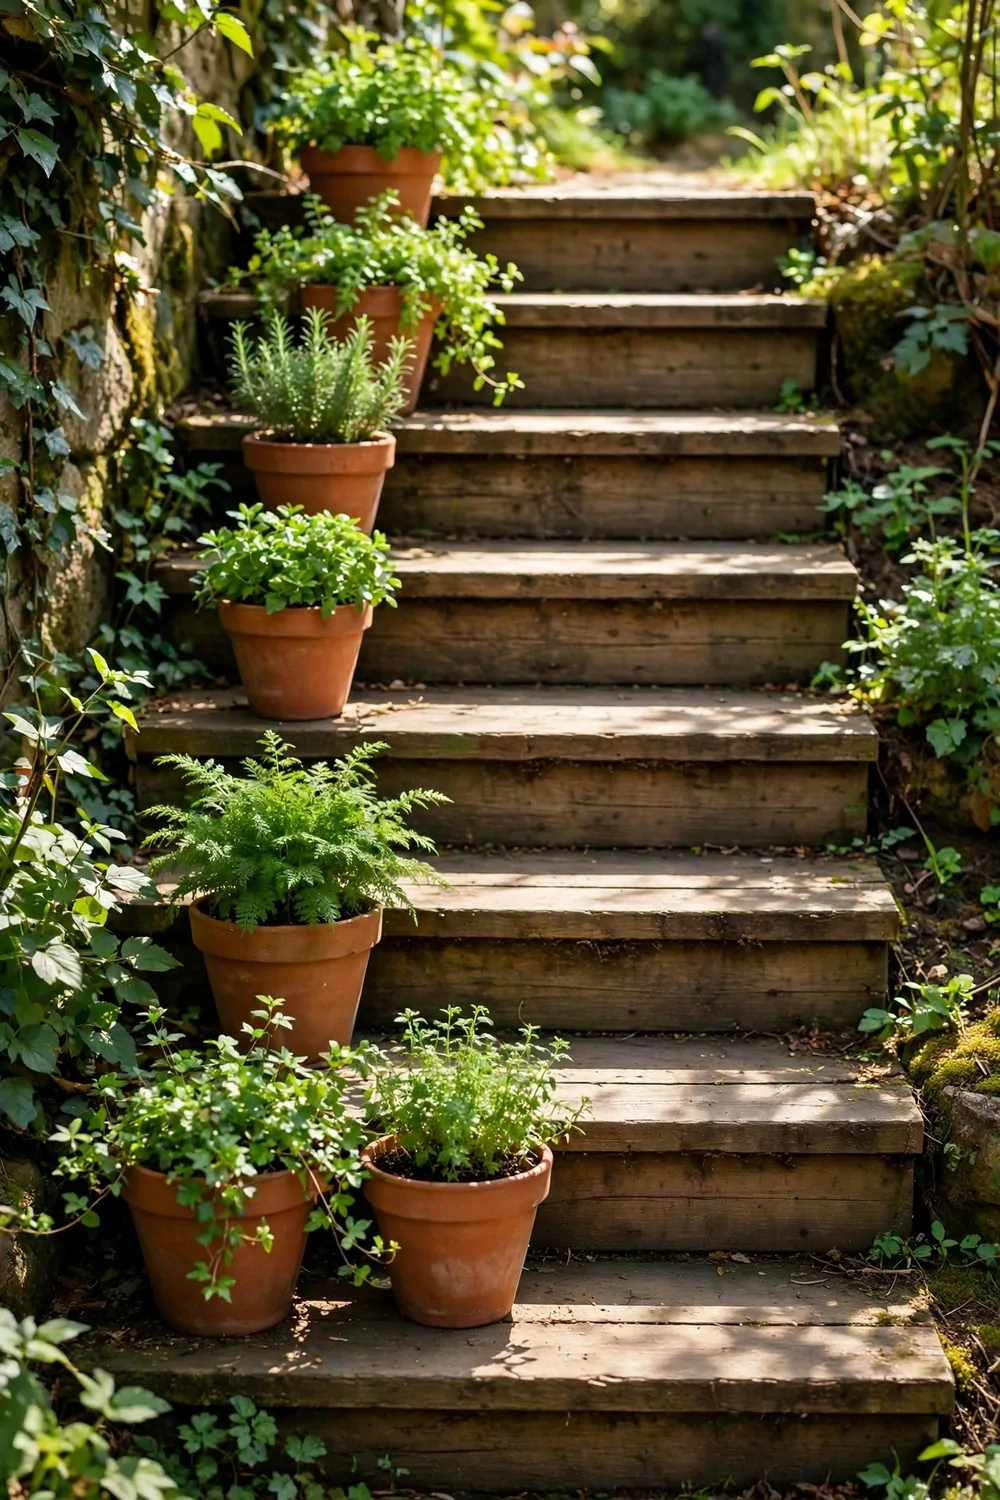
I made my first stair-step planter on the old wooden steps by the wall. Each step sat a little higher than the one in front of it.
The sun hit every row because no pot hid the one behind it.
I put the tallest plants at the back. Short leafy greens went in the front row. That way I could see every plant from one spot.
I filled each pot with light potting mix. Heavy soil would make the pots hard to move.
The pots, plants and mix for my step planter came to about $45 to $75 in all. I set the pots in a neat row on the steps so they matched the wall.
Water runs down from the top step to the ones below. I water the top row first and let the extra drip down. The bottom row stays damp the longest, so I check it before I add more water.
I keep the pots on the sunniest steps in my yard.
Lettuce and herbs love the front rows. Beans and peas climb up the back if you give them a thin stick to hold.
Start with pots on two steps if three feels like too much. You can add a third step later when you feel sure. A small stack still gives you a few handfuls of greens for your meals.
17. Using a Fence as a Growing Wall
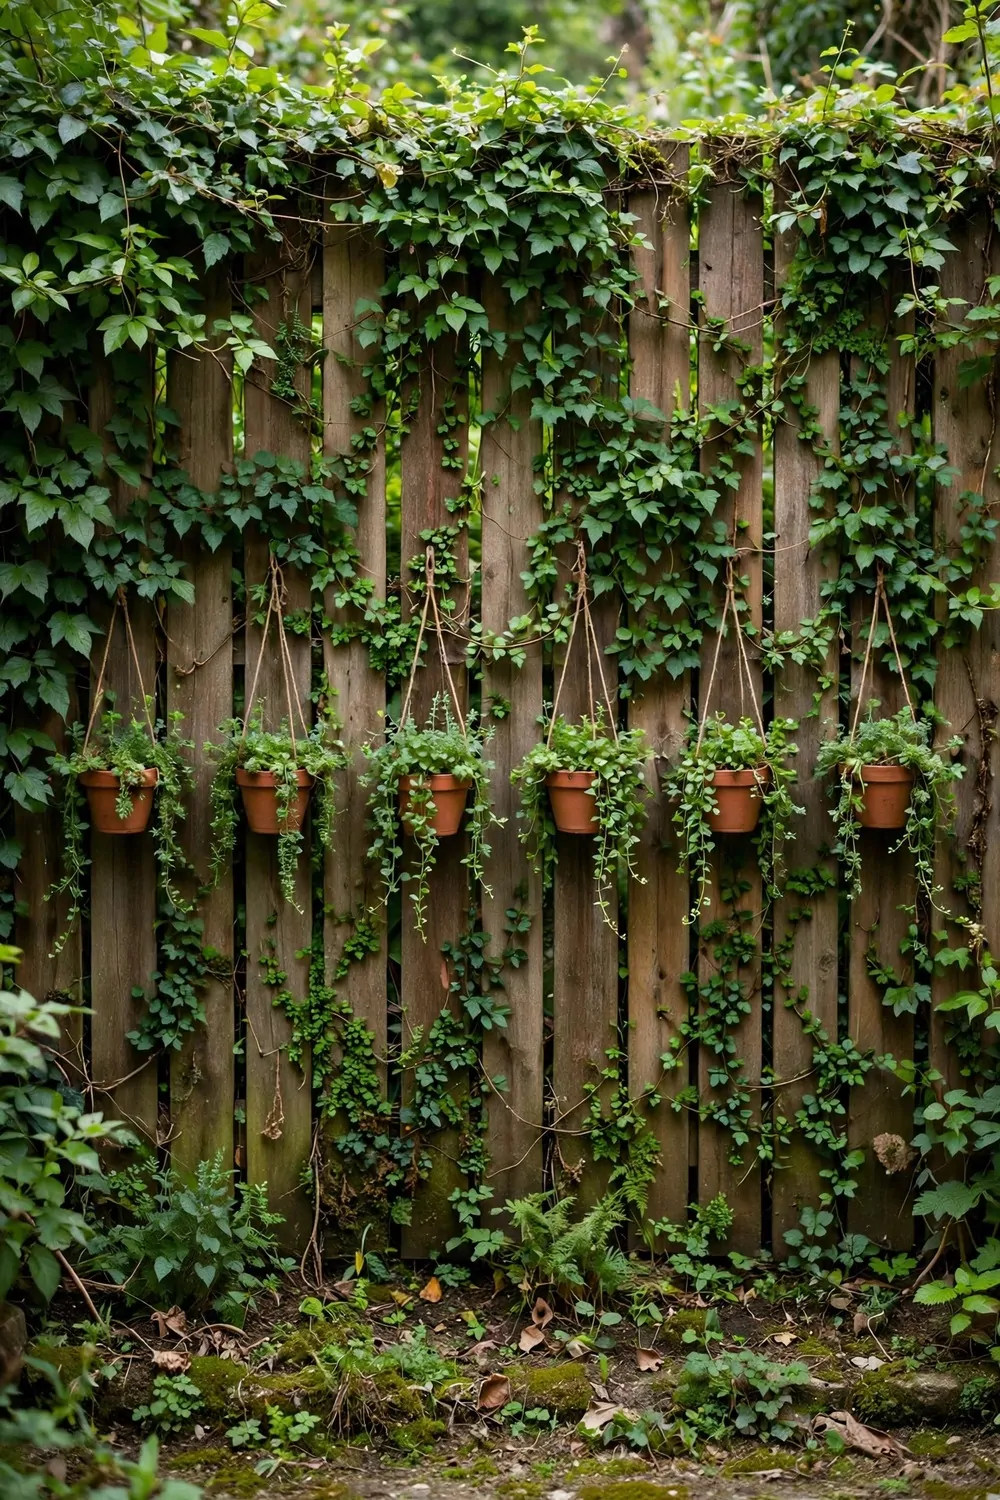
My old wooden fence turned into my best growing wall. It was just sitting there doing nothing before.
I fixed small pockets and pots to the fence boards with strong screws.
First I checked that the fence posts were firm in the ground. A wobbly fence will not hold wet soil for long. I pushed each post and made sure nothing moved.
I left a small gap behind each pocket so air could move. Wet pockets stuck flat to wood can rot the boards over time.
Screws, hooks and a set of pockets for one fence panel ran me $30 to $55 all told. I picked pockets with drain holes so rain could flow out.
Climbing plants do best on a fence. Beans reach up fast and cover the boards in green. Trailing plants hang down and soften the hard lines of the wood.
I plant the sun lovers at the top and the shade lovers near the bottom.
The fence gets hot in the afternoon sun. I water in the early morning so the soil stays cool through the day.
Do not load one fence panel with too much weight. Spread your pots over two or three panels instead. Your fence will last longer and your plants will have more room to grow.
18. A Vertical Herb Tower
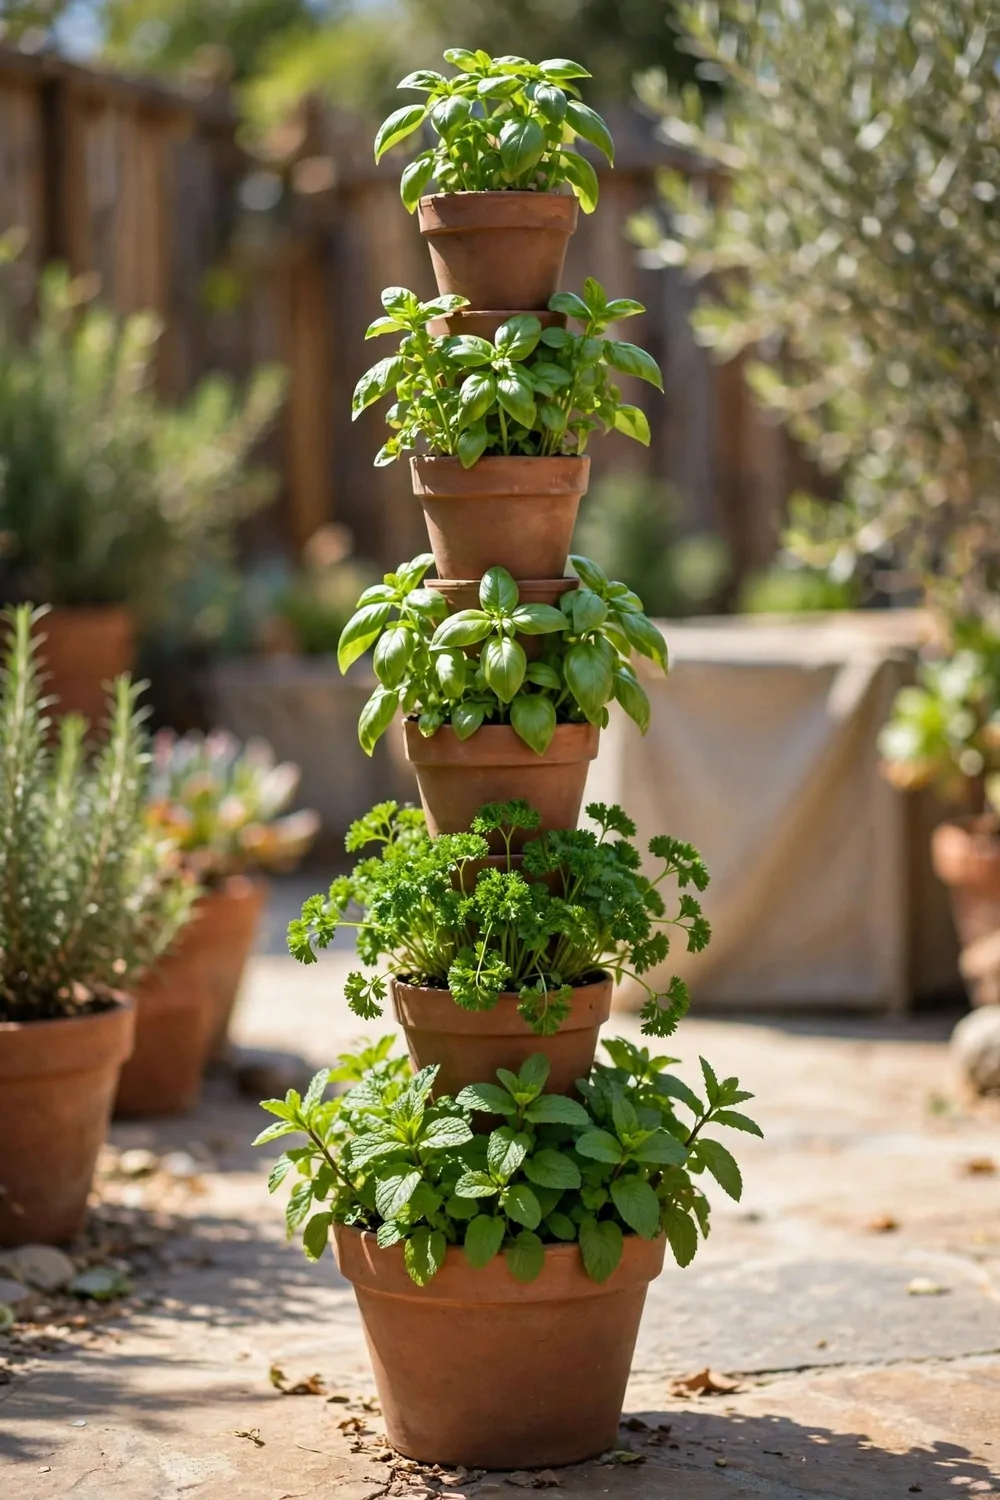
A herb tower is a tall stack of pots with a plant in each pocket. Mine stands by my back door and I pick from it almost every day.
Basil sits at the top where the sun is strongest.
Mint goes in its own pot at the bottom. It spreads fast and will take over a shared pot. I learned that the hard way in my first year.
I use a light mix with a little sand in it. The water drains fast and the roots do not sit in a puddle.
For the tower, the pots and the young herb plants I spent around $38 to $65. I started with five herbs and added more the next month.
Water the tower from the top and let it drip down. The middle pockets get a drink on the way down. I always check the bottom pot because it can stay wet the longest.
Snip a few leaves at a time and the plant will keep growing back.
Fresh herbs make plain rice and pasta taste so much better. A few leaves of basil on top of a tomato dish is one of my small joys.
Turn the tower a little each week. Every side gets its turn in the sun. That keeps the tower full and even all the way round.
19. A Hanging Strawberry Planter
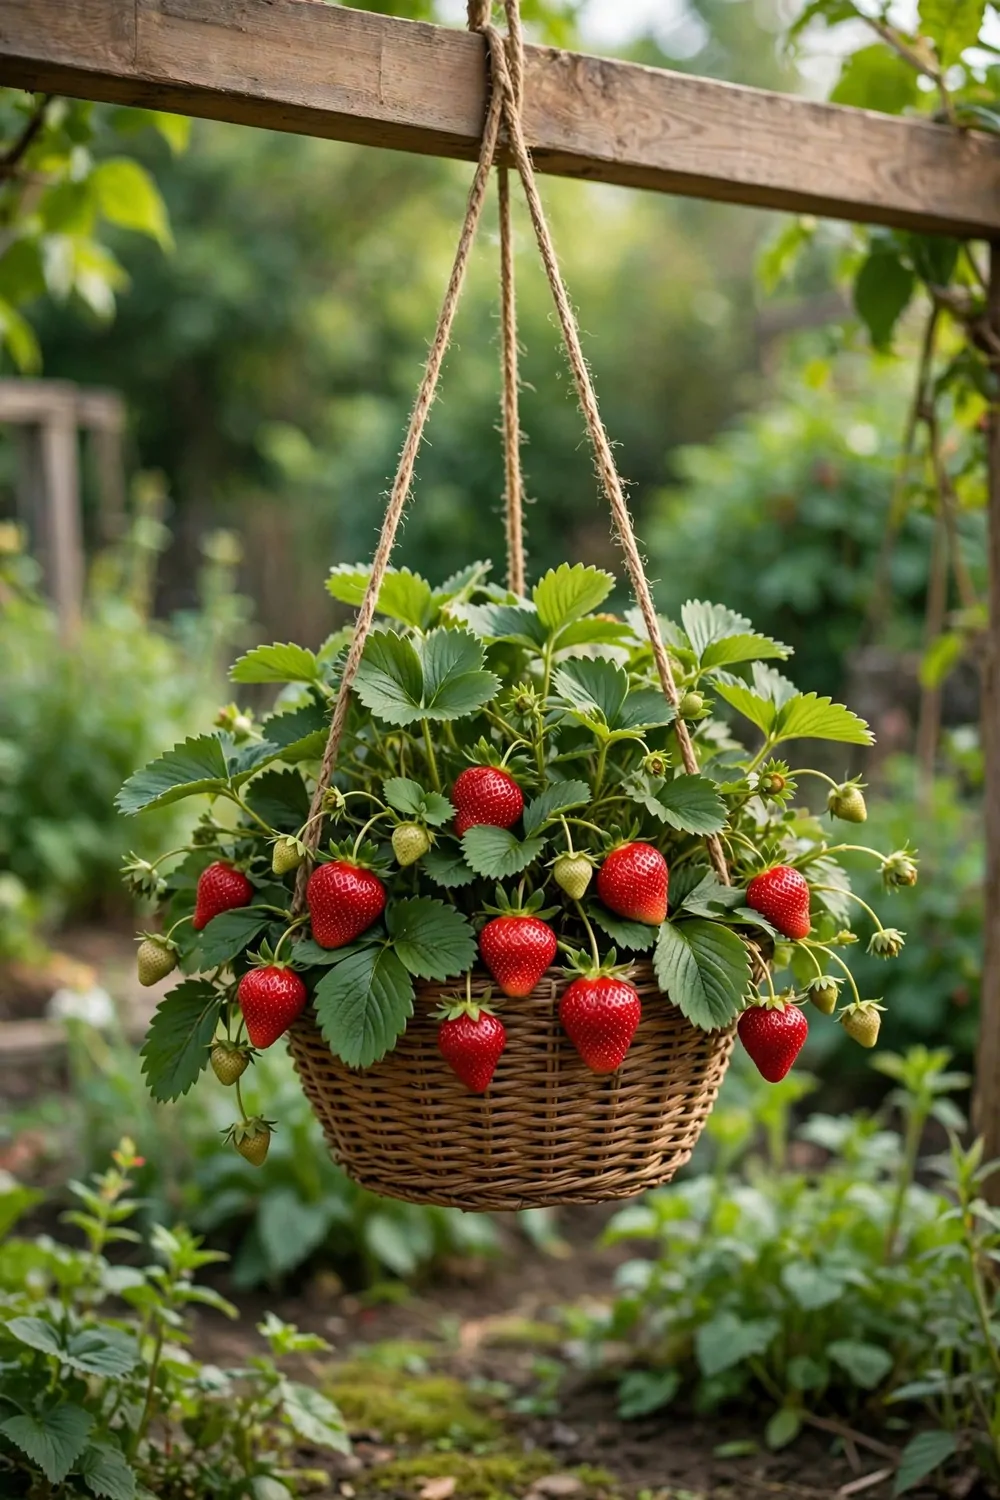
Strawberries love to hang down over the side of a pot. A hanging planter lets the fruit dangle in the air where I can see it.
I hung mine from a strong hook under the roof edge.
The fruit stays clean because it never touches the soil. It also dries fast after rain. That means less rot and more fruit for my bowl.
I fill the planter with light mix and one young plant per hole. Too many plants in one pot will crowd each other out.
My hanging planter, hook and three young plants added up to $25 to $48. I used a hook rated for much more weight than the wet pot.
Hanging pots dry out fast in wind and sun. I check mine every morning in hot weather. A quick water in the morning keeps the fruit sweet and full.
Pick the red fruit as soon as it is ripe and more will follow.
My kids love to pick the first red ones. We eat them right there in the yard with a little bread and fruit for lunch.
Hang the planter where you can reach it without a ladder. If you need to stretch too far, you will skip watering it. A planter at chest height is the easiest one to care for.
20. A Door-Hung Planter by the Back Door
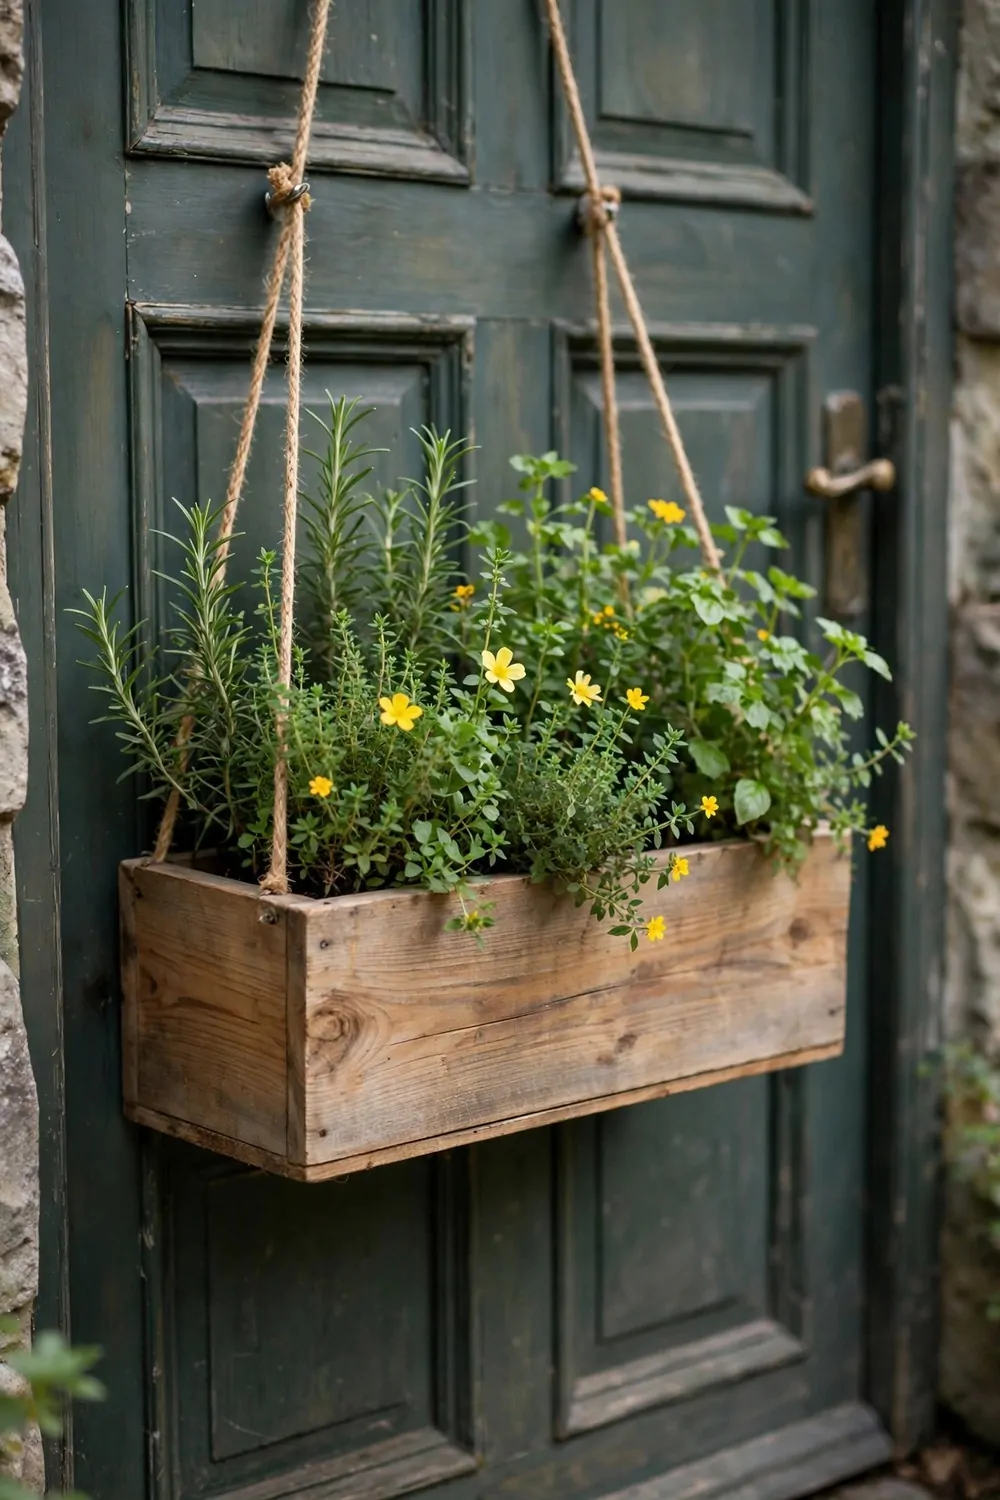
I hung a narrow planter right on my back door. Now I grab fresh leaves on my way out to cook.
The planter is slim so the door still opens and shuts fine.
I fixed it with two strong hooks over the top of the door. No holes in the door at all. That was key for me because I rent my home.
Small herbs fit best in a door planter. Basil, parsley and chives all stay short and neat.
The slim planter, hooks and three small herb plants set me back $22 to $40. I filled it with light mix so the door would not feel heavy.
A door planter dries out fast because it is thin. I water it with a small jug each morning. The water drains into a tray at the bottom so my floor stays dry.
I keep a pair of small scissors by the door for quick snips.
Fresh herbs from the door make a plain chicken dish taste bright and fresh. I add them at the very end so their flavour stays strong.
Check the hooks once a month. Wet soil gets heavy and hooks can loosen over time. Tighten them early and your door garden will stay safe and neat.
21. Watering a Tall Garden Without Waste
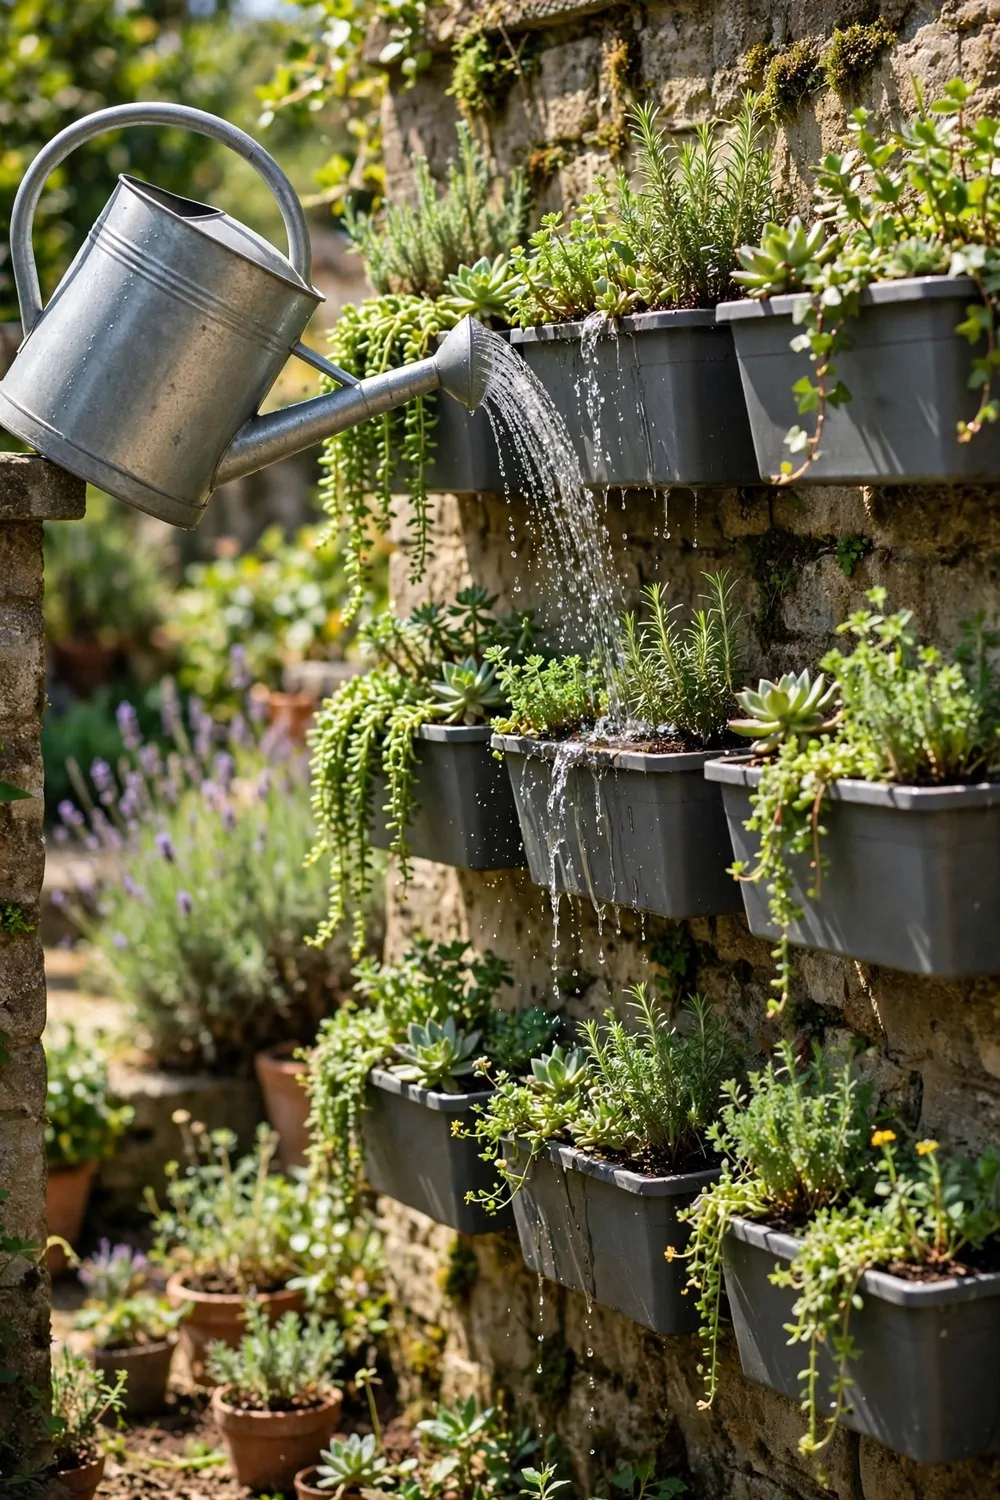
Watering a tall garden can waste a lot of water. Most of it runs off the top and lands on the ground.
I learned to water slow and low so the soil can drink it in.
I start at the top row and use a thin stream. The water soaks in bit by bit. Then I move down one row at a time.
A drip line is the best fix I have found. It lets out tiny drops right at the roots. Almost no water is lost to the air.
A simple drip kit with a timer cost me $48 to $80 to set up. It waters my tall rows each morning while I make breakfast.
I water in the early morning when the air is cool. Less water turns to mist in the heat. The soil stays damp right through the hot part of the day.
I put a tray under the bottom row to hold the extra drips.
That saved water goes back on the top row the next day. Nothing is wasted and my plants stay happy.
Feel the soil with your finger before you water again. If the top is still damp, wait a day. Your plants will tell you what they need if you check them often.
22. A One-Week Vertical Garden Starter Plan
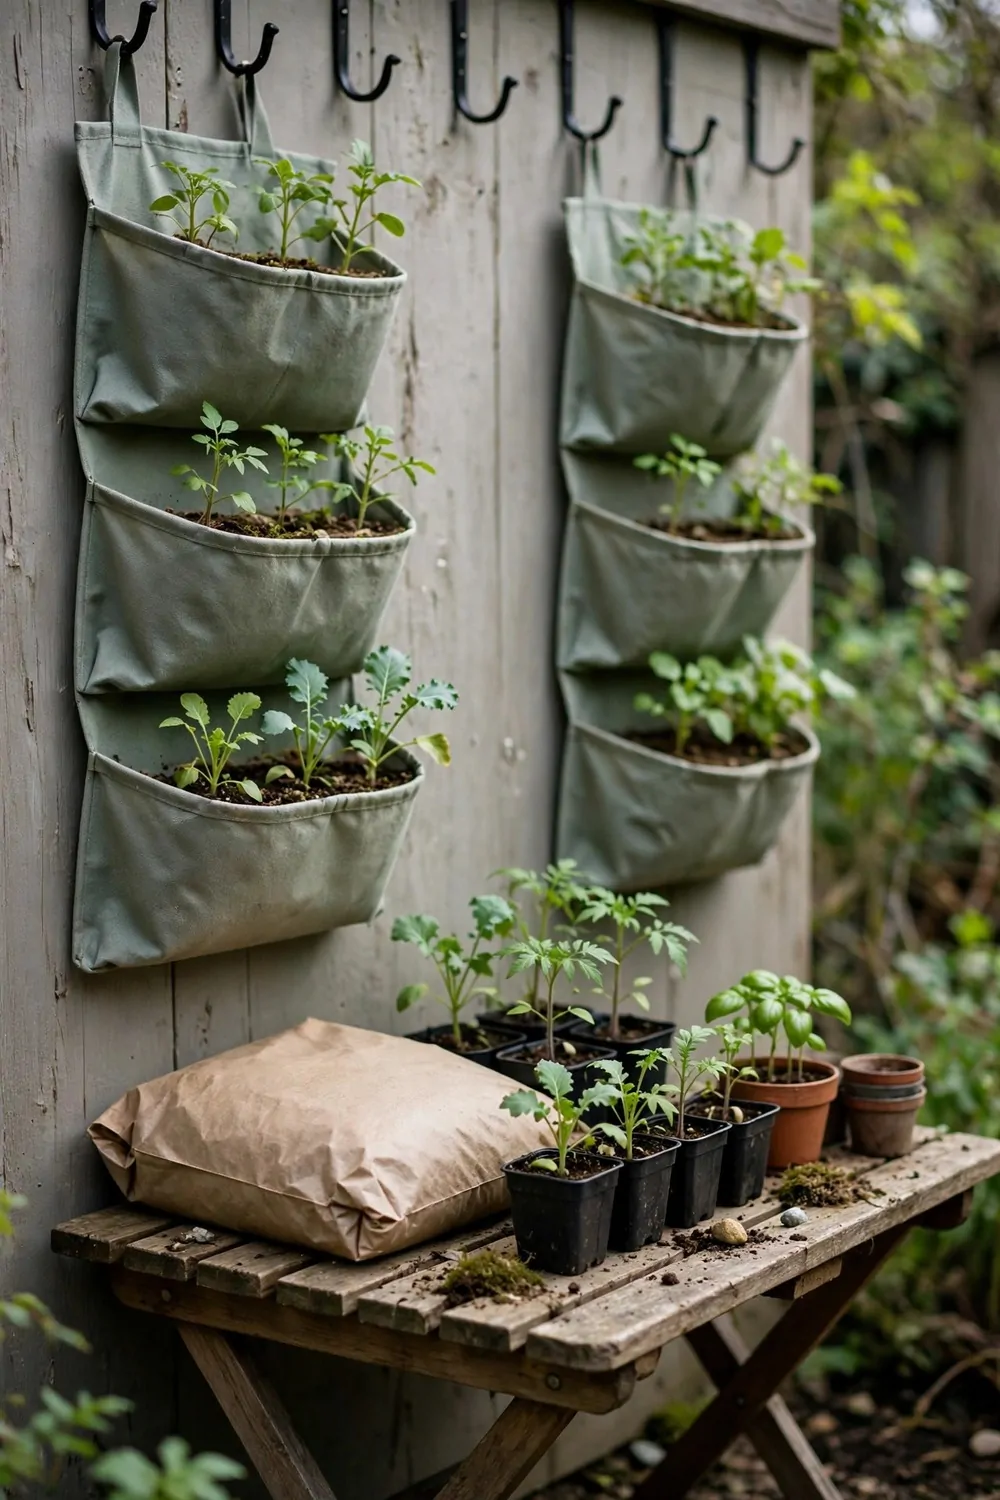
You do not need a whole month to start a vertical garden. One good week is enough to get your first plants in place.
Day one is for picking your wall and measuring it.
Day two is for fixing hooks and pockets to the wall. Take your time and check each one is firm. A solid fix now saves you trouble later.
Day three is for filling every pocket with light potting mix. Day four is for setting in your young plants and watering them well.
For my starter week I wrote down wall planter pockets at $12 to $22, hooks and screws at $6 to $12, potting mix bags at $14 to $24, a small watering can at $10 to $18 and young plants at $15 to $28. All together that comes to $57 to $104 for the full starter week.
Day five is for checking the sun at each height. Move any plant that looks pale or droopy to a brighter spot. The top rows get the most light in my yard.
Day six is for setting up your watering routine.
Day seven is just for looking and enjoying your work. Take a photo so you can see how fast it grows.
A one-week start keeps the job small and fun. You learn what works before you spend more. Next month you can add a second wall if you want to.
| Area | Main change | Typical Cost |
|---|---|---|
| Wall planter pockets | Pockets fixed in neat rows on the wall for the first plants | $12 to $22 |
| Hooks and screws | Strong hooks and screws to hold the planters safe on the wall | $6 to $12 |
| Potting mix bags | Bags of light potting mix filled into every pocket and pot | $14 to $24 |
| Small watering can | A small watering can with a long spout for the top rows | $10 to $18 |
| Young plants | Young vegetable and herb plants set into the pockets | $15 to $28 |
| Total | One-week vertical garden set | $57 to $104 |
Keep Reading
If you liked these ideas, you will love these posts too.
- 28 Raised Garden Bed Ideas for Small Backyards
- 31 Herb Garden Ideas for Beginners
- 24 Balcony Vegetable Garden Ideas That Actually Work
- 26 Container Garden Ideas for Patios and Small Spaces
- 33 Vegetable Garden Ideas for First Time Growers
- 30 Before and After Home Remodel Ideas That Inspire Big Changes
Your wall is ready and your first plants are in place, so pick one small spot tomorrow and start there. A tall green wall grows one pocket at a time, and yours will look better with each week that passes.