28 Raised Garden Bed Ideas for Small Backyards

The first thing I grew in our small backyard was a single pot of basil on the step, and it made me want more.
Our yard is small, and I thought that meant I had no room to grow food or flowers. I was wrong, and a raised bed showed me how much can fit in a little space.
A raised bed is just a low box filled with good soil, and you can put it on grass, on dirt, or on a bare patch by the fence. It keeps your plants tidy, it keeps the soil soft, and it gives you a clear edge to work with. You do not need a big garden to start one.
I like raised beds because I can reach the middle without stepping on the soil. My back feels better when I work at a low bed, and my plants seem happier when the soil stays loose and deep.
Some beds in this post are plain wood boxes, and some use brick, stone, or old boards you already have.
You will also find beds for herbs, salad leaves, and flowers, plus simple ideas for soil, water, and feeding the ground. Each idea works in a small yard, and each one can be made smaller or bigger to fit your space.
All 28 ideas are here in this single post for you to read through from start to finish, so you can pick the ones you love and plan your whole yard in one go.
1. A Simple Wood Bed You Can Build in a Weekend
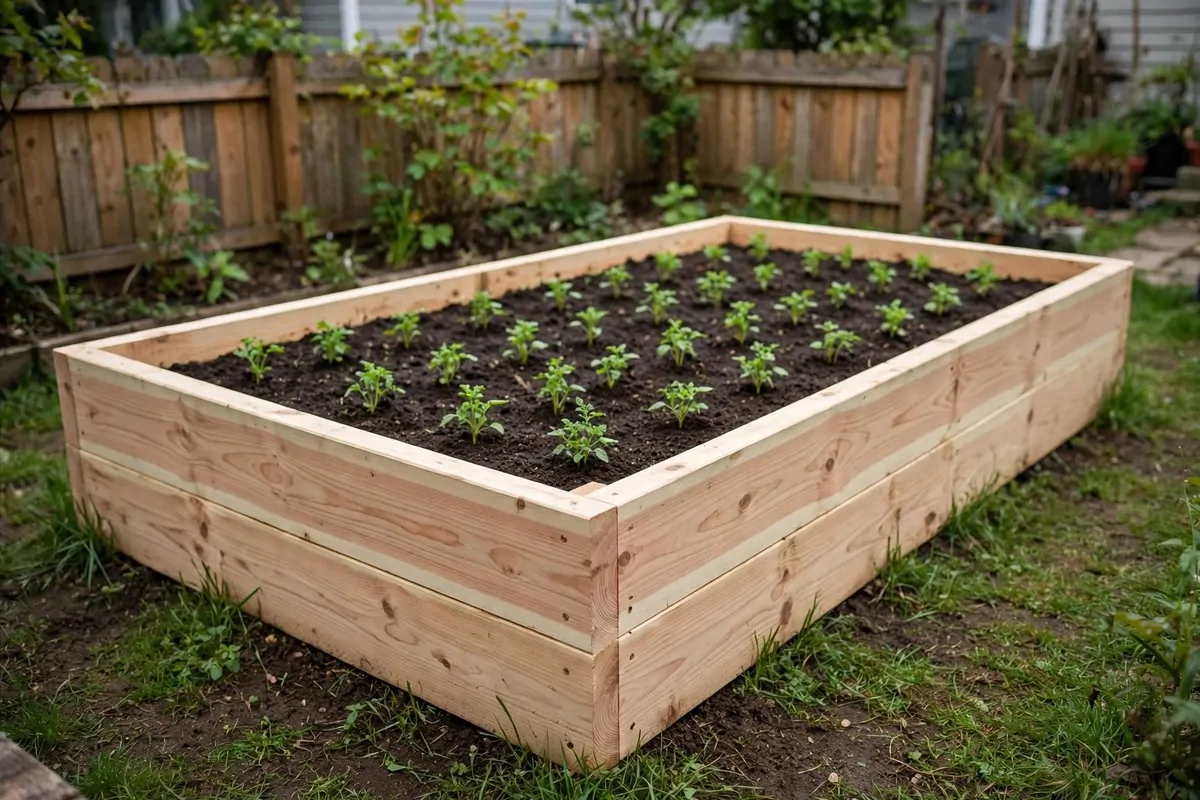
A plain wood bed is the best place to start if you have never built one before. Four boards, a few screws, and a free afternoon are all you need to get going.
Pick untreated wood boards that are thick enough to hold soil without bending. I use boards about six inches tall for a first bed, and that depth is fine for salad leaves, herbs, and many vegetables.
Set the bed on level ground and press the corners tight before you fix them in place. A square corner makes the whole bed look neat, and it stops gaps where soil can wash out.
Line the base with a layer of plain cardboard to block weeds from below. Wet the cardboard well, then fill the bed with a mix of topsoil and compost until it sits a little below the top edge.
Leave a path around the bed that is wide enough for your feet and a wheelbarrow. You will thank yourself later when you need to reach the far side with a watering can.
Plant in rows with space between each plant so air can move and leaves can dry after rain. Crowded plants look full at first, but they grow weak when they fight for light and water.
Most of the wood, screws, soil, and compost for a bed this size adds up to $60 to $130, and you can lower that price by using boards you already have at home.
Water the bed well on the first day and check it each morning for the first few days. New soil dries fast on top, so a gentle soak helps the roots settle in.
Start with easy plants like salad leaves, beans, or herbs, and add more kinds as you learn what grows well in your yard. A simple bed can feed your kitchen for a few weeks at a time once it gets going.
2. A Brick Bed That Lasts for Years
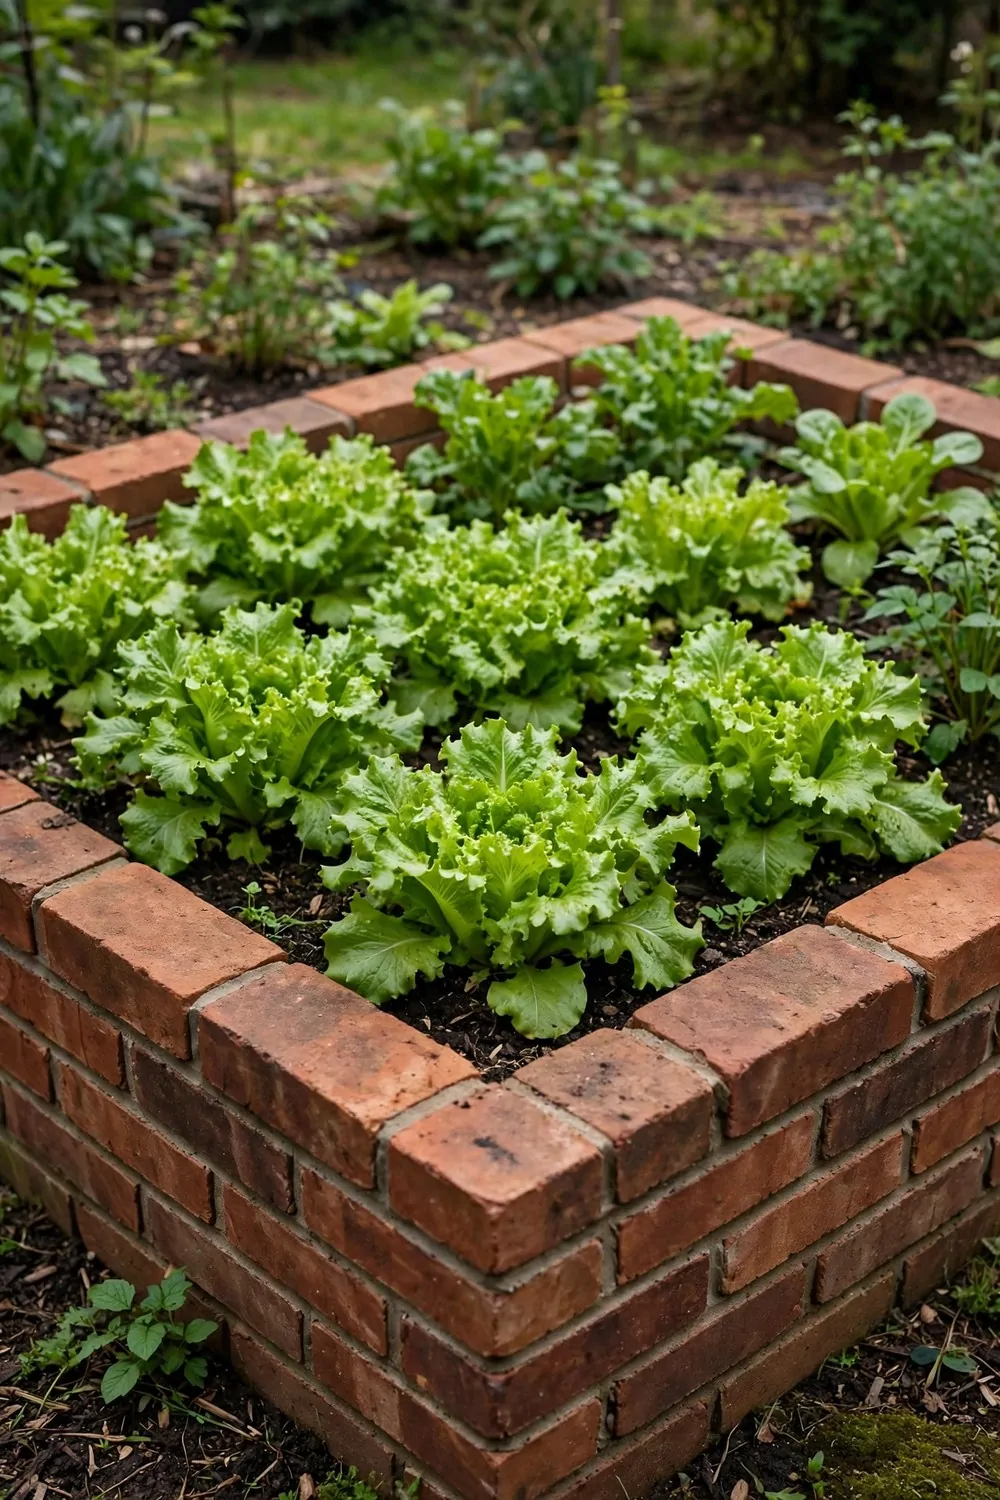
A brick bed feels solid from the first day, and it stays put through wind and rain. It also holds a little warmth from the sun, which plants seem to like.
You can lay bricks in a simple rectangle with no mortar if you want a quick build. Stack them two or three high, press each one firm, and check that the top line stays level as you go.
For a firmer bed, a thin bed of mortar between the bricks will lock them in place. Take your time with the first row, because every row above it follows that line.
Brick beds suit a spot near a wall or a path, where a wood bed might rot fast from damp. The brick edge also gives you a flat seat while you weed or pick leaves.
Fill the inside with the same soil mix you would use for a wood bed, and leave a small gap at the top so water does not spill over the edge. A mulch layer on top helps the soil stay damp for longer.
Keep the bed shape simple and leave room to walk all the way around it. A wide bed looks grand, but a narrow one is much easier to reach across.
If you buy new bricks, mortar, soil, and compost, the full build often lands between $180 to $420, while old bricks from a local yard can bring that price right down.
Wash brick dust off with plain soap and water before you plant, and let the bed dry for a day. Then plant herbs or salad leaves first, and watch how the bed holds water before you fill it with more kinds.
A brick bed can stay in the same place for years with almost no care. Just top up the soil each season and pull out weeds while they are still small.
3. A Corner Bed That Uses Dead Space
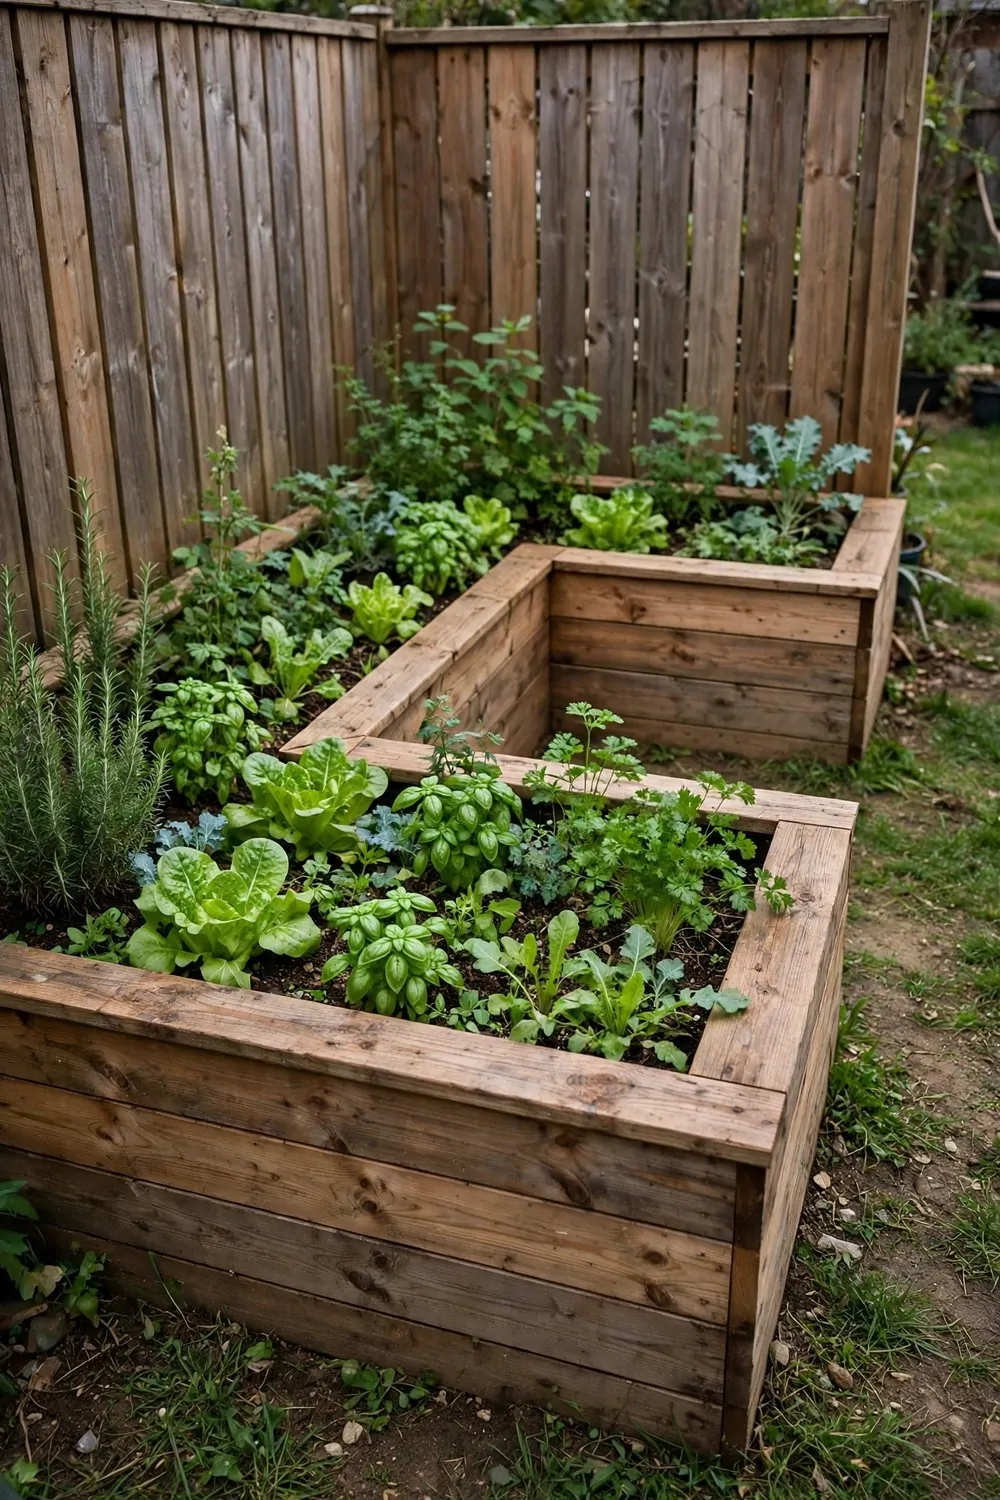
Every small yard has a corner that gets ignored, and a corner bed turns that dead space into a growing spot. It fits where a square bed would waste room.
Build the bed in an L shape or a triangle to match the corner of your fence or wall. Measure the space first, then cut your boards to fit snug against both sides.
A corner bed works well for tall plants at the back and low plants at the front. The tall ones get the fence for support, and the low ones stay in the sun at the edge.
Leave a small gap between the bed and the fence so air can move and the wood can dry after rain. Damp wood against a fence will rot much sooner than wood with air around it.
Fill the bed deep in the back and a little lower at the front, so rain runs off gently instead of pooling. A level top edge will help you see at a glance if the soil has sunk.
Plant the corner with things you pick often, like herbs for cooking or salad leaves for lunch. You will walk past that corner every day, so easy picks make sense there.
Putting this bed together with new wood, soil, and compost will run you about $50 to $110, and a corner made from spare boards costs even less.
Check the corner for shade through the day before you plant. Some corners stay cool and damp, and those suit leafy plants more than fruit that loves full sun.
Keep the front edge low enough to step over with a basket in your hands. A corner bed should feel easy to use, not like a wall you have to climb around.
4. Tiered Beds for a Small Slope
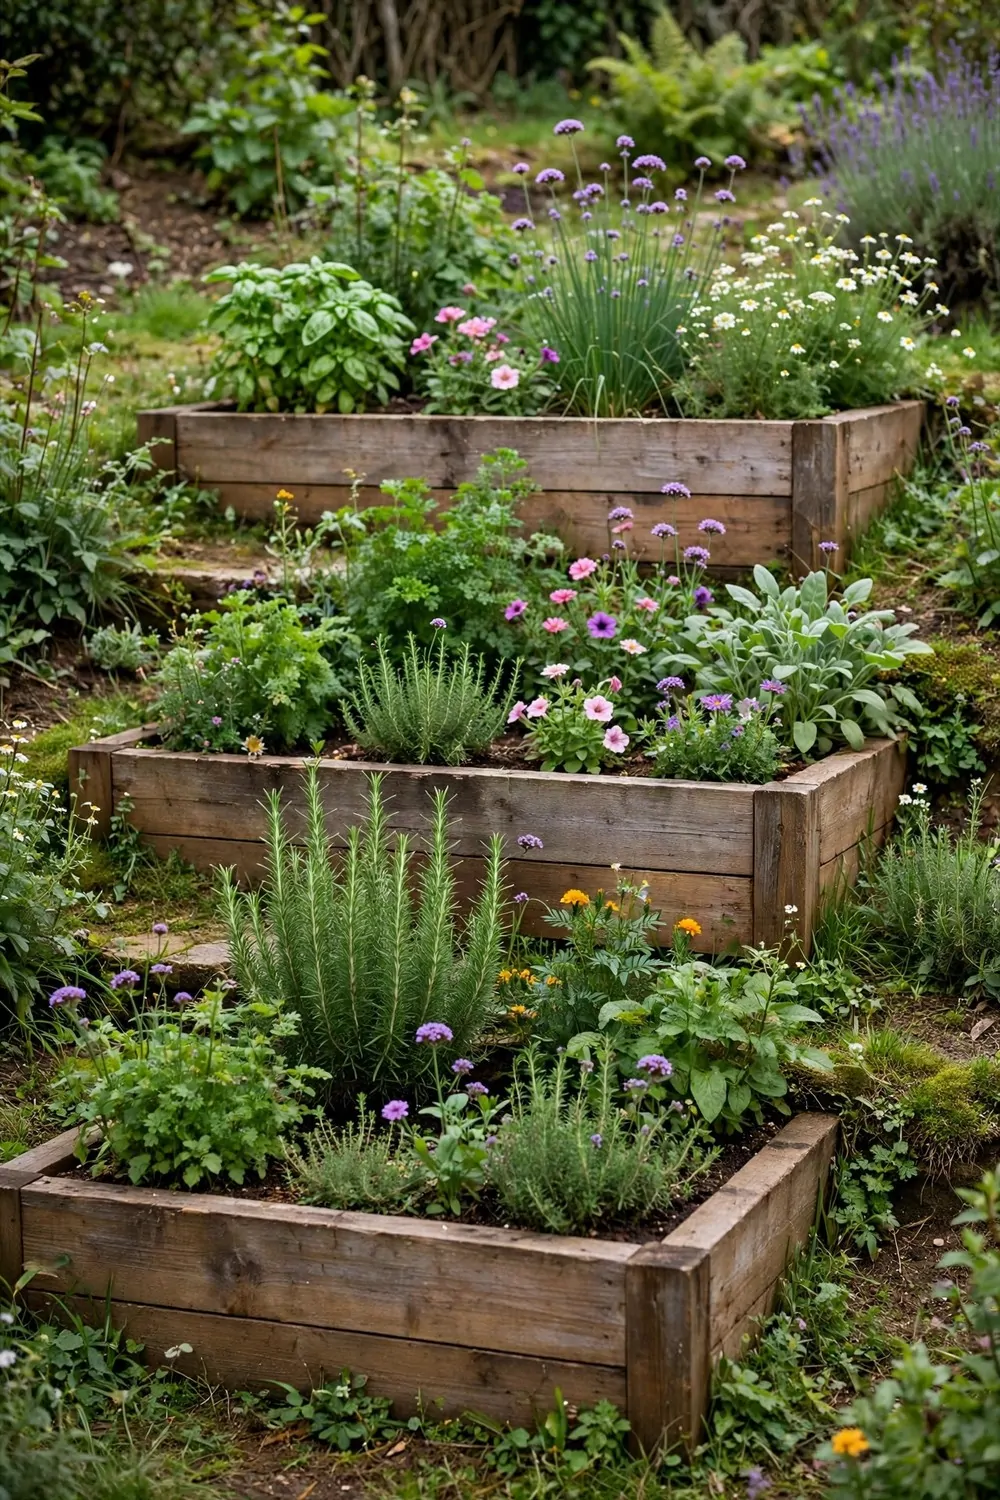
A slope can feel like a problem in a small yard, but tiered beds turn it into a set of flat growing steps. Each step holds its own soil and its own plants.
Start at the bottom of the slope and build the first low bed, then build the next one a little higher up. Leave a flat path between each tier so you can stand and work without slipping.
Use short boards or bricks for each tier, and pack soil firm behind each wall. A tier that is too tall will push soil forward after heavy rain, so keep each step low and wide.
Tiered beds drain well because water moves down from one step to the next. That helps roots stay firm, but it also means the top tier dries first and needs water sooner.
Plant the top tier with plants that like dry soil and the lower tiers with plants that like more water. You can learn a lot just by watching which tier stays damp the longest.
Add a layer of mulch to each tier to slow water as it runs down the slope. Mulch also keeps the soil from washing onto the path below.
For three small tiers with wood, soil, and compost, expect to spend roughly $140 to $320, with the price shifting a lot based on the size of your slope.
Walk the tiers after the first rain and look for soil that has moved or boards that have shifted. A quick fix early on saves a big repair later in the season.
Tiered beds look good from the house because each level shows a different row of green. They make a plain slope feel planned and full of life.
5. A Herb Bed by the Kitchen Door
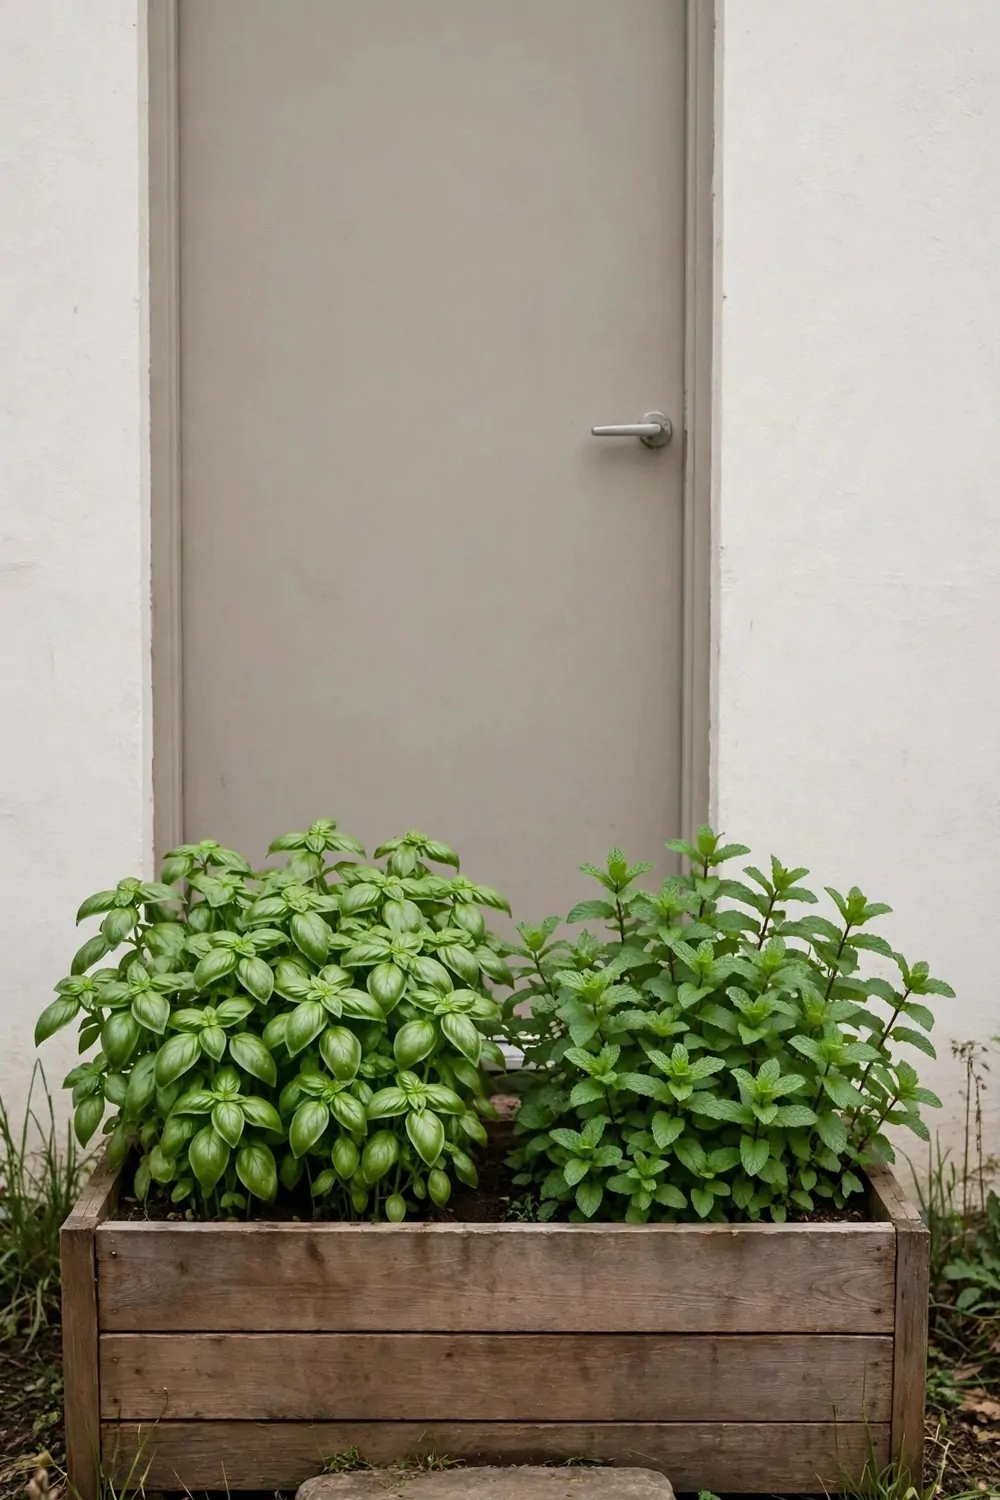
A herb bed by the kitchen door is one I use almost every day. I can step out, snip a few leaves, and be back at the stove in a minute.
Pick a spot close to the door that gets sun for a good part of the day. Herbs like light, and a sunny doorstep bed will give you strong flavour all season.
Keep the bed small and low so it does not block the path. A bed about as wide as your step is plenty for the herbs you use most in cooking.
Plant basil, mint, and other soft herbs in their own spots, because mint spreads fast and can crowd its neighbours. Give each herb room to grow wide at the base.
Use light, free soil that drains well, and do not overfeed herbs with rich compost. Too much feed makes soft leaves with weak flavour, while lean soil gives you strong taste.
Snip herbs in the morning when the leaves are fresh and full of scent. Cut just above a leaf joint, and the plant will branch out and grow fuller.
A small doorstep bed with wood, soil, and a few young herb plants comes to $35 to $80 in total, which makes it one of the cheapest beds in this post.
Water the bed lightly and often, and let the top soil dry a little between drinks. Herbs hate wet feet, and soggy soil will turn their leaves yellow fast.
Fresh herbs lift simple food like rice, pasta, beans, and bread, and a doorstep bed means you always have some to hand. Once you taste fresh leaves, dried jars will feel like a poor swap.
6. A Salad Bed for Fresh Leaves
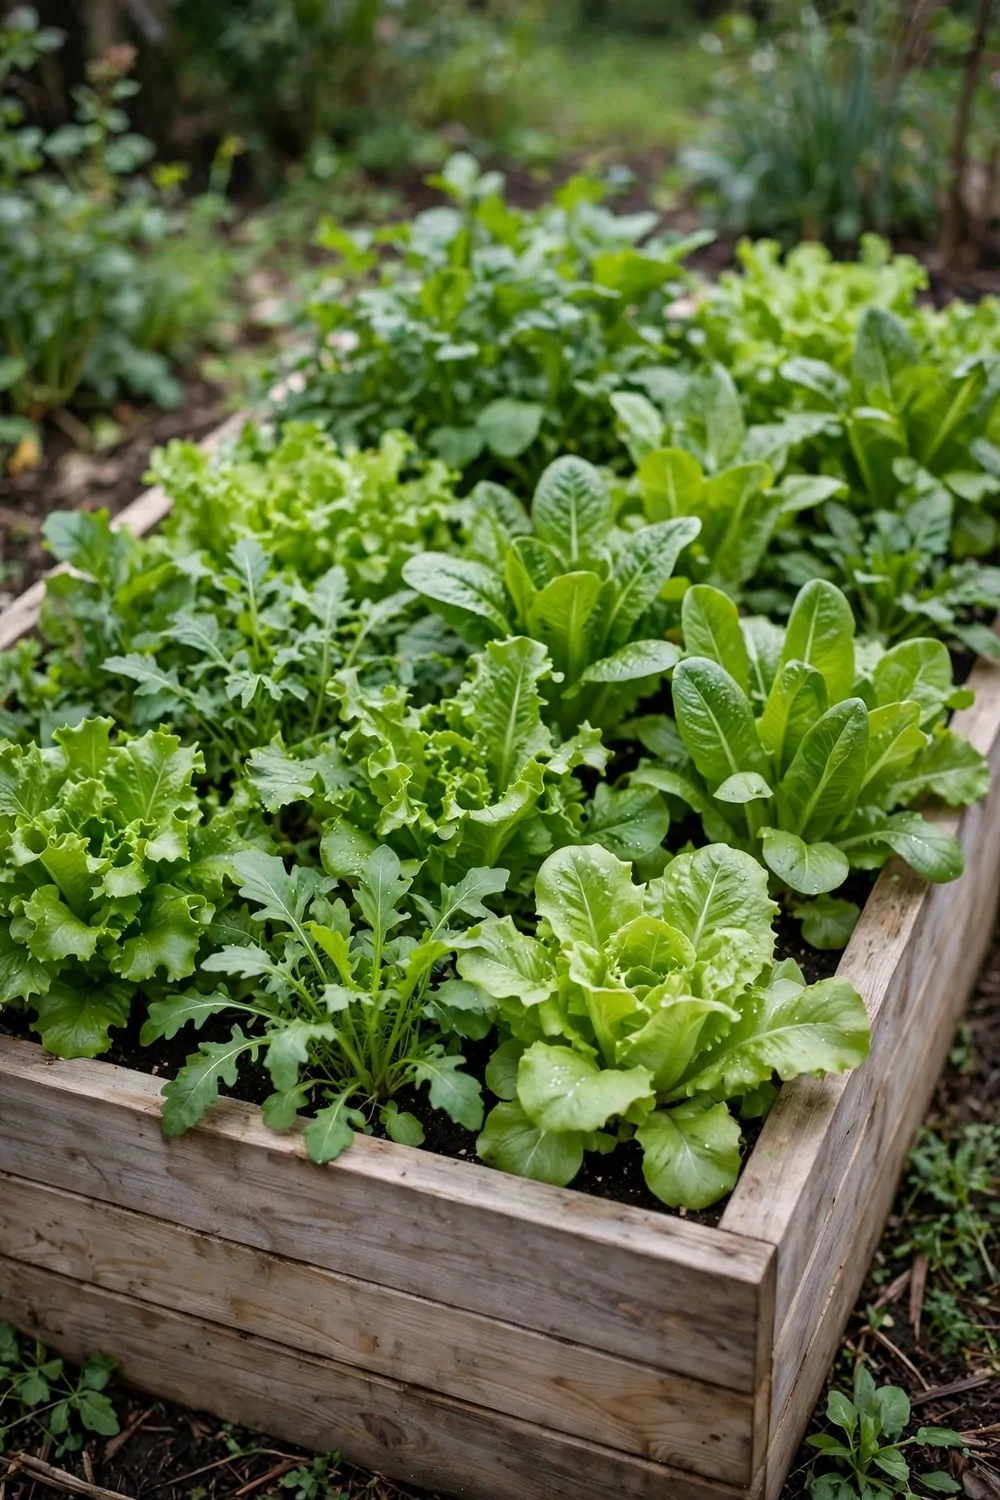
A salad bed gives you fresh leaves to pick a little at a time, all through the growing season. It is the bed I check first when I plan lunch.
Build the bed in a sunny spot with soft soil that stays damp but never soggy. Salad leaves grow fast in loose soil, and they turn bitter if they dry out for too long.
Sow seeds in short rows and thin them out as they grow, so each plant has space to form full leaves. Thin plants look bare at first, but they grow much stronger than a crowded row.
Pick the outer leaves first and leave the centre to keep growing. That way one plant can give you leaves for a few weeks instead of just one big pick.
Plant a new short row every week or two if you want a steady supply. A small bed with rows at different stages means you are never waiting for the next batch.
Cover young leaves with a light cloth on very hot days to stop them from wilting. A little shade at noon can keep leaves sweet and crisp.
Wood, soil, compost, and seed for a salad bed this size should set you back $45 to $95, and seed is cheap enough to try a few kinds at once.
Wash leaves well in plain water before you eat them, and dry them gently in a clean cloth. Fresh leaves taste best on the same day you pick them.
A salad bed suits a small yard because it gives a lot of food from a small patch. You do not need a big plot to fill a bowl with fresh green leaves.
7. A Flower Bed That Brings Bees
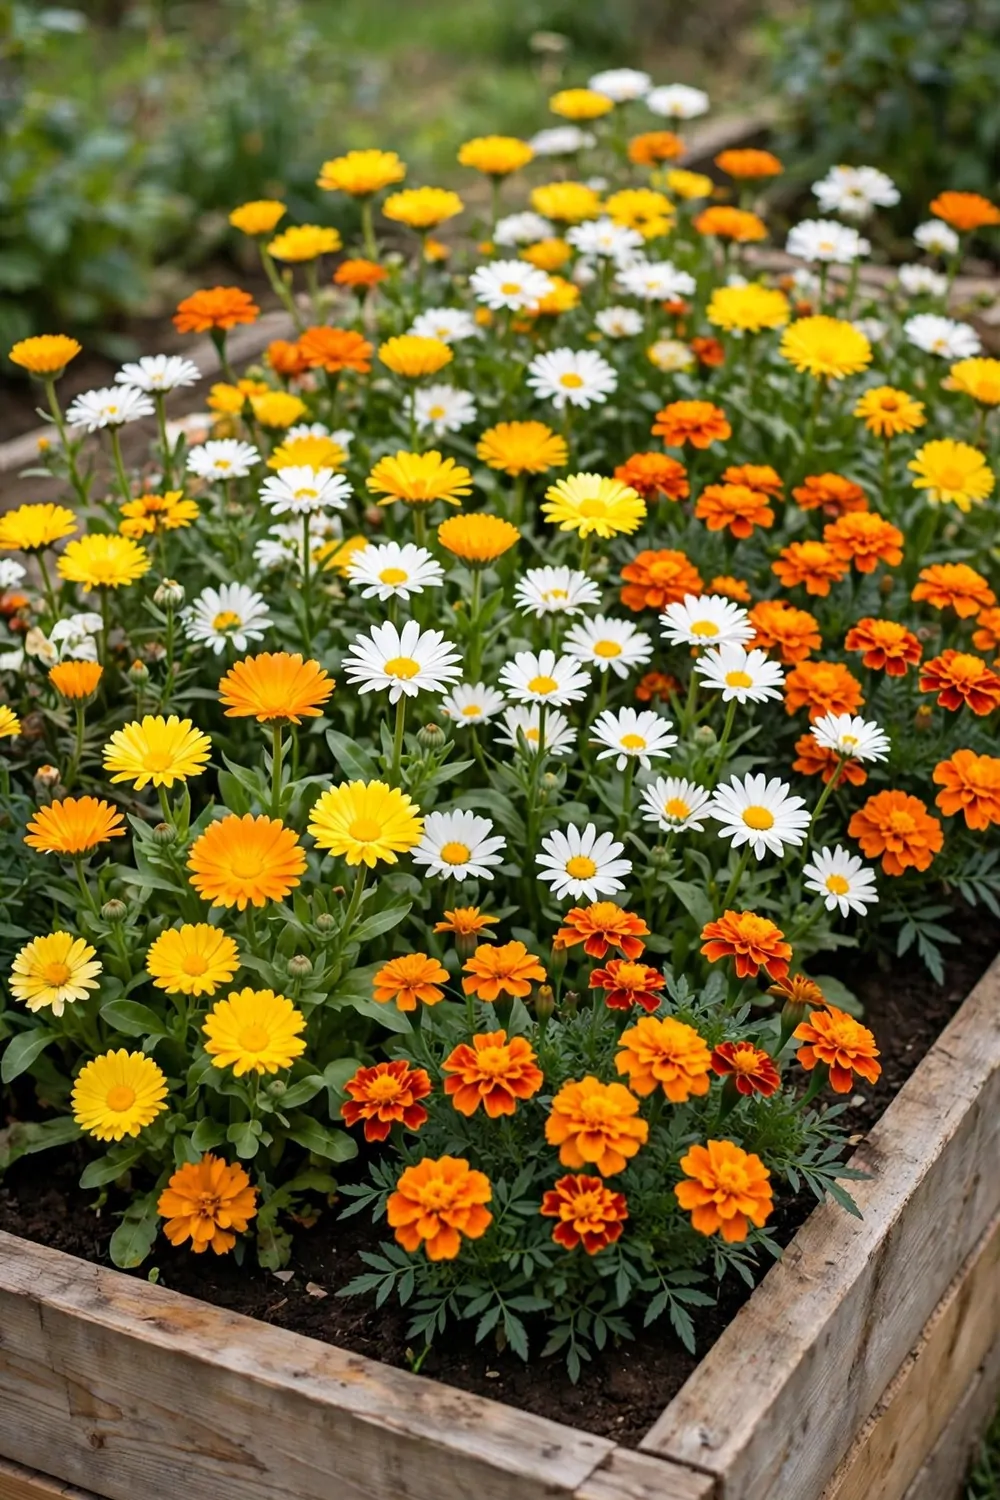
A flower bed for bees is a joy to watch, and it helps the rest of your garden too. Bees move from flower to flower, and that helps your vegetables set fruit.
Pick flowers with open, simple shapes that bees can reach with ease. Big, full blooms look grand, but bees often pass them by because the centre is hard to reach.
Plant in groups of the same kind, so bees can see a clear patch of colour from the air. A single flower here and there is pretty, but a group draws bees in much faster.
Mix early and late flowers in the same bed so something is always in bloom. Bees need food through the whole season, not just for one bright week.
Leave a small bare patch of dry soil near the bed for bees to rest on. They like a warm, dry spot to sit between visits to the flowers.
Do not spray the flower bed with strong cleaners or garden sprays. A bed for bees should stay clean and plain, with just soil, water, and sun.
All in, a flower bed with wood edging, soil, compost, and young plants will cost $55 to $125, and seed-grown flowers bring the price down even more.
Watch the bed in the morning to see which flowers the bees visit first. That tells you what to plant more of next time, and what to leave out.
A flower bed makes a small yard feel alive, and it fills the air with soft colour and movement. It is one of the simplest ways to help bees while you enjoy your garden.
8. A Narrow Bed Along the Fence
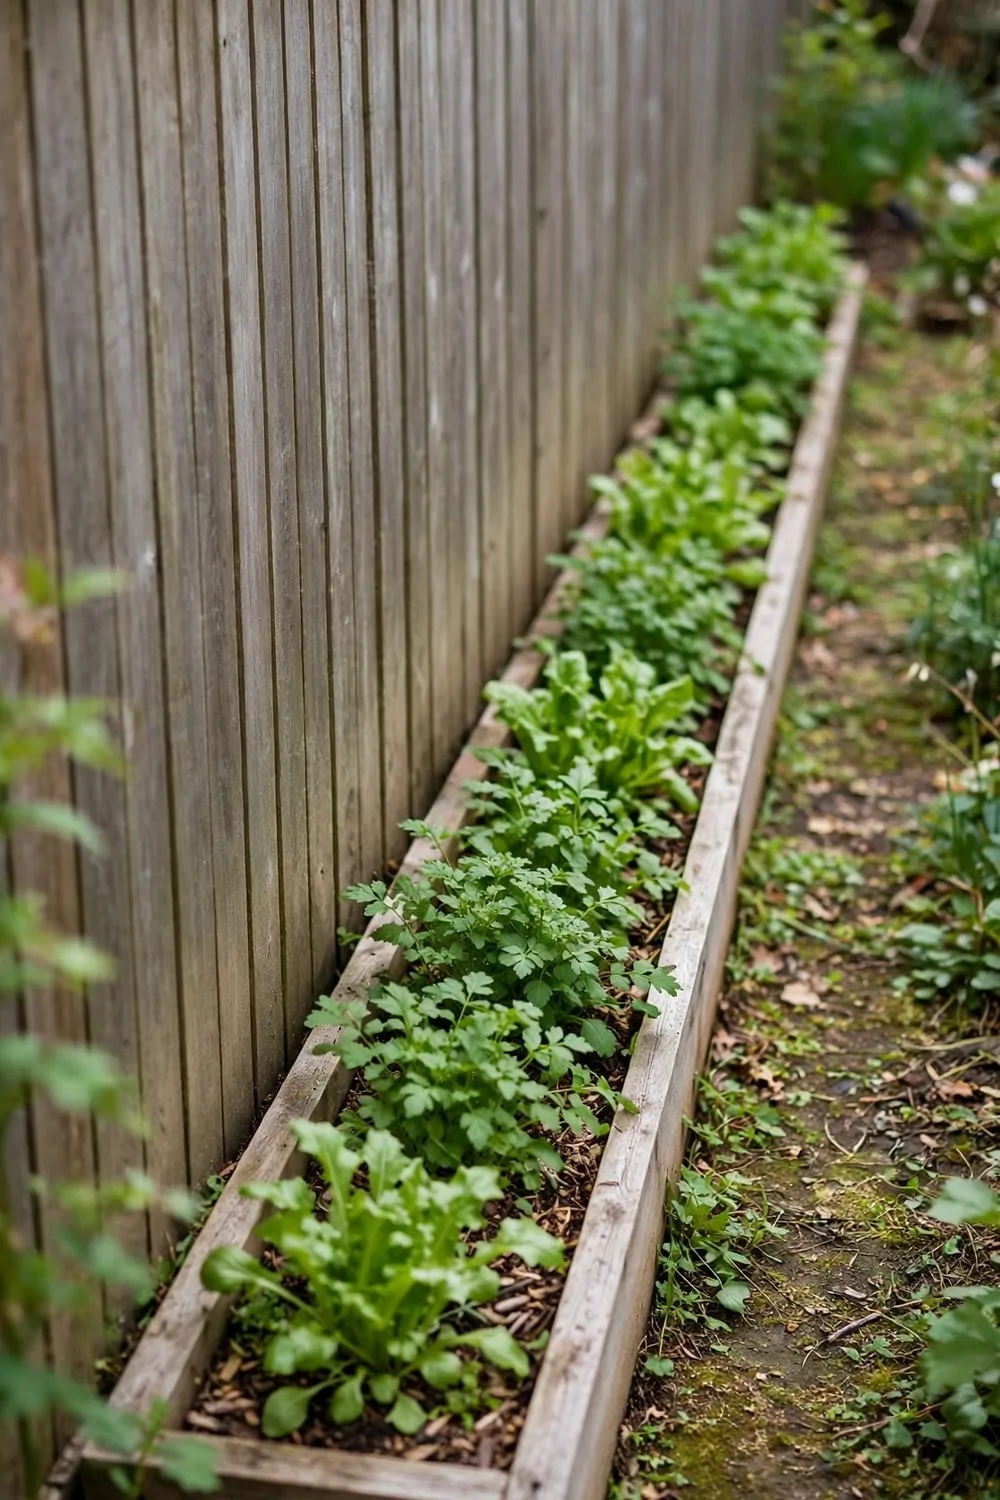
A narrow bed along the fence uses a strip of ground that often stays bare and weedy. It turns a plain fence line into a green edge.
Build the bed about a foot or two wide, so you can reach the fence side from the front without stepping inside. A bed that is too wide will leave the back row out of reach.
Fix a low board along the front edge to hold the soil in, and let the fence act as the back wall. Leave a small gap behind the board so the fence can dry after rain.
Narrow beds suit tall, slim plants that grow up the fence, plus low plants at the front edge. The fence gives shade in the morning and sun in the afternoon, so watch the light before you plant.
Fill the bed with deep, loose soil, because a narrow bed dries out fast in sun and wind. A thick mulch layer will help it hold water for longer.
Plant in a single line or two staggered lines, and leave space for air between plants. Crowded stems along a fence can trap damp air and invite mildew.
Boards, soil, compost, and plants for a fence bed of this length add up to $70 to $160, and the price grows with each extra foot you add.
Water the bed at the base of the plants, not over the fence boards. Wet wood rots fast, and dry boards last much longer.
A fence bed is easy to tend because you walk along one side and see every plant at once. It is a calm, tidy way to grow in a yard with little spare ground.
9. A Square Foot Bed for Tiny Yards
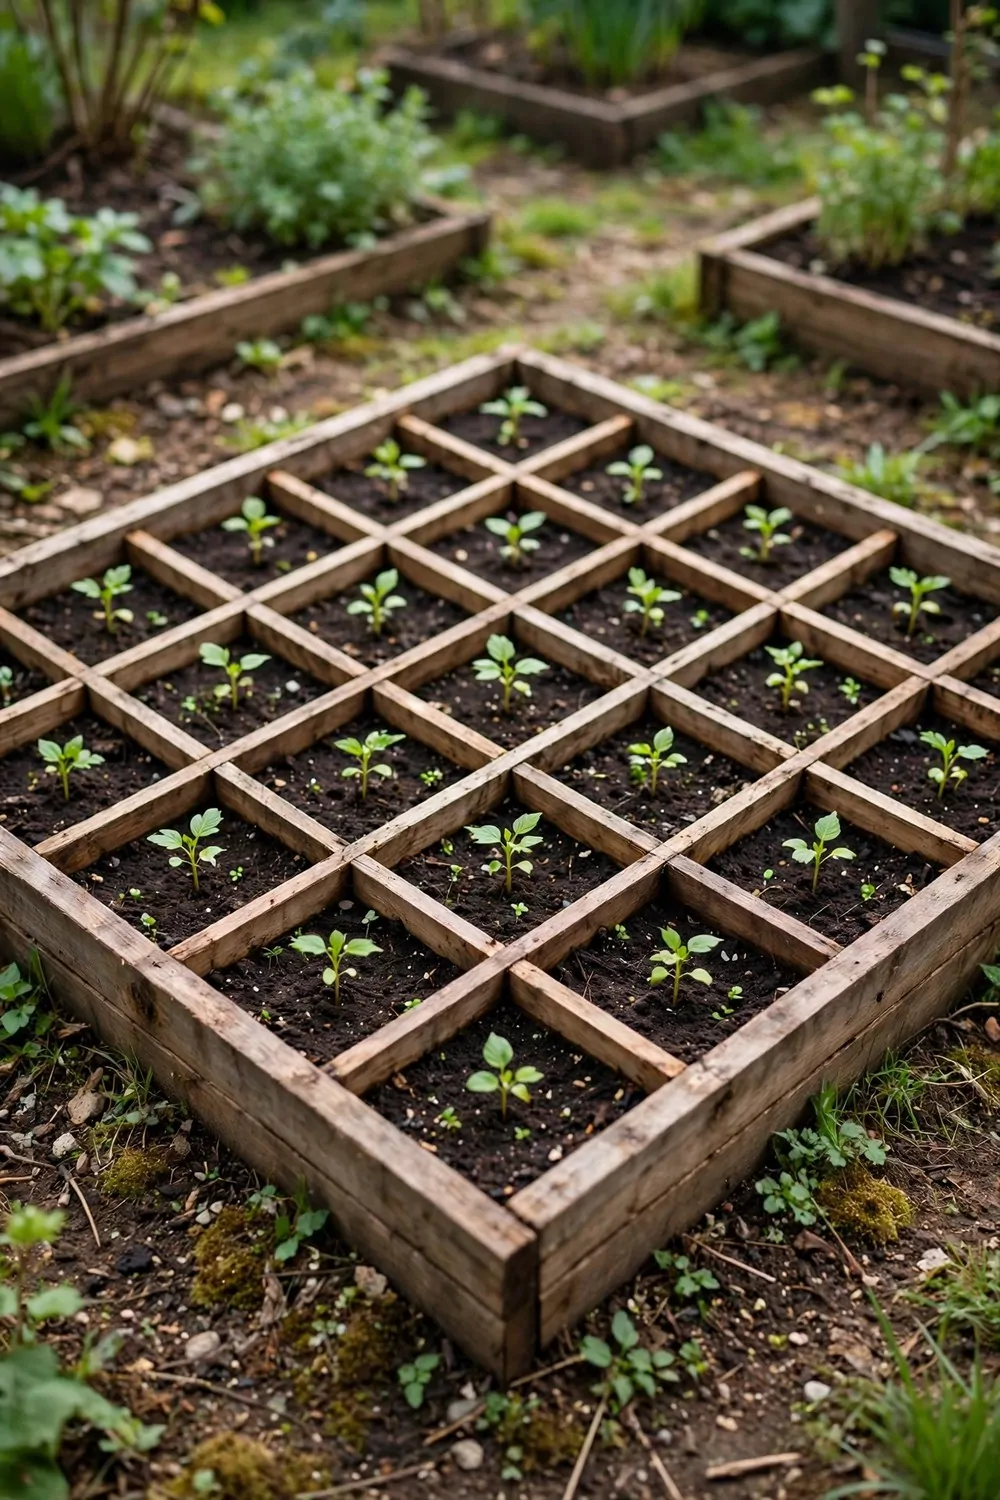
A square foot bed splits a small square into a grid, with one kind of plant in each square. It is a neat way to grow a lot in very little space.
Build a square bed about four feet across, then mark it into one-foot squares with thin strips of wood or string. Each square gets its own plant or small group.
Big plants like beans get a whole square to themselves, while small plants like salad leaves can share one square in a neat group. The grid stops you from overplanting by mistake.
Use deep, soft soil so roots can grow down in each square without hitting hard ground. A square foot bed works best when the soil stays loose all season.
Plant a new square as soon as one is empty, so the bed never sits bare. A fresh sowing in an empty square keeps the harvest going for a few weeks longer.
Keep a simple map of what you planted in each square, on paper or on a phone note. It is easy to forget what is where once the leaves grow tall.
You can build this grid bed, fill it, and plant it for $65 to $140, which is fair value for how much food a small square can give.
Water each square gently with a can, and check the corners most often because they dry first. A square bed in full sun needs water more often than a bed in part shade.
A square foot bed is perfect for a first garden because it feels small and clear. You can see the whole bed at once, and you always know what to do next.
10. A Bed on Legs for Easy Reach
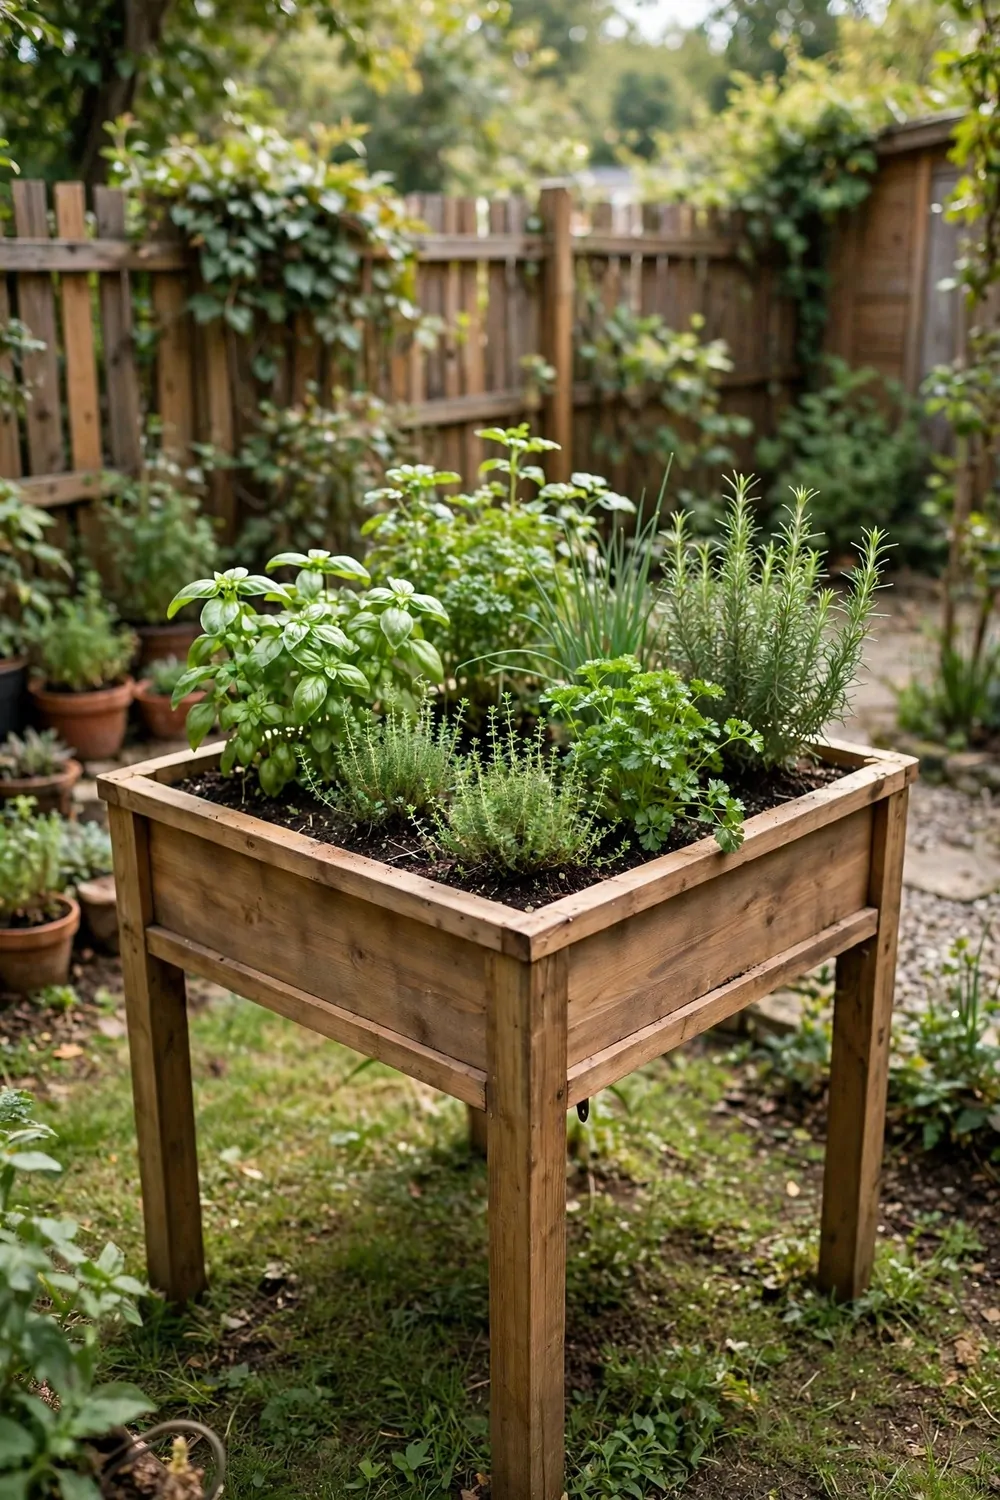
A bed on legs lifts the soil up to waist height, so you can tend plants without bending down. It is kind to backs and knees, and it suits a small patio too.
Build a strong frame with four legs and a deep box on top, and fix the legs firm so the bed does not wobble when it is full of wet soil. Wet soil is heavy, so the frame must be solid.
Line the box with a plain cloth or a sheet of strong plastic with small holes for drainage. Without drainage, the soil will stay wet and the roots will rot.
Keep the bed no wider than you can reach across from one side. A wide bed on legs is hard to tend in the middle, even when it is raised up high.
Fill the box with light soil, not heavy clay, because heavy soil puts too much weight on the legs. A mix of topsoil and compost is light enough and holds water well.
Plant herbs, salad leaves, and small vegetables in a bed on legs, and leave tall plants for ground beds. Tall plants can make a raised bed top heavy in wind.
Strong wood, legs, lining, soil, and compost for this build usually total $110 to $260, and sturdy legs are worth the extra spend for safety.
Check the legs and joints each season, and tighten any screws that have worked loose. A bed on legs must stay steady all year, even when it is full and wet.
A bed on legs brings the garden up to you, and it makes growing feel easy and close. It is a good pick if bending down is hard for you.
| Idea | Typical Cost |
|---|---|
| A Simple Wood Bed You Can Build in a Weekend | $60 to $130 |
| A Brick Bed That Lasts for Years | $180 to $420 |
| A Corner Bed That Uses Dead Space | $50 to $110 |
| Tiered Beds for a Small Slope | $140 to $320 |
| A Herb Bed by the Kitchen Door | $35 to $80 |
| A Salad Bed for Fresh Leaves | $45 to $95 |
| A Flower Bed That Brings Bees | $55 to $125 |
| A Narrow Bed Along the Fence | $70 to $160 |
| A Square Foot Bed for Tiny Yards | $65 to $140 |
| A Bed on Legs for Easy Reach | $110 to $260 |
11. A Compost Corner That Feeds Your Soil
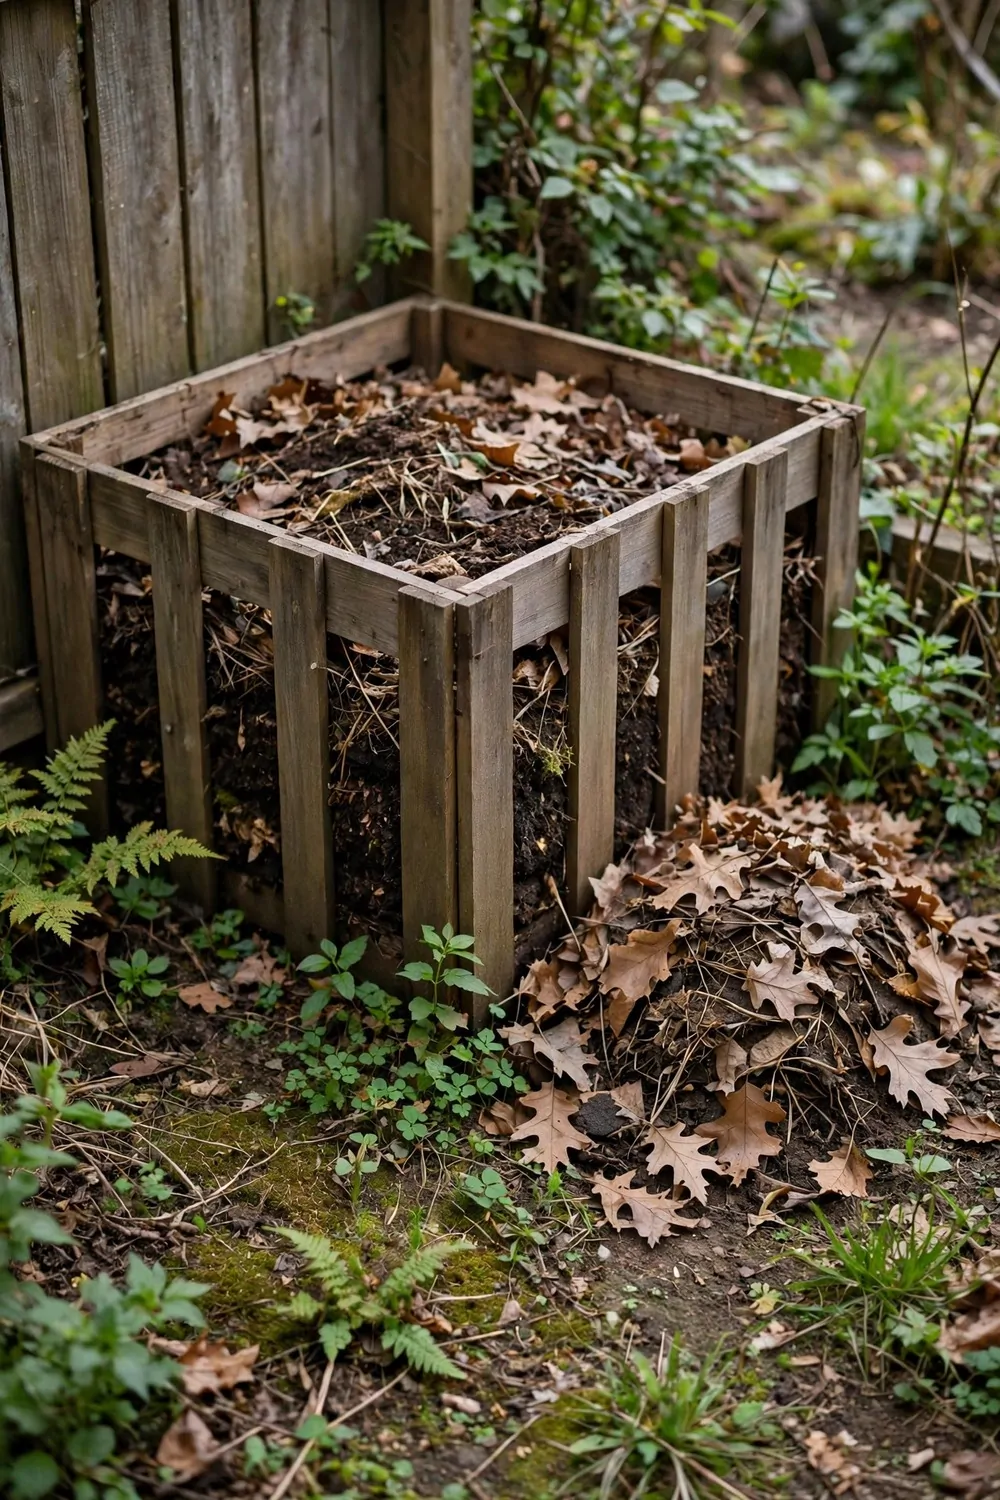
A compost corner turns kitchen scraps and garden waste into dark, rich food for your soil. It is the cheapest way to feed a raised bed.
Pick a corner at the back of the yard, away from the house, with room for a simple bin made from boards or wire. Air must flow through the bin, so leave gaps between the boards.
Add a mix of green waste like fresh leaves and vegetable peelings, plus brown waste like dry leaves and torn cardboard. A good mix breaks down faster than a heap of one kind alone.
Keep the heap damp like a wrung-out cloth, and turn it with a fork every week or two. Turning lets air in, and air helps the heap break down without bad smells.
Do not add meat, bread with oil, or any food that draws pests to the heap. Plain vegetable scraps, fruit peelings, and garden leaves are the safest things to add.
Cover the heap with a board or an old cloth to keep rain off and warmth in. A covered heap stays damp and warm, and it breaks down much faster than an open one.
A simple compost bin with boards, wire, and a fork will cost $30 to $75 to set up, and the compost it makes will save you money on bagged feed later.
Wait until the compost is dark, crumbly, and smells like fresh earth before you use it. If you can still see whole leaves or peelings, give it more time to finish.
Mix a few handfuls of finished compost into each raised bed before you plant. Your soil will feel softer, hold water better, and feed your plants for a few weeks.
12. Good Soil Mix for Raised Beds
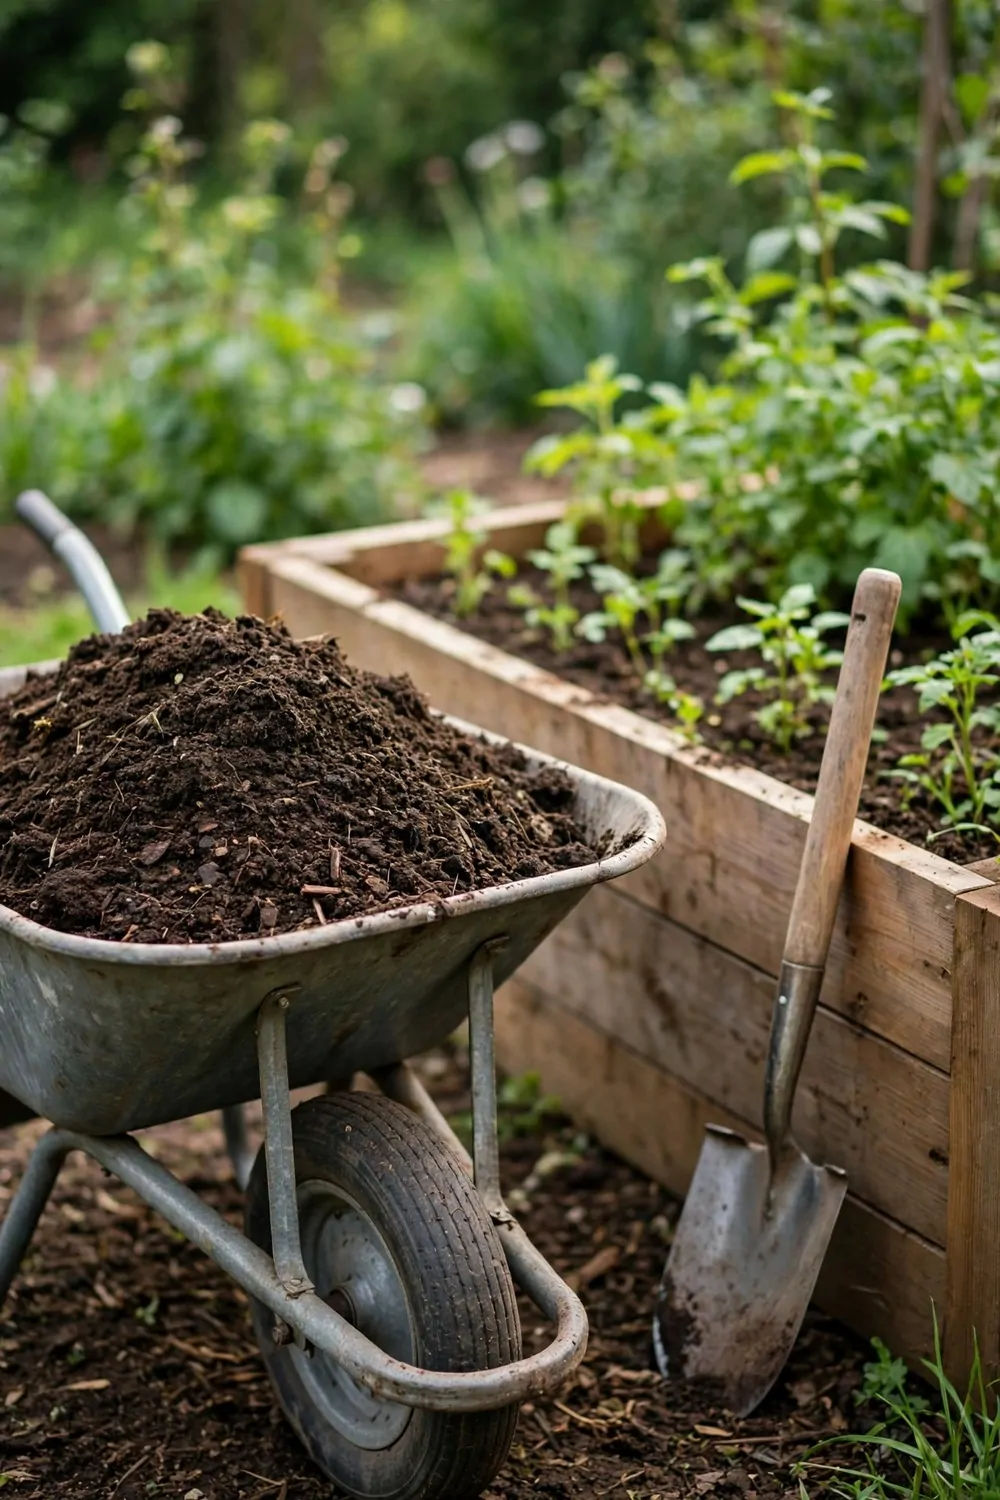
Good soil is the heart of every raised bed, and it is worth getting right before you plant a single seed. Plants can only grow as well as the soil lets them.
Mix equal parts of topsoil, compost, and a light, airy material like leaf mould or coarse sand. That blend holds water, drains well, and stays soft enough for roots to push through.
Avoid heavy clay soil on its own, because it sets hard in sun and stays wet in rain. If your ground is clay, use more compost to lighten the mix.
Fill the bed to a little below the top edge, then water it well and let it settle for a day. The soil will sink a little, and you can top it up before you plant.
Dig a hand into the mix and squeeze a fistful to test it. Good soil holds its shape for a moment, then falls apart when you poke it, and it should not feel sticky or dusty.
Top up the bed with fresh compost each season, because soil sinks and loses food as plants grow. A bed that is never topped up will grow weaker plants each year.
Buying topsoil, compost, and the light mix for one bed will come to $40 to $100, and bulk bags are often cheaper than many small bags.
Do not use soil from a building site or a road edge, because it may hold rubble or grime. Clean garden soil from a trusted source is always the safer pick.
Keep a spare bag of compost by the bed so you can feed plants as they grow. A little extra food at the right time can turn a weak plant into a strong one.
13. A Watering Can Routine That Works
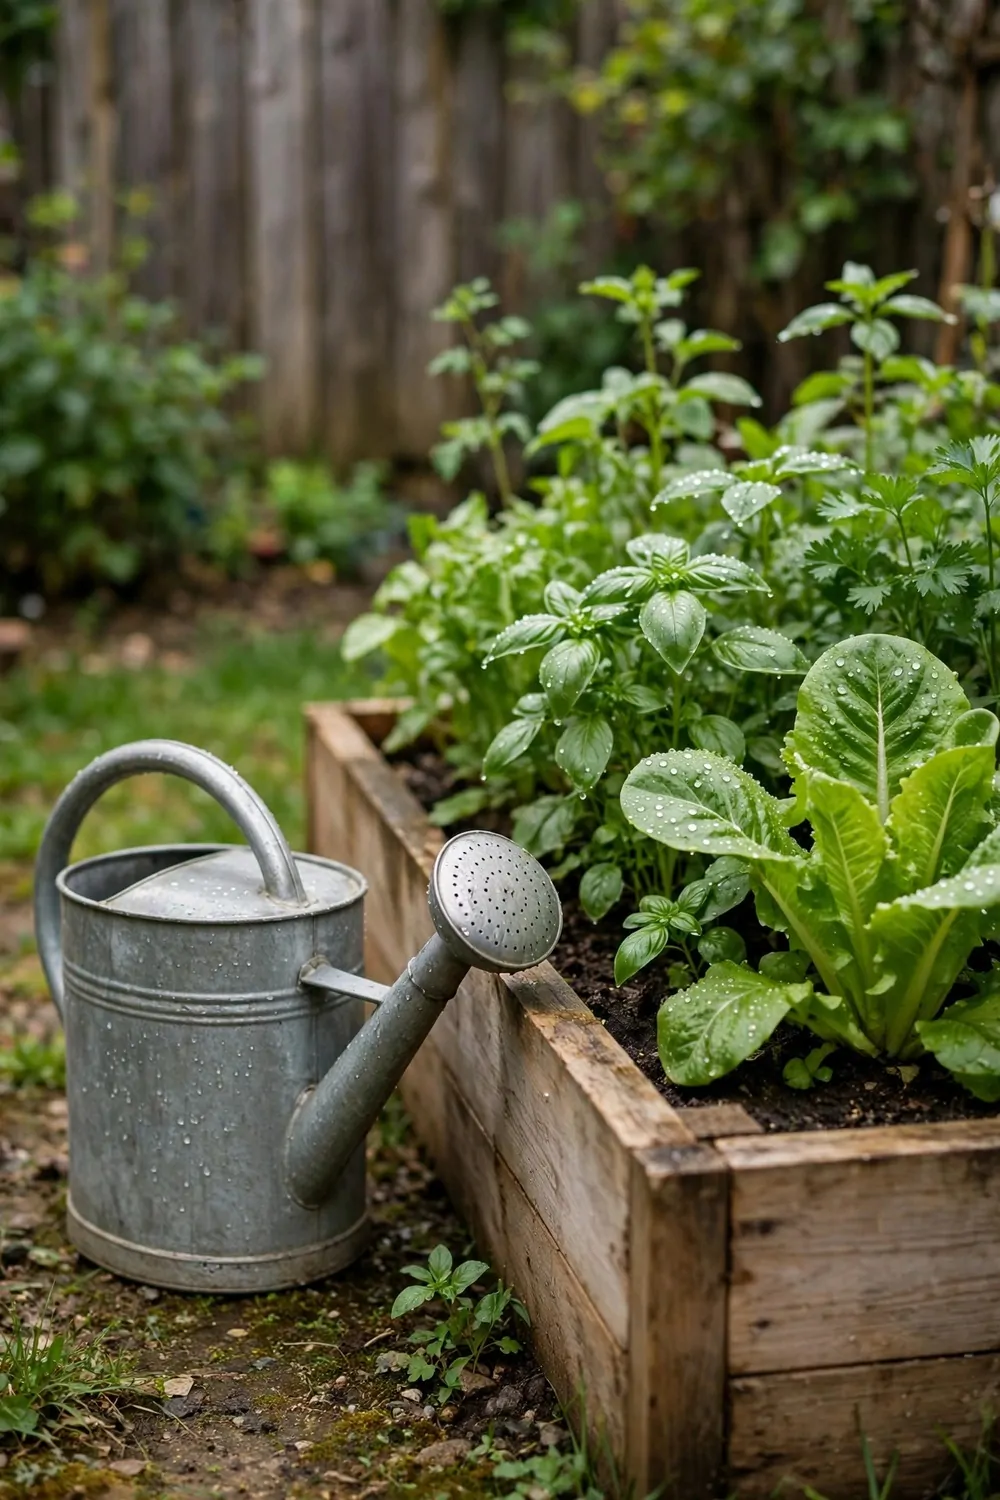
A good watering routine is simple, steady, and easy to keep up. Plants like a regular drink, not a flood one day and nothing the next.
Water early in the morning when the air is cool and the sun is low. Leaves dry fast in the morning sun, and wet leaves at night can invite mildew.
Water at the base of the plant, right on the soil, so the water goes to the roots. Water on the leaves washes off fast and does little good in hot sun.
Give the soil a slow, deep soak instead of a quick sprinkle on top. A deep drink helps roots grow down, while a light sprinkle keeps roots near the surface.
Check the soil with your finger before you water again. If the top inch feels dry but the soil below feels damp, wait a little longer before you water.
Use a can with a fine rose head for young plants and seeds, so the water falls soft and does not wash seeds away. A strong jet can move soil and bare small roots.
A good watering can, a spare rose head, and a simple rain gauge for the bed will cost $25 to $60, and a can this size will last for years with basic care.
Keep the can full and near the bed, so watering feels quick and easy. If the can is far away in a shed, you will water less often than your plants need.
Watch your plants after you water, and learn how fast each bed dries out. A steady routine that fits your yard is better than any fixed rule from a book.
14. A Drip Line for Busy Weeks
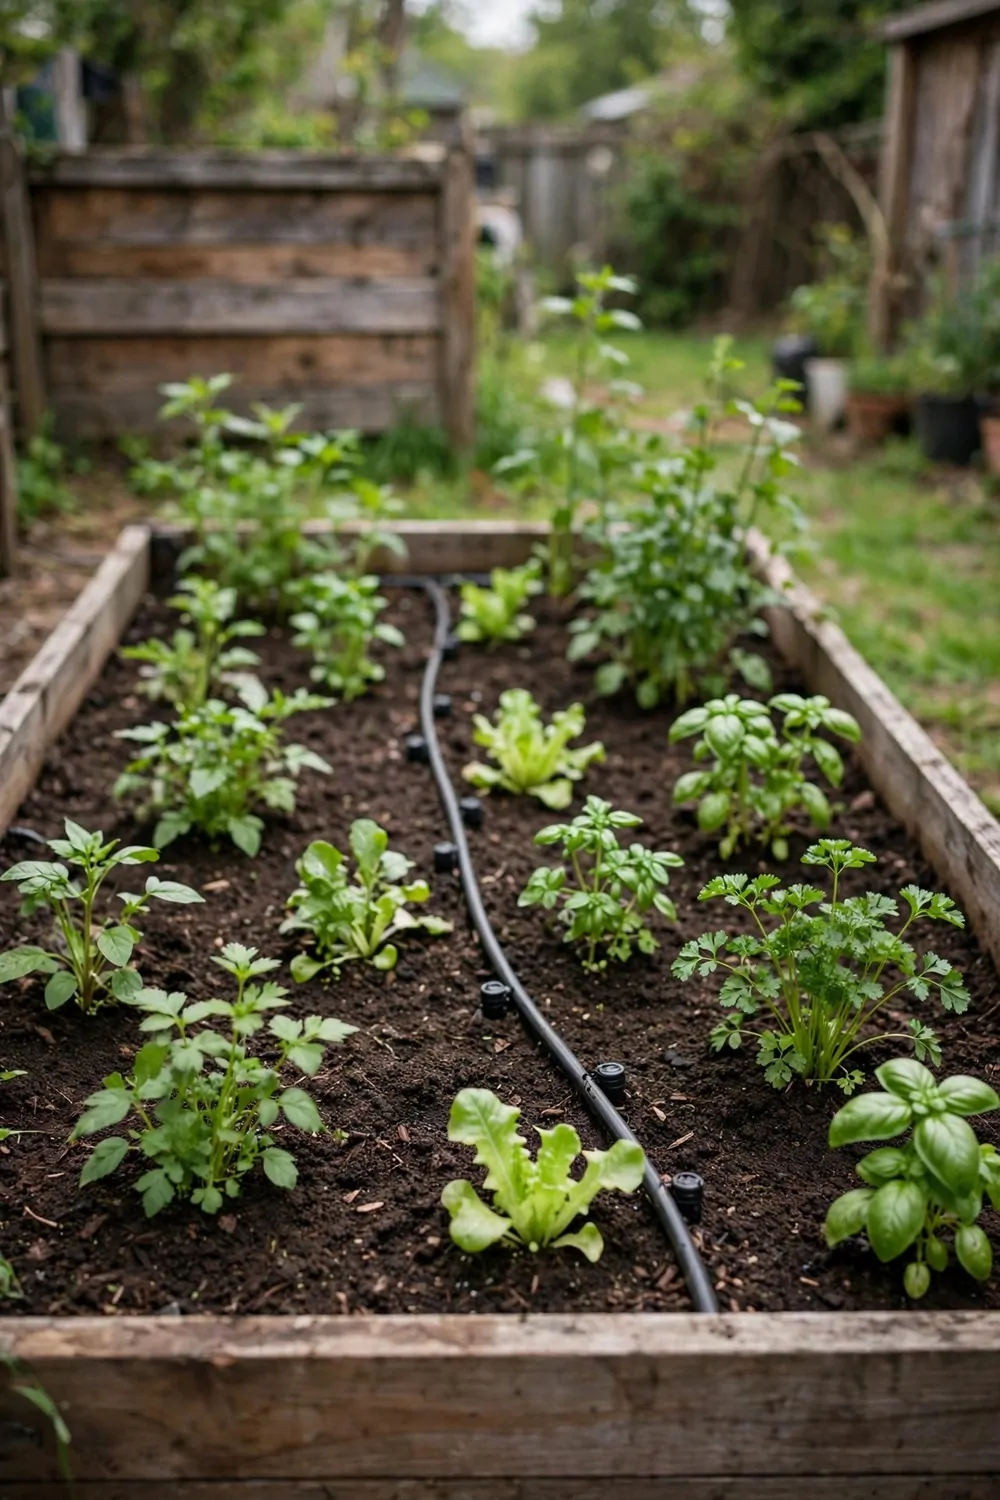
A drip line is a thin hose with small holes that lets water drip slow and steady at the base of your plants. It waters while you get on with your day.
Lay the line along each row in the bed, with a hole near the base of each plant. Press the line flat on the soil and hold it down with small pegs so it stays in place.
Connect the line to a tap with a simple timer if you want it to run on its own. A timer can give the bed a short drink each morning, even when you are away from home.
Drip lines save water because the water goes straight to the roots and does not spray over paths or leaves. You will use less water than a hose, and the soil will stay damp for longer.
Check the holes once a week to make sure none are blocked with soil or grit. A blocked hole leaves one plant dry while the rest get a drink, so a quick check matters.
Cover the line with a thin layer of mulch to keep it cool and out of the sun. Sun can make thin hose brittle over time, and mulch keeps it working for longer.
A starter kit with hose, pegs, connectors, and a basic timer will run $55 to $130, and you can add more lines later as your beds grow.
Run the line for a short time at first, then check how deep the water has soaked into the soil. You can add a few more minutes each day until the soil feels damp a few inches down.
A drip line is a kind helper for busy weeks, and it keeps your raised beds watered when life gets in the way. Your plants will stay steady, and you will worry less.
15. A Trellis Bed for Climbing Beans
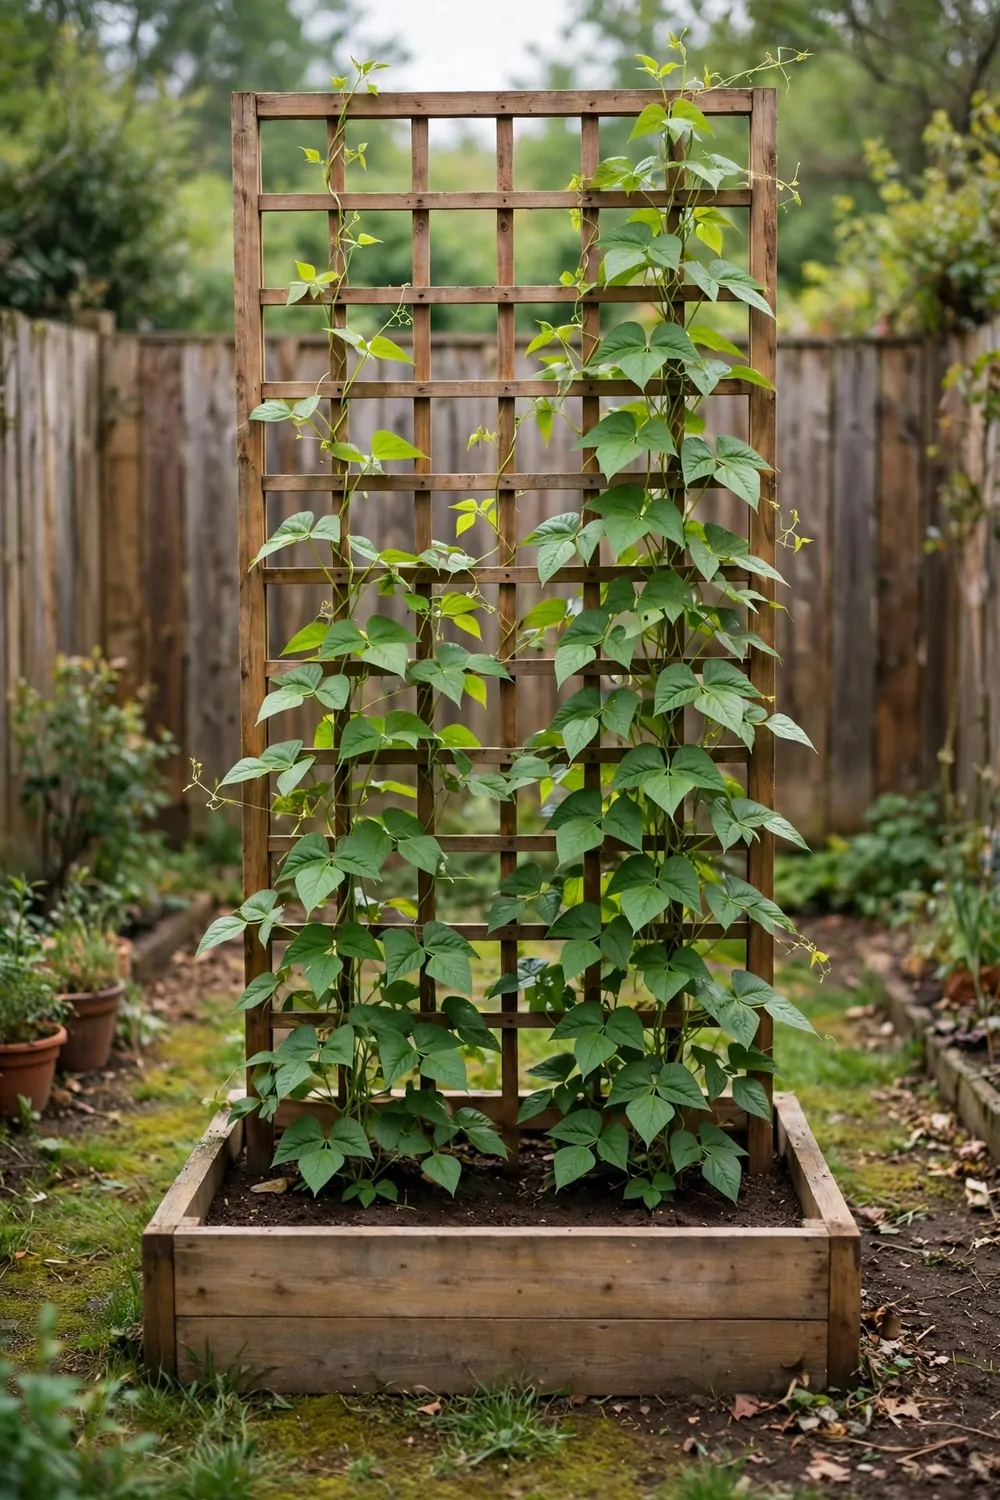
I love watching beans climb up a tall trellis in a small yard. It feels like the plants are reaching for the sky while they save ground space for you.
Pick a sunny spot near a fence or a wall for this bed. Beans like warmth and light for most of the day. A spot that gets six hours of sun works well for them.
Build the bed about four feet long and two feet wide. That size gives you room for two rows of beans and still lets you reach the middle with ease.
Fix a simple trellis at the back of the bed with two tall posts and some netting or string tied between them.
Fill the bed with loose soil mixed with old leaves or compost from your pile. Loose soil lets the roots spread and helps water drain away after rain.
Push the seeds into the soil about one inch deep. Leave a small gap between each seed so the plants have room to grow. Water the soil well on the first day so the seeds settle in.
Guide the young stems toward the trellis as they grow taller. They will soon wind around the strings on their own and climb up fast.
Most of the wood, netting, soil, and seeds for this bed land near $45 to $95 in total, and you can reuse the trellis year after year.
Pick the beans when they feel firm and look full in the pod. I like to pick a few each day so the plant keeps making more. Fresh beans taste so good in a simple pan with rice or pasta.
16. A Strawberry Bed for Sweet Snacks
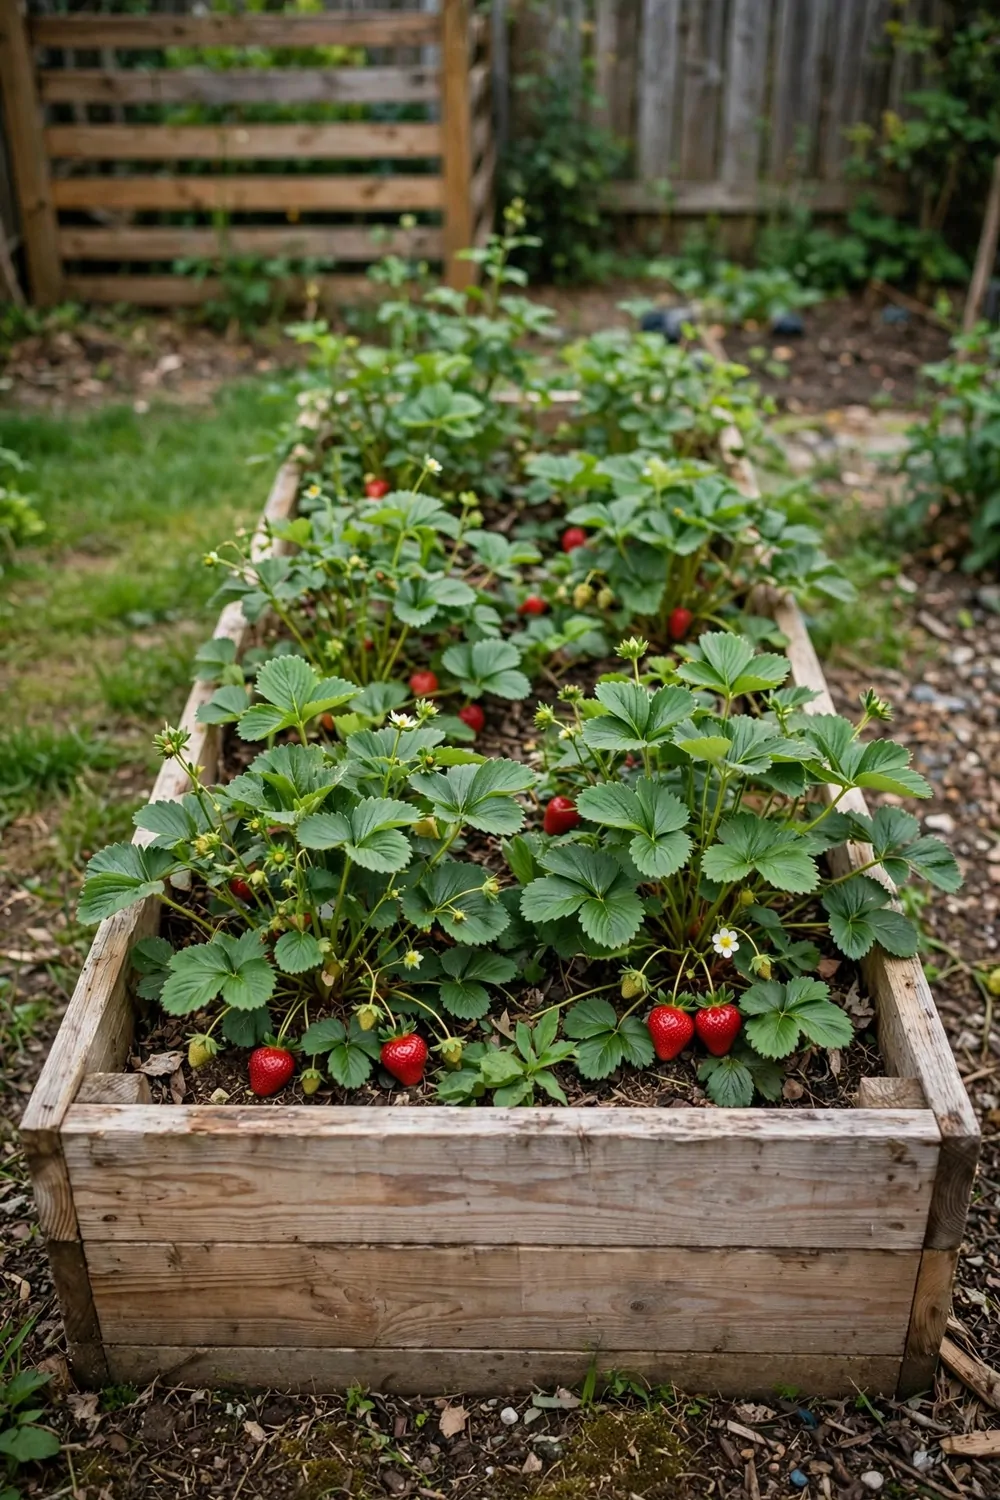
Strawberries are my favorite sweet treat from the garden. A small raised bed gives you just enough fruit for snacks all through the warm weeks.
Find the sunniest corner you have for this bed. Strawberries need lots of light to turn red and sweet. A spot by a low wall that holds warmth works very well.
Make the bed low and wide so you can reach every plant from the edge. I like a bed about six inches high and three feet wide for easy picking.
Fill it with soft soil and mix in some old leaves to keep it light. Strawberries hate wet feet, so the soil must drain well after you water.
Set each plant about a foot apart in a neat row. Tuck the roots down and keep the green crown just above the soil line. Press the soil firm around each plant and give it a good drink of water.
Add a thin layer of straw or dry leaves around the plants. This keeps the fruit clean and holds water in the soil on hot days.
Watch for runners that spread out from the main plants. You can snip them off or let one or two root down to make new plants for next year.
I spent $50 to $90 on plants, soil, and straw for my first strawberry bed, and the plants came back again the next year.
Pick the fruit when it is fully red all over. Taste one warm from the sun and you will know why I love this bed. I share the extra fruit with friends and we eat it plain or with bread and fruit.
17. A Bed for Root Vegetables
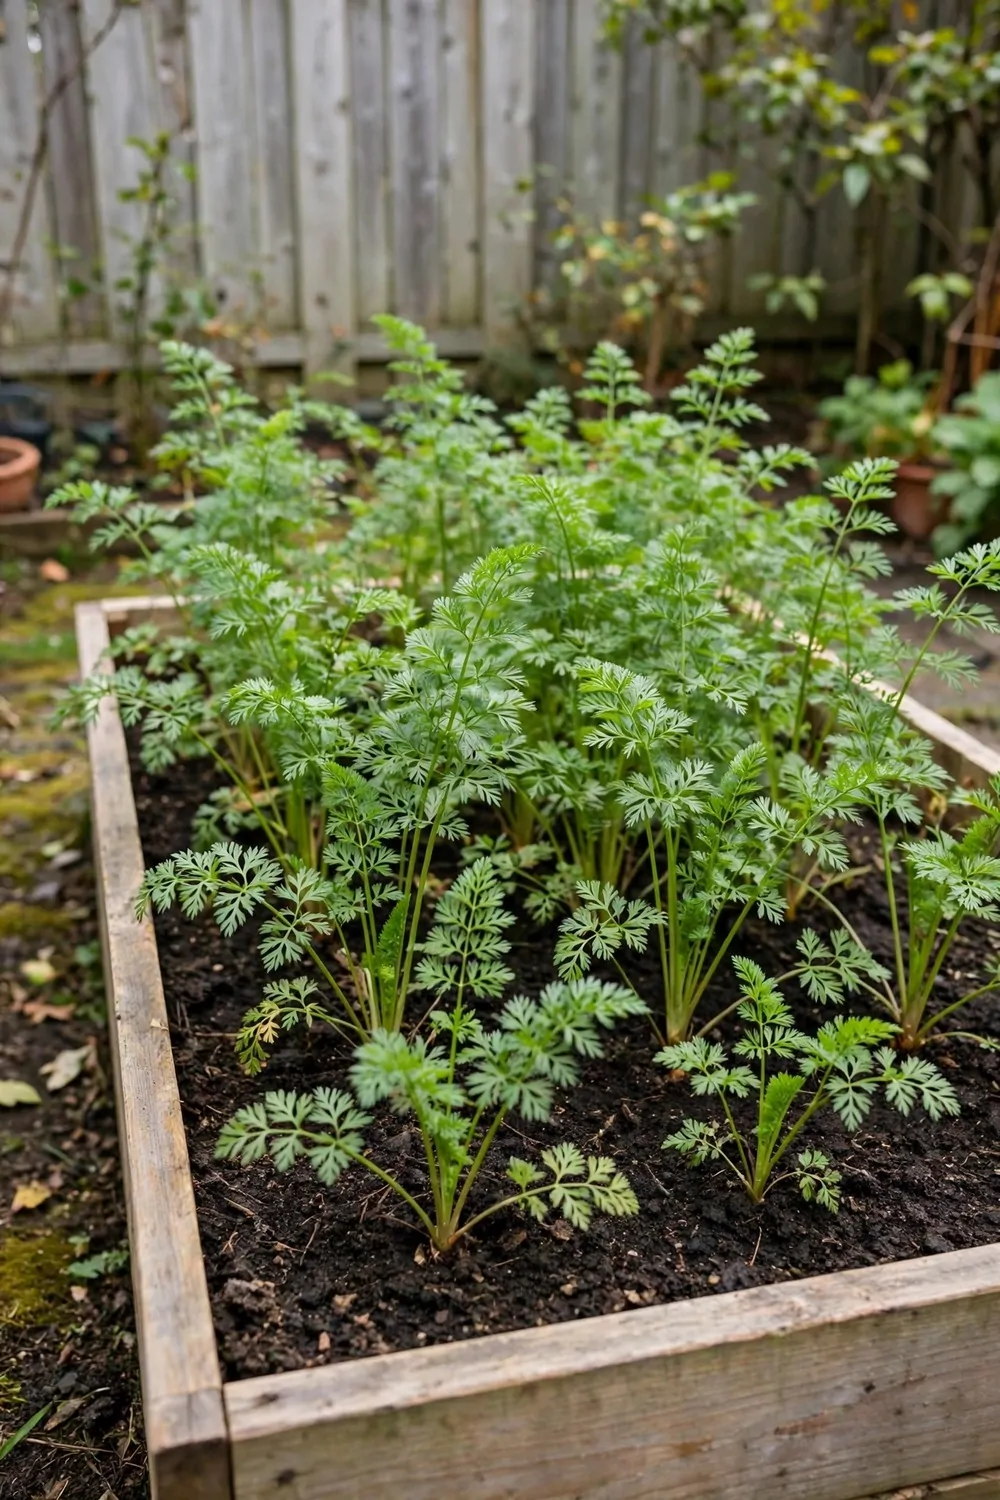
Root vegetables grow down where you cannot see them, and that makes them fun to pull up. A deep raised bed gives carrots and beets the soft soil they need to grow long and straight.
Build this bed at least twelve inches deep. Shallow soil makes short roots that split or fork. Deep soil lets each root grow down in a neat line.
Pick a spot with full sun and good air flow. Roots like cool soil but warm tops, so sun on the leaves helps a lot.
Fill the bed with loose soil and take out any small stones you find. Stones can bend a young root and make it grow in a funny shape.
Sow the seeds in shallow rows and cover them with a thin layer of soil. Keep the soil damp for the first few weeks. Thin the young plants so each one has room to swell.
Water the bed with care and do not flood it. A gentle soak each day beats a hard rush of water that washes the seeds away.
Pull one root now and then to check how big they are getting. When they feel thick and look bright, it is time to pull a few for your meals.
A deep bed of this size with seeds and soil often adds up to $40 to $85 from start to finish.
I rinse the roots well with plain water before I cook them. They taste sweet and soft in a warm pot with rice and vegetables. My family likes them best when they are fresh from the bed that same day.
18. A Pollinator Bed With Bright Flowers
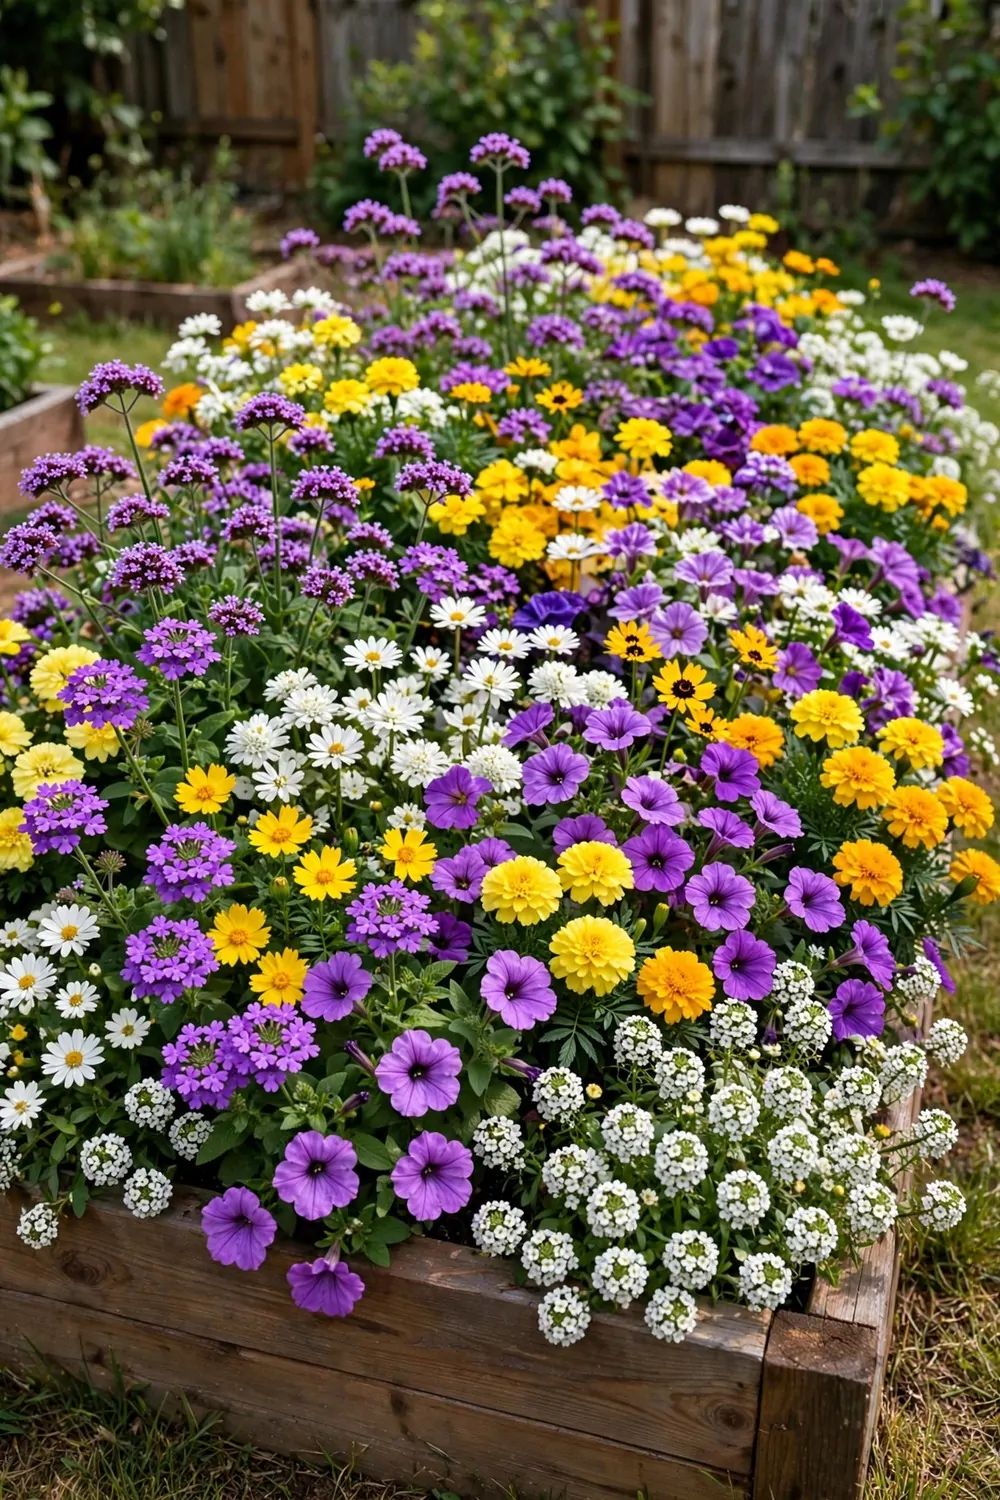
Bees and butterflies bring life to a small yard. A bed full of bright flowers gives them food and gives you color all season.
Pick a sunny spot where you can see the flowers from your door. Pollinators love open sun and calm air. A spot near your vegetable beds helps those plants too.
Build a low bed and fill it with light soil. Flowers do not need deep soil, so a bed about eight inches high works fine.
Choose three or four kinds of flowers that bloom at different times. This way the bed has color from early in the season to late in the season.
Plant tall flowers at the back and short ones at the front. This keeps every bloom easy to see. Leave small gaps so air can move between the stems.
Water the bed in the morning so the leaves dry by night. Wet leaves at night can bring trouble that you do not want.
Let a few flowers go to seed at the end of the season. Birds will visit for the seeds, and you can save some for next year.
Seeds, soil, and wood for this flower bed came to $35 to $75 for me, and the blooms lasted for weeks.
I like to sit near this bed in the morning and watch the bees work. It is calm and it makes the whole yard feel alive. You will smile every time a butterfly lands on a bright bloom.
19. A Shade Bed for Leafy Greens
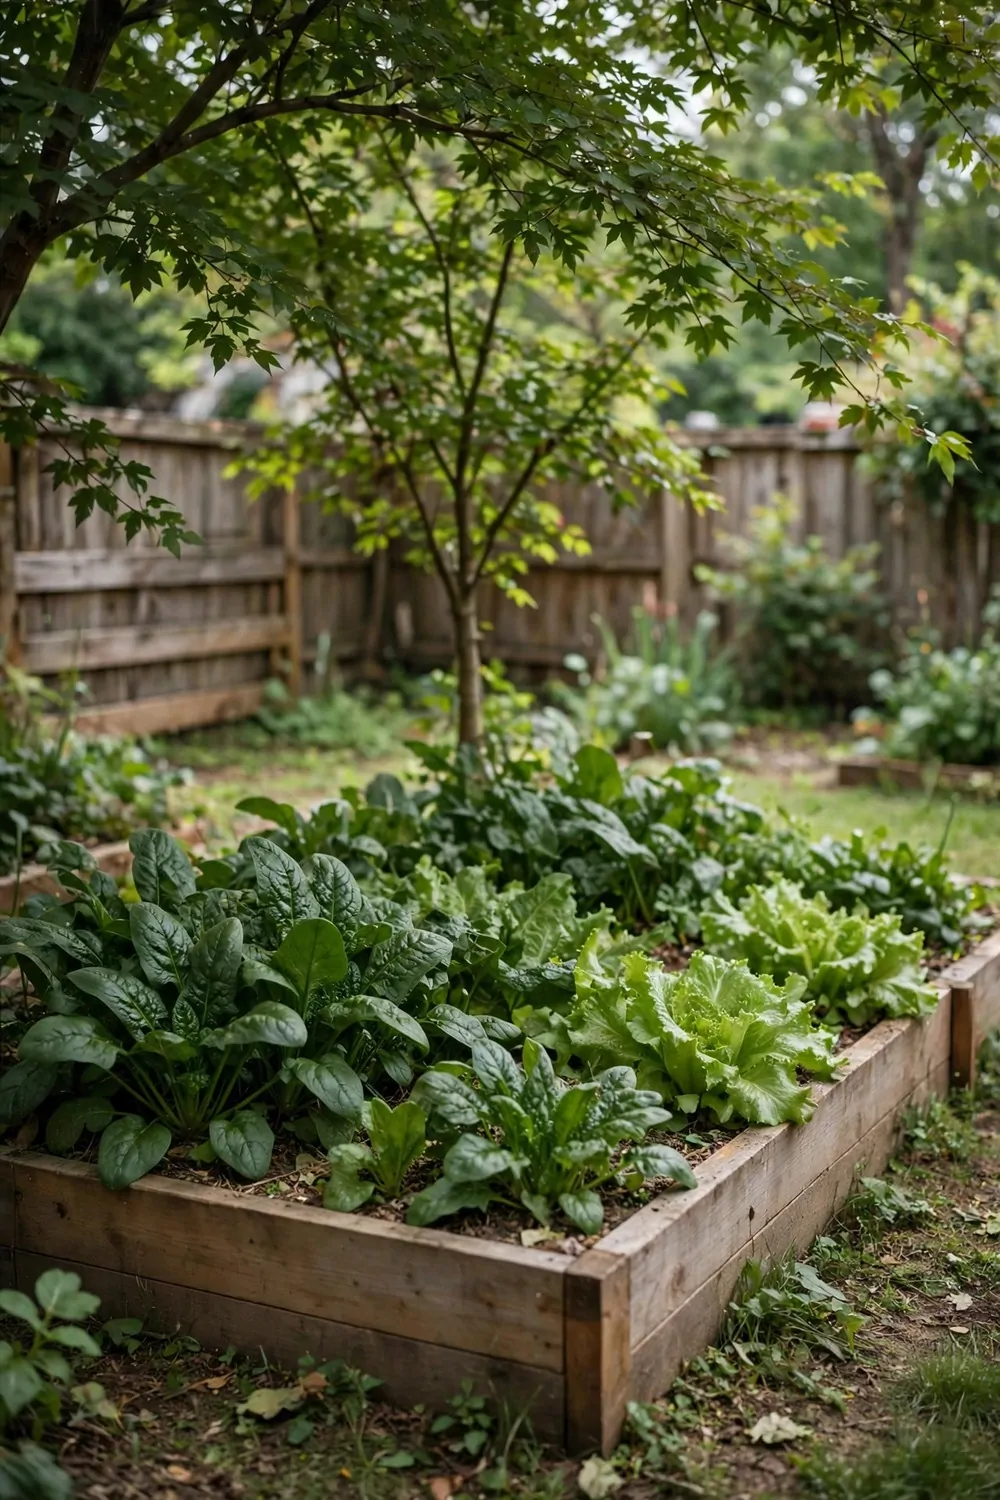
Leafy greens love cool shade and soft soil. A bed under a tree or by a tall fence can grow fresh leaves for weeks.
Find a spot that gets morning sun and afternoon shade. Hot midday sun can make the leaves taste bitter. Gentle light keeps them tender and green.
Build a low bed with rich soil and lots of old leaves mixed in. Greens feed fast, so rich soil helps them grow big leaves.
Sow the seeds in rows and cover them with a thin layer of soil. Keep the top of the soil damp until the tiny plants show.
Thin the young plants so each one has space to spread. Crowded leaves stay small and weak. I pull the extra plants and use the small leaves in my meals.
Water the bed often but with a light hand. Greens wilt fast on a hot day, so a little water in the morning helps a lot.
Pick the outer leaves first and leave the center to keep growing. This way one plant can feed you for many days in a row.
For my shade bed the boards, soil, and seed packets together were $30 to $70, which felt fair for weeks of fresh leaves.
I wash the leaves well and eat them fresh with bread and vegetables. They taste crisp and clean when they come straight from the bed. A small bed like this is a good start if you are new to growing food.
| Idea | Typical Cost |
|---|---|
| A Compost Corner That Feeds Your Soil | $30 to $75 |
| Good Soil Mix for Raised Beds | $40 to $100 |
| A Watering Can Routine That Works | $25 to $60 |
| A Drip Line for Busy Weeks | $55 to $130 |
| A Trellis Bed for Climbing Beans | $45 to $95 |
| A Strawberry Bed for Sweet Snacks | $50 to $90 |
| A Bed for Root Vegetables | $40 to $85 |
| A Pollinator Bed With Bright Flowers | $35 to $75 |
| A Shade Bed for Leafy Greens | $30 to $70 |
20. A Sunny Bed for Tomatoes and Peppers
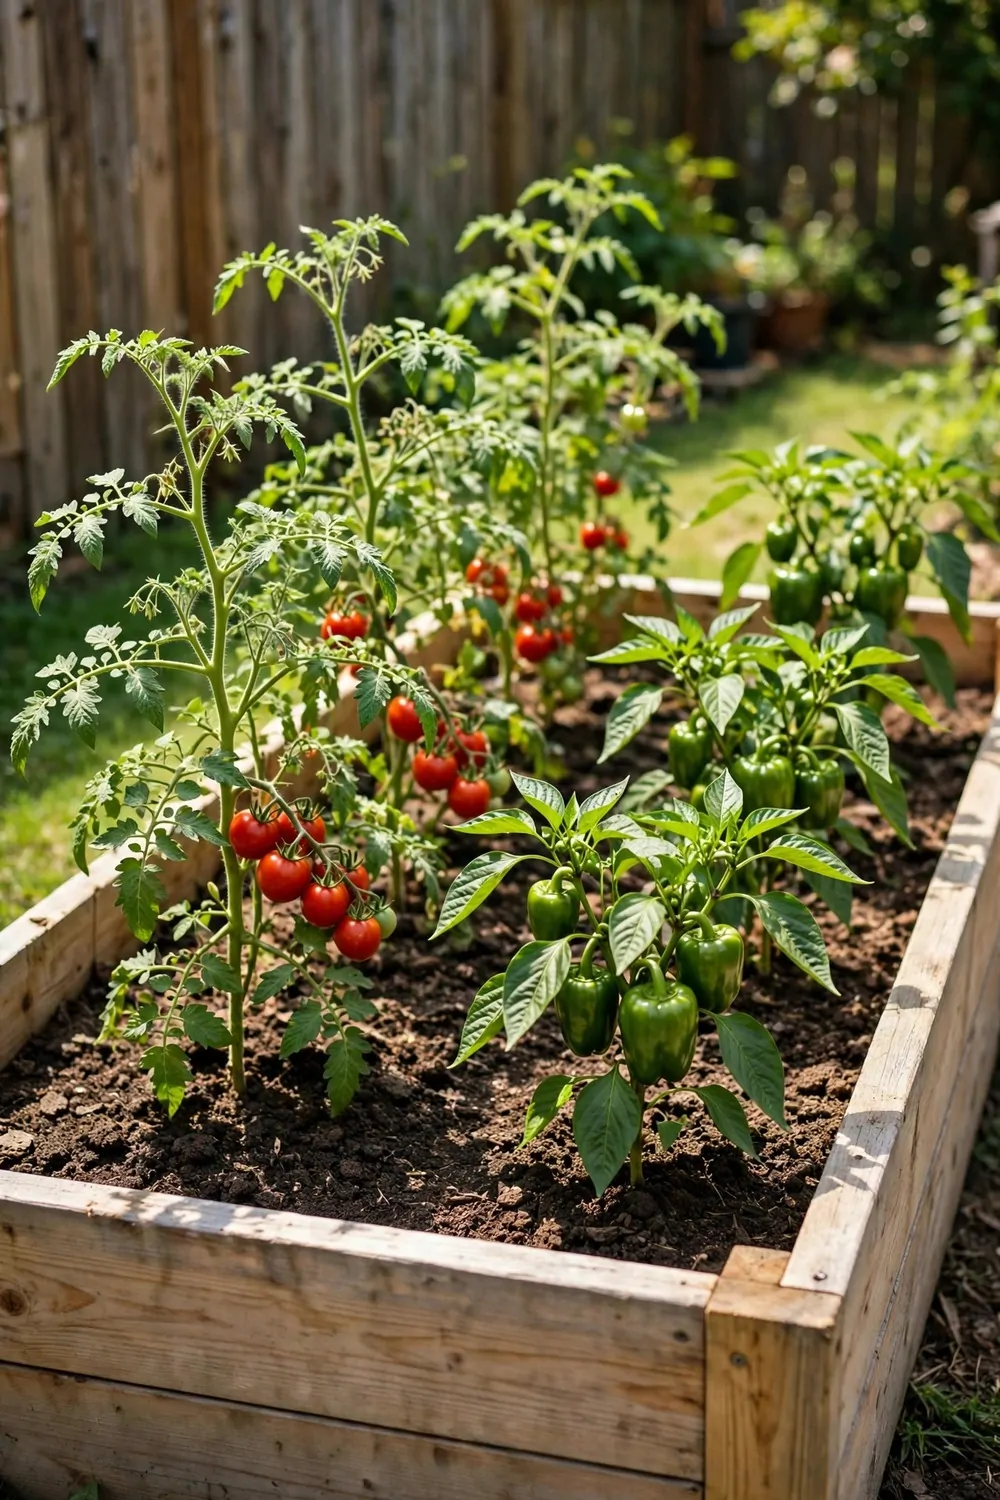
Tomatoes and peppers are the stars of a sunny yard. They love heat and they reward you with fruit all through the warm season.
Pick the hottest, brightest spot you have for this bed. A south wall that holds warmth through the day is ideal. These plants sulk in shade, so give them full sun.
Build the bed at least twelve inches deep for strong roots. Deep roots help the plants stand tall when they get heavy with fruit.
Fill the bed with rich soil and mix in old leaves for food. Tomatoes and peppers eat a lot, so rich soil makes a real change.
Set each plant about two feet apart so air can move around them. Crowded plants trap damp air and get sick more often. Push a tall stake next to each plant on the day you plant it.
Tie the stems to the stakes as they grow taller. Loose ties work best so the stems can thicken without harm.
Water the soil at the base and keep the leaves dry. Wet leaves in hot sun can spot and burn, so water low and slow.
I put about $55 to $100 into stakes, plants, soil, and wood for this sunny bed, and it fed us for a long stretch.
Pick tomatoes when they feel soft and look deep red. Pick peppers when they feel firm and shiny. I cook them with rice, pasta, and beans, and they taste like summer in a bowl.
21. A Bed Made From Old Pallets
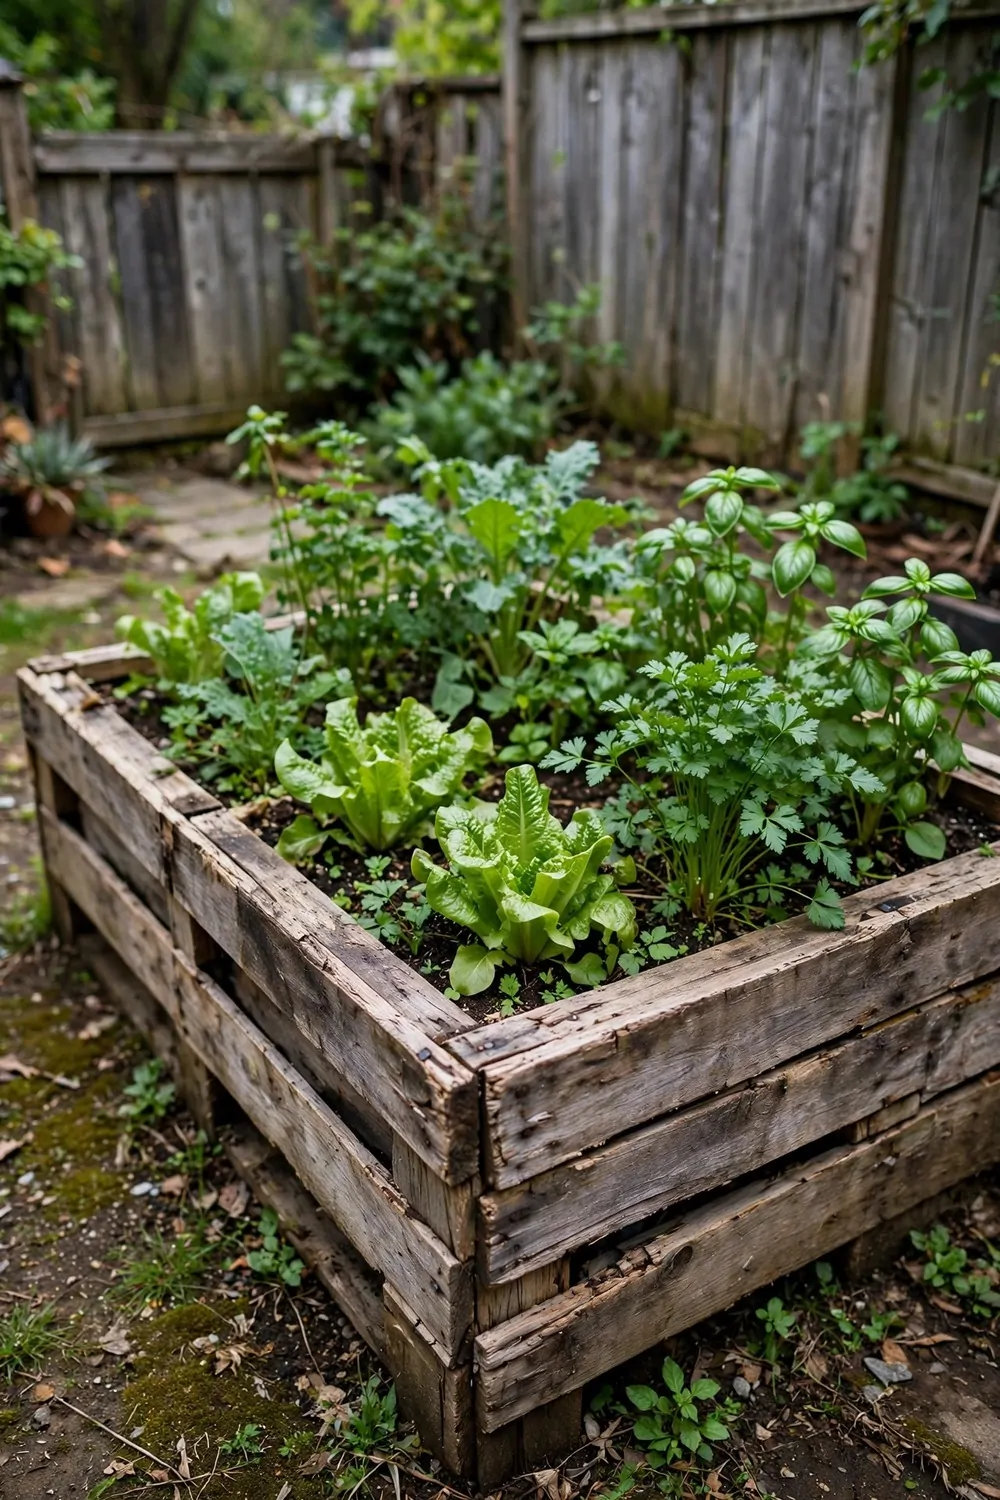
Old pallets can turn into a fine raised bed with a little work. I like this build because it costs little and keeps old wood out of the bin.
Look for pallets that look clean and dry with no spills or odd smells. Skip any pallet that looks stained or smells like chemicals. Clean wood is the only safe pick for a food bed.
Take the pallets apart with care and pull out the nails. Wear gloves and check each board for sharp bits before you use it.
Cut the boards to the length you need for your bed. Four boards make the sides, and short offcuts can brace the corners.
Screw the boards into a simple box shape on flat ground. Add a small post at each corner to hold the sides firm. Check the box with a level eye so it sits straight.
Line the inside with plain cloth or old sacking to hold the soil in. Leave the base open so water can drain down into the ground.
Fill the box with soil and plant it the same day if you like. Pallet beds warm fast, so seeds sprout quick in them.
Since the wood was free, my pallet bed needed only soil and seeds, which ran $25 to $60 in all.
I grow beans and leafy greens in my pallet bed. The wood looks rough and warm, and it fits a small yard so well. If a board breaks, I swap it for a spare and the bed goes on as before.
22. A Metal Bed That Stays Neat
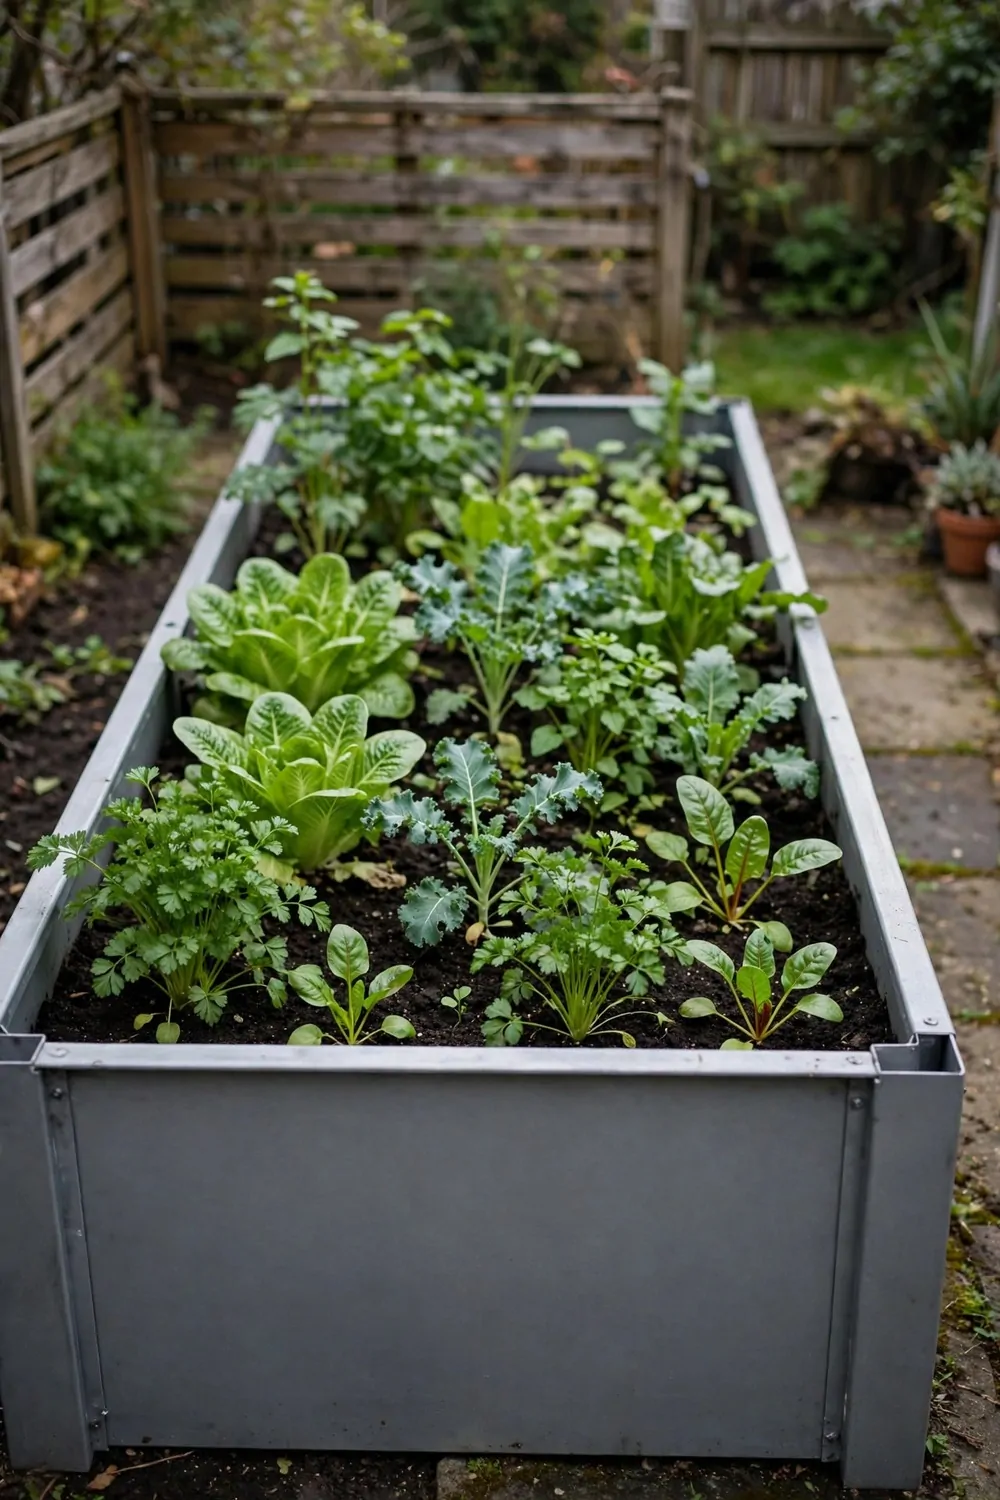
A metal bed looks tidy and holds its shape for years. I like how the clean lines make a small yard feel calm and neat.
Pick a flat spot with good sun for this bed. Metal warms fast in sun, so the soil wakes up early in the season. A level spot keeps the bed from leaning over time.
Buy a metal bed kit or bend flat sheets into a box shape. Kits come with bolts and corners, so the build is quick and simple.
Set the bed down and check that each corner sits firm on the ground. Push the base a little into the soil so it does not shift.
Line the sides with plain cloth if you want to slow heat on the edges. Fill the bed with soil and leave an inch at the top. This gap stops water from spilling over when you water.
Plant herbs and greens near the edges where the soil warms first. They sprout fast and give you early leaves to pick.
Metal beds need little care once they are built. A quick rinse with plain water keeps the sides clean after dusty days.
A metal kit, soil, and plants for this bed set me back $70 to $140, but the bed should last for many years.
I grow peppers and leafy greens in my metal bed. The neat shape makes the whole yard look cared for. If you like tidy lines, this bed is a joy to keep.
23. A Round Bed in the Middle of the Lawn
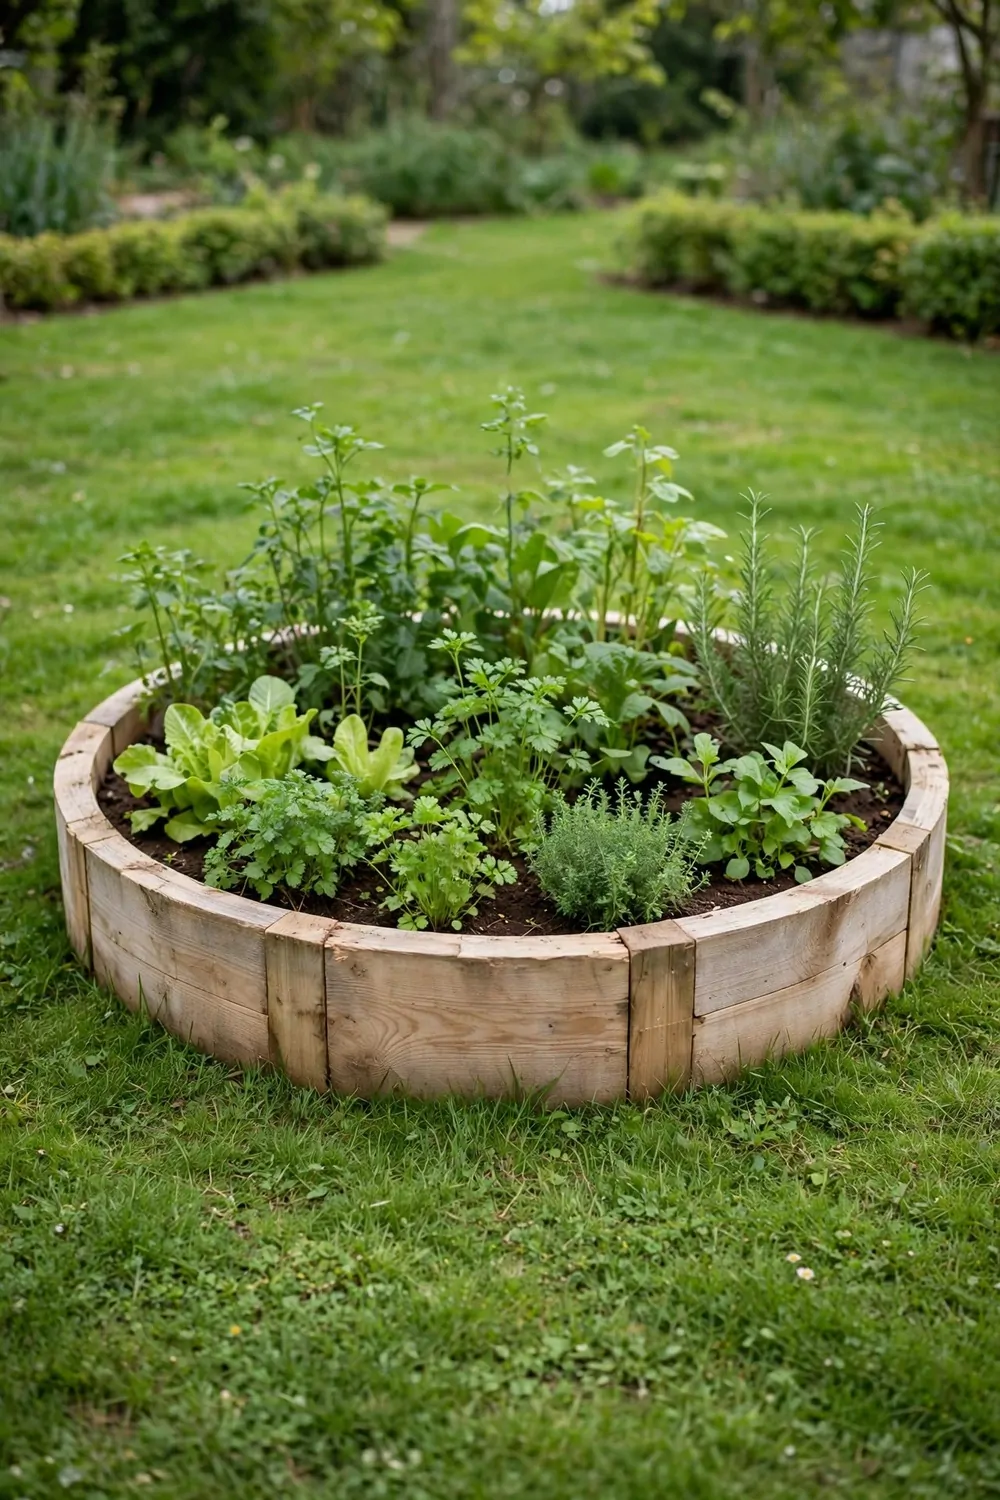
A round bed in the middle of the lawn makes the whole yard feel planned. It draws your eye and gives you a soft center to plant around.
Mark a circle on the grass with a rope tied to a stake. Walk the rope around to draw a neat ring. A circle about five feet wide is easy to reach from all sides.
Build the edge with bricks, stones, or short boards bent into a ring. I like stones because they look soft and last for years.
Lift the grass inside the ring and loosen the soil below. This gives the roots a good start and helps water sink in.
Fill the ring with rich soil and shape it into a low dome. A dome sheds rain well and looks nice from the house. Pat the soil down with your hands so it holds its shape.
Plant a tall flower or a small shrub in the center. Put shorter plants around the edge so every plant gets light.
Water the bed from the edge and let the water sink toward the middle. This keeps the center damp without flooding the ring.
Stones, soil, and plants for a round bed like this usually come to $60 to $120, and the shape does the rest of the work.
I plant bright flowers in my round bed with leafy greens at the edge. It looks good from every window in the house. You can mow around it in a neat ring and the yard stays tidy.
24. A Keyhole Bed for Easy Reach
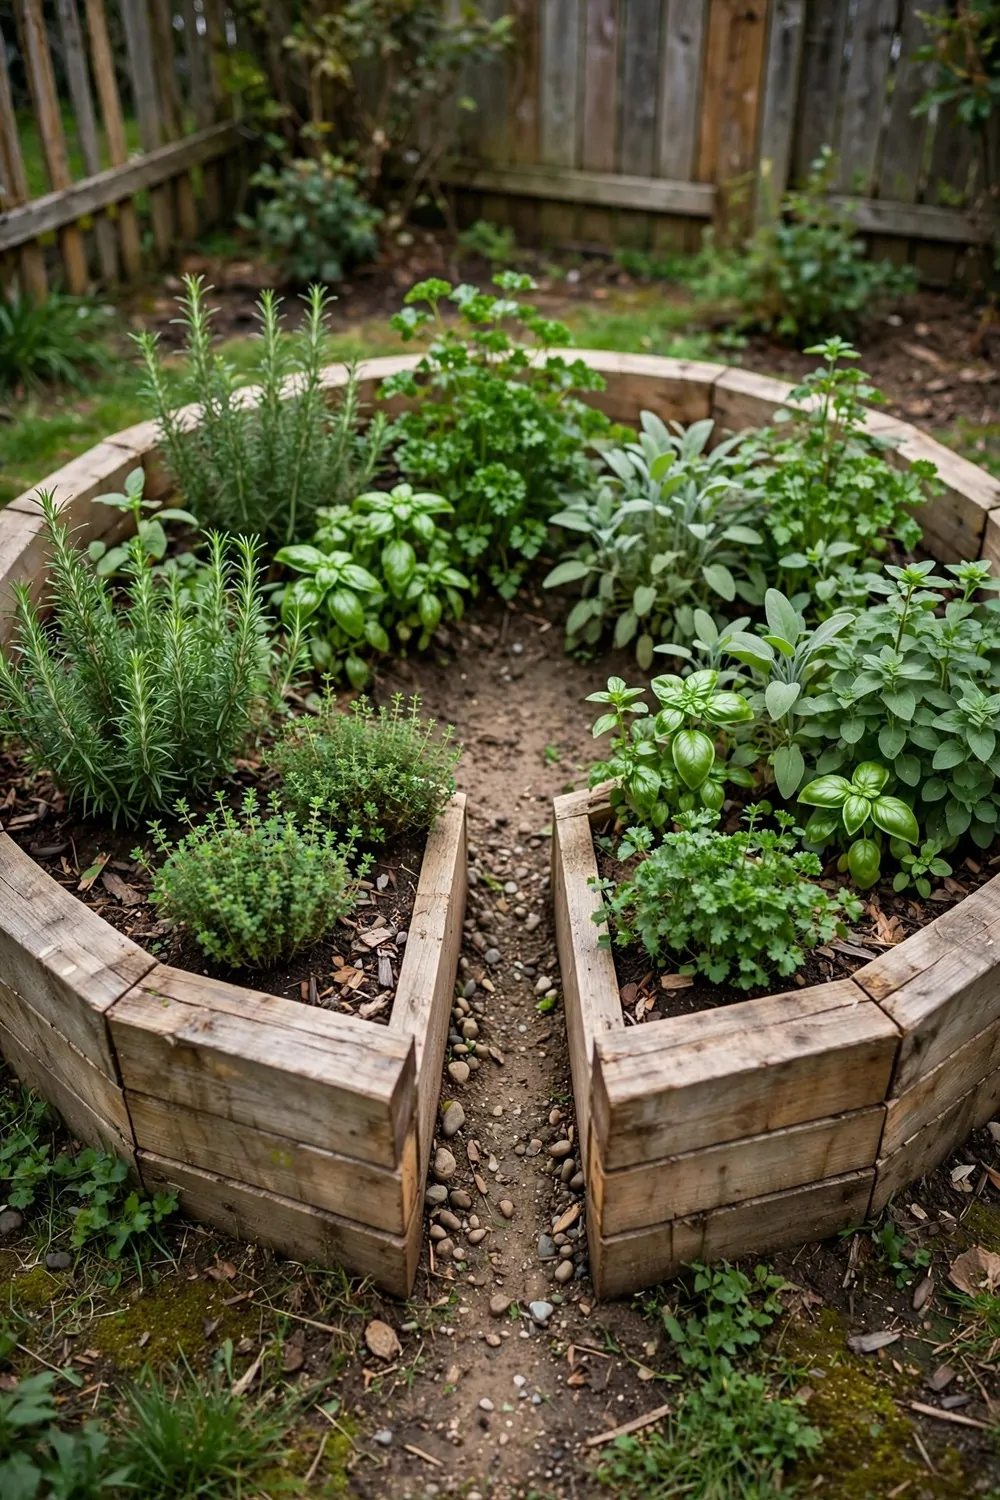
A keyhole bed is round with a small path cut into one side. You step into the notch and reach every plant without stretching far.
This shape suits small yards and stiff backs. You stand in one spot and your hands can reach the whole bed. It is a kind and clever shape for daily picking.
Mark a wide circle on the ground and leave a wedge open on one side. The wedge is your path in, so make it wide enough to stand in.
Build the edge with stones or short boards in a ring. Leave the path open and build a small basket or bin in the center if you like.
Fill the bed with layers of soil, old leaves, and kitchen scraps like fruit peel. The layers break down and feed the soil over time. Top it with a thick layer of plain soil for planting.
Plant greens and herbs around the edge where you can pick them fast. Put taller plants near the center where they get full sun.
Water the bed from the path and turn the soil now and then. A keyhole bed stays rich if you feed it with leaves through the season.
My keyhole bed took $65 to $130 for stones, soil, and plants, and the easy reach makes it worth every cent.
I pick leaves for meals with bread and vegetables from this bed most days. The short walk in feels easy even when I am tired. If you hate stretching across wide beds, this shape will suit you well.
25. A Bed With a Cold Frame Lid
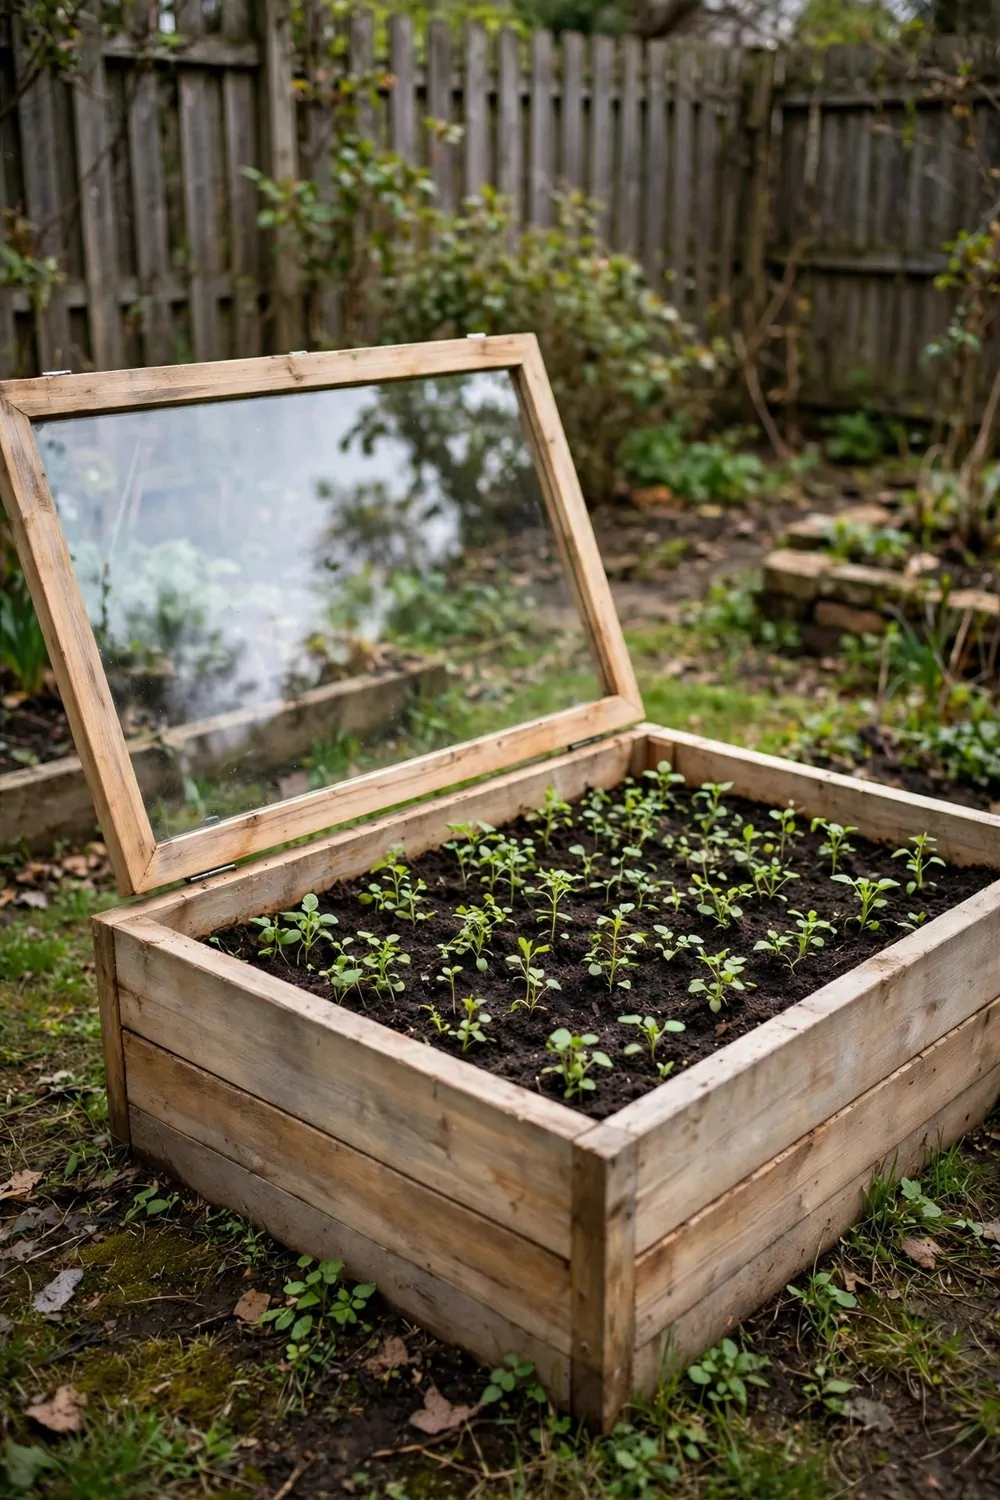
A cold frame lid turns a plain bed into a small warm house for plants. It holds heat and shields young plants from wind and cold nights.
Build a low bed first with wood boards and rich soil. Keep the bed small so the lid is light enough to lift. A bed about three feet wide works well for a first lid.
Make the lid from an old window frame or clear plastic on a wood frame. Clear lids let light in while they keep the cold out.
Fix the lid to the back of the bed with hinges. Hinges let you lift the lid on warm days and shut it at night.
Prop the lid open a little on sunny days so the plants do not cook. Hot air can build up fast under glass. A small stick makes a fine prop for fresh air.
Plant greens and young plants under the lid early in the season. They grow fast in the warm air and give you leaves weeks sooner.
Water with care and check the soil each morning. Lids block rain, so you must water by hand under them.
Wood, hinges, a clear lid, and soil for this bed added up to $80 to $150 for me, and the lid lasts for years.
I lift the lid each morning to check my plants. It feels like opening a small gift each day. You will love how fast greens grow in that warm little space.
26. A Kids’ Bed for Little Gardeners
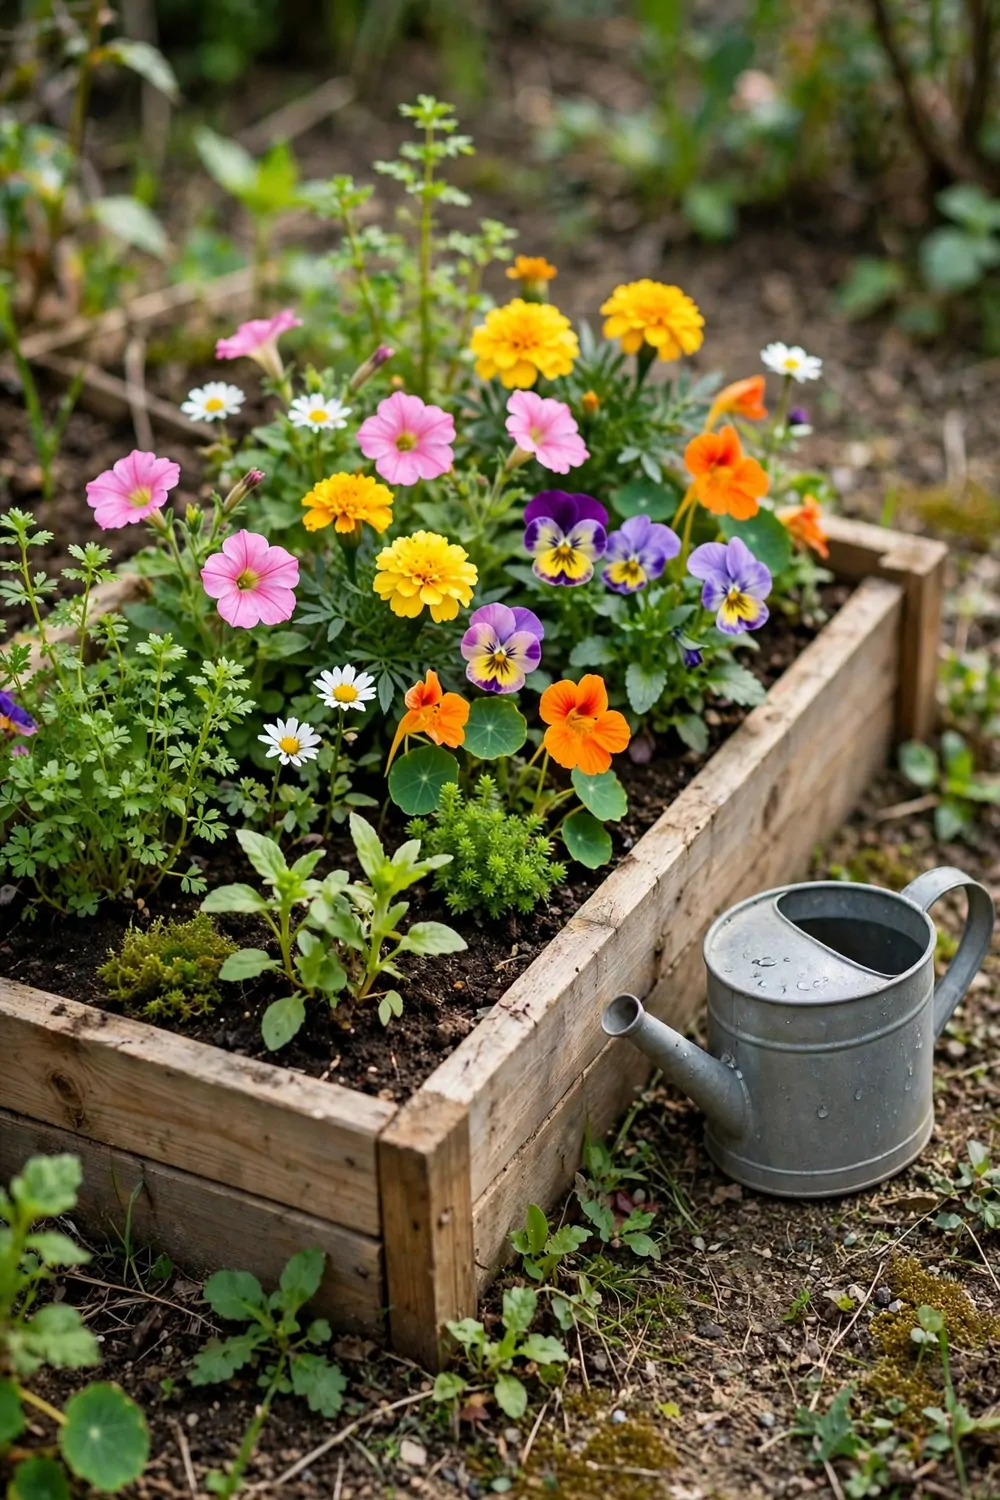
A small bed just for kids makes gardening feel like play. When children plant their own seeds, they care for them with joy.
Build a low bed that a child can reach across with ease. A bed about two feet wide and one foot high is just right. Keep it close to the house so kids can check it each day.
Let your child pick the plants from a short list you give them. Beans, strawberries, and bright flowers are fun picks for small hands.
Give each child a small spade and a watering can of their own. Tools that fit small hands make the work feel real and fun.
Show them how to push seeds into the soil and pat it down. Let them water the bed each day with a little can. Praise their care and they will come back to the bed on their own.
Make a small sign with the plant names on it. Kids love to read the sign and tell friends what is growing.
Let them pick the fruit and leaves when they are ripe. Tasting food they grew makes them proud and keen to grow more.
A low kids bed with small tools, soil, and seeds cost us $35 to $80, and the joy it brought was worth far more.
My kids eat strawberries and beans from their bed with big smiles. They wash their hands with plain soap and water when they come inside. A kids bed is a small start that can grow into a love of fresh food.
27. A Bed Along the Patio Edge
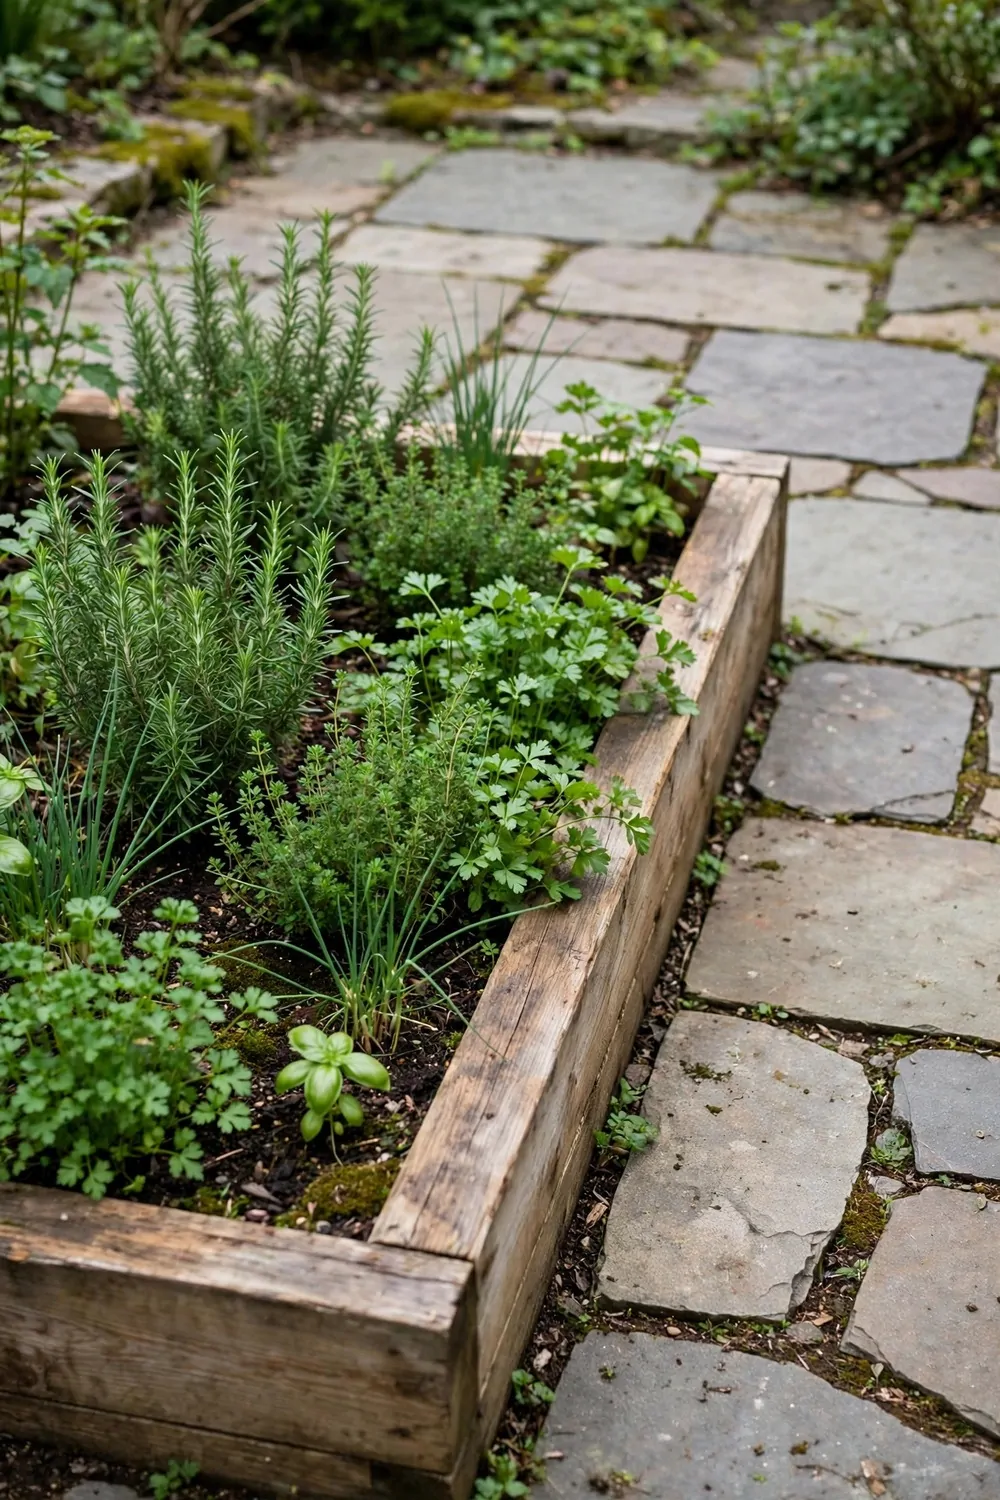
A bed along the patio edge turns a plain slab into a soft green frame. It hides the hard edge and gives you plants right where you sit.
Measure the patio edge and plan a narrow bed to fit it. A bed about eighteen inches wide fits most patios well. Leave a small gap at the ends so you can still walk past.
Build a long low box with wood boards or stones. Keep the height low so it does not block your view or your chairs.
Fill it with light soil that drains well. Patio beds dry fast in sun, so good soil helps hold water.
Plant trailing flowers at the front so they spill over the edge. Put taller greens and herbs at the back. This mix looks full and soft from your seat.
Water this bed more often than beds out in the yard. Heat from the patio dries the soil fast on warm days.
Pick leaves and flowers here while you sit outside. It is a joy to reach out and snip a few leaves for your meal.
Boards, soil, and plants for a patio edge bed ran $45 to $100 for me, and it changed how the patio feels.
I grow leafy greens and bright flowers along my patio. They smell fresh and look soft against the hard stone. You will sit outside more once this bed is full and green.
28. A One-Weekend Starter Bed Plan
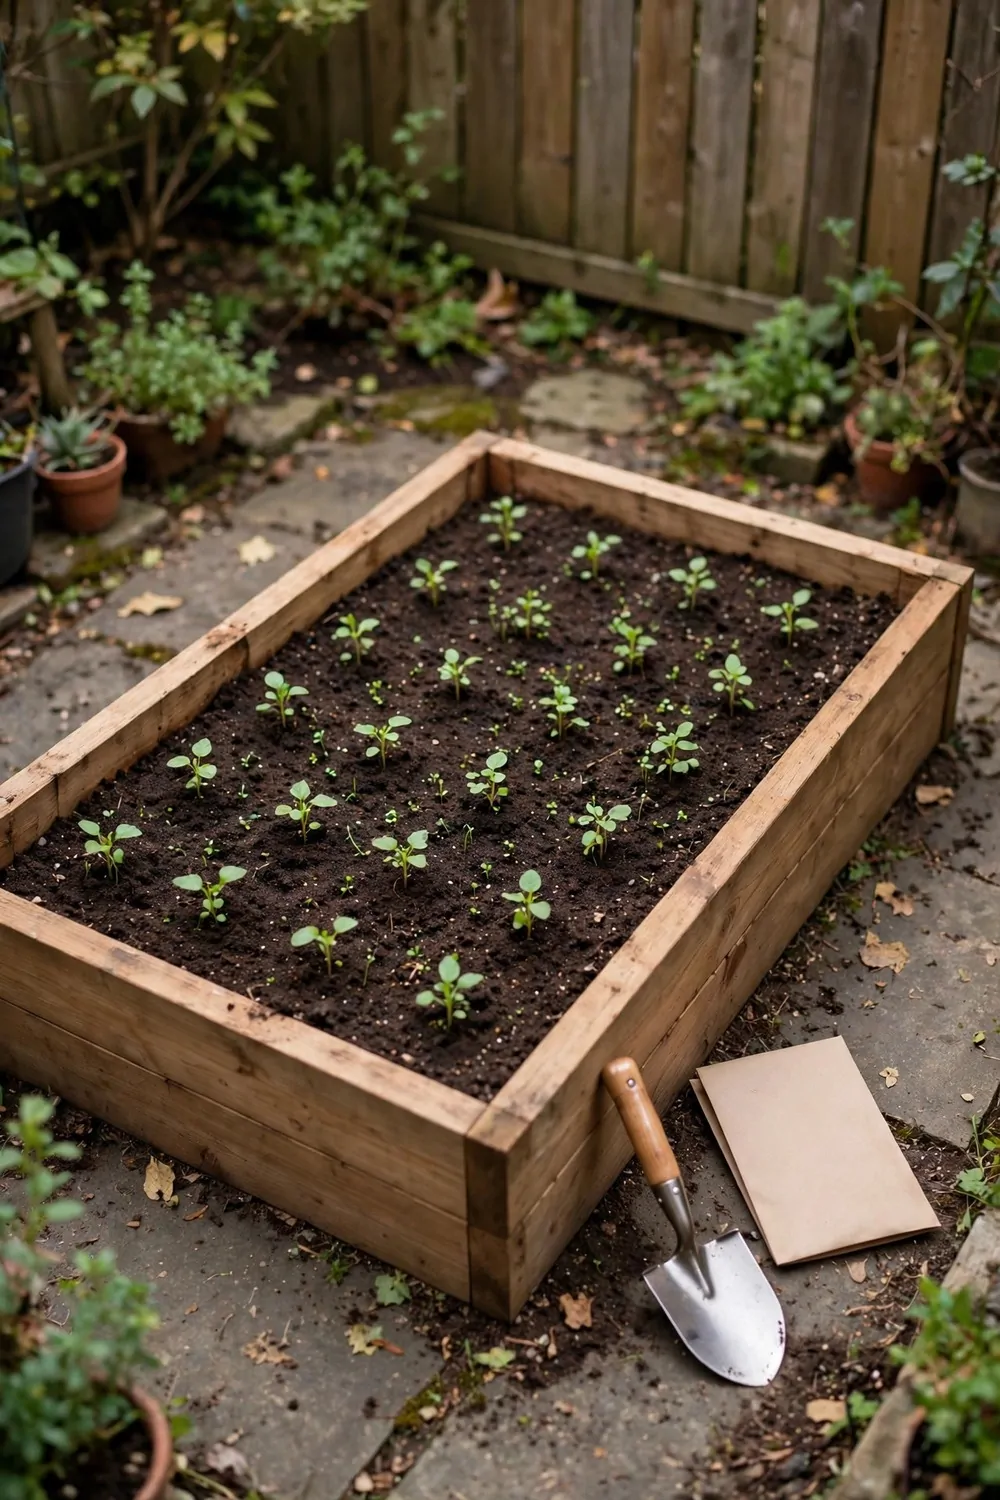
You can build your first raised bed in one weekend with a clear plan. I did mine this way and it felt easy from start to finish.
On Friday evening, clear the spot and lay out your tools. Measure the ground and mark a bed about four feet long and two feet wide. A short plan on paper saves time the next morning.
On Saturday morning, screw the boards into a box and set it on the marked spot. Check that the box sits level and firm on the ground. Fill it with soil and pat the top flat with your hands.
On Saturday afternoon, rest and let the soil settle. A quick water helps the soil sink into the corners.
On Sunday morning, plant your seeds and young plants in neat rows. Space them well so each one has room to grow. Water the bed well and add a thin layer of dry leaves on top.
On Sunday afternoon, stand back and look at your new bed. You built a garden in one weekend and it will feed you for weeks.
Keep the bed watered each day for the first few weeks. Young plants need steady water while their roots take hold.
The five small buys are wood boards $20 to $35, soil bags $15 to $30, seeds $10 to $20, a watering can $8 to $15, and a small spade $12 to $25, which add up to $65 to $125 in total.
Start with one bed and learn how it grows. Next weekend you can build a second one with the same plan. A small start is the best start, and your yard will thank you for it.
| Area | Main change | Typical cost |
|---|---|---|
| Wood boards | Boards screwed into a box for the bed | $20 to $35 |
| Soil bags | Soil to fill the bed and pat flat | $15 to $30 |
| Seeds | Seeds and young plants in neat rows | $10 to $20 |
| Watering can | A watering can for steady water | $8 to $15 |
| Small spade | A small spade for digging and planting | $12 to $25 |
| Total | One-weekend starter bed | $65 to $125 |
Keep Reading
If you liked these ideas, you will love these posts too.
- 27 Small Bathroom Remodel Ideas That Look Expensive
- 30 Kitchen Remodel Ideas With Before and After Photos
- 28 Basement Remodel Ideas That Turn Dead Space Into Living Space
- 24 Attic Remodel Ideas That Add a Whole New Room
- 31 Open Plan Kitchen Ideas That Make Small Homes Feel Big
- 35 Whole Home Remodel Ideas Room by Room
Pick one bed idea this week and try it in your own backyard. A small bed with fresh soil and a few seeds can change how your yard feels. Then pick the next one when you have time and give it a try in your own yard.