30 Kitchen Remodel Ideas With Before and After Photos

The kitchen in my home had yellow walls, dark wood, and a smell of old grease that never left.
I walked in each morning and felt a little sad. The room was dark, the counters were full, and nothing in it made me want to cook.
The cabinets were scratched and dull. The faucet dripped, the light was weak, and the floor looked worn in the middle where we walked each day.
I did not have a big budget, so I started small. I painted one thing, then I changed one more thing, and the room started to feel new.
That is why I love before and after photos so much. They show you what a room looked like, and then they show you what it can look like with a few smart changes.
In this post I share the ideas that helped me most, with plain steps you can copy at home. I kept the words simple and the jobs doable.
You will find all 30 ideas right here in this one post, from small paint jobs to big sink swaps, and you can pick the ones that fit your home and your budget.
1. Paint the Cabinets a Soft White
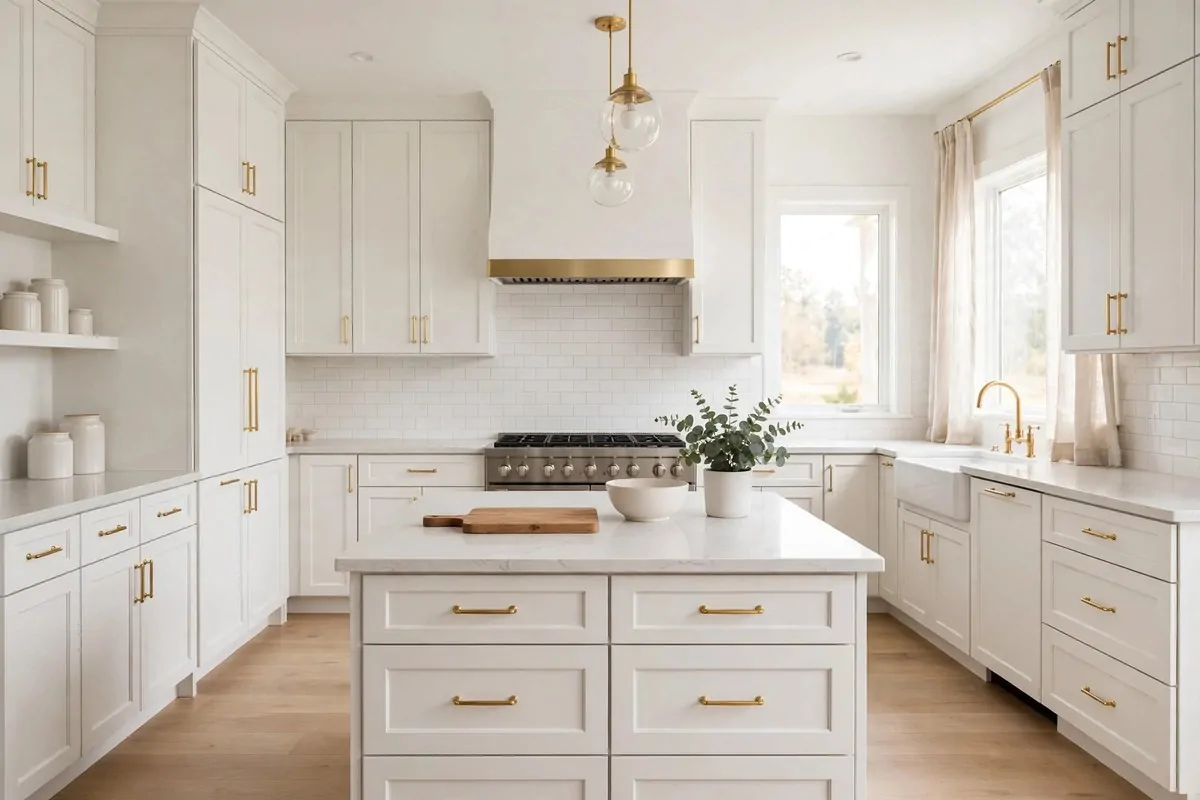
Before, my cabinets were dark brown and full of marks. They made the whole kitchen feel small and old.
I cleaned them with plain soap and water first, then I let them dry all day. After that I put on a soft white paint with a small roller.
The after look was so bright. The room felt bigger, and the white made my plates and cups stand out in a nice way.
You can paint just the doors first if you feel nervous. That small step alone can change how the kitchen feels.
I took the handles off before I painted, and I put tape on the hinges. It took a little more time, but the paint job looked much cleaner.
A gallon of cabinet paint runs $35 to $65.
White paint also hides small marks better than dark paint does. I wipe the doors with a damp cloth, and they look fresh again.
My kitchen now feels calm in the morning, and I like to sit there with bread and fruit. The white cabinets make the light from the window feel soft and warm.
If your cabinets are old and tired, try this idea first. It is cheap, it is simple, and the change is big.
2. Swap the Old Faucet for a Brushed Gold One
Before, my faucet was dull and gray, and it dripped at night. It looked old next to my white sink.
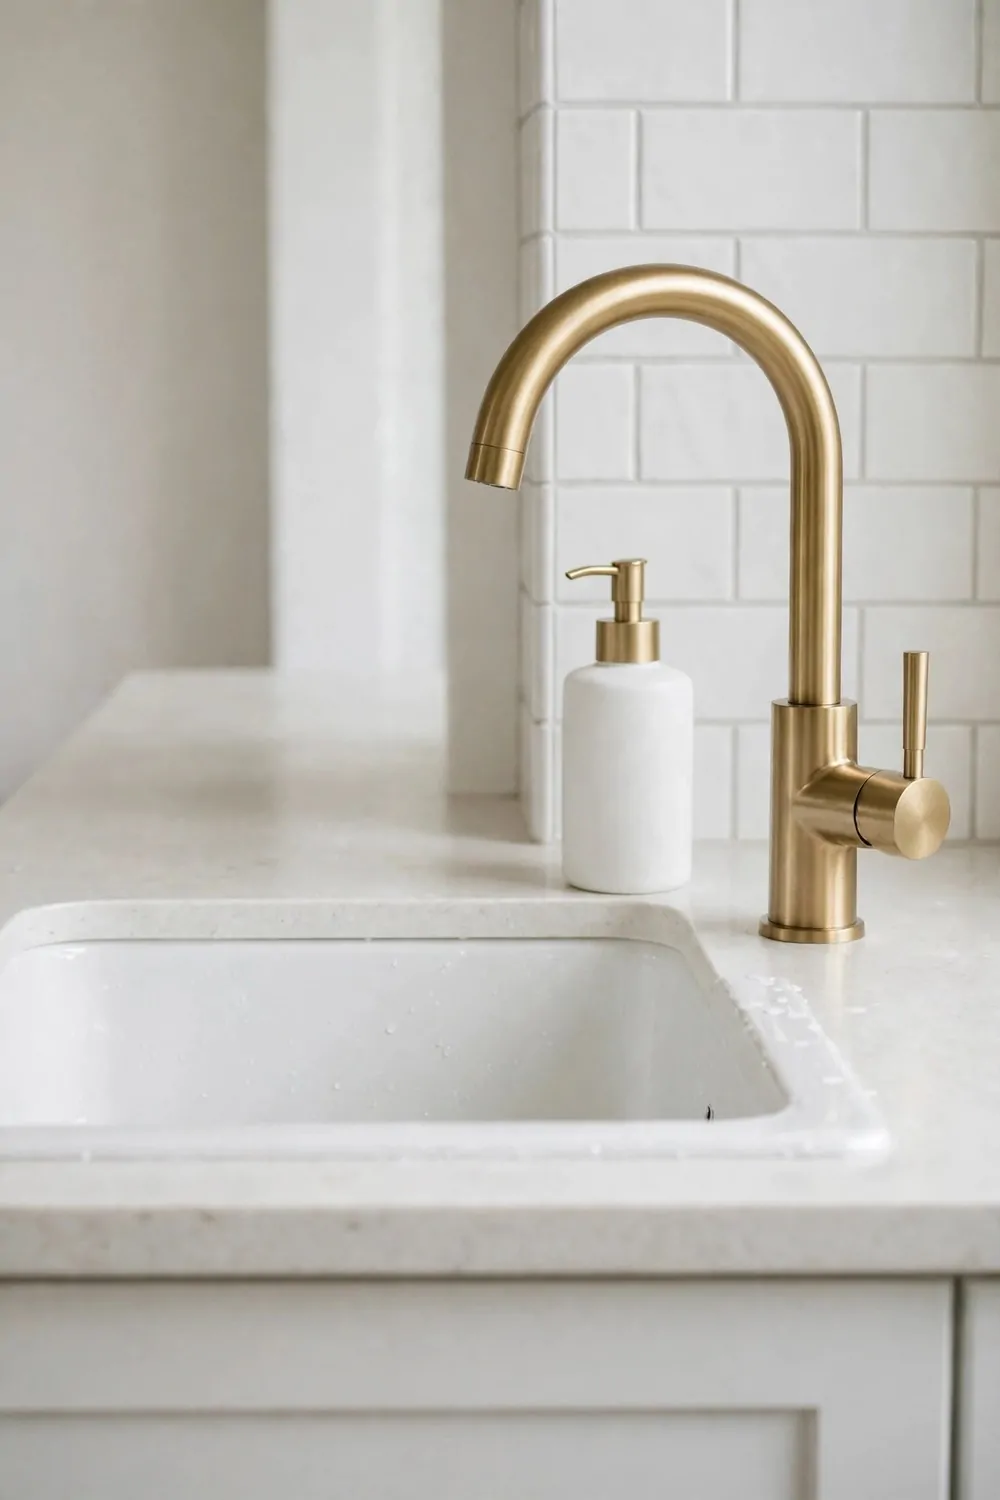
I picked a brushed gold faucet because the gold felt warm and rich. It was not too shiny, and it matched my new handles.
After the swap, the sink area looked new. The gold made the plain sink look like it belonged in a nice home.
You turn off the water first, then you take the old faucet out with a wrench. I asked a friend to help me hold it steady.
The new faucet came with clear steps in the box. I read them twice, and I took my time with each part.
You can pick up a new faucet in brushed gold for $60 to $140.
Now I wash vegetables and fill pots with ease. The tall neck gives me room, and the water flow feels strong and smooth.
I wipe the gold with a soft cloth each week. Plain soap and water keep it clean, and I do not use hard scrub pads on it.
This small swap changed the whole sink wall for me. It is one of the fastest ways to make a kitchen feel new.
3. Add a Large Window Over the Sink
Before, the wall over my sink was blank and dark. I washed dishes and stared at plain paint all the time.
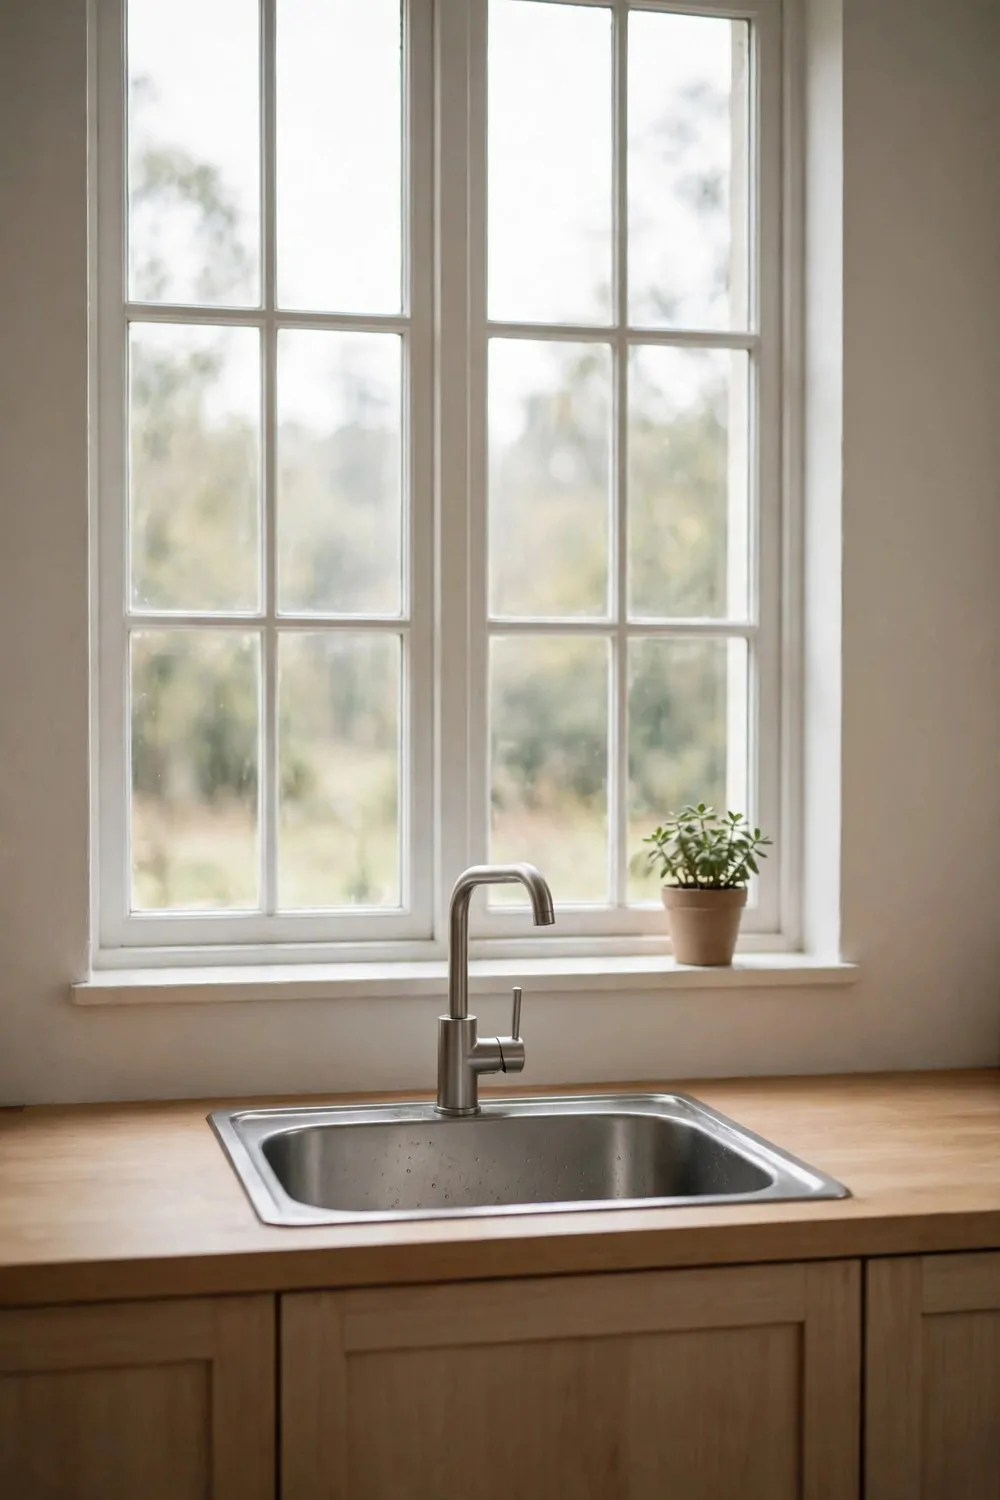
A large window changed that wall in one day. Now I see sky, trees, and soft light while I work at the sink.
The after look feels open and fresh. The kitchen gets more light, and the room feels less closed in.
I hired a pro to cut the wall and fit the window. That job was too big for me, and I wanted it sealed right.
We picked a wide window with a simple white frame. It matches the cabinets, and it lets in a lot of light.
A large kitchen window runs $300 to $800.
In the morning I open it a little and let fresh air in. I cook rice and chicken, and the steam goes out fast.
I put a small plant on the sill, and I keep the glass clean with plain soap and water. The view makes dish time feel less like work.
If your sink wall feels dark, this idea is worth the cost. Light makes every other change in the room look better.
4. Lay Peel-and-Stick Backsplash Tiles
Before, the wall behind my stove was plain and stained. Splashed food left marks that I could not wipe off.
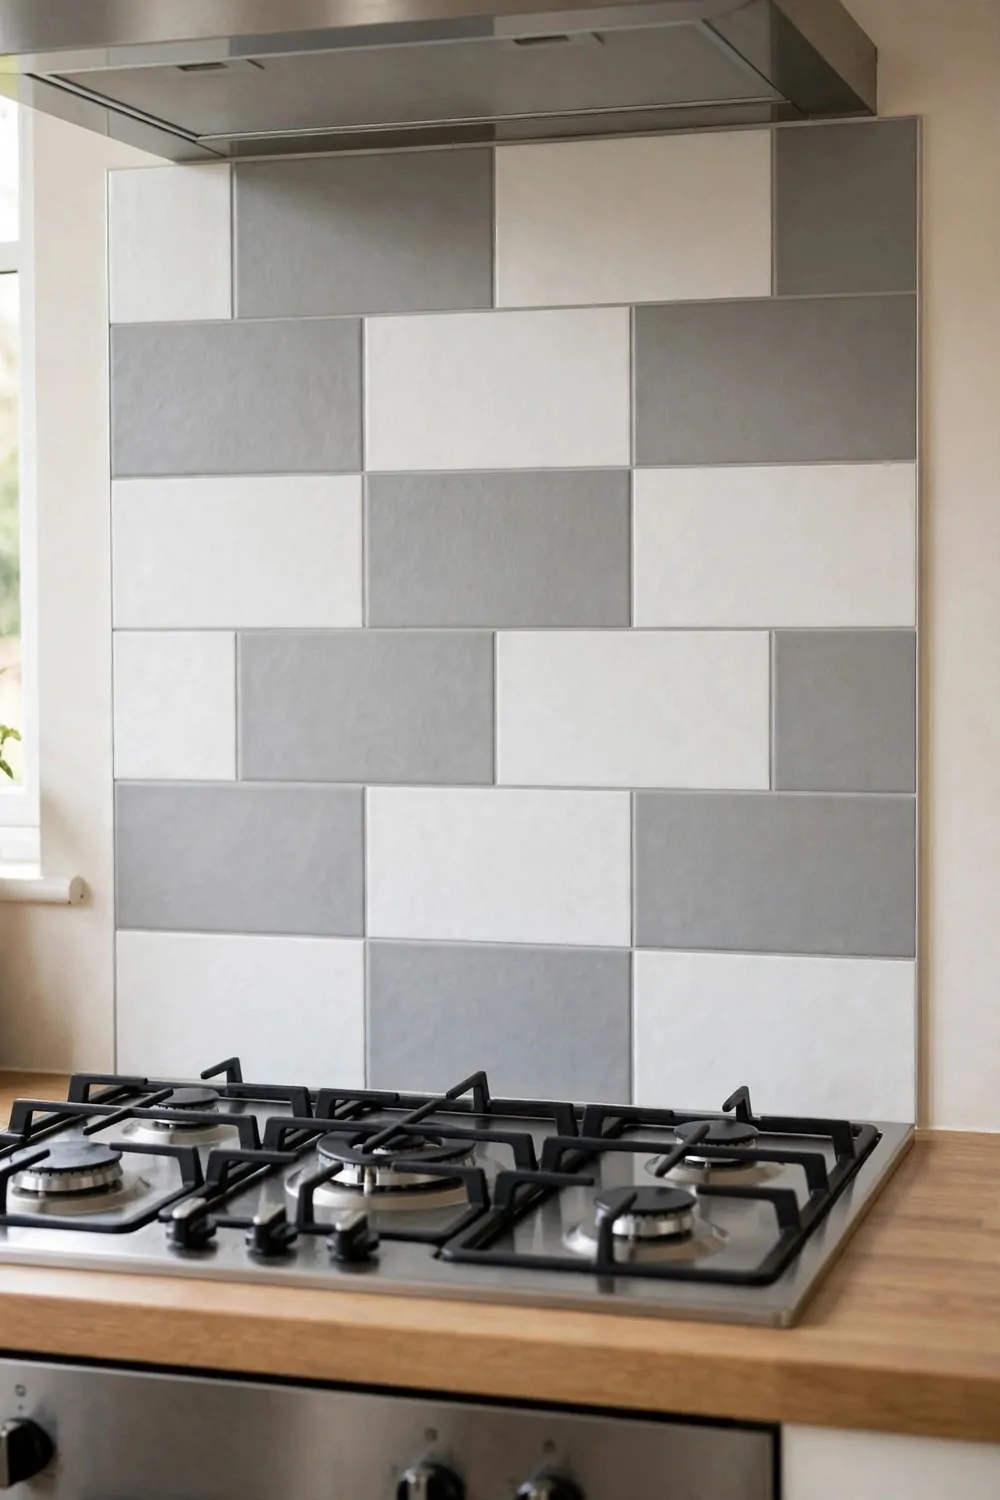
Peel-and-stick tiles fixed that wall in an afternoon. I picked white tiles with soft gray lines, and they looked neat and clean.
The after look is bright and tidy. The tiles make the stove area feel finished, like a real new kitchen.
You peel the back off, press the tile on the wall, and line up the next one. I used a small level to keep the rows straight.
I cut the last tile in each row with sharp scissors. It took a bit of care, but the edges came out clean.
A box of peel-and-stick tiles runs $20 to $50.
Now I wipe the wall with a damp cloth after I cook pasta or vegetables. The tiles wipe clean, and the marks do not stay.
I love that I did not need grout or big tools for this job. It was a simple weekend job, and I did it on my own.
If your backsplash is old or bare, try these tiles first. They are cheap, they are easy, and the change is clear the same day.
5. Replace the Cabinet Handles
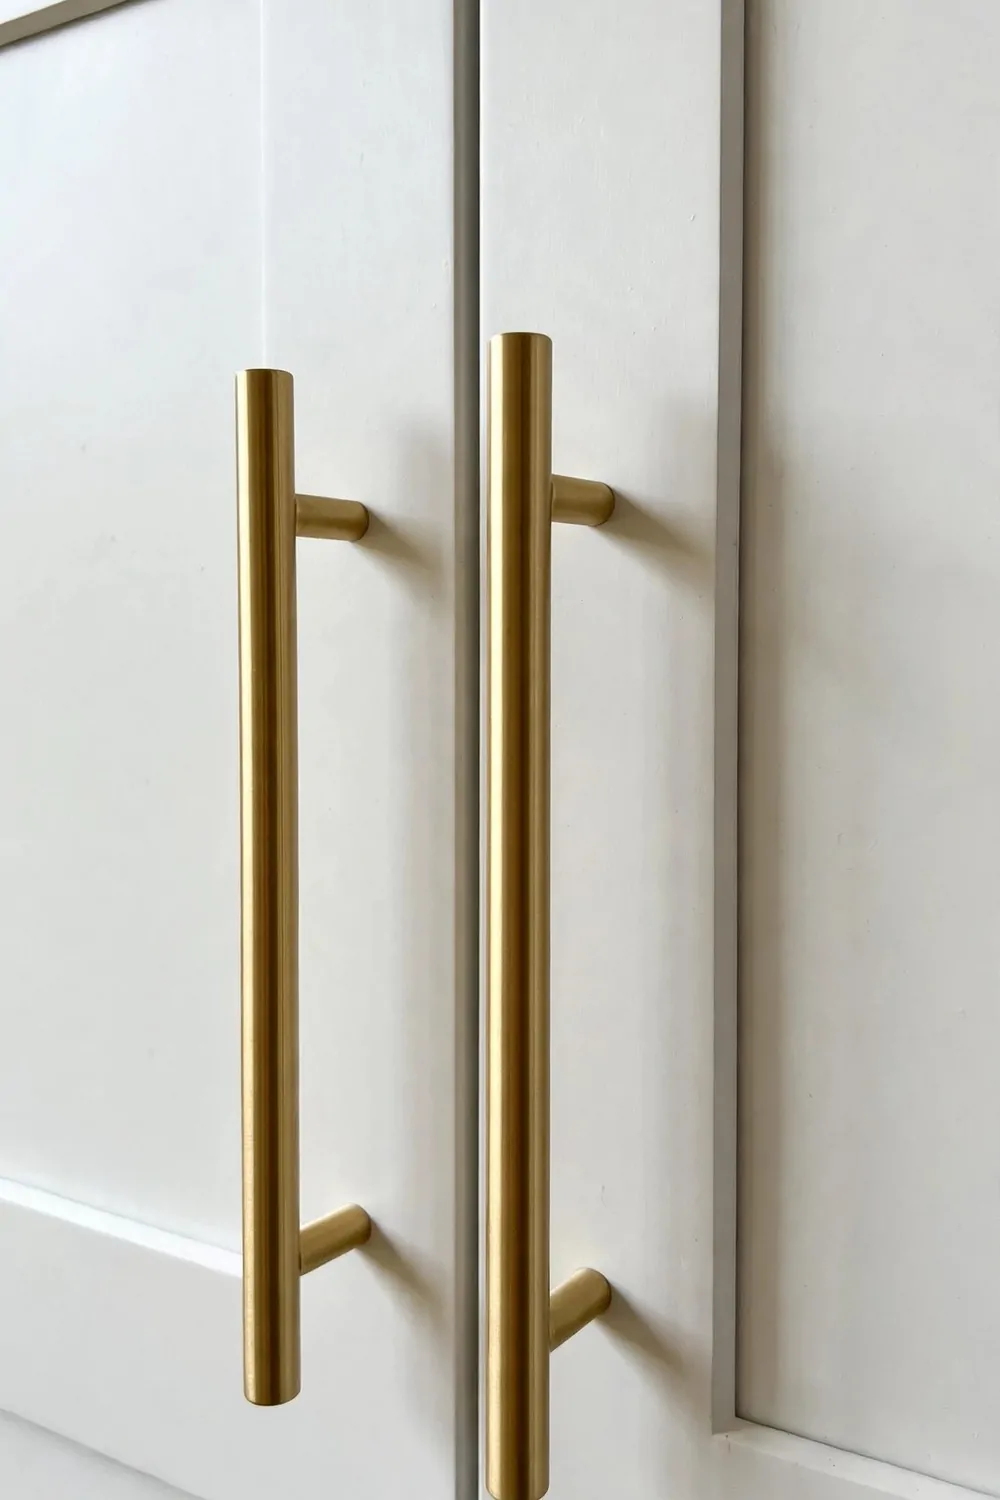
Before, my cabinet handles were small, dark, and hard to grip. Some were loose, and one was missing a screw.
New handles made the cabinets look new right away. I picked simple gold bars that felt good in my hand.
The after look is neat and modern. The long bars make the doors look longer, and the whole wall feels tidy.
You take the old handle off with a screwdriver, then you line up the new one in the same holes. Most of mine fit the old holes just fine.
I did one door at a time so I would not mix up the screws. It was slow, but it was easy work.
A set of new cabinet handles runs $30 to $80.
I like how the gold handles look with my white cabinets. The mix feels warm, and it is not too bold.
When I open a door now, the handle feels solid and smooth. It is a small touch, but I notice it each day.
If you want a fast win, change your handles first. It takes an hour, and your kitchen will feel fresh.
6. Add Open Wood Shelves
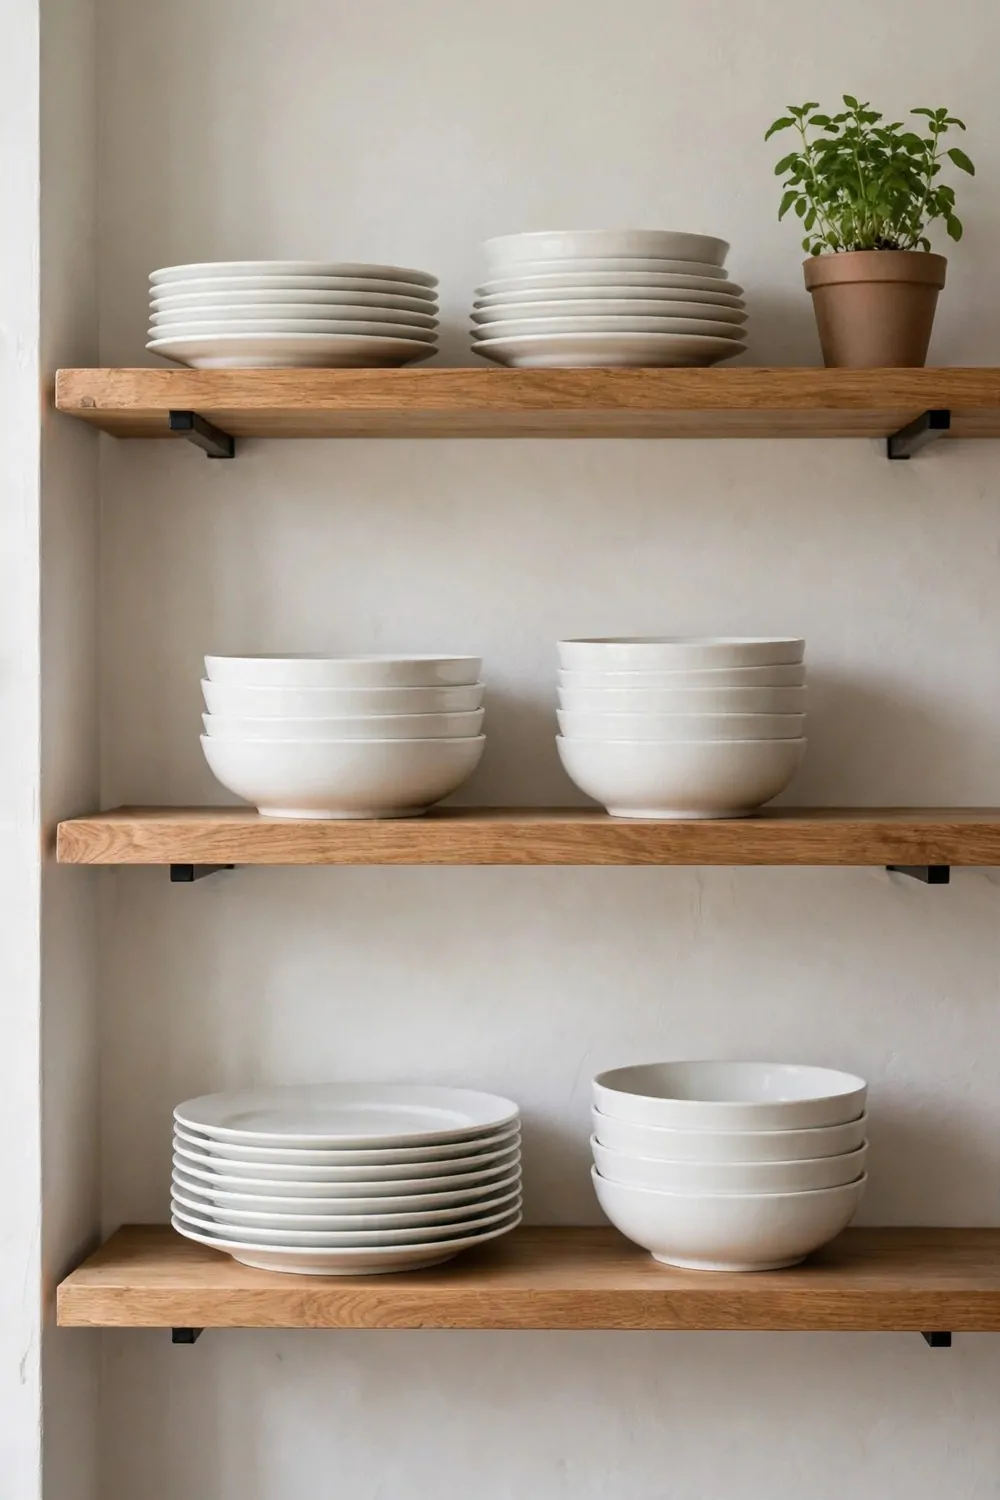
Before, my top cabinets were dark and heavy. They blocked the light, and I lost cups and bowls in the back.
I took two cabinets down and put up open wood shelves instead. The wood was warm and light, and the wall felt open at once.
The after look is airy and bright. I can see my white plates, my bowls, and my fruit, and they look like part of the room.
You need strong brackets and good screws for the shelves. I found the wall studs first so the shelves would hold well.
I kept just a few things on each shelf, and I left some space free. A full shelf looks messy, but a light shelf looks calm.
A pair of wood shelves runs $40 to $120.
Now I grab a bowl or a cup in one reach. I cook with chicken and rice, and my bowls are right there when I need them.
I wipe the shelves once a week with a damp cloth. Plain soap and water keep the wood clean without harm.
If your top cabinets feel too dark, try open shelves on one wall. The room will feel bigger, and your dishes will look nice.
7. Put in a New Light Over the Island
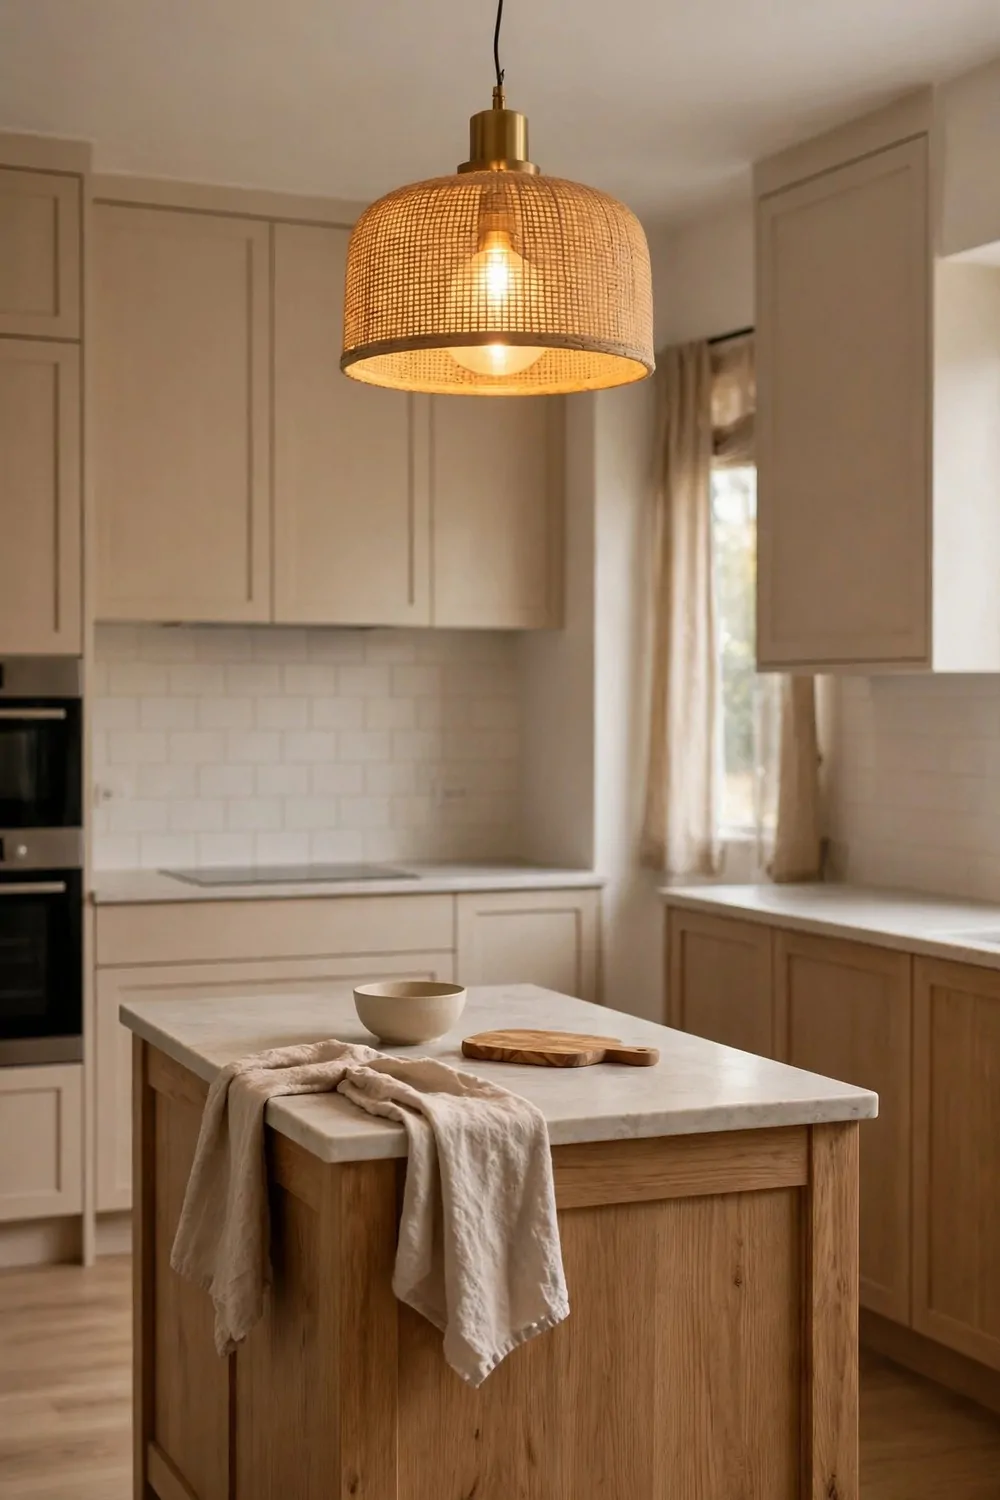
Before, my island had one weak bulb in the middle of the ceiling. The light was dim, and the island felt dull at night.
A new light over the island changed the whole room. I picked a wide pendant with a warm glow, and it hangs low over the counter.
The after look is rich and cozy. The island feels like the heart of the kitchen now, and the light makes food look good.
I turned the power off first, then I took the old light down. A friend helped me hold the new one while I fixed the wires.
We hung it at a height where I could see under it with ease. It does not block my view, and it does not hit my head.
A new light for the island runs $70 to $200.
In the evening I sit at the island with bread and fruit. The warm light makes the room feel calm, and I like to stay there a while.
I dust the shade once a week, and I use a soft cloth. The light stays bright, and the room stays warm.
If your island feels dark, change the light first. One good light can make the whole kitchen feel new at night.
8. Change the Countertop to Butcher Block
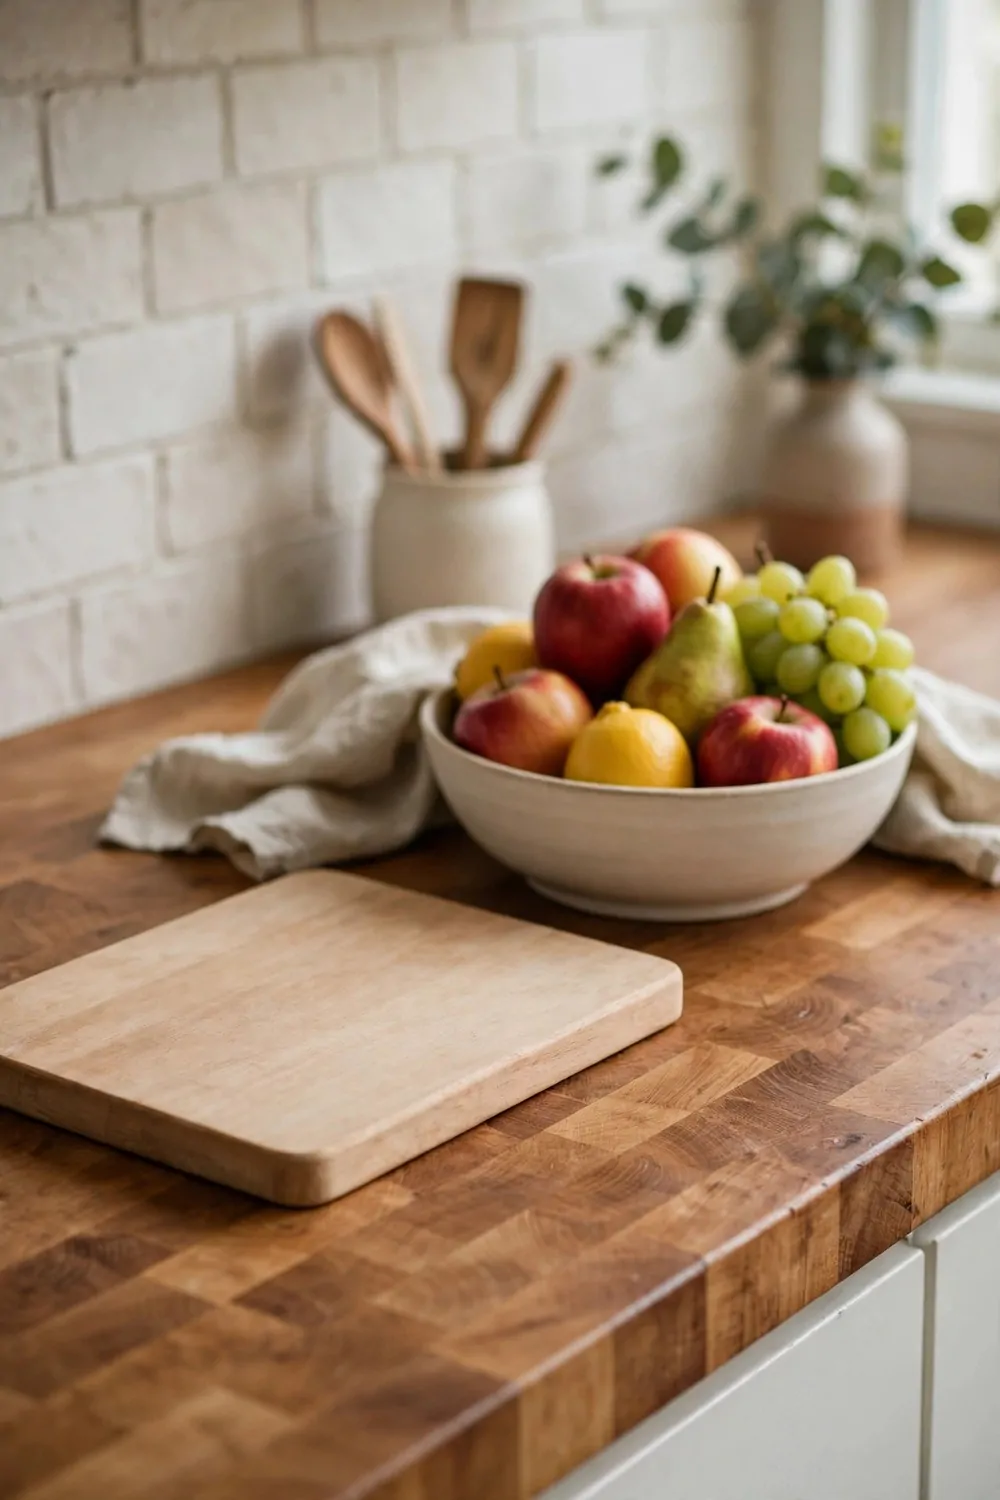
Before, my countertop was old and stained. It had burns, cuts, and dull spots that I could not clean off.
Butcher block made the counter feel warm and new. The wood has soft lines, and it feels smooth under my hands.
The after look is rich and homey. The wood warms up the white cabinets, and the kitchen feels like a place to cook and sit.
I had a pro cut the wood to fit my counters. He sealed the top so water would not soak in, and he fixed it in place.
I oil the top once a month to keep it safe. It takes a little time, but the wood stays smooth and looks good.
A butcher block countertop runs $200 to $600.
Now I chop vegetables right on a board on top of it. I cook pasta and beans, and I have space to work with ease.
I wipe it with plain soap and water after I cook. I dry it well, and I do not leave wet pots on it for long.
If your counters are old and dull, try butcher block. It is warm, it is strong, and it makes the kitchen feel like home.
9. Add a Rolling Kitchen Cart
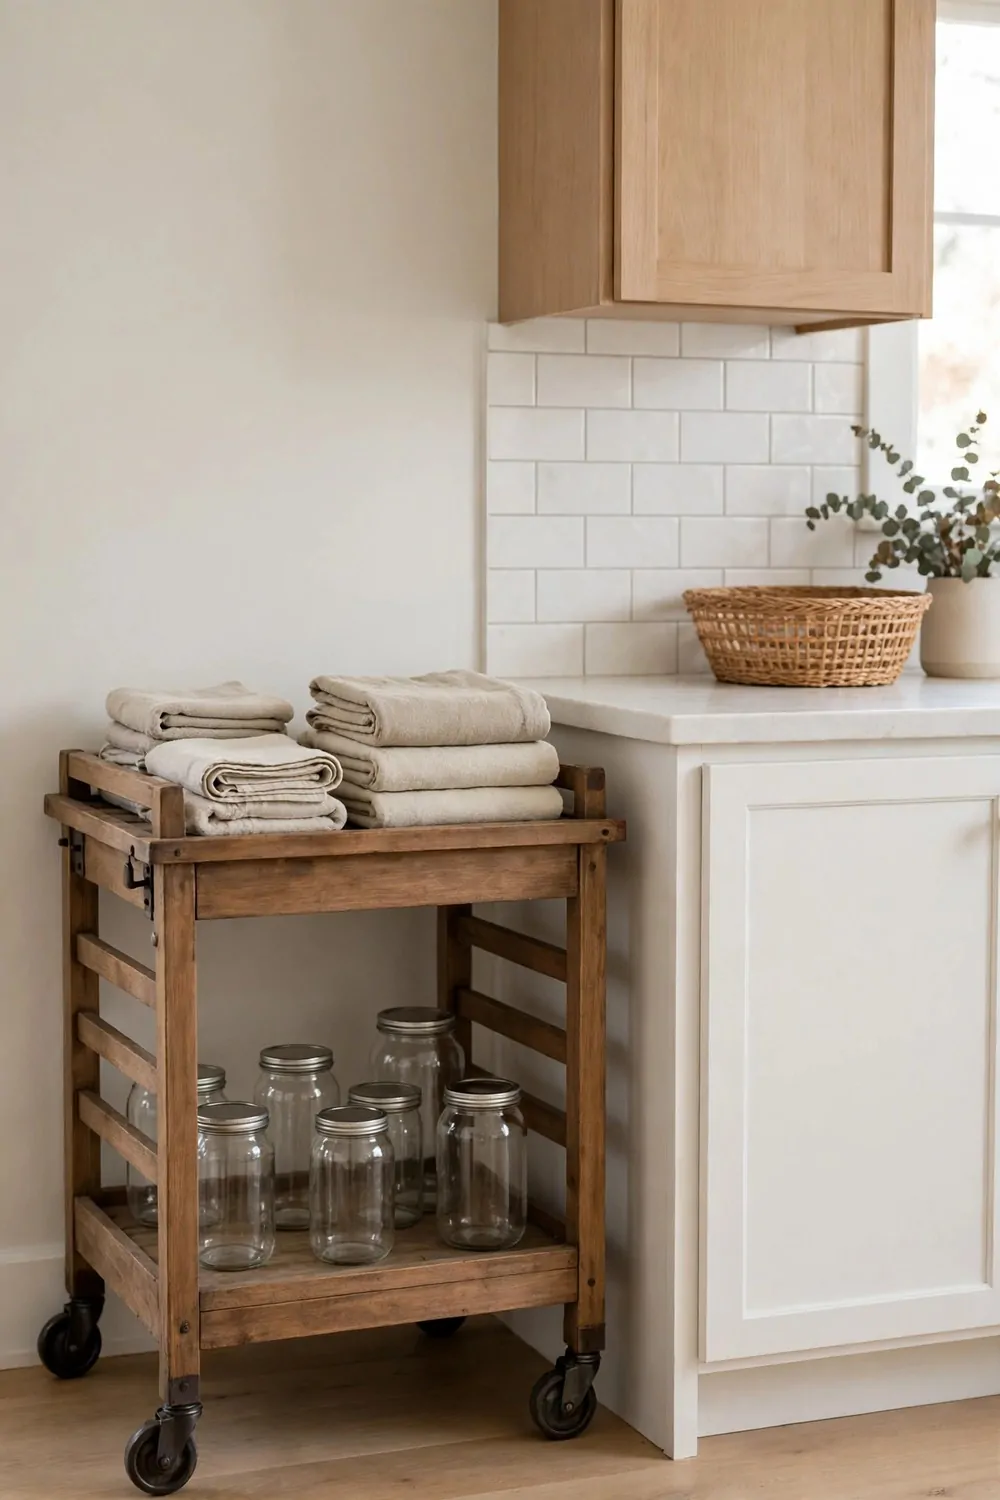
Before, my kitchen had no spare counter space. I had no place to chop, mix, or set down a hot pan.
A rolling kitchen cart gave me that space back. I picked a wood cart with wheels, a shelf below, and a top I could work on.
The after look is neat and useful. The cart sits by the wall when I do not need it, and I roll it out when I cook.
You put the cart together with the steps in the box. It took me about an hour, and I used the tools that came with it.
I put my bowls on the lower shelf and my cutting boards on top. The cart holds a lot, but it does not take much room.
A rolling kitchen cart runs $80 to $250.
Now I roll it next to the stove when I cook chicken and vegetables. I chop, I stir, and I have space for all my pans.
I lock the wheels when I use it so it stays still. I wipe the top with plain soap and water, and it looks clean fast.
If your kitchen feels tight, a cart can help a lot. It is extra space that moves where you need it.
10. Paint One Wall a Deep Green
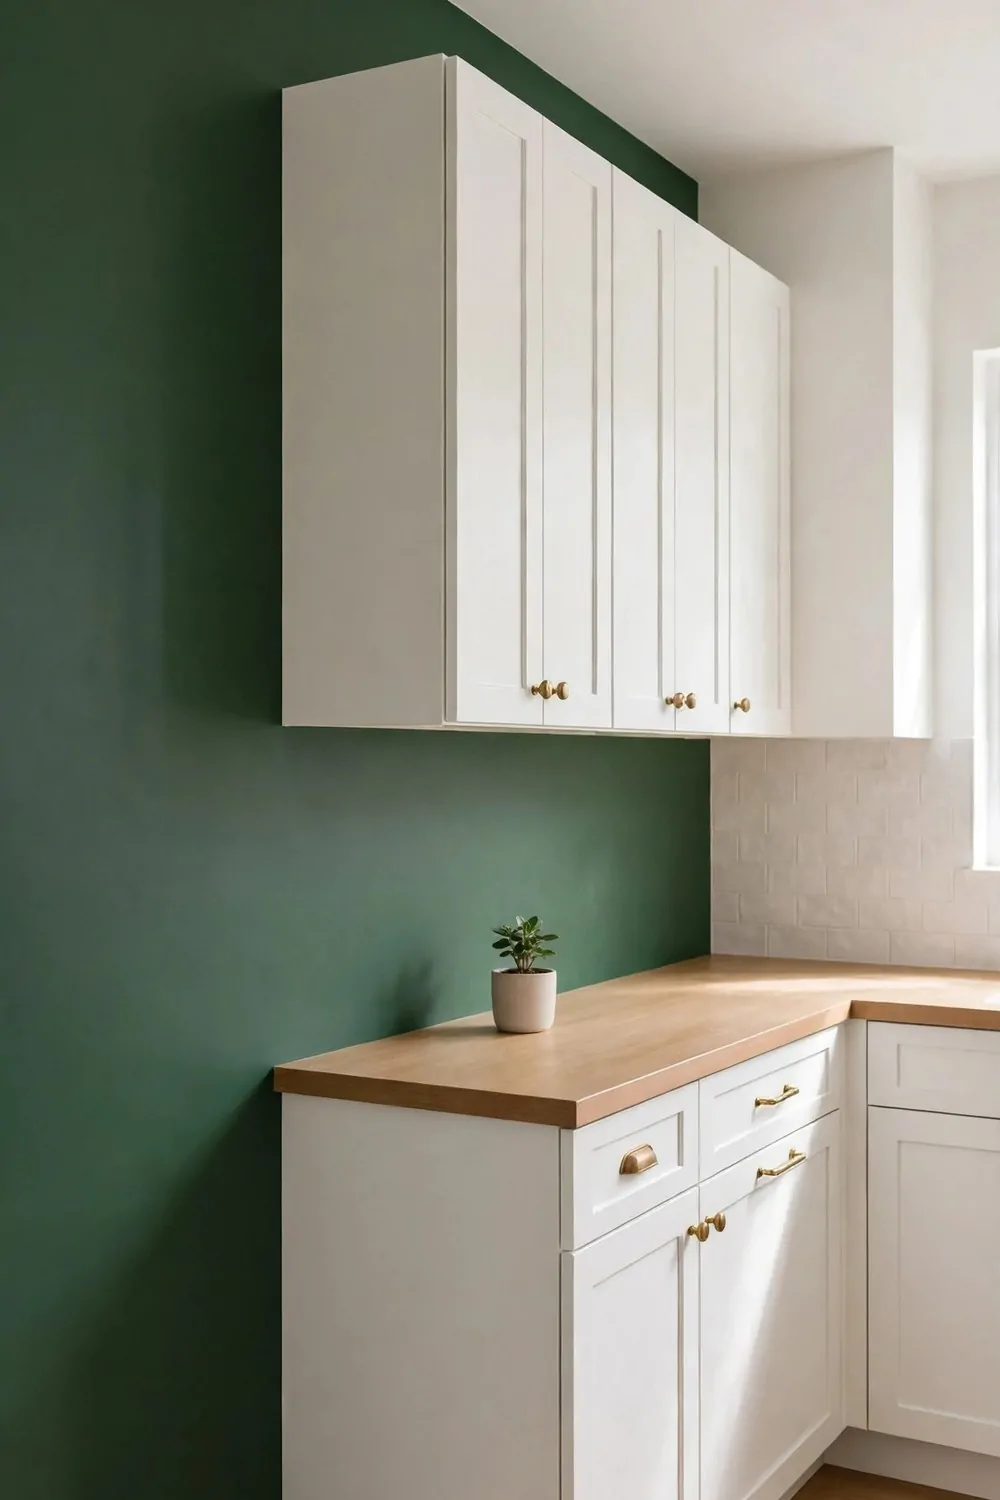
Before, all my kitchen walls were the same pale color. The room felt flat, and nothing stood out.
One deep green wall changed that in a day. The green feels rich and calm, and it makes the white cabinets pop.
The after look is bold but still soft. The green wall feels like the back of the room, and the rest of the room feels bright.
I picked the wall behind the stove for the green paint. I taped the edges, and I put on two coats with a roller.
The first coat looked thin, but the second coat made the color deep and even. I let it dry all night before I hung things back up.
A gallon of deep green paint runs $30 to $60.
Now the green wall makes my wood shelves look warm. I put white plates on the shelf, and the green behind them looks lovely.
I like to cook in the room now, and the color makes me feel calm. It is a small change, but it has a big feel.
If your kitchen feels plain, paint one wall a deep color. It is cheap, it is fast, and it gives the room a new mood.
| Idea | Typical Cost |
|---|---|
| Paint the Cabinets a Soft White | $35 to $65 |
| Swap the Old Faucet for a Brushed Gold One | $60 to $140 |
| Add a Large Window Over the Sink | $300 to $800 |
| Lay Peel-and-Stick Backsplash Tiles | $20 to $50 |
| Replace the Cabinet Handles | $30 to $80 |
| Add Open Wood Shelves | $40 to $120 |
| Put in a New Light Over the Island | $70 to $200 |
| Change the Countertop to Butcher Block | $200 to $600 |
| Add a Rolling Kitchen Cart | $80 to $250 |
| Paint One Wall a Deep Green | $30 to $60 |
11. Swap the Old Sink for a Deep Farmhouse One
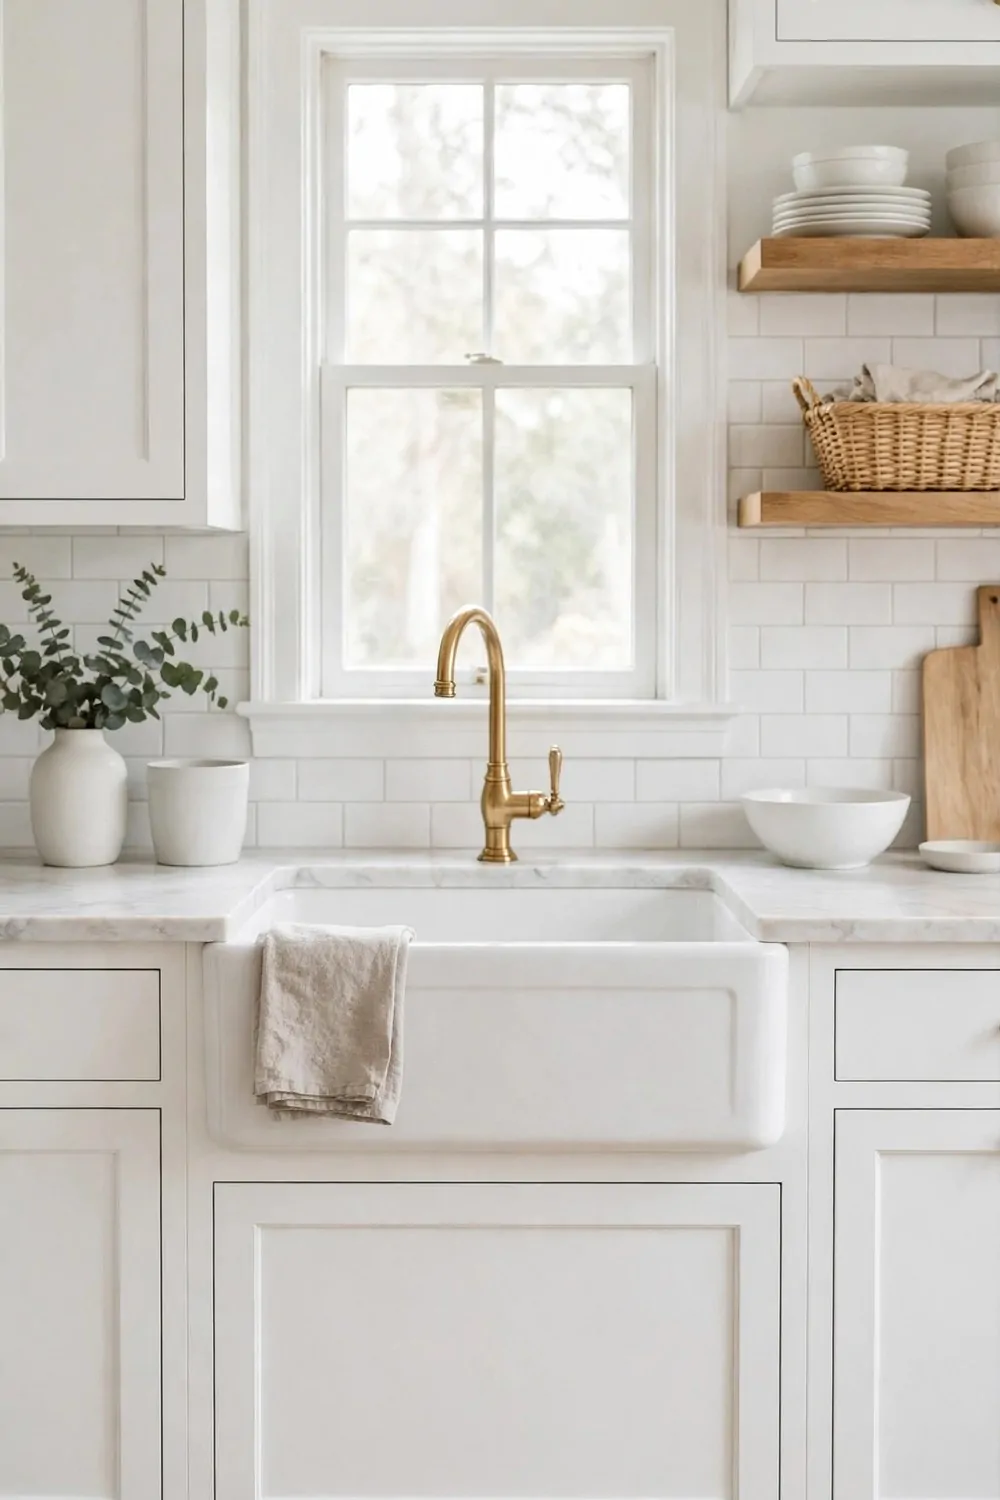
Before, my sink was small and shallow. Water splashed out, and my big pots did not fit at all.
A deep farmhouse sink fixed that problem in one day. It is wide, it is deep, and it has a tall front that looks classic.
The after look is clean and rich. The white sink stands out against the wood counter, and the kitchen feels new.
I had a pro fit the sink because the cabinet had to be cut to hold it. He made sure the pipes lined up right.
We picked a white sink with smooth sides. It is easy to wipe, and it looks good with my brushed gold faucet.
A deep farmhouse sink runs $250 to $700.
Now I wash big pots with ease, and I rinse vegetables in the deep basin. The water stays in the sink, and my floor stays dry.
I clean it with plain soap and water each night. I dry it with a soft cloth, and the white stays bright.
If your sink is too small, this swap is worth it. A deep sink makes daily work feel easy, and it looks lovely too.
12. Add a Small Breakfast Nook
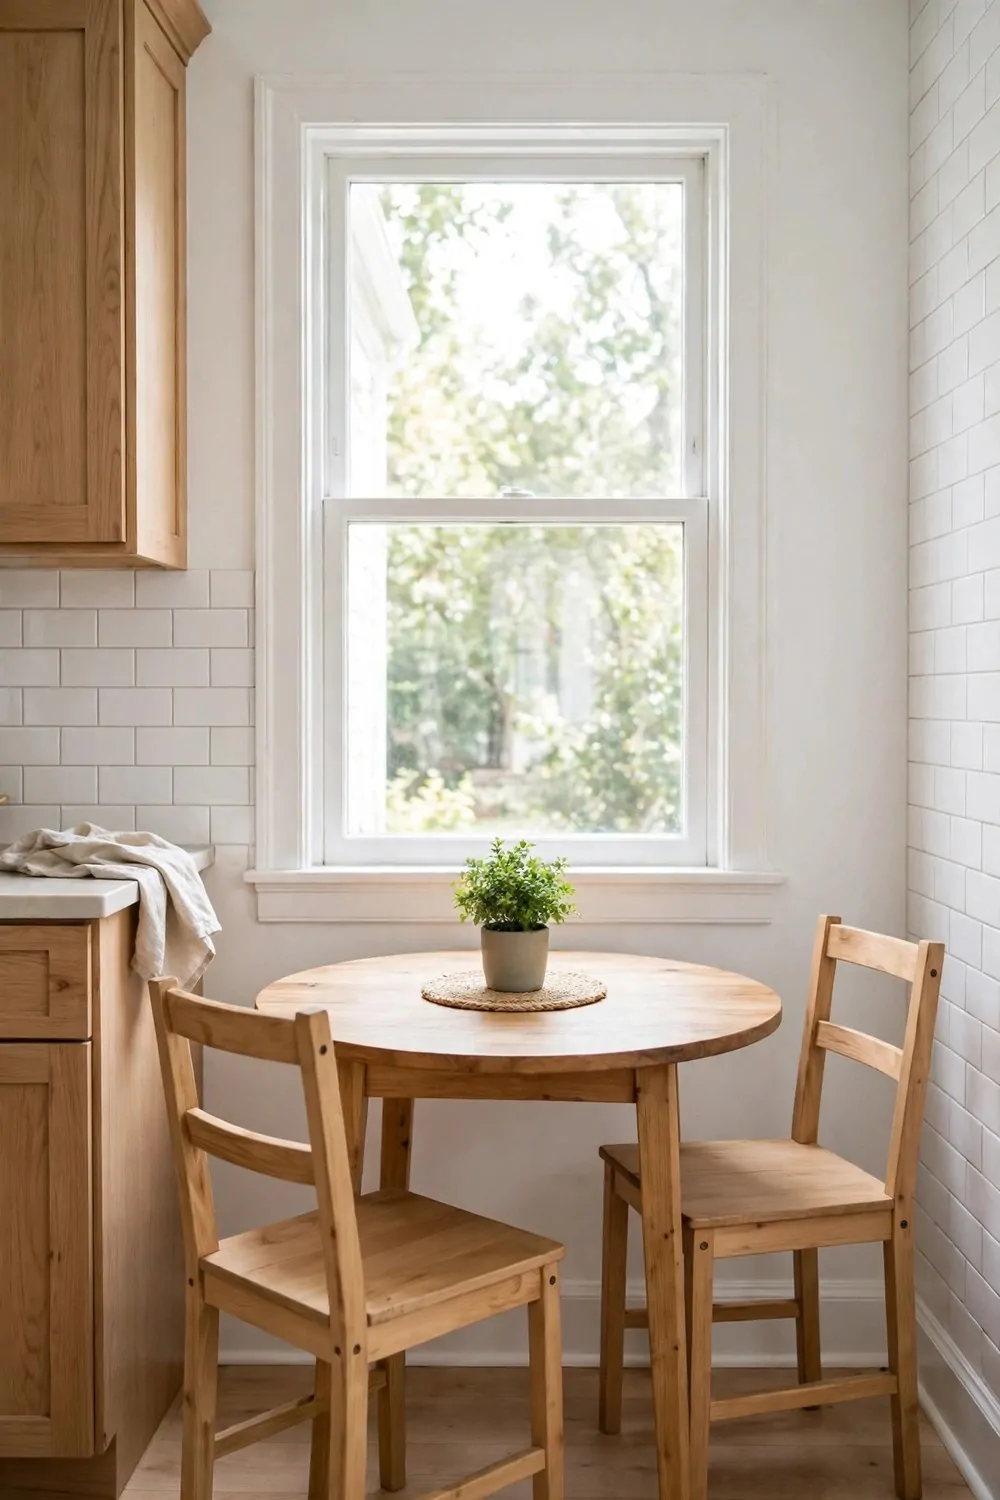
Before, the corner by my window was empty and dull. It held a box of old things, and no one sat there.
A small breakfast nook turned that corner into my best spot. I put in a small round table and two chairs, and it felt cozy at once.
The after look is warm and sweet. The nook feels like a tiny cafe, and the light from the window makes it bright.
I picked a table that fits two people with ease. It does not crowd the room, and I can pull a chair out with room to spare.
I added a soft seat pad to each chair. The pads make the chairs feel nice, and the colors match the room.
A small breakfast nook set runs $150 to $450.
In the morning I sit there with bread and fruit. I eat slow, I look out the window, and I start my day in a calm way.
I wipe the table after each meal with a damp cloth. Plain soap and water keep it clean, and the nook stays ready to use.
If you have an empty corner, make it a nook. It is a small spot, but it gives your kitchen a warm heart.
13. Hang a Pot Rail on the Wall
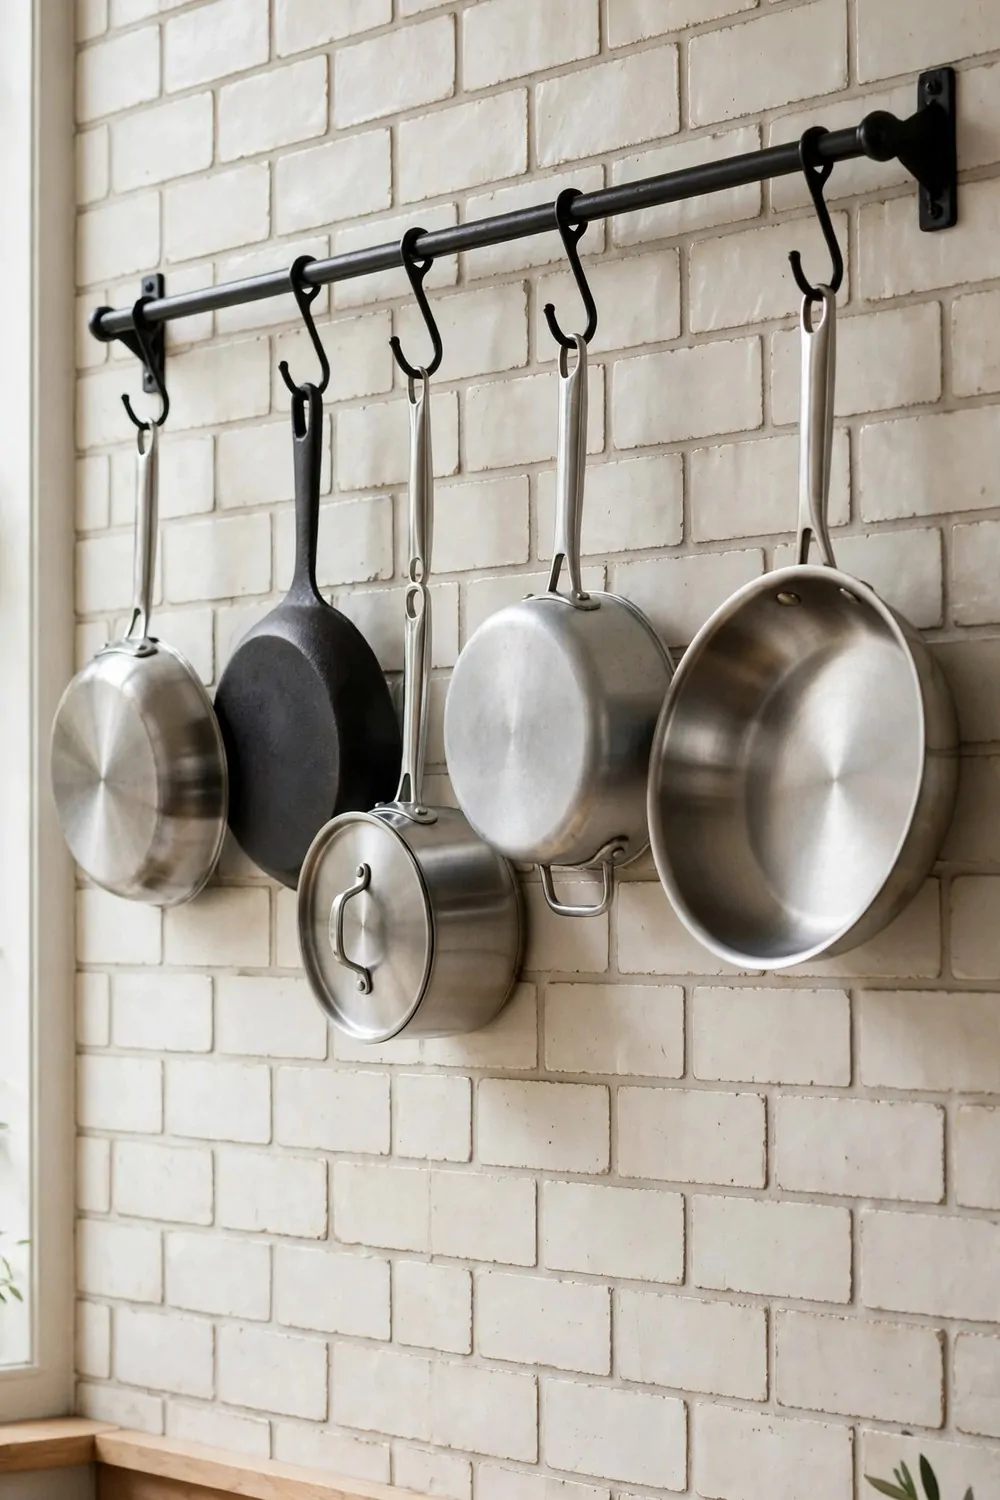
Before, my pots were piled in a low cabinet. I had to pull them all out to find the one I wanted.
A pot rail on the wall fixed that mess. I hung my pans from hooks, and I could see each one at a glance.
The after look is neat and rich. The pots hang in a row, and the wall looks like a cook’s wall, full and useful.
You fix the rail to the wall studs so it holds the weight. I used strong screws, and I tested it with my heaviest pan first.
I hung the pans I use most at the front. The big pot goes at one end, and the small pans go in the middle.
A wall pot rail runs $25 to $70.
Now I grab a pan in one move when I cook rice or chicken. I do not dig in a dark cabinet, and my pans stay in good shape.
I wipe the rail once a week with a damp cloth. Plain soap and water keep it clean, and the hooks stay smooth.
If your cabinets are full of pans, try a rail. It frees space, it looks good, and it makes cooking feel easy.
14. Put in Pull-Out Pantry Shelves
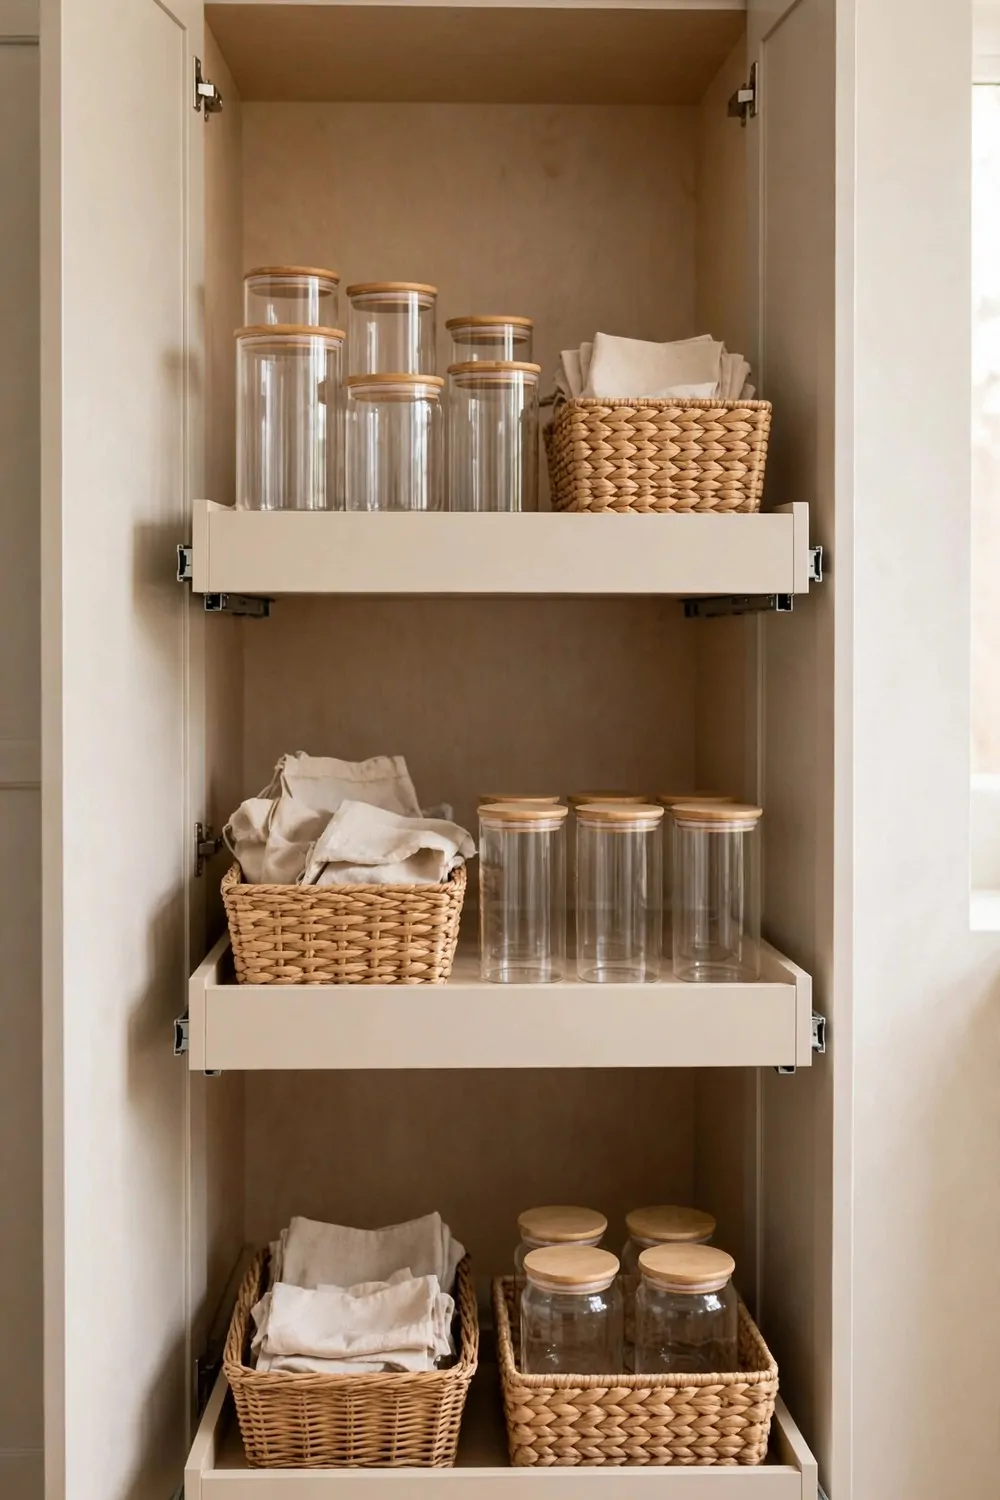
Before, my pantry was deep and dark. Food got lost in the back, and I bought the same thing twice more than once.
Pull-out shelves changed that pantry in one day. Now each shelf slides out, and I can see all my food at once.
The after look is tidy and bright. The shelves roll out smooth, and the pantry feels like a small shop, neat and full.
You take the old shelves out, then you fix the rails in place. I read the steps twice, and I used a level to keep them straight.
I put rice and pasta on one shelf, beans on the next, and bread on the top shelf. Each thing has its own spot now.
A set of pull-out pantry shelves runs $60 to $180.
Now I find what I need in seconds. I cook with ease, and I do not waste food that hides in the back.
I wipe the shelves once a month with a damp cloth. Plain soap and water keep them clean, and the rails roll smooth.
If your pantry feels like a dark hole, try pull-out shelves. They save time, they save food, and they make the kitchen feel smart.
15. Add Under-Cabinet Lights
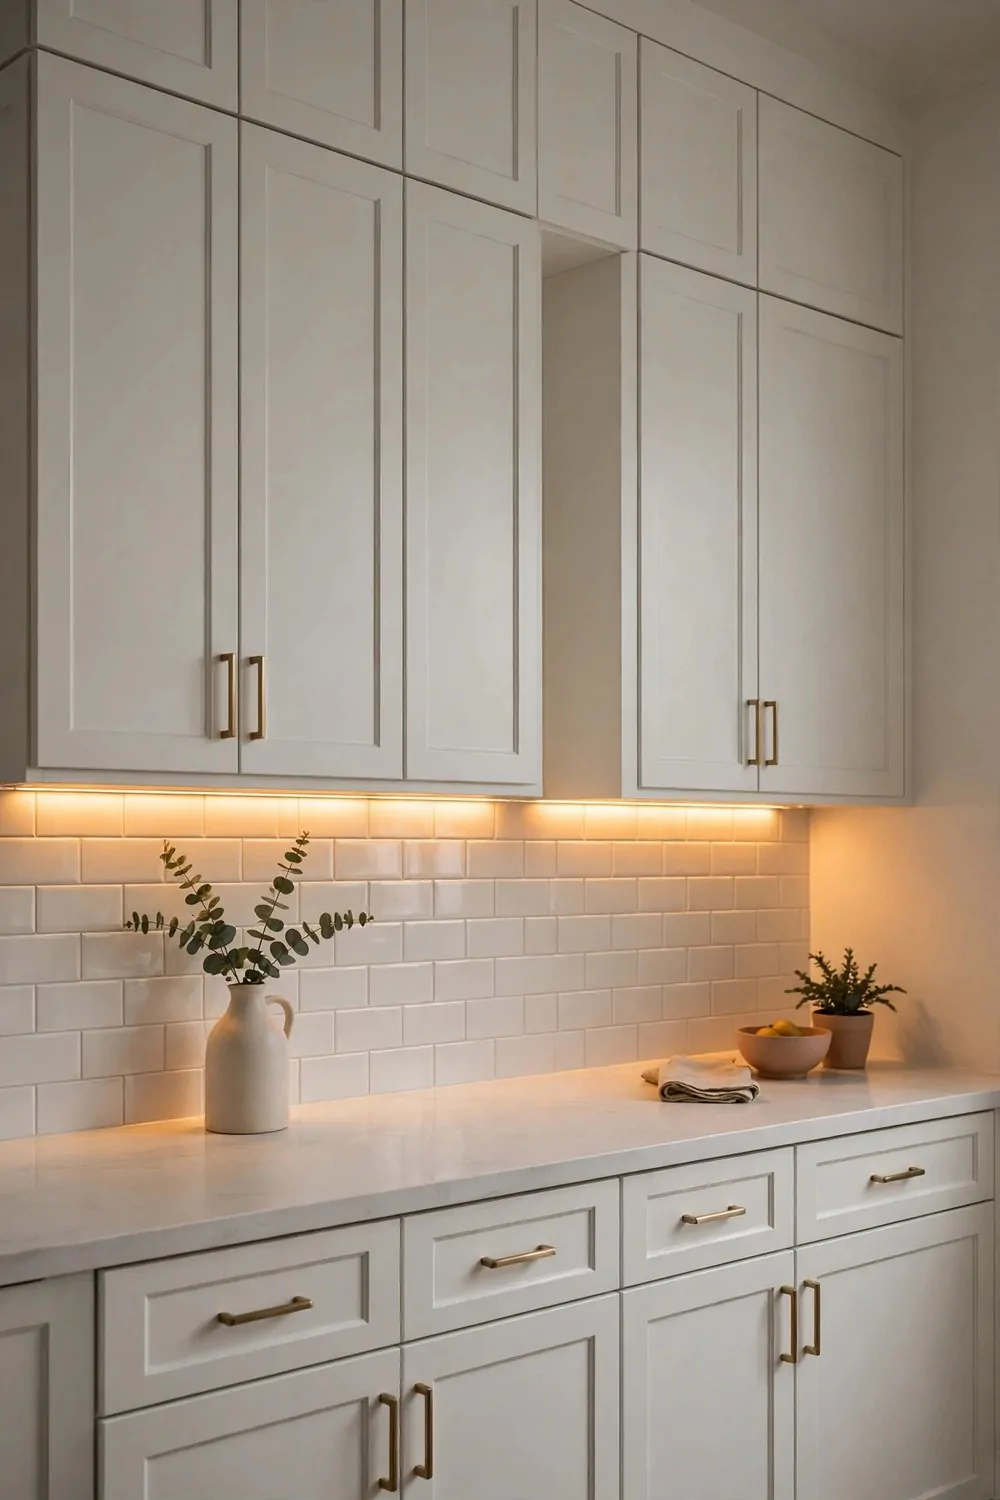
Before, my counters were dark in the evening. The top cabinets cast a shadow, and I could not see what I was chopping.
Under-cabinet lights fixed that shadow in an hour. I stuck small light strips under the cabinets, and the counters lit up at once.
The after look is bright and warm. The light falls on the counter, and the whole kitchen feels rich at night.
You plug the strips in, or you use small batteries for some types. I picked plug-in strips because they stay bright for a long time.
I hid the wires behind the cabinets so they would not show. It took a little care, but the finish looks clean.
A set of under-cabinet lights runs $25 to $90.
Now I chop vegetables and make rice at night with ease. I can see all my work, and the kitchen feels safe and bright.
I wipe the strips once a week with a dry cloth. The light stays clear, and the counters stay easy to use.
If your counters feel dark, add these lights first. They are cheap, they are easy, and they make night cooking feel new.
16. Replace the Old Floor with Wood-Look Tiles
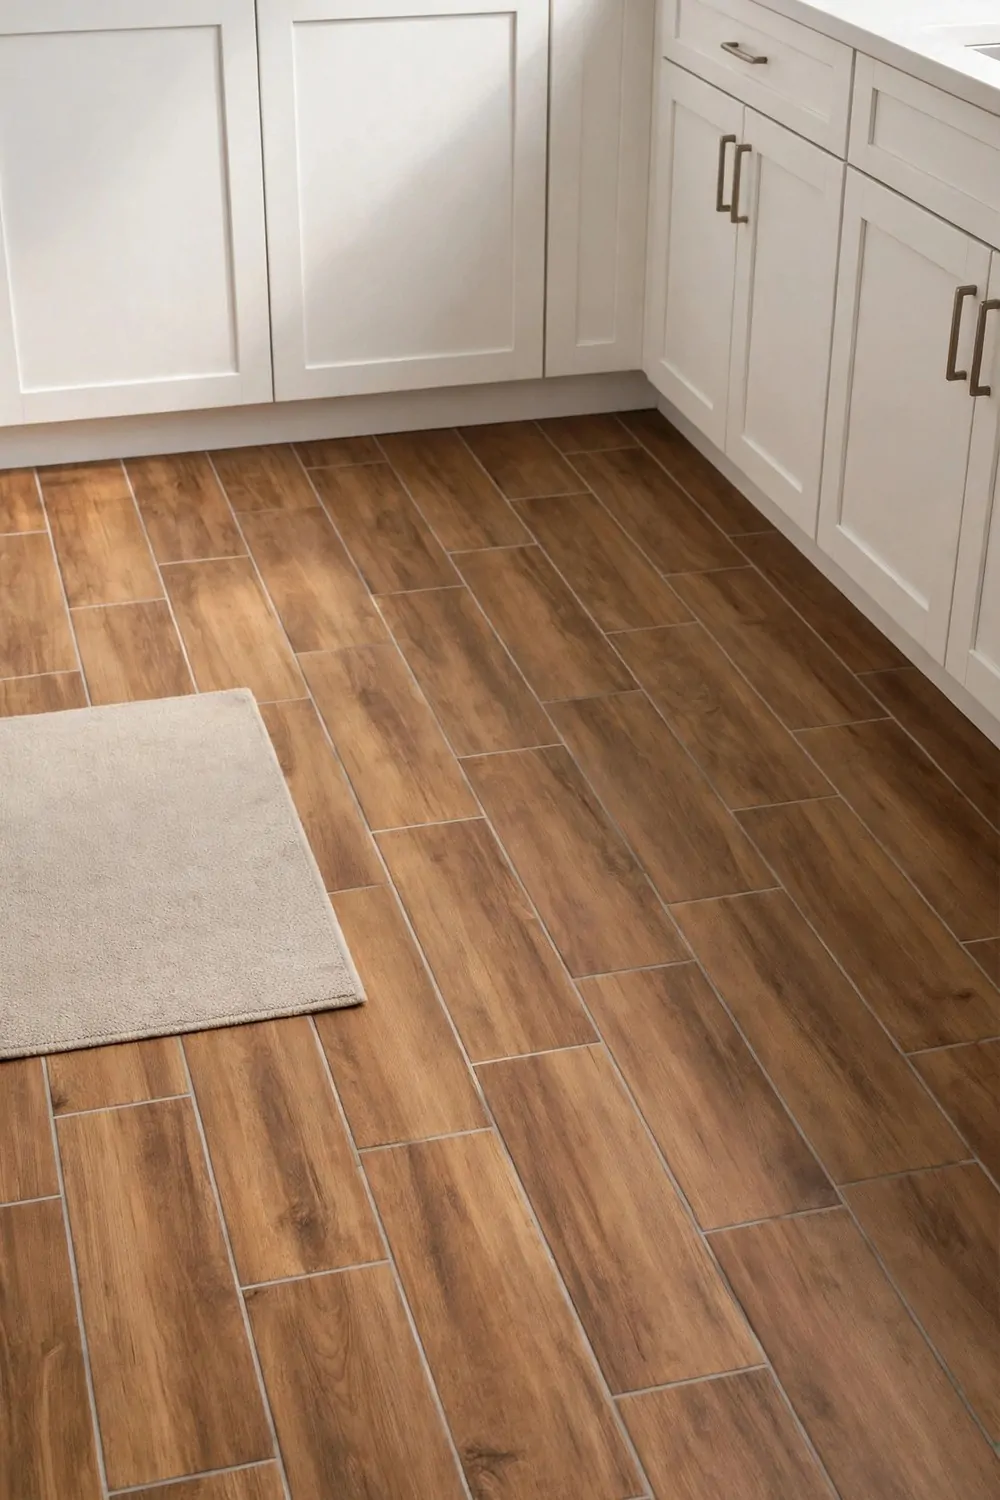
My old kitchen floor looked tired and dull, and every mark showed up on it.
The colour had faded in the middle where we walk each day. It made the whole room feel old, even when the counters were clean.
I wanted the warm look of wood without the worry of water marks.
Wood-look tiles gave me just that. They look like real wood planks, with soft lines and warm tones. They feel solid under my feet, and they wipe clean with plain soap and water.
Now the floor looks fresh and rich. The room feels bigger, and the light moves across the floor in a soft way.
A wood-look tile floor runs $300 to $800.
I picked a light warm tone that suits my white cabinets. It lifts the whole kitchen, and it works well with my wooden tray and fruit bowl.
My kids drop crumbs, and I spill water near the sink. The tiles do not mind at all. I just wipe them, and they look new again.
If your floor looks old, this one change can wake up the whole room.
17. Add a Slim Island with Stools
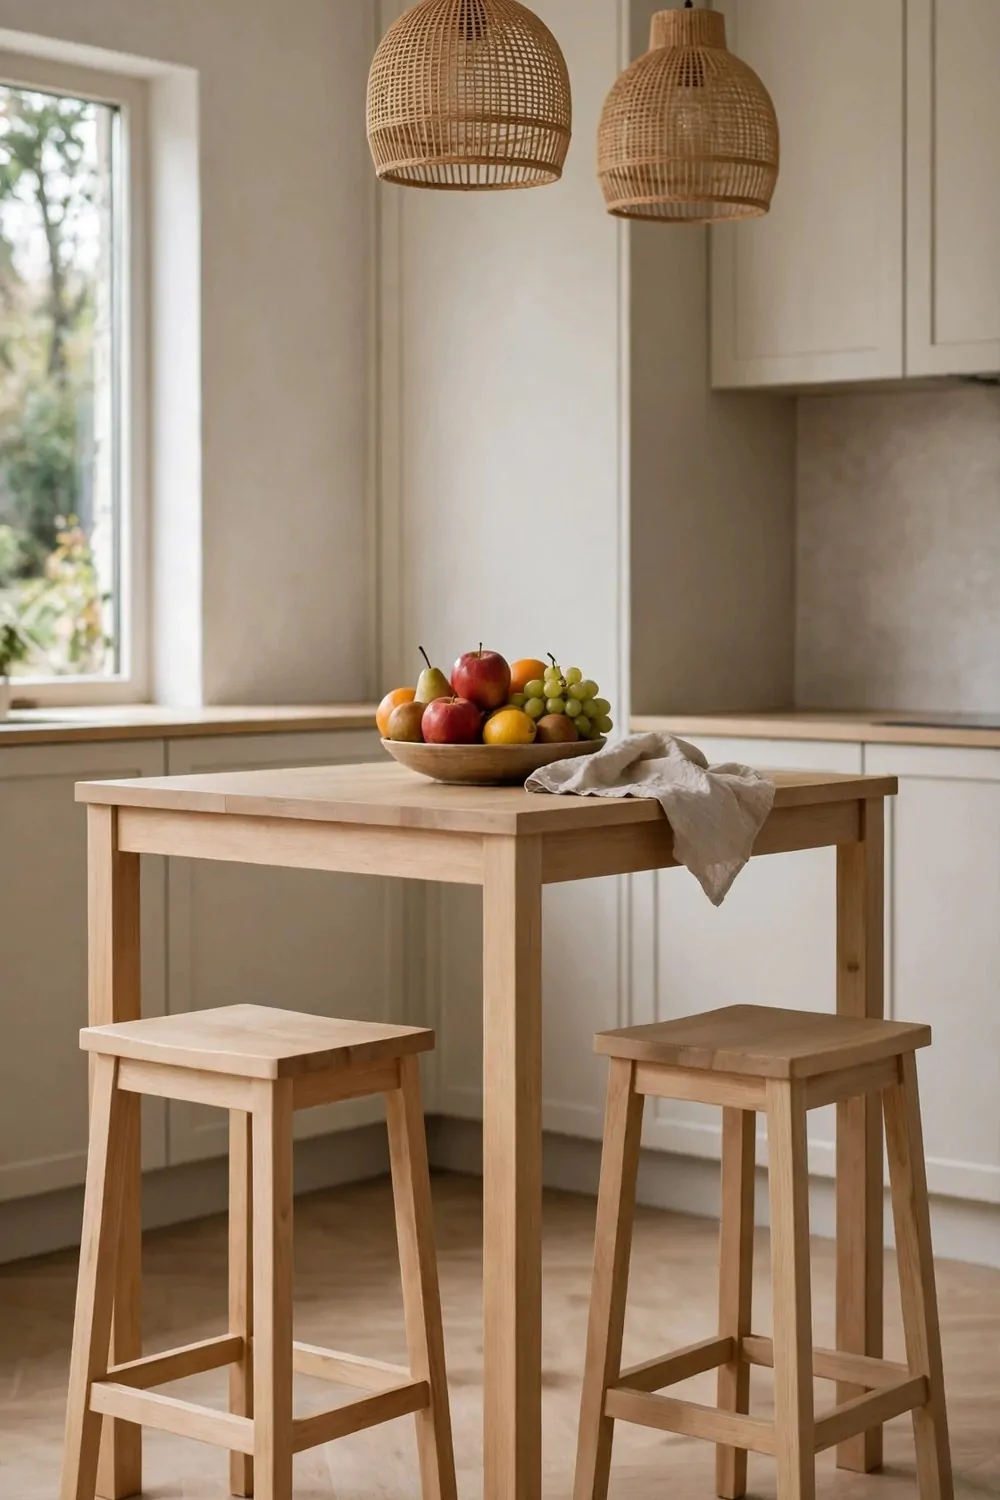
Our old kitchen had no place to sit, and we all stood in a line by the counter.
I made snacks on one side, and my kids did school work on the other side. We kept bumping into each other, and the room felt tight.
A slim island fixed that in one day.
It is long and narrow, so it fits even in a small kitchen. It gives me extra space to chop vegetables and roll bread dough. It also gives us a spot to sit and talk.
Now the after look is bright and calm. The island feels like the heart of the room, and we use it all day.
A slim island with stools runs $250 to $600.
I picked two plain stools that tuck right under the top. They do not take up much room, and they are easy to pull out for lunch.
In the morning I sit there with bread and fruit. In the evening my kids sit there with rice and chicken, and we chat while I cook.
A slim island is a small change that makes a big difference.
18. Paint the Island a Bold Colour
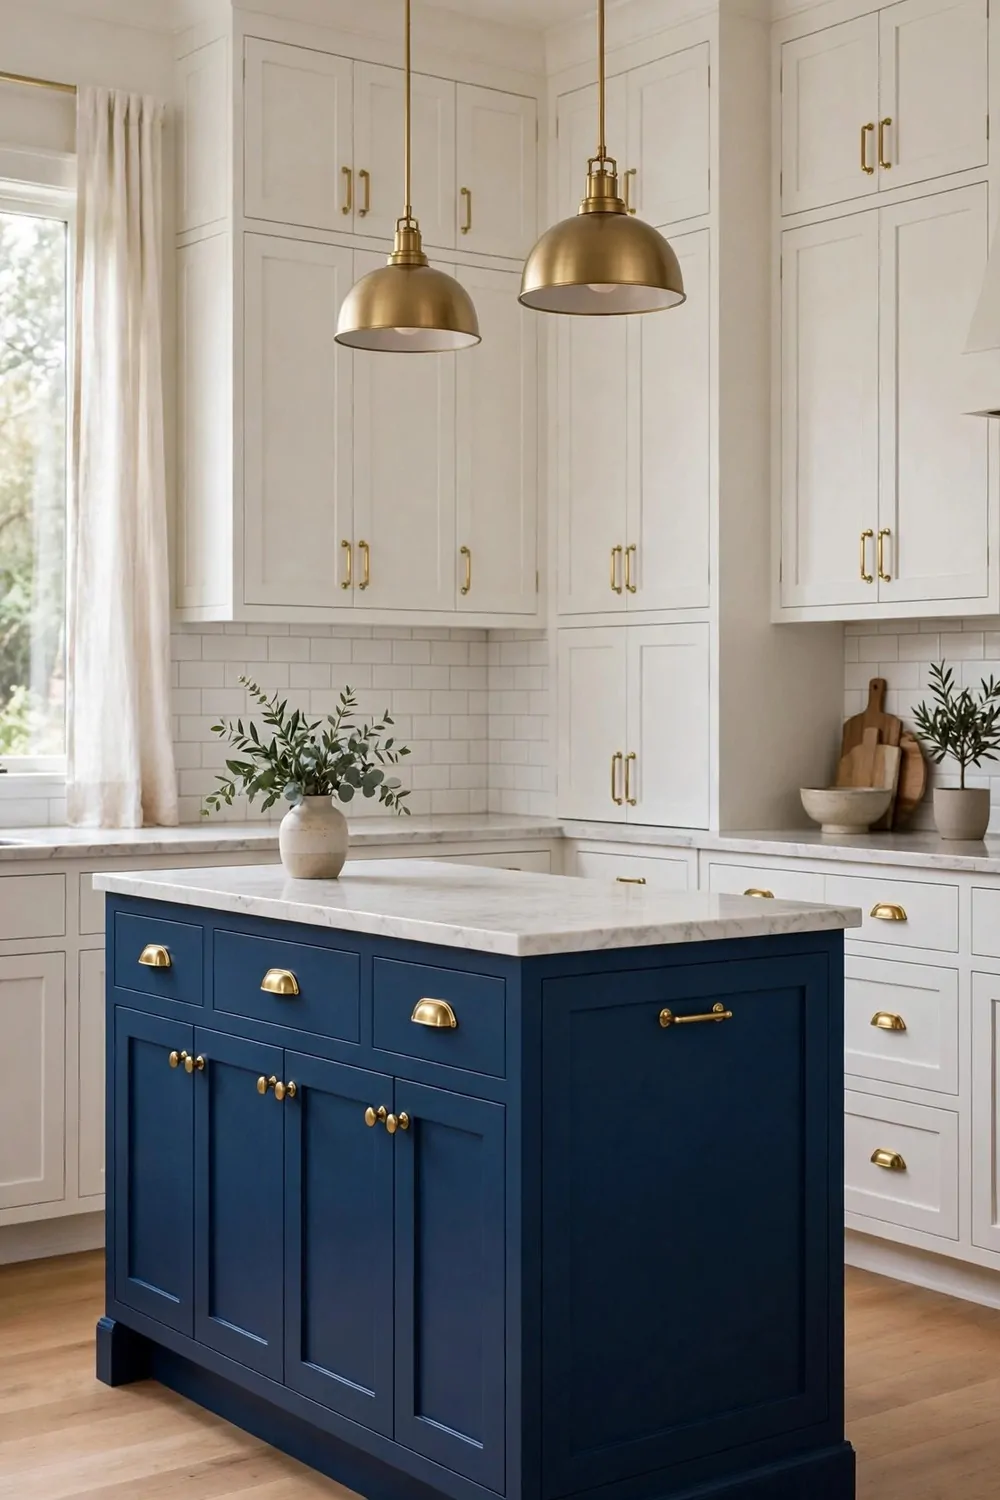
My island used to blend in with all the white, and it looked plain and flat.
It had no life at all. Guests walked past it, and my eyes just slid right over it.
I gave it a bold colour, and the whole kitchen woke up.
I picked a deep blue that feels rich and calm. I cleaned the wood first, then I put on two thin coats. I let each coat dry well before the next one.
Now the island is the first thing you see. It looks fresh and strong, and it makes the white cabinets look even brighter.
A tin of paint for the island runs $20 to $45.
I kept the top plain wood so the colour would not feel too much. The mix of wood and colour feels warm, and it suits our home.
If you worry about a bold colour, try it on the island first. It is just one small spot, and you can change it again if you do not love it.
One pot of paint can turn a dull island into a star.
19. Add Glass-Front Cabinet Doors
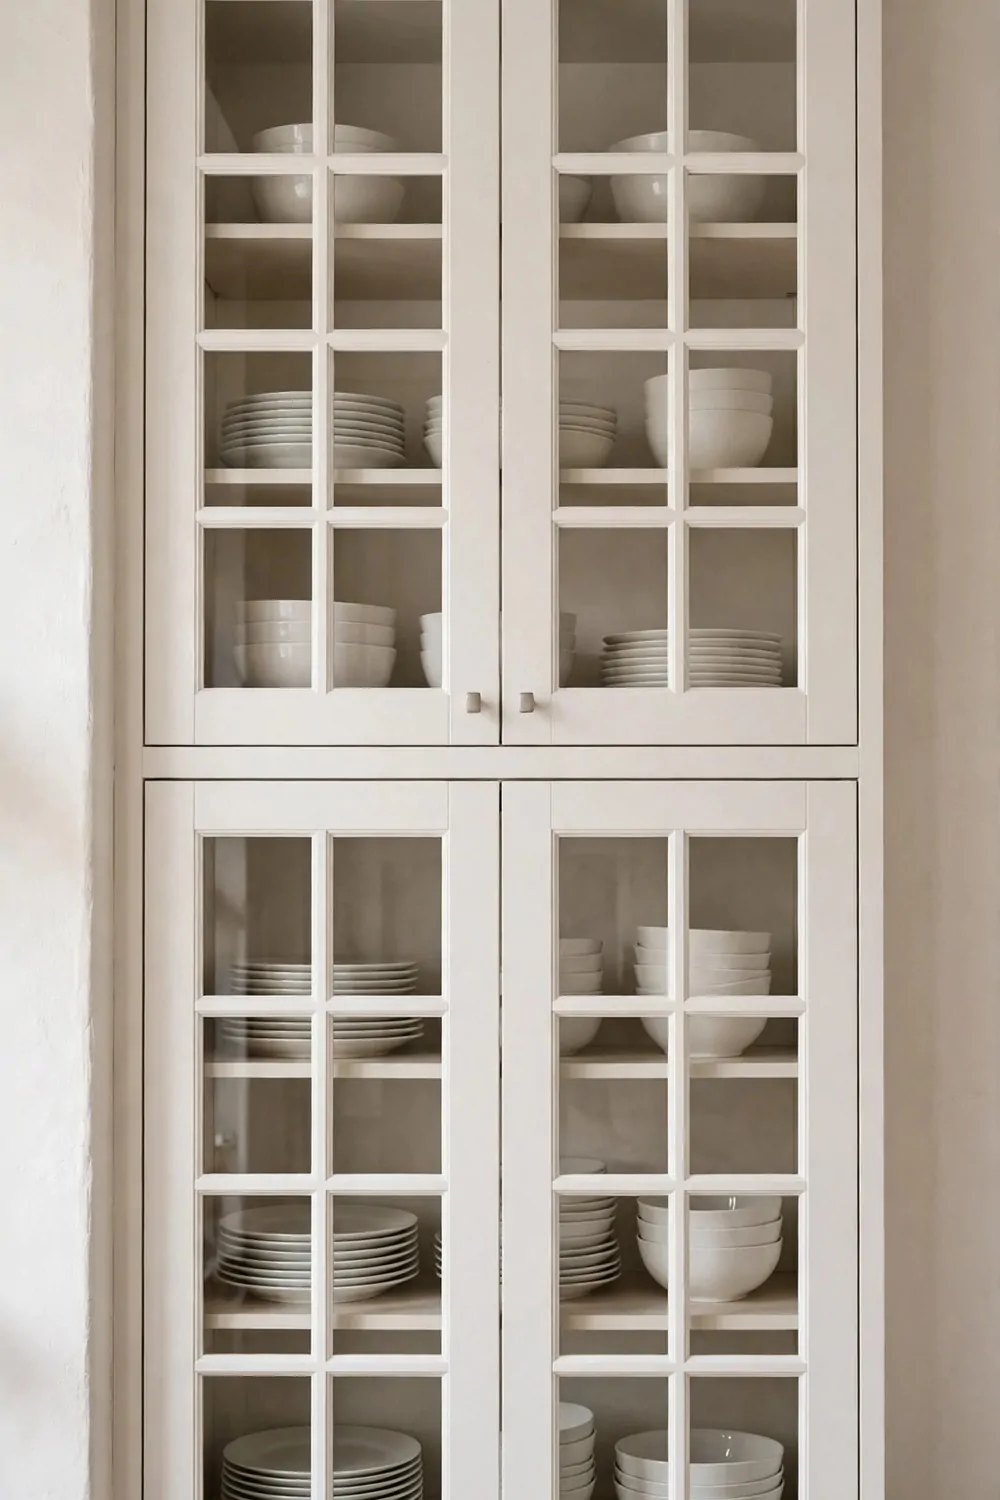
My old cabinets had solid doors, and I never knew what sat behind them.
I opened the wrong door all the time. The kitchen felt dark and shut in, and my nice bowls stayed hidden away.
Glass-front doors changed all of that.
Now I can see my white plates and clear glasses in a neat row. The glass lets light through, and the room feels open and bright. I keep only my best things on show, so it always looks tidy.
The before look was heavy and dull. The after look is light and fresh, and it feels like a new kitchen.
A set of glass-front cabinet doors runs $150 to $400.
I put my plain white cups in one cabinet and my fruit bowls in the next. It looks calm, and it helps me find things fast.
You do not need glass on every door. Just two doors near the sink can lift the whole wall, and the rest can stay plain.
Glass doors make a small kitchen feel big and bright.
20. Put a Wooden Tray on the Counter
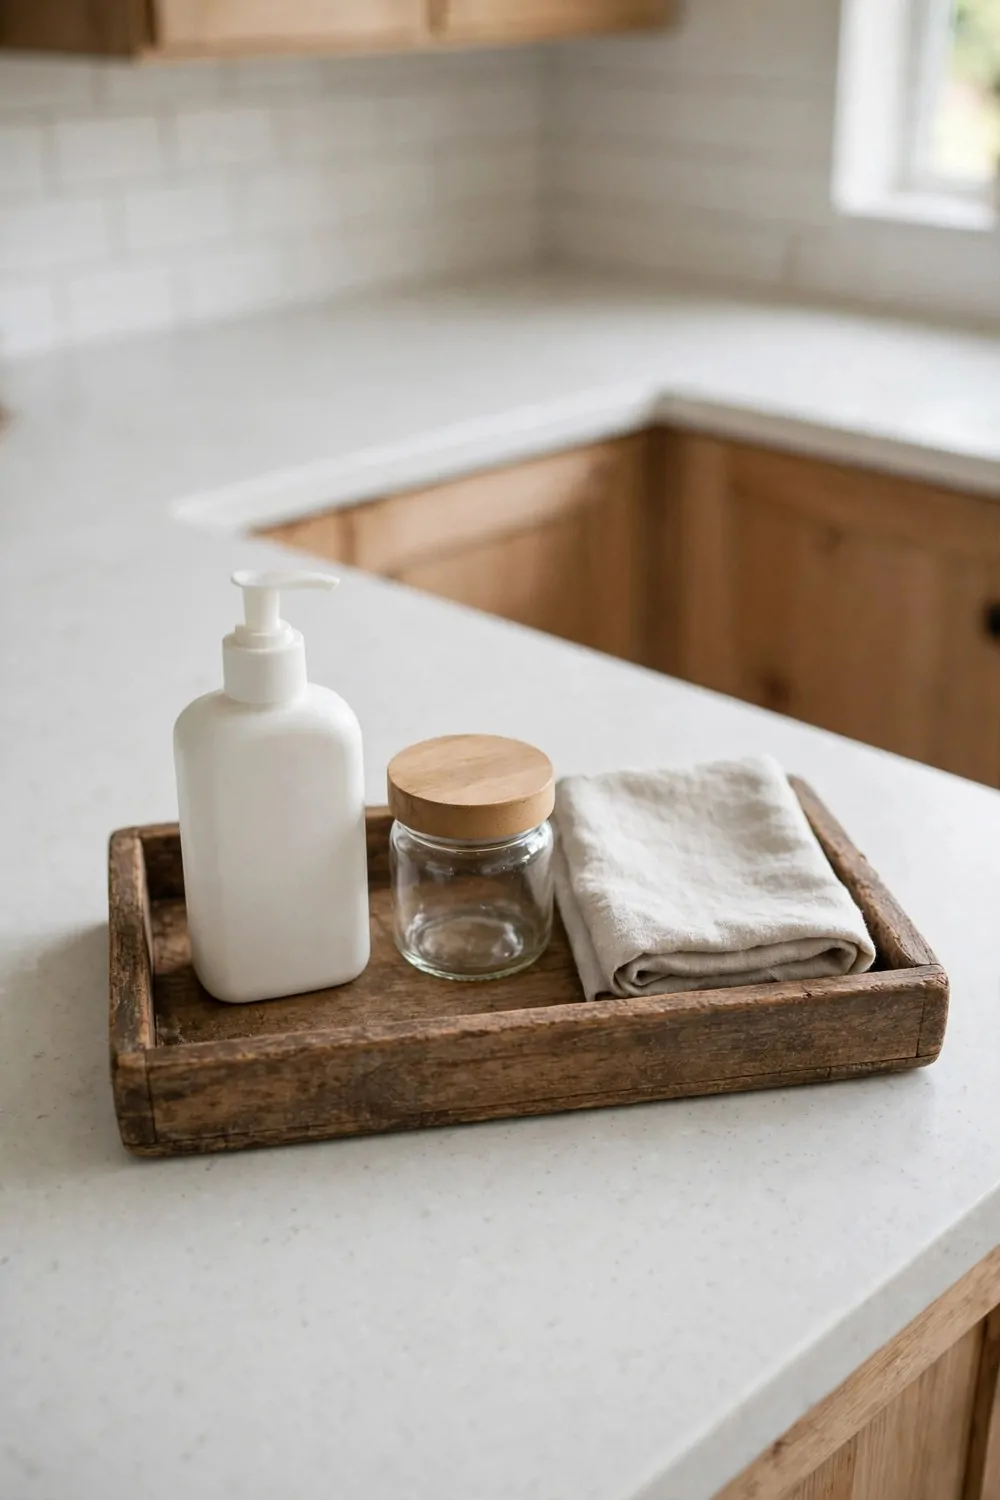
My counter used to look messy, with small things spread all over it.
A bottle here, a cloth there, and a pile of papers in the middle. It never looked tidy, even right after I cleaned it.
A wooden tray gave all those bits a home.
I put my soap, a small plant, and a jar on the tray. It looks neat, and I can lift the whole tray when I wipe the counter. The wood adds a warm touch that feels soft and rich.
Now the counter looks calm and fresh. The tray makes a plain corner feel cared for.
A wooden tray runs $15 to $35.
I use mine near the sink for soap and a small cloth. In the evening I move it to the side and put bread and fruit on it for a quick snack.
A tray is a small buy with a big effect. It keeps things in one place, and it stops the counter from looking like a mess.
Try one tray, and you will see the change at once.
| Idea | Typical Cost |
|---|---|
| Swap the Old Sink for a Deep Farmhouse One | $250 to $700 |
| Add a Small Breakfast Nook | $150 to $450 |
| Hang a Pot Rail on the Wall | $25 to $70 |
| Put in Pull-Out Pantry Shelves | $60 to $180 |
| Add Under-Cabinet Lights | $25 to $90 |
| Replace the Old Floor with Wood-Look Tiles | $300 to $800 |
| Add a Slim Island with Stools | $250 to $600 |
| Paint the Island a Bold Colour | $20 to $45 |
| Add Glass-Front Cabinet Doors | $150 to $400 |
| Put a Wooden Tray on the Counter | $15 to $35 |
21. Add a Herb Garden on the Windowsill
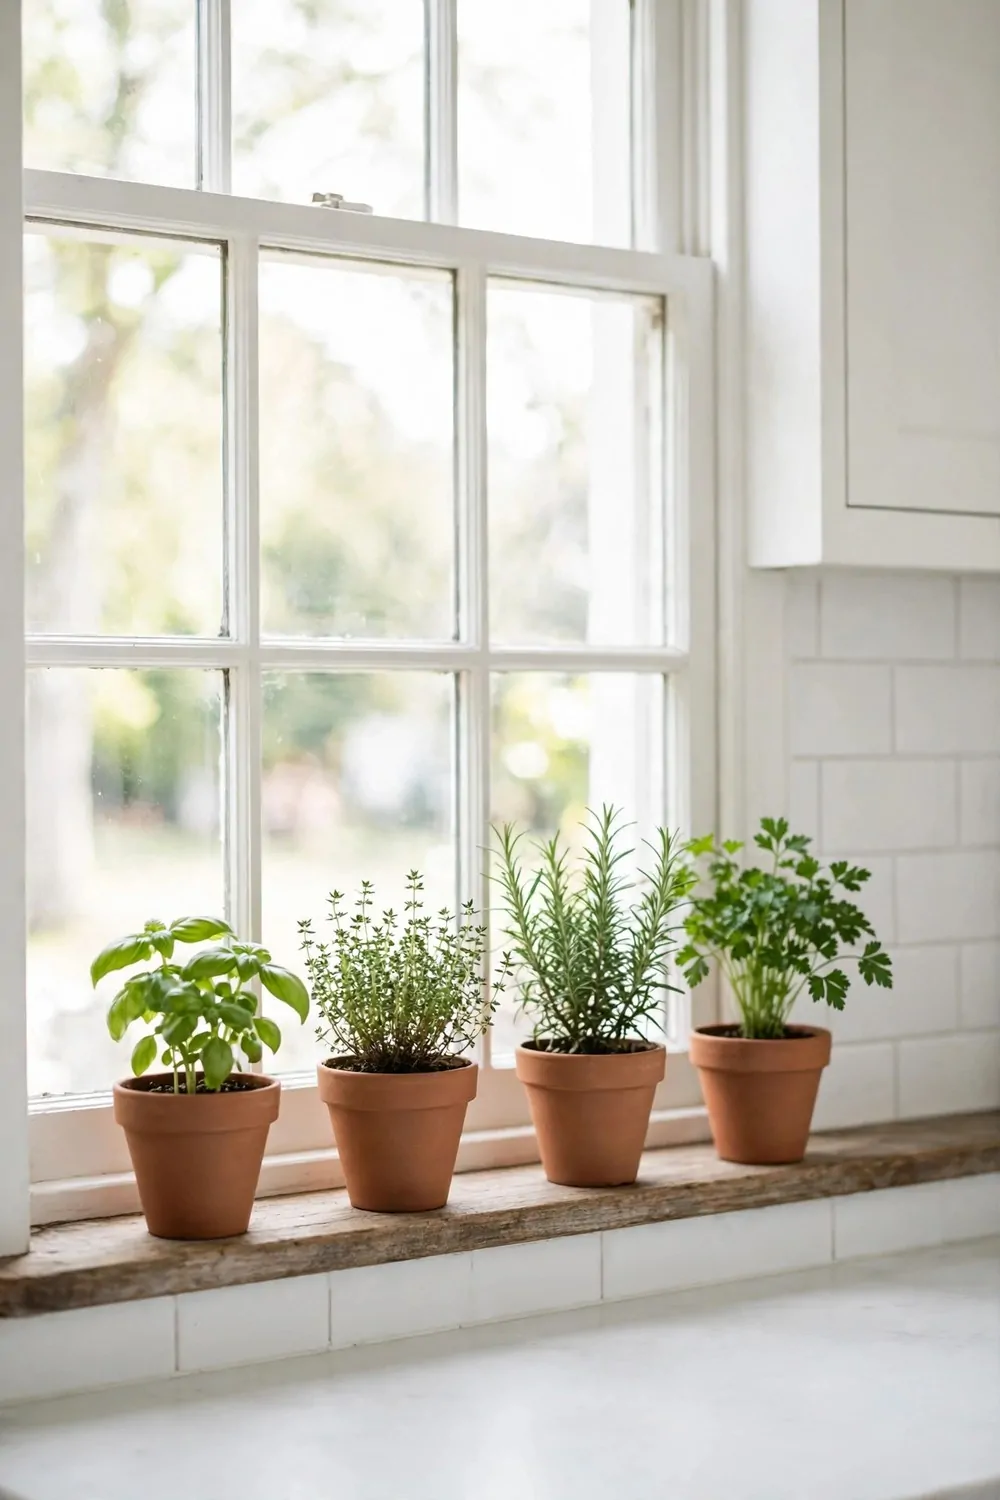
My windowsill used to hold old jars and dust, and it looked sad and dull.
It was just a bare strip of wood. I never looked at it, and it added nothing to the room.
A small herb garden made it come alive.
I put three small pots in a row, with green leaves that smell fresh when I touch them. I water them each morning, and they grow a little more each week. They make the window feel bright and full of life.
Now the kitchen smells fresh and looks green. The before look was bare, and the after look is soft and full.
A small herb garden kit runs $15 to $30.
I snip a few leaves for pasta and rice. It feels good to use something I grew right by the window.
You do not need a big garden for this. Three small pots are enough, and they are easy to care for, even if you are new to plants.
A green windowsill makes the whole kitchen feel fresh.
22. Swap the Fridge Handles for Black Ones
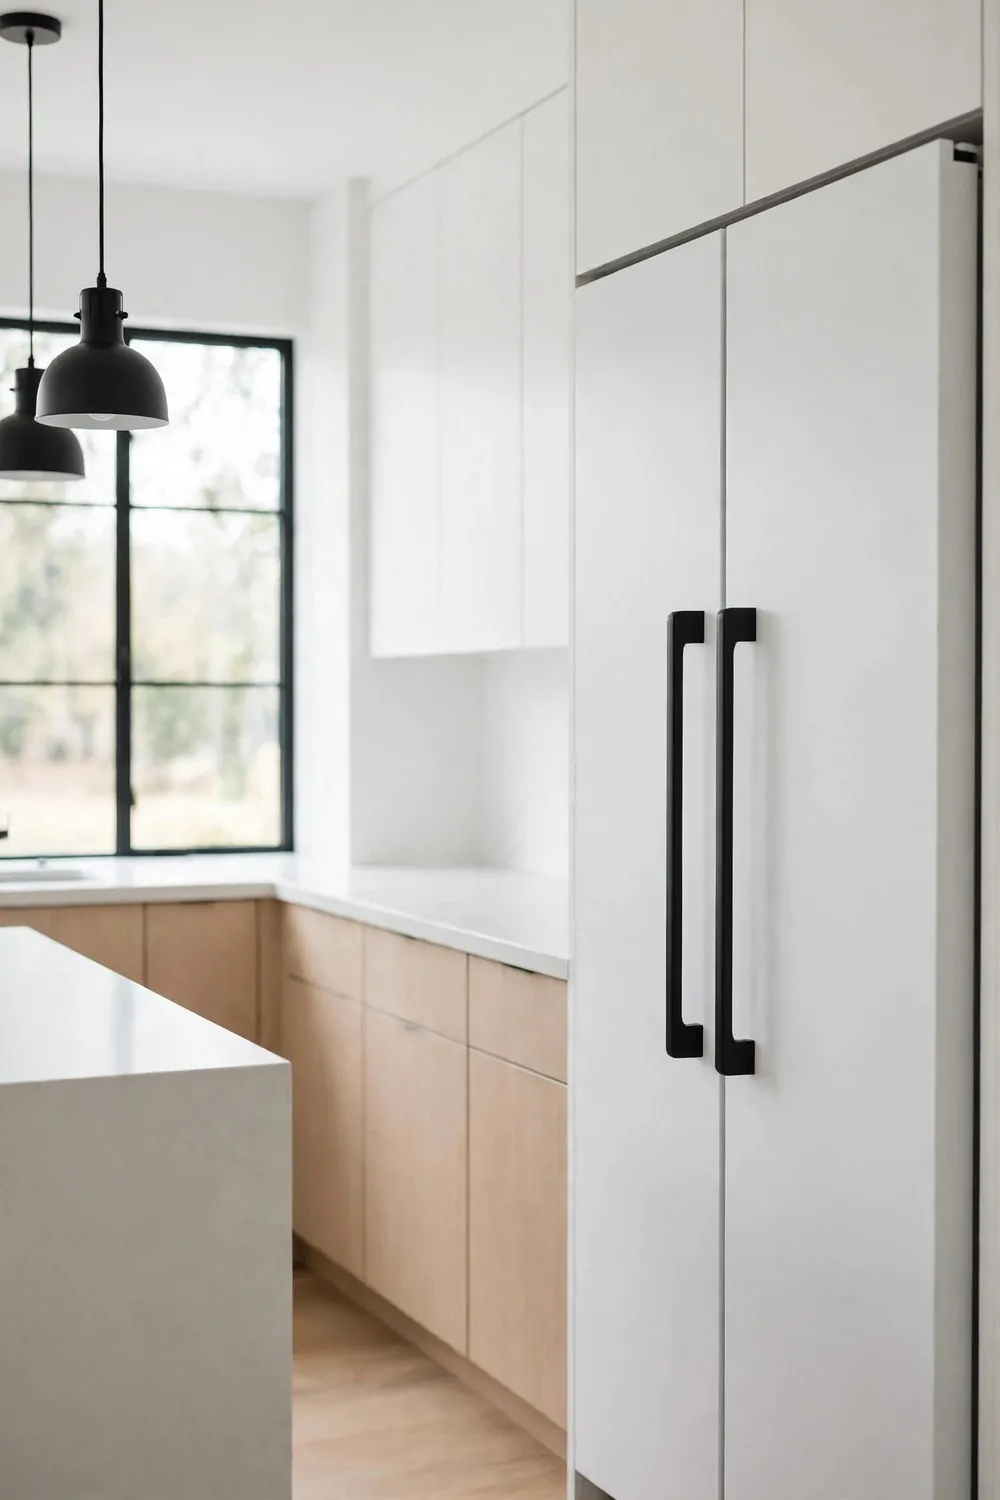
My old fridge handles were pale and worn, and they looked tired next to the clean fridge.
They had small marks that would not wash off. They made the whole fridge look old, even though it still worked well.
Black handles gave it a fresh new face.
I took off the old handles with a simple tool. I put on the new black ones in the same holes, and it took less than an hour. The dark colour looks smart against the light fridge door.
Now the fridge looks new and bold. The before look was dull, and the after look is clean and rich.
A set of black fridge handles runs $25 to $60.
I picked plain black handles with no fancy shape. They feel good in my hand, and they match my black tap and dark chairs.
This is one of the easiest swaps in the kitchen. You do not need new tools, and you do not need to move the fridge at all.
New handles can make an old fridge look brand new.
23. Add a Built-In Spice Rack
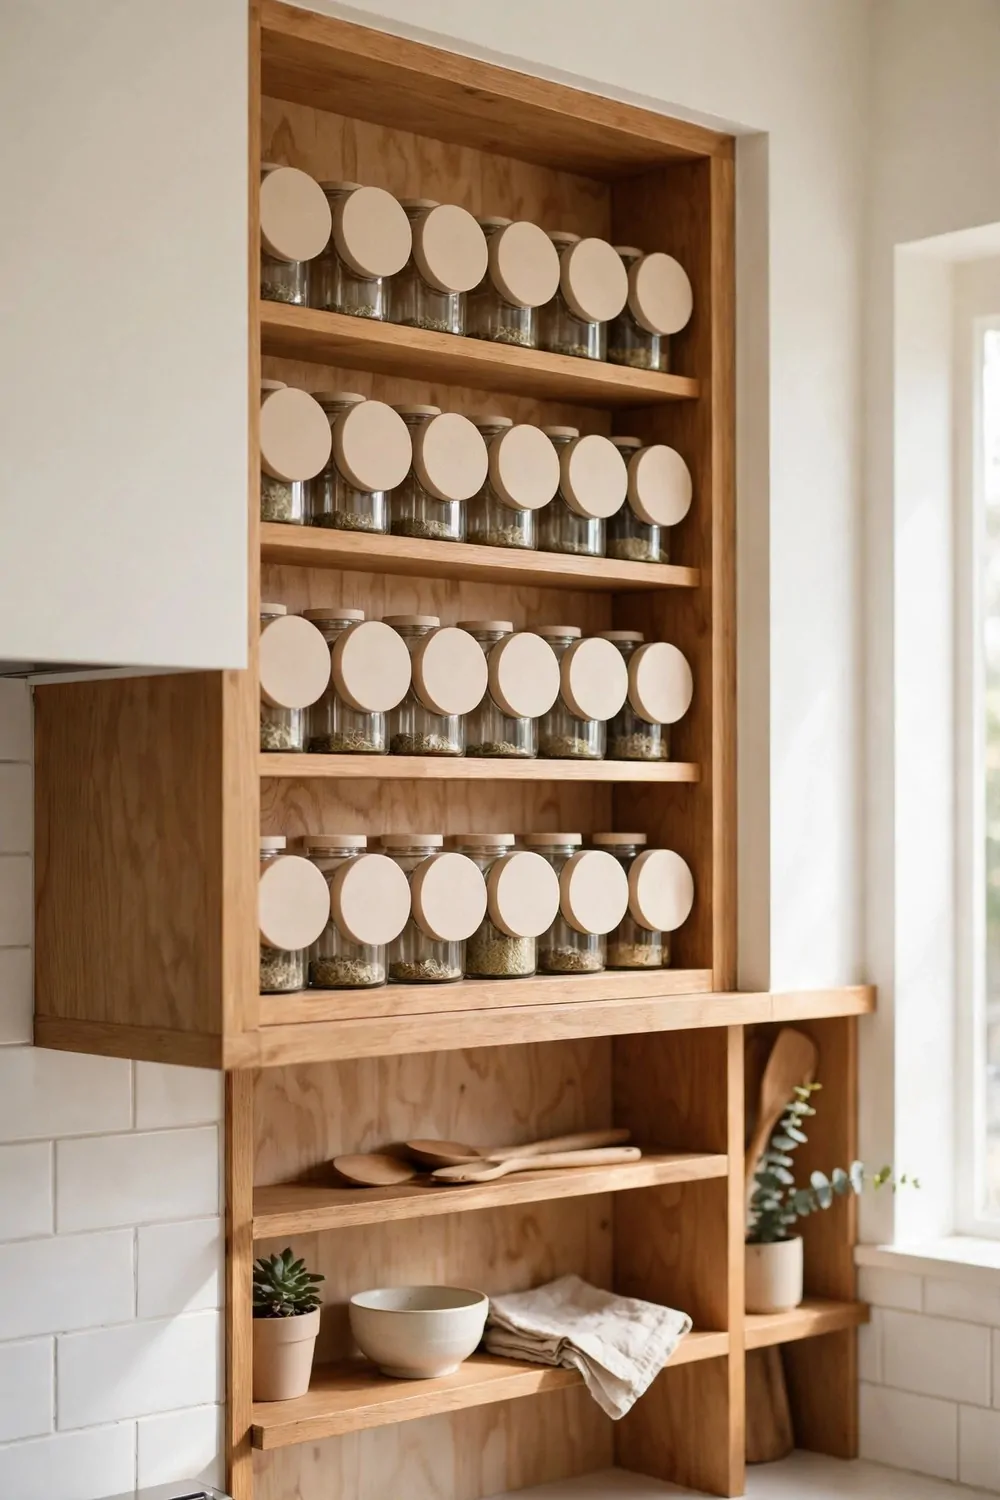
My spices used to sit in a jumble on a shelf, and I could never find the one I wanted.
Jars fell over, lids went missing, and I bought the same spice twice. The shelf looked messy, and cooking felt slow and hard.
A built-in spice rack fixed the mess for good.
I put a slim rack on the inside of a cabinet door. Each jar has its own spot, and I can see every label at a glance. It frees up my counter, and it makes cooking feel quick and easy.
Now the kitchen looks neat and bright. The before look was full and dull, and the after look is clean and calm.
A built-in spice rack runs $40 to $120.
I keep my most used spices at eye level. I use them for chicken, vegetables, beans, and rice, and I reach for them without a hunt.
A rack like this does not need a big space. A narrow strip of wood on a door is enough, and it holds a lot more than you think.
When your spices have a home, cooking feels much lighter.
24. Hang a Woven Basket for Fruit
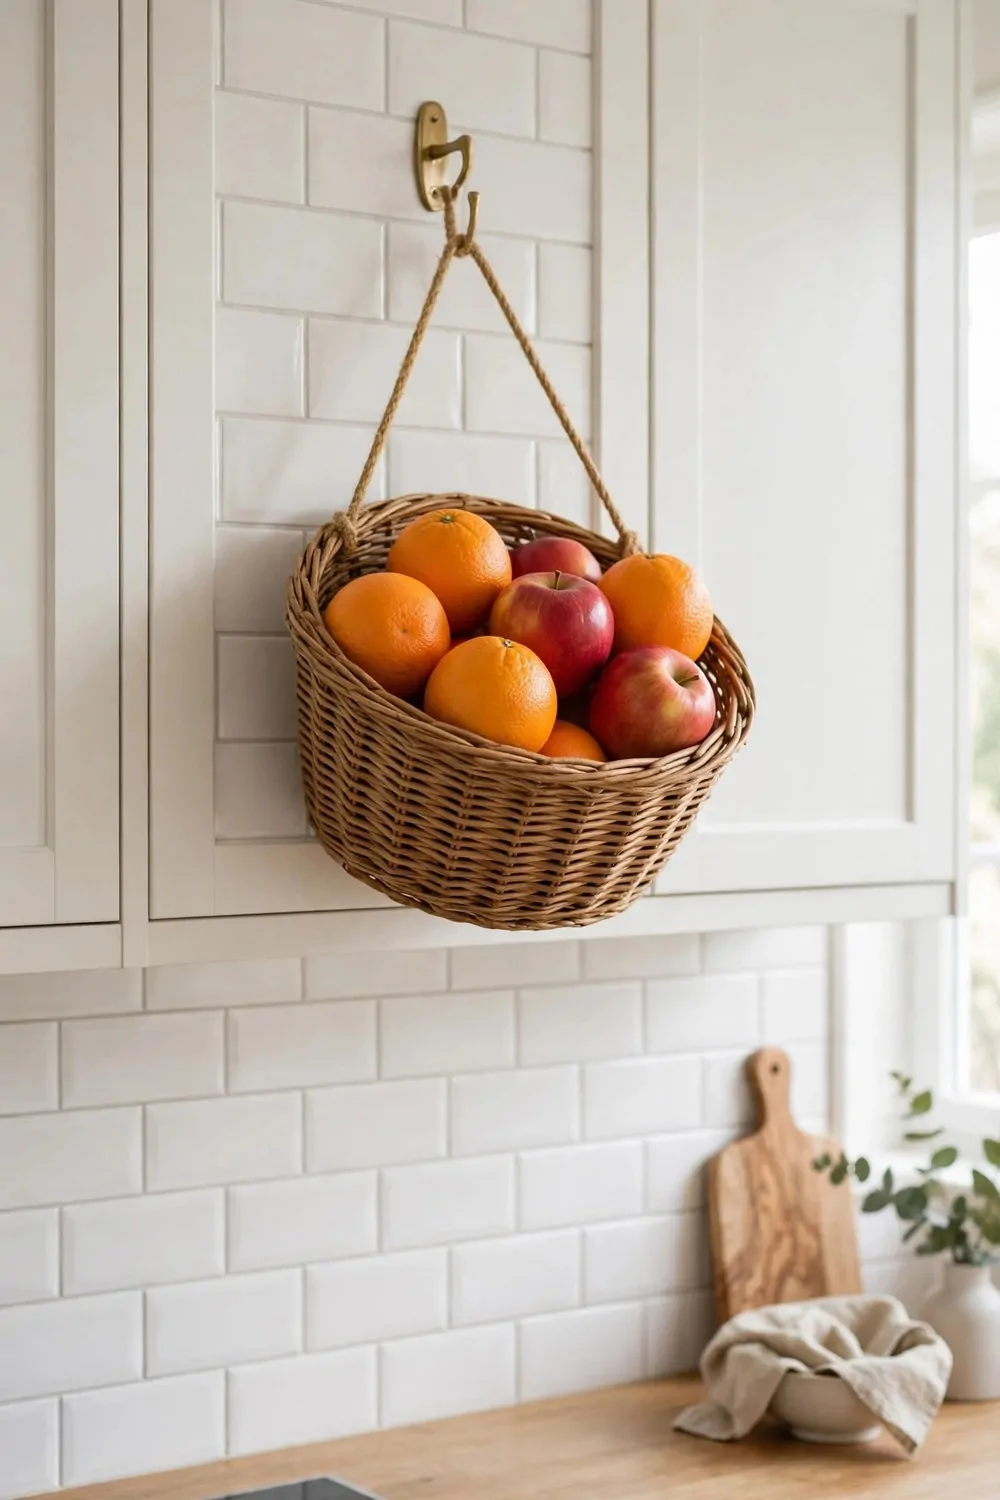
My fruit used to sit in a bowl on the counter, and it took up space I needed for cooking.
Fruit rolled off the side, and the bowl got in the way of my chopping board. The counter looked full, and the fruit got soft fast.
A hanging woven basket saved my counter space.
I hung it from a hook near the window. It holds fruit up high, where air can move round it. It looks soft and warm, and it adds a nice touch to the wall.
Now the kitchen looks fresh and airy. The before look was crowded, and the after look is light and open.
A woven basket for fruit runs $12 to $25.
I put fruit in it each morning after I shop. It is easy to reach, and it keeps my counter clear for bread and vegetables.
A basket like this is light and strong. It does not need much room, and it looks good even when it holds just a few pieces of fruit.
Hang your fruit up, and your counter will thank you.
25. Put in a New Range Hood
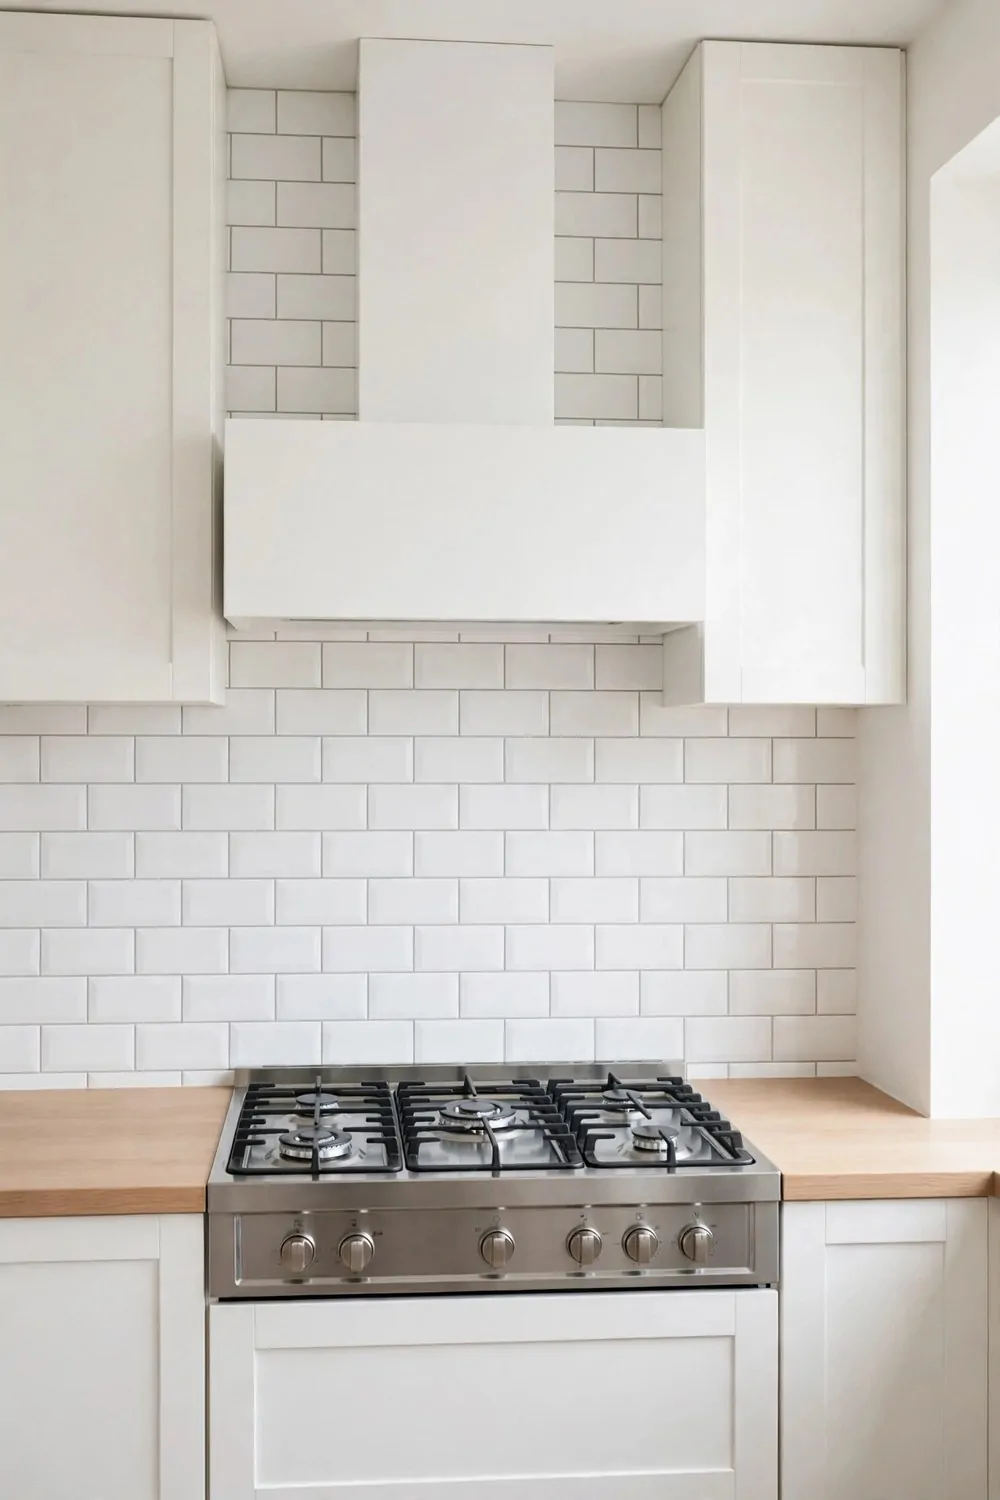
My old range hood was loud and weak, and it never cleared the steam from cooking.
The kitchen smelled of food for hours after dinner. The walls felt sticky, and the light above the stove was dim and dull.
A new range hood changed the air in the whole room.
It pulls steam up fast, and it is much quieter than the old one. I can talk while I cook, and the room stays fresh. The clean shape over the stove looks smart and new.
Now the kitchen feels bright and clean. The before look was dark and tired, and the after look is fresh and open.
A new range hood runs $80 to $200.
I picked a plain white hood that matches my cabinets. It blends in well, and it makes the stove area look neat and cared for.
I wipe it with plain soap and water once a week. It takes just a few minutes, and it keeps the hood looking new.
Clean air makes cooking feel much better.
26. Add a Small Pantry Nook with Baskets
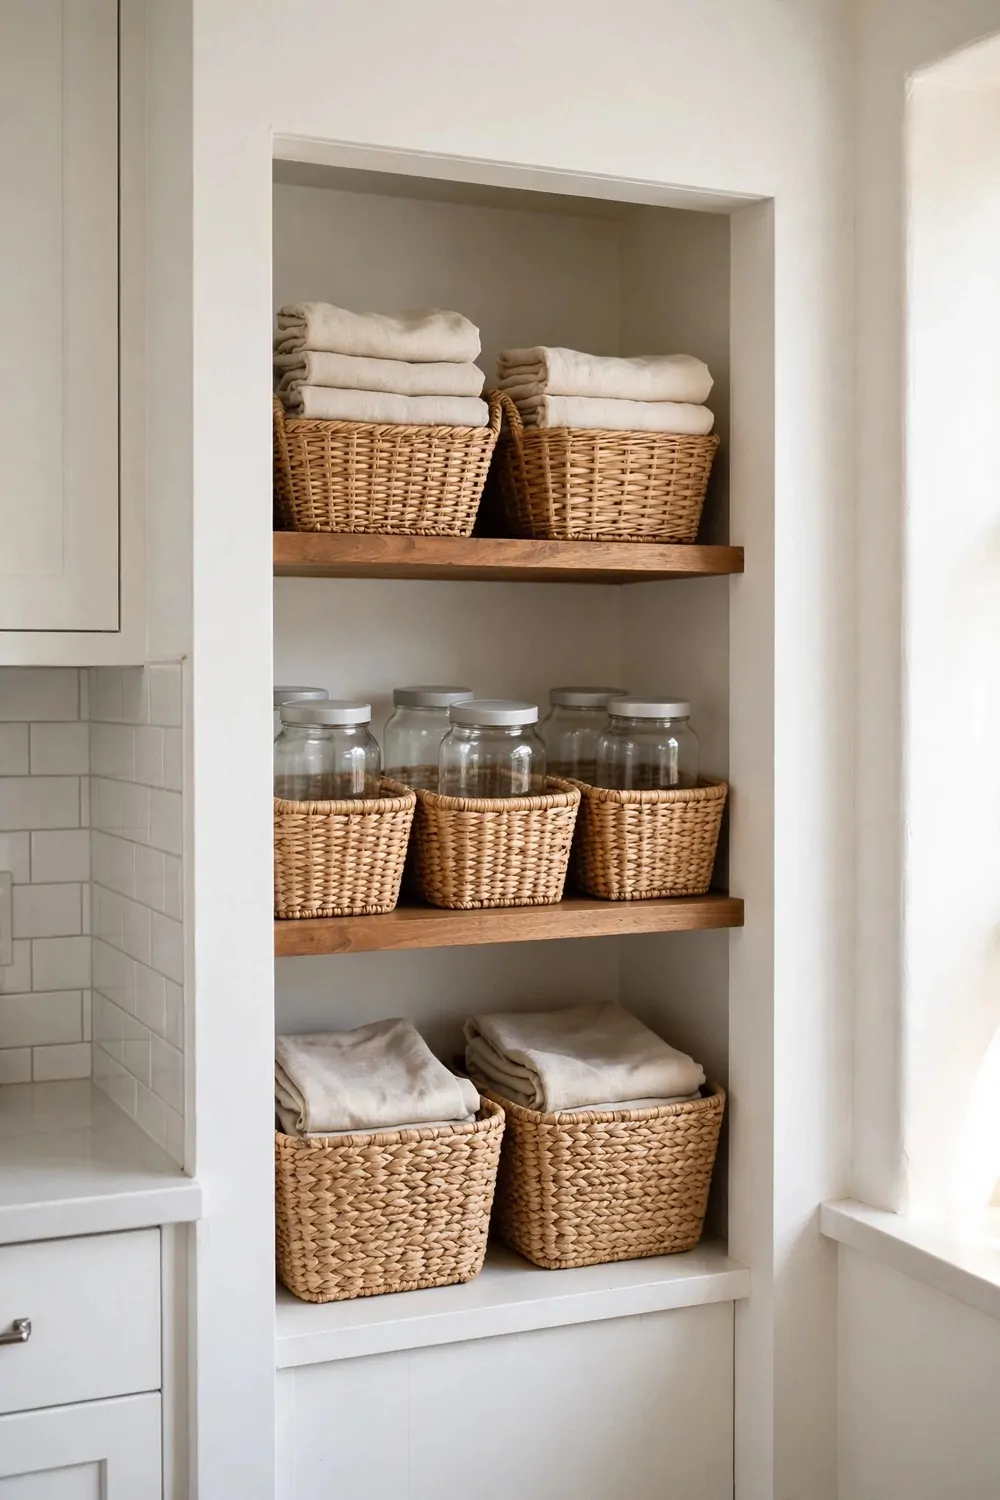
My food used to hide in deep cabinets, and I forgot what I had at the back.
Bags of rice and pasta got lost behind jars. I bought food I already had, and the cabinets looked like a mess.
A small pantry nook with baskets fixed that.
I cleared one low shelf and put three baskets in a row. One holds rice and pasta, one holds beans, and one holds bread and fruit. I can pull a basket out and see all of it at once.
Now the nook looks neat and rich. The before look was dark and jumbled, and the after look is bright and calm.
A small pantry nook with baskets runs $60 to $150.
I put plain labels on each basket so my kids know where things go. They put food back in the right spot, and the nook stays tidy.
You do not need a big pantry for this. A small corner or one shelf is enough, and baskets make it feel like a real pantry.
A tidy nook makes meal time feel easy.
27. Change the Curtains to Simple Linen Ones
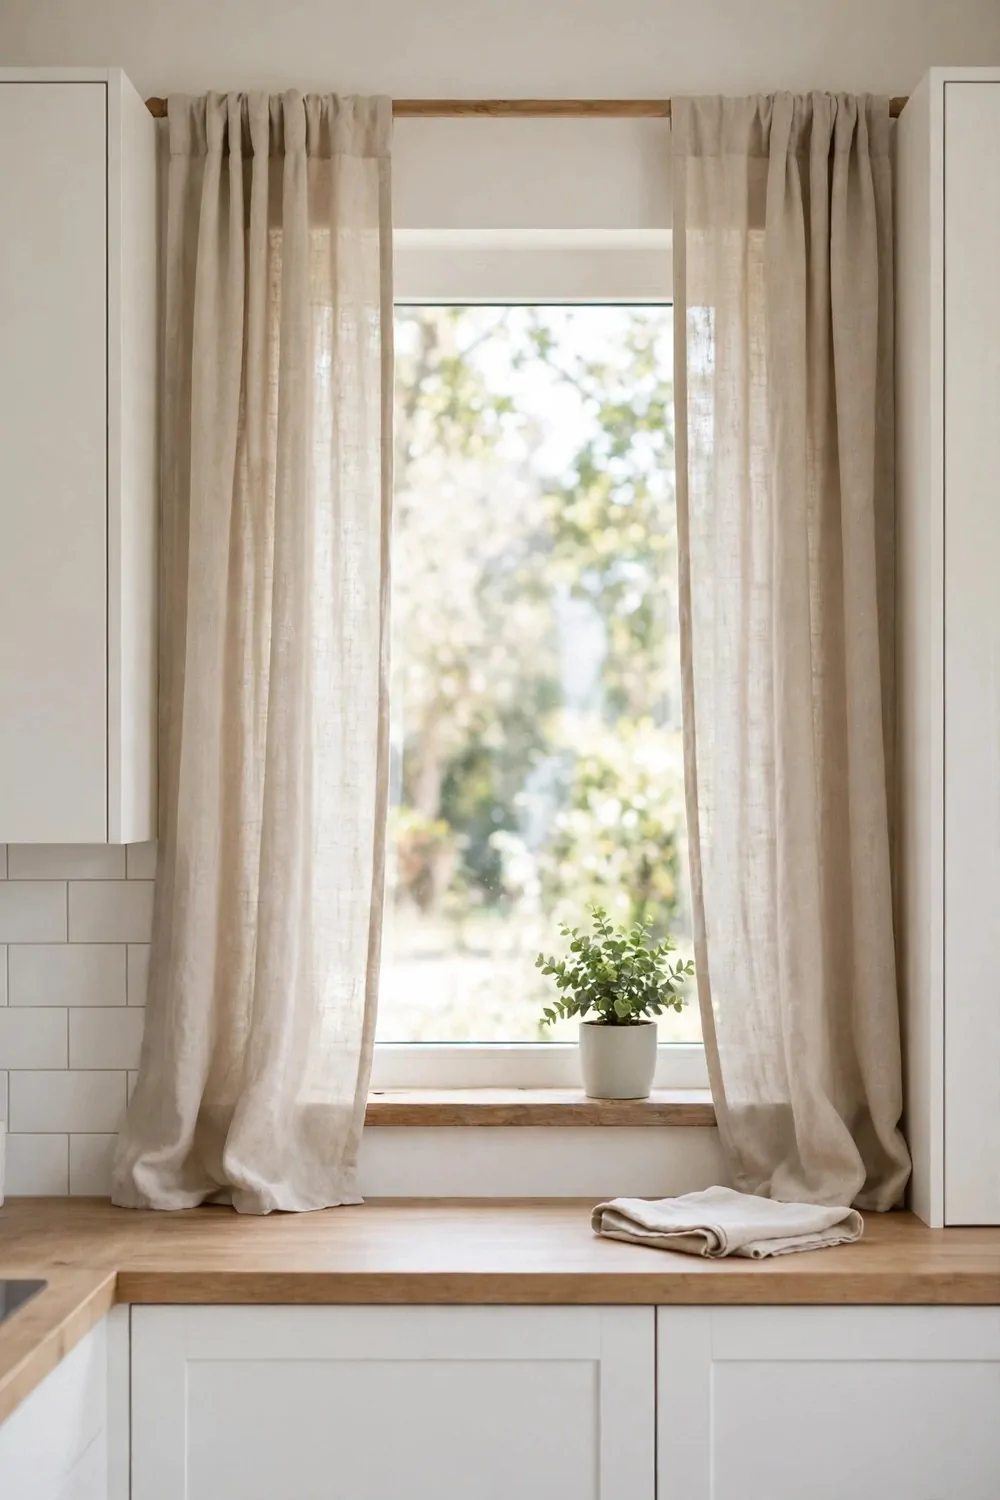
My old curtains were heavy and dark, and they blocked much of the light from the window.
They looked dusty, and they made the kitchen feel small and dull. I kept them shut most days, and the room never felt bright.
Simple linen curtains let the light back in.
They are light and soft, and they move a little when the window is open. They frame the window without hiding it, and they make the room feel airy. The plain weave looks calm and fresh.
Now the kitchen looks bright and soft. The before look was dark and heavy, and the after look is light and clean.
A pair of simple linen curtains runs $25 to $60.
I picked plain white linen with no pattern. It suits my wood floor and white cabinets, and it goes with every season.
Linen is easy to wash, and it dries fast on a line. I wash mine with plain soap and water, and they come out soft each time.
Light curtains can make a dark kitchen feel new.
28. Add a Tile Rug in Front of the Sink
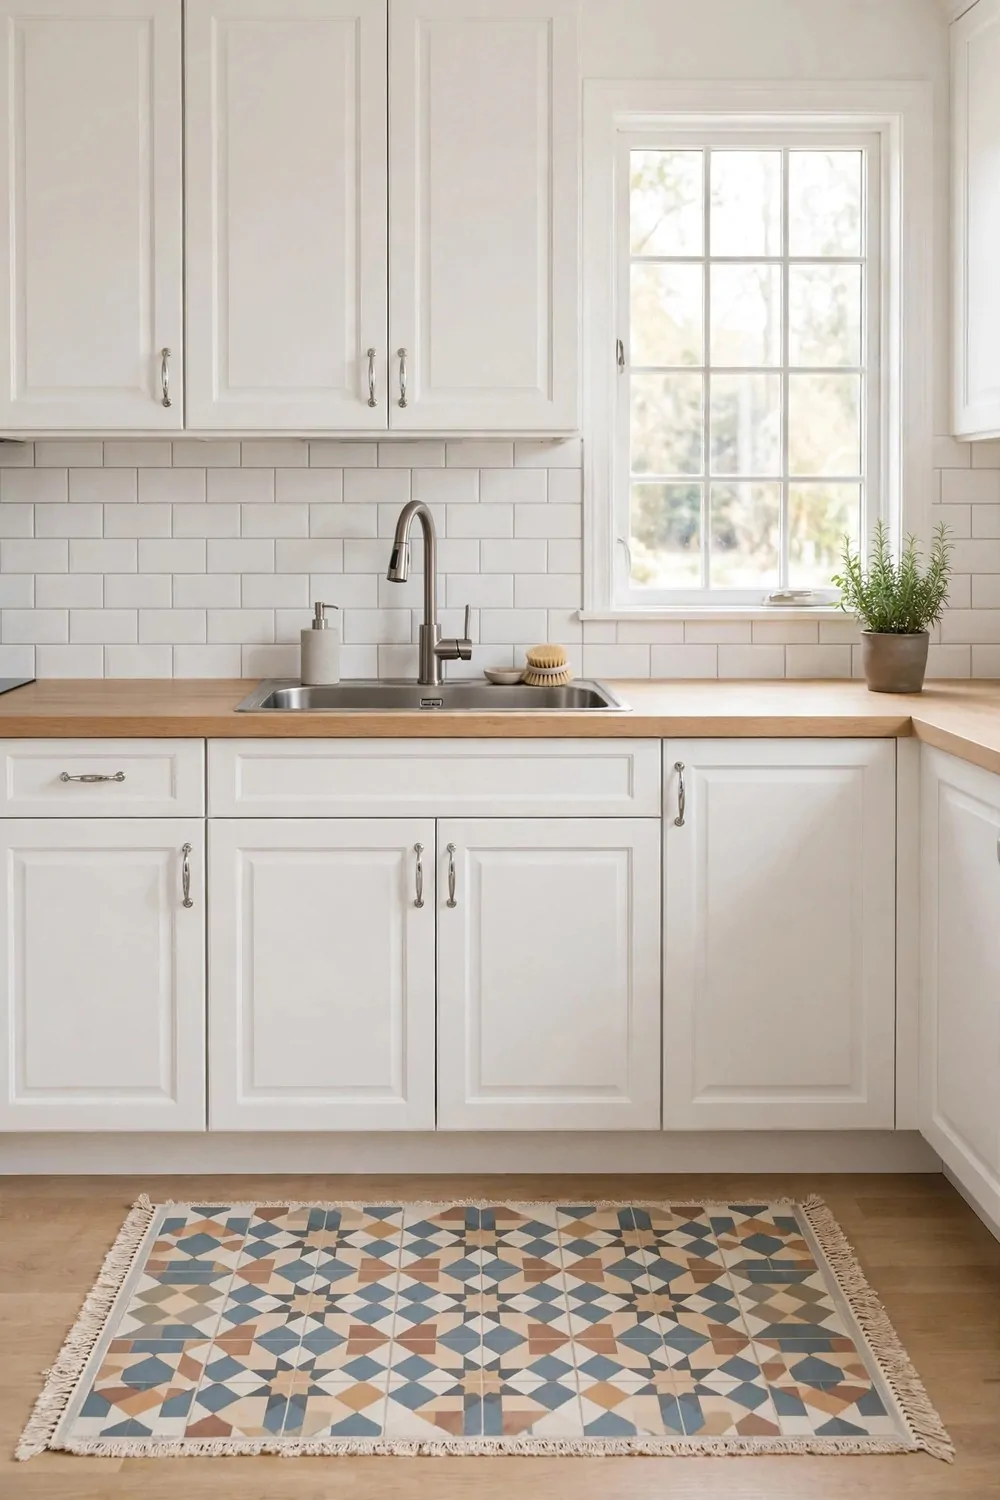
The floor in front of my sink used to get wet and dull, and it looked worn out fast.
Water splashed down each time I washed dishes. The floor felt cold, and my feet got tired when I stood there for a long time.
A tile rug made that spot soft and pretty.
It looks like small tiles in a neat pattern, but it feels soft under my feet. It soaks up small splashes, and it stays in place while I work. The pattern adds colour without making the room feel busy.
Now the sink area looks fresh and cared for. The before look was bare and tired, and the after look is bright and warm.
A tile rug for the sink runs $30 to $80.
I picked a soft blue and white pattern that suits my cabinets. It lifts the floor, and it makes washing up feel a little nicer.
I shake it out each week and wash it with plain soap and water. It dries fast, and it looks new again each time.
A small rug can make a hard spot feel soft.
29. Put a Small Table with Two Chairs by the Window
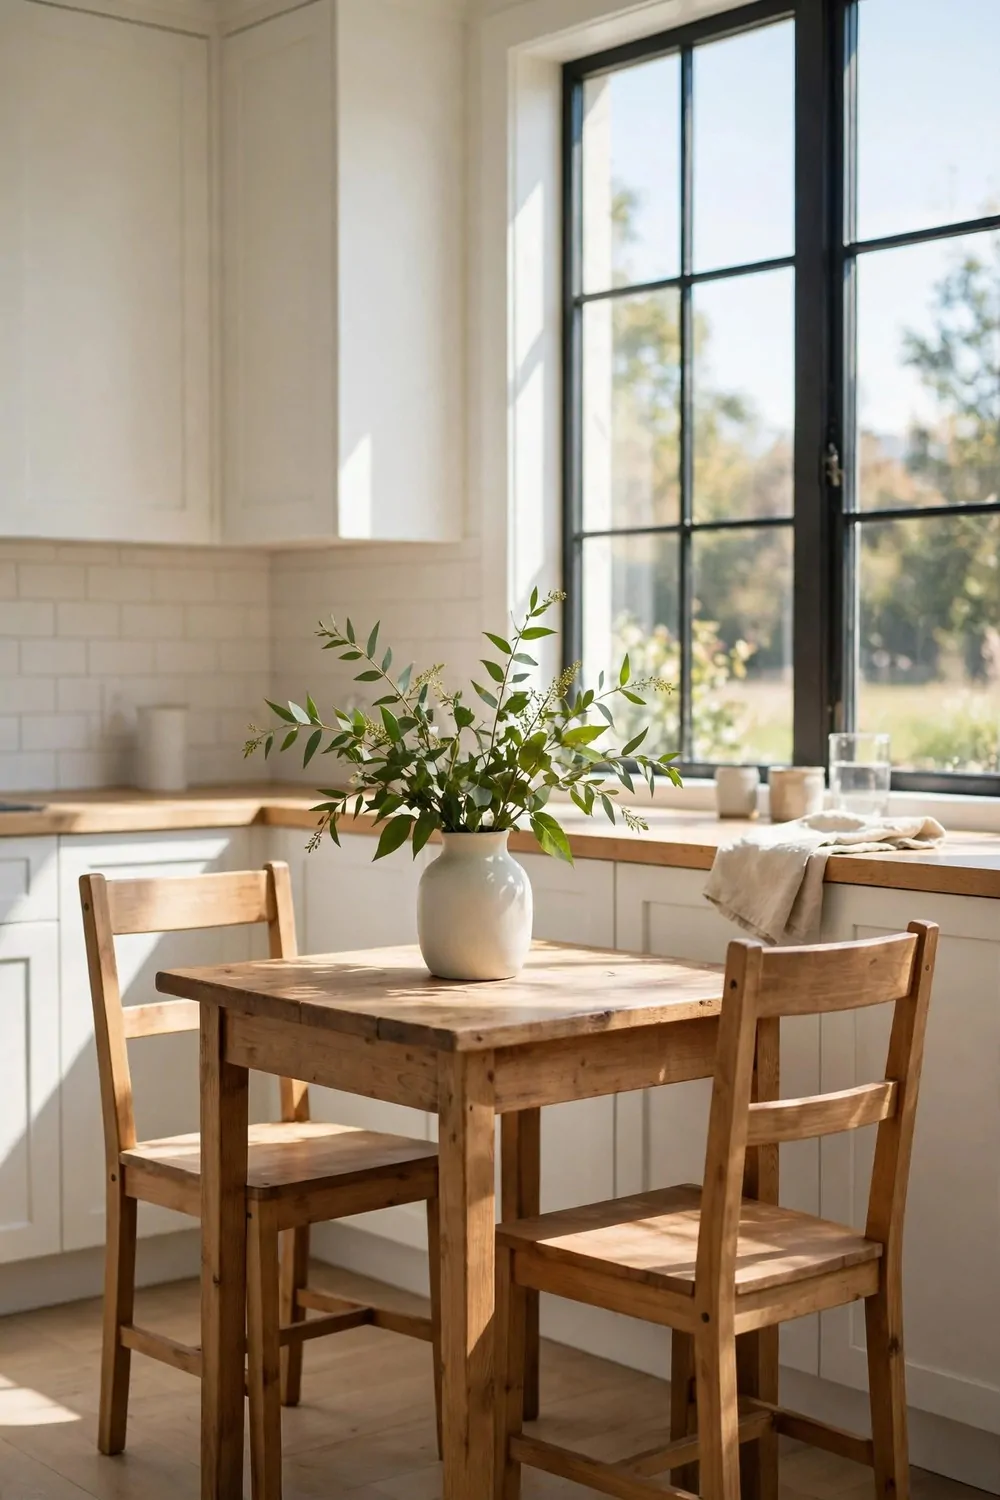
The corner by my window used to hold old boxes, and it looked dull and sad.
It was dead space that no one used. The window was pretty, but the corner below it did nothing for the room.
A small table with two chairs brought it to life.
I put a round wood table right by the glass. I added two plain chairs, and now we sit there for breakfast each day. We look out at the sky while we eat bread and fruit.
Now the corner looks bright and warm. The before look was empty and dull, and the after look is fresh and full of life.
A small table with two chairs runs $120 to $300.
I kept the table small so it would not block the walkway. It fits just right, and it leaves room to move round it with ease.
In the morning I sit there with a book and a cup of water. In the evening my kids sit there with rice and vegetables, and we talk about our day.
A tiny table by the window can change how you use your kitchen.
30. A One-Weekend Kitchen Reset Plan
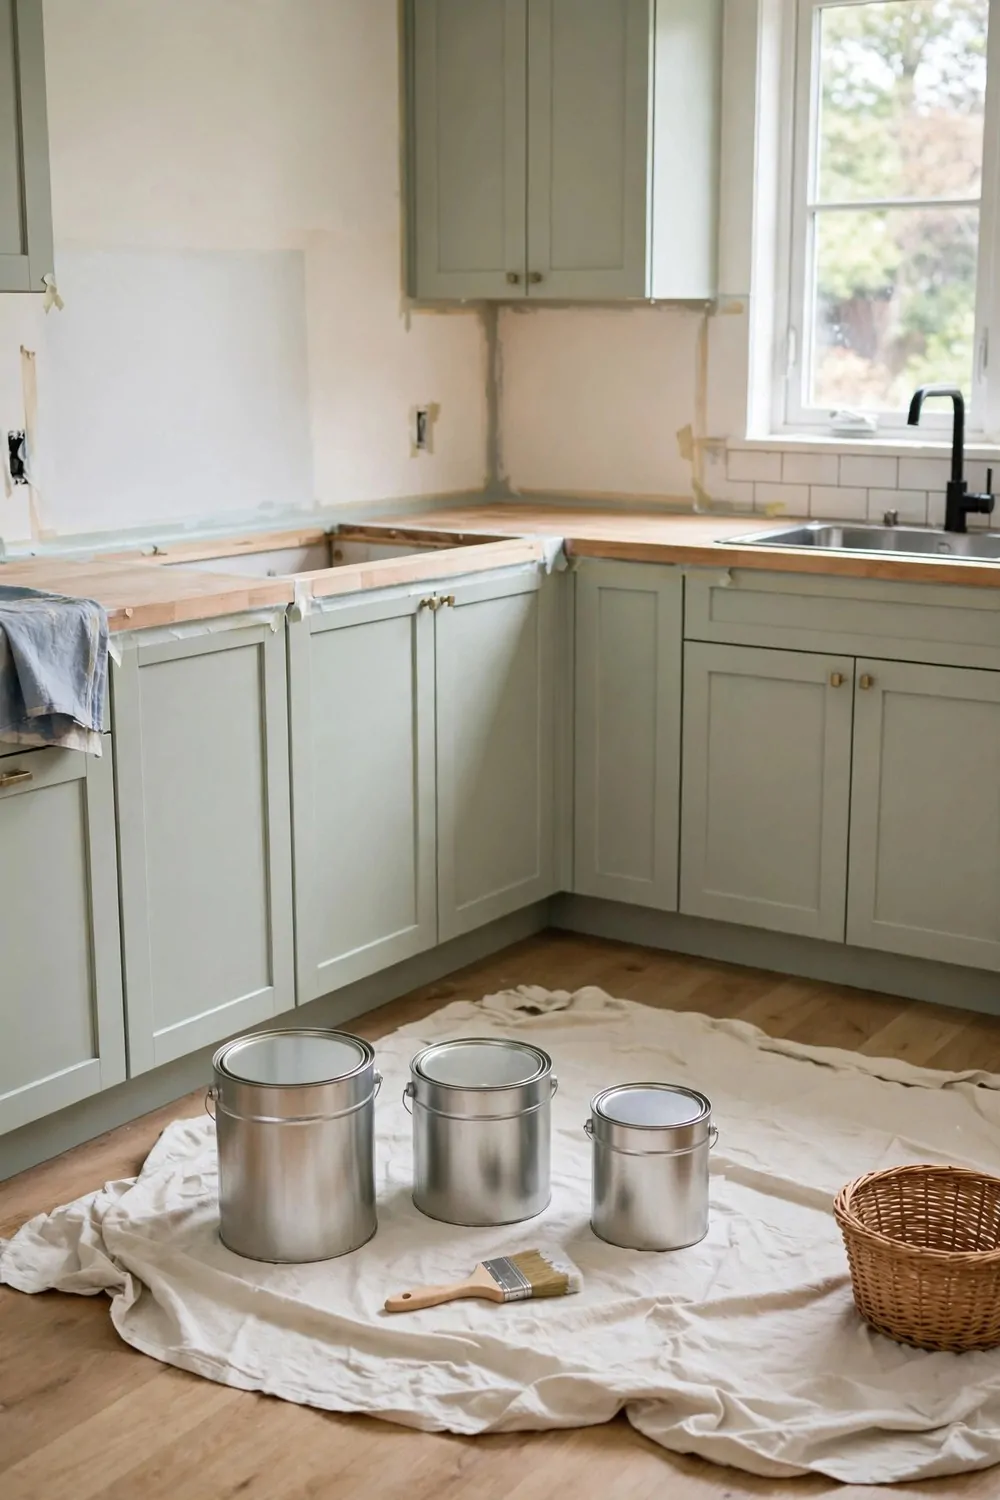
You can give your kitchen a fresh look in just one weekend, with five small buys and a little time.
Start on Saturday morning with one small wall. You can pick up paint for one small wall for $10 to $20.
Next, swap the old handles on a cabinet or two. A set of new handles comes in at $8 to $15.
Then add two hooks by the door for cloths and bags. You can find a pair of hooks for $10 to $15.
Put a woven basket on the counter for fruit and bread. A woven basket will cost you $12 to $25.
Last, label your jars and baskets so all can find things fast. You can get a pack of plain labels for $15 to $25.
On Sunday, wipe the counters and the sink with plain soap and water. Put the fruit in the basket, the bread in its spot, and the jars back in a neat row. Stand back and look at how bright the room feels now.
Put all five buys side by side and you spend $55 to $100 for the whole weekend. That is a small spend for a kitchen that looks fresh and new.
By Sunday night your kitchen will feel bright, tidy, and ready for a new week.
| Area | Main change | Typical cost |
|---|---|---|
| Paint | Paint for one small wall | $10 to $20 |
| Handles | A set of new handles | $8 to $15 |
| Hooks | A pair of hooks | $10 to $15 |
| Baskets | A woven basket | $12 to $25 |
| Labels | A pack of plain labels | $15 to $25 |
| Total | Whole kitchen reset in one weekend | $55 to $100 |
Keep Reading
If you liked these ideas, you will love these posts too.
- 26 Outdoor Furniture Storage Ideas That Protect Your Pieces
- 20 Outdoor Wall Decor Ideas for Patios and Porches
- 29 Backyard Decor Ideas on a Budget
- 22 Front Door Decor Ideas That Make a Great First Impression
- 31 Outdoor Storage Ideas for Small Yards and Patios
- 24 Deck Decor Ideas That Make Outdoor Evenings Better
Pick one idea tonight and start with the smallest one this weekend. One fresh change can make your whole kitchen feel new by Sunday, and you will want to keep going from there.