28 Office Organization Ideas for a Clutter-Free Desk

Take your eyes off this screen for ten seconds and look at your desk.
Go on. What do you see? A mug from last Tuesday. Three pens, only one of which works. A cable that belongs to something you no longer own. A stack of papers you keep meaning to read but never do.
Now count the things you actually used today. I did this once, in my own office, and it was almost funny. Seventeen things sat on my desk. I had touched four of them. Four.
That is what a cluttered desk really is. Not a big mess. Just a pile of little things that stopped earning their spot.
The good news is you do not need a new desk or a big budget to fix it. You need small moves, the kind that give every item a home and keep the surface clear. These 28 Office Organization Ideas are the ones I trust most. Pick one tonight. Start with the pens.
1. Divide Your Drawers With Organizers
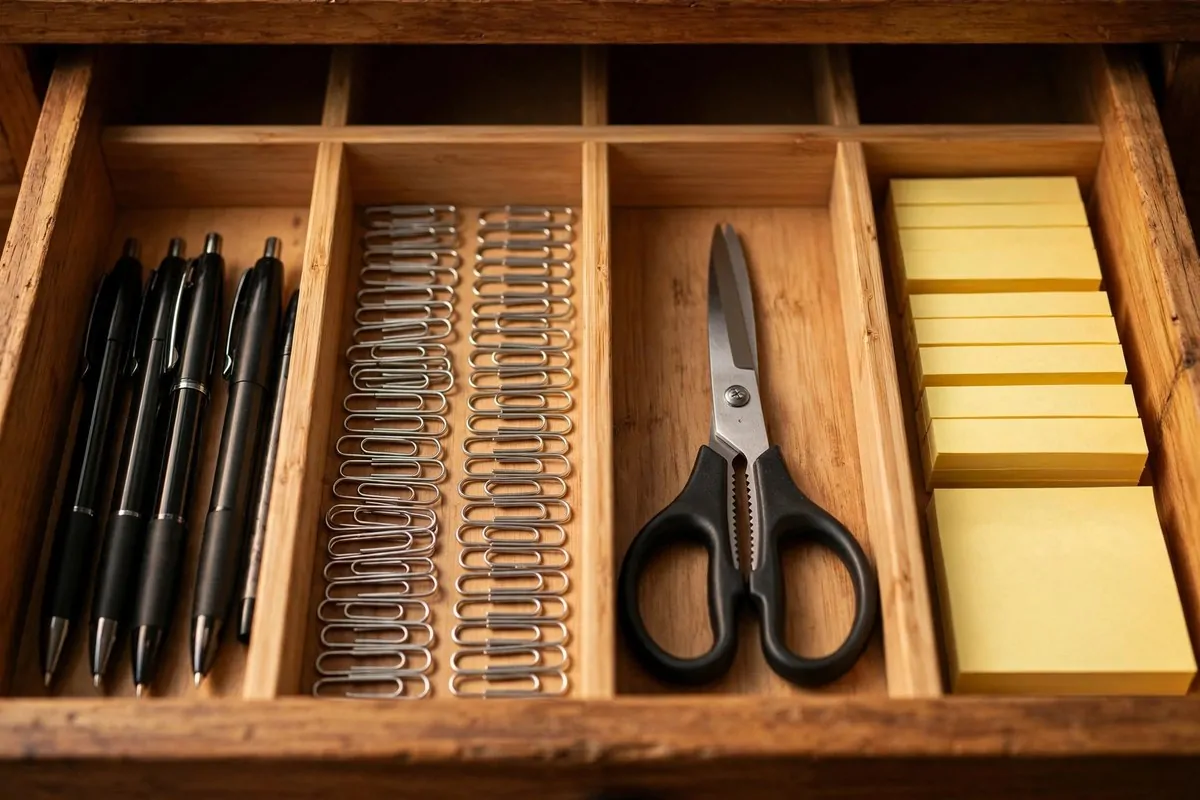
A desk drawer without dividers is just a small trash can.
Every loose pen, clip and battery slides to the back and disappears. Then you buy another one, and it disappears too. I once found five identical black pens in one drawer. I had been buying a new one every month.
Drawer dividers change that fast. They split the drawer into small homes, and every item gets one.
I like bamboo trays because they look warm and cost very little. You drop one in the drawer and you are done. The pens stop rolling around. The clips stop hiding.
Sort by how you use things. Pens in one spot. Sticky notes in another. The little stuff like pins and bands in the smallest squares.
Put daily tools in the top drawer. It should open and show you exactly what you need, with no digging. That is the whole goal.
I keep my scissors and tape in the front left square. My hand goes there on its own now. That is how fast a habit forms when the layout is simple.
If your drawer is shallow, use a flat tray instead of tall dividers. Tall dividers make a shallow drawer feel cramped. A flat tray still keeps things sorted.
Every few weeks, dump the drawer and check what moved. Something always drifts. A pin lands in the pen square. A pen rolls into the clips. That is normal. Just put them back.
This one change saves real time each day. You stop hunting for a pen that was there all along. You stop buying things you already own.
You can get a decent divider set for less than the price of two coffees. It is probably the cheapest fix in this whole list. Start here.
2. Hang a Pegboard Above Your Desk
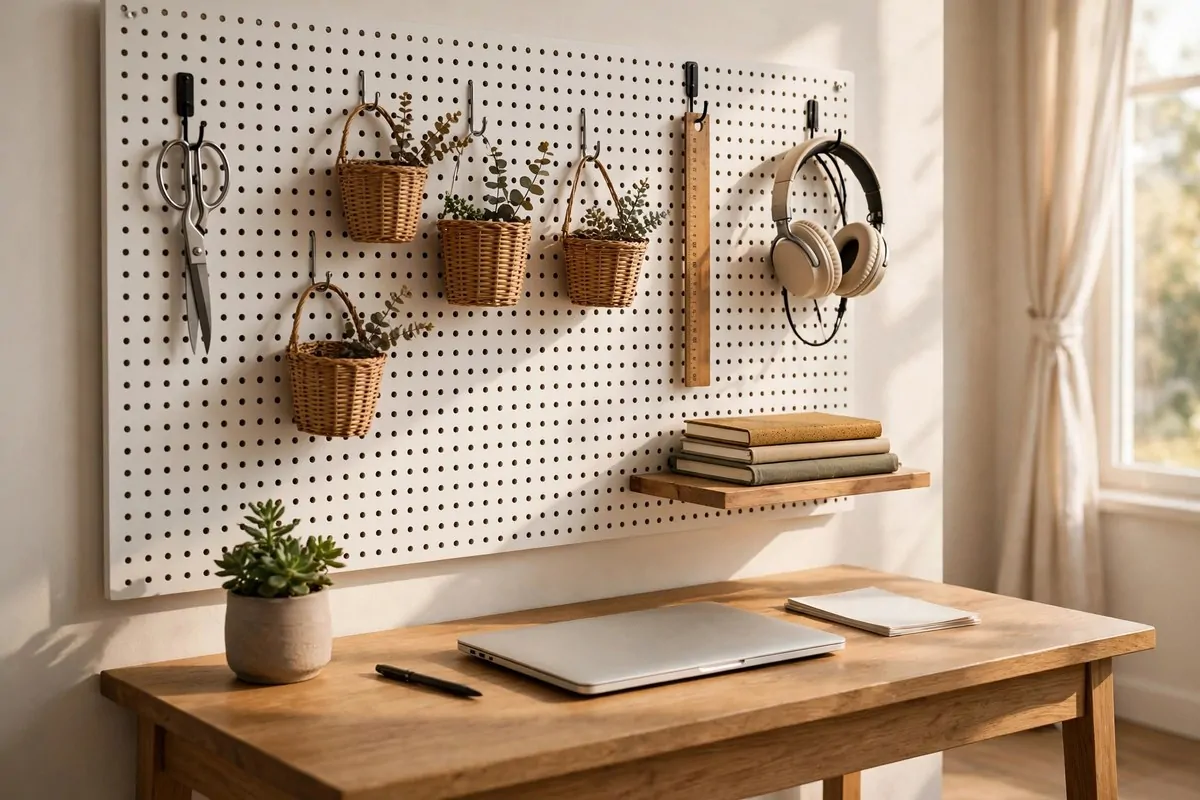
The wall above your desk is free storage space. Most people just leave it empty.
A pegboard turns that blank wall into the hardest working part of your office. You hang small baskets, hooks and shelves on it. Your desk stays clear because the wall holds the stuff.
I put one up last year and the first thing I noticed was how much space appeared. My scissors, my ruler, my headphones, all of them moved off the desk. It felt like I got a bigger desk without buying one.
Pegboards are cheap and easy to hang. Two screws into the wall and it is done. If you rent, get a smaller one that hangs on a picture hook.
The best part is how flexible it is. You can move a hook in ten seconds. If a new tool comes in, it gets a hook. If something goes away, the hook comes off.
Hang a small basket for your phone and charger. Hang scissors and tape on hooks. Keep your notebooks on a little shelf. Everything sits at eye level, right where your hands can reach it.
Paint it if you want. A pegboard in a soft color looks like real decor, not just storage. Mine is a warm white and people ask about it on video calls.
One rule I follow: if the pegboard gets crowded, something has to come down. It is easy to keep adding. That is how walls become cluttered too.
Put the heavy stuff low on the board. Baskets full of tools can pull on the top screws. Keep it light up high, heavier down low.
This is one of those Office Organization Ideas that looks hard and is actually simple. One afternoon, one board, a much clearer desk.
3. Float Shelves Above the Desk
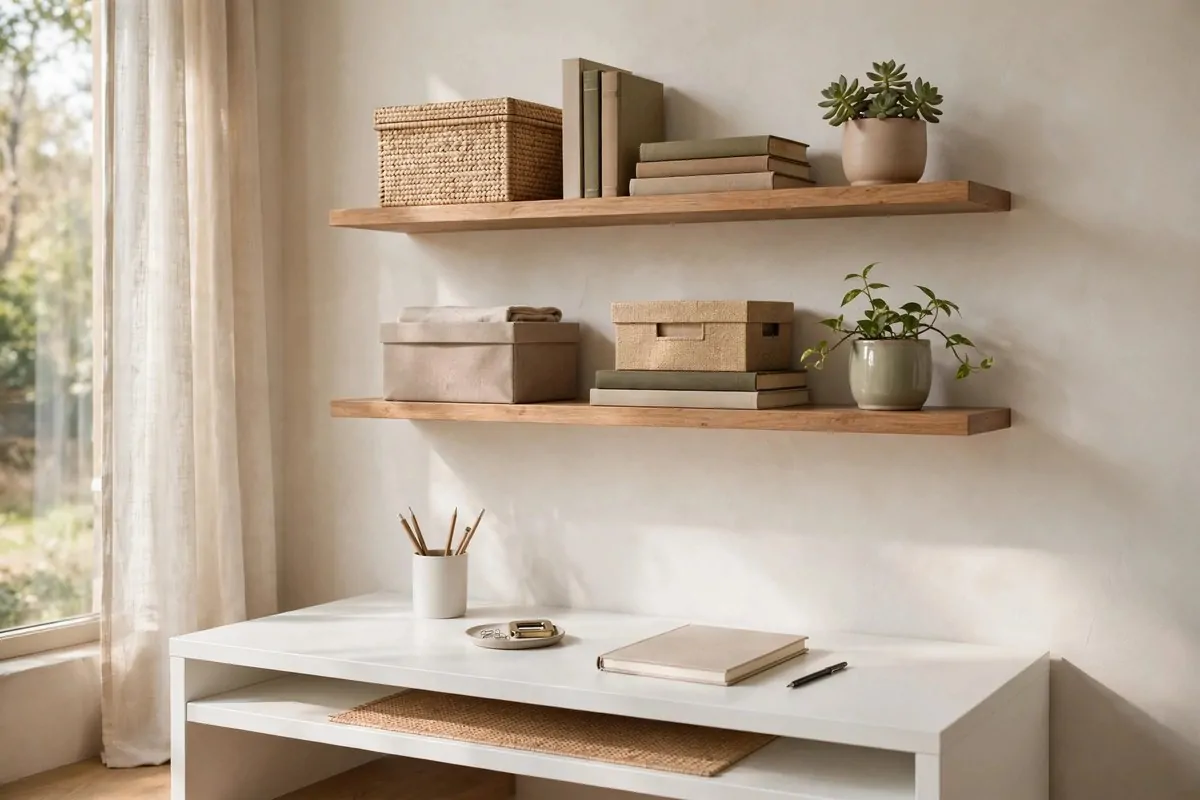
Floating shelves do what your desk cannot. They lift things up and out of your way.
Books, boxes and supplies climb up there. Your desk surface keeps only the things you are using right now. That is the difference between a busy desk and a calm one.
I have two shelves above my desk. The top one holds reference books and a small box of old files. The lower one holds a few daily items in a neat row. Both are above eye line, so they never pull my attention while I work.
Measure the space above your monitor first. Leave enough room so your screen does not feel squeezed. About a foot and a half above the desk is a good spot for the first shelf.
Use closed boxes on the shelves. Open stacks of stuff on a shelf look like clutter wearing a costume. A box with a lid looks tidy even when it is full of odd things.
Label the boxes on the front edge. One says “tax stuff.” One says “craft supplies.” When you need something, you read the label instead of pulling every box down.
Keep a plant on one shelf if you want. A small one. It makes the whole corner feel alive, and it costs almost nothing to keep.
Dust the shelves once a month. Things you do not touch daily collect dust fast. It takes two minutes with a damp cloth.
If you rent and cannot drill, try a tall bookcase next to the desk instead. It gives you the same lift-up effect without any holes in the wall.
Shelves are quiet helpers. They hold a lot, they show a little, and your desk gets to breathe again.
4. Tame Cables With a Box
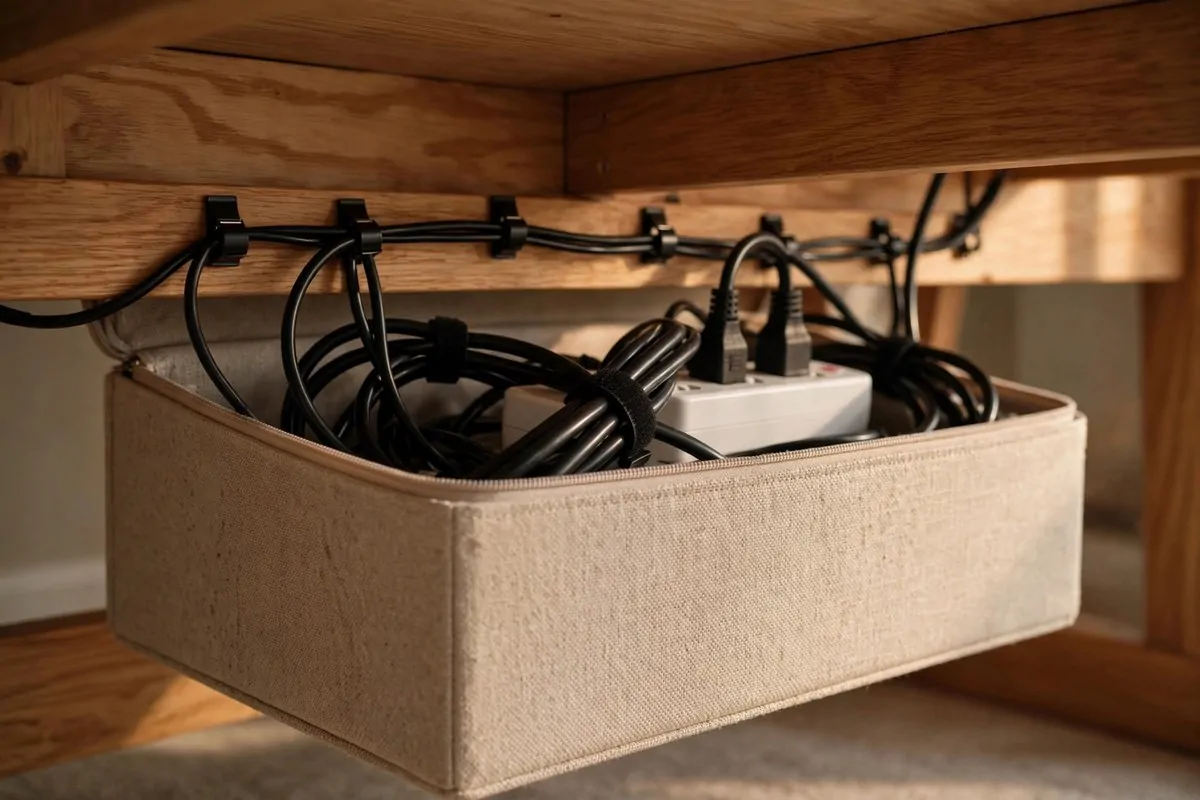
Cables are the sneakiest clutter of all. You can clean your whole desk and still feel messy because of one tangled snake of cords.
A cable box fixes this in one step. It is a simple box with holes on the sides. Your power strip goes inside. The cords poke out where you need them.
I bought one for under the desk and the change was instant. The knot of wires behind my legs just vanished. Now I see a plain box and nothing else.
Label each plug before you hide it. A tiny tag that says “monitor” or “charger” saves you later. When something needs unplugging, you do not have to pull everything out.
Use short cords where you can. Long cords coil and tangle. A cord that is exactly the right length lies flat and stays calm.
For the cords along the desk top, use small clips. Stick them on the back edge of the desk. The charger cable lives in its clip, not in a pile.
Velcro ties beat zip ties. Zip ties have to be cut. Velcro ties you can open and close. Wrap each loose cord with one and it stops wandering.
If you charge your phone at your desk, give the cable a clip right where you sit. Then it never falls behind the desk. You know that game where the cable slips and you fish for it. This ends that game.
Check the box once a month. Unplug anything you are not using. Old chargers for old devices pile up in there. They can go.
People notice cable clutter more than they realize. Clean cables make even a cheap desk look sharp.
5. Keep a Desk Organizer Tray
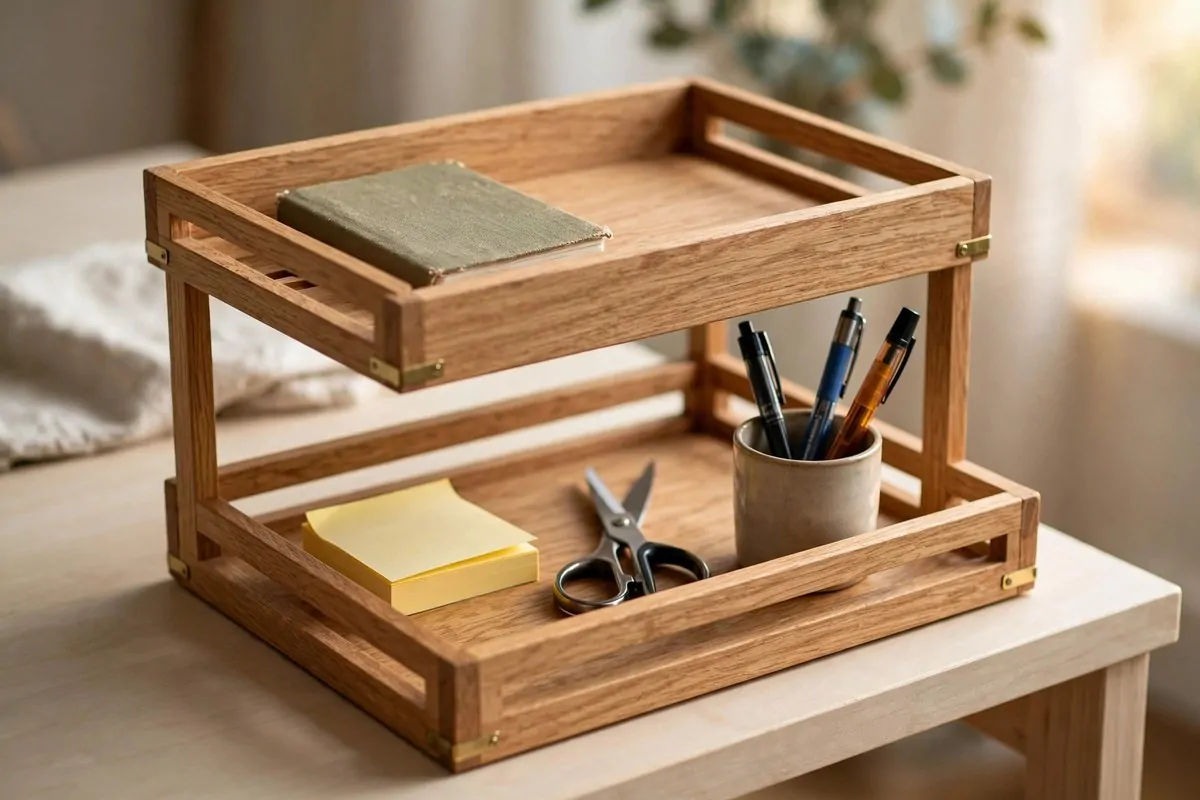
A desk organizer tray is like a little parking lot for your tools.
Pens, scissors, sticky notes, your glasses, all of them get a spot. When they have a spot, they stop spreading across the desk. That is the entire trick.
I use one with two tiers. The top holds my pen cup and my scissors. The lower level holds my sticky notes and a small notebook. Everything sits in one corner of the desk.
Pick one that matches your style. Wood looks warm. White looks clean. Metal looks modern. Any of them work as long as you actually use it.
Do not buy a giant organizer. A big one becomes a junk shelf. Small ones force you to choose. Choose the ten things you use most and give them each a slot.
Empty it once a week. Old receipts sneak in. Candy wrappers sneak in. Tip it out, keep what you use, and put the rest away or toss it.
If you like writing by hand, keep one good notebook in the tray. Not five. One. The one you actually write in. The rest can live on the shelf.
A tray also marks a border. Once it is full, you cannot add more without moving something out. That little limit keeps the desk from slowly filling up again.
My tray sits on the right side of my desk, always in the same place. My hand finds the scissors without looking. That is the kind of ease you are building.
It is a small buy for a big daily difference. Your desk will look calmer by tonight.
6. Roll In a Storage Cart
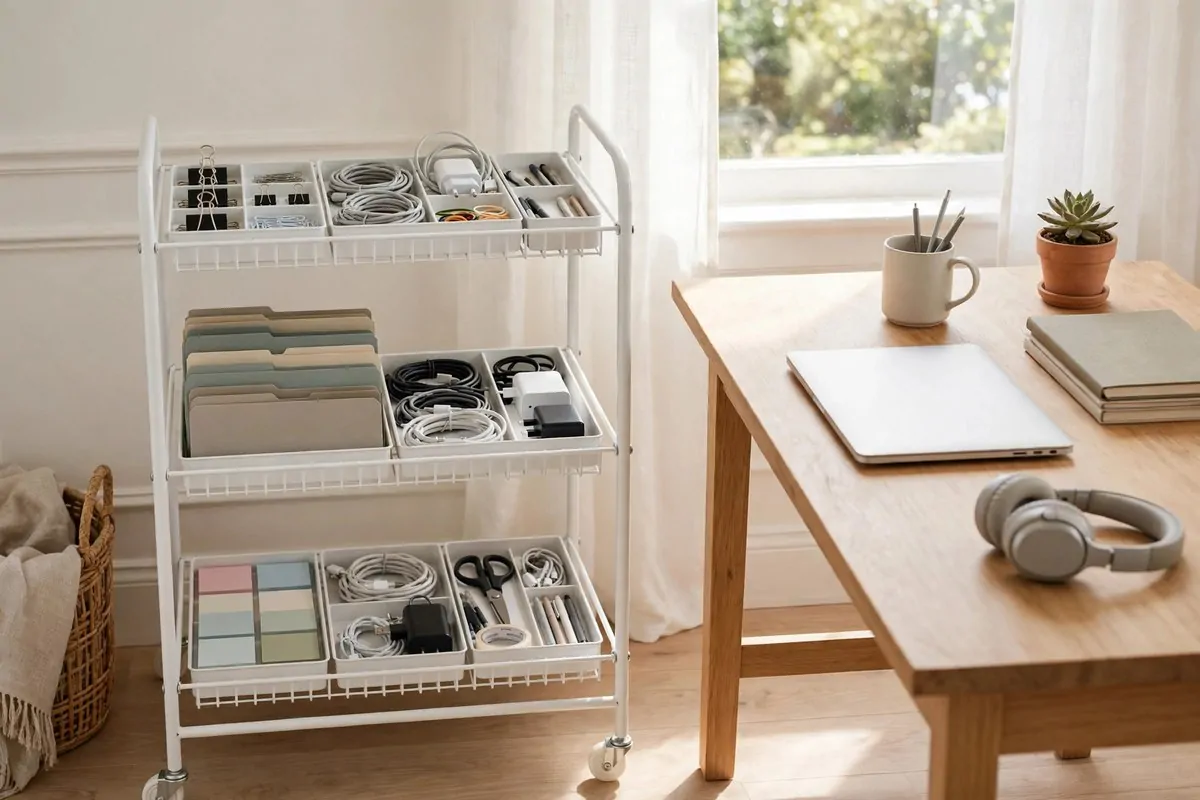
A rolling cart is a drawer you can move anywhere.
It slides under your desk when you need space. It rolls beside you when you need tools. Three little tiers hold papers, pens, tech bits and anything else that wanders.
I keep mine on the left side of my desk. The top tier has my current project folder and my planner. The middle tier has chargers and spare cables. The bottom tier has paper and notebooks.
Label the sides of each tier. When you need a charger, you read the label. No opening three drawers to find it.
Carts are perfect if your desk has no drawers. Instead of wishing for drawers, you get something better, a drawer that moves.
If your office is also your bedroom, a cart is gold. At night you roll it into the closet. Your desk goes back to being a desk. That trick alone keeps the room feeling like a room.
They are cheap and light. Most of them come in a few colors. I like the white ones because they disappear against the wall.
Do not let it become a junk tower. Once a month, look at each tier. If you have not touched something in weeks, move it to a shelf or out of the office.
The wheels lock. Lock them when it sits beside your desk. An unlocked cart rolls away at the worst moments. I learned that one the noisy way.
A cart gives small desks big storage. Try it and watch the desk clear up.
7. Stick On a Magnetic Strip
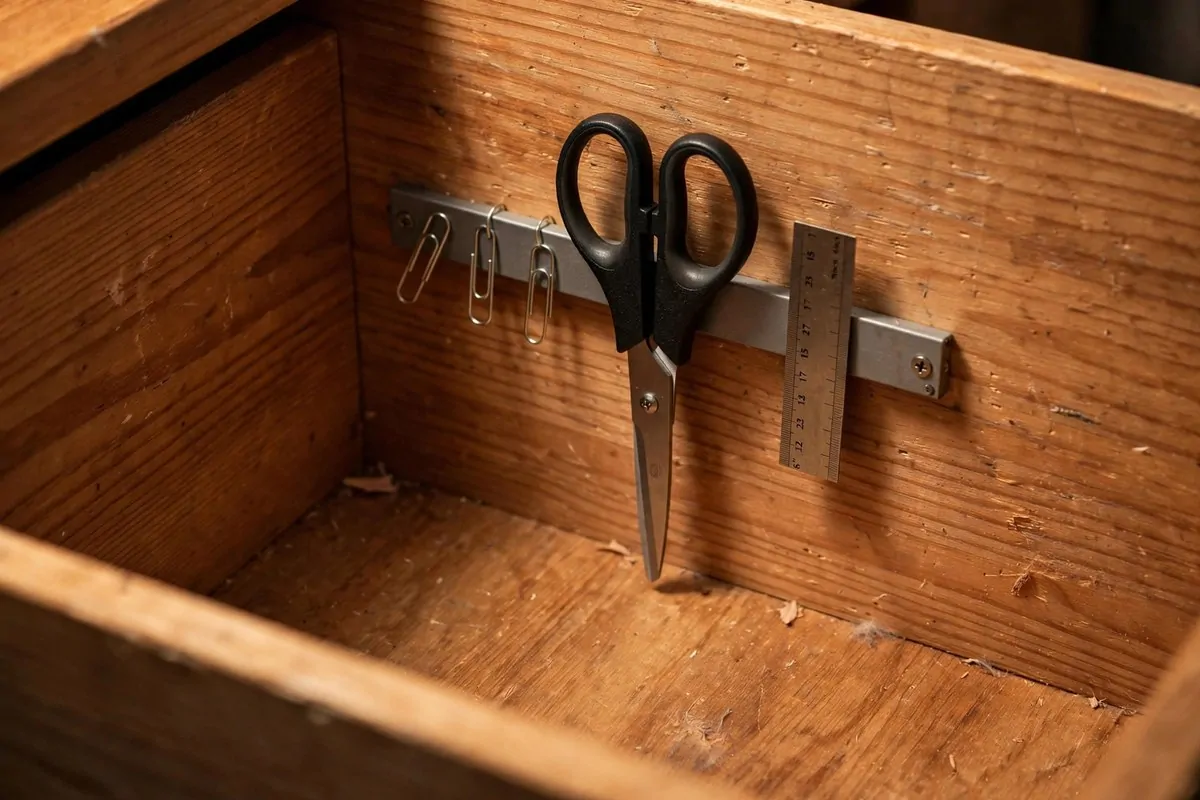
A magnetic strip is the cheapest storage trick on this list.
You know the strips people hang in kitchens for knives. The same idea works at a desk. Scissors, staples, paper clips, any small metal tool just clicks onto it.
I put one inside my desk drawer. The scissors hang on it now instead of sliding around the bottom. My ruler sticks to it too. The whole drawer feels calmer.
You can also stick one on the side of your desk. It stays out of sight but right next to your hand. That is the sweet spot for tools you grab a lot.
Installation is easy. Most strips come with screws or strong tape. The tape kind is fine for light tools. Use screws if you hang scissors.
Keep it small. A short strip for three or four tools is plenty. A huge strip covered in stuff looks messy again. The goal is less, not more.
Check what you have that is metal. Most people are surprised. Scissors, a letter opener, a tiny screwdriver, clips, all of it can live on the strip.
Keep the strip away from your phone and cards if it is a strong magnet. For desk strips it is usually not a problem. But be a little careful.
This is one of my favorite Office Organization Ideas because it costs almost nothing and it feels like magic. Things just stick there. No hooks. No holes. Just click.
Try it this weekend. You will wonder why your drawer did not always work this way.
8. Stand Files Up Vertically
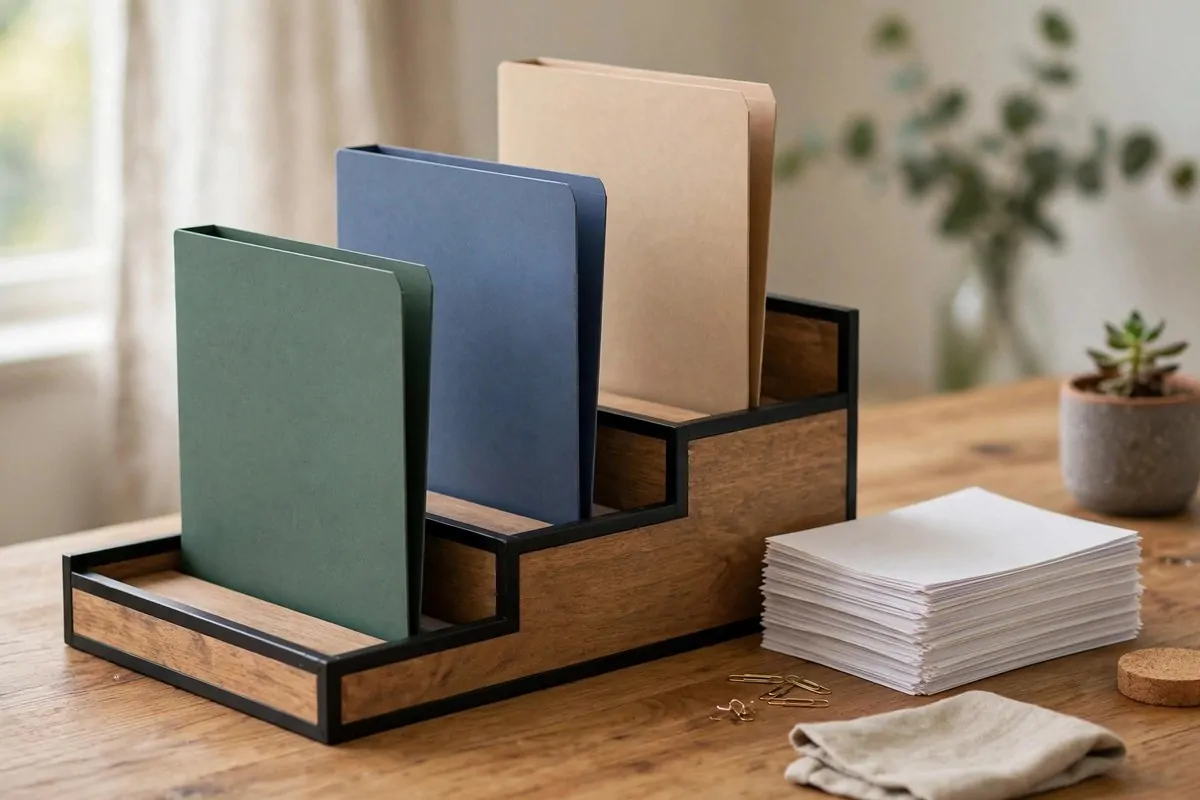
Paper piles grow sideways. That is the problem.
One stack becomes two, two become five, and soon the whole desk is a paper farm. Standing your files up vertically stops the spread. Gravity works for you instead of against you.
I use a stepped file holder with three slots. The front slot is “today.” The middle is “this week.” The back is “file later.” Every paper that lands on my desk goes into one of them.
Magazine holders work the same way. They are cheap and they look neat. Line them up on a shelf or at the back of the desk.
Label each slot clearly. Write on a little tag. If the slot has no label, it becomes a junk slot. I have learned that the hard way more than once.
Sort papers once a day, not once a month. It takes one minute to drop three papers into the right slots. It takes an hour to sort a month of piles.
Keep the slots slim. A slot that holds fifty papers is just a pile with a frame. Five to ten papers per slot is a good limit. More than that, and it is time to file or recycle.
Shred or recycle what you do not need. Most papers that sit on desks do not need to sit on desks. Old meeting notes, junk mail, takeout menus, let them go.
When the slots stay empty, your desk stays clear. And an empty-looking desk does something nice to your brain. It says the day is handled. Try it and see.
9. Try the One-In-One-Out Rule
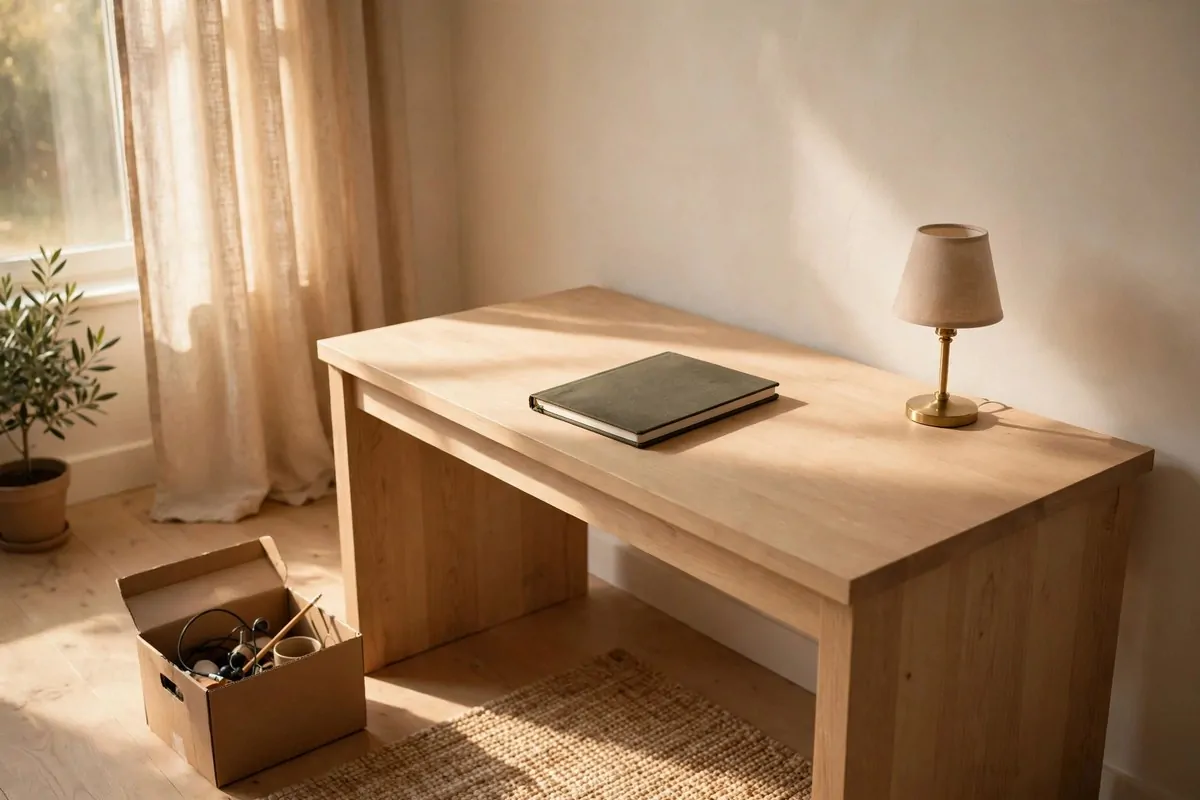
Desks get messy because things come in but never go out.
A new mug shows up. A new notebook. A free pen from a fair. Each one lands on the desk and stays forever. That is how seventeen things end up living there.
The one-in-one-out rule fixes this gently. Every time something new comes to your desk, one old thing has to leave. New notebook in, old notebook out. New plant in, old mug out.
I started doing this with pens. My desk had nine pens. I picked one new pen I loved. The other eight went into a drawer box. My desk looked better in one minute.
Keep a small “out” box near your desk. When something gets replaced, it goes in the box. When the box fills up, you donate or recycle the whole thing. No hard decisions each time.
This rule is strongest with stationery. Pens, notebooks and sticky pads multiply like rabbits. They are small and cheap, so nobody feels guilty keeping them. That is exactly why they take over.
Do not count things you truly use daily. The rule is for extras. Your lamp stays. Your laptop stays. The fourth water bottle goes.
Tell yourself it is a game. Can I bring in this cute new tray? Sure, but what leaves? It becomes fun instead of sad.
Your desk will stay at the same size forever. Not one item more. That is the whole point. Simple and it works.
10. Do a Five-Minute Evening Reset

The best time to clean your desk is when you are done using it.
Five minutes before you finish work, do a little reset. Put the pens back in the tray. Stack the papers into the file holder. Wipe the desk if it needs it. Then walk away.
I do this every day and it is the single best habit on this list. I start each morning with a clean desk. I never sit down to yesterday’s mess. It feels like someone else did me a favor.
Set a tiny timer if it helps. Five minutes is short enough that you cannot talk yourself out of it. Most days I finish in three.
Have a clear checklist in your head. Pens away. Papers sorted. Mug to the kitchen. Trash tossed. Done. The same order every day makes it fast.
Do not reorganize during the reset. That is a trap. The reset is just putting things back, not deciding where things should live. That is a weekend job.
On Fridays the reset is bigger. I empty the file holder, clear the sticky notes and toss old lists. Monday morning feels like a fresh start. It is a small joy I give myself.
If you live with others, the reset protects your desk from becoming a dumping ground. A clean desk at night stays cleaner the next day. People are less likely to pile stuff on a tidy surface.
This is not really an organization tool. It is an organization habit. Tools give you a place for everything. The reset makes you use those places. Both halves matter.
11. Hide the Printer on a Pullout Shelf
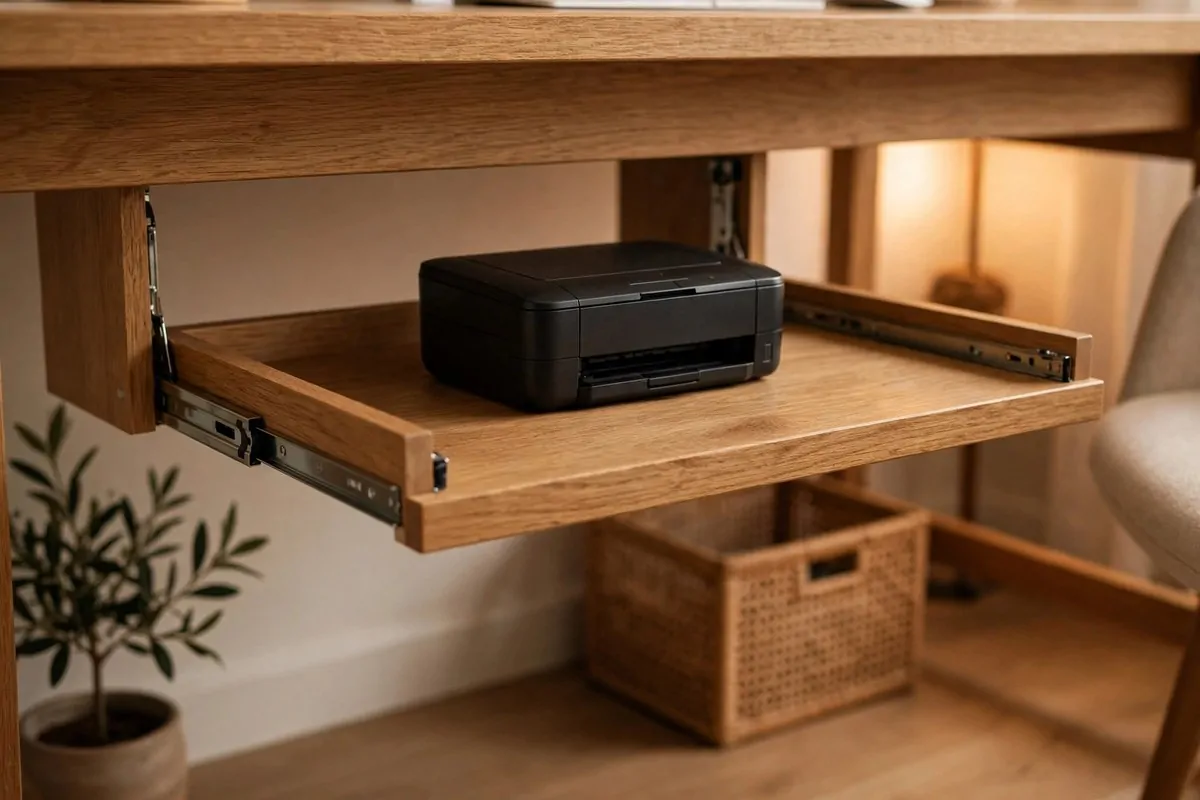
Printers are desk hogs. They sit there all day, doing nothing, taking up space you need.
Most people print maybe twice a week. So why does the printer get a permanent front-row seat on the desk? Move it somewhere it can hide until you need it.
A pullout shelf under the desk is perfect. The printer sits on it, pushed in during the day. When you need to print, you pull the shelf out, print, and push it back. Two seconds.
I put mine on a simple sliding shelf and it felt like my desk grew six inches. That is how much space a printer steals.
Make sure the shelf can hold the weight. Printers are heavier than they look. A sturdy slide-out shelf or a small low cart works best.
Keep paper and ink in the cart or shelf too. If the printer moves, its supplies move with it. Then you never have to dig around for paper when it is time to print.
Connect it over wifi if you can. A cable-free printer is easy to slide around. One less cord on the desk is always a win.
If you have a separate table nearby, the printer can live there too. The key idea is the same. Big tools you use rarely do not deserve desk space.
Printers are not pretty. Let them hide. Your desk will look calmer and you will still have a printer when you need it.
12. Build a Hidden Charging Drawer
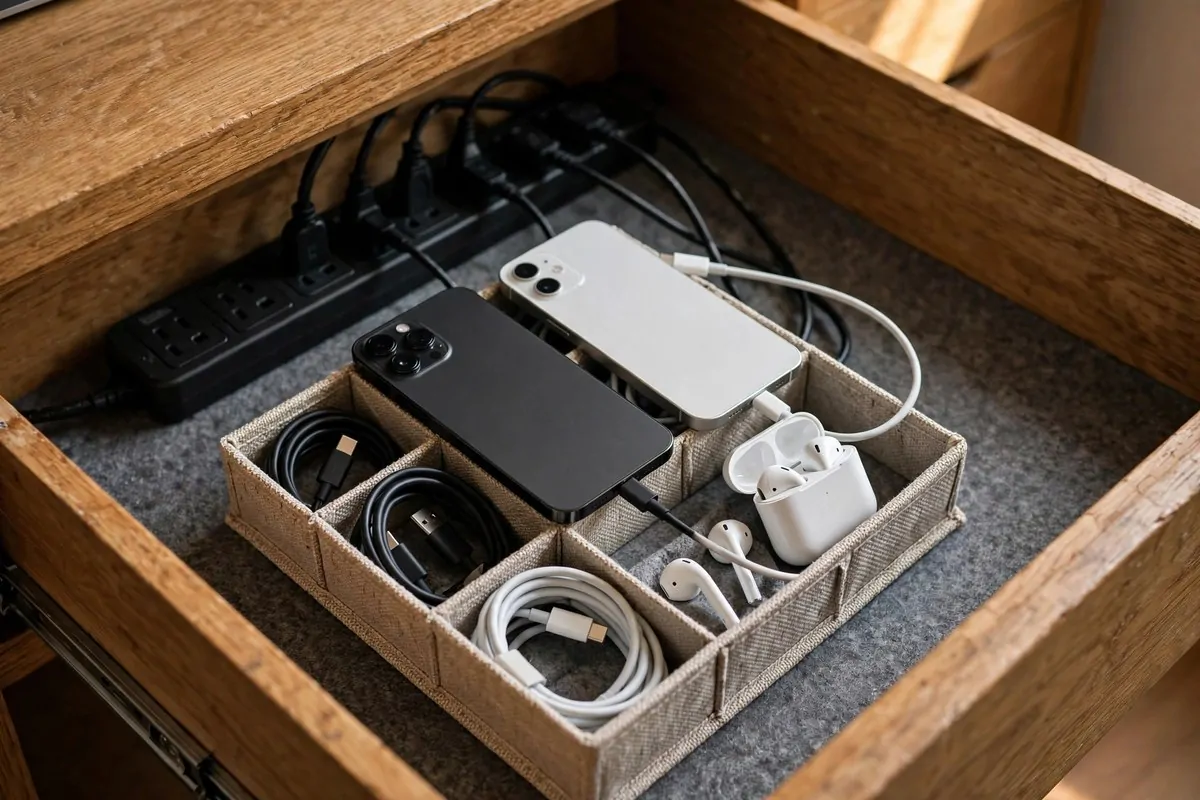
Chargers multiply fast. Phone charger, watch charger, earbud charger, laptop charger. Each one drags a cord across your desk.
A hidden charging drawer gathers them all in one spot. You drill or cut a small hole in the back of a desk drawer. The power strip sits inside. The cords stay inside. The desk stays clear.
I set this up on a Sunday and it changed my desk more than anything else that month. No more cords snaking across the surface. No more hunting for the right charger. They are all in the drawer, plugged in, waiting.
Use a surge-protected strip inside the drawer. Keep it away from paper and cloth. It is a small safety step that matters.
Give each device a little spot in the drawer. A phone on the left. Earbuds on the right. The watch in the middle. When every device has a place, you never leave a charger lying on the desk.
Label the cables if you have a lot. A small tag on each cord that says what it charges. It takes five minutes and saves so much guessing later.
Keep one cable for guests or a spare outside the drawer. Sometimes you need to charge a tablet while you work. One cable is fine. The rest stay hidden.
Clean the drawer out now and then. Old cords for old devices creep in. If you no longer own the device, the cord can go.
This is one of the smartest Office Organization Ideas because it hides the mess instead of organizing it. The desk just looks empty and calm. That is the goal.
13. Use Clear Boxes So You Can See Everything
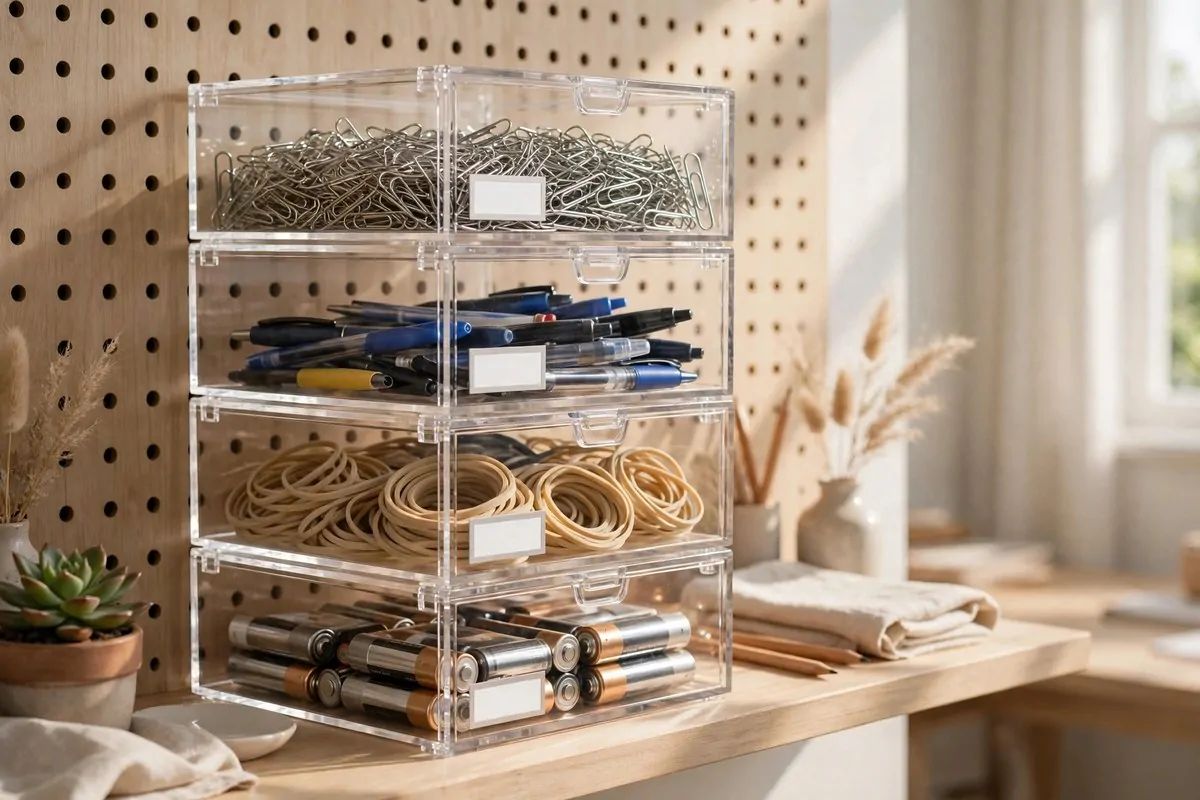
Searching through a box is a special kind of waste.
You open it, dig around, and pull out three wrong things before you find the right one. Then the box never looks the same again. Clear boxes end that whole routine.
When you can see inside, you grab what you need in one second. No opening, no digging, no mess. It is such a simple idea that I wonder why I used solid boxes for years.
I use clear boxes for my small supplies. Paper clips, pins, bands, batteries, all visible at a glance. My drawers went from messy to calm in one afternoon.
Add small labels on the front. Even though you can see inside, a label helps others. My husband knows which box is mine because it says my name on it. No more borrowing my stuff.
Clear also keeps you honest. You can see when a box is getting full. A solid box hides the pile until it bursts. A clear box shows you it is time to stop adding.
Stack them neatly. Clear boxes look best in straight stacks. Wonky stacks look messy even when they are organized. Take ten seconds to line them up.
For paper, use clear magazine holders. You can see which pile is which from the side. It beats pulling out every folder to find one document.
The one thing to avoid is mixing too many colors inside. A clear box full of rainbow clutter still looks busy. Keep similar colors together and it stays calm.
See everything, grab anything. That is the promise of clear boxes.
14. Pin Notes on a Cork Board
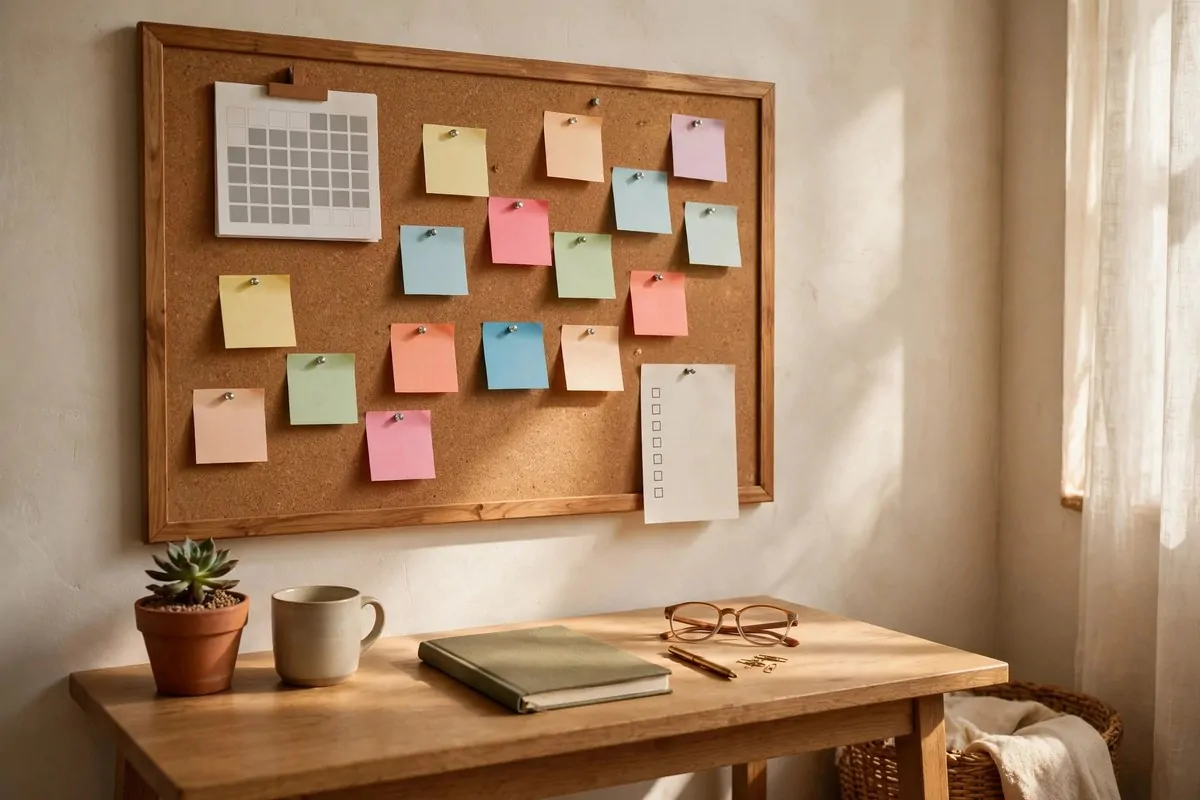
Sticky notes have a talent for escaping.
They land on your monitor, your lamp, your coffee mug, the edge of your keyboard. Soon your desk looks like it is covered in tiny paper confetti. A cork board rounds them all up.
I moved every sticky note onto one board and my desk breathed again. The board hangs on the wall right beside my desk. Notes I need, dates I cannot miss, one small photo, that is all.
Set a limit on how many notes live there. Ten is plenty. When the board fills up, something old has to come down. That keeps it useful instead of crowded.
Use pins with colored heads. One color for work, one for home, one for fun. You can scan the board and know what is what in seconds.
Check the board every morning. Pull down anything that is done. Pin anything new. It takes one minute and it keeps the board fresh.
If you have kids, give them their own little corner of the board. Their drawings and school notes stay off your desk. Everyone wins.
A board also replaces half the papers on your desk. The calendar page, the password list, the phone numbers, they can all live on the board. The desk gets emptier and emptier.
Cork boards are cheap and they work in any space. Hang one this week and watch the sticky note swarm leave your desk for good.
15. Slide Storage Under a Monitor Riser
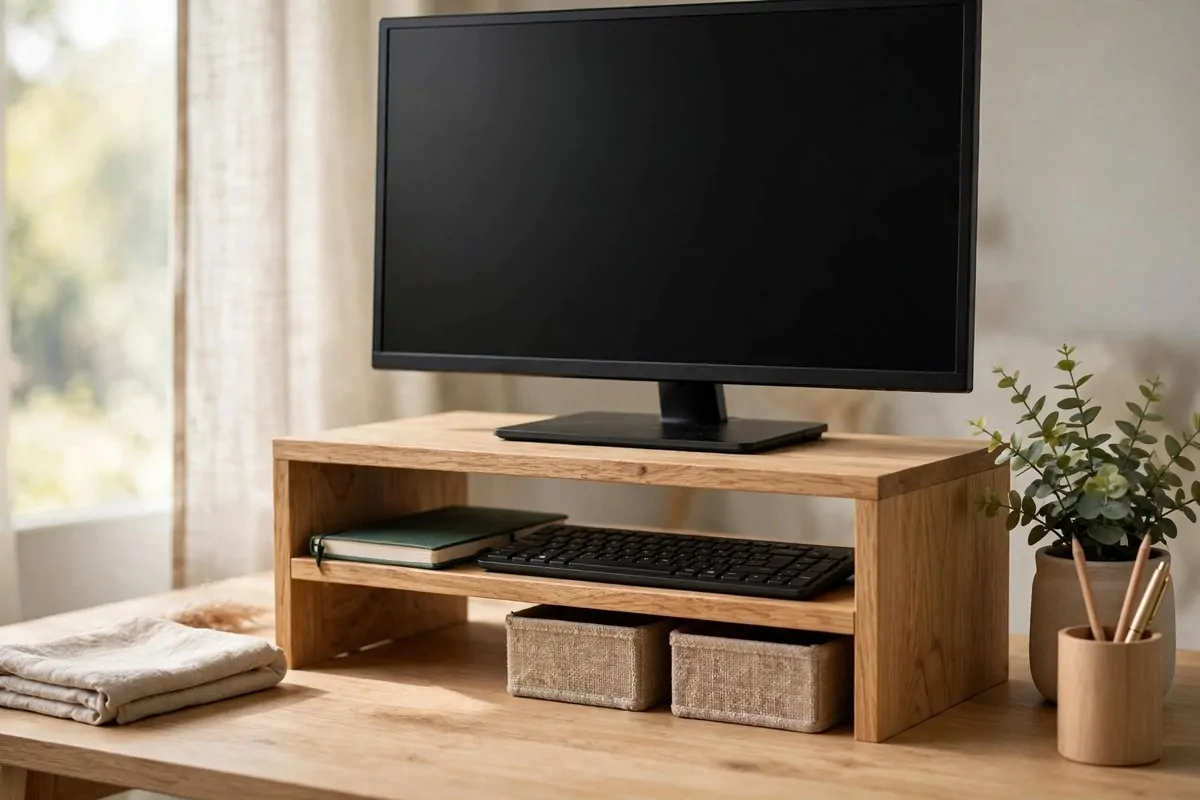
The space under your monitor is doing nothing. It just sits there, empty, while your desk gets crowded around it.
A monitor riser turns that dead space into storage. It lifts your screen to eye level, and the gap underneath becomes a home for your keyboard, your notebook and a few small boxes.
My neck thanked me within a week. My screen used to sit too low and I hunched. Now it sits right at eye level. The storage underneath was almost a bonus.
Slide your keyboard under the riser when you are done. The whole desk surface opens up. It is the fastest way to clear a desk for other work.
Keep a notebook and pen under there too. Anything flat works. The riser becomes a little roof over your daily tools.
You do not have to buy a fancy one. A sturdy wooden box works fine. Just make sure it is the right height and strong enough to hold your screen.
If you use a laptop, a laptop stand does the same job. The laptop rises up, and the space below holds your phone and charger. Add a separate keyboard and it feels like a full desk setup.
Keep the top of the riser simple. The monitor and maybe one small plant. If you stack stuff on top, the screen gets buried and the calm is gone.
Eye level screen, hidden storage below, clear desk around. One small piece of wood does all three.
16. Give Every Corner a Job
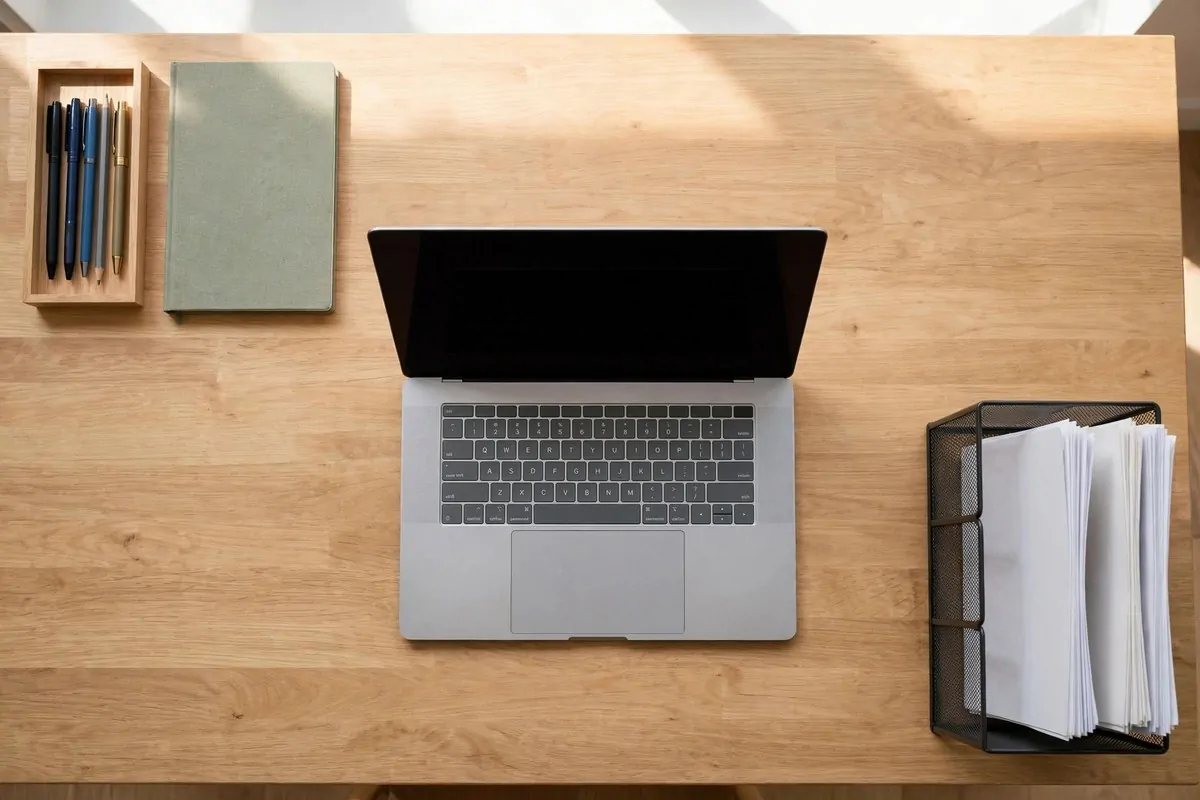
A desk without zones is a desk where everything lands everywhere.
Give each corner a job and the mess stops spreading. One corner is for your computer. One corner is for supplies. One corner is for papers you are working on. That is it.
My desk has three corners and they each have a name. The work corner holds my laptop. The tool corner holds my pen tray and notebook. The paper corner holds my file holder. I know where everything lives.
Use trays to mark the zones. A tray is a physical border. Things stay inside it because the edge says so. It sounds silly but it works.
Keep your main work zone clear of everything else. The keyboard, the mouse, a bit of elbow room, that is all the work corner needs. No pens there. No papers there.
The supply corner should be the one closest to your strong hand. If you are right-handed, the right corner holds the pens. Your hand will travel there all day, so keep the trip short.
The paper corner is the one you visit least. Put it farthest away. That way papers never creep into your work space.
Teach the zones to anyone who shares your desk. Kids, partners, anyone. If they know the system, they will keep it. If they do not know, they will dump.
Zones turn a desk into a tiny organized office. Every item has an address. And when everything has an address, nothing gets lost.
17. Go Wireless Wherever You Can
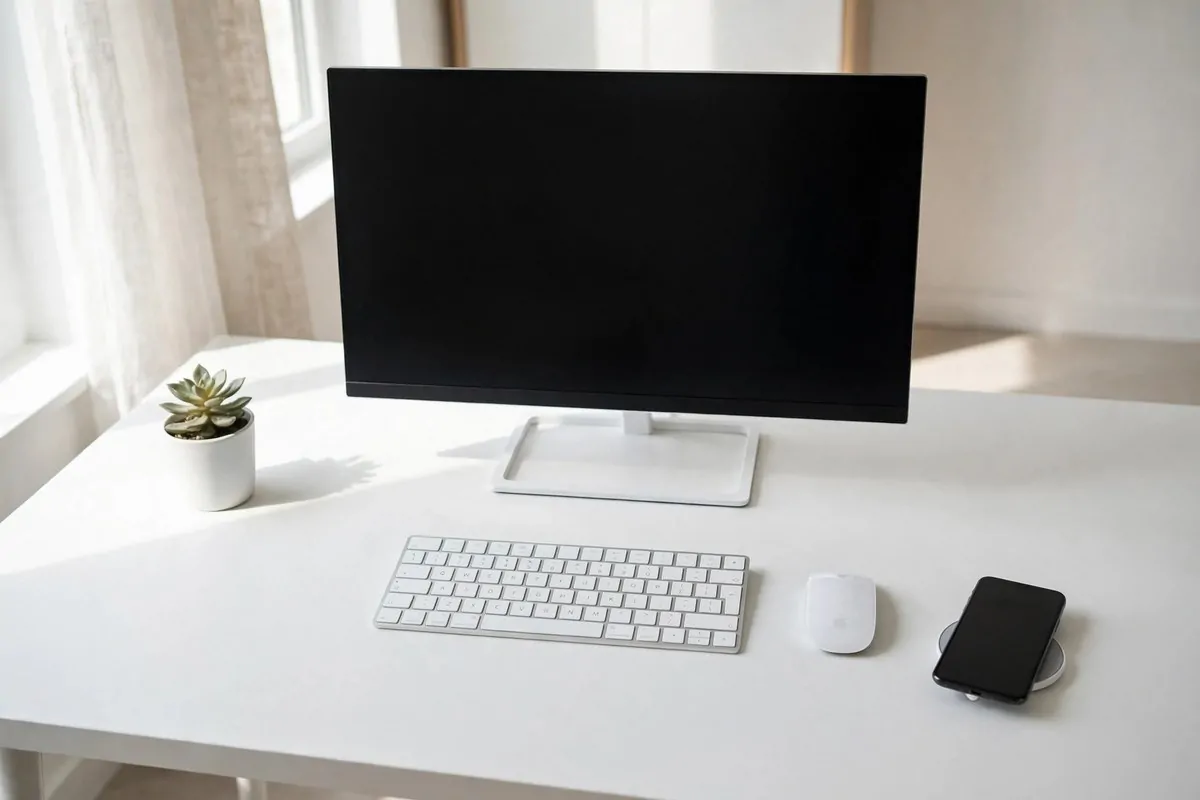
Every cord you remove is one less line of clutter on your desk.
Think about how many wires your desk has right now. Keyboard wire, mouse wire, phone cable, headphone cord, lamp cord. Each one draws a little squiggle across your space. Together they look like a nest.
I went wireless piece by piece. First the mouse. Then the keyboard. Then the charger. My desk went from a tangle to a clean sheet in a few weeks.
Start with the mouse. A wireless mouse is cheap and the change is instant. No more cord dragging across the desk or catching on papers.
The keyboard is next. Wireless keyboards come in every size and price. Pick one that feels good to type on. Your hands will live there all day.
Wireless headphones replace the earbud cord. No more cord catching on your coffee mug. No more untangling before a call.
A wireless charging pad replaces the phone cable. You just set the phone down. It charges. You pick it up. It is done. One less cord forever.
Keep the old wired versions as backups. Put them in the storage cart. If a battery dies mid-day, you plug in the backup and keep working.
Recharge everything overnight. Wireless gear needs its batteries filled. Make it a night routine. Devices on the charger when you sleep, full batteries when you wake.
A desk with no wires looks twice as tidy. It also cleans easier. You just wipe the whole surface. Nothing in the way.
18. Color-Coordinate Your Supplies
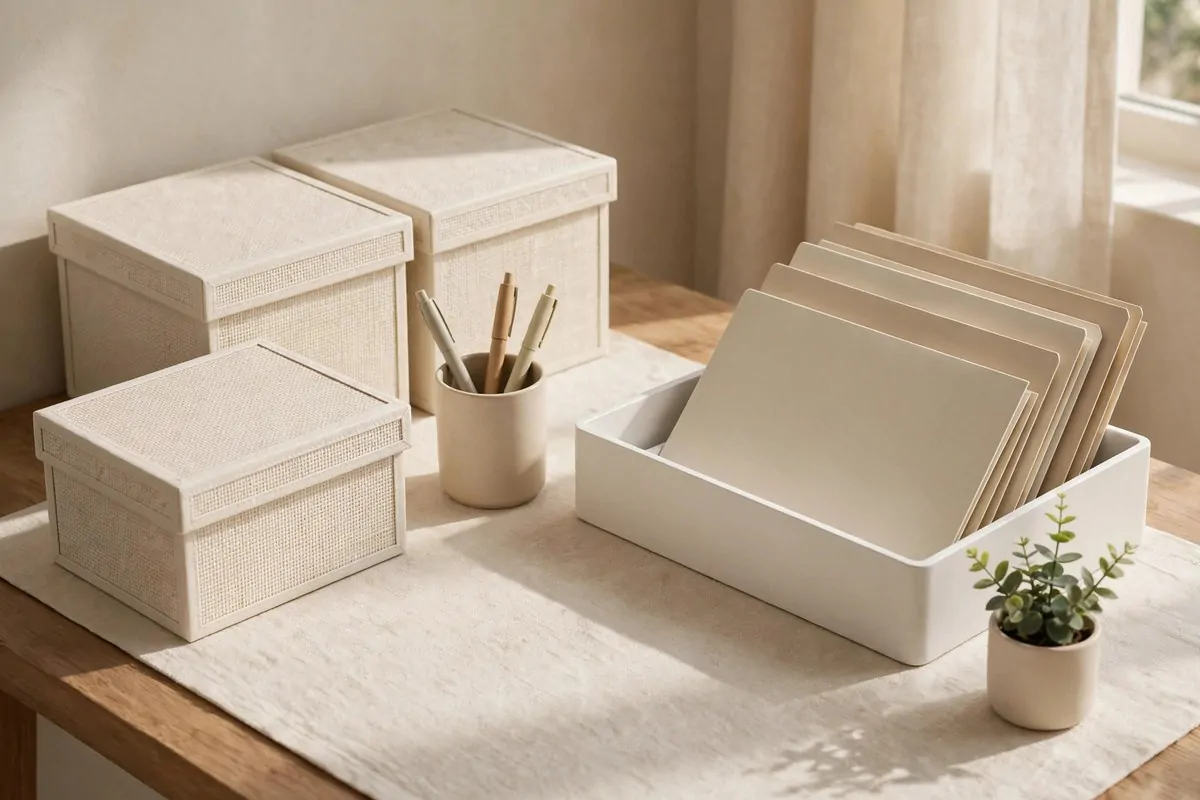
Clutter is not always about too much stuff. Sometimes it is about too many colors.
Look at a desk with a red pen cup, a blue folder, a green box and a black tray. Even if everything has a home, your eyes jump around. It feels busy.
Now picture the same desk in matching tones. Cream boxes, a beige pen cup, a white tray. The same stuff, but suddenly the desk looks calm. That is the power of one color story.
I did this with a basket of beige and cream items. My desk did not get emptier, but it looked like it did. The pieces stopped fighting each other.
Pick two or three colors and stick to them. Neutral colors work best, white, cream, gray, wood tones. They fade into the background and let your work stand out.
You do not have to buy everything new. Spray paint is your friend. A can of matte paint turns a mismatched pen cup into a matching piece. I painted three things last spring and they look brand new.
Match your folders and binders. Paper goods are the loudest clutter. When they all share one color, the whole desk quiets down.
Keep one accent color if you like personality. Maybe a soft green plant pot or a single blue notebook. One accent is pretty. Ten accents is noise.
This trick also slows new purchases. Before you bring in a new item, you ask if it fits the colors. If it does not, you skip it. Fewer impulse buys, less clutter.
Color coordination is makeup for your desk. Same face, better look.
19. Grab a Storage Caddy
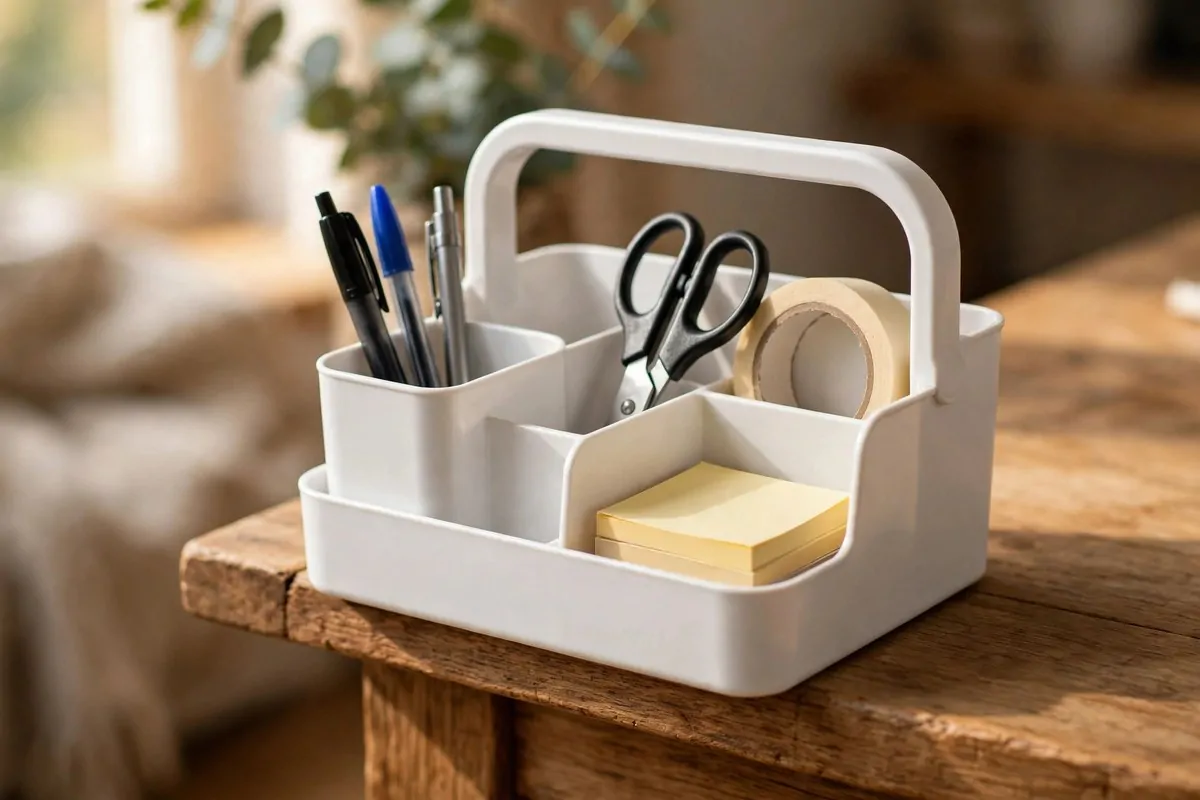
If your desk has no drawers, a caddy is your drawer.
It is a small box with a handle. Pens go in one side. Scissors and tape in the other. You carry it to the desk when you work and carry it away when you are done.
I used one when my desk was just a table. It lived on the floor beside my chair. When I sat down to work, I pulled it up. My supplies came with me, no drawer needed.
Pick a caddy with a few dividers. Without dividers it becomes a junk box with a handle. With dividers, everything has a spot.
Keep the handle strong. Cheap caddies break at the handle first. A good one lasts years. It is worth paying a little more.
When the workday ends, the caddy goes away. Under the desk, on a shelf, in a closet. The desk returns to being a plain table. That disappearing act is the whole point.
Caddies are great for shared spaces too. If two people use one table, each gets a caddy. Your stuff stays yours. No more hunting for your scissors in someone else’s pile.
Clean it out monthly. Old pens, dried markers and bent clips collect in there. Tip it out, keep the good ones, and start fresh.
A caddy also works as a project box. Put everything for one project inside it. When you work on that project, grab the caddy. When you stop, put it back. Your desk never learns the project’s mess.
No drawers? No problem. A caddy is drawers with a handle.
20. Move Your Calendar to the Wall
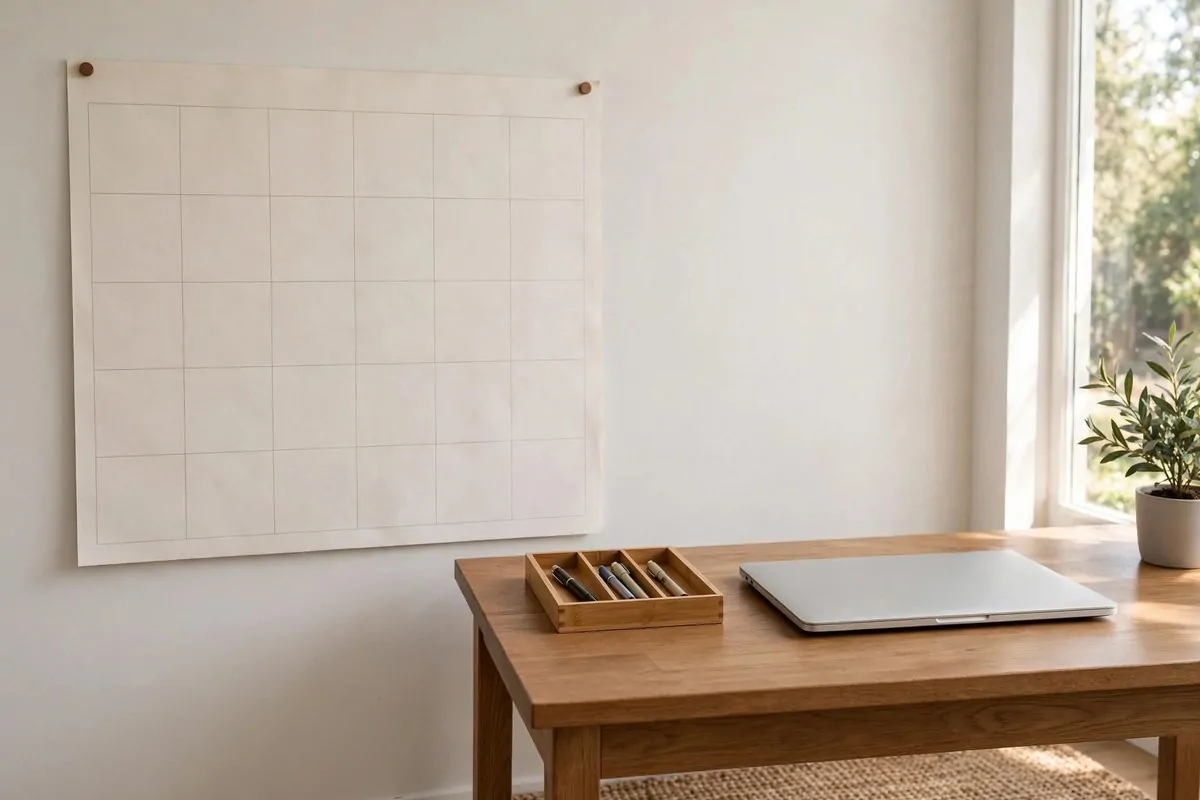
Desk calendars eat a surprising amount of space.
They sit open on your desk, and you flip their pages, and they collect coffee stains. Meanwhile the wall beside your desk sits empty, doing nothing. Swap them.
I moved my calendar to the wall and got back a whole corner of my desk. The wall calendar is bigger, easier to read, and it never gets buried under papers.
Hang it at eye level, right where you can see it while you work. If you have to turn around to check a date, it is in the wrong spot.
Write in pen, not pencil. Pencil fades and smudges. Pen stays readable for the whole month. One dark pen for everything keeps it clean.
Color-code by person or project if you share your life with others. My work dates are blue. My home dates are green. One look tells me which is which.
At the end of each month, take a photo of the calendar before you flip it. Then you have a record without keeping old pages. The old page can be recycled.
If you hate paper, a small wall-mounted whiteboard works too. Write the month’s plan, wipe it clean, start over. Same idea, less paper.
Either way, the calendar leaves your desk. And every item that leaves your desk makes the desk feel a little calmer. Try it and enjoy the extra space.
21. Store Supplies in Labeled Bins Under the Desk
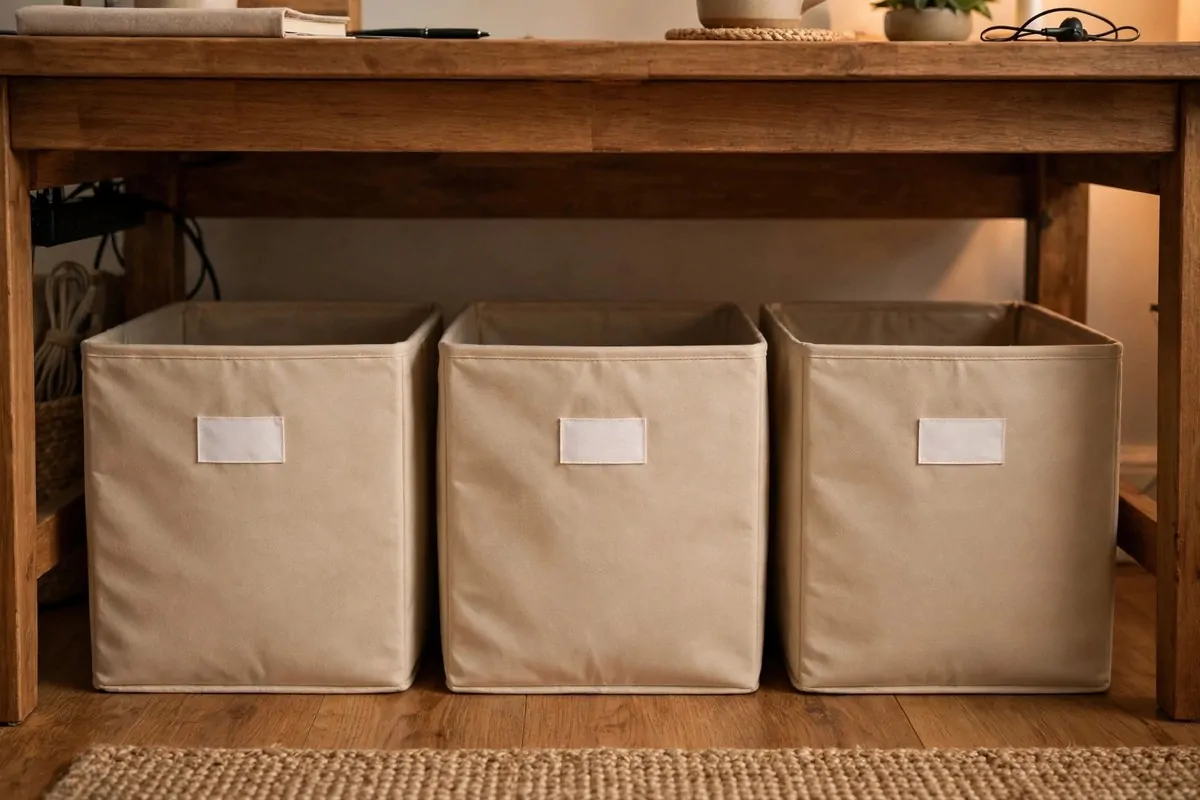
The space under your desk is a secret storage room.
Most people leave it empty or let it become a graveyard of old bags and shoes. Put some labeled bins down there instead. Your desk top stays clear because the extra stuff has a real home below.
I have three bins under mine. One for paper and notebooks. One for tech bits like old chargers and adapters. One for craft and art supplies. Each one has a label on the front.
Labels are the key. Without labels, bins become mystery boxes. You open each one to find things. With labels, you read and grab. Two seconds instead of two minutes.
Use bins that fit your space. Measure under the desk first. You want bins that slide in and out easily, not ones you have to shove.
Keep the bins shallow or medium. A very deep bin becomes a pit. Things fall to the bottom and never come back. Shallow bins keep everything visible.
Pull the bins out once a season. Check what is inside. Old cables for dead devices can go. Half-used notebooks can move to the paper bin. A little sorting keeps them useful.
If your under-desk space is open, matching bins look tidy. Mismatched bins look like clutter, even when they are organized. It is the same color trick from idea 18.
Think of the desk top as the shop window and the bins as the stock room. The window stays pretty. The stock room holds everything else. That is how real shops work.
22. Keep Only Daily Items Within Arm’s Reach
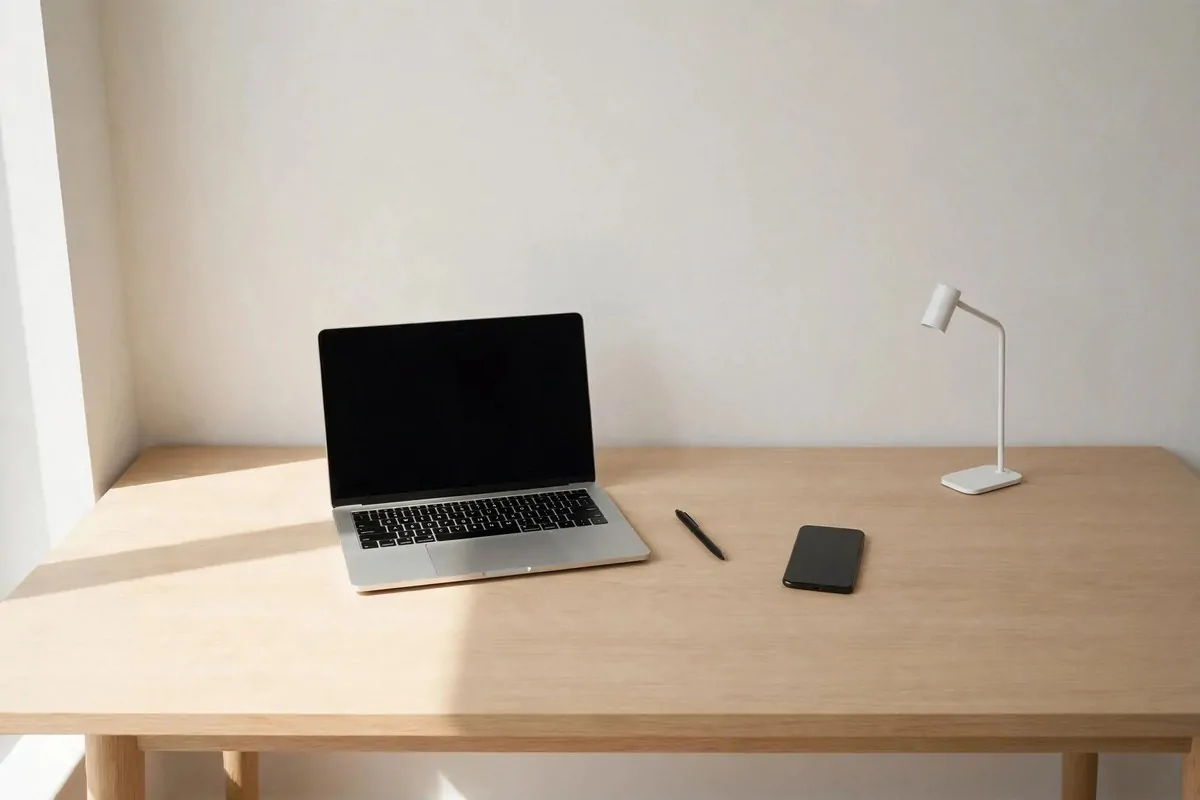
Your desk should hold what you use daily. Not weekly. Daily.
Everything else can live one step further away, on a shelf, in a drawer, on the cart. The desk itself is prime real estate. Only daily items get to live there.
I did a test once. I put everything from my desk into a box. Then over one week, I only took out what I actually needed. At the end of the week, the box still had most of its stuff. That told me everything.
Your daily list is probably short. Laptop, phone, one pen, one notebook, water. Maybe a lamp. That is the whole desk.
Move everything else to its real home. The stapler goes in the drawer. The spare cables go in the cart. The folders go in the file holder. If you miss something, you can always bring it back.
This rule makes decisions easy. Pick up an item. Did I use it today? Yes, it stays. No, it moves. No hard thinking needed.
Watch your desk shrink. The first time I did this, my desk looked almost empty. I thought something was wrong. Then I worked on it for a week. It was the best working week I had in months.
Empty space on a desk is not wasted space. It is breathing room. It is space for your elbows, your coffee, your thoughts.
Try the box test this weekend. Your desk will thank you on Monday.
23. Move Extras Off the Desk Entirely
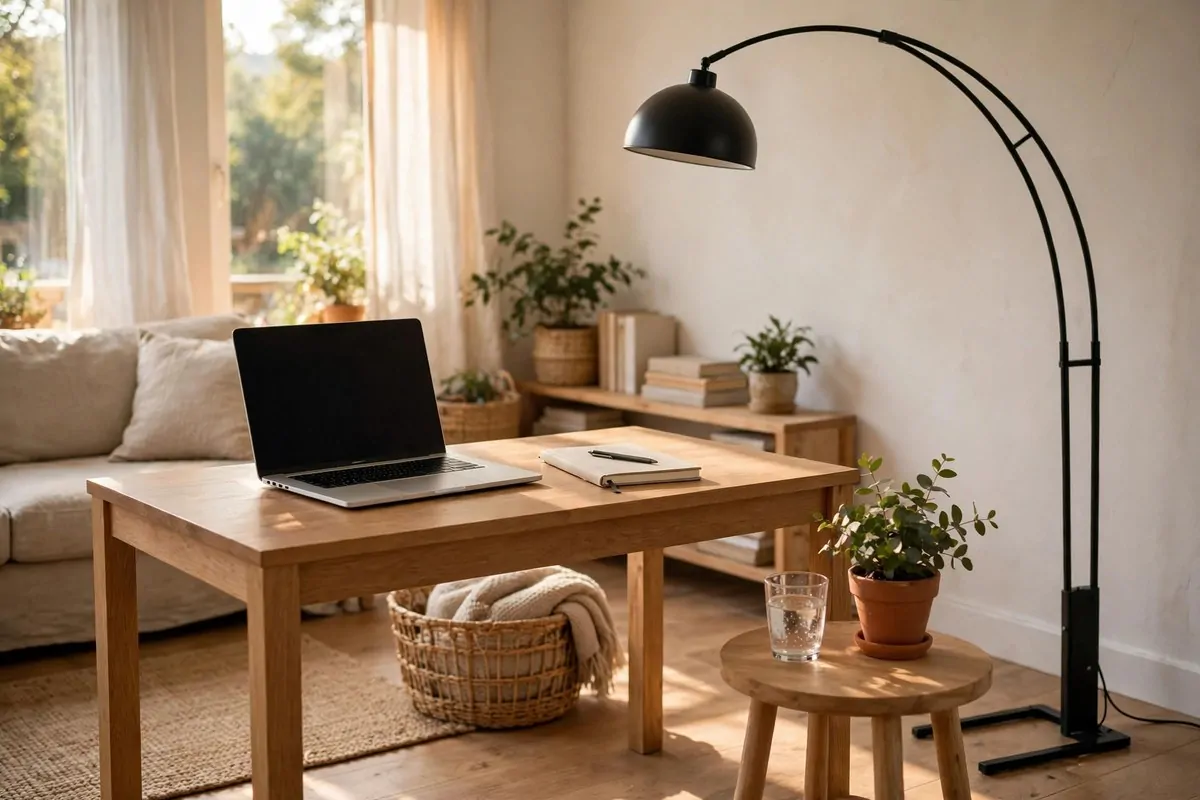
Some things do not need to sit on your desk at all.
Your lamp can become a floor lamp. Your water can sit on a small side table. Your plant can live on the shelf. Each item that moves off the desk gives you space back.
I moved my lamp first. A floor lamp with an arm reaches over the desk just like a desk lamp does. But it takes zero desk space. The difference was shocking.
A small side table beside your desk is a game changer. It holds your water, your snacks, your phone charger. The desk keeps only the work stuff.
Move decorative items to the wall. Photos and art look better on the wall anyway. They are meant to be seen from far, not from two feet away.
Your speaker can sit on the shelf. Sound travels fine from there. It does not need to sit next to your elbow.
Ask about each item: does it need to be within reach, or just nearby? Reach means desk. Nearby means shelf, table or floor. Most things are nearby things.
I count my desk items every month. If the count creeps up, something has drifted back. I move it off again. It takes one minute.
The desk is for working. Everything else has the whole rest of the room. Give the desk room to do its job.
24. Digitize Your Paper Piles
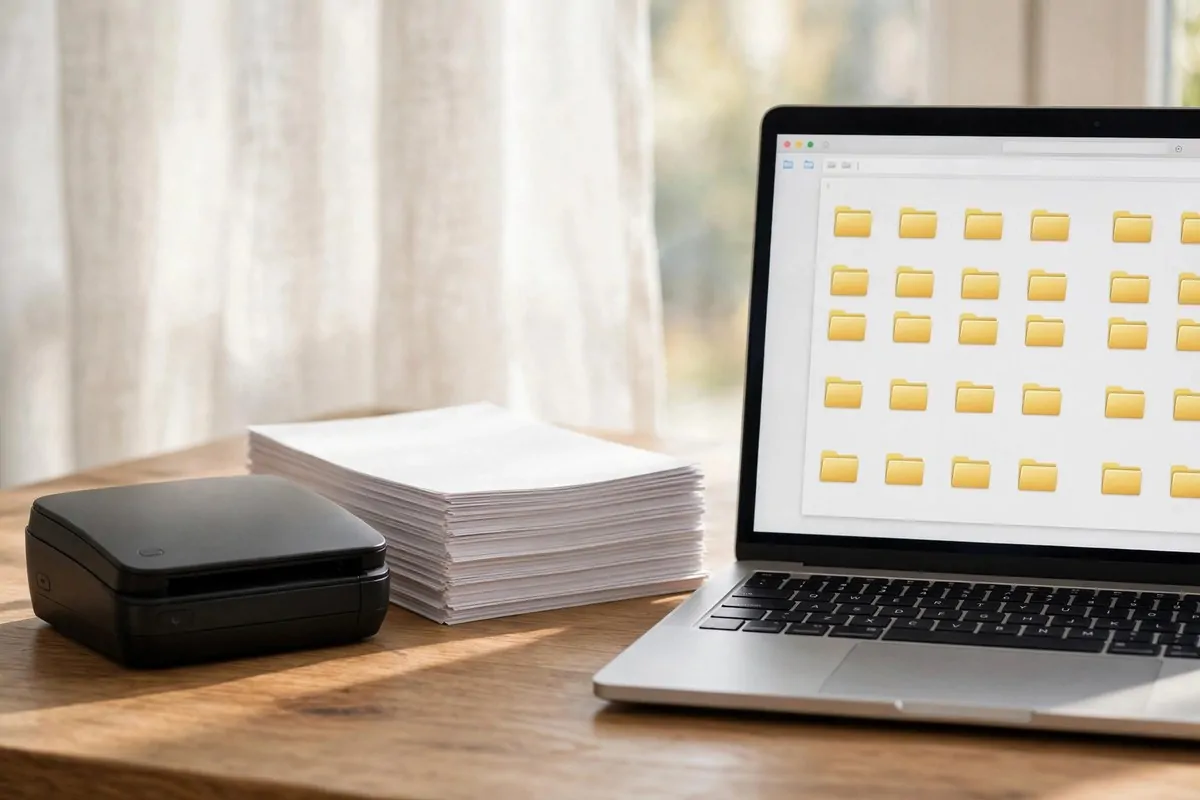
Paper piles are the hardest clutter to beat, because paper keeps coming.
Bills, letters, receipts, notes, they land on your desk every single day. If you keep them all, the desk drowns. Digitizing breaks the cycle. Paper comes in, gets scanned, and goes away.
I scan my mail the day it arrives. The scanner takes ten seconds. The paper goes in the shredder or the recycle bin. My desk never grows a pile anymore.
Use your phone if you have no scanner. Free apps take a clear photo and save it as a PDF. It works just as well for receipts and letters.
Name your files well. “Bill-Electric-March” beats “scan0042.” Good names mean you can find things later. Bad names mean you never look again.
Keep digital folders that match your life. One for bills. One for receipts. One for work. Back them up somewhere safe. A cloud drive or an external drive works.
Go paperless for bills if you can. Most companies let you get email bills. Fewer bills in the mail means fewer papers on the desk. It is that simple.
Keep only papers you truly need in paper form. For most people that is almost nothing. I keep my passport and a few certificates. Everything else lives on the drive.
Tell your family the system. If they know the papers get scanned, they stop stacking them on your desk. They hand them to you or put them in the scan tray.
Paper in, scan, paper out. That is the rhythm. Your desk stays clear because paper never gets to stay.
25. Add an Under-Desk Keyboard Tray
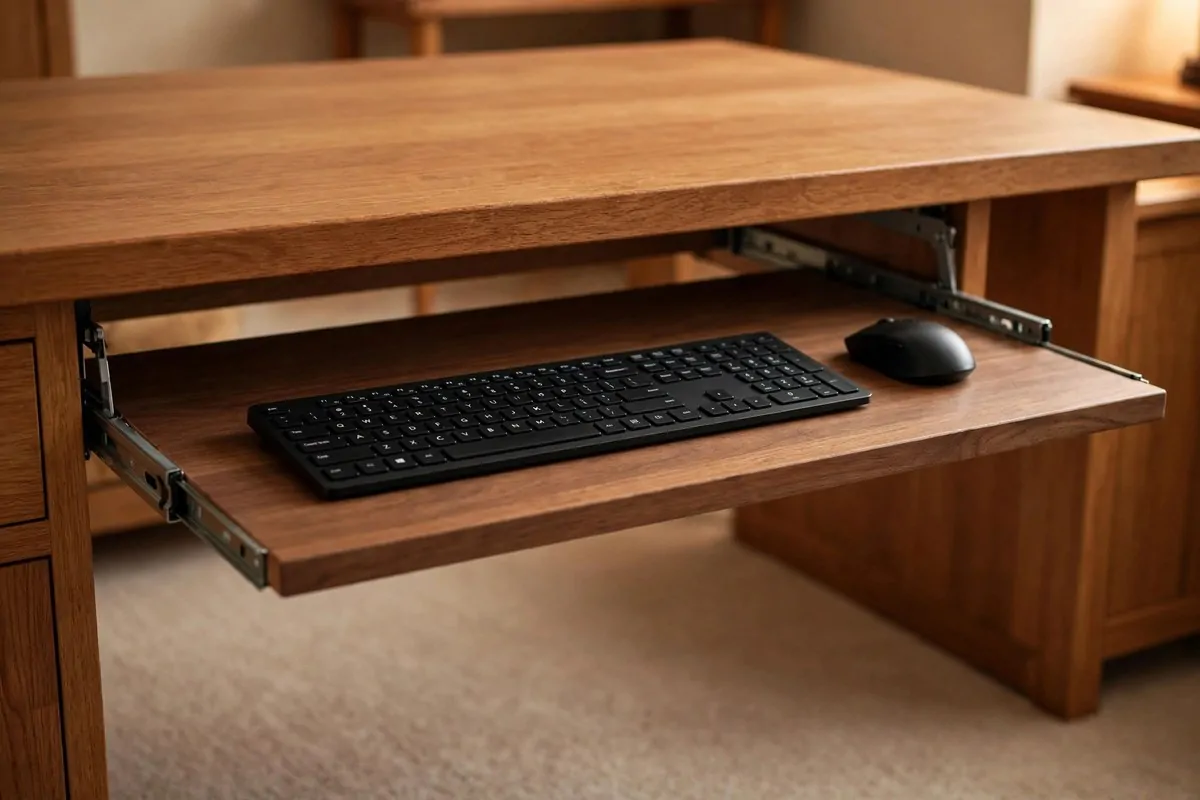
Your keyboard takes up the middle of your desk all day. Even when you are not typing.
A sliding tray under the desk gives you a choice. Pull it out when you type. Push it in when you are done. The whole center of your desk opens up.
I added one and my desk felt twice as big. Reading, writing notes, eating lunch, all of it happens on the clear space where the keyboard used to sit.
Trays are easy to install. Most screw under the desk in about twenty minutes. No special tools needed, just a screwdriver.
Make sure the tray is wide enough for your mouse too. A tray with only a keyboard is half a fix. The mouse needs a home as well.
Check the height. Your arms should rest flat when you type. If the tray sits too high or too low, it hurts your wrists. Most trays let you adjust the height a little.
When you push the tray in at night, the desk looks empty and calm. That is the reset done without any effort. You just slide it in.
If your desk is very small, a tray is almost a must. It is the fastest way to double your desk space without buying a new desk.
Keyboard out for work, keyboard in for everything else. Your desk thanks you either way.
26. Hang an Organizer Behind the Door
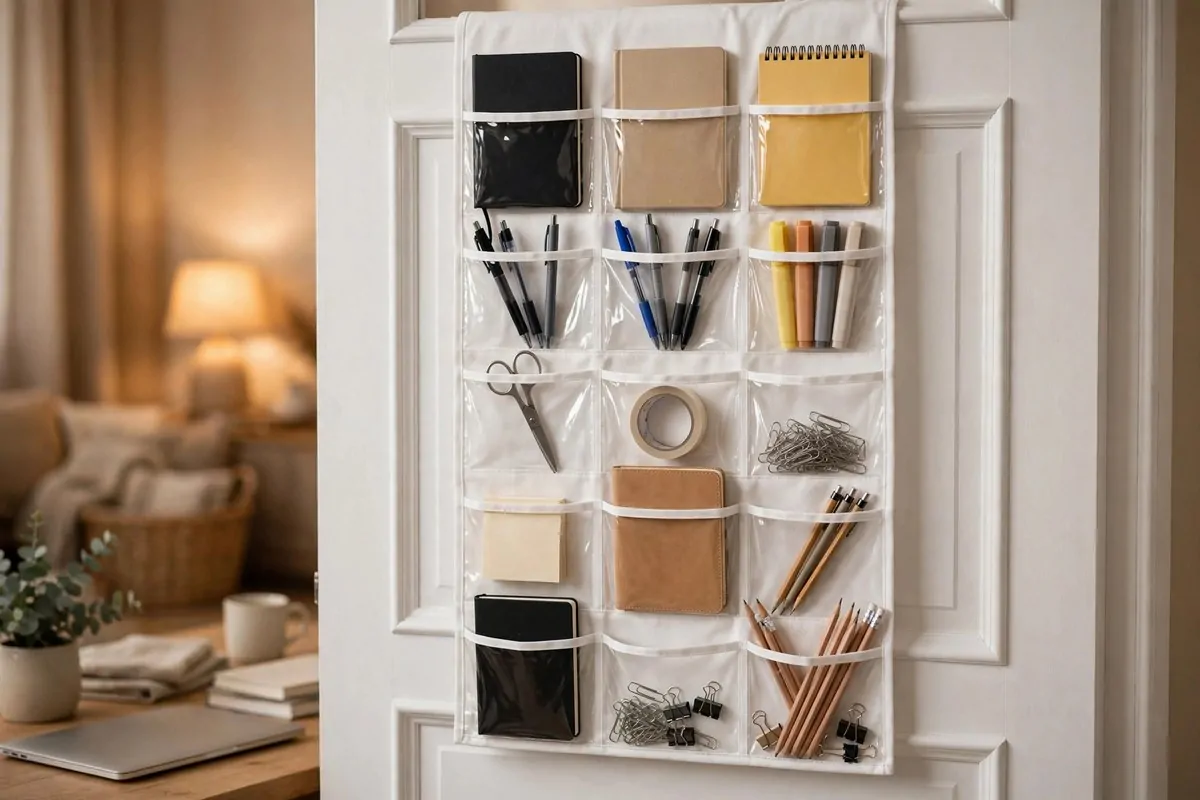
The back of your office door is hiding storage space.
A hanging organizer with clear pockets slips over the top of the door. No screws, no holes. Each pocket holds notebooks, pens, chargers and bits that used to live on your desk.
I hung one on my office door and cleared half a shelf of supplies into it. My desk never saw those items again. They live behind the door now, out of sight but close by.
Clear pockets beat solid ones. You can see what is inside each pocket. Solid pockets make you open five of them to find one pen.
Sort by type, not by size. One pocket for pens. One for notebooks. One for tech bits. When pockets hold mixed stuff, they become little junk drawers.
Keep the heavy stuff low. Top pockets hold light things like papers and notebooks. Heavy chargers and tools go lower. The door stays balanced and quiet.
This is perfect for renters. No holes in the wall, no damage, no landlord trouble. It hangs on the door and comes off in ten seconds when you move.
Check the pockets once a month. Old receipts and dead pens creep in. A quick clean keeps the organizer useful instead of crowded.
Close the door and the clutter vanishes. That is the beauty of door storage. It is there when you need it and gone when you do not.
27. Sort Mail the Second It Arrives
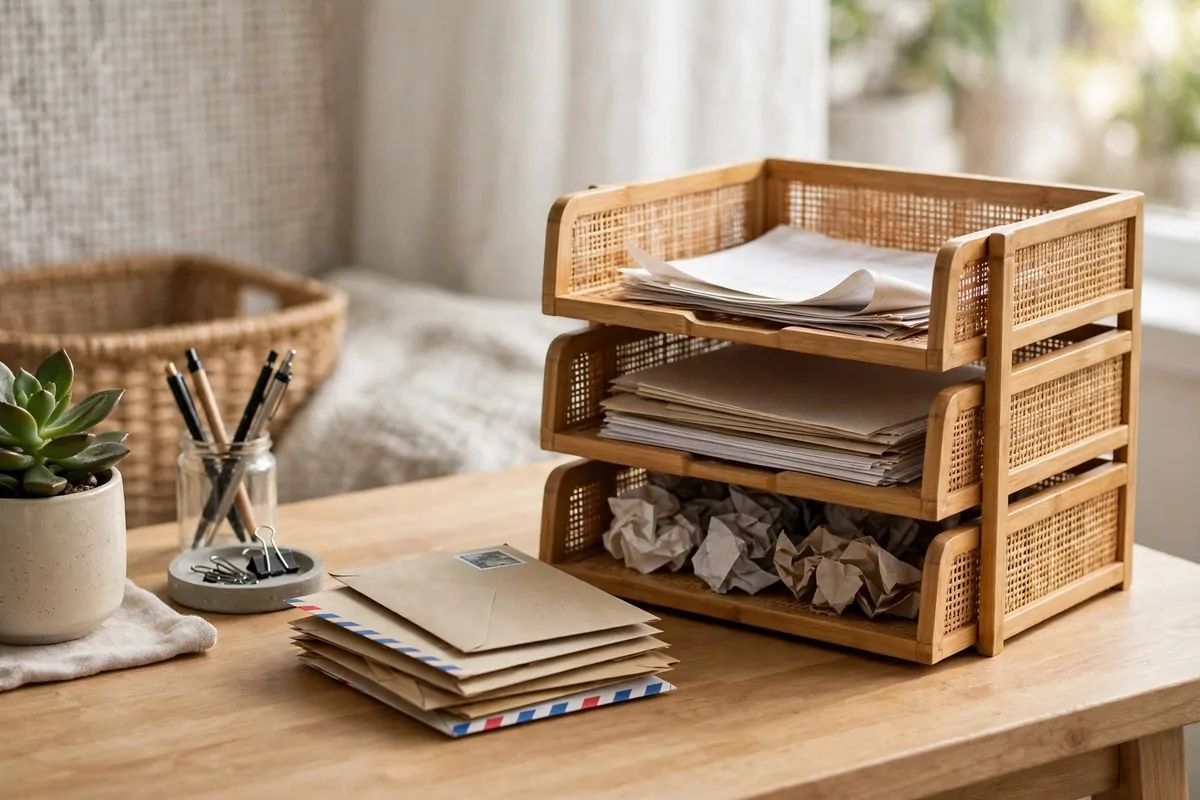
Mail is the number one source of desk paper piles.
It comes every day. If you just set it down, it grows. By Friday you have a mountain. Sort it the second it arrives and the mountain never forms.
I keep three trays by the door. One says action. One says file. One says recycle. Mail lands in one of the three within ten seconds of coming inside.
Open every envelope right away. Do not let sealed mail pile up. Sealed mail feels important, but most of it is junk. Open it, check it, sort it.
Recycle the junk at once. Catalogs, ads, offers you will never read, they go straight in the recycle bin. Do not give them a temporary home on your desk.
Put action mail in the action tray. Bills to pay, forms to fill, letters to answer. Once a week, sit down and clear the action tray. Everything in it gets handled.
File the keepers right away. Insurance papers, tax forms, warranties, they go to the file box. Not tomorrow. Today. Tomorrow becomes never.
Keep a small shredder nearby if you get a lot of mail with your name on it. Shred the junk mail. It takes seconds and it keeps your information safe.
Ten seconds per day beats one hour per week. That is the math of mail. Sort it now or drown in it later. Your desk stays clear either way you choose.
28. Do a Weekly Desk Purge
Even the best systems drift. Things creep back onto the desk.
A pen from a friend. A note from a meeting. A cable for a device you borrowed. Each one is small. Together they rebuild the clutter you cleared.
A weekly purge stops the drift. Pick one day, I use Friday. Spend ten minutes and reset the whole desk to clean. That is it.
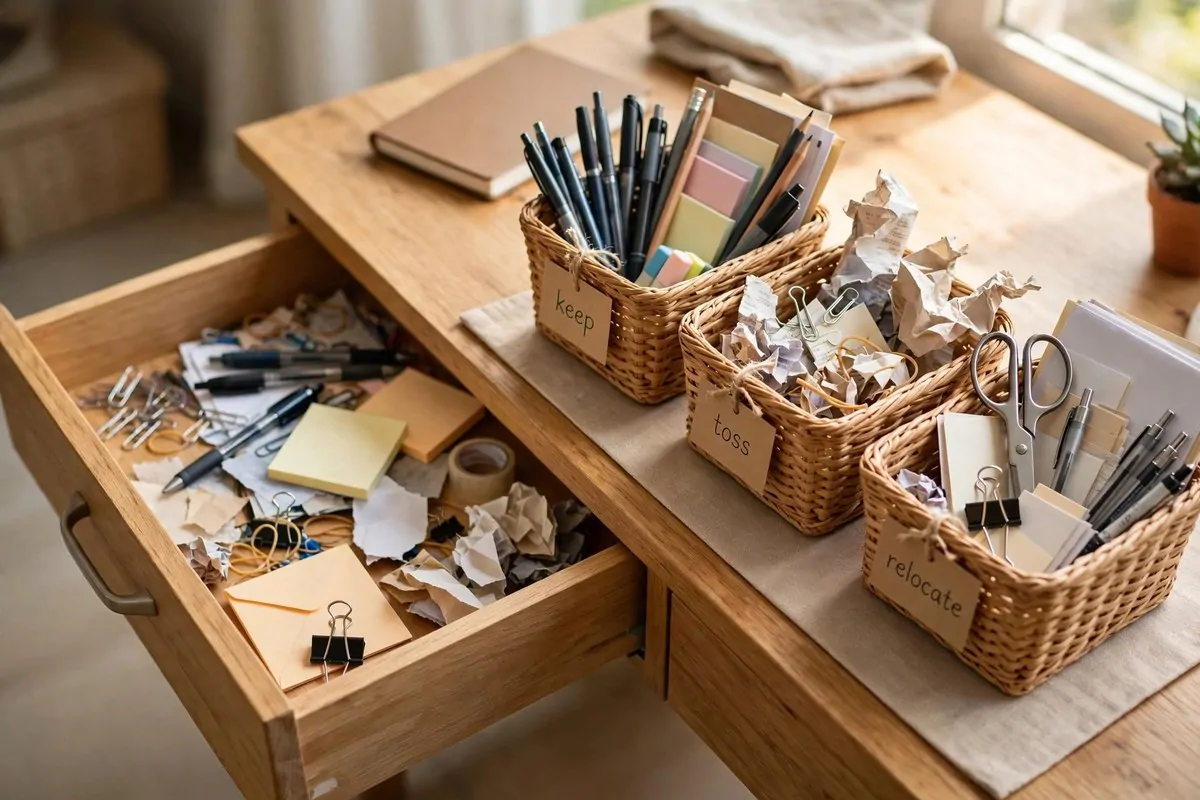
Pull everything off the desk. All of it. Lay it out and look at each item. Keep, toss, or relocate. Three choices. No maybe pile, because maybe piles are just clutter with a nicer name.
The toss pile goes straight in the trash or recycle. Old lists, dried pens, broken clips, they are done. Let them go.
The relocate pile goes back to real homes. The stapler to the drawer. The notebook to the shelf. The cable to the charging drawer. Everything you kept gets put away.
Wipe the desk when it is empty. Dust and crumbs collect under things. A quick wipe makes the desk feel brand new. It is a small reward for the work.
Check your bins and drawers too. Pull one drawer per week. It keeps the whole system healthy without a big monthly cleanup.
Friday purge, Monday fresh start. That rhythm keeps your desk clutter-free all year. Not perfect, not magazine-clean, just calm and ready for work.