30 Studio Ideas That Turn Any Space Into a Creative Haven

Last month I cleaned out the kitchen drawer. You know the one. Every house has it. The drawer with the scissors, the tape, the glue stick, the half-used markers, and three batteries I could not throw away for some reason.
I laid it all on the counter and laughed. There was enough stuff in that one drawer to fill a small craft box. And I thought, this is what a studio looks like before it grows up. A pile of tools with no home.
Every creative person I know started exactly there. A drawer. A corner. A bag. Then one day they gave those tools a real spot, and everything changed. Making things stopped being a hunt for the good scissors and became a habit.
That is what this list is about. 30 Studio Ideas that turn any space, even a tiny corner, into a place where you actually make things. Paint studios. Music nooks. Sewing corners. Writing dens. Pick the one that fits your life. Your drawer full of tools is waiting for a home.
1. The Bright Painter’s Corner
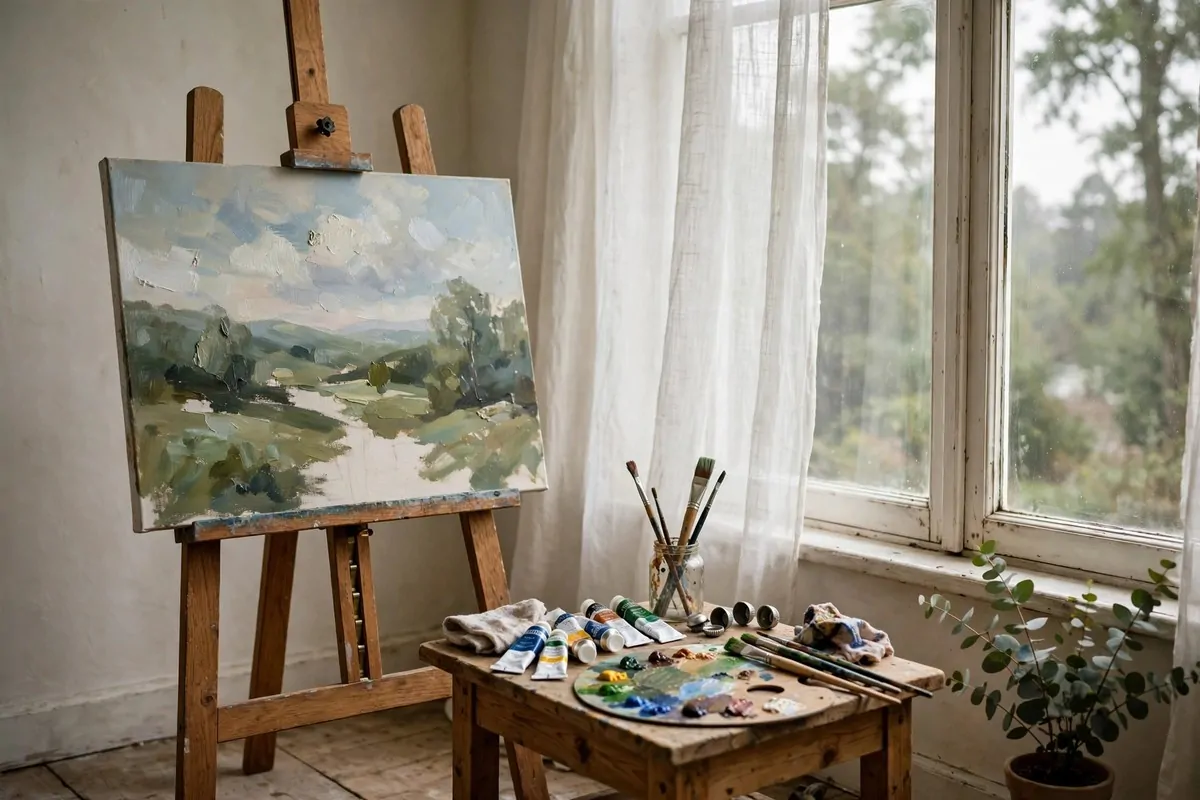
Every painter I know talks about light the way gardeners talk about soil. It is everything. The corner you paint in matters more than the paints you buy.
The best spot in any house is beside a tall window. Not in front of it, where the sun hits your canvas and washes it out. Beside it, so the light falls across your work from the side.
Artists love north-facing windows for one simple reason. The light stays steady all day. It does not swing around and change your colors on you by three in the afternoon.
You do not need a whole room for this. A corner fits an easel and a small table. That is honestly all a painter’s corner needs to be real.
Set the easel first. Then pull the table up beside it, close enough that you can reach your paints without standing up. Every step you save is a minute you spend painting instead.
Keep the palette on the table, not on the easel. Your arm will thank you by the end of the hour.
A sheer curtain is your best friend here. It softens harsh midday sun into something you can actually work with. White and thin works best.
I like to keep a little stool nearby too. Some days I paint standing up. Some days I sit. The stool lets me choose without moving the whole setup.
Start simple. Easel, table, window. You can add shelves and storage later, once you know how you actually work in the space.
2. The Pegboard Supply Wall
I used to keep my brushes in a mug on the desk. Then I bought more brushes. Then more mugs. My desk disappeared under mugs, and I could not find the one brush I actually wanted.
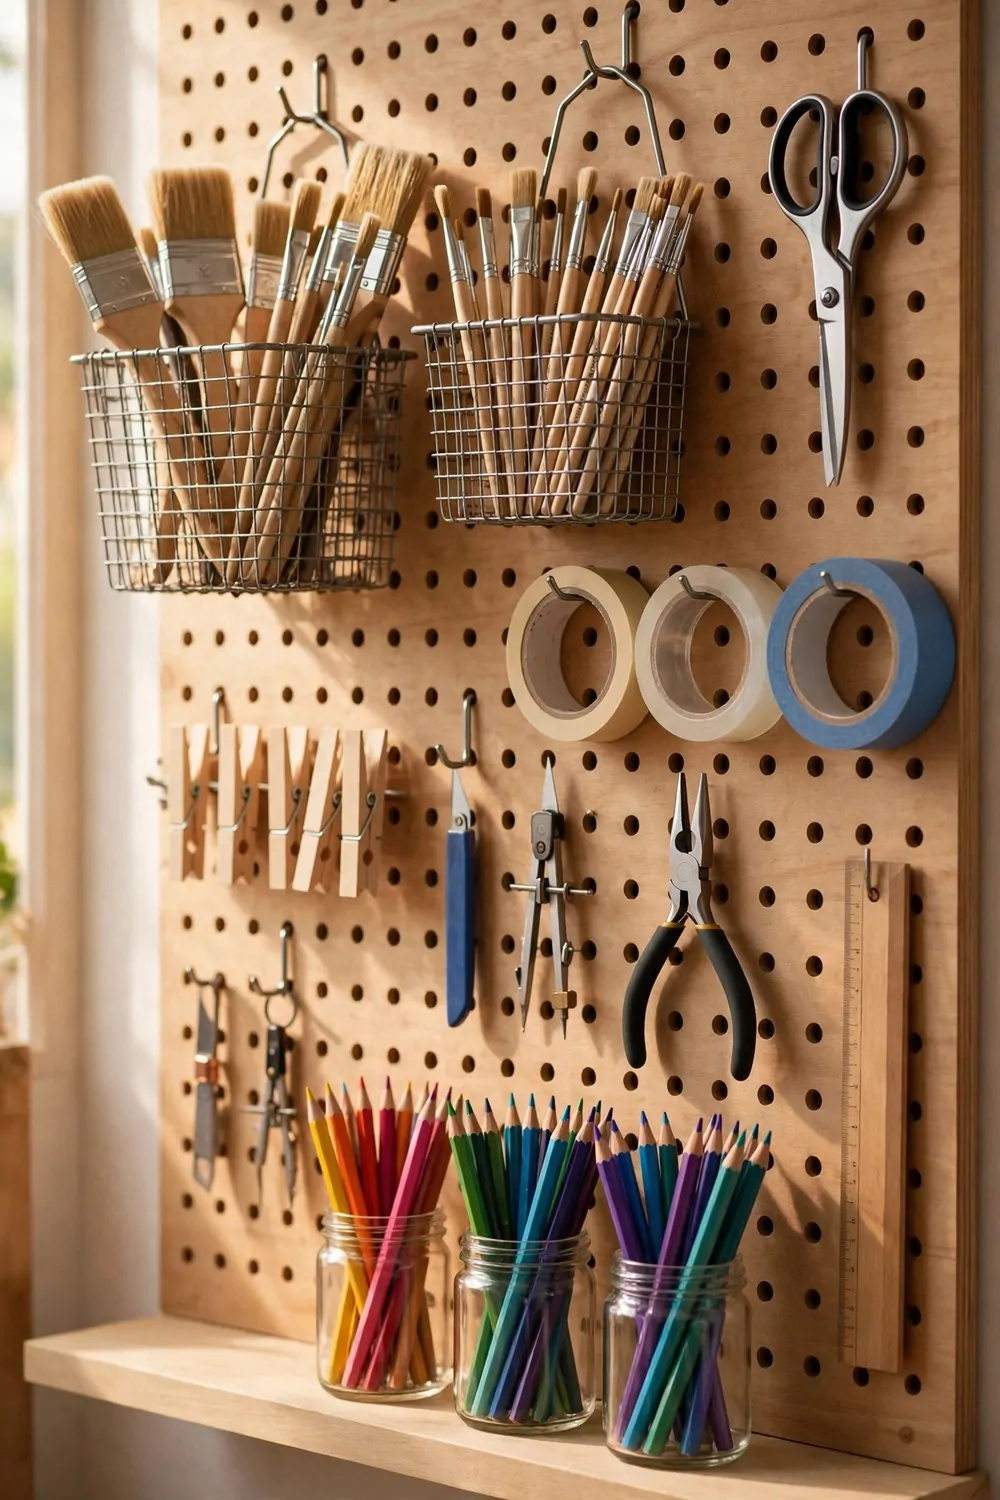
A pegboard fixed all of it in one afternoon. One board on the wall, a bag of hooks, and suddenly every tool had a home I could see.
The magic of a pegboard is simple. Everything hangs at eye level. You grab what you need and put it back in one motion.
Wire baskets clip onto the hooks and hold the small stuff. Scissors, tape rolls, glue sticks. Things that roll away on a table stay put in a basket.
Jars of colored pencils sit on a small shelf at the bottom of the board. Brushes hang from the top. You learn your own system in about a day.
Buy the hooks before you buy the board. Sounds backwards, I know. But hooks are what you will run out of, never the board space.
Keep the board near your work spot. Across the room is too far. An arm’s reach from your chair is perfect.
I label nothing on mine. The shapes tell me what is what. A brush looks like a brush, and that is faster than any label.
If you rent, no problem. There are pegboards that lean against the wall like a ladder. They work just as well and leave no holes.
3. The Rolling Art Cart Station
Some days I work at the desk. Some days I work at the kitchen table. Some days the light is best in the guest room, and I drag everything in there like a traveling artist.
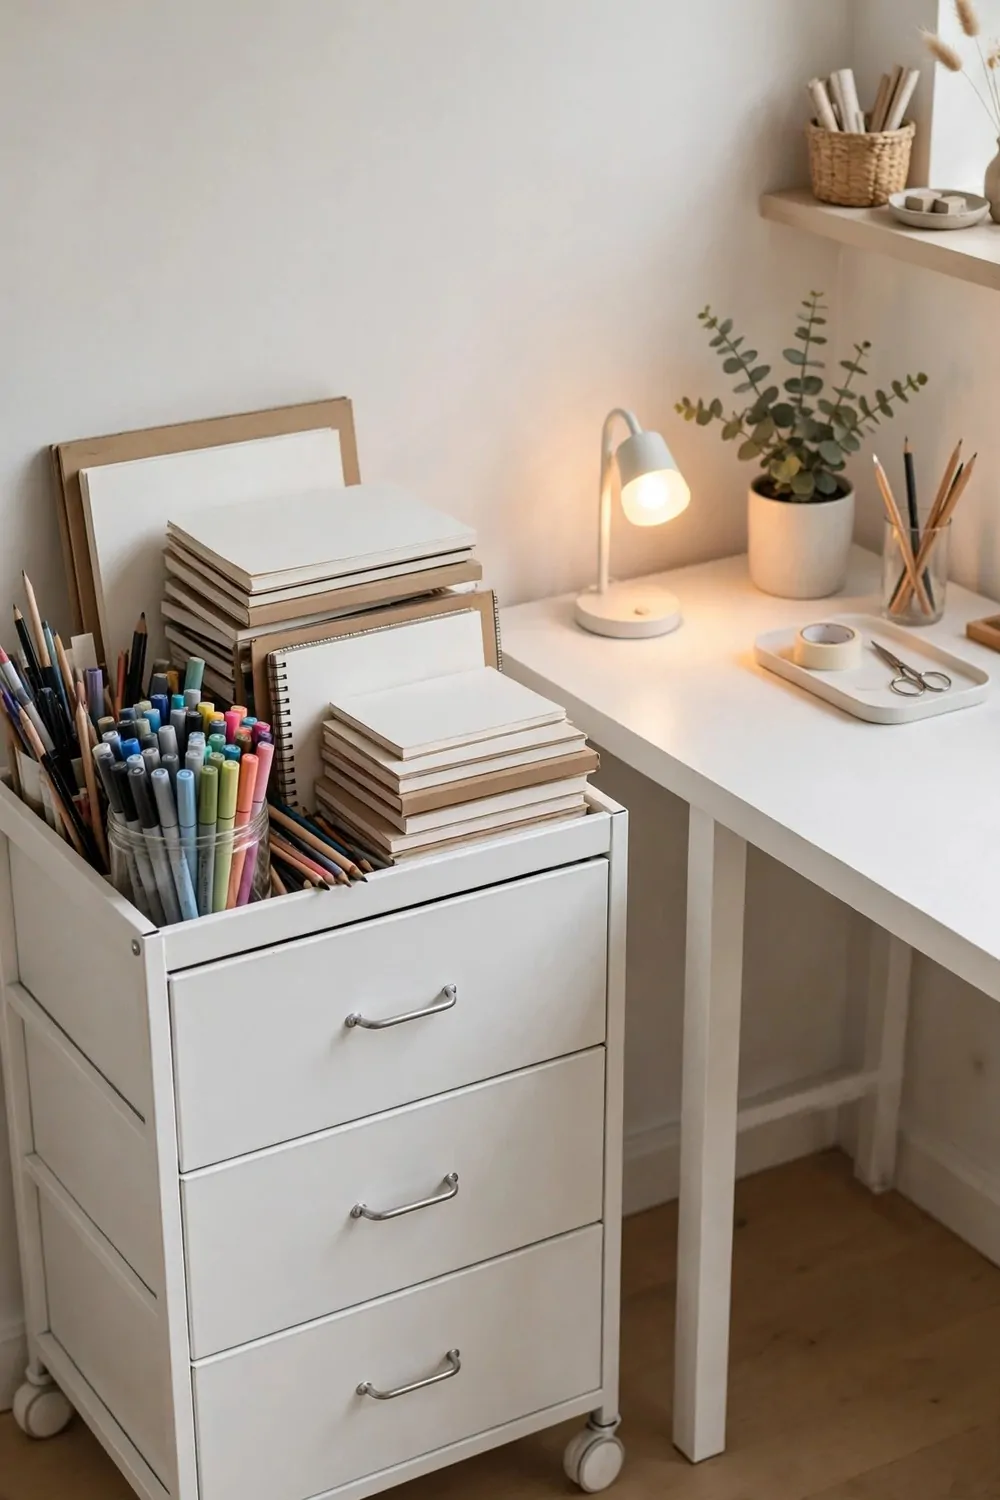
A rolling cart made that life easy. It holds my whole practice in three drawers, and it follows me wherever the light goes.
Lock the wheels when you work. I learned that the hard way. A cart that rolls away mid-brushstroke is not funny, even though my friend thought it was.
The top tray holds what I am using today. Only today. Everything else lives in the drawers below.
I gave each drawer a job. Top drawer is drawing stuff. Middle drawer is painting stuff. Bottom drawer is paper and the things I forgot I owned.
A cart also hides the mess fast. Guests at the door? Roll it into the closet. Ten seconds and your studio is gone.
Look for one with deep drawers. Shallow ones only fit flat things, and tubes of paint are not flat.
Wipe the wheels now and then. Paint drips find them. They always do.
This is the cheapest real studio setup I know. One cart, one lamp, and a table you already own.
4. The Big Family Craft Table
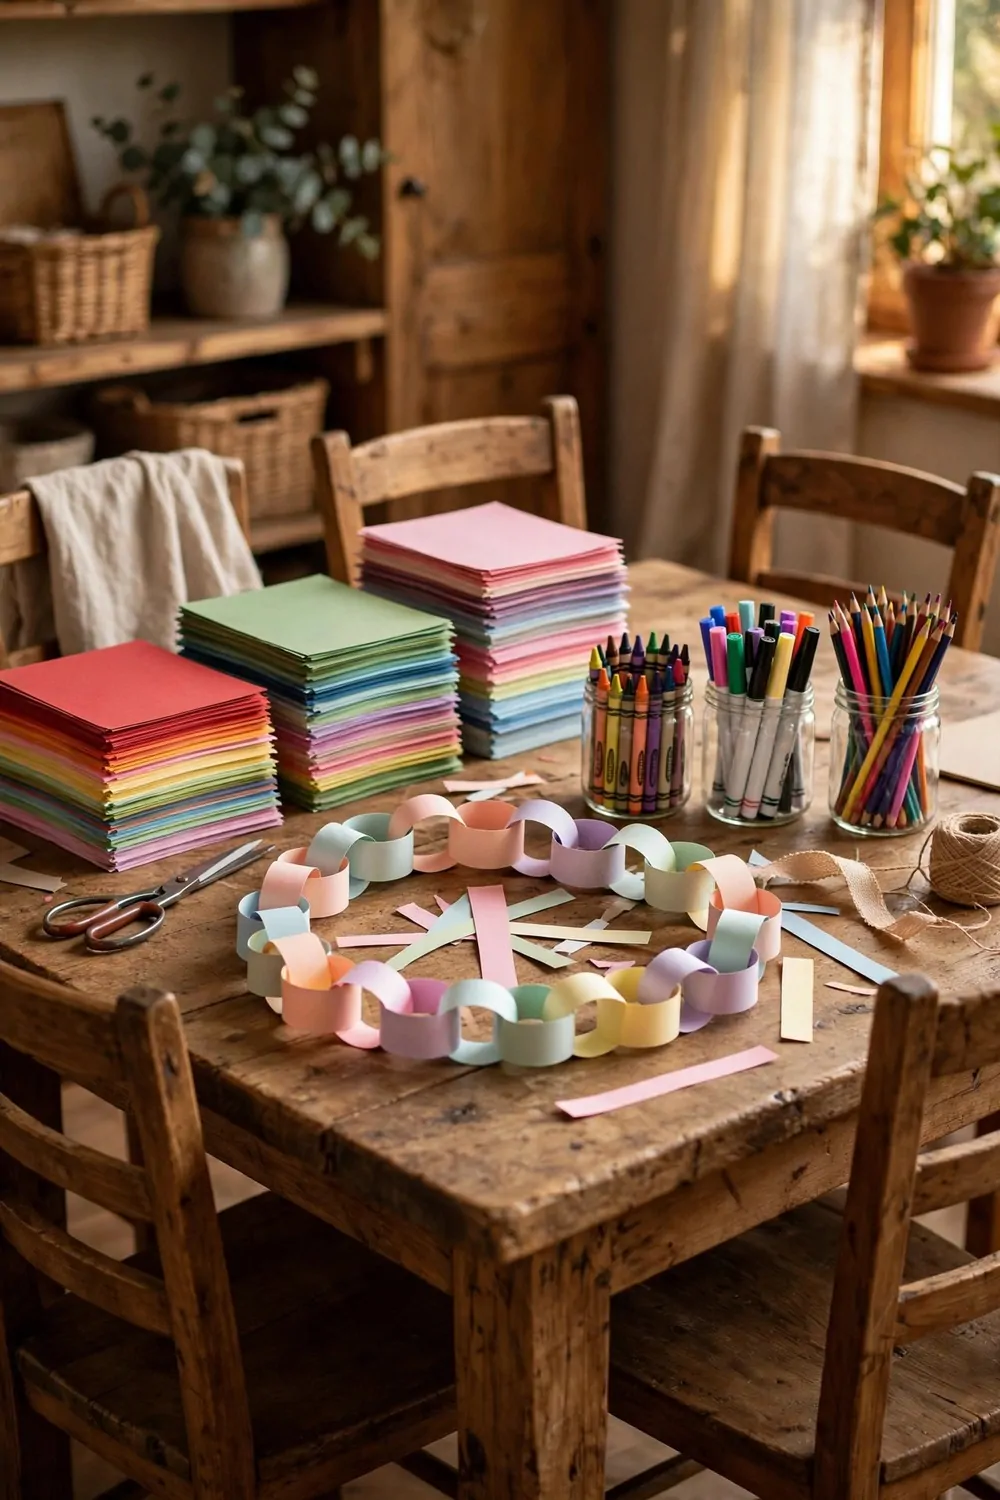
The best studio in my house is not mine. It belongs to all of us. It is the big wooden table where my family makes things together, and it gets more use than any other room.
A big table changes what people make. Small tables make small, careful things. A big table says spread out, make a mess, take up space.
Wood is the right material here. It takes scratches and glue and paint without complaining. Put a washable cloth on top and it lasts for years.
Keep jars of crayons and markers right on the table. If the kids have to ask for supplies, the moment passes. If the supplies are already there, they just start.
I keep paper in three sizes in a basket under the table. Big sheets for big ideas. Small ones for quick sketches. Scraps for cutting and gluing.
One rule keeps it working. The table gets cleared at night. Not perfectly. Just enough that the next morning starts fresh.
We made a paper garland on this table last spring. It hung in the hallway for months. Nobody remembers what show we watched that week, but we all remember the garland.
If you have no spare room, this table can be your dining table. Cover it while you work, uncover it for dinner. Many families do exactly this.
5. The Cozy Writing Den

Writing needs almost nothing. A surface, a chair, and a little quiet. But the room around you still matters, because writing is really just thinking with a pen.
My writing den is the smallest setup on this whole list. A little antique desk, a warm lamp, and a wall painted deep green. That is the whole room.
The lamp matters more than the desk. Warm light makes evening writing feel like a treat. Cold light makes it feel like overtime.
I keep one notebook open and one pen that I love. Fancy pens are a trap, by the way. The one you reach for is the right one.
Books sit within arm’s reach. Not for reading while I write. For stealing courage. When I get stuck, I open a favorite book and read one page. It reminds me what sentences can do.
The green wall was an accident. I had leftover paint. But dark walls hug a small room, and a writing den should feel a little bit like a hug.
Close the door if you can. A writing den with the door open is just a desk. With the door closed, it becomes a world.
No phone on the desk. That is the whole rule. The phone lives in another room while I write. My best pages all came from phone-free hours.
Start with twenty minutes a day in your den. The room will do the rest.
6. The Little Music Corner
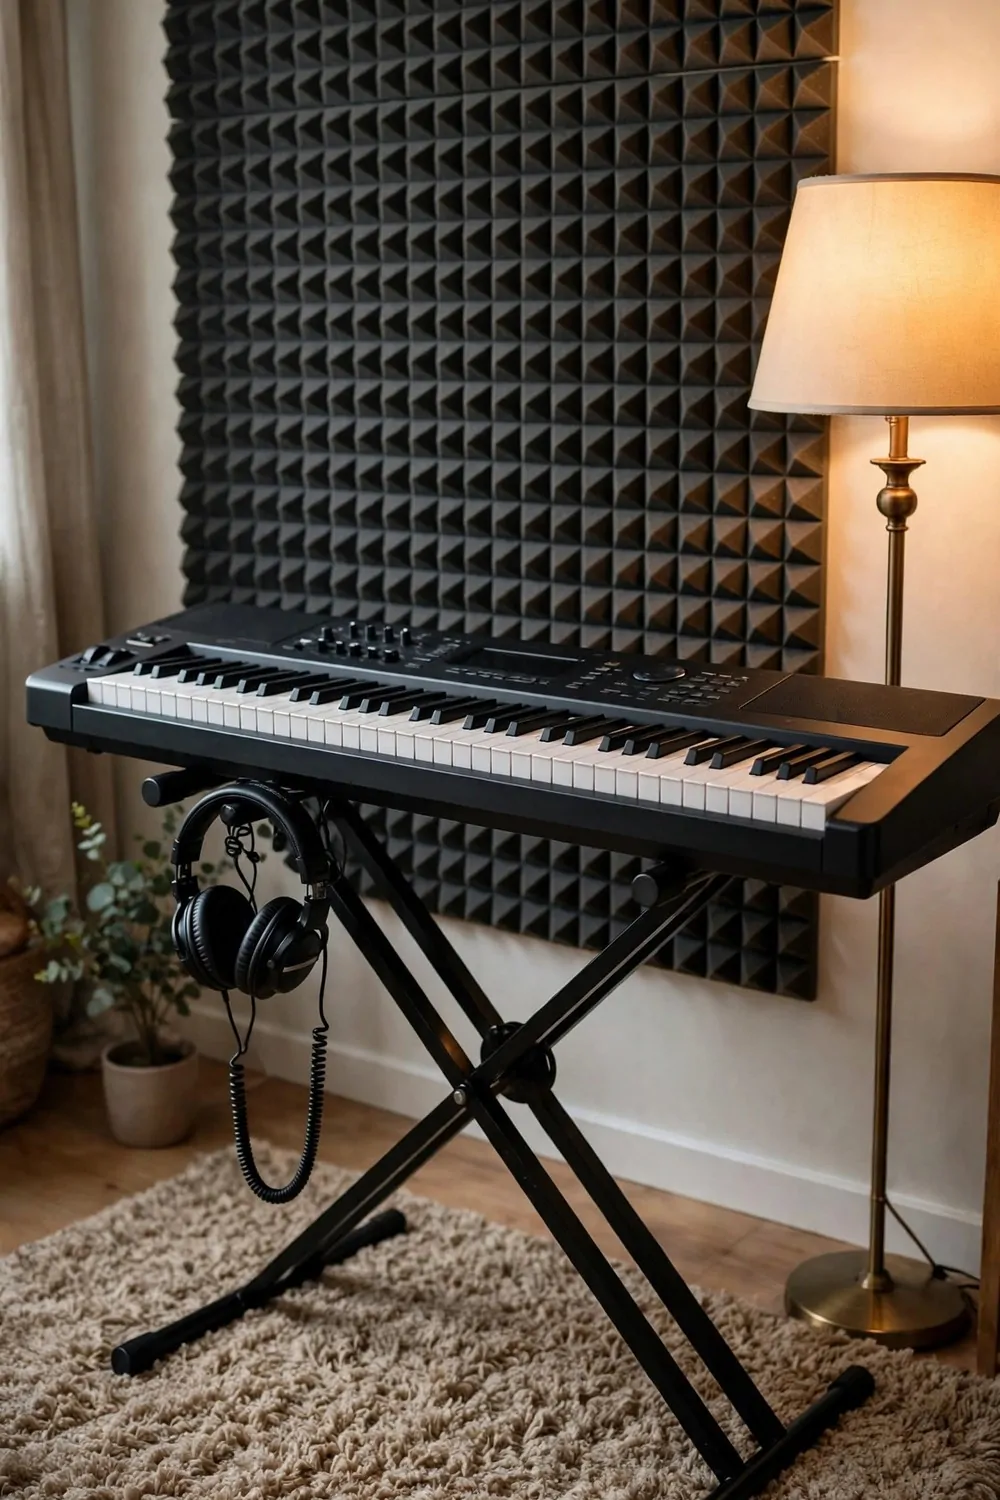
You do not need a soundproof room to make music at home. You need a corner that is always ready, so playing takes ten seconds instead of ten minutes of setup.
My friend keeps her keyboard on a stand in the corner of her living room. It is always plugged in. She plays for ten minutes while dinner cooks. That is more music than she made in years of big plans.
A thick rug under the instrument does two jobs. It softens the sound for the rest of the house, and it marks the corner as its own little zone.
Foam panels on the wall help more than you would think. They do not need to cover the whole wall. A few panels behind the instrument calm the echo a lot.
Curtains help too. Heavy ones. If your music corner has a window, thick curtains keep the sound in and the street noise out.
Headphones are the secret weapon. An electric keyboard with headphones is silent to everyone else. You can practice at midnight and nobody knows.
Keep a small lamp nearby. Music corners tend to be dim, and reading sheet music in the dark is a fast way to quit.
A spot for your coffee goes right beside the stand. I am not joking. Musicians love having a warm drink within reach, and it keeps you in the corner longer.
Start with what you own. The corner comes first, the gear comes later.
7. The Sewing Nook

Sewing machines are heavy. Setting one up and putting it away every time is the number one reason people stop sewing. A nook that stays set up fixes that.
My sewing nook is a table by the window that never gets cleared. The machine sits there, threaded and ready. I can sit down and sew a seam in the time it takes the kettle to boil.
Good light is a must. You are threading tiny needles and matching tiny stitches. A window plus a small desk lamp covers you day and night.
Fabric rolls lean against the wall in a basket. Folded fabric stacks get messy fast, but rolls stay tidy and you can see every color at a glance.
Thread spools live in a basket on the table. Buy the colors you use most in bulk. White, black, and the three colors of your current project.
A dress form in the corner looks fancy, but it is also useful. Draping fabric on it saves you from pinning things to yourself in the mirror.
Keep a small trash bin right under the table. Snipped threads go everywhere if there is no bin. Ask me how I know.
An iron nearby changes everything. Pressed seams look professional. A tiny ironing board that folds flat fits behind the door.
Mend one thing this week in your nook. A hem, a button, a torn pocket. Small wins keep the nook alive.
8. The Clay and Pottery Spot
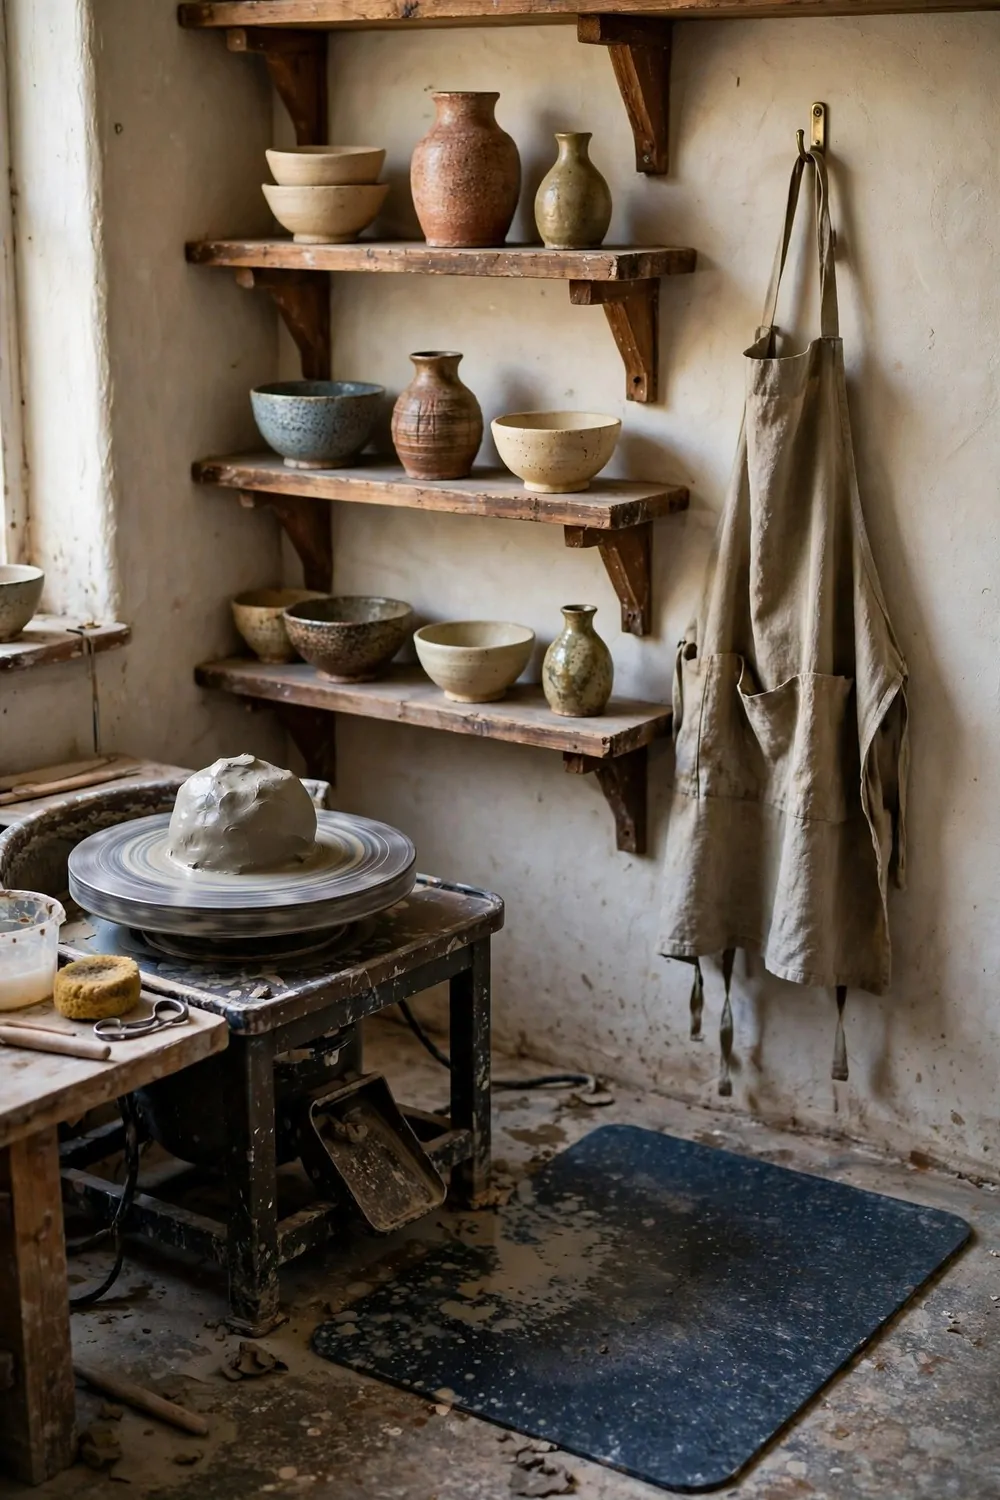
Clay is the messiest hobby on this list, and also one of the most calming. A pottery spot just needs to accept the mess instead of fighting it.
A splash mat on the floor is the first thing to buy. Clay water goes everywhere. The mat catches it, and you shake it out at the end of the day.
The wheel goes in the middle of the mat. You need elbow room on both sides. Clay work is physical, and cramped arms make lopsided pots.
Shelves hold the drying pieces. Bowls and vases need days to dry before they get fired, and they need air all around them. Do not stack them.
An apron hangs on a hook by the door of the spot. Put it on when you enter, take it off when you leave. Your clothes will thank you.
Keep a bucket of water nearby. You rinse your hands in it a hundred times per session. Change it when it gets thick.
Air-dry clay is a great start if you have no kiln. It hardens on the shelf in a day or two, and you can paint it after.
Ventilation matters more here than in a paint corner. Clay dust is fine and light. A window cracked open keeps the air moving.
Your first ten pots will be wobbly. That is the rule. The eleventh one will make you grin like a kid.
9. The Journal Window Seat
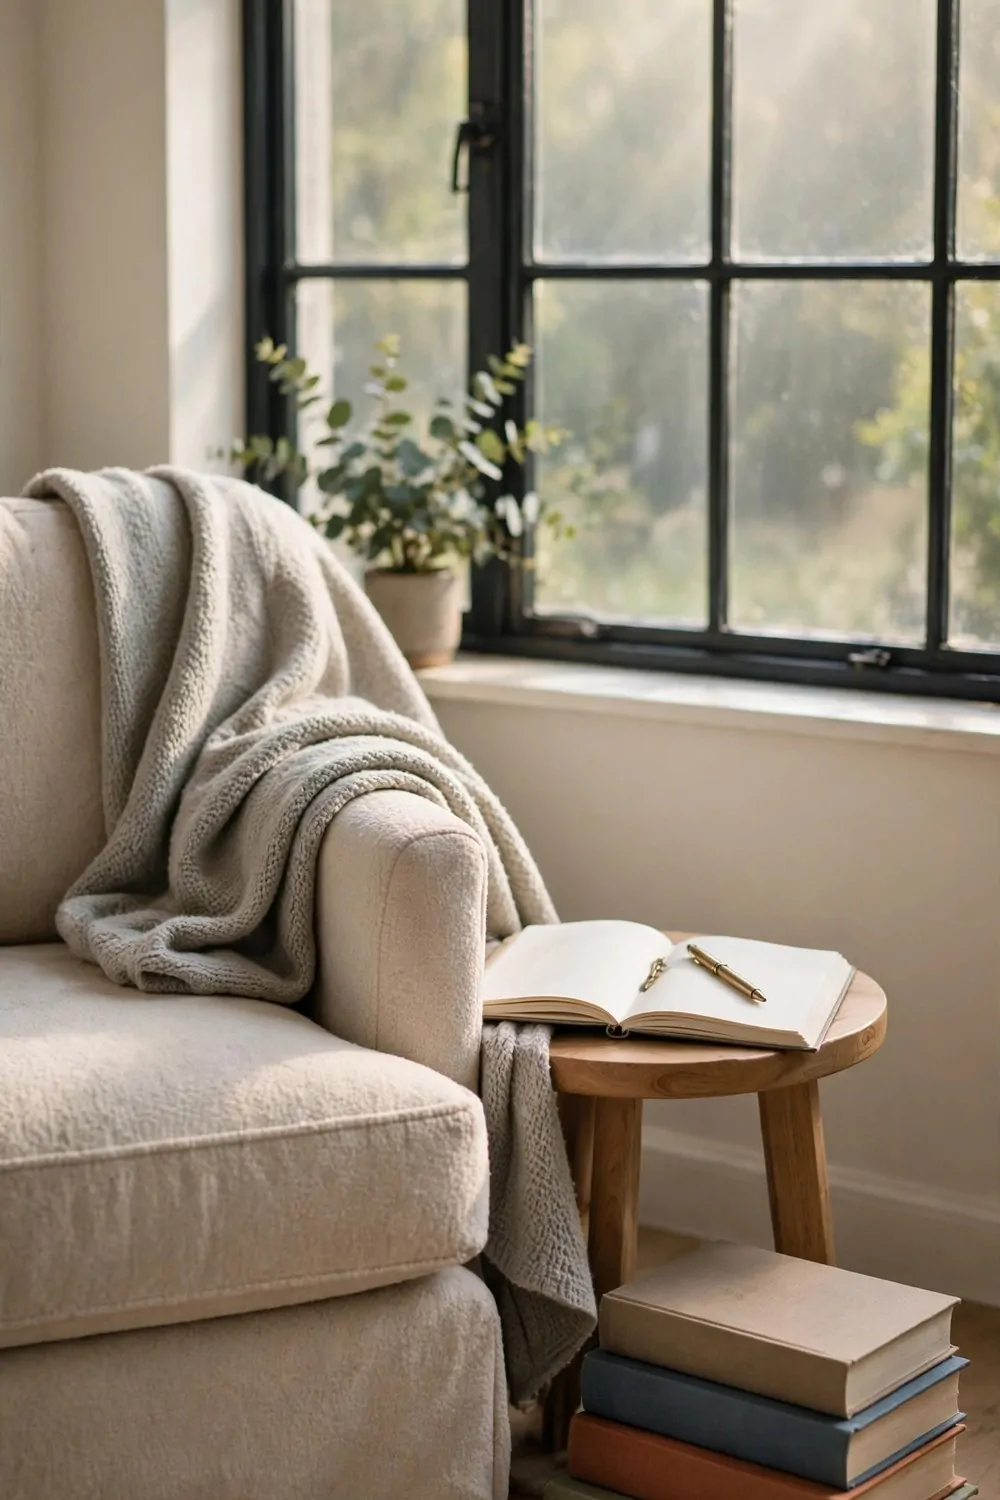
Not every studio makes things you can hold. Some studios just hold thoughts. A journal corner is the smallest, cheapest studio on this list, and it might be the most powerful.
All it needs is a comfortable chair by a window and a small table for your journal. That is the whole setup. You could build it today.
Morning light makes the best journaling light. Sit down with your coffee before the house wakes up. Ten minutes is enough to start.
Keep the journal open on the table, not closed on a shelf. An open journal invites you. A closed one on a shelf is just furniture.
The pen stays with the journal. Always. A journal without a pen beside it is a plan that never happens.
I keep a stack of inspiring books on the lower shelf of the table. On slow days I read a page or two first. It wakes up my writing brain.
A soft throw blanket on the chair makes the corner feel like a gift, not a chore. You are more likely to sit in a cozy chair than a stiff one.
No rules for what you write. Lists, sketches, complaints, dreams. The page does not judge.
This corner pairs well with any other studio on this list. Write about what you made today. It makes the making feel bigger.
10. The Two-Lamp Desk Setup
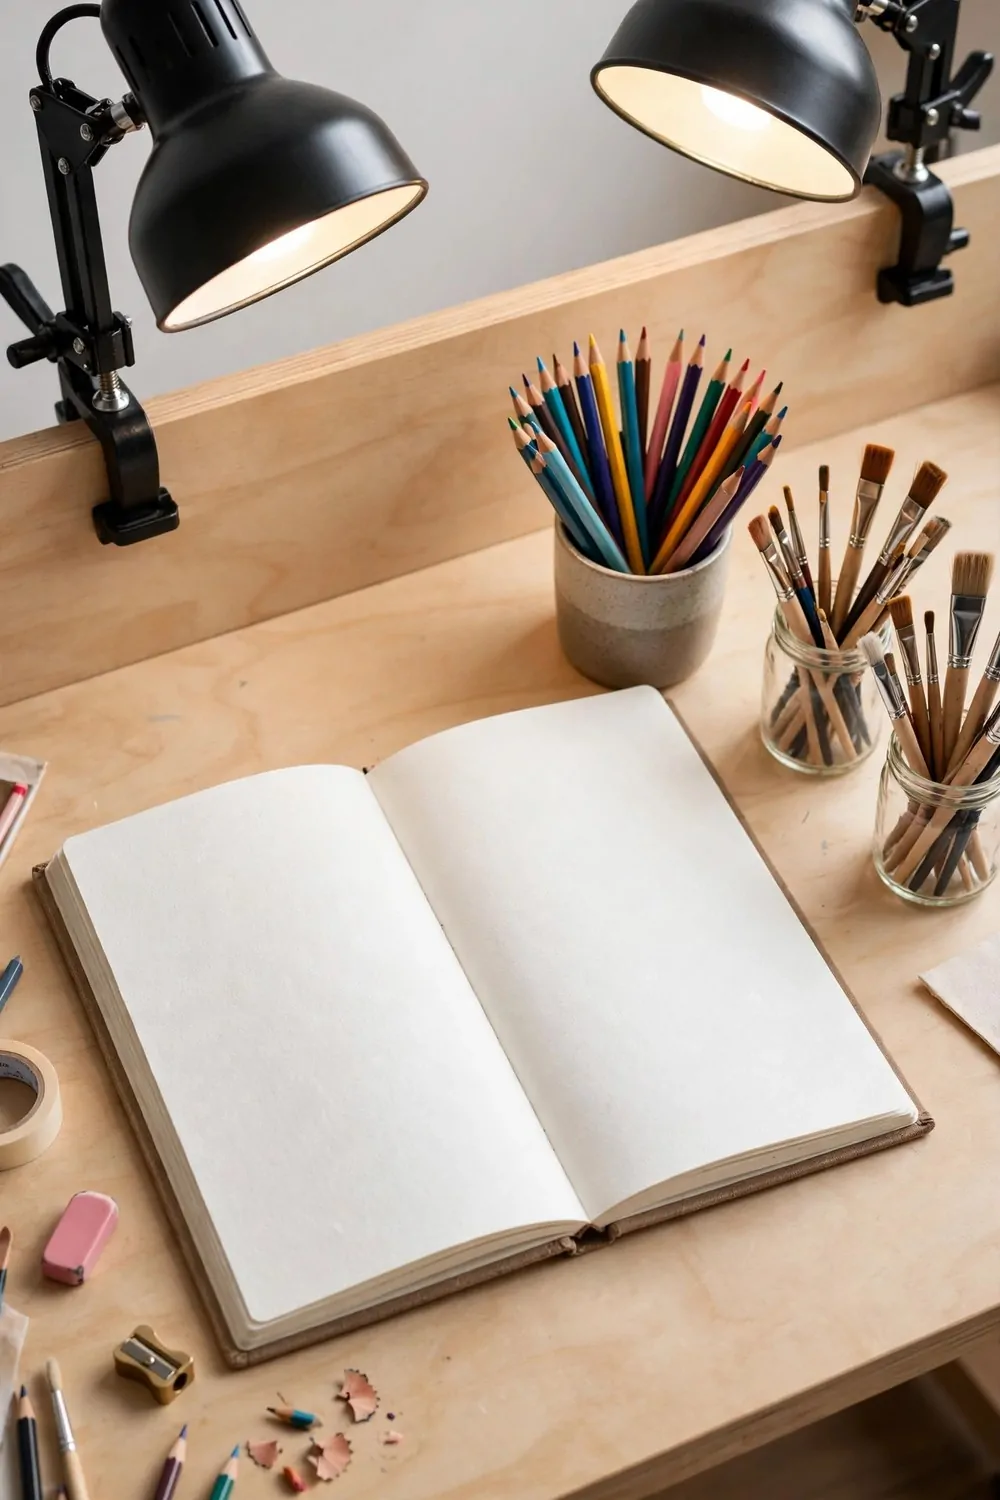
Here is a problem every artist knows. You sit down to draw, your one lamp shines from the left, and your own hand throws a shadow right across your work. All evening you fight your own shadow.
Two lamps fix it. One on each side. The shadows cancel out, and your paper stays evenly lit no matter where your hand goes.
Clamp lamps are the best kind for this. They grab the edge of the desk and aim exactly where you want. No base eating up your work space.
Use daylight bulbs in both lamps. Regular warm bulbs make your colors look different than they really are. Daylight bulbs show you the truth.
Turn off the overhead light when you work. One big ceiling light plus two desk lamps is too much. The desk lamps alone give you cleaner, more even light.
Here is a quick guide to placing them:
| Lamp | Where it goes | What it does |
|---|---|---|
| Left lamp | Clamped at the back left corner | Lights the right side of your hand |
| Right lamp | Clamped at the back right corner | Lights the left side of your hand |
| Both together | Aimed at the center of your paper | No shadows from either hand |
This setup costs less than one big fancy lamp. Two small clamp lamps beat one expensive one every time.
It also works for writing, sewing, and crafts. Any close work gets better with shadow-free light.
Keep the cords behind the desk with a clip. Two lamps mean two cords, and cords on the work surface drive you mad.
Try it for one evening. You will wonder how you ever worked with one lamp.
11. The Attic Hideaway Studio
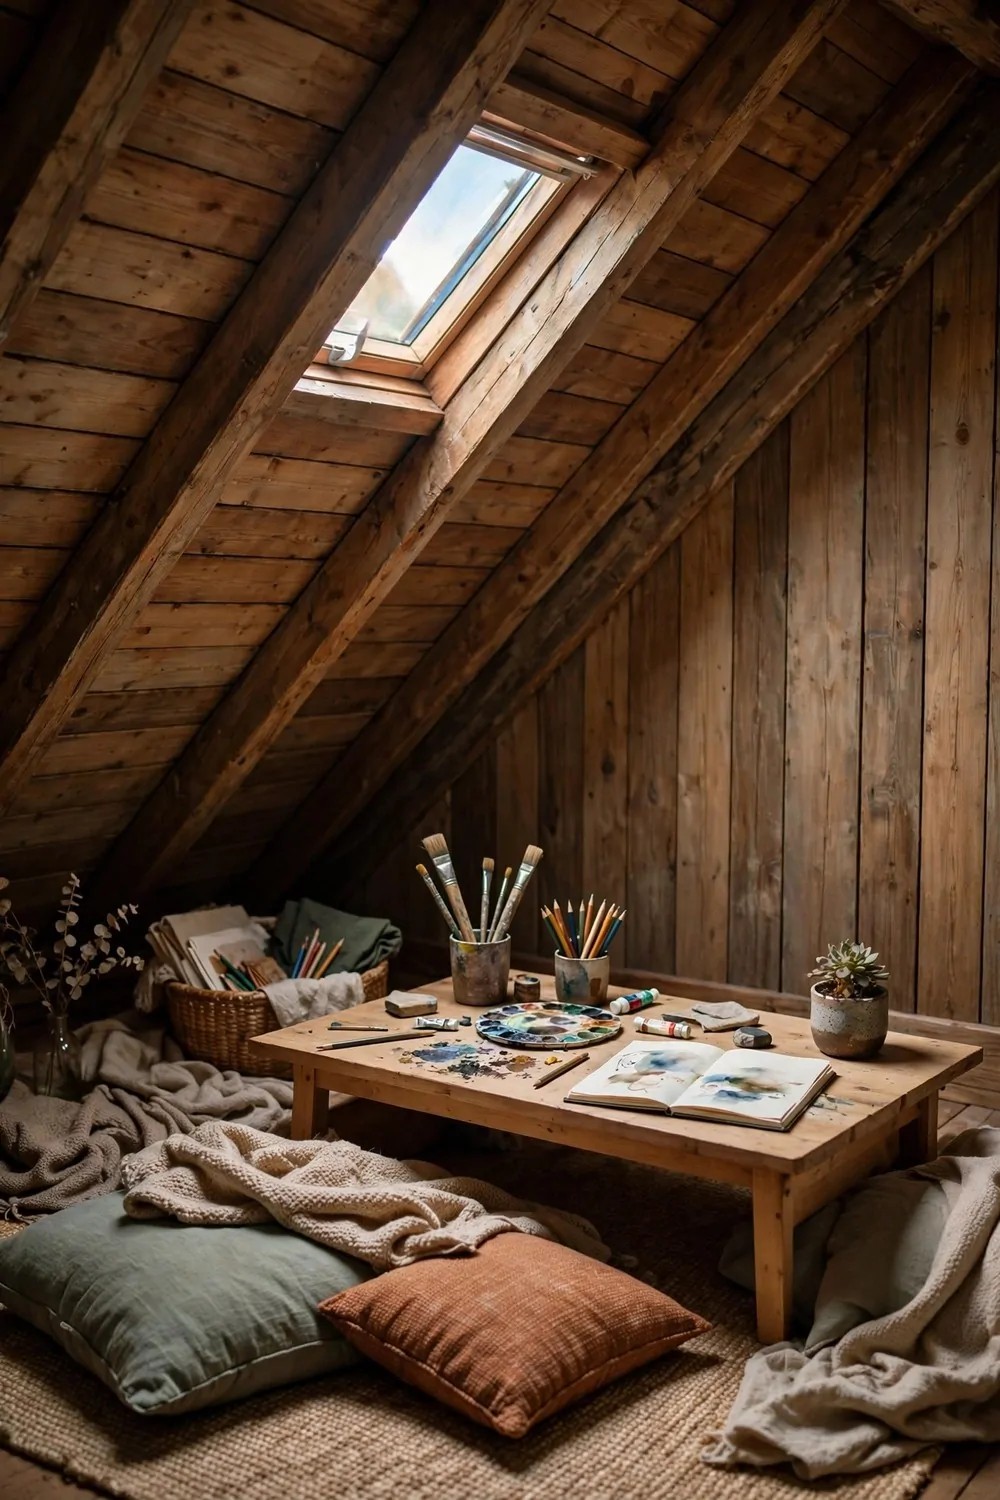
Every attic I have ever climbed into smells the same. Dust, old wood, and quiet. That quiet is exactly why an attic makes such a good studio.
Up there, nobody walks past your door. The kettle is not boiling. The TV is not on. It is just you and your work, above it all.
A skylight is the attic’s best feature. Sunlight rolls in from above and lights the whole sloped space. If yours has one, put your work spot right under it.
Low furniture fits the sloped ceiling better than tall pieces. A low desk, floor cushions, a short shelf. You work with the slope, not against it.
Watch the heat. Attics get hot in summer and cold in winter. A small fan and a warm blanket extend your studio season a lot.
Air matters up here. Attics trap smells and dust. Crack a window or a vent while you work, especially if you use paints or glues.
The sloped walls are perfect for pinning things up. Sketches, photos, color swatches. Flat walls are overrated for inspiration.
Keep a lamp for cloudy days. Skylight is lovely, but it quits early in winter. A warm desk lamp keeps you going after dark.
Walking up that little ladder puts you in work mode. By the time you sit down, your brain already knows it is studio time.
12. The Garden Shed Escape
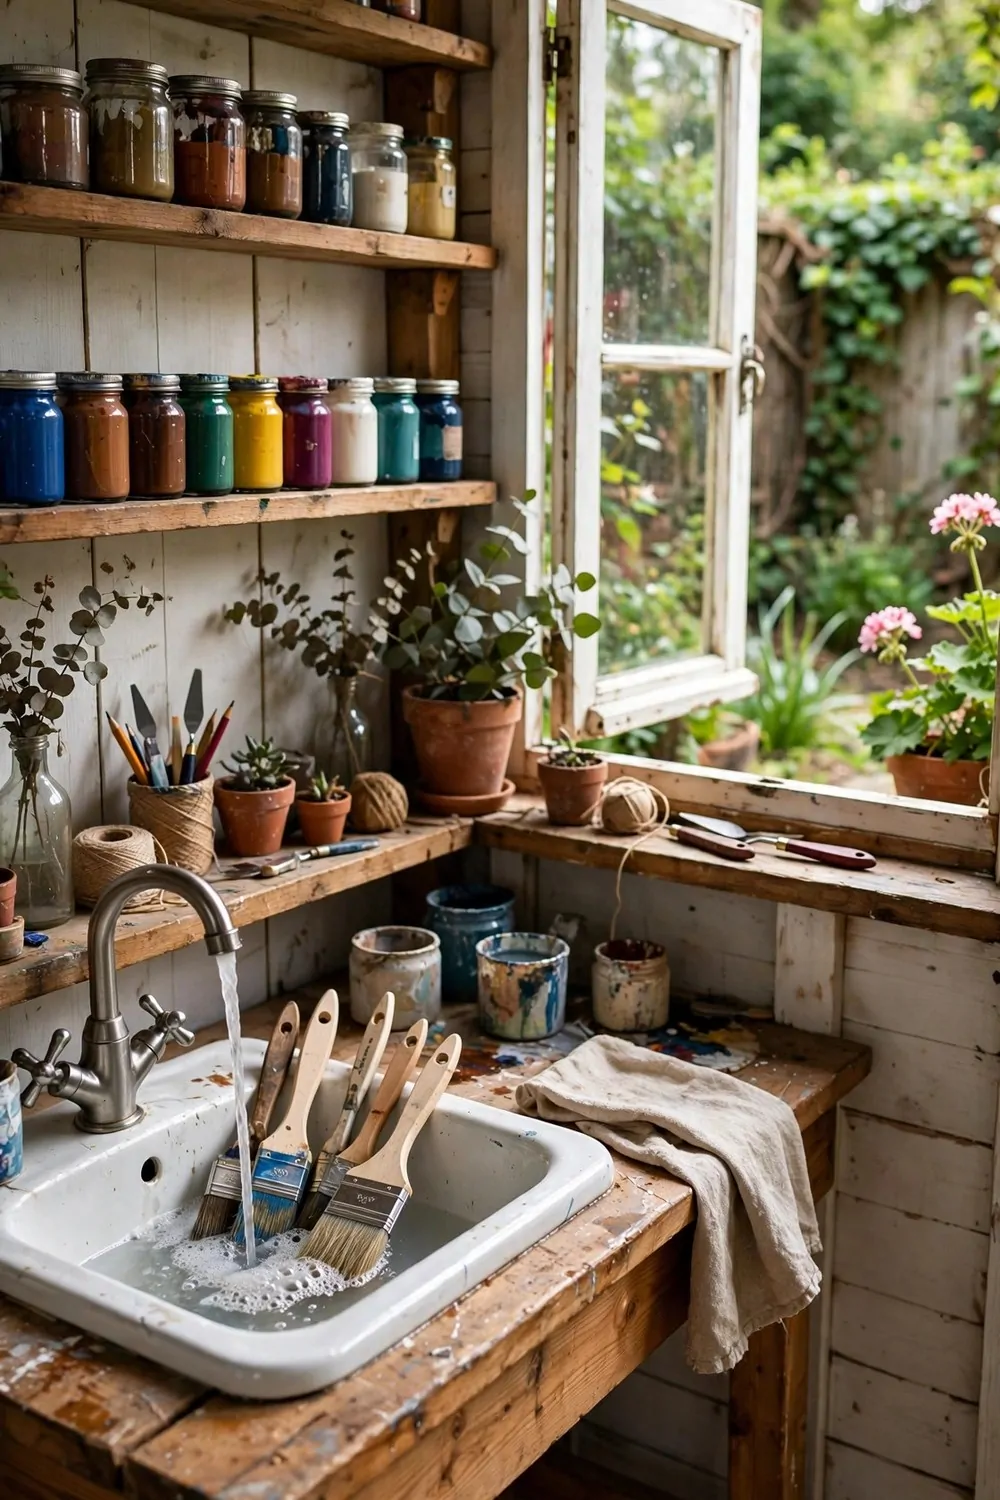
A studio with its own front door changes everything. When you step out to the garden shed, you leave the house behind. The laundry, the dishes, the noise. All of it stays inside.
Clean out the shed first. Really clean it. Sweep it, scrub it, and let it air out for a day before you move a single art supply in.
A small sink is the shed studio’s superpower. Rinsing brushes and palettes without walking back to the house keeps you in the flow. A simple utility sink works fine.
Ventilation is not optional out here. One openable window at minimum. Sheds are small, and paint fumes build up fast in a small sealed box.
Insulate if you can. Even a little insulation makes the shed usable in cold months. A small heater does the rest.
The walk to the shed becomes a ritual. Put on your boots, cross the garden, open the door. Your brain learns that this walk means it is time to make things.
Keep a kettle out there. Tea breaks on the shed step, looking at the garden, are half the reason to have a shed studio.
Lock it at night. Sheds are easy targets. A good padlock protects your paints and your peace of mind.
In summer, open the door wide and work with the garden around you. There is no better studio wall than real trees.
13. The Balcony Painting Perch
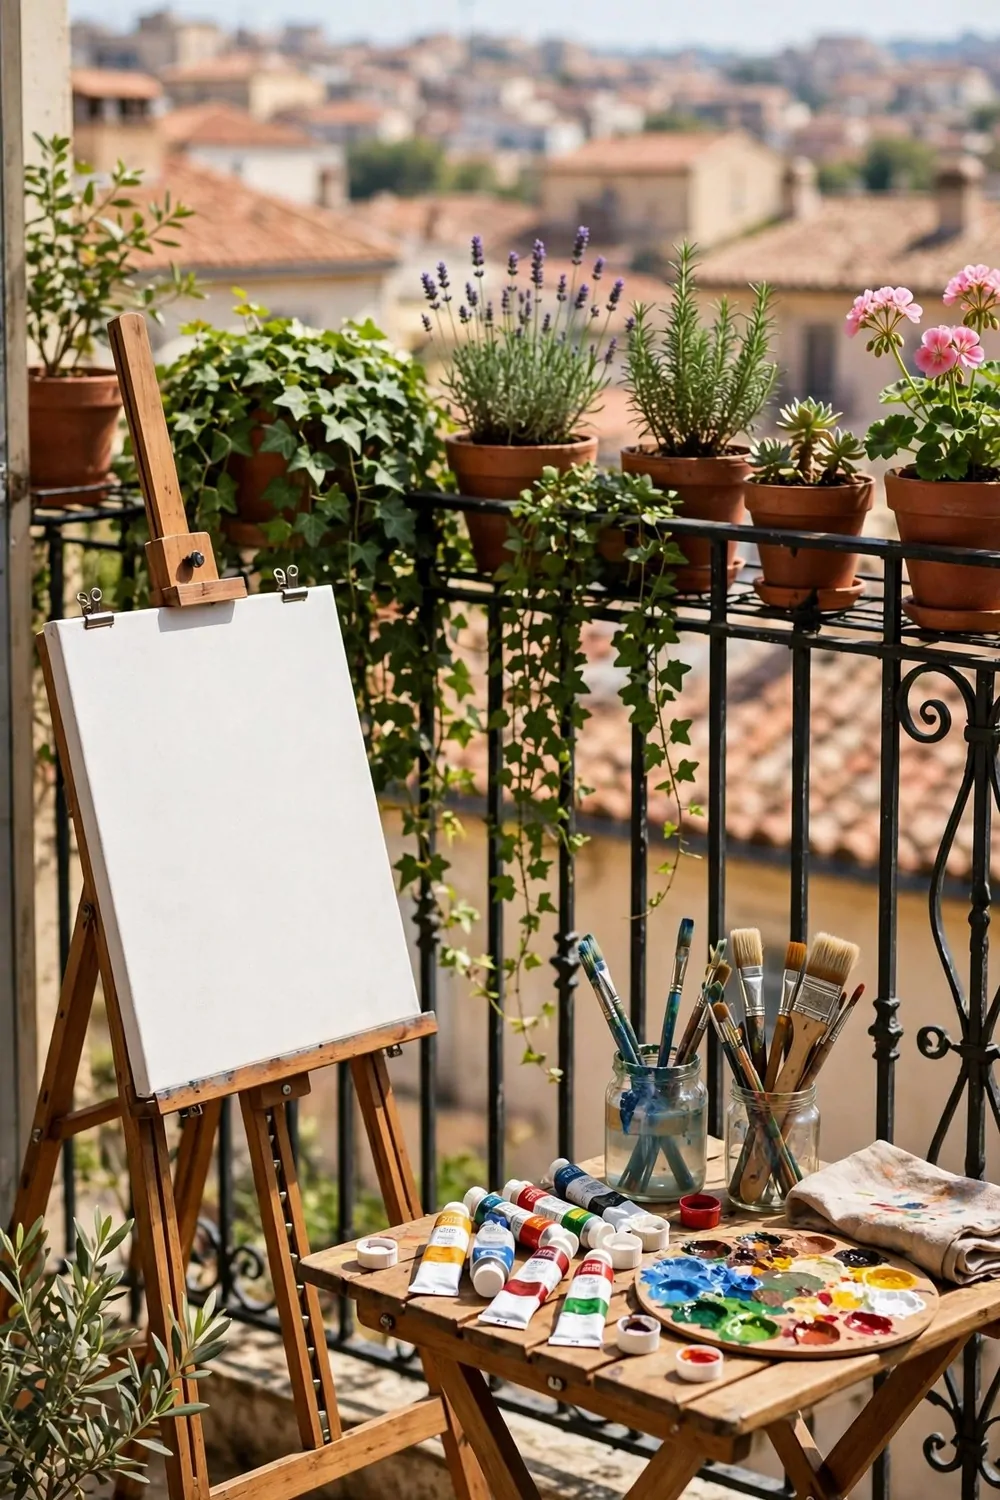
Some studios have no walls at all. A balcony with a portable easel is a real studio, and the fresh air does half the creative work for you.
A folding easel is the key piece. It sets up in a minute and folds flat against the wall when you are done. Your balcony stays a balcony.
The light outside is honest. Colors look true in daylight in a way no lamp can match. Your paintings will thank you.
Wind is the enemy. Use clips to hold your paper down, and keep a heavy jar for your brushes. Light things fly. Heavy things stay.
A small folding table holds your paints at hand height. Bending down to the floor for every color gets old in about ten minutes.
Morning is the golden time on a balcony. Soft light, cool air, quiet street. I do my best outdoor work before nine.
Plants on the railing do double duty. They make the perch pretty, and they give you something living to paint when you need a subject.
Bring everything inside when rain threatens. Balcony studios are fair-weather friends, and that is fine. Fair weather is when you want to paint outside anyway.
Even a tiny balcony works. If you can stand on it, you can paint on it.
14. The Shared Studio With Zones
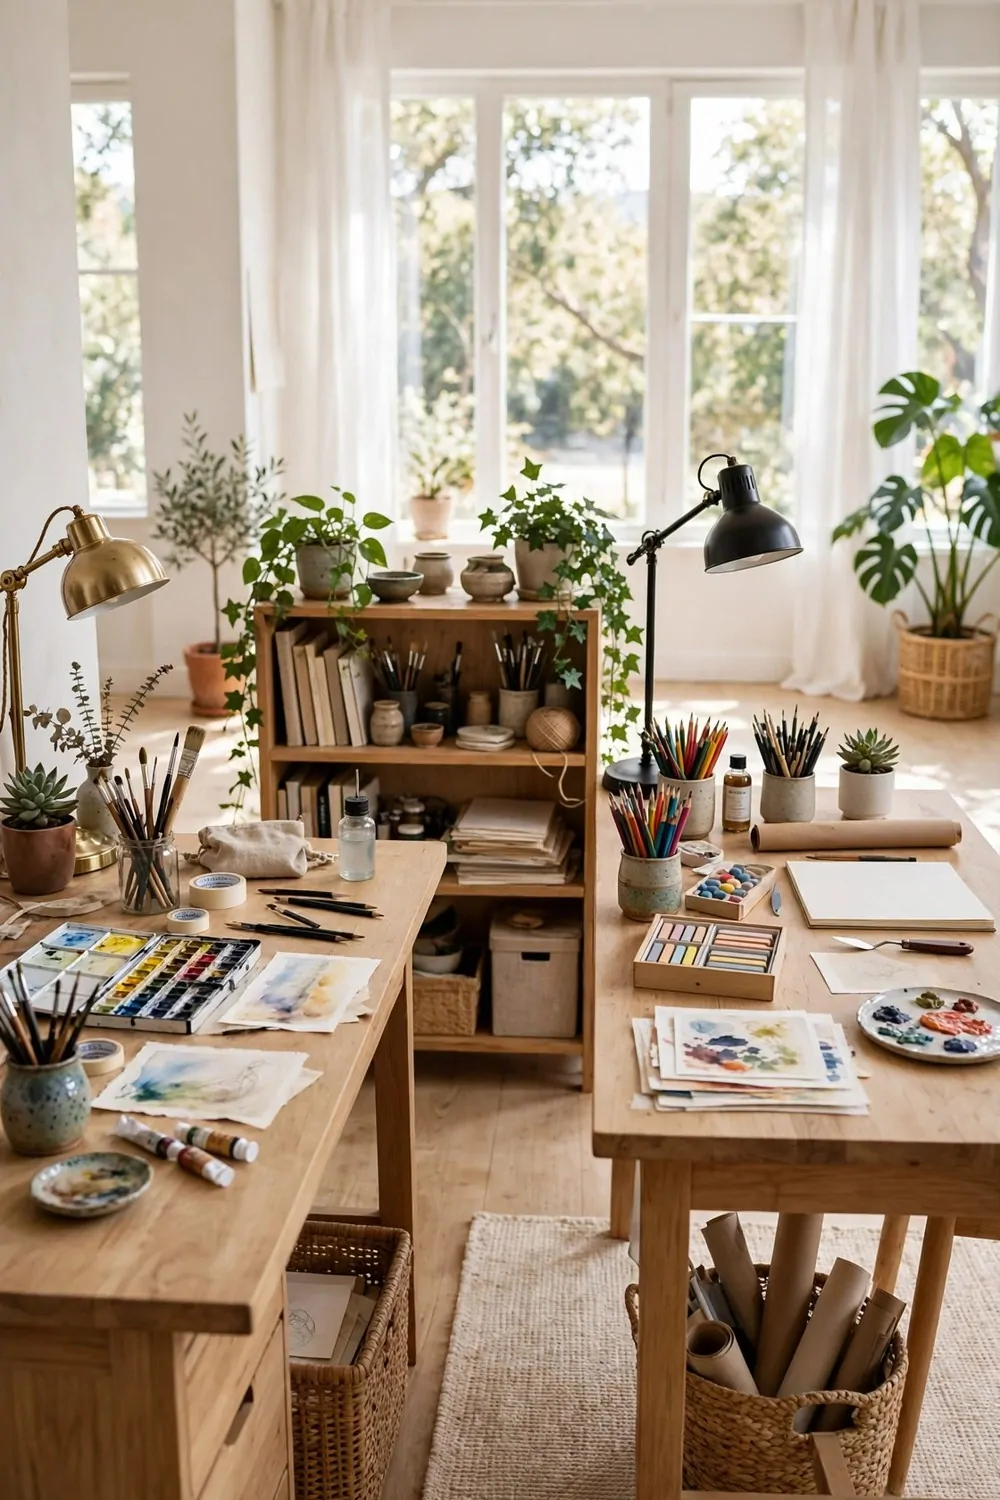
Two creative people, one room. It can be wonderful or it can be war. The difference is zones. Each person needs their own defined spot.
A low bookshelf makes the perfect divider. It splits the room without blocking the light, and both sides get storage. Everyone wins.
Face the desks away from each other if you can. Back to back or side by side works better than face to face. You need to forget the other person is there.
Each zone gets its own lamp. Sharing a lamp means negotiating every evening about who needs the light. Two lamps, zero arguments.
Agree on the noise rules early. Headphones for music. No speakerphone calls. These little rules save friendships.
Shared supplies live on the divider shelf. Things you both use, like scissors and tape, go in the middle. Personal tools stay in personal zones.
Clean your own zone. This is the big one. Nothing kills a shared studio faster than one person’s mess creeping into the other’s space.
It helps to have slightly different schedules. If one of you works mornings and the other works evenings, the room feels bigger than it is.
My favorite shared studios feel like two little worlds with a friendly border between them. Build that, and the room works.
15. The Gallery Wall of Your Own Work
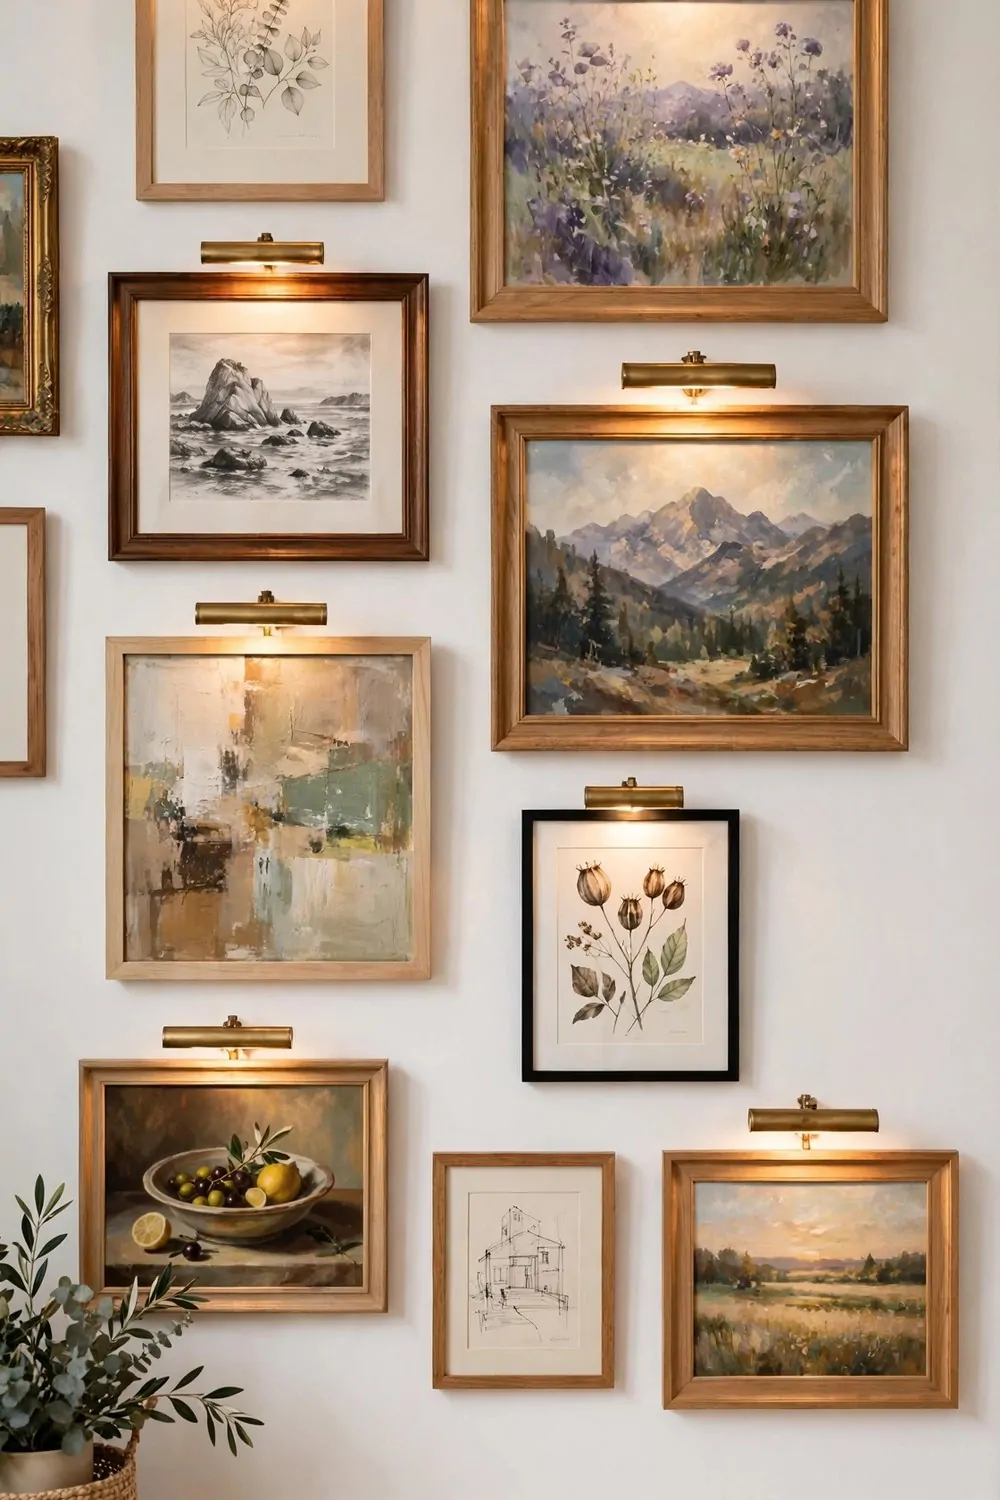
Hang your own work on your studio walls. It sounds obvious, but most artists I know have bare studio walls and a stack of finished pieces facing the wall in a corner.
Seeing your own progress every day is fuel. That painting from last year that you hated? Next to this year’s work, it shows you how far you have come.
Mix the sizes. Big pieces and small sketches together look better than a neat row of matching frames. Galleries call it a salon hang. You can call it the fun way.
Warm picture lights make a huge difference. One small light above the main pieces turns a wall of paper into a real gallery. It feels serious in the best way.
Rotate the wall. Every few months, swap in new pieces and retire old ones to the portfolio. The wall stays fresh, and you stay motivated.
Include the almost-good ones. The piece that is 90 percent great teaches you more than the perfect one. Keep it where you can see it.
Frame the small stuff simply. Cheap frames in one color make sketches and studies look finished. The frame tells your brain the work matters.
Leave one empty spot on the wall. It is a promise. The next piece goes there. An empty frame is the best motivation I know.
Your studio should remind you that you are an artist. Nobody else is going to hang your work. Do it yourself.
16. The Splash-Proof Mess Zone
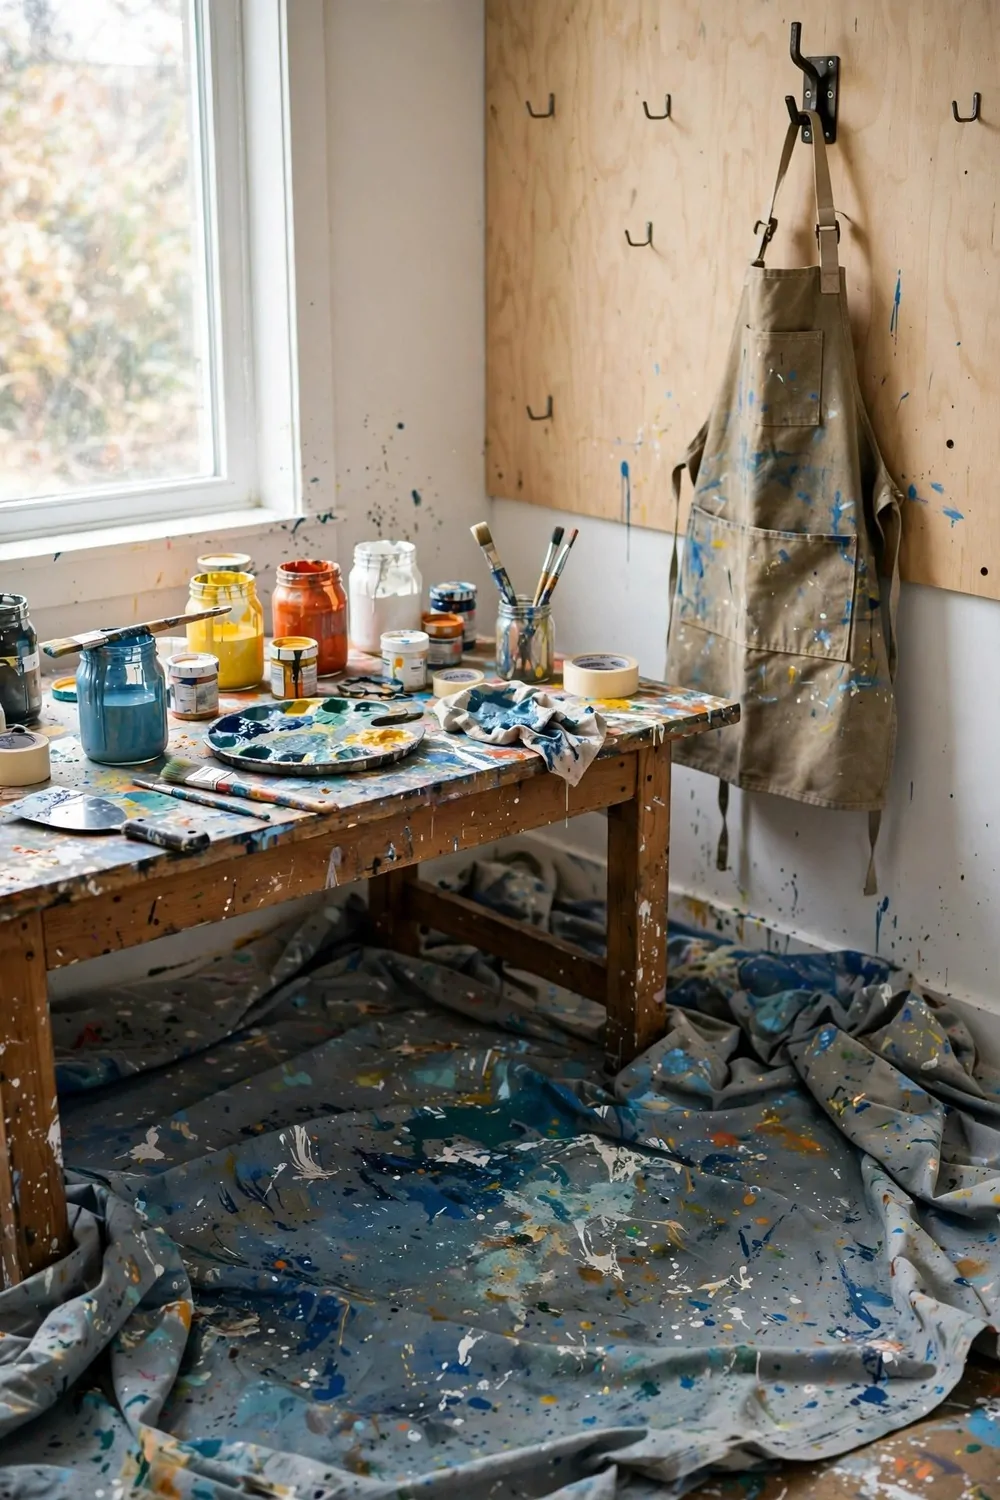
Every studio needs one corner where mess is allowed. Not tolerated. Allowed. A place where you can drip, splash, and spill without flinching.
A drop cloth on the floor is the foundation. Canvas ones are best. Plastic ones slide around and make you nervous. Canvas stays put and soaks up the drips.
Cover the table too. An old shower curtain under your work surface catches what the drop cloth misses. Wash it outside now and then.
This is the corner for the wild stuff. Big brushes. Poured paint. Spray bottles. The techniques that are too messy for the nice desk.
Keep the apron on a hook right at the edge of the zone. Putting it on is the signal. Apron on, caution off. You are in the mess zone now.
Store the messy supplies here, not across the room. If you have to carry an open jar of paint past the clean desk, something will spill. Keep it all in the zone.
A roll of paper towels lives here permanently. Not in the kitchen. Here. Within arm’s reach of the table.
Wipe up at the end, but do not deep clean. A mess zone should look lived in. It should invite you back tomorrow.
Paradoxically, having a mess zone keeps the rest of your studio cleaner. The mess has a home, so it stops wandering.
17. The Inspiration Board Wall
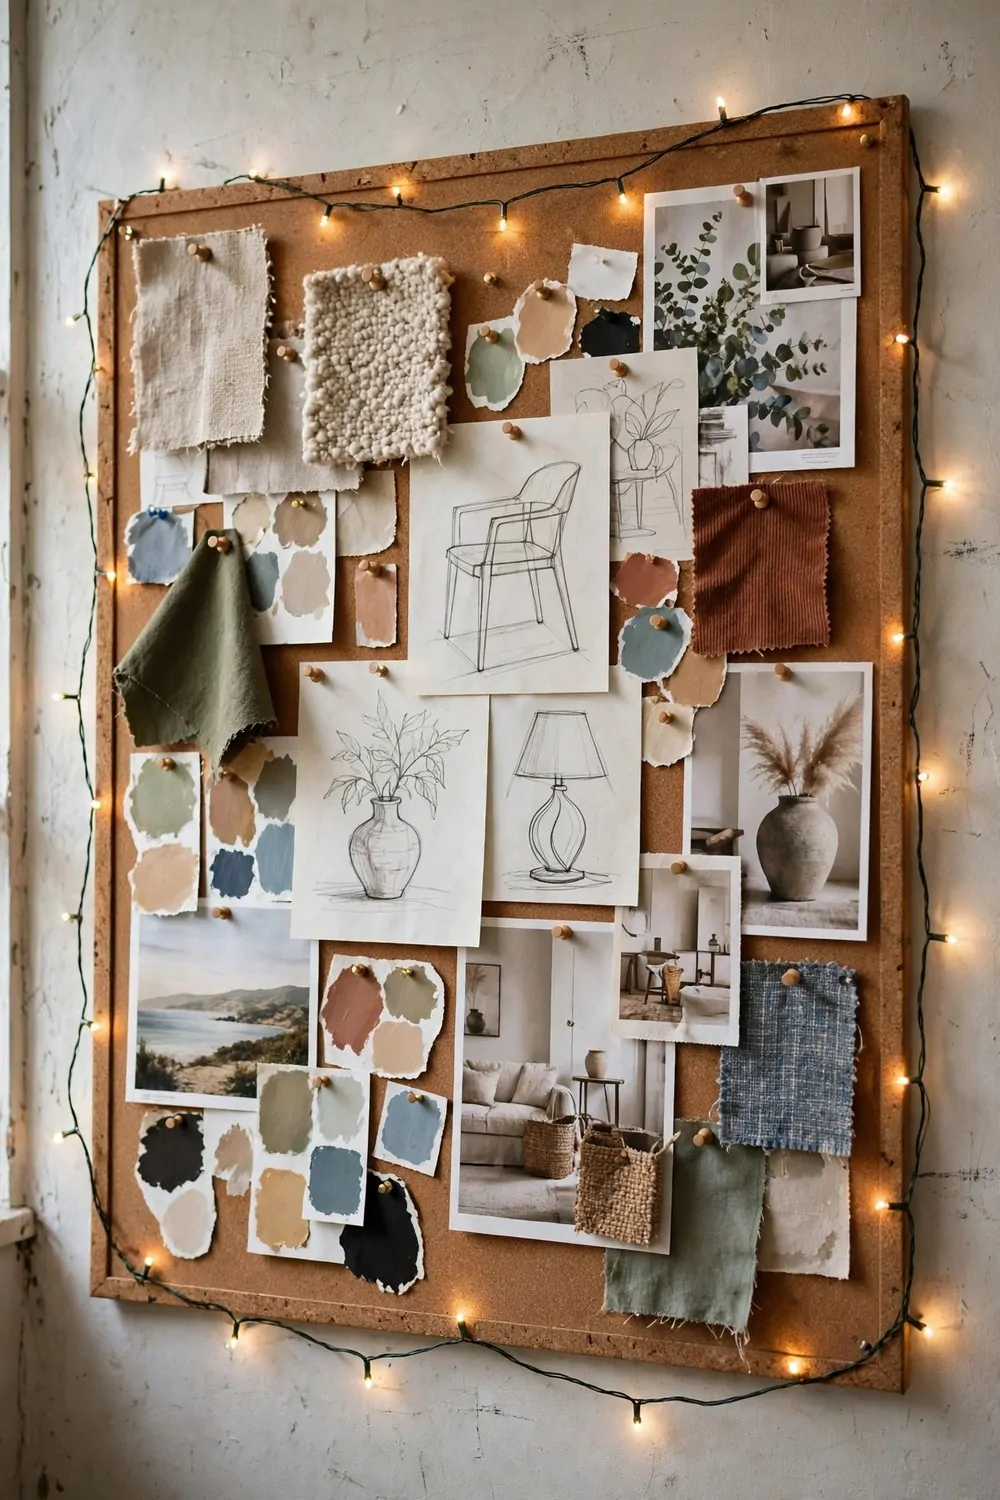
Ideas are shy. They show up when you are not looking, and they vanish if you do not catch them. An inspiration board is a net for ideas.
A big corkboard on the wall is the classic version. Pin up sketches, photos, fabric scraps, color swatches, anything that makes your brain buzz.
Do not organize it. Seriously. The board works because it is messy. Your eye wanders across it and connects things you would never connect on purpose.
Add to it constantly. Tear a page from a magazine. Print a photo. Stick a leaf to it. The board should grow like a garden.
Take things down too. When a piece stops exciting you, unpin it. A board full of dead ideas is just wallpaper.
String lights around the board make it glow in the evening. It becomes the warm heart of the studio, the thing your eye goes to first.
Keep pins in a little dish on the shelf below. Hunting for pins kills the moment. You want to pin the idea in the three seconds it is hot.
Photograph the board now and then. When you finally clear it, the photo keeps the good stuff. I have years of old boards in my phone.
Some days I just stand and look at mine. That counts as studio time. Staring is part of the work.
18. The Color-Sorted Storage Wall
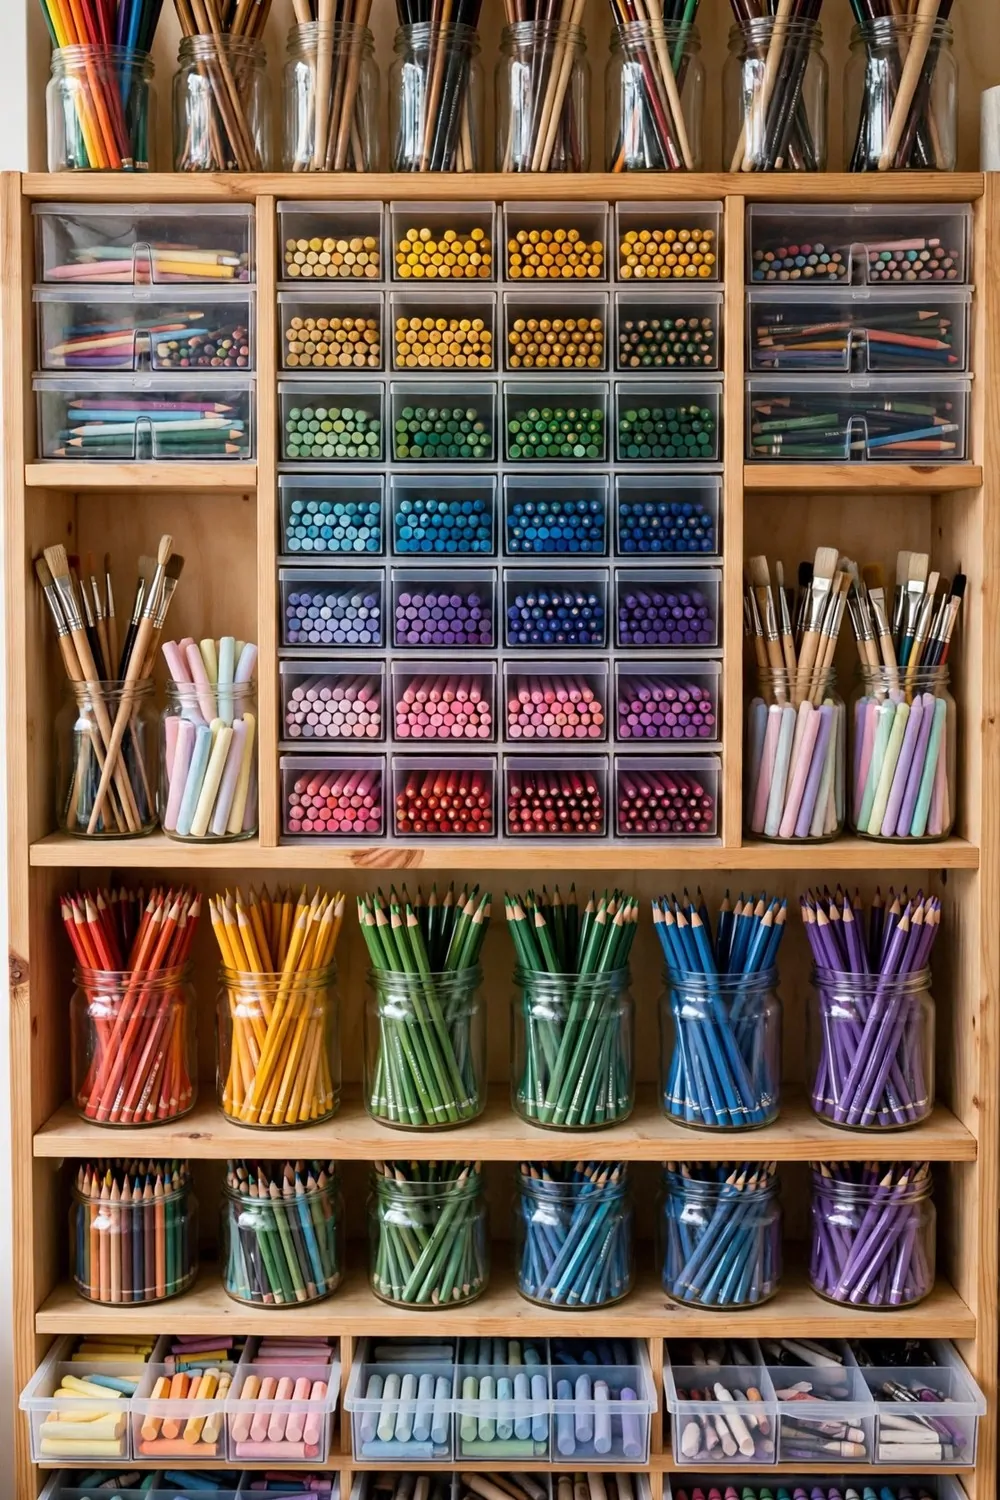
There is a special kind of joy in opening a drawer and seeing every pencil lined up like a rainbow. Color-sorted storage is not just pretty. It is practical.
When supplies are sorted by color, you find what you need in seconds. No digging. No buying a third tube of blue because you could not find the first two.
Glass jars are perfect for brushes and pencils. You see everything at a glance. The jars themselves become decoration on the shelf.
Clear drawers work for the flat stuff. Paper, fabric, pastels. Label the front if you want, but the color showing through is label enough.
Here is how I sort mine:
| Storage type | Best for | Where it lives |
|---|---|---|
| Glass jars | Brushes, pencils, markers | Open shelf at eye level |
| Clear drawers | Paper, pastels, small tools | Under the work table |
| Baskets | Fabric, yarn, bulky items | Floor shelf or closet |
| Mason jars | Buttons, beads, tiny bits | Small wall shelf |
Sort once, properly, on a rainy afternoon. Put on music. It is actually fun. Then keeping it sorted takes almost no effort.
Put things back in the right spot every time. The system only works if you respect it. One lazy week and the rainbow becomes a muddle.
Kids love this system. Sorting colors feels like a game. Let them help, and the studio stays tidy almost by itself.
A sorted wall also shows you what you are missing. Out of yellow? The empty jar tells you before you start a project, not in the middle of one.
19. The Single-Wall Apartment Studio
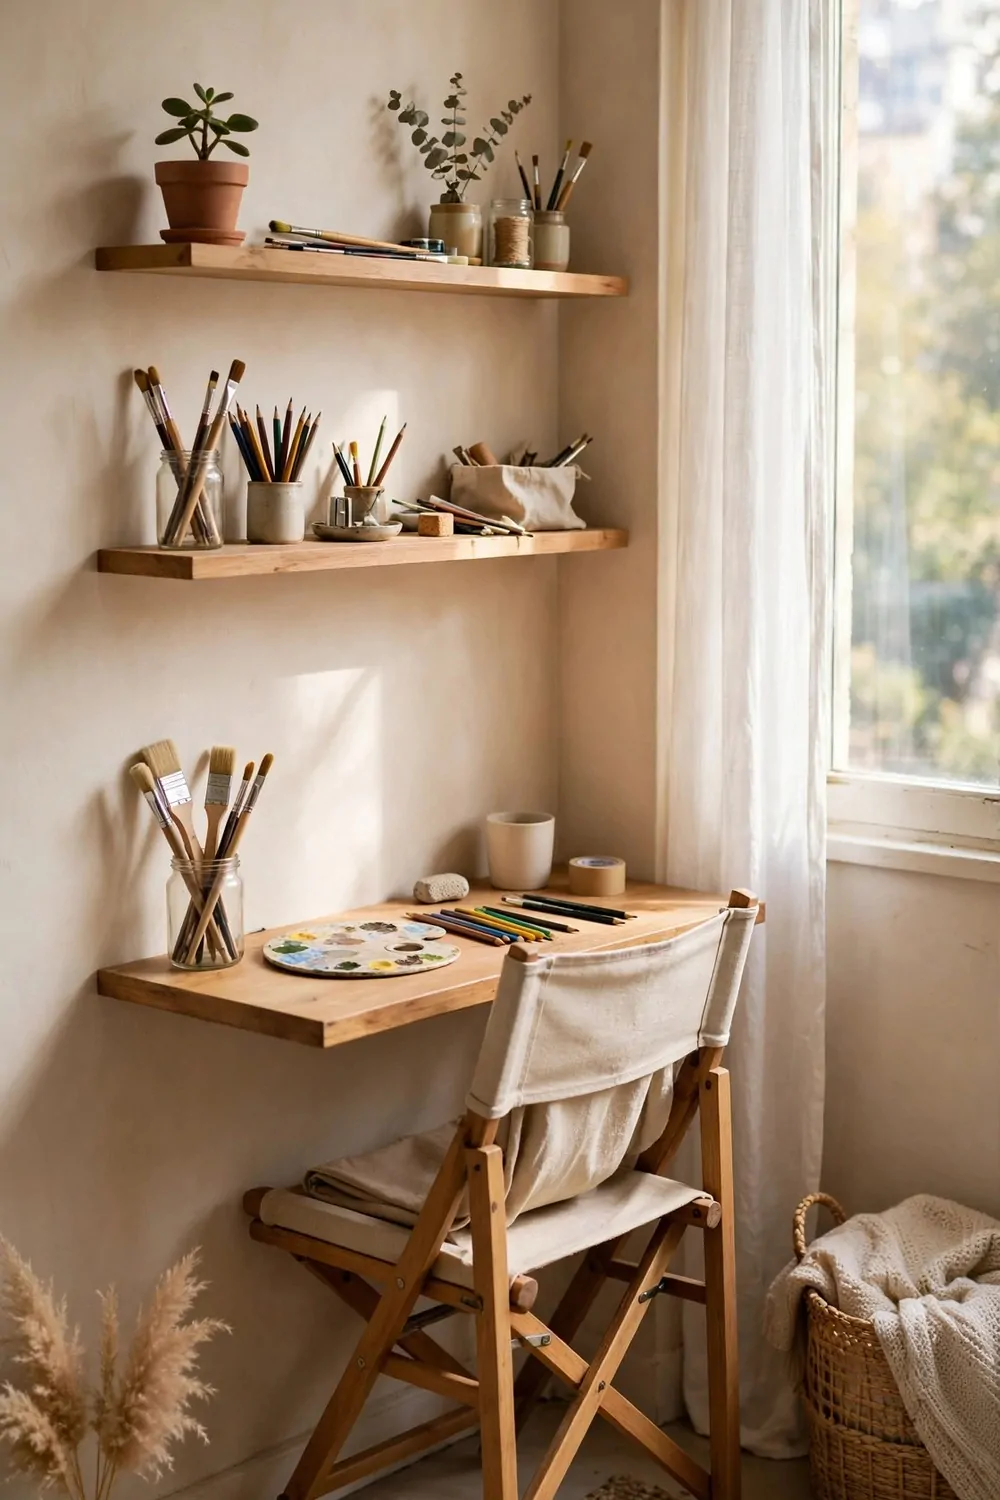
No spare room? No problem. Some of the best studios I have seen are a single wall in a small apartment. One wall, fully working, fully yours.
Pick the wall with the best light. Everything else follows from that one choice. Light first, furniture second.
A narrow desk pushed against the wall is the base. Deep desks eat the room. A slim one gives you work space and keeps the floor clear.
Floating shelves above the desk hold everything. Supplies, books, a plant. The wall becomes your storage, your inspiration, and your gallery all at once.
A folding chair tucks right under the desk. When you are done, the whole studio is six inches deep. Your living room is back.
Keep the wall tidy. A single-wall studio is always visible, so clutter shows. This is actually a gift. It keeps you organized without trying.
A small rug under the desk marks the zone. Step onto the rug and you are in the studio. Step off and you are home. Your brain learns the boundary fast.
Hang one piece of your own art above the shelves. It says this wall is a studio, not just a desk in a living room.
This setup proves the big point. A studio is not a room. It is a habit with a home.
20. The Kids’ Art Zone
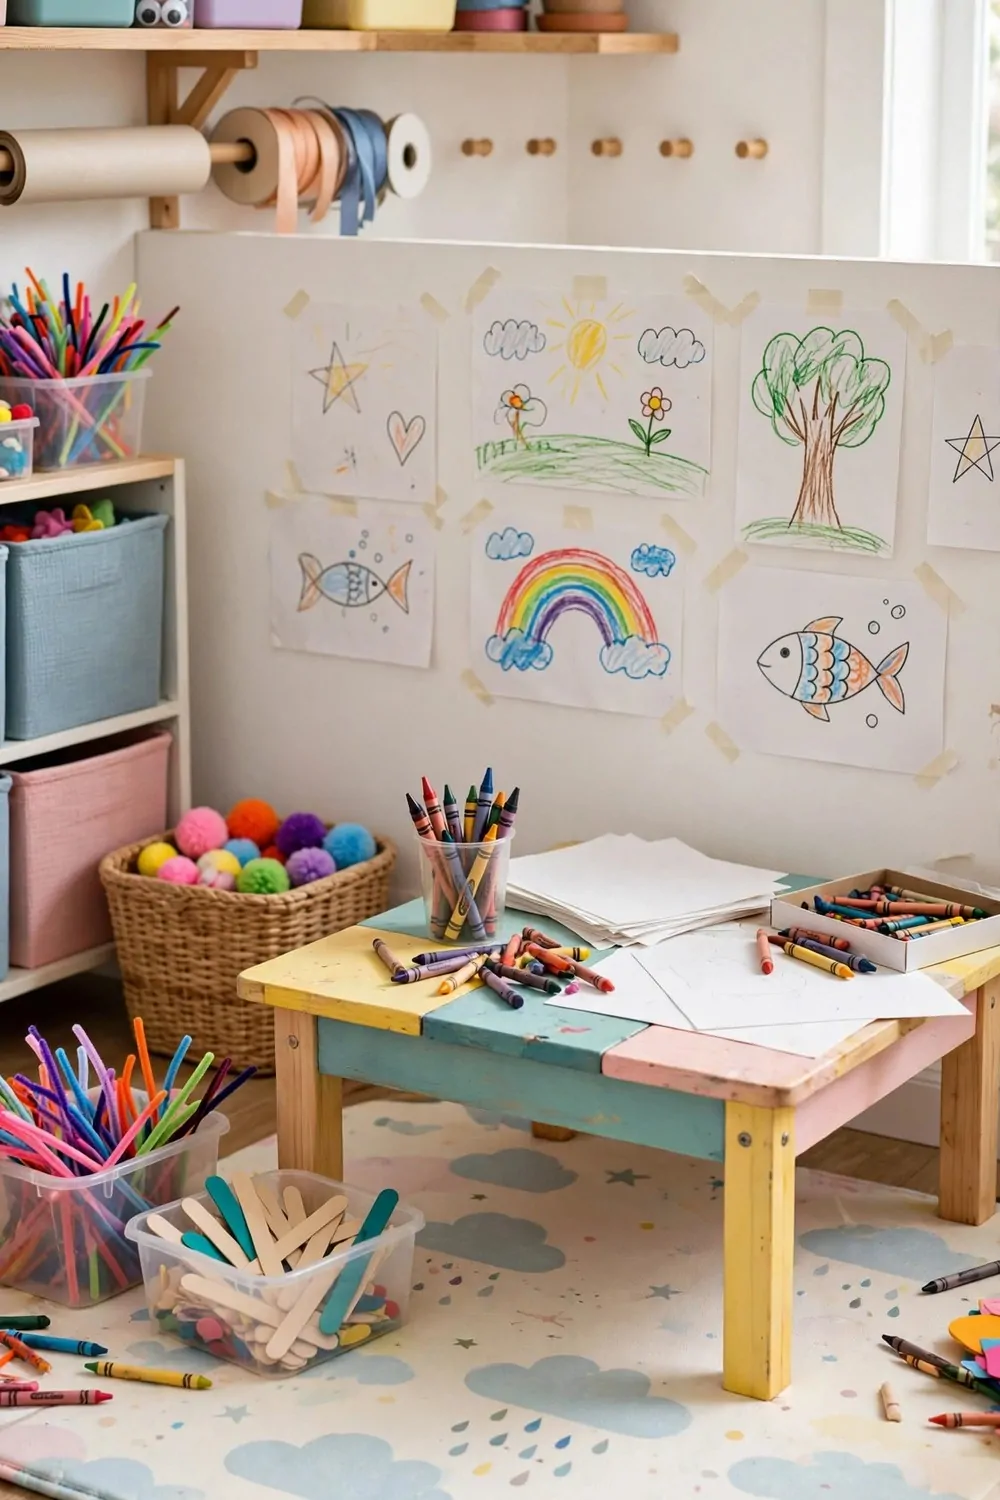
Kids do not need a perfect studio. They need a place where making a mess is fine and the supplies are always out. The rest takes care of itself.
A low table they can reach without climbing is the heart of it. Kid height, kid chairs. If they need help to sit down, they will not sit down.
Washable everything. Washable paints, washable markers, a washable mat under the table. You want to say yes to art, not worry about the floor.
Bins of supplies beat boxes every time. Open bins they can see into. Lids are just obstacles between a kid and an idea.
Tape their drawings to the wall at their eye level. Not yours. Theirs. A gallery they can actually see makes them so proud.
Keep smocks on hooks by the zone. Make putting on the smock part of the ritual. It also saves every shirt you own.
Sit with them sometimes. Not to teach. Just to make your own thing beside them. Kids copy what they see, and a parent making art is the best lesson there is.
Clean up together at the end. Make it a game. Five minutes, everything in bins. Then the zone is ready for tomorrow’s ideas.
The drawings will pile up. Keep the best, photograph the rest, and let the pile teach you what your kid loves.
21. The Digital Drawing Desk
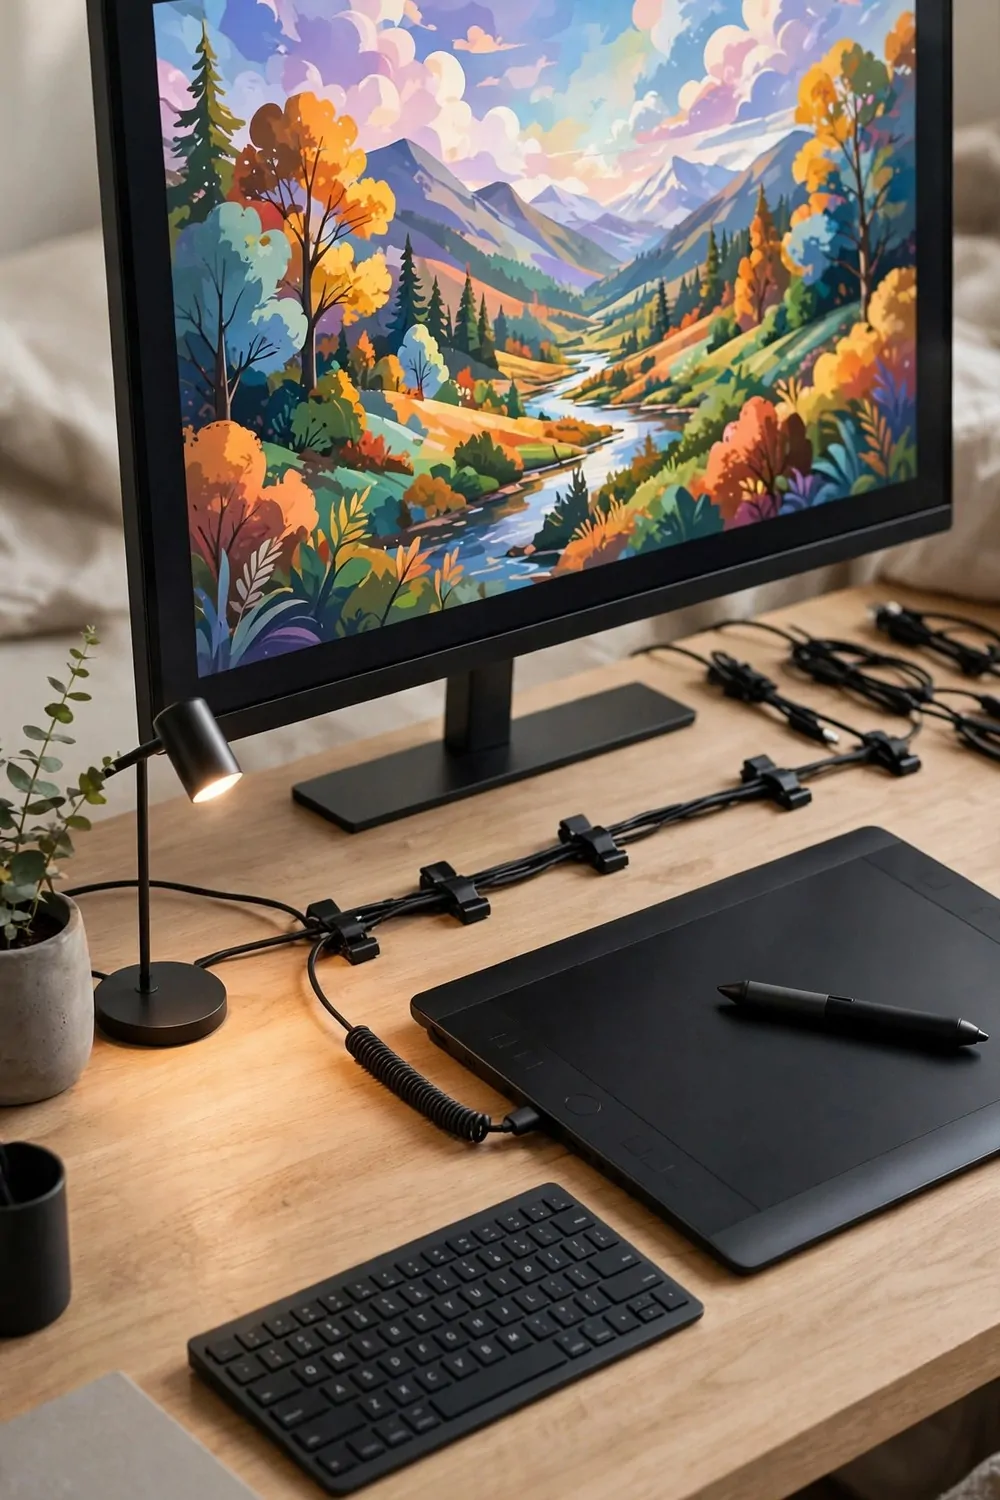
Not all studios smell like paint. Some hum quietly. A digital drawing desk is a real studio, and it fits in the smallest corner of the house.
The drawing tablet is the heart of it. It sits beside the keyboard like a second mouse, and after a week your hand forgets it was ever strange.
A big monitor helps more than anything else. Drawing on a tiny screen is like painting through a keyhole. Go as big as your desk and budget allow.
Cable clips are the unglamorous hero of this setup. Tablet cable, keyboard cable, charger cable. Clip them all along the back edge and the desk stays clean.
A small desk lamp still matters. Screens glow, but your hands and your sketchbook need real light. One warm lamp does the job.
Keep a paper sketchbook on the desk too. Digital artists sketch on paper more than you would think. Ideas start analog and finish digital.
Good posture saves you here. Digital work means long hours in one chair. A chair that supports your back is not a luxury, it is equipment.
Back up your work. An external drive or cloud folder, whatever you prefer. Losing a month of drawings to a dead laptop is a pain you only need once.
The undo button is the best thing about this studio. Be bold. Try the wild idea. You can always step back.
22. The Printmaking Nook
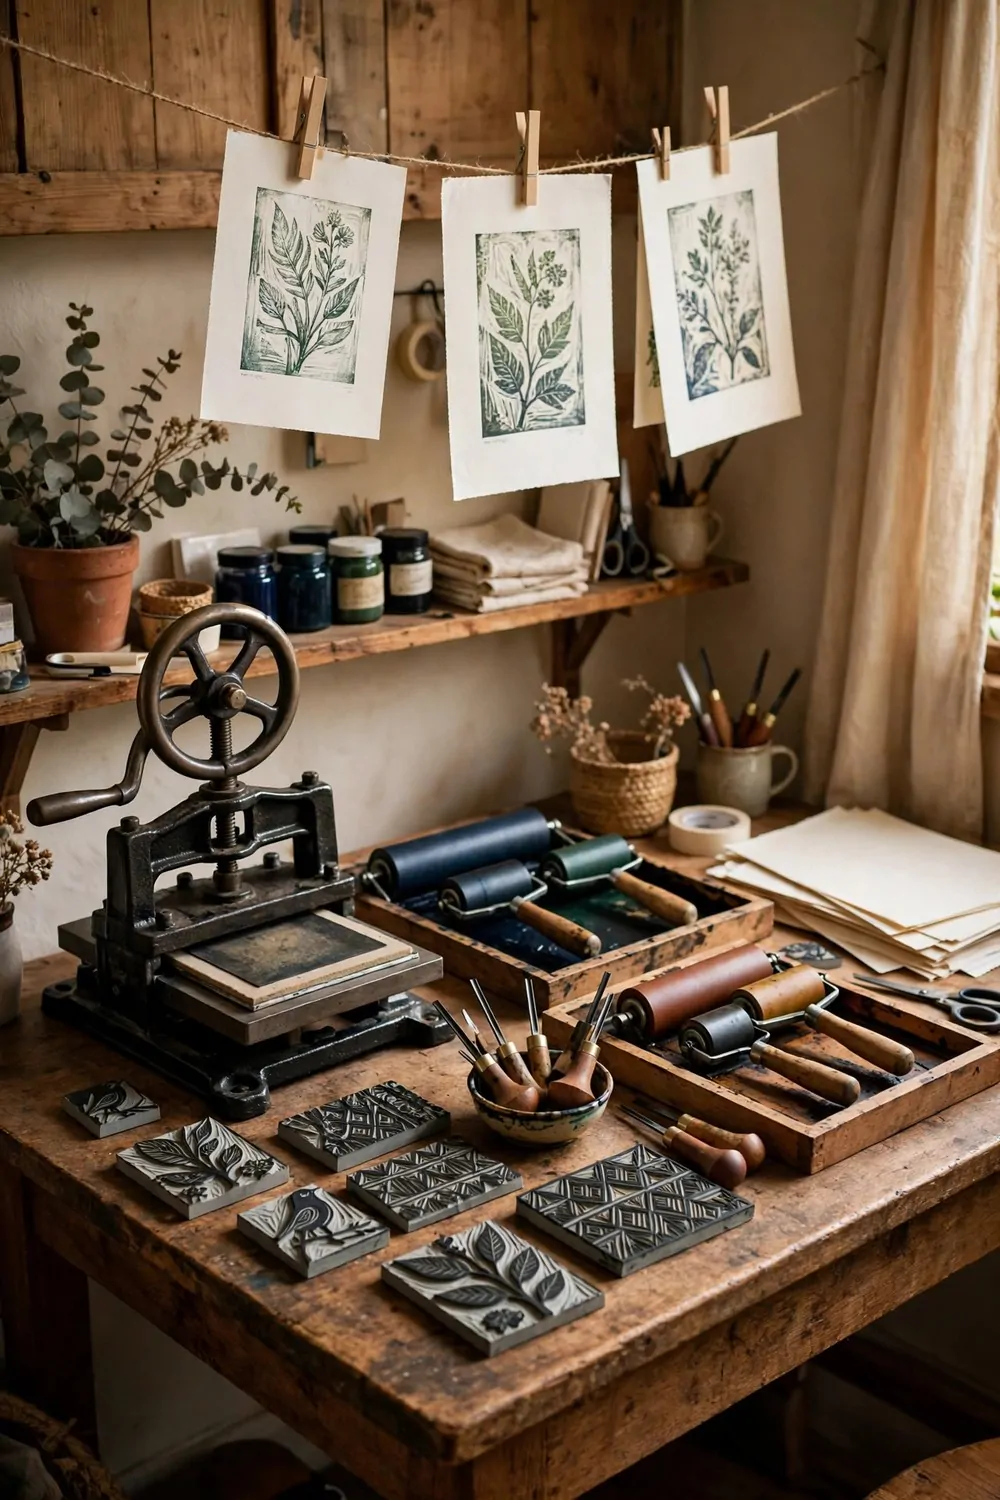
There is something magical about pulling a print. You carve the block, roll the ink, press the paper, and lift it to find your image staring back at you. Every pull feels a little like a surprise.
A hand press on a sturdy table is the centerpiece. It does not need to be big. Small presses make beautiful prints and fit on a normal table.
Ink rollers, called brayers, live in a tray beside the press. Keep them clean. Dried ink on a roller ruins the next print.
Carved blocks stack neatly on a shelf. Linocut blocks are light and flat. A whole collection fits in one drawer.
The drying line is my favorite part. A string across the nook with fresh prints hanging from little clips. It looks wonderful and it is completely practical.
Paper storage matters. Print paper should stay flat and dry. A flat drawer or a portfolio case under the table works perfectly.
Wear the apron for this one. Print ink stains like it is its job. Old clothes and an apron keep the hobby fun instead of stressful.
Start with simple shapes. A leaf, a star, a wave. Bold simple cuts make the strongest first prints.
Gift your early prints. People love handmade prints, and giving them away makes room for the next batch on the line.
23. The Idea Reading Corner
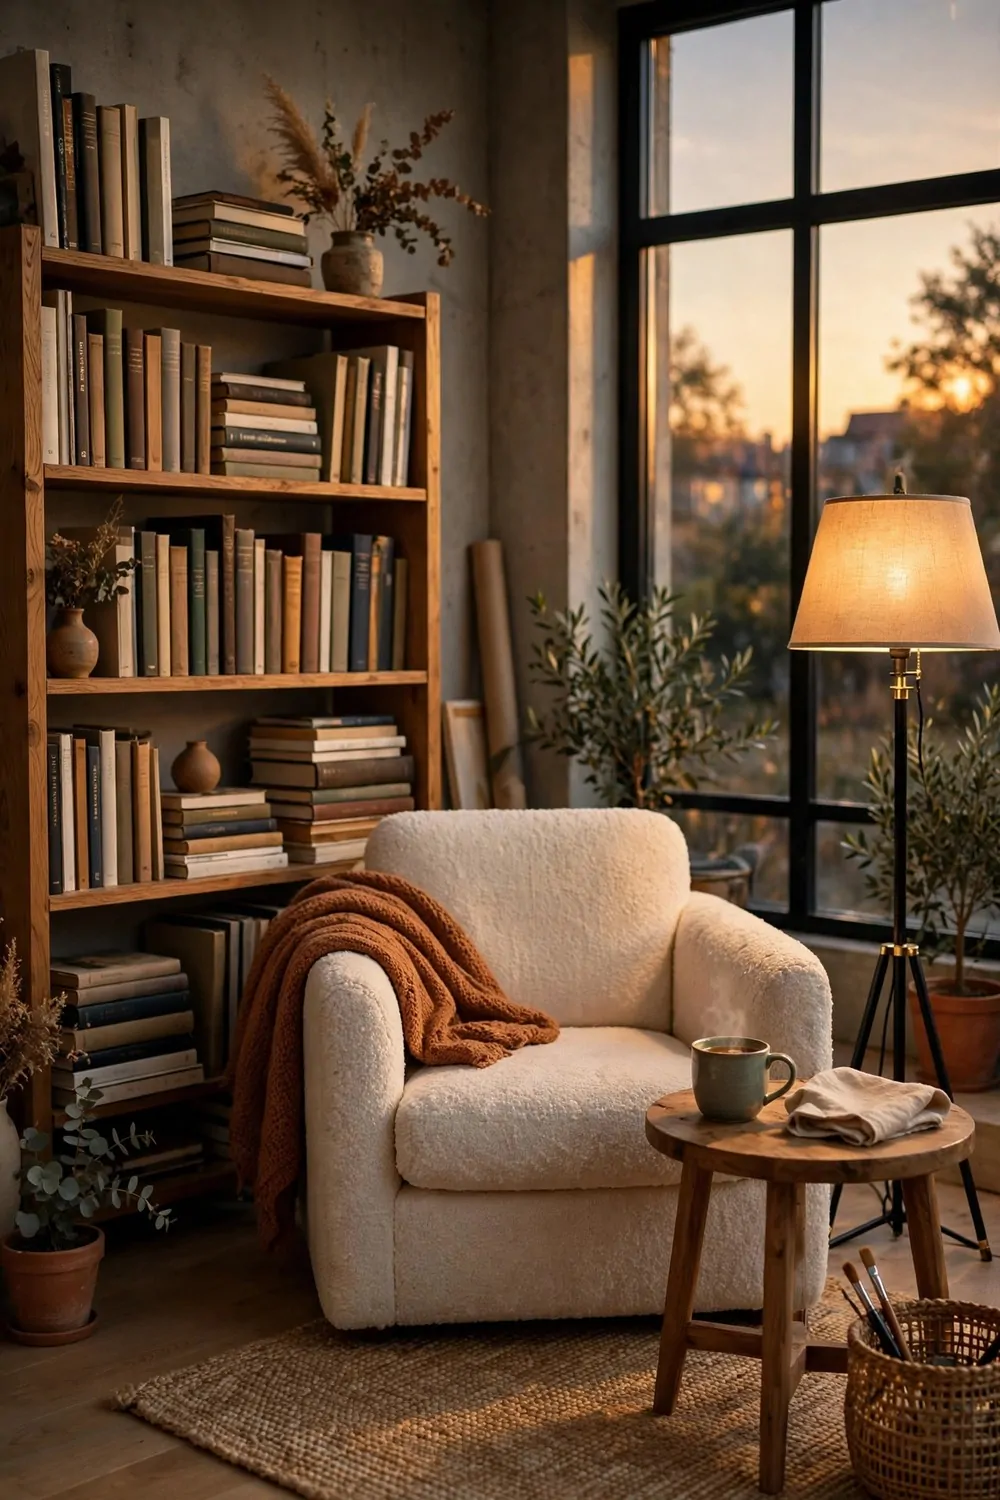
Every studio needs a chair that is not for working. A chair for sitting back, opening a book, and letting ideas come to you instead of chasing them.
A bookshelf of art books is the soul of this corner. Not novels. Big heavy books full of pictures. The kind you open at random and lose an hour in.
The chair should be the most comfortable one you own. Deep seat, soft back. This is where your brain rests, and resting brains make the best ideas.
A floor lamp arcs over the chair with warm light. Evening reading in this corner, with the studio quiet around you, is one of life’s great small pleasures.
Keep a notebook on the side table. Ideas arrive while you read. You will want to catch them before they float away.
Tea belongs here. I keep a little tray with a mug on the side table. The ritual of making the tea is part of the slow-down.
Rotate the books. Every month, pull five new ones from the library or your shelves. Fresh pictures feed fresh thinking.
This corner also works for sketching from books. Copy a painting you love. Copying the masters is how every artist learned for centuries.
Do not feel guilty sitting here. Looking at beautiful things is studio work. It is just the quiet kind.
24. The Plant-Filled Studio
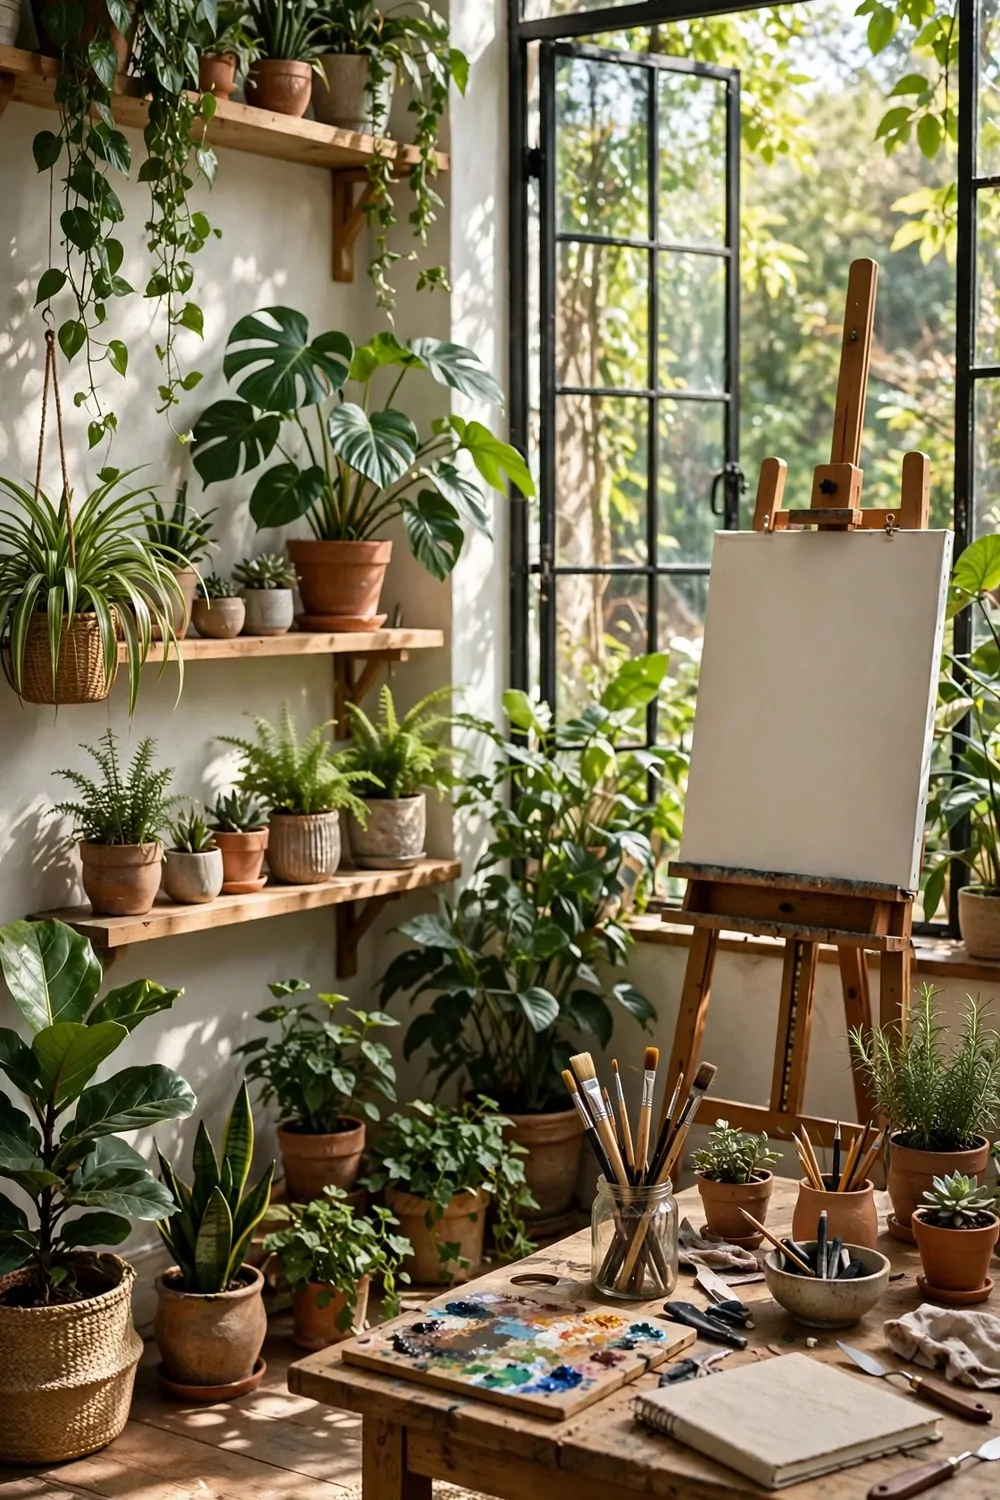
Plants and studios were made for each other. They want the same things. Good light, fresh air, and a person who shows up every day.
Start with the easy ones. Pothos, spider plants, snake plants. They survive missed waterings and low light, and they look great trailing off shelves.
Hang some plants above your work area. Trailing leaves overhead make the studio feel alive in a way nothing else does. It is like working in a greenhouse.
Big plants go in the corners. A tall plant in an empty corner fills the space better than any furniture. It also cleans the air while you work.
Watering day becomes studio ritual. Once a week, walk around with the watering can, check every plant, wipe the leaves. It is meditative.
Plants teach patience, which artists need. You cannot rush a leaf. You cannot hurry a bloom. The plant grows on its own schedule, and so does your best work.
Keep the thirsty ones near the sink. Ferns and calatheas drink a lot. Put them where watering is easy or you will resent them.
A plant on the desk is non-negotiable. One small green thing in your eyeline while you work. It rests your eyes between long focused stretches.
Propagate and share. Snip a pothos cutting, root it in water, give it to a friend. Studios that grow plants grow community too.
25. The Garage Workshop Studio
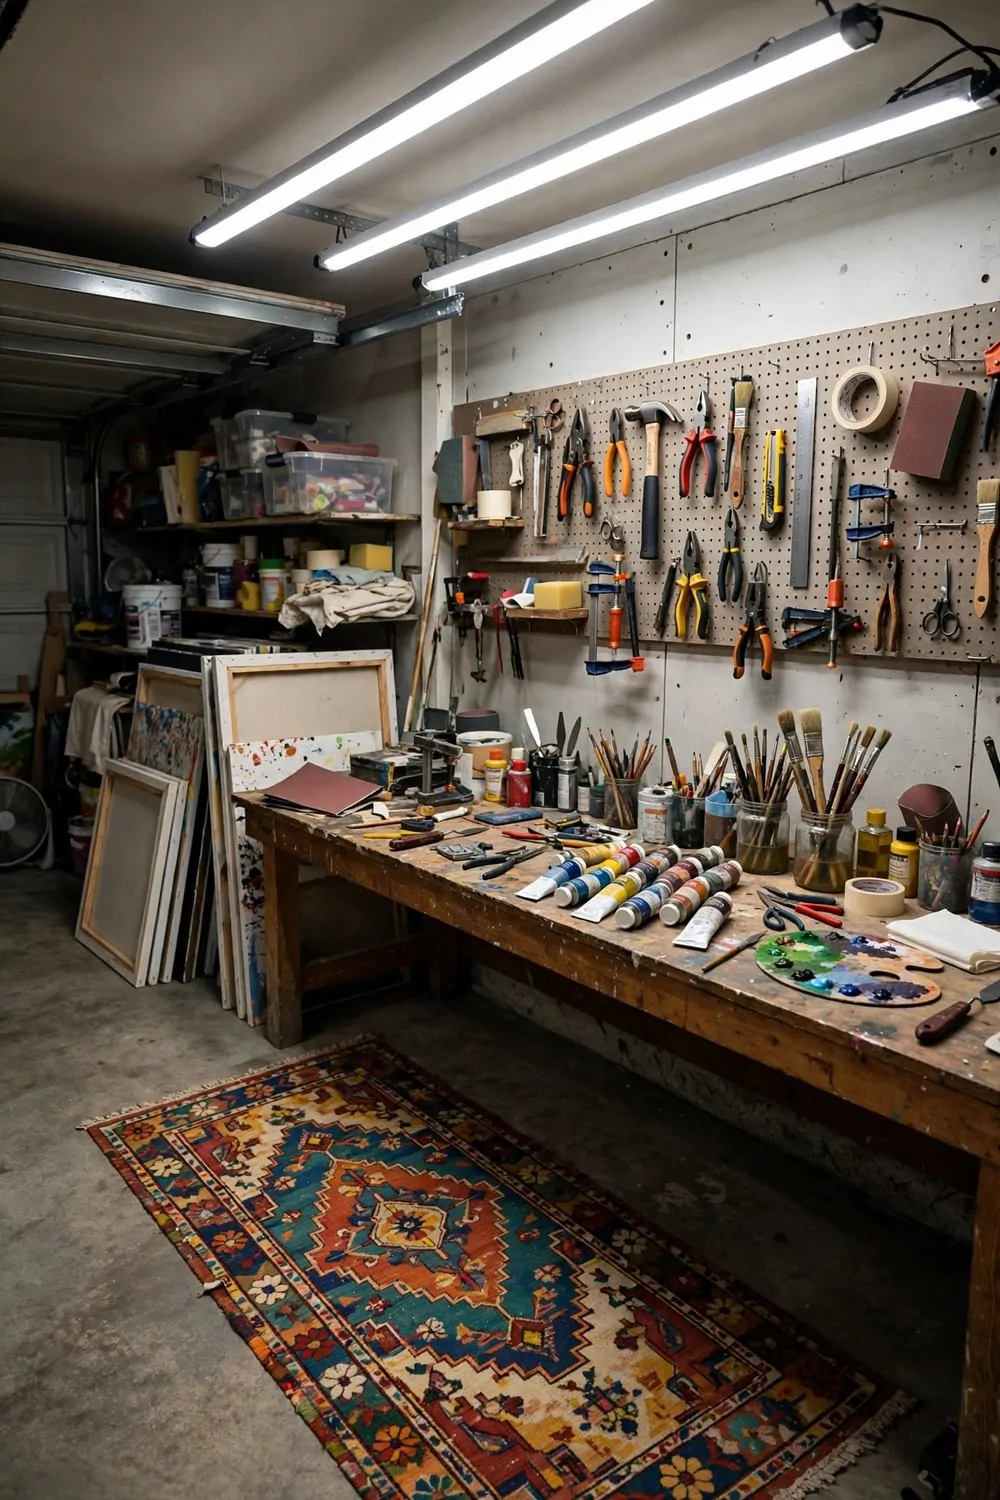
The garage is the most underused room in most houses. It holds a car, some boxes, and a lot of wasted potential. Take half of it back.
A long workbench along one wall is the foundation. Deep and sturdy. This is where the big projects happen, the ones too large for a desk.
Pegboard above the bench holds the tools. Hammers, saws, clamps, all visible and within reach. A workshop where you can see your tools is a workshop you actually use.
The concrete floor is a feature, not a flaw. Spill paint on it, drop clay on it, sweep it up. A colorful rug in the middle softens it and marks your zone.
Bright overhead lights matter in a garage. They are usually dim. Add two bright shop lights and the space transforms from cave to studio.
Insulate the door if you work in winter. Garage doors leak heat like crazy. A little insulation and a small heater make it cozy.
Keep the car half if you must. A curtain or a shelf divider splits the space. Your studio does not need the whole garage, just a real half.
Ventilation is easy here. Open the big door. Fresh air floods in, fumes flood out. No studio in the house ventilates this well.
Big projects need big space. Furniture, sculptures, large canvases. The garage is where your biggest ideas finally fit.
26. The Grab-and-Go Art Kit
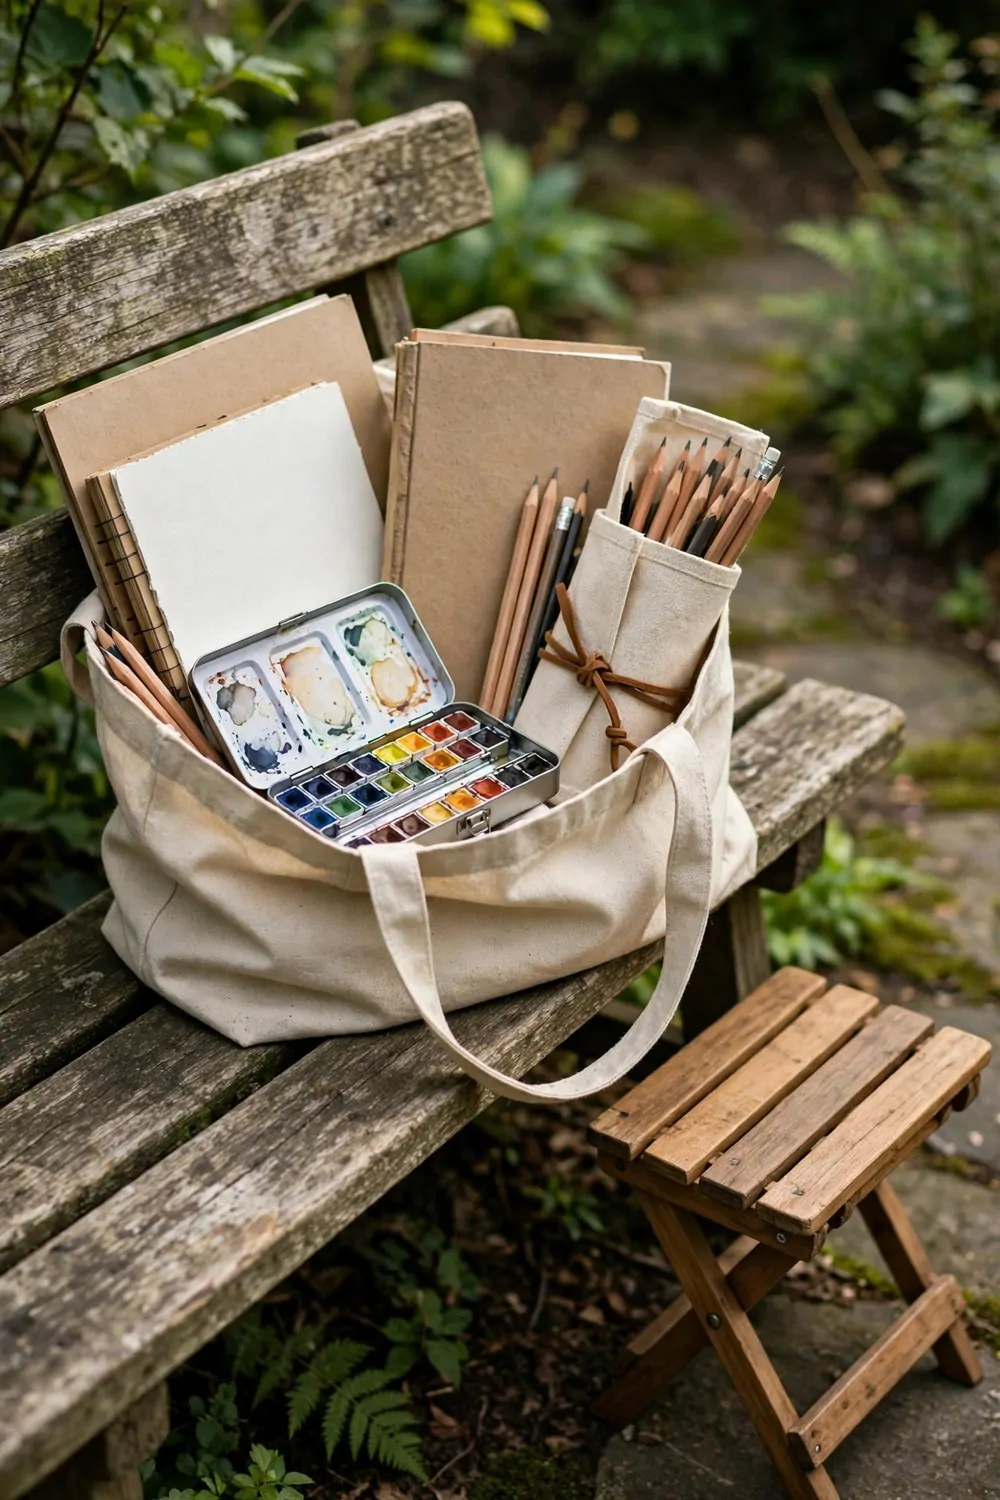
Sometimes the studio needs to leave the house. A park bench, a cafe table, a friend’s porch. The grab-and-go kit makes every place a studio.
A sturdy tote bag is the base. Canvas, with pockets. It should stand open on its own so you can see everything inside without digging.
Pack only what you love. A small sketchbook, a pencil roll, a tin of watercolors, two brushes, a water cup that collapses flat. That is a full studio in one bag.
The pencil roll is the cleverest piece. Pencils and pens roll up in fabric, tie with a string, and unroll anywhere. No rattling case, no lost lids.
Keep the bag packed by the door. Not in a closet. By the door. If packing takes even five minutes, you will talk yourself out of going.
A folding stool completes the kit. Parks have benches, but not always where the good view is. Your own stool means you sit exactly where you want.
Sketch outside once a week. It trains your eye in a way indoor work never does. Light moves, people move, clouds move. You learn to catch things fast.
The kit also saves indoor studio days. Stuck on a painting? Grab the bag, walk to the park, sketch for an hour. You will come home unstuck.
Small kits get used. Big kits stay home. Pack light and go often.
27. The Coffee Pause Corner
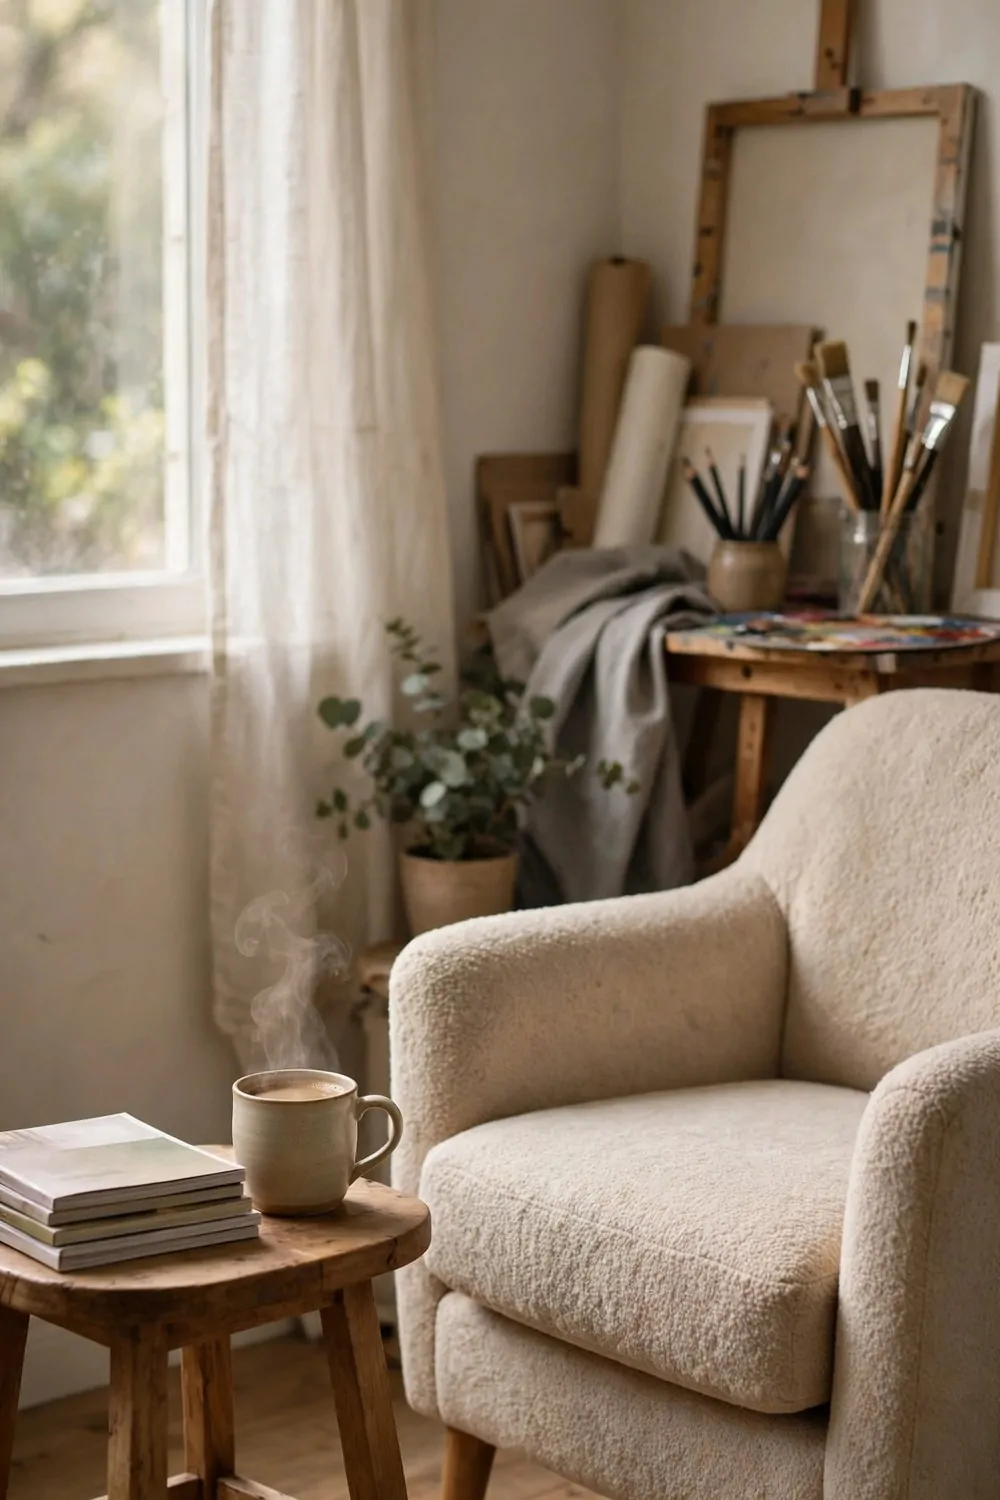
Every studio needs a place to stop. Not to quit. To pause. A corner where you sit with a warm drink and look at your work from a distance.
Place it so you can see your main work area. The whole point is stepping back. From the chair, the painting looks different. Problems you could not see up close become obvious.
A comfortable armchair is the anchor. Not a desk chair. A real sink-into-it chair. Your breaks should feel like breaks.
The side table holds the mug and nothing else. No supplies creeping over. This corner is for resting, not for working.
Keep a stack of magazines or a book on the lower shelf. Ten minutes of flipping through beautiful pictures refills the creative tank.
Make the coffee or tea part of the ritual. Walk away from the work, make the drink slowly, carry it back. The walk itself clears your head.
Time your pauses. Work for an hour, pause for ten minutes. Your eyes need the rest, and your brain solves problems while you sip.
Invite someone to sit there. A friend visiting the studio, a kid watching you work. The pause corner becomes the conversation corner.
Studios without a pause corner burn people out. The work is important. The rest is important too.
28. The Warm Minimal Studio
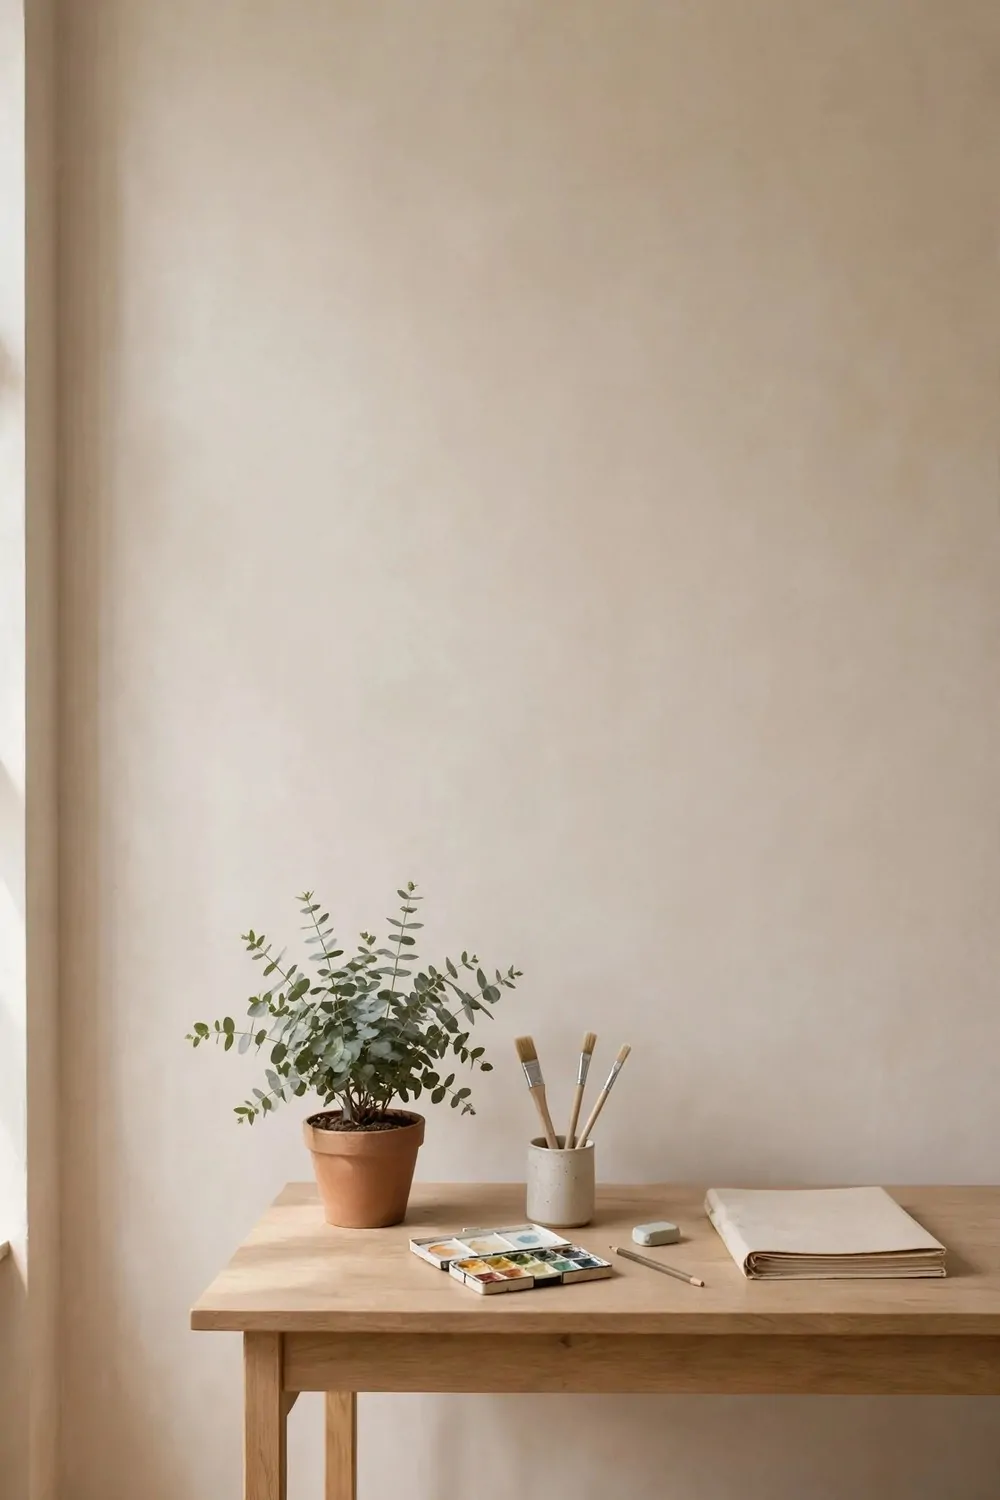
Some studios are full. This one is empty on purpose. A warm minimal studio keeps only what you need, and the empty space does the talking.
Soft beige walls set the tone. Not stark white, which can feel cold. Warm neutrals that glow a little in the daylight.
One desk. One chair. A few chosen supplies. Everything else lives in a closet. When you sit down, there is nothing to distract you.
A single plant is the only decoration. One green thing, well cared for. It proves the room is alive without filling it up.
This style suits deep-focus work. Writing, drawing, planning. If your craft spreads everywhere, this is not your studio. If your craft needs calm, it is perfect.
Storage hides behind closed doors. A cabinet, a closet, drawers. Out of sight means out of mind, and your mind stays on the work.
Clean lines calm busy brains. I know artists who switched to minimal studios and found their anxiety dropped. Fewer things, fewer worries.
The room is easy to clean. Ten minutes and it is spotless. A tidy studio invites you in every morning.
Minimal does not mean cold. Warm wood, soft textiles, one plant. It is minimal with a heartbeat.
29. The Night Owl Studio
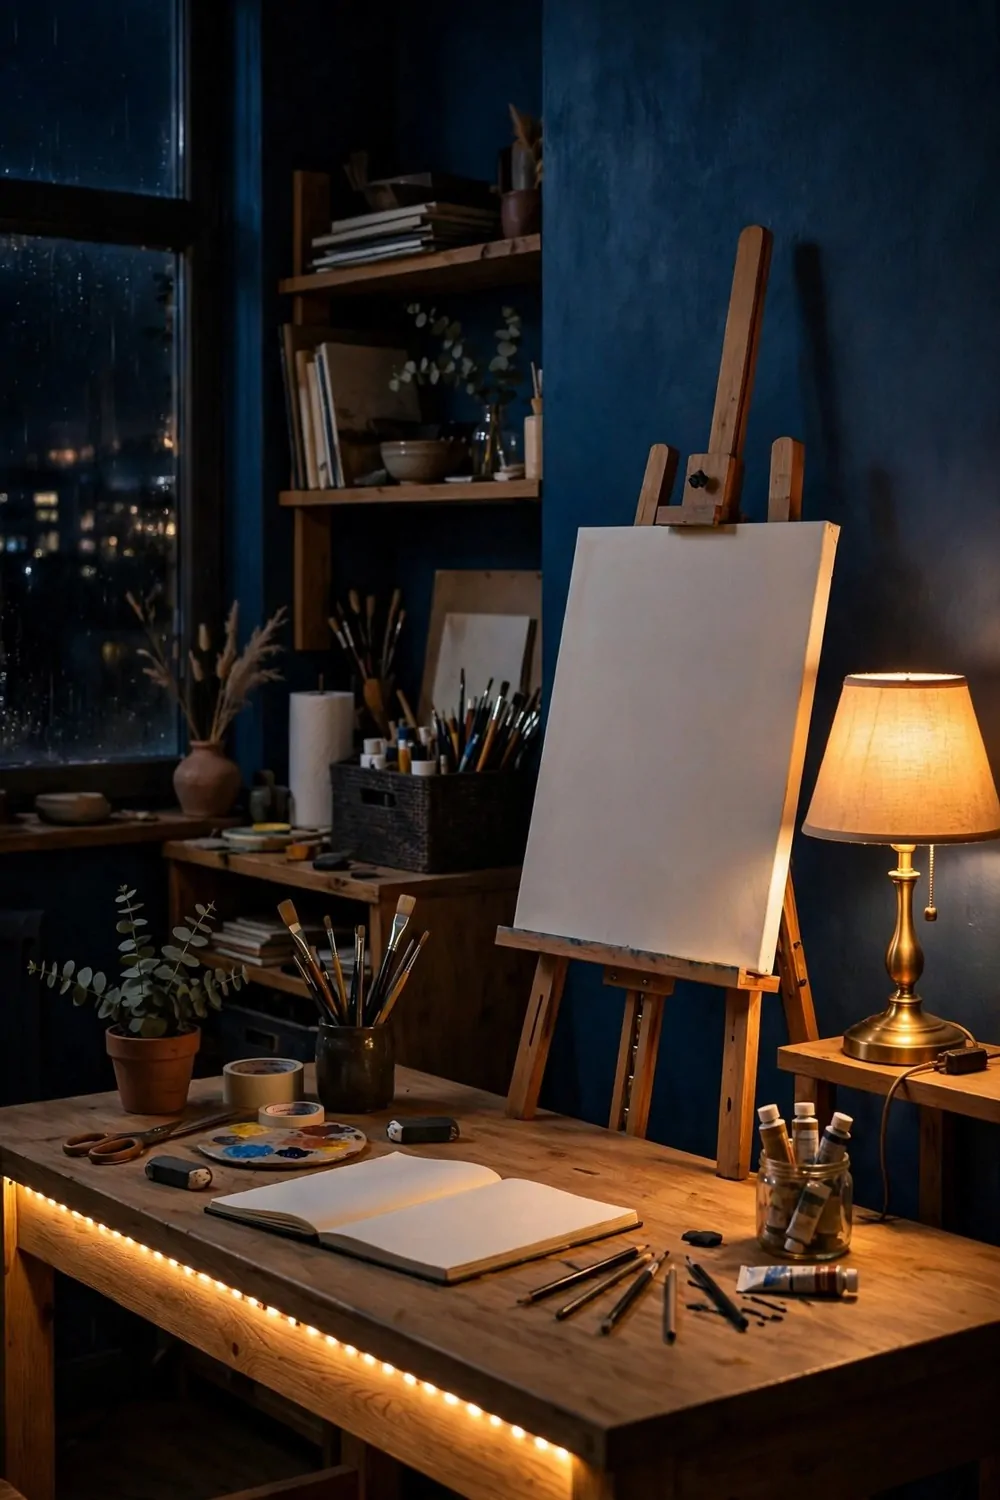
Some of us do our best work after dark. The house is quiet, the phone is silent, and the ideas finally have room to stretch. A night studio honors that.
LED strip lights are the star here. Run them along a shelf or behind the desk. They glow softly without the harshness of a ceiling light. Warm white is best for working.
A cozy lamp beside the easel gives you focused light where you need it. The room stays dim and moody, but your work surface stays bright.
Deep wall colors suit a night studio. Dark blue, charcoal, forest green. In daylight they are rich. At night under warm light, they feel like a cocoon.
Keep the setup quiet-friendly. If others sleep nearby, soft tools only. Sketching, watercolor, writing. Save the hammering for daytime.
A warm drink station helps. Night sessions run long. Tea or hot chocolate within reach keeps you going without a trip to the kitchen.
Dim the screens. If you use a tablet or laptop, turn the brightness down. Bright screens in a dark room strain your eyes fast.
Set a gentle end time. Night studios are wonderful, but 2 a.m. sessions steal from tomorrow. A small alarm keeps the habit healthy.
There is a special magic in making things while the world sleeps. This studio is built for it.
30. The Watercolor Wash Corner
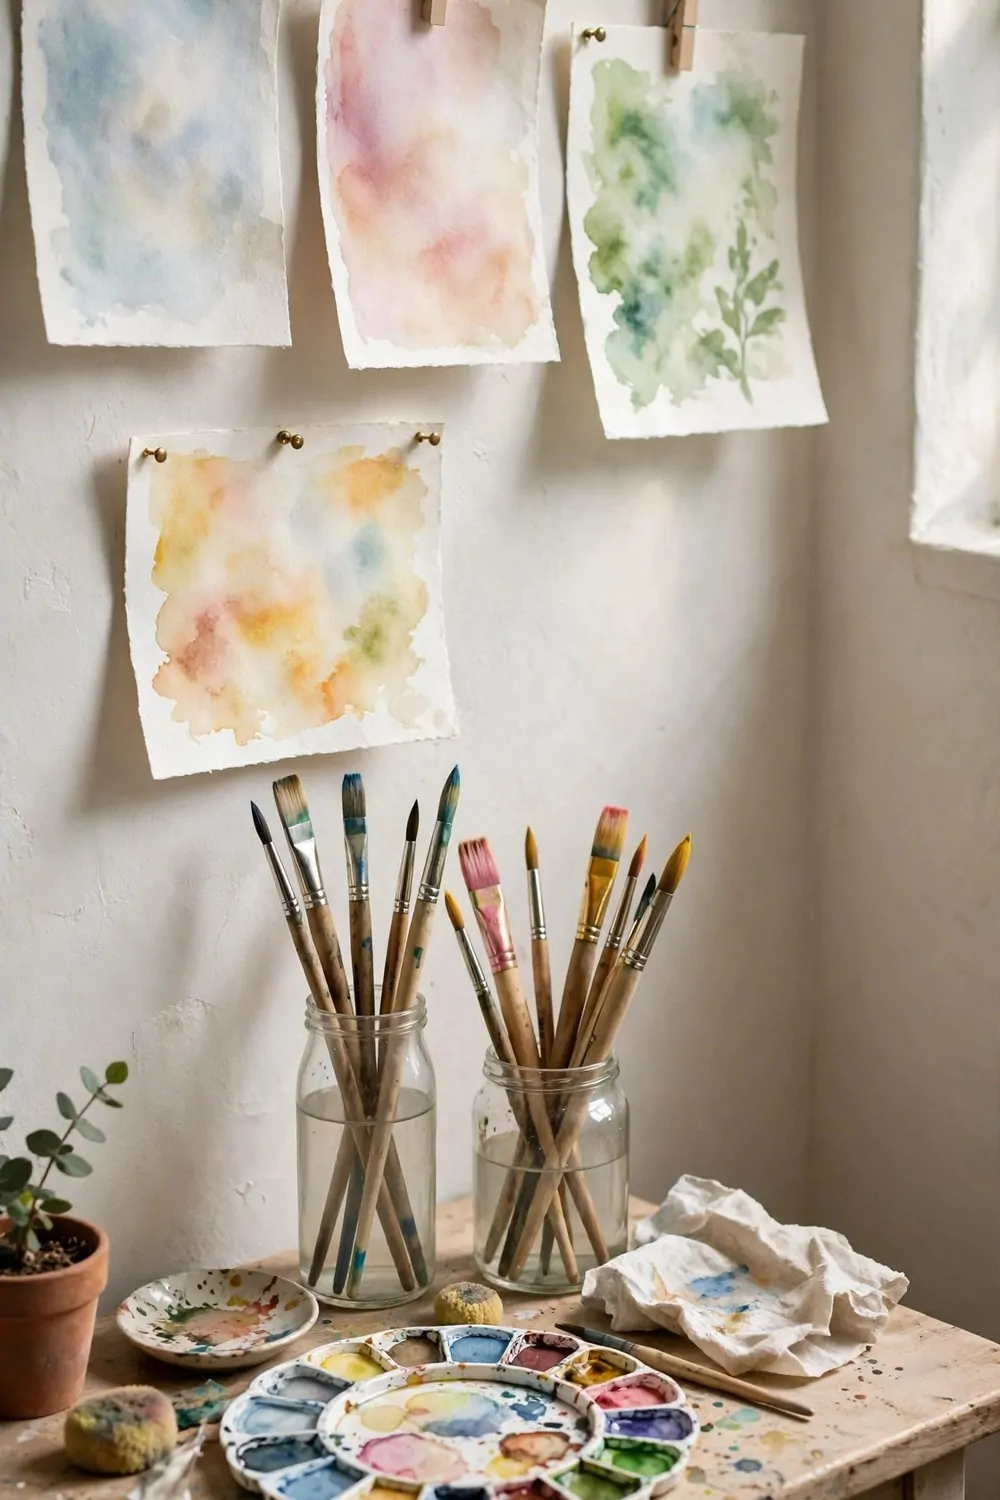
Watercolor is the gentlest paint, and it deserves its own gentle corner. Small table, good light, and a wall where wet washes can dry in peace.
The palette sits in the middle of the table. A real watercolor palette with wells, not a paper plate. The wells keep your colors clean and separate.
Brushes stand in glass jars of water. Two jars, actually. One for rinsing, one with clean water for mixing. Muddy water makes muddy paintings.
Pin fresh washes to the wall above the table to dry. Little clips on a string work beautifully. Watching yesterday’s washes dry is part of the pleasure.
Keep paper flat and dry in a drawer below. Watercolor paper warps in humidity. A flat drawer keeps it perfect until you need it.
A spray bottle lives on this table. A light mist wakes up dried paint on the palette. It also softens edges on wet washes if you are quick.
Tape your paper down before you start. Painter’s tape around the edges stops the curling and gives you a clean white border when you peel it off.
This corner is quiet work. No noise, no mess, no fumes. Just water, color, and patience.
Start with washes. Big soft skies of color. The corner will teach you the rest.
Your Turn: Pick One Corner and Start This Weekend
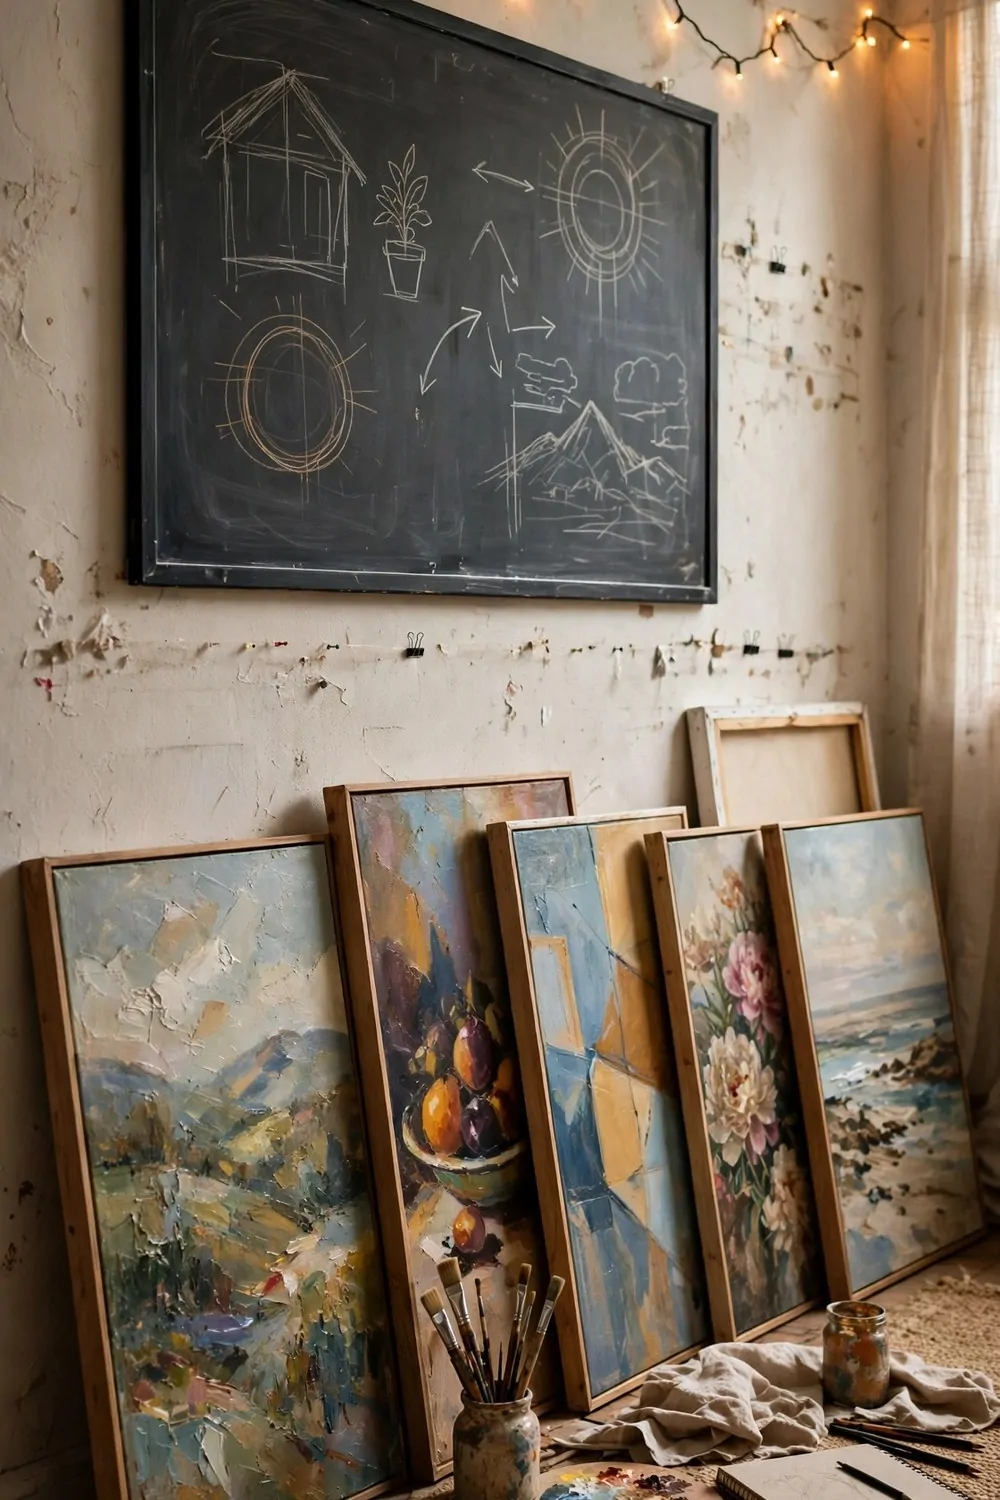
Thirty ideas. That is a lot to read in one sitting. But here is the secret. You do not need thirty. You need one.
Pick the idea that made your heart beat a little faster while you read. The painter’s corner. The sewing nook. The journal seat. Whichever one whispered your name.
Start this weekend. Not next month. This weekend. Clear the corner, set up the table, hang the pegboard. One afternoon is enough to begin.
It will not be perfect. My first studio corner had a wobbly table and a lamp that buzzed. I still made things there every day, and I loved it.
Let it grow slowly. Add a shelf when you need it. Buy the better lamp when you can. Studios are living things. They grow with you.
Show someone what you made. A photo to a friend. A drawing on the fridge. Making things in private is fine, but sharing them makes it real.
Your kitchen drawer full of tools is still waiting. Go give it a home. That drawer was never just a drawer. It was a studio, waiting to be born.
Take a photo of your corner when it is done. Not for anyone else. For you. Six months from now you will look at that photo and smile at how far a single corner took you.