22 Nightstand Makeover Ideas That Look Brand New

Last night I reached for my book in the dark. My hand hit the lamp and the lamp hit my glass of water. Water ran all over my nightstand and down to the floor.
I turned the small light on and I just looked at it. The top was marked and dull and the drawer stuck a bit when I tried to open it.
It was not a bad nightstand.
It was just tired and plain and a bit sad next to my bed. I had bought it second-hand years ago and I had never really given it any love. That night I knew it was time to fix it.
You may have one just like it at home. It holds your book and your phone and your glass of water each night.
A nightstand does a lot of small jobs for you.
In this post I share my best nightstand makeover ideas for you to try at home. All 22 ideas are in this one post, no part two, nothing held back.
1. Soft White Paint Refresh
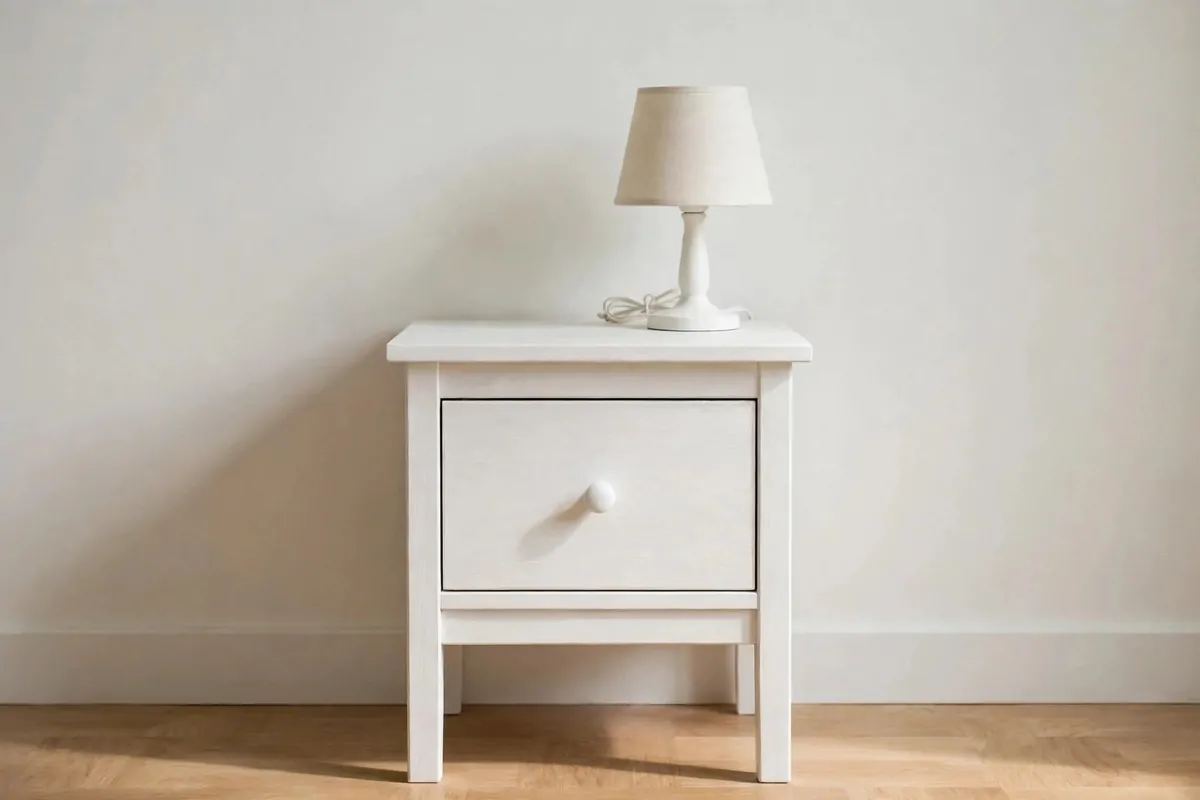
I found my nightstand at a second-hand shop and it was brown and dull. A coat of soft white paint made it look fresh and clean in one day.
First I took the drawer out and I took the knob off.
I wiped the whole nightstand with a damp cloth and I let it dry. Then I gave it a light sand with fine paper. I sanded it in a well-aired spot on my porch and I wore a plain mask.
Soft white paint is kind to a small room. It makes the nightstand look light and it goes with almost any bed and any wall paint.
I used a small brush for the edges and a small roller for the flat parts.
Two thin coats looked much better than one thick coat. I waited until the first coat was fully dry before I brushed on the next one.
You can keep the old knob if you like it. I put a plain round white knob back on mine and it looked neat and new.
Put the drawer back in only when the paint feels dry and hard.
Let the paint dry fully before you put your book and your lamp back on top. A small tin of soft white paint and one round knob cost $9 to $16 in total.
2. Sage Green Paint With Ceramic Knobs
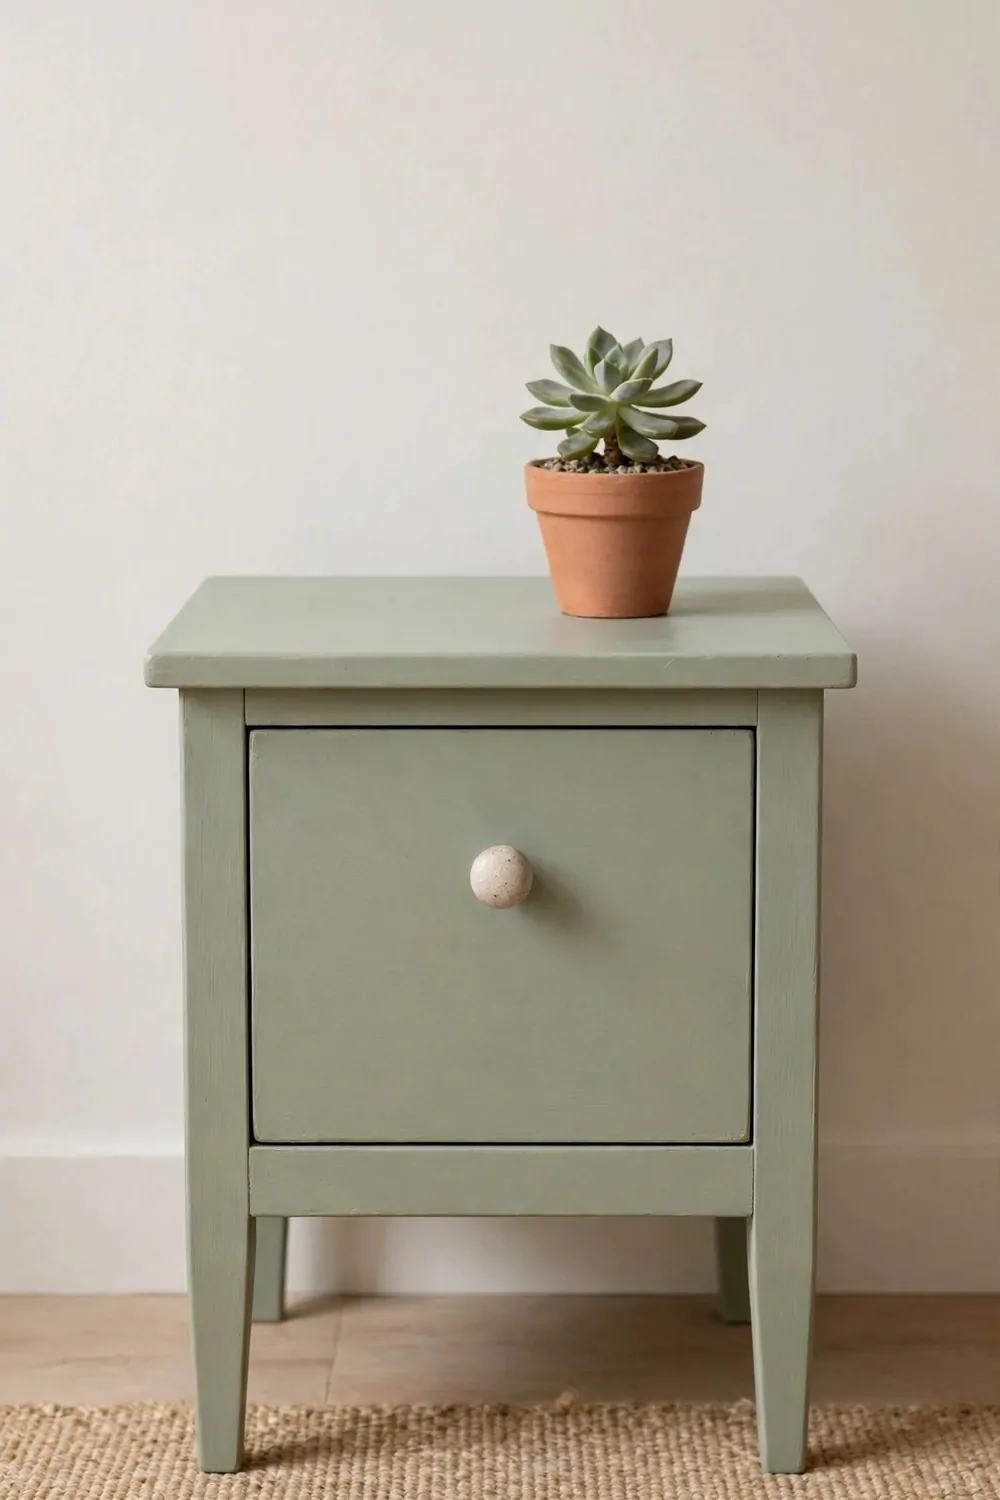
Sage green is a soft green and it looks calm next to a bed. I painted my second-hand nightstand sage green and it changed the whole corner of my room.
Start by cleaning the nightstand well. Dust and old wax can stop the paint from sticking well.
Give it a light sand and wipe the dust off with a damp cloth. Work near an open window when you sand and wear a plain mask so you do not breathe in the dust.
Paint the body first and let it dry. Then paint the drawer front and let that dry too.
A ceramic knob adds a soft touch to the green paint. I picked a plain white one with a smooth round shape.
Here is what I used for this look:
- One small tin of sage green paint
- One plain white ceramic knob
- One small brush and one small roller
Screw the new knob on with care. Do not turn it too hard or the ceramic can crack.
I like this look in a room with plain white walls. The green stands out just a bit and it still feels calm at night.
Wait until the paint is fully dry before you use the drawer each day. A small tin of sage green paint and one ceramic knob cost $13 to $22 in total.
3. Two-Tone Paint, Body and Drawers Different
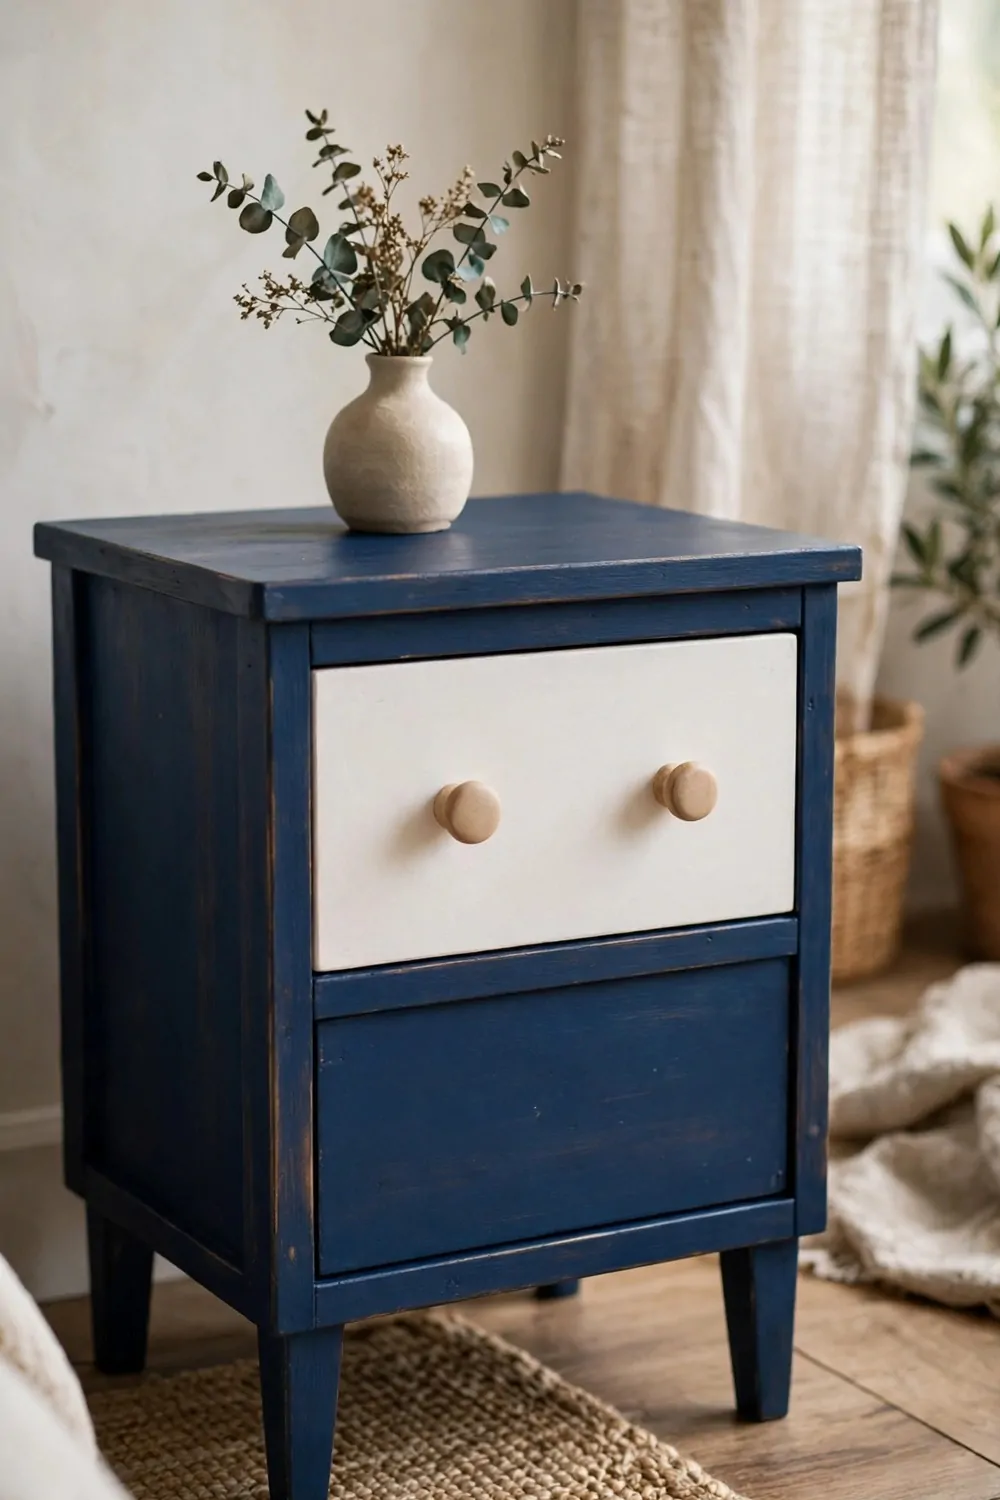
Two-tone paint means the body is one paint shade and the drawers are a different shade. It is a simple trick and it makes a plain nightstand look planned and smart.
I painted the body of my nightstand a deep blue shade.
Then I painted the top drawer front a soft white shade. The two shades sat well next to each other and neither one was too loud.
Take the drawers out before you start. That way you can paint each part with care and you will not get paint on the wrong part.
Use tape on the edges where the two shades meet. Press the tape down well so the line stays clean and straight.
I sanded the old top coat off in a space with fresh air and I kept a plain mask on while I worked.
Two thin coats on each part gave me a smooth look. I gave each coat a good while to dry before I brushed on the next one.
Plain knobs work best here. The paint is the star of this look, so the knobs can stay quiet and simple.
Let the paint dry fully before you put the drawers back in and use them. Two small tins of paint and plain tape cost $15 to $25 in total.
4. Matte Chalk-Style Finish
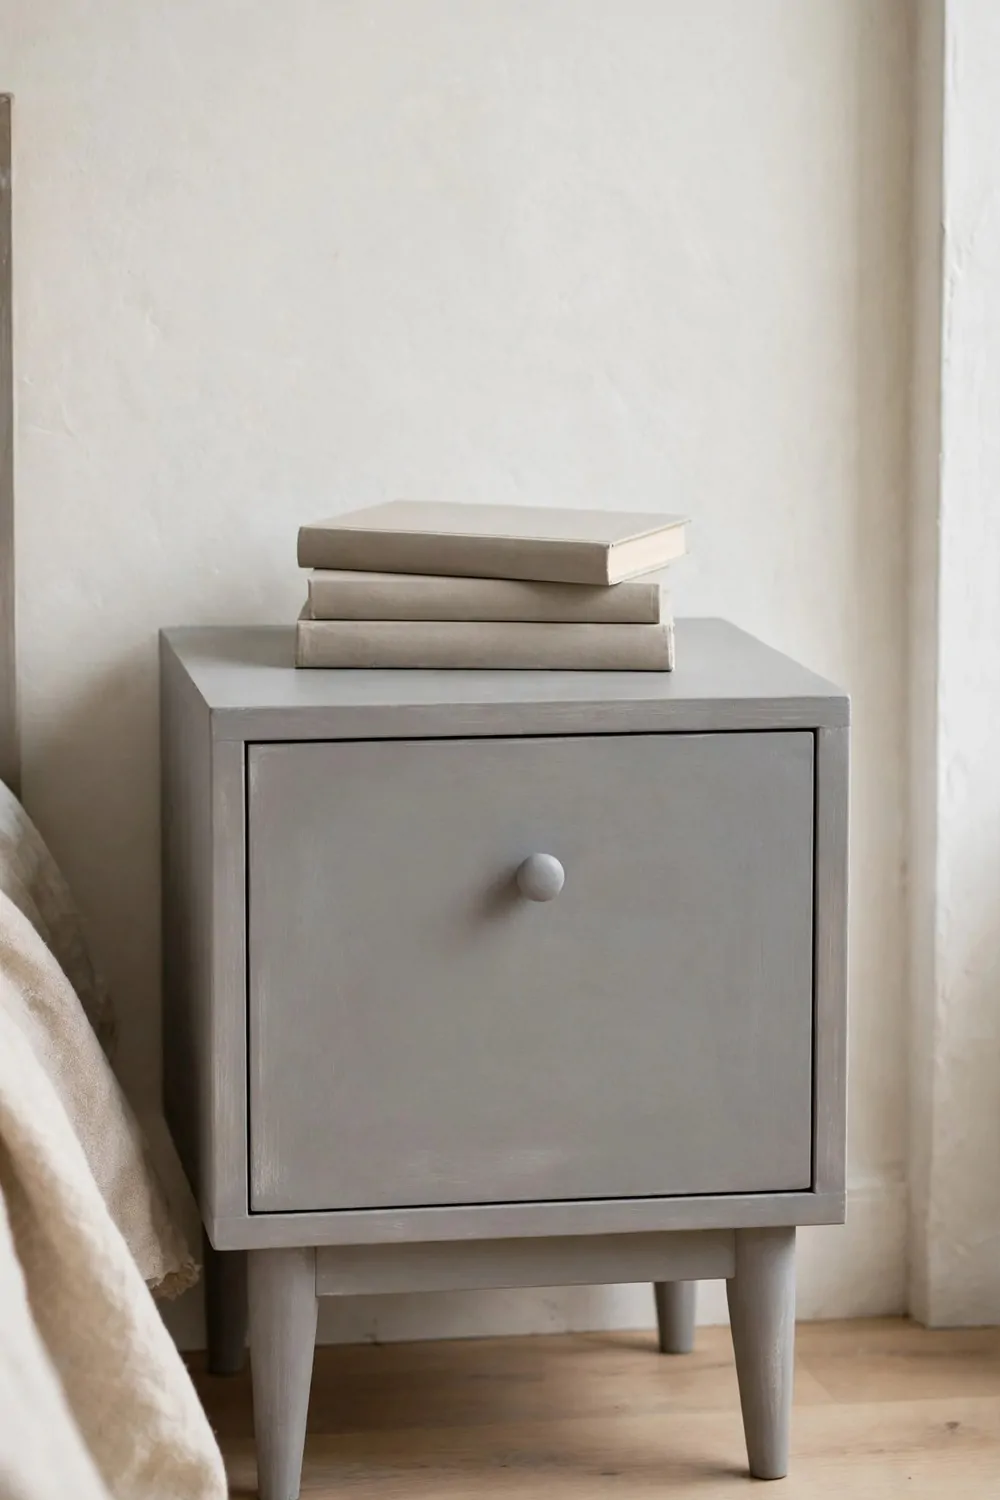
A matte chalk-style finish has almost no shine. It looks soft and flat and it suits an old nightstand very well.
I loved how it hid the small marks on my second-hand nightstand. The flat finish made the old wood look calm and even.
Clean the nightstand first and let it dry. Then sand the rough spots with light strokes.
Brush the chalk-style paint on in thin coats. I did two coats on the top and two coats on the sides.
Do not rush this step. Let each coat dry fully before you add the next one, or the paint can lift off.
A soft wax coat on top can help the finish last longer. Smooth a little clear wax over the top once it feels dry to the touch.
Keep the look simple with one plain knob. A dark knob looks good on a pale chalk-style finish.
I sanded in a well-aired space on my porch and I wore a plain mask while I sanded.
Give the wax a day to set before you put a lamp or a book on the top. A small tin of chalk-style paint and a small tin of clear wax cost $16 to $28 in total.
5. Natural Wood Revival With Clear Varnish
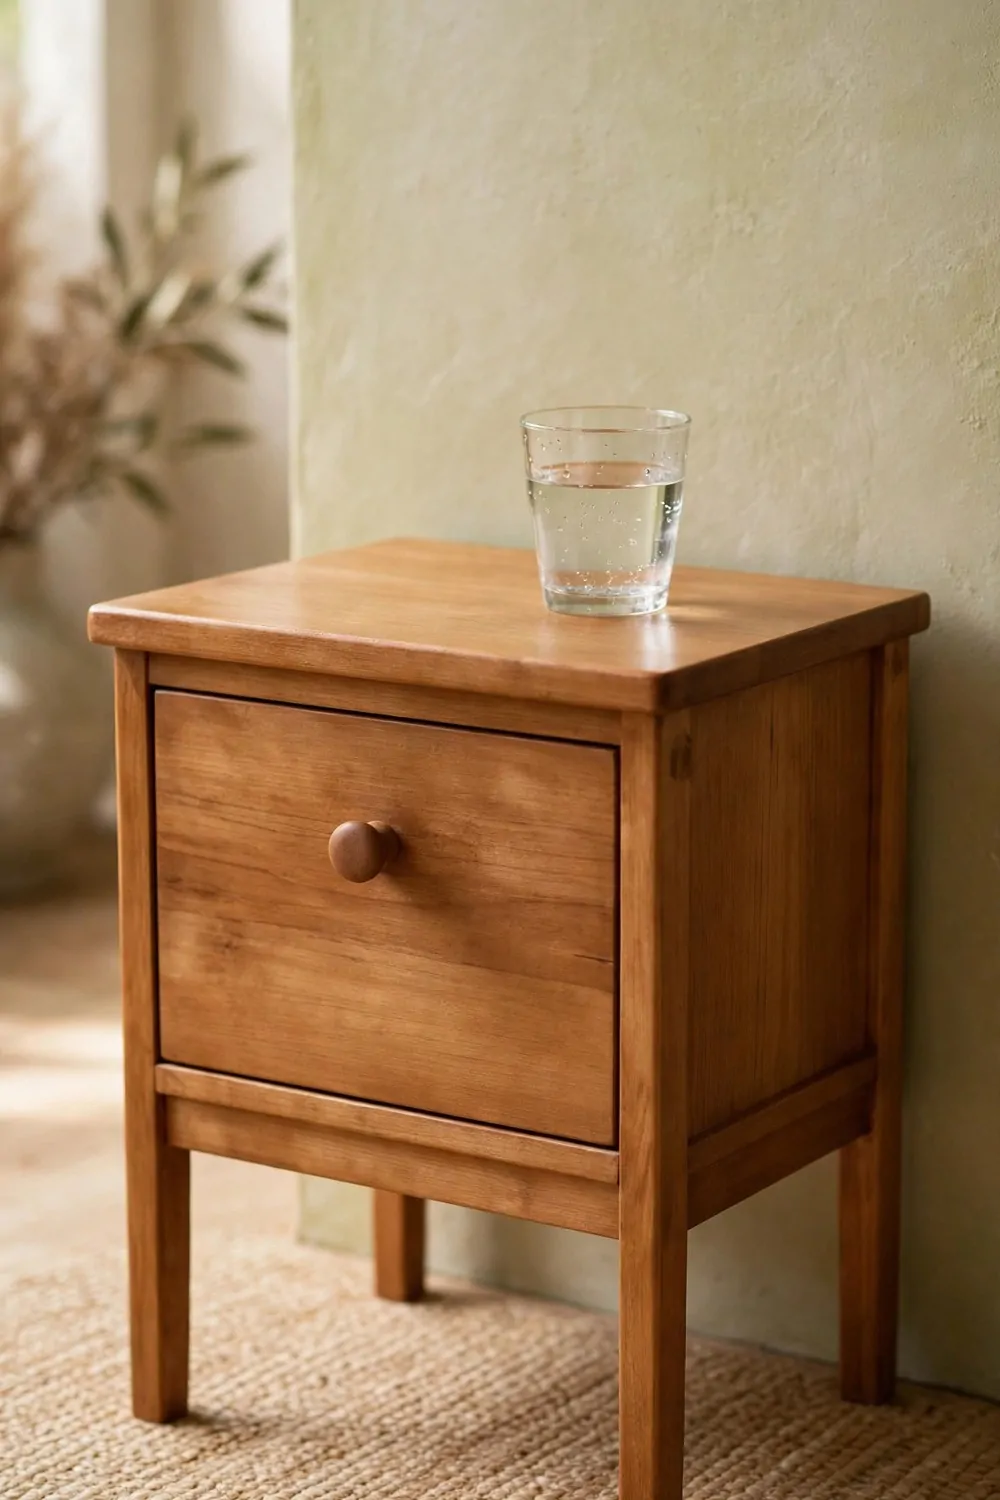
Some nightstands have good wood under the old paint. Mine did, and a clear varnish let that wood show through.
I sanded the old finish off the top first. The wood under it was warm and pale and it had a nice grain.
Take your time with the sanding. Start with rough paper and then move to fine paper for a smooth top.
Here is the order I followed:
- Sand off the old finish
- Wipe off all the dust with a damp cloth
- Brush on one thin coat of clear varnish
- Let it dry and add a second thin coat
Sand in a spot with fresh air and keep a plain mask on while you work. The dust gets in the air fast.
Clear varnish keeps the wood look but it adds a light shield on top. Water marks wipe off with ease when the varnish is dry.
I left the drawer fronts in plain wood too. The whole nightstand looked warm and honest next to my bed.
Do not put a wet glass on it until the varnish is fully hard.
Let the last coat dry fully before you use the nightstand each night. Sandpaper, a brush and a small tin of clear varnish cost $12 to $22 in total.
6. Brass Cup Pulls Swap
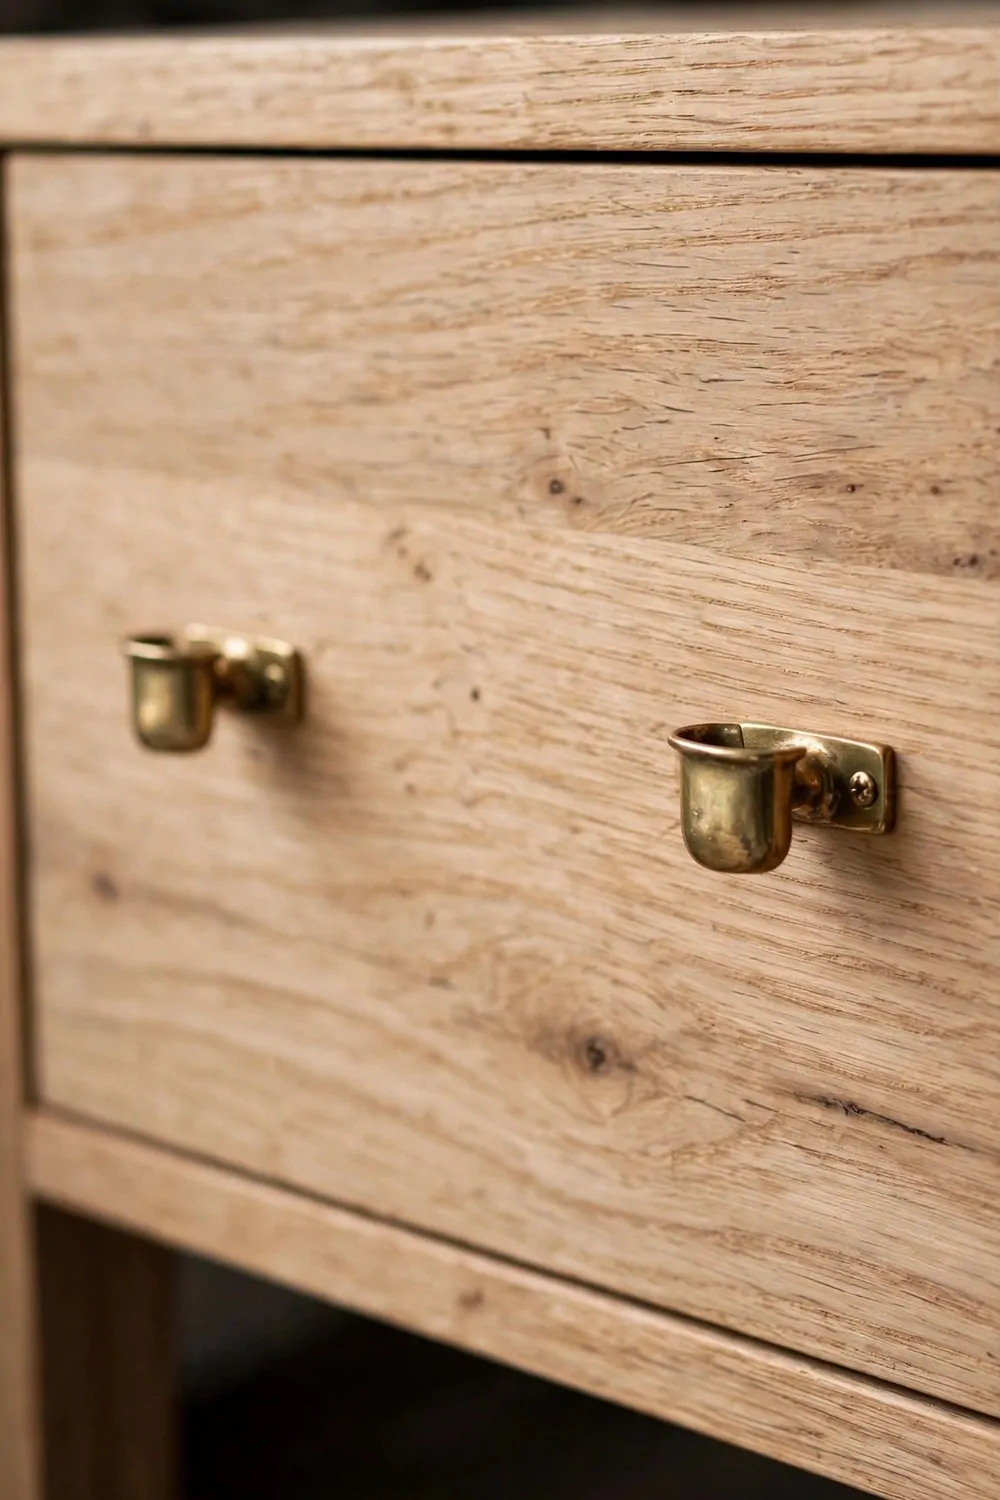
A brass cup pull is a small half round cup that you pull with your fingers. It looks old in a good way and it feels nice in your hand.
My nightstand had small plain knobs that did not suit it. I took them off and I filled the old holes with wood filler.
Let the filler dry and sand it smooth. Then mark the spot for each new cup pull with a pencil.
Brass cup pulls sit low on the drawer front. They do not stick out far, so they do not hit the wall or the bed.
I held each pull in place and I marked the screw holes with care.
Drill small pilot holes first. That helps the screws go in straight and it stops the wood from splitting.
Screw each pull on from the back of the drawer front. Check that each one sits flat and straight before you move on.
Warm brass looks good on white paint and on dark wood. It adds a small bit of shine without looking loud.
Wipe the pulls with a dry cloth to keep them clean. Two brass cup pulls and a small tube of wood filler cost $11 to $20 in total.
7. Leather Strip Pulls
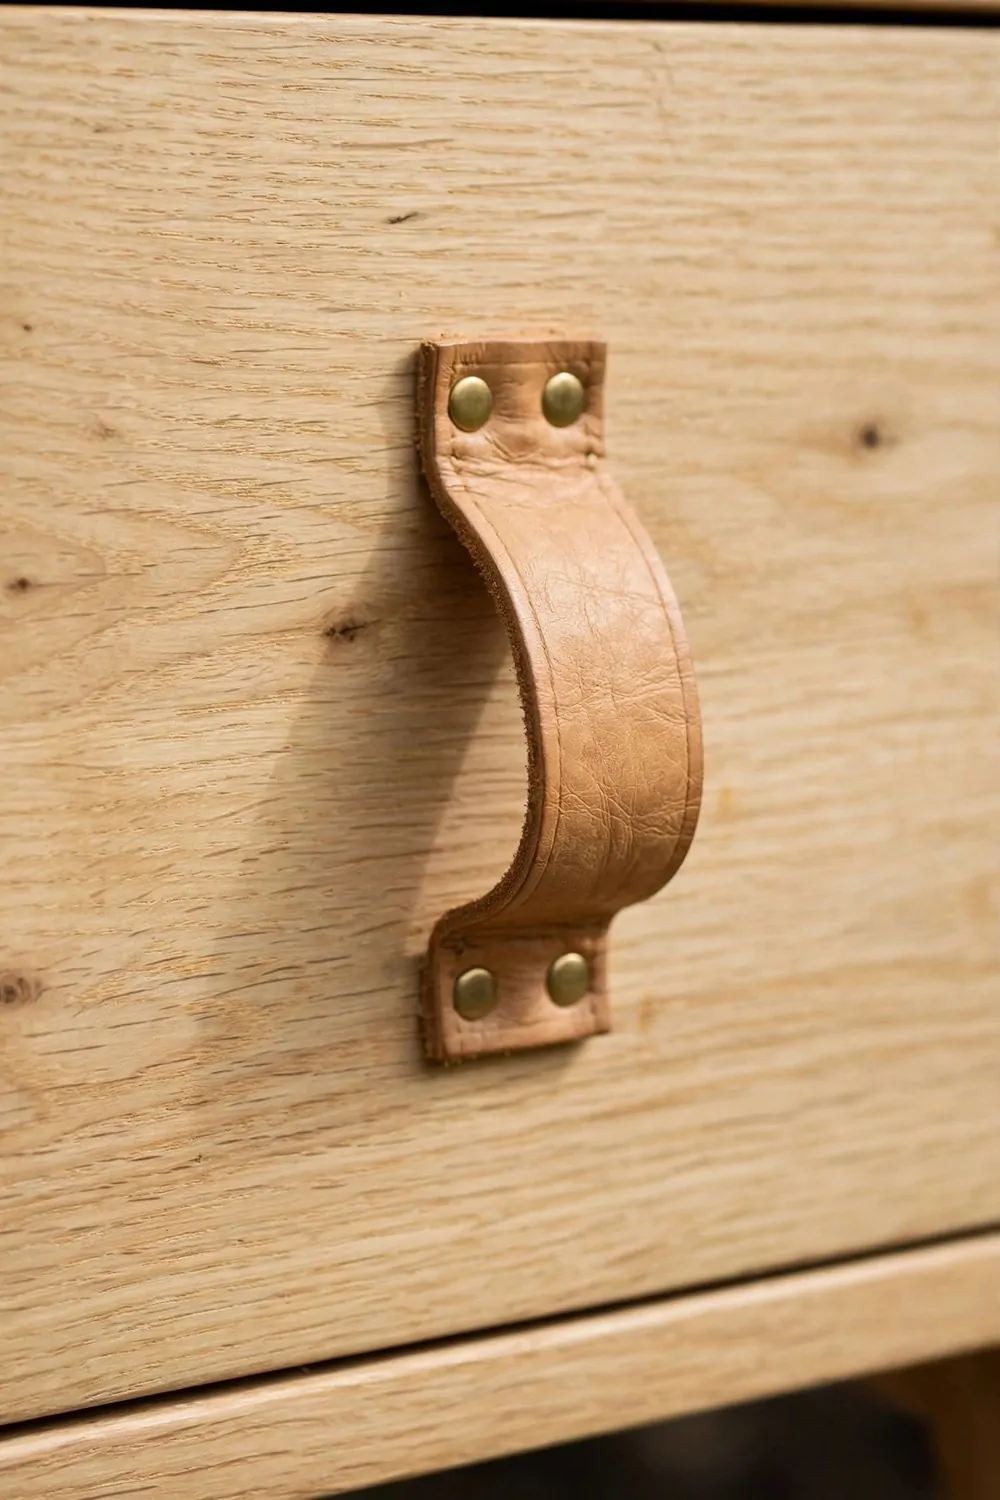
Leather strip pulls are short strips of leather that hang down from the drawer front. They are soft to touch and they look warm and simple.
I cut two strips from a plain piece of leather. Each strip was about as long as my hand and about as wide as two fingers.
Fold each strip in half to make a loop. The loop is the part you pull with your fingers.
Fix each loop to the drawer front with two small brass studs at each end. The studs hold the leather flat and stop it from pulling loose.
Plain brown leather suits a white nightstand well. Dark leather suits a pale wood nightstand well.
Keep the strips the same length. If one is longer than the other, it will look off each time you open the drawer.
This is a good fix for a second-hand nightstand with worn knobs. You do not need to fill old holes if the new studs go in the same spot.
Leather gets softer with time. It will feel better in your hand after a few weeks of use.
Trim any rough edge with sharp scissors for a neat look. A plain piece of leather and a set of small brass studs cost $8 to $15 in total.
8. Cane Drawer Front
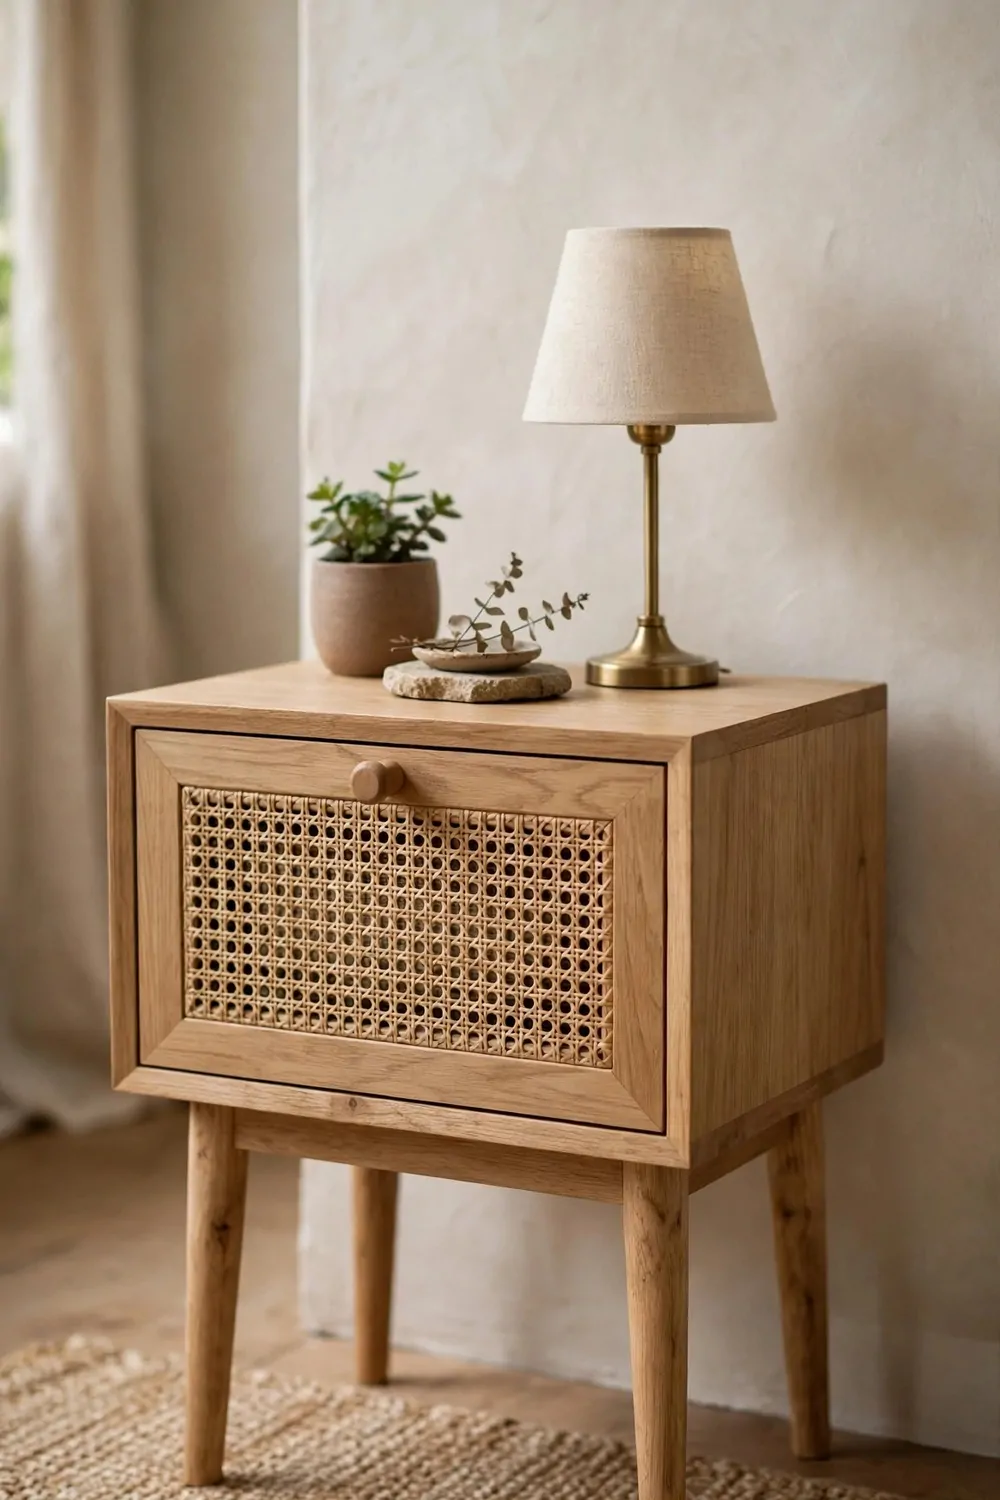
I found a plain old nightstand at a thrift shop. Its drawer front was flat and dull, and I knew cane webbing would give it a fresh look.
I took the drawer out and set it on a table in my yard.
I sanded the front with light strokes. I wiped the dust off with a damp cloth. I let it dry in a well-aired space and wore a plain mask while I sanded.
I cut a piece of cane webbing to fit the front.
I spread a thin layer of glue on the back of the webbing. I pressed it flat on the drawer front and held it for a minute.
I added a thin wood frame around the edge to hold the webbing in place. I fixed the frame with small nails and a bit of glue. I wiped off any glue that came out at the sides.
I let the glue dry all day before I put the drawer back.
I gave the frame a coat of paint to match the rest of the nightstand. I let the paint dry fully before I used the drawer again.
A small roll of cane webbing and a tin of glue cost $12 to $20 in total.
9. Stencilled Drawer Front Pattern
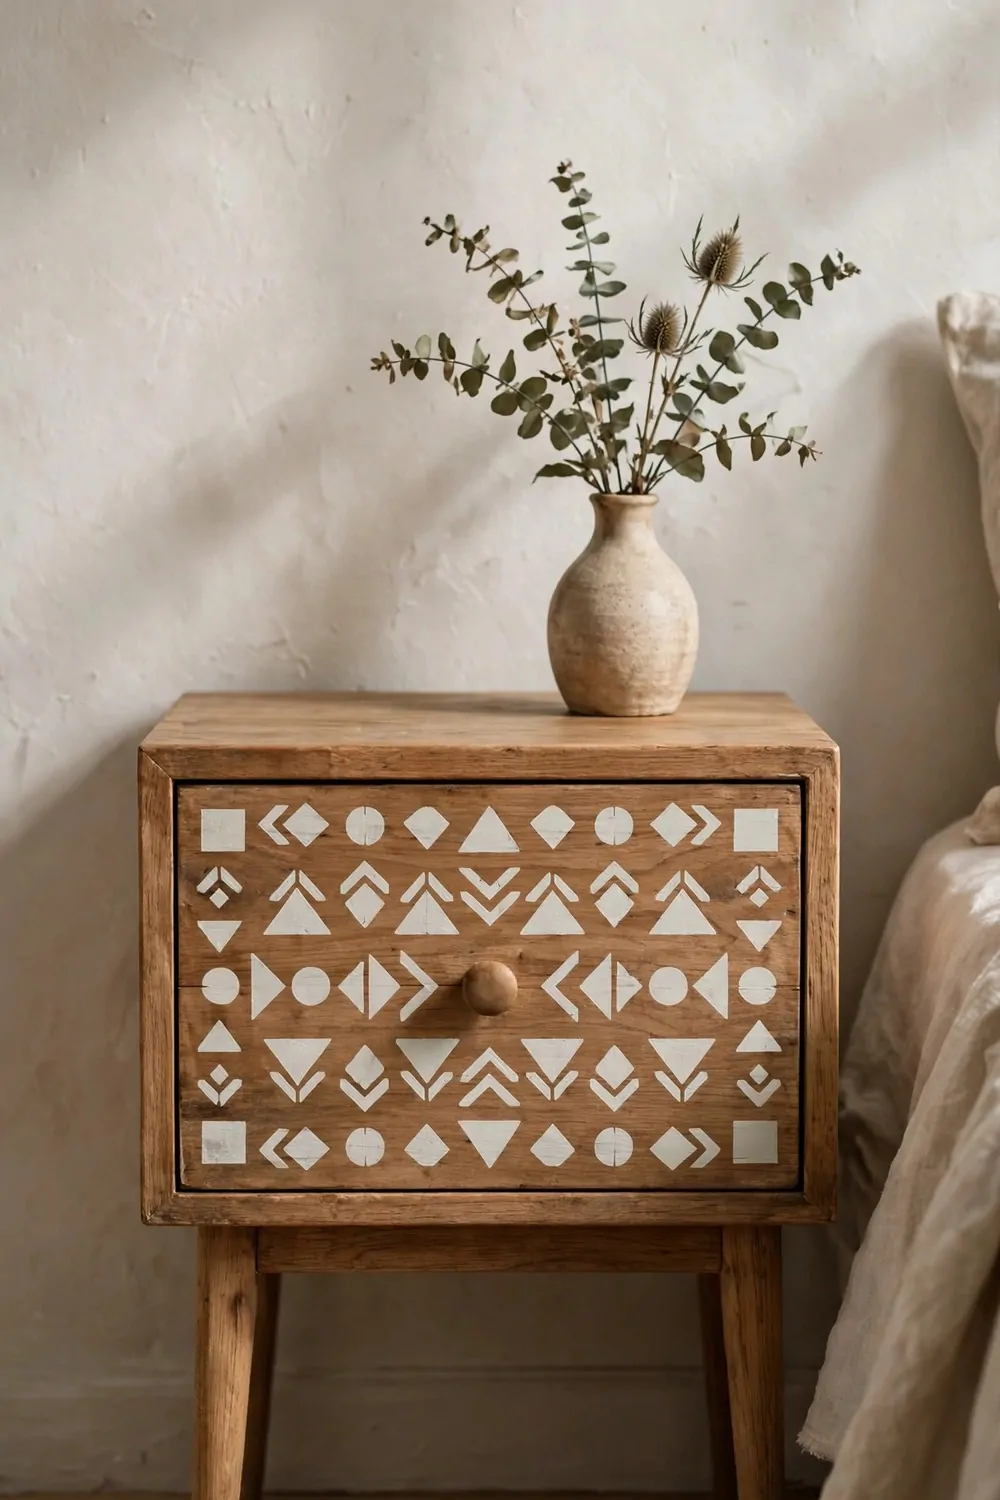
A plain drawer front can look new with a stencil and a bit of paint.
I cleaned my thrifted nightstand drawer front and let it dry.
I picked a simple shape stencil from a craft shop. I held it flat on the drawer front. I taped the edges so it would not move.
I dabbed paint on with a small sponge in light dabs so the paint would not run under the stencil.
- A stencil
- A small sponge
- A tin of paint
- Tape
I lifted the stencil off with care and let the first shape dry.
I moved the stencil to the next spot and dabbed paint on again. I kept the shapes in neat rows across the front. I left a small gap between each shape.
I let the paint dry fully before I touched the front again.
I put a clear coat on top to keep the shapes safe from marks. I let that dry too before I put the drawer back in the nightstand.
A stencil, a small sponge and a tin of paint cost $8 to $15 in total.
| Item | Main change | Typical cost |
|---|---|---|
| A small tin of soft white paint and one round knob | paints the nightstand soft white and adds a round knob | $9 to $16 |
| A small tin of sage green paint and one ceramic knob | paints the nightstand sage green and adds a ceramic knob | $13 to $22 |
| Two small tins of paint and plain tape | paints the body deep blue and the top drawer front soft white | $15 to $25 |
| A small tin of chalk-style paint and a small tin of clear wax | gives the nightstand a matte chalk-style finish with a wax coat | $16 to $28 |
| Sandpaper, a brush and a small tin of clear varnish | sands the old finish off and seals the wood with clear varnish | $12 to $22 |
| Two brass cup pulls and a small tube of wood filler | fills old knob holes and fits two brass cup pulls | $11 to $20 |
| A plain piece of leather and a set of small brass studs | fits two leather strip pulls on the drawer front | $8 to $15 |
| A small roll of cane webbing and a tin of glue | adds a cane webbing panel to the drawer front | $12 to $20 |
| A stencil, a small sponge and a tin of paint | stencils a shape pattern on the drawer front | $8 to $15 |
10. Paper-Covered Drawer Fronts
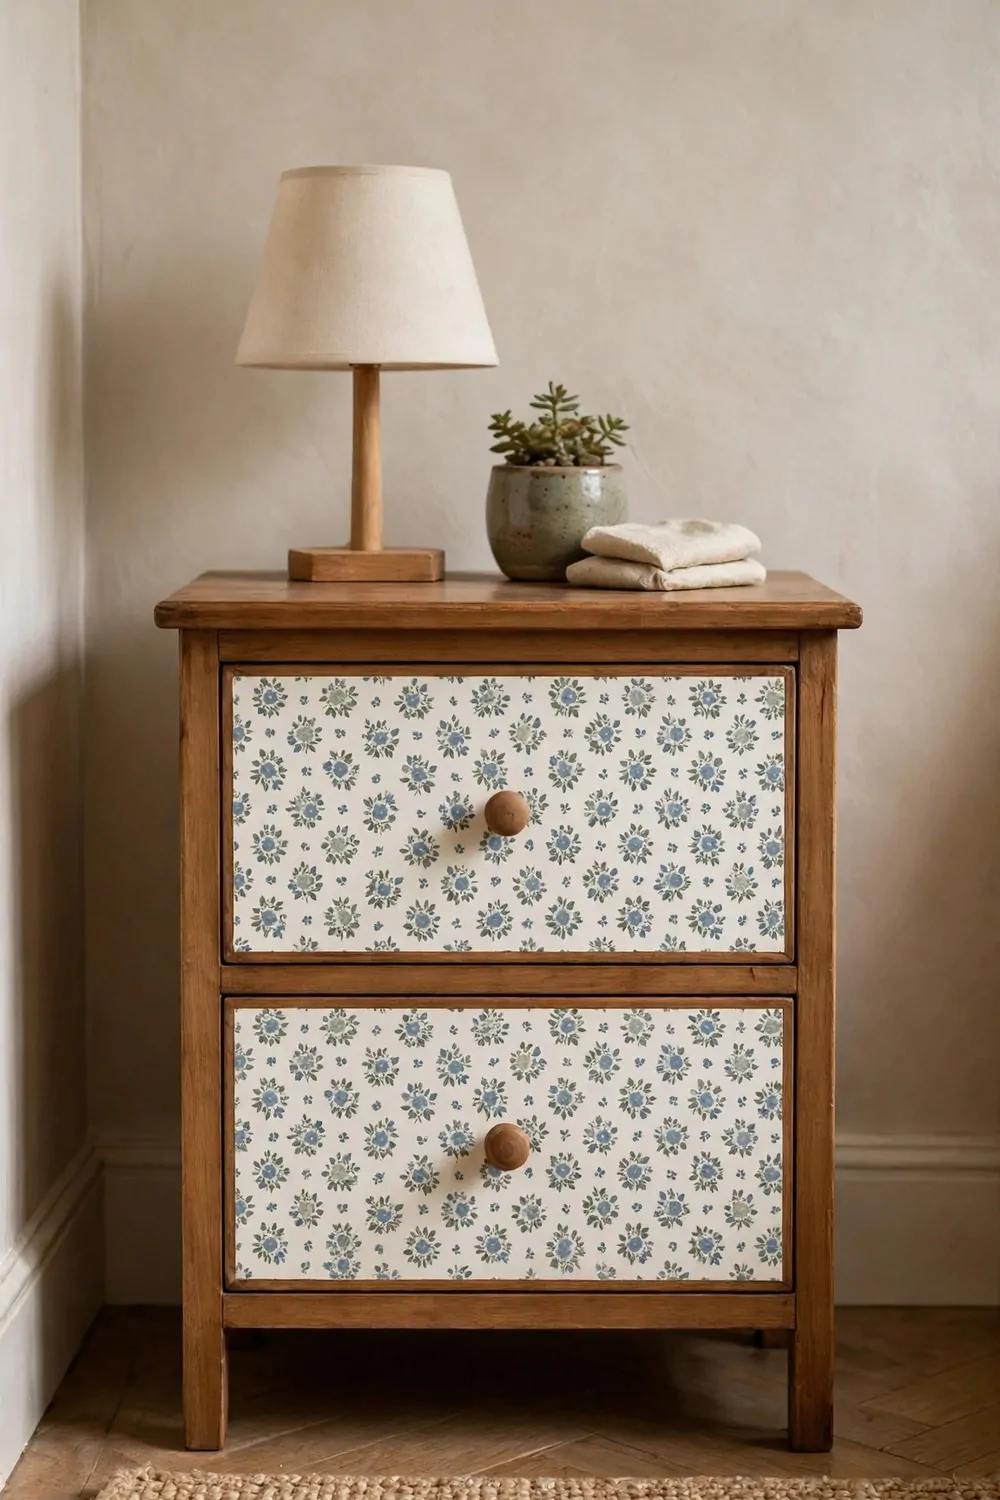
I had a thrifted nightstand with a drawer front full of small marks. I covered it with plain paper, and it looked fresh again.
I picked a thick paper with a soft blue flower print.
I took the drawers out and wiped the fronts clean. I let them dry for a few minutes. I cut the paper to fit each front with a small edge to fold over.
I spread glue on the front in a thin, even layer.
I laid the paper on top and smoothed it from the middle out to the sides. I pushed out each air bubble with my hand.
I folded the paper edge over the sides of each drawer front. I pressed the folds flat and let the glue dry. I trimmed off any loose bits with small scissors.
I put two thin coats of clear coat on top to keep the paper safe.
I let each coat dry fully before I put the drawers back in the nightstand. I love how the soft print looks next to my bed now.
A few sheets of thick paper, a tin of glue and a tin of clear coat cost $6 to $14 in total.
11. Drawer Out, Open Shelf In
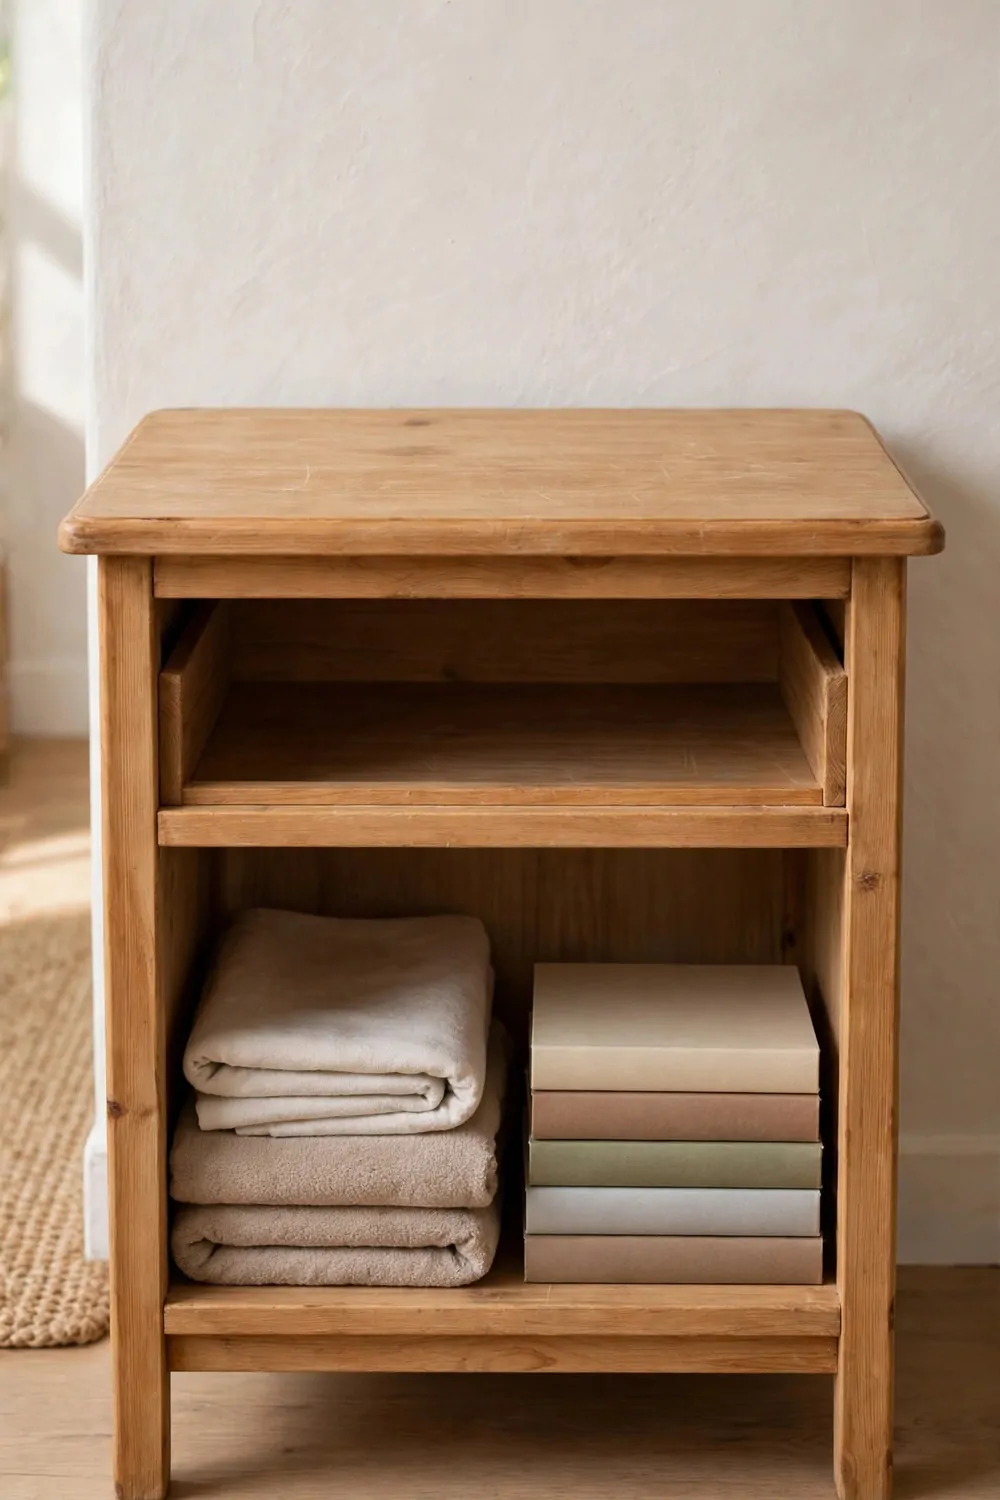
I had an old nightstand with a drawer that stuck each time I pulled it. I took the drawer out for good and made an open shelf in its place.
I slid the drawer out and set it to one side.
I sanded the inside of the empty drawer space with light strokes. I brushed the dust away with a clean cloth. I sanded with the window open and a plain mask on my face.
I gave the inside a light coat of clear varnish so it would look clean and bright.
I cut a thin board to fit across the middle of the space. I fixed it in place with small wood screws so it would hold books and a small lamp.
I let the varnish dry fully before I put books on the new shelf. I put a stack of books on the low shelf beside folded towels, and I left the top clear.
The open shelf makes it easy to grab a book at night.
I left the shelf board plain for a neat look. It gives the nightstand a crafted feel, and my room feels more open now.
A thin board, a tin of clear varnish and a few small screws cost $10 to $18 in total.
12. Slide-Out Tray Under the Top
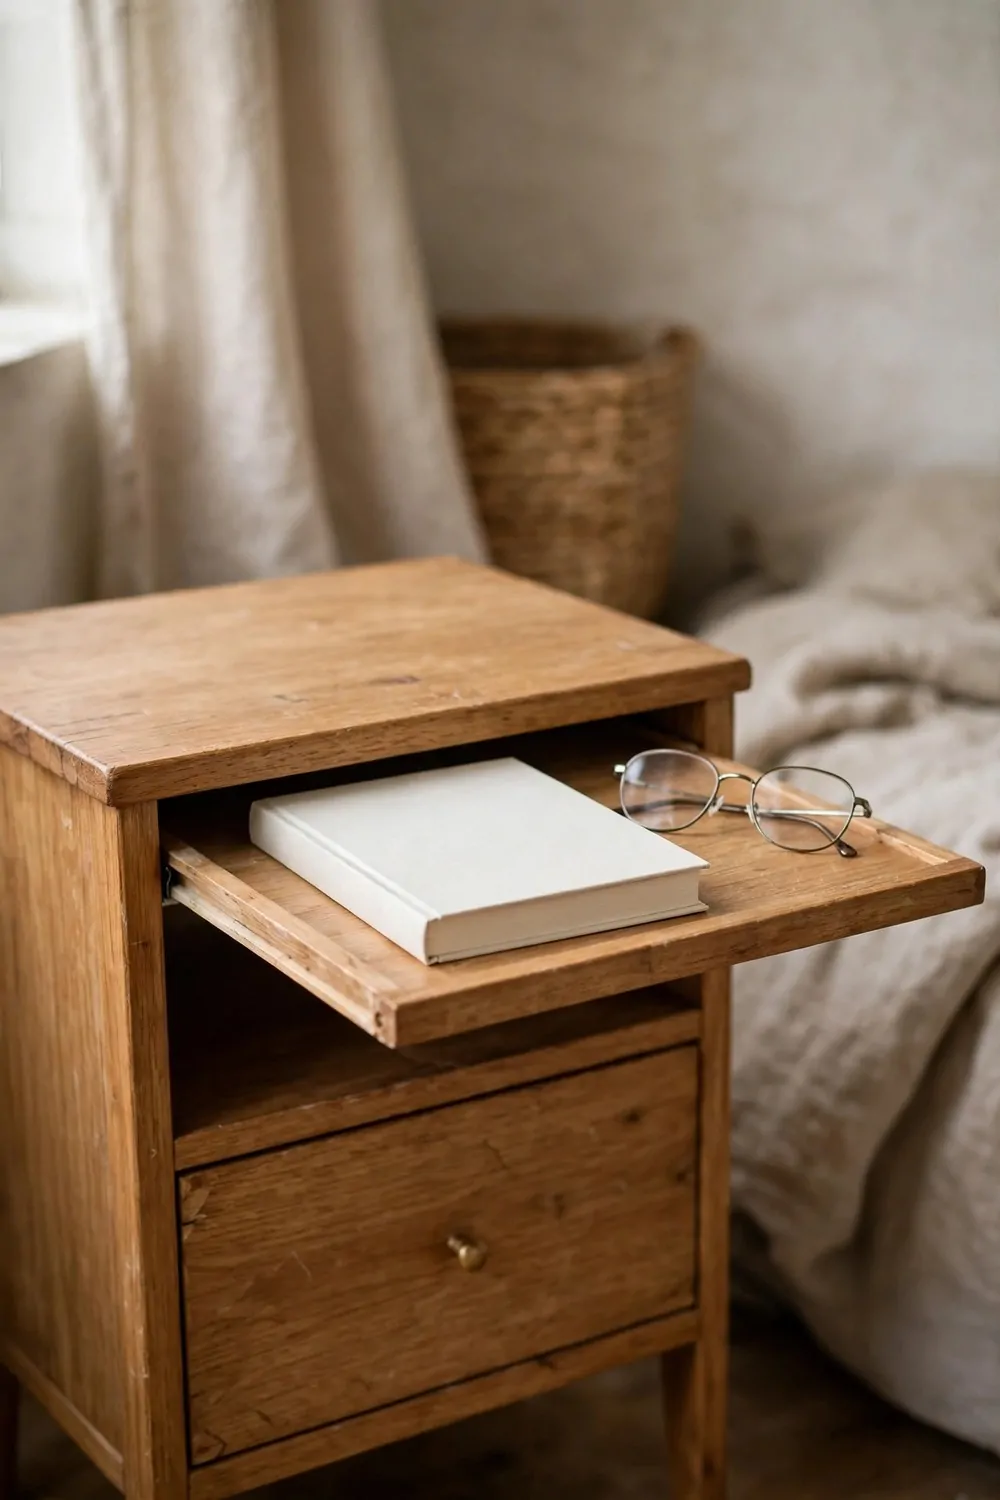
My nightstand top was always full of small bits. I added a slide-out tray under the top, and now the top stays clear.
I took the drawer out so I could work on the top part with ease.
I cut a thin tray from a wood board. I sanded the edges smooth so the tray would slide well. I cleared the dust off with a damp rag.
I fixed two small rails under the top of the nightstand.
- A thin wood board for the tray
- Two small rails
- A few small screws
I set the tray on the rails and slid it in and out a few times to check it.
I gave the tray a coat of paint to match the nightstand. I let the paint dry fully before I slid the tray back in.
Now I keep a small notebook and my glasses in the tray.
I slide it out at night and slide it back in the morning. It is a small change, but it makes my nightstand much tidier.
A thin wood board and two small rails cost $12 to $20 in total.
13. Small Caster Wheels for a Rolling Nightstand
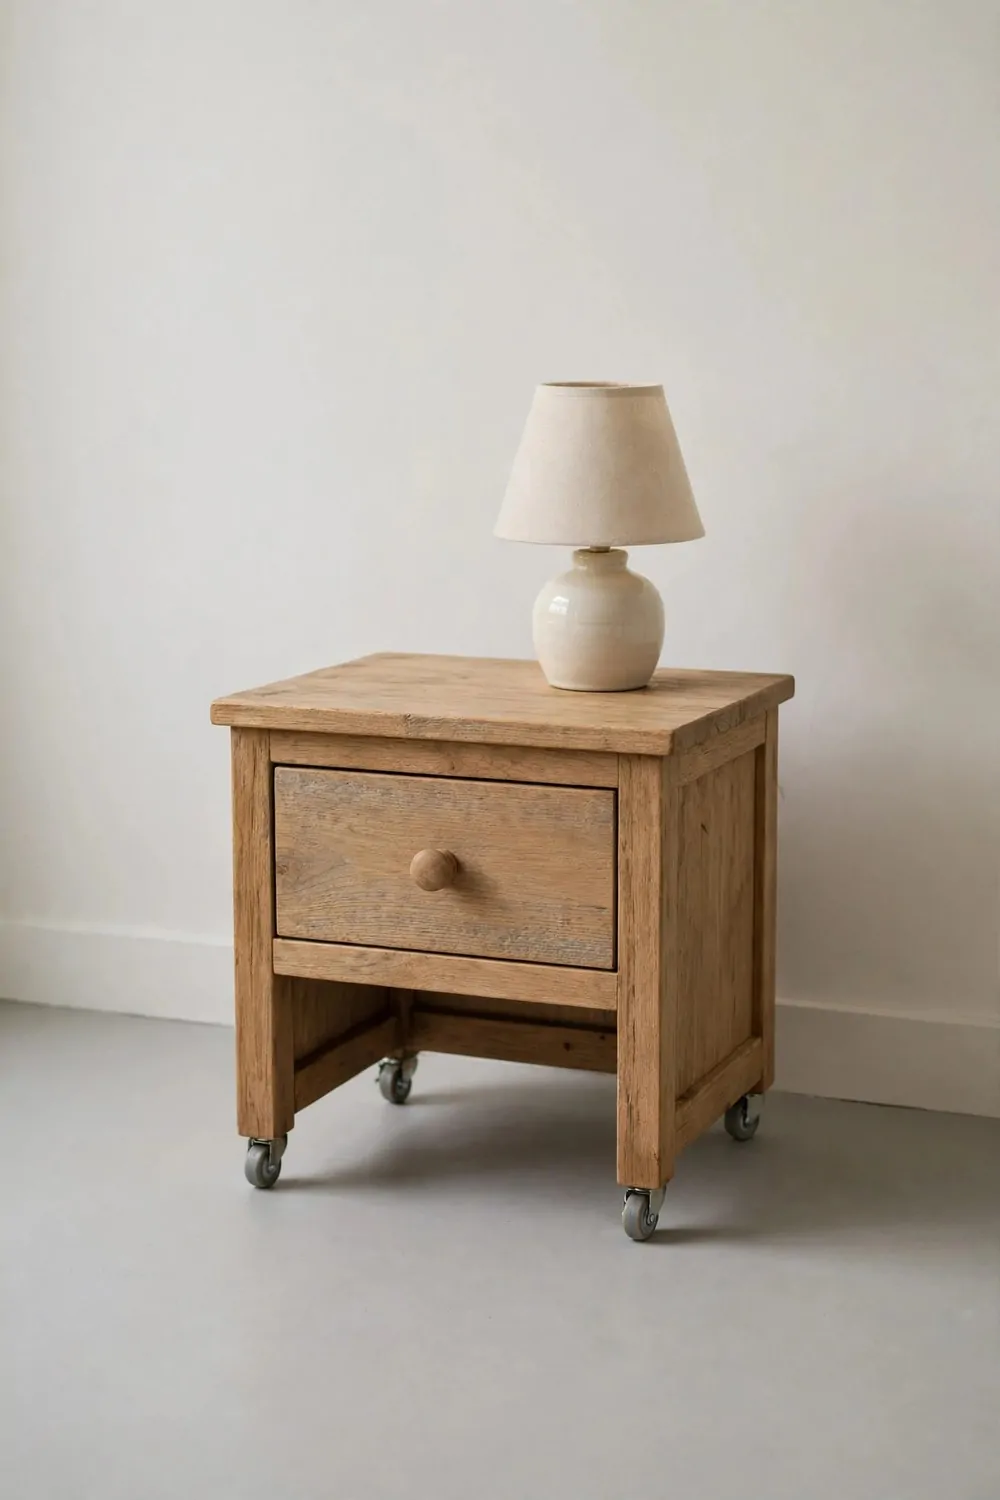
I like to move my nightstand when I clean my room. I added small caster wheels, and now it rolls with ease.
I turned my thrifted nightstand on its side on a soft cloth.
I picked four small caster wheels with a lock on two of them. I held each wheel in place at a corner. I marked the screw holes with a pencil.
I fixed each wheel with short screws.
I made sure each screw was tight so the wheel would not wobble. I turned the nightstand back up and gave it a small push to test it.
I locked the two lock wheels when I put the nightstand next to my bed. I left the lock off when I wanted to move it for cleaning. I like that I can move it with one hand now.
I checked the wheels once more after a week to make sure they were still tight.
The nightstand rolls on a wood floor with ease, and it stays still when I lock the wheels. It is a simple fix that makes a big change in my room.
Four small caster wheels and a pack of short screws cost $12 to $19 in total.
14. Charging Nook Inside the Drawer
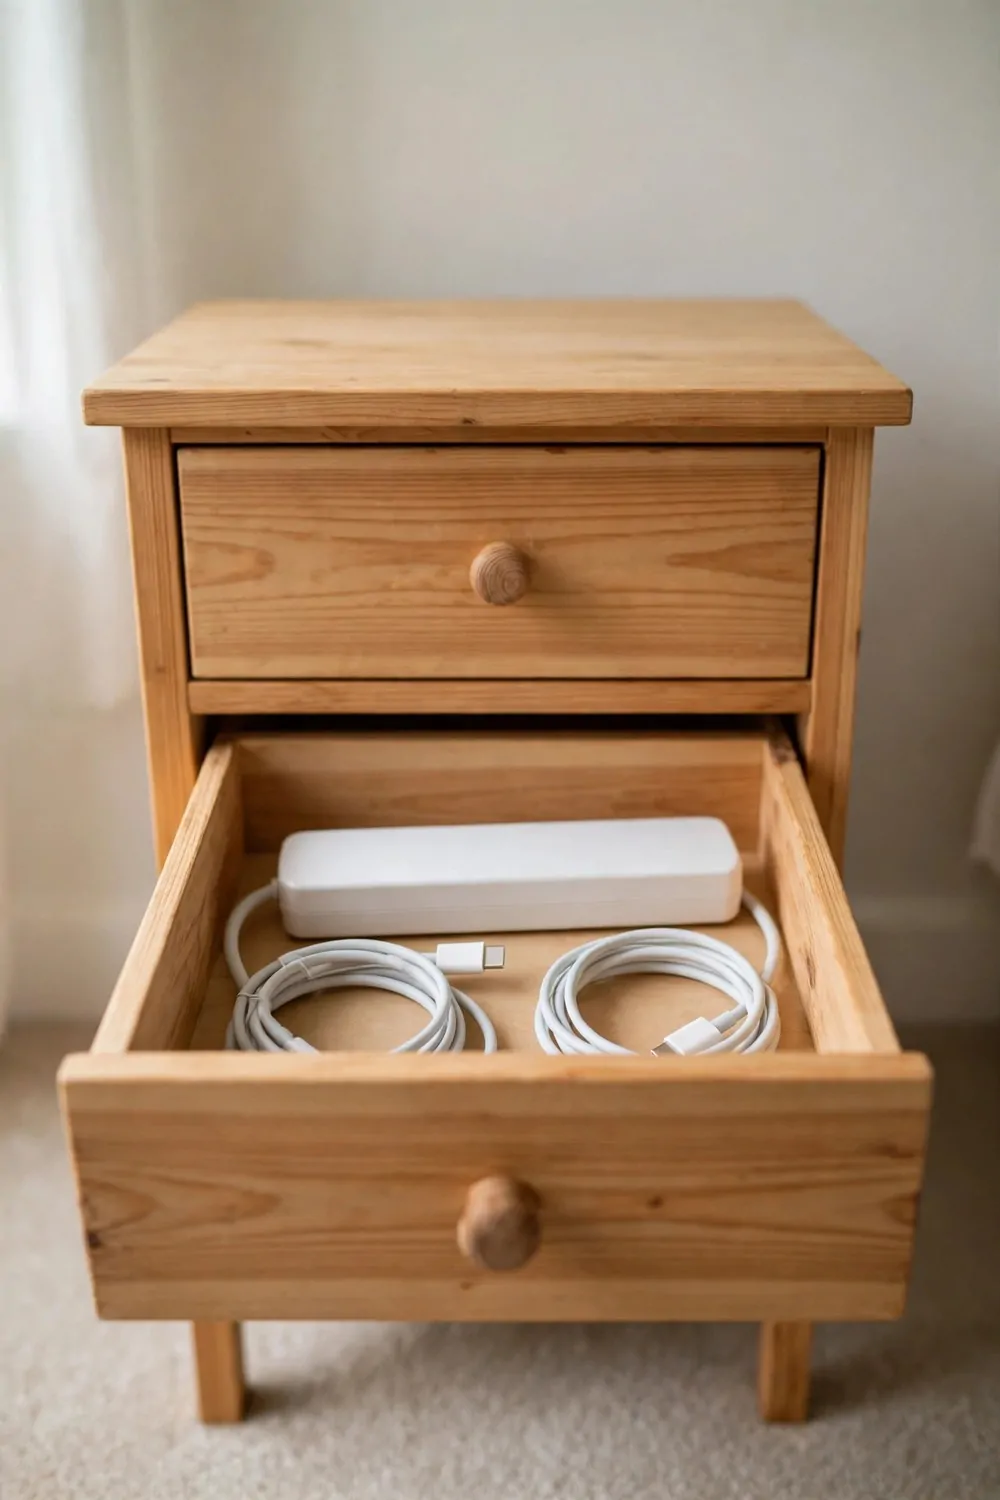
My phone cable was always on the floor next to my bed. I made a charging nook inside my nightstand drawer, and now the cable stays neat.
I took the drawer out of my thrifted nightstand.
I cut a small round hole at the back of the drawer for the cable to pass through. I sanded the edge of the hole smooth so the cable would not rub. I wiped the edge clean with a damp cloth.
I put a plain power strip inside the drawer near the back.
I fed the power strip cord out through that small round hole. I plugged the cord into the wall plug behind the bed. I kept the strip flat so the drawer would still close well.
I put my phone charger cable in the strip and coiled the extra cable in a neat loop. I left a small space at the front of the drawer for my phone at night. I made sure no cable was pinched when I closed the drawer.
The white strip and the coiled cables fit the drawer with room to spare.
Now I put my phone in the drawer at night, and it charges while I sleep. The top of the nightstand stays clear, and the cables stay out of sight.
A plain power strip and a phone charger cable cost $13 to $22 in total.
15. Plant Stand Nightstand
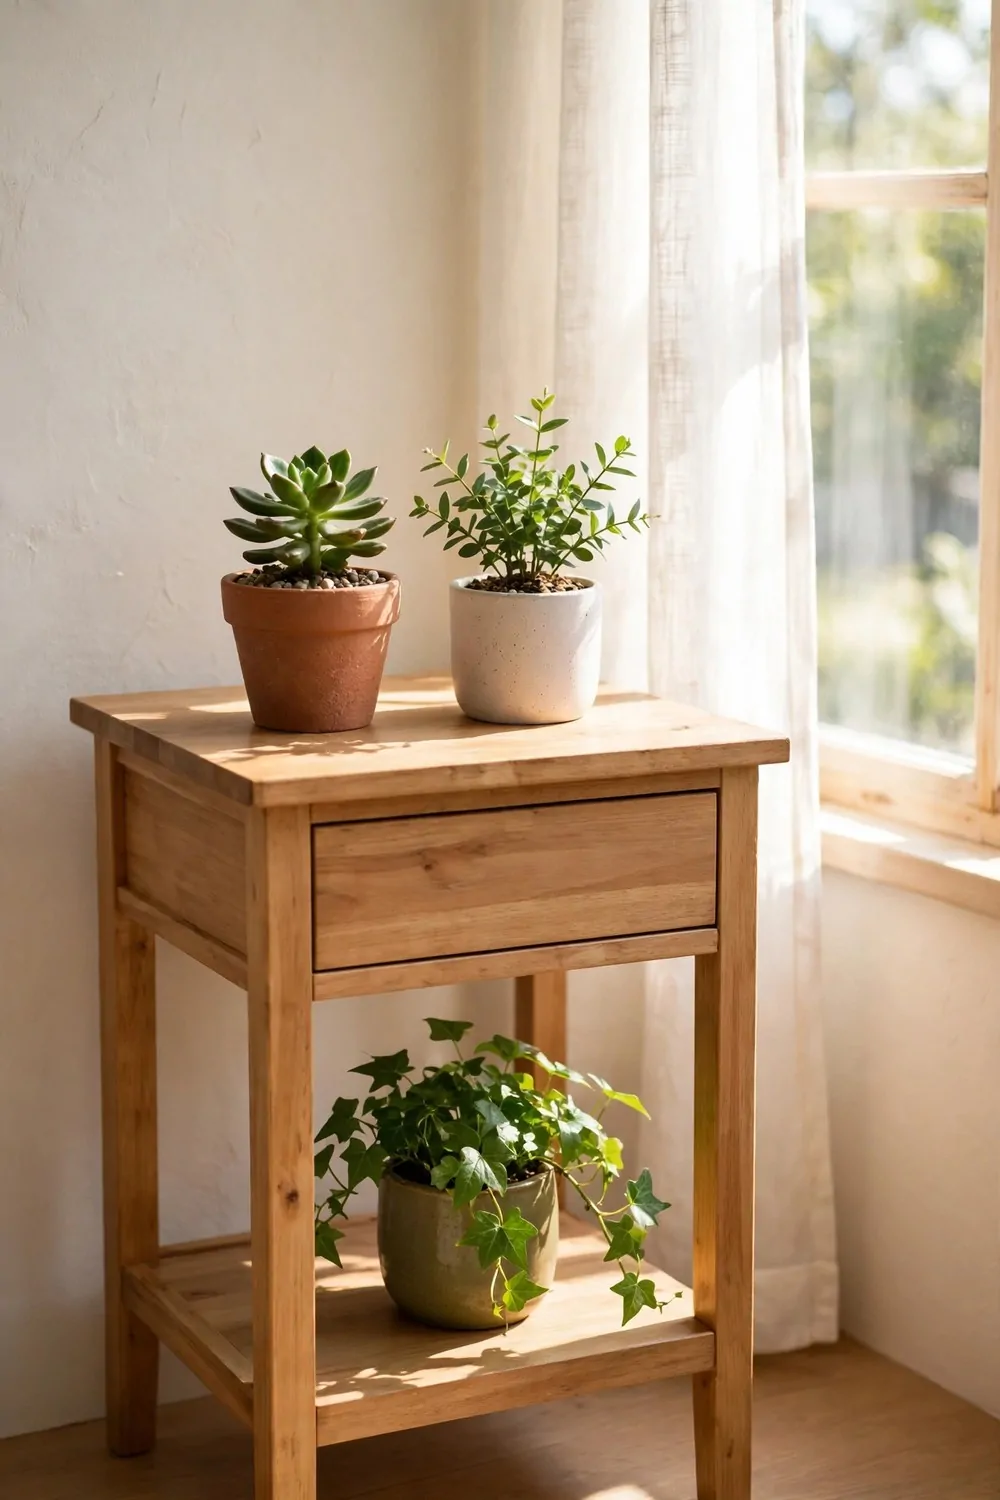
I had a small thrifted nightstand that I did not need next to my bed. I turned it into a plant stand for the corner of my room.
I cleaned the nightstand and let it dry in the sun.
I left the wood plain so the green leaves stand out in my room. I put a clear coat on top to keep the wood safe from water marks.
I set two small potted plants on the top, one in a clay pot and one in a plain white pot.
I set a third small pot on the low shelf. I kept the drawer for my small plant tools and a watering can. I put the nightstand near a window so the plants get light.
I water the plants with care so no water runs on the wood.
I wipe the top dry after each water so it stays neat. I move the pots round once a week so each side gets light. I love how green the corner looks now.
The drawer holds my small tools, and the top holds my plants. It is a simple way to give an old nightstand a new job in my home.
A tin of clear coat and three small pots cost $10 to $17 in total.
16. Bedside Tea Station
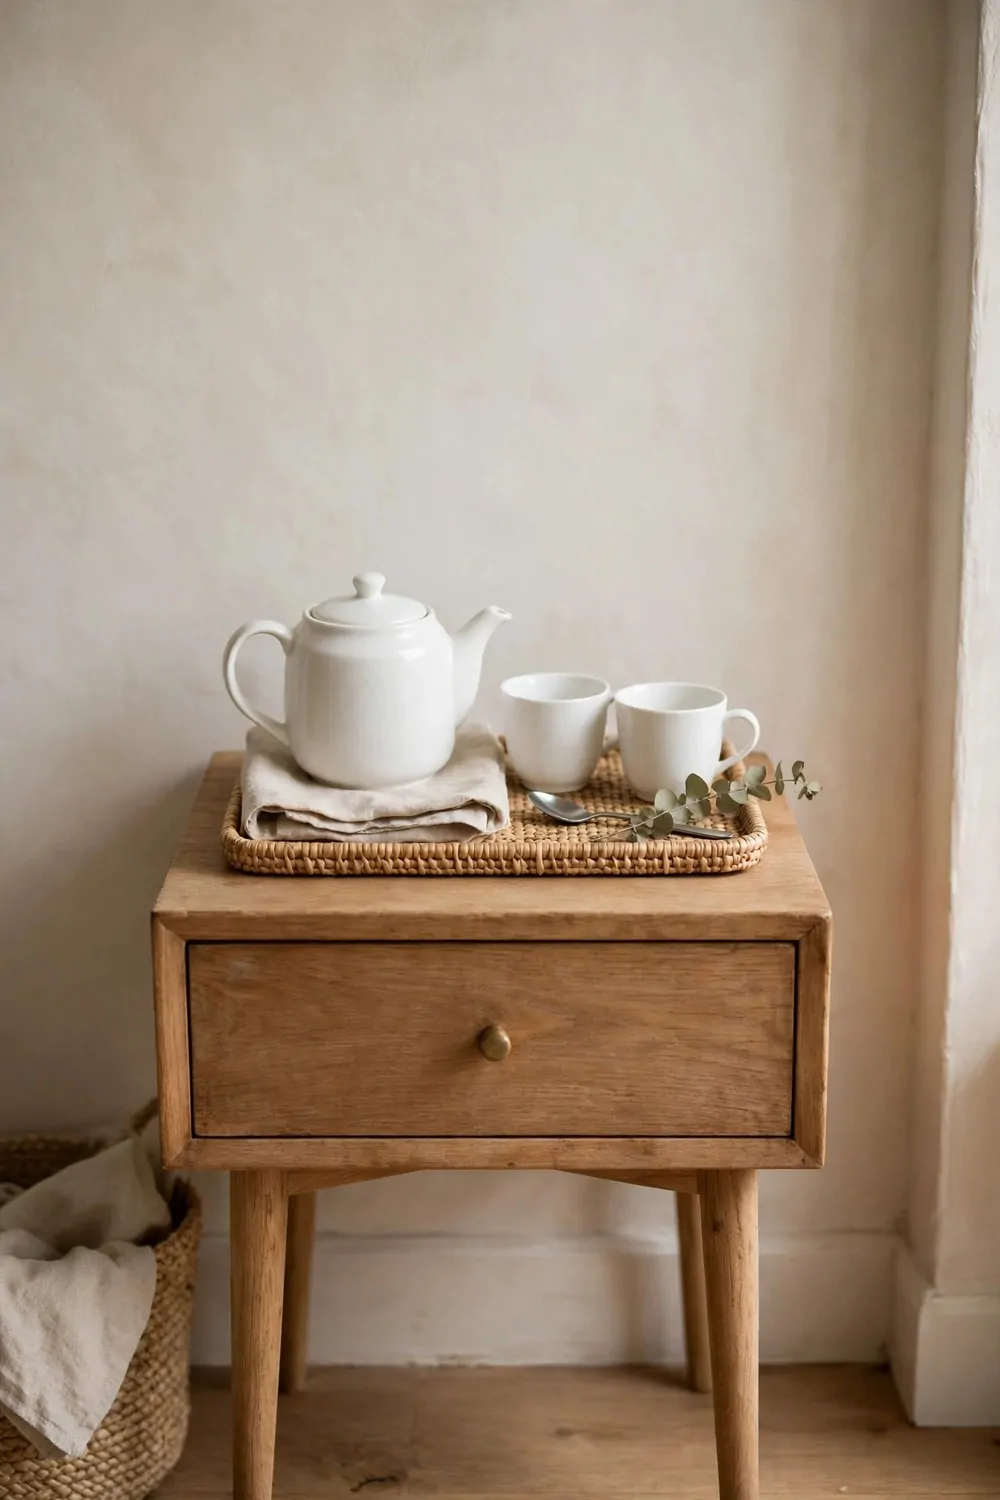
I found my old nightstand at a thrift shop for a few coins, and it now sits right by my bed. I gave it a quick clean and a light coat of clear varnish, and it looks fresh and calm.
The top is now my small tea spot for slow mornings and quiet nights.
I keep a small tray on top so spills stay in one place. A little teapot sits in the middle of the tray. Two plain cups wait beside it, ready for a warm drink.
A small spoon rests on the tray beside the cups, ready for a warm drink. I like to see the tray first thing, because it makes the whole corner feel ready.
- small tray
- little teapot
- two plain cups
- small spoon
The drawer holds extra tea bags and a few small spoons.
I sanded the top in a well-aired space on my porch and wore a plain mask while I worked. The old marks came off fast, and the wood felt smooth under my hand. I let the varnish dry fully before I put the tray back on top.
I did not add a lamp here, because the tray takes the whole top. The tea things are the whole point, and they look neat all in a row.
At night I fill the pot and set out one cup for the morning.
It is a tiny habit, but it makes my mornings feel slow and kind. A small tray, two plain cups and a small teapot cost $10 to $18 in total.
17. Kids’ Bedside Book Nook
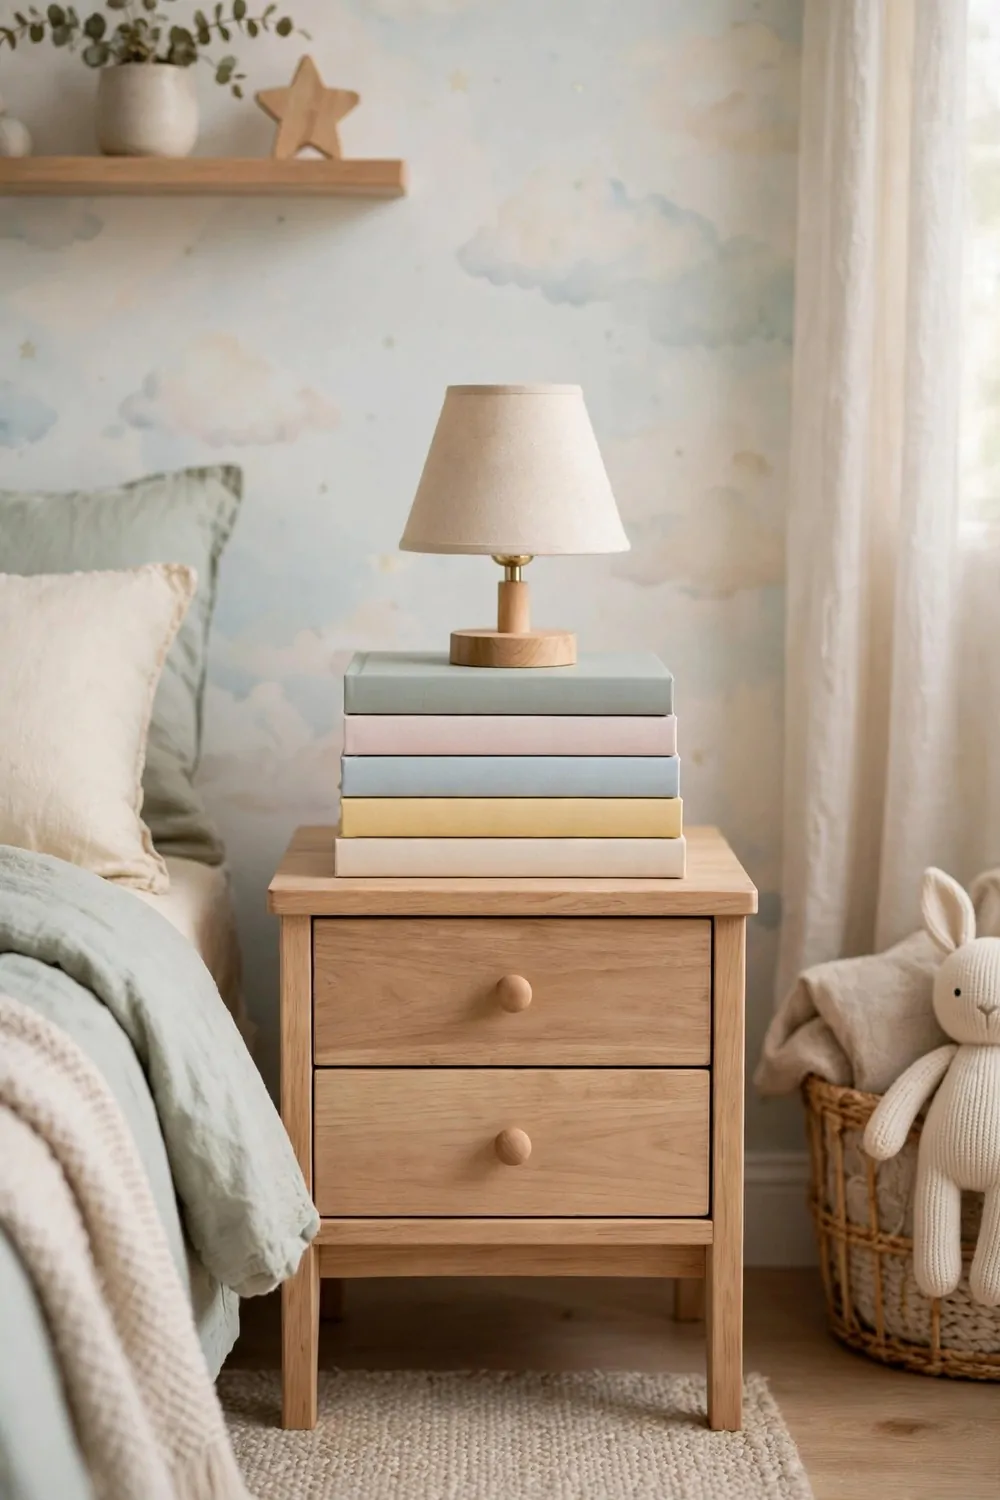
I turned a small thrifted nightstand into a book nook for the small bedroom. It sits low by the bed, so the books are easy to reach.
The top holds a small lamp with a soft warm glow.
I keep a short stack of picture books on the top. The books lie flat in a neat stack, and the lamp sits on top of them.
The lamp gives just enough light to read a few pages before sleep. I picked a small base that does not tip over when the top is bumped.
The drawer holds a small notebook and a few plain pencils.
I sanded the edges smooth in a well-aired space and wore a plain mask while I sanded. I wiped the dust off with a damp cloth and let it dry. Then I brushed on a thin coat of clear varnish, and I let it dry fully before I set the books back.
The books sit close to the bed, so they are easy to reach at night. It is a small touch, but it makes the nook feel like a real reading spot.
I keep the stack short, so the top never looks full or messy.
A tidy book nook makes bedtime feel calm and slow. A small lamp and a stack of plain books cost $8 to $15 in total.
18. Craft Supply Cabinet
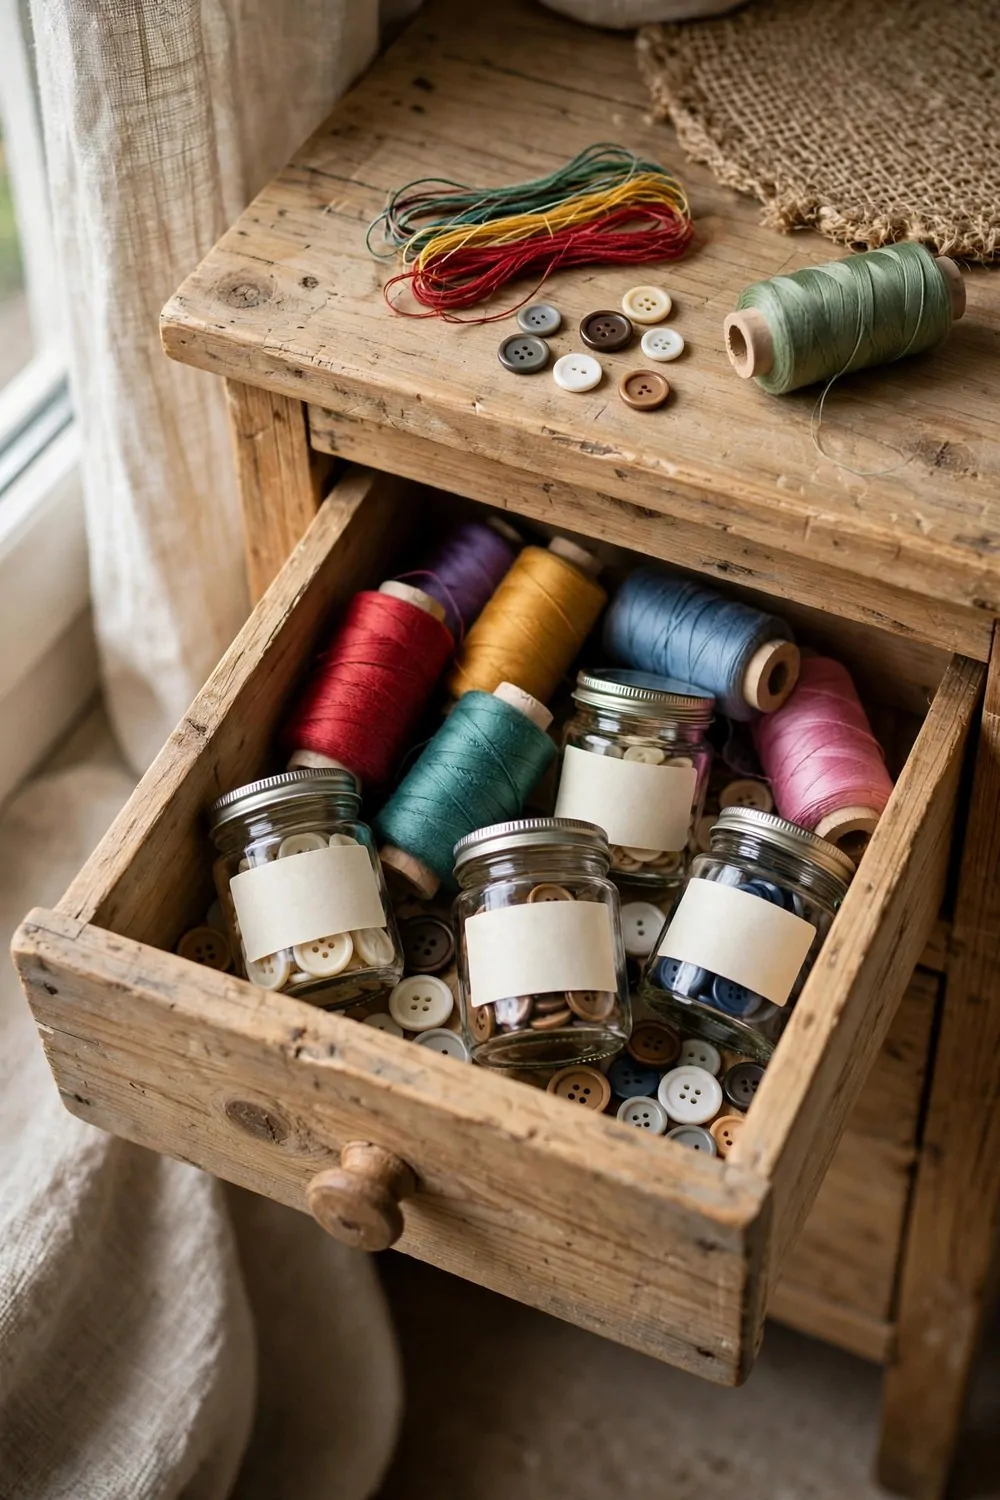
My old nightstand now holds all my craft bits in one neat place. I found it second hand, and the drawers were still strong and smooth.
The open drawer holds thread spools, jars of buttons and loose buttons. The drawer below holds paper, plain cards and a few rolls of tape.
A spool of thread and a few loose buttons on top keep the bits I reach for most.
I keep the small bits in jars so they do not roll around. The jars keep the wood clean when glue or paint drips a bit.
- small jars
- plain paper
- pens and pencils
- small scissors
- rolls of tape
I left the outside plain wood and sanded it smooth. I added small plain knobs so each drawer opens with one pull. I let the varnish dry fully before I filled the drawers again.
The threads and buttons on top are the project I am working on right now.
When I sit down to make a card, all I need is right there. I do not hunt through boxes any more, and that saves me a lot of time.
I smoothed the rough spots near an open window with a plain mask on. The top felt smooth fast, and the old marks were gone. A coat of clear varnish on top keeps spills from marking the wood.
It is a small cabinet, but it holds a whole craft box worth of bits. Small jars, plain paper and a set of pens cost $8 to $14 in total.
| Item | Main change | Typical cost |
|---|---|---|
| A few sheets of thick paper, a tin of glue and a tin of clear coat | covers the drawer fronts with thick patterned paper | $6 to $14 |
| A thin board, a tin of clear varnish and a few small screws | turns the drawer space into an open shelf | $10 to $18 |
| A thin wood board and two small rails | adds a slide-out tray under the top | $12 to $20 |
| Four small caster wheels and a pack of short screws | fits four caster wheels under the nightstand | $12 to $19 |
| A plain power strip and a phone charger cable | makes a charging nook inside the drawer | $13 to $22 |
| A tin of clear coat and three small pots | turns the nightstand into a plant stand | $10 to $17 |
| A small tray, two plain cups and a small teapot | turns the top into a bedside tea station | $10 to $18 |
| A small lamp and a stack of plain books | turns the nightstand into a kids’ bedside book nook | $8 to $15 |
| Small jars, plain paper and a set of pens | turns the nightstand into a craft supply cabinet | $8 to $14 |
19. Bathroom Towel Tower
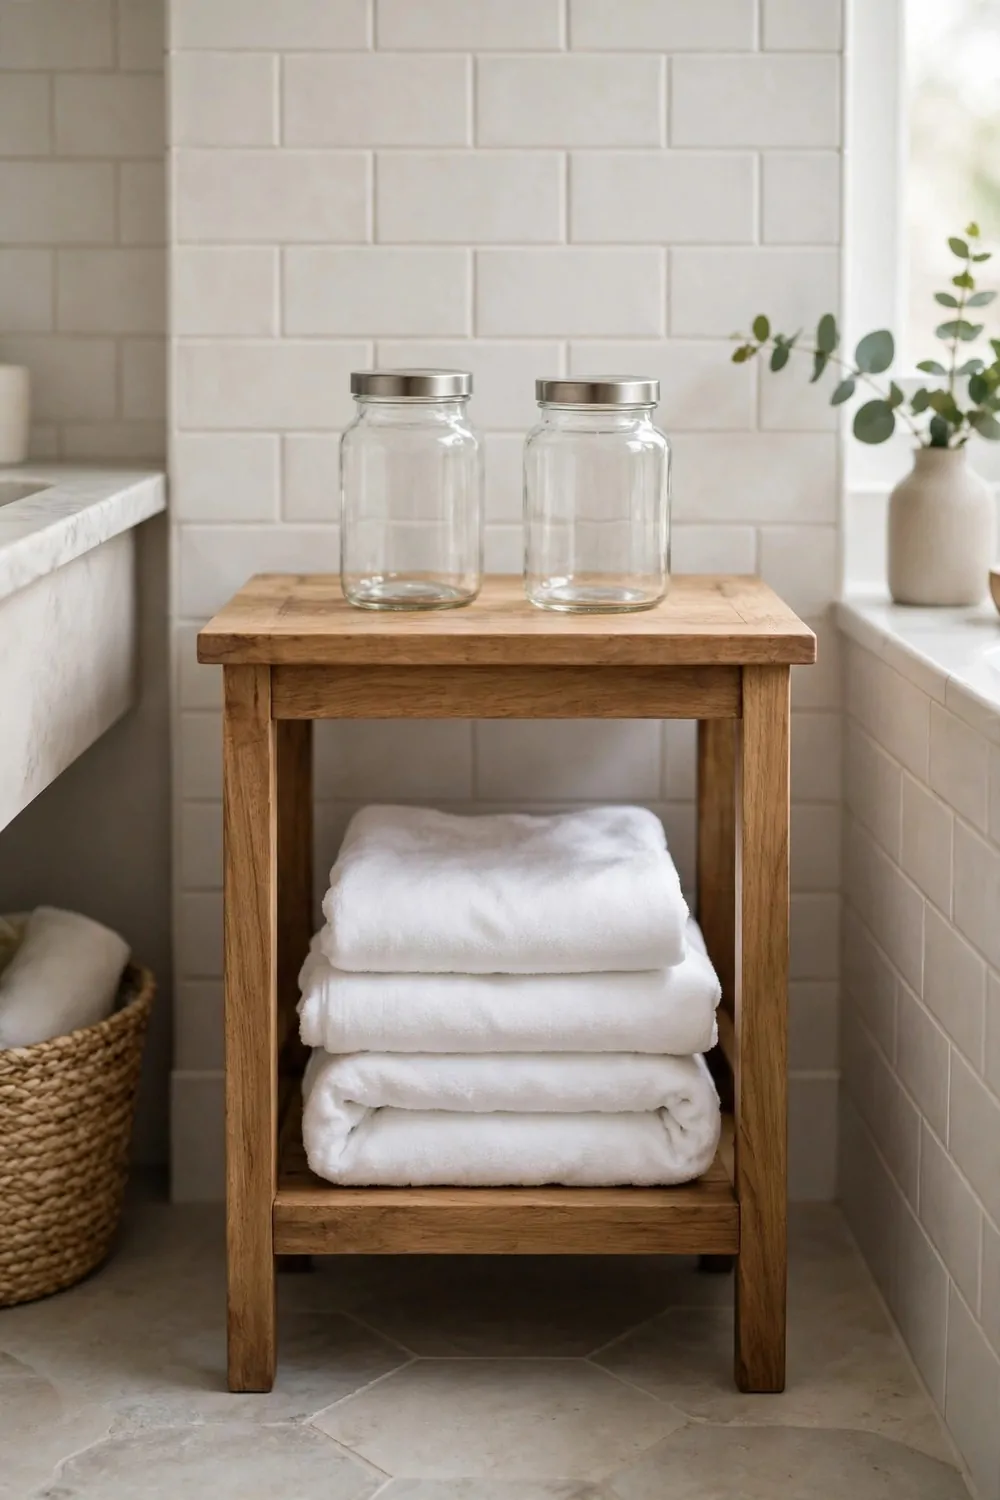
I put a small thrifted nightstand in the bathroom, and it now holds our towels. It fits in the corner by the bath, and it keeps the towels dry and close.
I fold each towel neat and stack them on the open shelf. The folds look neat, and I can see at a glance how many clean towels are left. A small basket on the floor beside it holds spare towels.
The top holds two plain glass jars.
I left the nightstand plain wood so it suits the tiles. Two coats of clear varnish help it stand up to steam and splashes.
I sanded it in a well-aired space and wore a plain mask while I sanded. I wiped off the dust and let it dry in the sun for an hour. Then I brushed on a coat of clear varnish to seal the wood.
The jars on top are handy for cotton balls and small bits.
I added small felt pads under the feet so the floor does not mark. The nightstand stays put, and it does not wobble when I pull a towel out.
I keep the shelf for clean towels and the basket on the floor for spares. That way the towels never sit in a damp pile. It is a small change, but the bathroom feels much tidier now.
A towel tower by the bath makes mornings run smooth. Folded towels, a small basket and two plain glass jars cost $10 to $19 in total.
20. Hallway Tidy Table
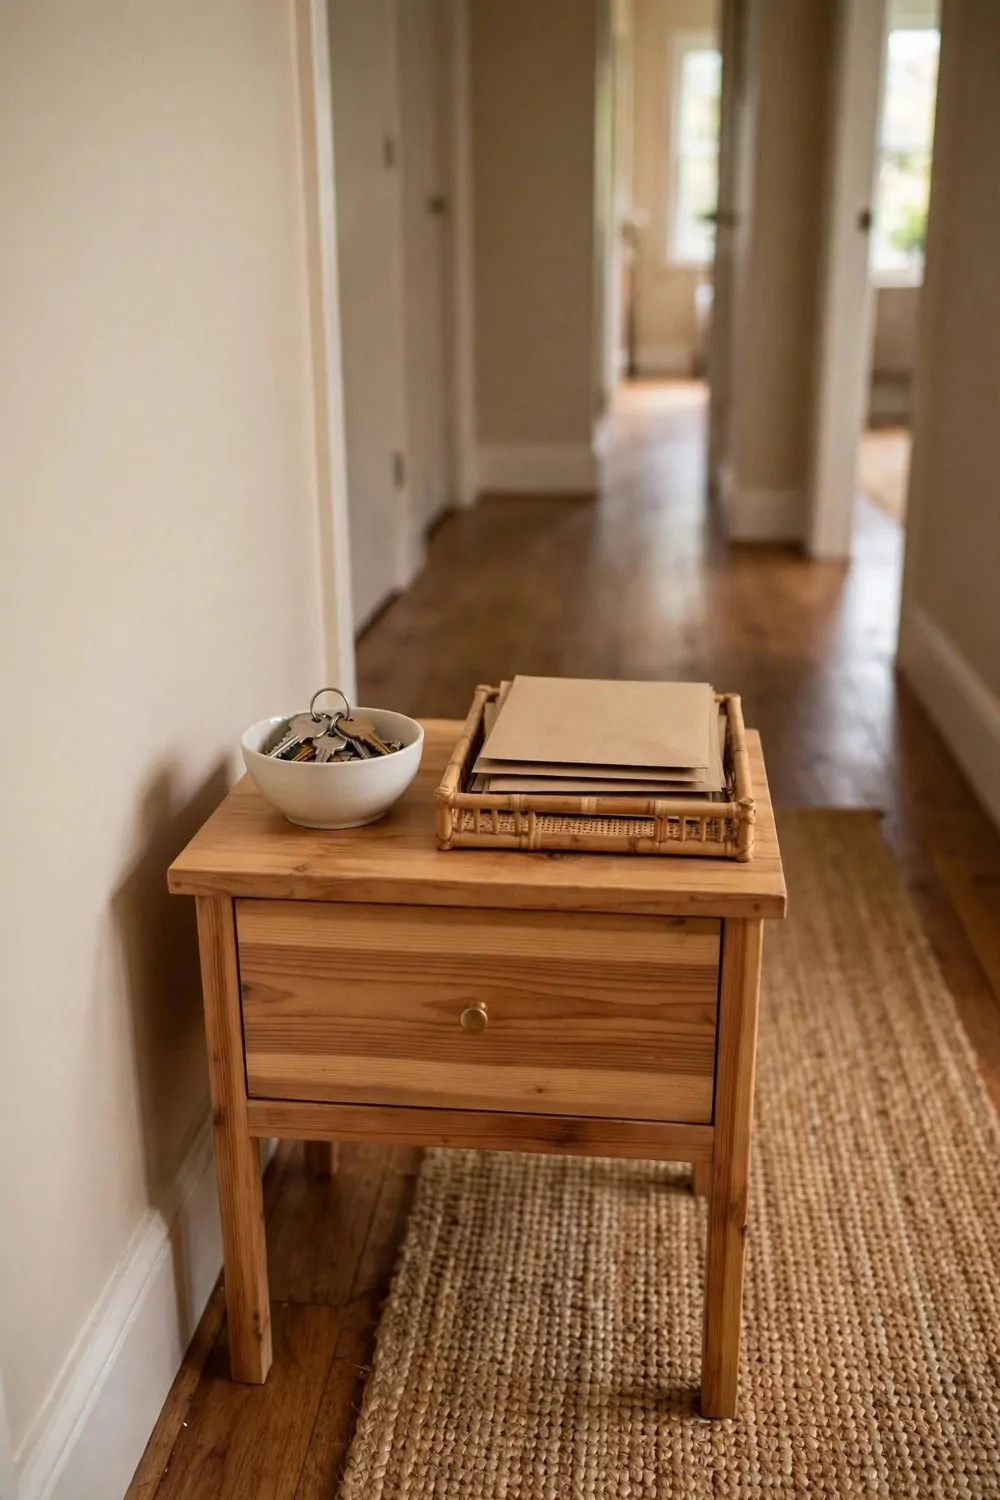
I set a small thrifted nightstand by the front door, and it is now our tidy table. It holds the small things we drop when we walk in.
A small bowl on top holds keys. A woven tray beside it holds plain envelopes.
The drawer holds spare keys, a pen and a small notepad.
I left it plain wood so it fits the hall. I waited until the varnish was fully dry before I set the tray back on top.
- small bowl for keys
- woven tray for letters
- small notepad and pen
I sanded the top in a well-aired space and wore a plain mask while I sanded. The old varnish came off in thin strips, and the wood felt smooth. I wiped the dust away and let it dry before I brushed on a thin coat of clear varnish.
Now nothing piles up on the floor by the door.
Each thing has one home, so I can find my keys in a flash. The hall feels calm when I walk in, and that is a nice way to come home.
I added small felt pads under the feet to keep the floor safe. The nightstand does not slide when the door bumps it. A small plain knob on the drawer makes it easy to open with one hand.
It is a tiny table, but it stops a whole pile of mess. A small bowl, a woven tray and a small notepad cost $7 to $13 in total.
21. Slide-Out Writing Board Nightstand
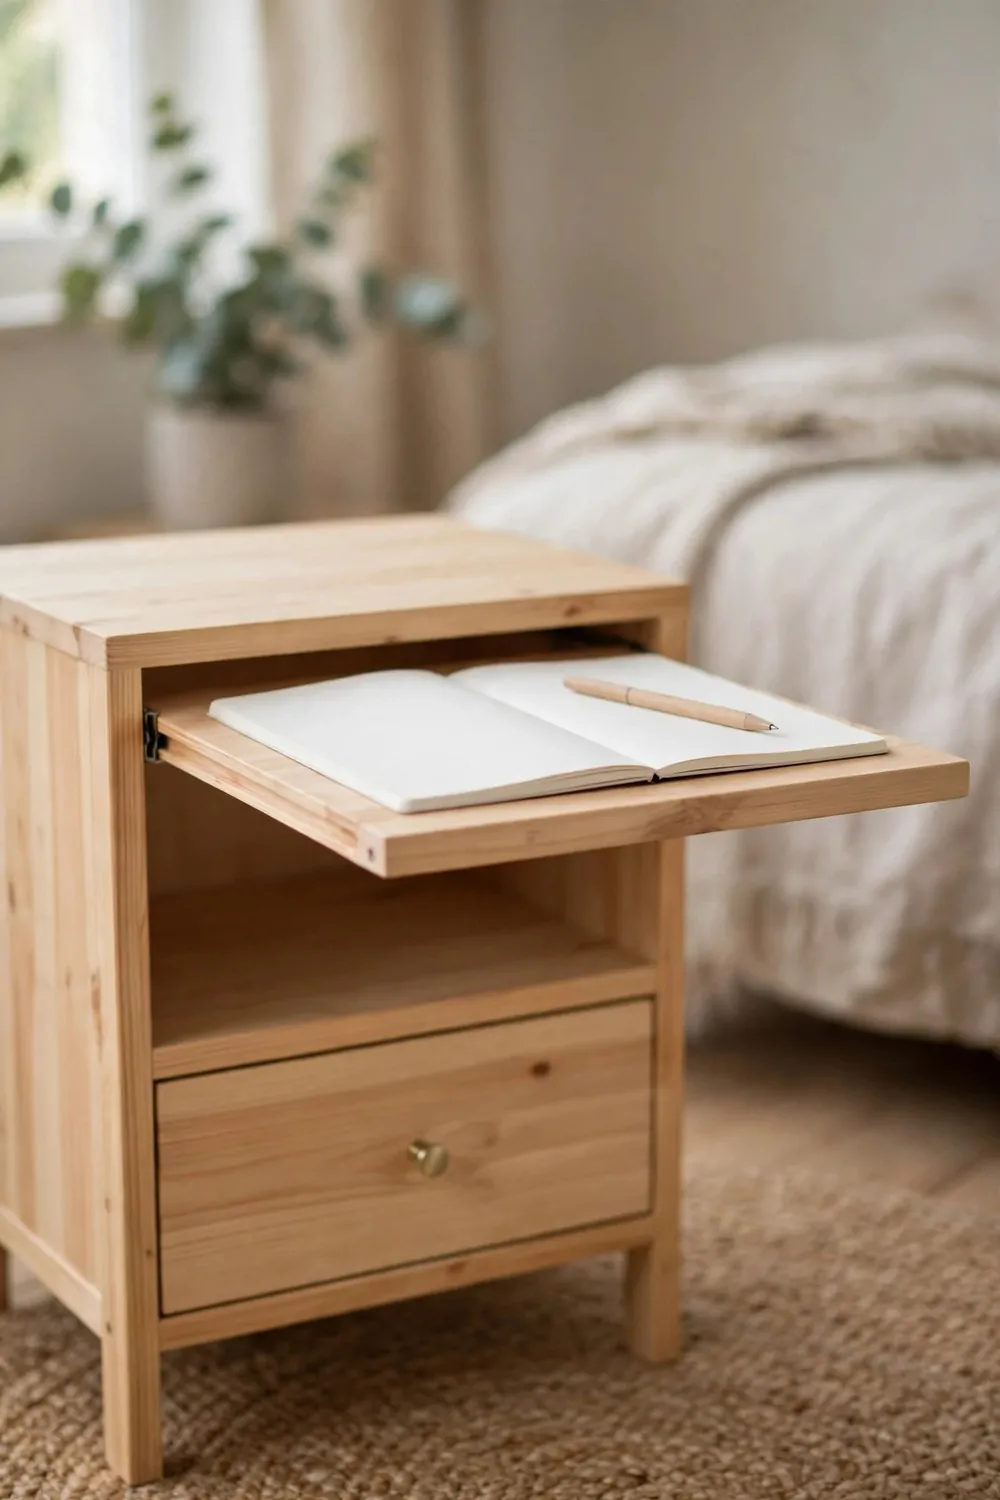
I turned a thrifted nightstand into a small writing desk for my bedroom. A plain board slides out from under the top, and it gives me a flat place to write.
The board is just wide enough for a notebook and a pen. I pull it out when I want to jot a note or a short list. I push it back in when I am done, and the nightstand looks plain again.
A pen rests on the open notebook, ready for a quick note.
The drawer holds paper, stamps and a few plain envelopes. I write by the window light, so I can see the page well.
I sanded the board smooth in a well-aired space and wore a plain mask while I sanded. I rubbed a little clear wax over the top when it felt dry. The board now slides in and out with no squeak at all.
I left the nightstand plain wood, and it suits the room.
I let the varnish dry fully before I slid the board again. The board still slides free, and the varnish did not stick it shut.
A small brass knob on the drawer makes it easy to open. The board has a plain wood edge, so I can grip it with one finger. It is a small desk, but it fits in a corner that held nothing before.
I write my notes here each night, and the board tucks away by morning. A plain board, a wooden pen and a plain notebook cost $7 to $13 in total.
22. One-Weekend Full Nightstand Plan
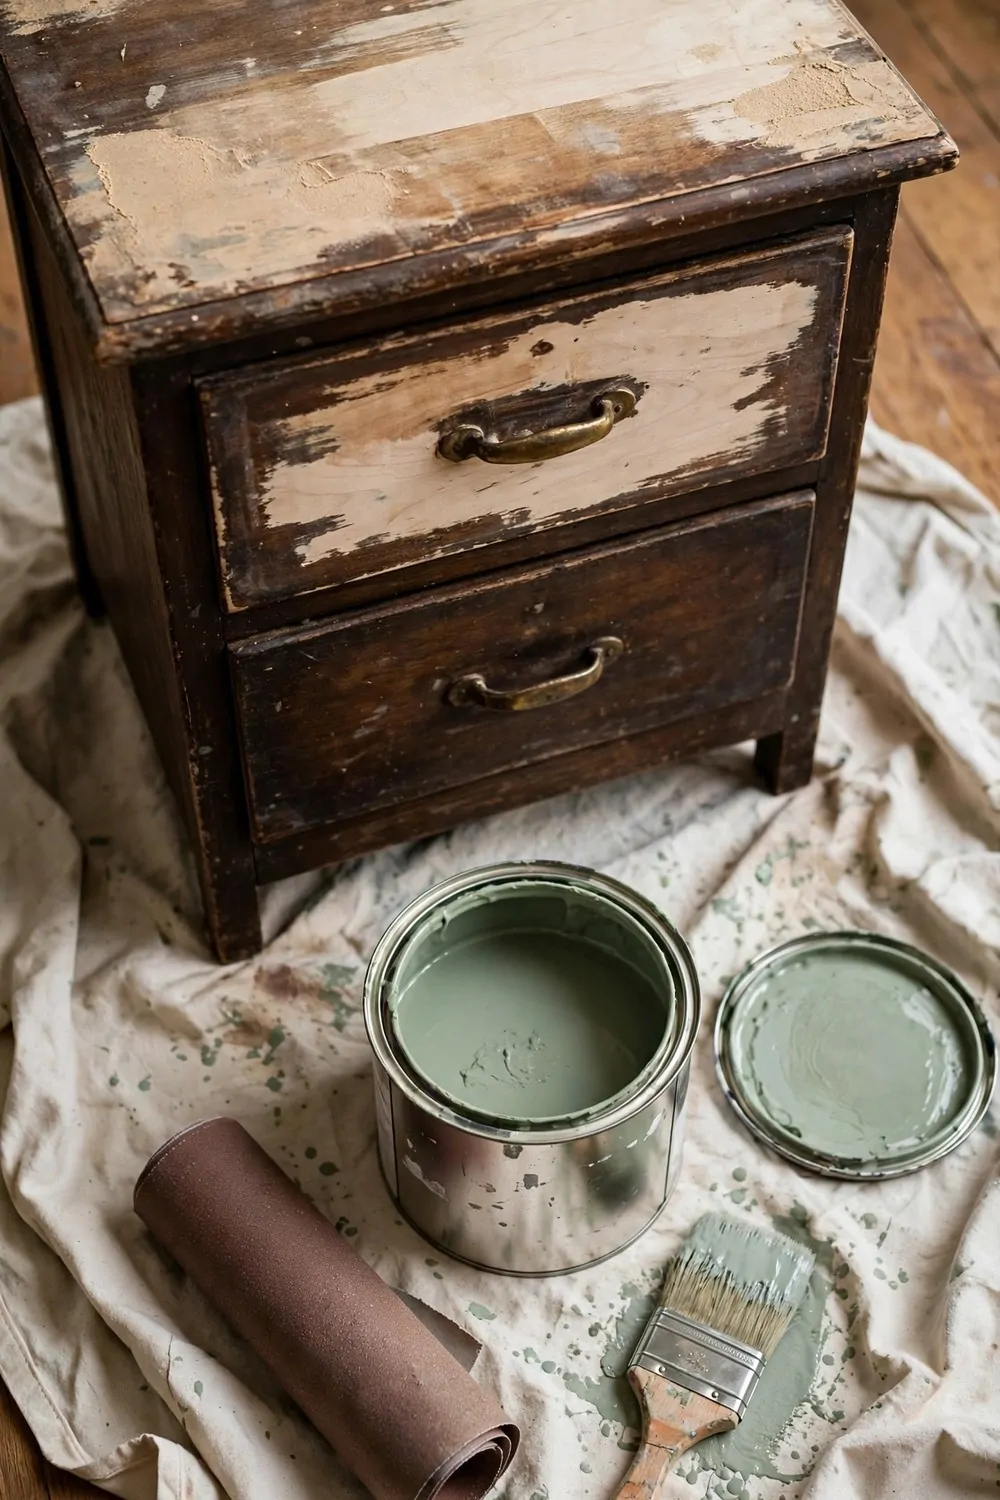
This plan turns one tired nightstand into a fresh piece in one weekend. I did it last month, and it took less time than I thought.
On Saturday morning I set the nightstand on a drop cloth and give it a good clean. I sand the whole piece in a well-aired space and wear a plain mask while I sand.
Then I wipe off the dust and let the wood dry.
On Saturday noon I brush on the first coat of sage green paint. I let it dry fully, then I add a second thin coat for a smooth finish.
On Sunday morning I line the drawer with a strip of plain cork. I cut it to fit and press it flat, and it stops small things from sliding. The cork also keeps the drawer quiet when I open it at night.
Then I take off the old pulls and fit the new knobs and one small plain brass cup pull on the drawer.
I brush clear varnish over the top to seal the paint. I let the varnish dry fully before I put anything back on top.
I stick plain felt pads under the feet so the floor stays safe. The nightstand looks new, and it cost far less than a shop piece.
A small tin of sage green paint cost $6 to $10, a pack of plain ceramic knobs cost $5 to $9 and a small roll of plain cork sheet cost $4 to $7. A small pot of clear varnish cost $5 to $8, a pack of plain felt pads cost $2 to $4 and a small plain brass cup pull cost $3 to $6. Pick one nightstand idea from this list tonight and give your old nightstand a fresh job by your bed.
| Item | Main change | Typical cost |
|---|---|---|
| A small tin of sage green paint | paints the nightstand sage green | $6 to $10 |
| A pack of plain ceramic knobs | fits new ceramic knobs on the drawer | $5 to $9 |
| A small roll of plain cork sheet | lines the drawer with cork sheet | $4 to $7 |
| A small pot of clear varnish | seals the top with clear varnish | $5 to $8 |
| A pack of plain felt pads | sticks felt pads under the feet | $2 to $4 |
| A small plain brass cup pull | fits a brass cup pull on the drawer | $3 to $6 |
| Total | $25 to $44 |
Keep Reading
If you liked these ideas, you will love these posts too.
- 34 Repurposed Furniture Ideas for Small Homes
- 23 Side Table Flip Ideas That Take One Weekend
- 29 Bookshelf Makeover Ideas That Turn Old Into Beautiful
- 26 Vintage Furniture Finds That Add Charm to Any Room
- 33 Upcycled Wood Pallet Ideas for Home and Garden
- 21 Coffee Table Flip Ideas on a Small Budget
Each post has more simple ideas you can try at home this weekend.