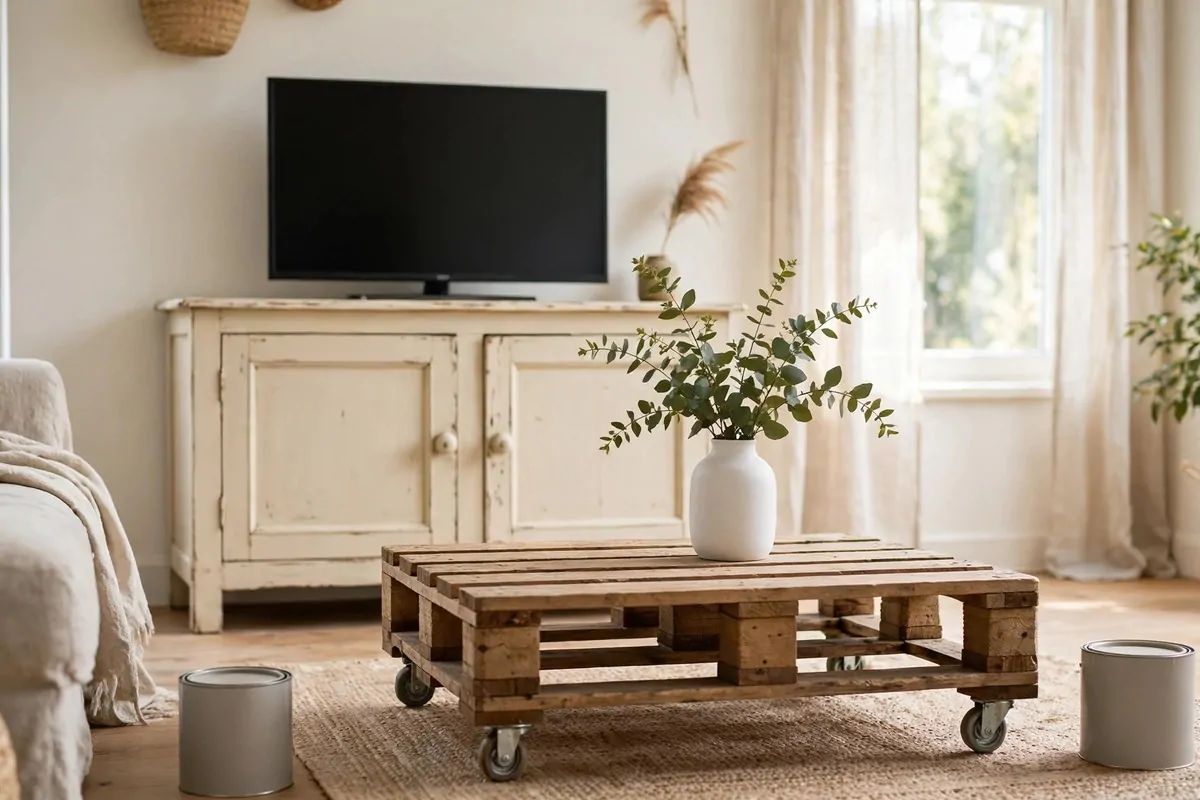
33 Upcycled Wood Pallet Ideas for Home and Garden

A stack of old pallets sat behind my neighbour’s shed for months, and I walked past them every day without a second look.
Pallets are plain wood, free in many places, and strong enough to build with. I asked my neighbour if I could take a few, and he was glad to see them go. One stack of old wood can turn into seats, shelves, and garden beds.
You do not need fancy tools or a big workshop to start. A hammer, a saw, and a few screws will carry you through most of these ideas. I built my first pallet piece on a Saturday, with tools I already owned.
Each idea in this post uses wood you might have thrown away, and each one fits a real spot in your home or garden. I picked ideas that are simple to build, and easy to use every day. You can start small, and build bigger as your trust grows.
I learned to check each pallet first, and to sand the rough edges smooth before I build. A quick check for broken boards and loose nails keeps the work safe and calm. I share those small checks with you in each idea below.
Some ideas suit the garden, some suit a bedroom, and some suit a kids room. I tried to mix them, so you will find one that fits your home. Pick the one that calls to you, and start there.
All 33 ideas sit in this one post, with no part two and nothing held back. You can read them all here, and pick your favourite to build this weekend.
1. Build a Low Pallet Platform Bed from Natural Wood
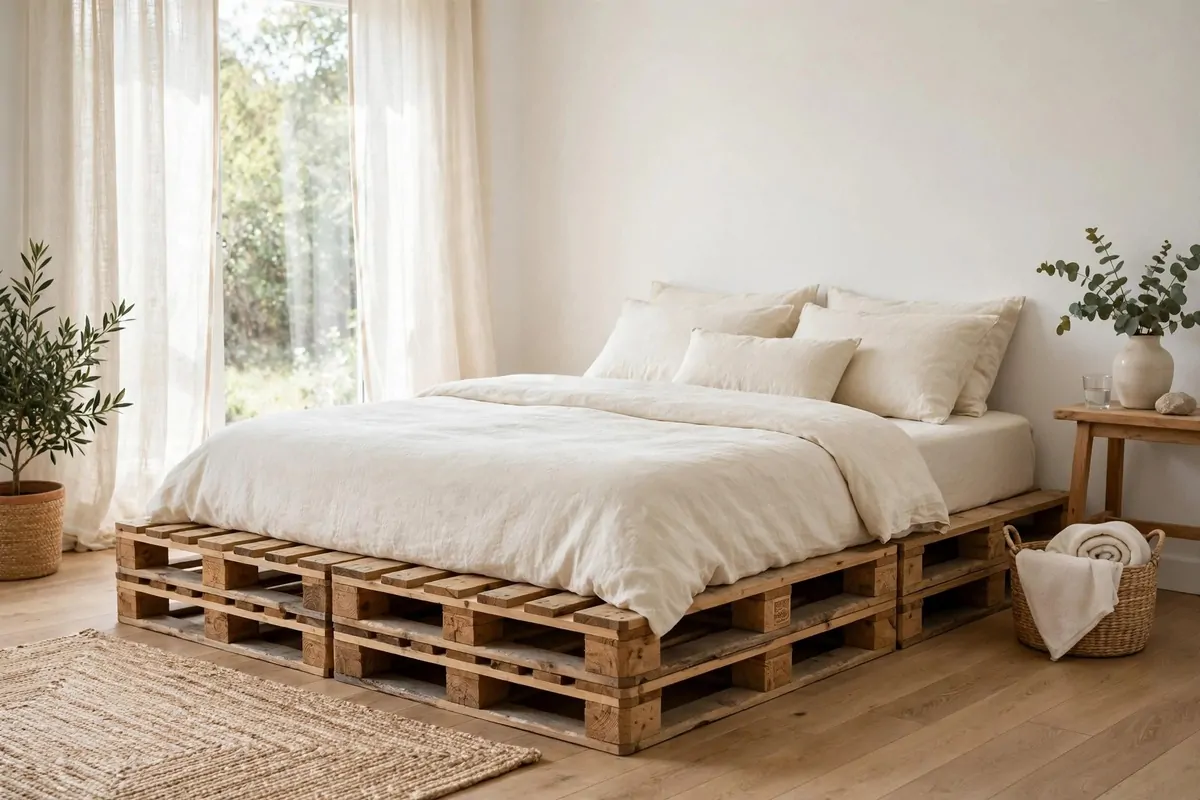
I wanted a low bed that felt calm and close to the floor. Pallet wood gave me that look without a big spend.
I picked two clean pallets with no broken boards and no loose nails.
I laid them side by side on the bedroom floor and checked that they sat flat. I pushed each board to test for wobble. I swapped out one weak board for a stronger piece from a spare pallet.
I sanded every rough edge smooth in a well-aired spot by the open window, and I wore a plain mask while I worked. The wood felt soft to the touch when I finished.
I wiped the dust off with a dry cloth and let the boards rest for an hour.
I set plain wooden bed slats across the top to hold the mattress firm. I paid $14 to $20 for those plain wooden bed slats at my local shop.
I placed the mattress right on top and smoothed out plain bedding in soft white. I folded the top edge back so the bed looked neat. The room felt open at once because the bed sat so low.
You can slide a flat box under the frame for spare sheets. I keep mine there so the closet stays clear.
I sleep well on it, and I smile each time I walk into the room.
2. Paint a Pallet Headboard Sage Green
A plain wall behind my bed felt too bare for a long time.
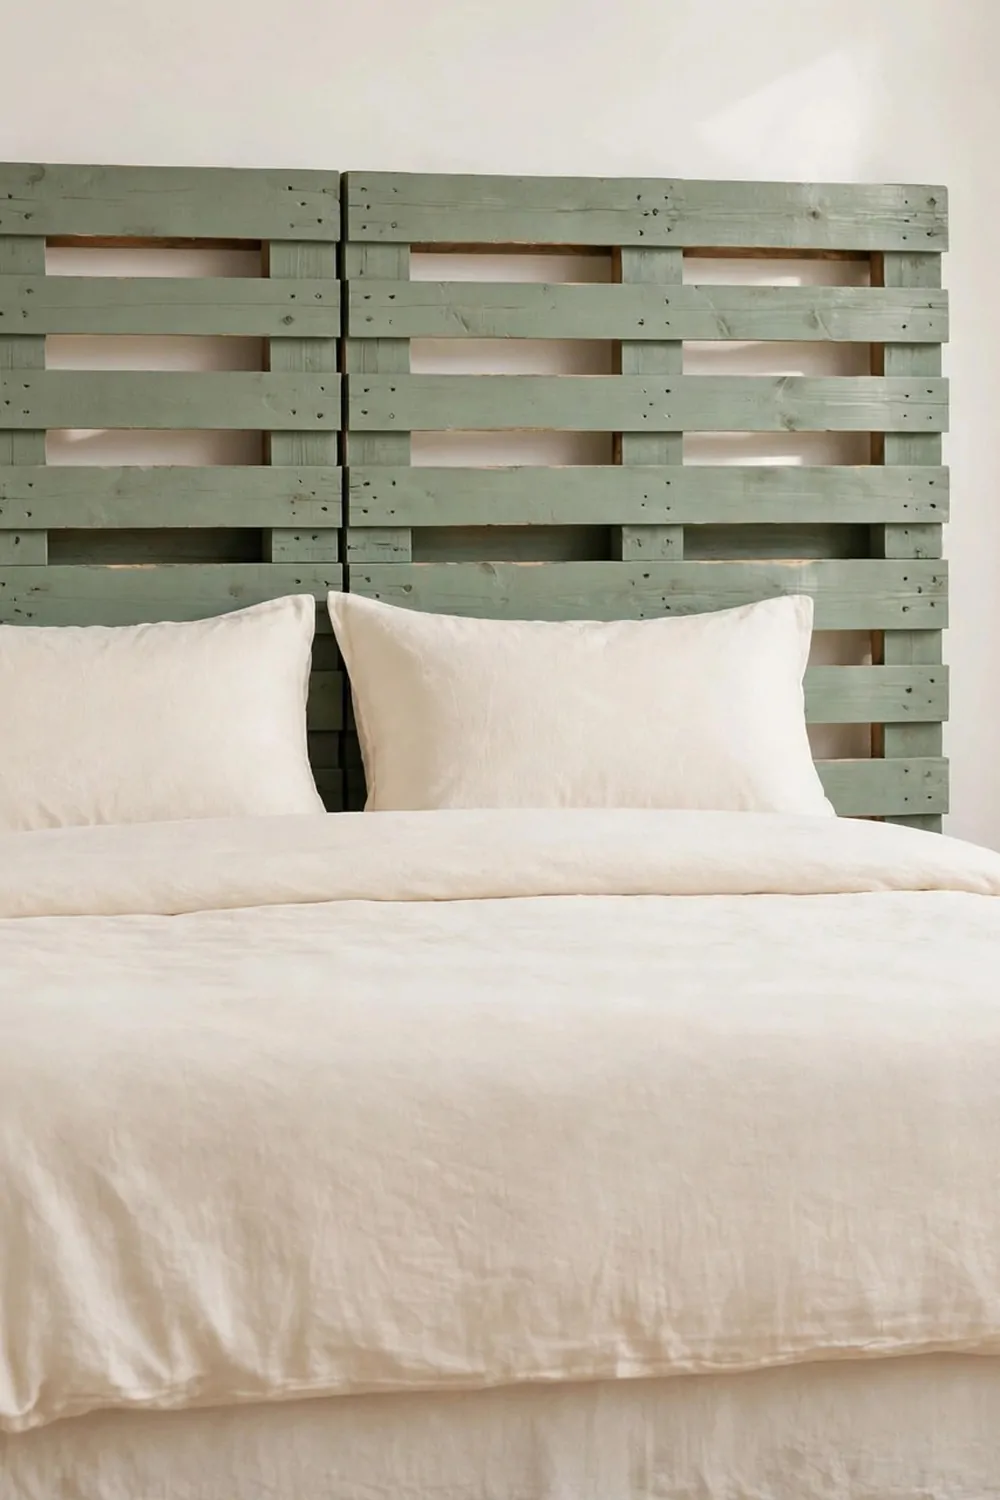
I stood pallet boards upright and lined them up side by side. I liked how tall they looked behind the pillows.
I checked each board for loose nails and pulled out two bent ones with care. I tapped the rest flat so nothing stuck out. I sanded the rough edges smooth in a well-aired space on my porch.
I wore a plain mask while I sanded and brushed the dust away after. The boards felt clean and ready for paint.
I picked up a small tin of sage paint for $8 to $12 from the paint shelf.
I brushed on one thin coat and let it dry all day. I added a second thin coat the next morning for a soft even green. I let the paint dry fully before I moved the boards near the bed.
I fixed the boards to the wall with short screws and a level. The sage green sits soft behind plain white pillows.
My bedroom feels fresh now, like a calm garden corner indoors.
You can try this in a spare room first if you feel unsure. One small tin goes a long way on pallet wood.
3. Hang a Small Pallet Wall Shelf in the Entryway
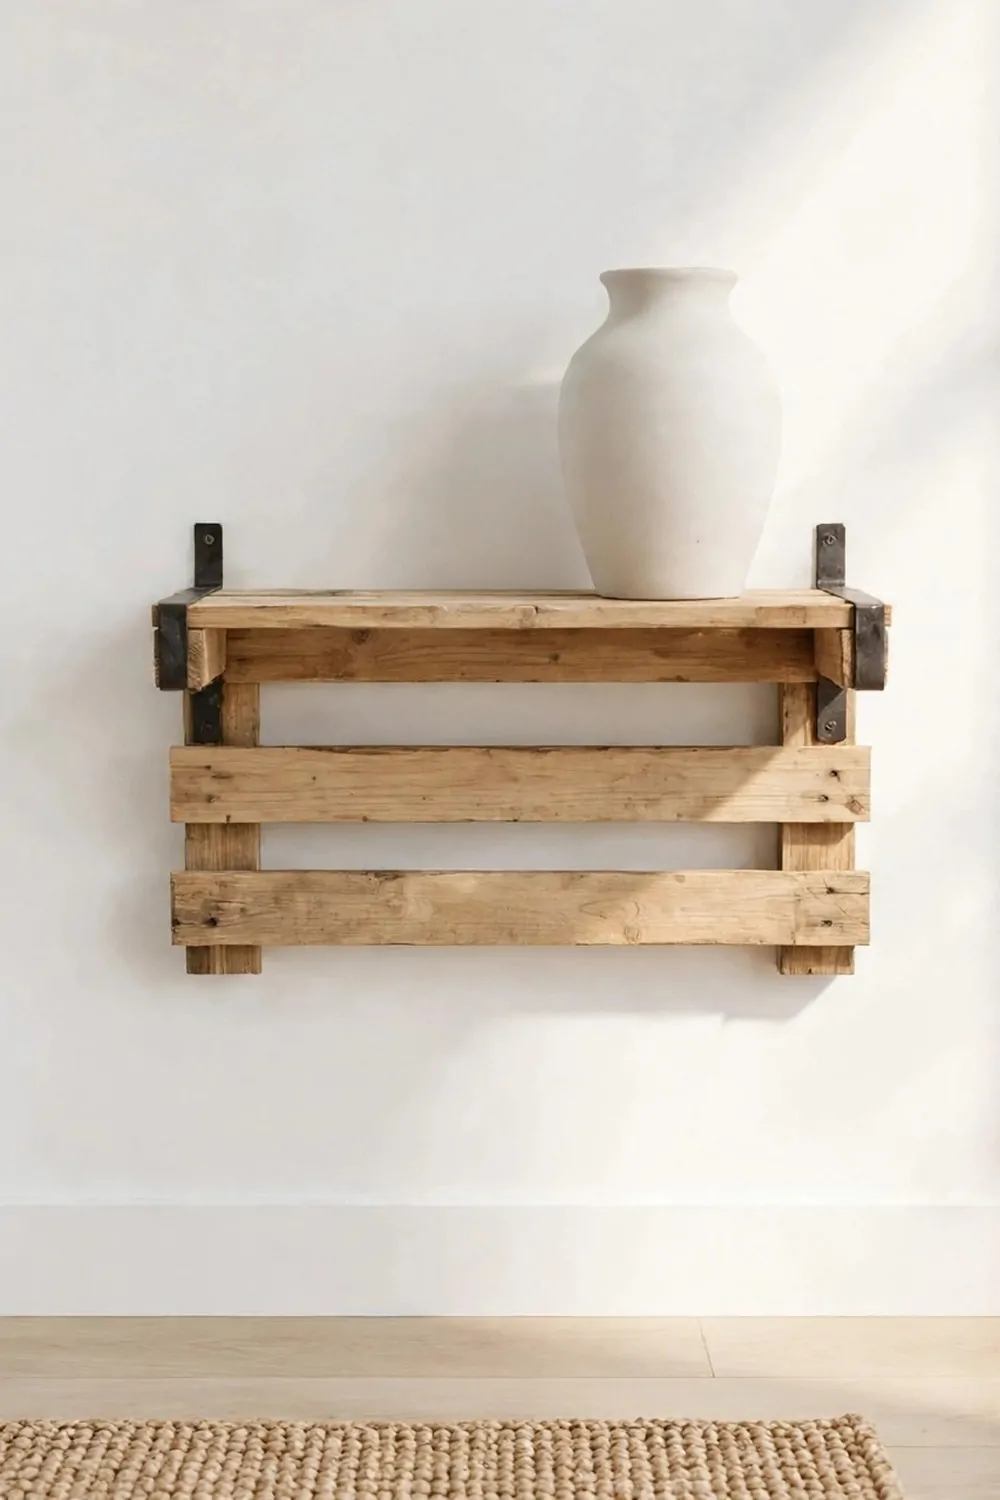
My entryway had a bare wall where keys and mail piled up on a small table. I wanted one small shelf to lift that clutter off the table.
I cut a short length from a clean pallet and kept the best flat boards.
I checked the wood for broken boards and loose nails before I cut anything. I sanded the edges smooth in a well-aired spot near the back door. I wore a plain mask while I sanded so the dust stayed out of my nose.
I wiped the shelf clean and rubbed a little clear oil over the wood. The grain looked warm and soft after that.
I bought small wall brackets for $4 to $7 to hold the shelf firm.
I marked the wall height with a pencil and fixed the brackets level. The shelf slid on top and sat steady with no wobble.
I set a plain vase on the shelf near one end. The wall looks neat now each time I walk in. I smile when I pass it on my way out.
You can add one more small shelf below it if you need room for mail. I kept mine to one shelf so the wall stays light.
This tiny shelf took me one short afternoon to finish.
4. Build a Tall Pallet Bookcase for the Living Room
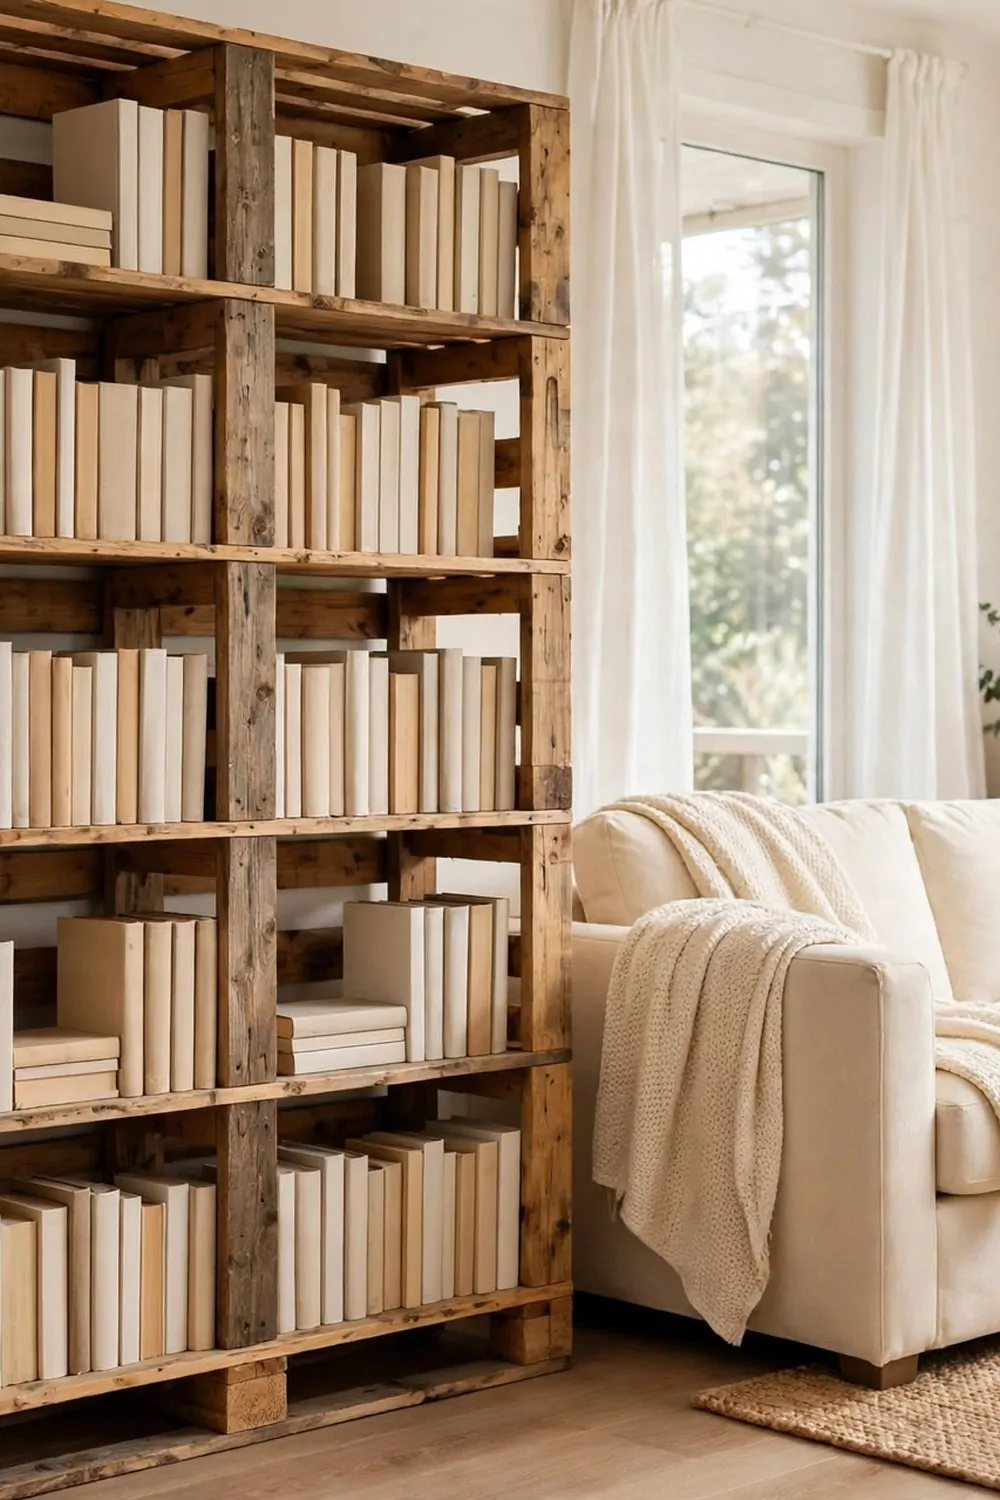
My living room books lived in piles on the floor for too long.
I stacked pallet boards into a tall frame with five open shelves. I measured twice so each shelf sat at the same height.
I looked over every board for cracks and loose nails first. I sanded the rough spots smooth in a well-aired corner of the garage with the door open. I wore a plain mask while I sanded and swept the dust up after.
I screwed the sides together and checked that the frame stood straight. A small level helped me fix one lean before I moved on.
I picked up a set of plain shelf pins for $3 to $5 to hold the middle shelves in place.
I slid the pins into the side holes and set each shelf down flat. I tested each shelf with a stack of heavy books. Nothing bent, and nothing tipped, so I knew it was safe.
I lined up plain books by size and left a little space on each shelf. The top shelf holds a short row of books laid flat.
You can rub a little clear oil on the frame if you want a soft shine. I left mine plain so the wood grain shows.
My books finally have a home, and the floor is clear again.
5. Make a Pallet Hallway Bench with a Plain Cushion
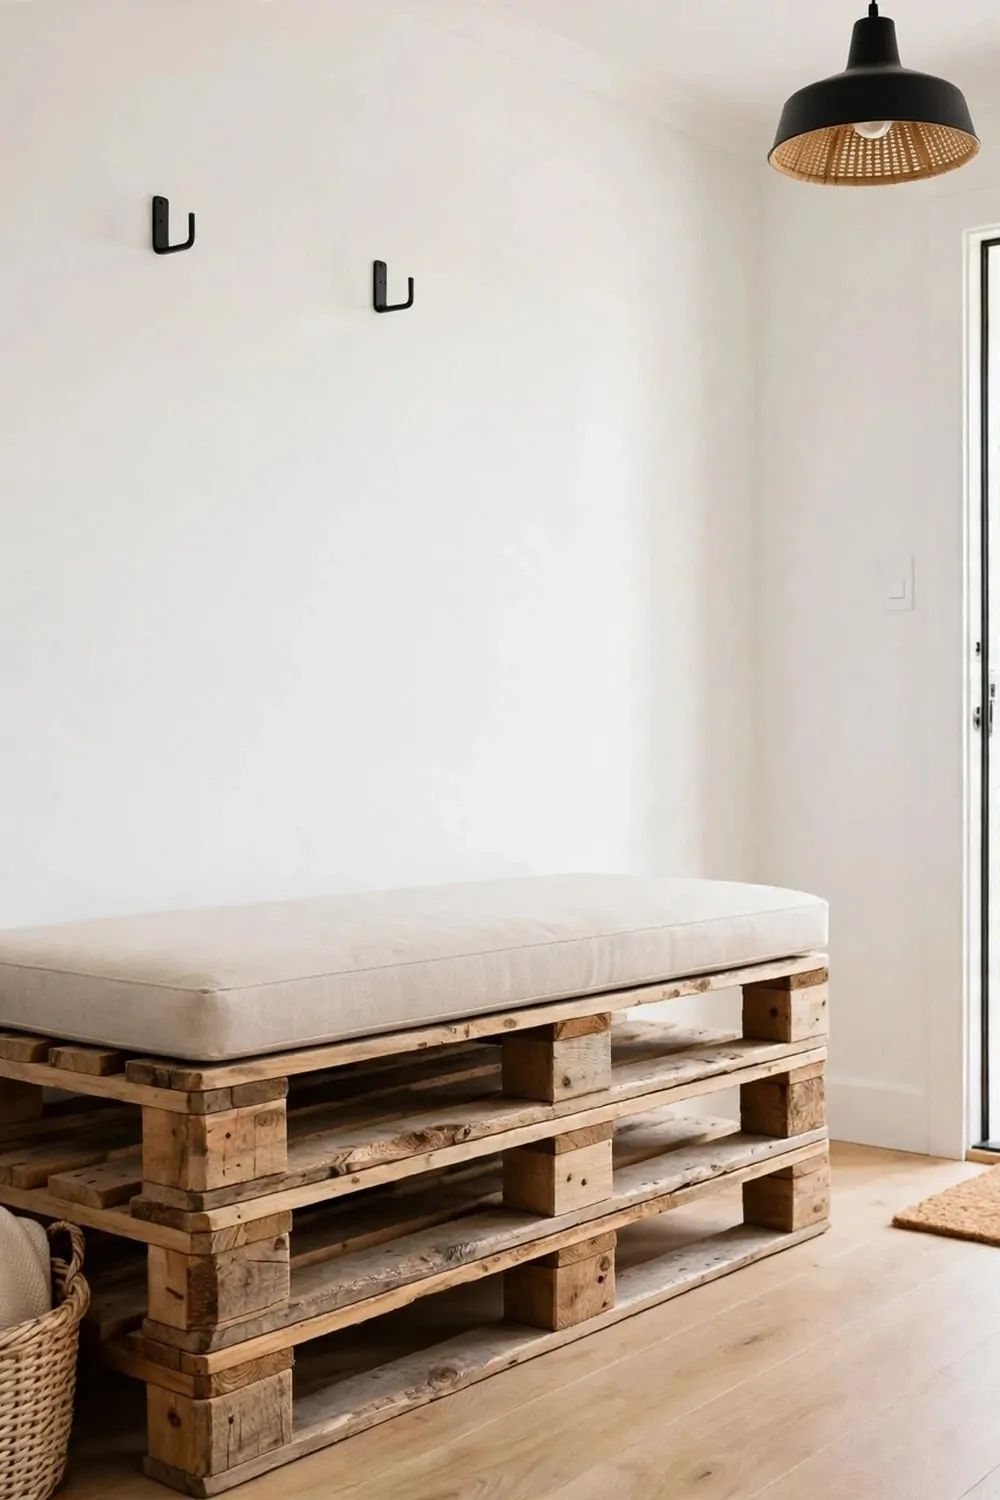
Our hallway had no place to sit while we put on shoes. I built a low pallet bench to fix that small daily fuss.
I used two short pallets stacked flat to make a sturdy seat base.
I checked both pallets for broken boards and loose nails before I started. I sanded every rough edge smooth in a well-aired space by the front door. I wore a plain mask while I sanded and brushed dust off my sleeves after.
I joined the pallets with short screws and tested the seat with my full weight. It held firm with no creak and no wobble.
I found a plain bench cushion for $9 to $14 that fits the seat just right.
I set the cushion on top and tied its short straps under the seat. It stays put when we sit down fast. The soft top makes the hard wood kind to sit on.
I sit down to put on my shoes each morning now. The hallway feels calm and clear.
You can set the bench by the door or at the end of the hall. Mine sits by the door where we need it most.
This bench took one weekend afternoon to build. I use it each day now.
6. Build a Pallet Shoe Rack with Two Shelves
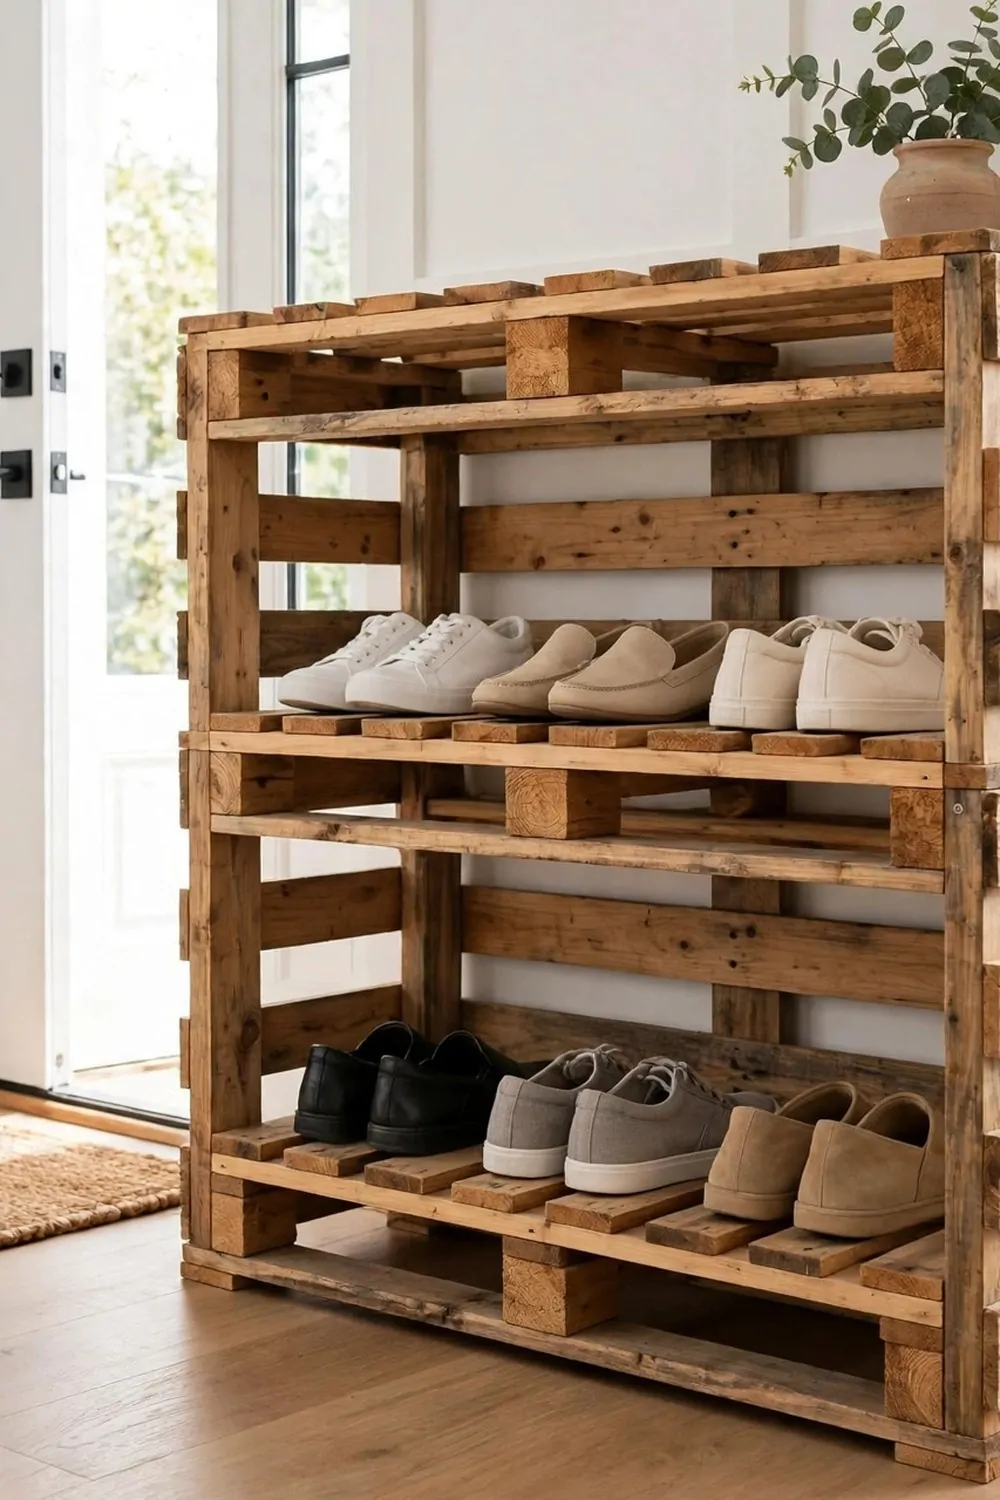
Shoes by our door used to form a messy pile each night.
I built a small pallet rack with two open shelves to sort them out. Each shelf holds three pairs with room to spare.
I picked a clean pallet and checked it for broken boards and loose nails. I sanded the rough edges smooth in a well-aired spot in the yard. I wore a plain mask while I sanded and shook the dust off the boards after.
I cut the pallet into two shelf boards and two short side pieces. I screwed them into a low frame that sits flat on the floor.
I laid a plain woven mat by the door for $5 to $8 to keep the floor clean.
I set plain shoes on the top shelf in a straight row. I set more plain shoes on the bottom shelf the same way. The rack keeps dust off the hall floor.
You can wipe the shelves with a damp cloth once a week. The wood dries fast and stays fresh.
My kids now know just where their shoes belong.
This rack is small, but it changed our whole entryway. I wish I had built it a year sooner.
7. Hang a Pallet Coat Rack with Plain Hooks
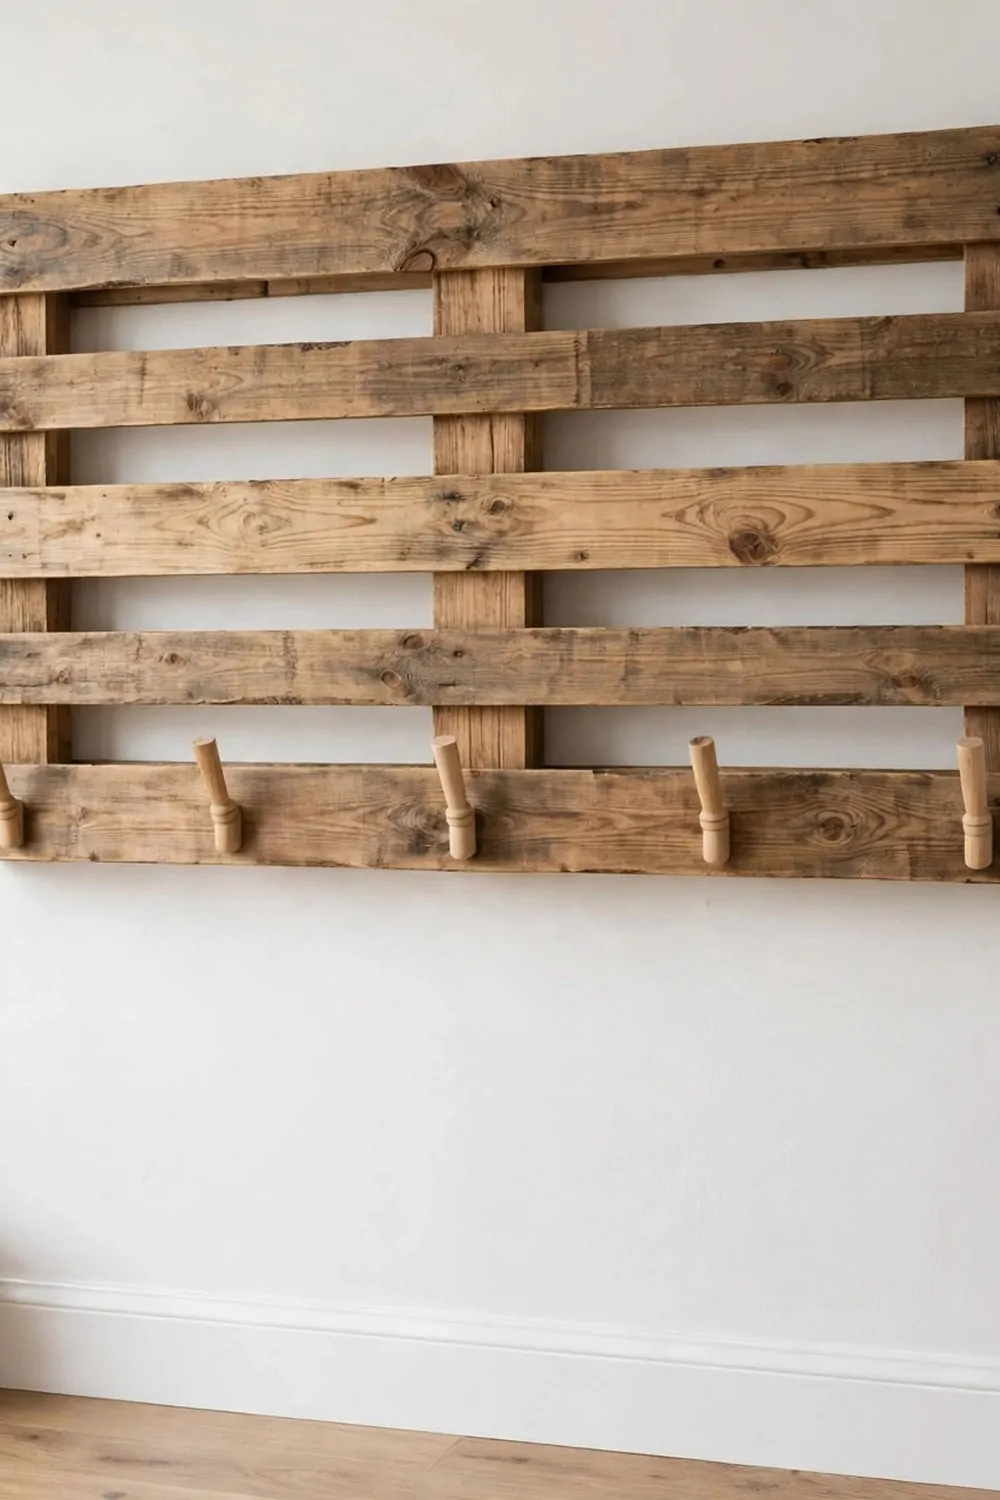
Coats kept landing on chairs in our entryway. I wanted a wall rack that held them up and out of the way.
I took one long pallet board and kept its straightest flat piece.
I checked the board for loose nails and tapped each one flat. I sanded the rough edges smooth in a well-aired space near an open window. I wore a plain mask while I sanded and wiped the dust away with a dry cloth.
I marked even spots along the board for the hooks. A pencil line kept the row straight and level.
I bought a set of plain coat hooks for $6 to $10 at the hardware shop.
I screwed each hook into the board with short screws. I tugged each one hard to test it. Each hook held firm, so I knew coats would be safe on it.
I fixed the board to the wall with two strong wall plugs. It sits at a height my whole family can reach.
Coats will hang in one neat row by the door. The chairs stay clear at last.
You can hang one coat on each hook and still have room. Our entryway feels calm when we walk in now.
8. Build a Pallet Kitchen Island on Caster Wheels
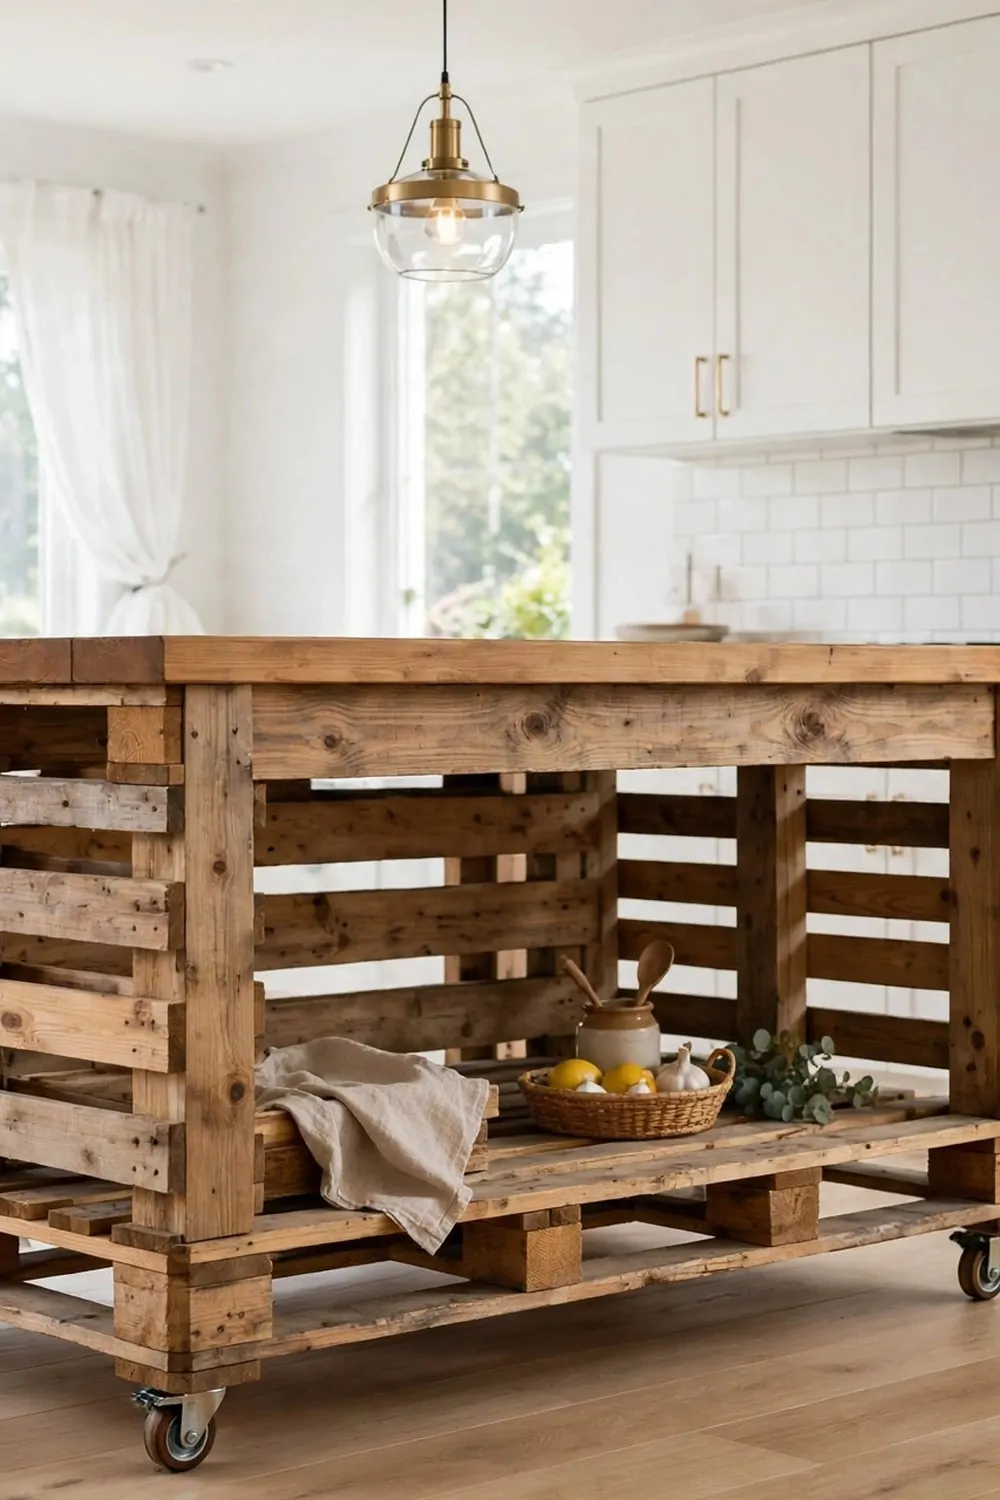
My kitchen needed more counter space, but I had no room for a fixed island.
I built a small pallet island that rolls where I need it. I can push it to the wall when dinner is done.
I checked each pallet board for broken boards and loose nails before I built. I sanded the rough edges smooth in a well-aired spot in the kitchen with the window open. I wore a plain mask while I sanded and swept up the dust right after.
I boxed the pallets into a tall block with a flat wood top. I left one open shelf low down for a basket and a jar.
I paid $9 to $14 for four small caster wheels to fit under the island.
I screwed one wheel to each bottom corner and flipped the island upright. I pushed it across the floor to test the roll. It moved smooth and stopped firm when I pressed the small brakes.
I use the flat top for prep work when I cook. The low shelf keeps a basket and a jar close by, so I can grab them fast.
You can roll it beside the stove when you cook a big meal.
This rolling island cost little and works hard each day. I would build it again in a heartbeat.
9. Build a Pallet Desk for a Home Office
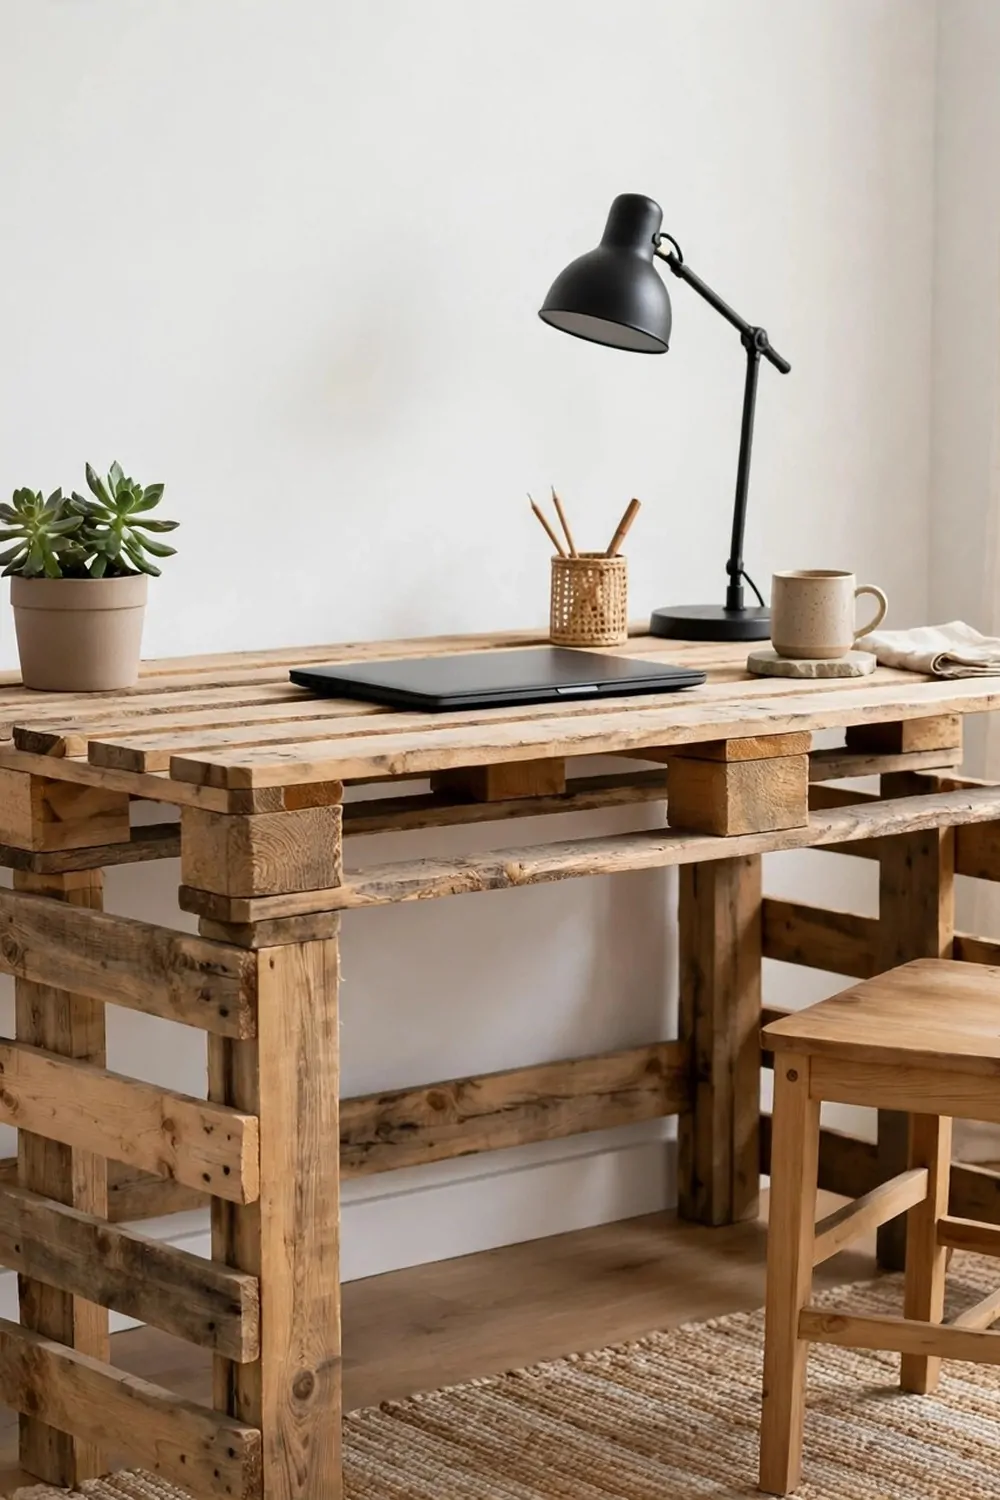
I work from home, and I needed a desk that fit my small office corner. Pallet wood gave me a wide top without a high price.
I built a simple desk from two pallet tops joined side by side.
I checked the pallets for broken boards and loose nails first. I sanded the rough edges smooth in a well-aired space by the office window. I wore a plain mask while I sanded and wiped the top clean after.
I fixed short legs under each corner and tested the desk for wobble. It stood firm, so I knew it would hold my work things.
I bought a small tin of clear wood oil for $8 to $12 to bring out the grain.
I rubbed on a thin coat of clear oil and let it dry through the night. I added a second thin coat the next day for a smooth finish. I let the oil dry fully before I set anything on the desk.
I slid the desk into the corner and pulled up my plain chair. The warm wood top makes the small room feel light.
You can add a low shelf under the desk for paper and books.
I do my best work at this desk now. It feels like mine in a way a shop desk never did.
10. Build a Pallet TV Stand with Open Shelves
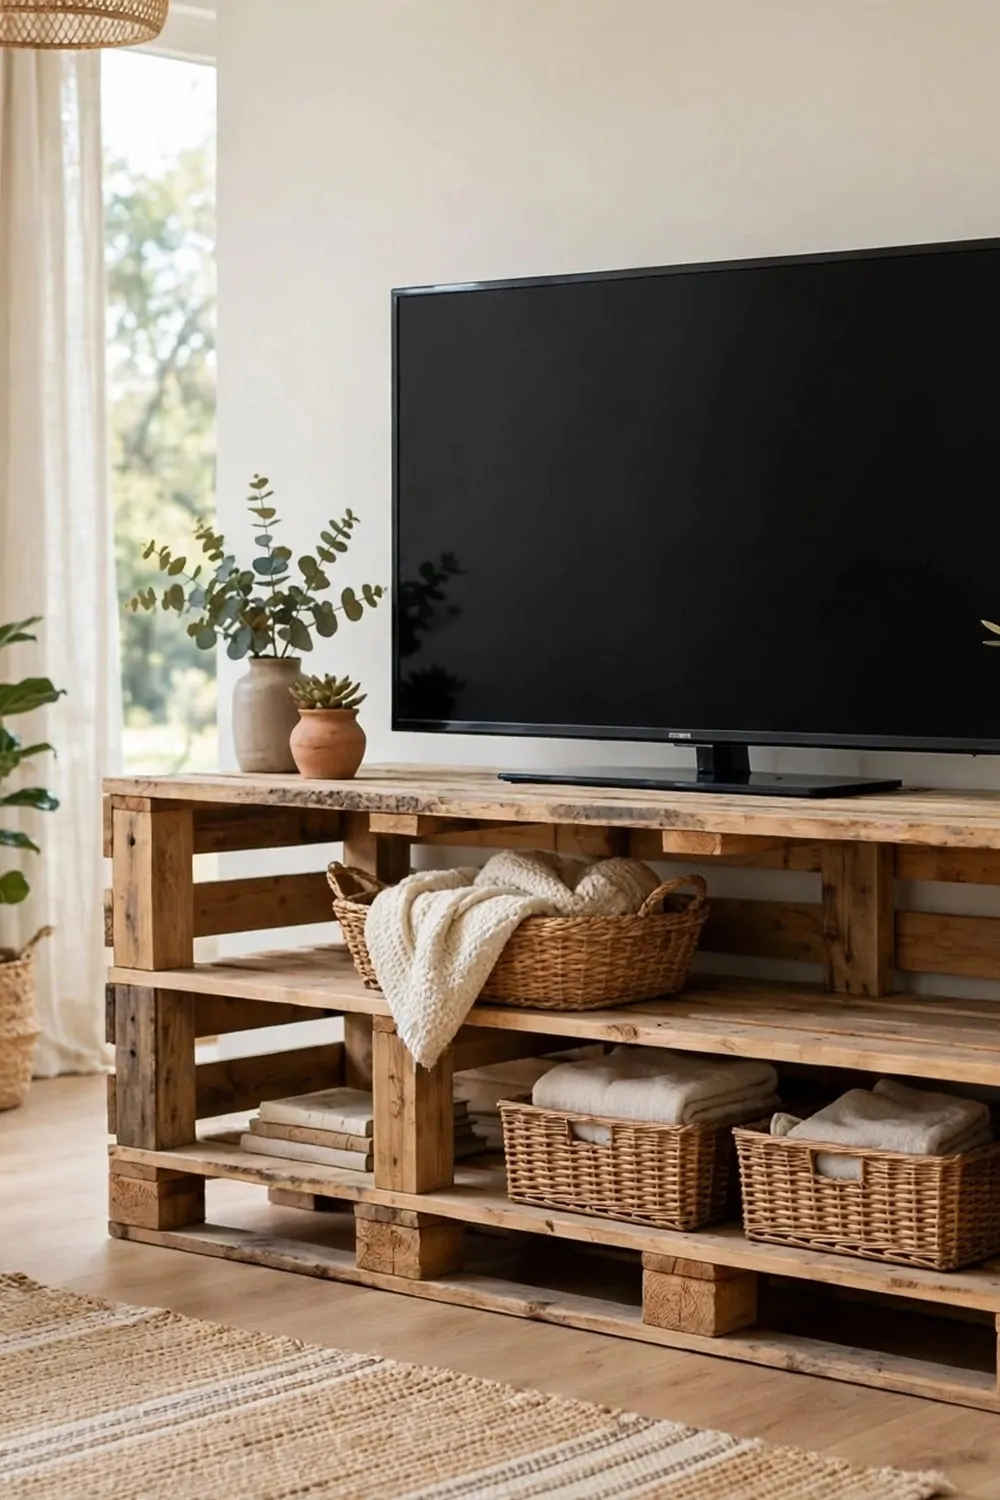
Our TV sat on a low box that never looked right in the living room.
I built a long pallet stand with open shelves below the TV. The shelves give me room for the baskets that go with it.
I checked every pallet board for broken boards and loose nails before I cut. I sanded the rough edges smooth in a well-aired spot on the patio. I wore a plain mask while I sanded and brushed the dust off the boards when I was done.
I joined the boards into a low wide frame and checked it sat flat. A quick push at each end told me it would not rock.
I picked up a set of plain shelf brackets for $5 to $9 to steady the middle shelves.
I fixed the brackets inside the frame and set the shelves on top. I tested each shelf with a firm press. Nothing moved, so I knew the stand was safe.
I set the TV on top and centred it by eye. The open shelves below hold the small baskets in a neat row.
You can hide wires behind the stand with a small clip.
Our living room looks tidy now when we sit down at night. This stand took me one quiet weekend to build.
11. Make a Pallet Toy Chest with a Hinged Lid
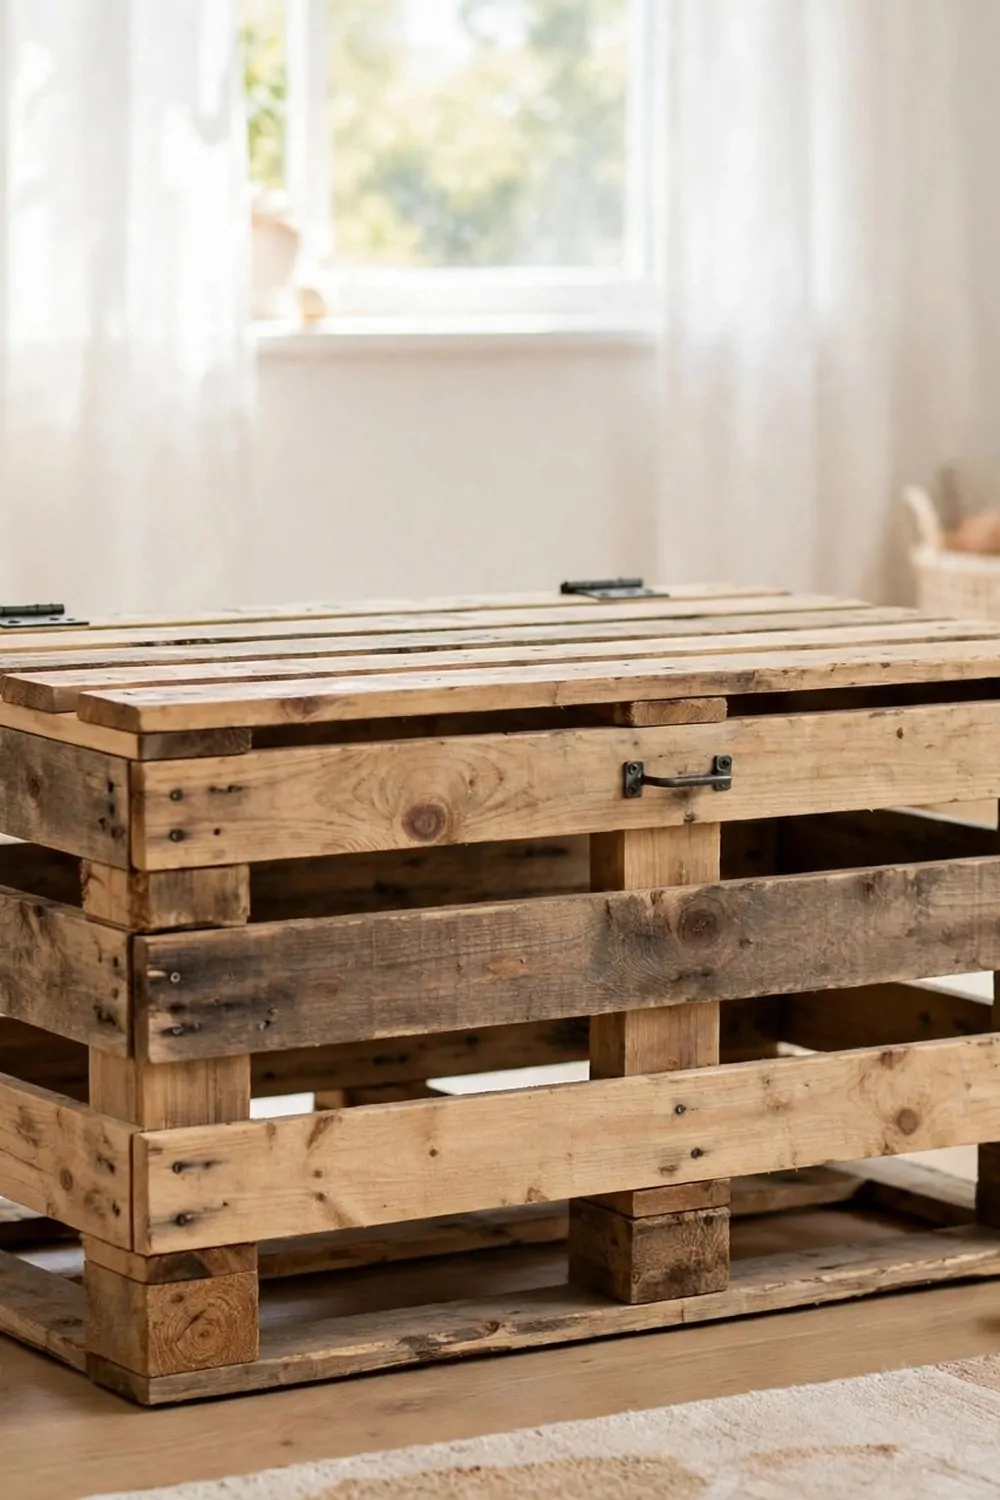
Toys covered the floor of the kids room each night. I built a pallet chest so clean-up takes just a few minutes.
I boxed pallet boards into a low wide chest with a flat lid.
I checked the boards for broken boards and loose nails before I joined them. I sanded the rough edges smooth in a well-aired space in the garden. I wore a plain mask while I sanded and wiped each board clean after.
I screwed the sides together and lined the inside with a smooth flat base. I checked the corners twice so no sharp edge poked out.
I bought a pair of plain lid hinges for $5 to $8 to join the lid to the chest.
I fixed the hinges to the back edge with short screws. I lifted the lid up and down to test the swing. It opened smooth and closed soft with no pinch.
Toys go in the chest at the end of each day now. The lid closes flat, so the chest can sit by the wall.
You can set the chest under the window or at the foot of the bed. Mine sits under the window where the light falls.
Clean-up is fast, and the floor stays clear for play. My kids love lifting the lid to find their toys again.
| Item | Main change | Typical cost |
|---|---|---|
| Plain wooden bed slats | hold the mattress firm | $14 to $20 |
| A small tin of sage paint | paints the headboard soft green | $8 to $12 |
| Small wall brackets | hold the shelf firm | $4 to $7 |
| A set of plain shelf pins | hold the middle shelves in place | $3 to $5 |
| A plain bench cushion | fits the seat just right | $9 to $14 |
| A plain woven mat | keeps the floor clean | $5 to $8 |
| A set of plain coat hooks | hold coats in the entryway | $6 to $10 |
12. Hang a Pallet Spice Rack on the Kitchen Wall
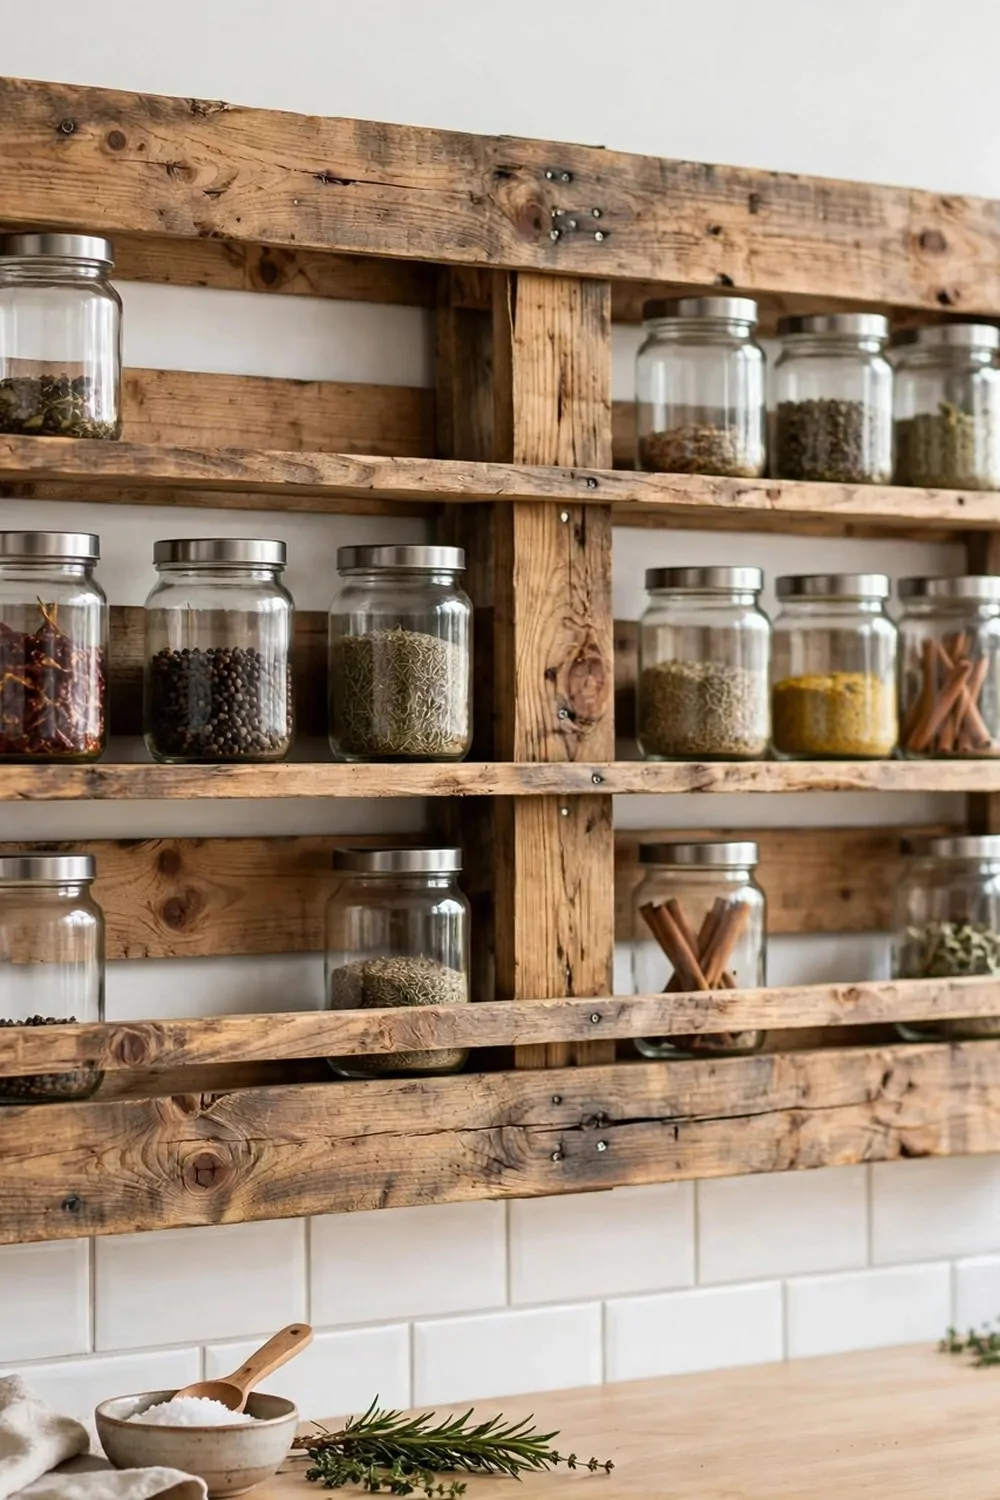
I wanted my spice jars off the counter and up where I could see them.
A short pallet board gave me a neat row on the wall. I picked a board that felt strong and flat.
First I checked the pallet for broken boards and loose nails.
I pulled out any loose nails and set them aside. I sanded each rough edge until it felt smooth under my hand. I worked in a well-aired spot by an open door and wore a plain mask while I sanded.
Then I fixed two small wood strips across the board to hold the jars. Each strip keeps the jars from sliding forward.
I left the board natural and wiped it clean before I touched it again. The warm wood makes the glass jars easy to spot.
A set of plain spice jars costs $6 to $10, and I filled mine one by one.
I hung the rack at eye level near my stove. I put the jars I reach for most in the middle. Now I can grab what I need while I cook.
You can wipe the board clean and swap jars around any time you like.
13. Build a Pallet Tea Cart on Small Wheels
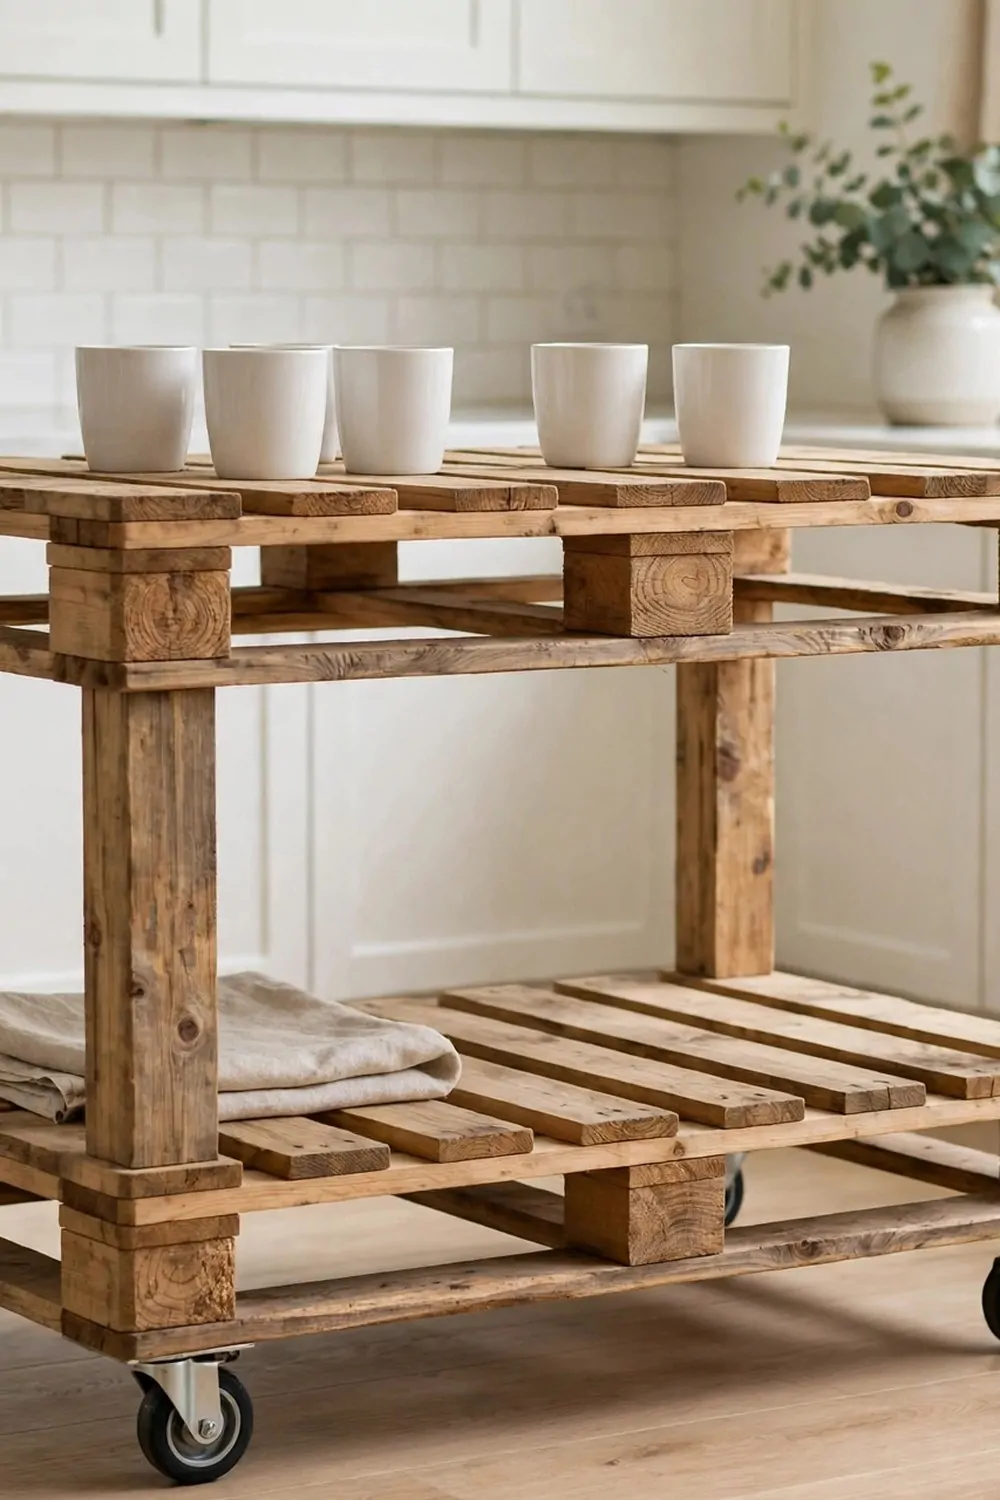
I wanted a small cart I could roll to the sofa on a slow morning.
A pallet base gave me a flat top and a low shelf. I cut it down to a size that fits through my door.
I checked each board for cracks and pulled out loose nails before I started.
I sanded the top and the edges until they felt smooth. I did the sanding in a well-aired place near a window and wore a plain mask. I brushed off the dust before I moved on.
I kept the top flat and wide so cups sit steady when the cart moves. The flat top lets me lift cups off with ease.
I left the cart natural and wiped the top clean before I put cups on it. The warm wood looks calm next to my chairs.
A set of four small wheels costs $7 to $11, and I picked wheels that roll well on my floor.
I fixed one wheel at each corner under the base. I checked that all four wheels touch the floor at once. Then I gave the cart a slow push across the room.
You can load it with a teapot and two cups for a quiet break. When you finish, you roll it back to its corner by the wall.
14. Make a Pallet Room Divider with Plain Panels
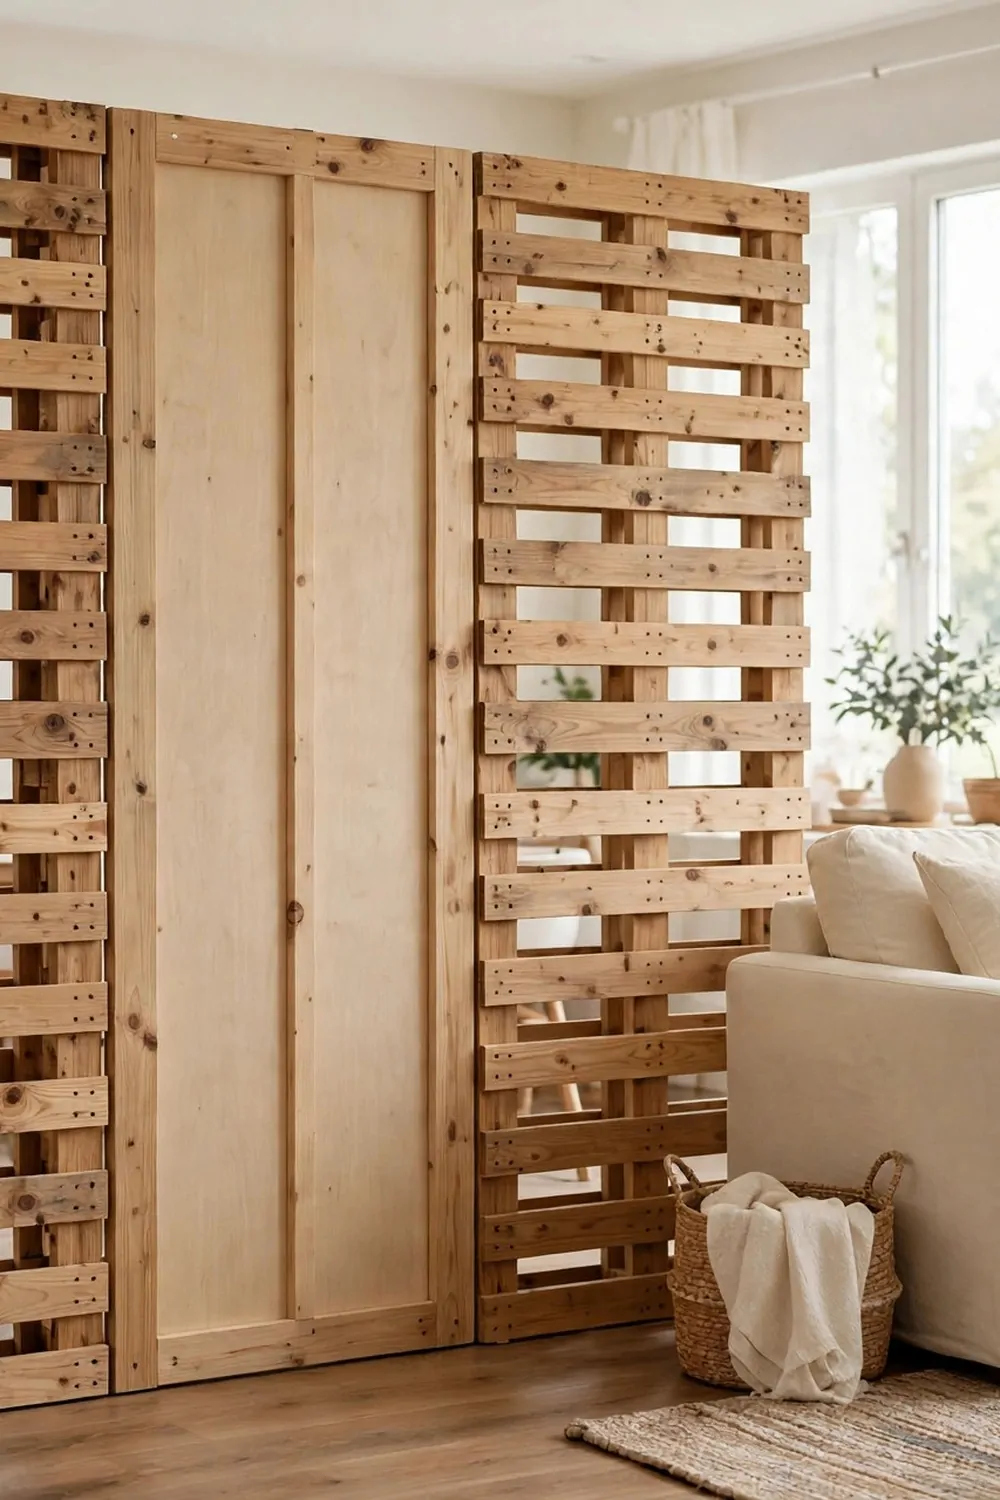
My living room felt like one big open space. I wanted a soft split between my reading chair and the rest of the room.
Three pallet panels made a light divider I can fold away.
I looked over each pallet for broken boards and loose nails. I took out the loose nails and kept the good boards. I sanded the rough edges smooth so no one snags a sleeve.
I sanded in a well-aired room and wore a plain mask while the dust was in the air.
I joined the panels with hinges so they fold like a screen. Each join moves well and stays firm when I open it out.
I left the panels natural and wiped them clean before I stood the divider up. The pale wood lets light pass around the room.
A set of plain hinges costs $5 to $9, and I chose hinges that felt strong in my hand.
I set the divider behind my chair at a slight angle. It gives me a quiet corner for a book and a cup of tea. When guests come, I fold it flat and lean it by the wall.
You can move it in a minute and change the shape of your room.
15. Paint Pallet Wall Art with Leaf Shapes
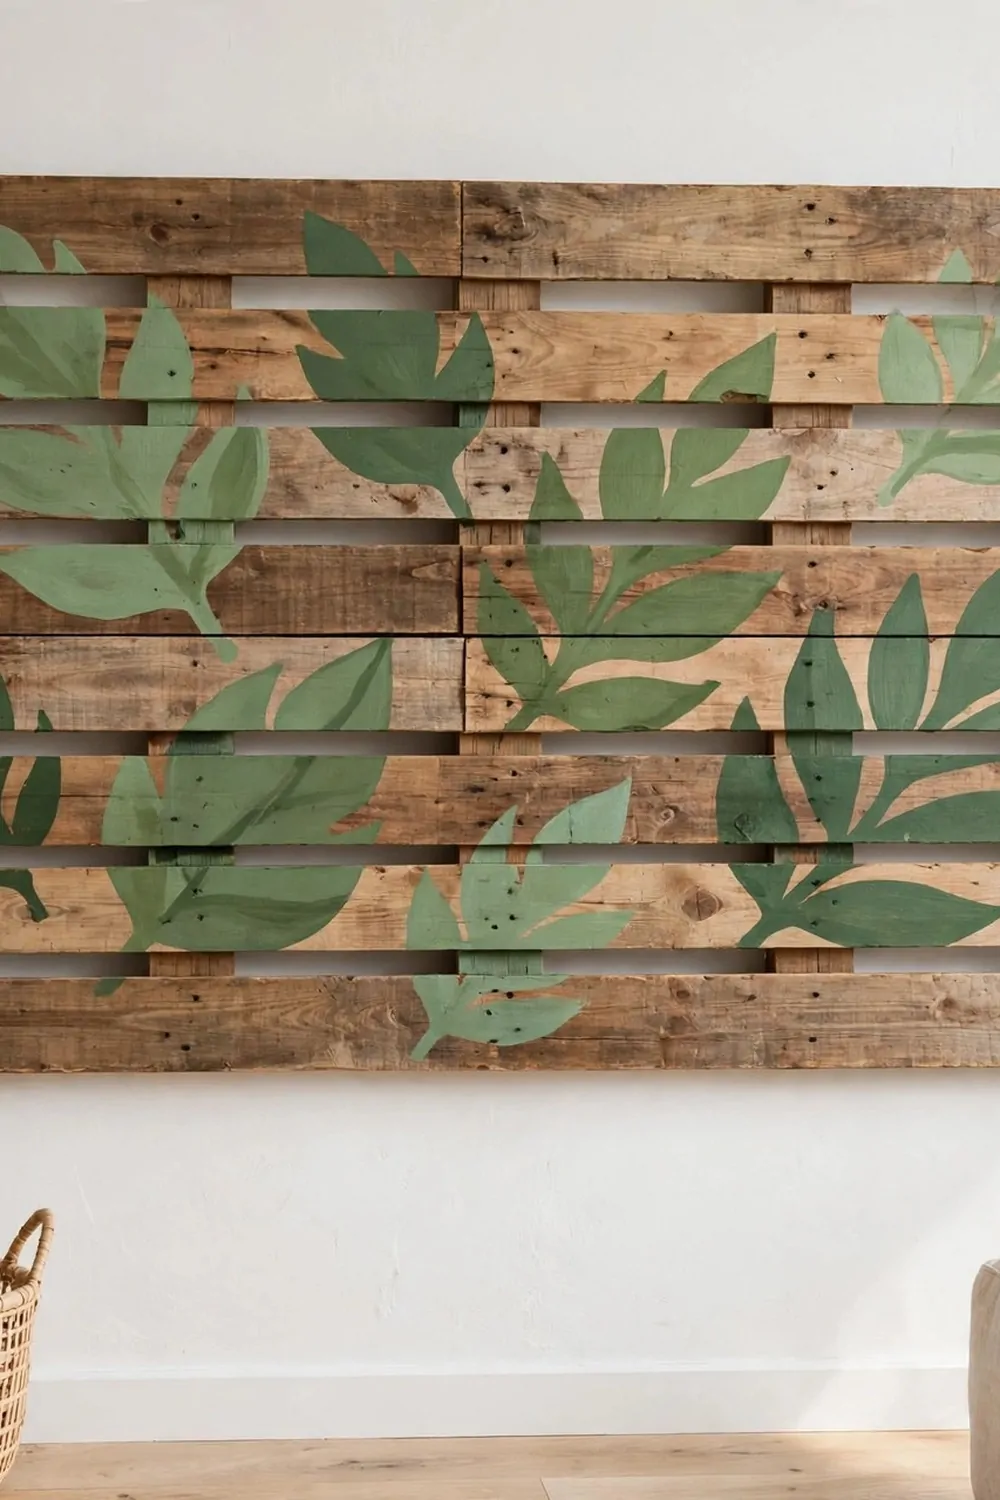
I wanted a bit of green on a plain wall in my hall.
A flat pallet panel gave me a wide board to paint on. I picked a panel with a smooth face and few knots. It felt like a fresh page for leaves.
I checked the panel for broken boards and loose nails first. I sanded the rough edges smooth and brushed the dust away.
I sanded in a well-aired spot on my porch and wore a plain mask while I worked. The fresh air kept the dust from hanging in the room.
Then I drew big leaf shapes in light pencil across the board.
I filled each leaf with soft green paint and left a thin gap between leaves. I added a small stem to each leaf with a thin brush. I let the paint dry fully before I hung the panel up.
A small tin of leaf-green paint costs $6 to $9. I had paint left over for a small frame too.
I hung the art where the morning light falls on it.
You can try big leaves, small leaves, or a mix of both. Keep the shapes plain and the colours soft. Your wall will feel fresh without a lot of fuss.
16. Make a Pallet Wall Clock with a Plain Face
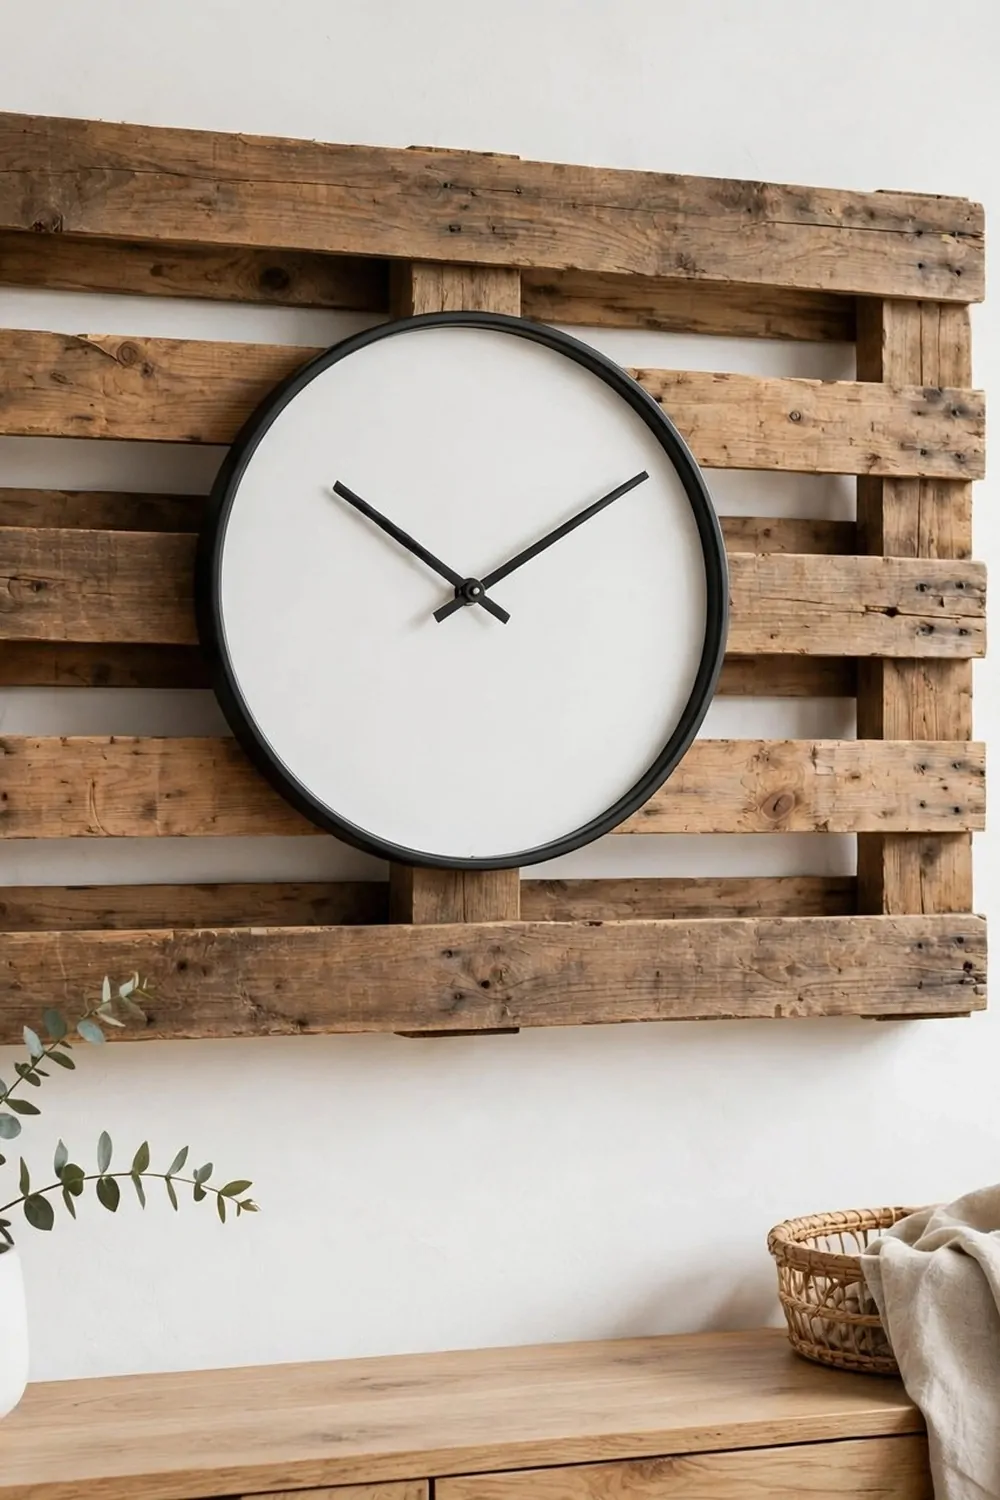
I wanted a clock that felt warm and plain in my kitchen.
A round board gave me a wide face for the clock. I liked the clean white face with dark hands.
I checked the wood for broken boards and loose nails. I pulled the loose nails out and filled the small holes. I sanded the rough edges smooth until the rim felt soft.
I did my sanding in a well-aired space and wore a plain mask while I sanded. I wiped the dust off with a dry cloth when I finished.
I painted the face a soft white and let the paint dry fully before I added the hands.
I kept the face plain and the hands dark, so the time is easy to read at a glance.
A plain clock kit costs $8 to $12, and it came with hands that fit the face well.
I fixed the kit through the centre of the board and set the hands in place. I hung the clock on a strong hook at eye level. Now I glance up and know the time while I work in the kitchen.
You can paint the rim a soft green if you like. Keep the face plain so the hands stay clear.
17. Frame a Mirror with Pallet Wood
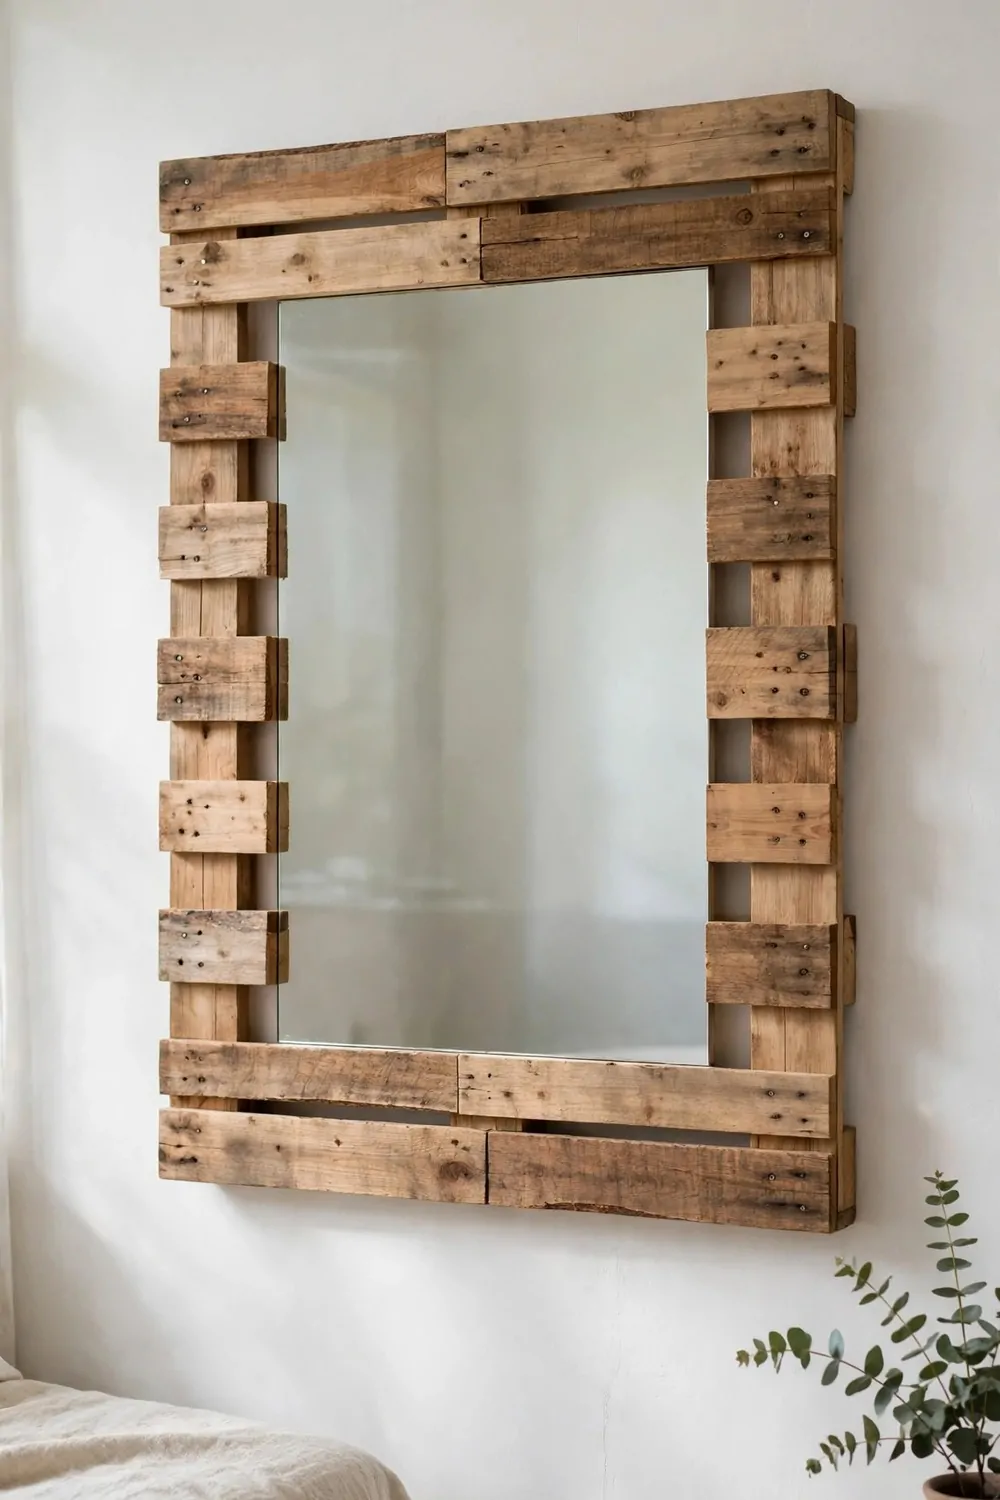
My bedroom wall had a plain mirror with no frame at all. I wanted a warm wood edge around it to make it feel finished.
Pallet wood gave me a natural frame with soft grain and a calm tone.
I checked each pallet strip for broken boards and loose nails. I set the cracked strips aside and kept the straight ones. I sanded the rough edges smooth so the frame feels soft to touch.
I sanded in a well-aired spot and wore a plain mask while the dust rose.
I cut four strips to fit the mirror sides and joined them at the corners. I checked the corners twice so the frame sits square.
I left the wood natural and rubbed a clear finish over it. I let the finish dry fully before I fixed the mirror inside.
A plain mirror glass costs $12 to $18, and I picked a size that fits my wall well.
I fixed the frame to the wall with two strong hooks. I set the mirror inside the frame and checked it from across the room. The wood edge makes the whole wall feel warm.
You can dust the frame with a dry cloth and it will keep its soft look.
18. Hang a Pallet Porch Swing with Plain Cushions
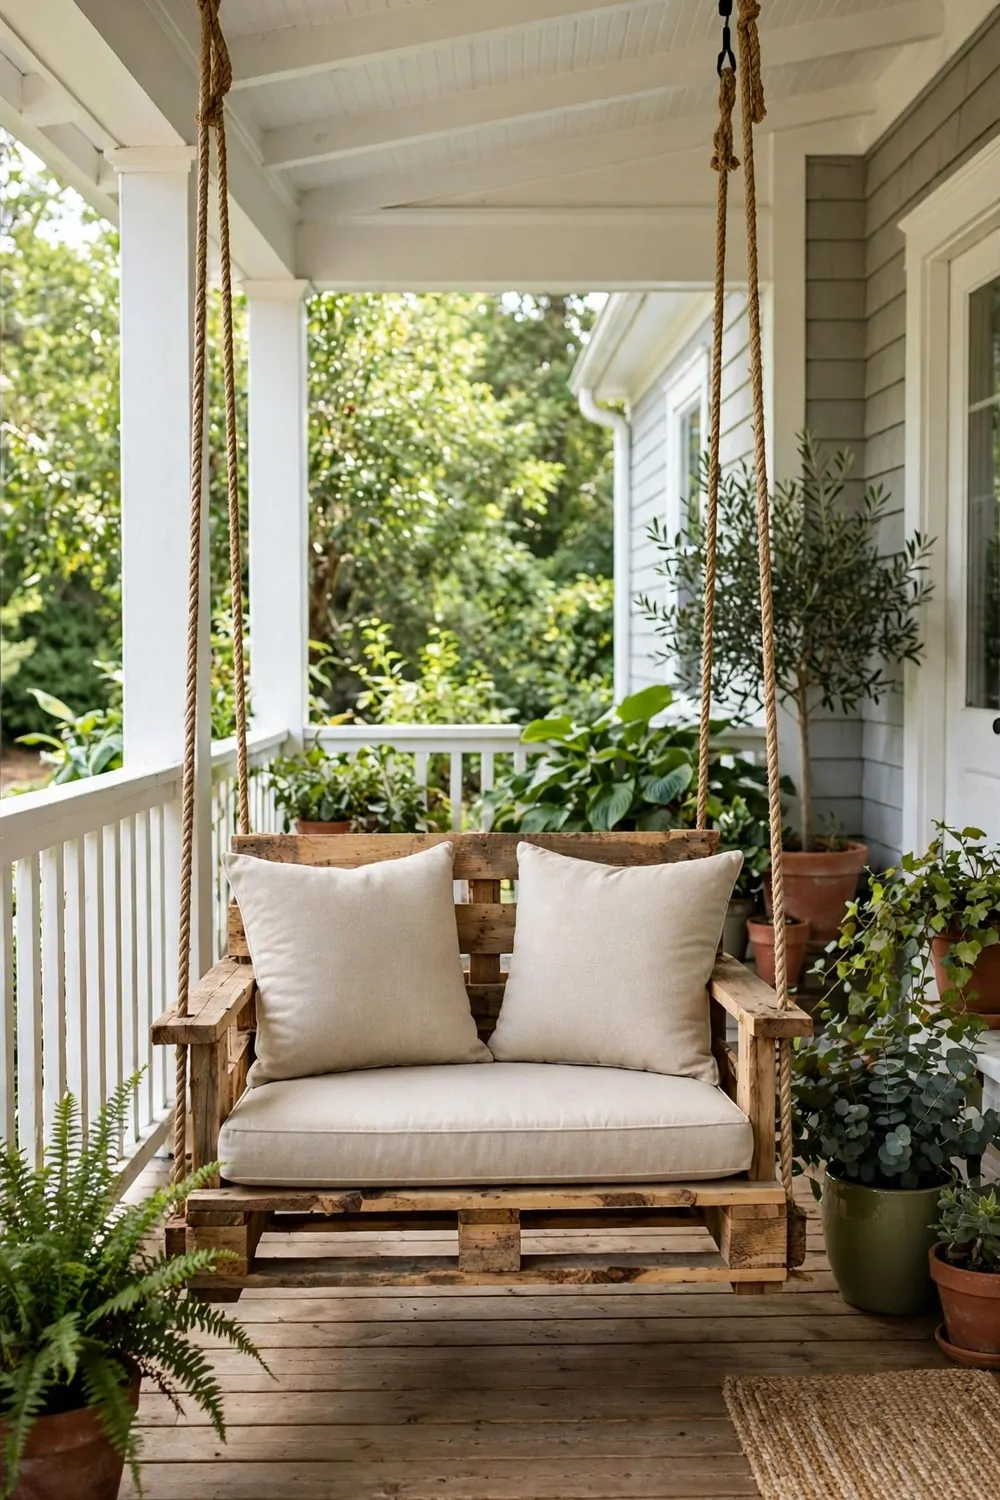
I wanted a swing on my porch for slow evenings outside.
A pallet seat gave me a wide base that fits two people. I picked thick boards that felt firm under my weight.
I checked the pallet for broken boards and loose nails before I built. I pulled out the loose nails and replaced one split board. I sanded the rough edges smooth so the seat feels soft.
I sanded in a well-aired place in my yard and wore a plain mask while I worked. I brushed the dust off the seat before I painted it.
I left the seat natural and wiped it clean before I hung it up.
I fixed strong ropes to each side of the seat and to a beam above. I checked each knot and pulled the seat to test it.
A pair of plain swing ropes costs $9 to $14, and I chose ropes that felt thick and firm.
I added plain cushions in a soft cream for comfort. I sat down slow and felt the swing move with ease. Now I read out there in the cool air at the end of the day.
You can take the cushions in when rain comes. The swing stays out and dries fast in the sun.
19. Build a Pallet Outdoor Daybed
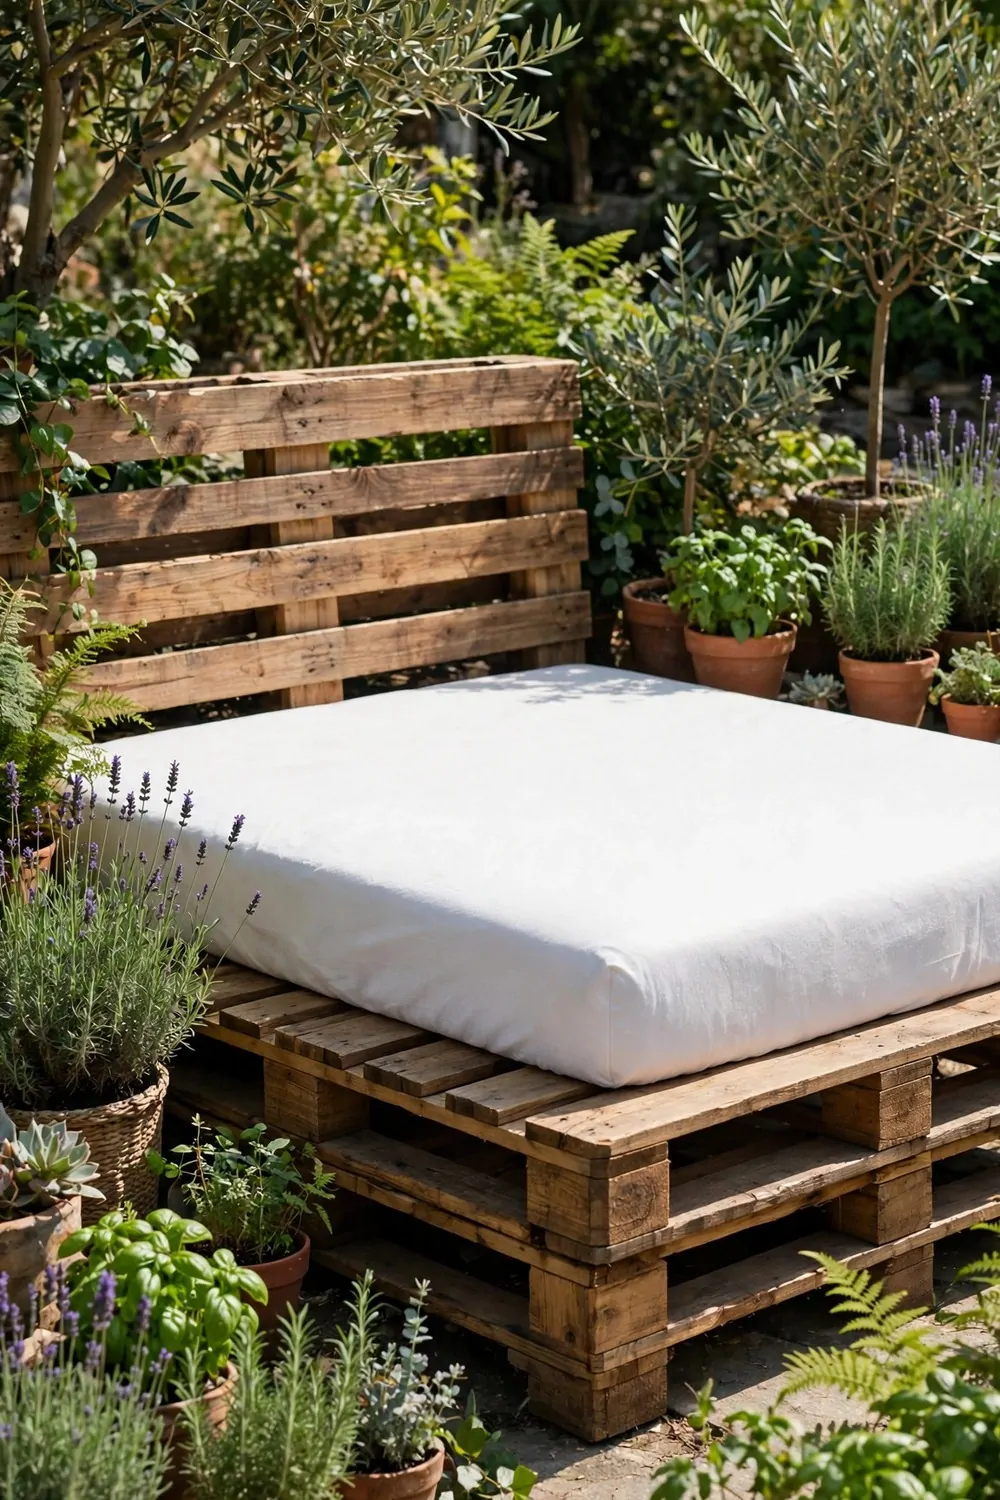
I wanted a low bed in the garden for naps in the shade. A pallet base gave me a wide frame that sits close to the ground.
I stacked two pallet layers to lift the bed a little off the soil.
I checked each pallet for broken boards and loose nails. I pulled the loose nails and swapped out a cracked board. I sanded the rough edges smooth so no bare foot snags on a splinter.
I sanded in a well-aired spot in the garden and wore a plain mask while I sanded. I swept the dust away before I painted the frame.
I left the frame natural and wiped it clean before I laid the mattress down.
I set a plain mattress on top and smoothed it flat. The bed feels firm yet soft when I lie down.
A plain outdoor mattress costs $18 to $25, and I picked one that dries fast after rain.
I placed the daybed under a tree where the shade moves through the day. I can read there, rest there, or just watch the clouds. In the evening I pull a light throw over the mattress to keep it clean.
You can add two soft pillows when you lie down if you like. The frame stays out and holds up well in the sun.
20. Grow a Vertical Garden on a Pallet Wall
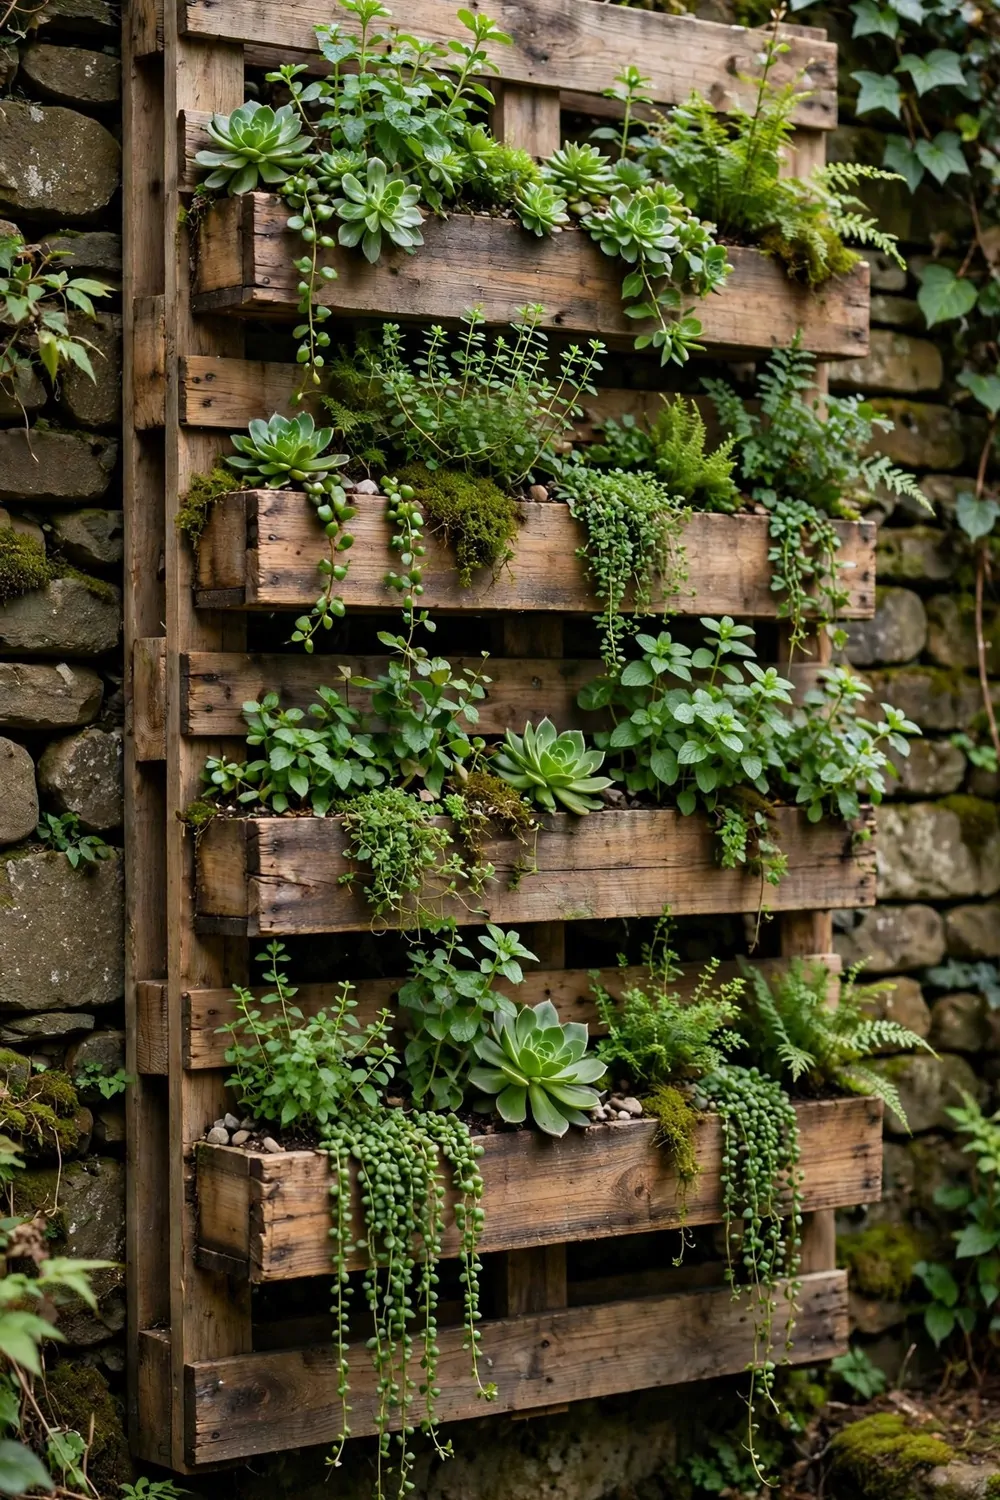
I wanted green plants on a bare wall by my back door.
A standing pallet gave me rows of pockets for small plants. I leaned it flat on the wall and checked it felt firm. The upright shape saves floor space in a small yard.
I checked the pallet for broken boards and loose nails first. I sanded the rough edges smooth so my hands stay safe when I tend the plants.
I sanded in a well-aired spot in the yard and wore a plain mask while I worked. I brushed the dust off before I lined the pockets.
I lined each pocket with landscape fabric and filled it with soil.
I tucked small green plants into each row and watered them well. I kept the tall plants at the top and the low plants near the base. I let any paint on the frame dry fully before I watered the plants.
A roll of plain landscape fabric costs $6 to $10, and one roll lined all my pockets.
I water the top rows first and let the water trickle down. In a few weeks the green fills out and softens the wall.
You can grow leafy greens, herbs, or small flowers in the pockets. Pick plants that like the light on your wall. Check the soil with your finger and water when it feels dry.
21. Grow a Pallet Herb Garden by the Kitchen Window
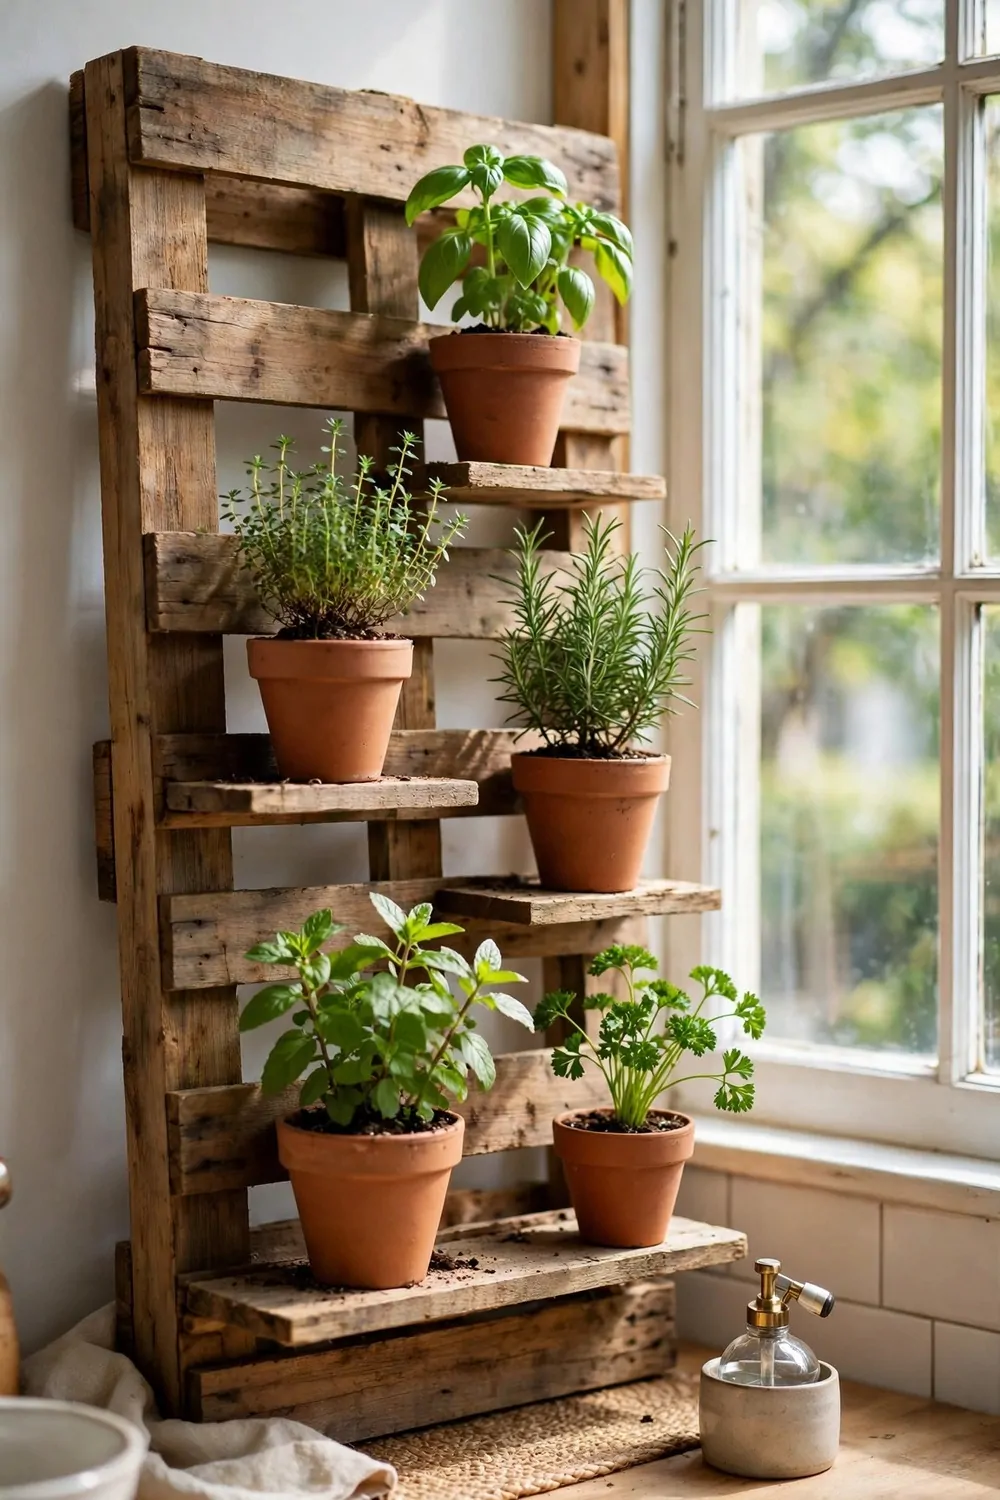
I wanted fresh herbs close to my kitchen window. A small pallet box gave me a neat row of green right where I cook.
I set the shelf by the window where the light falls.
I checked the pallet wood for broken boards and loose nails. I pulled out the loose nails and sanded the rough edges smooth. I worked in a well-aired spot and wore a plain mask while I sanded.
I left the shelf natural and wiped it clean before I added the pots. The warm wood makes the green herbs stand out.
I filled the pots with fresh soil and set them on the shelf.
I sowed the seeds in the pots and pressed them down with care. I watered the soil with a light pour and set the pots in the sun. In a few weeks small green shoots will show through the soil.
A pack of plain herb seeds costs $3 to $5, and one pack gave me more than one row.
I snip a few leaves when I need them for lunch. The plants keep growing back when I trim them with care.
You can start with basil, mint, or parsley in your pots. Keep the soil damp but not wet. Your window will smell fresh and look green through the day.
22. Build a Pallet Raised Garden Bed
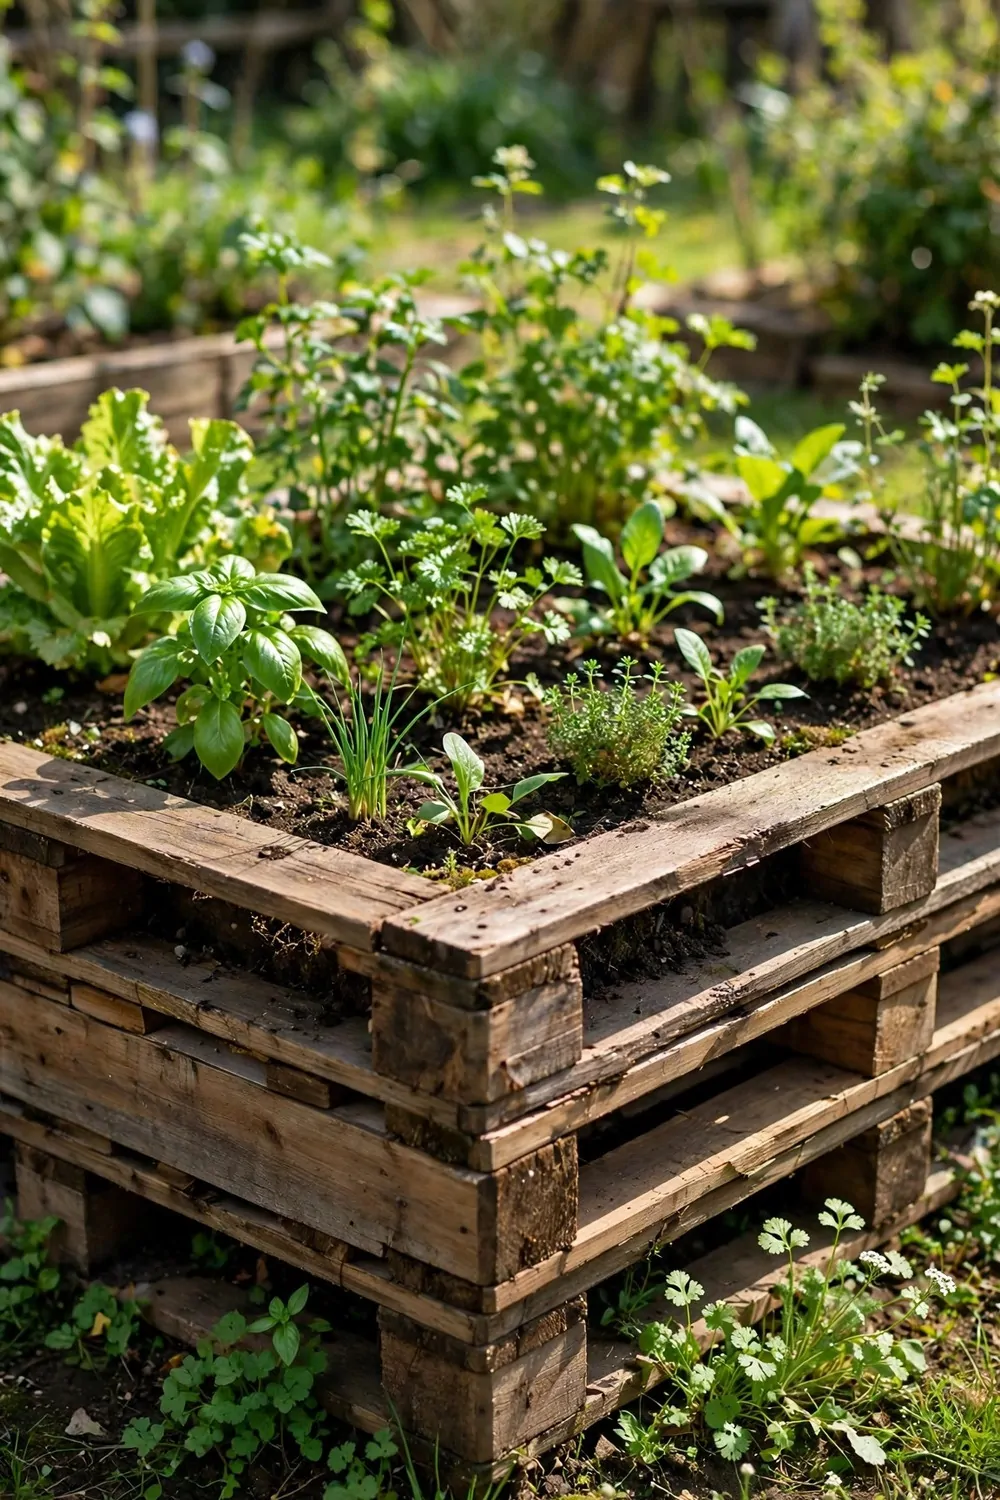
I wanted a raised bed for green plants in a sunny corner.
Pallet boards gave me deep sides that hold soil well. I built a low rectangle that I can reach across with ease.
I checked each board for broken boards and loose nails. I set aside any cracked board and kept the firm ones. I sanded the rough edges smooth so the rim feels soft.
I sanded in a well-aired place in the garden and wore a plain mask while I sanded. I brushed the dust away before I lined the bed.
I left the outside boards natural and brushed them clean before I added soil. The warm boards look calm in the sun.
I lined the base with weed fabric and filled the bed with fresh soil. I pressed small plants into the soil in neat rows. I watered them well and watched the soil settle around the roots.
A roll of plain weed fabric costs $5 to $8, and one roll covered the base with ease.
I water the bed in the morning and check the soil in the evening. In a few weeks the plants fill out and the bed looks lush and green.
You can grow leafy plants, beans, or small flowers in your bed. Give each plant room to spread as it grows. A raised bed keeps the soil in one neat place.
| Item | Main change | Typical cost |
|---|---|---|
| A set of plain spice jars | hold spices on the wall | $6 to $10 |
| A set of four small wheels | roll well on the floor | $7 to $11 |
| A set of plain hinges | join the divider panels | $5 to $9 |
| A small tin of leaf-green paint | paints leaf shapes on the wall art | $6 to $9 |
| A plain clock kit | fits the clock face well | $8 to $12 |
| A plain mirror glass | fits the wall well | $12 to $18 |
| A pair of plain swing ropes | hold the swing firm | $9 to $14 |
23. Build a Pallet Compost Bin with Slatted Sides
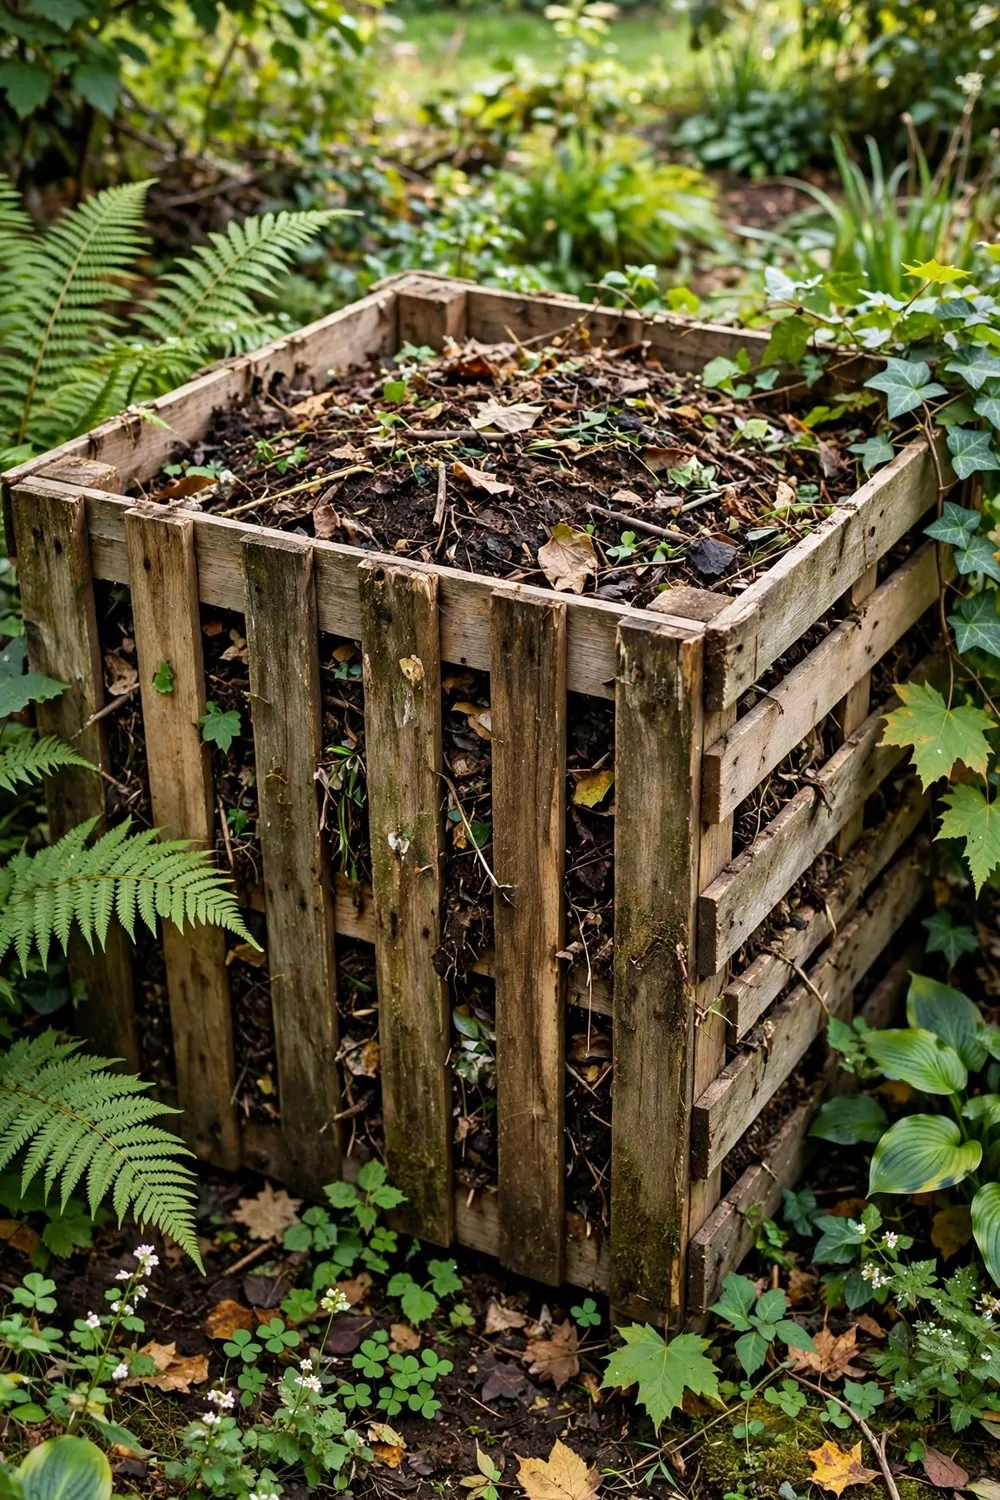
A compost bin made from old pallets turns garden waste into dark, crumbly compost for your beds. The slatted sides let air move through the pile, and that air helps the waste break down. You can build it in a quiet corner of the garden in one afternoon.
I check each pallet for broken boards and loose nails before I start, and I sand every rough edge smooth. I do my sanding outside where the air moves freely, and I wear a plain mask while I sand. A quick check at the start saves sore hands later.
I stand four pallets on their edges to make a square, and I join the corners with short screws. The gaps between the boards stay open, so air can reach the pile from all sides. I leave the front pallet loose, so I can lift it away when I need to turn the pile.
I fill the bin with leaves, grass clippings, and plain fruit and veg scraps from the kitchen. I add no meat, no dairy, and no cooked food, and I keep it to garden waste and plain scraps only. A mix of green waste and dry leaves breaks down best.
A small roll of wire mesh for the base costs $7 to $11, and it keeps the pile neat while air still moves through.
I layer green waste and dry leaves like a sandwich, and I add a little water when the pile feels dry. I turn the pile with a fork every few weeks, and the middle soon feels warm. In a few months the bottom layer turns dark and crumbly.
I place the bin on bare soil, so worms can crawl up into the pile. I pick a spot that gets a little sun and a little shade through the day. The open top lets rain fall in and keeps the pile damp.
I use the finished compost on my veg beds and round my plants, and a little goes a long way. I spread it in a thin layer, and I mix it into the top soil with my hands. Your plants will thank you with fresh green growth.
If you add a coat of plain garden paint, let the paint dry fully before you use the bin. I brush it on thin, and I leave it in the sun for a full day. A dry coat stays put and keeps the wood safe from rain.
24. Build a Pallet Potting Bench with a Lower Shelf
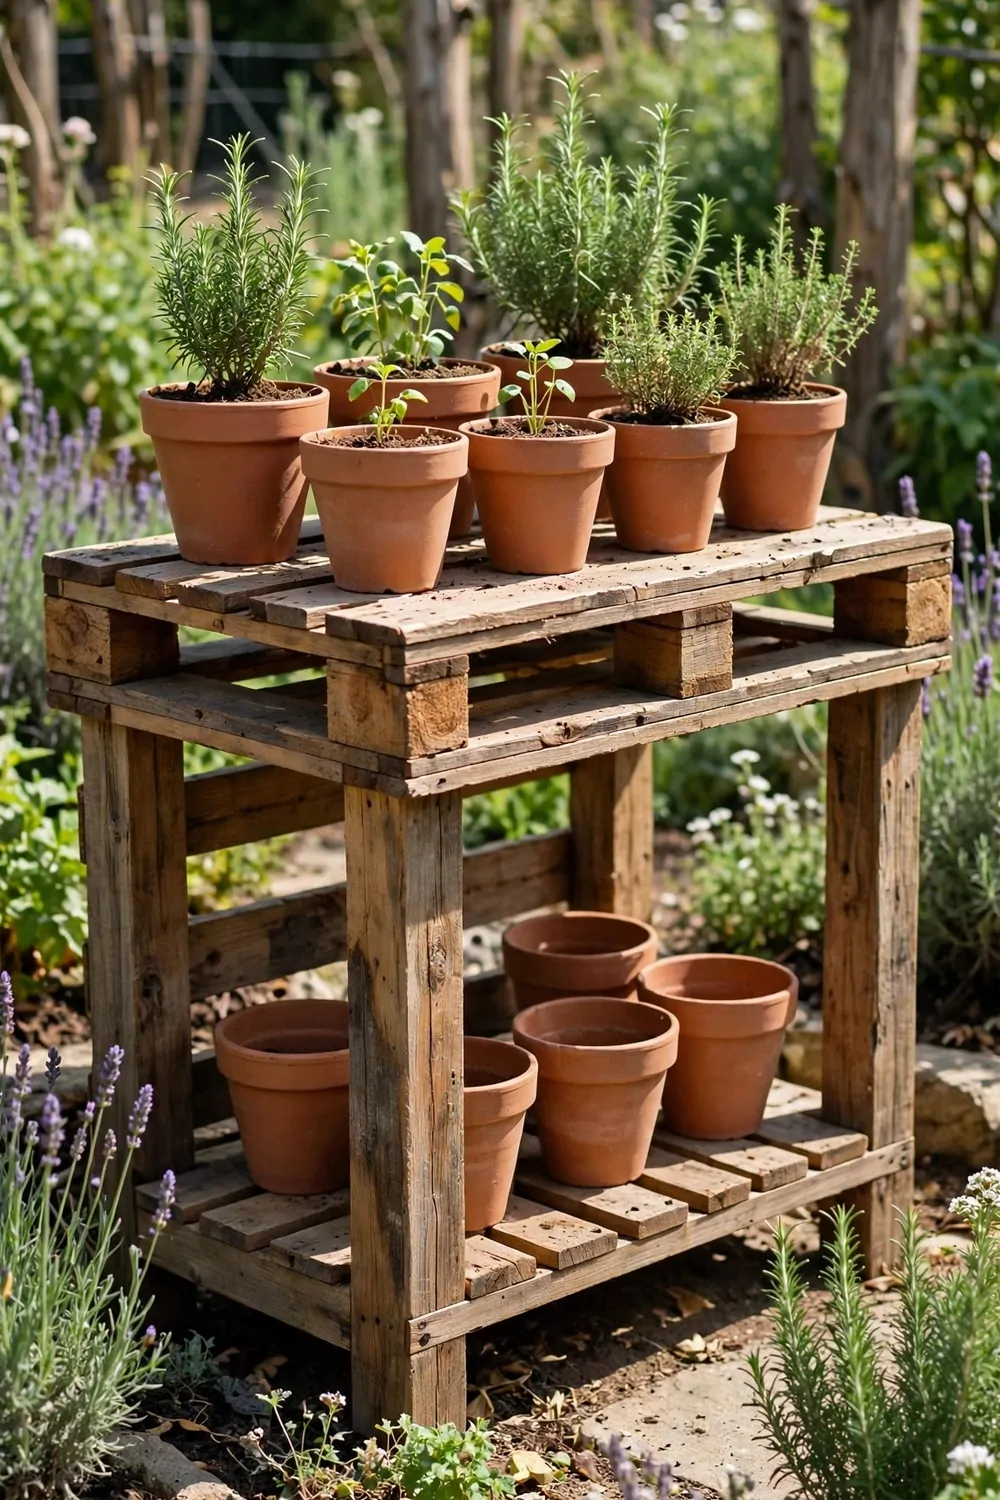
A potting bench gives you a steady table for pots, soil, and small plants, right where you garden. The lower shelf holds spare pots, so your work top stays clear. I built mine from two old pallets, and it still stands strong.
I look over each pallet for broken boards and loose nails first, and I smooth the rough edges with sandpaper. I sand in a spot with fresh air moving through, and I keep a plain mask on while I work. Clean wood feels good under your hands.
I lay one pallet flat for the work top and fix legs under each corner. I fix a plain board across the middle for the lower shelf, and I check it sits level. The shelf holds spare pots without a wobble.
I keep small pots on the top and spare pots on the shelf below. I sweep the top clean after each job, so soil does not pile up. A tidy bench makes the next job start fast.
A set of plain clay pots for the bench top costs $6 to $9, and they hold seedlings while they grow.
I work at the bench when I pot up seedlings in spring, and I move it near the beds in summer. The bench stays outside all year, and the wood turns a soft grey with time. A little oil on the top keeps rain from soaking in.
I set the bench close to the beds, so I can reach it with muddy hands. I bring a small bucket when I weed, for trimmings. Everything I need sits in one spot now.
I sit a small plant on the bench when friends visit, and it makes the corner look loved. You can leave the wood plain, and it still looks calm next to the leaves. A plain bench fits any garden style.
If you paint the bench, let the paint dry fully before you put pots on it. I leave mine in the sun for a full day after painting. Dry paint will not stick to your pots or your hands.
25. Build a Pallet Trellis for Climbing Beans
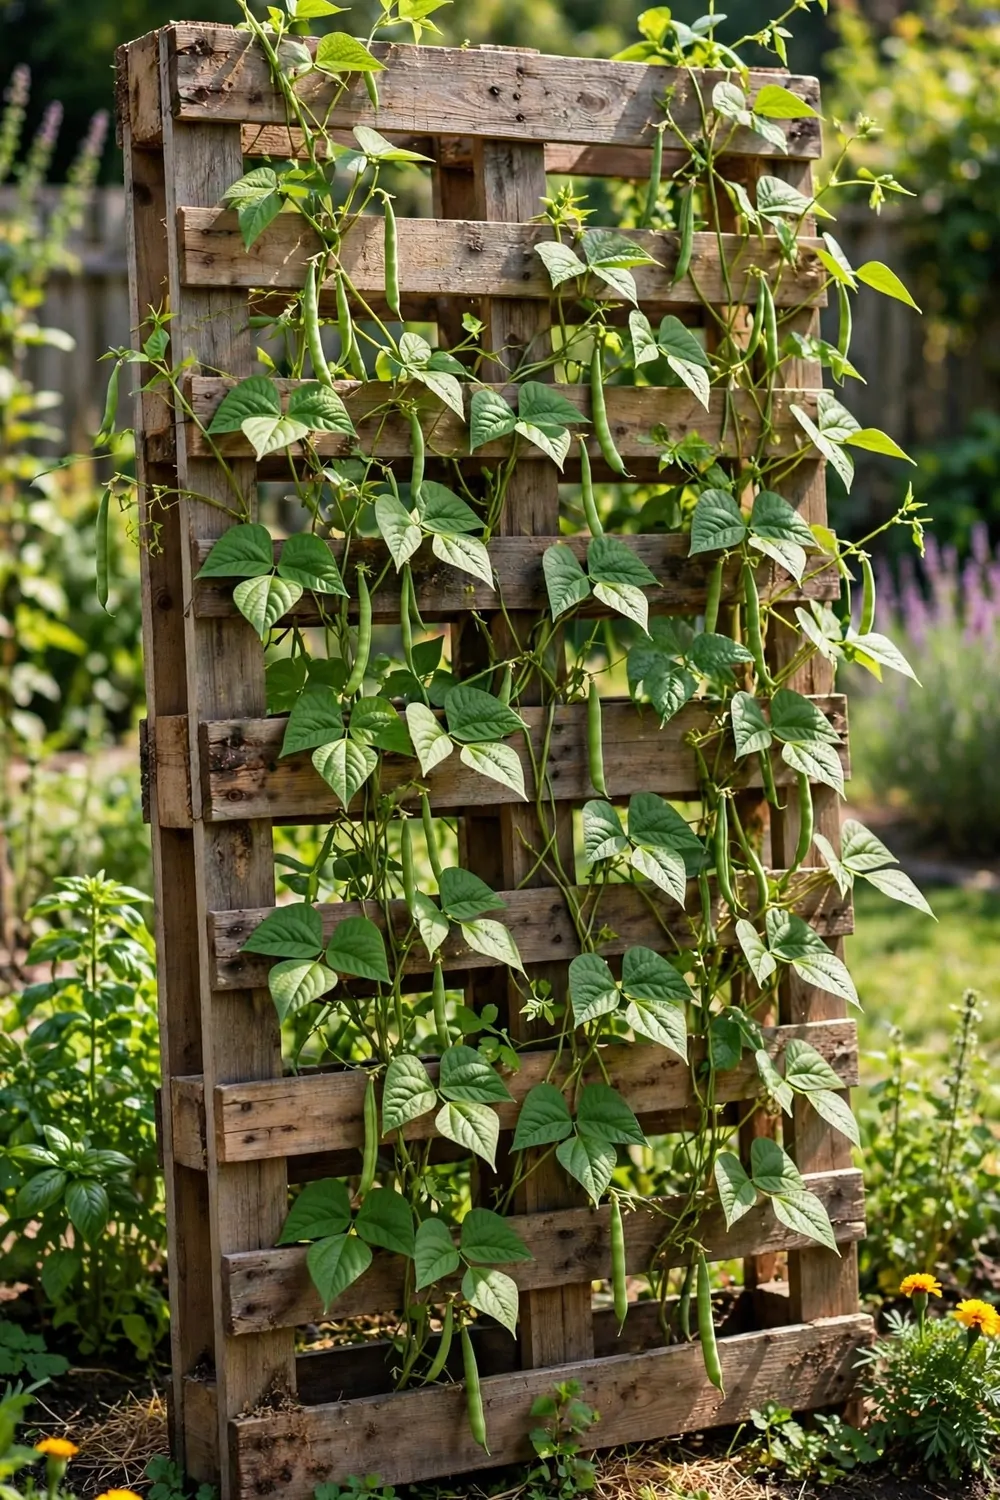
A pallet trellis gives climbing beans a strong frame to climb, and it turns one plain pallet into a green wall. I lean it against a sunny fence, and the beans soon cover the boards. You can pick beans at waist height, with no bending low.
I check the pallet for broken boards and loose nails, and I sand the rough edges smooth before I lift it. I sand out in the open air, with a plain mask over my nose and mouth. Smooth wood will not snag the stems as they grow.
I stand the pallet upright and fix its feet into the soil with two short posts. I tie plain garden twine across the slats in a loose grid, and the young stems wind round it. The twine gives each stem something soft to hold.
I plant the beans at the base in late spring, when the soil feels warm to my hand. I water the base well, and I keep the soil damp while the seeds sprout. In a few weeks the first tendrils reach for the twine.
A roll of plain garden twine for the trellis costs $2 to $4, and one roll ties up a whole row of beans.
I pick the beans when they feel firm and snap clean, and I pick often so more pods grow. I pick in the morning, when the pods feel cool and crisp. A full trellis gives plenty of pods through summer, with more to spare most weeks.
I grow the beans where they get sun for most of the day, and I shelter them from strong wind. The trellis shades the soil below, so it stays damp longer. I plant lettuce in that shade, and it stays fresh there.
I pull the old stems away in autumn, and I save the twine if it still looks strong. I brush the pallet clean, and I lean it in a dry spot for winter. It comes out again next spring, ready for a new row.
If you paint the trellis, let the paint dry fully before you plant beans near it. I paint mine before the seeds go in, and I leave it a full day in the sun. Dry paint keeps the wood safe, and the beans climb clean wood.
26. Build a Pallet Garden Fence Panel
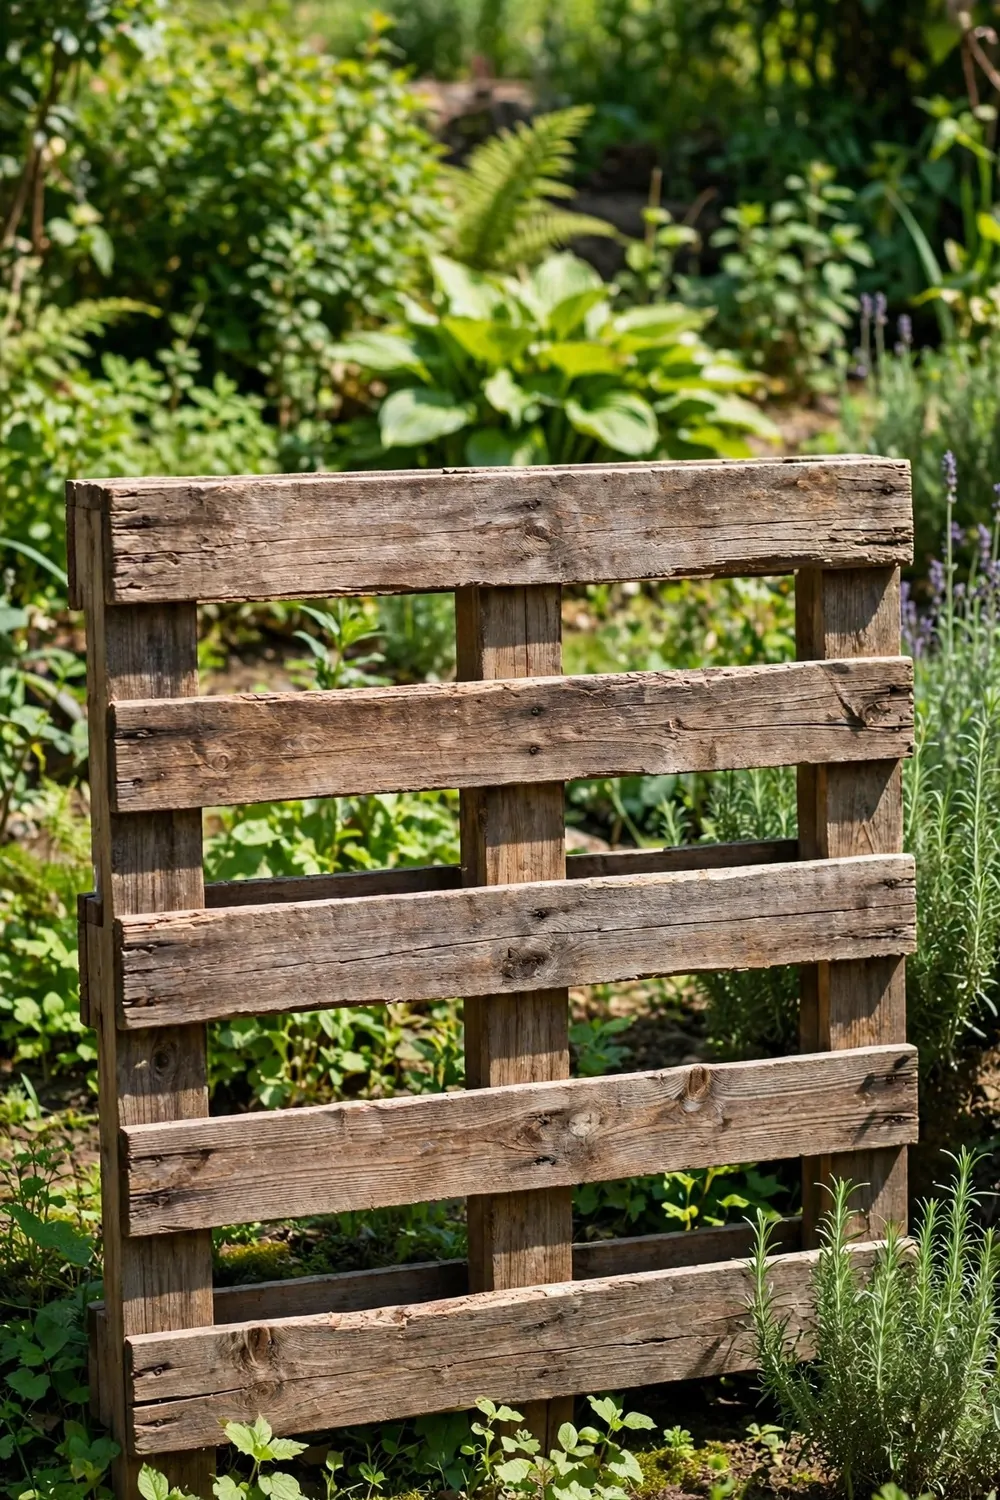
A pallet fence panel marks the edge of a garden bed, and it looks far smarter than a bare gap. I use a few pallets in a row to screen my compost corner from the path. The panels keep feet off the beds, and they give the garden a tidy frame.
I check every pallet for broken boards and loose nails, and I sand the rough edges till they feel smooth. I do the sanding in a well-aired spot in the garden, with a plain mask on. Smooth edges mean no splinters when you brush past.
I sink two short posts into the soil, and I fix the pallet between them with screws. I check the panel sits straight, and I pack soil firm round each post. A straight panel stays put through wind and rain.
I line the panels along the back bed, and I leave a small gap at one end for a path. The gap lets me walk through with a wheelbarrow, and it keeps the route clear. A fence should guide you, not block you.
A small tin of fence paint for one panel costs $9 to $13, and one tin covers the front and back with a thin coat.
I brush the paint on in thin coats, and I work from the top down so drips do not pool. I let the first coat dry fully before I add the next one. Two thin coats last longer than one thick coat.
I plant low flowers along the base, and they soften the straight lines of the wood. The flowers draw your eye, and the panel fades into the garden. A plain fence can still look soft and full of life.
I check the screws each spring, and I tighten any that feel loose. I look for boards that have warped in the rain, and I swap them for fresh boards. A small fix each year keeps the fence strong for years.
When I freshen the paint, I sand the rough spots outside, with a plain mask on my face. I brush off the dust, and I let the paint dry fully before I use the gate path again. A dry coat will not mark your hands or your clothes.
27. Build a Pallet Outdoor Serving Table
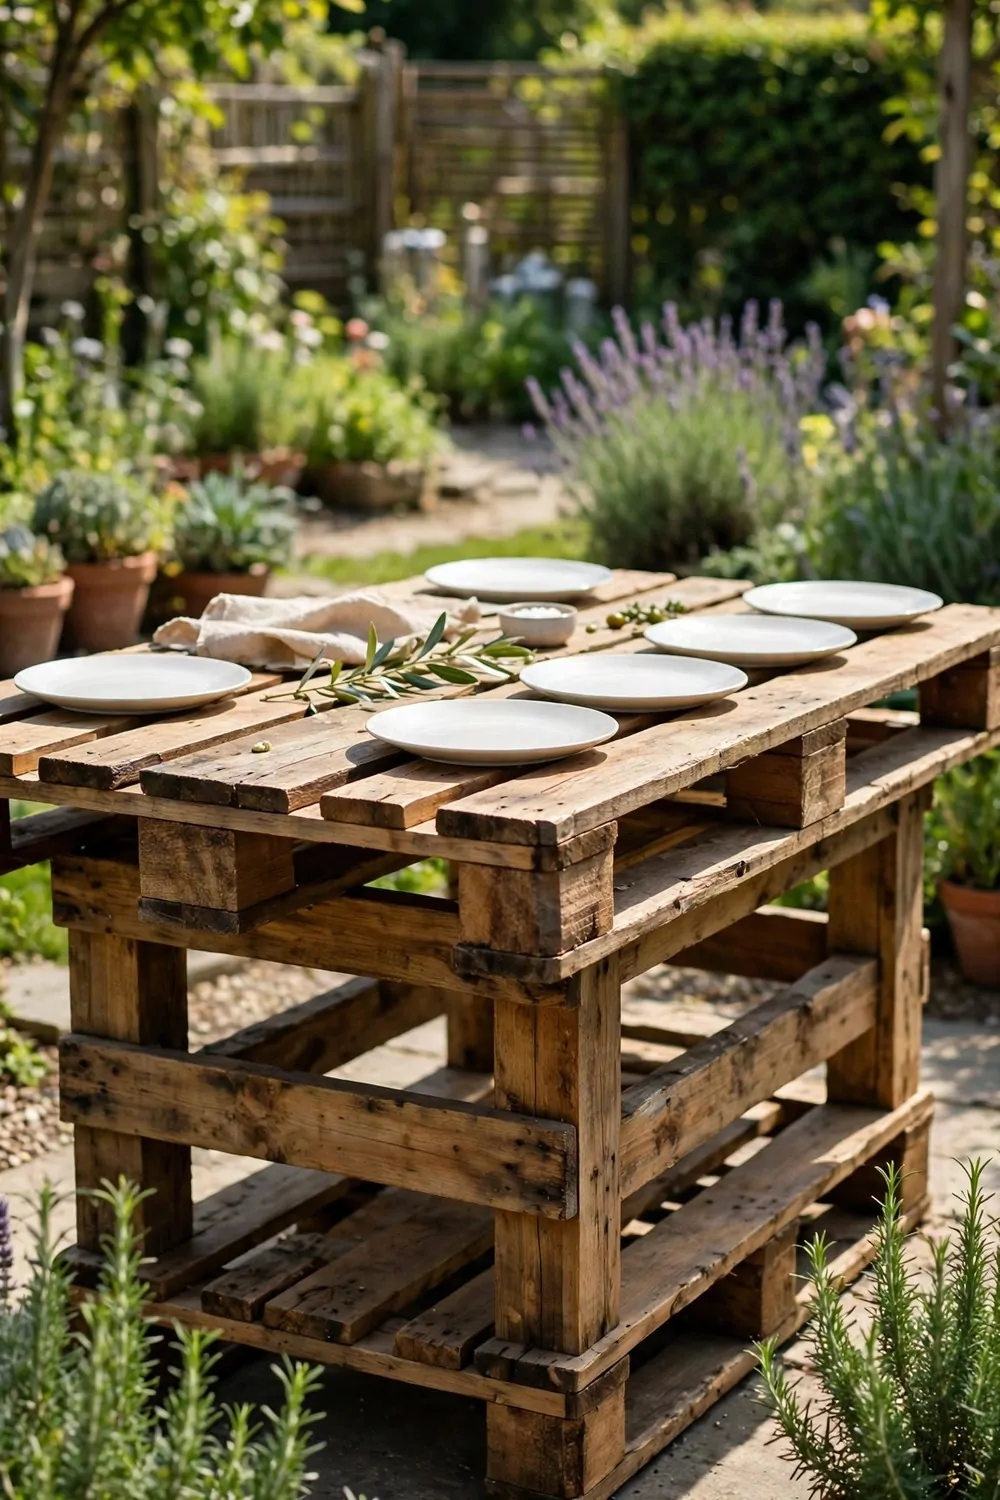
An outdoor serving table turns a garden meal into a small party, with room for plates and drinks. I set mine near the back door, so trips to the kitchen stay short. Guests help themselves, and I can sit down too.
I check the pallet wood for broken boards and loose nails, and I sand the top till it feels smooth. I sand outside in a breeze, with a plain mask on while I work. A smooth top will not snag cloths or scratch plates.
I build the top from pallet boards laid side by side, and I fix them to two cross pieces below. I add short legs at each corner, and I check the table stands level on the grass. A level table keeps drinks from sliding.
I lay a plain cloth over the top for meals, and I set out plates for everyone. I keep the food in the shade, and I bring it out just before we eat. A table in the shade stays cool on warm days.
A set of plain outdoor plates for the table costs $8 to $12, and the set serves a small family meal with ease.
I use the table for lunch on warm days, and for tea when friends drop by. I clear it after each meal, and I wipe the top clean with a damp cloth. A quick wipe keeps the wood fresh and ready.
I store the table under a porch roof when rain comes, so the wood stays dry. I tip it on its side in winter, and I lean it against the shed wall. A dry table lasts many summers.
I use the shelf below the top for spare plates, and it keeps the top clear. The space under the table holds what I do not need at once. Everything stays close, and the meal flows well.
If you paint the table, let the paint dry fully before you set food on it. I paint mine a week before our first garden meal, and I leave it in the sun. Dry paint is safe for plates, and it wipes clean.
28. Build a Pallet Sandbox with a Plain Lid
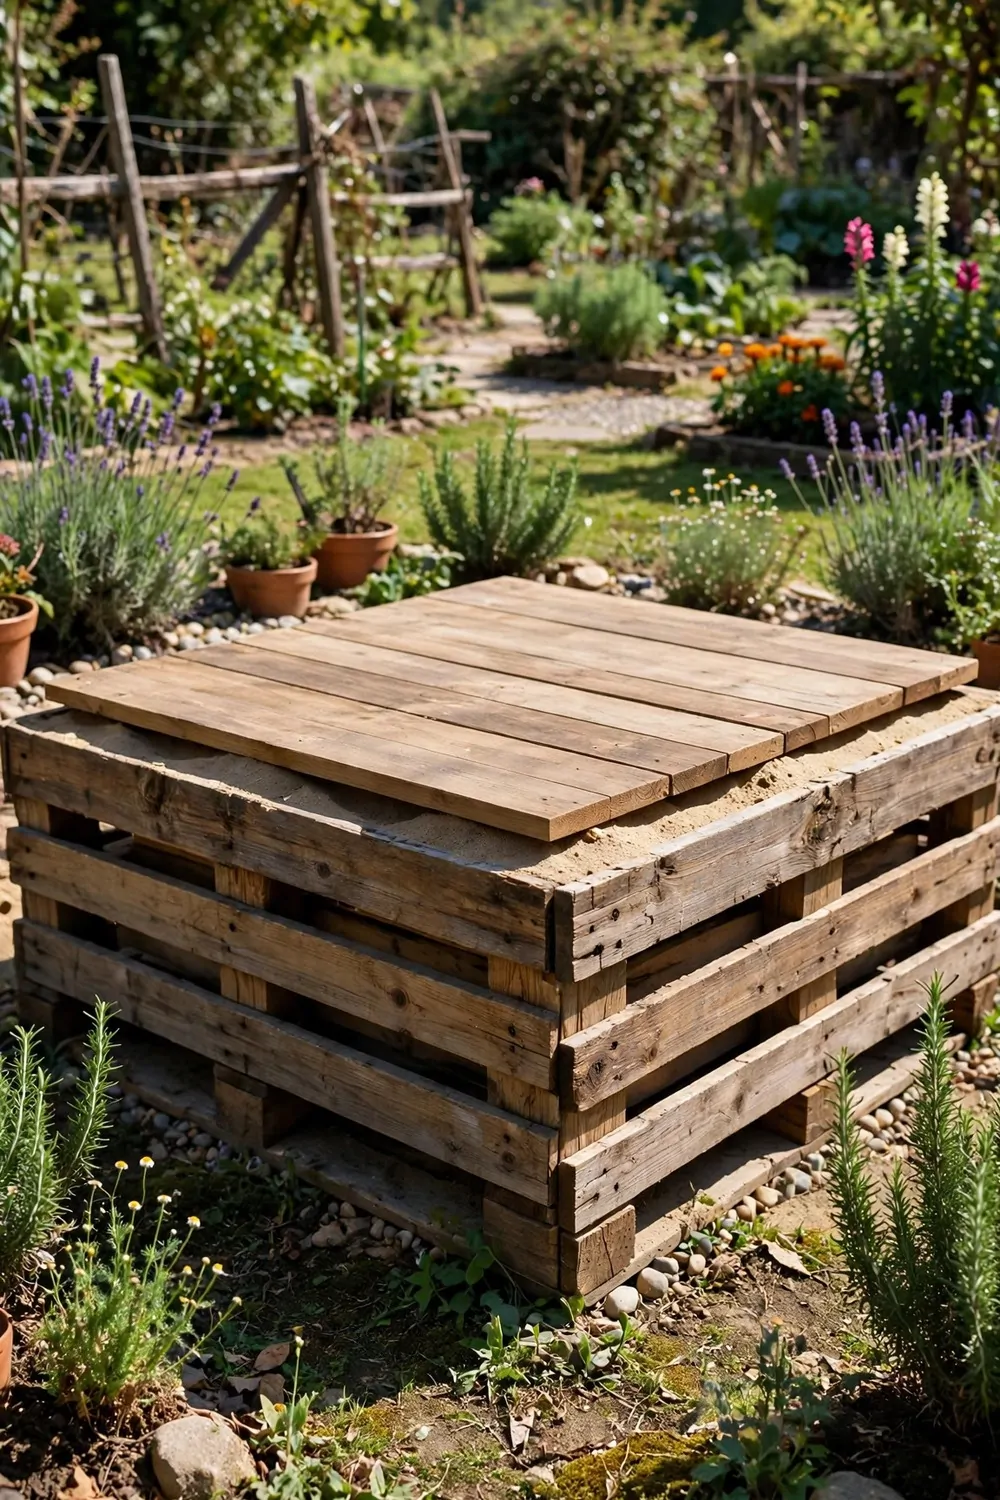
A pallet sandbox gives kids a safe spot to dig, build, and pour, right in the garden. I built ours low, so small legs can climb in and out with ease. The plain lid keeps leaves and rain out when play ends.
I check each pallet for broken boards and loose nails, and I sand every edge till it feels soft. I sand in the open air, with a plain mask over my face while I work. Soft edges mean safe hands during play.
I lay four pallet boards on their sides to make a square, and I join the corners with screws. I line the base with a plain sheet, and I tip in the sand. The sheet stops weeds from poking through the sand.
I build the lid from flat pallet boards that sit snug on top. I lift the lid off in the morning, and I put it back on at dusk. A lid keeps the sand clean and dry for tomorrow.
A bag of plain play sand for the box costs $5 to $8, and two bags fill a small box to a good depth for play.
I set the box where I can see it from the kitchen window, and where it gets morning sun. I check the sand each week, and I rake out leaves and twigs. Clean sand feels soft, and it pours well through small hands.
I bring out a few plain buckets and spades, and the kids build castles all afternoon. I pack the toys away in a basket when play ends, so tidy up takes a minute. A small box holds a whole world of play.
I top up the sand when it gets low, and I change it when it looks tired. I brush the lid clean before I lift it off, so dirt does not fall in. Fresh sand smells clean, and it feels soft to dig.
If you paint the box, let the paint dry fully before you let kids play in it. I paint the outside only, and I leave it in the sun for a full day. Dry paint stays on the wood, not on small hands.
29. Build a Low Pallet Kids Bookshelf
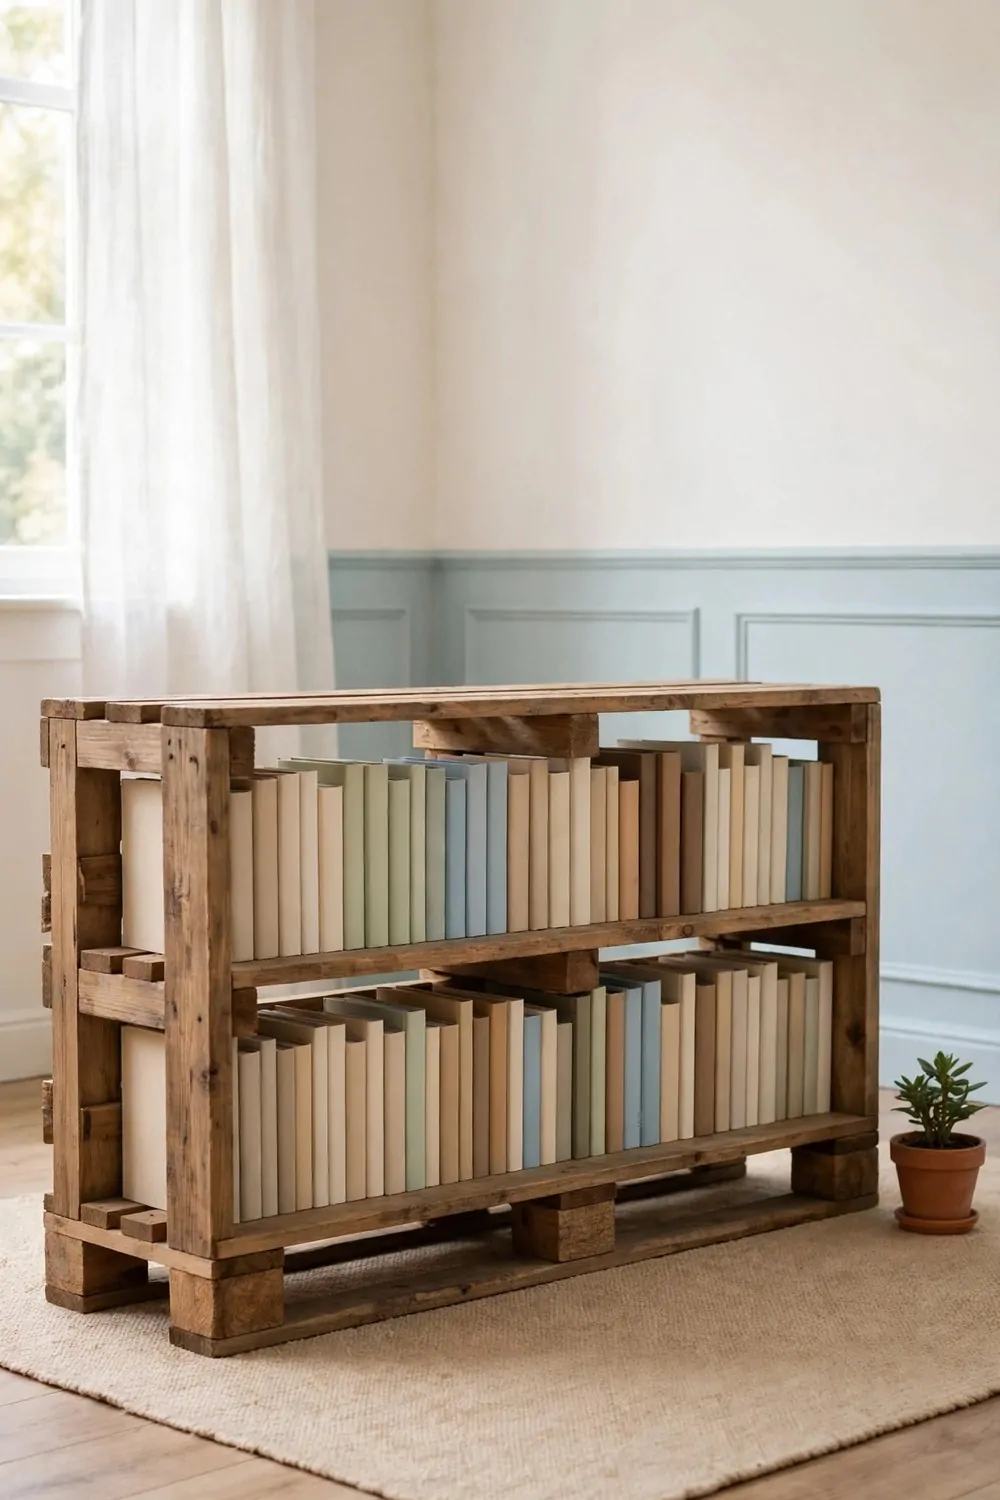
A low, wide bookshelf puts books where small hands can reach them, with no climbing and no fuss. I built ours from pallet boards, and it sits flat against the wall in the kids room. The books face out, so each cover invites a pick.
I check the pallet wood for broken boards and loose nails first, and I sand the rough edges smooth. I sand in a well-aired room with the window open, and I wear a plain mask while I sand. Smooth wood is kind to small fingers.
I build two low shelves from pallet boards, and I fix them to short side pieces. I check each shelf sits level, and I screw the shelf to the wall for safety. A fixed shelf will not tip when a child leans on it.
I sort the books by size, with tall books on the bottom shelf and small books on top. I leave a little space at each end, so books slide out with ease. A shelf with room feels calm, not crammed.
A small tin of clear wood oil for the shelf costs $7 to $11, and one tin gives the wood a fresh, warm glow.
I rub the shelf with clear oil after sanding, and I let it dry fully before I put books on it. I rub on two thin coats, and I leave a day between coats. Dry oil will not stick to book covers.
I rotate the books each month, so old favourites feel new again. A fresh row of books sparks a fresh love of reading.
I read with my kids beside the shelf each night, and we pick one book together. I let them choose, even when we have read it ten times before. A shelf they can reach builds a habit that lasts.
I check the screws twice a year, and I tighten any that feel loose. I wipe the shelves with a damp cloth each week, and I dust the books. A cared-for shelf stays strong through many stories.
30. Make a Pallet Bedside Table
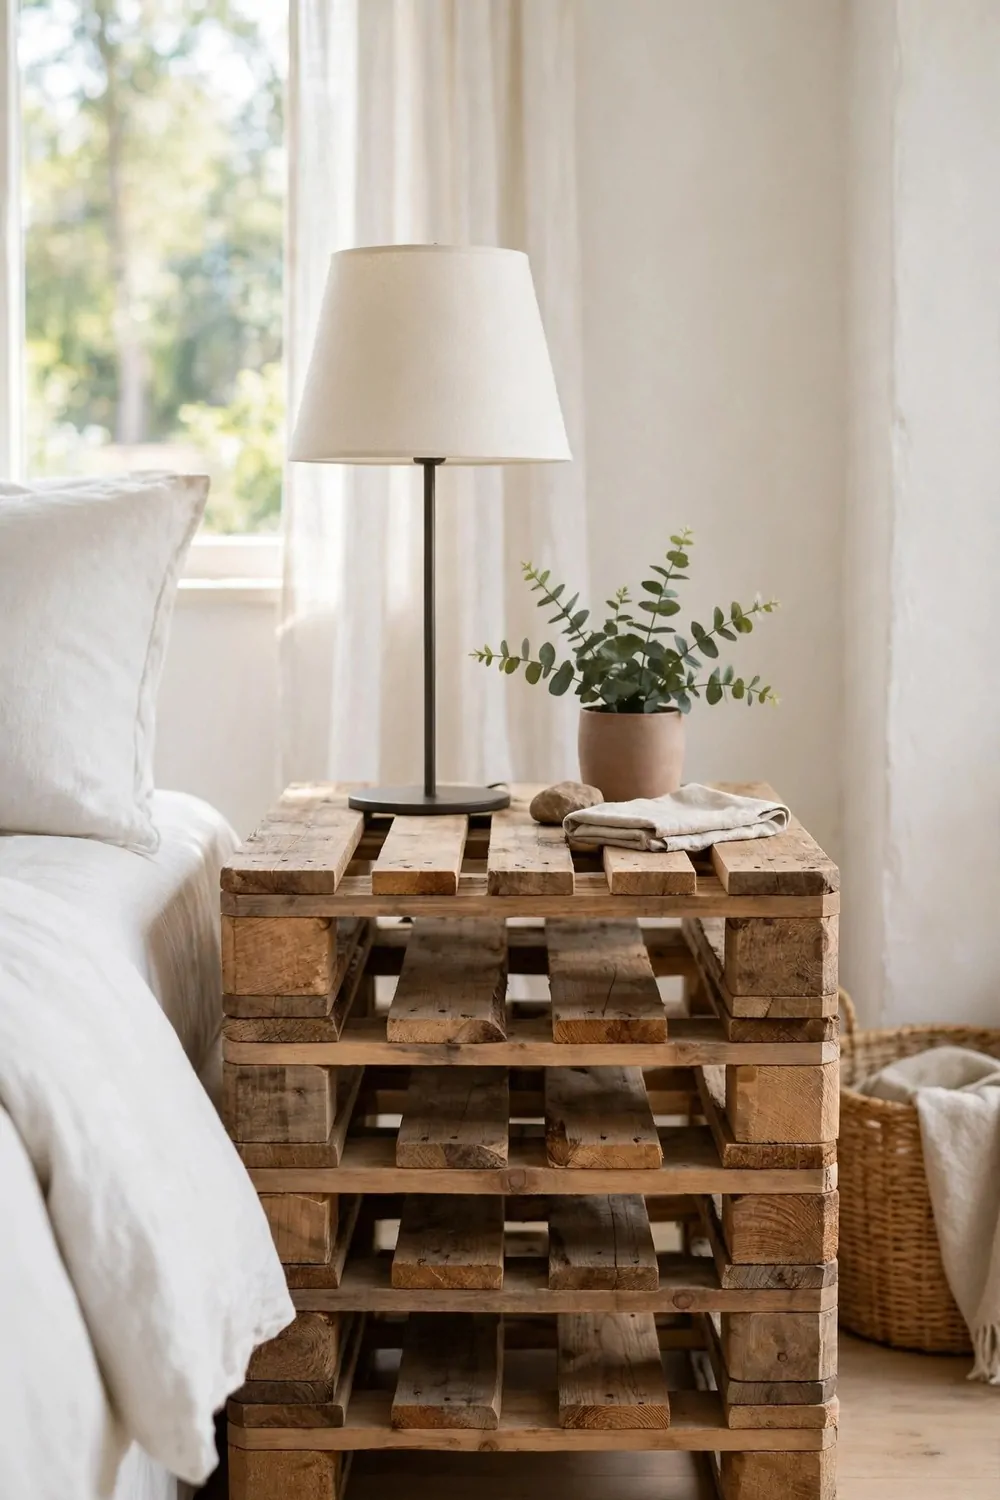
A pallet bedside table gives you a spot for a lamp and a small plant, right by your bed. I built mine from one pallet, and it fits the small gap by my bed. It holds what I need, and nothing more.
I check the pallet for broken boards and loose nails, and I sand the rough edges smooth with care. I sand outside where fresh air moves, and I wear a plain mask while I sand. Smooth wood feels nice to touch in the dark.
I cut the pallet down to a small cube, and I fix a top board across it. I leave small shelves inside for books, and I check they sit firm. A firm shelf holds a stack of books without a sag.
I set a plain lamp on top, and it casts a soft light for reading at night. I keep a small plant and a folded cloth on the top too. Everything I need for the night sits within reach.
A plain bedside lamp for the table costs $9 to $14, and it gives a soft light that suits a small bedroom.
I sand the top extra smooth, so cups sit flat and books slide with ease. I wipe the dust away, and I let the wood rest before I paint. A smooth top is the part you touch most, so it earns the care.
I leave the table natural and wipe it clean before I use it. I rub on a thin coat of clear oil, and I wait a full day for it to dry. Dry oil will not mark your bedding or your books.
I keep a notebook by my bed, for thoughts before sleep. I write one line each night, and I close the book. A small table can hold a whole night routine.
I dust the table each week, and I check the legs still stand firm. I move it a little from the wall when I clean behind it. A steady table by the bed makes the room feel calm.
31. Build a Pallet Open Wardrobe with a Clothes Rail
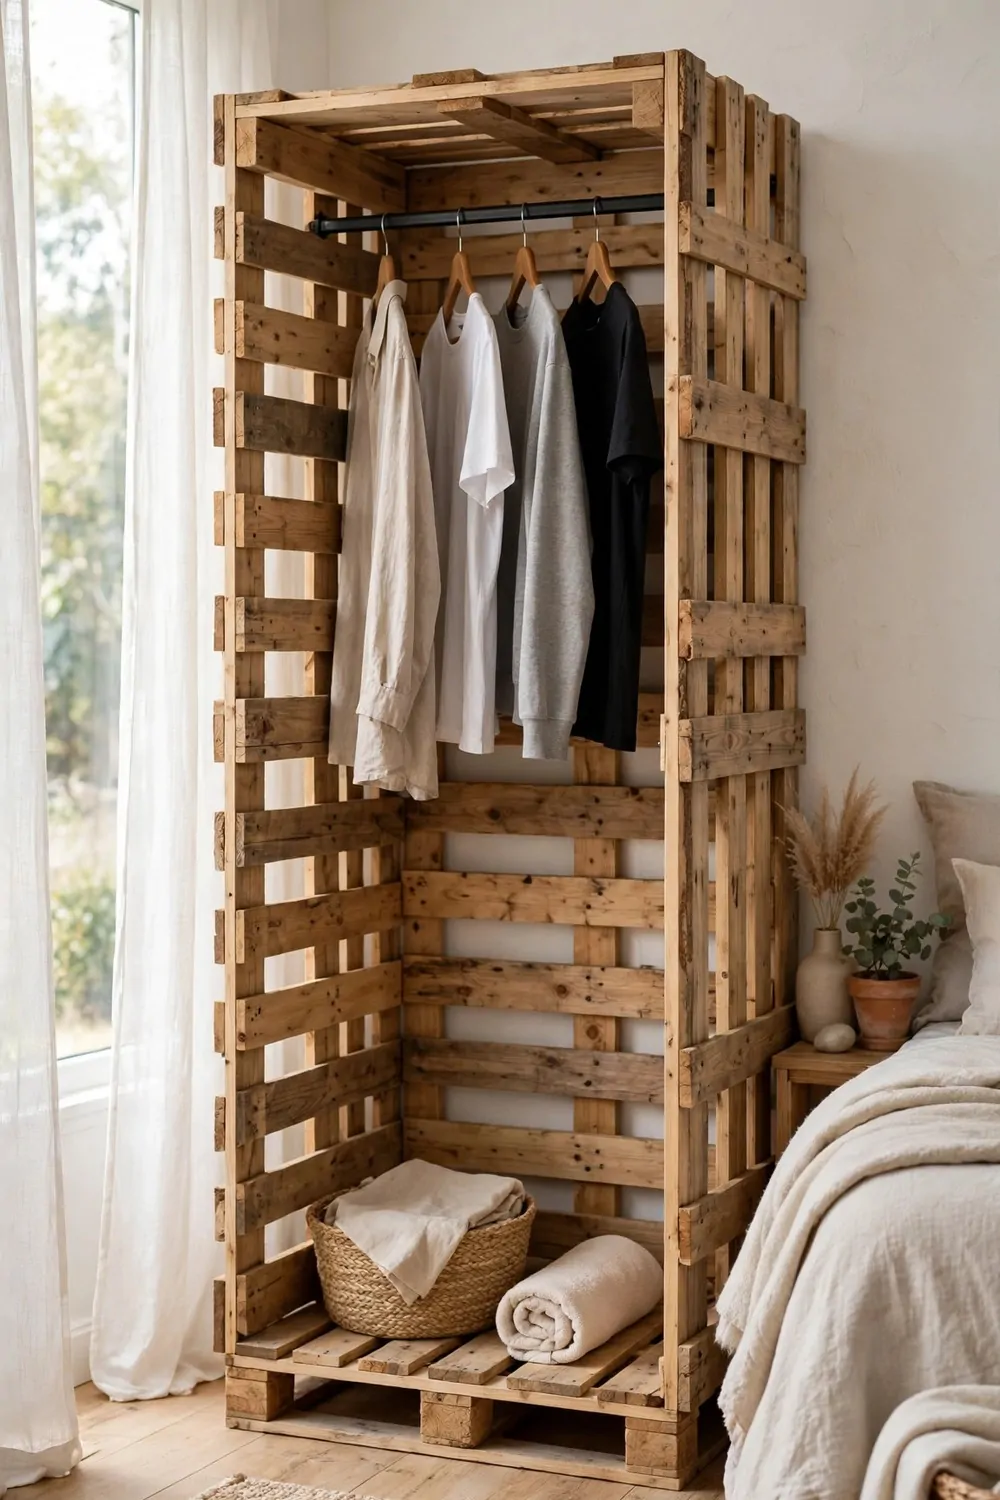
An open wardrobe turns a pallet frame into a simple place to hang clothes, with no doors to hide them. I built mine against one bedroom wall, and it holds my daily clothes in plain sight. You can see all you own, and you pick fast in the morning.
I check each pallet for broken boards and loose nails, and I sand the rough edges smooth before I build. I sand in a well-aired space by the open door, and I wear a plain mask while I sand. Smooth wood will not snag your clothes.
I stand two pallets upright for the sides, and I fix a top board across them. I fit a plain rail between the sides, and I check it sits level and firm. A firm rail holds a row of hangers without a dip.
I hang my shirts and dresses on the rail, and I keep folded cloths in a basket on the low shelf below. An open wardrobe shows you what you have, so you wear more of it.
A plain clothes rail for the wardrobe costs $7 to $11, and it fits between the pallet sides with room to spare.
I leave the frame natural and wipe it clean before I hang clothes on it. I leave the wood plain, and it keeps its warm tone. Dry wood will not mark your shirts or your dresses.
I keep scarves and belts tucked in the basket below. A small setup can make mornings feel easy and calm.
I sort the rail by colour, with light clothes at one end and dark at the other. I move out-of-season clothes to a box in the closet, so the rail stays clear. A clear rail makes each morning choice simple.
I check the rail screws each month, and I tighten them when they feel loose. I dust the top board each week, and I air the room. A cared-for wardrobe keeps your clothes fresh and easy to find.
32. Build a Pallet Outdoor Storage Bench
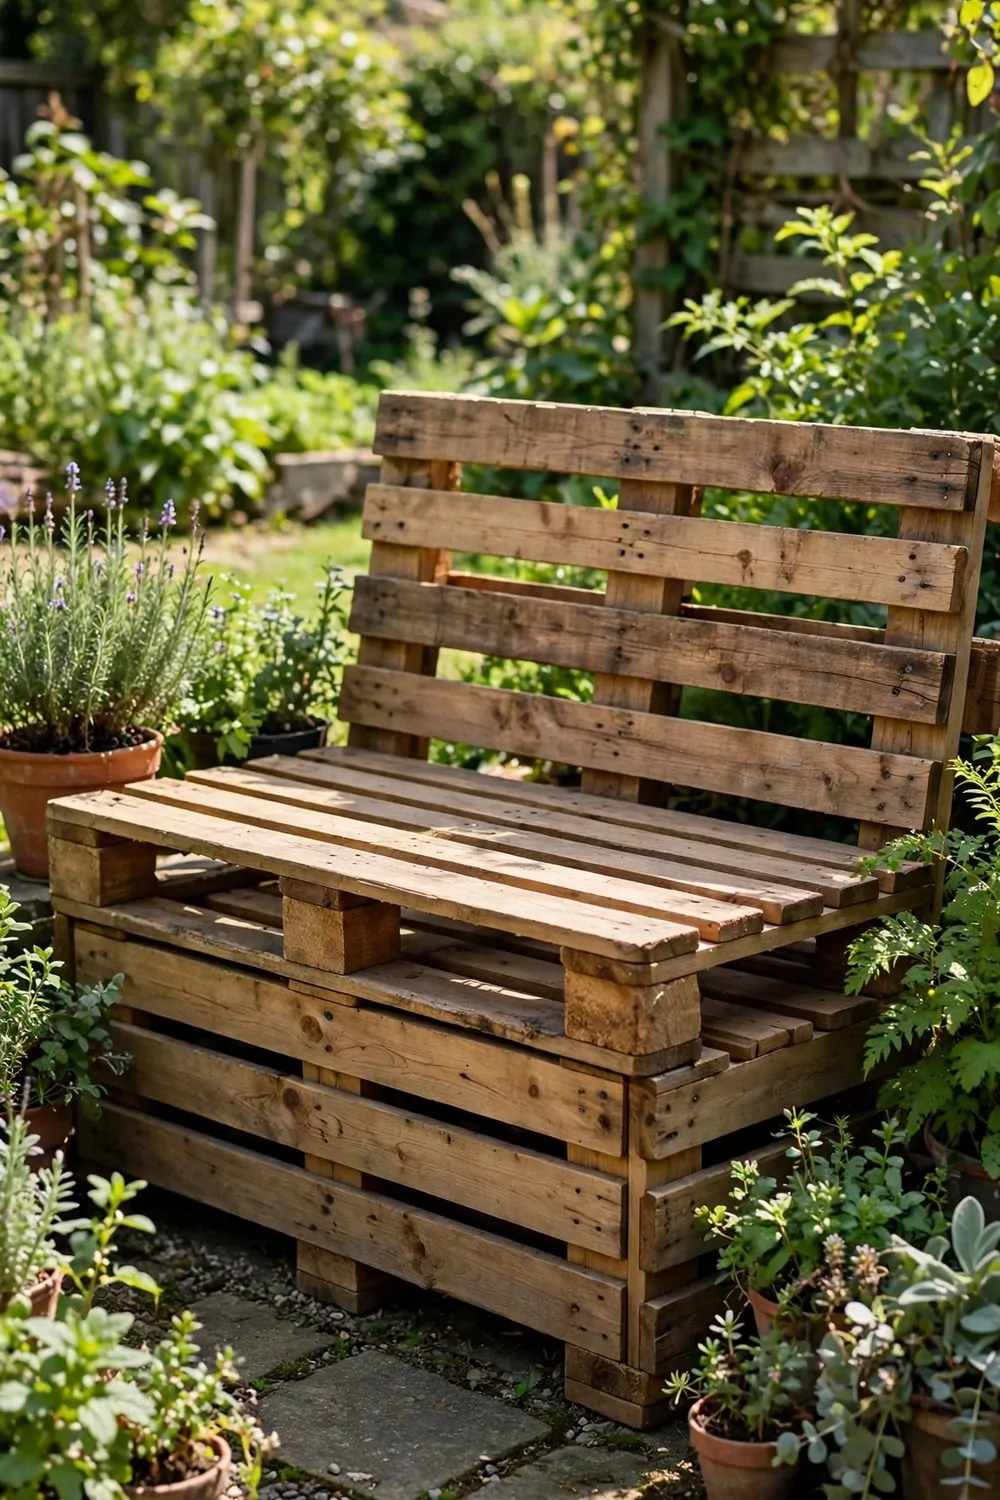
An outdoor storage bench gives you a seat and a hiding spot for garden tools in one piece. I built mine from pallets, and it sits by the back door for boots and balls. You sit to pull on your shoes, and you lift the lid to grab what you need.
I check the pallet wood for broken boards and loose nails, and I sand the rough edges smooth. I sand out in the garden air, with a plain mask on while I sand. Smooth edges are kind to hands and to clothes.
I build a box from pallet boards, and I hinge the top so it lifts like a lid. I fix the hinges firm, and I check the lid opens and shuts with ease. A lid that lifts well gets used every day.
I store balls, gloves, and small tools inside, and I keep the top clear for sitting. I sit on the bare wood in summer, and it feels cool and firm. A bench that stores and seats earns its spot by the door.
A set of plain hinges for the lid costs $10 to $15, and they let the top lift smooth.
I leave the bench natural and wipe it clean before I sit on it. I let the wood dry in the sun for a day. Dry wood will not stick to your clothes when you sit.
I tip the bench lid shut when rain comes, and the tools inside stay dry too. A dry bench is ready whenever you need it.
I check the hinges each spring, and I oil them if they squeak. I look for boards that feel soft from rain, and I swap them for sound boards. A small check each year keeps the bench strong.
I set the bench where it gets a little sun in the morning, and shade in the heat of the day. I sweep leaves off the lid each week, and I wipe the top clean. A clean bench by the door welcomes you home.
33. Build Your Pallet Project Kit
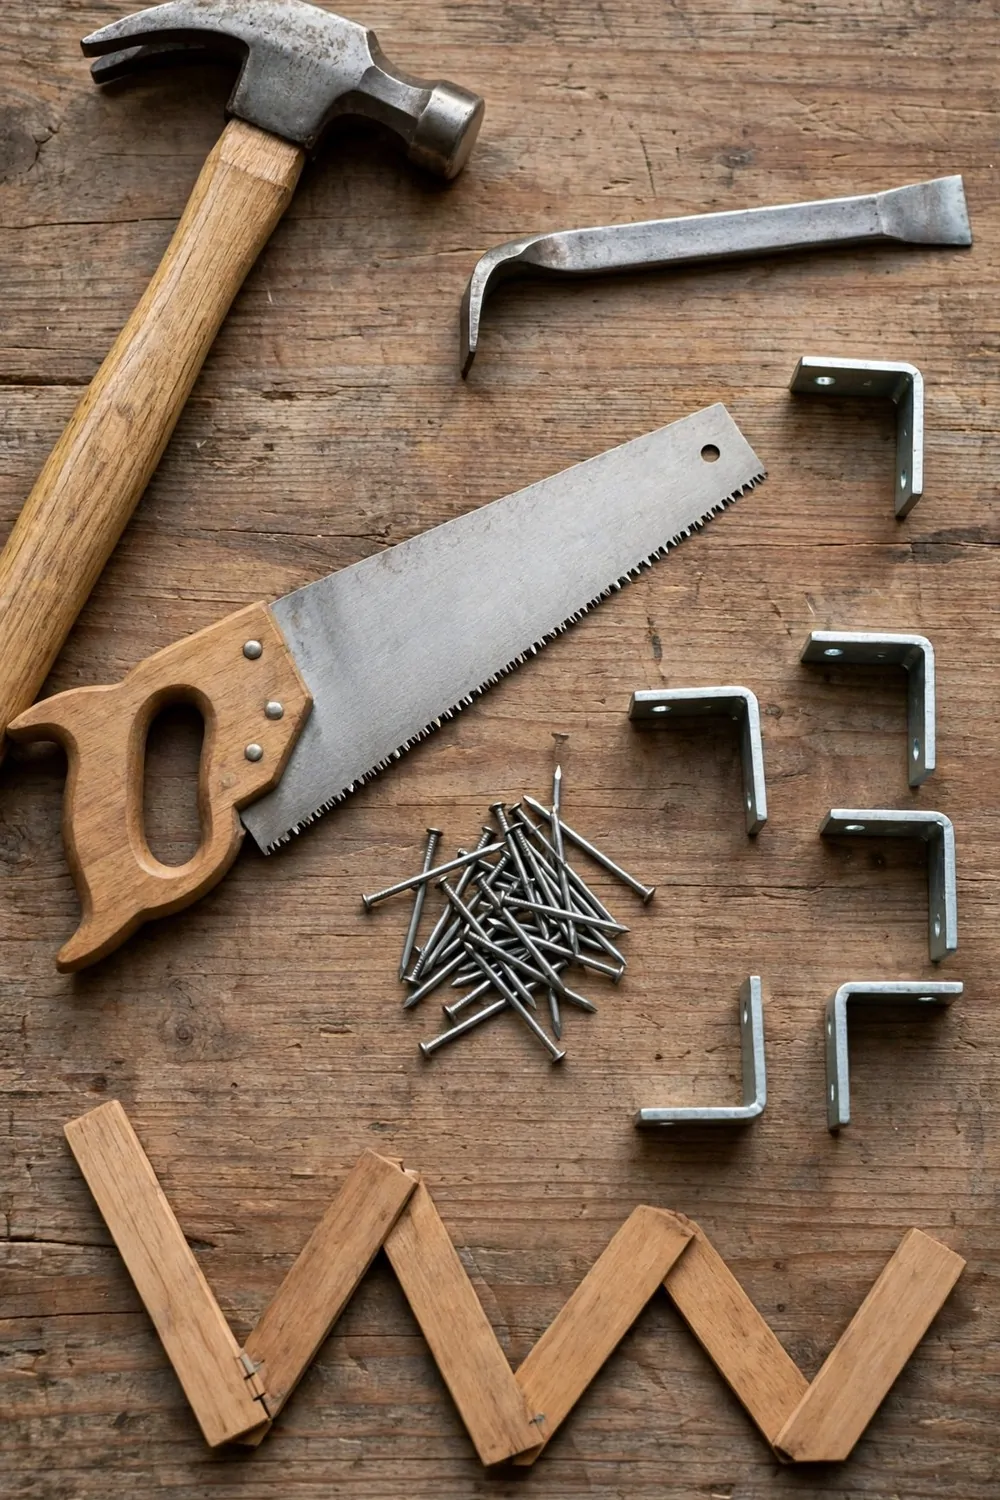
A small kit of plain tools turns pallet building from a chore into a calm afternoon job. I keep these six tools together, and I reach for them for every pallet project. With this kit in hand, I check each pallet for broken boards and loose nails, and I smooth rough edges before I build.
A plain claw hammer costs $8 to $12, and it pulls old nails and taps boards into place. A plain pry bar costs $6 to $9, and it lifts pallet boards apart without splitting them.
I sand in a well-aired space, and I wear a plain mask while I sand, before I cut or join any boards. I brush the dust off, and I check each board feels smooth. Clean boards join tight, and they paint well too.
A plain wood saw costs $9 to $13, and it cuts pallet boards clean and straight. A small box of plain nails costs $3 to $5, and it holds pallet boards tight to the frame.
A pack of plain L-brackets costs $4 to $7, and it firms up corners on tables and shelves. A plain folding ruler costs $3 to $5, and it helps me mark each cut straight and true.
The whole kit costs $33 to $51, and I built it up one tool at a time over a few months. I bought one tool each month, so the cost never felt big at once.
I use the hammer and pry bar first, to take pallets apart with care. I use the saw next, to cut boards to the size I need. I use the nails and brackets last, to join the piece firm.
I let paint dry fully before I use any piece I build with this kit. I leave fresh paint in the sun for a full day, and I test it with a light touch. Dry paint feels smooth, and it will not stick to your hands.
I keep all six tools in one plain box beside my work bench, so I can grab them in a moment. The box sits where I build, and I put each tool back when I finish. A kit that lives in one spot never gets lost when I need it.
| Item | Main change | Typical cost |
|---|---|---|
| A plain claw hammer | pulls old nails and taps boards into place | $8 to $12 |
| A plain pry bar | lifts pallet boards apart without splitting them | $6 to $9 |
| A plain wood saw | cuts pallet boards clean and straight | $9 to $13 |
| A small box of plain nails | holds pallet boards tight to the frame | $3 to $5 |
| A pack of plain L-brackets | firms up corners on tables and shelves | $4 to $7 |
| A plain folding ruler | helps me mark each cut straight and true | $3 to $5 |
| Total | $33 to $51 |
Keep Reading
If you liked these ideas, you will love these posts too.
- 28 Chair Makeover Ideas That Give Old Seats New Life
- 24 Secondhand Furniture Finds That Look Expensive
- 32 Painted Furniture Ideas That Transform Old Pieces
- 25 Old Dresser Makeover Ideas That Look Expensive
- 27 Upcycled Furniture Ideas for Every Room
- 30 Thrift Store Furniture Flips That Look Brand New
Pick one pallet idea from this list this weekend and give a plain old pallet a fresh job in your home or garden.