21 Ikea Art Studio Ideas That Look Custom-Made

The custom-made look is not a budget thing. It is a measurement thing.
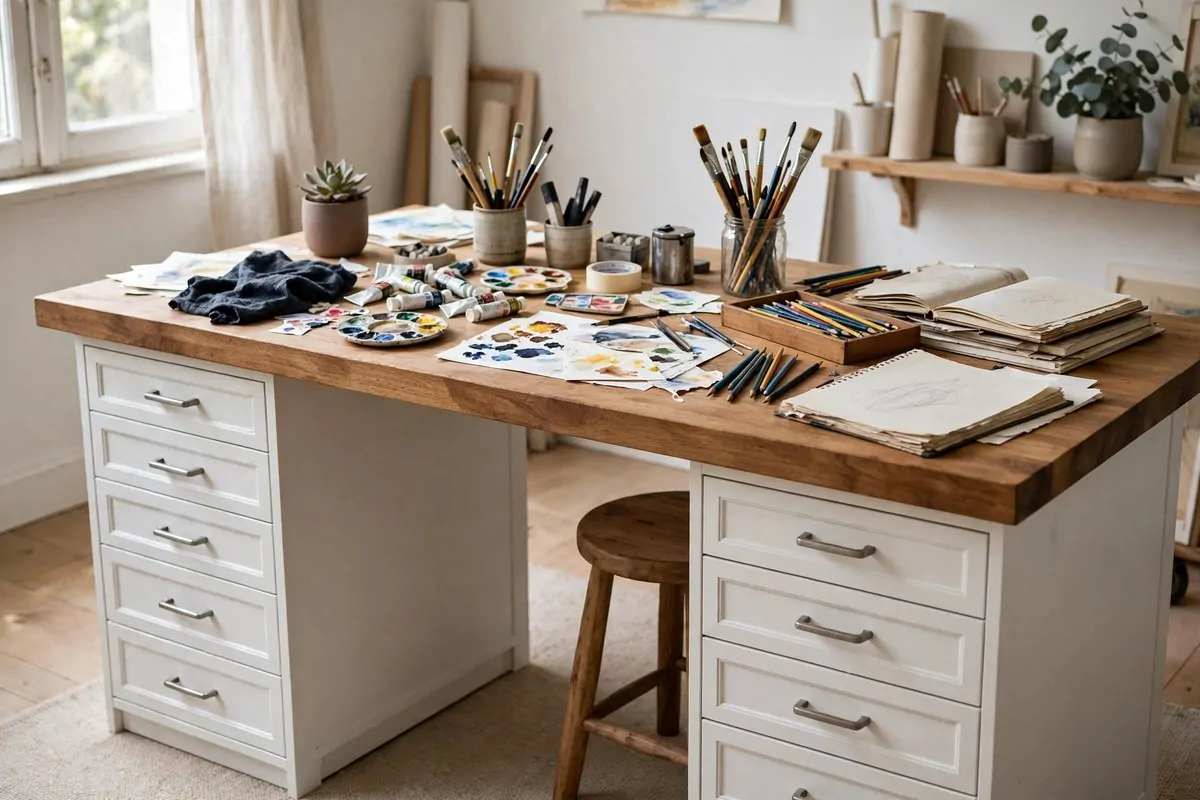
My desk runs from one wall to the other with no gaps and no wobble. Friends always assume a carpenter built it for me. The truth is much simpler. It is two drawer units and one wooden top from IKEA, measured twice and built in one afternoon.
That is the whole secret behind these 21 Ikea Art Studio Ideas. IKEA sells you the bones. You add the small moves that make them look built-in. A strip of trim. A coat of the right paint. Hardware that feels like jewelry. A top that runs the full width of the wall.
None of these ideas need a big budget or scary tools. Pick one this weekend. Start with the desk hack. Your studio is about to look like it cost way more than it did.
1. Build the Famous ALEX Desk Hack First
If you only do one idea from this list, make it this one.
You set one ALEX drawer unit at each end. A long wooden countertop goes across the top. Leave about two feet between the units for your knees and your chair.
The result is a desk with ten drawers and a huge work surface.
I keep my pencils and pens in the shallow top drawers. Paper pads live in the deep bottom drawers. Everything is within reach and nothing is on the floor.
Seal a raw wood top with a water-based polyurethane. Paint and ink will wipe right off. Your desk will still look new a year from now.
Add a center leg or a wall cleat if your top is very long. Wood sags a little in the middle over time. This one small brace stops that.
Line the drawers with cheap shelf liner. It stops pencils rolling and it is easy to wipe clean.
People always ask who built my desk. I smile every time.
This hack is the reason my whole studio looks expensive. And it was the cheapest big piece I own.
2. Give Every KALLAX Cube a Job
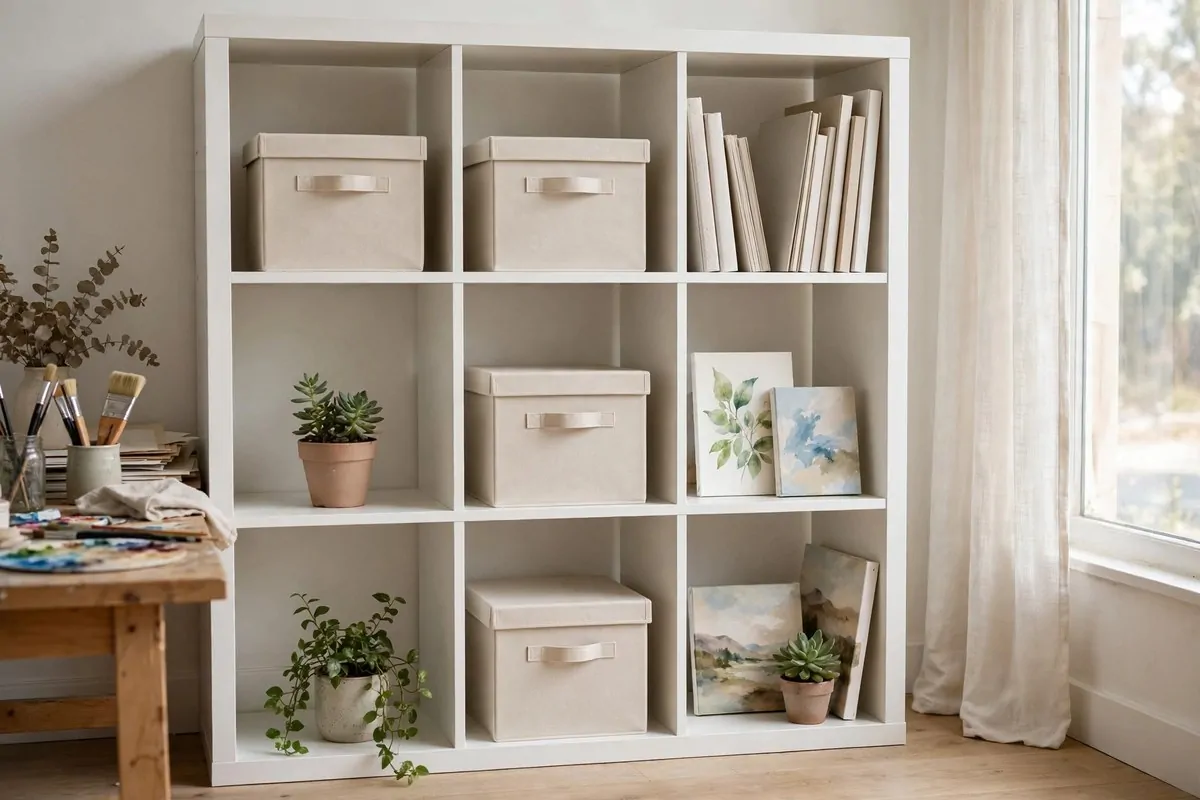
KALLAX is the workhorse of every IKEA studio I know.
The trick is giving every row a job. Here is the map I use in my own studio.
| Row | Job |
| Top row | Display: finished pieces, a small plant, things that make you smile |
| Eye level | Daily supplies in bins, the things you grab every hour |
| Waist level | Sketchbooks standing upright, spine out, labels readable |
| Bottom row | Heavy paint, gesso and bulk paper, where leaks cannot hurt |
I use the same fabric boxes in every cube. Same color, every time. One look makes a wall of storage read as one piece of furniture.
Sketchbooks stand upright like books, spine out. I can read every label at a glance. A 9 by 12 pad fits upright. Bigger pads lie flat.
Leave two or three cubes open. Show a finished painting or a small plant. It stops the unit looking like a wall of boxes.
Liquids go on the bottom row. If paint leaks, it cannot drip on paper.
Heavy jars of gesso and bulk paper packs live down low too. Your back will thank you.
Anchor the unit to the wall with the included restraint. A tall unit full of paint is heavy. This step is not optional.
This one piece stores my whole studio. Paper, fabric, yarn, finished work. It all has a cube.
3. Roll a RASKOG Cart Beside Your Easel
Paint supplies belong beside you, not across the room.
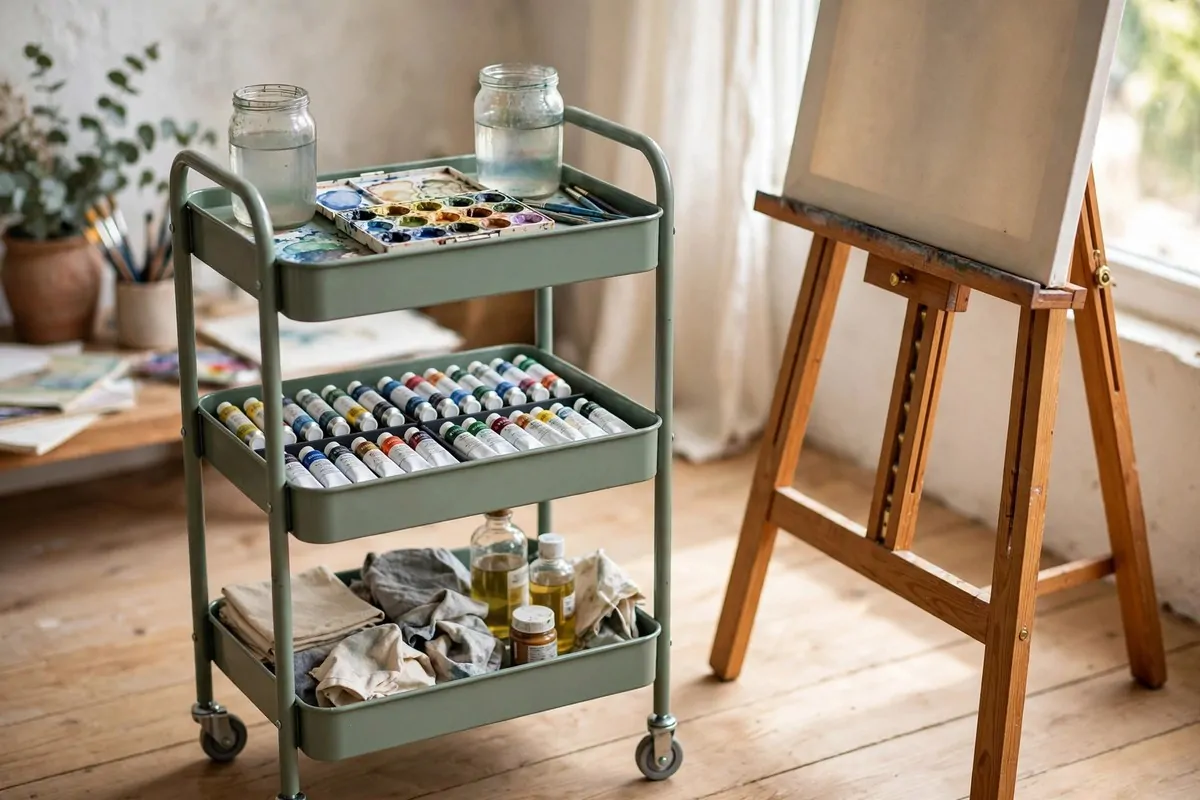
The three-tier rolling cart solves that. It parks next to your easel while you work. It rolls into a corner when you are done.
Here is how I load mine:
– Top tier: palette, water jars, paper towels
– Middle tier: the tubes I am using this week, sorted warm to cool
– Bottom tier: extra tubes, mediums and rags
Add a magnetic strip to the side. Palette knives stick right to it.
A tiny cup hook holds my scissors. I never hunt for them anymore.
The cart costs very little and works in the smallest studio. It even tucks under some desks.
I roll mine to the window when I need daylight. Then back to the wall at night.
Wheels make storage feel like furniture that helps you. Not furniture that traps you.
If you buy nothing else this month, buy the cart.
4. Build a SKADIS Pegboard Tool Wall
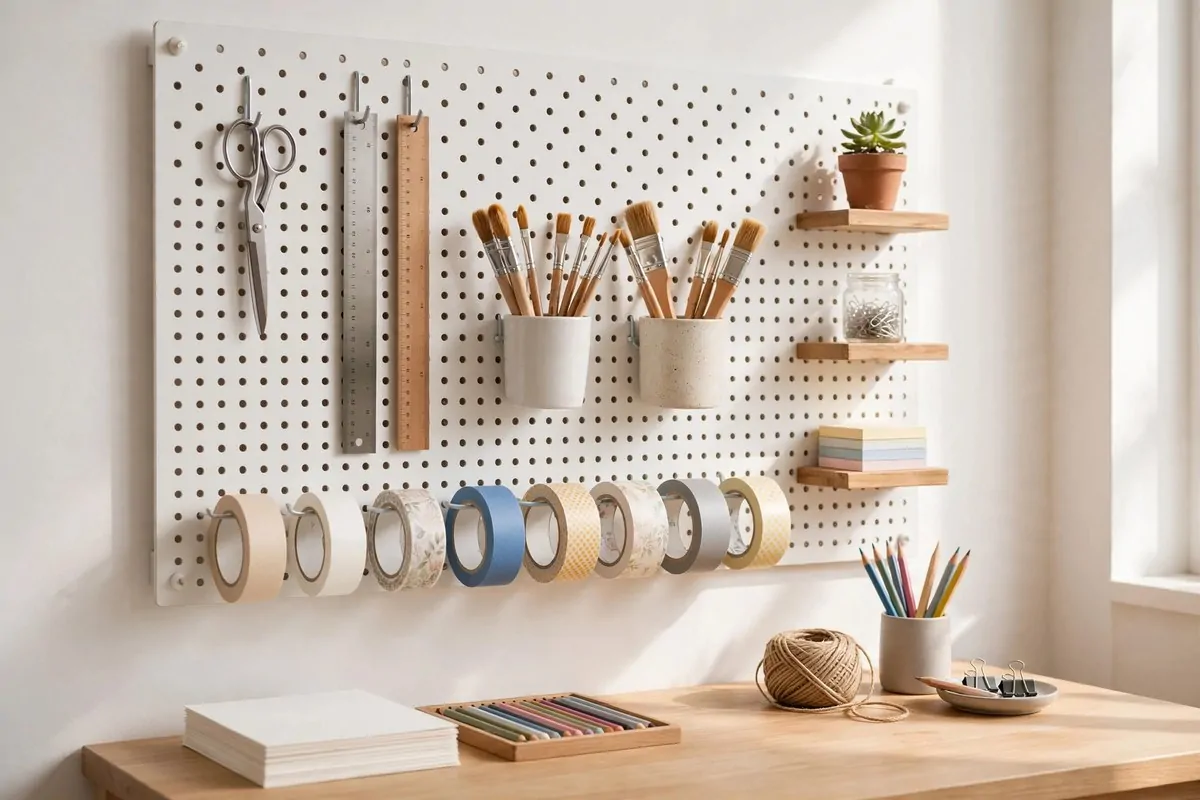
Walls are free storage. Use them.
A pegboard panel above your desk holds scissors, rulers, tape and little cups. Everything hangs at arm’s reach. Your work surface stays clear.
Hooks, shelves and containers all snap into the holes. You rearrange them in seconds. The wall grows with your habits.
Hang it about 15 to 18 inches above the desktop. Tools stay close but out of your way.
Group brush jars by type, not by color. You grab what you need faster. That is what a tool wall is for.
Add one framed sketch or a tiny plant to soften it. A tool wall can still look pretty.
Renters, listen up. Use strong removable hooks or one panel on a small rail. You can take the whole thing down clean.
My pegboard changed how I work more than any drawer did. I see my tools. I use my tools.
Start with one panel. You will want two.
5. Light a LACK Shelf From Underneath
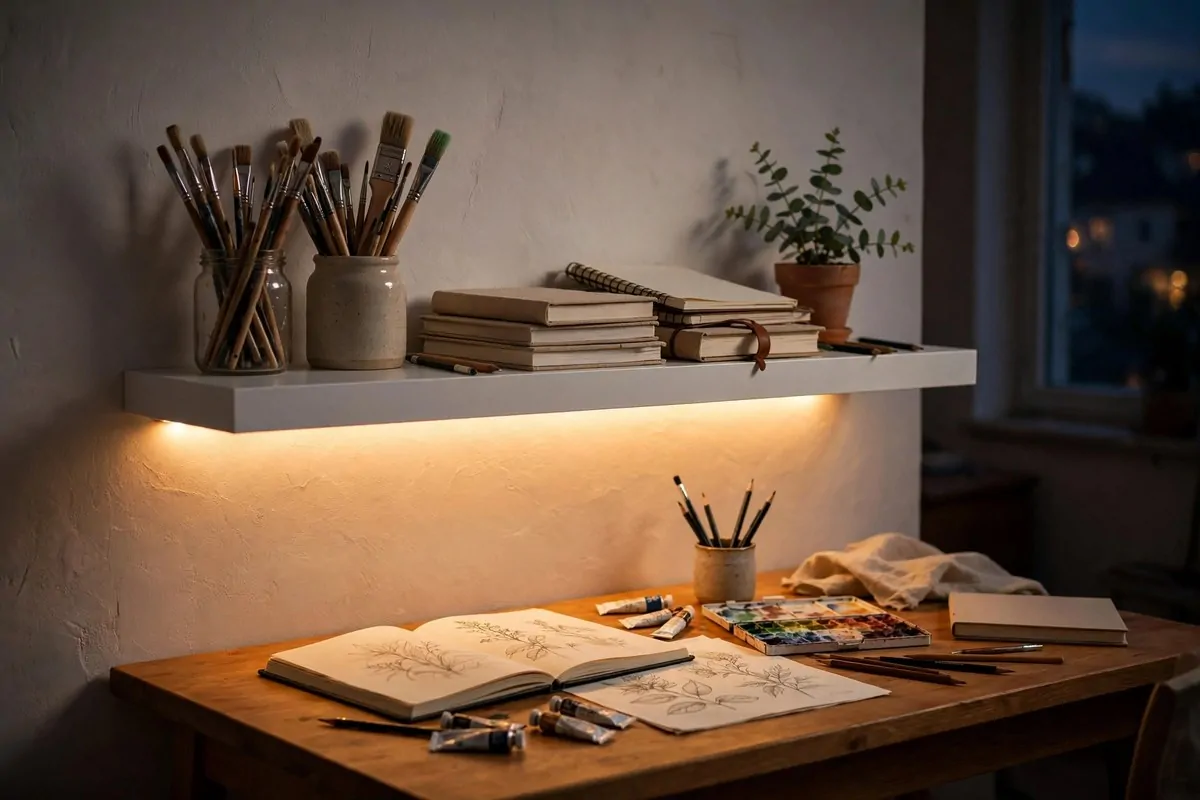
Art needs good light. Overhead room light is almost never enough.
Hang a floating shelf above your desk. Stick warm LED puck lights under it. The glow lands right on your work.
It costs a fraction of a fancy studio lamp. It looks built-in and thoughtful.
I work past sunset most nights. This light makes colors read true. My paintings stopped looking different in the morning.
The shelf itself holds brush jars and sketchbooks. Light and storage in one move.
Keep the cables tidy with a small cord cover. One messy wire ruins the clean look.
Warm white beats cold white for art. Cold light flattens your colors. Warm light feels like daytime.
This was a ten minute project. I timed it.
Now my desk looks like a little stage every evening. I never want to stop working.
6. Turn a Sideways KALLAX Into a Rolling Work Table
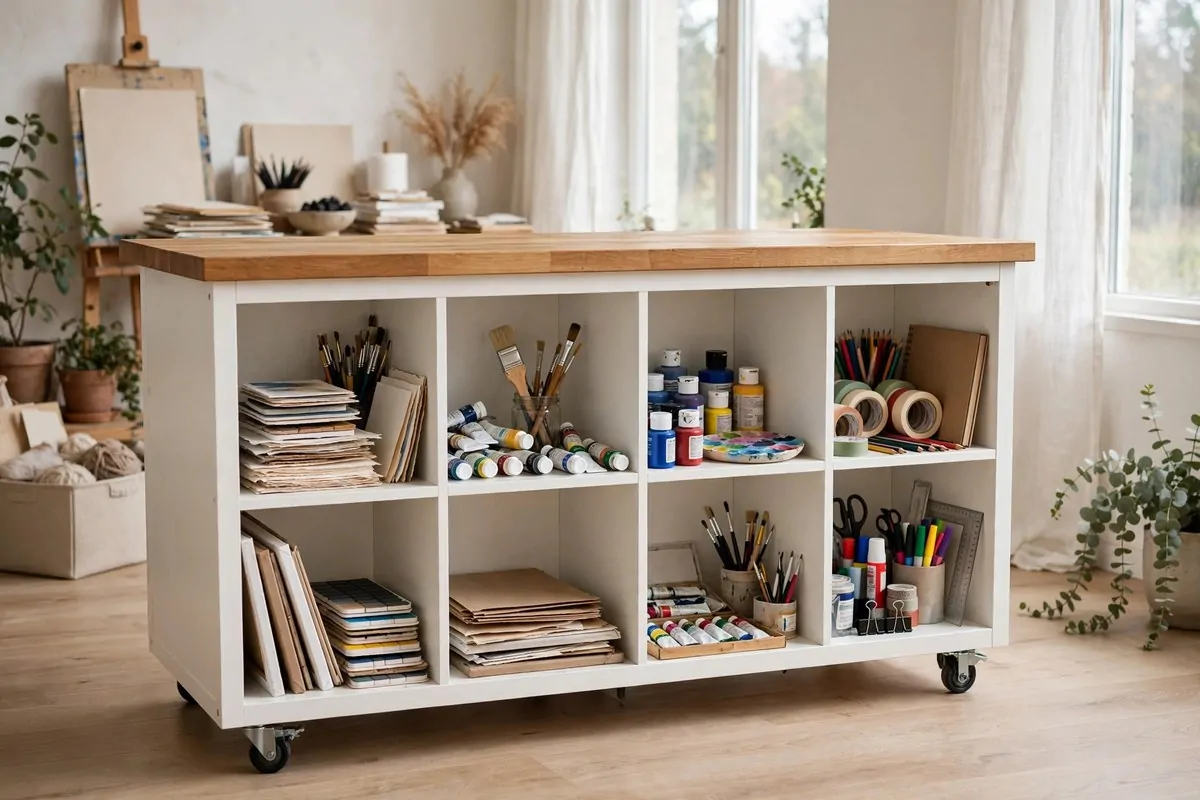
Here is a clever one. Lay a 2 by 4 KALLAX on its side.
Add caster wheels to the bottom and a wooden top above. You get a rolling work table with open cubes on the side. Every cube stores supplies.
Roll it to the window for daylight. Roll it back to the wall for dinner. The studio moves around you.
The cubes face sideways, so they are easy to reach while you stand. Brushes, jars, paper. All right there.
A butcher block style top makes it look like real furniture. It handles clamps and heavy cutting mats too.
This table works best for standing or perching work. There is no knee room on the cube side.
Pair it with a tall stool. You get the best of both heights.
I love furniture that moves. A studio should flex with the project.
One afternoon of work. Years of rolling around.
7. Use a LAGKAPTEN Top for a Second Work Surface
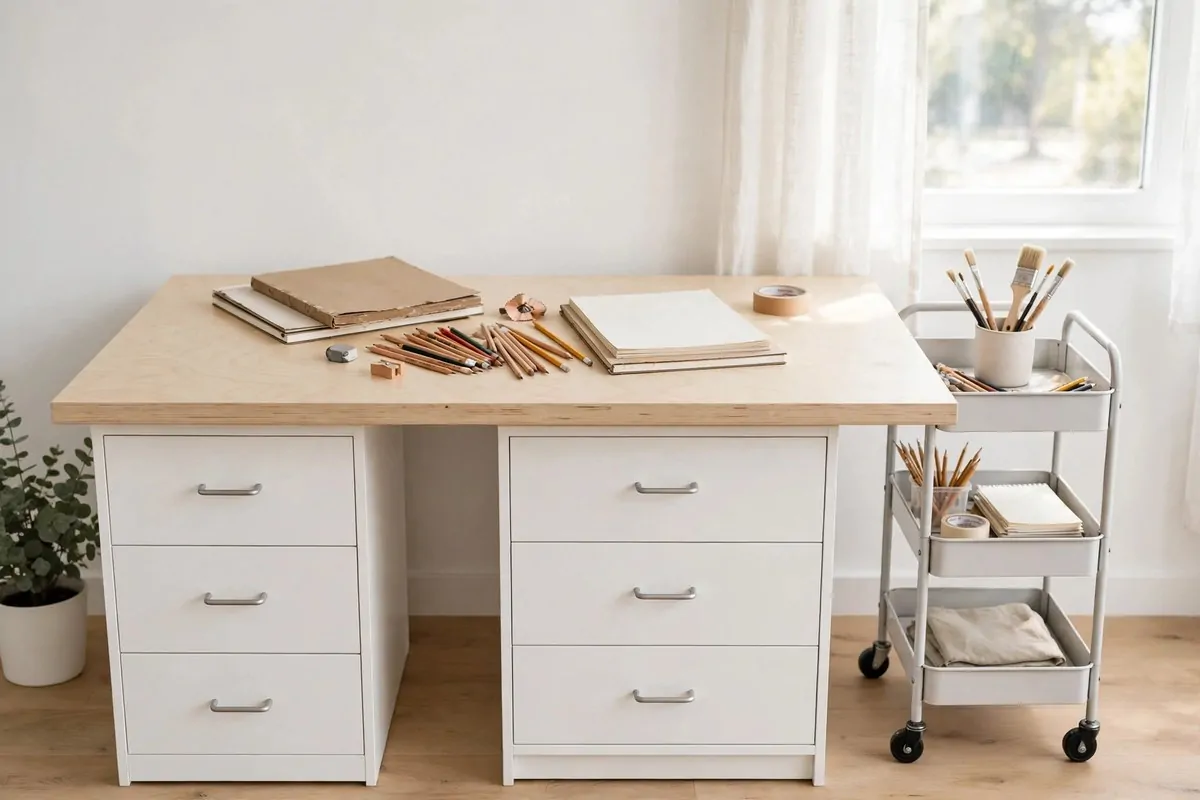
One desk is never enough in an art studio. You always need a second surface.
A light tabletop on two ALEX units makes a cheap, sturdy second desk. It holds the sewing machine, the cutting mat, or the drying paintings.
The back of the ALEX is finished. You can float this desk in the middle of the room as an island. It looks good from every side.
I use mine as a packing and cutting station. Big paper sheets fit with room to spare.
Match the top to your main desk and the two read as one big unit. Same wood, same legs, same look.
Check the load rating before you park a heavy machine on it. Light tops have limits. A die cutter is fine. A kiln is not.
This desk took me less than an hour to build. The hardest part was opening the boxes.
Two desks changes everything. One stays clean. One stays messy.
Guess which one I use more.
8. Line MOSSLANDA Ledges With Paint Bottles
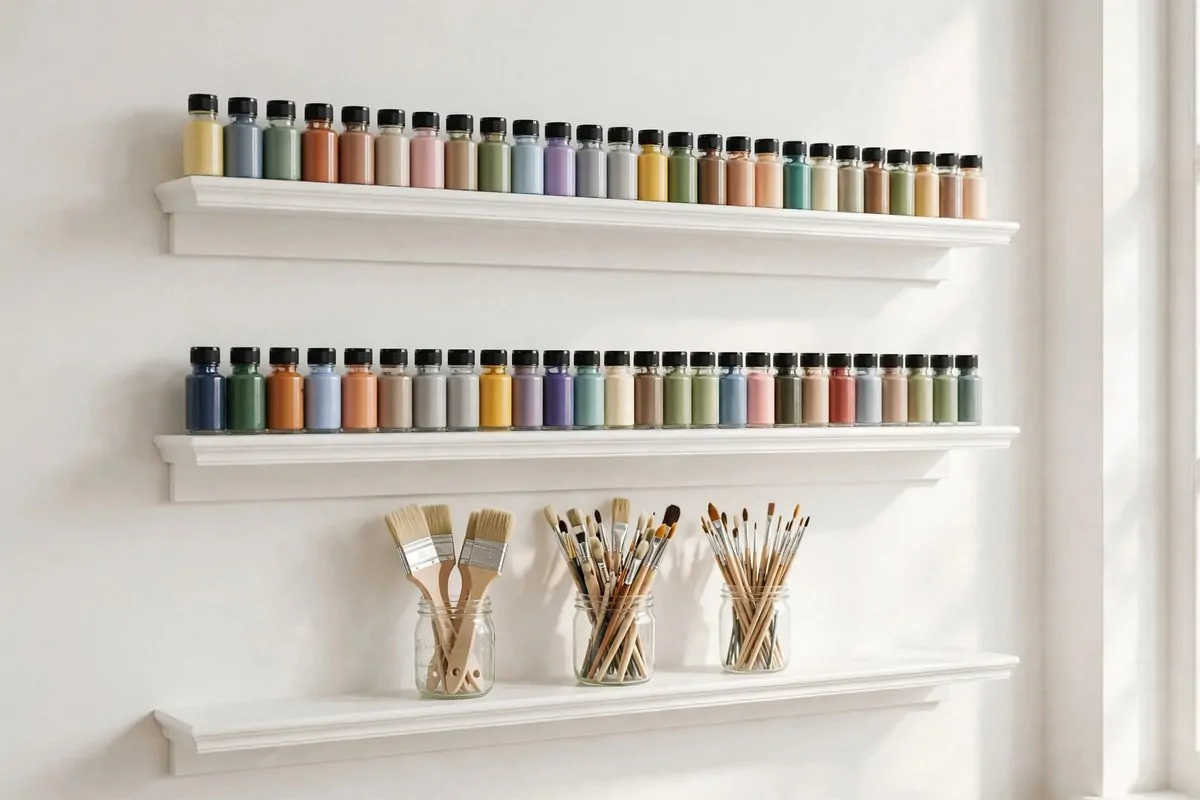
Shallow ledges beat deep shelves for small bottles. Nothing hides behind something else.
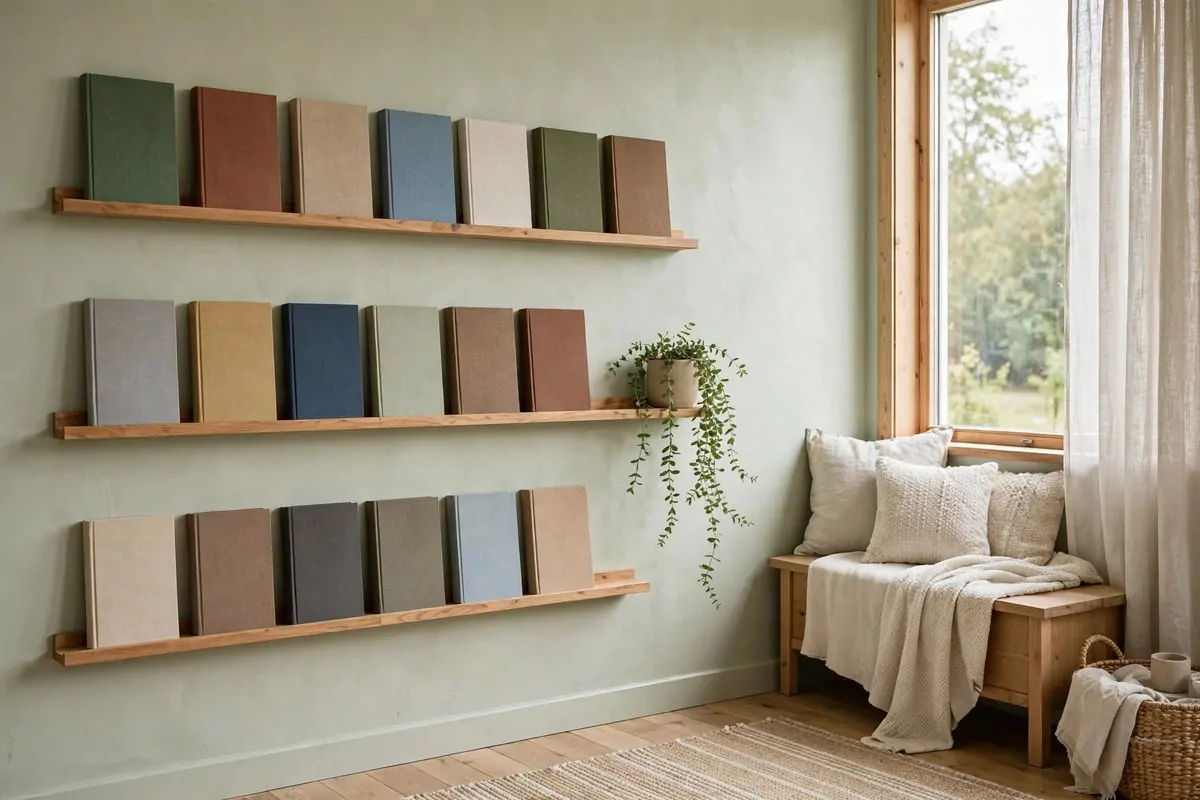
Picture ledges were made for frames. They are perfect for paint. Line them with paint bottles, labels facing out. You see every color at once.
I keep these on mine:
– Brush jars grouped by type
– Small stamp pads in a row
– Sketchbooks standing like books
– One tiny plant to keep it pretty
Hang two or three ledges in a row above your desk. They read as one long shelf.
Labels out is the whole trick. You shop your own wall like a store.
My ledges hold the paints I reach for daily. The rest live in the KALLAX.
Dust wipes off a ledge in seconds. Deep shelves collect dust in corners.
This cost me almost nothing and it looks like a paint shop display.
I smile every time I look at that wall. Colors lined up make me want to paint.
9. Sort Supplies Into One-Color DRONA Boxes
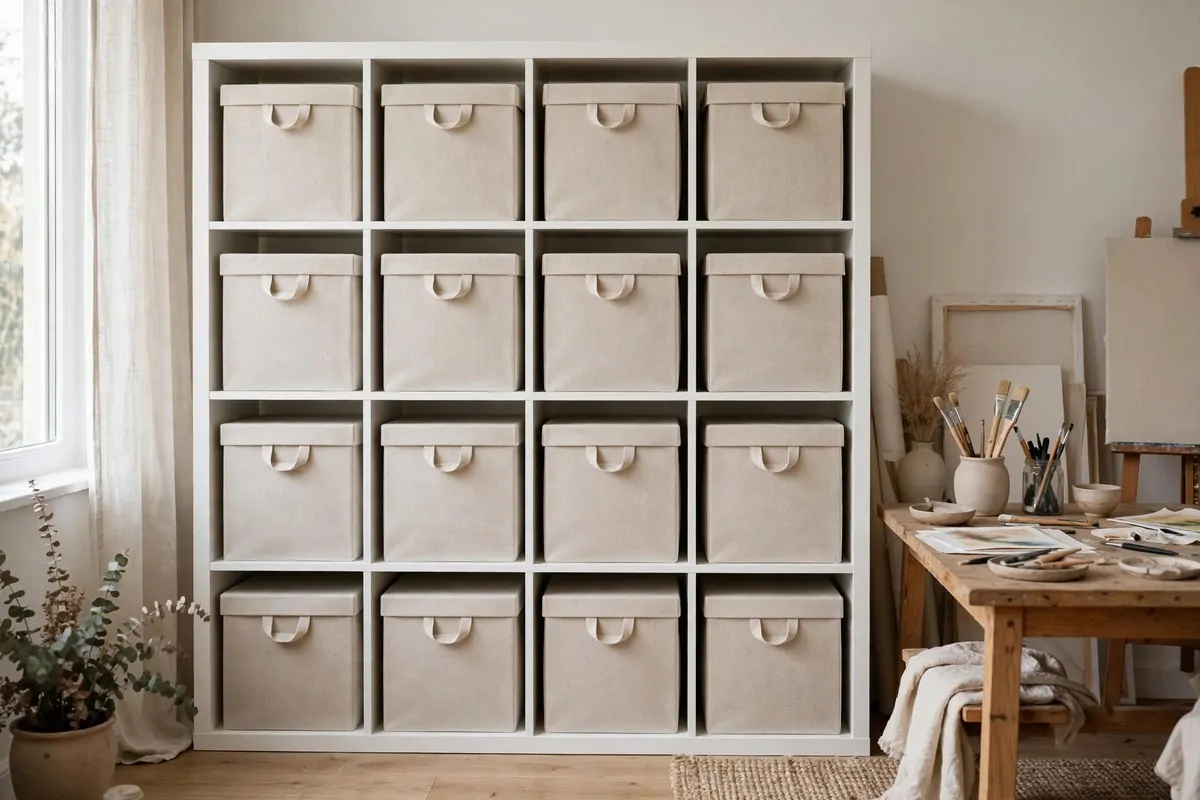
Matching boxes are the fastest custom-made trick I know.
Pick one color of fabric box. Fill every KALLAX cube with it. The whole wall suddenly looks like one designed piece.
One box per project is my rule. Yarn for the scarf in one. Fabric scraps for the quilt in another. When I finish, the box goes back on the shelf.
The boxes hide mess completely. Inside can be chaos. Outside looks calm.
Add small labels to the front. You will never open the wrong box again.
Boxes add up in cost if you buy twenty at once. Buy them in stages. Start with the messiest shelf.
I chose a warm beige. It hides dust and matches everything.
White is classic too. It makes small rooms feel bigger.
This is the cheapest way to make flat-pack look fancy.
10. Make BILLY Bookcases Deeper With Back Panels
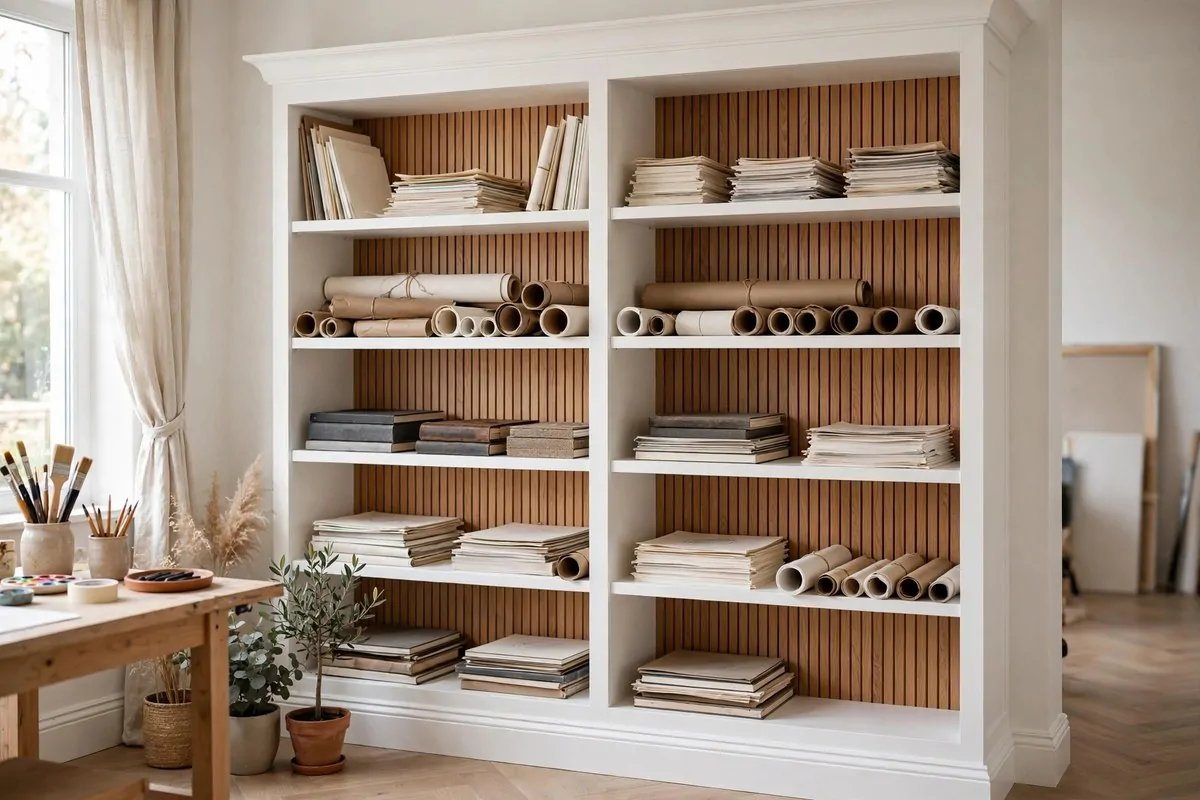
BILLY shelves are shallow. Big paper and fabric hang over the edge.
Add a thin plywood back and side panels. The shelf gains real depth. Nothing falls behind it anymore.
Now it holds stacked canvases and rolled paper with ease. Things stay put.
Add small wheels to the bottom. Your deep storage rolls where you need it.
Paint the panels the same color as the shelf. It will look like one piece.
This hack takes a free afternoon and basic tools. A saw, a drill, some screws.
The closed back hides wall scuffs too. Bonus.
My BILLY holds all my large paper now. It used to hold novels.
Furniture should change jobs when you do. This one did.
11. Turn DETOLF Cabinets Into a Gallery Display
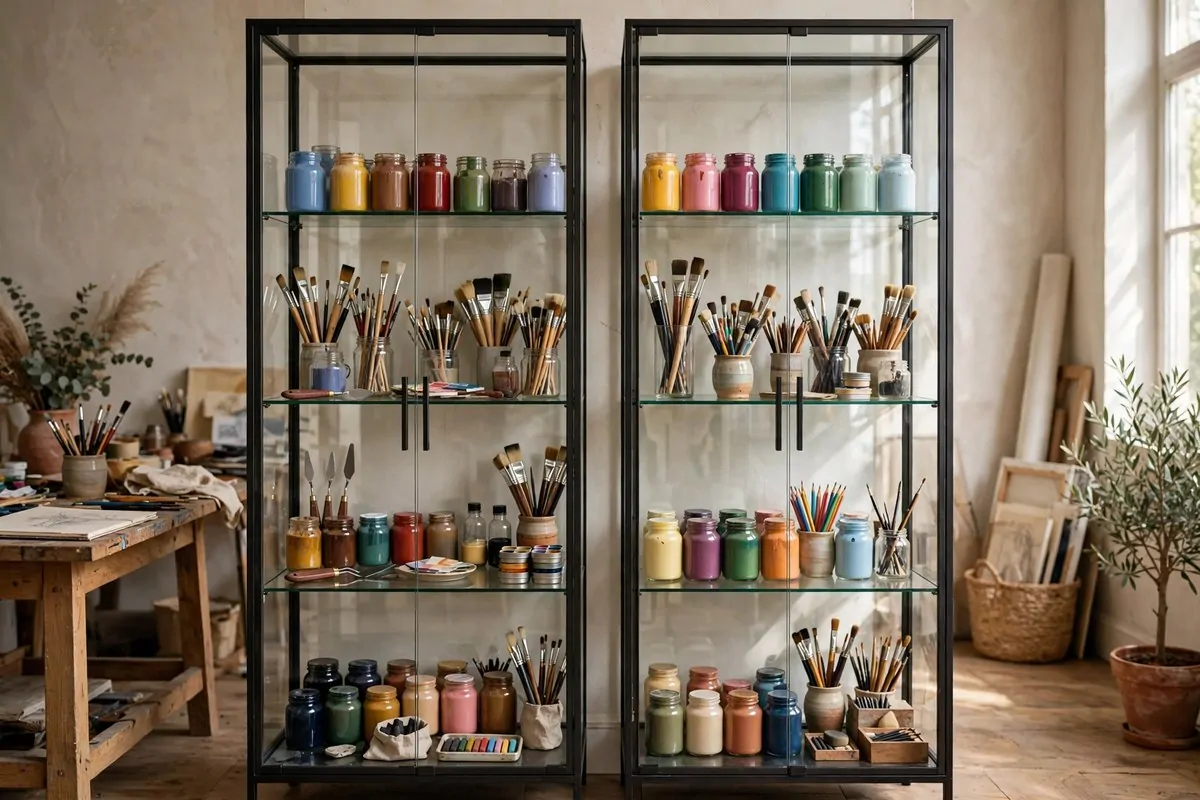
Your prettiest supplies deserve to be seen.
Slim glass cabinets protect things from dust and keep them visible. Line up two or three side by side. They become a display wall.
Arrange your most beautiful jars, inks and brush sets inside. Think of it as a tiny museum of your tools.
Glass doors mean you see everything without opening them. Dust stays out. Inspiration stays in.
Keep the display light. Do not cram every shelf. Empty space makes the pretty things pop.
Put a small LED strip in the top. At night the cabinet glows like a shop window.
This is where I keep my special papers and vintage tins. Looking at them makes me happy.
Guests always stop at this wall. They think I collect art supplies. I do.
A studio should show off a little. This is how.
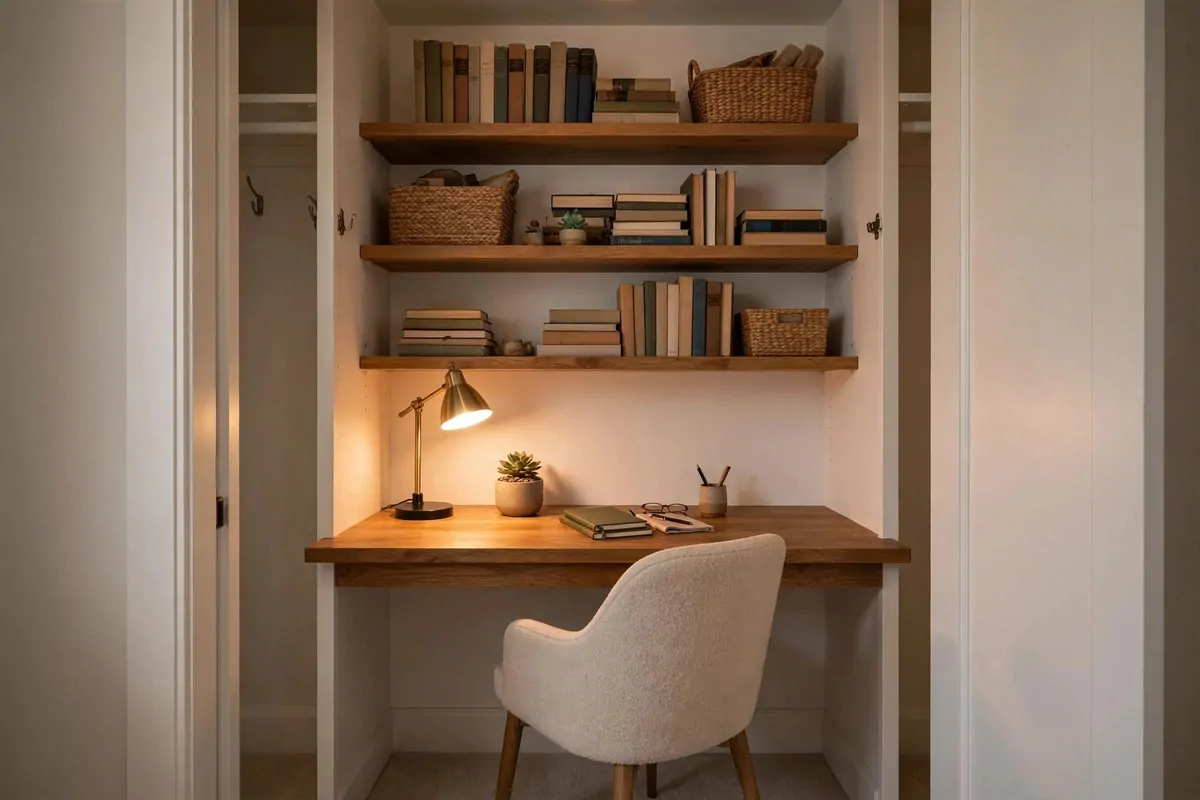
12. Hack a MICKE Desk for a Tiny Studio Corner
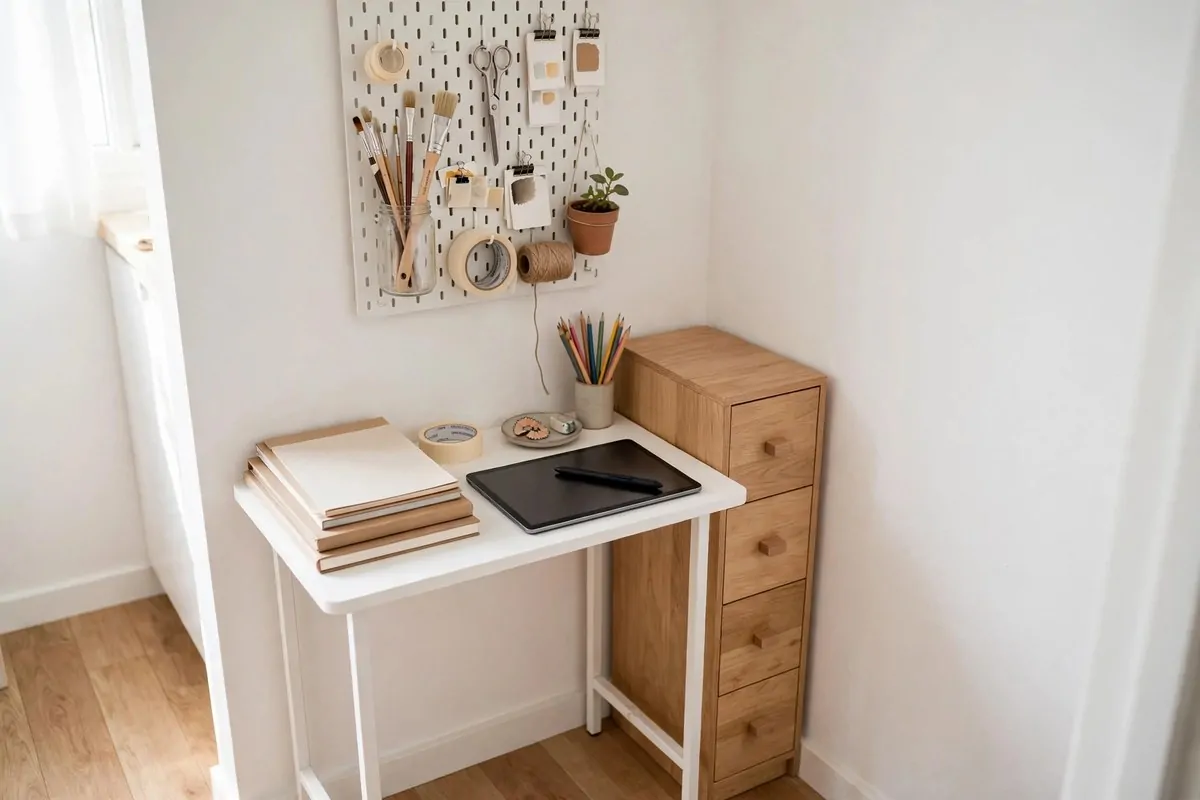
No spare room? A corner works if every piece earns its spot.
A small desk with built-in storage fits where a big desk cannot. Add a pegboard panel above it. Slide a rolling cart underneath.
That is a full studio in about four square feet.
Keep only daily tools on the surface. Everything else lives on the wall or under the desk.
A slim chair tucks fully under when you are done. The corner goes back to being a corner.
I painted my tiny desk the same color as the wall. It almost disappears. The art on the wall does the talking.
Small spaces force good habits. You clean as you go. You keep only what you use.
My first studio was a corner like this. I made my best work there.
Start small. Grow later.
13. Set Up a MÅLA Paper Roll Art Station
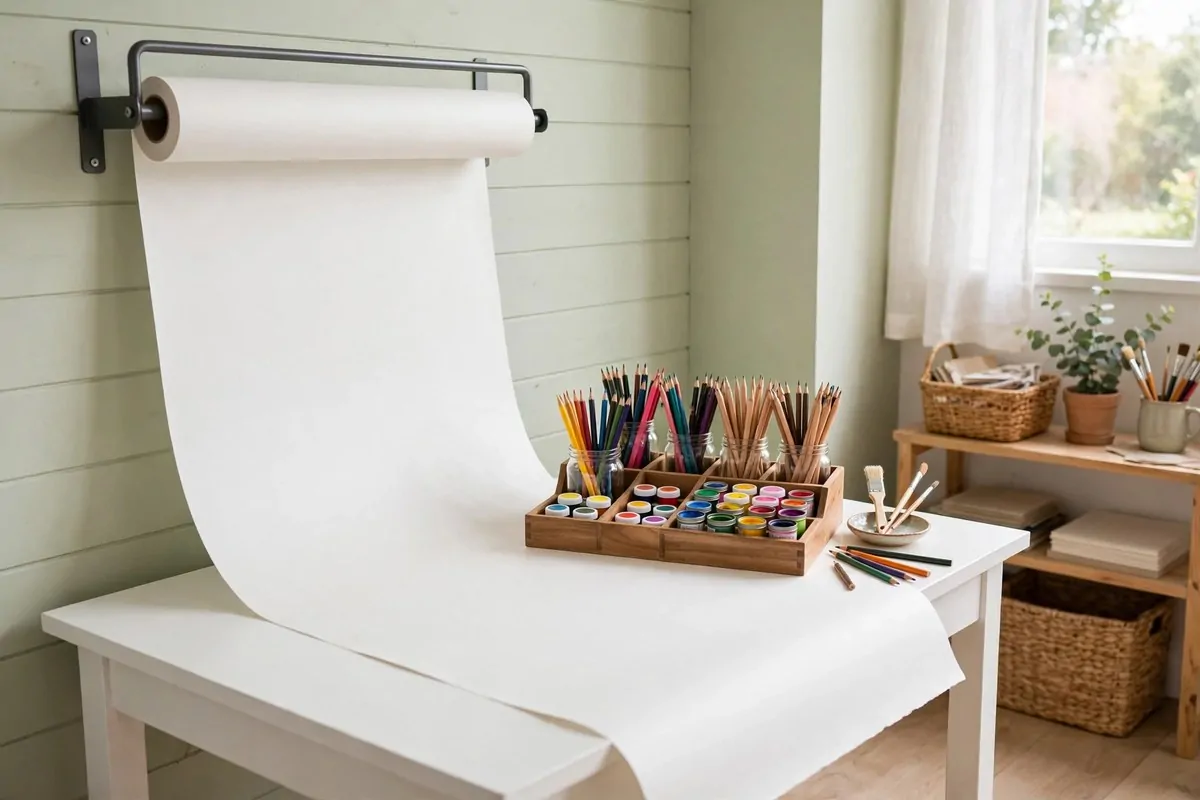
Kids paint more when paper is always ready.
A wall-mounted paper roll holder changes everything. Pull the paper down over the table. Tear it off when the art is done. Roll out fresh paper for the next one.
Keep it stocked like this:
– Pens and pencils stored with the paper itself
– A small caddy for brushes and paint pots
– A wipe-clean mat under everything
The paper roll lives on the wall, not the table. The table stays clear for elbows and masterpieces.
When friends visit, their kids head straight for it. It is like a little art restaurant.
Tear off finished work and hang it right away. The gallery wall grows every week.
This setup costs very little and needs almost no floor space.
My niece painted a purple horse at mine. It is still on my fridge.
Give kids an always-ready station and they will use it daily.
14. Give Kids a TROFAST Storage Corner
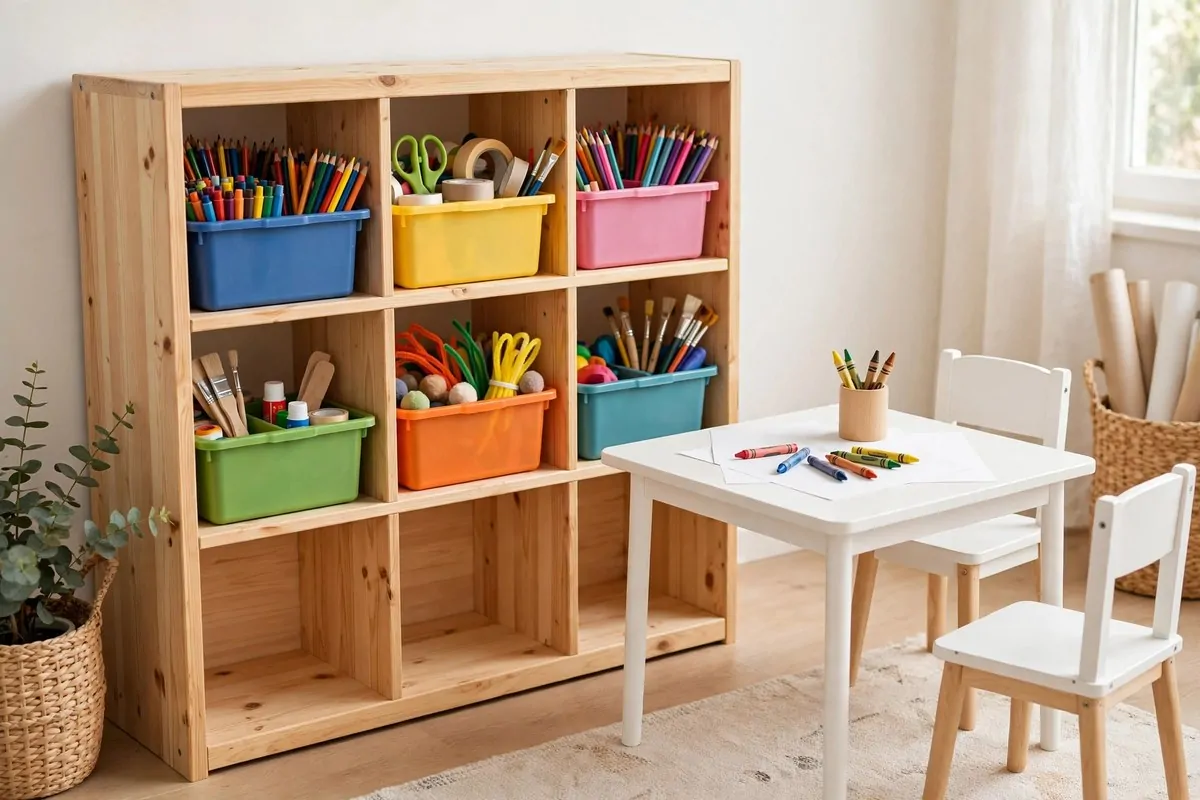
Kids’ craft rooms need storage they can reach.
A low wooden frame with removable boxes is perfect. Little hands pull out a box, craft, and slide it back. No climbing. No mess on high shelves.
Sort boxes by material. Crayons in one. Paint in another. Paper in a third. Kids learn the system fast.
Pair it with a small wipe-clean table and chairs. Spills wipe off in seconds. You stop worrying about the mess.
The boxes come in different depths. Deep ones for bulky stuff. Shallow ones for small bits.
Label each box with a picture, not words. Toddlers can tidy up too.
I set one up for my friend’s twins. They clean it faster than the adults do.
When the kids outgrow it, the frame becomes regular storage. Nothing wasted.
A kids’ corner that tidies itself is worth every penny.
15. Mount PINNIG Cabinets Sideways for Fabric Rolls
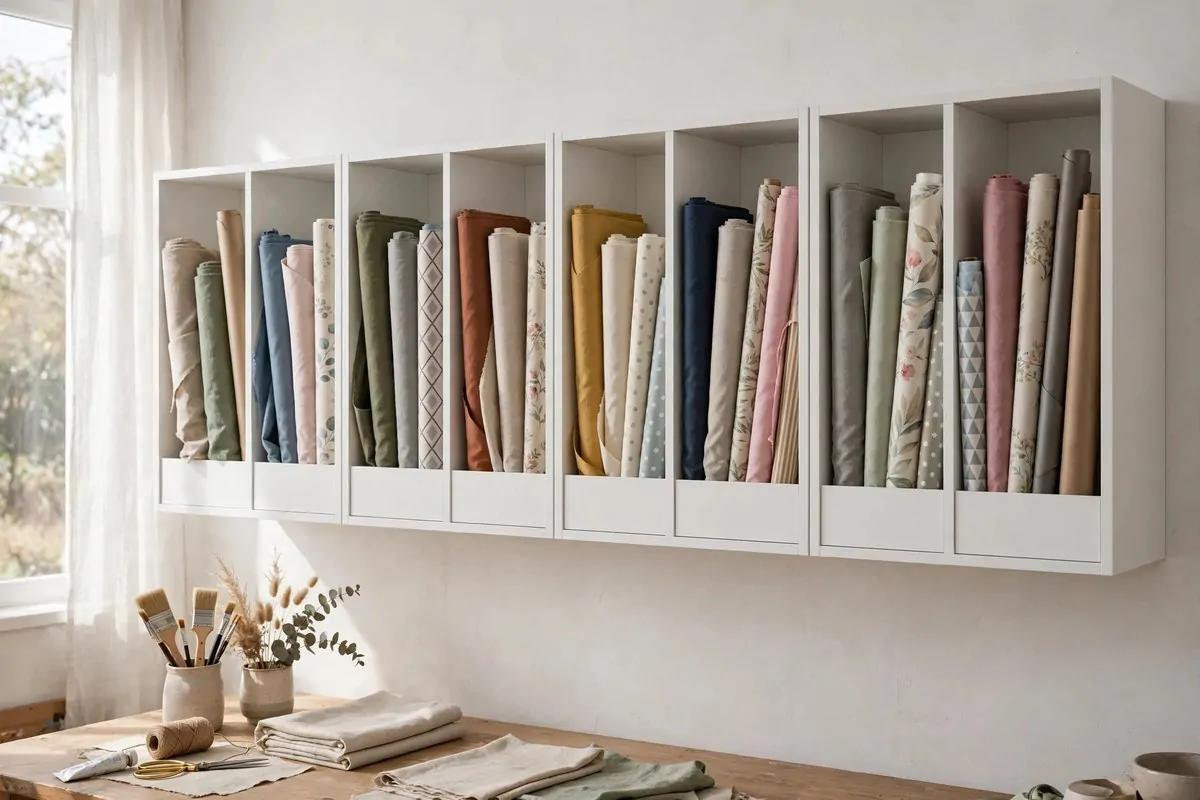
Fabric rolls are awkward. They flop. They unroll. They take over.
Shoe storage cabinets have perfect little compartments. Mount them sideways on the wall. Each slot holds one roll, horizontal and tidy.
The rolls stay visible but neat. You see every fabric at a glance. No more unrolling five to find one.
Mount into wall studs. Rolls of fabric get heavy. Safety first, always.
This is one of those hacks that makes people gasp. A shoe cabinet? For fabric? Yes. And it works beautifully.
Sort rolls by color or weight. Light cottons together. Heavy canvas together.
The compartments stop rolls from sliding. Everything stays put.
My fabric wall is now my favorite wall. It looks like a fabric shop.
Think beyond the label on the box. That is the whole IKEA hacker mindset.
16. Stack TRONES Cabinets Into a Slim Storage Tower
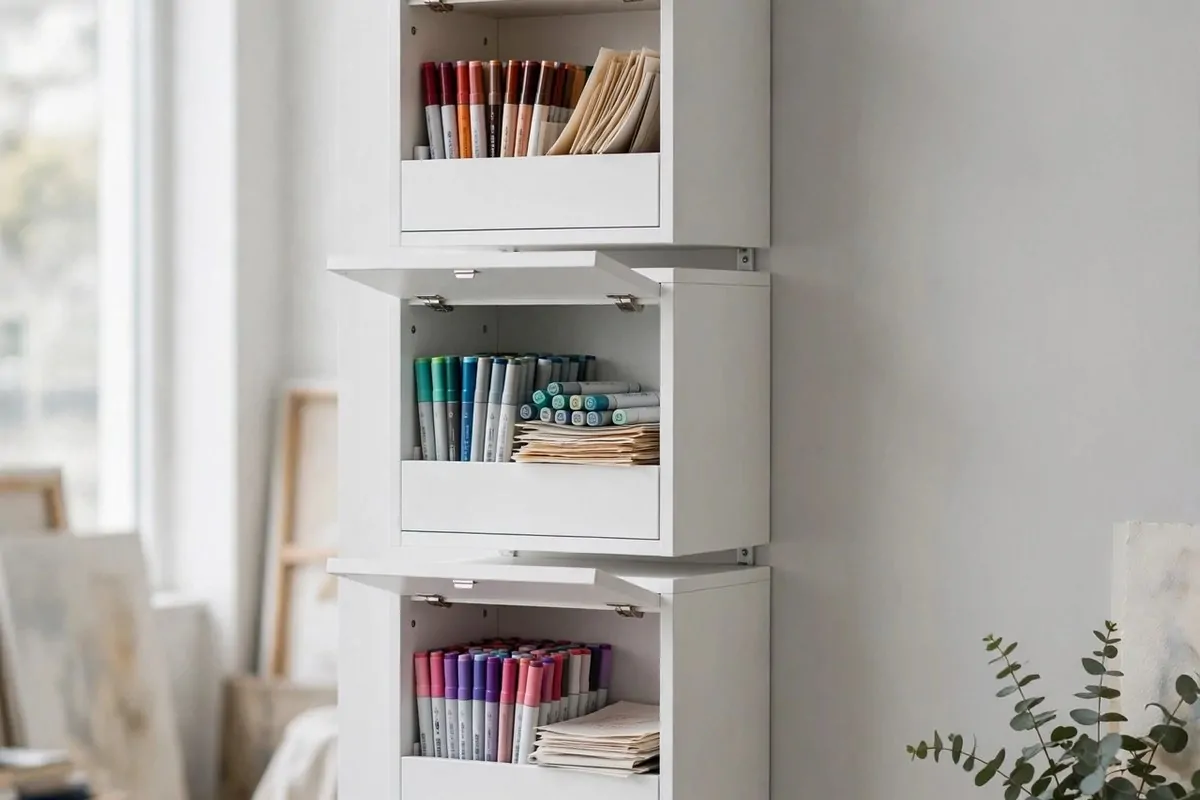
Narrow walls are wasted in most studios.
Slim flip-top wall cabinets were made for entryways. Stack three or four into a tall column. You get a tower of storage on one narrow strip of wall.
One cabinet holds markers. The next holds paper. The next holds thread. Each has its own job.
The flip tops keep dust out and hide clutter. Closed, the tower looks like wall paneling.
Secure every cabinet to the wall and and to each other. A tall stack must not wobble.
This works in hallways and beside doors too. Dead space becomes storage.
I keep mine beside the studio door. I grab supplies on the way in.
Small footprint, big capacity. That is the dream combo.
Measure your wall first. The tower should fit like it was built for the spot.
17. Warm Up an IVAR Wall System With Baskets
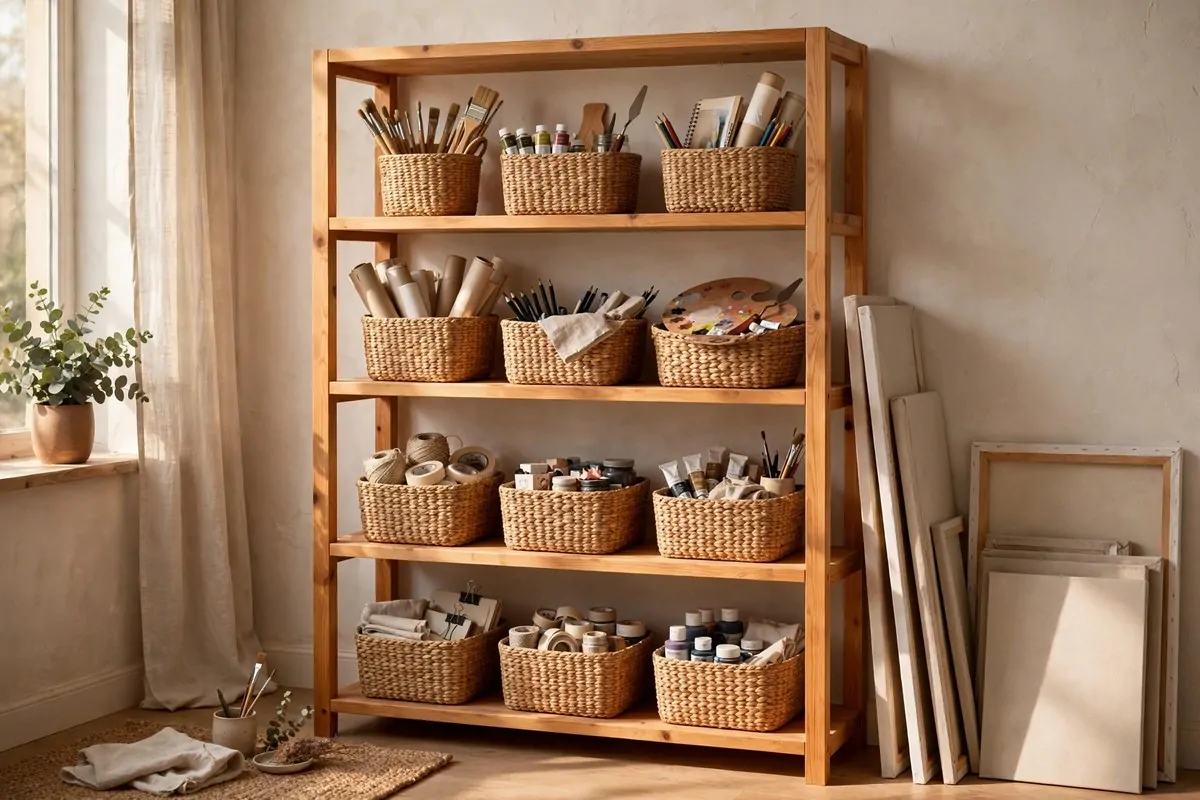
Open shelves show everything. That is good and bad.
A solid pine shelving system gives you tall, airy storage. Add woven baskets to every shelf. The mess hides. The wood shows.
Baskets come in every size. Mix big ones for fabric and small ones for tools.
The pine takes stain beautifully. A warm honey stain makes the whole unit look like fine furniture.
I lined my baskets with fabric scraps. Cute and free.
Keep one shelf open without baskets. Display finished work there.
The system grows with you. Add shelves. Add cabinets. Move it to a new wall.
Wood warms up a room in a way white boxes cannot. My studio feels cozier since I added it.
Natural materials make a creative space feel human.
18. Swap the Hardware for an Instant Upgrade
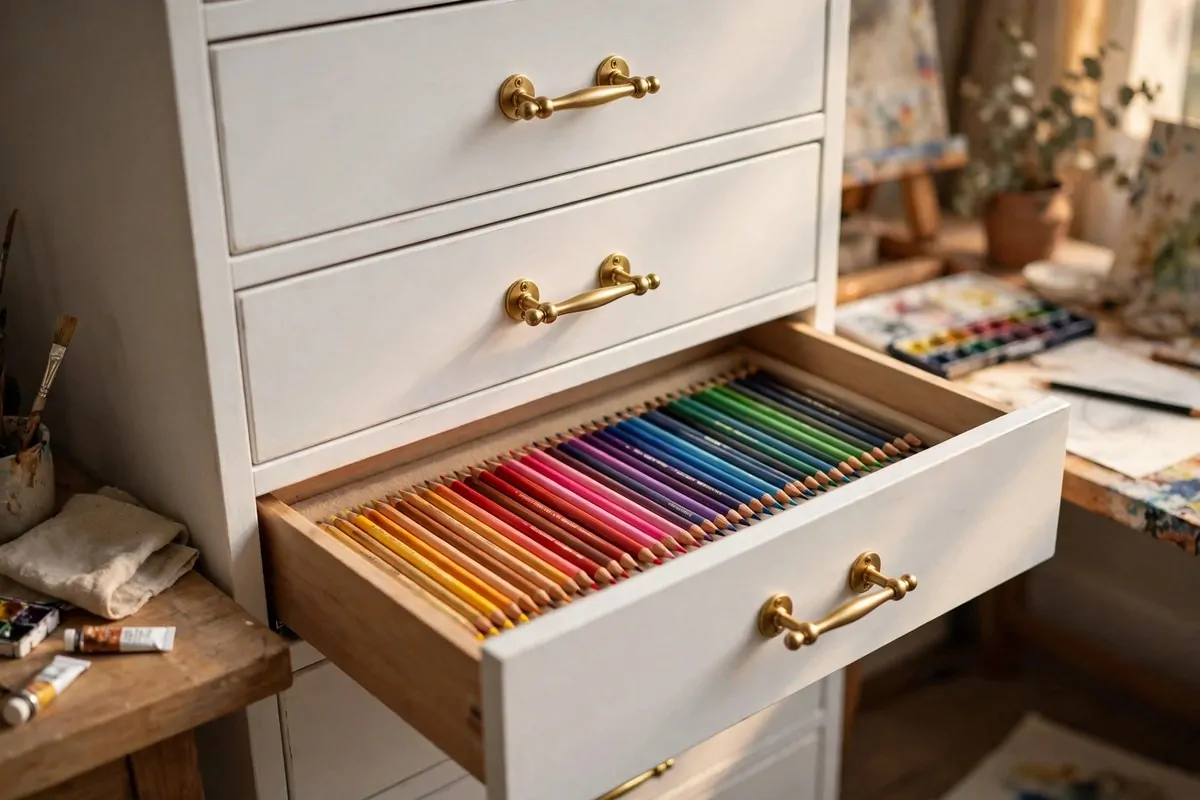
New handles are the fastest upgrade in this whole list.
Brass pulls on white drawers. Matte black knobs on wood. Leather loops on a kids’ unit. Hardware is jewelry for furniture.
It takes about thirty minutes and a screwdriver. Unscrew the old. Screw in the new. Done.
The change is shocking. Same drawers. Totally different furniture.
Match the metal to your lamp and frames. One finish repeated looks designed.
Cheap knobs chip fast. Spend a tiny bit more on solid ones. They feel good in your hand every day.
I did my whole studio in brushed brass. It glows against the white.
Guests touch the handles and say oh, nice. Nobody touches plain plastic knobs.
Thirty minutes. That is all. Do it this weekend.
19. Let a NORDEN Drop-Leaf Table Do Double Duty
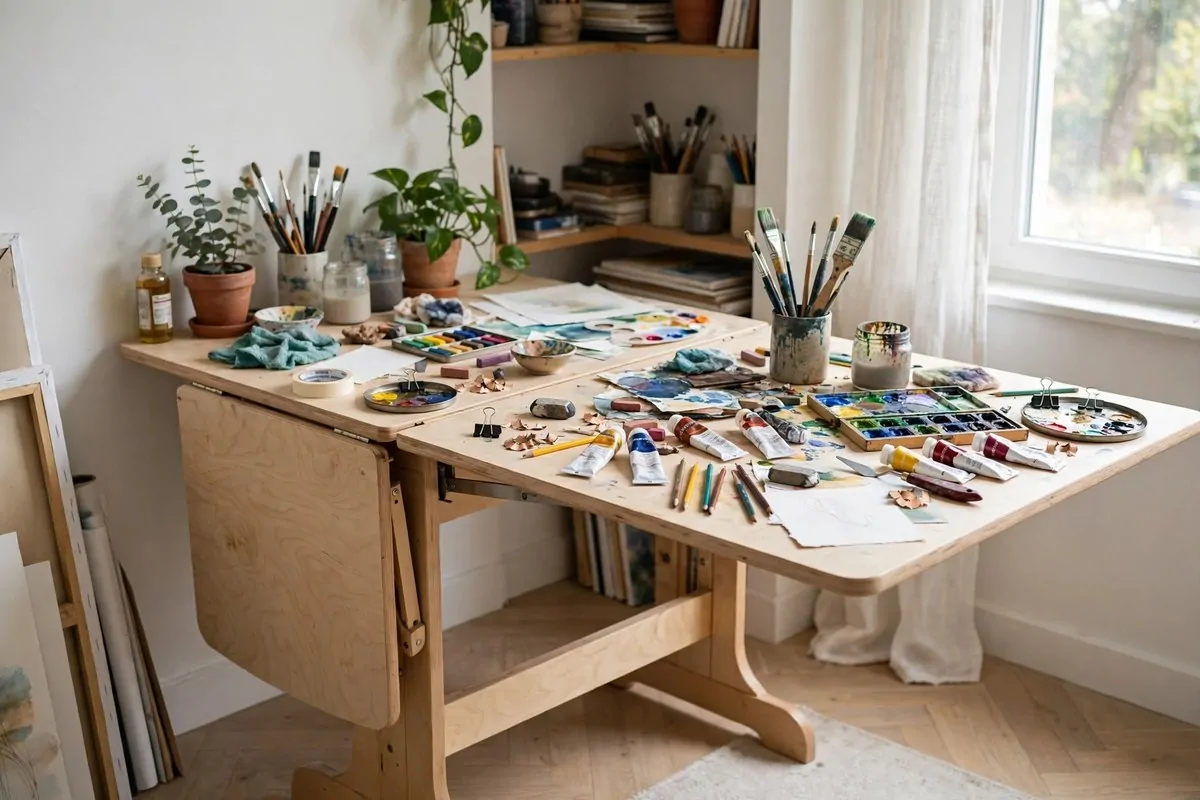
Studios need big tables sometimes and small tables always.
A drop-leaf table gives you both. Fold the leaves down for a slim console. Pop them up for a full work table.
I use mine folded against the wall most days. It holds a lamp and a plant. When a big project lands, the leaves come up.
It seats extra crafters for group sessions too. Quilting days. Card-making nights. Everyone gets elbow room.
The drawers in the middle hold tools even when folded. Nothing is ever far.
Solid birch takes paint splatter in stride. Wipe it and move on.
One table, three sizes. That is smart furniture.
Mine has survived six years of art chaos. It still looks great.
If your studio is also your dining room, this table is the answer.
20. Paint or Stain Laminate Tops Like Real Wood
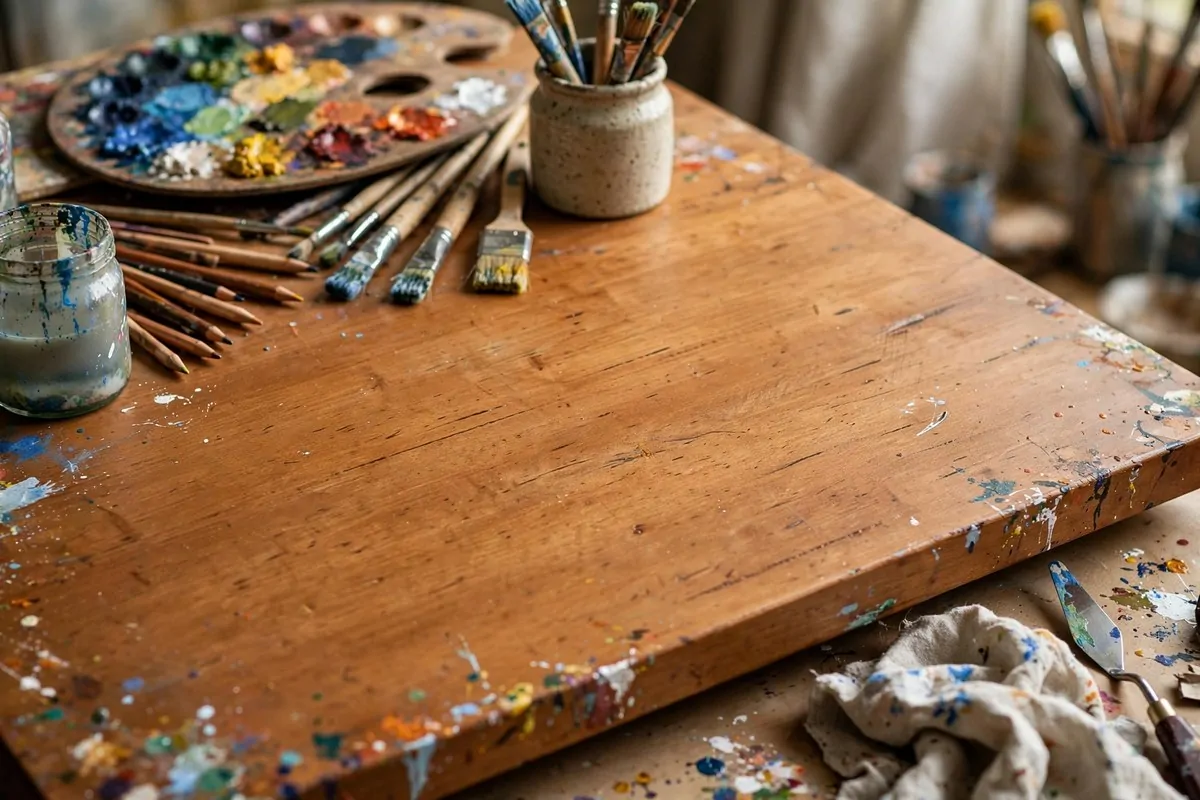
Laminate tops look flat. Real wood has depth. You can fake it.
Lightly sand the surface first. Just a scuff. You are not removing the finish, only roughing it up.
Use a bonding primer made for slick surfaces. This is the step people skip. Do not skip it.
Then paint with a durable cabinet enamel, or stain over a wood-look base. Two thin coats beat one thick coat.
| Step | What to do | Why it matters |
| Sand | Light scuff with fine sandpaper | Gives the primer something to grip |
| Prime | Bonding primer for slick surfaces | Stops the paint peeling later |
| Paint | Two thin coats of cabinet enamel | Hard finish that resists chips |
| Seal | Water-based polyurethane | Wipes clean for years |
Seal everything with polyurethane when dry. Your top will survive paint, glue and coffee rings.
I stained my old white top a warm walnut. It looks like a different desk.
This is a weekend project. Most of the time is waiting for coats to dry.
Test your colors on the underside first. I learned that the hard way.
A painted top hides every old scratch. It is like a reset button for furniture.
21. Hide the Mess Inside a PAX Wardrobe
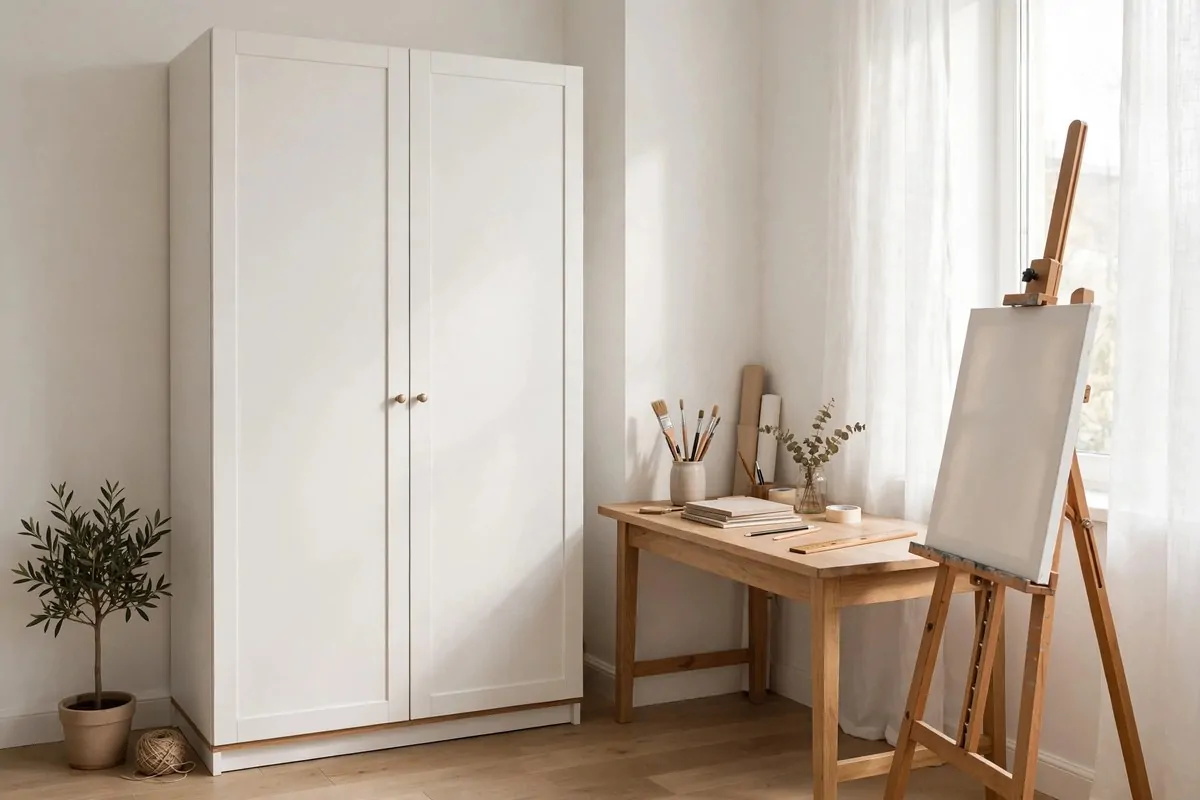
Some days the studio must look like a normal room. Guests come. Life happens.
A tall wardrobe with doors solves it. Open the doors and it is a supply closet. Close them and the mess vanishes.
Line the inside with pretty wallpaper or fabric. Every time you open it, it feels like a gift.
Add small shelves and rails inside. Use every inch of height.
Keep the bulkiest, ugliest supplies in here. Half-used canvases. Drying racks. The things no shelf can pretty up.
I close mine at the end of every workday. Out of sight, out of mind. Tomorrow starts fresh.
A closed wardrobe also keeps dust off everything. Your supplies stay clean.
Choose doors with a simple frame. They look like built-in cabinetry.
The best storage is the kind you never see.
Keep Reading
If you loved these Ikea Art Studio Ideas, here are more posts you will enjoy.
– 25 Tiny Home Ideas to Maximize Space and Style
– How to Organize My Home and My Life
– 10 Best Apps to Organize My Life
– 7 Best AI Tools to Organize My Life