19 Small Photo Studio Setups That Still Look Professional

A friend sent me two headshots last spring. One was taken in a rented studio across town. One was taken in her spare bedroom, next to a drying rack and a laundry basket.
I could not tell which was which.
I stared at both photos for a full minute. Same soft light. Same clean background. Same calm, professional look. The bedroom photo was the better one, actually. The light in it was warmer.
That is the whole secret of a Small Photo Studio. Clients never see the room. They see the light, the background, and the few feet of space right behind you. Get those three things right and a corner of your home can look like a studio that costs a fortune.
You do not need a big empty room. You need a plan for light, a background that behaves, and enough distance between your subject and the wall. Most of these 19 Small Photo Studio setups fit in a corner, a closet, or a patch of floor the size of a rug.
Pick the setup that matches what you shoot most. Portraits need something different from product shots. Start with one idea, try it this weekend, and add the rest slowly. Your spare corner is already a studio. It just does not know it yet.
1. The Corner Studio
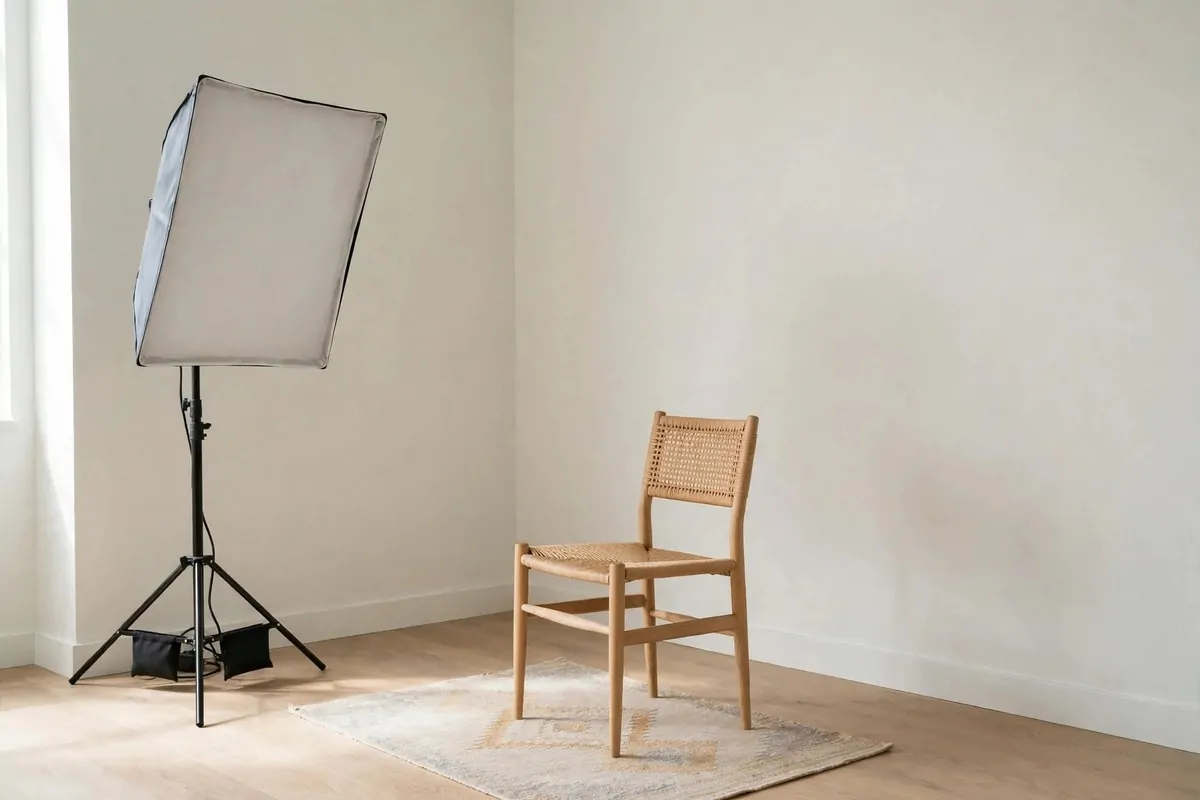
A corner is the most useful shape in a Small Photo Studio. Two walls meet, and suddenly you have a background, a bounce surface, and a boundary all in one spot.
Put your subject a few feet out from the corner, facing into the room. The two walls behind them catch the light and fall softly out of focus. Your camera sees a clean backdrop. Your subject sees open space and feels relaxed.
The corner also keeps your gear contained. Lights tuck against one wall. The backdrop leans against the other. Nothing spills into the rest of the room, and the whole setup reads as tidy even mid-shoot.
Paint the corner walls a soft white or pale gray if you can. White bounces light back onto your subject and fills in shadows for free. Gray gives you a moodier look with the same setup and no extra gear.
Keep the corner clear of clutter. A plant in the corner reads as a prop. A laundry basket reads as a laundry basket. The camera is honest about what sits behind your subject, so give it something clean to look at.
One corner, two walls, one chair. That is a portrait studio that fits in any bedroom, and it packs down to nothing when the shoot is over.
A small rug under the chair marks the spot. Your subject knows where to sit. You know where to stand. The rug also stops chair legs from scraping the floor during a long session.
If the corner is dark, add one cheap daylight LED panel aimed at the wall, not at the subject. The wall becomes a giant soft light source. The light wraps around faces in a way no small lamp ever will.
Corners work for product shots too. Set a small table into the corner, shoot from above or straight on, and the two walls give you a clean sweep with no seams showing.
2. One Window and a White Sheet
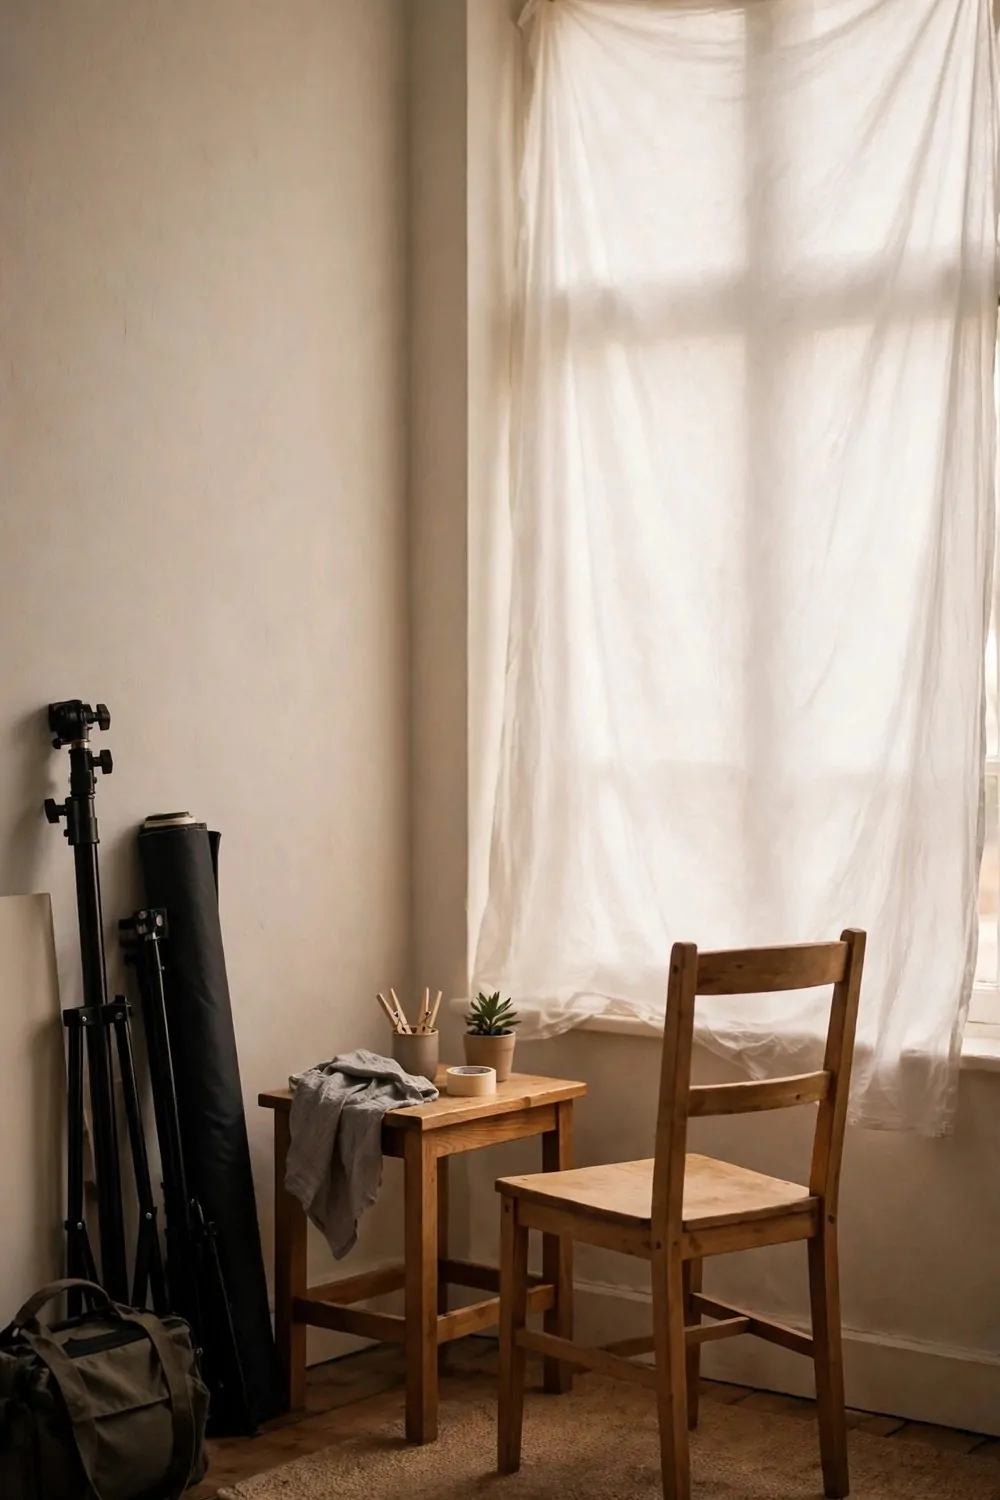
The cheapest professional light in the world is a window with a white sheet over it. No softbox. No flash. Just daylight, softened.
Hang a plain white flat sheet over the window on a tension rod or a couple of hooks. The sheet turns harsh direct sun into a big, soft glow. Your subject sits facing the window, about three feet away, and the light wraps around their face like it was planned.
Morning light is usually the kindest. It is softer and a little warmer. Afternoon sun can be strong, and the sheet earns its keep then. If the light gets too bright, add a second layer of sheet. Two layers cut the glare without killing the glow.
A white sheet also works as a reflector. Hang one on the opposite side of the subject, on a drying rack or a second rod, and it bounces window light back into the shadows. No gear to buy. Just laundry.
Keep the sheet clean and wrinkle free. A stained sheet shows up in the light and tints everything. Wash it before a shoot day, and let it dry flat so it hangs smooth.
This setup shines for headshots and family portraits. The light looks natural because it is natural. Clients relax faster when the room feels like a bright living room instead of a dark studio.
When the shoot ends, the sheet goes back in the linen closet. The window goes back to being a window. Nothing in the room says studio, and that is the beauty of it.
One window, one sheet, one chair. The oldest lighting trick in photography, and it still beats most of the gear I have bought since.
3. The Closet Photo Studio
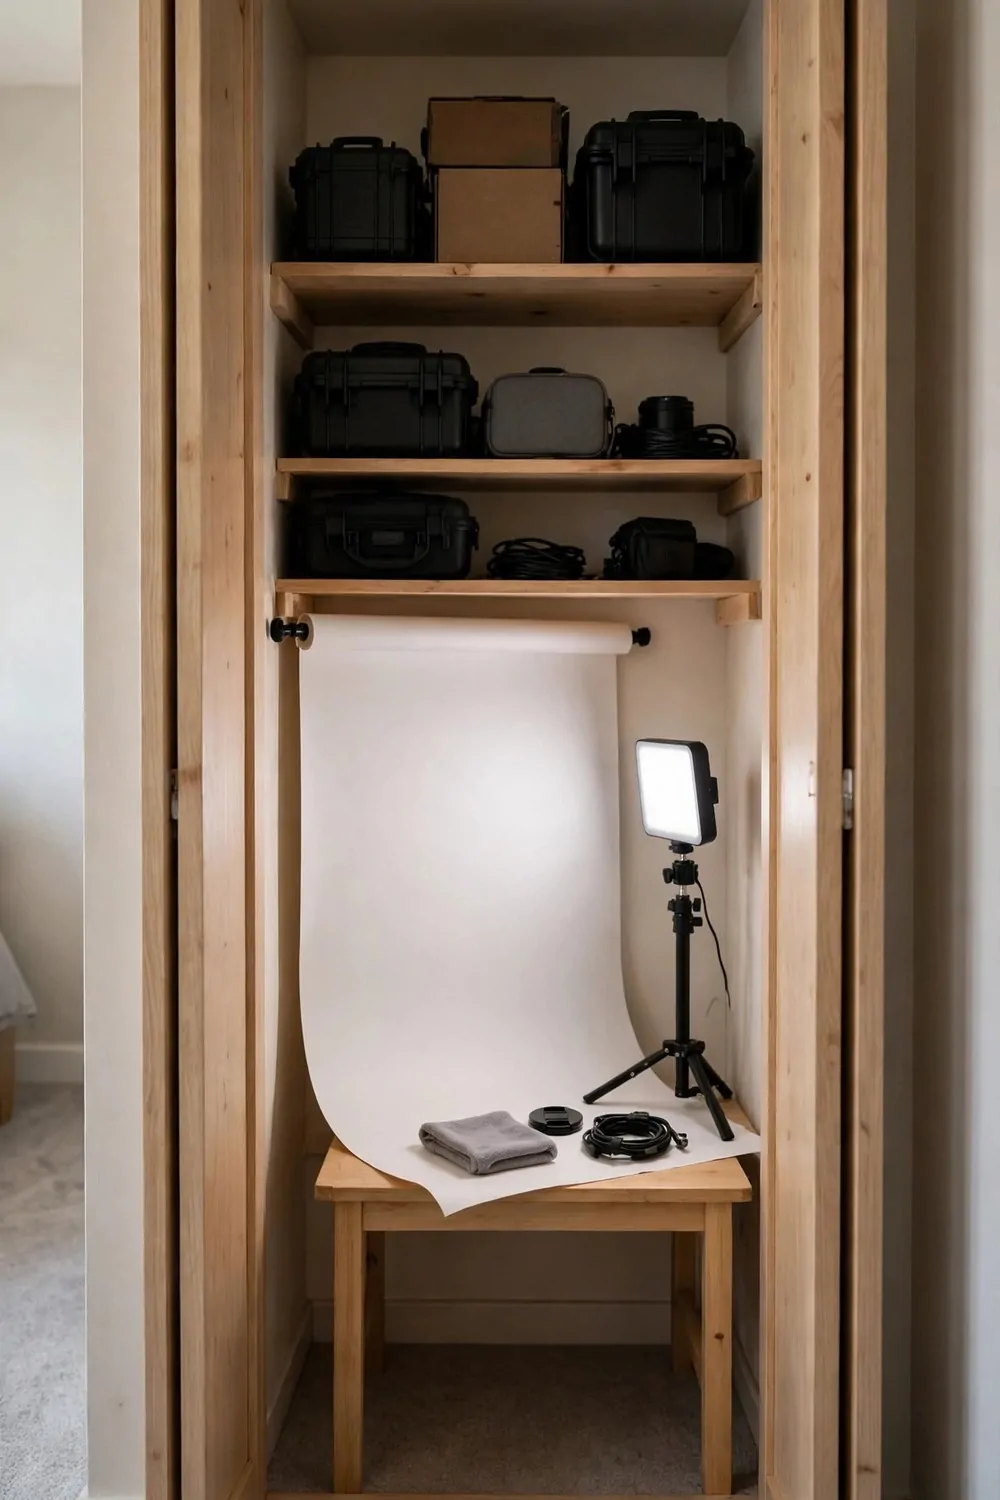
A closet is a Small Photo Studio hiding in plain sight. Take the doors off, or slide them open, and you have a ready made booth with three walls and a light you can control.
The closet walls are your backdrop. Paint them white, or hang a roll of seamless paper inside. The narrow space keeps the background close and simple, and your subject stands just outside the opening where the light is better.
This setup is perfect for product photography. A small table fits inside most closets. Add one light above and one to the side, and you have a product booth that stays set up all the time. Close the doors and it vanishes.
For portraits, the closet works best as the background, not the room. Your subject sits in front of the open closet, a few feet out. The closet reads as a clean, plain backdrop, and the rest of the room stays out of frame.
Closets are dark, so light matters here. A daylight LED panel on a small stand, aimed at the closet walls, turns the whole box into a soft light source. Add a second small light for the subject and the setup is complete.
Use the closet shelves for gear storage. Lenses, backdrops, reflectors, and chargers all live on the shelves above the shooting space. Everything for the studio lives in one place.
Measure the closet before you plan. A closet that is too shallow will not fit a table and a light. A deep closet can hold a whole product setup and still close its doors.
One closet, one light, one table. The smallest studio in this list, and one of the most useful.
4. A Backdrop That Rolls Up
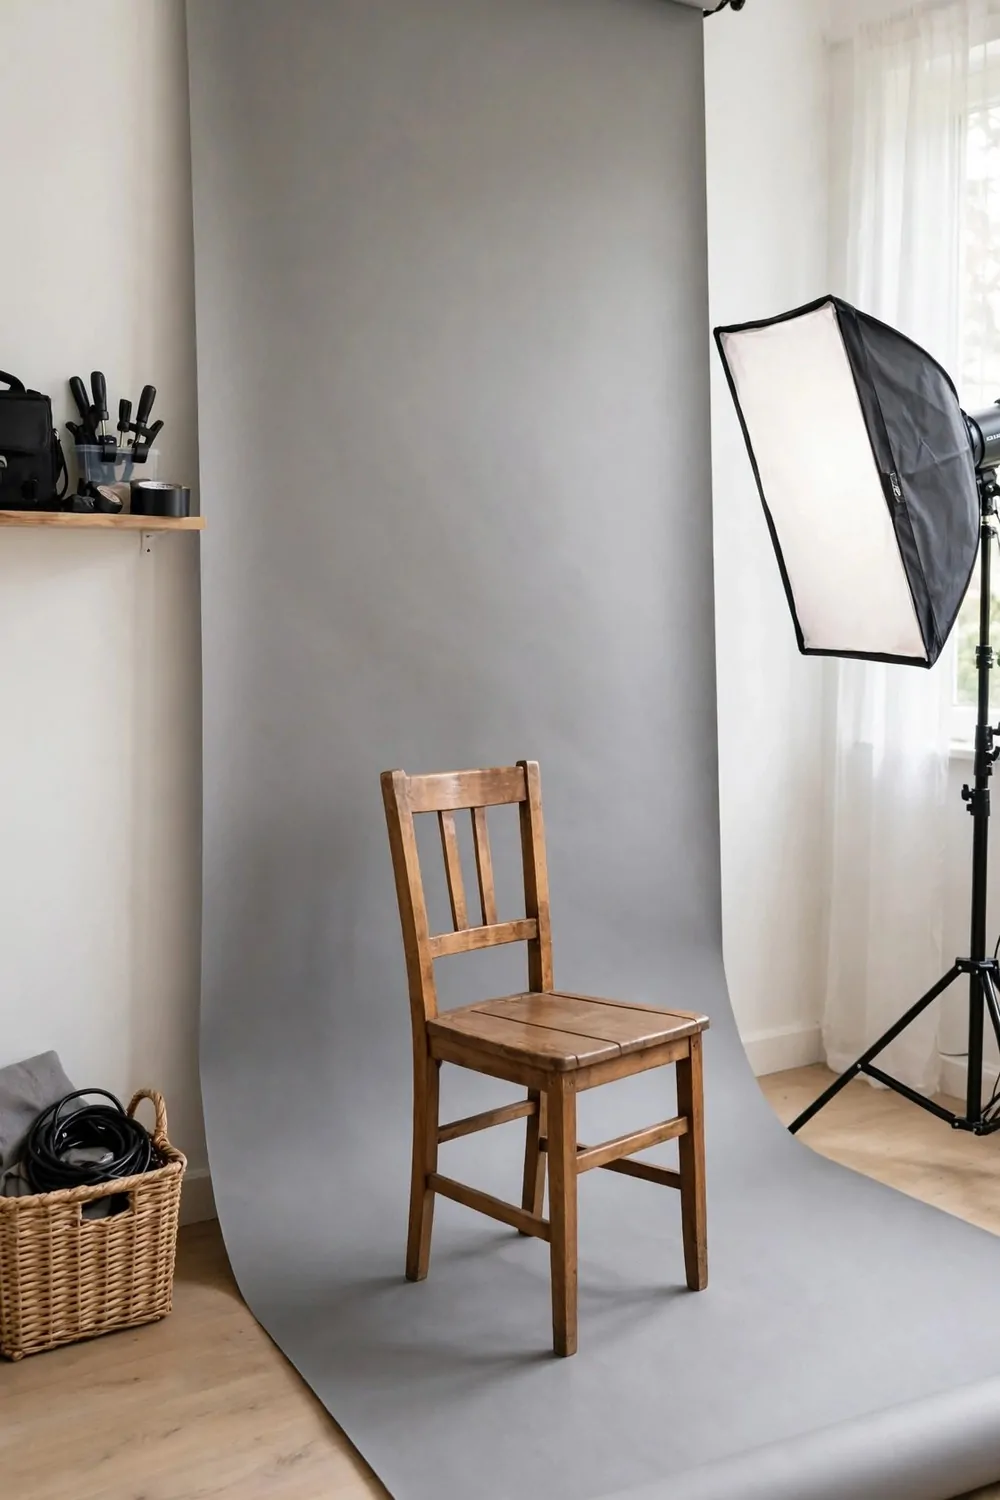
A backdrop that lives on the floor is a trip hazard. A backdrop that lives on the wall is a room feature you did not ask for. A backdrop that rolls up is the answer.
Mount a curtain rod or a backdrop rail high on one wall. Hang a roll of seamless paper, a fabric backdrop, or even a plain bedsheet from it. When you shoot, unroll it down the wall and across the floor. When you finish, roll it back up and tie it.
The roll-up trick gives you a sweep, which is the smooth curve where the wall meets the floor. A sweep makes the background look endless, like the floor goes on forever. That is the look that makes product shots and portraits feel professional.
Start with gray seamless paper. Gray is the most flexible single color. Light it bright and it reads almost white. Light it low and it reads dark and moody. One roll gives you three looks.
Keep the paper clean. Sweep the floor before you unroll it, and keep shoes off the paper. A dirty sweep shows every mark in the photo, and paper is hard to clean once it is marked.
Fabric backdrops roll up even smaller and survive washing. A plain muslin cloth in gray or cream, ironed before the shoot, looks soft and expensive in portraits. It also packs into a bag for shoots away from home.
Label each backdrop roll with a strip of tape on the end. Gray, cream, black. When the rolls hang in a row, the labels save you from unrolling three wrong ones to find the right color.
A roll-up backdrop needs a little wall space and nothing else. The floor stays clear. The room stays a room. The studio appears in two minutes and disappears in one.
5. The One-Light Portrait Setup
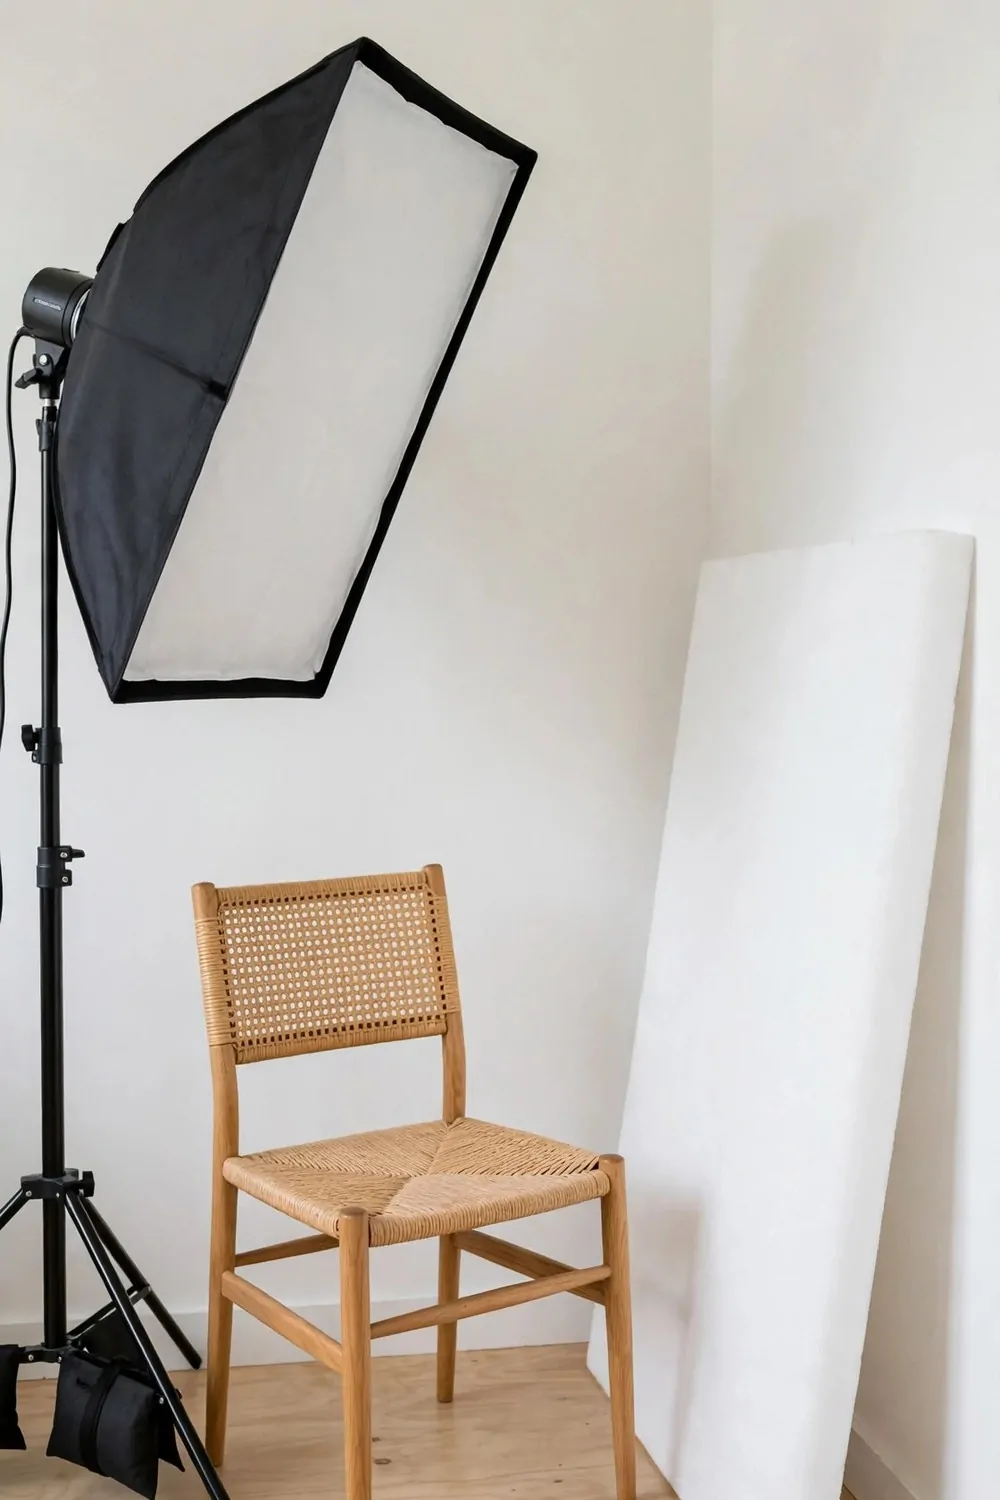
You do not need three lights to make a professional portrait. One good light, placed well, does the job. Most of the portraits you admire were lit with one light and one reflector.
Put your single light at 45 degrees to your subject, a little above eye level, aimed down at their face. That angle shapes the face, gives the eyes a catchlight, and keeps the shadows soft and natural.
The reflector sits on the opposite side, bouncing light back into the shadows. A white foam board works. A 5-in-1 reflector works better. Your subject holds it, or it leans on a chair. No stand needed.
Here is how the common one-light modifiers compare in a small space:
| Modifier | Light it gives | Space it needs |
|---|---|---|
| Umbrella | Broad and soft, very forgiving | Needs room to open fully |
| Small softbox | Soft with more direction | Compact, fits a corner |
| Bare bulb in a corner | Hard and dramatic | Almost none, but harsh |
| Window plus reflector | Natural and soft | Window side only |
A small softbox is the best all rounder for a Small Photo Studio. It folds flat, sets up in a minute, and gives soft light that flatters every face. Buy that one first.
Continuous LED lights beat flashes for beginners. You see the light before you shoot. What you see is what you get, and learning is twice as fast.
Keep the light close to your subject. Light gets softer the closer it sits. A softbox two feet from a face looks creamy. The same softbox eight feet away looks hard and flat.
One light, one reflector, one chair. That is a portrait studio that fits in a corner and costs less than a weekend away.
6. The DIY V-Flat
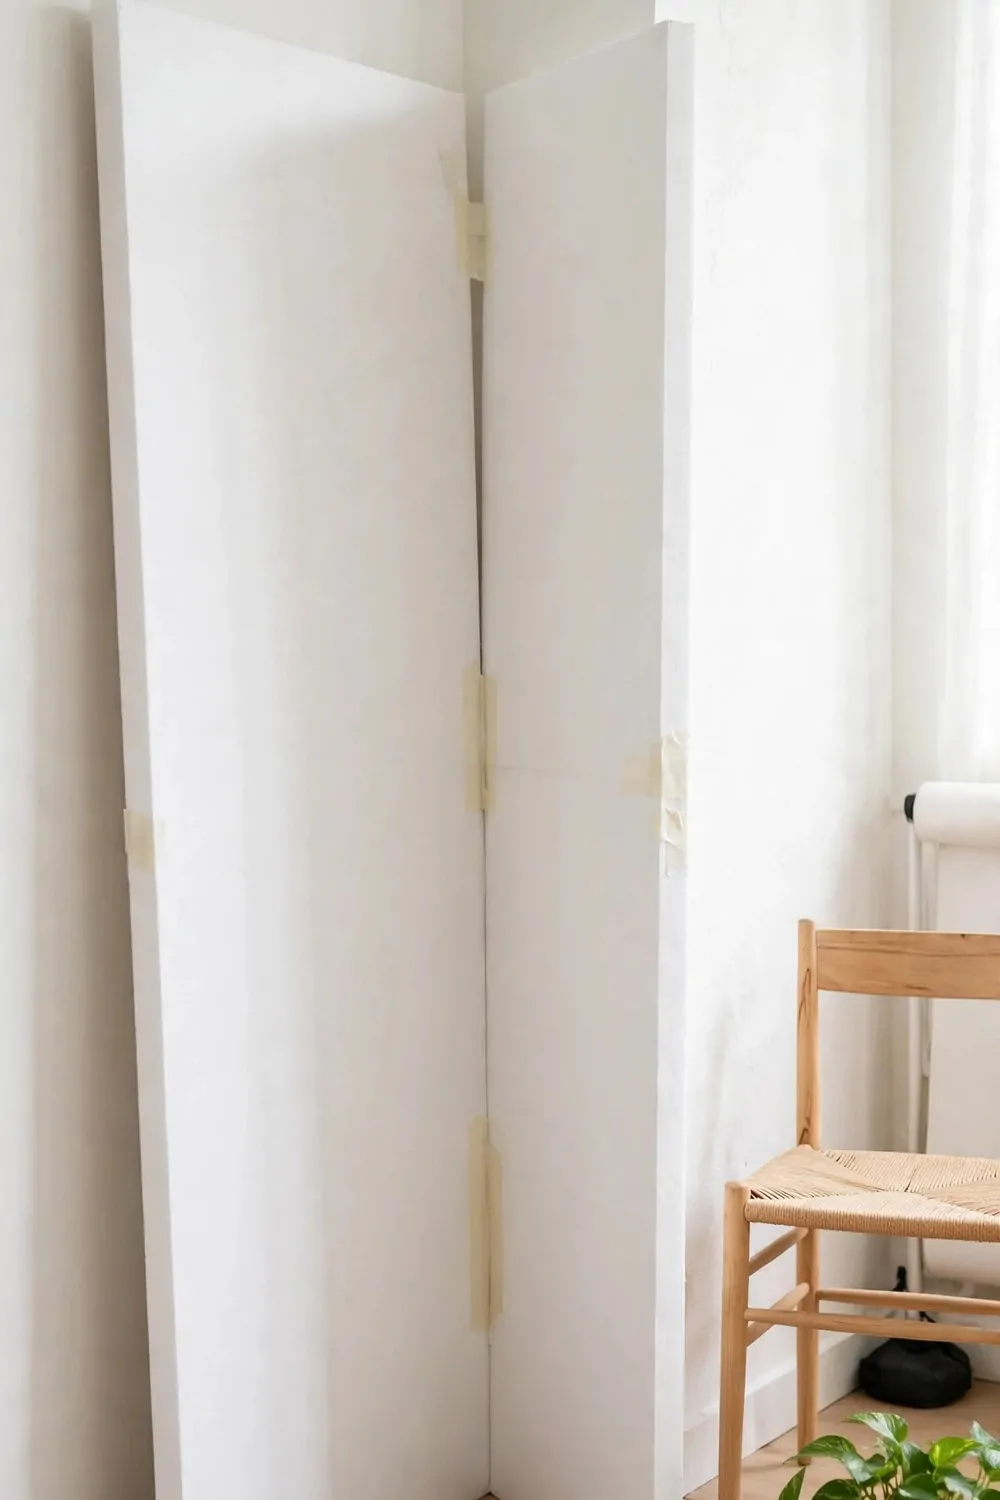
A V-flat is two big boards hinged together in a V shape. Photographers use them to bounce light, block light, and build instant walls. You can make one for very little money.
Buy two sheets of white foam board, the biggest size the craft store sells. Tape them together along one long edge with strong tape. Stand them up in a V. That is your V-flat.
The white side bounces light back onto your subject. Put it opposite your window or your main light, and the shadows fill in softly. It is a reflector the size of a doorway.
Flip it around and the black side blocks light. Put the black side between your subject and a bright window, and the light on that side drops away. That gives you drama and mood with no extra gear.
Paint one side of each board black and the other stays white. Now you have a white-white flat and a black-black flat in one build. Two tools for the price of one.
V-flats also work as backgrounds. Stand one behind your subject and shoot against the white side for a clean high key look. Stand it behind them with the black side out for a dark portrait.
Store V-flats flat against a wall or behind a door. They are big but thin, and they slide into gaps that nothing else uses. A closet side wall is perfect.
Build two if you have room. Two V-flats can stand on either side of your subject and make a little booth of light. That booth is the closest thing to a real studio you can build in an afternoon.
7. The Tabletop Product Studio
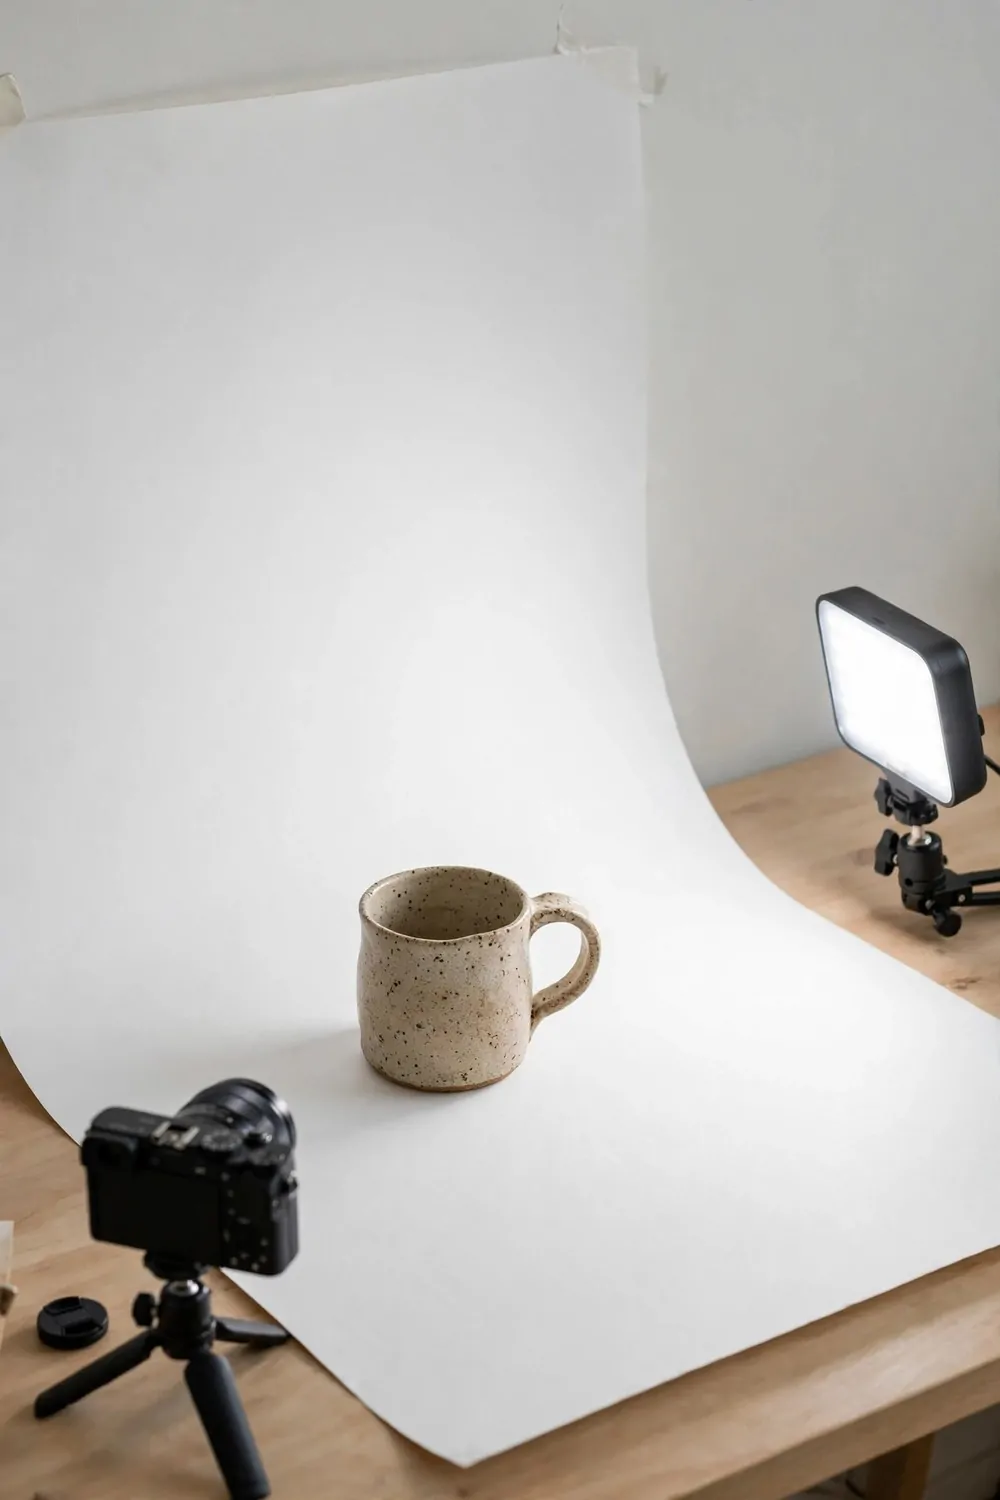
Product photos do not need a room. They need a table, a sweep, and good light. A tabletop studio fits on a desk and packs into a drawer.
Set a small table against a wall. Curve a sheet of white poster board from the wall down onto the table and tape it at the back. That curve is your sweep, and it makes the background look endless.
Light it from the side with a window or a small LED panel. Side light shows texture, which is what sells products. A candle, a jar of cream, a handmade mug. Side light makes all of them look touchable.
A light tent is the other option. It is a small collapsible cube of white fabric with lights built in or shining through the sides. Put the product inside, shoot through the front opening, and the light wraps around it evenly.
Here is a quick guide to backdrop colors for product shots:
| Backdrop color | Best for | Watch out for |
|---|---|---|
| White | Online shops, clean catalog looks | Needs bright even light |
| Gray | Almost everything, very flexible | Can look dull if underexposed |
| Black | Jewelry, glass, luxury items | Dust shows up fast |
| Warm beige | Food, handmade goods, cozy brands | Can tint white products |
Keep the table surface clean and level. A wobbly table ruins more product shots than bad light does. A folded towel under one leg fixes most wobbles in seconds.
Shoot at the product’s level, not from above, unless the shot calls for it. Eye level makes products look real and solid. A small stack of books under the camera or phone gets you to the right height.
One table, one sweep, one light. That is a product studio that lives in a corner and earns its keep every week.
8. The White Wall That Does Everything
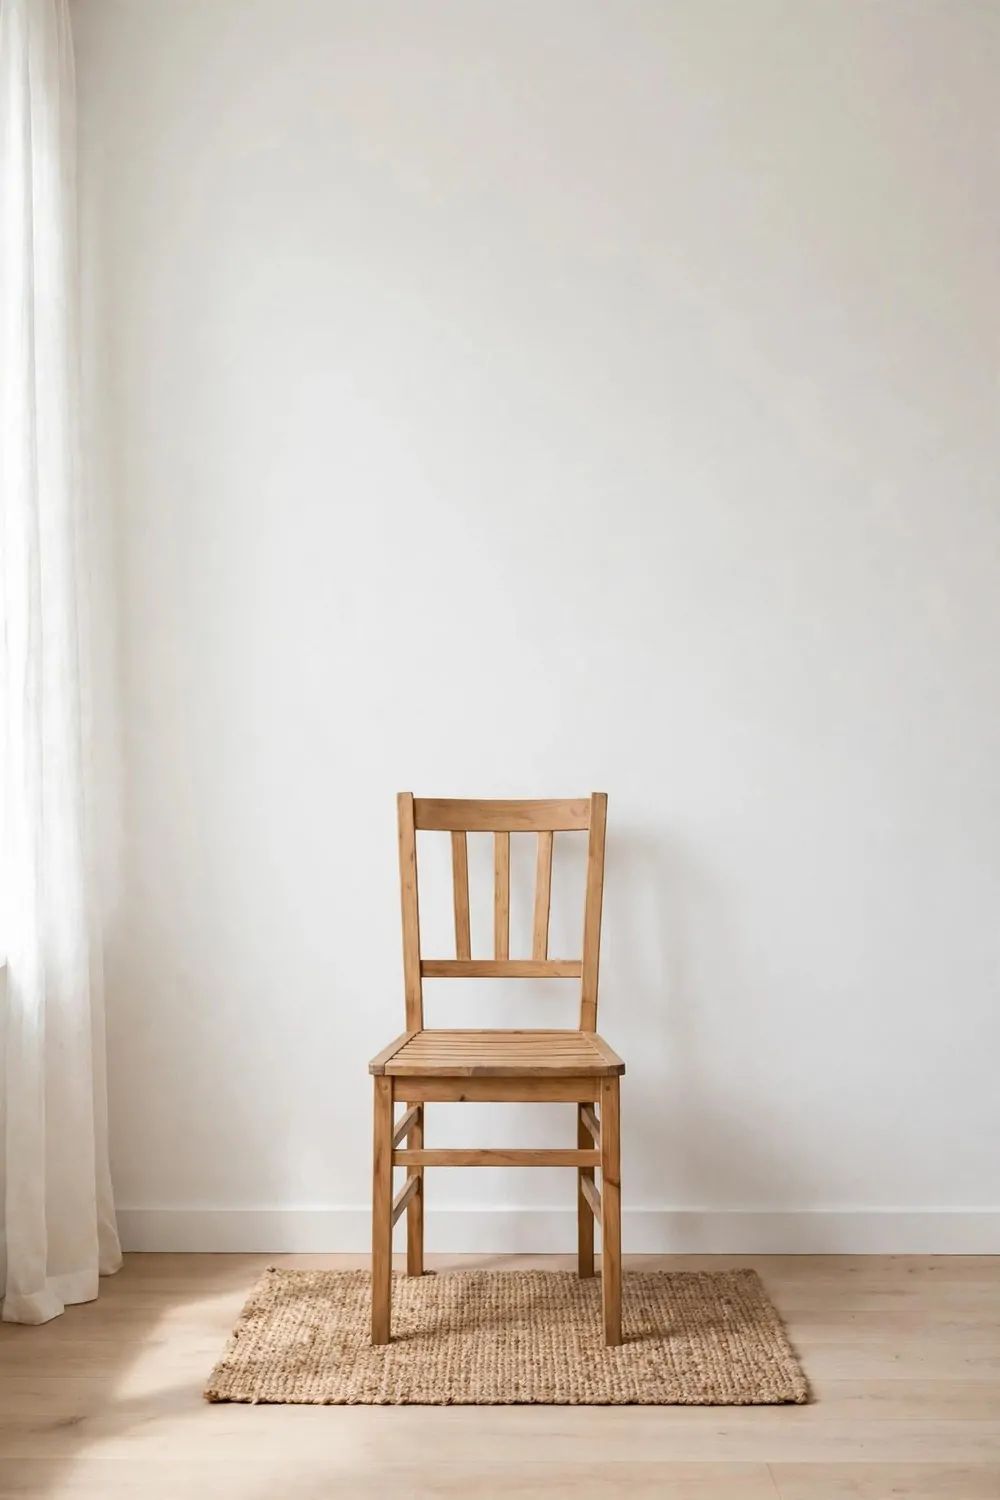
A plain white wall is the hardest working backdrop in photography. It costs nothing, it never wrinkles, and it suits almost every subject.
Pick the cleanest wall in your home. The one with no switches, no marks, no picture hooks. That wall is your studio wall now. Keep it that way.
Distance is the trick. Put your subject four to six feet in front of the wall. The camera focuses on the subject, the wall falls softly out of focus, and every mark and bump disappears into a clean blur.
Light the wall separately if you want it pure white. A small light aimed at the wall, low and from the side, lifts it to bright white while your subject keeps their own softer light. Two lights, one job each.
If you only have one light, light the subject and let the wall go a little gray. Gray reads as intentional and classy in portraits. It is not a flaw. It is a look.
Keep a magic eraser and a small tin of touch up paint near the wall. Scuffs happen, especially near the floor. A quick wipe before a shoot keeps the wall looking fresh.
A white wall works for video too. Sit in front of it for video calls, tutorials, and talking head clips. Add one plant just out of frame and the shot looks polished and calm.
No backdrop to buy. No paper to replace. No fabric to iron. Just a wall, kept clean, with enough distance in front of it.
9. The Fold-Away Studio
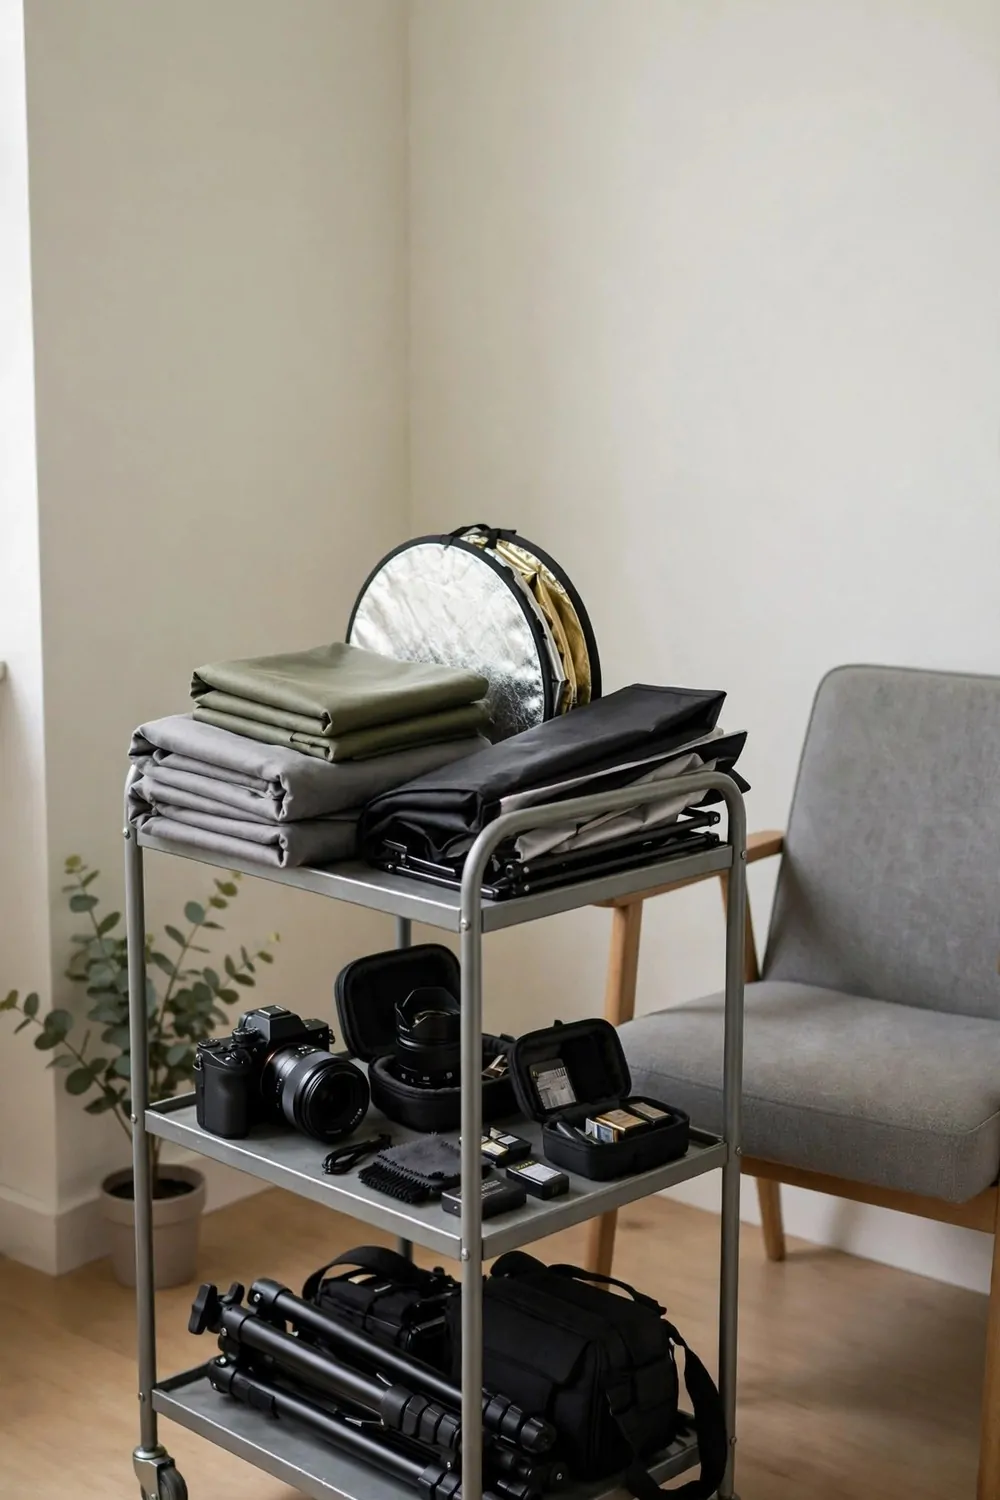
Some rooms have to be two things. A living room by night and a studio by day. A fold-away setup makes that possible without a fight.
Keep all your studio gear on one rolling cart. Backdrop, lights, reflector, clamps, and chargers. The cart lives in a closet or a corner. On shoot day, roll it out and you are set up in ten minutes.
Collapsible gear is the whole trick. A collapsible backdrop folds to the size of a pizza box. A collapsible reflector folds to a small circle. A folding light stand collapses to a thin tube. Everything folds, and everything fits on the cart.
Use a backdrop stand with a crossbar that breaks down. Two stands and one bar hold a full fabric backdrop. When the shoot ends, the stands fold flat and lean behind a door.
Mark your floor positions with small pieces of tape. One tape mark for the subject chair. One for the light stand. One for the camera tripod. Next shoot, you place everything on the marks and the setup is identical.
Keep a small checklist taped inside the cart lid. Backdrop, lights, reflector, clamps, charger, spare batteries. A quick glance before you roll out stops the mid-shoot hunt for a missing clamp.
The fold-away studio suits renters best. Nothing mounts to the wall. Nothing stays out. The room goes back to normal the same evening, and the landlord never knows a studio lived there.
Ten minutes up. Ten minutes down. That is the deal that makes a Small Photo Studio work in a home that has to stay a home.
10. The Garage Studio
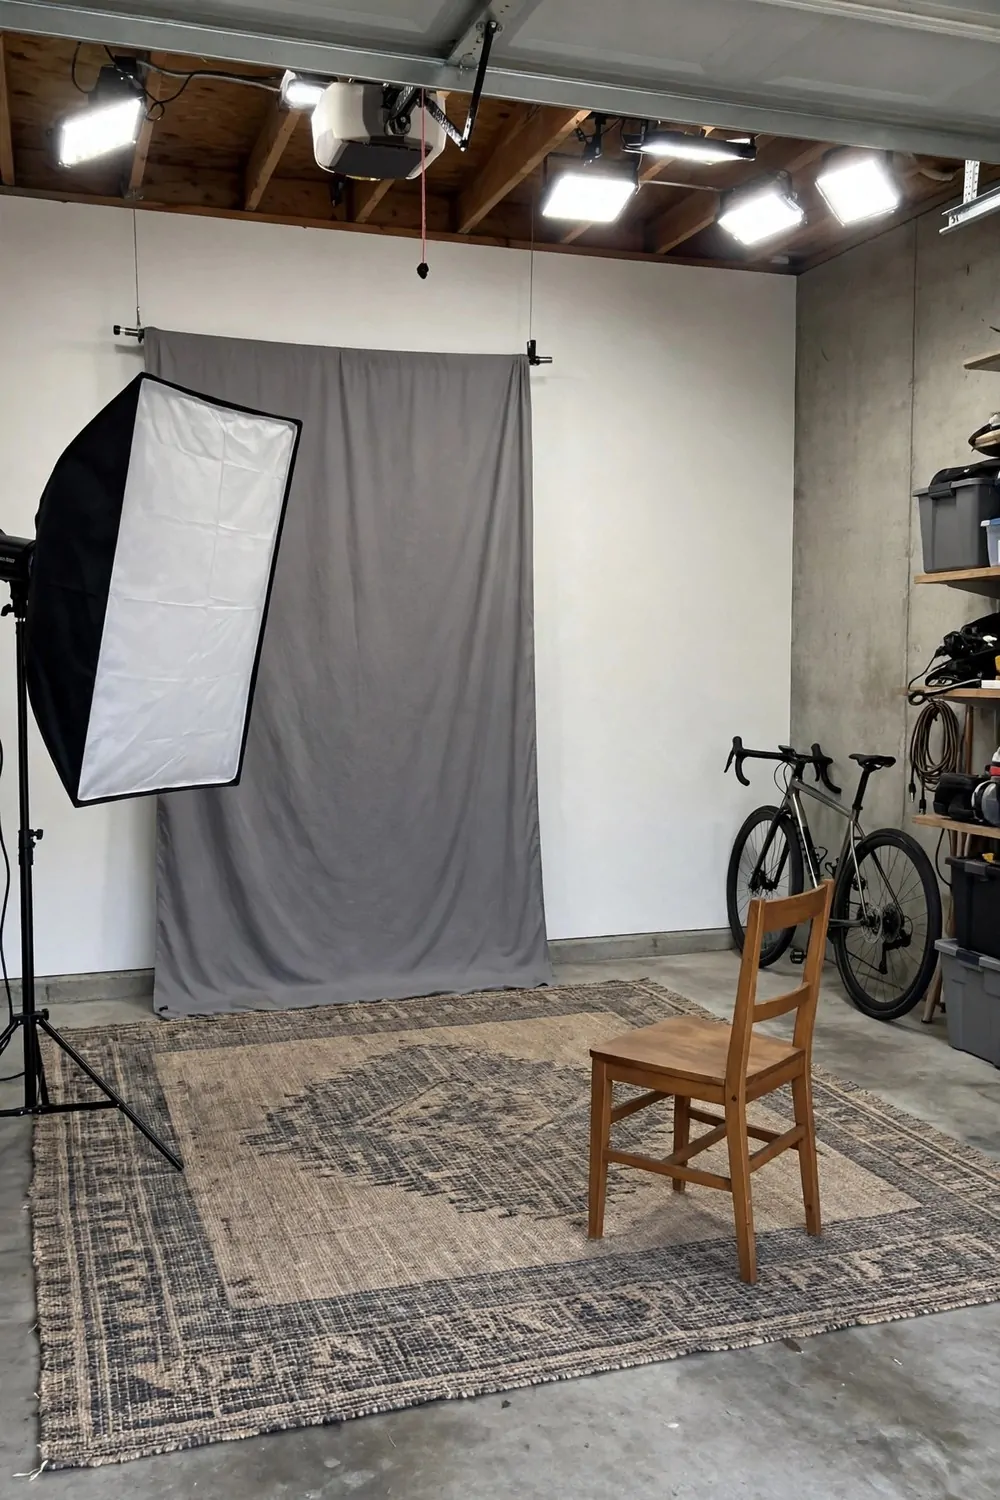
A garage is a gift for a photographer. It is big, it is empty, and nobody minds if it looks like a studio. The floor is concrete, the walls are plain, and the space is yours.
Clear one wall and one patch of floor. That is your shooting bay. The rest of the garage keeps holding bikes and boxes. You do not need the whole garage. You need one clean corner of it.
Garages are dark, which is actually good news. Dark means you control all the light. No window light sneaking in and changing color through the day. Your lights are the only lights, and every shot matches the last one.
A garage door makes a great large backdrop when it is closed and clean. A white or gray door reads as a seamless wall in photos. Hang a fabric backdrop over it for a softer look.
Watch the temperature. Garages get cold in winter and hot in summer. A small heater or fan keeps your subject comfortable, and a comfortable subject photographs ten times better than a freezing one.
Concrete floors are hard on feet and noisy under chairs. A big rug or a sheet of foam flooring under the shooting area fixes both. It also stops chair legs from scraping during a session.
Power is easy in a garage. Outlets are usually plentiful. Run one power strip to your shooting bay and keep all your lights and chargers on it. One switch kills everything at the end of the day.
A garage studio can grow. Start with one wall. Add a second light. Add a backdrop rail. One day you look up and the garage is a real studio that happens to share space with a car.
11. The Balcony Studio
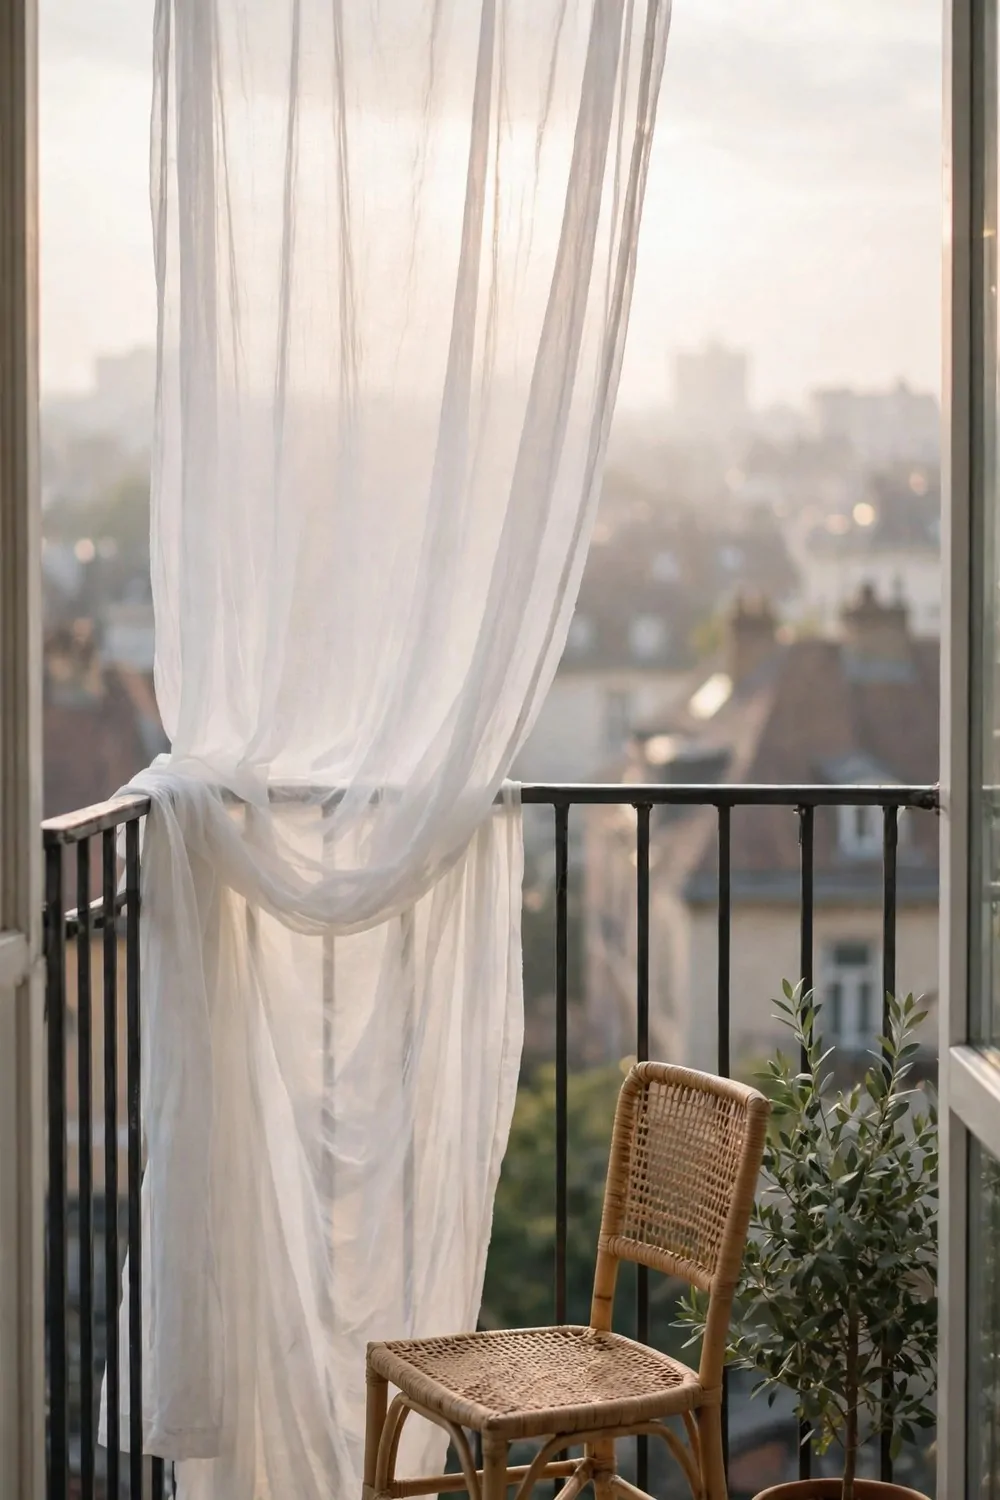
A balcony gives you the one thing indoor studios struggle to fake. Beautiful, open daylight with a real sky behind it. Use it.
Shoot in the morning or the late afternoon, when the sun is low and soft. Midday sun is harsh and makes people squint. The golden hours are short, so plan your shots and work fast.
A sheer curtain hung from the balcony rail softens direct sun. It turns the whole balcony into a giant softbox. The light wraps around your subject and the background falls into a soft blur of sky and rooftops.
Keep the balcony floor clean and simple. A plain outdoor rug or a swept floor reads as a clean surface in photos. Potted plants at the edges frame the shot and add life without stealing focus.
Wind is the enemy on a balcony. It moves backdrops, hair, and light stands. Use sandbags or heavy books on light stand bases. Clip fabric backdrops tight so they cannot flap.
Privacy matters. A balcony shoot is visible to neighbors, and your subject needs to feel at ease. A tall plant screen or a fabric panel on the rail gives privacy without blocking the light.
Watch the background. Rooftops, trees, and sky look lovely. A neighbor’s drying laundry does not. Angle your shots so the background stays clean, or hang a backdrop behind your subject.
One balcony, one sheer curtain, one calm morning. Outdoor light does the heavy lifting, and your photos get a glow no indoor light can quite match.
12. The Curtain Backdrop
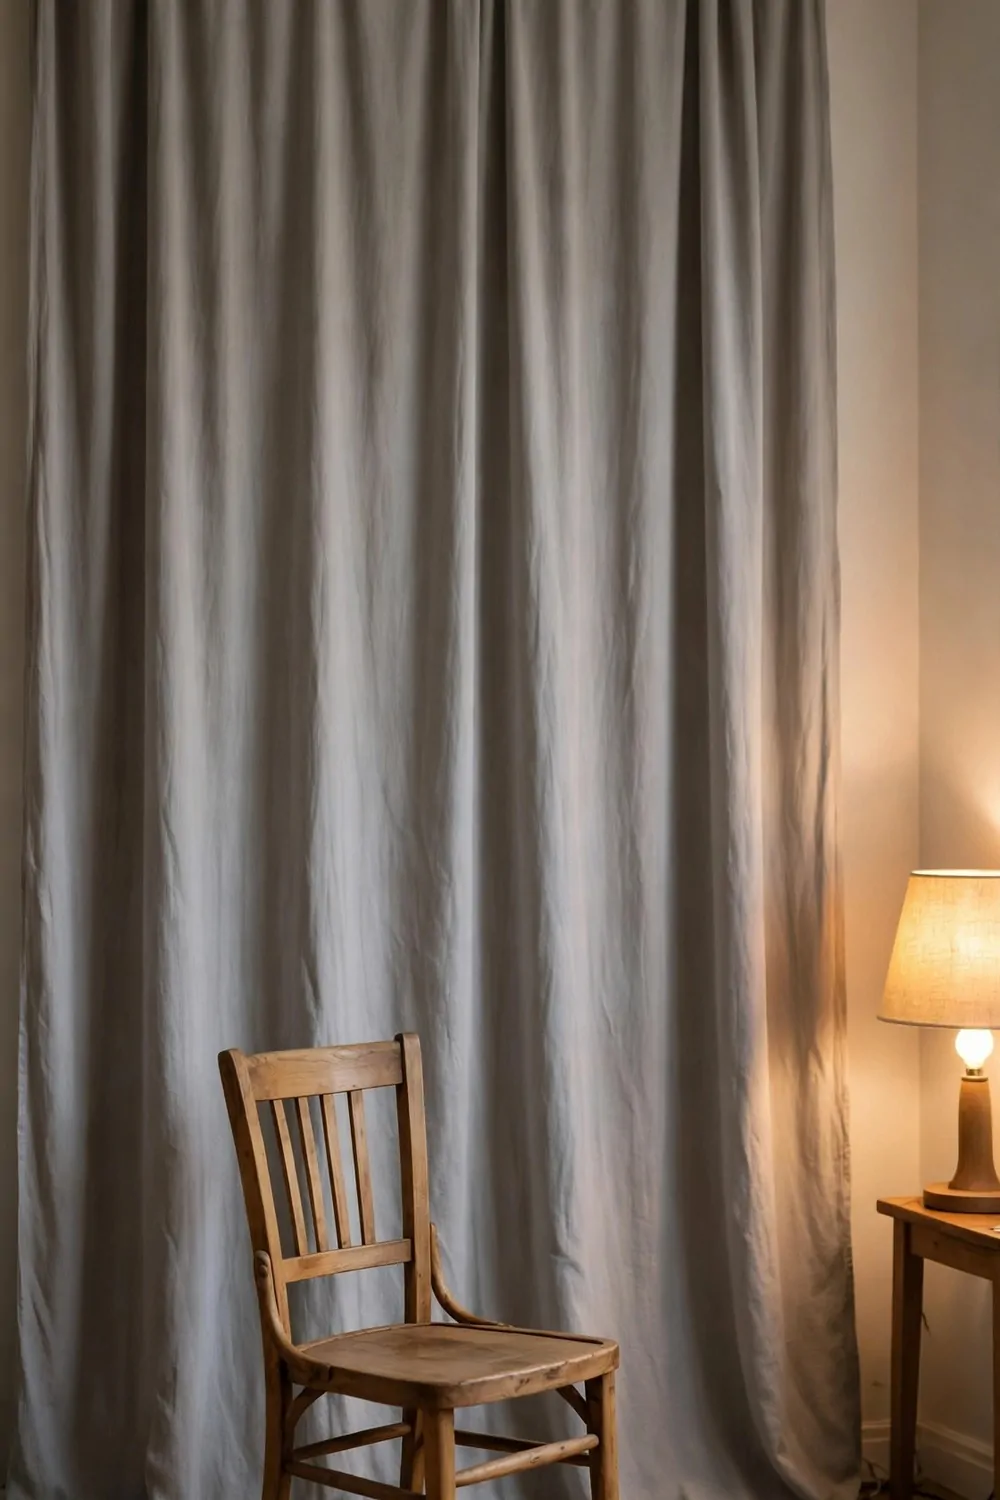
A curtain makes a better backdrop than most people expect. It hangs in soft folds, it catches light beautifully, and it costs very little.
Hang a curtain rod high on the wall, close to the ceiling. The curtain should fall all the way to the floor. Long curtains make the wall look taller and the backdrop look grander.
Choose a plain fabric with a little weight to it. Velvet reads as luxury in portraits. Linen reads as soft and natural. A plain cotton curtain in gray, cream, or deep green covers almost every shoot.
Iron or steam the curtain before a shoot. Wrinkles show up in photos as dark lines, and they are hard to edit out. A handheld steamer takes two minutes and makes the curtain look new.
Let the curtain pool slightly on the floor. A little pooling looks intentional and rich. A curtain that stops short of the floor looks like it shrank in the wash.
Layer two curtains for a richer look. A sheer curtain in front of a solid one lets you change the mood by pulling one layer aside. Bright and airy, or dark and moody, with one pull.
Curtains also hide storage. Hang a curtain across an open shelf or a messy corner, and the mess disappears behind fabric. The room looks tidy and the backdrop is always ready.
One rod, one curtain, one steamer. The backdrop that also makes your room look better when nobody is shooting.
13. The Reflector Trick
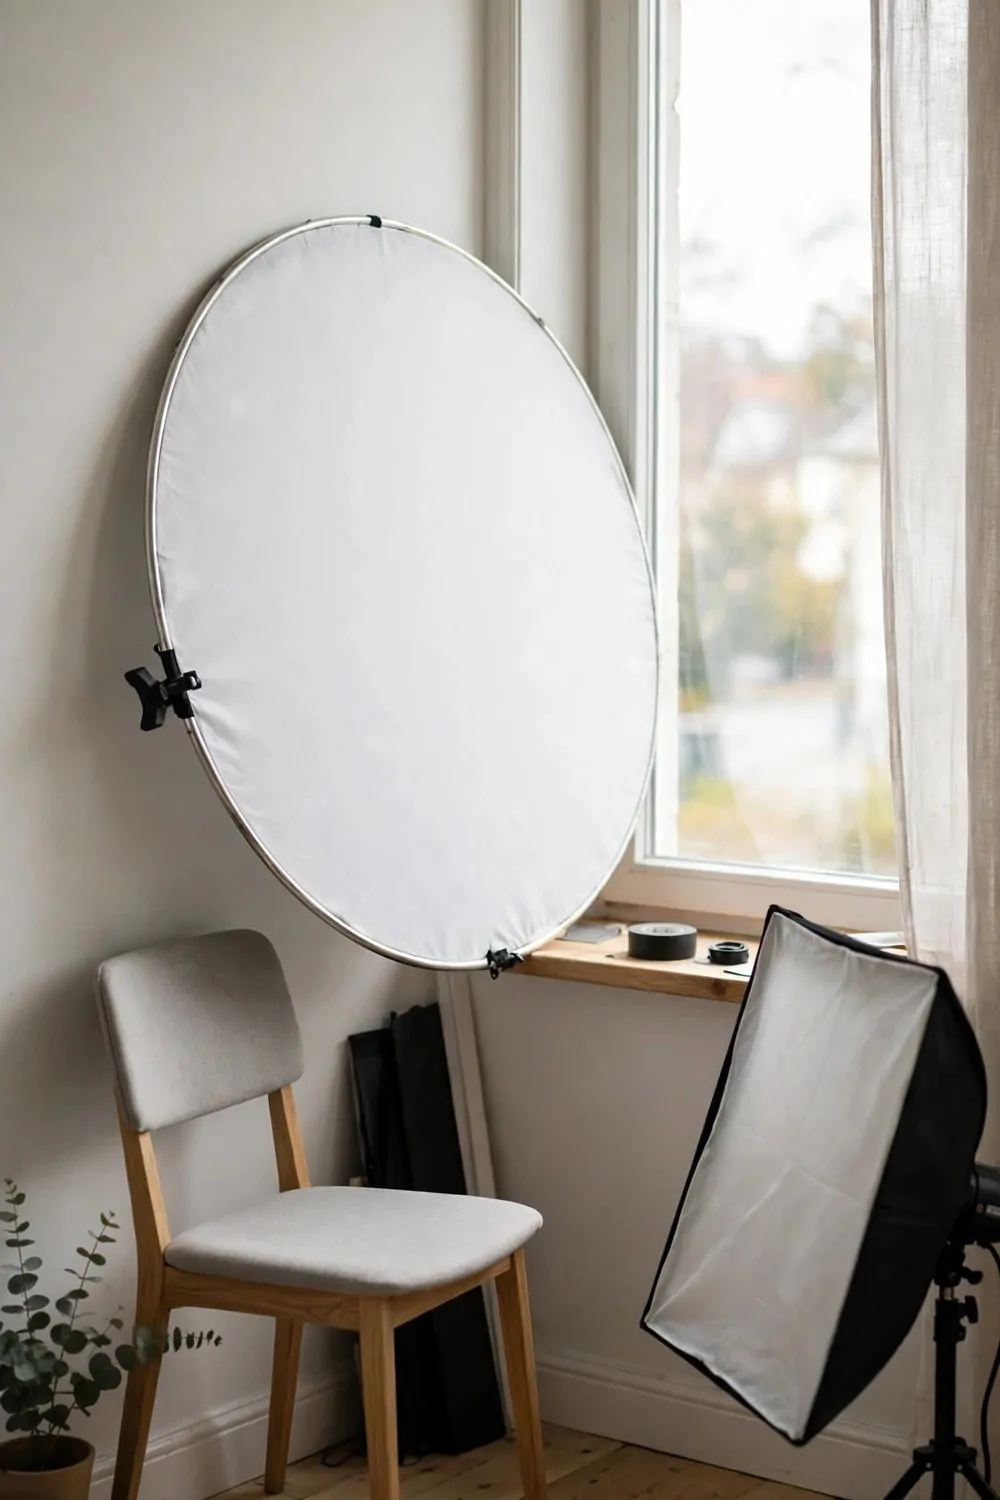
A reflector is the cheapest light you will ever own. It makes no light of its own. It just takes the light you already have and puts it where you need it.
A 5-in-1 reflector folds to a small circle and opens to a big round surface. It has five covers. White for soft fill. Silver for bright fill. Gold for warm fill. Black for blocking light. Translucent for softening it.
White is the one you will use most. Hold it opposite your window or main light, angled toward your subject’s shadow side. The shadows lift, the eyes brighten, and the photo looks like it was lit with two lights.
Silver is stronger and cooler. Use it outdoors or in bright rooms where white is not enough. Silver can be too harsh up close, so hold it a little farther back.
Gold warms skin tones and suits evening shoots. It can look too yellow indoors under artificial light, so test it before a client session. A quick test shot saves an awkward surprise.
The translucent cover turns the reflector into a diffuser. Hold it between the sun and your subject outdoors, and the harsh light softens instantly. It is a softbox you can carry in one hand.
A reflector needs a holder or a stand if you work alone. A cheap reflector arm clamps to a light stand and holds the disc at any angle. Solo shooters swear by it.
Learn the reflector before you buy a second light. Most small studios need a reflector far more than they need more power.
14. Lights on the Wall, Not the Floor
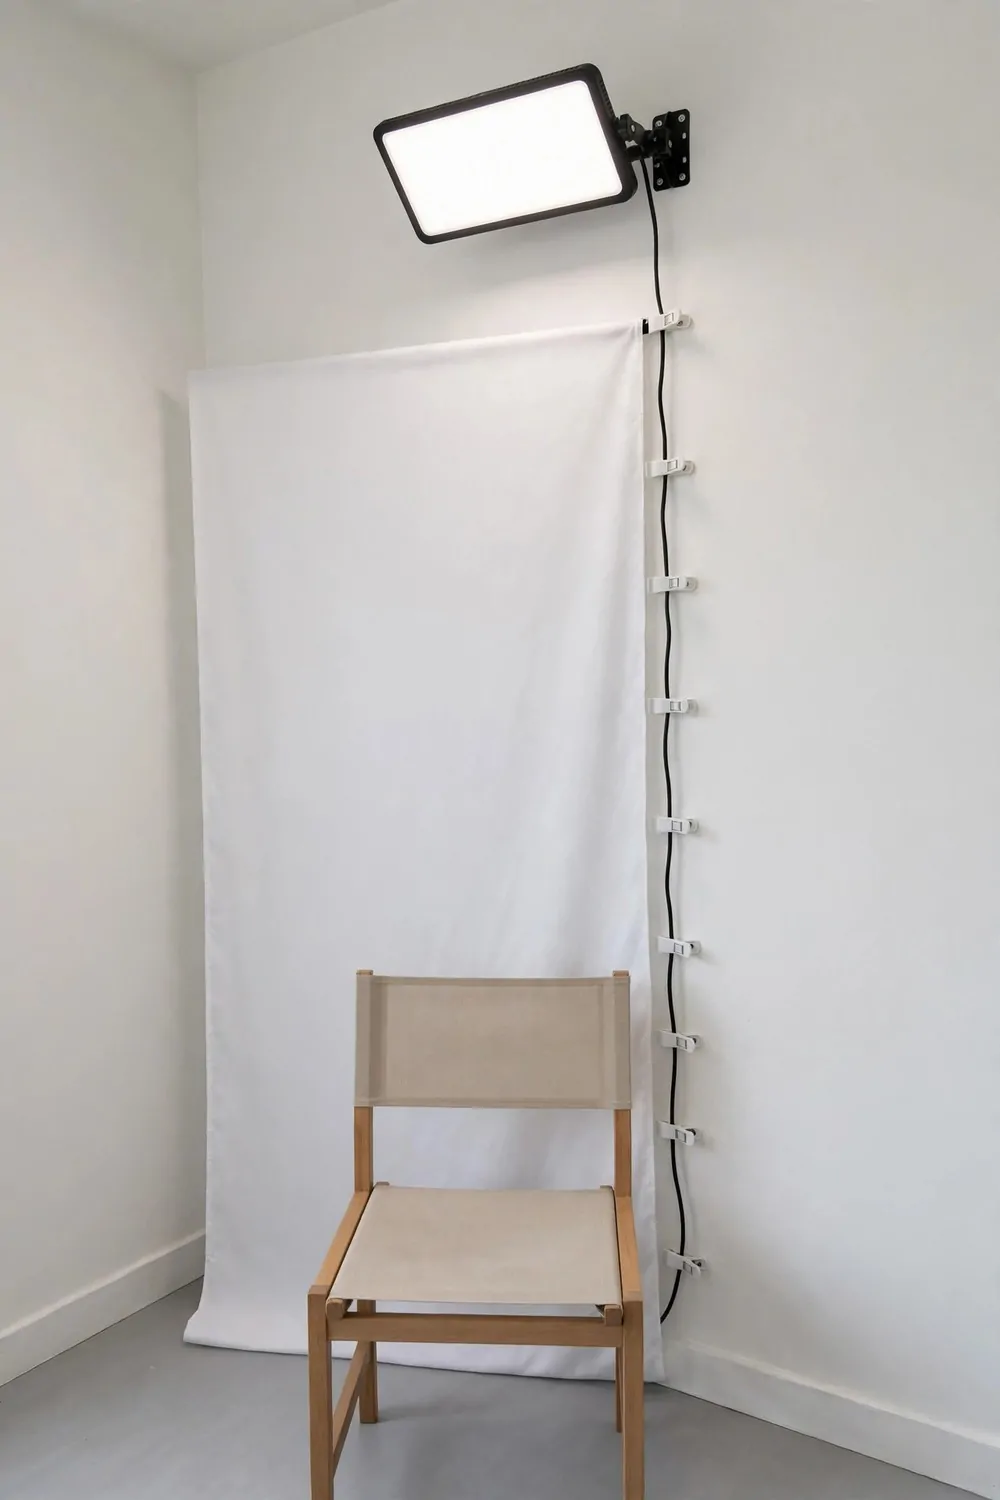
Light stands eat floor space. In a Small Photo Studio, floor space is the one thing you cannot make more of. So put the lights on the wall instead.
Wall mounted light brackets hold a small LED panel or a softbox against the wall. The light sits high, aimed down at your subject, and the floor stays completely clear. No tripod legs to trip over.
A wall mounted rail system is even better. A rail runs along the wall near the ceiling, and light heads slide along it. Move a light left or right in seconds, with no stand to drag around.
Clamp lights are the budget version. A strong clamp with a daylight bulb clips to a shelf, a door frame, or a high rail. Two clamp lights and a reflector can light a whole portrait setup.
Keep the lights high. Light from above eye level shapes faces and keeps shadows falling down and back, where they look natural. Light from below makes faces look strange and tired.
Cable management matters with wall lights. Run cables along the wall with small clips, and keep the power strip off the floor. A tidy wall setup looks professional and keeps the room safe.
Renters can use heavy duty adhesive hooks or tension mounted rails. Nothing drills into the wall, and everything comes down clean. The lights still sit high and the floor still stays free.
Lights on the wall, gear off the floor. That is how a tiny room keeps feeling like a studio instead of a storage cupboard.
15. The Flat-Lay Station
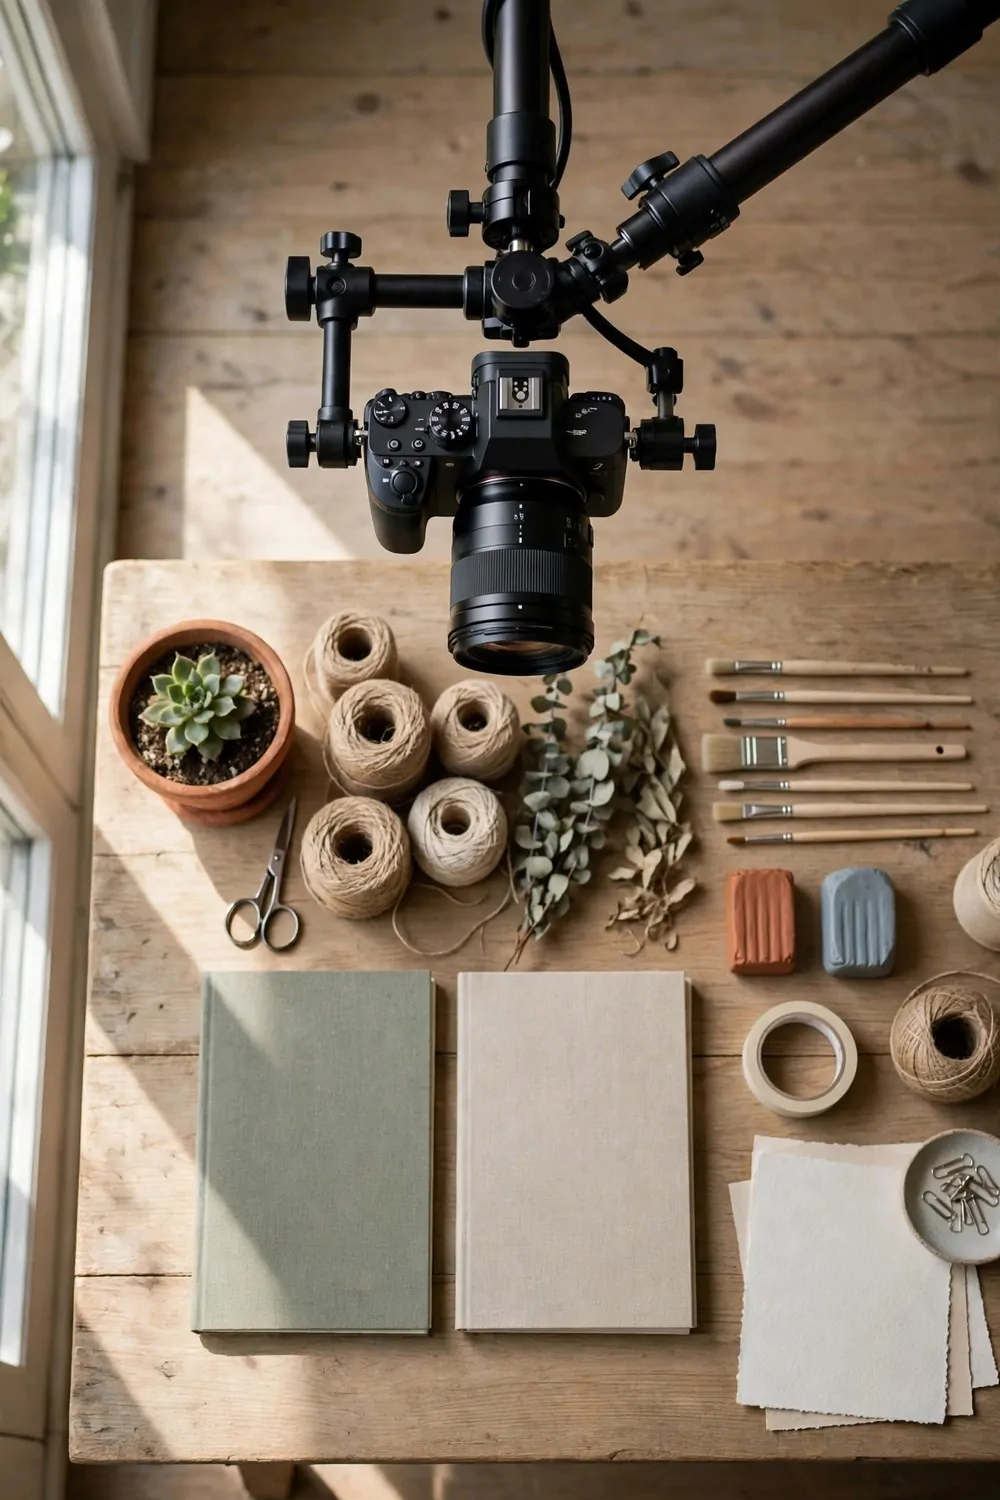
Flat-lay photos are shot from directly above, looking straight down. They are perfect for products, food, crafts, and anything small. A flat-lay station needs almost no space at all.
Mount your camera or phone on an overhead arm above a table. A boom arm clamped to the table edge holds the camera steady, pointing down. Your hands stay free to arrange the shot.
The table surface is the background. A plain white table, a wood board, or a marble contact paper sheet all work. Change the surface and the whole look changes, with no new gear.
Light a flat-lay from the side, not from above. Side light shows texture and shape. Overhead light flattens everything and makes food look dull. A window to one side is ideal.
Keep a step stool nearby. Arranging a flat-lay means leaning over the table and seeing the whole frame. A stool lets you check the shot from above without climbing on furniture.
Shoot tethered if you can. A cable from the camera to a laptop shows each shot big on screen the moment you take it. You spot problems in seconds instead of after the shoot.
Keep a small box of styling props beside the station. Scissors, tape, tweezers, and a lint roller. Flat-lays need tiny adjustments, and having the tools in reach keeps the flow going.
A flat-lay station lives on one table against one wall. It shoots products all week, and the table goes back to normal use in the evening. Small space, big output.
16. The Self-Portrait Corner
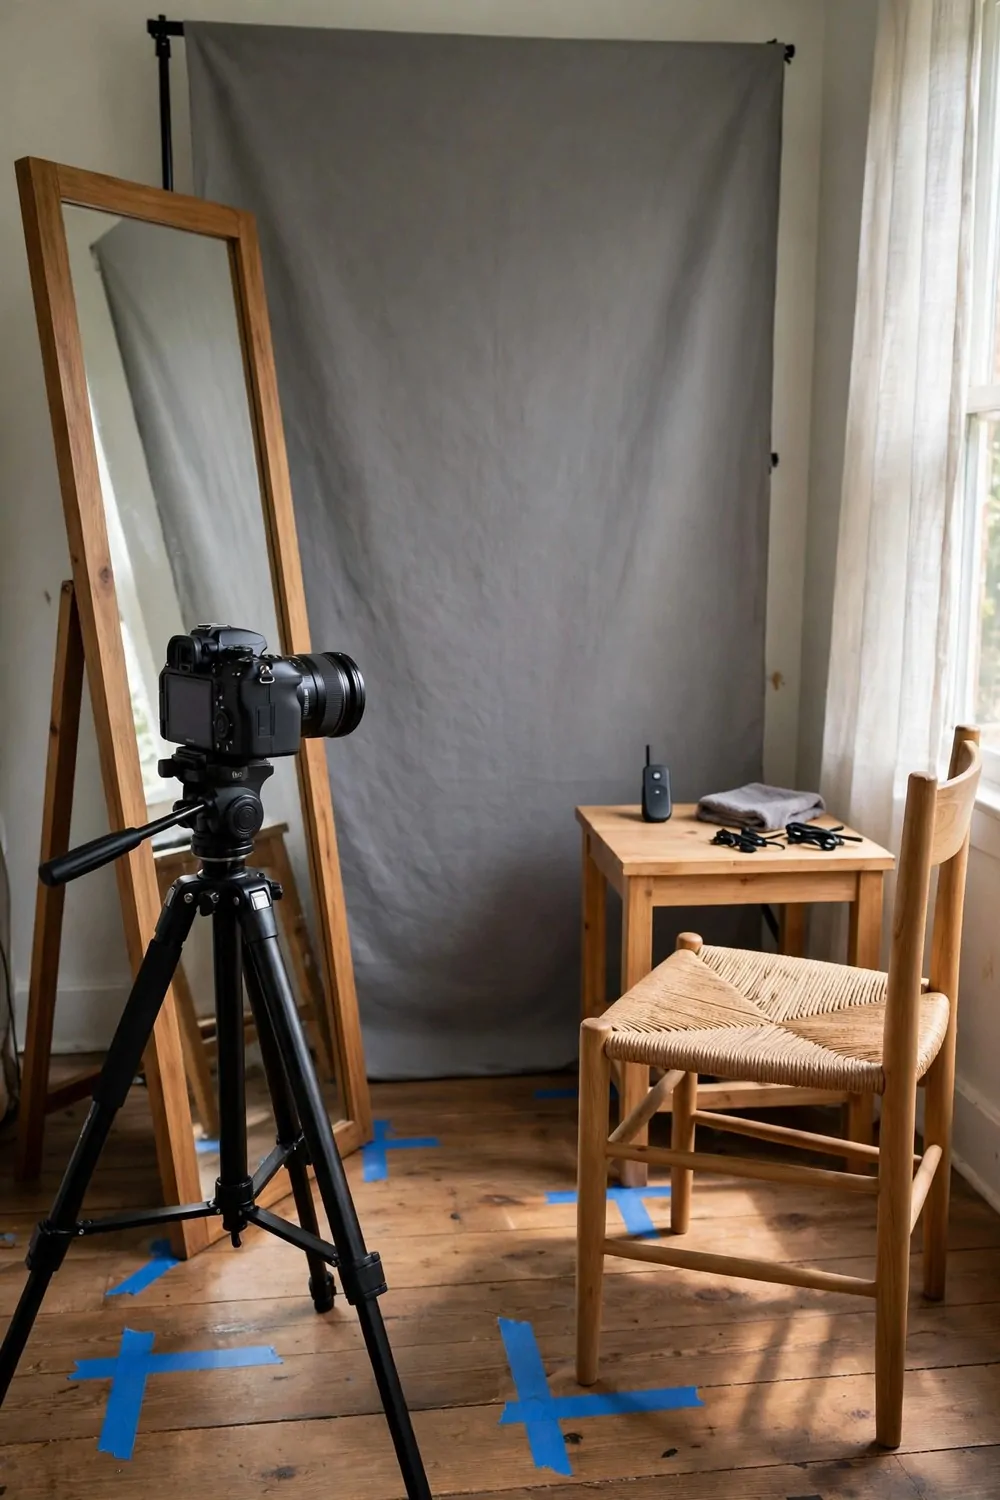
Self-portraits need a studio that works with nobody else in the room. The setup has to be simple, repeatable, and kind to one person working alone.
Pick one spot and mark it. Tape on the floor for your feet. Tape on the wall for your backdrop edge. A marked spot means every self-portrait starts from the same place, and you stop guessing.
Use a remote trigger or your camera’s phone app. A ten second timer works, but a remote is faster and calmer. You pose, click, and check, without running back and forth.
A mirror behind the camera helps you check your pose. Angle it so you can see yourself without it appearing in the shot. A small mirror on a stand, just behind the tripod, does the job.
Tether to a laptop or tablet if your camera allows it. Seeing yourself large on screen while you pose is a game changer. You fix a stray hair before the shot, not after fifty shots.
Keep the light simple. One window or one softbox, same position every time. Consistency is the whole point of a self-portrait corner. Change the outfit and the backdrop, not the light.
A self-portrait corner is also a video corner. The same marked spot, the same light, and the same backdrop shoot talking head videos that look steady and professional.
One marked spot, one remote, one mirror. Your own portrait studio, ready whenever you are, with no assistant required.
17. The Video-Ready Corner
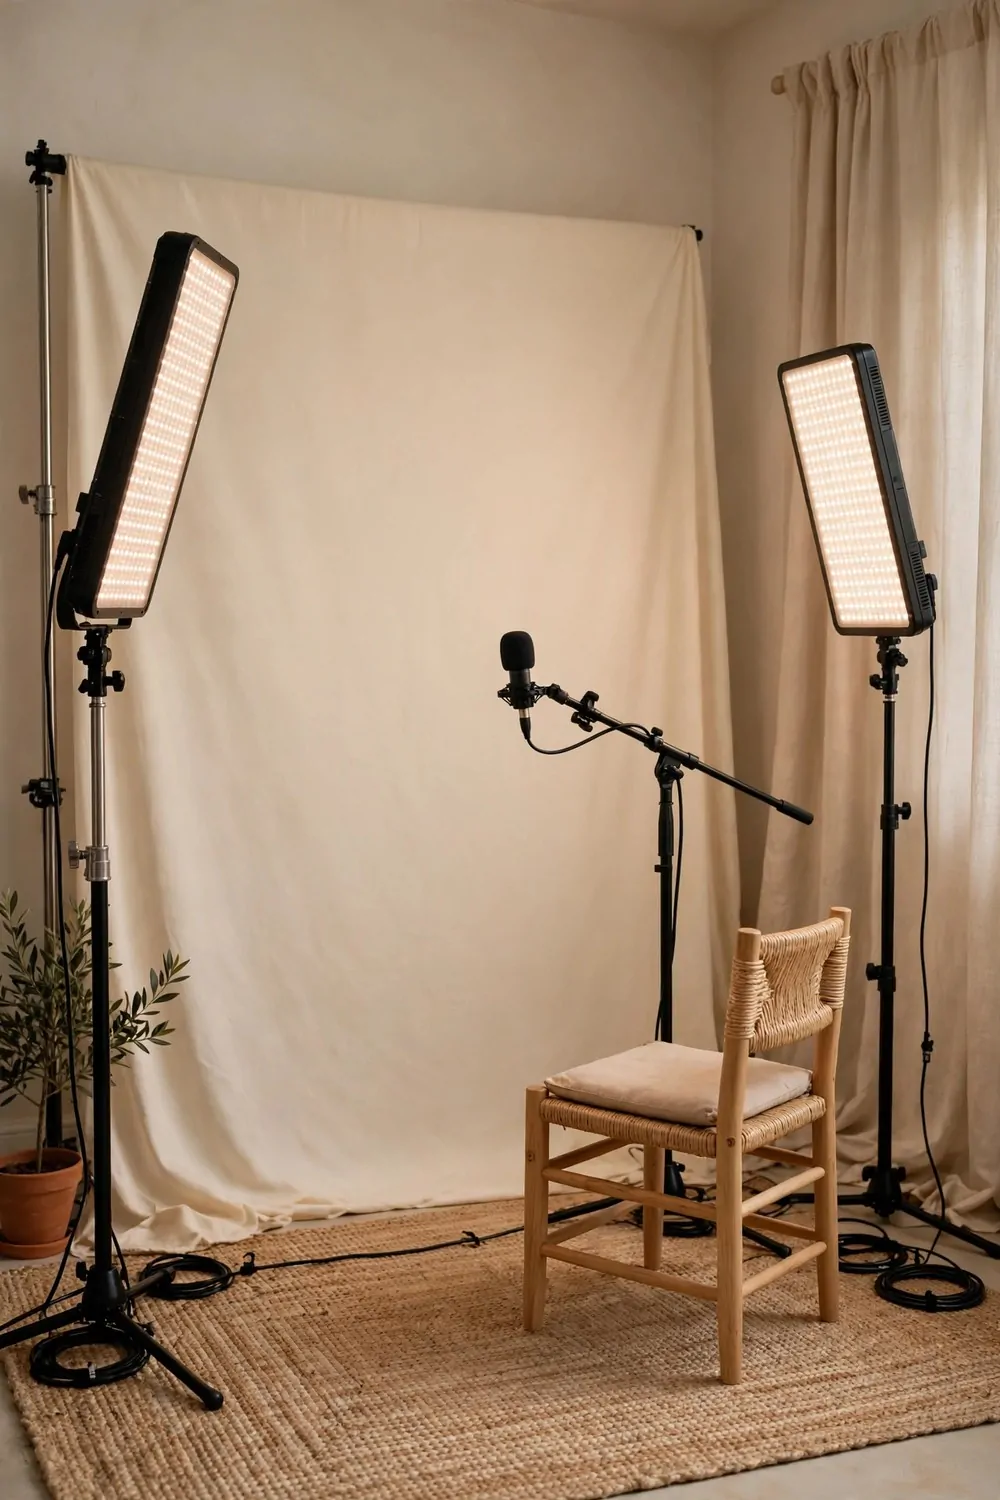
Photos and video share most of their needs. Light, background, and quiet. A corner that shoots good photos can shoot good video with three small additions.
First, continuous light. Flashes do nothing for video. LED panels that stay on are the only lights that matter here. Daylight balanced LEDs keep skin tones true on camera.
Second, sound. A small microphone on a boom arm or clipped to your shirt beats any camera microphone. Soft furnishings in the corner, a rug, curtains, and cushions, soak up echo and make voices sound warm.
Third, a clean background that does not move. A plain wall, a curtain, or a shelf styled once and left alone. Viewers notice a background that changes between videos. Keep it steady and it becomes your brand.
Frame the shot a little wider than a photo. Video crops and movement need breathing room. Leave space above your head and on both sides. You can always crop tighter later.
Hide cables. A cable across the floor shows up in every wide shot and looks messy. Run cables along the wall or under a rug, and tape down anything that crosses the frame.
Do a short test recording before every session. Thirty seconds of talking, played back with headphones. You will hear echo, hum, or a noisy fan before your viewers do, and fixing it takes a minute.
A video-ready corner earns its keep fast. Tutorials, reels, product demos, and video calls all use the same spot. One setup, many kinds of content.
18. The Gear Wall
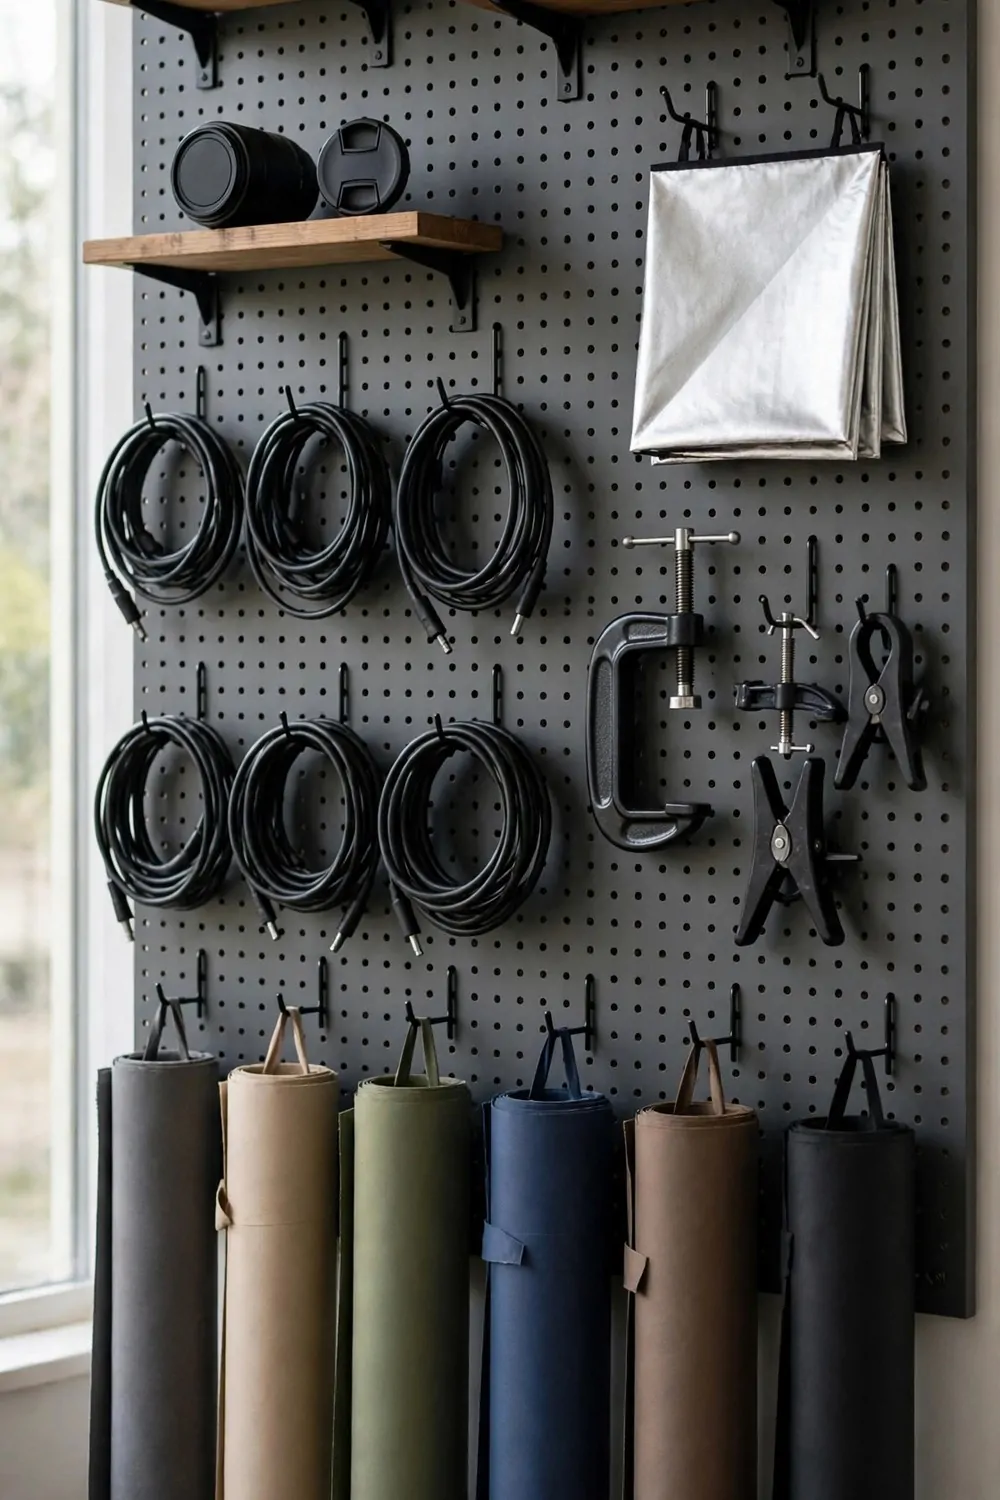
Studio gear is small but it multiplies. Lenses, chargers, reflectors, clamps, and backdrops end up in a pile, and the pile eats the studio. A gear wall fixes that.
Mount a pegboard on one wall. Hooks hold reflectors, cables, and clamps. Small shelves hold lenses and chargers. Everything hangs in plain sight, and you grab what you need in seconds.
Label each hook or shelf with a strip of tape. Lens 50mm. Reflector. Clamps. Labels sound fussy, but they stop gear from drifting into drawers and disappearing before a shoot.
Keep batteries and chargers on one shelf together. A charging station with a power strip means every battery starts the shoot full. Dead batteries have ruined more shoots than bad light ever will.
Hang backdrops from hooks on the gear wall. Rolled fabric backdrops hang neatly in a row, sorted by color. You see every option at a glance and pick the right one without unrolling three wrong ones.
A gear wall also protects your gear. Lenses off the floor means no kicked bags and no dust. Cables hung up means no tangles and no tripped feet.
Add a small whiteboard or a notepad to the gear wall. Scribble the next shoot date and the gear it needs. The wall becomes your studio planner as well as your storage.
One wall, one pegboard, a few hooks. The studio stays tidy, the gear stays safe, and setup time drops to minutes.
19. The Ten-Minute Pack-Down
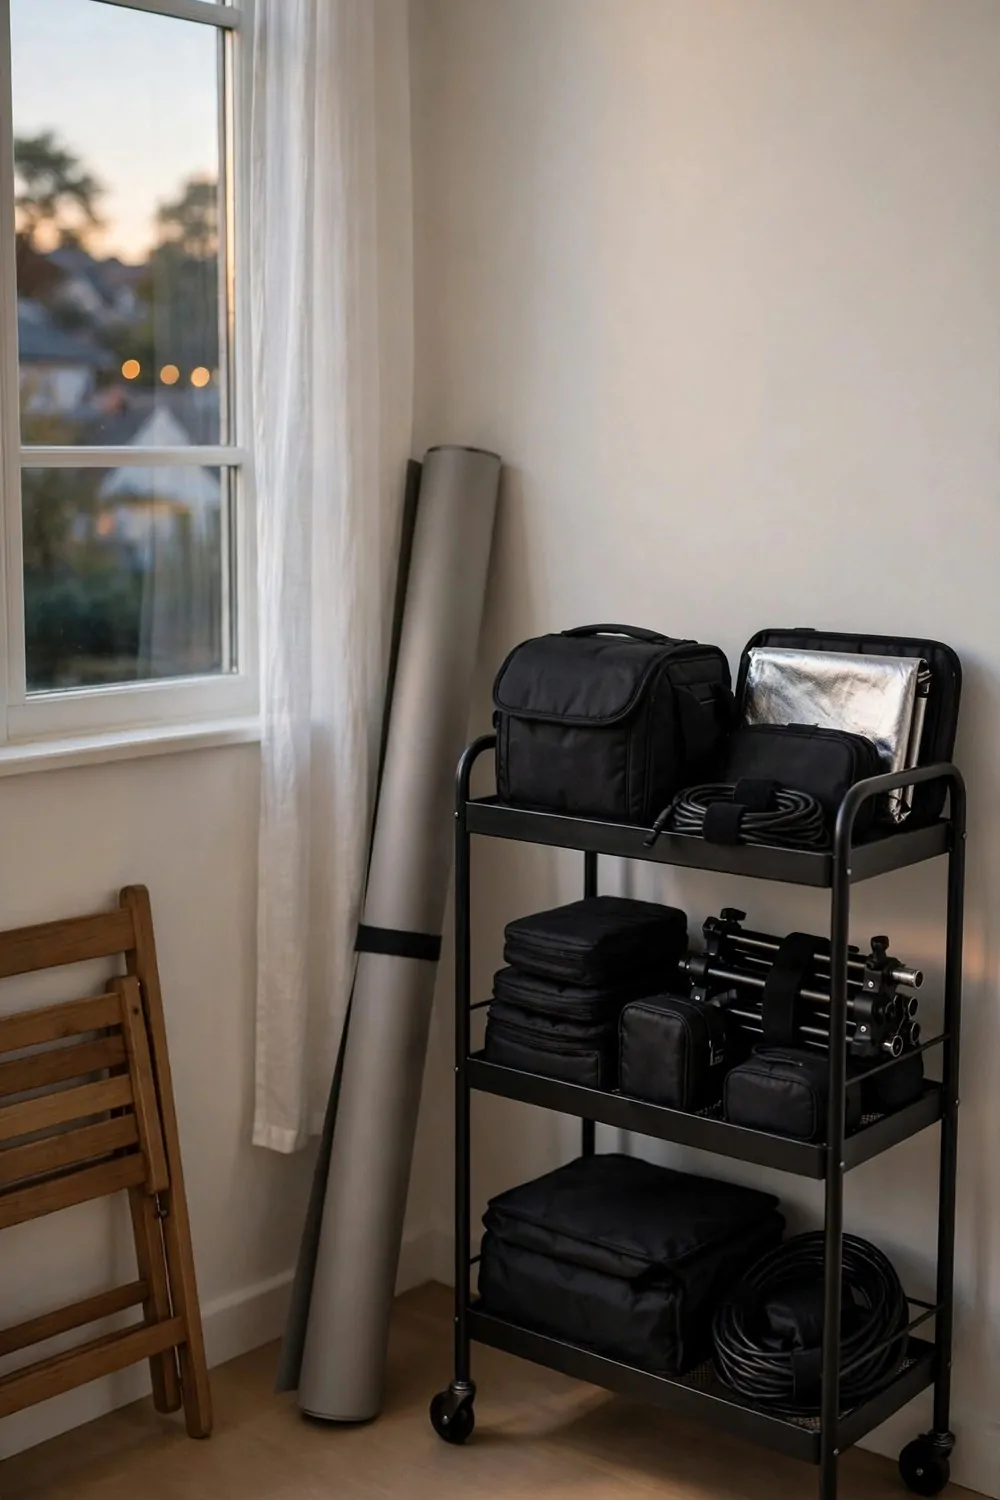
A Small Photo Studio has to disappear. The room has to go back to being a living room, a bedroom, or a dining room, and it has to do it fast. The pack-down routine is the last setup in this list, and it matters most.
Write the pack-down as a short list and stick it inside a cupboard door. Lights off and unplugged. Backdrop rolled and tied. Reflector folded. Cart rolled to its corner. Floor swept. That is the whole list.
Pack in the same order every time. Lights first, because they are hot and fragile. Backdrop second, because it is big and awkward. Small gear last, into the cart or the box. Same order, no thinking, ten minutes.
Keep a shoot bag packed and ready. Camera, lenses, cards, batteries, and the remote trigger live in the bag all the time. Grab the bag and the cart, and you can shoot anywhere in the house.
Clean as you pack. Wipe the backdrop sweep. Fold the reflector properly. Coil cables instead of stuffing them. Five minutes of care now saves thirty minutes of untangling next time.
Do the pack-down the same evening as the shoot. Gear left out overnight becomes part of the room, and part of the room becomes a mess. Ten minutes tonight keeps tomorrow calm.
A studio that packs down in ten minutes gets used ten times more than one that takes an hour. That is the real secret. Make it easy to start, and easy to finish, and you will shoot far more often.
Your home does not need to be big. It needs one good wall, one good window, and a little plan for the gear.
Start with the corner studio or the one window setup. Those two cost almost nothing and you can try them this weekend. Then add a reflector, then a roll-up backdrop, and let the studio grow one piece at a time.
The best portrait I ever saw from a home studio was shot in a hallway, with a sheet over the window and a chair borrowed from the kitchen. Nobody asked how big the studio was. They asked who took the photo.
That is the whole point. Clients see the picture. They never see the room. Build the corner, learn the light, and let your Small Photo Studio do the talking.