27 Ikea Office Ideas That Look Custom-Made

"Is that really from IKEA?" I hear this question more than any other one. People say it when they stand in my home office and look at the wall of shelves. They say it again when they run their hand across the desk.
And honestly, I love that question. It means the trick worked. Flat-pack furniture can look like a carpenter built it just for your room. I have done it in my own home, and so have thousands of other people.
The secret is not buying more expensive pieces. The secret is a short list of small moves. A strip of trim. A coat of the right paint. New hardware. A countertop that runs the full width of the wall instead of stopping short. That is what turns a cheap bookcase into something that looks built-in.
This list has 27 Ikea office ideas that look custom-made. Every one uses real IKEA pieces and real hacks people actually did. Pick one this weekend. Start small. You will not believe the difference it makes.
1. ALEX Drawers Plus a LAGKAPTEN Top: The Classic Custom Desk
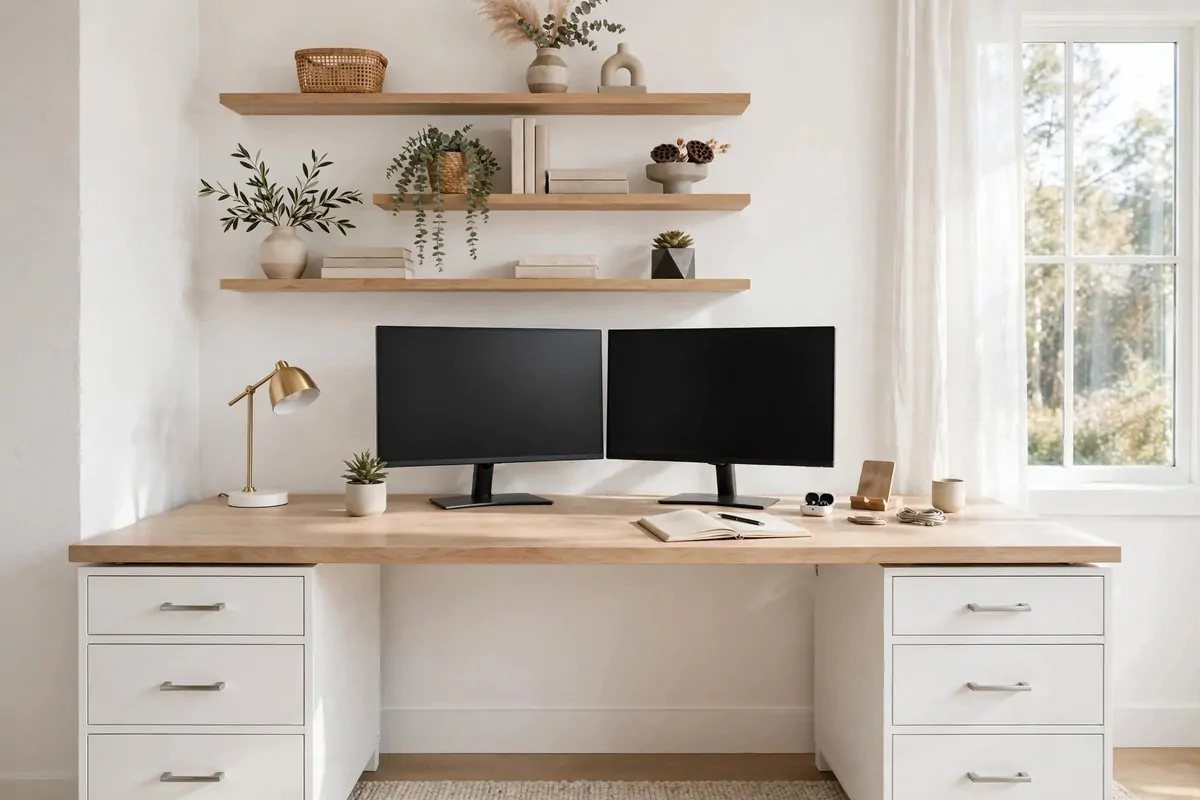
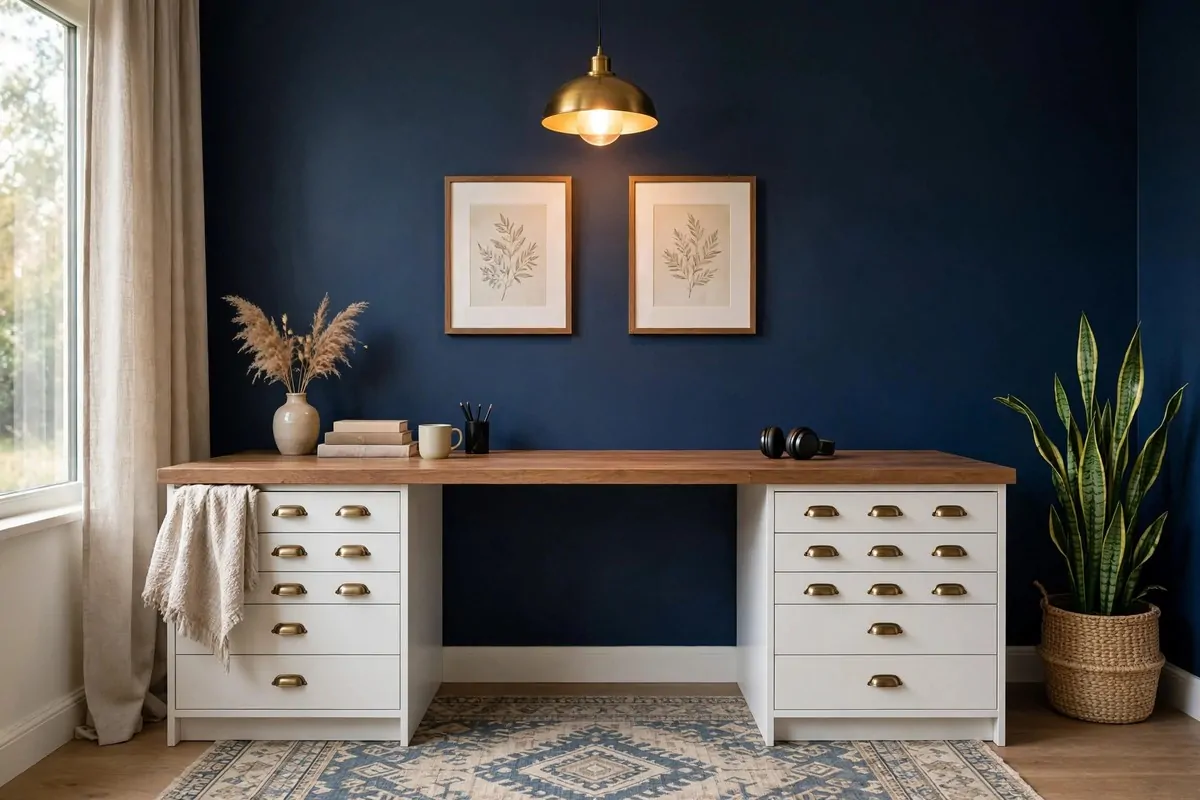
This is the hack that started it all for so many home offices. Two ALEX drawer units. One long LAGKAPTEN top laid across them. Done.
It looks custom because the top is one long piece with no break in the middle. Your eye reads it as one big desk, not two small pieces pushed together. That one detail does all the work.
I used this setup for two years. The drawers held everything. Pens in the top drawer, papers in the middle, and all the ugly stuff I never wanted to see in the deep bottom one. My desk stayed clean because everything had a place to go.
Pick a top that is longer than you think you need. You want a little empty space on each side of your laptop. That breathing room is what makes a desk feel expensive.
The wood-effect tops look the most custom. The white ones look clean and modern. I had the white-brown one and people always asked where I bought it.
Cable control matters here. Clip a cable tray under the top so no wires hang down. A desk with hanging wires always looks cheap, no matter what it cost.
If your room is small, use a shorter top and one drawer unit. Put the other end of the top on legs. Same look, half the storage, much less floor space.
Here is how I organized my drawers, and it worked great:
- Top drawer: pens, sticky notes, chargers, and the little things you grab daily
- Middle drawers: notebooks, folders, and current project papers
- Deep bottom drawer: the printer paper, spare cables, and everything ugly
The best part is you can build this in one afternoon. No tools beyond the little Allen key. It is the easiest win on this whole list.
2. BILLY Bookcases With Crown Molding That Look Like Real Built-Ins
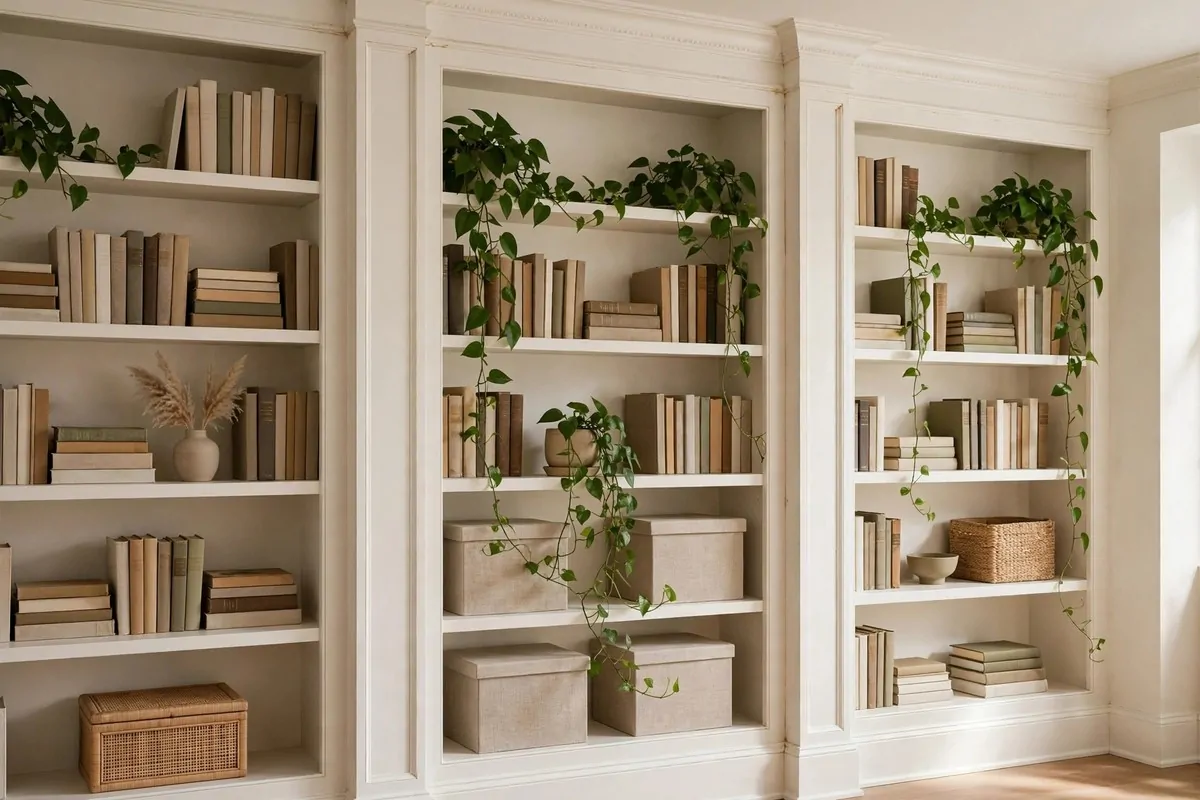
The BILLY bookcase is the most hacked piece of furniture on earth. And for good reason. With a little trim, it can pass as a real built-in.
Here is the trick everyone uses. Push two or three BILLY units side by side against the wall. Add crown molding along the top so it meets the ceiling. Caulk the seams. Paint it all one color.
That gap between the top of a bookcase and the ceiling is what gives away a flat-pack piece. Fill it and the unit suddenly looks like part of the house. Your brain just accepts it.
Paint the wall behind the same color as the bookcases. This sounds small. It is not small. It erases the edges and makes everything melt into one wall.
Use a shellac-based primer first. Regular paint peels right off the laminate surface of a BILLY. This is the one step you cannot skip. Ask me how I know.
Anchor the units to the wall with the straps in the box. Tall bookcases full of books get heavy. Safety first, then beauty.
Style the shelves with a mix of books, boxes, and a plant. Leave some empty space. Built-ins in fancy homes are never stuffed to the edges.
I painted mine a soft green once. It took a weekend. My whole office felt like a different room. Friends thought I had hired someone.
3. HAVSTA Cabinets With BILLY Stacked on Top for a Library Wall
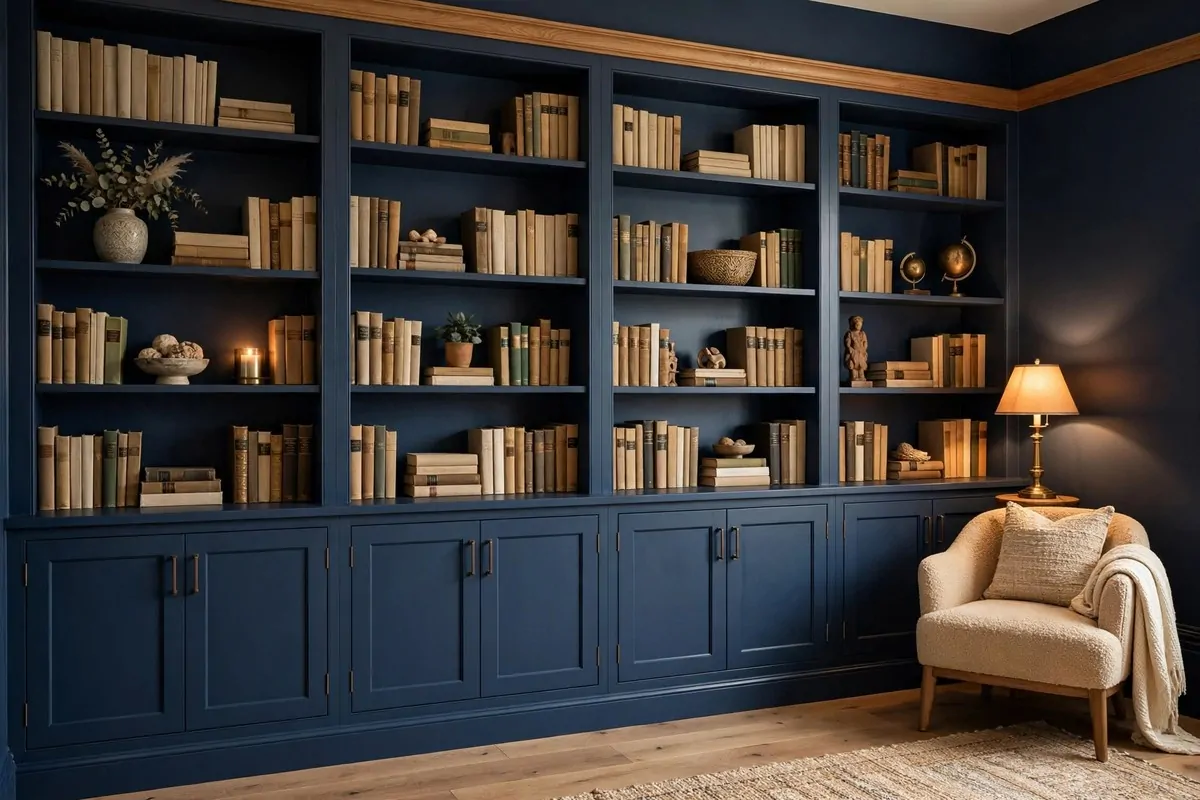
This is the next level of the built-in trick. Short HAVSTA cabinets go on the bottom. BILLY bookcases sit on top of them. The whole wall becomes one tall library.
The HAVSTA base gives you closed storage. That means all the ugly stuff disappears behind doors. Paper, cables, the printer you hate looking at. Gone.
Remove your baseboards first where the units will sit. Then the cabinets can sit flush against the wall. It is a small step that makes a big difference in the final look.
Screw the cabinets to each other and to the wall. Stack the BILLY units on top and screw those down too. You want one solid piece, not a tower of boxes.
Fill the adjustable shelf holes with wood filler before you paint. Those little holes scream IKEA to anyone who looks closely. A custom bookcase would never have them.
Add a 1×4 board along the top as trim. It gives the wall a finished edge, like the top of a real built-in. Caulk every seam. Paint everything the same color.
This project takes a weekend, maybe two. But the result is a full wall of storage that looks like it cost thousands. I still stop and stare at mine sometimes.
4. SEKTION Kitchen Cabinets Turned Into a Built-In Office
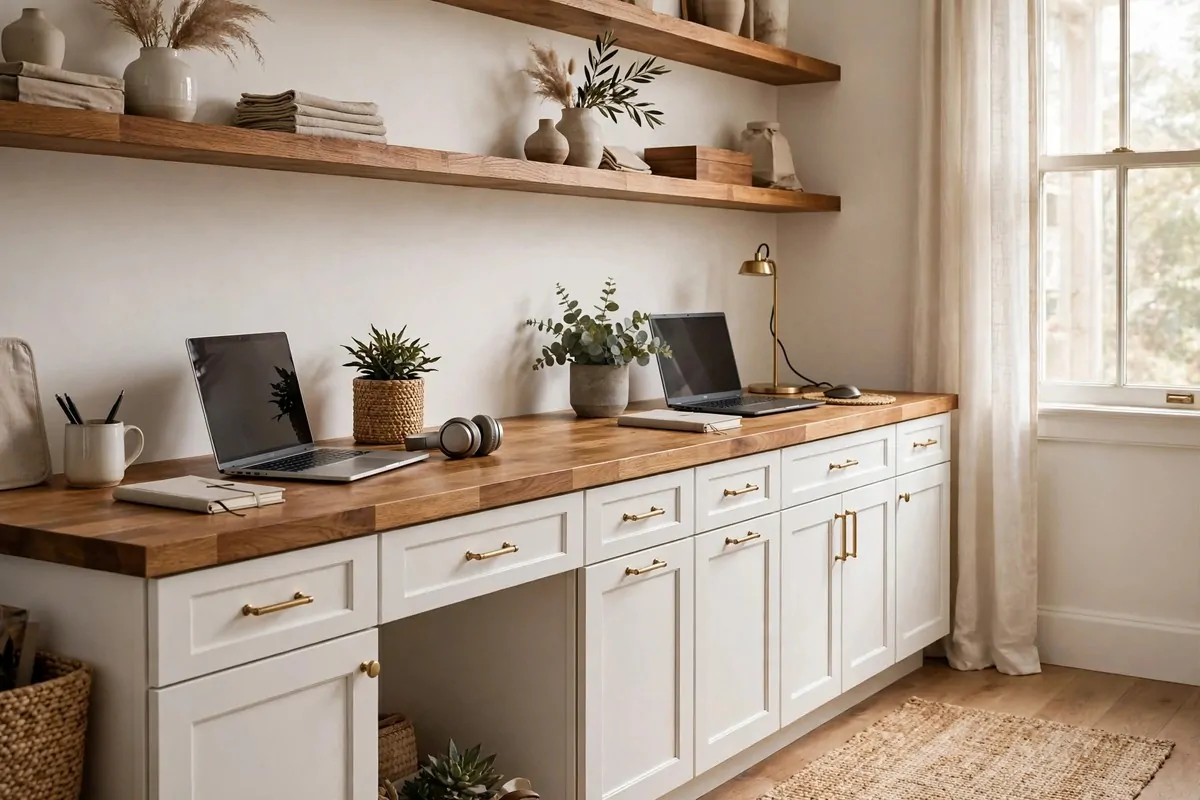
Here is a hack most people never think of. IKEA kitchen cabinets, the SEKTION ones, make amazing office bases. They are deep, strong, and cheap.
Run a row of them along the wall at desk height. Drop a butcher-block or concrete-look countertop on top. Suddenly you have a desk that looks like it was built by a cabinet maker.
The deep drawers are the real prize. A kitchen drawer is built to hold heavy pots. Your office papers feel like nothing to it. I fit my whole filing system in two drawers.
Set the counter at 30 inches high for a normal desk. Or keep part of the run at 36 inches, like a standing-height counter. One person sits, one stands. It works for two people.
Use corner braces to attach the counter to the cabinets. Then add a strip of trim along the front and paint it to match the cabinet fronts. That trim hides the gap and sells the custom look.
Put soft-close hinges and nice bar pulls on the doors. The pulls are the jewelry of the piece. Spend a little here. It shows.
A quick look at your base options:
| Base option | Best for | Why it looks custom |
| SEKTION cabinets | Full wall built-ins | Deep drawers, real cabinet fronts |
| ALEX drawers | Simple desks | Slim profile, easy to dress up |
| BESTA cabinets | Pretty storage walls | Wide fronts take cane and panels well |
| MALM dressers | Big storage desks | Deep drawers hide a whole office |
This one takes some planning. Measure your wall twice. But kitchen cabinets in an office always surprise people. "Wait, those are kitchen cabinets?" Every time.
5. BESTA Cabinets With Cane Webbing Doors as a Desk Base
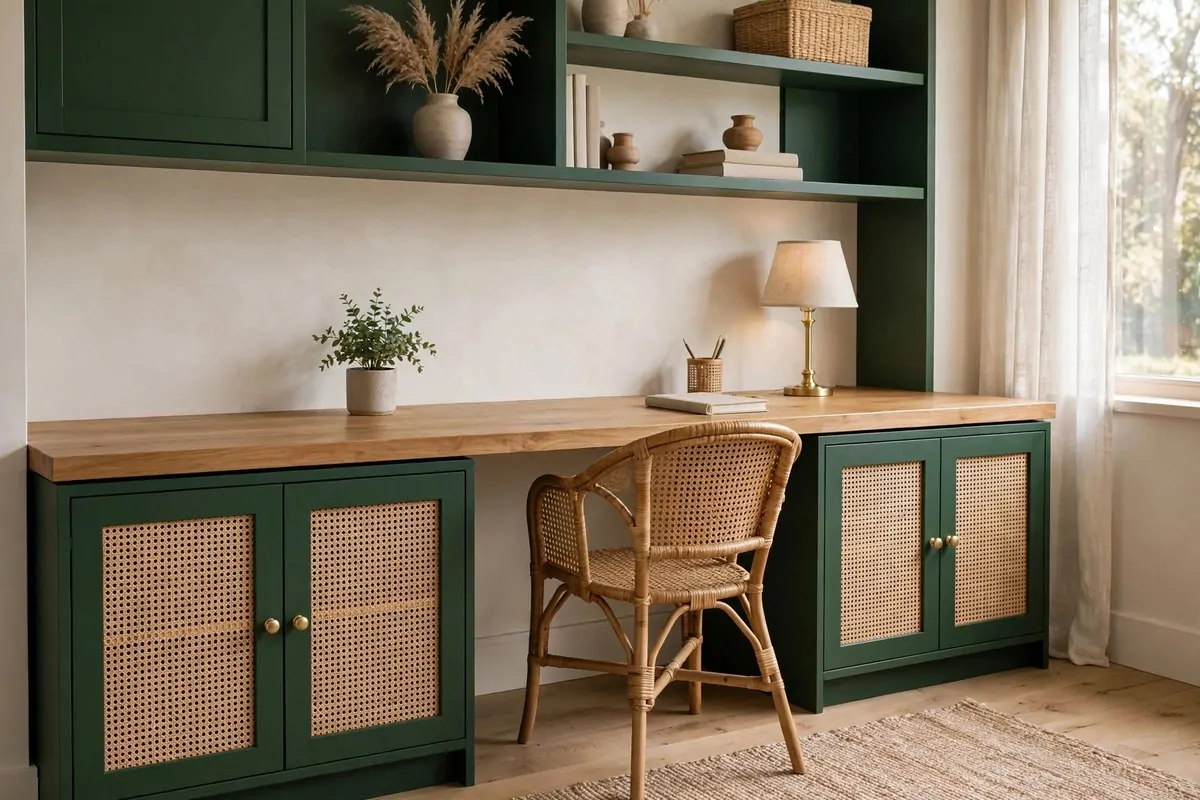
This is my favorite pretty hack on the list. Two BESTA cabinets as the base. A long wood top across them. Cane webbing on the doors.
Cane webbing is that woven rattan look. It is having a moment right now, and for good reason. It makes flat-pack doors look handmade and warm.
You glue the cane to the door fronts and cover the rough edges with thin wood trim. It is simple craft work. No power tools needed beyond a small saw for the trim.
Paint everything one color after the cane is on. A deep green looks amazing with natural cane. White looks clean and coastal. I have seen both and both work.
The cane lets a little air through, which is nice if you keep your router or printer inside the cabinet. No more overheating box hidden in a drawer.
Cut the desktop to span the full wall if you can. Wall to wall always looks more custom than a desk that stops in the middle of nowhere.
Add one support leg in the middle if your top is very long. Wood tops sag over time. A hidden middle leg keeps it straight for years.
6. Dressed-Up ALEX Drawers With New Faces and Gold Pulls
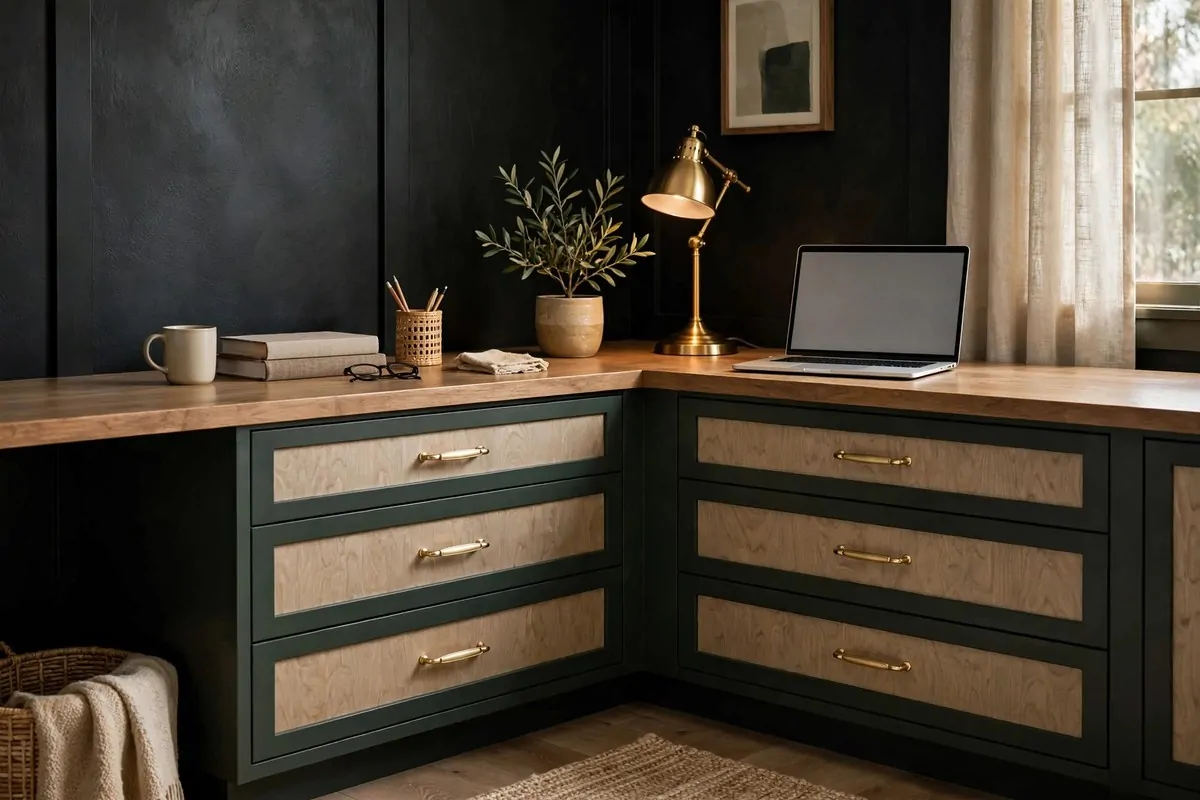
Plain ALEX drawers are fine. But with new drawer faces and gold pulls, they look like a designer piece. This hack costs almost nothing extra.
Glue thin plywood panels to the drawer fronts. It adds texture and depth. Then add champagne gold or brass pulls instead of the plain silver ones.
The hardware swap alone changes everything. I swapped my pulls one Sunday and the drawers looked like different furniture. My husband thought I had bought new ones.
Put a wood-look countertop on top instead of a plain white one. The warm wood against the painted drawers is the contrast that makes it look custom.
Paint the drawer units to match your wall or your trim. White on white looks clean. Dark green on a dark wall looks moody and rich. Both hide the IKEA look.
Keep the desktop clear except for your laptop and one nice lamp. Dressed-up drawers deserve a clean stage. Clutter ruins the illusion fast.
This is a perfect weekend project. The plywood and pulls cost less than dinner out. And the result photographs like furniture three times the price.
7. Two MALM Dressers as the Base for Your Desk
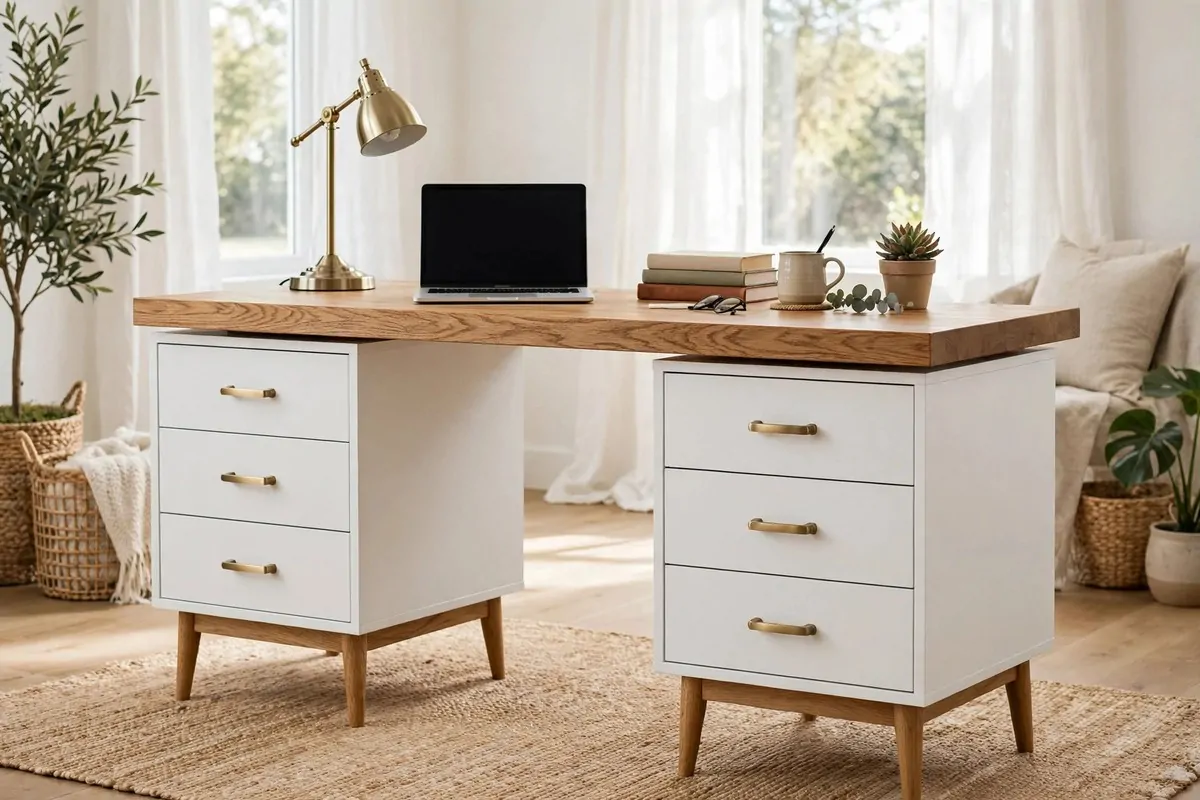
Here is a trick from the bedroom section of IKEA. Two MALM dressers, three drawers each, with a desktop laid across the top. Instant desk with tons of storage.
The dressers are wider and deeper than office drawer units. That means real storage. Sweaters in one drawer, tax papers in another, craft stuff in the third. Nobody knows.
Swap the short plastic legs for taller wood ones. This one change lifts the whole piece. It goes from boxy to graceful. I used simple tapered legs and it looked twice as nice.
Add new pulls in a metal you love. Brushed brass is my pick. The standard MALM pulls are fine, but brass makes people ask where the dresser came from.
Match the desktop wood to the new legs. Same wood tone top and bottom ties it together. It reads as one designed piece instead of parts.
This desk is heavy, so set it where you want it before you load the drawers. Trust me on this one. I learned the hard way and my back reminded me for days.
Paint the dressers if you want a bold look. Navy dressers with an oak top is a classic combo. White dressers disappear into a white wall. Both look custom.
8. KALLAX on Tall Legs That Looks Like a Credenza
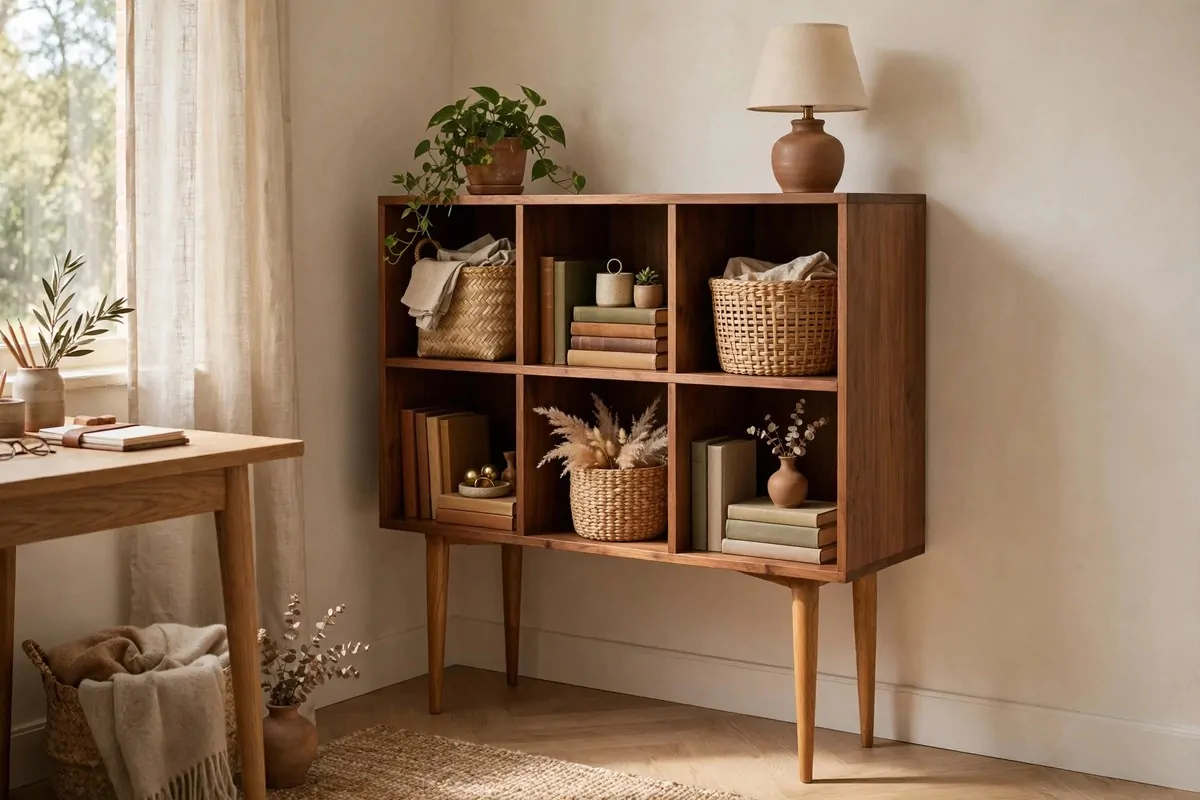
The KALLAX is the most recognizable IKEA piece ever. But put it on tall legs and it stops looking like a KALLAX. It starts looking like a credenza.
Screw tapered wooden legs to the bottom corners. Even simple hairpin legs work. The unit rises off the floor and the whole thing feels lighter and more expensive.
Fill the cubes with a mix of baskets, books, and a few pretty objects. Not all storage cubes. Not all decor. The mix is what makes it look styled instead of stuffed.
Put it against the wall behind your desk or beside it. It holds your printer, your paper, and your office supplies. Everything you need is close but out of sight.
Stain or paint the legs to match your desk. Matching wood tones across pieces is a quiet trick designers use. It makes different pieces feel like a set.
Leave the top mostly clear. A small lamp and a plant is plenty. A credenza top covered in piles just looks like a shelf again.
This hack takes about twenty minutes once the KALLAX is built. Legs, screws, done. It is the fastest transformation on this list, I think.
9. KALLAX as a Room Divider With a Finished Back
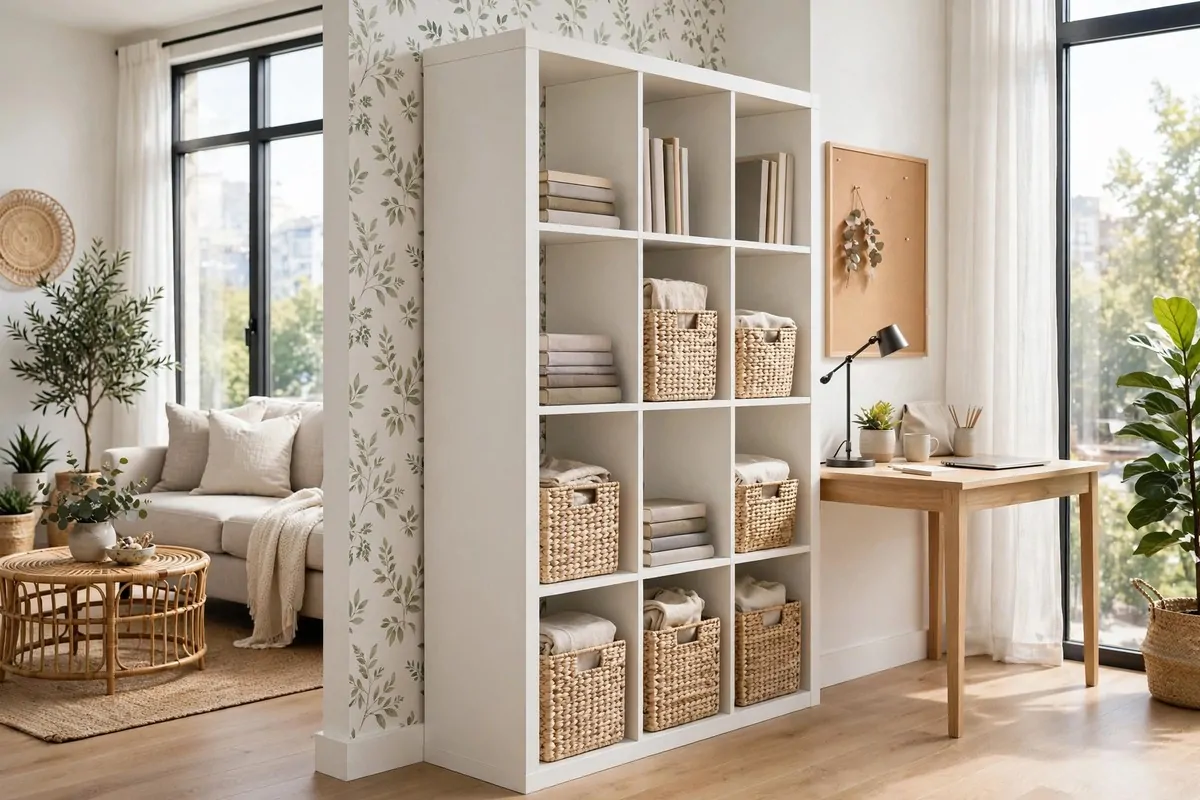
If your office is in a corner of a bigger room, a KALLAX can divide the space. The trick is finishing the back so it looks good from both sides.
Cover the back with wallpaper, fabric, or a painted panel. Now the side facing the living room looks like decor. The side facing you holds your office stuff.
Anchor it so it cannot tip. A freestanding shelf full of books is a hazard. The wall straps take five minutes. Do not skip this part.
Use the cubes facing your desk for office storage. Baskets with labels keep it tidy. The cubes facing the room can hold books and pretty things.
Pick a wallpaper back that matches your room. A grasscloth look is calm. A bold pattern makes it a feature. Either way, it stops looking like flat-pack.
This works so well in studio apartments. One piece of furniture gives you a wall, storage, and a display shelf. That is three jobs for the price of one.
I have seen this in a one-room apartment and it honestly looked like a custom partition. The owner said guests always ask for her carpenter's name. She just smiles.
10. BILLY With Arched MDF Panels for a High-End Look
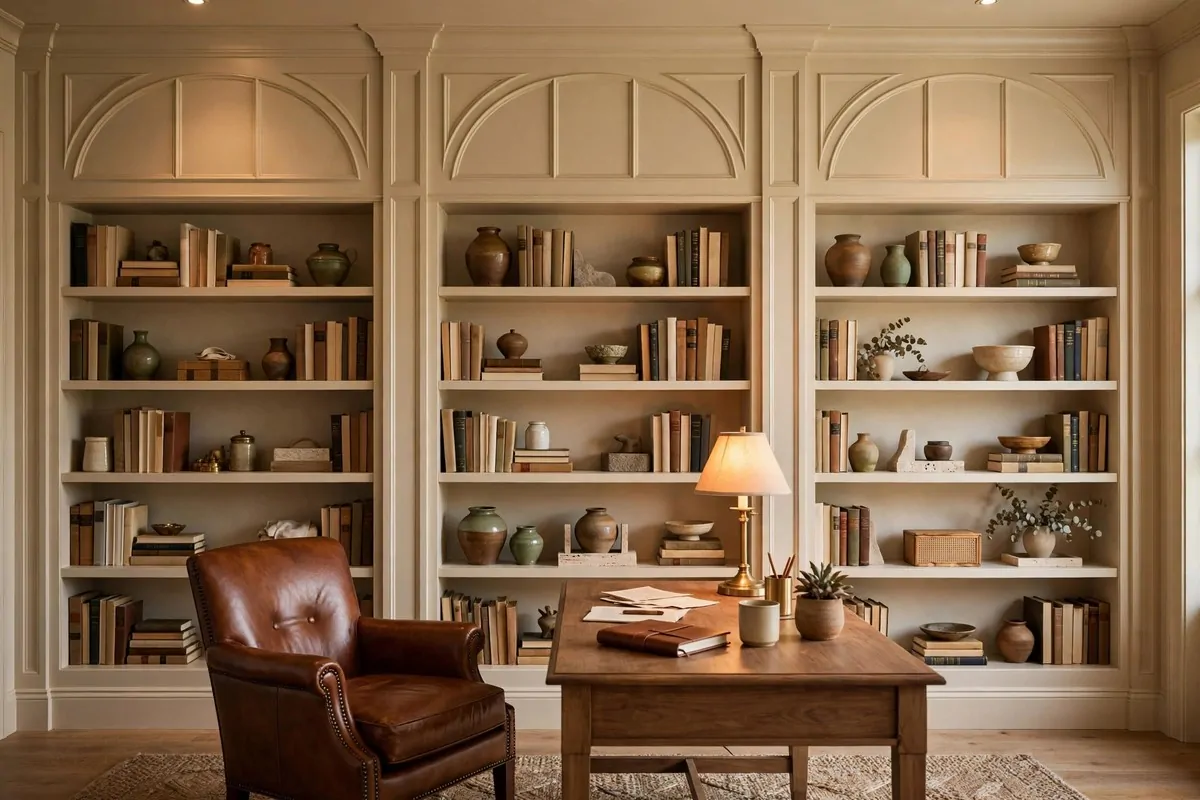
Want a home office that looks truly expensive? Cut arches from MDF and attach them to the top or back of your BILLY bookcases. It is a showstopper.
The arch is the detail that makes people gasp. It is soft and classic, and it looks like something from a design magazine. Nobody guesses it started as a bookcase.
Trace your arch on thin MDF with a large bowl or a string and pencil. Cut it with a jigsaw. Sand the edges smooth. It does not need to be perfect to look good.
Paint the arches the same color as the bookcase. One color keeps it calm and lets the shape do the talking. I love this in warm white or soft cream.
This works best as a full wall of BILLY units. Three or four side by side with arches across the top. It reads like one big custom library wall.
Add small picture lights above each section if you can. Light washing down over the arches at night looks unreal. Battery ones work if you cannot wire anything.
This one takes more skill than the others. But if you can cut a curve, you can do it. And the result is genuinely unrecognizable as IKEA.
11. IVAR Storage Painted a Bold Color
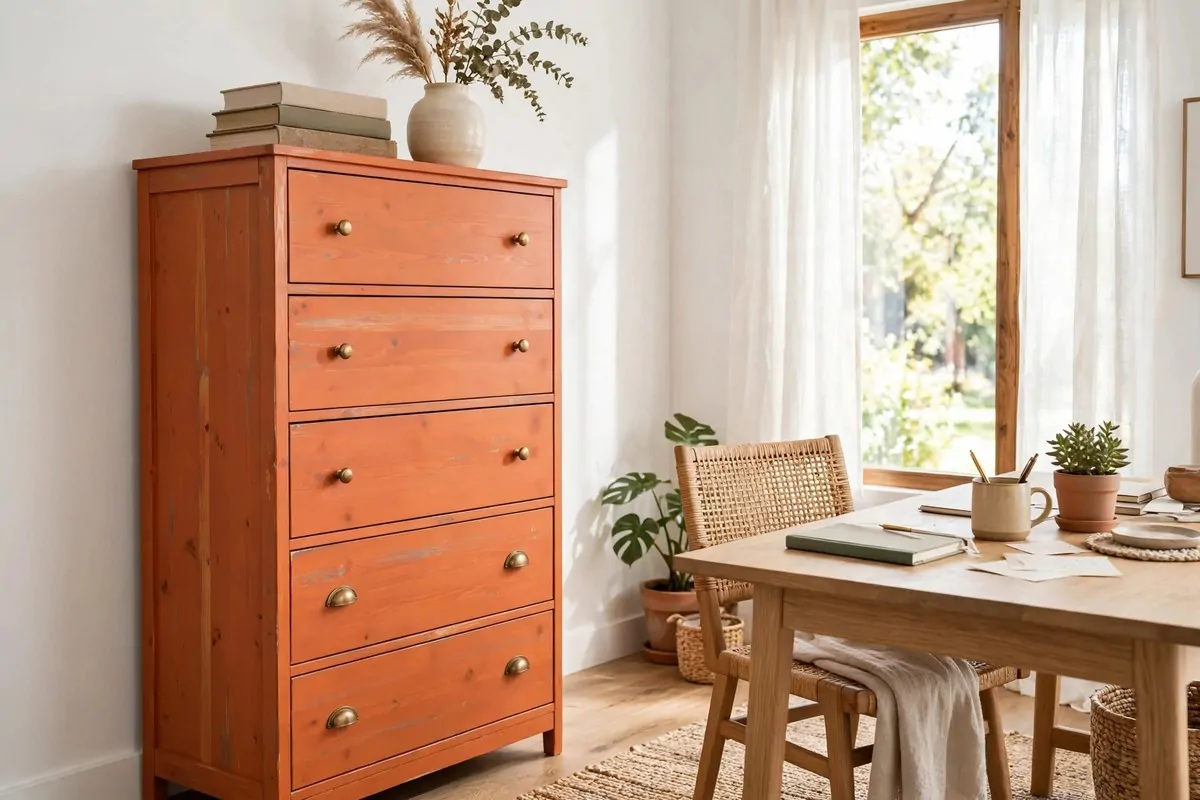
The IVAR is IKEA's secret weapon. It is solid pine, unfinished, and it takes paint like a dream. No primer drama. No peeling.
Paint a tall IVAR cabinet in a bold color and it looks like a vintage find. Deep green. Inky blue. Warm terracotta. The wood grain shows through just a little, which looks rich.
Add simple wood legs to raise it up. Or swap the knobs for brass ones. One small change plus the paint is all it takes. The pine does the rest.
Use it for the ugly office stuff. The printer. The paper shredder. The box of cables you cannot throw away. Close the doors and your office looks calm.
You can stain IVAR too, if you prefer wood tones. A walnut stain on pine looks warm and classic. Two coats, some wax on top, and it glows.
Mix one painted IVAR with white pieces around it. The color pop becomes the star of the room. Everything else fades back. It is a cheap way to get a designer moment.
I painted mine terracotta last spring. It is still my favorite piece in the house. People touch it and ask where I found it. IKEA, I tell them. They never believe me.
12. Floating EKET Cabinets Above the Desk
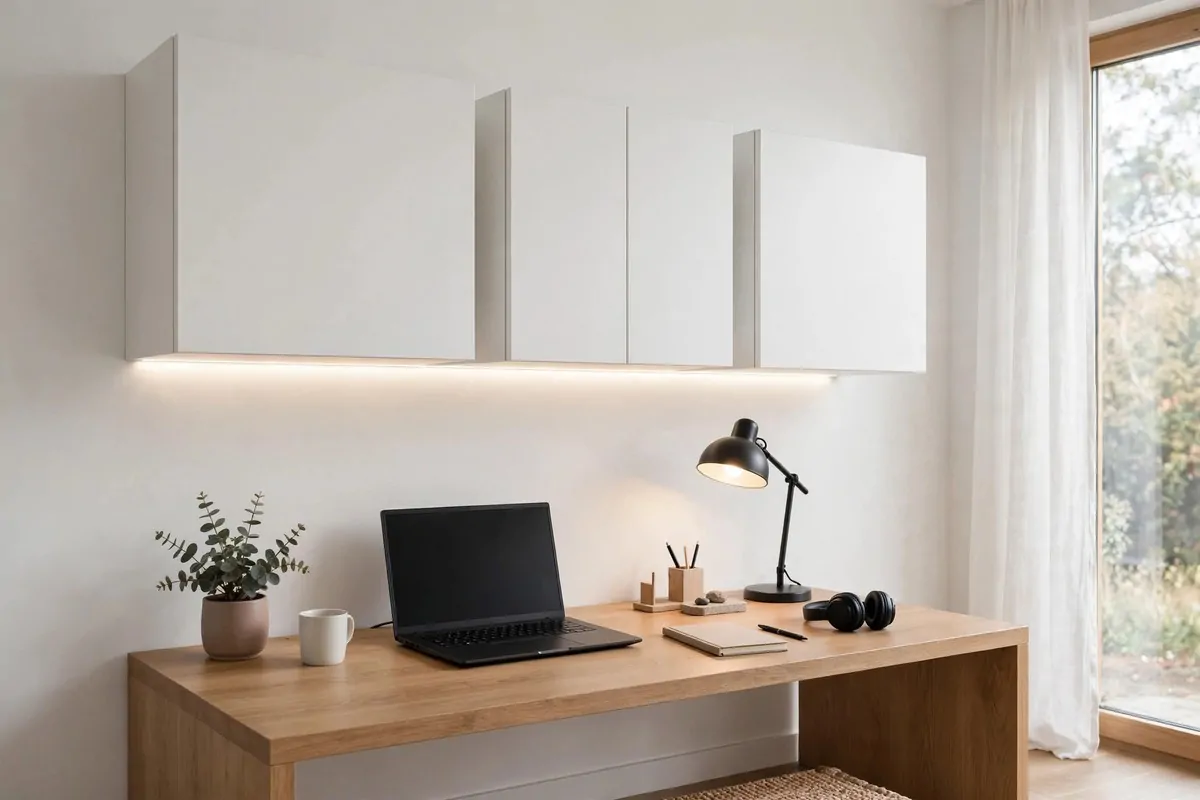
Wall-mounted EKET cabinets are the floating shelves of the storage world. They hang on the wall, hold alot, and make your floor space feel bigger.
Mount two or three in a row above your desk. Keep the fronts simple. White on a white wall almost disappears. Colored fronts become art.
The trick is hanging them perfectly level. Use a real level, not your eye. One crooked cabinet ruins the whole floating effect. Take your time here.
Hide your printer paper, notebooks, and supplies inside. Closed fronts mean no visual mess. Your desk stays clear and your brain stays calm.
Leave a gap between the desk top and the bottom of the cabinets. About 18 inches works well. Enough room for a monitor and a lamp underneath.
Run a small LED strip under the cabinets. It lights your desk like a pro setup. The warm glow at night makes the whole corner feel cozy.
This is perfect for small rooms. All the storage of a bookcase with zero floor space used. Your room feels twice as big.
13. A Floating Desk on Wall Brackets
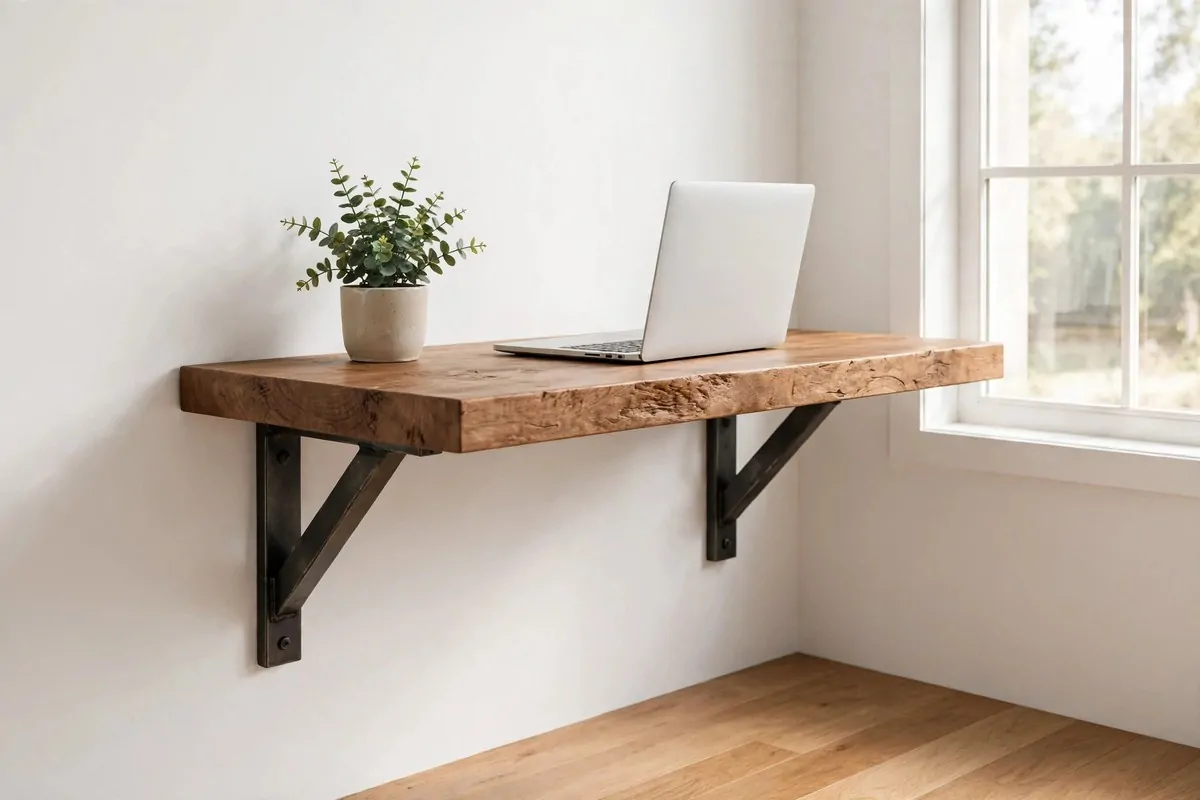
A desk with no legs looks like magic. Mount a deep shelf or countertop on heavy wall brackets and you have a floating desk. It looks fully custom.
Use solid wood brackets or metal ones rated for real weight. This desk will hold your arms, your laptop, and your coffee. It needs to be strong.
Find the wall studs and screw into them. Drywall anchors are not enough for a desk. If you are unsure, ask someone who knows. A falling desk is no joke.
The floating look makes a small room feel open. You can see the floor all the way to the wall. Your brain reads that as more space.
Add a shallow drawer under the top for pens and small stuff. Or mount a small EKET cabinet beside it for storage. Floating desk plus floating storage is a clean combo.
Style it simply. A floating desk with clutter looks messy fast. Keep the surface to your laptop, a lamp, and one small plant.
I love this in a hallway nook or under a window. Dead space becomes a real office. And visitors always ask how it stays up. That is the fun part.
14. A Full Wall of SKÅDIS Pegboard
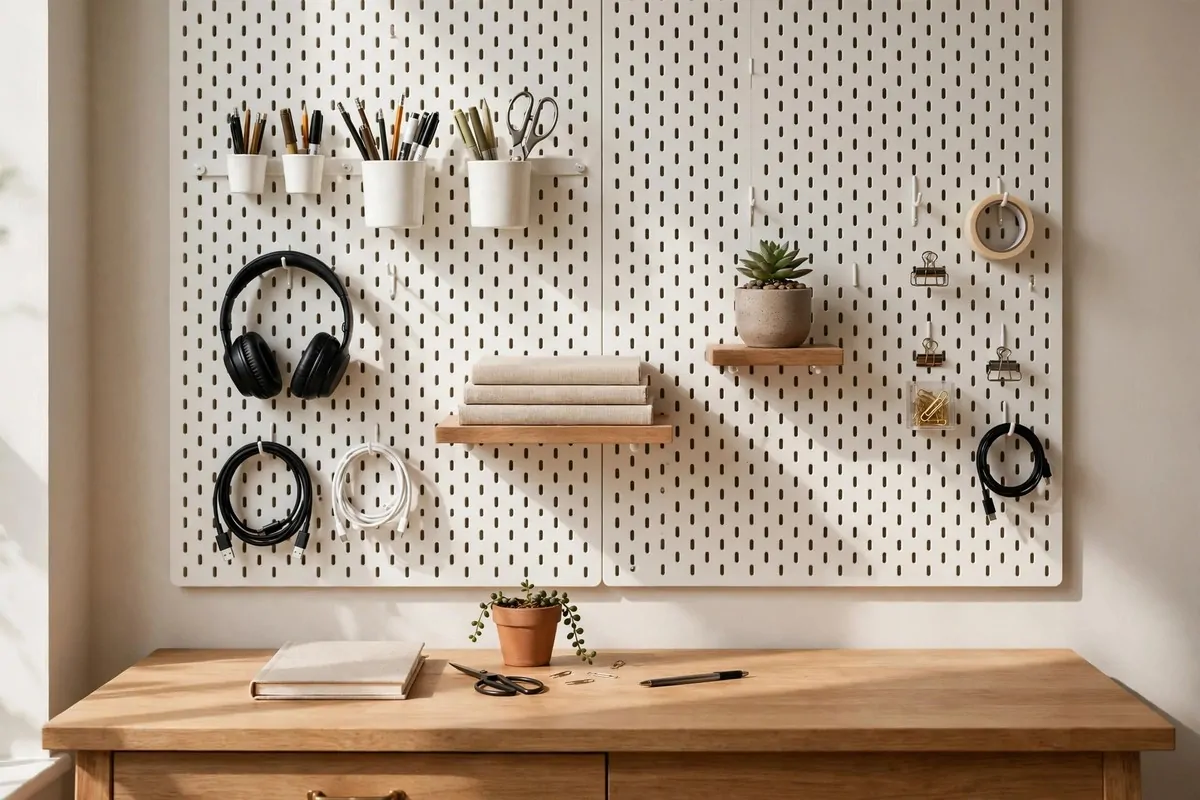
The SKÅDIS pegboard is the most useful wall in my office. It holds my scissors, my headphones, my notebooks, my calendar. Everything has a hook.
Cover a full wall section above or beside your desk. Use the cups, shelves, and hooks made for it. Arrange it like a store display. It looks intentional and cool.
Paint the pegboard to match your wall. A white board on a white wall looks built-in. A black board on a dark wall looks moody and modern.
Change it with the seasons. That is the joy of a pegboard. Move things around in five minutes when your needs change. No holes in the wall beyond the first ones.
Some of my favorite things to hang:
- Small cups for pens, scissors, and washi tape
- Hooks for headphones, cables, and your work bag
- Tiny shelves for notebooks, plants, and pretty boxes
- Clips for photos, notes, and this week's to-do list
Keep the prettiest things at eye level. Washi tape, nice scissors, a small plant. The boring stuff goes lower where nobody looks.
This also works inside a cabinet door or on the side of a bookcase. Small pegboard, same idea. Any vertical surface can work harder.
People underestimate this one. But an organized wall looks expensive. Chaos looks cheap, even in a fancy room. The pegboard kills chaos.
15. The MICKE Desk in a Tiny Corner
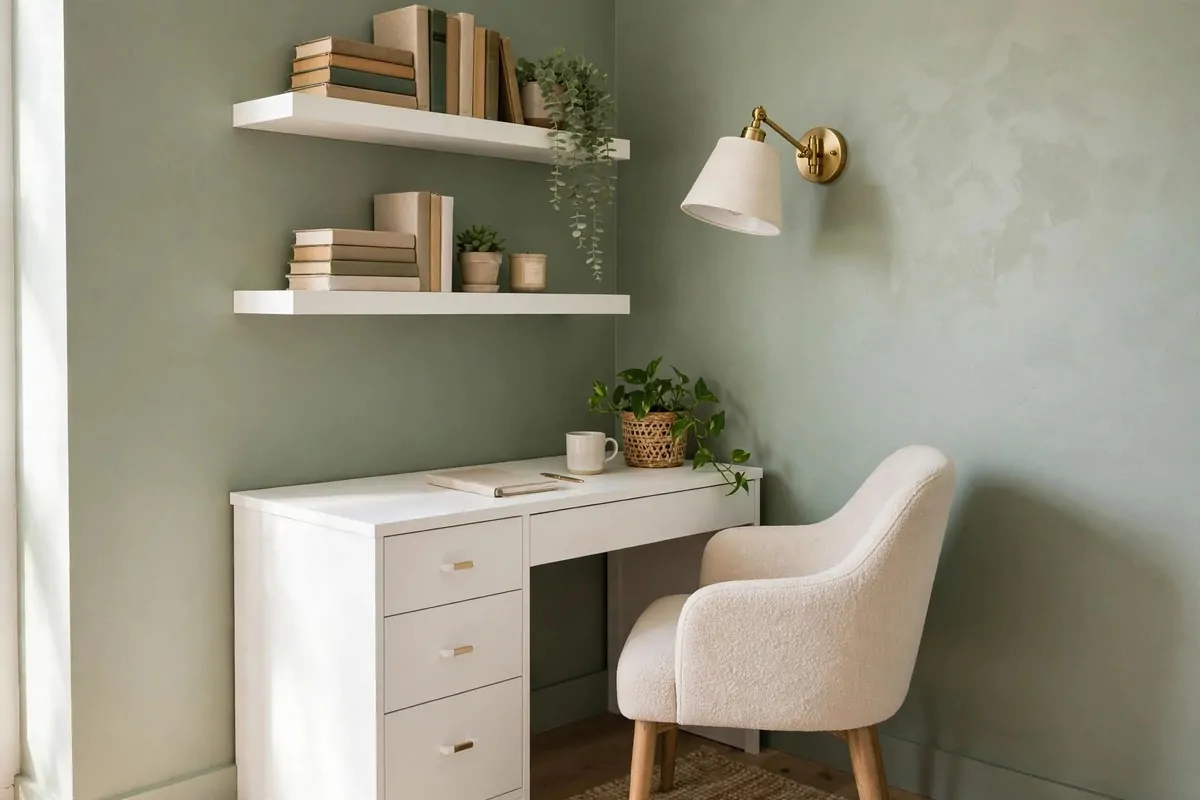
Not everyone has a whole room for an office. The MICKE desk is made for corners. It is small, but it has storage built right in.
Tuck it into a corner and add floating shelves above. The shelves give you the storage the small desk lacks. It becomes a full workstation in four square feet.
Paint the wall behind it an accent color. A small painted corner looks deliberate, like a little office zone. It separates work space from living space.
Add a good chair. In a tiny setup, the chair is what you see most. A nice chair makes a small desk look like a choice, not a compromise.
Use the drawer for the mess. Laptop charger, notebooks, pens. Everything disappears when work is done. A tiny desk cannot hide clutter on top.
Hang a small lamp on the wall above it. A wall lamp saves desk space and looks custom. Plug-in ones need no electrician.
I worked from a MICKE in a bedroom corner for a year. Nobody on video calls ever guessed my office was four feet wide. The shelves and the paint did the trick.
16. The NORDEN Gateleg Table as a Fold-Away Desk
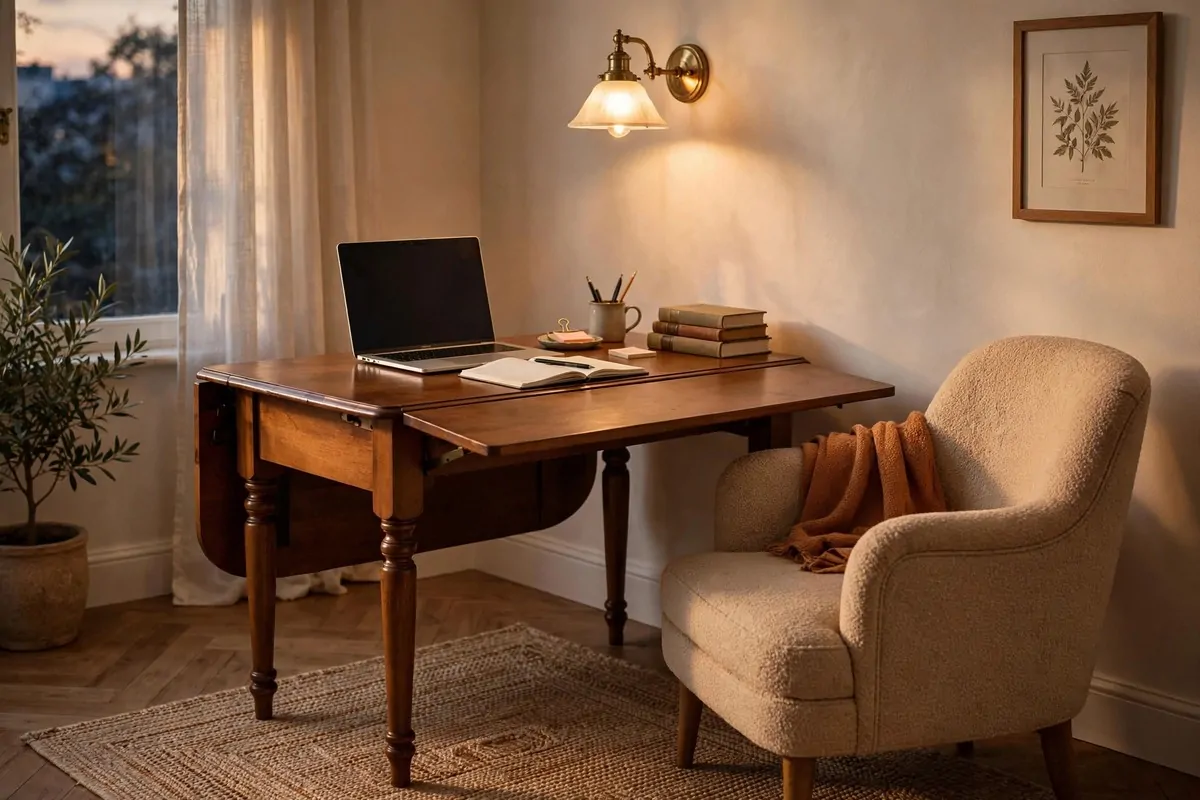
The NORDEN table is a genius piece. Fold the sides down and it is a slim console. Fold one or both up and it is a full desk. Perfect for small homes.
Use it as a desk during work hours. Fold it down in the evening. Your office disappears and your living room comes back. It is the best of both worlds.
The drawers in the middle hold your office supplies. When you fold the table down, everything stays inside. Close it up and the room looks untouched.
Put it against a wall with a nice chair. Add a wall lamp above. When it is open, it looks like a real writing desk. Nobody suspects it folds.
The solid wood top looks great with a little oil or wax. It ages nicely. Scratches and marks just add character, like an old farmhouse table.
This is ideal if you work from home but hate seeing your office all evening. Fold it away. Out of sight, out of mind. Your brain gets to rest.
I know a woman who uses one in her dining room. Guests eat dinner at it on weekends. On Monday it is her office again. That is smart furniture.
17. A BEKANT Corner Desk for Two People
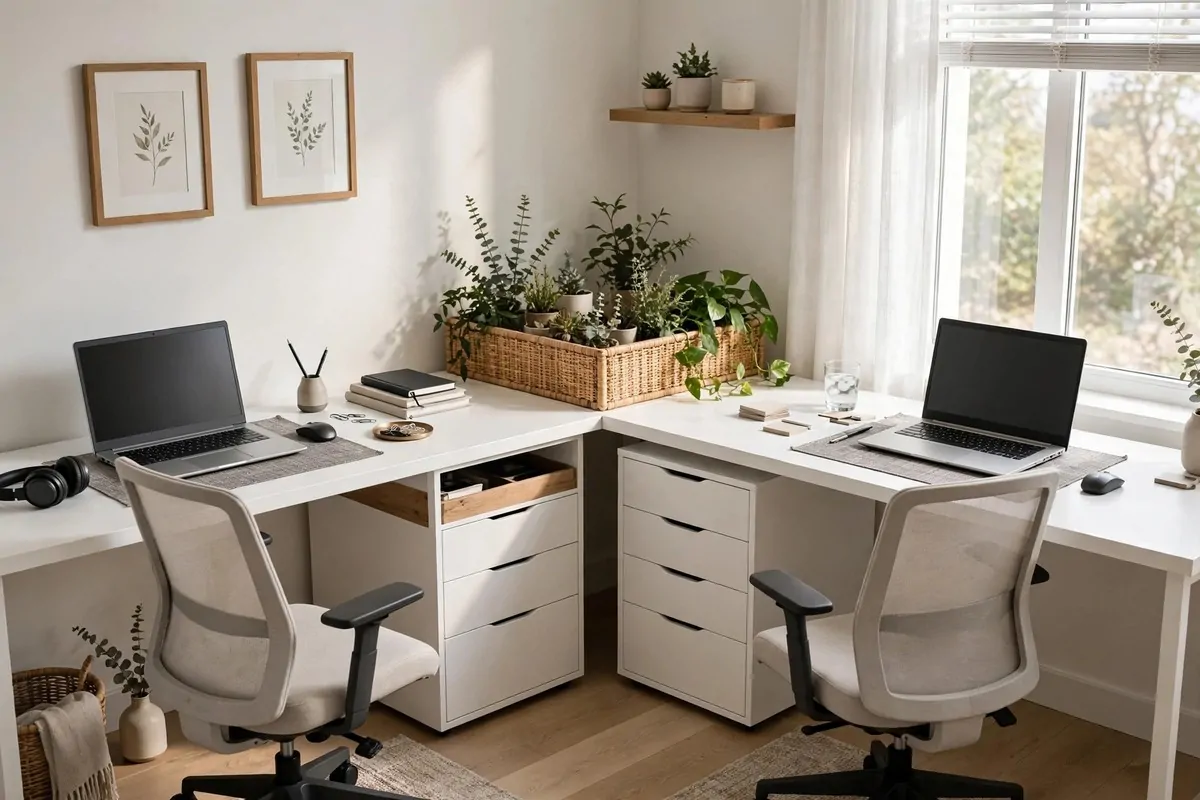
Two people working from home need two desks. Or one big corner desk. The BEKANT corner unit gives each person their own wing.
Set it in the corner and add the matching storage. Each person gets drawers on their side. No fighting over space. Peace in the home office.
The sit-stand version is worth it if you can. Standing for part of the day changes how you feel. Your back will thank you by Friday.
Run a cable tray along the back edge for both sides. Two people's wires are twice the mess. Tame them once and enjoy the calm.
Add a small divider in the middle if you need focus. A low plant or a small shelf marks the border. It is a gentle way to say this side is mine.
Match your chairs but not your setups. Same chair, different desk lamps, different little things. It looks like a designed shared office.
My friend and her husband share one of these. She says it saved their marriage during remote work. A little space of your own matters, even at the same desk.
18. Shiplap Wall Plus BILLY Plus a Stone-Look Top
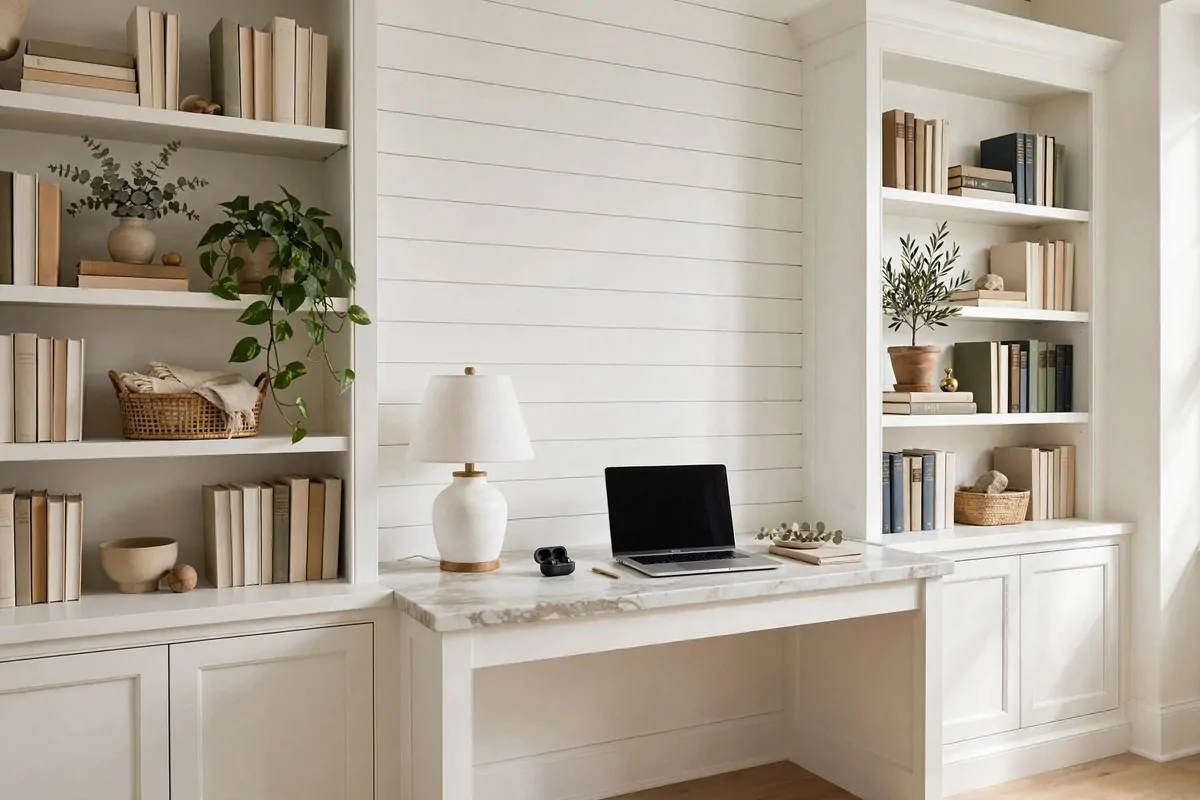
This combo looks like a million dollars. Shiplap on the wall. BILLY bookcases on each side. A marble-look top as the desk between them. All from IKEA and the hardware store.
Start with the shiplap. Thin boards or even peel-and-stick panels work. It gives the wall texture and makes everything in front of it look richer.
Place a BILLY on each side of your desk spot. Fill the middle with your desktop. The bookcases frame the desk like a built-in nook. It feels like a little room inside the room.
Use a kitchen countertop with a marble effect for the desk top. IKEA sells them. They look like real stone from a few feet away. Nobody touches it to check.
Paint the BILLY units to match your wall color. The shiplap, the bookcases, and the wall become one background. The desk floats in the middle like a stage.
Caulk where the bookcases meet the wall. That thin line of caulk is the difference between furniture and built-in. It takes ten minutes.
Style the shelves simply. Books, a plant, one pretty box per shelf. The shiplap is already busy enough. Let the texture be the star.
19. A Herringbone Desktop Made From Paint Sticks
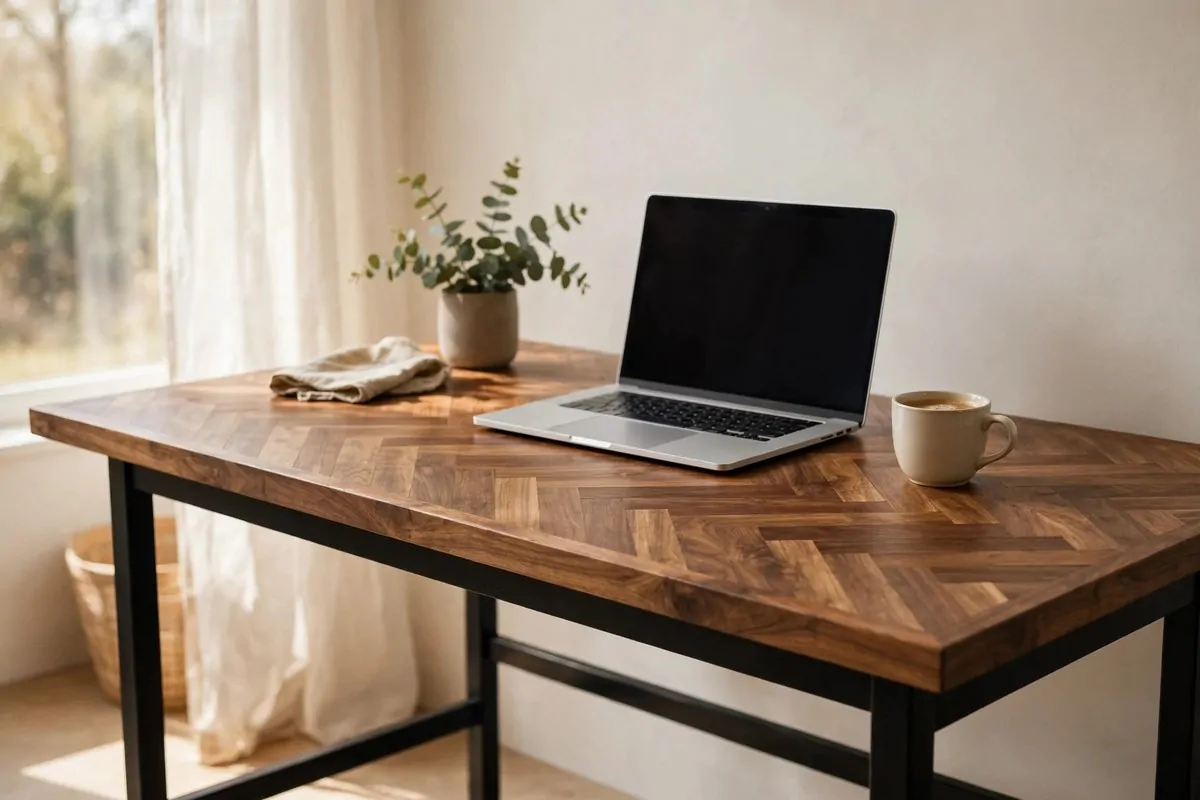
This is the wildest cheap trick on the list. Cover a plain desk top with wooden paint sticks in a herringbone pattern. It looks like expensive parquet.
Glue the sticks down in a zigzag pattern. It takes patience, not skill. Put on a podcast and go row by row. The pattern hides small mistakes.
Stain it when the glue dries. A warm walnut stain makes paint sticks look like real wood flooring. Sand lightly first so the stain takes evenly.
Seal it with polyurethane. Three thin coats. This is a desk, not art. It needs to survive coffee cups and laptop heat. The sealer makes it tough.
Paint the desk legs black. Dark legs with a warm wood top is a classic high-end look. It is the same trick expensive furniture brands use.
People will touch this desktop. They will ask what wood it is. Tell them the truth and watch their faces. Paint sticks. It never gets old.
This takes a full weekend. It is slow work. But the result is a one-of-a-kind desk that looks like it came from a boutique. For the price of glue and sticks.
20. PAX Wardrobes With Custom Fronts as an Office Wall
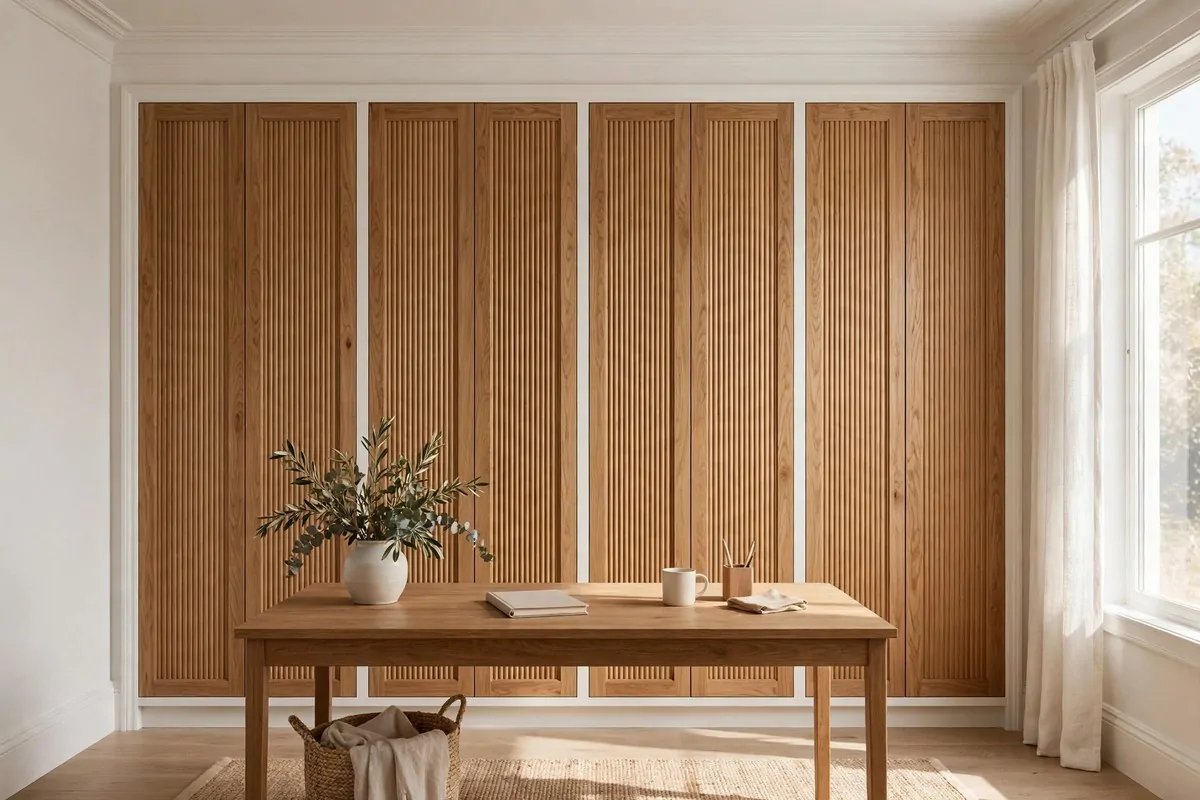
The PAX wardrobe is a blank box you fill how you want. As office storage, it is unbeatable. Deep shelves, drawers, file sections. All hidden behind doors.
Swap the standard doors for custom fronts. Companies make doors sized exactly for PAX frames. Fluted wood, cane, or simple painted panels. The doors change everything.
Frame the units with trim top and bottom. Add crown molding to the ceiling. Paint it all one color. The wardrobes stop looking like wardrobes and start looking like a wall.
Inside, use the drawer inserts for office supplies. Use shelves for paper and boxes. One PAX can swallow the entire contents of a messy desk.
Put your printer inside one section with a hole cut in the back for cables. Close the doors and the printer noise drops. Your office gets quieter instantly.
This is a bigger project. The units are heavy and the trim work takes time. But a full wall of closed storage is life-changing for a messy worker like me.
If custom doors are too pricey, paint the standard ones and add nice pulls. Paint plus hardware gets you most of the way there for much less money.
21. LACK Floating Shelves Styled Like Art
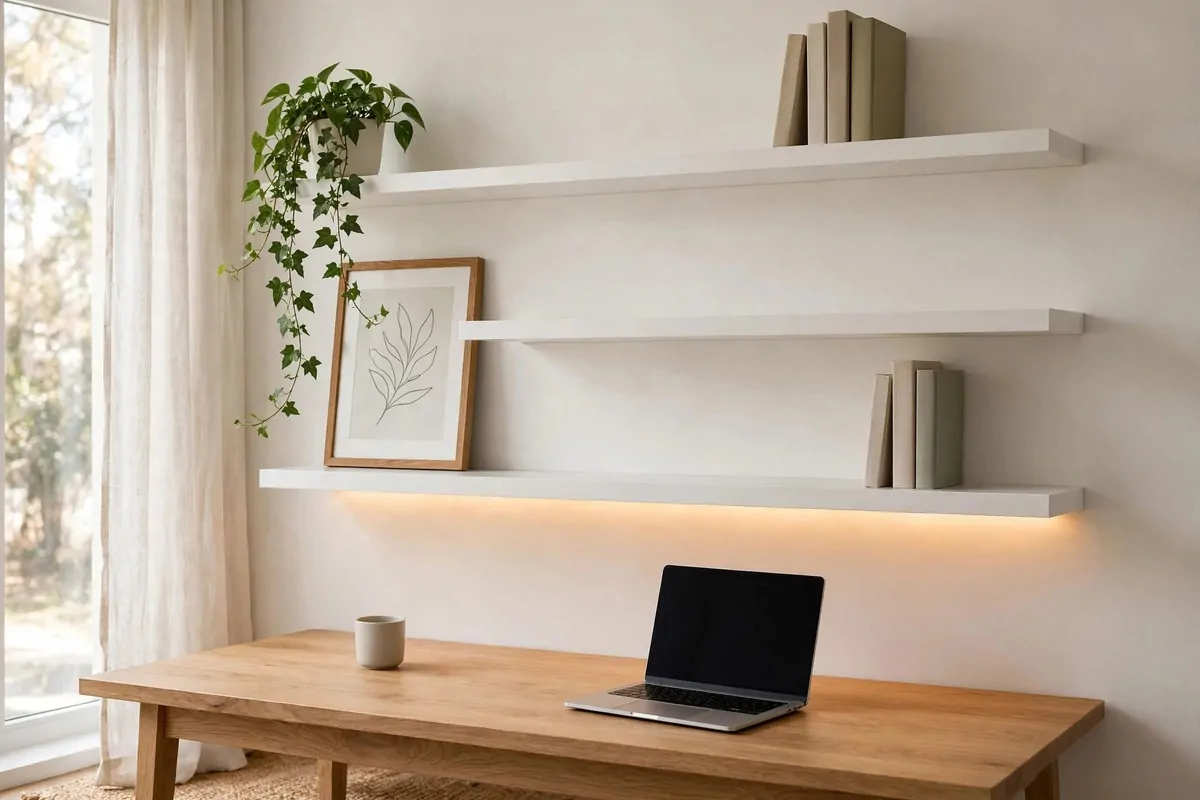
Line two or three RIBBA ledges above your desk. Lean framed art, small plants, and a few books on them. It looks like a gallery wall with storage.
Hang two or three above your desk. Keep them level and evenly spaced. Crooked shelves look sad. A level and a pencil are your best friends here.
Style them like a magazine. Books standing up, a small plant trailing down, a framed print leaning against the wall. Leave air between things. Air looks expensive.
Do not overload them. LACK shelves sag under heavy books. Keep the heavy stuff low and the pretty stuff up high. They are for looks plus light storage.
Paint them the wall color to make them disappear. Or paint them a contrast color to make them pop. Both look intentional. Bare white on a colored wall can look unfinished.
Add a small LED strip under the lowest shelf. It lights your desk and makes the shelves glow at night. Cozy and practical at once.
These cost almost nothing. Three shelves, some brackets, done in an hour. But a styled shelf wall makes any desk look like it belongs in a catalog.
22. RIBBA Picture Ledges as Low-Profile Shelves
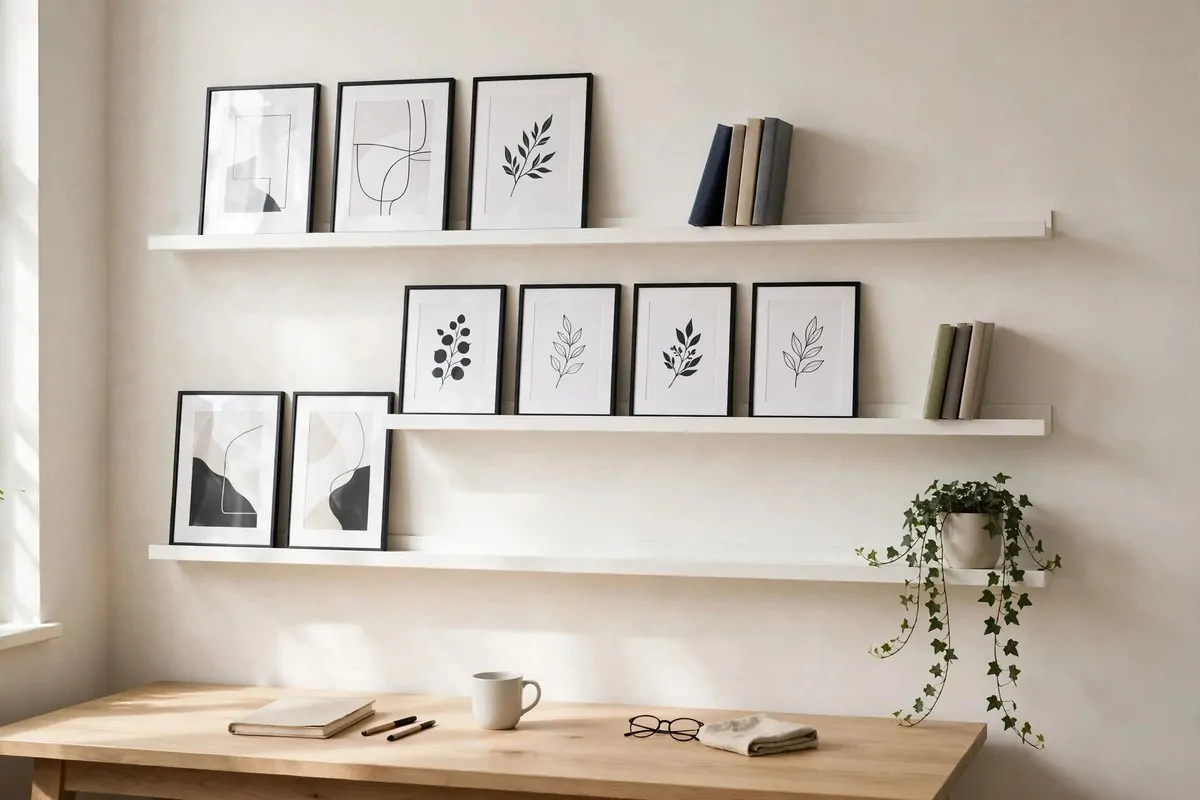
Picture ledges are the gentlest shelves. They stick out just a little. Perfect for small offices where deep shelves would eat the room.
Line two or three RIBBA ledges above your desk. Lean framed art, small plants, and a few books on them. It looks like a gallery wall with storage.
The magic is how easy they are to change. Swap the art when you get bored. No new holes. Your office gets a fresh look in ten minutes.
Keep the frames simple and matching. Same color frames in different sizes look curated. Mixed random frames can look messy on a narrow ledge.
Add one small trailing plant. The green softens the straight lines of the ledges. It makes the whole wall feel alive instead of flat.
This works great in rentals. A few small screws, easy to fill later. Big style, tiny commitment. Landlords never mind picture ledges.
I change mine every season. Spring art, summer art, cozy fall prints. It is my favorite cheap refresh in the whole house.
23. The Under-Desk Cable Cleanup That Changes Everything
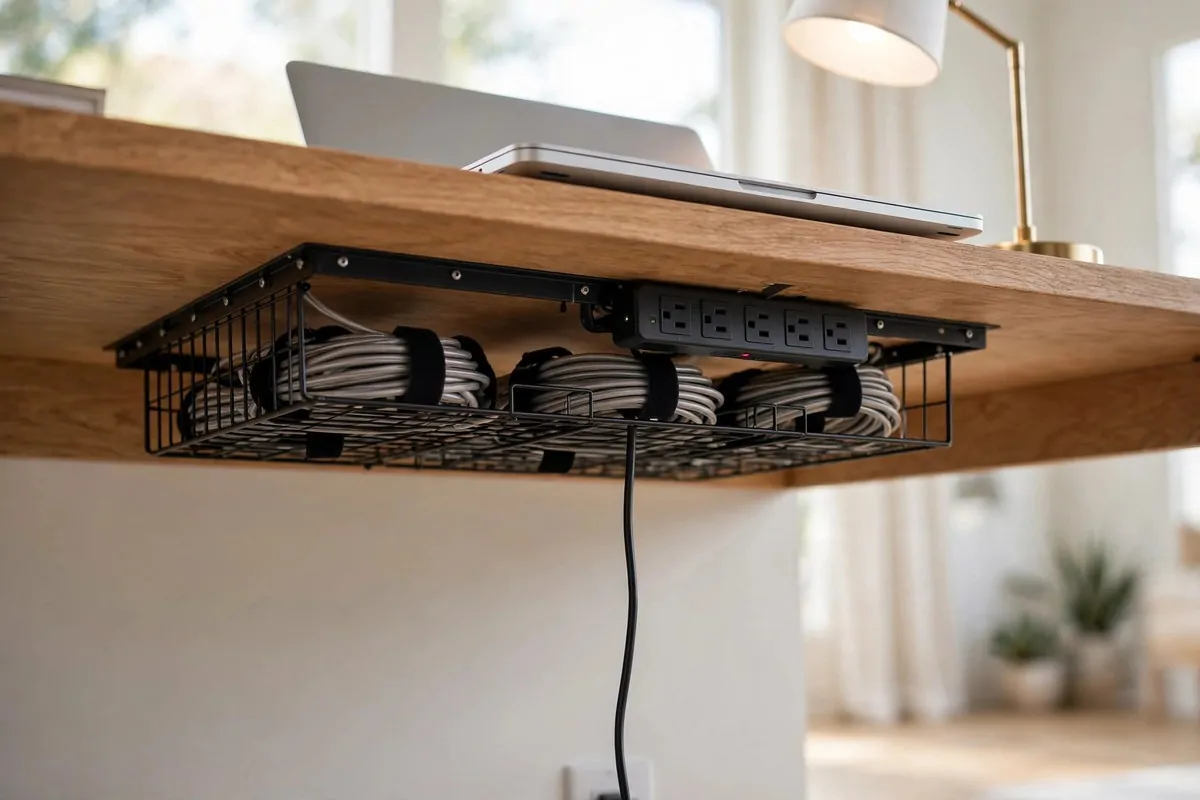
You can have the prettiest desk in the world. If wires hang under it, it looks cheap. Clean cables are the fastest custom upgrade there is.
Screw a cable tray under your desktop. Coil every wire and lay it in the tray. One cable drops to the wall outlet. That is it. That is the whole trick.
Use velcro ties, not zip ties. You will need to move things someday. Velcro lets you redo it in seconds. Zip ties mean scissors and regret.
Mount a power strip under the desk too. Everything plugs in up high, out of sight. Only one cord goes down to the wall. It looks so clean.
Drill a small hole in the desktop for the monitor cable if you dare. A grommet cover makes it look professional. The wire drops straight through, invisible.
This takes one hour and costs almost nothing. But the before and after is shocking. A desk with no visible wires looks twice as expensive. I am not exaggerating.
Do this before you buy anything else for your office. Seriously. It is the highest-impact hour you can spend. Everything else builds on clean cables.
24. A Bench, Desk, and Bookshelf Built as One Unit
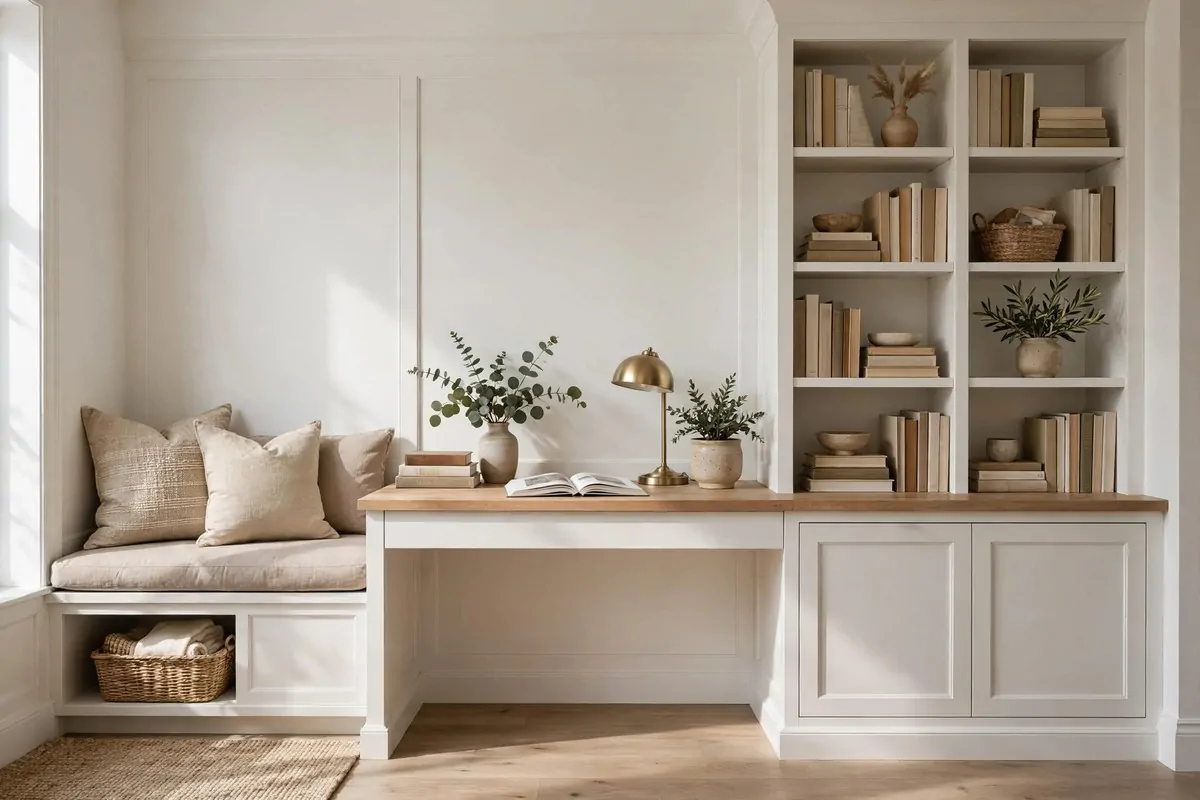
This needs measuring and planning. Sketch it on paper first. But once it is built, it looks like it grew there. Guests assume it came with the house.
Use a low BESTA or a bench frame for the seat. Add a desktop at sitting height beside it. Top it with a bookcase. One long wood top ties it all together.
The bench is for reading breaks. The desk is for work. The shelves hold books and supplies. Three jobs, one wall, one clean look.
Paint everything the same color. When separate pieces share one color, your eye reads them as one piece of furniture. This is the oldest designer trick there is.
Add cushions to the bench in a fabric you love. A cushion turns a storage bench into the best seat in the house. I do my best thinking there.
This needs measuring and planning. Sketch it on paper first. But once it is built, it looks like it grew there. Guests assume it came with the house.
Start with the pieces pushed together before you commit. Live with the layout for a week. Then screw them together and add the trim. No regrets that way.
25. A Closet Turned Into an Office Nook
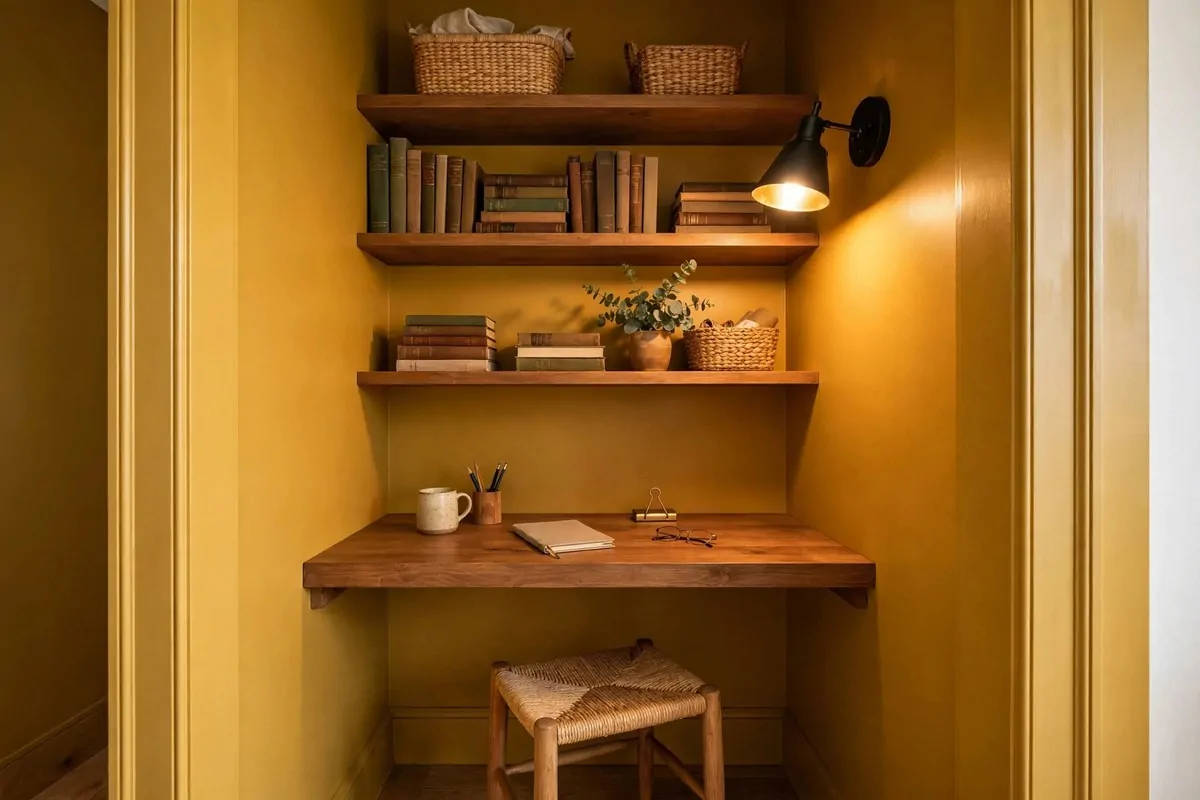
Got a closet you barely use? Take the doors off. Put a desk inside. You just gained a home office without losing any room.
Fit a narrow desktop across the closet opening. Add shelves above for storage. A small stool tucks in when you are done. The nook holds a full workstation.
Paint the inside of the closet a fun color. The inside becomes a little jewel box. When you sit down to work, it feels like your own secret room.
Add a wall lamp or a small pendant light. Closets are dark. Good light makes it feel like a real office instead of a cupboard. Battery puck lights work too.
Use the closet's depth for storage. Baskets on the top shelf, files on the side. Everything is within arm's reach. Small space, big function.
Close a curtain across the opening in the evening if you want. Work disappears. The room goes back to being a bedroom or a living room. I love this trick.
This is the ultimate small-home office. No extra room needed. Just a closet, a shelf, and a chair. And it always impresses visitors.
26. Statement Hardware on Everything
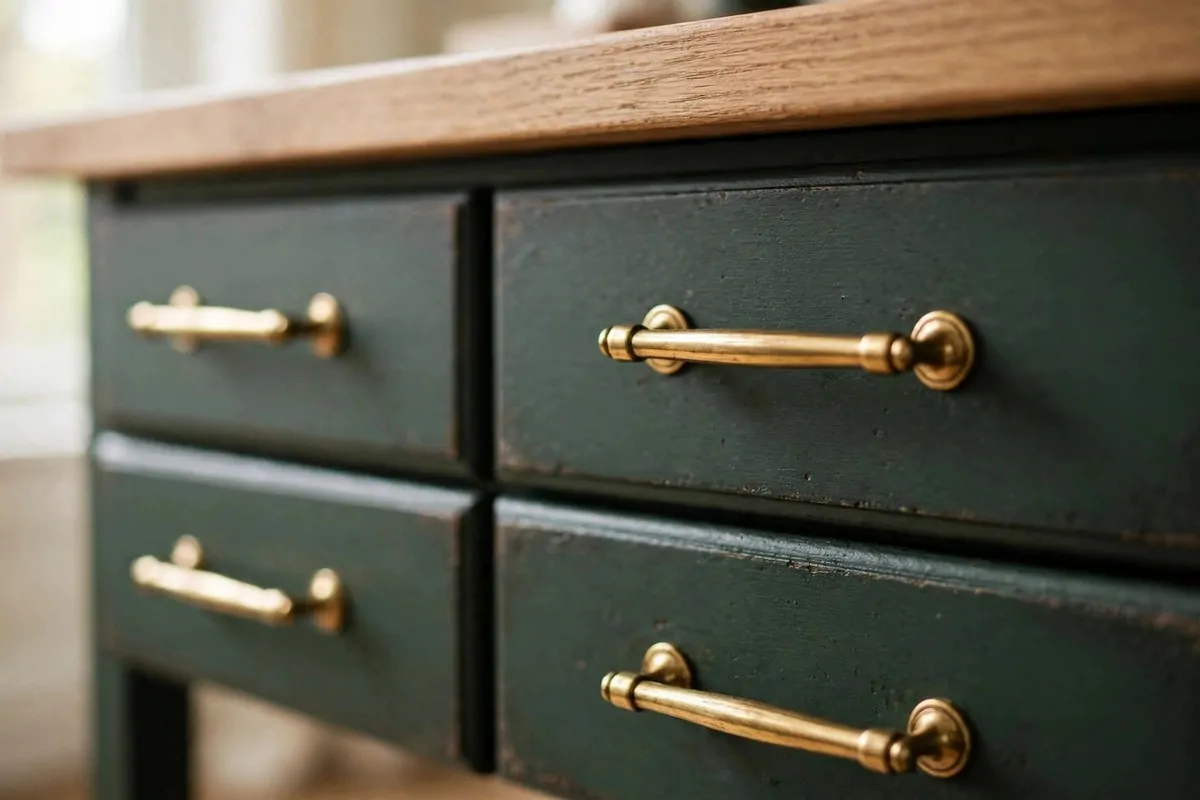
New knobs and pulls are the cheapest custom look there is. One afternoon, one screwdriver, and every piece in your office looks upgraded.
Swap plain knobs for aged brass pulls. Or matte black handles. Or leather tabs. The hardware sets the mood like jewelry sets the mood of an outfit.
My go-to finishes and the mood each one gives:
- Aged brass: warm, vintage, a little fancy
- Matte black: modern, clean, a little bold
- Brushed nickel: safe, bright, works with everything
- Leather tabs: handmade, soft, very now
Do all your pieces at once. Same finish on the desk drawers, the bookcase doors, and the storage cabinet. Matching hardware ties different pieces into a set.
Measure the hole spacing before you buy. IKEA uses standard sizes, but check anyway. Nothing is worse than beautiful pulls that do not fit.
Keep the old hardware in a bag. If you move or change your mind, you can swap back. It is a fully reversible upgrade. No risk at all.
This works on ALEX drawers, BESTA doors, MALM dressers, even PAX wardrobes. Every flat-pack piece looks better with nicer pulls. Every single one.
I did my whole office for the price of a pizza night. Brass everywhere. It is the first thing people notice and the last thing they guess cost so little.
27. The One-Color Trick: Paint It All the Same
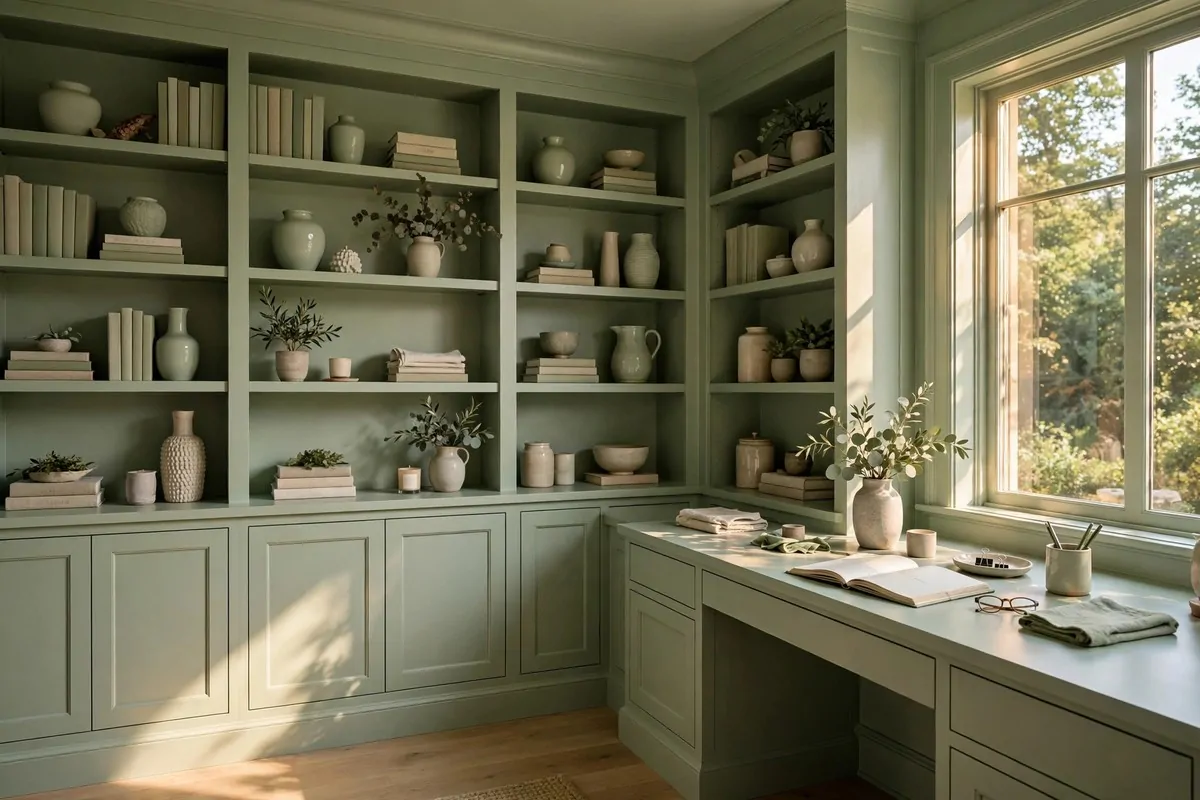
If you do nothing else on this list, do this. Paint your furniture and your walls the same color. It is the single biggest custom-looking trick.
When the bookcase, the desk, the trim, and the wall are all one color, edges disappear. Your brain stops seeing separate pieces. It sees one built-in room.
Pick a color with some depth. Soft sage. Warm greige. Dusty blue. Flat white works too, but a color with pigment looks richer and more designed.
Prime the laminate first. Always. Shellac-based primer grips the slick IKEA surface. Then two coats of your color. Let each coat dry fully. Patience pays.
Paint the back panels too. The inside of a bookcase in the same color looks seamless. A white back panel inside a green bookcase breaks the spell.
This trick even works on pieces you cannot move. Add cushions to the bench in a fabric you love. A cushion turns a storage bench into the best seat in the house. I do my best thinking there.
I painted my whole office corner one soft green. Desk, shelves, wall, trim. It took two weekends. It looks like a room from a magazine now. One color did all of it.