27 Garage Door Ideas That Lift the Whole Look

My garage door used to be the biggest dull patch on the front of my house, and I drove past it every day without ever really seeing it.
It was plain and tired and it made the whole front of the house look tired too. I kept thinking about the garden and the front door, but the garage door was right there in the middle of it all.
Then one weekend I stood on the pavement and looked at my house the way a guest would see it. The door took up so much space that I could not ignore it any more.
I am not a builder and I do not own fancy tools. I just wanted simple changes that I could do myself or hire out for a fair price.
That is what this post is about. Each idea is small and plain and easy to follow, and you can pick one or mix a few together.
Some ideas cost very little and take one weekend. Others take more time and more money, but they still keep things simple.
All 27 garage door ideas are gathered in this one post, so you can read them in order and pick the ones that lift the front of your house.
1. A Fresh Coat of White Paint on the Door
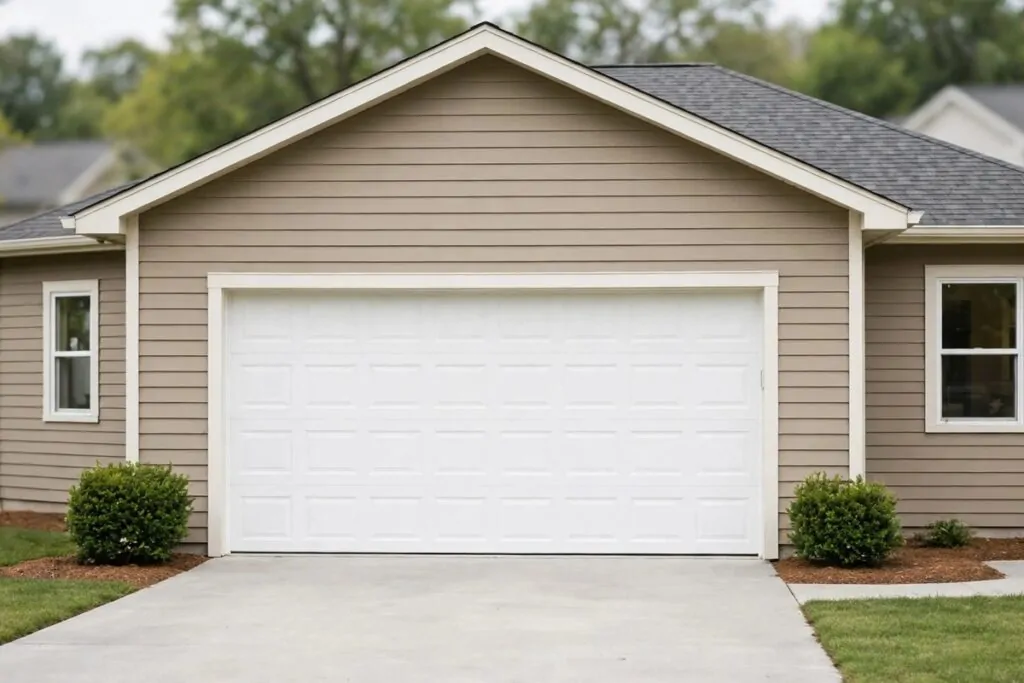
A plain white coat can wake up a tired garage door in one weekend. It looks clean and fresh from the street.
I washed my door first with warm soapy water and a stiff brush. Dirt and dust stop paint from sticking, so this step matters.
I let the door dry in the sun for a full afternoon. A damp door will make the paint bubble and peel.
Then I rolled on a coat of paint made for outside doors. I worked from the top down so drips would not spoil the parts I had done.
I brushed the next coat on the day after. Two light coats look far better than one heavy coat.
Typical cost $35 to $70.
White paint suits almost any house. It goes well with brick, stone, and pale walls.
I taped the edges round the frame so the lines stayed neat. A steady hand and a small brush help here.
Stand back and look at it from the street when you finish. You will see the whole front of the house look brighter.
2. Soft Grey Paint for a Calm Front
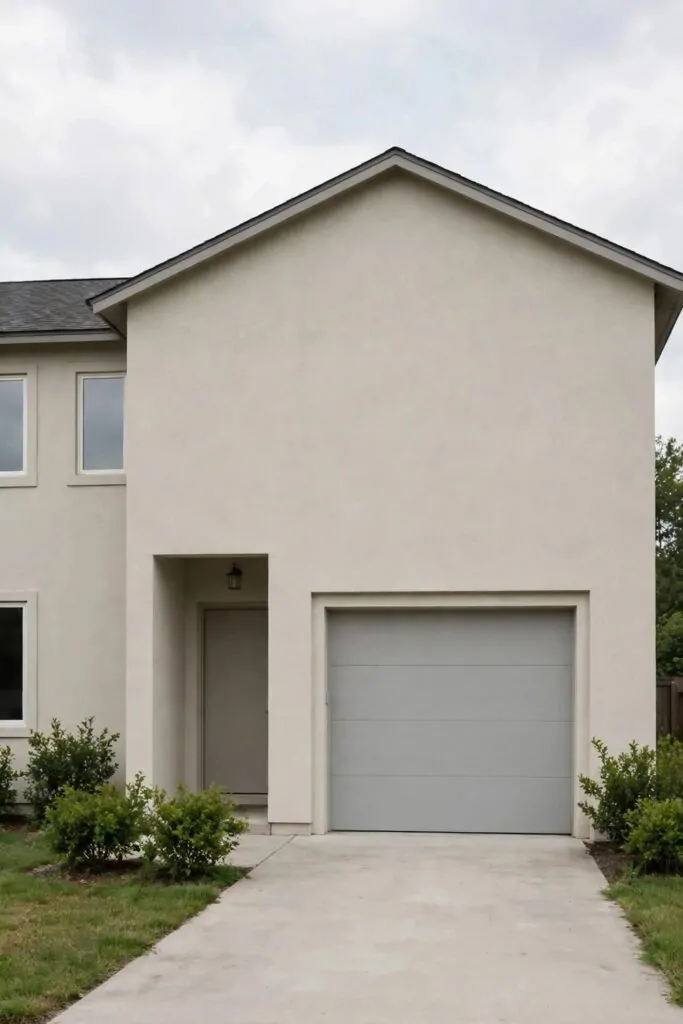
Soft grey paint gives the door a calm and tidy look. It is not too bright and not too dark.
I picked a soft grey that matched the roof tiles on my house. When the colours sit well together, the front looks planned.
I cleaned the door the same way as before, with soapy water and a good rinse. Then I let it dry all day.
A primer coat helps the grey sit flat and even. I rolled it on thin and let it dry right through.
Then I added two coats of soft grey paint. I kept the strokes in one direction so the finish looked smooth.
Typical cost $40 to $85.
Soft grey works well with pale walls and dark roofs. It also hides small marks better than white does.
I used a small brush for the edges and the joins. The roller did the wide flat parts.
If your door has panels, paint the dips first and the flat parts last. That way you miss no spots.
3. Deep Navy Paint for a Bold Door
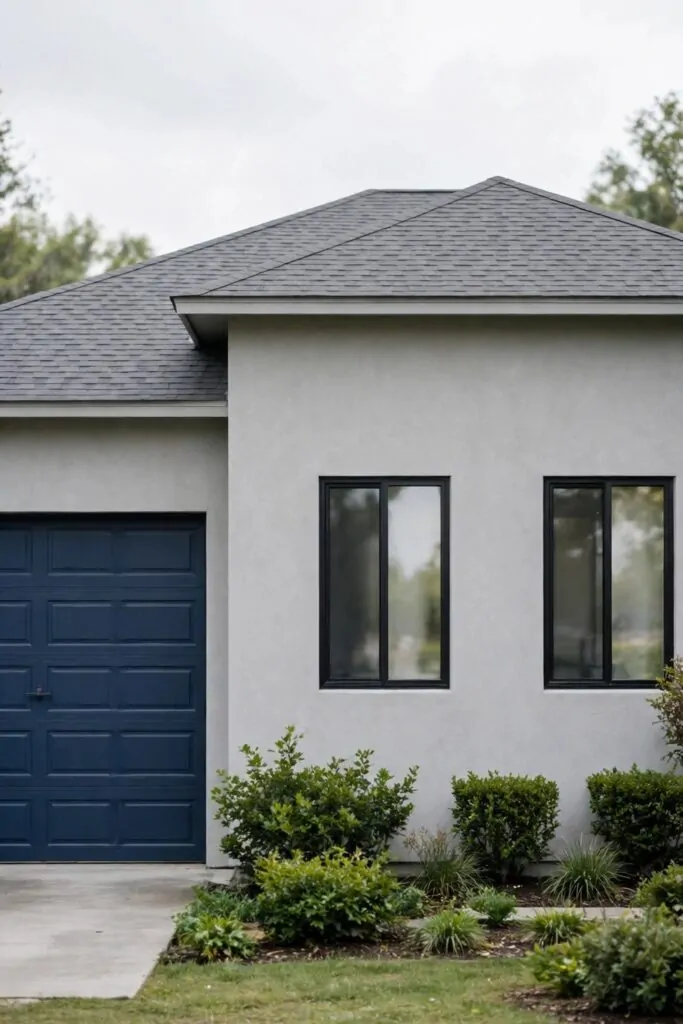
Deep navy paint turns a plain door into the main feature of the front. It looks bold and smart.
I was nervous about such a dark colour at first. But once it was on, the house looked rich and neat.
Deep navy goes well with pale walls and white trim. The contrast makes the front of the house stand out.
I washed the door and sanded the rough spots with light strokes. Smooth wood and metal take paint much better.
Then I put on a primer made for dark colours. It stops the old colour from showing through.
Typical cost $45 to $90.
Two coats of deep navy gave a deep even finish. I let each coat dry before I added the next one.
A small brush helped round the hinges and the handle. I took my time so the lines stayed clean.
This colour suits a house with a neat path and tidy plants by the door. It pulls the whole front together.
4. Sage Green Paint for a Soft Look
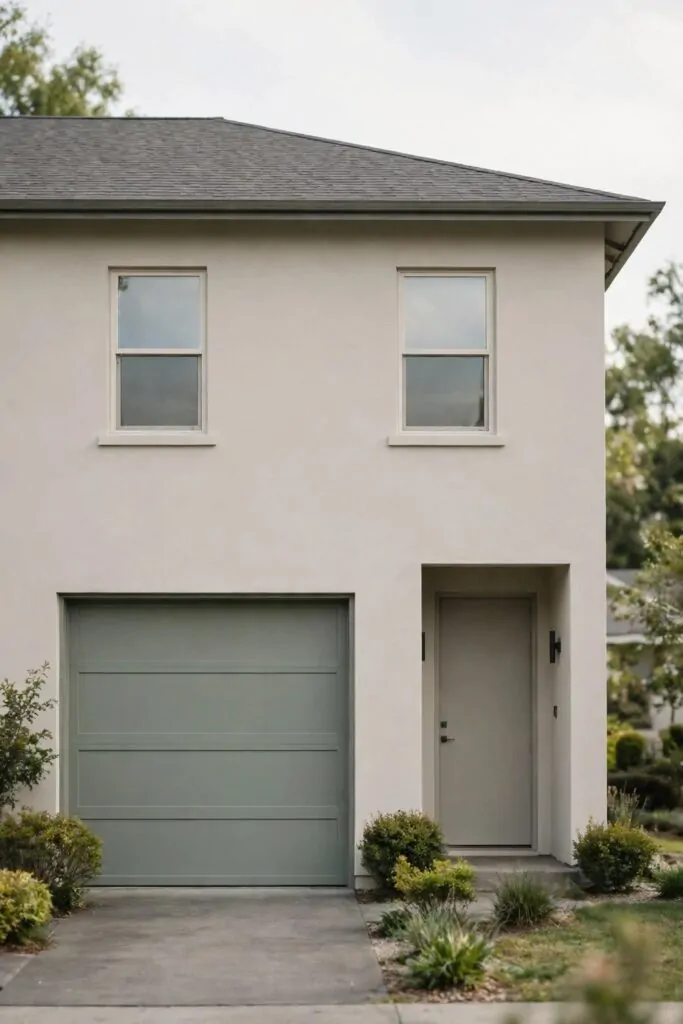
Sage green paint gives the door a soft and gentle look. It feels calm and close to nature.
I picked sage green because my front garden has lots of green leaves. The door now blends with the plants round it.
Sage green suits brick houses and pale stone houses too. It is soft enough not to fight with the walls.
I cleaned the door and let it dry in the sun. Then I rolled on a coat of primer.
Two coats of sage green paint went on after that. I worked in the shade so the paint would not dry too fast.
Typical cost $40 to $85.
The finish looks best with plain pale trim round the door. Keep the frame simple and let the colour do the work.
I used a small brush for the panel edges. The roller covered the wide parts in good time.
Step back and look at the door with the garden in view. The soft green ties the house and the garden together.
5. Black Paint for a Smart Modern Door
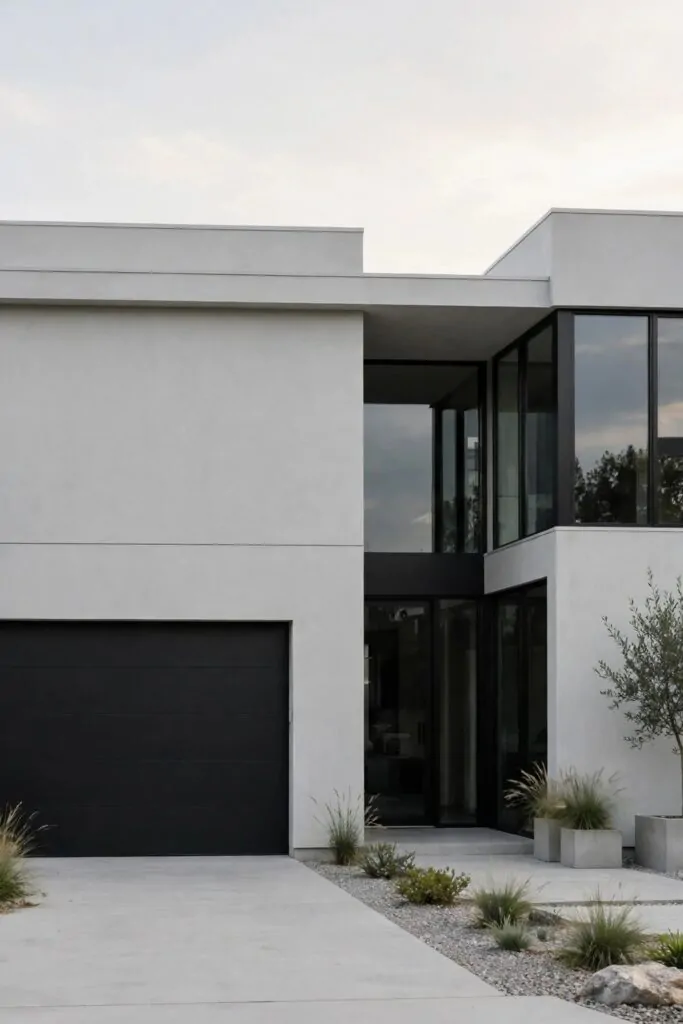
Black paint gives the door a smart and modern look. It makes the front of the house feel sharp and neat.
I chose black because my window frames are dark too. When they match, the whole front looks like one plan.
Black shows dust more than pale colours do, so wash the door often. A quick wipe keeps it looking fresh.
I gave the door a light sand and cleared the dust off with a damp rag. Then I gave it time to dry right through.
A primer coat went on first. It helps the black paint sit even and last longer.
Typical cost $45 to $95.
Two coats of black paint gave a smooth deep finish. I rolled the flat parts and brushed the edges.
Black suits a modern house with clean lines. It also suits a brick house with pale walls.
Pair it with a plain handle and neat trim. Simple details keep the bold colour from looking too heavy.
6. Natural Wood Stain for a Warm Door
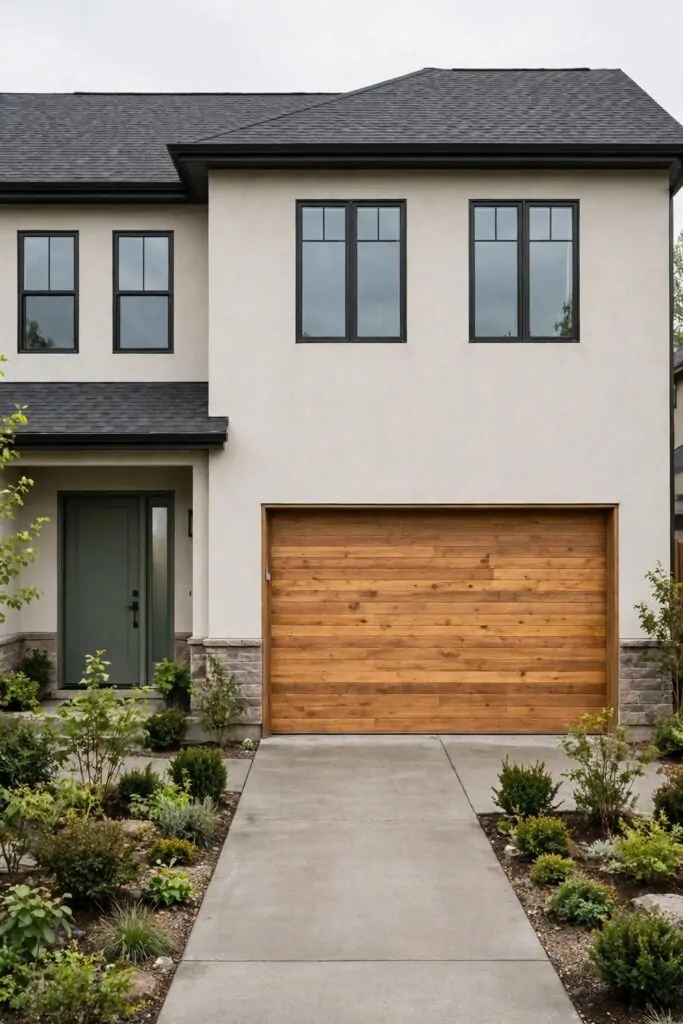
A natural wood stain brings out the grain and gives the door a warm feel. It looks rich without any paint on top.
I love how wood stain lets the grain show through. Each board looks a little different, and that is part of the charm.
First I washed the door and sanded it with fine paper. Smooth wood takes stain in an even way.
I brushed the dust off with a dry rag. Any bits left on the wood will show through the stain.
Then I brushed the stain on with the grain, not across it. I worked one board at a time so the edges would not dry in patches.
Typical cost $60 to $140.
A second coat made the wood tone deeper and warmer. I waited until the first coat felt fully dry before I brushed on the next one.
A clear top coat on top of the stain guards the wood from rain and sun. I rolled it on thin and even.
Wood stain suits a house with stone or brick walls. It adds warmth to a front that feels cold and plain.
7. Two-Tone Paint with a Dark Frame
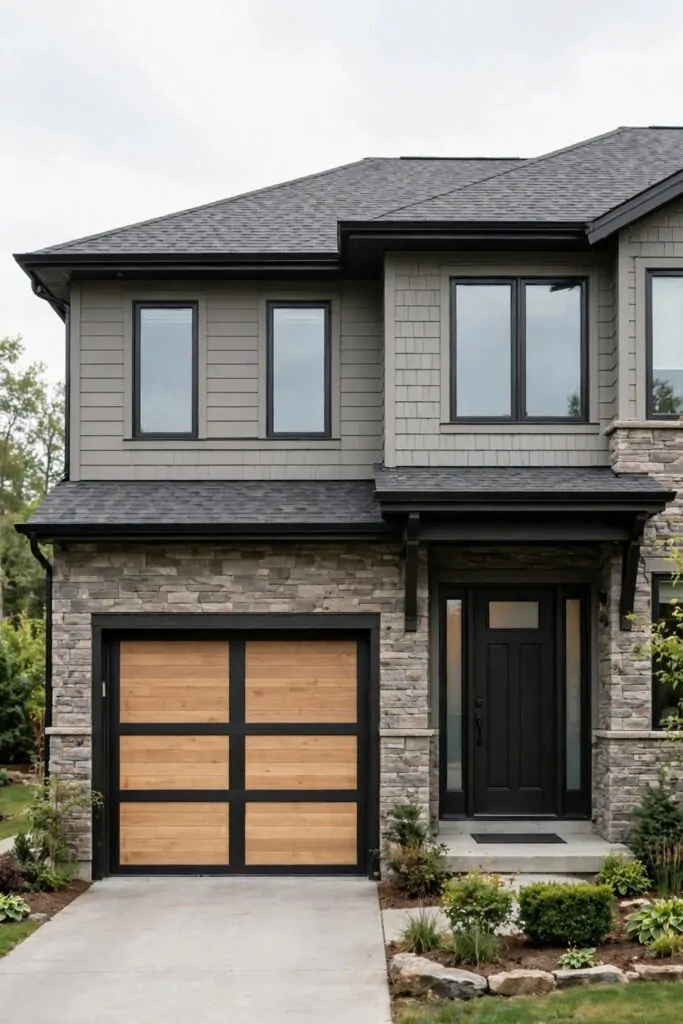
Two-tone paint means the frame is dark and the door panels are light. The contrast gives the door a neat framed look.
I painted the frame first in a dark tone. Then I painted the panels in a lighter tone that matched the house walls.
The dark frame makes the door look like a picture on the front of the house. It draws your eye in a good way.
I taped off the frame before I painted the panels. Clean tape lines make the two tones look sharp.
Wash and dry the whole door first. Paint will not stick well to a dirty door.
Typical cost $55 to $120.
Use a small brush for the frame edges and a roller for the wide panels. Two coats of each tone give the best finish.
Let the frame dry fully before you tape it and paint the panels. Wet paint and tape do not mix well.
This look suits a plain door with flat panels. It adds style without any new parts or fittings.
8. Carriage House Style Doors with Black Hardware
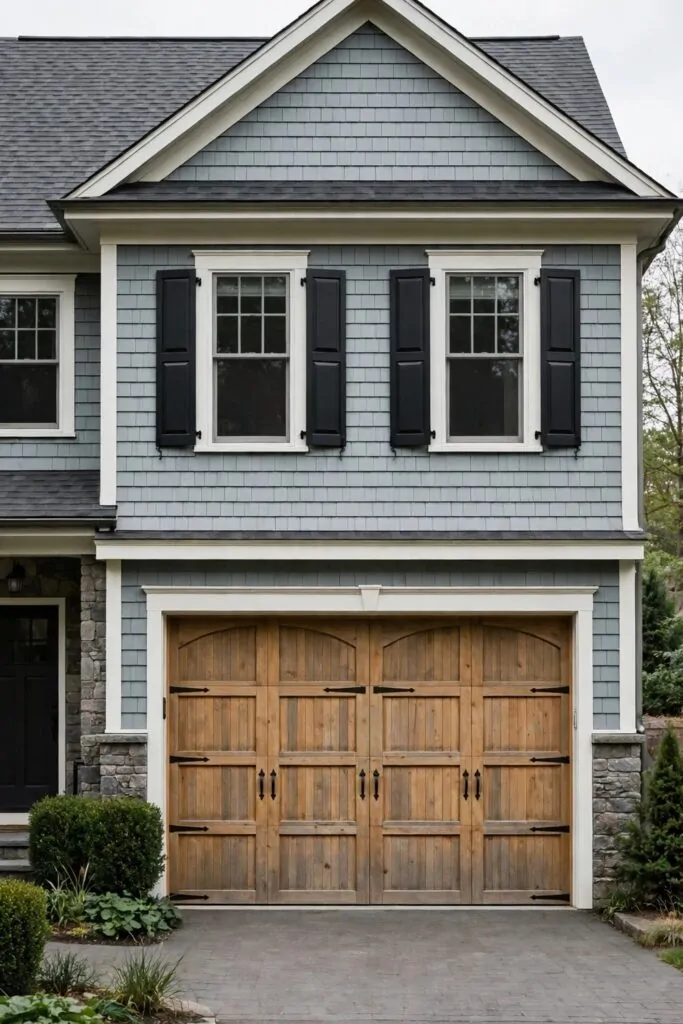
Carriage house style doors look like old barn doors. They have cross bars and black hinges that give them charm.
The black hardware is the key part of this look. Big hinges and handles stand out against the door panels.
I added fake hinge straps to my plain door first. They screw on flat and give the door that old style at once.
Then I added black pull handles low on each side. They look like the handles on an old carriage door.
Measure twice before you drill any holes. Mark each spot with a pencil so the straps sit level.
Typical cost $180 to $450.
Black hinges suit a pale door best, as the dark metal shows up well. They also suit a wood stain door.
Keep the rest of the front simple so the door stays the star. Plain trim and a tidy path work well.
This style suits a house with a country feel. It adds warmth and charm without a full new door.
9. Windows Across the Top of the Door
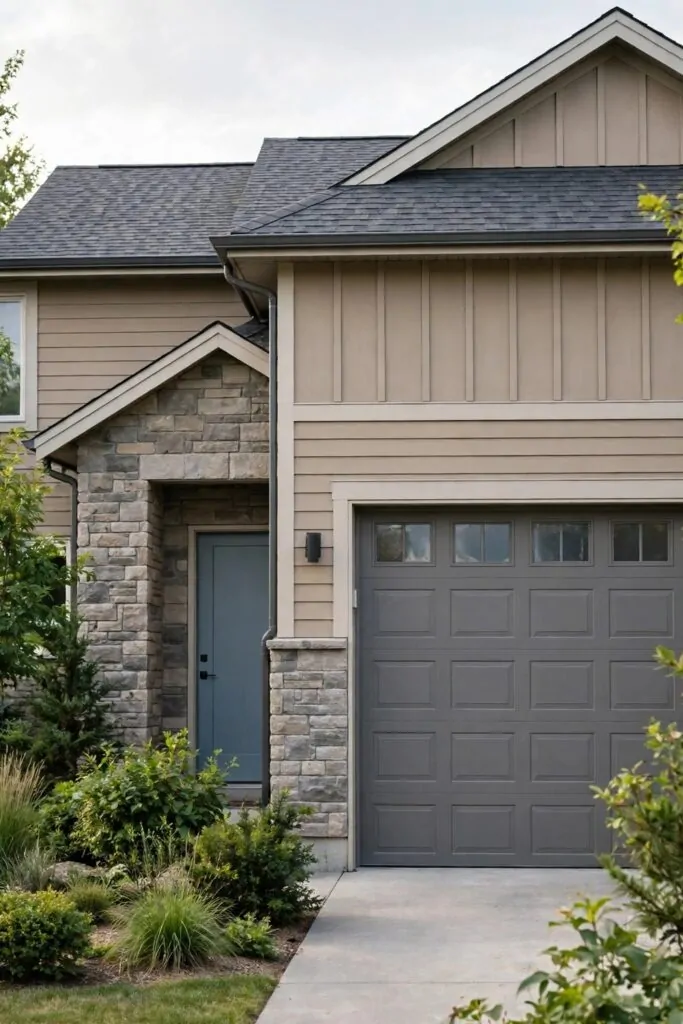
Windows across the top of the door let light into the garage. They also make the door look lighter and more open.
I like how the top row of windows breaks up a big plain door. It gives the door a friendly face from the street.
Clear glass lets in the most light. Frosted glass lets in light too but keeps the inside of the garage private.
You can buy a door with windows built in, or add a window kit to the door you have now. A kit is the cheaper way.
Measure the top panel with care before you cut or fit anything. The windows must sit level in a straight row.
Typical cost $250 to $600.
Keep the window frames the same tone as the door. Matching frames make the row look neat and planned.
Clean the glass from inside and outside once a month. Clean glass keeps the light bright in the garage.
This idea suits a dark garage that needs more daylight. It also suits a house where the door feels too big and plain.
10. Small Square Windows in a Row
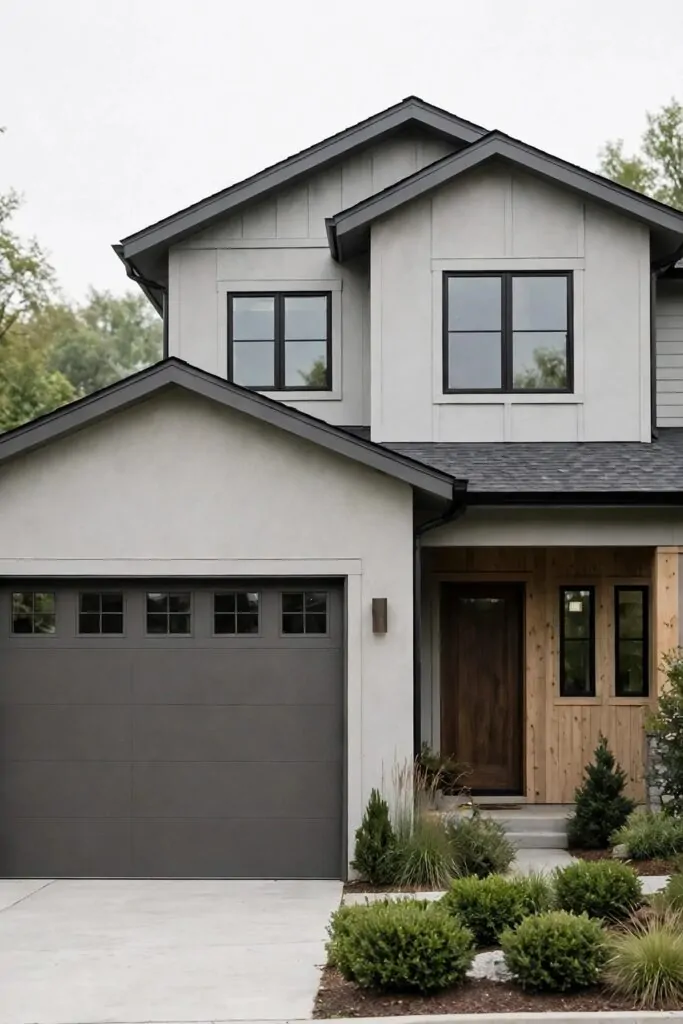
I love how a plain door looks with small windows across the top.
A row of little square windows lets in a bit of sun. You can see a soft glow inside the garage on a bright day.
I picked the same size for each window so the row looks neat.
You can fit them high up, so no one can see in from the street. That keeps your stuff private and still lets sun in.
Typical cost $40 to $85.
I wiped the glass clean each week when I first fit mine. It only takes a minute and the row stays bright.
Small squares suit a wide door and a narrow door too.
You can pick clear glass or a frosted style if you want more privacy. I went with clear glass and I like it a lot.
Try it on your own door and see how the front of the house changes. A small row can make a big change to how it feels.
| Idea | Main change | Typical cost |
|---|---|---|
| A Fresh Coat of White Paint on the Door | Paint the garage door bright white | $35 to $70 |
| Soft Grey Paint for a Calm Front | Paint the garage door soft grey | $40 to $85 |
| Deep Navy Paint for a Bold Door | Paint the garage door deep navy | $45 to $90 |
| Sage Green Paint for a Soft Look | Paint the garage door sage green | $40 to $85 |
| Black Paint for a Smart Modern Door | Paint the garage door black | $45 to $95 |
| Natural Wood Stain for a Warm Door | Stain the garage door with natural wood stain | $60 to $140 |
| Two-Tone Paint with a Dark Frame | Paint the frame dark and the panels light | $55 to $120 |
| Carriage House Style Doors with Black Hardware | Add carriage style doors with black hardware | $180 to $450 |
| Windows Across the Top of the Door | Add windows across the top of the door | $250 to $600 |
| Small Square Windows in a Row | Fit small square windows in a row | $40 to $85 |
| Total | $790 to $1820 |
11. Arched Windows for a Soft Shape
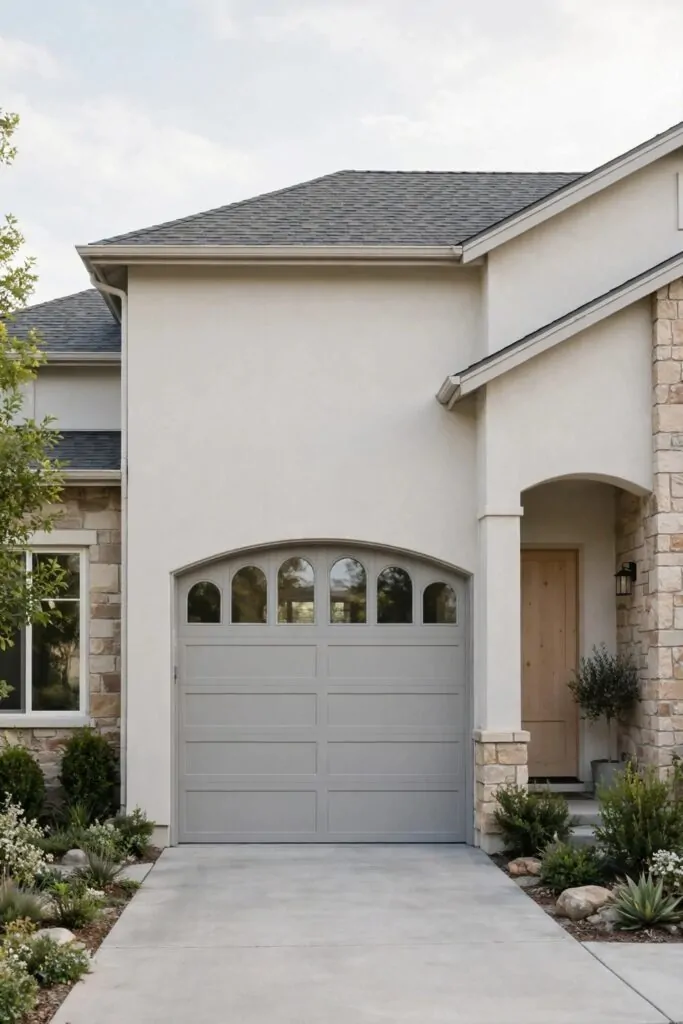
An arched window makes a plain door look softer at once.
I like the curved top because it breaks up all the straight lines. It gives the door a friendly feel.
You can put one arch in the middle or a few across the top.
I chose a small arch for my door and it changed the whole front. My neighbours noticed it on the first day.
Typical cost $60 to $120.
Arched glass lets in soft sun in the morning. You will notice it most on a clear day.
Keep the frame simple so the curve can stand out.
You can paint the frame the same colour as the door, or a shade darker. I kept mine the same and it looks calm.
If your house has a curved path or a round window somewhere, this shape fits right in. It ties the front together in a quiet way.
12. Frosted Glass Panels for Privacy
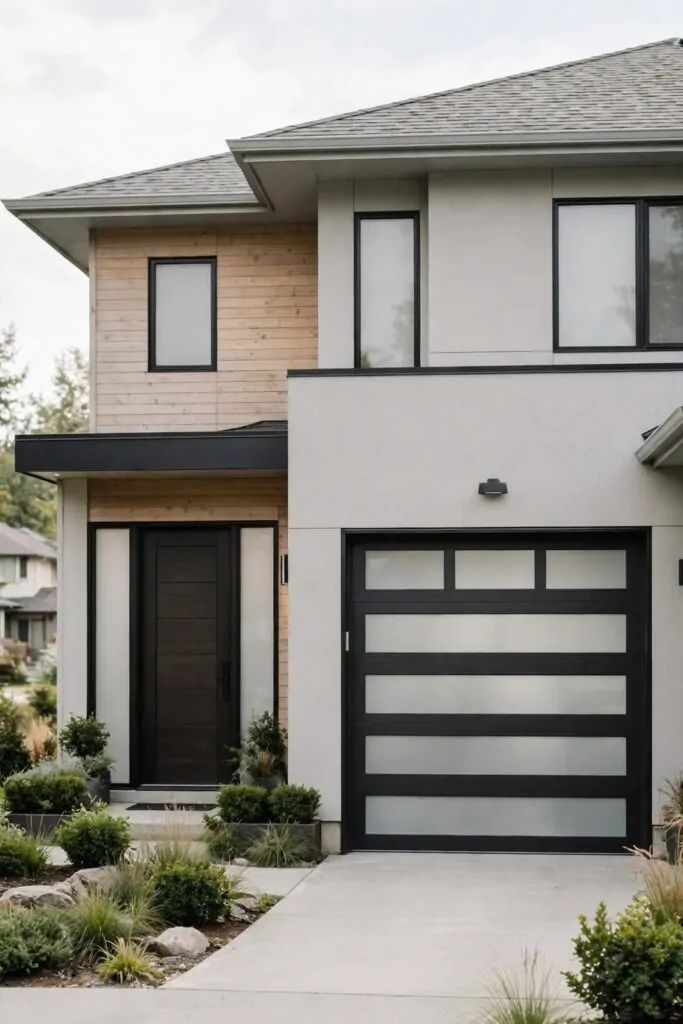
Frosted glass lets sun in but no one can see through it.
I like it for my garage because I keep boxes and tools in there. You get the sun in without showing everything you own.
You can swap one panel at a time if you do not want to change the whole door.
The frosted look stays neat even when the glass gets a bit dusty. I wipe mine with a damp cloth and it looks new again.
Typical cost $55 to $110.
Pick a simple frosted style with no pattern on it.
You can pair the panels with plain handles and the door still looks clean. I did that and the front feels tidy now.
Frosted glass works well on a busy street too. It gives you sun and privacy in one go.
Try it if you want sun in the garage without opening the door. It is a small change that helps every day.
13. New Black Handles and Hinges
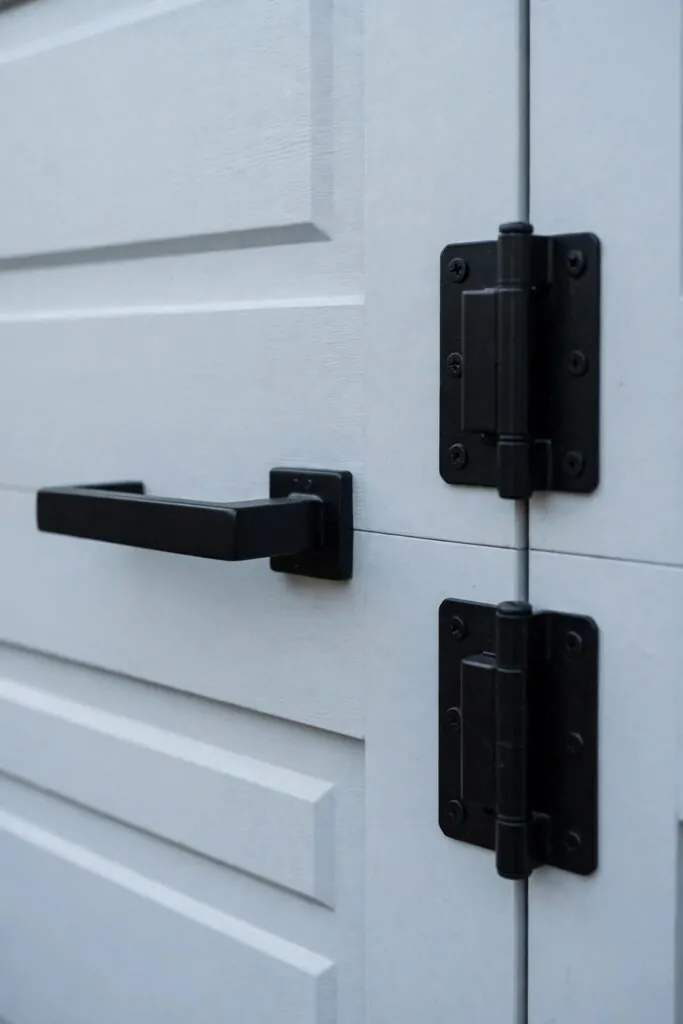
New black handles can wake up an old door in an afternoon.
I swapped my worn handles for plain black ones and the door looked new. You can do it with a screwdriver and a bit of time.
Black hinges match the handles and make the door look finished.
Pick a plain shape with no fancy curls on it. I went with a simple bar handle and it suits the door well.
Typical cost $25 to $70.
Wipe the handles clean before you fit them so they stay shiny.
You can match them with a black lamp by the door too. It pulls the front together in a simple way.
Check the screws are tight after a week or two. Mine loosened a little and a quick turn fixed it.
Small black details make a plain door look smart. Try it and you will see the change from the street.
14. A Plain Pergola Over the Door
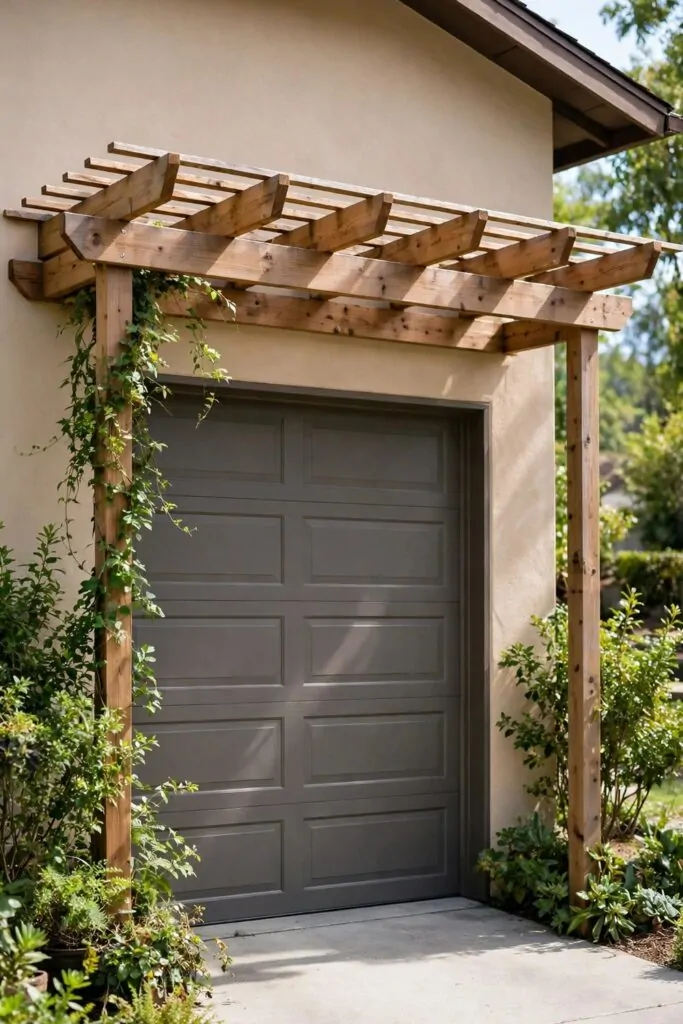
A plain pergola over the door gives the front a bit of shade.
I built a simple wood frame above my door and it changed the look at once. You can sit under it on a warm day and enjoy the shade.
Keep the beams plain and straight, with no extra carving on them.
You can grow a green vine over the top if you like plants. I let mine grow slow and it looks soft now.
Typical cost $180 to $420.
A pergola also keeps a bit of rain off the top of the door.
Paint the wood the same shade as your trim, or leave it bare. I left mine bare and it turned a soft grey over time.
Make sure the frame is fixed tight to the wall so it stays put in wind.
If you want a simple change with a big feel, this is a good one. It frames the door and makes the house look cared for.
15. A Small Awning Over the Door
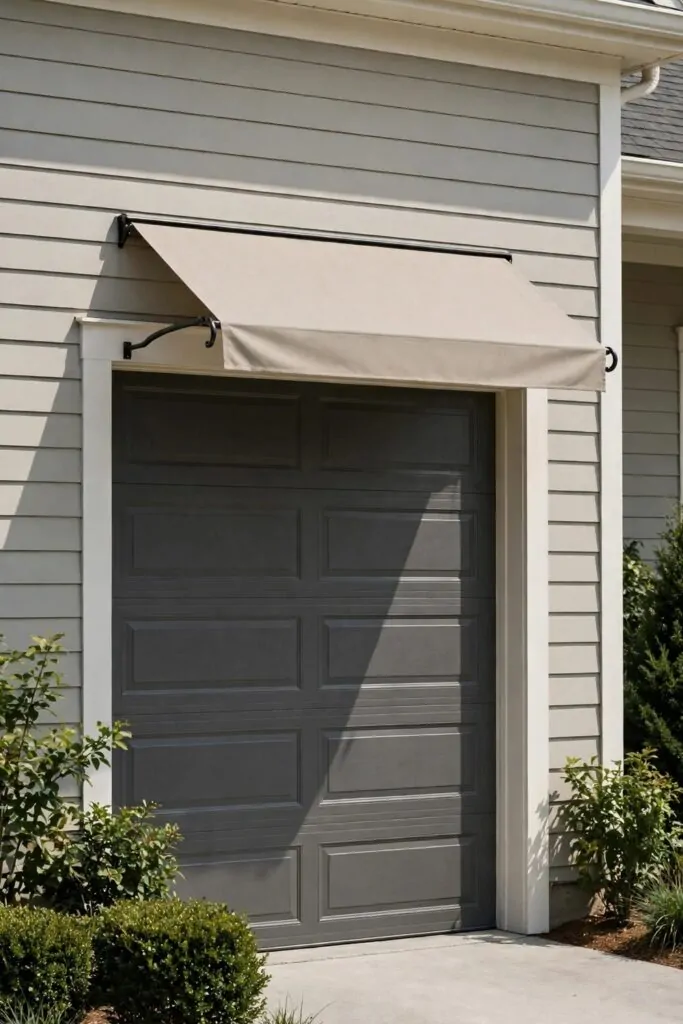
A small awning over the door keeps rain off the top edge.
I fitted a plain fabric awning and now the door stays dry in a shower. You can step out without getting wet right away.
Pick a plain colour that matches your door or your trim.
The fabric should be pulled tight so rain runs off it. I check mine after a storm and shake the drops off.
Typical cost $90 to $240.
An awning also gives a bit of shade on a hot day.
You can take the fabric down in winter and wash it. I wash mine once a year and it looks fresh again.
Keep the frame simple, with straight arms and no extra bits.
Try a small awning if your door faces the rain a lot. It is a cheap fix that makes coming home nicer.
16. Climbing Plants Beside the Door
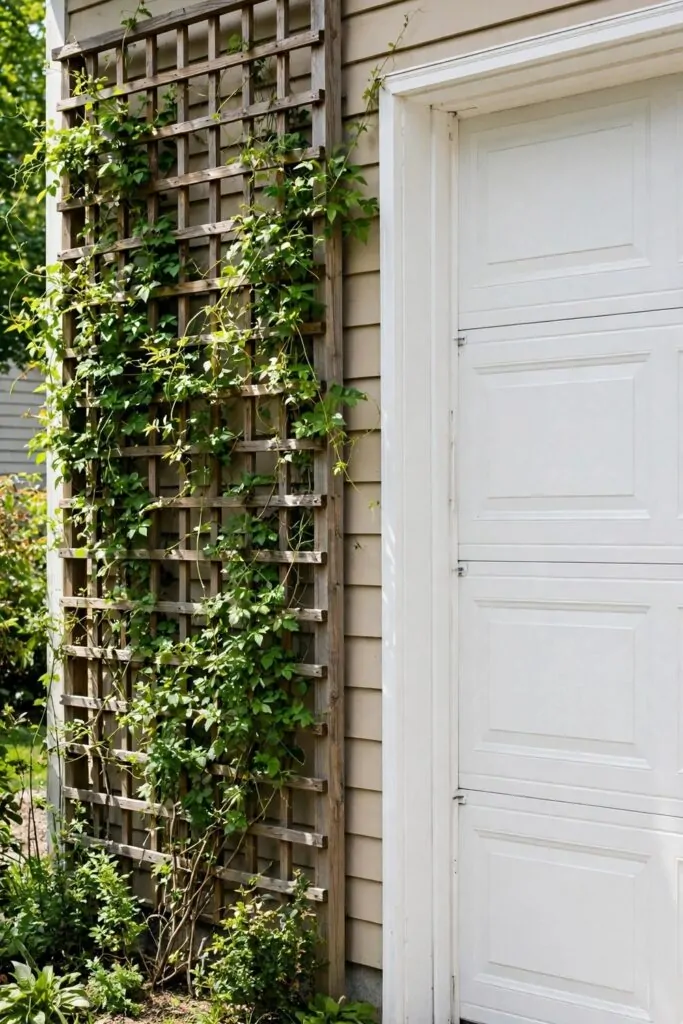
Climbing plants beside the door make the front feel alive.
I planted a green vine by the side of my door and it grew up the wall. You can watch it climb a little more each week.
Pick a plant that suits your sun and your soil.
Give it a simple trellis or a few wires to hold on to. I used a plain trellis and the plant found its way up on its own.
Typical cost $30 to $80.
Trim the plant back when it starts to cover the door frame.
Give it a good drink each morning in the first few weeks till the roots take hold. I watered mine each morning till it looked strong.
Green leaves next to a plain door look soft and fresh.
If you like a natural look, this is an easy way to get it. The door stays the star and the plant frames it well.
17. Potted Plants on Each Side of the Door
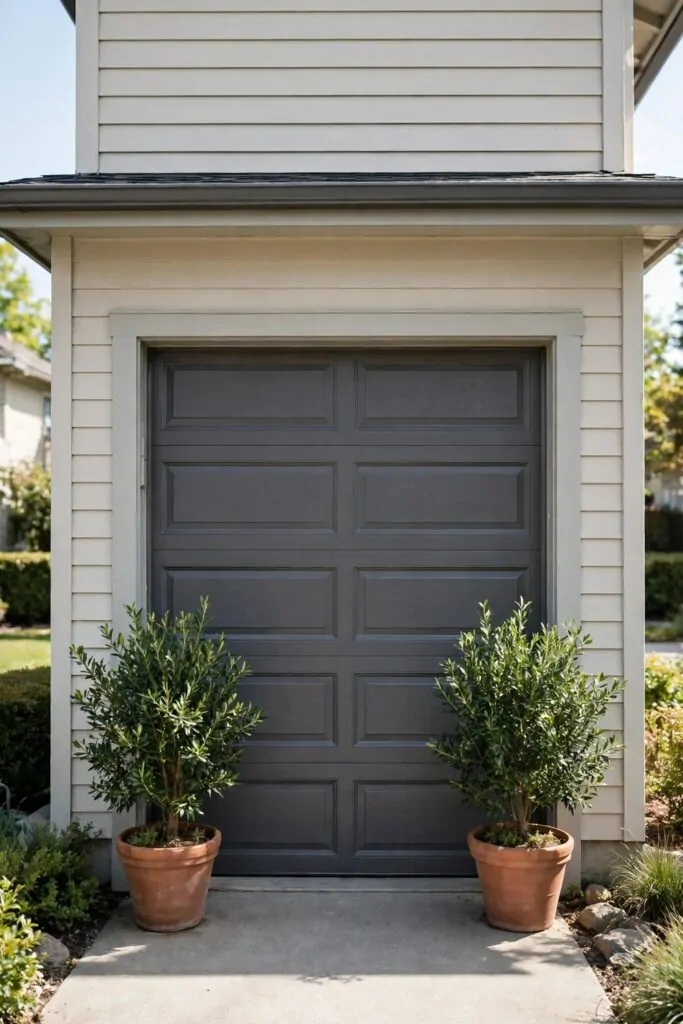
Two pots, one on each side of the door, make the front look balanced.
I put a green plant in each pot and the door felt welcoming at once. You can swap the plants with the seasons if you like.
Pick pots that are the same size and the same colour.
Heavy pots stay put in wind and do not tip over easy. I filled the bottom with stones so mine sit firm.
Typical cost $35 to $95.
Water the plants when the soil feels dry on top.
You can use tall plants for a grand feel, or low ones for a neat look. I went with low green plants and they suit my door.
Keep the pots clean and brush off dirt when you sweep the path.
Try this if you want a quick change with no big work. Two pots can lift the whole front in an afternoon.
18. A Stone Path to the Door
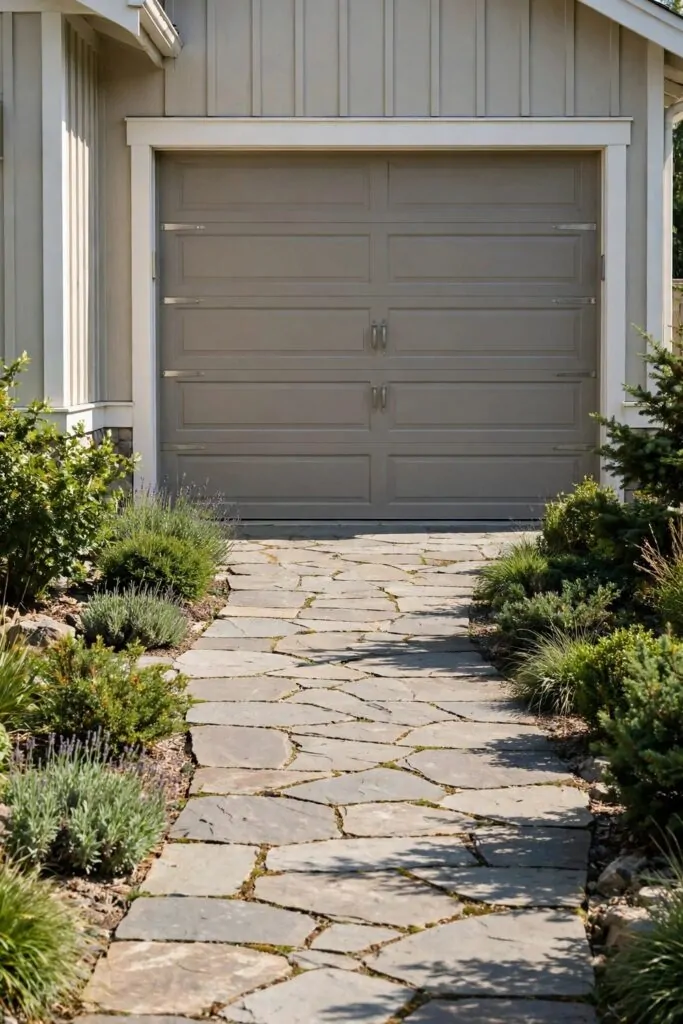
A stone path to the door makes the front feel solid and neat.
I laid flat stones from my drive to the door and it changed how I walk in. You can step on them even when the grass is wet.
Pick stones that are wide enough for your feet.
Leave a small gap between each stone for a natural look. I filled the gaps with soil and tiny green plants grew in.
Typical cost $120 to $300.
A stone path also keeps mud off your shoes on rainy days.
You can edge the path with small stones or low plants. I used low plants and the edge looks soft now.
Sweep the stones now and then so they stay clean.
Try a stone path if your door opens straight onto grass. It gives you a clear way in and it looks good too.
19. New Driveway Edging by the Door
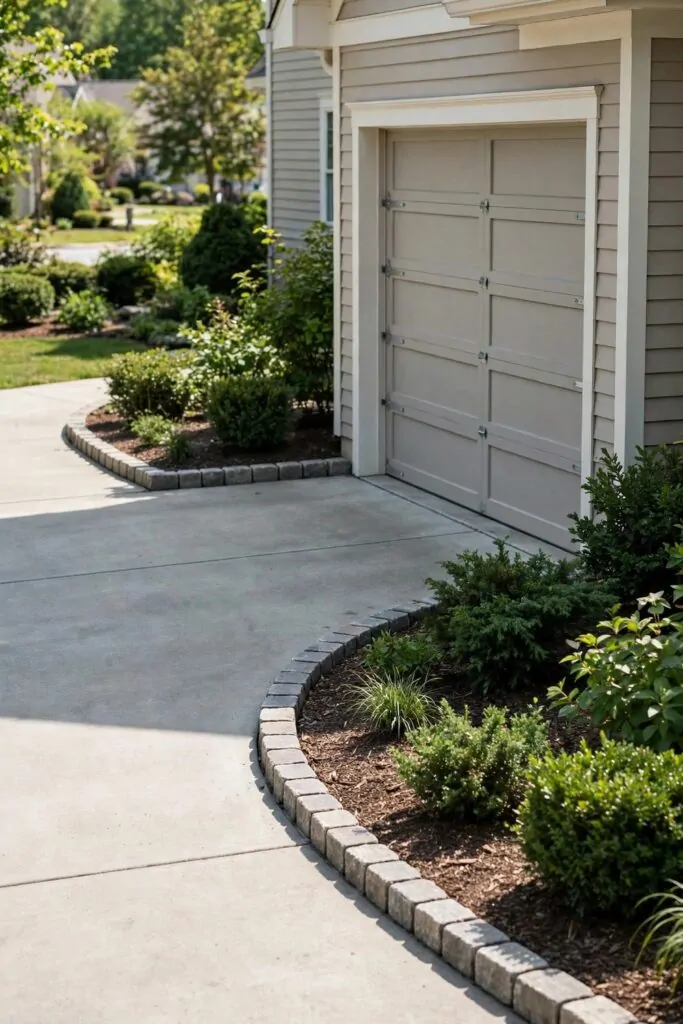
I looked at the edge where my driveway meets the grass.
The line was soft and messy. I wanted a clean edge that would frame the garage door and make the whole front look tidy.
I picked small flat stones for the job.
I set them in a row along both sides of the driveway near the door. I pressed each one down firm so it would not wobble when I walked past it.
The stones gave the driveway a clear border.
You can use bricks or short pavers too if you like that look better. Just keep the line straight and the tops level with each other.
I swept the loose dirt off the stones when I was done. Then I stepped back to the street and looked at the door again.
Typical cost $30 to $65.
That neat edge made the garage door stand out in a good way.
20. Solar Lights Along the Driveway
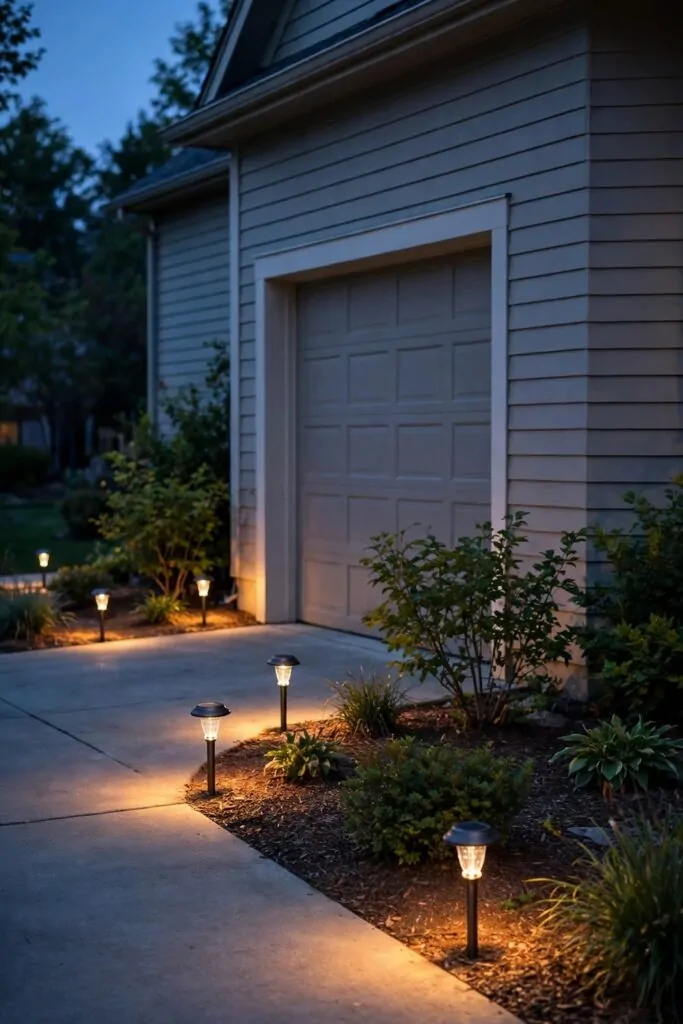
I wanted the path to the garage door to feel safe at night.
I picked small solar lights that sit low to the ground. They charge in the sun all day and turn on by themselves when it gets dark.
I placed them in a line along the driveway.
I spaced them out so each one had room to shine on its own patch of ground. I pushed each stake into the soil until it felt steady.
The line of lights leads your eye right to the door.
You can move them around until the spacing looks right to you. I moved two of mine twice before I was happy with the line.
I clean the tops when they look dull so the sun can still reach them well. A fast wipe keeps them bright.
Typical cost $25 to $55.
At night the driveway feels calm and easy to walk.
| Idea | Main change | Typical cost |
|---|---|---|
| Arched Windows for a Soft Shape | Fit arched windows for a soft shape | $60 to $120 |
| Frosted Glass Panels for Privacy | Fit frosted glass panels for privacy | $55 to $110 |
| New Black Handles and Hinges | Fit new black handles and hinges | $25 to $70 |
| A Plain Pergola Over the Door | Build a plain pergola over the door | $180 to $420 |
| A Small Awning Over the Door | Fit a small awning over the door | $90 to $240 |
| Climbing Plants Beside the Door | Plant climbing plants beside the door | $30 to $80 |
| Potted Plants on Each Side of the Door | Put potted plants on each side of the door | $35 to $95 |
| A Stone Path to the Door | Lay a stone path to the door | $120 to $300 |
| New Driveway Edging by the Door | Edge the driveway with neat stones | $30 to $65 |
| Solar Lights Along the Driveway | Line the driveway with small solar lights | $25 to $55 |
| Total | $650 to $1555 |
21. A Wall Lantern Beside the Door
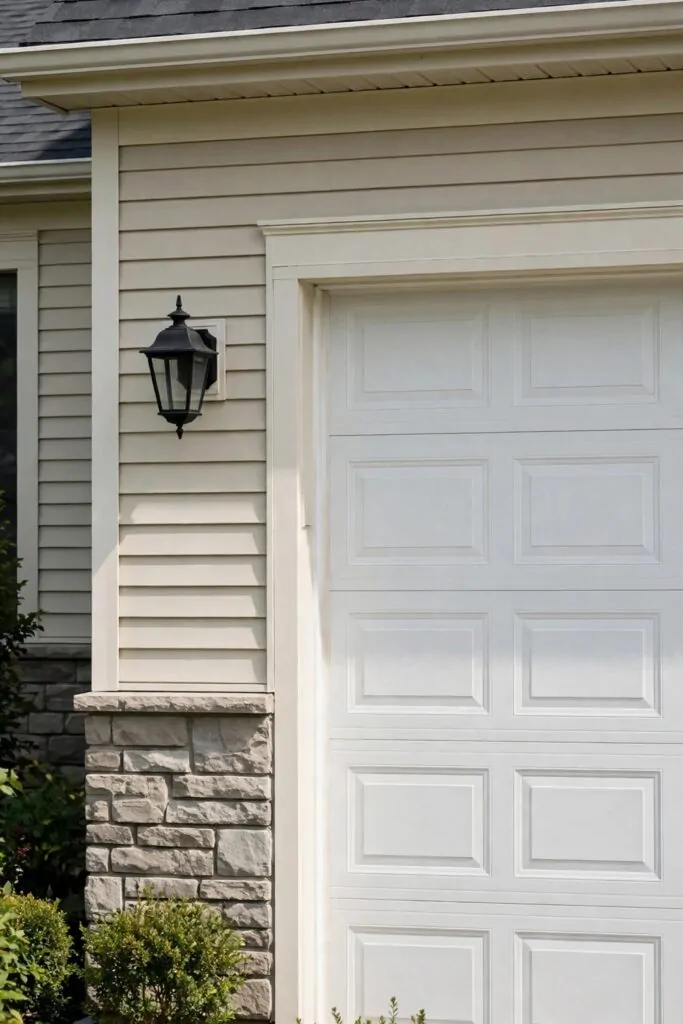
I wanted something simple on the wall beside the garage door.
I picked a plain wall lantern with a clear glass front and a dark metal frame. It looks neat in the daytime and adds shape to a bare wall.
I hung it at eye level beside the door.
I made sure it sat straight and close to the wall. I checked it from the street to see how it looked next to the trim.
The lantern gives the door a finished feel.
You can pick a small one if your wall space is tight. A big one works well too if you have a wide wall and want it to show.
I dust the glass now and then so it stays clear. A clean lantern looks much better than a dusty one.
Typical cost $20 to $48.
That one small fixture made the whole wall look planned.
22. A Wooden Bench Beside the Garage Door
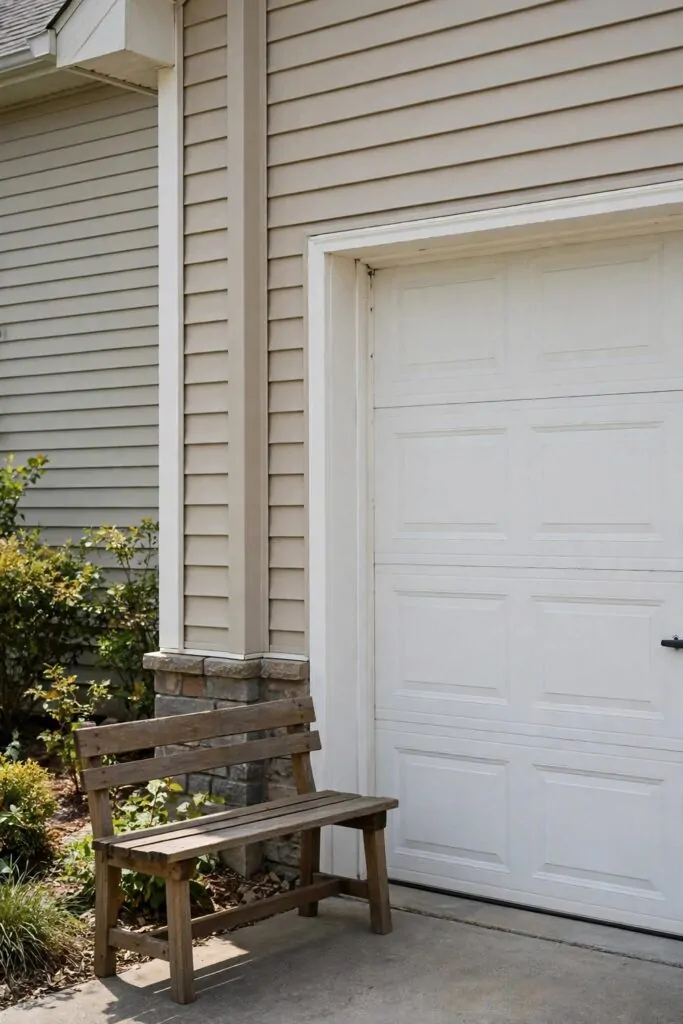
I had an empty spot beside the garage door that looked bare.
I put a plain wooden bench there. It gave me a place to sit while I tied my shoes or waited for a ride.
The bench is low and simple.
I set it flat against the wall so it would not block the door. I checked that the door could open and close with room to spare.
You can leave the bench bare or add a plain cushion.
I keep mine bare most days because it is easy to wipe clean. When it rains I brush the water off the seat with my hand.
The wood adds a warm touch next to the door.
Typical cost $45 to $90.
Now that corner feels useful instead of empty.
23. A Painted Border Around the Door Frame
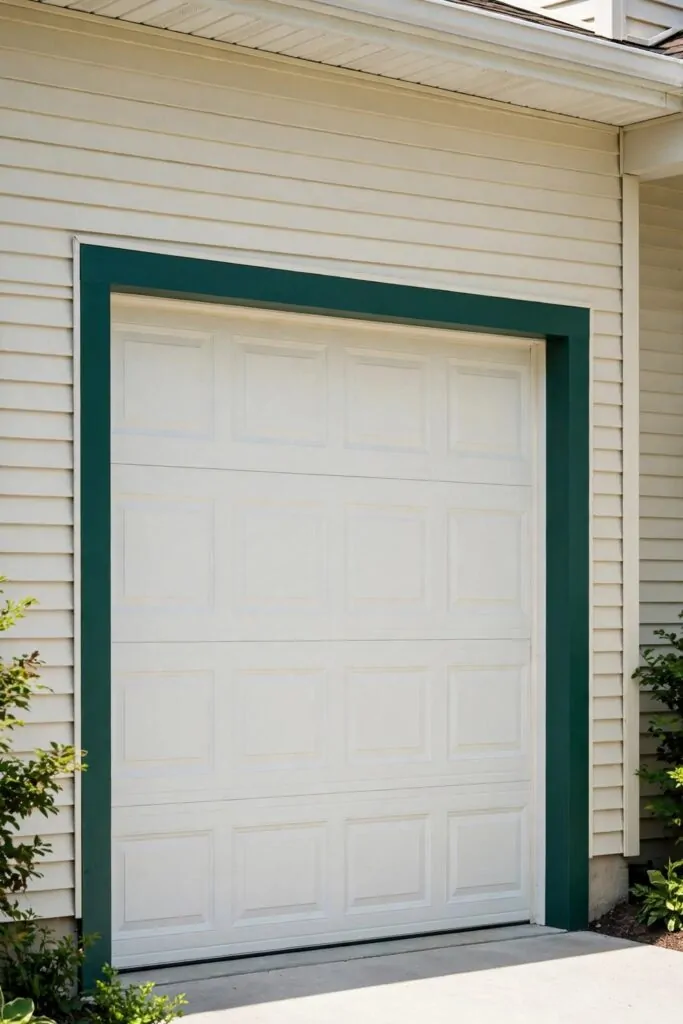
I wanted the garage door frame to stand out a little more.
I painted a plain border around the frame in a deep green shade. It took one small brush and a steady hand.
I cleaned the frame first so the paint would stick well.
I taped the edges so the line would stay neat. Then I painted slow strokes from top to bottom on each side.
The border frames the door like a picture frame.
You can pick a deep tone that matches your house. I kept mine dark green so it would frame the white door.
I waited for the first coat to dry right through before I brushed on the next one. Two thin coats look much smoother than one thick coat.
Typical cost $12 to $28.
That deep green band made the door look fresh again.
24. Trim in Bright White Around the Door
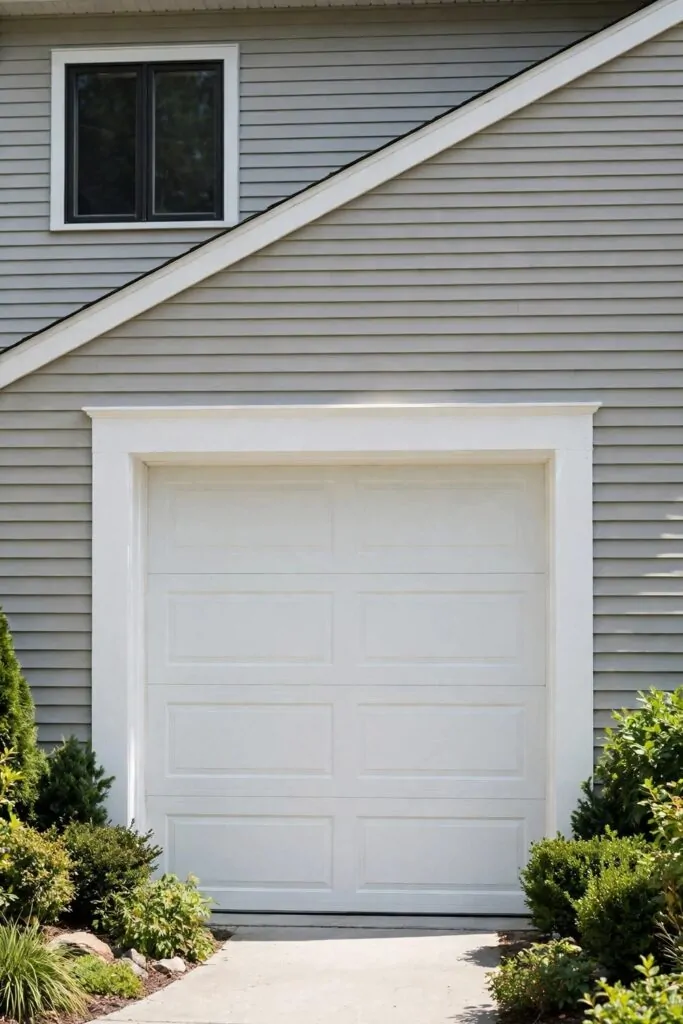
My old trim looked dull and tired next to the door.
I painted it bright white. The fresh white made the whole door area look clean and new.
I washed the trim first with warm water and a cloth.
I let it dry in the sun before I opened the paint tin. Then I brushed on a thin coat from one end to the other.
The white trim pops against the wall.
You can use a small brush for the corners and a wider brush for the long runs. That mix keeps the work fast and neat.
I added a second coat the next day. The second coat covered the old marks that the first coat had missed.
Typical cost $18 to $40.
Now the door looks bright every time I pull into the driveway.
25. A Plain Wreath of Green Leaves on the Door
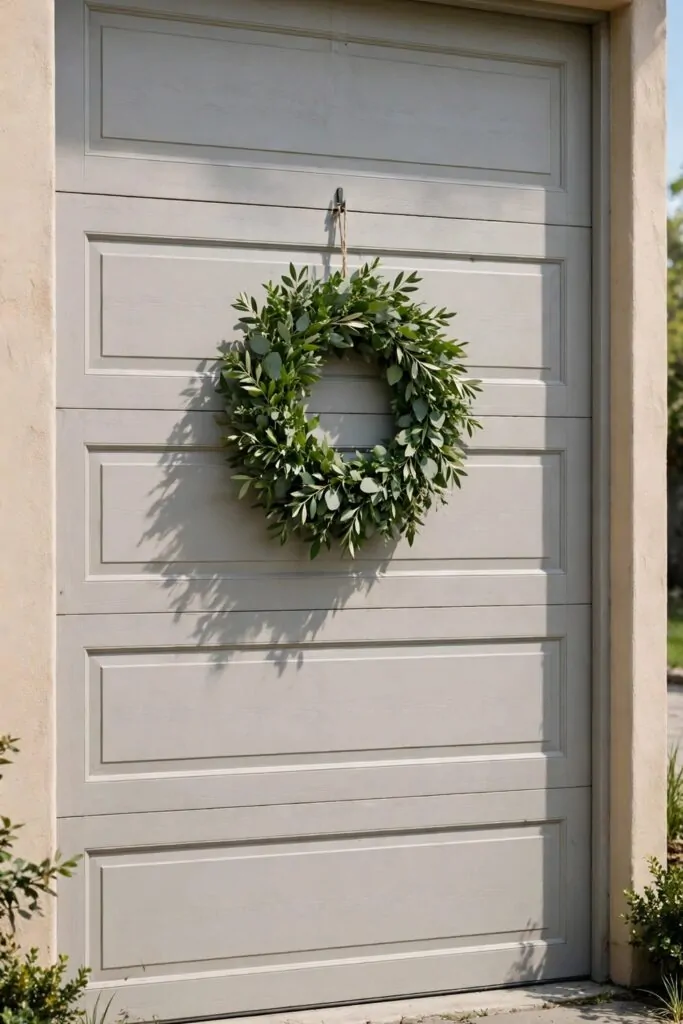
I wanted a soft touch on the garage door for any time of year.
I hung a plain wreath made of green leaves. It has no extra bits on it, just leaves in a round shape.
I hung it in the middle of the door with a small hook.
I stepped back to check that it sat level. I moved it a tiny bit to the left until it looked right.
The green leaves add life to a plain door.
You can pick leaves in one shade of green or a mix of soft greens. I like the mix because it looks more natural up close.
I take the wreath down now and then and shake off the dust. A quick shake keeps the leaves looking fresh.
Typical cost $15 to $32.
That simple wreath makes the door feel friendly all year.
26. A New Seal Along the Bottom of the Door
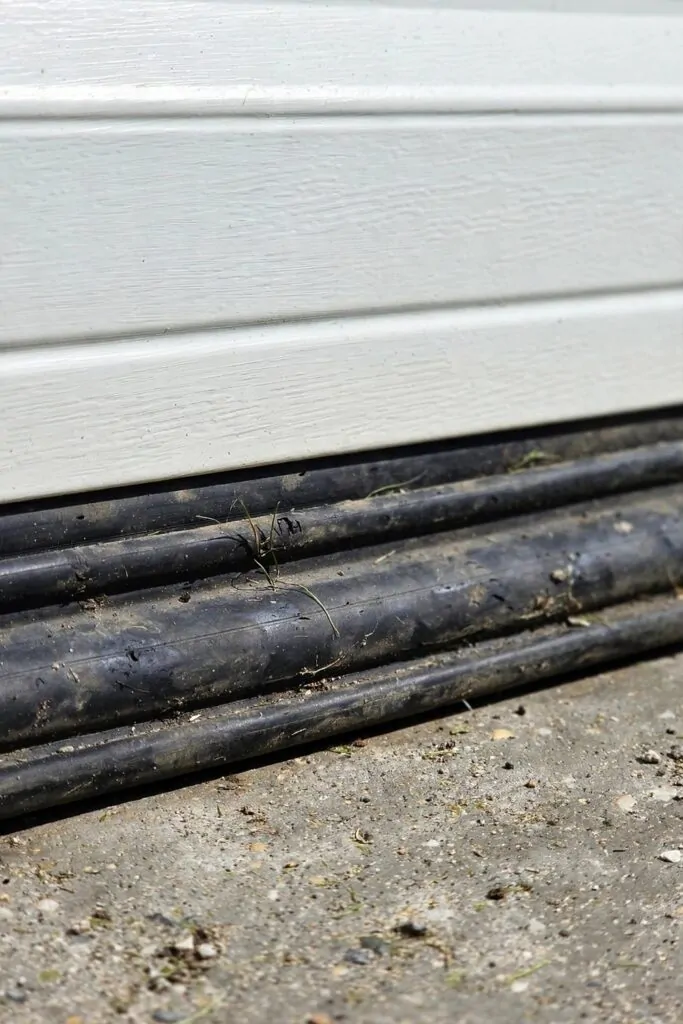
I could feel a cold draught under my garage door on windy days.
I checked the old seal at the bottom and saw it was flat and worn. It did not press against the ground the way it should.
I bought a new rubber seal to fit the door.
I pulled the old one out and cleaned the track. Then I slid the new seal in slow and made sure it sat even all the way across.
The new seal closes the gap at the bottom.
You can trim the ends with care if the seal is a bit long for your door. Just measure twice and cut once so it fits snug.
I closed the door and looked at the seal from outside. It touched the ground in a neat line from one side to the other.
Typical cost $10 to $25.
Now the garage feels drier and less draughty inside.
27. A Small Garage Door Care Kit
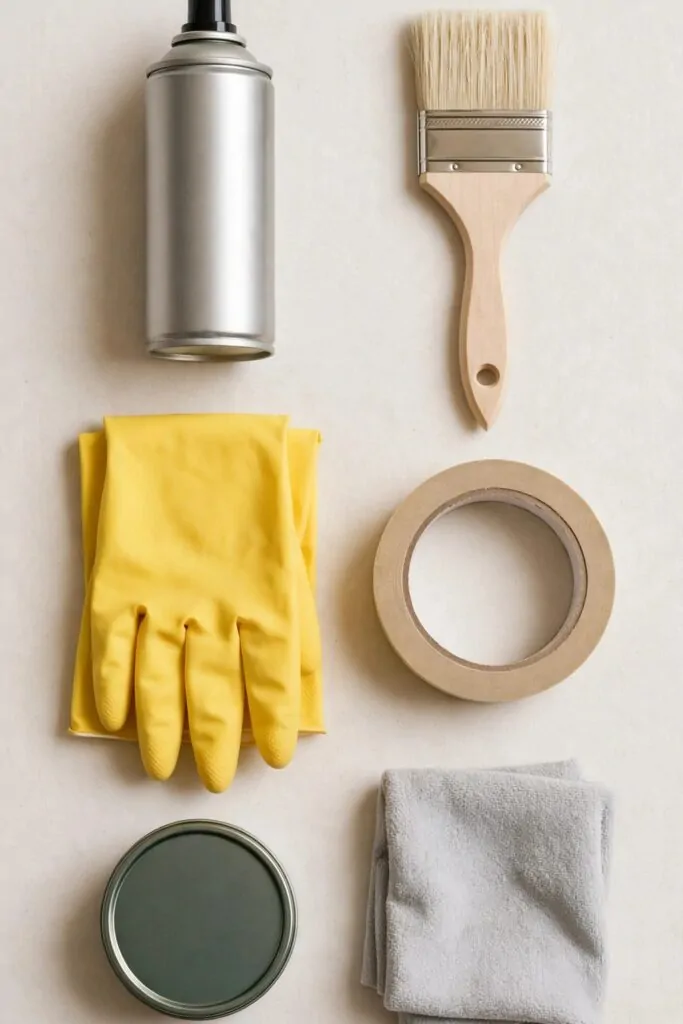
I keep a small care kit by the garage door so I can fix little marks fast.
The first thing in my kit is a can of spray lubricant. I spray a little on the hinges and rollers when the door starts to feel stiff, and it moves smooth again.
Next I keep a clean paintbrush in the kit. I use it to brush touch-up paint on small marks, and the brush leaves a neat edge with no mess.
I also keep a pair of rubber gloves in the kit. The gloves keep my hands clean while I spray and paint, and I can pull them off and wash them after.
A roll of masking tape is in the kit too. I stick the tape along the edges before I paint, so the paint stays where I want it and the trim stays clean.
The kit holds a tin of touch-up paint that matches the door. I dab a little on small chips with the brush, and the mark blends in well once it dries.
Last in the kit is a soft rag. I use the rag to wipe dust off the door and to wipe up any small drips before they dry.
Typical cost $6 to $10 for the spray lubricant, $4 to $7 for the paintbrush, $3 to $6 for the gloves, $3 to $5 for the masking tape, $8 to $14 for the touch-up paint, and $2 to $4 for the rag, for a total of $26 to $46.
Keep this little kit by the door and small jobs stay small.
| Idea | Main change | Typical cost |
|---|---|---|
| a can of spray lubricant | Spray the hinges and rollers with a can of spray lubricant | $6 to $10 |
| a clean paintbrush | Brush touch-up paint on small marks with a clean paintbrush | $4 to $7 |
| a pair of rubber gloves | Keep your hands clean with a pair of rubber gloves | $3 to $6 |
| a roll of masking tape | Mask the edges neatly with a roll of masking tape | $3 to $5 |
| a tin of touch-up paint | Cover small chips with a tin of touch-up paint | $8 to $14 |
| a soft rag | Wipe the door clean with a soft rag | $2 to $4 |
| Total | $26 to $46 |
Keep Reading
If you liked these ideas, you will love these posts too
Each post has more simple ideas you can try at home this weekend.