21 Wedding Photo Studio Ideas for Timeless Portraits

Think about the oldest wedding photo in your family. The colors might be faded. The edges might be curled. The hair might be big enough to make you laugh. But you still stop and look, every time you walk past it.
That is what I call timeless. Not fancy. Not trendy. Just a photo that still feels good to look at, twenty or fifty years later.
I have spent years looking at wedding photos from every era. The ones that age well all share one thing. They were taken in front of simple, elegant setups that let the people be the star. That is the heart of these 21 Wedding Photo Studio Ideas.
Each idea in this list is a full studio look you can build. Floral arches, soft drapes, vintage corners, all of it. They are made to look just as beautiful on a fifty-year anniversary as they do on the wedding day itself.
So grab a cup of tea and come look through them with me. By the end, you will know exactly which look fits your day. Let us start with the most classic of them all.
1. Classic White Floral Arch
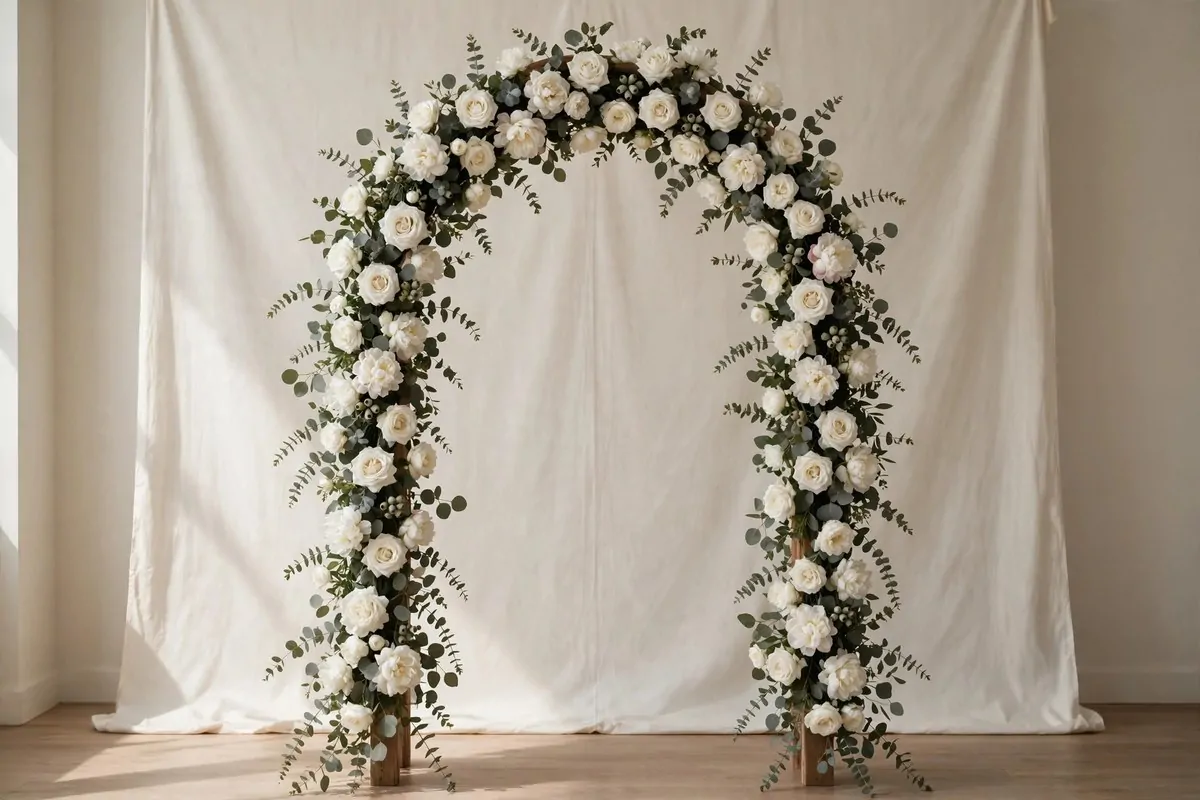
There is a reason the white floral arch never goes away. It just works, every single time.
White roses and peonies on a tall arch make the most gentle frame for a portrait. Your eye goes straight to the faces. The flowers hold the photo together around the edges.
Use a mix of real blooms and good faux ones to keep costs kind. Place the fuller clusters at the top and let a few trails fall down the sides. That soft fall is what makes it look expensive.
Keep the backdrop behind the arch plain. Ivory fabric or a warm white wall is perfect. Anything too busy will fight with the flowers.
Add a touch of greenery between the blooms. Eucalyptus or soft fern leaves add depth without stealing attention. A little goes a long way here.
Ask your florist to build the arch on a rental frame. That way it stands straight all day. You do not want flowers drooping before the last photo.
This look suits every dress style. A big ball gown looks grand under it. A simple slip dress looks pure and calm. Even a suit and tie pops nicely against all that white.
The real secret is soft light. Stand the arch a few feet from a big window, or use one soft lamp to the side. Harsh light washes white flowers out. Soft light makes them glow.
If you want it extra dreamy, add a thin gauze curtain behind the arch. It catches the light and gives the whole photo a soft haze. I have seen this one little trick save a plain-looking studio wall.
2. Full Flower Wall
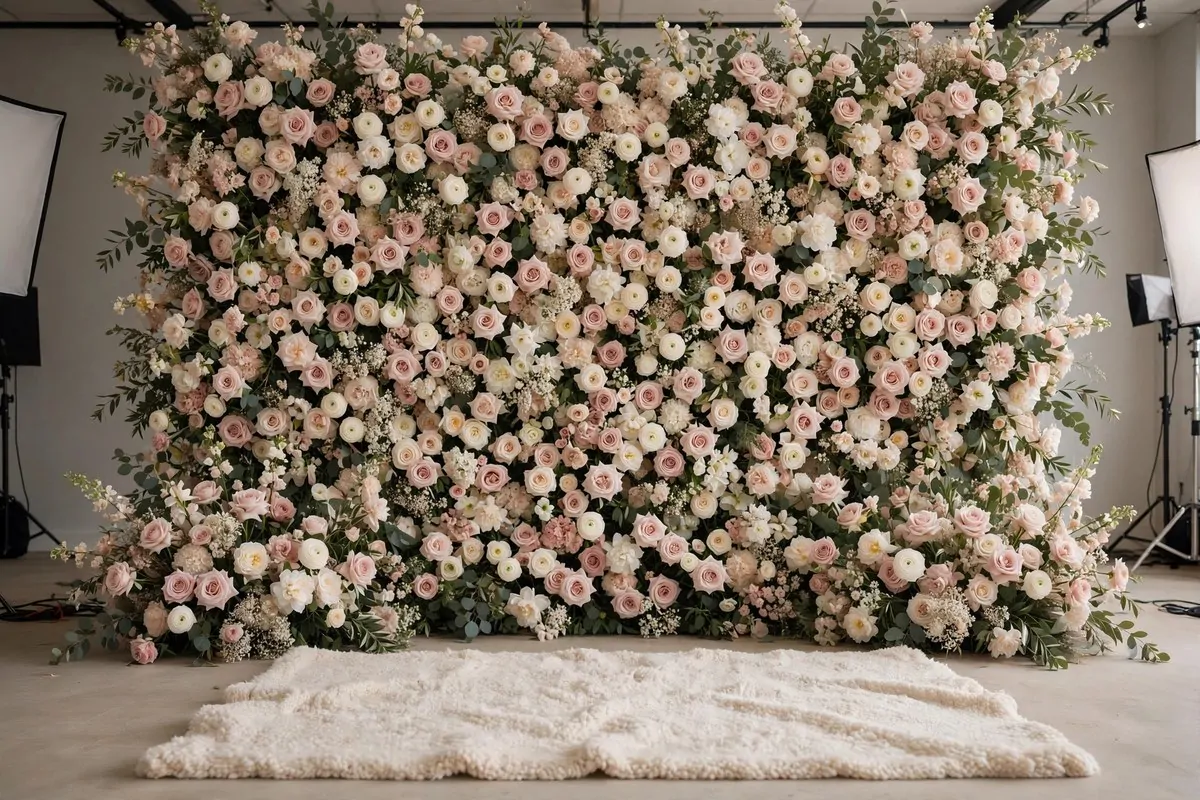
A full flower wall sounds like a lot. In person, it is pure magic.
Every inch of the wall is covered in blooms, so the camera sees nothing but flowers and faces. The result looks rich even in a tiny room. You could be standing in a small studio corner and it reads like a garden.
Blush, ivory, and cream flowers are the safest pick for timeless portraits. They flatter every skin tone. Bright reds and purples can be lovely too, but they date faster. Soft colors stay classic.
Mix real and faux flowers to keep the wall full without a florist’s bill that makes you cry. Put the real ones at eye level and around the middle, where the camera lingers. Faux ones fill the top and bottom corners nicely.
Add a rug under your feet. A wall of flowers with a hard floor underneath can feel a little cold. A soft rug grounds the whole setup and looks better in full-length shots.
Sit on a low stool in front of the wall for one set of photos. Standing for another. The same wall gives you two very different moods just by changing your pose.
Lighting matters more here than anywhere else. Two soft lights, one on each side, keep the wall from going flat. If you only have one light, angle it slightly to the side. That gives the flowers a gentle shadow that shows their texture.
I once saw a couple hang small photo clips among the flowers with tiny prints of their parents’ weddings. It was so sweet, and it cost almost nothing. Little touches like that make the wall personal.
Wipe the wall down before the shoot if you are using faux flowers. Dust shows up in close-ups. A quick lint roll across the blooms takes two minutes and saves you from spotting dusty petals in every photo.
3. Flowing White Drape Backdrop
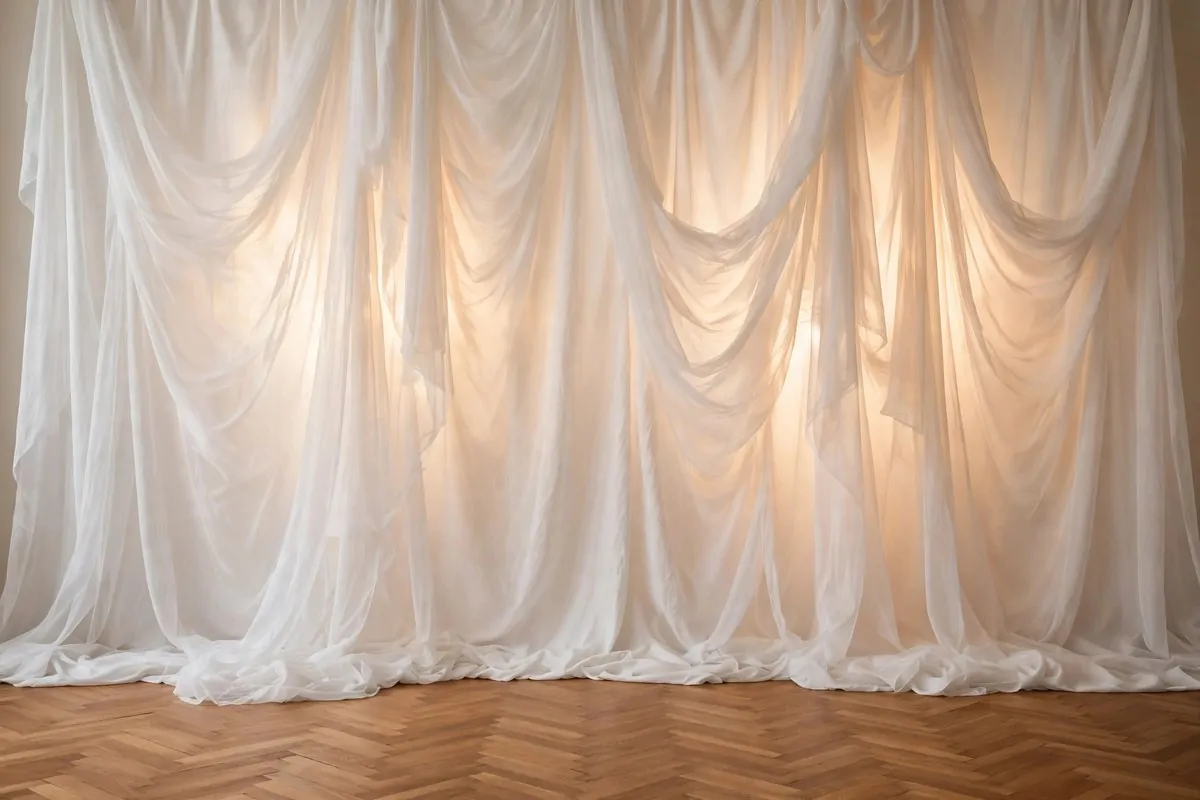
Some of my favorite wedding portraits were taken in front of nothing but fabric. White drapes are proof that simple wins.
Floor-to-ceiling drapes in white or ivory make a clean canvas. The folds catch light and shadow in a way that flat walls never do. Your photos get depth without any clutter.
Hang the fabric loosely, not pulled tight. Loose folds look soft and romantic. Tight fabric looks like a bed sheet. Let it bunch a little at the bottom for that natural drape.
You can rent drape panels from most event shops. Three to five panels usually cover a wide enough area. Overlap them slightly so no gaps show.
Layer two fabrics for extra richness. A solid white base with a sheer voile over it gives you softness and texture at once. In photos, it looks like mist.
Wind is your friend here. If you are shooting near a fan or an open window, let the drapes move a little. Motion in fabric adds life to a still photo.
Stand a few feet in front of the drapes, not right against them. That gap lets the fabric blur softly behind you. Photographers call this depth of field, and it is the easiest way to look professional.
This backdrop works with almost every Wedding Photo Studio Ideas theme because it disappears behind you. Vintage dress, modern dress, cultural dress, it all reads beautifully.
Add a simple garland of greenery across the top of the drapes if you want a little nature. Keep it thin. The drapes are the star. The greenery is just a quiet guest.
4. Fairy Light Curtain With Sheer Fabric
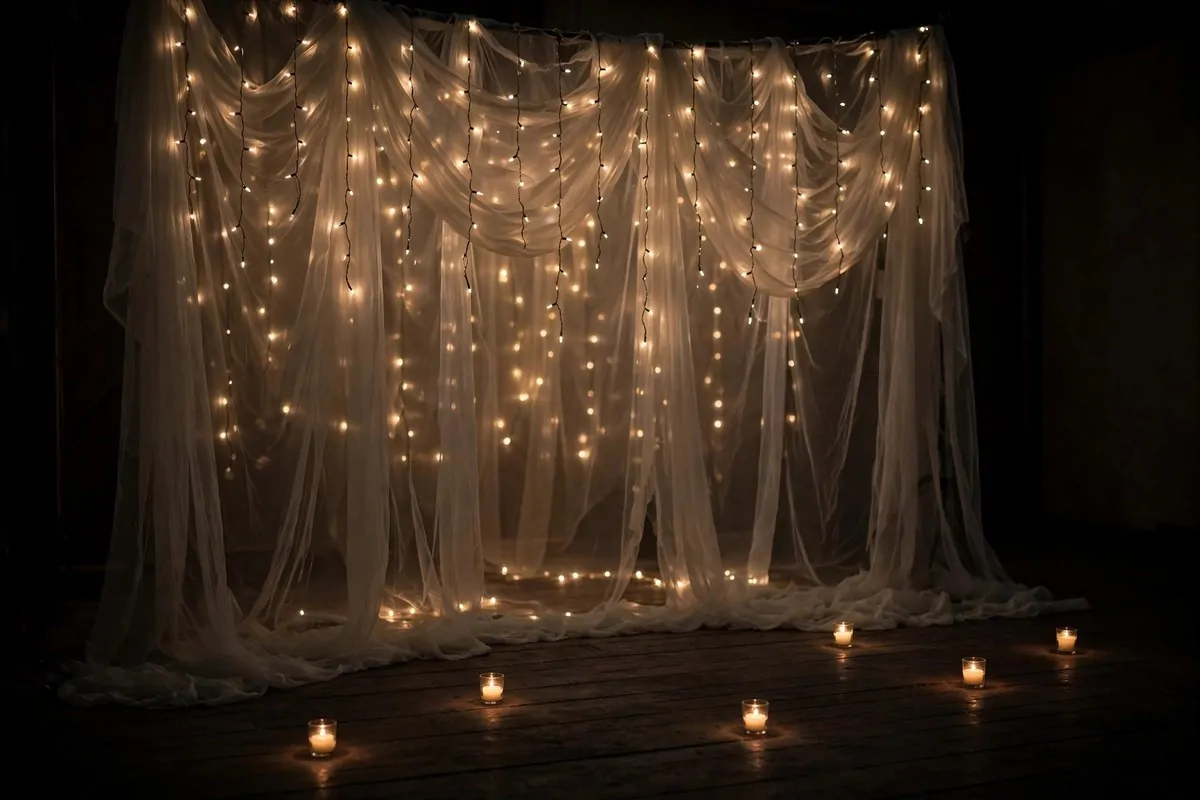
Fairy lights turn an ordinary wall into something that glows. They are small, cheap, and kind of magical.
Hang a curtain of warm white fairy lights behind a sheer ivory fabric. The fabric softens the tiny bulbs into soft blobs of light. The effect looks like fireflies caught behind silk.
Use warm white lights, not cool blue-white ones. Cool lights make skin look pale and tired. Warm lights make everyone glow. It is the easiest lighting upgrade you can buy.
Let the light strings fall at slightly uneven lengths. Perfect rows look stiff. A little randomness looks natural, like stars. Your eyes will thank you.
This setup shines in dim rooms. The darker the room, the more the lights pop. If your studio has big windows, shoot this one later in the day or pull the curtains.
Add a couple of battery candles on the floor nearby. They add warm light at the bottom of the frame. Just keep them away from the fabric.
Keep the rest of the styling minimal. The lights are doing all the work. A plain outfit photographs best against this busy glow.
One trick I love is a slow-exposure shot here. The photographer sets the camera to a long exposure and the lights turn into trails of gold. Ask your photographer if they can do it. The result is unreal.
Battery packs hide easily behind the fabric. Tape them down so no one trips. And bring spare batteries, because fairy lights love to die right before the last photo.
5. Vintage Velvet Settee With Greenery
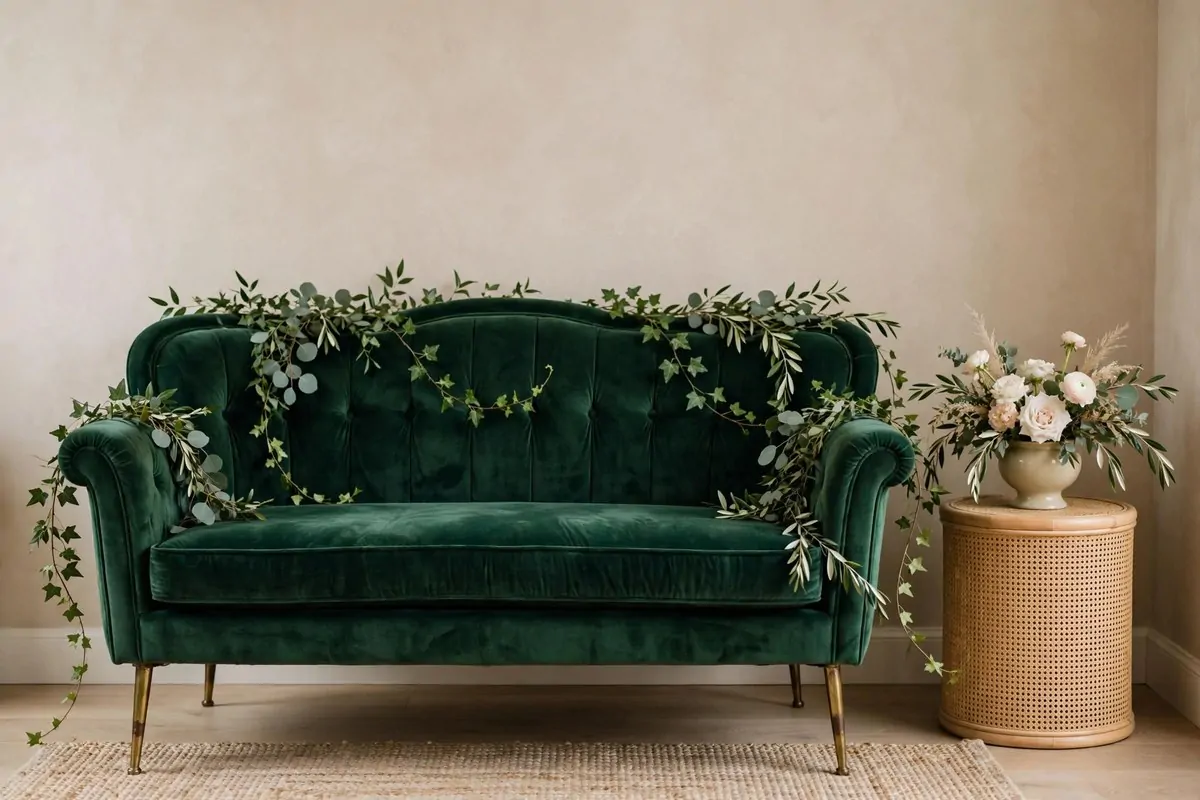
A beautiful old sofa changes everything. Suddenly you have a place to sit, lean, and be yourselves.
Look for a vintage velvet settee in a deep color. Emerald, navy, or dusty rose all photograph like a dream. The texture of velvet catches light in a way smooth fabric never does.
Check rental shops and antique stores. Many rent furniture for the day at prices that surprise you in a good way. Ask if they deliver and pick up. Your back will be grateful.
Drape greenery over the back and arms of the settee. Long trailing plants look best. Let a few strands fall over the front edge too. It should look like the garden claimed it.
Keep the backdrop behind the settee simple. A warm neutral wall works. A painted backdrop in a soft tone also looks great. The sofa is busy enough on its own.
Sit close together for half the shots. Then sit at opposite ends and look at each other for the rest. Both poses tell a different story, and both look amazing on velvet.
Add a small side table with a vase of flowers next to the settee. It balances the photo and gives you something to hold or lean toward. Little props make posing feel less awkward.
Watch the height of the settee arms in photos. Sit forward a little so your bodies show above them. Sinking back into deep velvet looks cozy, but you can disappear into the cushions.
This look photographs beautifully in both color and black and white. If you are unsure about colors aging well, ask your photographer for a few black and white versions. Velvet and greenery look stunning in monochrome.
6. Rustic Wooden Arch
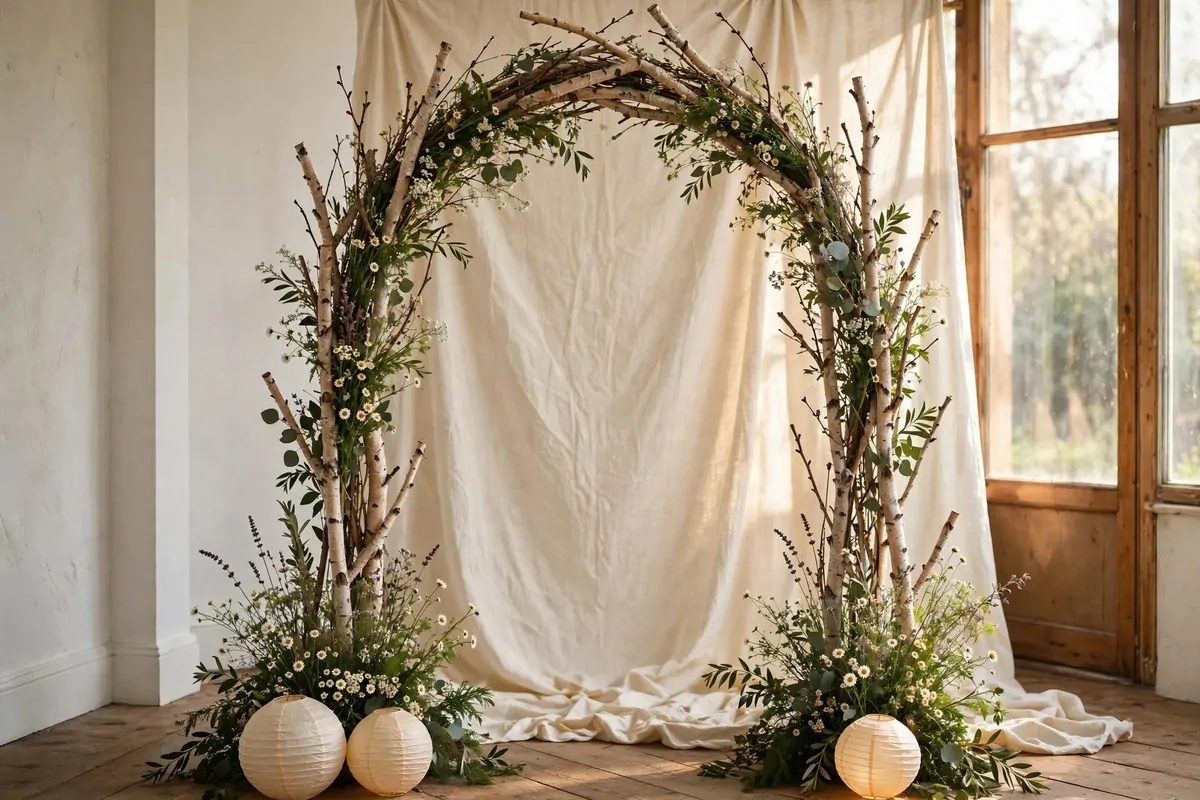
Wood brings warmth that no fabric can match. A rustic arch feels honest and grounded.
Build or rent an arch from natural branches or rough timber. Birch poles look light and fresh. Reclaimed wood looks rich and old. Both are lovely, so pick what fits your mood.
Decorate it simply. Wildflowers and greenery suit wood best. Avoid heavy, formal arrangements. The charm of a wooden arch is that it looks gathered, not arranged.
Let the decorations be uneven. More flowers on one side than the other. A long trailing vine on the left, short sprigs on the right. Nature is not symmetrical, and your arch should not be either.
Place the arch against a plain backdrop to keep the focus. A cream wall or a linen drape behind the wood keeps everything calm. Brick can work too, if the tones are warm.
Add lanterns at the base of the arch. Paper lanterns or small metal ones with candles inside. They add a warm glow at ankle level and look adorable in wide shots.
This setup loves natural light. If you can, face the arch toward a window. The wood grain catches the sun and glows. Artificial light can flatten wood, so go easy on it.
For couples who want a countryside feel, this arch is the one. It looks like it belongs in a field at golden hour, even if you are actually in a rented studio room.
Sweep the floor around it before shooting. Bits of leaf and petal fall off and show up in photos. A clean floor keeps the rustic look intentional instead of messy.
7. Circular Moon Gate Arch
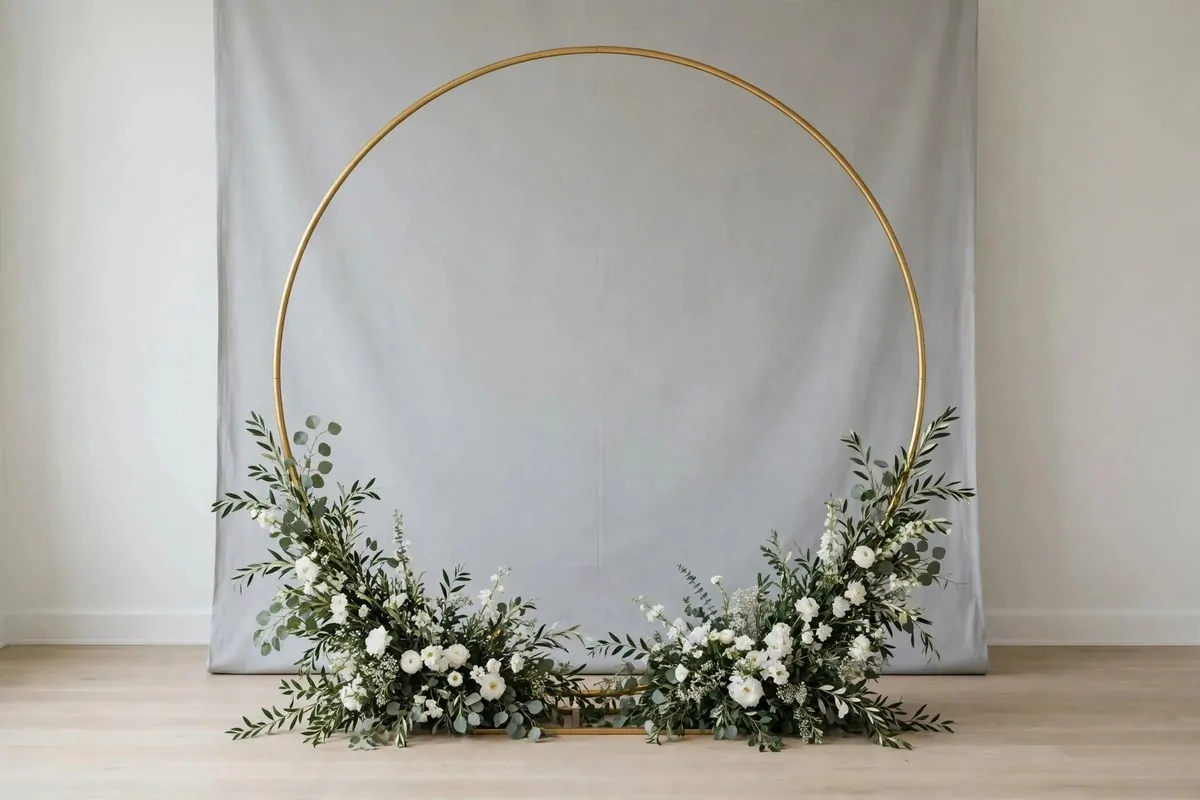
The round arch is the modern cousin of the classic floral arch. It is fresh, clean, and very photogenic.
A metal circle, about six to seven feet across, stands on its own or with simple feet. Decorate only part of it. Flowers along the bottom third look intentional and artistic. Covering the whole circle looks crowded.
Greenery with white blooms is the timeless pick. It looks good in every season and matches every dress. Add one color accent, like blush roses, if you want a little warmth.
Stand in the center of the circle for the classic shot. Then try sitting on the floor inside the circle with the flowers framing you. Both look completely different. Kids and grandparents love this arch too, because it feels playful.
Rent the metal frame from a decor shop. They are cheap to rent and easy to move. Zip ties hold the greenery in place fast. Just hide the ties inside the leaves.
Keep the background behind the circle plain. A solid backdrop in white, cream, or soft gray works best. The circle is a strong shape. It does not need competition.
This arch doubles as ceremony decor. Use it at the ceremony, then move it to the studio corner for portraits. Two uses for one rental is smart planning.
Add fairy lights woven through the greenery for evening shots. The circle shape makes the lights look like a halo. It is one of the prettiest effects you can get for almost no money.
If the metal frame is gold, keep the flowers soft and romantic. If it is black, go bolder with the greenery. The frame color sets the whole mood, so pick it on purpose.
8. Boho Macramé and Pampas Grass Wall
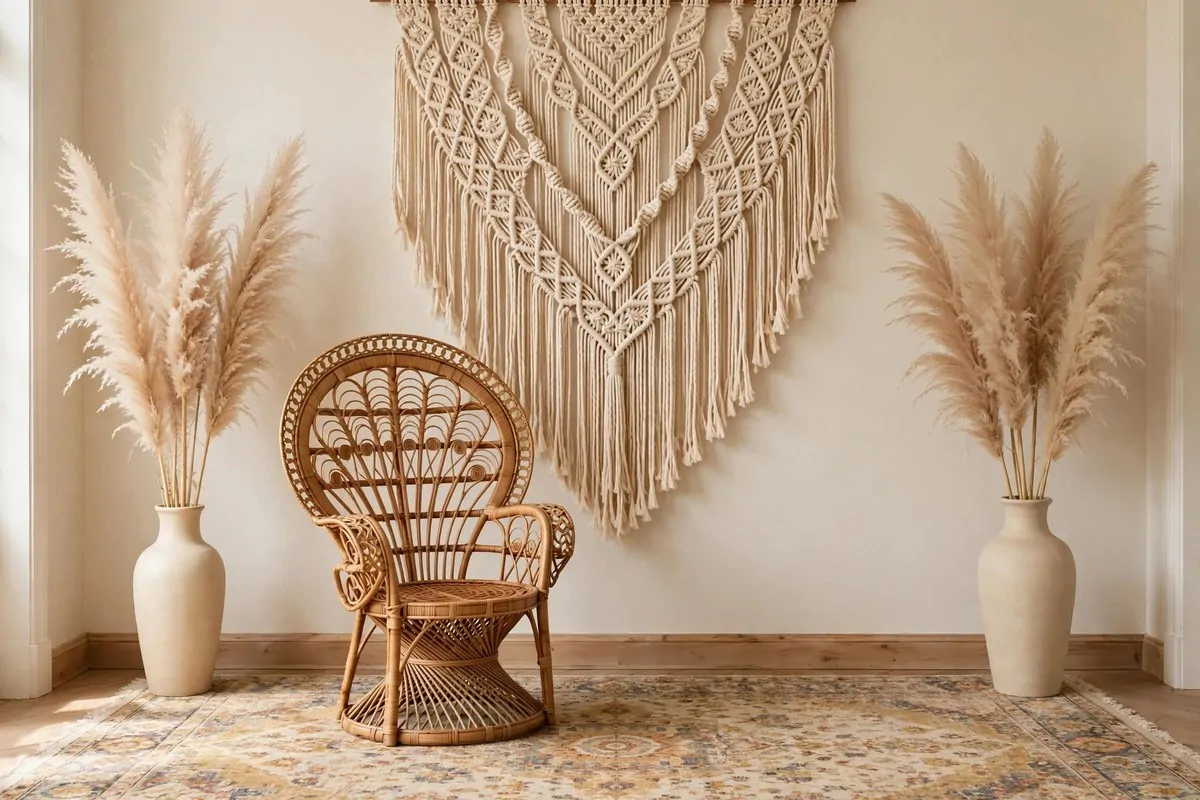
Boho style is all about texture. Macramé, pampas grass, and rattan together make a wall you want to touch.
Hang a large macramé piece as your center backdrop. The knots and fringe add pattern without any color. It looks handmade and warm in photos.
Flank it with tall pampas grass in floor vases. The fluffy plumes soften the edges of the frame. They also move gently, which looks lovely in video clips.
Add a rattan or wicker chair in front. It gives you a natural place to sit and adds another layer of texture. Peacock chairs are the classic pick, but any rattan chair works.
Keep the color palette warm. Creams, tans, and soft browns are the boho neutrals. They photograph well and never look harsh. Avoid stark white here, it fights the handmade mood.
Layer a vintage rug under everything. A patterned rug ties the whole setup together and adds color at the bottom of the frame. It also keeps bare feet happy.
This look is perfect for barefoot or relaxed portraits. If your wedding vibe is laid back, the photos will match. The setup practically begs you to laugh and lean on each other.
Watch the pampas plumes around faces. They shed a little, and a stray fluff near an eye can ruin a shot. Keep the tallest plumes to the sides, not right behind heads.
Add small dried flower bundles to the macramé itself. Tuck them into the knots at the top corners. It takes five minutes and makes the whole piece look custom.
9. Hand-Painted Canvas Backdrop
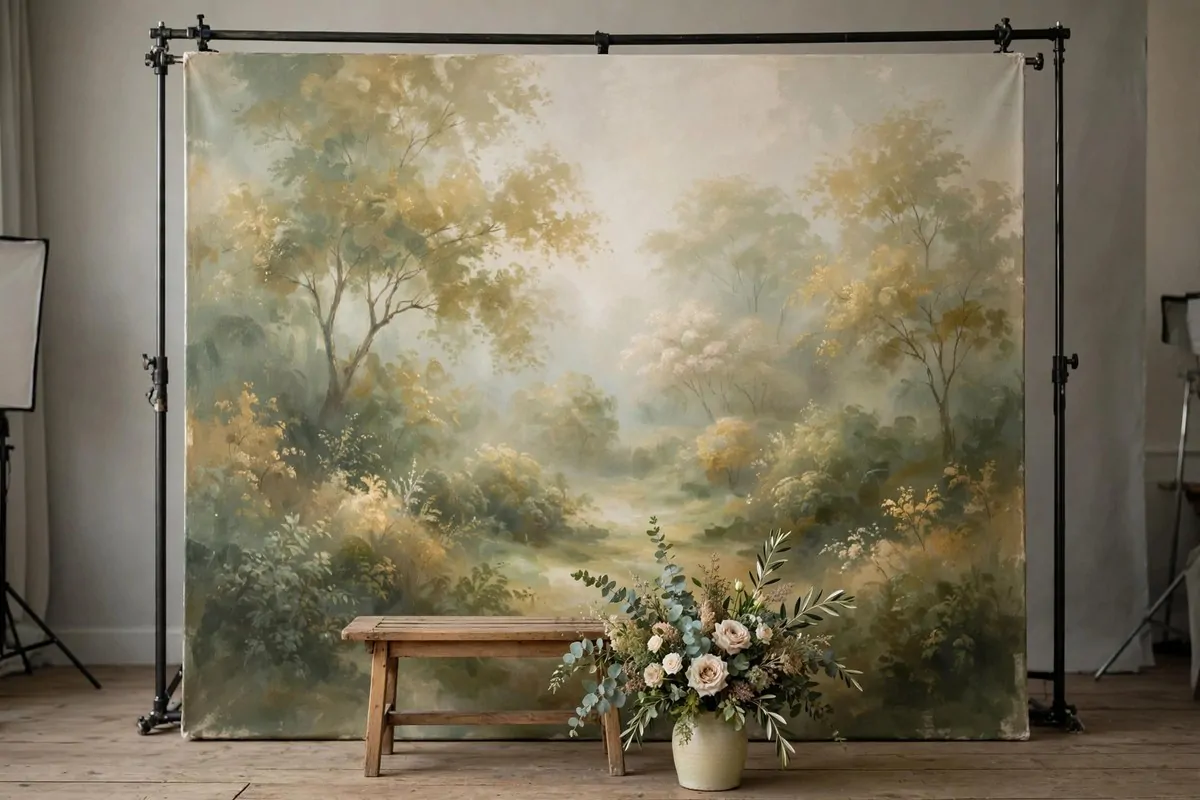
A painted backdrop is the oldest trick in studio photography. It is also one of the prettiest.
Hand-painted canvases in soft landscapes, cloudy skies, or garden scenes give your photos an old-world feel. They look like they belong in a museum. That is the point.
Rent one from a photo studio prop shop. They come in many styles, from Italian gardens to misty forests. Pick a scene with soft colors and no sharp details. Busy paintings distract.
Stand several feet in front of the canvas. This keeps you sharp and the painting softly blurred. The photo will look like it was taken somewhere magical, not in a studio.
Match your outfit tones to the painting. If the canvas is cool blues and grays, cool-toned outfits blend beautifully. If it is warm golds, wear warm tones. This is the trick to photos that look painted themselves.
Add one real prop in front, like a small bench or a vase of flowers. It bridges the real and painted worlds. Your eye accepts the scene as one place.
Light the canvas evenly from the front. Two soft lights, one each side, stop the paint from glaring. Never use a harsh flash on a canvas. The shine ruins the illusion.
Ask the rental shop how the canvas hangs. Most need a strong stand or wall hooks. Canvases are heavy, so test the setup before the wedding day.
I think this look suits couples who love art and history. It is romantic in a quiet way. Your grandchildren will think the photo was taken in another century, and honestly, that is kind of wonderful.
10. Antique Chair and Vintage Suitcase Vignette
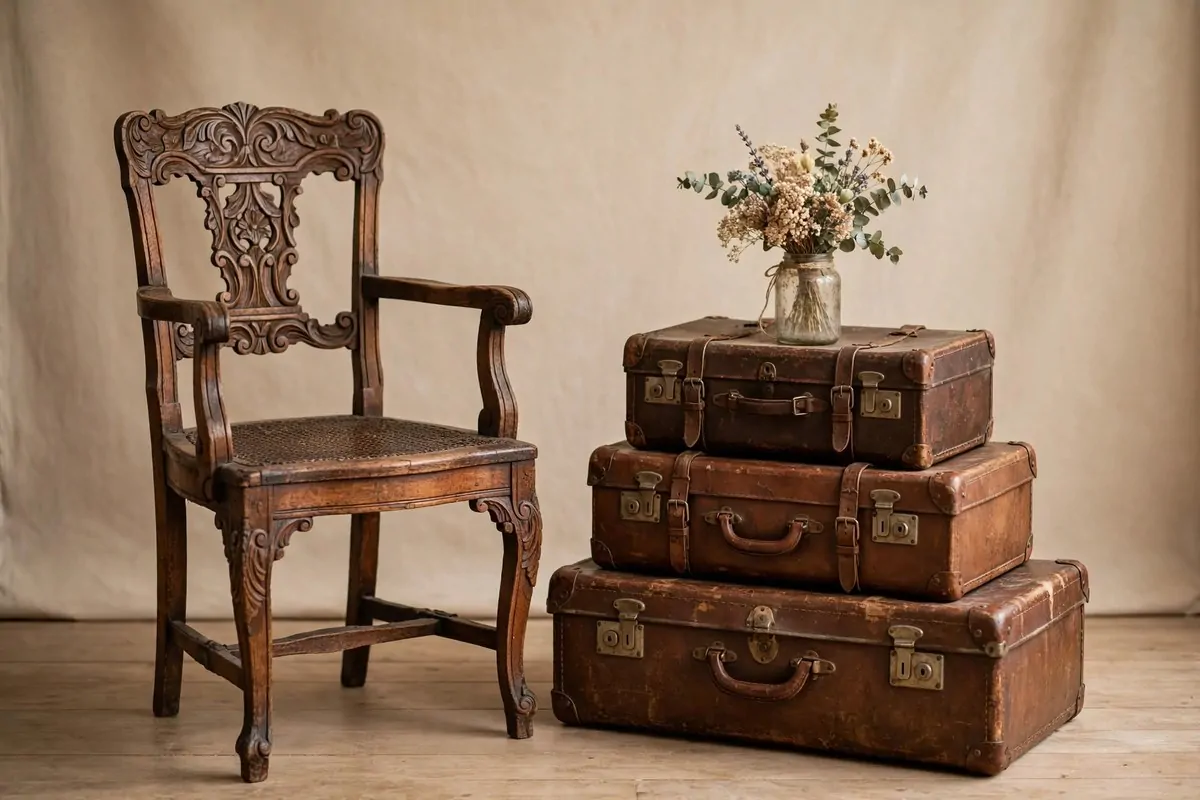
Small vintage pieces tell a story. A chair, some suitcases, and a few flowers can say as much as a full wall.
Find one beautiful antique chair. A carved wooden chair or a faded velvet armchair both work. It becomes your seat and your centerpiece. One great chair beats five average ones.
Stack two or three vintage suitcases beside it. Leather or canvas, worn at the edges. They suggest travel and adventure, which is a sweet theme for a wedding portrait.
Add a small bouquet in an old jar on top of the suitcases. Fresh flowers next to worn leather is a lovely contrast. It keeps the vignette from looking like a museum corner.
Keep the backdrop plain and warm. A beige wall or a simple linen drape lets the vintage pieces shine. The props are the art here, so the wall should stay quiet.
This setup is great for detail shots too. Hands on the chair arm. Shoes beside the suitcase. Rings resting on the old leather. These little photos become favorites.
Check thrift stores and flea markets for these props. They cost very little and you can keep them after. I know couples who still have their wedding suitcase in the hallway.
Make sure the chair is steady before anyone sits. Old chairs can be wobbly. A wobble ruins a pose fast. Test it, tighten it, or pick another one.
A chalkboard sign leaning against the suitcase adds a personal note. Write your wedding date or a short line you love. It photographs like a caption on the photo itself.
11. Soft Window Light Portrait Corner
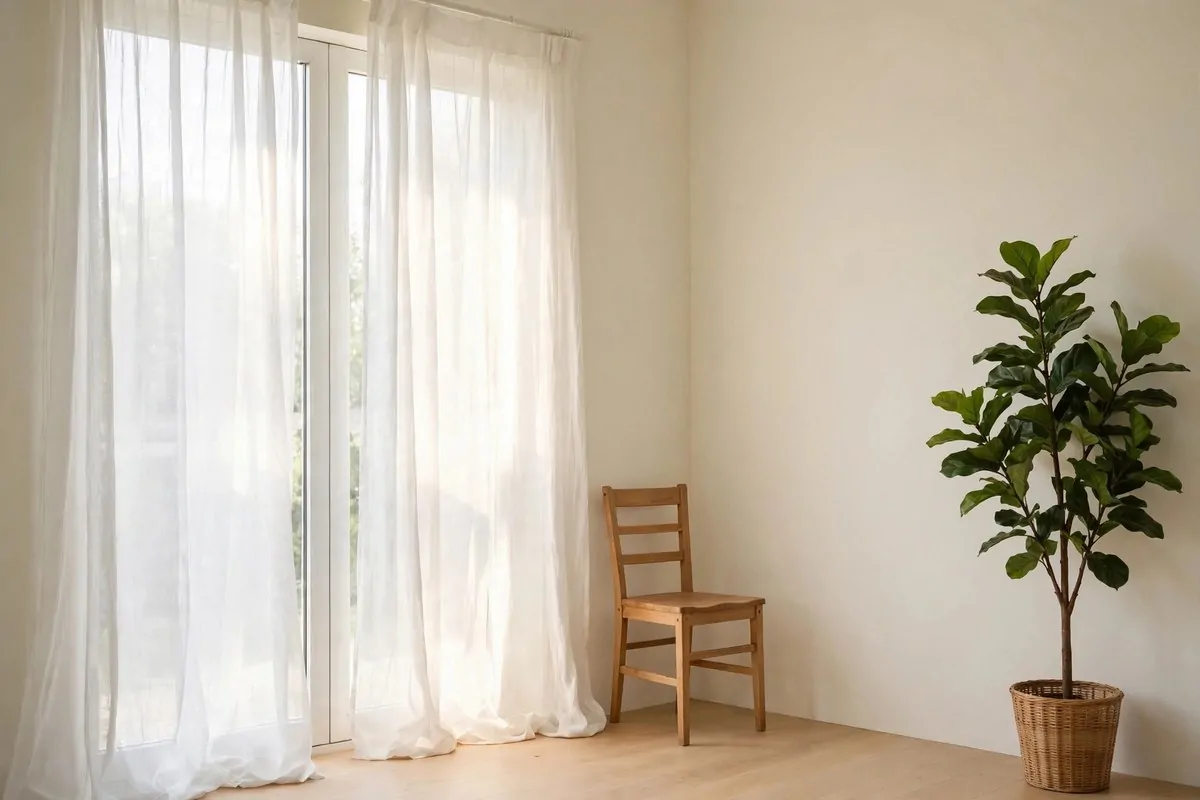
No backdrop at all. Just a big window and soft light. Sometimes that is all you need.
Find a studio corner with a tall window and sheer curtains. The curtains spread the sunlight into a gentle glow. This light flatters everyone. Wrinkles soften. Eyes brighten. Skin glows.
Place a simple chair near the window. A wooden chair or a plain upholstered one. Nothing fancy. The light is the star, so the furniture stays humble.
Stand or sit at an angle to the window, not straight on. Side light shapes the face and adds gentle shadows. Front light is flat and boring. Your photographer will know exactly how to place you.
Shoot in the morning or late afternoon. Midday sun is harsh and creates hard shadows. Soft morning light or golden evening light is what you want. Timing matters more than gear here.
Keep the wall beside the window a light, neutral color. White or cream bounces the light back onto your faces. Dark walls swallow light and make the photo moody, which can be lovely too, but soft light needs soft walls.
Here is a quick guide to window light timing:
| Time of day | Light quality | Best for |
|---|---|---|
| Early morning | Soft and cool | Bright, fresh portraits |
| Midday | Harsh and strong | Avoid if you can |
| Late afternoon | Warm and golden | Romantic, glowing shots |
| Overcast day | Even and gentle | All-day soft portraits |
Add a plant near the window for a touch of life. A tall leafy plant in the corner adds green without any work. It also gives the photo a little foreground to play with.
This corner costs almost nothing to set up. A chair, a plant, and a window you already have. Yet the photos look like they came from an expensive studio.
Turn off the room lights when you shoot here. Mixed light, sun plus lamps, creates weird color casts on skin. Let the window light do everything on its own.
12. Gold Sequin Glam Wall
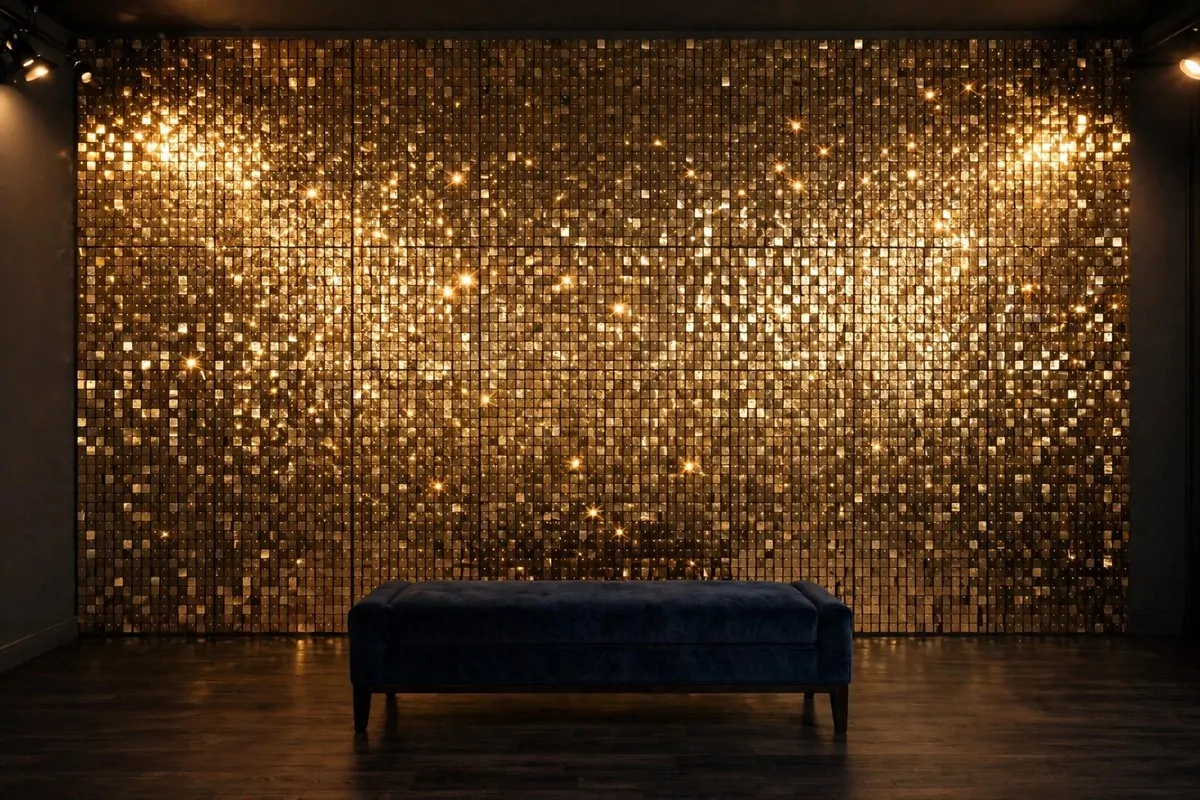
A little glamour never hurt a wedding photo. Gold sequins bring the sparkle without going over the top.
Hang sequin panels as a full wall behind you. Gold is the classic choice. It photographs warm and rich. Champagne sequins are softer and just as pretty.
Sequins bounce light around the room. This means your faces get a natural glow from the wall itself. It is like the backdrop is lighting you. Photographers love this.
Keep your outfits simple against a sequin wall. The wall is loud. A plain white dress or a dark suit balances it. Too much detail on both sides looks busy.
Rent the panels from an event decor shop. They come on rods or frames that stand on their own. Tape down the feet so no one kicks the wall mid-shoot.
This look is made for evening. Under warm studio lights, gold sequins shimmer like candlelight. In daylight, they can look a little flat. Plan this one for after sunset if you can.
Add a black or dark rug under the setup. It grounds the sparkle and keeps the floor from reflecting light up into your faces. Dark floors also make the gold pop more.
Sit on a low bench in front for some shots. The sequins behind you turn into a field of soft bokeh dots when the camera focuses on you. It looks like stars.
I would skip this one if your style is very rustic or minimal. It is glam, and it owns it. But for couples who love a little shine, it photographs like a celebration.
13. Lush Greenery Wall
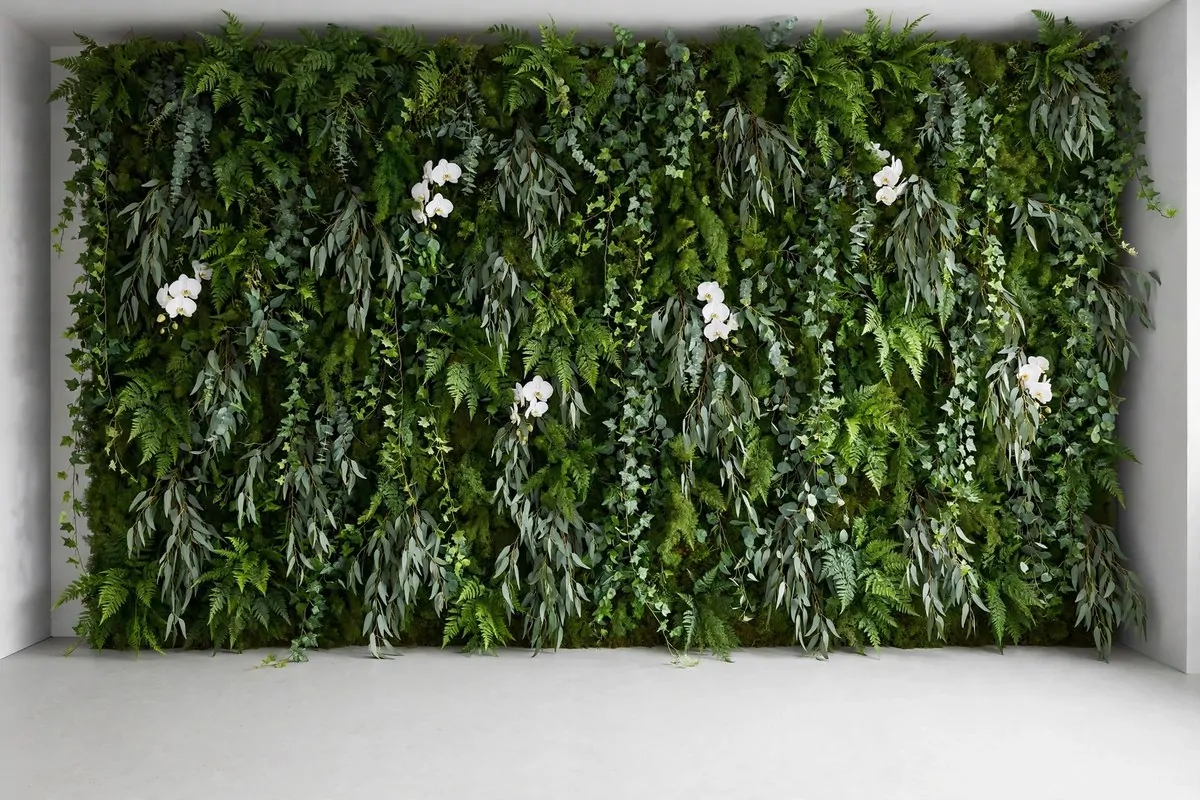
Green is the most calming color in photos. A wall of leaves feels like standing in a secret garden.
Build the wall from a mix of greens. Ferns, eucalyptus, ivy, and soft grasses together look natural. One type of leaf alone can look flat. Variety is what makes it rich.
Mix real and faux greens. Real eucalyptus smells amazing and photographs with soft edges. Faux ferns fill out the wall cheaply. Your nose gets the real ones, your wallet gets the fake ones.
Add a few white flowers tucked into the green. Not many. Just enough to break up the green and draw the eye. White orchids or small roses work best.
Stand close to the wall for portraits with shallow depth. The green blurs into a soft wash behind you. It looks like a painting. Step back for full-body shots that show the wall’s texture.
Light the wall evenly. Shadows on greenery look muddy. Two soft lights from the front keep every leaf crisp. If you see dark patches, move the lights wider.
A greenery wall suits almost any wedding style. Rustic, modern, classic, it fits them all. Green is nature’s neutral, and it never argues with your dress.
Keep a spray bottle handy for real leaves. A light mist before the shoot makes them look fresh and adds tiny sparkles in the light. Do it right before you start, not an hour before.
This wall photographs beautifully in all seasons. In winter it brings life to a cold day. In summer it feels cool and fresh. I think every studio should have one of these ready.
14. Neon Name Sign Over Greenery
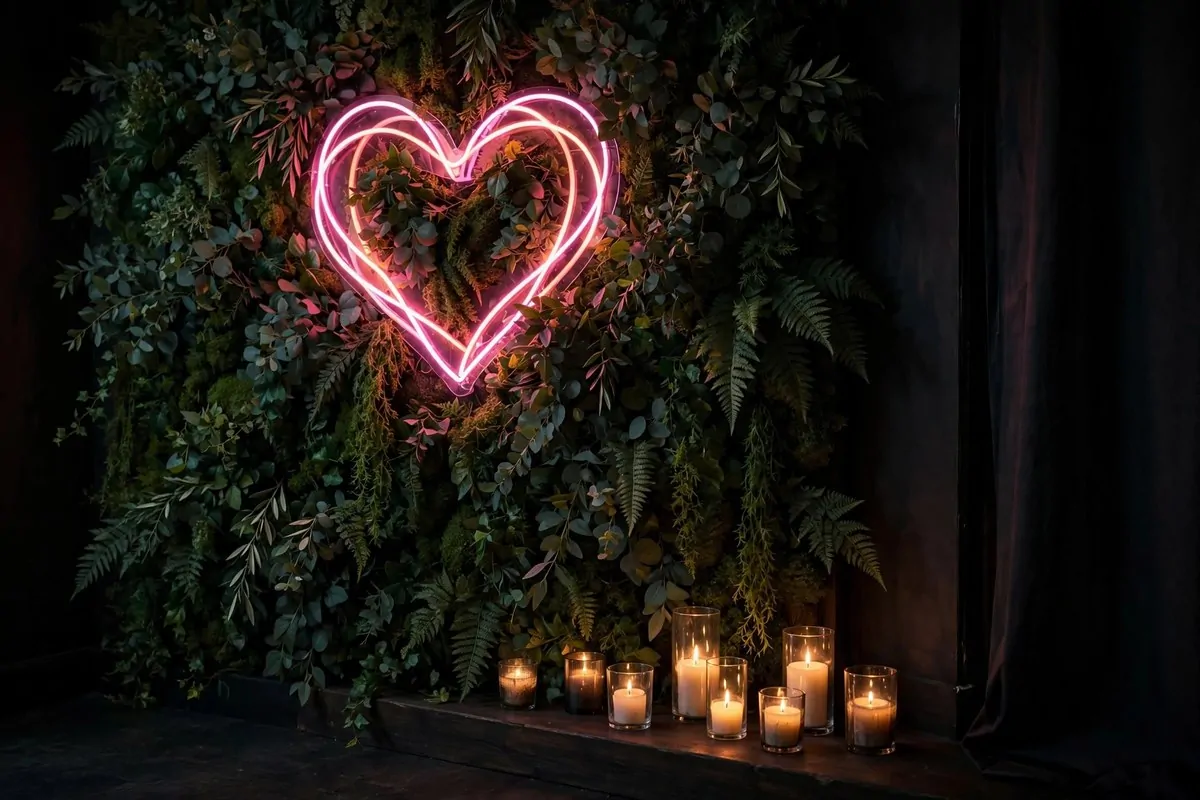
Your names in glowing light. It is personal, modern, and it photographs like a dream.
Order a custom neon sign with your names or a short phrase. Your last name looks timeless. A short line like “better together” feels sweet. Keep it short so it fits in photos.
Hang the sign on a greenery wall or a dark fabric backdrop. Greenery softens the modern neon and keeps it romantic. Dark fabric makes the neon pop hard and dramatic.
Use warm white or soft pink neon. These colors flatter skin and suit weddings. Bright blue or green neon can look fun but less timeless. Think about how you want the photo to feel in twenty years.
Dim the room lights when you shoot. Neon needs darkness to glow. The rest of the room goes dark and moody, and the sign becomes the heart of the photo.
Stand in front of the sign, not too close. Let a little space sit between you and the glow. The neon will softly light your faces from behind and make a gentle halo.
This sign can move to your home after the wedding. Many couples hang it in their living room or bedroom. It becomes wedding decor that lives on, which makes the cost feel fair.
Check the sign when it arrives, well before the wedding day. Neon signs are fragile and shipping can break them. Test every letter. A dead letter in your name would be heartbreaking.
Add candles below the sign for extra warmth. The flicker mixes with the steady neon glow and looks incredible on camera. Keep the candles in glass holders for safety.
15. Mismatched Vintage Mirrors Wall
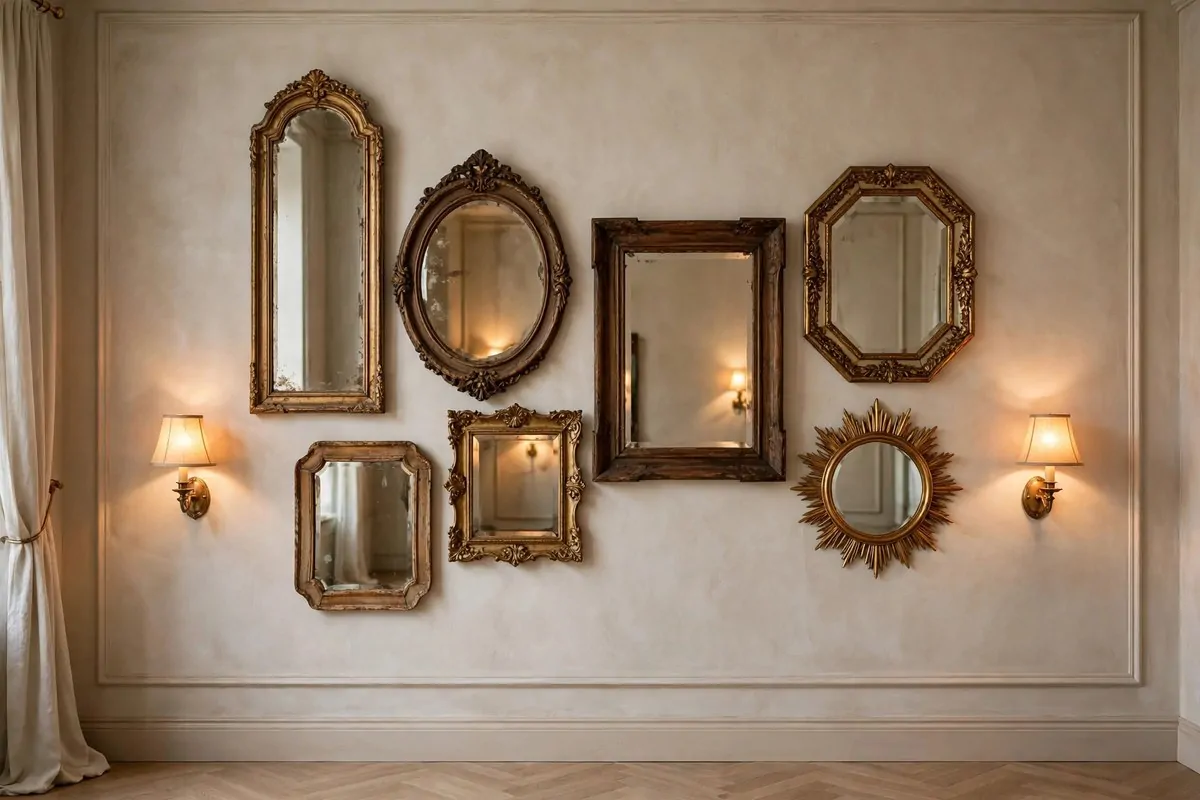
Mirrors do something no other backdrop does. They bounce light and double the beauty in the room.
Collect five to eight vintage mirrors in different shapes and frames. Round, oval, rectangle, ornate gold, plain wood. The mix is the point. Matching mirrors would look boring.
Hang them at slightly different heights on one wall. Overlap the edges a little. It should look collected over time, not installed in a day. That lived-in feel is what makes it charming.
Stand in front of the mirrors for portraits with depth. The reflections add layers to the photo. Your photographer can catch you and your reflection in one frame, which looks artistic and timeless.
Clean every mirror before the shoot. Dust and spots show up clearly, especially with flash. A quick wipe with glass cleaner takes ten minutes. Do not skip it.
Keep the room lighting warm. Mirrors reflect the light sources, so ugly overhead lights will show up in the reflections. Turn off harsh ceiling lights and use lamps or window light instead.
Add a small chandelier in front of the mirrors if you can. The light bounces between the mirrors and looks like something from an old film. It is pure glamour.
This wall is also great for detail photos. Rings reflected in an old mirror. The bouquet leaning against a gilt frame. These shots feel like they belong in a gallery.
Buy mirrors at thrift stores and flea markets. They cost very little and you can resell or keep them after. I have seen couples build a whole mirror wall for less than a dinner out.
16. Crystal Chandelier With Sheer Drapes
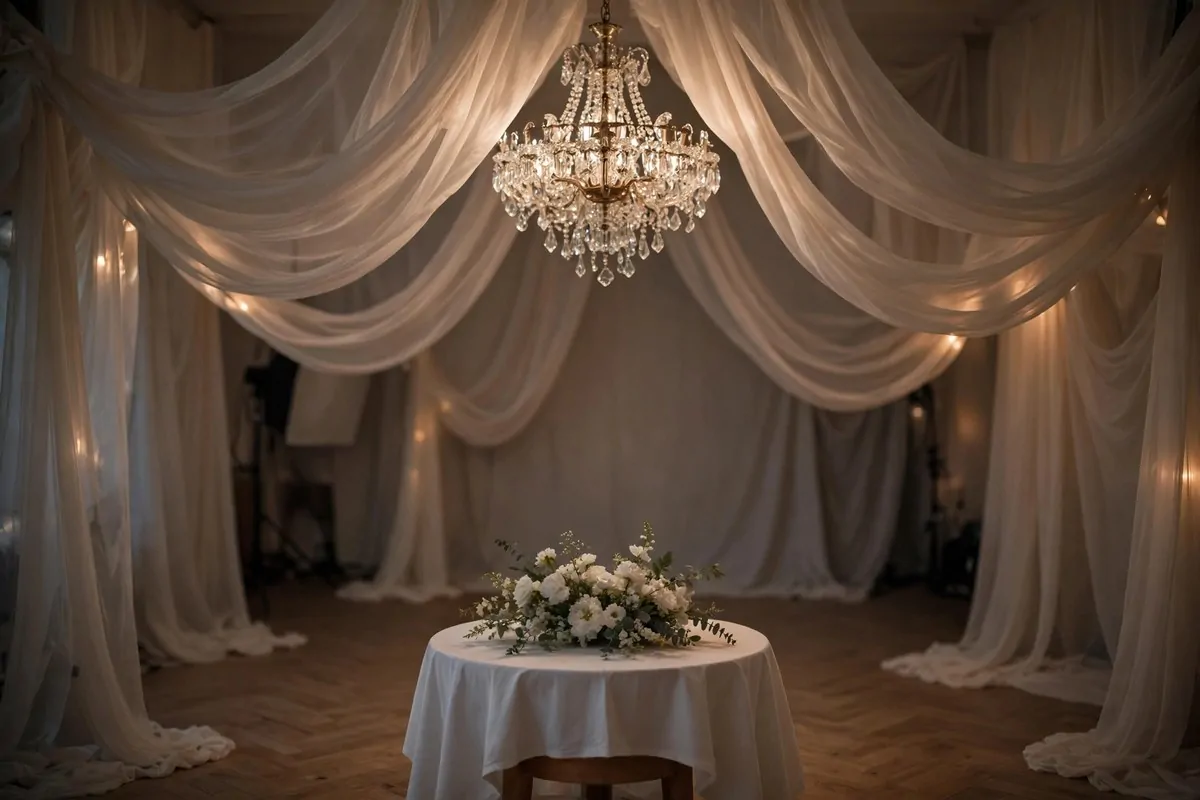
Nothing says celebration like a chandelier. It turns any corner into a ballroom.
Hang a crystal chandelier low enough to show in photos. About seven feet off the floor works. Too high and it disappears from the frame. Too low and people bump their heads.
Surround it with sheer drapes hanging from the ceiling. The fabric softens the room and frames the chandelier. White or ivory sheers are best. They catch the sparkle and glow.
Rent a chandelier from a lighting company. Many rent for events and will hang it for you. Ask about dimmers. A chandelier at full brightness can be harsh. Dimmed, it glows like candles.
Place a small table or a chair under the chandelier. It gives the setup a purpose and a place to pose. A round table with a white cloth and a small flower arrangement is classic.
Shoot from a low angle for some photos. Looking up at the chandelier with you beneath it makes the photo feel grand. It is a dramatic shot that still looks elegant.
Keep the rest of the room dark. The chandelier becomes the main light source, and the mood turns romantic fast. Dark corners around the edges make the center glow even more.
Add fairy lights woven through the sheer drapes. They echo the chandelier’s sparkle and fill the dark edges with tiny stars. The whole setup looks like a winter ballroom, minus the cold.
I think this look suits formal weddings best. If your day is black tie or very elegant, the photos will match perfectly. For casual weddings, it can feel a little dressed up, so know your vibe.
17. Oversized Paper Flower Wall
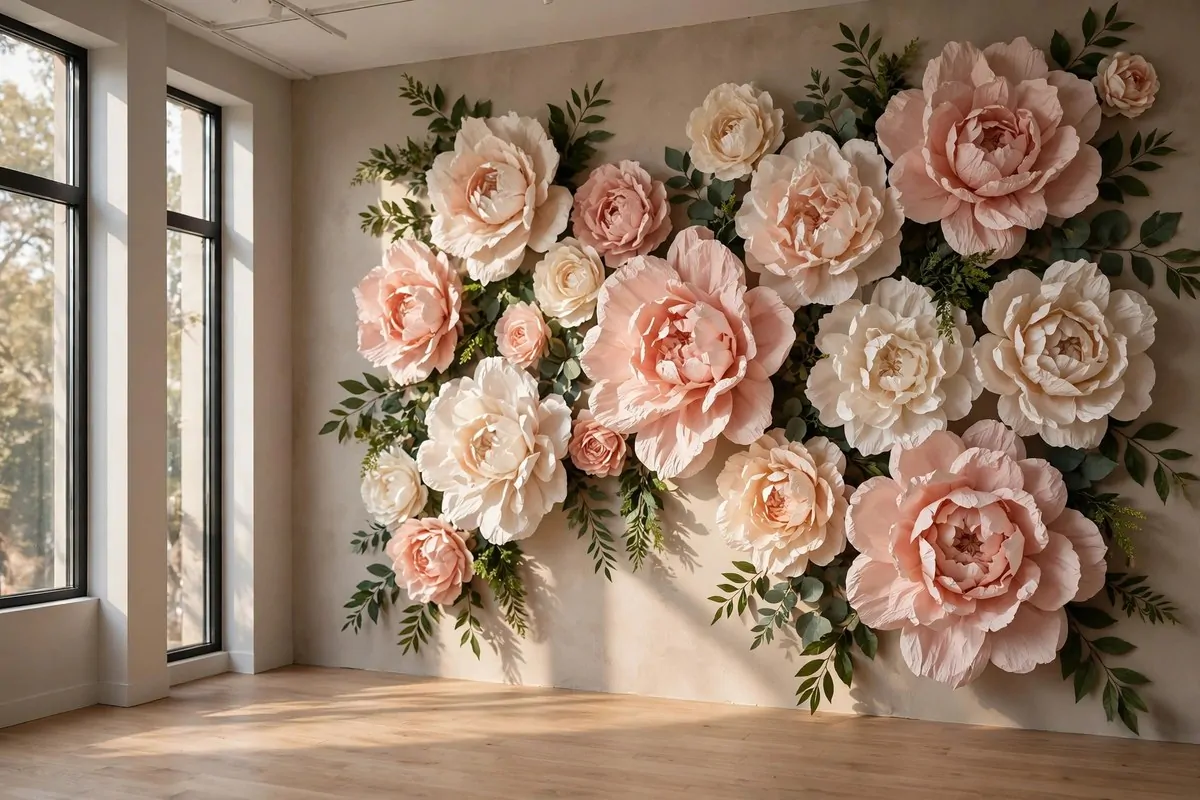
Big paper flowers are playful and bold. They make a backdrop that is impossible to ignore.
Make or buy paper blooms in large sizes. Twelve to twenty-four inches across is the sweet spot. Small paper flowers look crafty. Giant ones look like art.
Use blush, cream, and soft peach paper. These colors photograph softly and suit weddings. Bright colors can work too, but soft tones stay timeless longer.
Mount the flowers on a neutral wall with small pins or removable strips. Arrange them in a loose cluster, denser in the middle and sparser at the edges. It should look like a garden exploded, in a good way.
Stand in the center of the cluster. The giant blooms frame you like a storybook. Sitting works too, with the biggest flowers just above your head.
This wall is very kind to budgets. Paper, glue, and time are all it costs. If you have a crafty friend, this is their moment to shine. A weekend of making flowers saves a fortune.
Light the wall from the sides, not straight on. Side light shows the paper’s texture and folds. Flat front light makes paper look flat and cheap. Angle is everything.
Add real greenery between the paper blooms. The mix of real leaves and paper flowers looks surprisingly good. The greenery hides the flat parts and adds life.
Kids adore this wall. If little ones are in your wedding party, get their photo here. The giant flowers make them look like they wandered into a fairy tale.
18. Weathered Vintage Door With Florals
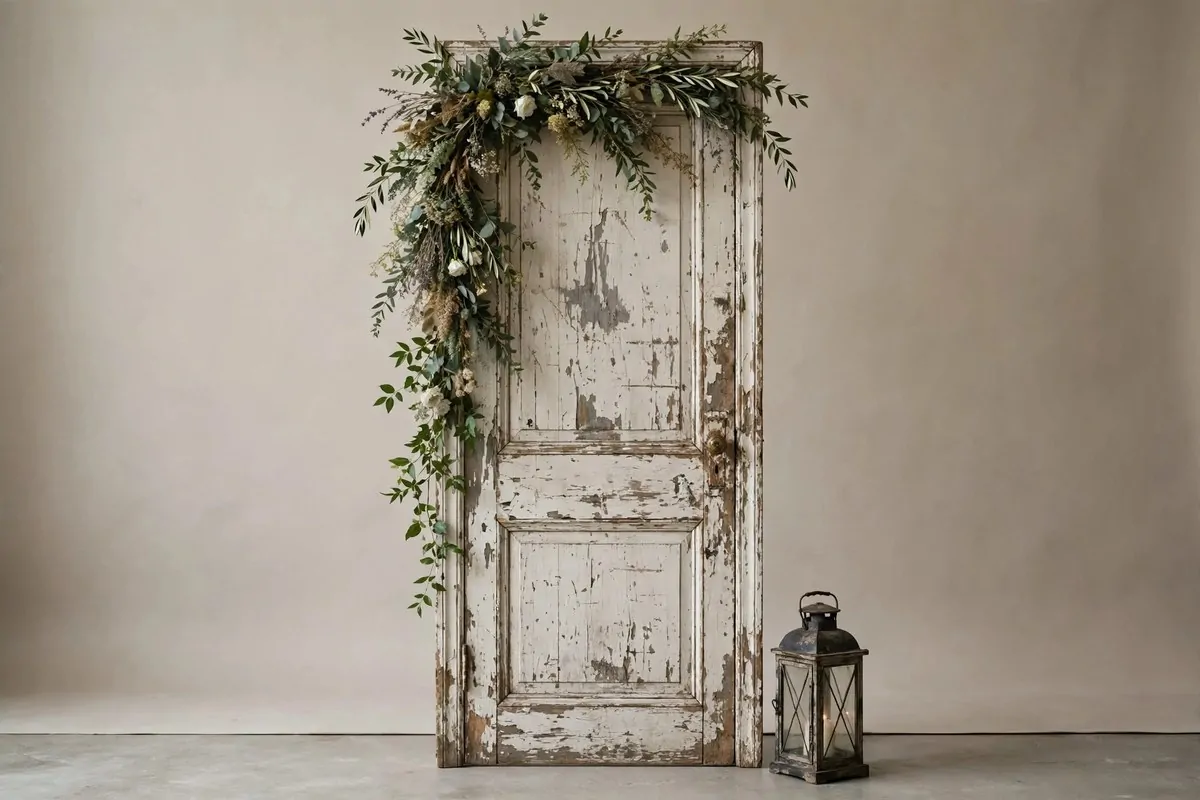
An old door is a doorway to somewhere. In a photo, it becomes a symbol, and symbols make portraits meaningful.
Find a tall vintage door with worn paint. Chippy white, faded blue, or weathered wood all work. The wear is the beauty. A perfect new door would look wrong here.
Stand the door upright with a strong support behind it. Doors are heavy and can tip. Sandbags or a heavy stand keep it safe. Test it before anyone poses near it.
Decorate the top and one side with flowers and greenery. Let them trail down naturally. The flowers soften the hard lines of the door and add color against the worn paint.
Keep the wall behind the door plain. A neutral backdrop or a soft drape works. The door is the star, so the background should stay out of the way.
Lean a small chalkboard against the door’s base with your wedding date. It adds a personal touch and fills the bottom of the frame nicely. Write it in pretty handwriting if you can.
This setup is wonderful for couple portraits with meaning. A door suggests a new beginning, a new home, a new life. Your photographer can play with that theme in beautiful ways.
Add a vintage lantern beside the door. The warm light and old glass suit the worn wood perfectly. It also lights your faces softly from the side, which is always flattering.
Check salvage yards and antique shops for doors. They are often cheap because few people want them. You get a one-of-a-kind backdrop for very little money.
19. Velvet Drape Canopy From the Ceiling
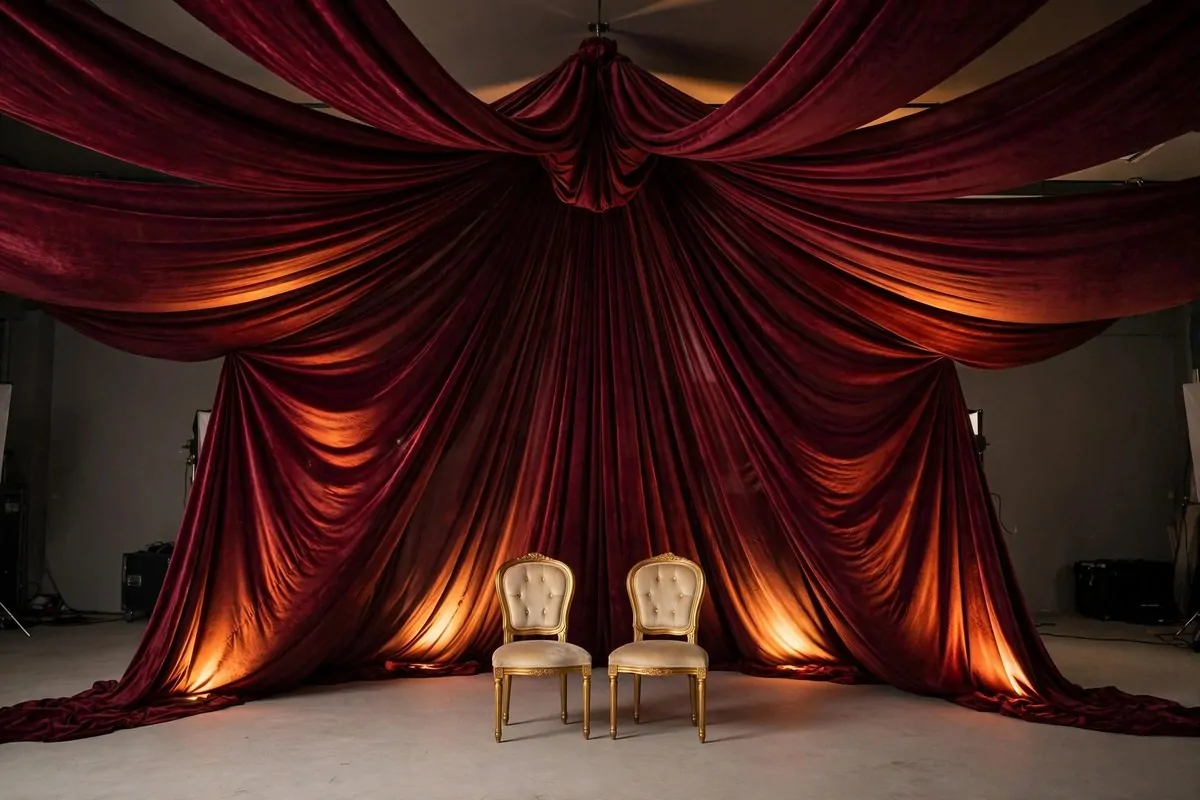
A canopy of fabric overhead makes a room feel like a tent of luxury. It is dramatic in the best way.
Hang long panels of velvet or heavy satin from a ceiling point. Gather them at the center and let them fall outward like a starburst. Deep colors like burgundy, navy, or forest green look rich. Ivory velvet looks soft and romantic.
You need a high ceiling or a strong frame for this. Event rental companies have ceiling rigs that hold the fabric safely. Do not try to hang heavy velvet from a weak hook.
Place a small seating area under the canopy. Two chairs facing each other, or one loveseat. The canopy frames you from above and makes the photo feel intimate, even in a big room.
Add warm uplighting at the base of the fabric panels. The light climbs the velvet and makes it glow from within. This is the trick that makes canopies look magical instead of just heavy.
Keep the floor simple. A plain rug or a clean floor works. The canopy is doing all the talking. Busy floors would compete with it.
This setup photographs beautifully from above too. If your photographer can get a high angle, the starburst pattern looks incredible. Ask for one wide shot that shows the whole canopy.
A few things to plan for with fabric canopies:
- Measure your ceiling height first. You need at least ten feet for a good drape.
- Choose fabric that does not wrinkle easily. Velvet and heavy satin are forgiving.
- Hide all clips and hooks inside the folds. Visible hardware ruins the illusion.
- Test the fabric weight on your rig before the wedding day. Better safe than sorry.
I love this look for winter weddings. The heavy fabric feels cozy and warm in photos. It is like being wrapped in a beautiful blanket while the world waits outside.
20. Black and White Timeless Setup
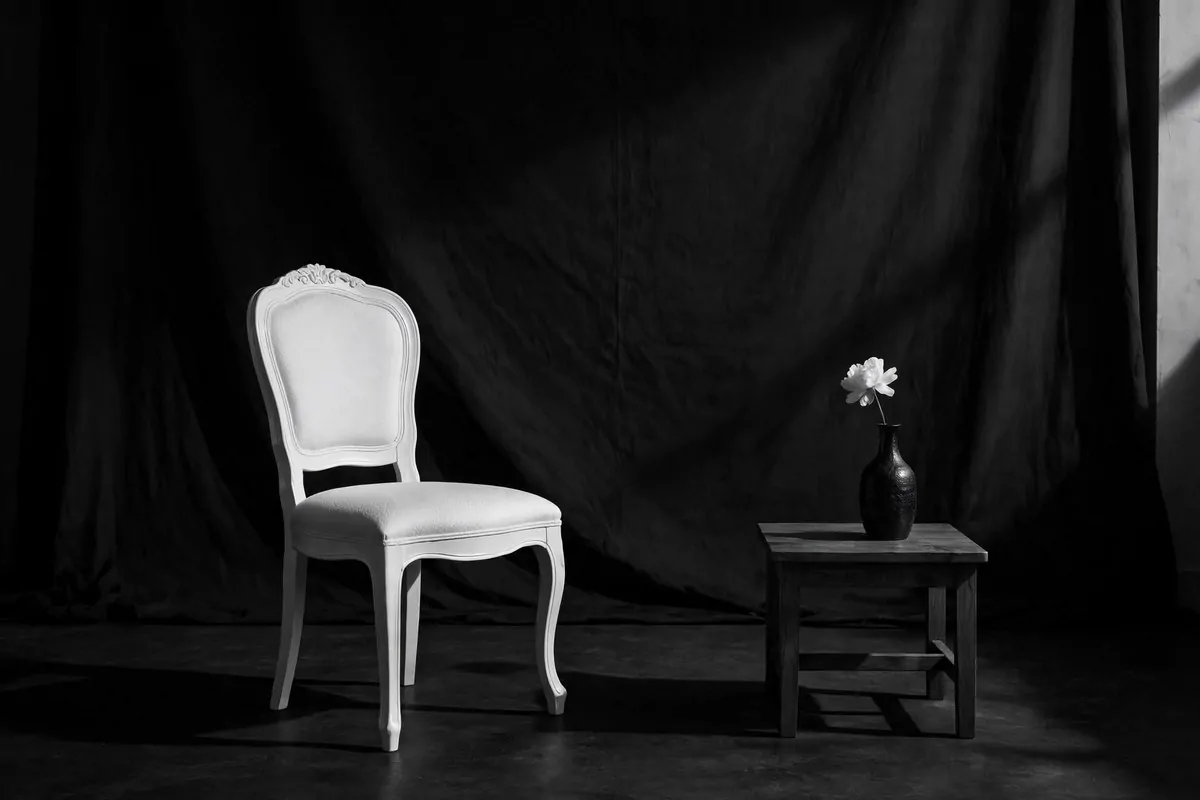
Strip away the color and something honest remains. Black and white never goes out of style.
Set up a corner with strong contrast. A dark backdrop, a white chair, or the reverse. Black and white photos need bold shapes because there is no color to carry the image.
Use one strong light from the side. Side light creates the deep shadows that make black and white portraits dramatic. Soft flat light makes them look gray and dull.
Keep props minimal and graphic. A black bench against a white wall. A white flower in a dark vase. Simple shapes read best when color is gone.
Ask your photographer to shoot some frames in true black and white, not converted later. Cameras see differently in monochrome mode. The results often look richer.
This setup is perfect for detail shots. Hands, rings, shoes, the back of the dress. Without color, textures and shapes take over. These small photos often become the most loved ones.
Wear outfits with texture for black and white portraits. Lace, velvet, and crisp cotton all show beautifully. Shiny smooth fabrics can look flat. Texture is the color of black and white.
Keep the background completely uncluttered. A plain wall or a simple drape is enough. Any clutter distracts when there is no color to organize the eye.
I think every couple should have at least a few black and white portraits. They look the same in ten years as they do today. That is the very definition of timeless.
21. Modern Gold Geometric Frame Arch
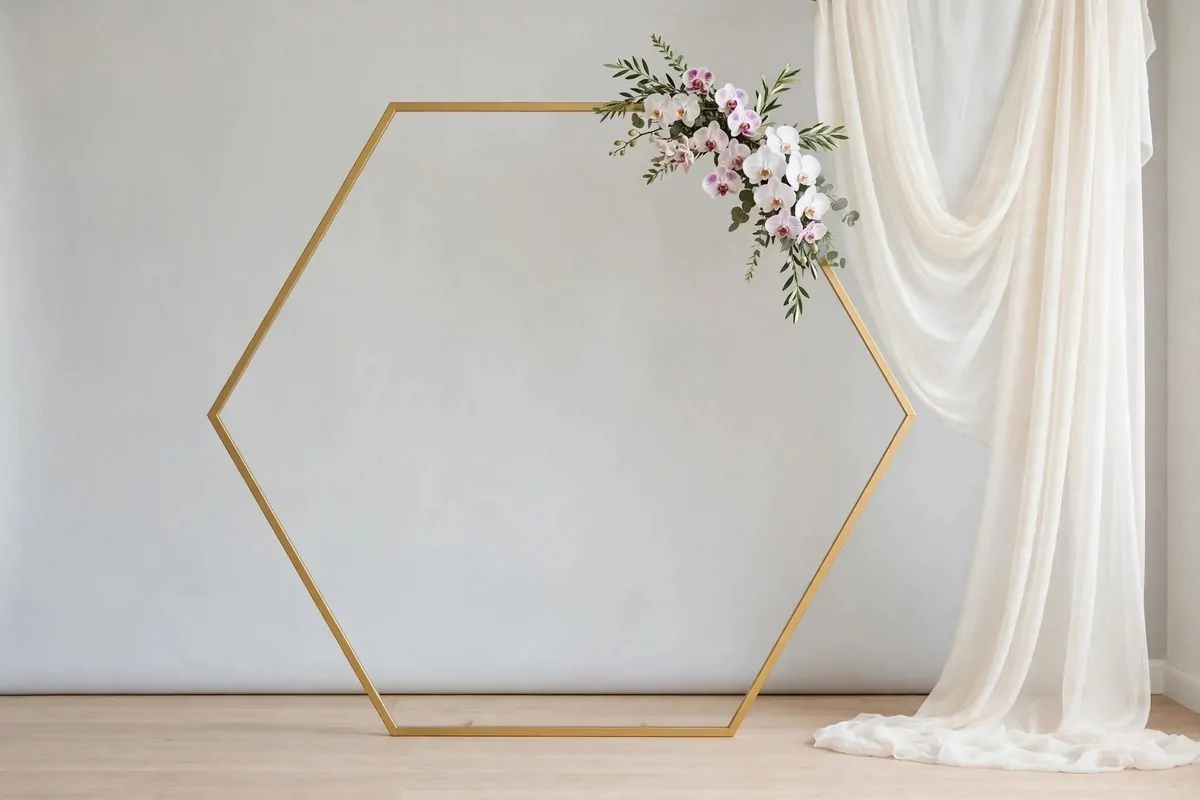
Clean lines meet soft flowers. The geometric arch is for couples who like modern style with a romantic heart.
Use a metal frame in a hexagon, triangle, or tall rectangle shape. Gold is the most popular finish. It looks warm and modern at once. Black frames look bolder and more dramatic.
Decorate only one corner of the frame. A cluster of flowers at the top left, or greenery along the bottom right. The empty space is part of the design. It gives the photo room to breathe.
Keep the flowers modern too. Single stems, orchids, or structured blooms suit the geometric shape. Wild loose bouquets fight with clean lines. Match the flowers to the frame’s mood.
Stand inside the frame for the classic shot. Then try standing beside it, leaning one hand on the frame. Both poses work. The frame gives your hands something natural to do.
Place the frame against a plain backdrop in a soft tone. White, cream, or pale gray all work. The frame is a strong shape, so the background should be calm.
This arch is easy to move and reuse. Use it at the ceremony, then in the studio corner. It packs flat and sets up in minutes. Practical and pretty is a rare combo.
Here is a quick way to pick your frame style:
| Frame shape | Mood | Best with |
|---|---|---|
| Hexagon | Soft and modern | Blush florals, greenery |
| Tall rectangle | Grand and clean | White blooms, minimal styling |
| Triangle | Bold and artistic | Single stems, orchids |
| Round arch | Romantic and fresh | Mixed florals, fairy lights |
Add a sheer drape on one side of the frame for softness. It keeps the modern look from feeling cold. One panel is enough. Let it fall naturally.
I have seen this frame style in so many wedding photos lately, and it always looks current. Clean shapes age well because they never shout. They just quietly look good, year after year.