40 Garage Wall Storage Systems That Make Every Tool Easy to Find

I lost my favourite screwdriver three times in one week, and each time it was sitting right under a pile of stuff I had already moved twice.
My garage had a big bare wall and a floor full of boxes, and I kept telling myself I would sort it out on Saturday. Saturday came and went, and the wall stayed empty while the mess grew taller.
Then I started hanging things up instead of stacking them down, and the whole room changed in a weekend. I could see my tools, I could reach them, and I stopped buying a second one just because the first one was lost.
This guide shares forty wall ideas that helped me, and they are all right here. Pick one small wall, start with the tools you use most, and let the rest follow.
Pegboard Wall Above the Workbench
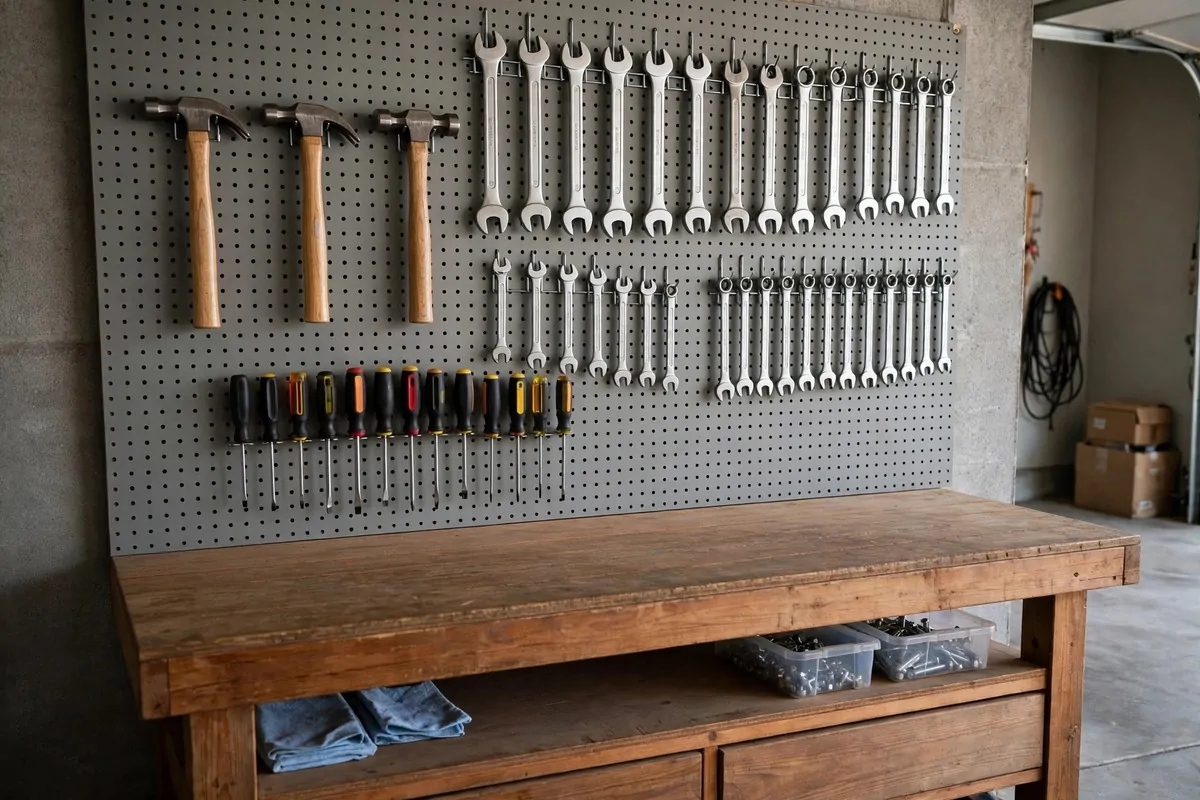
A pegboard above your bench puts every hand tool right where your eyes look first.
You hang a hammer here, a wrench there, and suddenly you stop digging through drawers. I put my most used tools in the middle, and the ones I grab once a month go near the edges.
Hooks cost very little, and you can move them in seconds when your habits change. I moved my screwdrivers three times before I found a spot that felt right, and it took me less than a minute each time.
Keep the board at arm height so you never need a step stool for a simple job. Your shoulders will thank you, and you will actually put tools back because it is easy.
Small baskets clip onto the board too, and they hold tape, pencils and bits. I keep a little pot for screws I take out during a fix, so they do not roll off the bench and vanish.
Paint the board a light colour if your garage is dark, because pale boards make tools stand out. I painted mine a soft cream, and now I can spot a black handle from across the room.
Leave a little empty space on purpose, because a full board is hard to use. Empty hooks invite you to hang the next tool up instead of dropping it on the bench.
Try this first if you are new to wall storage, as it is cheap, simple and fast to set up. One Saturday morning is enough to change how your whole bench feels.
Slatwall Panels That Hold Heavy Tools
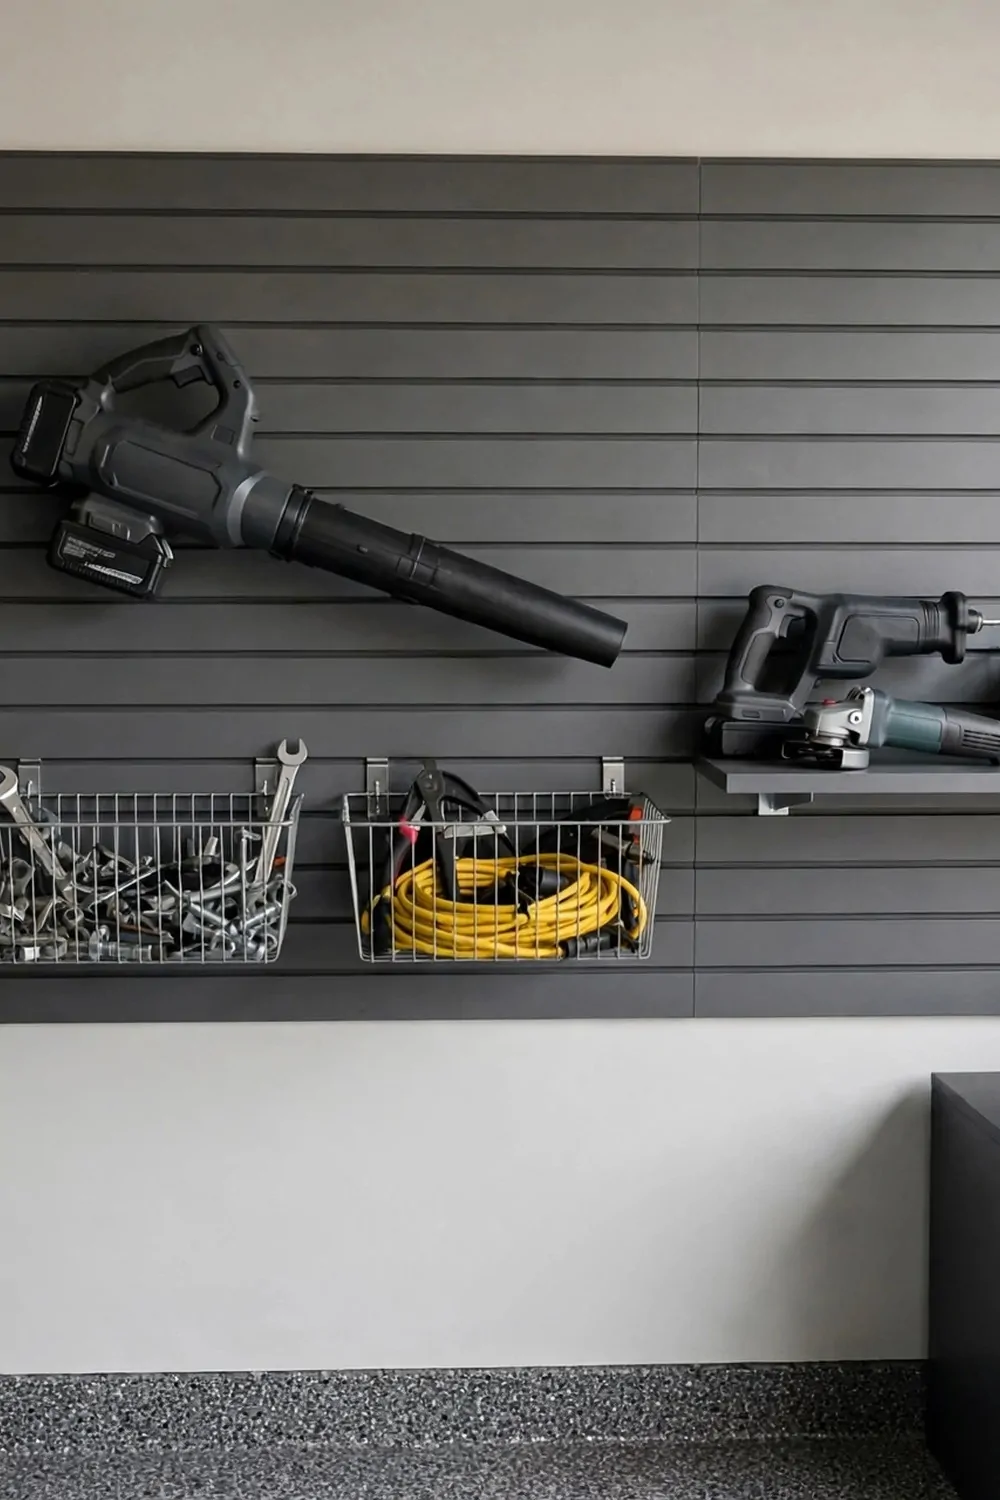
Slatwall looks like neat lines across the wall, and each line holds a strong hook or shelf.
I like it for heavy tools because the hooks lock in and do not slide around. My big drill hangs there all week, and it has never slipped once.
You can mix shelves, baskets and hooks on the same panel, so one wall does many jobs. I have a shelf for boxes on top, hooks for tools in the middle, and a basket for gloves at the bottom.
Start with one panel behind your main work spot, and add more later if you need them. I started with two panels, and a month later I added a third when my tools grew.
Check that the panel is fixed into the wall studs, not just the plaster, because heavy tools need a solid hold. I asked my brother to help me find the studs, and it took us ten minutes with a small magnet.
Wipe the panels now and then, as dust settles in the grooves. A quick cloth once a month keeps them looking clean and keeps hooks sliding in smoothly.
This system suits a busy garage where tools change often, since you can move a hook without tools. I move my saw hook in winter when I need more room for other gear.
If you want a wall that looks tidy and holds real weight, slatwall is a strong pick. It costs more than pegboard, but it earns its place fast.
French Cleat Wall You Build Yourself
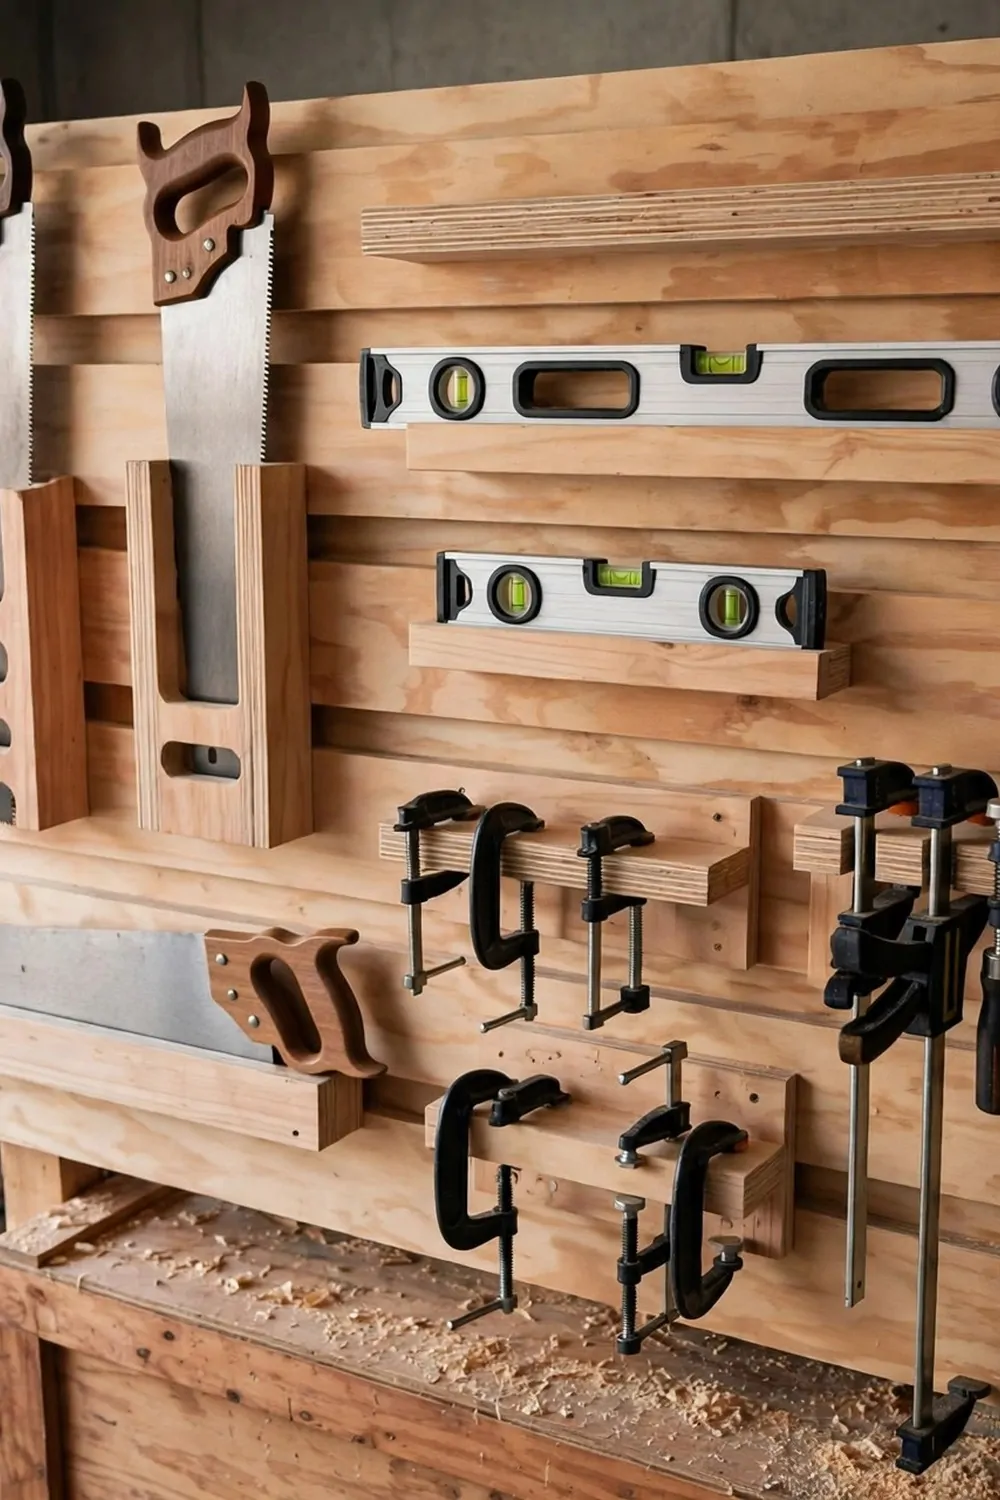
A French cleat wall is just strips of wood cut at an angle, fixed in rows across the wall.
Each holder you make has a matching angled back, so it hooks onto a strip and stays put. I made my first holder from scrap wood, and it held my level perfectly on the first try.
The best part is that you can build holders to fit your own tools, not someone else’s idea of them. My saw holder is shaped for my saw, and my clamp rack fits my clamps exactly.
You do not need fancy tools to start, just a saw, some screws and a level. I cut my strips on a Sunday afternoon, and by tea time the wall was ready for holders.
Make one holder at a time, and test it before you make ten more. I learned this the hard way when I built five boxes that were all a little too small.
Label each holder if you share the garage, so everyone knows where things live. My kids know the hammer goes on the holder with the hammer shape, and it works.
Wood looks warm and friendly in a cold garage, and you can paint it any colour you like. I left mine plain wood, and it still makes me smile when I walk in.
This is my favourite wall for people who like to make things, because the wall grows with your skills. Start small, and let it grow one holder at a time.
Magnetic Tool Strips for Wrenches and Screwdrivers
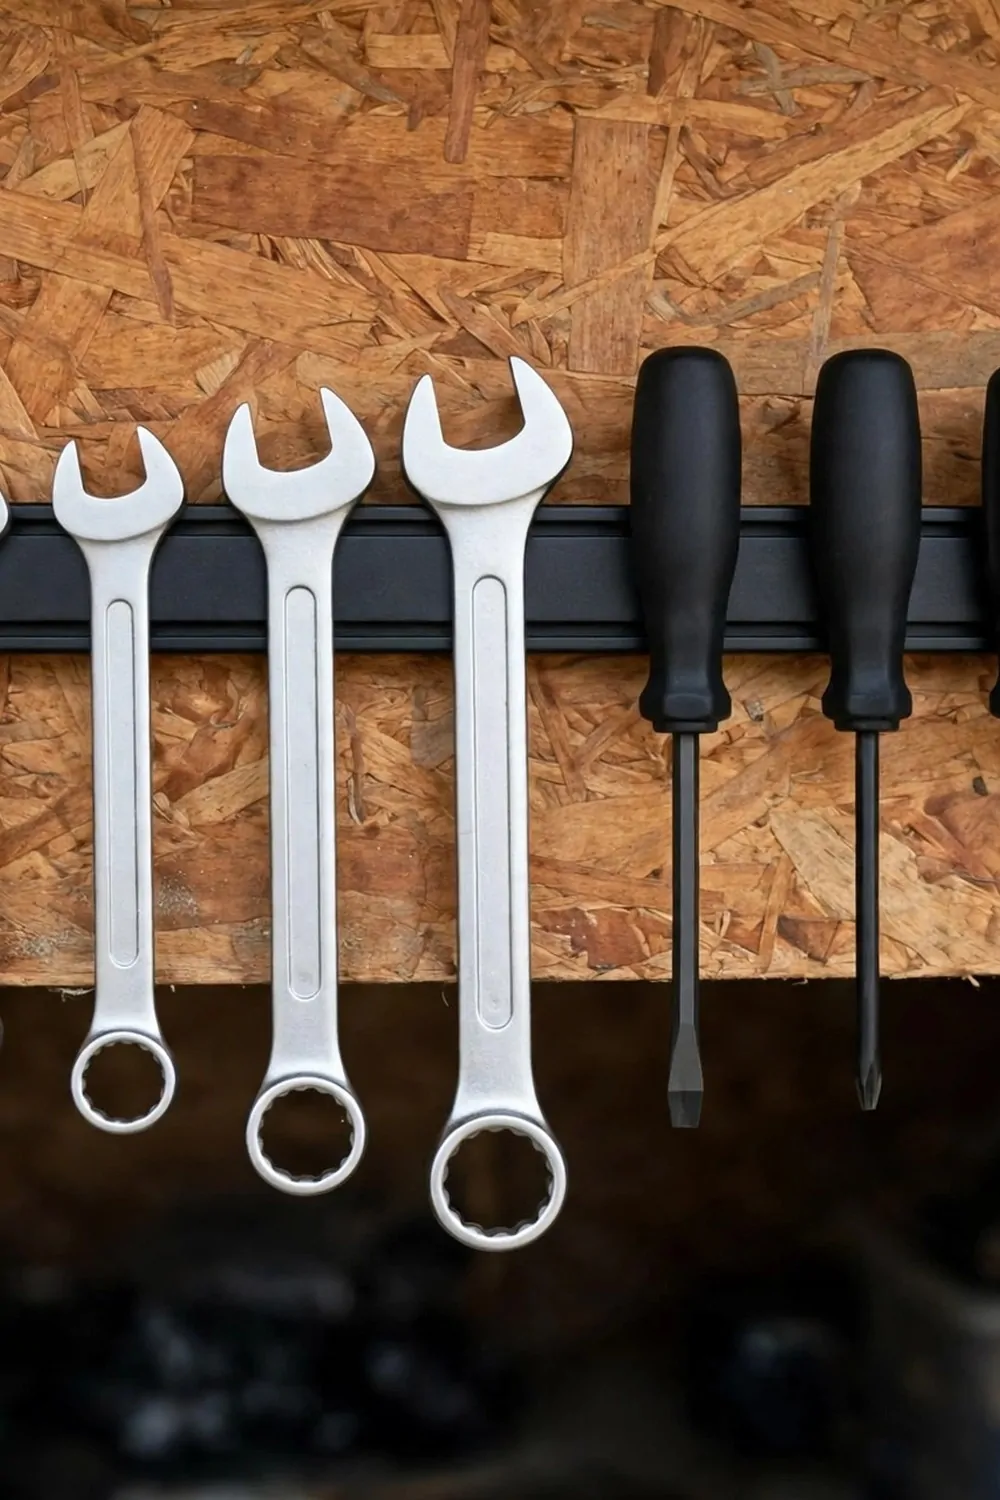
A magnetic strip is a long bar that holds metal tools with a strong pull.
You just press a wrench against it and it stays, no hook needed. I love the soft click when a tool snaps into place, and I can see at once if one is missing.
Put the strip at eye level near your bench, so you grab and return tools without thinking. My most used screwdrivers live on mine, and I reach for them without even looking now.
Keep the strip clean, because dust and metal bits can weaken the hold a little. I wipe mine with a dry cloth every few weeks, and it stays strong.
Do not hang very heavy tools on a short strip, as they may slide down over time. I keep my heavy wrenches on hooks, and the light ones on the magnet.
You can use two strips side by side if you have many tools, one for wrenches and one for screwdrivers. It looks tidy, and it saves you hunting through a drawer.
This is a quick win for a messy bench, because one strip takes ten minutes to fit. I fitted mine before lunch, and my bench has stayed clearer ever since.
Try it for the tools you use every day, and you will wonder why you waited so long. Small change, big difference, every single day.
Horizontal Rail System for Big Tools
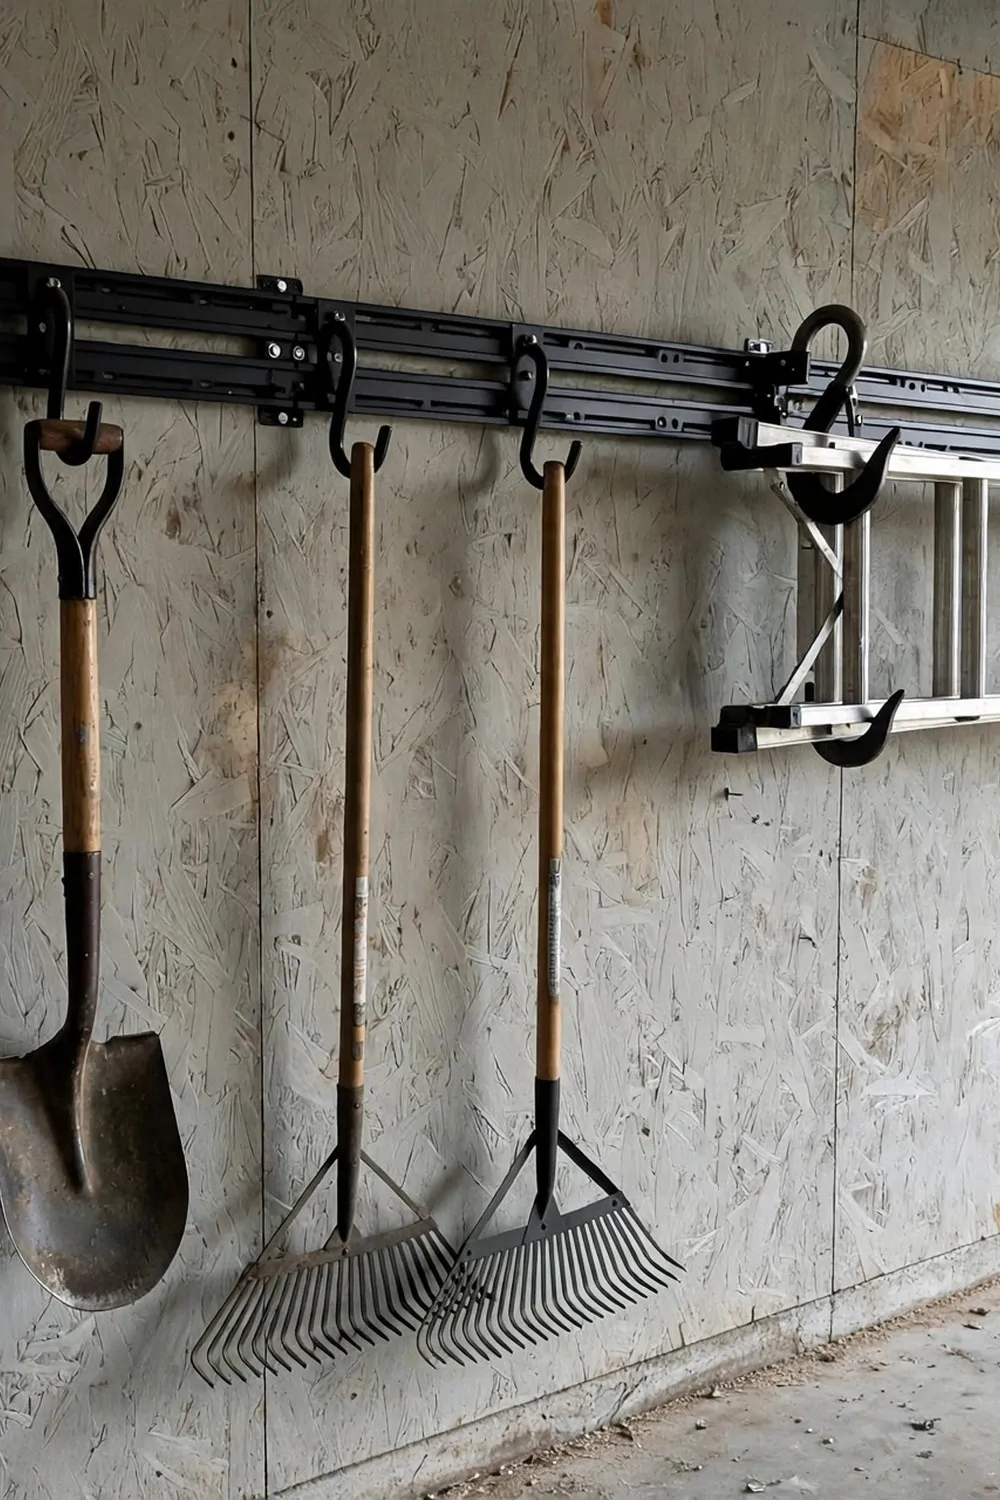
A rail system is one long bar fixed high on the wall, with big hooks that slide along it.
Long tools like shovels and rakes hang from the hooks by their handles, and their heads stay off the floor. I used to trip over my rake every week, and now it hangs quietly on the wall.
Slide the hooks apart to fit each tool, and move them when your set changes. I shifted mine when I bought a new spade, and it took seconds.
Fix the rail into studs, because long tools are heavy and they pull down hard. I used long screws, and I tested each hook with a good tug before I trusted it.
Keep the rail above head height for tall tools, so you do not bump into them. My rail sits just above my head, and the tools hang clear of my walkway.
You can hang a small ladder on two hooks on the same rail, which frees a whole corner. I did this last month, and the corner now holds my bins instead.
Wipe the rail now and then, and check the screws once a year. A quick check keeps everything safe, and it only takes five minutes.
If your floor is full of long handles, a rail is the fastest fix I know. One rail, a few hooks, and your floor is yours again.
Tool Outlines So Nothing Goes Missing
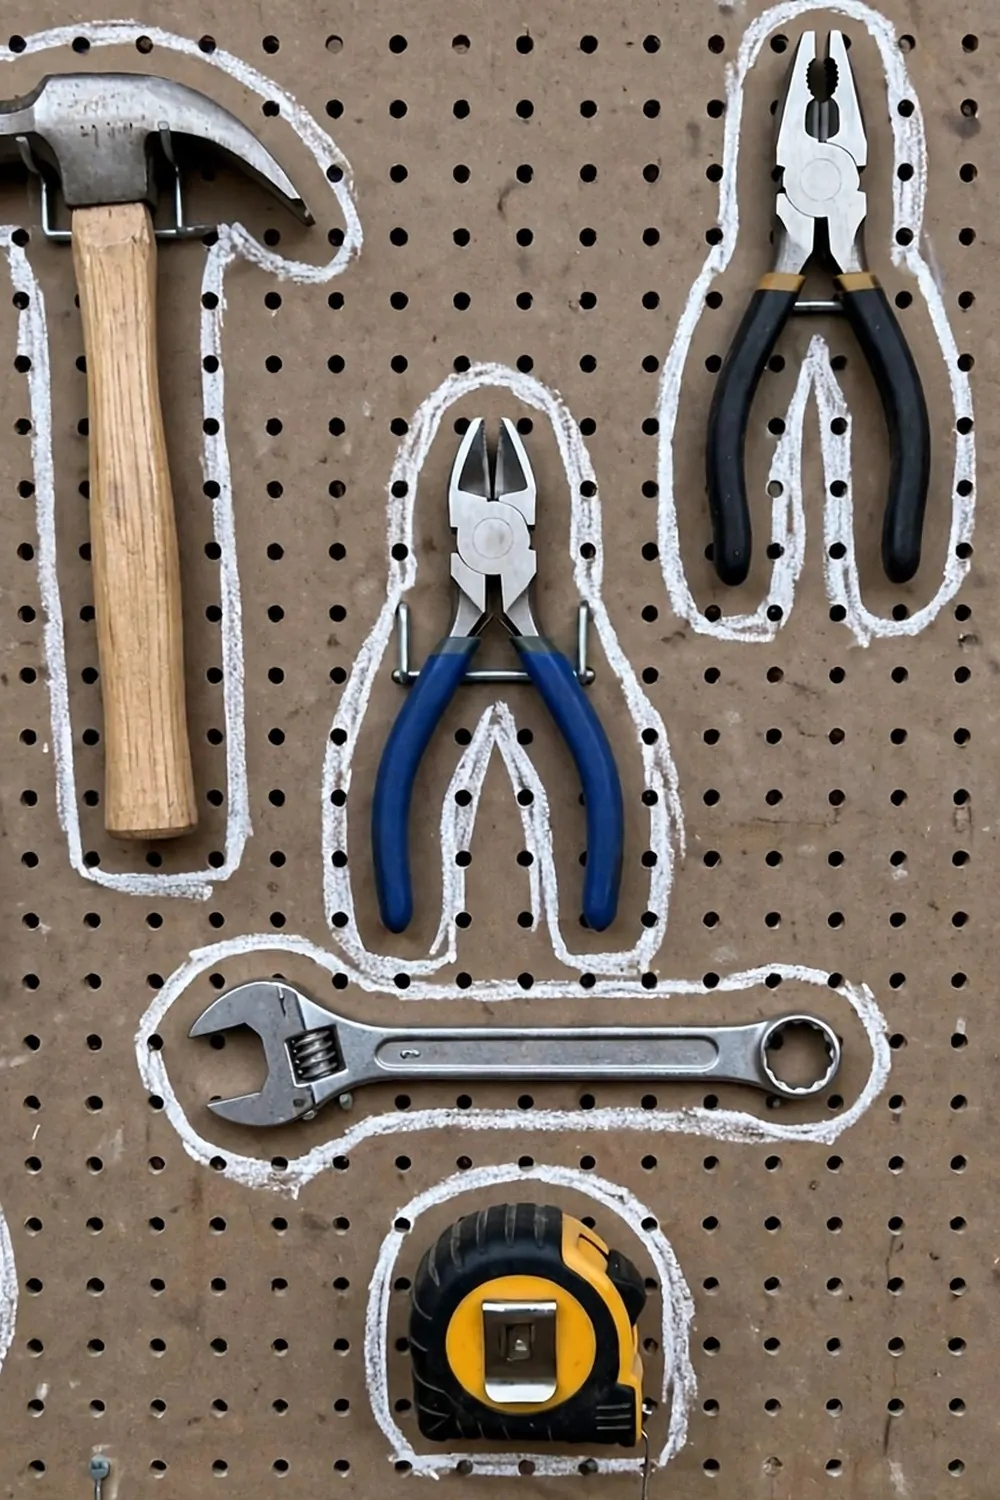
Draw a white outline around each tool on your board, and every tool gets its own home.
When a tool is missing, you see the empty shape at once. I noticed my pliers were gone in seconds last week, and I found them in the garden where I had left them.
Use a paint pen or white marker to draw the shapes, and take your time to trace neatly. I traced mine on a quiet evening, and it felt a bit like a puzzle.
Put the outline where the tool hangs best, not where it looks best in a photo. My hammer outline sits a little lower than the rest, because that is where my hand reaches first.
This trick also helps other people in the house put tools back right. My husband now hangs the saw in its outline without being asked, which never happened before.
If you buy a new tool, draw a new outline for it and give it a home on day one. New tools get lost fast if they have no place to live.
Outlines make a plain board look smart, and they cost almost nothing. A marker, a steady hand, and half an hour is all you need.
Try it on one board first, and you will soon want outlines everywhere. It is the simplest way I know to keep tools from wandering off.
| Wall system | Best for | Holds | Cost |
|---|---|---|---|
| Pegboard | Hand tools above a bench | Light tools | Low |
| Slatwall | Heavy tools and gear | Heavy loads | Medium |
| French cleat | Custom holders you build | Medium to heavy | Low |
| Rail system | Long tools and ladders | Long and bulky items | Low to medium |
Small Parts Bins on the Wall
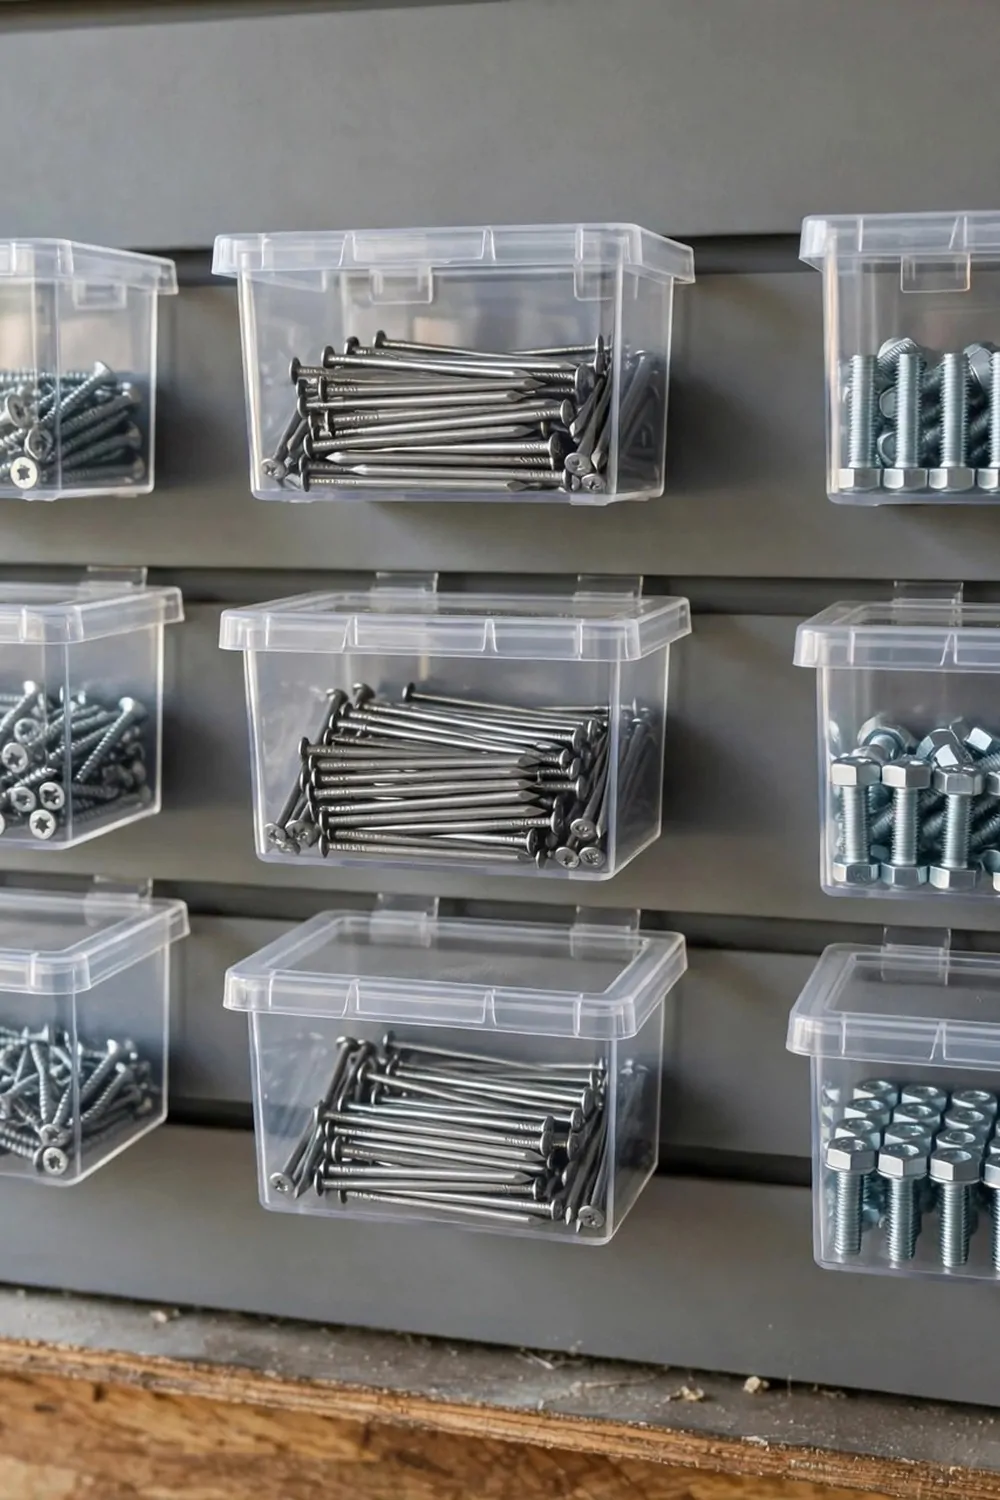
Small parts bins turn a messy drawer of screws into a neat wall you can read at a glance.
Clear bins let you see what is inside without opening each one. I can spot my wood screws from the door now, and I no longer open five boxes to find one size.
Mount the bins on a rail or a board, and keep the most used sizes at eye level. My most used screws sit in the middle row, and the odd sizes live up high.
Label each bin with a simple word or a number, so you do not have to guess. I used a marker and small paper tags, and it took me one evening to label them all.
Keep lids on bins that hold tiny parts, because a bump can scatter them everywhere. I learned this after a nail bin fell once, and I am still finding nails in corners.
Sort by type first, then by size, and do not mix them. Screws in one row, nails in the next, and bolts in their own row keeps it simple.
Add a bin for spare bits, like wall plugs and washers, so they have a home too. My spare bin has saved me three trips to the shop this year already.
This wall pays for itself in saved time, because you stop hunting for tiny parts. One tidy wall, and your small jobs get much faster.
Cordless Drill Charging Station on the Wall
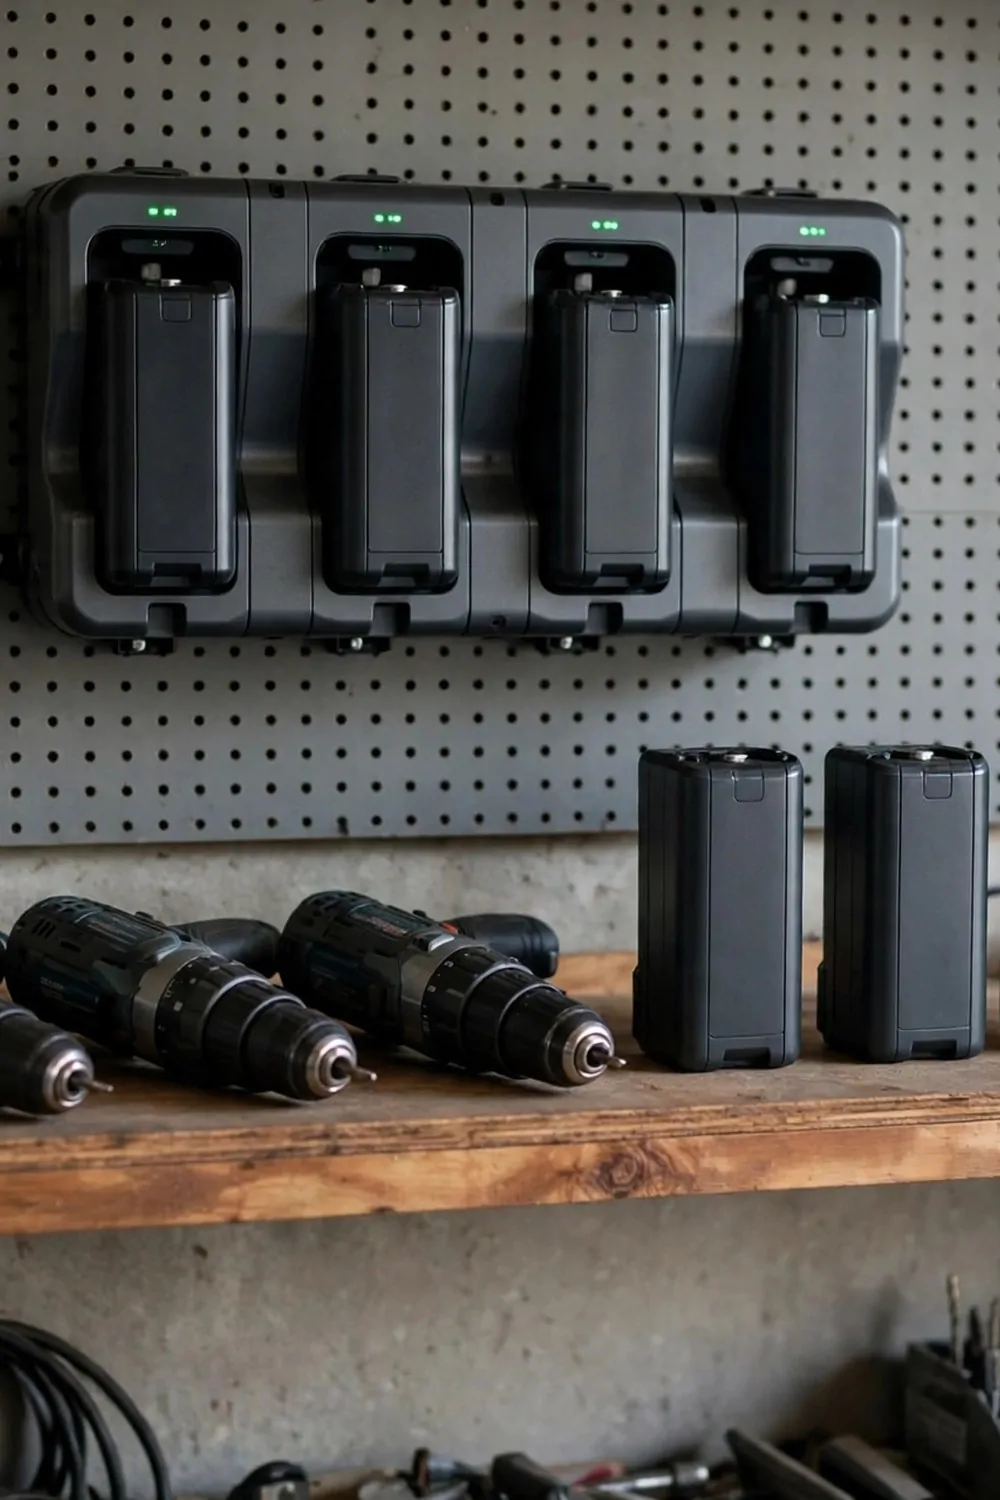
A charging station gives your drills and batteries one safe home on the wall.
I used to find drills on the floor, on shelves, and once in a plant pot. Now they all live on one shelf above my bench, and I always know where they are.
Fix a shelf with slots or hooks for each drill, and a strip for the chargers below. My drills hang by their handles, and the batteries sit in a neat row to charge.
Keep the station near a power point, so you do not need long cords across the room. I fitted mine right beside the socket, and the cords stay short and tidy.
Label each battery spot if you have more than one, so a flat battery goes straight back to charge. I put a small dot on the flat ones, and it helps me a lot.
Leave space for air around the chargers, because they get warm while they work. I left a gap between each charger, and nothing ever feels too hot now.
Check the cords now and then for wear, and keep the shelf dust free. A quick wipe each month keeps it safe and clean.
This one wall spot changed my whole routine, as I now start every job with a full battery. No more half-charged drills, no more waiting around.
Garden Tool Rack on the Side Wall
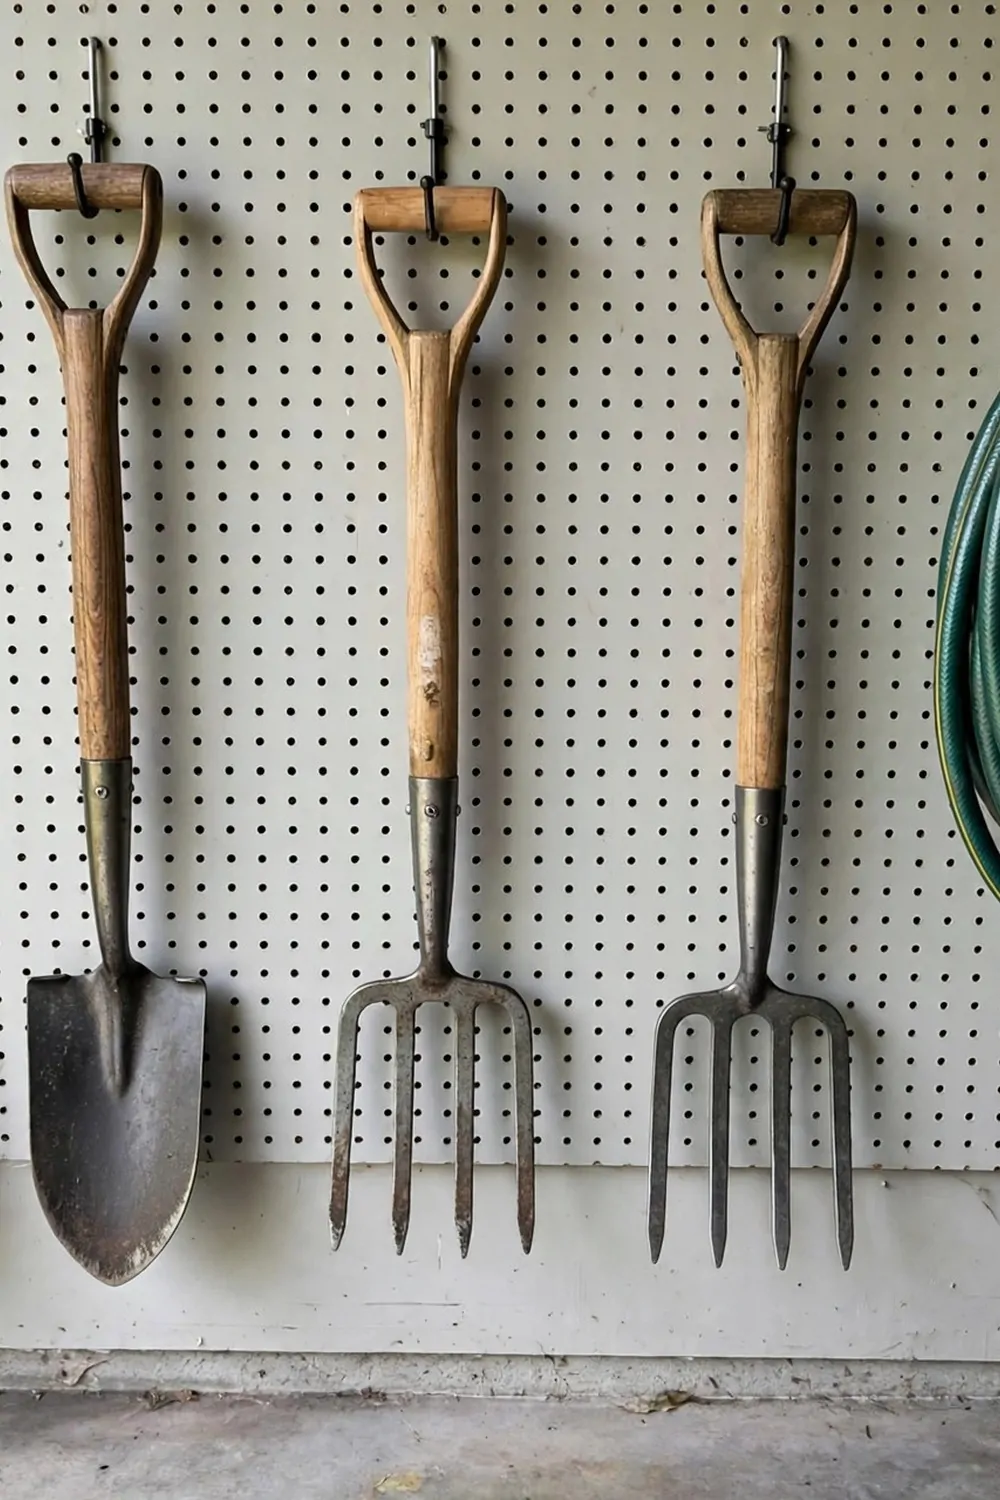
A garden tool rack on the side wall keeps muddy tools out of your main work area.
Hang spades and forks by their handles, with the heads down and clear of the floor. I hung mine in height order, and it looks tidy and makes sense to me.
Use strong hooks that hold the weight, and space them so handles do not tangle. My fork and spade used to clash, so I moved them a hand width apart and it fixed it.
Coil the hose on a large hook beside the tools, so it does not sit in a wet pile. My hose used to kink all the time, and now it coils neatly and lasts longer.
Keep a small brush near the rack, so you can knock mud off before you hang tools up. I keep an old brush in a pot by the door, and it takes seconds to use.
Wipe metal heads with an oily cloth now and then to stop rust. I do this in autumn, before the tools rest for the cold months.
This rack also keeps sharp tools away from little feet and paws. My garden tools are high enough to be safe, and low enough for me to reach.
If your garden tools live in a heap by the door, a side wall rack is the fix. One wall, a few hooks, and your garden corner feels calm.
Bike Hooks That Free the Floor
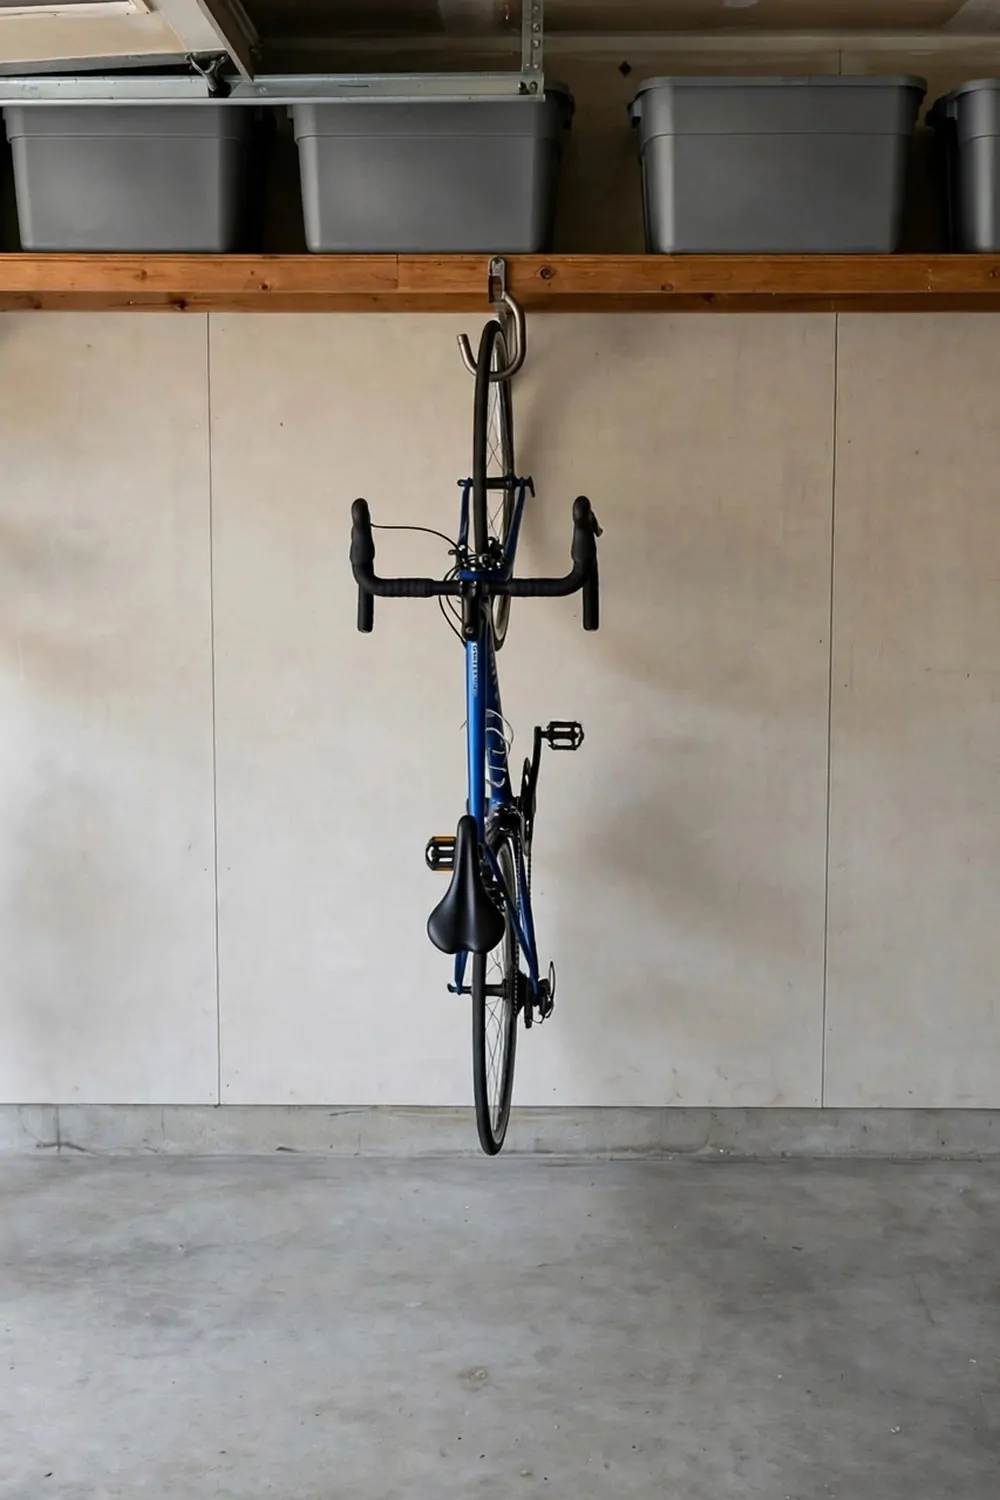
Bike hooks lift your bikes off the floor and give you back a whole strip of garage.
Hang a bike by its front wheel or its frame, whichever hook you choose. I hang ours by the front wheel, and the bikes sit flat against the wall like pictures.
Fix the hooks into studs, because a bike is heavy and you do not want it to fall. I tested each hook by hanging from it gently first, just to be sure it held.
Keep the hooks at a height you can reach without a ladder. I can lift my bike up and hook it with one smooth move now, after a little practice.
Leave space between bikes so handlebars do not clash and scratch paint. I left a wide gap between ours, and the paint has stayed perfect.
Hang helmets and gloves on small hooks beside each bike, so the whole kit stays together. My helmet hangs right by my bike, and I never forget it now.
Sweep the floor under the bikes once in a while, as dust still gathers there. It is much easier to sweep now that the floor is clear.
This is a big win for a small garage, because two bikes on the wall free space for a car. Try it, and you will feel the room grow.
Ladder Hooks High on the Wall
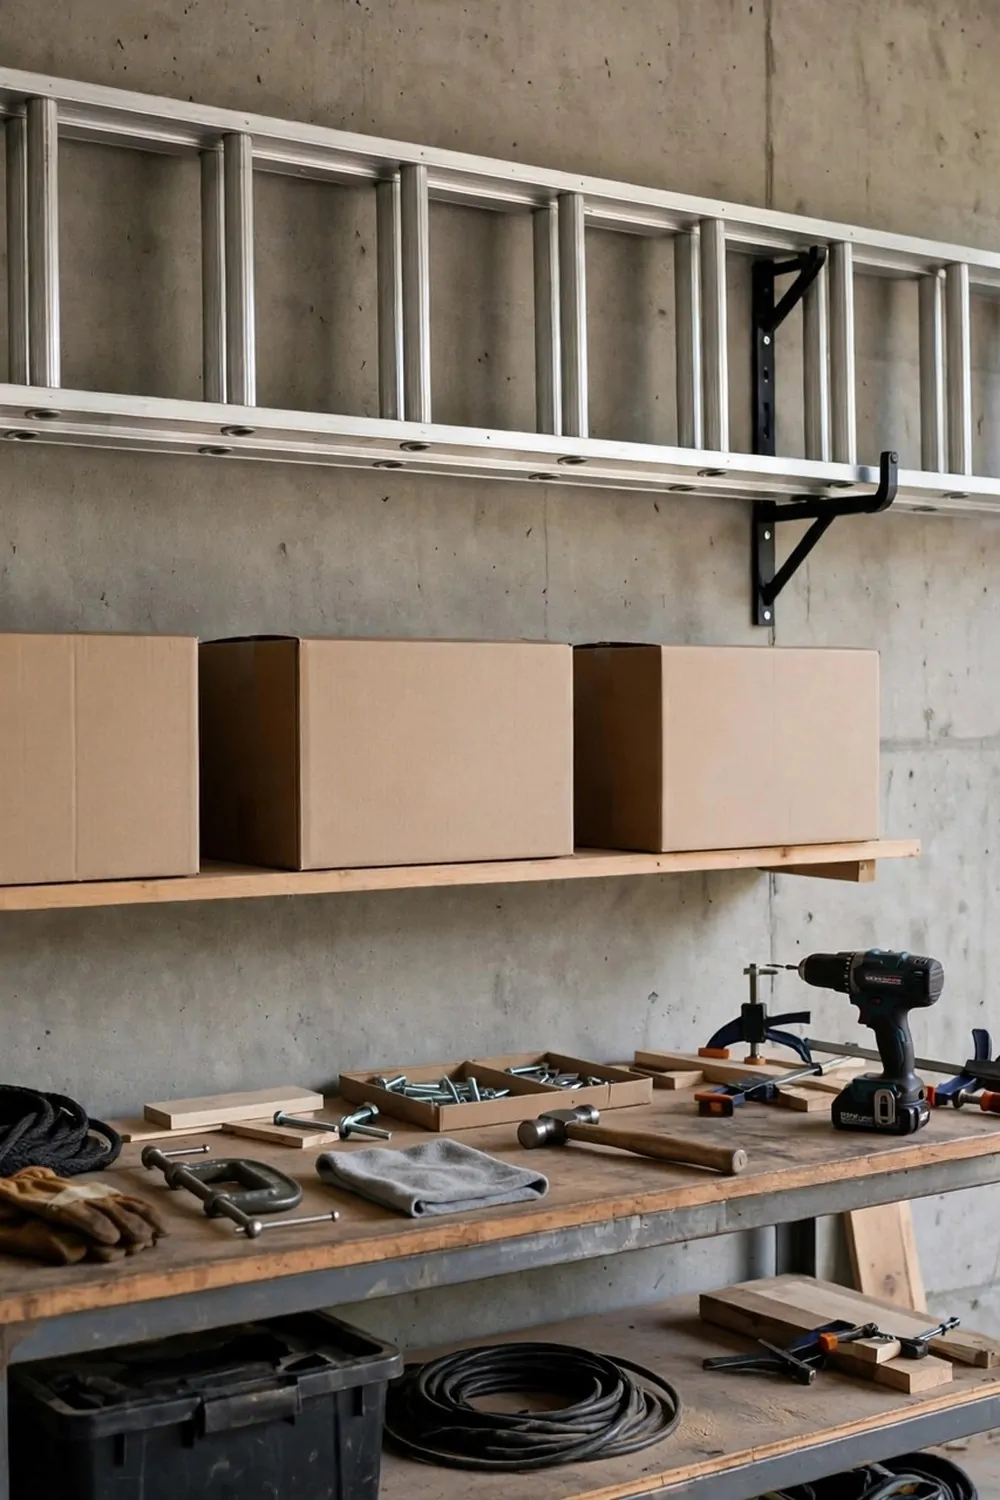
Ladder hooks high on the wall get a tall ladder out of the way and off the floor.
Hang the ladder flat against the wall, so it does not stick out into the room. Mine sits above my bench, and I walk under it without even thinking now.
Use two hooks, one near each end, so the weight is shared evenly. I fitted mine with a friend holding the ladder steady, and it took us twenty minutes.
Check the hooks are fixed into studs, because a ladder is long and heavy. I used long screws and gave each hook a hard pull before I trusted it with the ladder.
Keep the ladder high enough that it clears your head and your car door. Mine clears my car by a good gap, and I never worry when I open the door.
If you have two ladders, hang the one you use least at the very top. My small step ladder lives lower, and the tall one lives up high where I need it less.
Dust the ladder now and then, and check the hooks once a year. A quick look keeps it safe, and it only takes a minute.
This simple fix frees a corner that a ladder used to own. Your garage feels bigger the moment it goes up.
Sports Gear Baskets for Balls and Helmets
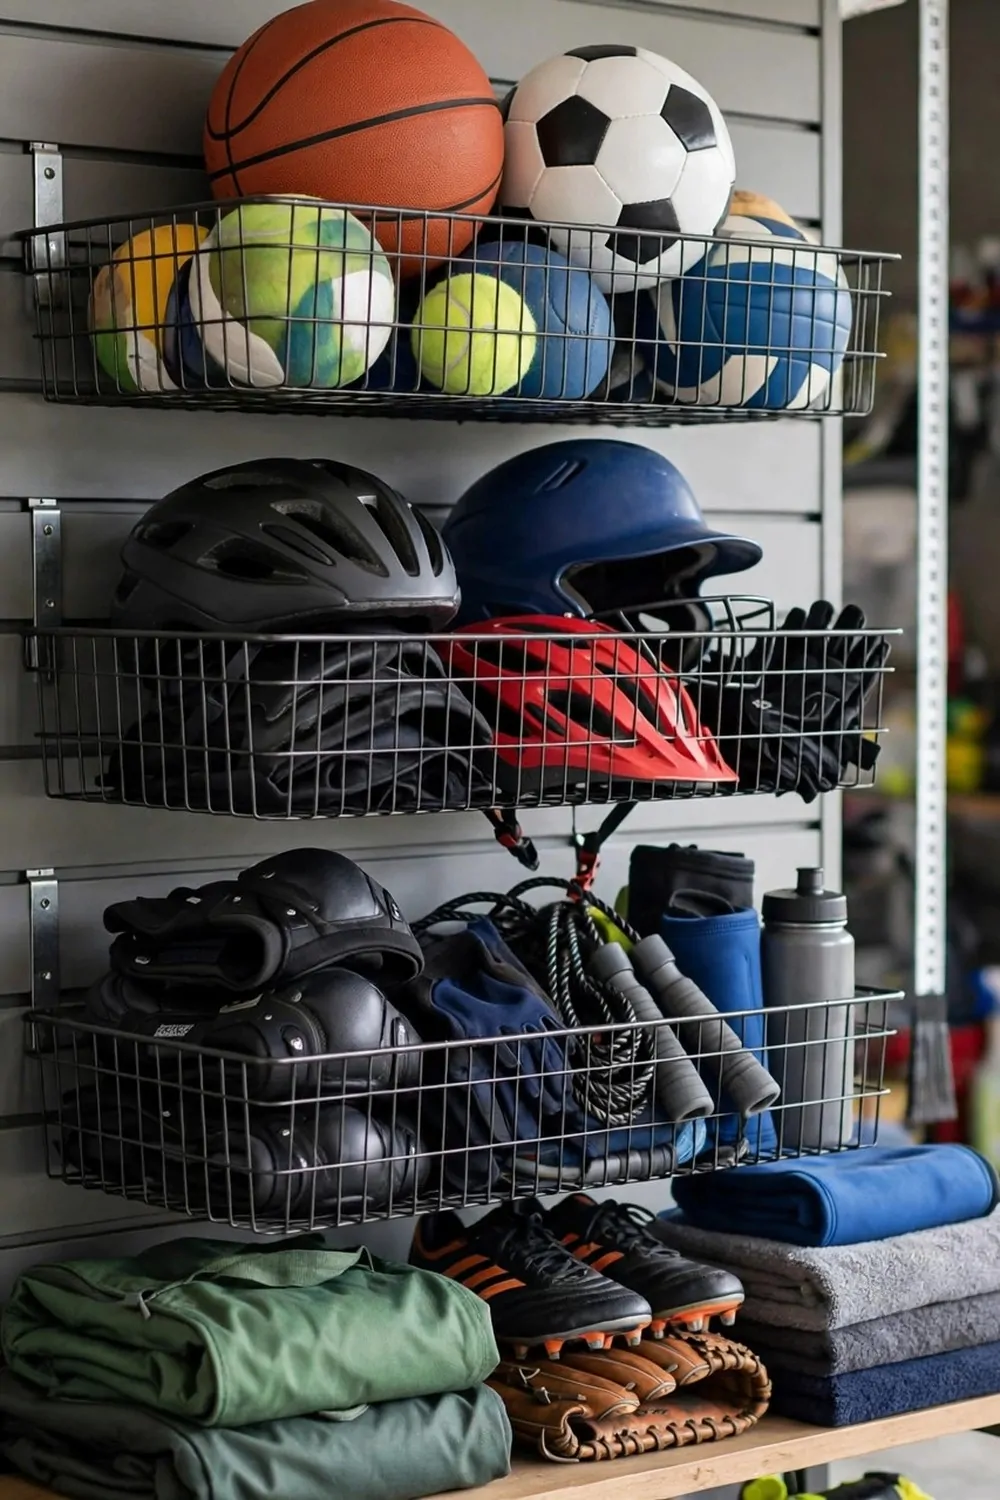
Wire baskets on the wall turn a pile of sports gear into a tidy stack you can see.
Balls go in the big baskets, helmets in the smaller ones, and gloves in a little pot. My kids now toss their balls into the basket instead of leaving them on the floor, most days at least.
Fix the baskets at a height kids can reach, so they can help tidy up. I put the ball basket low, and my youngest can reach it without help.
Use open wire baskets so gear can dry and air can move around it. Wet gear left in a closed box smells fast, and open baskets keep it fresh.
Label each basket with a simple picture or word, so everyone knows what goes where. I drew a little ball on one label, and even my youngest gets it.
Keep the heavy baskets low and the light ones high, for safety. My helmet basket sits at eye level, and the ball basket sits near the floor.
Empty the baskets now and then and wipe them out, as grass and dust gather fast. I shake mine out once a month, and it takes two minutes.
This wall makes after-school tidy up so much easier, and the floor stays clear for the car. One wall of baskets, and the sports mess has a home.
Hose and Extension Cord Reels
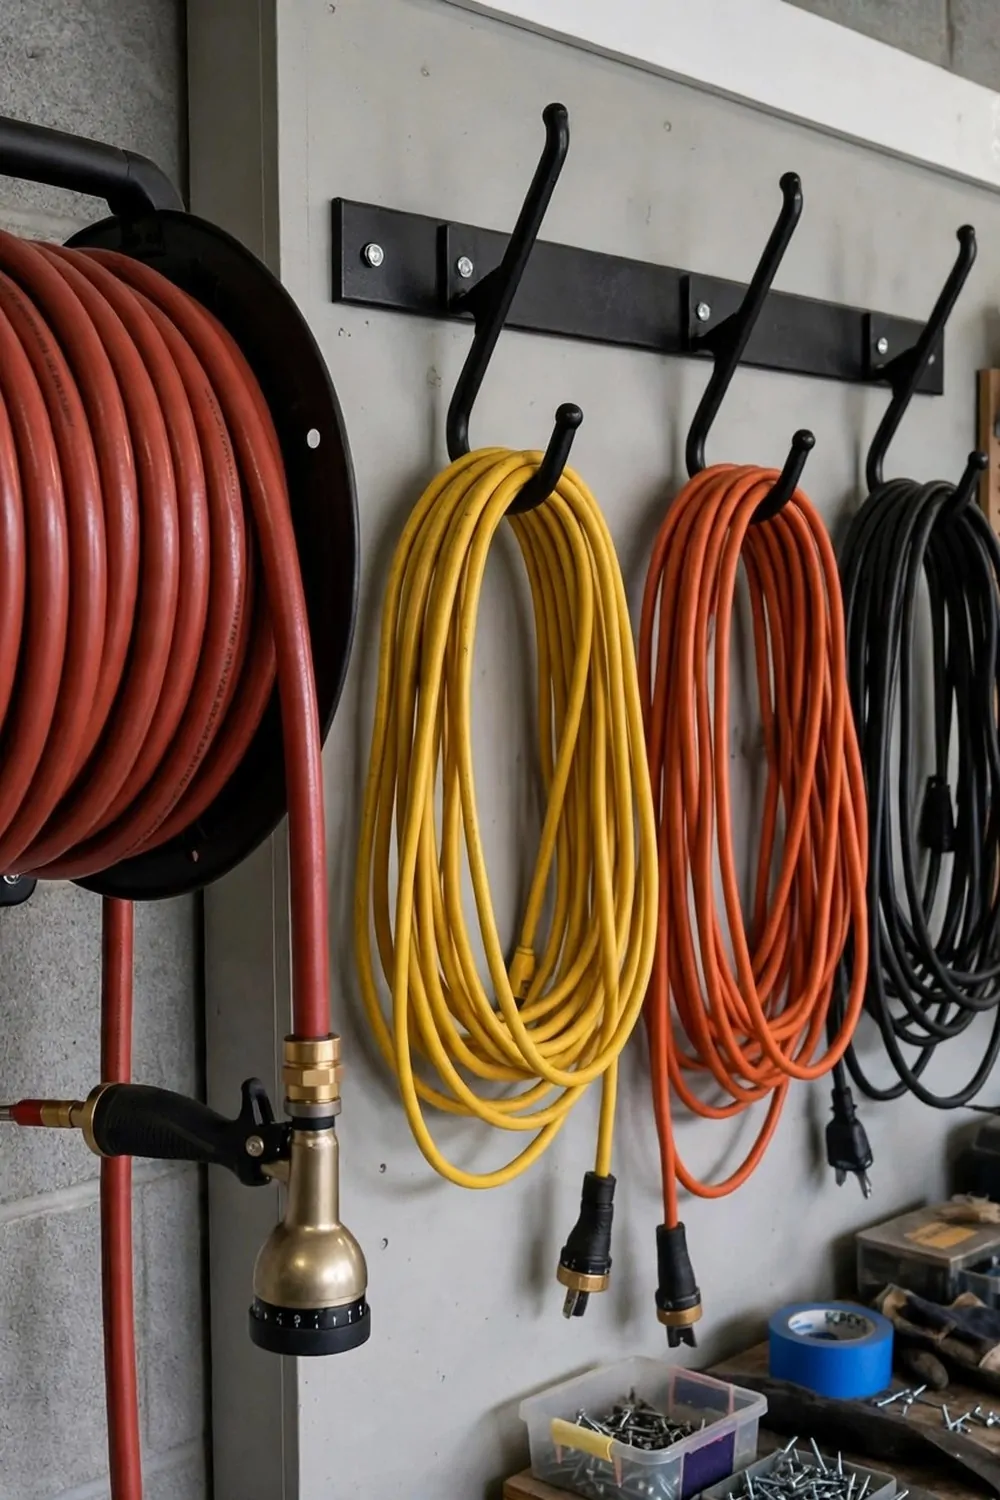
A wall reel keeps a hose neat, and hooks keep cords from turning into a tangled knot.
I used to spend ten minutes untangling a cord before I could start a job. Now I lift it off its hook, and it unrolls in seconds.
Wind the hose in even loops, and do not pull it tight around the reel. A loose wind lasts longer, and my hose has no kinks since I started doing this.
Hang each cord on its own hook, and label the hook if you have several lengths. I have a short cord hook and a long cord hook, and I always grab the right one first time.
Keep the reel near the door you use most, so you can reach the garden fast. Mine sits by the side door, and I use it far more now that it is easy to reach.
Check cords for cuts before you use them, and keep them dry. I give mine a quick look each time, and I coil them back up straight after use.
Drain the hose before winter, so water inside does not freeze and split it. I learned this one cold morning, and I never forget it now.
This wall is a small job with a big payoff, because tidy cords save time and temper. One reel, a few hooks, and the knot is gone.
Shelf Above the Pegboard for Paint Cans
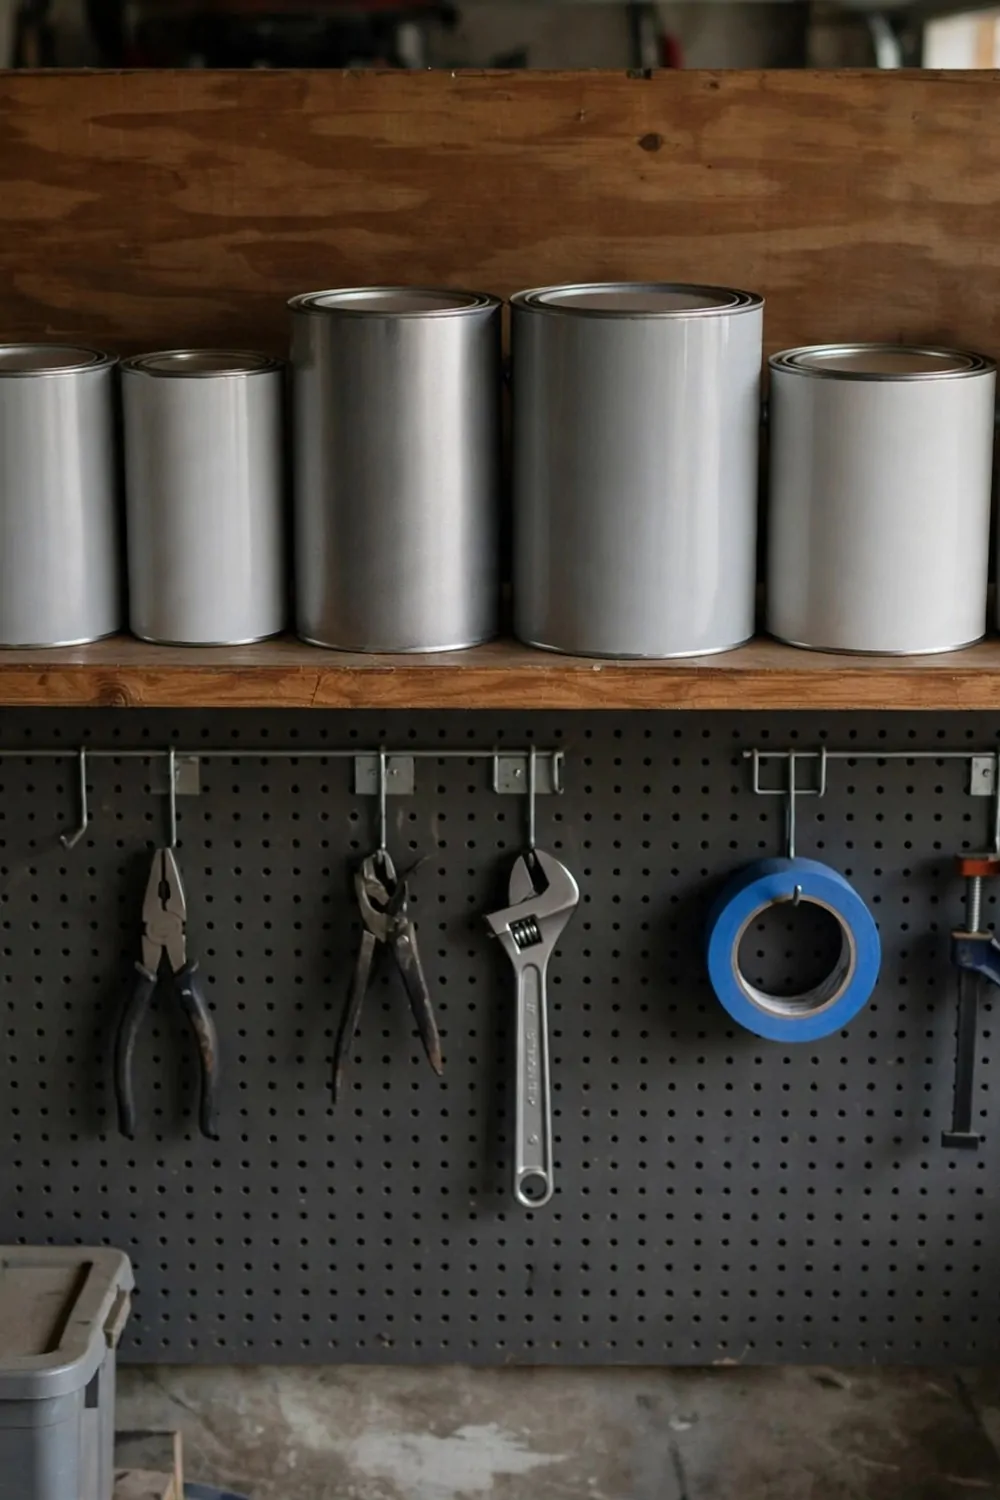
A shelf above your pegboard puts paint cans where you can see them, but out of your work space.
I used to stack paint cans on the floor, and I knocked one over twice. Now they sit in a row on a shelf, and my floor stays clean.
Use a strong shelf with a small front lip, so cans cannot slide off. My shelf has a thin strip of wood at the front, and it has caught a can more than once.
Sort cans by colour or by room, and put the ones you use most at the front. My white paint sits at the front, because I reach for it most often.
Keep lids tight, and wipe the rims before you close them. A clean rim seals better, and my paint stays fresh for months longer now.
Label each can with the room and the date you opened it. I write on the lid with a marker, and it saves me guessing later.
Do not overload the shelf, as paint is heavy and the shelf can sag. I keep just one row of cans, and the rest live in a cupboard.
This shelf frees your bench for real work, and it keeps paint safe from knocks. One shelf above the board, and your paint has a proper home.
Deep Baskets for Spray Cans and Bottles
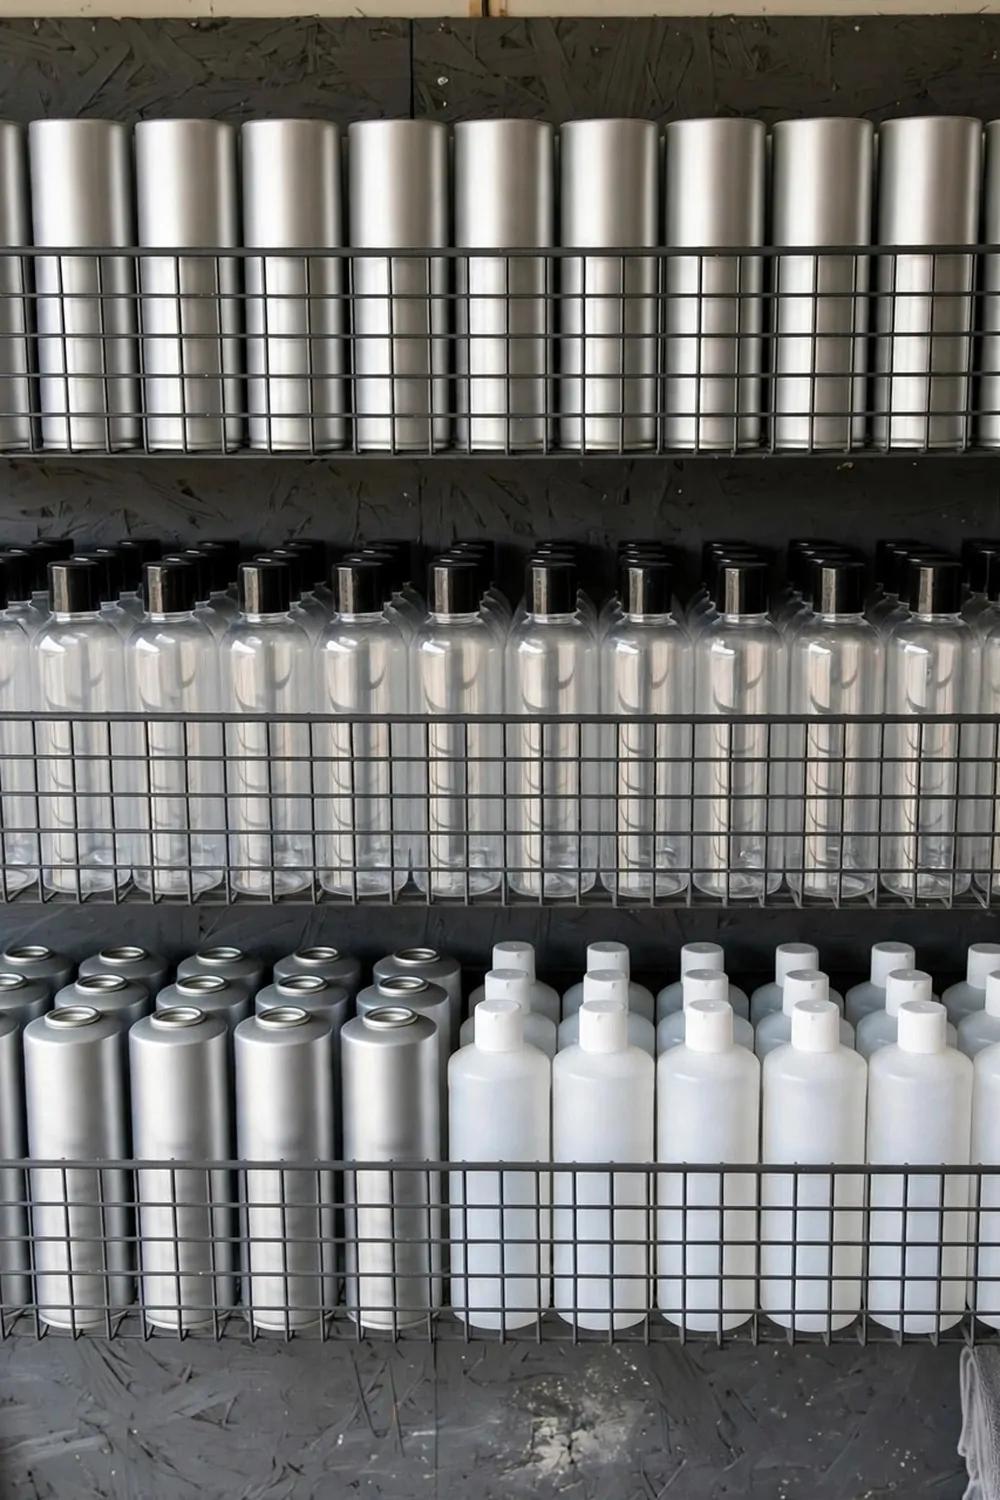
Deep baskets hold spray cans and bottles upright, so they do not fall over and roll away.
I used to keep sprays in a box, and I had to dig to the bottom every time. Now I can see every can from the front, and I grab the right one in seconds.
Fix the baskets at chest height, so you can read the labels without bending. My spray basket sits just below my eyes, and it is easy to scan.
Sort by job, with cleaners in one basket and sprays in another. I keep my wood sprays together, and my cleaners in a basket of their own.
Keep caps on, and store cans upright as the label says. I check the caps when I put cans back, and I have had no leaks since I started.
Do not hang baskets near heat, because sprays do not like warmth. Mine sit on a cool wall, away from the heater and the sun.
Wipe the baskets now and then, as spray mist settles on the wire. A quick cloth keeps them clean, and the cans stay easy to read.
This is a tidy fix for a cluttered shelf, and it takes one afternoon to fit. Deep baskets, upright cans, and no more digging.
Saw and Level Holders That Keep Blades Safe
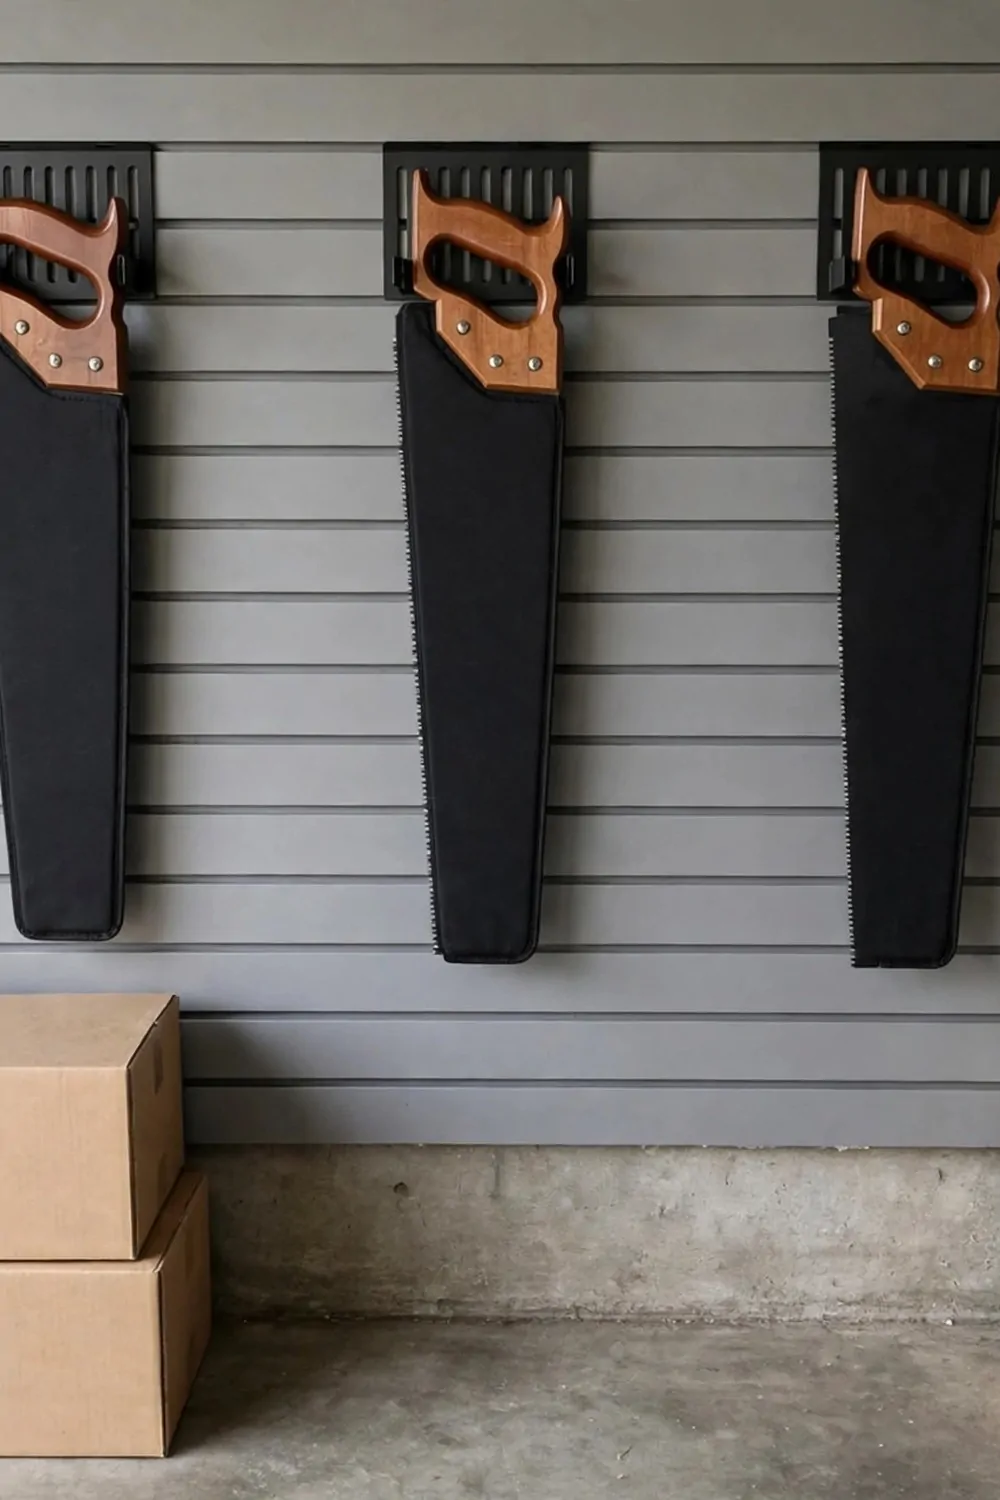
Slotted holders keep saw blades covered and safe, so you can grab a saw without a cut.
I made simple slots from wood, and each saw slides in with its teeth tucked away. My hands feel safe now, and my saws stay sharp longer too.
Hang levels in their own holders beside the saws, so they do not fall and lose their truth. I keep my long level flat in a holder, and it has stayed true for years.
Fix the holders at a height where blades stay clear of little hands. Mine sit above shoulder height, and I lift a saw down when I need it.
Make each slot a little wider than the blade, so it slides in easy and out easy. My first slot was too tight, and I had to widen it with sandpaper.
Label each holder if you have several saws, so you grab the right one first. I marked mine for wood and for fine cuts, and it saves time.
Check the holders now and then for wear, and sand any rough edges. Smooth slots protect blades, and they protect your hands too.
Safe blades are sharp blades, and a good holder keeps both. One wall of slots, and your saws are safe and ready.
Wall-Mounted Workbench That Folds Down
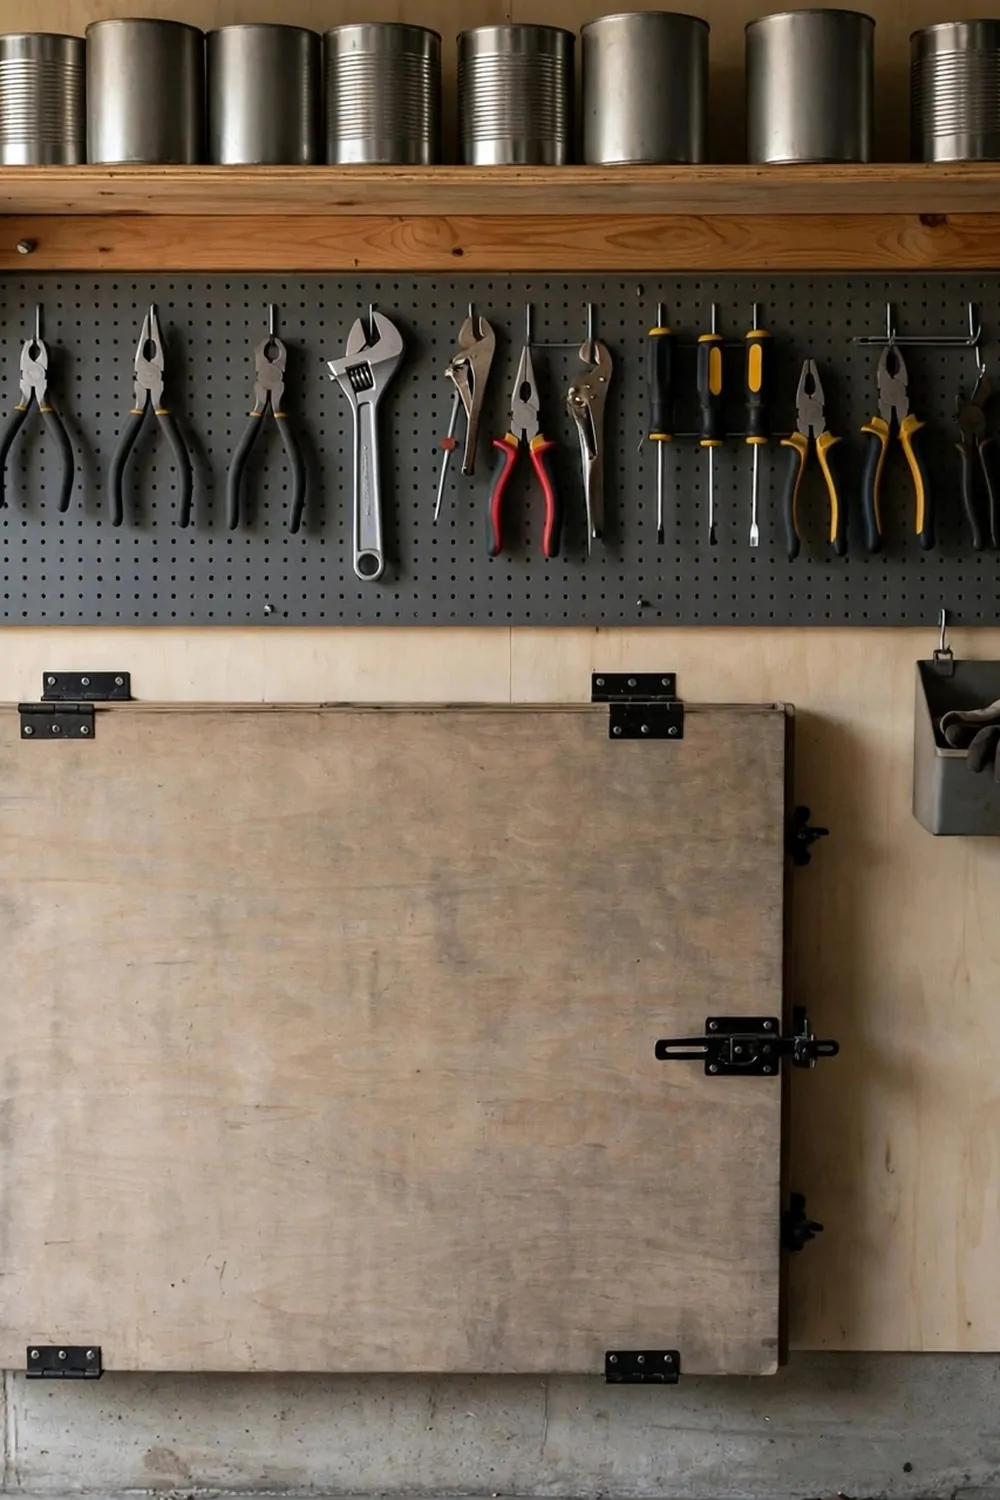
A fold-down bench gives you a work top when you need it, and your floor back when you do not.
I fold mine down for small fixes, and fold it up when the car comes in. It takes seconds, and it changed how I use my garage.
Fix the bench to studs with strong hinges, because it must hold weight when it is down. I used heavy hinges, and I tested it with a full toolbox before I trusted it.
Add a leg that folds out too, so the bench stays steady while you work. My leg clicks into place with a small latch, and the bench feels solid.
Keep the wall above the bench for tools, so everything you need is right there. My tools hang above my fold-down bench, and I never walk across the room mid-job.
Clear the bench before you fold it up, or things will fall. I learned this fast, and now I have a small tray for bits I am using.
Wipe the bench after each job, and oil the hinges once a year. A little care keeps it folding smooth, year after year.
This bench is perfect for a small garage, because it gives you space without taking space. Fold it down, do the job, fold it away.
Shadow Board for Measuring Tools
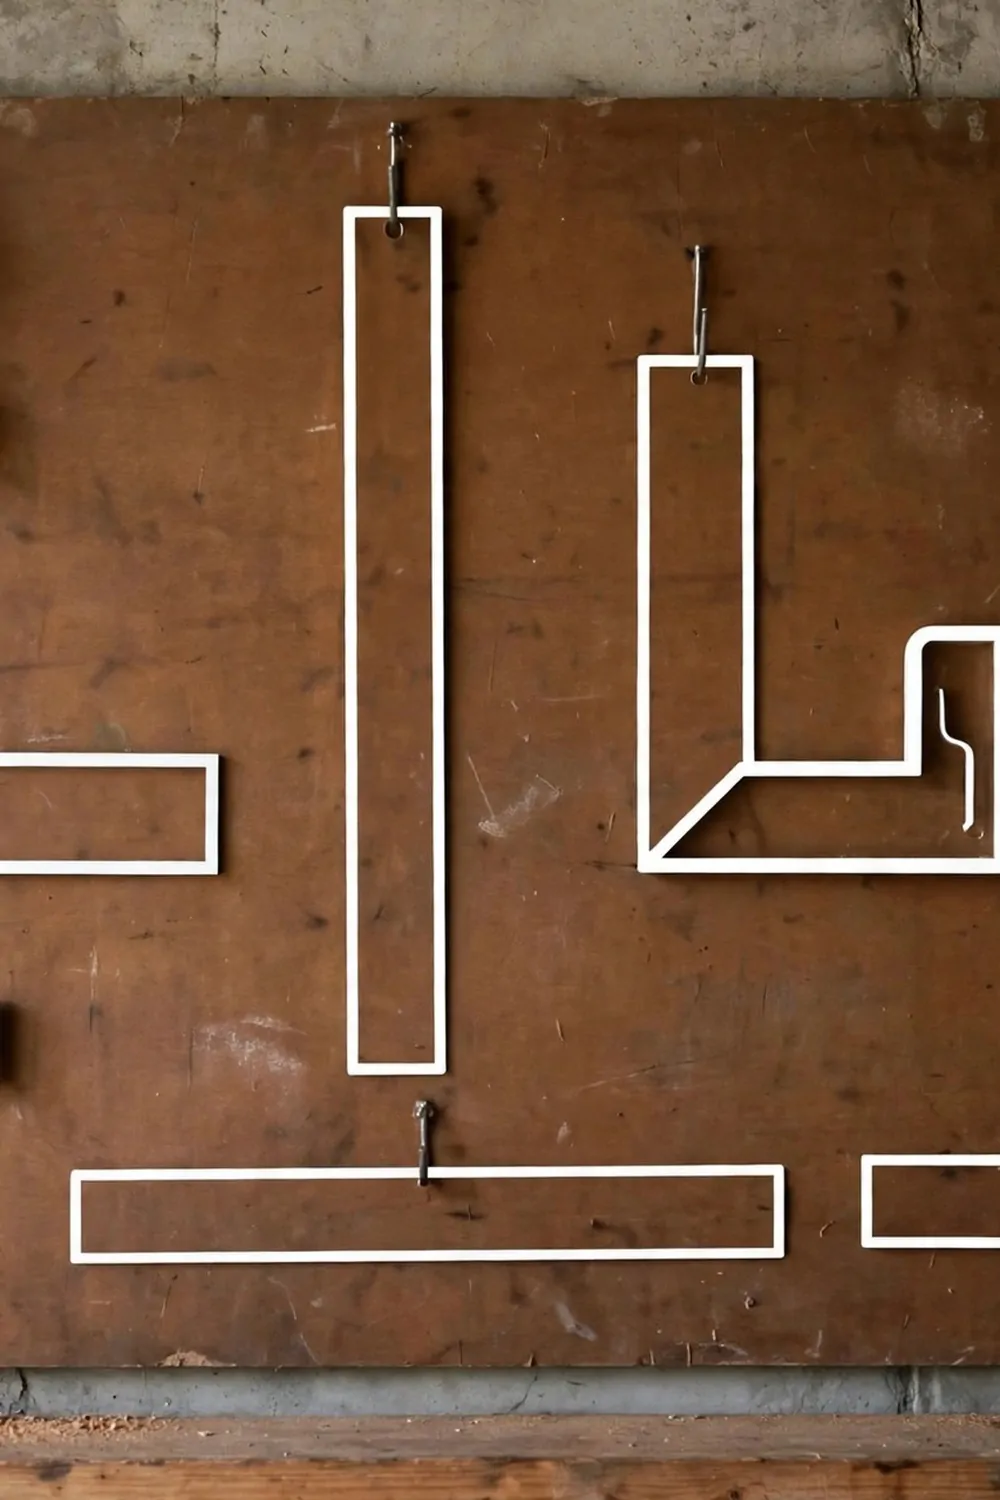
A shadow board is a board with the shape of each measuring tool painted or drawn on it.
Tapes, squares and rulers each have a dark shape behind them, so you can see where they belong. I can tell in one look if my square is missing, and that saves me hunting.
Use a board in a light colour with dark shapes, so the contrast is clear. I painted my shapes in a soft grey, and the tools stand out nicely against them.
Hang the tools on small hooks inside their shapes, so they sit flat and true. My tape hangs by its belt clip, and my ruler hangs by a small hole at its end.
Keep the board near your bench, because you measure most when you are working there. Mine sits right beside my saw holder, and I reach for it all day.
This board also teaches kids where tools live, as the shapes make it a game. My youngest loves matching the tape to its shape, and it works.
If you buy a new measuring tool, add a new shape for it on day one. A tool with no shape is a tool that will get lost, I promise you that.
A shadow board looks smart and works hard, and it costs very little to make. One board, a few shapes, and your measuring tools are always home.
Seasonal Gear Wall That Swaps With the Year
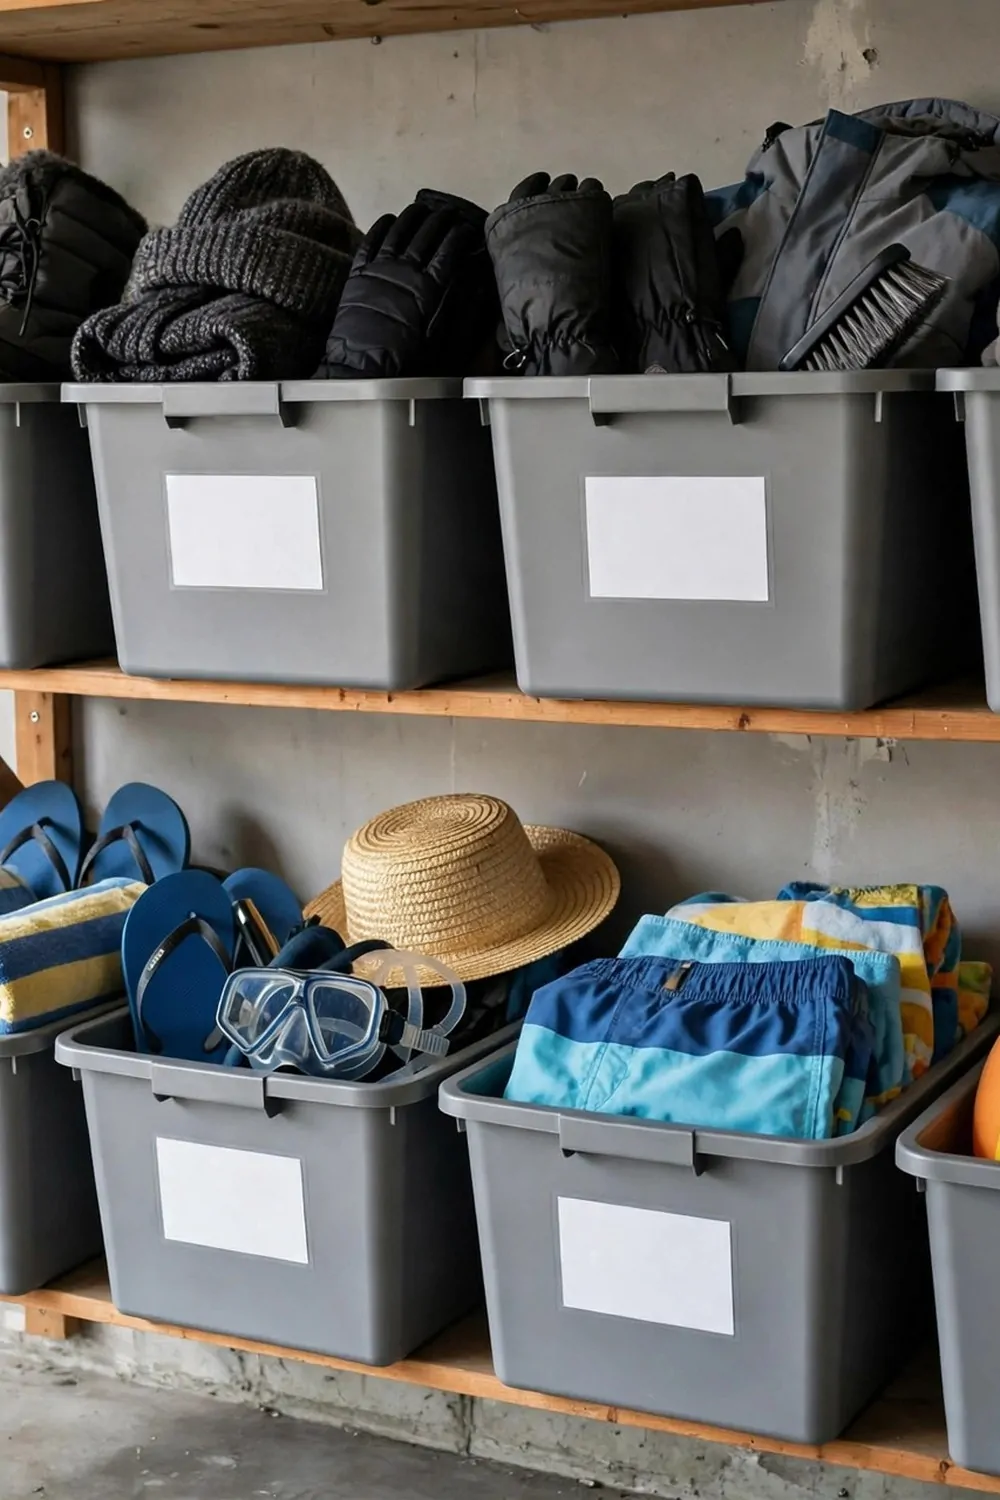
A seasonal wall swaps with the year, so the gear you need now is always easy to reach.
In the cold months, my warm gear sits low and my summer gear sits high. When the sun comes back, I swap them over in one afternoon, and the wall feels new again.
Use labelled bins for each season, so you do not have to open them to know what is inside. I write the season on each bin in big letters, and it is clear from the door.
Keep the current season at arm height, and the next season just above it. My present gear is always the easiest to grab, and the rest waits its turn.
Empty a bin before you swap it, and check what is broken or outgrown. I found two cracked buckets last spring, and I was glad to let them go.
Wash gear before you store it away, so it is clean when its season comes back. I wash my summer gear in autumn, and it is ready in spring.
This wall stops the seasonal pile on the floor, because every season has a bin. One swap a year, and your garage stays calm through every season.
Try it with just two bins first, one for now and one for later. You will soon want a whole wall of them, I know I did.
Kid Zone Low on the Wall
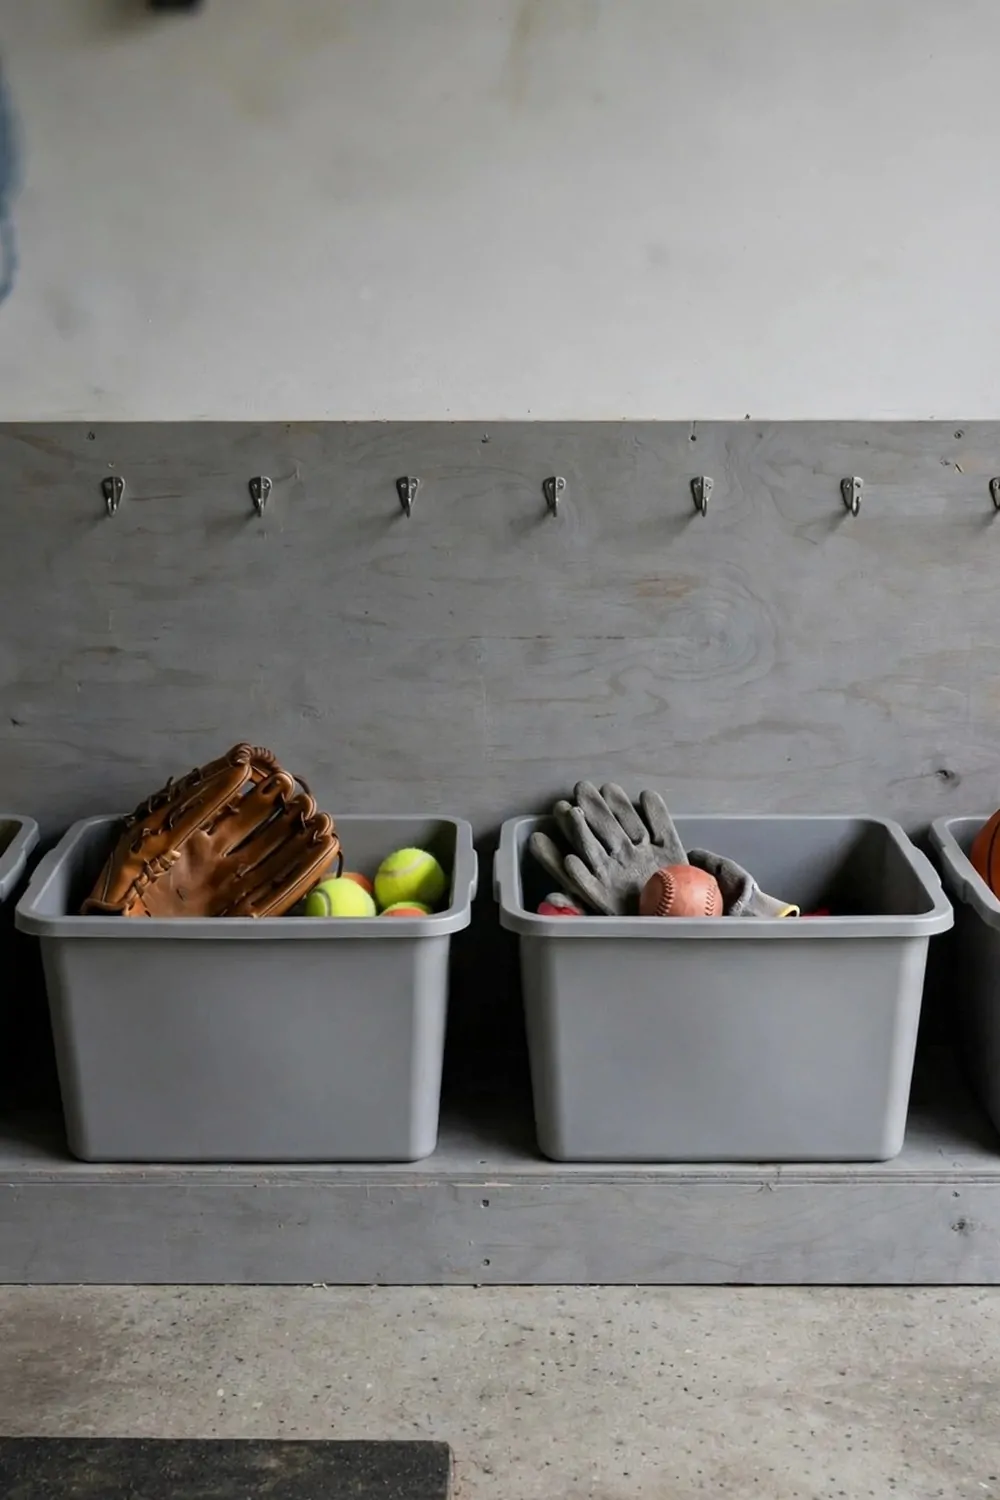
A kid zone low on the wall gives little hands their own place in the garage.
Small hooks at child height hold balls, gloves and small bags, and kids can reach them alone. My youngest hangs her own gloves up now, and she is so proud of it.
Use rounded hooks with no sharp ends, because little hands move fast. I chose soft hooks, and I check them often to make sure they are still smooth.
Put a low bin for shoes and a low bin for toys, so the floor stays clear. My kids know the ball goes in the ball bin, and the gloves go on the glove hook.
Label the zone with pictures, not just words, so young kids can follow it. I drew a glove and a ball on small cards, and they work better than words.
Keep heavy or sharp tools far above this zone, well out of reach. My tools live high on the wall, and the kid zone stays safe and low.
Praise kids when they use their zone, as it builds a tidy habit early. I say thank you each time, and now they tidy without being asked, most days.
This little wall teaches kids to care for their things, and it keeps your garage safer. Low hooks, small bins, and a big difference for the whole family.
Heavy Duty Hooks for String Trimmers
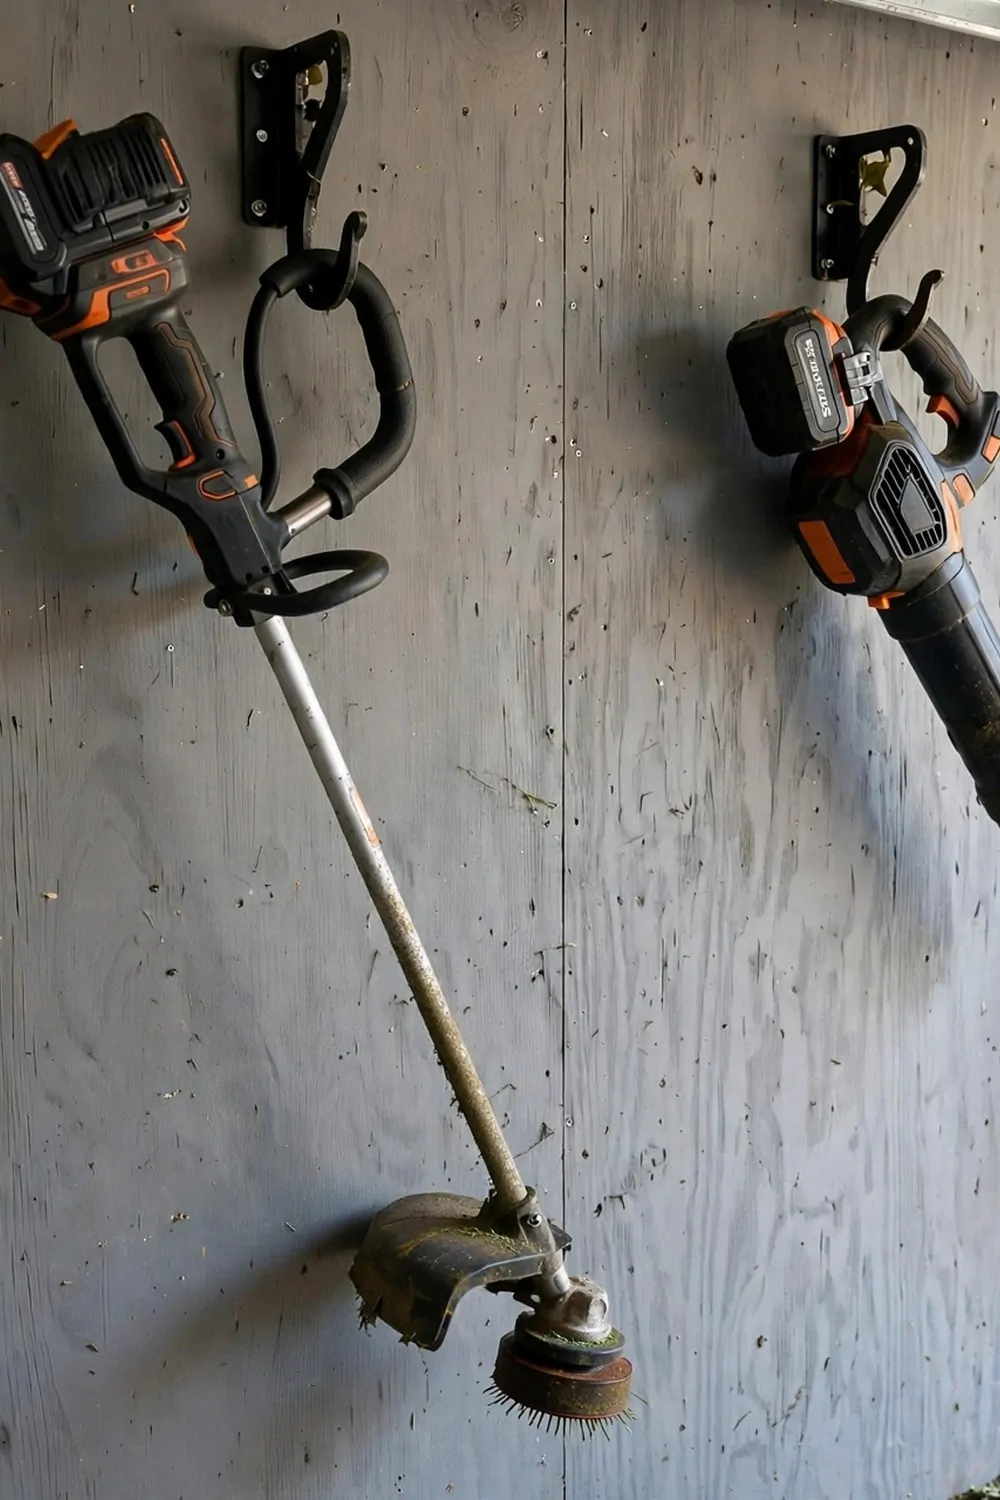
I used to lean my trimmer in a corner and it always fell over. It made a loud bang each time and I jumped every time. A strong hook fixed that in one afternoon.
Pick a hook that is made for heavy tools. It should feel solid in your hand and not bend when you press it. I test mine by hanging the trimmer and giving it a small tug.
Put the hook at chest height so you can lift the trimmer off with ease. You do not want to reach up high with a long tool in your hands. Keep the head of the trimmer low and the handle up.
I hang my leaf blower right next to it. They are a team in my yard and they should live side by side. Now I grab both in one trip and I am out the door fast.
Leave a little space between the two tools. If they touch, the cords and handles can tangle up. A gap as wide as your hand is enough for most tools.
Check the screws in the hook once a month. Heavy tools pull down a bit over time. A quick twist with a screwdriver keeps it safe and strong.
Label the spot if you share the garage with family. I put a small tag under the hook that says trimmer. My kids know not to hang bikes or bags there now.
This one hook changed how my garage feels. The corner is clear now and I can walk past it without tripping. Small wins like this add up fast.
Tool Cabinet Doors as Extra Storage
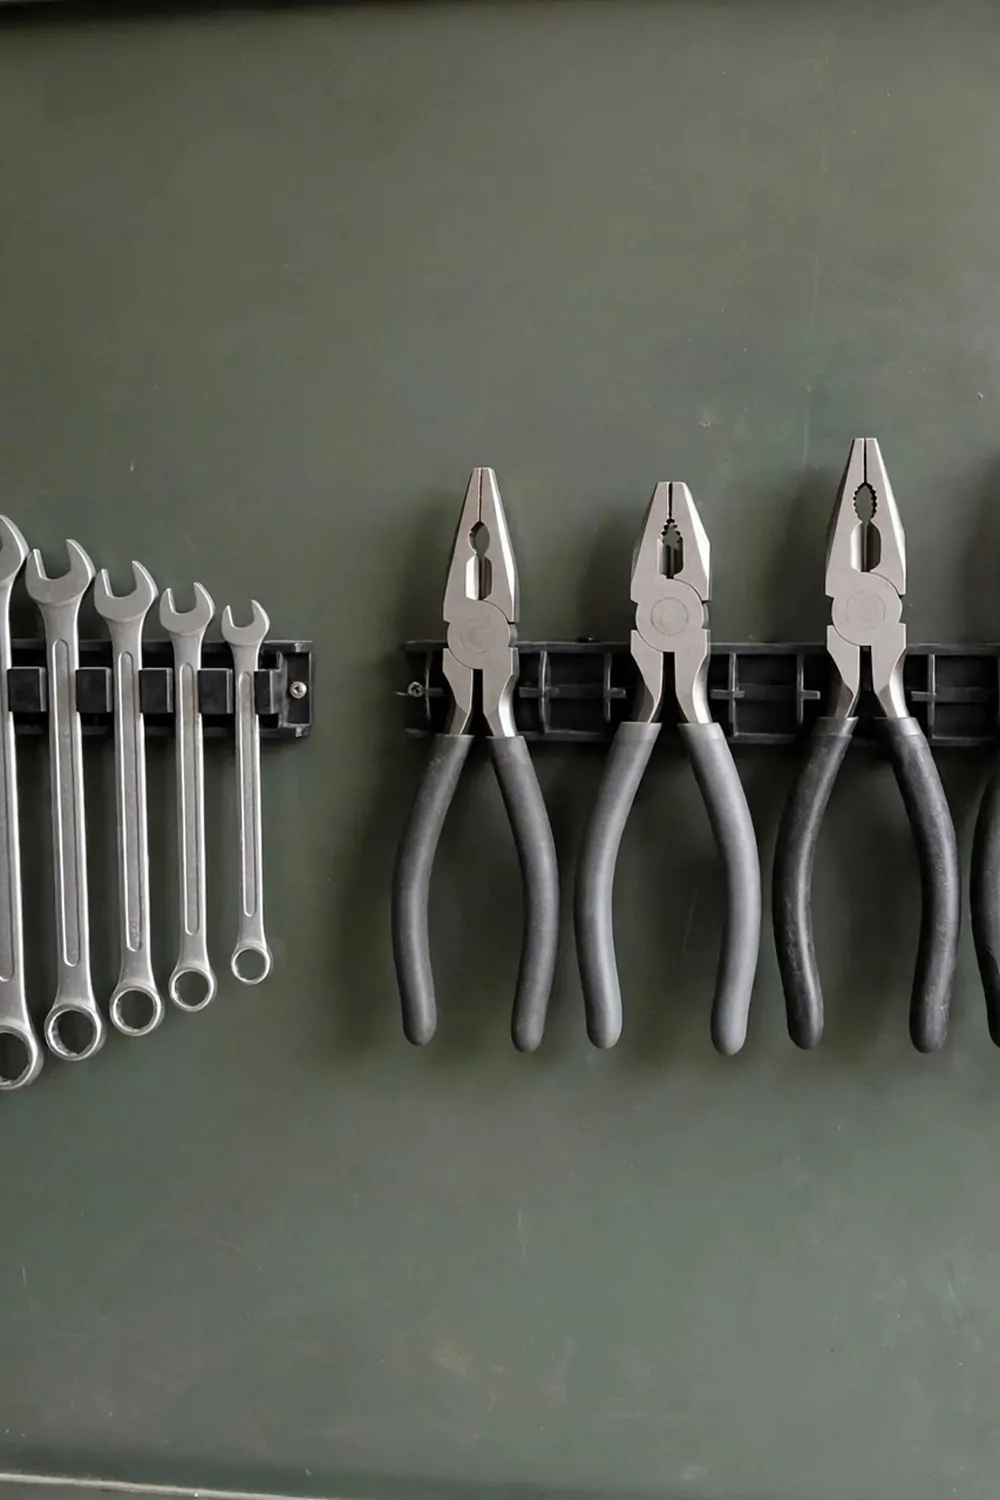
The inside of a cabinet door is free space and I wasted it for years. I only used the shelves and the door just closed over them. Now that door holds half my small tools.
Small racks work best on a door. They hold wrenches, pliers and small drivers in a neat line. I can see each tool the moment I open the door.
Measure the depth first before you buy racks. The door must still close without hitting the shelves inside. I learned this the hard way and had to move a rack twice.
Put the tools you use most at eye level on the door. The ones you rarely touch can go lower down. That way your hand finds the right tool without a hunt.
Use short screws so they do not poke through the front of the door. I check the back of the door after I fit each rack. It takes one minute and saves a lot of trouble.
Keep the weight light on the door. Heavy tools can make the hinges sag over time. I keep only hand tools here and the big stuff stays on the wall.
I like that the tools are hidden when the door shuts. The garage looks tidy from across the room. Open the door and everything is ready to work.
Try one door first before you do them all. You will learn what fits and what does not. Then you can copy the same setup on the next door with ease.
Wall-Mounted Lumber Rack
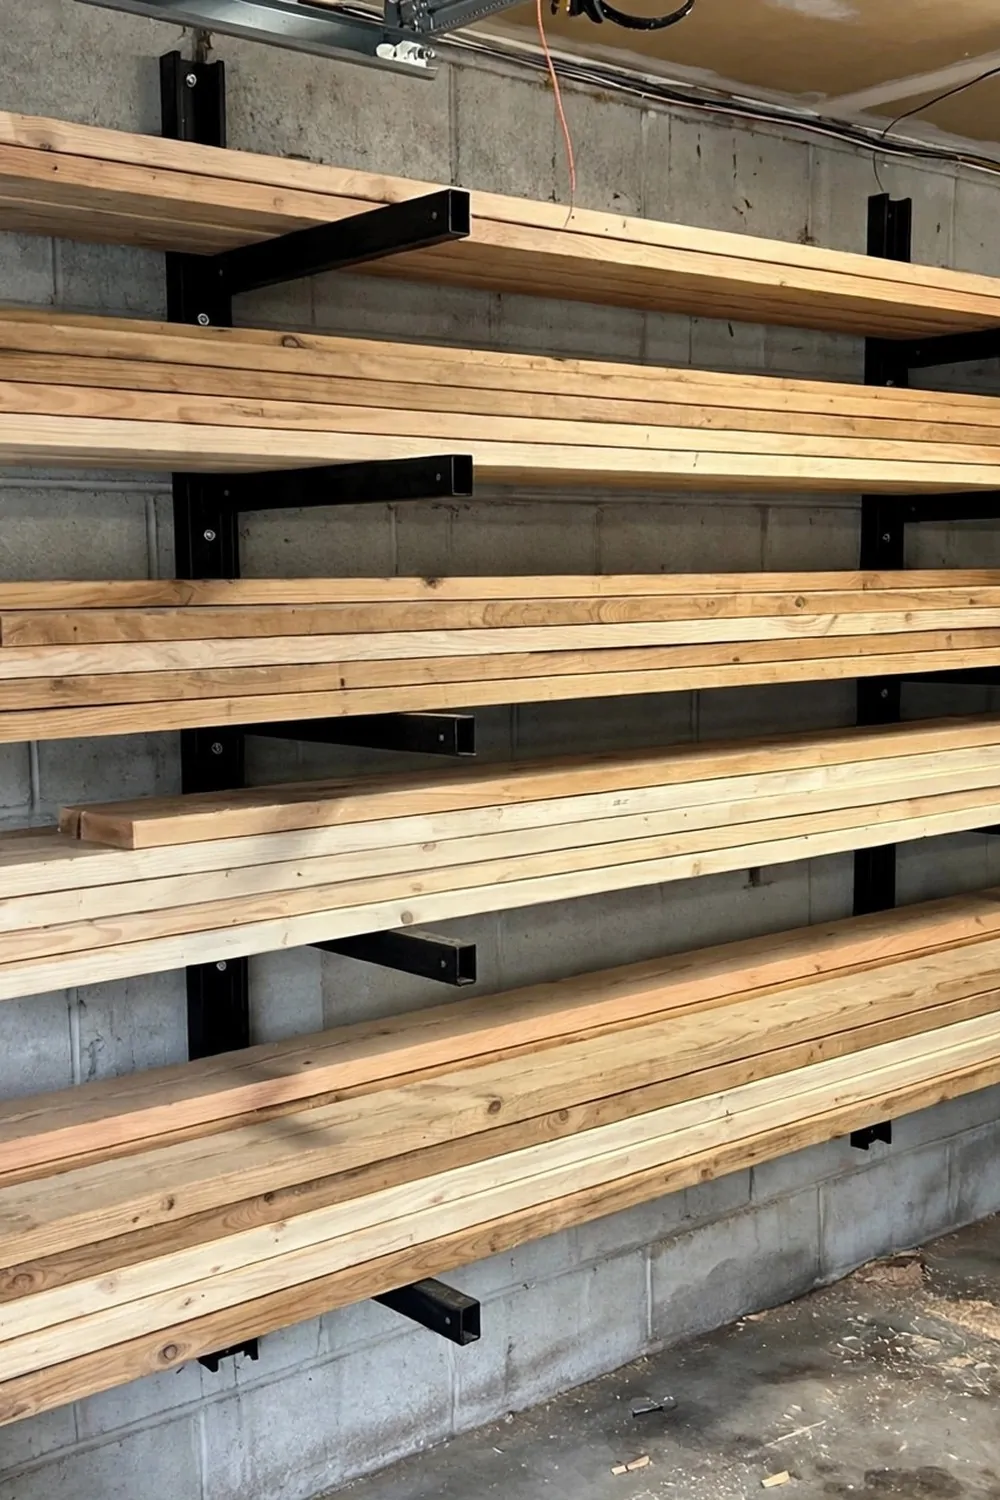
Long boards are hard to store and they always end up leaning in a corner. They slide down and they scratch the wall. A wall rack lifts them up and keeps them flat.
Pick a spot on a long, clear wall. You need room for the full length of your boards. I use the back wall because nothing else needs that space.
Fit the rack arms level or your boards will roll to one end. I use a small level and check each arm twice. It is slow work but it pays off.
Stack the boards flat with the heaviest ones at the bottom. That keeps the pile steady and safe. Lighter boards go on top where you can lift them off with ease.
Leave a small gap between each stack if you can. Air can move around the wood and it stays dry. Damp wood bends and I do not want that.
Sort your boards by length if you have the room. Short pieces go on one arm and long pieces on another. You will find the right board in seconds.
I keep a tape measure hanging at the end of the rack. I measure a board before I take it down. That saves me from lifting a heavy board I do not need.
A lumber rack frees up so much floor space. I can park my car in without moving a pile of wood first. It feels like I gained a whole new garage.
Clamp Rack That Keeps Clamps in Line
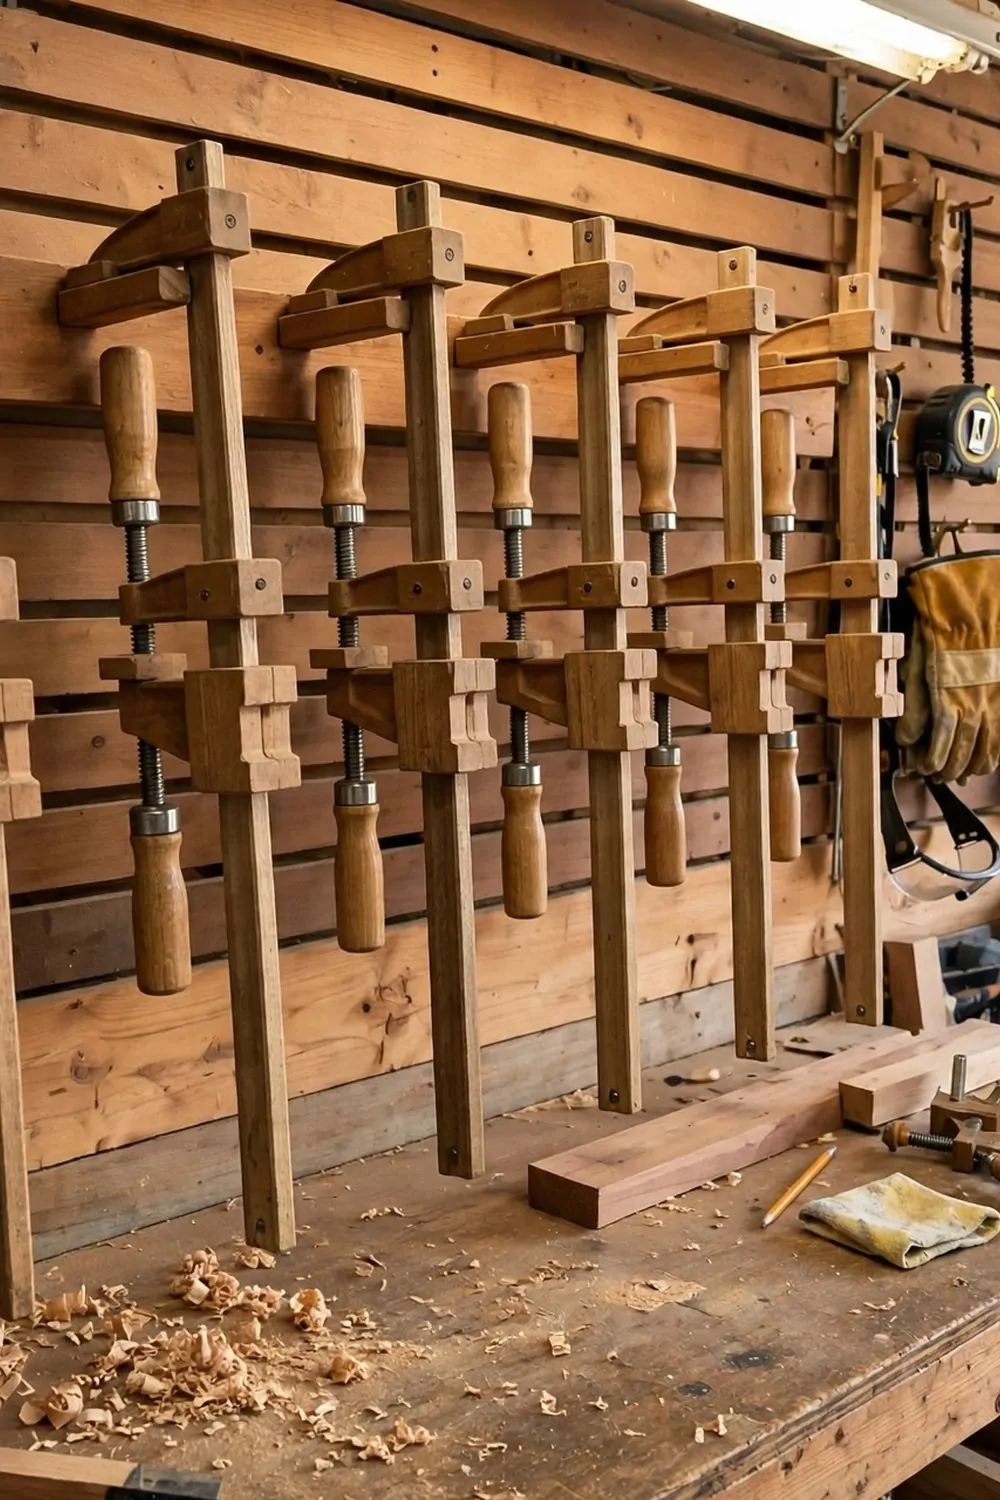
Clamps used to live in a bucket and I hated digging through it. I could never find the size I needed and my hands got dirty. A simple rack fixed it all.
A rack with slots holds each clamp by its handle. They hang in a neat row and you can see every size at once. I grab one and the rest stay put.
Put the rack near your workbench so the clamps are close when you need them. You do not want to walk across the garage with glue on your hands. Close is better.
Sort the clamps from small to big. I put the small ones on the left and the big ones on the right. My hand learns the order and I do not even need to look.
Make sure the slots are deep enough to hold the clamp firm. A shallow slot lets it slip out and fall. I test each slot with a firm pull before I trust it.
Keep the rack at arm height so you can reach each clamp with ease. Too high and you will stretch. Too low and you will bend down each time.
I wipe my clamps before I hang them back up. Glue and dust build up fast in a workshop. A clean clamp lasts longer and works better too.
This rack is one of my favourite small wins. It cost little and it took less than an hour to fit. Now my bench stays clear and my clamps are always in line.
Screwdriver and Pliers Rail
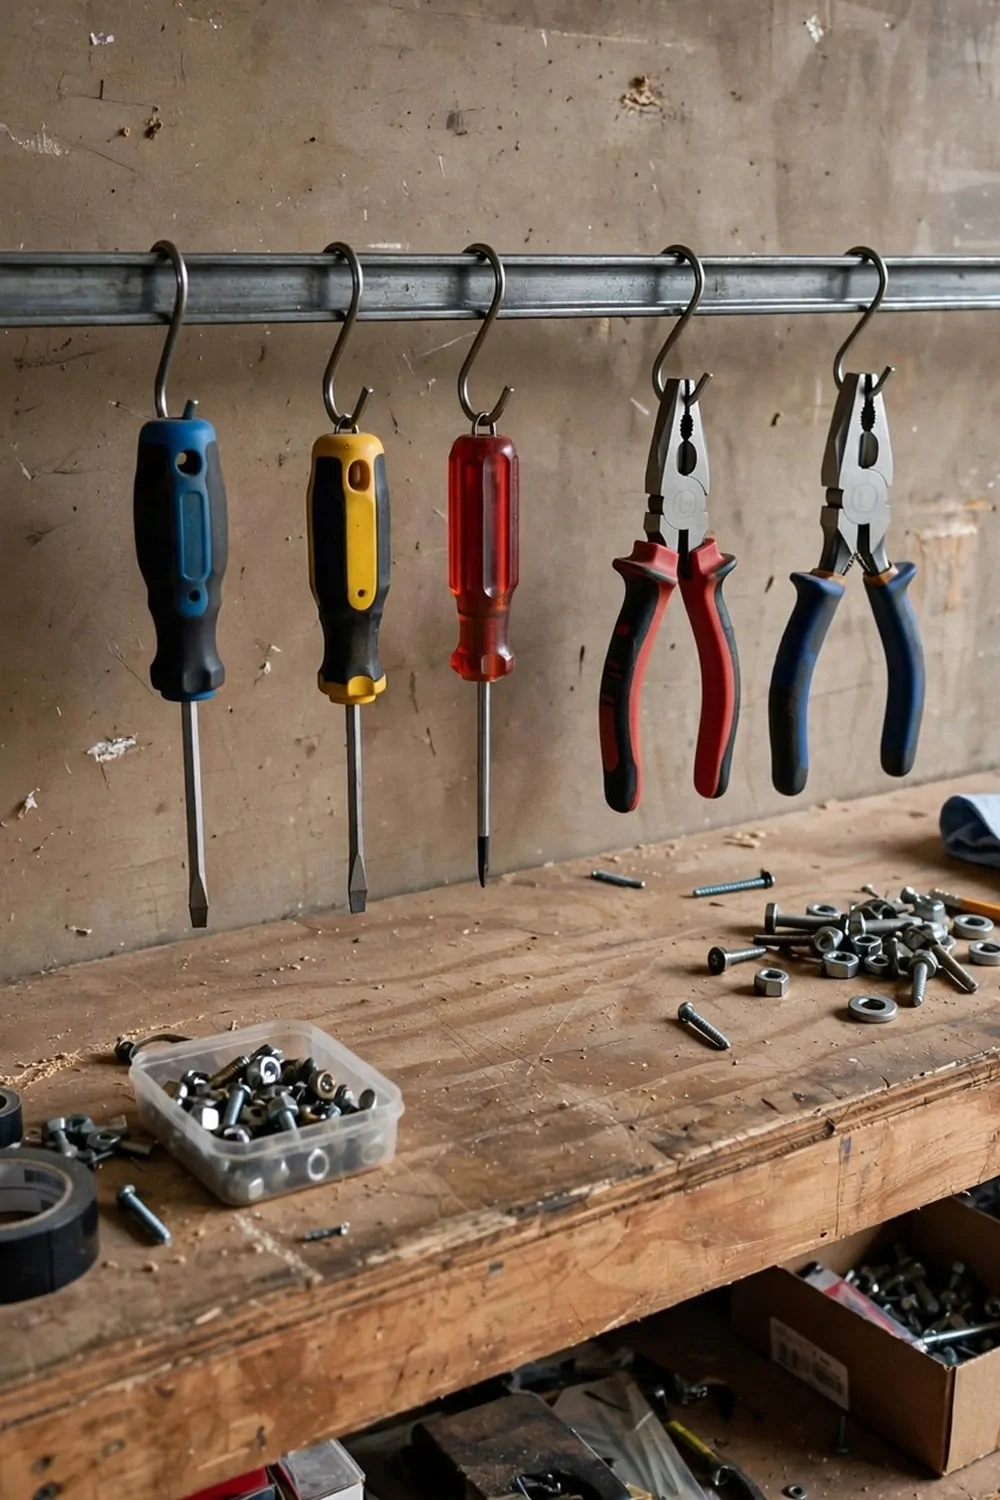
A rail above my bench holds all my screwdrivers and pliers in one line. I used to keep them in a drawer and they rattled around in a mess. Now each one has its own hook.
Metal rails are strong and they do not bend under the weight. I picked one with sliding hooks so I can move things around. When I add a new tool, I just slide the hooks along.
Hang the screwdrivers by their handles so the tips point down. That keeps the tips safe and it stops them from poking you. I sort mine by size from left to right.
Pliers hang best by their handles too. They open a little and rest on the hook with ease. I can pull one off with one hand and put it back the same way.
Put the rail at eye level above the bench. You should see each tool without standing on tiptoe. Your work stays in front of you and your tools stay just above it.
Keep the most used tools in the middle of the rail. The ones you use once a month can live at the ends. That small choice saves you time every single day.
I clean the rail with a dry cloth once a week. Dust and sawdust settle on it fast in a garage. A clean rail lets the hooks slide smooth and easy.
This rail turned my bench from a mess into a work spot I love. I sit down and start work right away. No more hunting in a drawer for the right driver.
| Tool type | Best wall spot | Why it works |
|---|---|---|
| Hand tools | Pegboard at eye level | You see and grab them in seconds |
| Power tools | Slatwall hooks near an outlet | Strong hold and easy charging |
| Long tools | Rail hooks low on the wall | Heavy items stay low and safe |
| Small parts | Clear bins at chest height | You see what is inside at a glance |
Wall-Mounted Vise Station
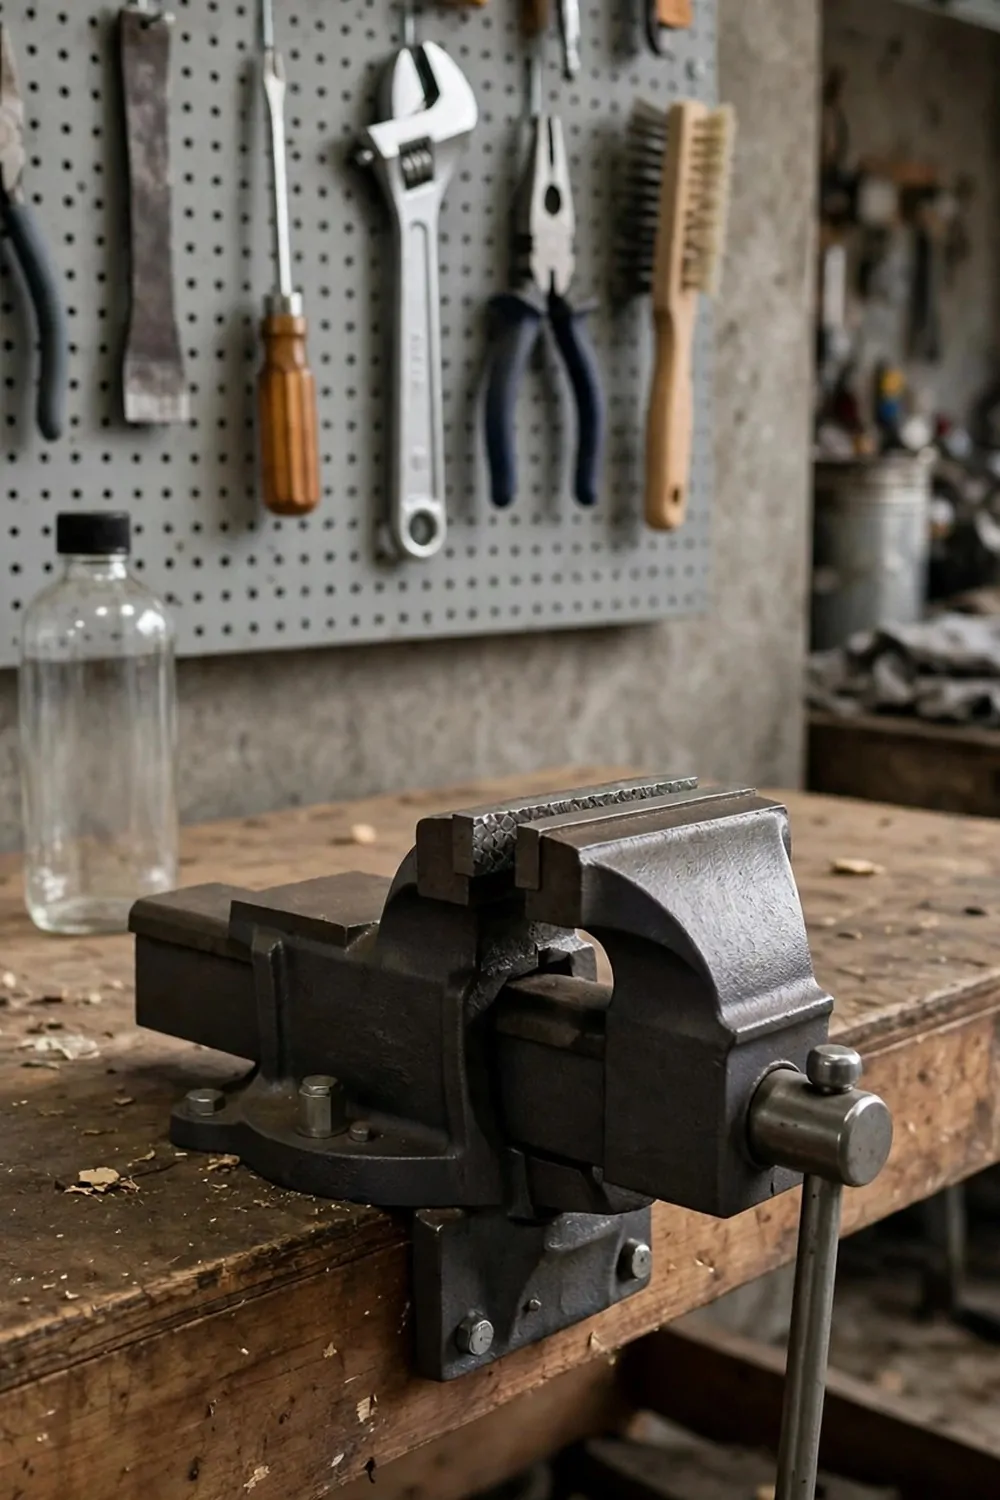
A vise holds your work still while your hands are free. I use mine to hold wood, pipe and small metal parts. Without it, I would need a third hand.
Bolt the vise to the edge of a strong bench. It must not wobble when you turn the handle. I test mine by pulling hard on a piece of scrap wood.
Put your hand tools on the wall right behind the vise. Hammers, files and wrenches should be within arm’s reach. You do not want to walk away mid-job to find a tool.
Keep the area around the vise clear. I leave the bench top empty for a full arm’s width on each side. That gives me room to turn long pieces without hitting a pile.
Use jaw pads if you work with soft wood. They stop the metal jaws from marking the surface. I cut mine from old leather and they work a treat.
Clean the screw thread now and then with a dry brush. Dust and grit can make it stiff over time. A smooth vise is a joy to use and it lasts for years.
I keep a small brush near the vise for sweeping off shavings. It takes ten seconds after each job. A tidy bench makes the next job start faster.
A vise station makes hard jobs feel easy. You clamp the work, you pick up your tool, and you get on with it. I wish I had set mine up years ago.
Oil and Fluid Shelf With a Drip Tray
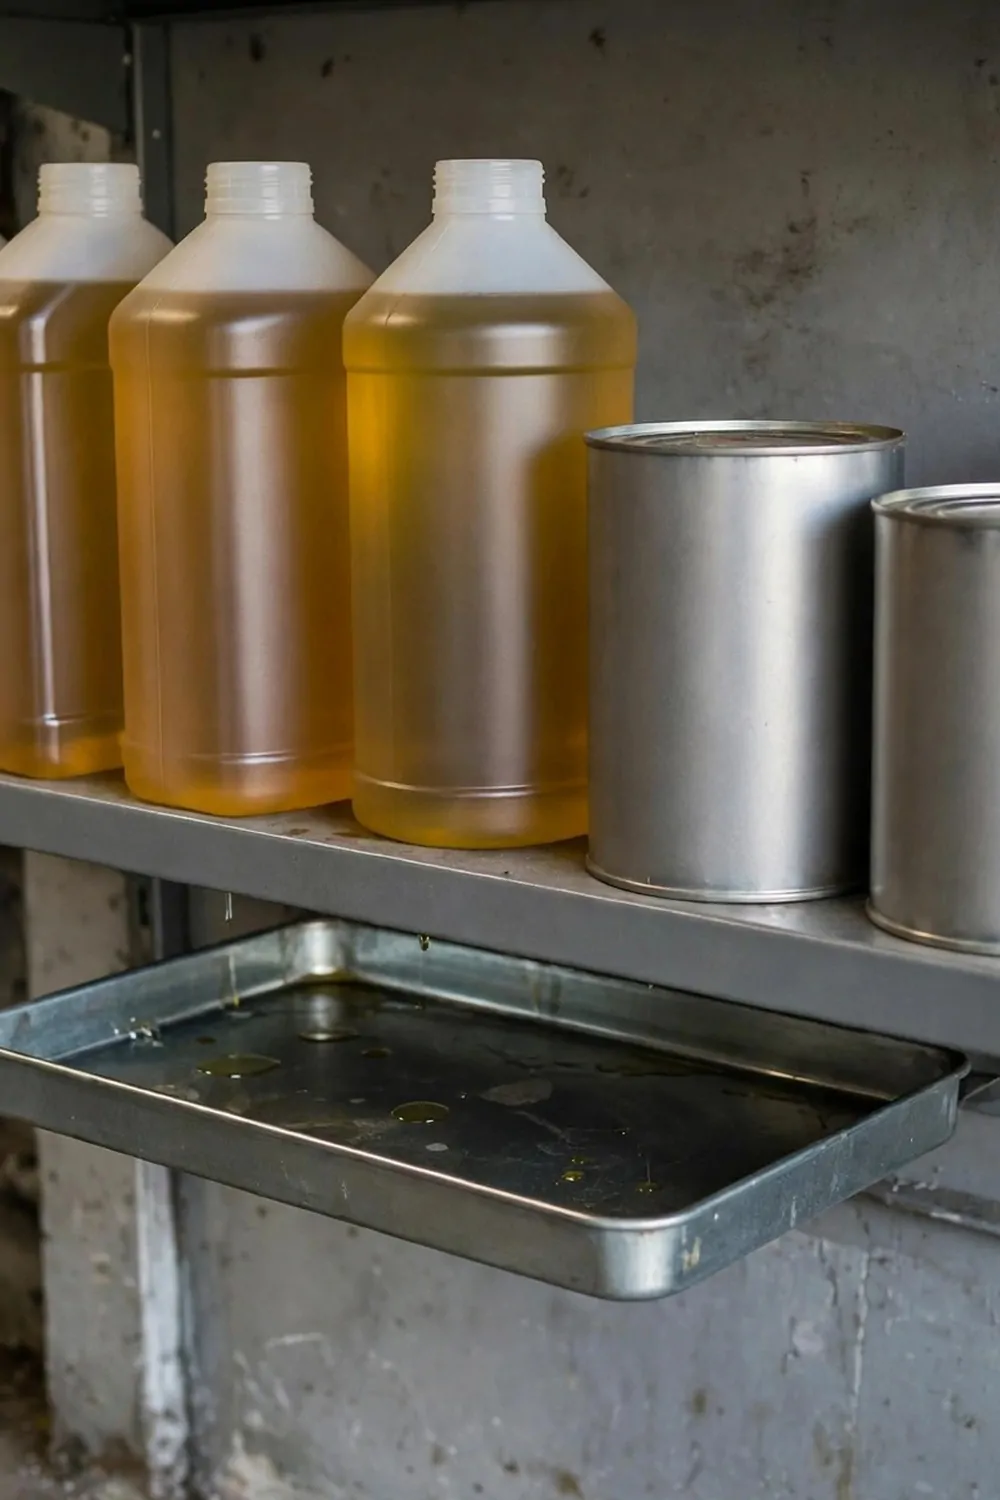
Oil bottles tip over so easy and one spill makes a huge mess. I keep mine on a shelf with a tray under it now. The tray catches every drip.
Pick a shelf that is easy to reach but out of the way of kids and pets. I use a high shelf near the back of the garage. It is safe and still close when I need it.
A metal tray works best because it will not soak up oil. Plastic trays can crack and bend. I wipe my tray with a rag once a week and it stays clean.
Stand the bottles upright and keep the caps tight. I check each cap before I put a bottle back. A loose cap is how most spills start.
Sort the bottles by type so you do not grab the wrong one. Engine oil goes on the left and the rest go on the right. Labels face out so I can read them fast.
Keep a roll of paper towels right beside the shelf. Small drips happen even with care. I wipe them up straight away before they spread.
Do not stack bottles on top of each other. One slip can knock the whole pile down. A single row on the shelf is safer and easier to see.
This shelf keeps my floor clean and my bottles safe. I know where each one is and I can find it in seconds. It is a small setup with a big payoff.
Flashlight and Battery Charging Nook
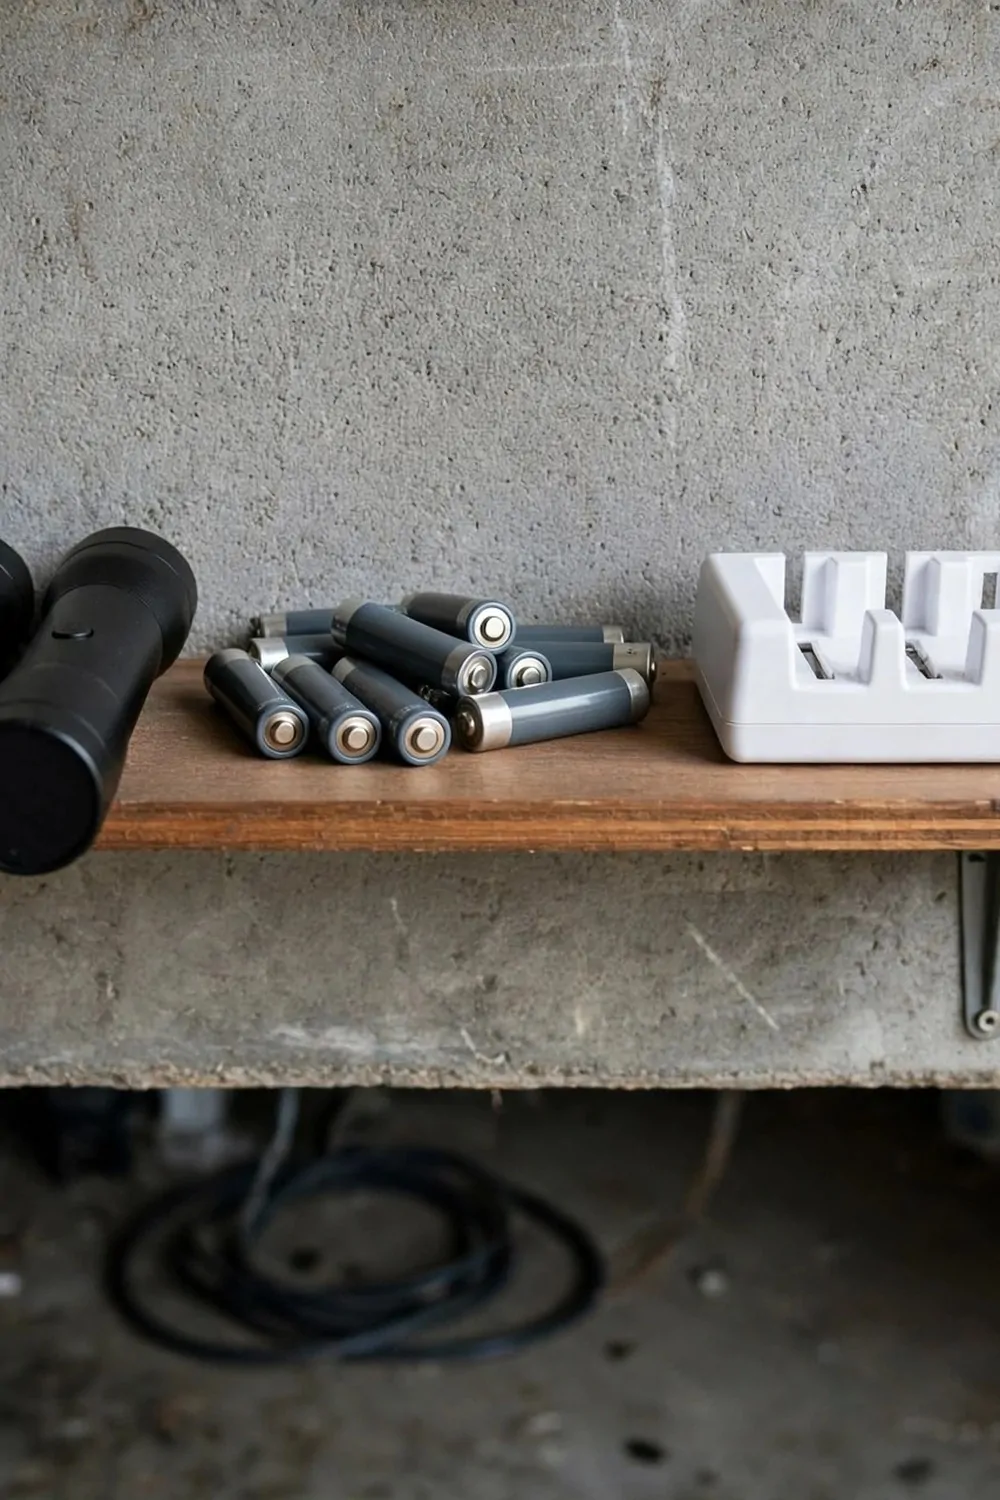
A dead flashlight is no use when the power goes out. I keep mine charged and ready on a small wall shelf. It is the first thing I grab in the dark.
Put the shelf near an outlet so the charger can plug in with ease. I use a short shelf just above my bench. The cords stay short and tidy.
Keep the flashlights upright in a row so you can grab one fast. I line mine up by size. The big one goes on the end and the small ones sit in the middle.
Charge the batteries on a set day each week. I do mine on Sunday night so they are full for the week. It is a small habit that saves a lot of stress.
Label the charger slots if you have more than one type of battery. I use a small sticker on each slot. That stops me from putting a battery in the wrong place.
Keep spare batteries in a small box on the same shelf. I use a clear box so I can see how many are left. When the box gets low, I know it is time to buy more.
Test each flashlight once a month with a quick click. A bulb can fail and you will not know until you need it. I check mine while I wait for the kettle to boil.
This little nook gives me peace of mind. When the lights go out, I am not hunting in the dark. I just reach for the shelf and I have light.
Fishing Rod Holders on the Wall
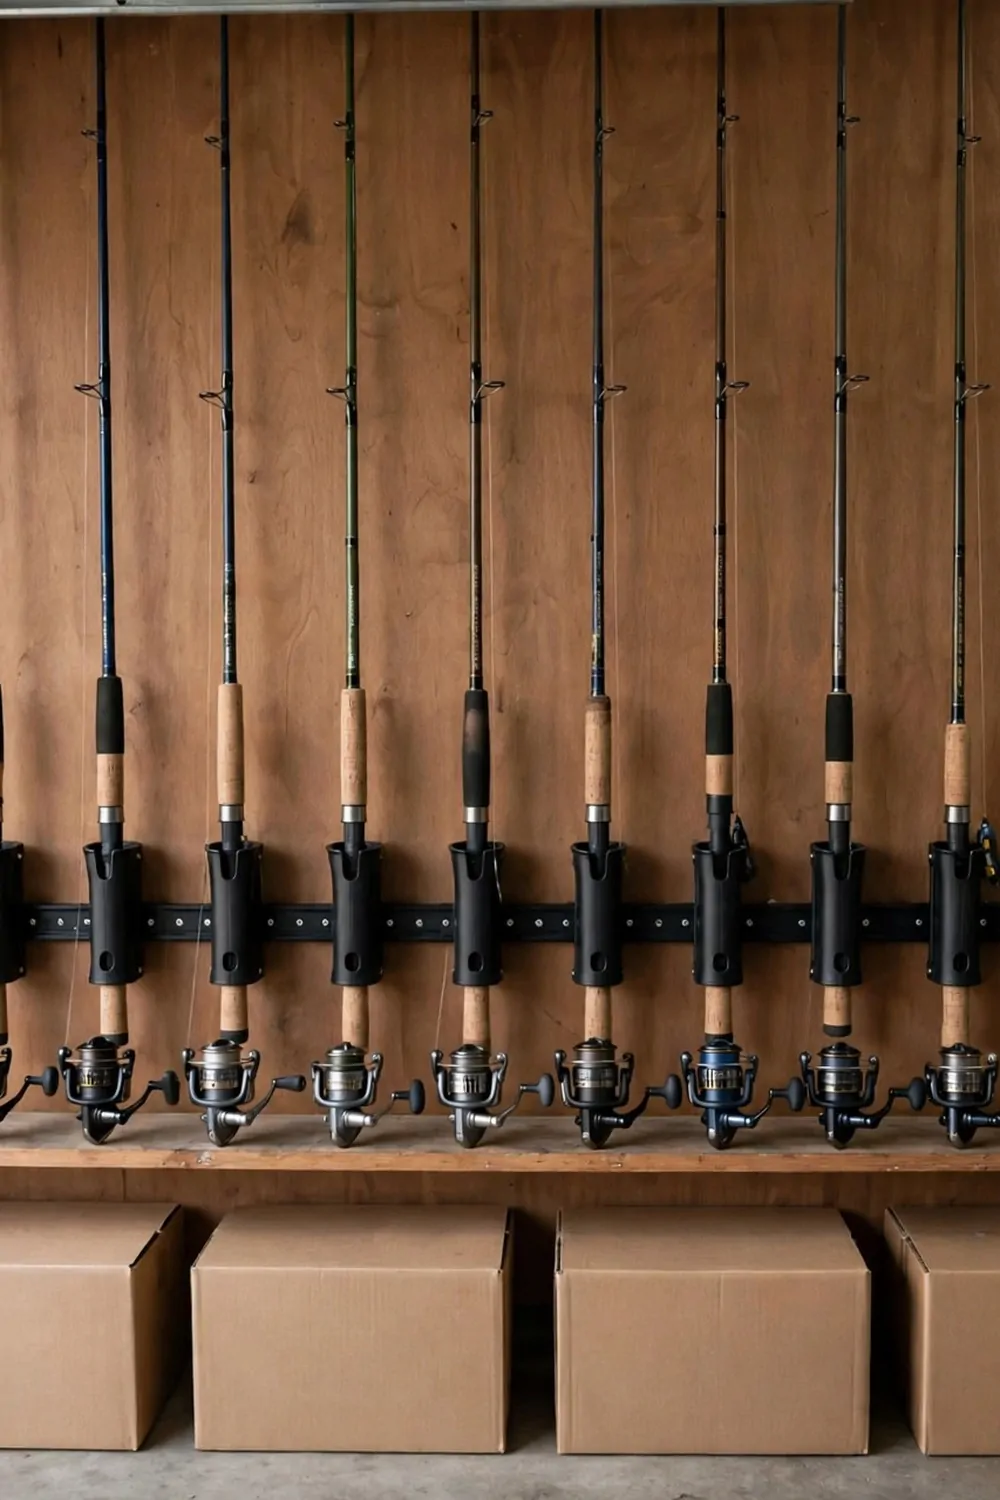
Fishing rods are long and thin and they break so easy. I used to lean mine in a corner and the tips kept snapping. Wall holders keep them safe and upright.
Fit the holders high enough that the rod tips clear the floor. The reels should sit at a height where you can reach them with ease. I measured my longest rod first.
Space the holders a hand width apart. Rods need room so the lines do not tangle. If they are too close, you will spend ten minutes untangling them before you fish.
Keep the reels in a neat line at the same height. I turn each reel so the handle faces out. That way I can check them all at a glance.
Store the rods with the lines loose, not pulled tight. A tight line can bend a rod tip over time. I let the line hang soft and free.
Wipe the rods down after a trip before you hang them back. Salt and dirt can harm the guides. A quick wipe takes a minute and keeps them in good shape.
I keep my tackle box on a shelf right under the rods. Everything for fishing lives in one spot now. I can load the car in five minutes and go.
Wall holders turned a tangled corner into a tidy fishing spot. My rods last longer and I feel calm when I look at them. It is a simple fix that works so well.
Ski and Snowboard Wall Racks
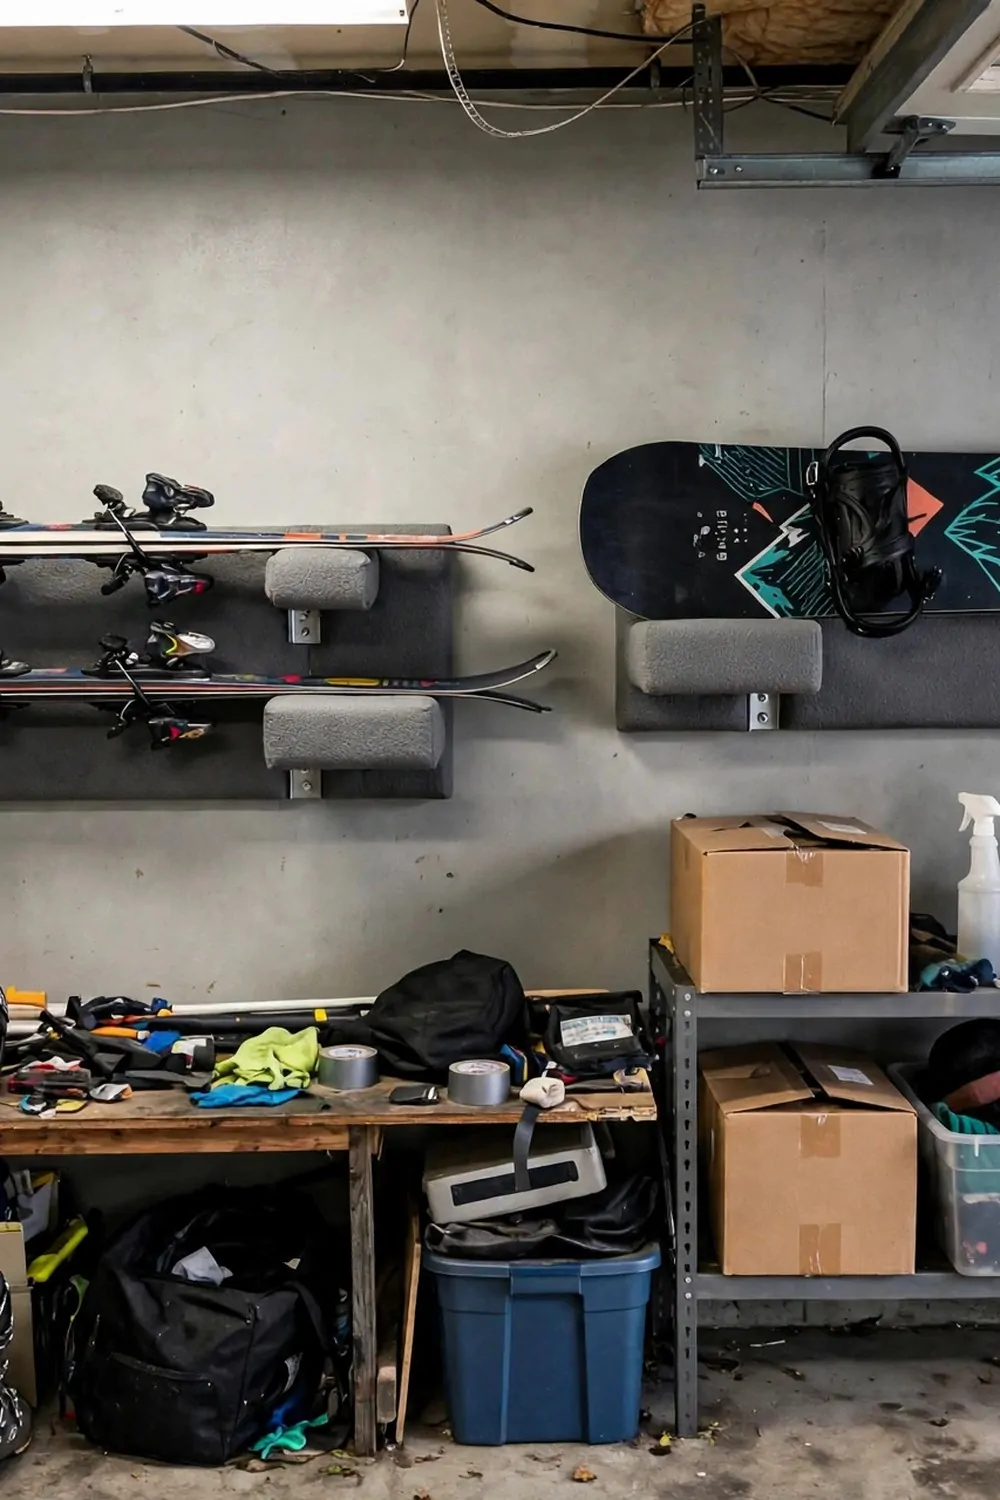
Skis and boards take up so much floor space in winter. I tripped over mine twice before I put them on the wall. Padded racks hold them flat and safe.
Pick a wall where the skis can hang flat from end to end. You need the full length clear. I use the side wall near the door so I can grab them on my way out.
Padded arms stop the racks from scratching the bases. I check the pads each season for wear. If a pad looks thin, I swap it before it marks a ski.
Hang the skis with the bases facing out so you can see them. That also lets air move around them and keeps them dry. Damp gear left in a pile can rust at the edges.
Keep the bindings facing the wall to protect them from knocks. I learned this after a binding got chipped by a passing bike. Now the wall takes the knocks, not the gear.
Store the boards flat on their own rack below the skis. I keep the snowboard low so my kids can lift it off with ease. Heavy gear up high is a bad idea.
Wipe the gear dry before you hang it back after a day out. Snow melts and drips onto the floor if you skip this step. I keep an old towel by the rack for this job.
These racks make winter feel easy. I walk in, hang my gear up, and it is ready for next time. No more pile on the floor and no more tripping.
Tool Belt Hooks by the Door
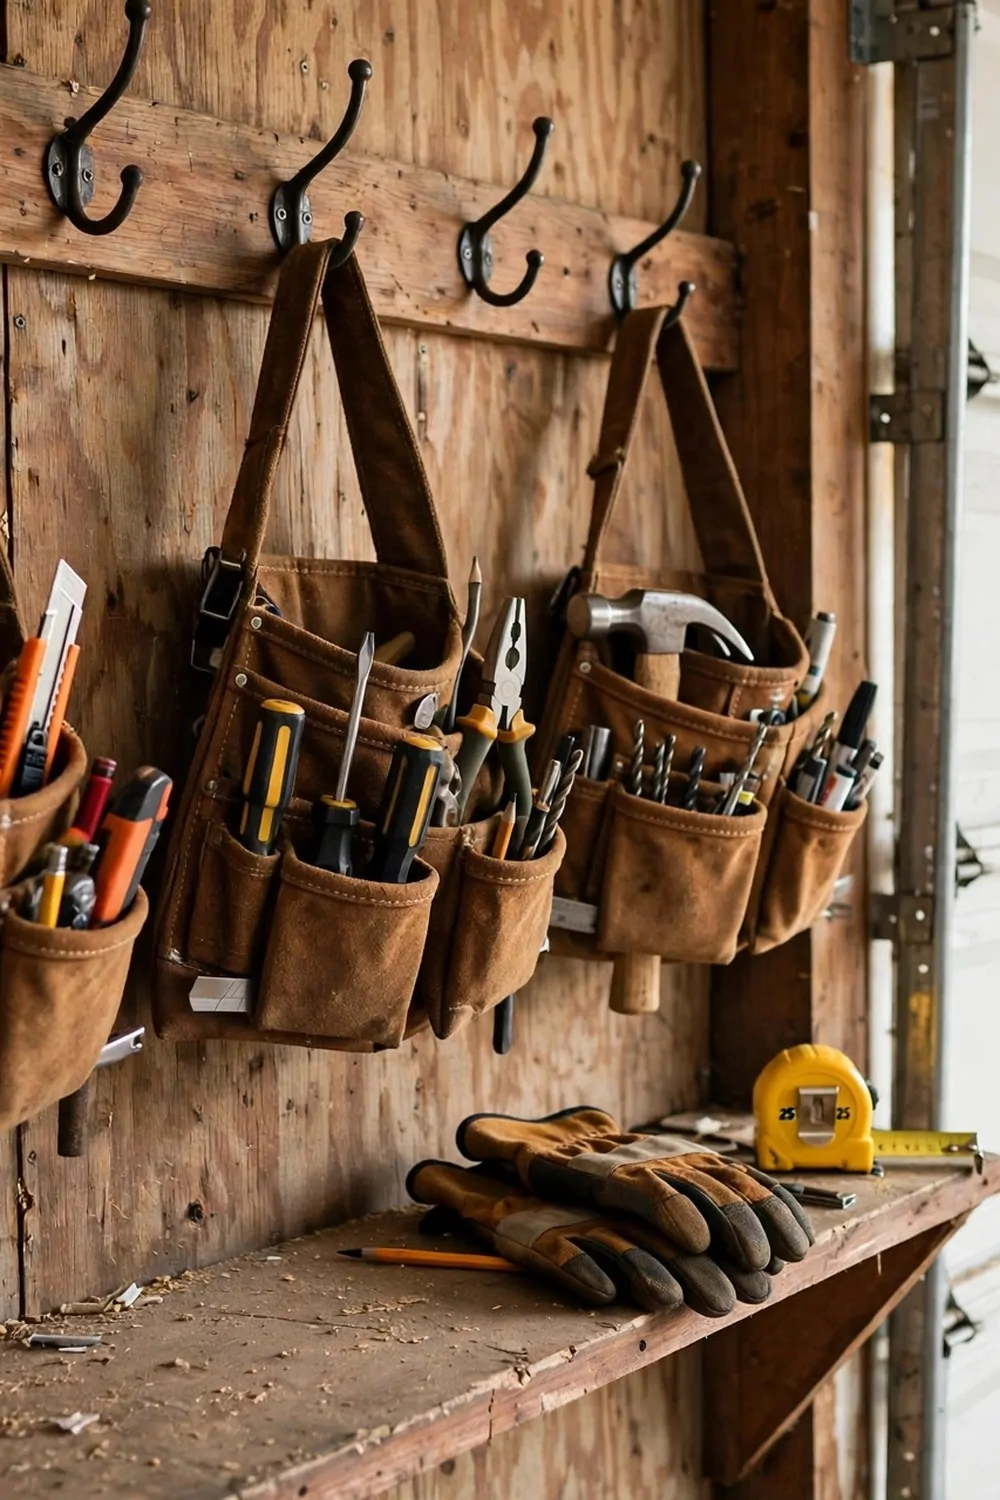
I grab my tool belt on my way out and hang it up when I come back in. Hooks by the door make that easy. No more belt left on the bench or the floor.
Put the hooks at shoulder height so the belt hangs free. It should not touch the floor or drag. I fit two hooks side by side so each belt has its own spot.
Keep your gloves right beside the belt. I hang mine on a small hook next to it. When I grab the belt, the gloves come too and I am ready to work.
Hang a tape measure on the same row. I clip mine to a hook at the end. It is the tool I reach for most and I hate hunting for it.
Empty the belt pockets at the end of each job. Nails and screws build up fast and make the belt heavy. I tip the pockets out over a small tub and sort what I keep.
Check the belt straps once a month for wear. A worn strap can snap when you lift a heavy belt. I look at the stitching and the buckle while I hang it up.
Teach the family that the hooks by the door are for belts only. I put a small sign up that says belts here. It sounds silly but it works and the hooks stay clear.
This spot by the door saves me time every day. I walk in, hang up my belt, and my hands are free. Small habits like this keep the whole garage tidy.
Wall-Mounted Air Hose Reel
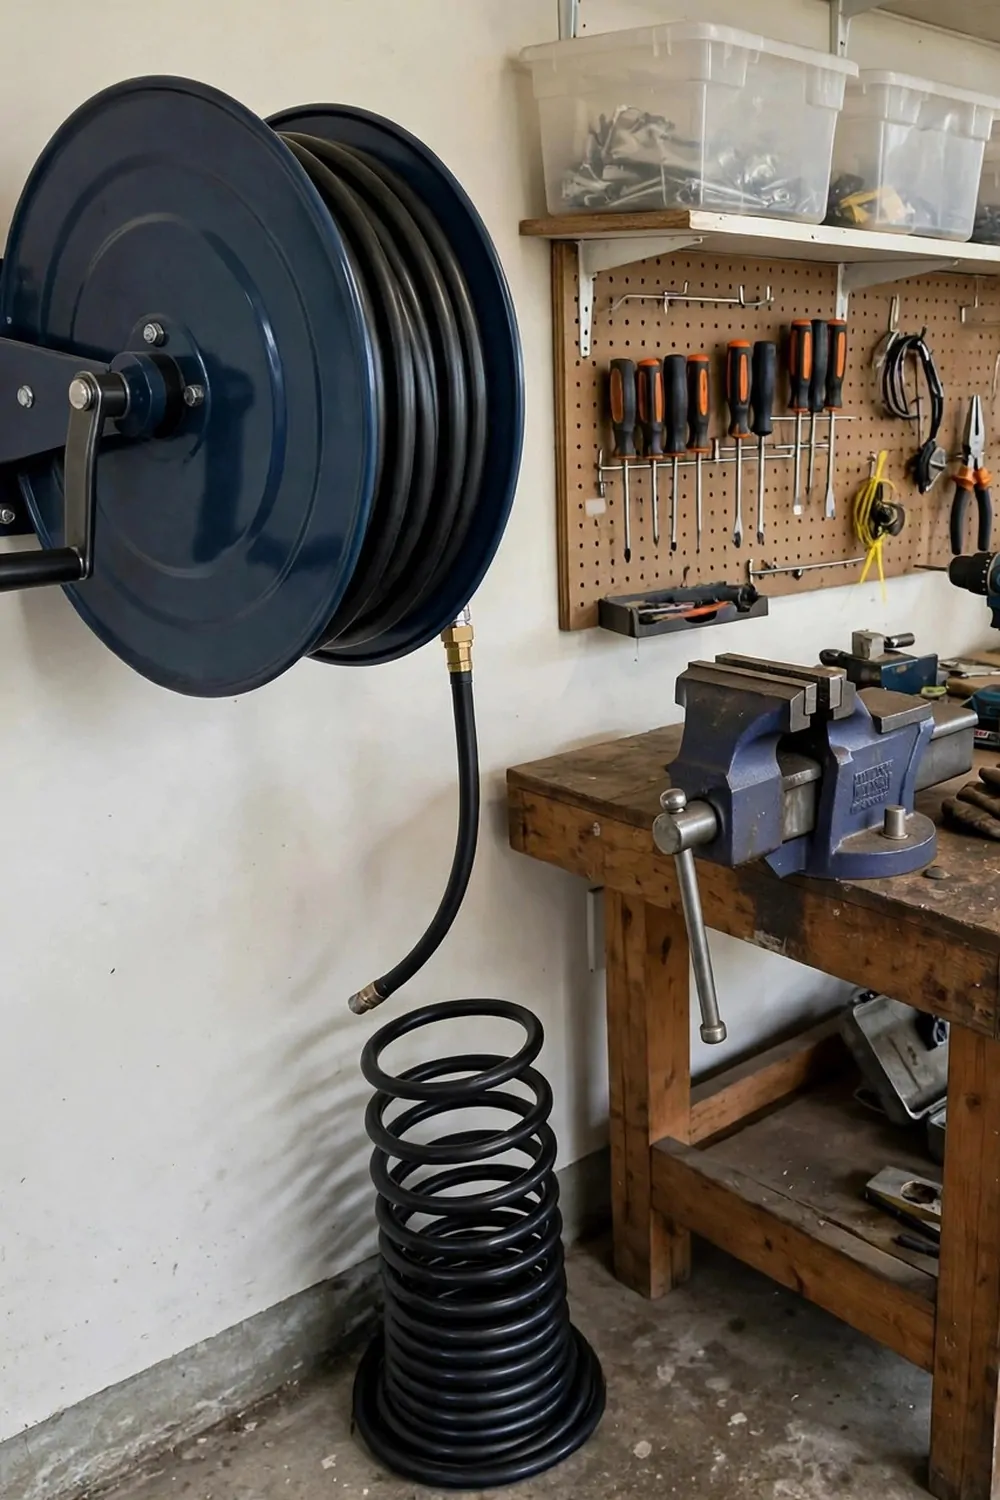
An air hose on the floor is a trip hazard and it gets dirty fast. I mounted a reel on the wall and the hose coils up neat. The floor is clear now.
Fit the reel near your workbench and near the air outlet. The hose should reach your bench with ease. I measured the hose length before I picked the spot.
Mount the reel high enough that the hose hangs free. It should not drag on the floor when it is wound up. I keep mine at chest height and it works well.
Wind the hose back after each use. I know it is tempting to leave it out. But a wound hose lasts longer and it never tangles round your feet.
Check the hose for cracks once a month. I run my hand along it and look for wear. A small crack can grow fast if you do not catch it early.
Keep the nozzle in a small clip beside the reel. I fitted one right next to it. The nozzle stays clean and I always know where it is.
Teach kids not to pull the hose out for fun. I had to say this twice in my house. A pulled hose can snap back and it can hurt.
A wall reel makes air tools so much easier to use. I pull out what I need, do the job, and wind it back. It is one of the best small upgrades in my garage.
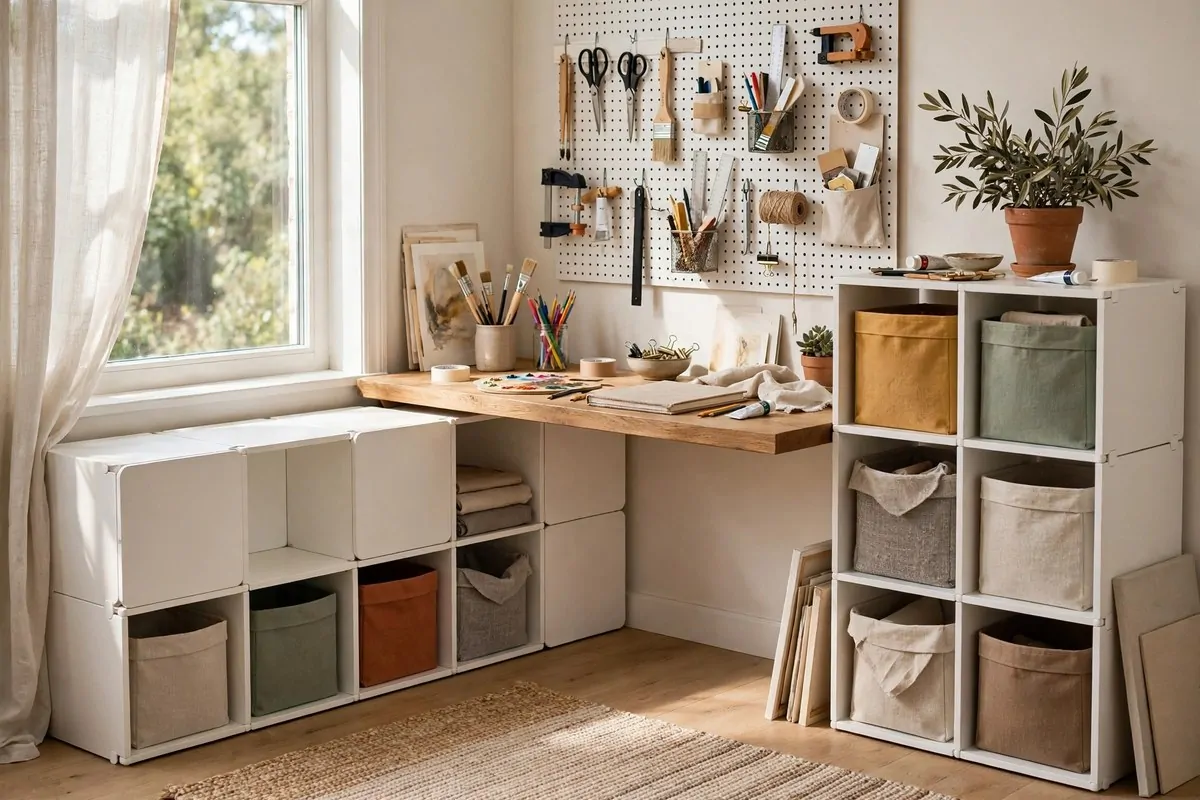
Pegboard for Craft and Hobby Supplies
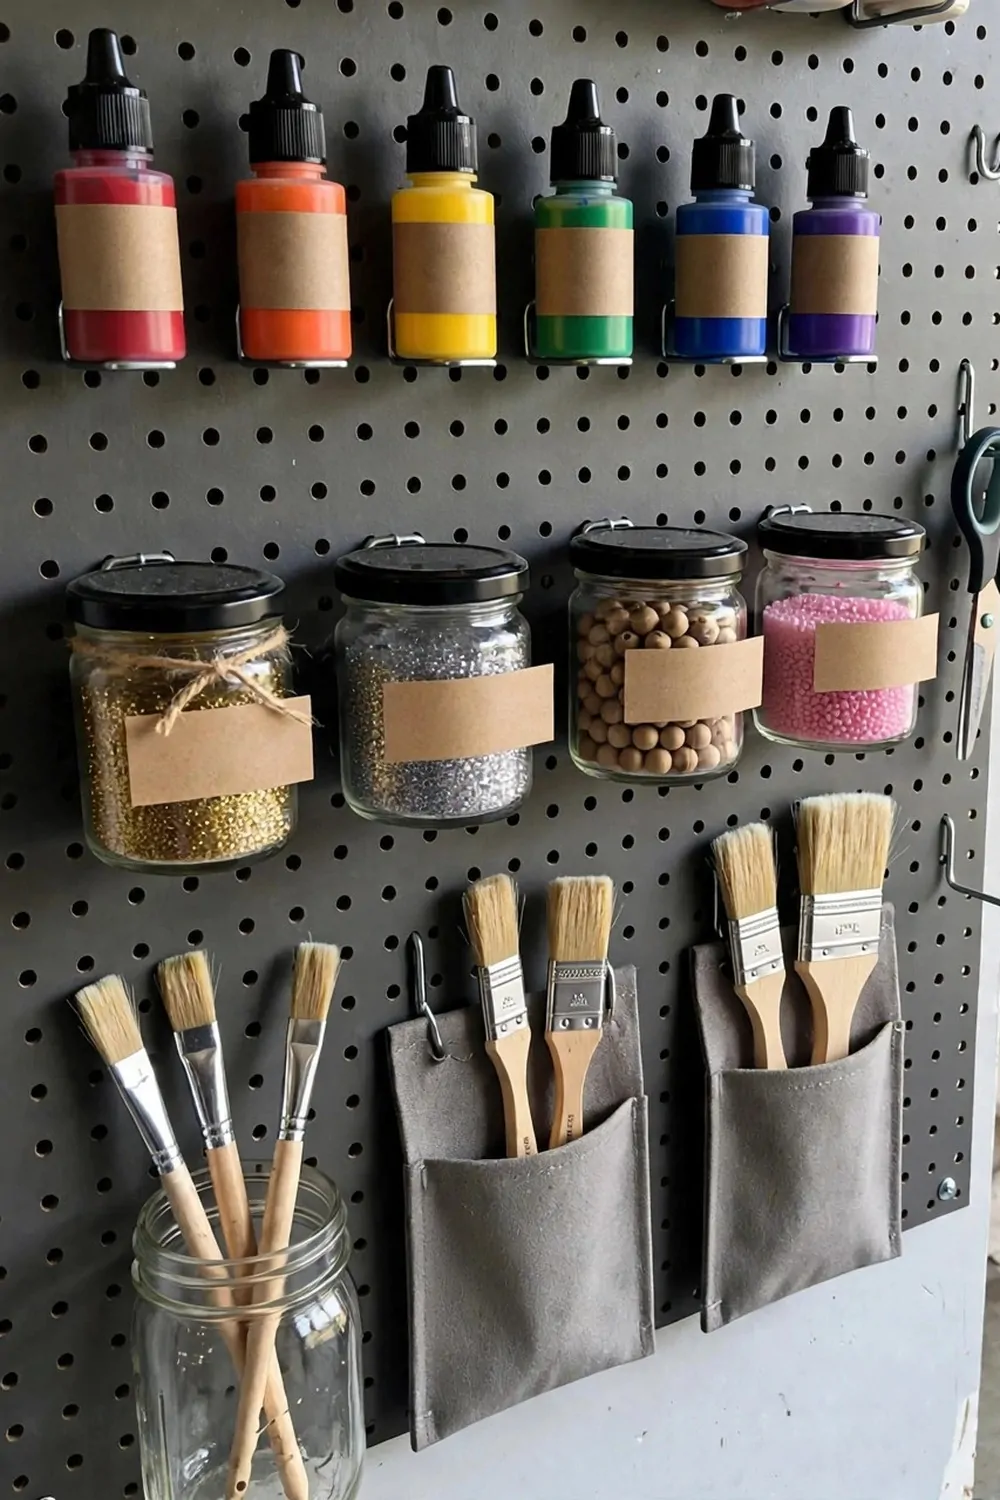
My craft corner used to be a pile of boxes on a bench. I could never find a paint brush when I wanted one. A pegboard on the wall changed all that.
Small jars and hooks hold paints, brushes and tools in neat rows. I can see every colour at a glance. It feels like a little shop in my own garage.
Put the pegboard in a corner with good light. Craft work needs light to see the small details. I fitted a small lamp above mine and it helps a lot.
Use small baskets on the pegboard for bits like beads and buttons. They stay in sight and they do not roll off the bench. I label each basket with its contents.
Keep the brushes hanging with the bristles down. That stops dust from settling in them. I rinse my brushes and hang them back while they are still damp.
Sort the paints by colour so you can find the right shade fast. I put warm colours on one side and cool colours on the other. It looks pretty too.
Leave a bit of empty space on the board for new supplies. If every hook is full, you have nowhere to put a new jar. I keep one row free at the bottom.
This corner is now my happy place in the garage. I sit down and everything I need is right in front of me. Craft time feels calm and fun again.
Heavy Shelf Brackets for Toolboxes
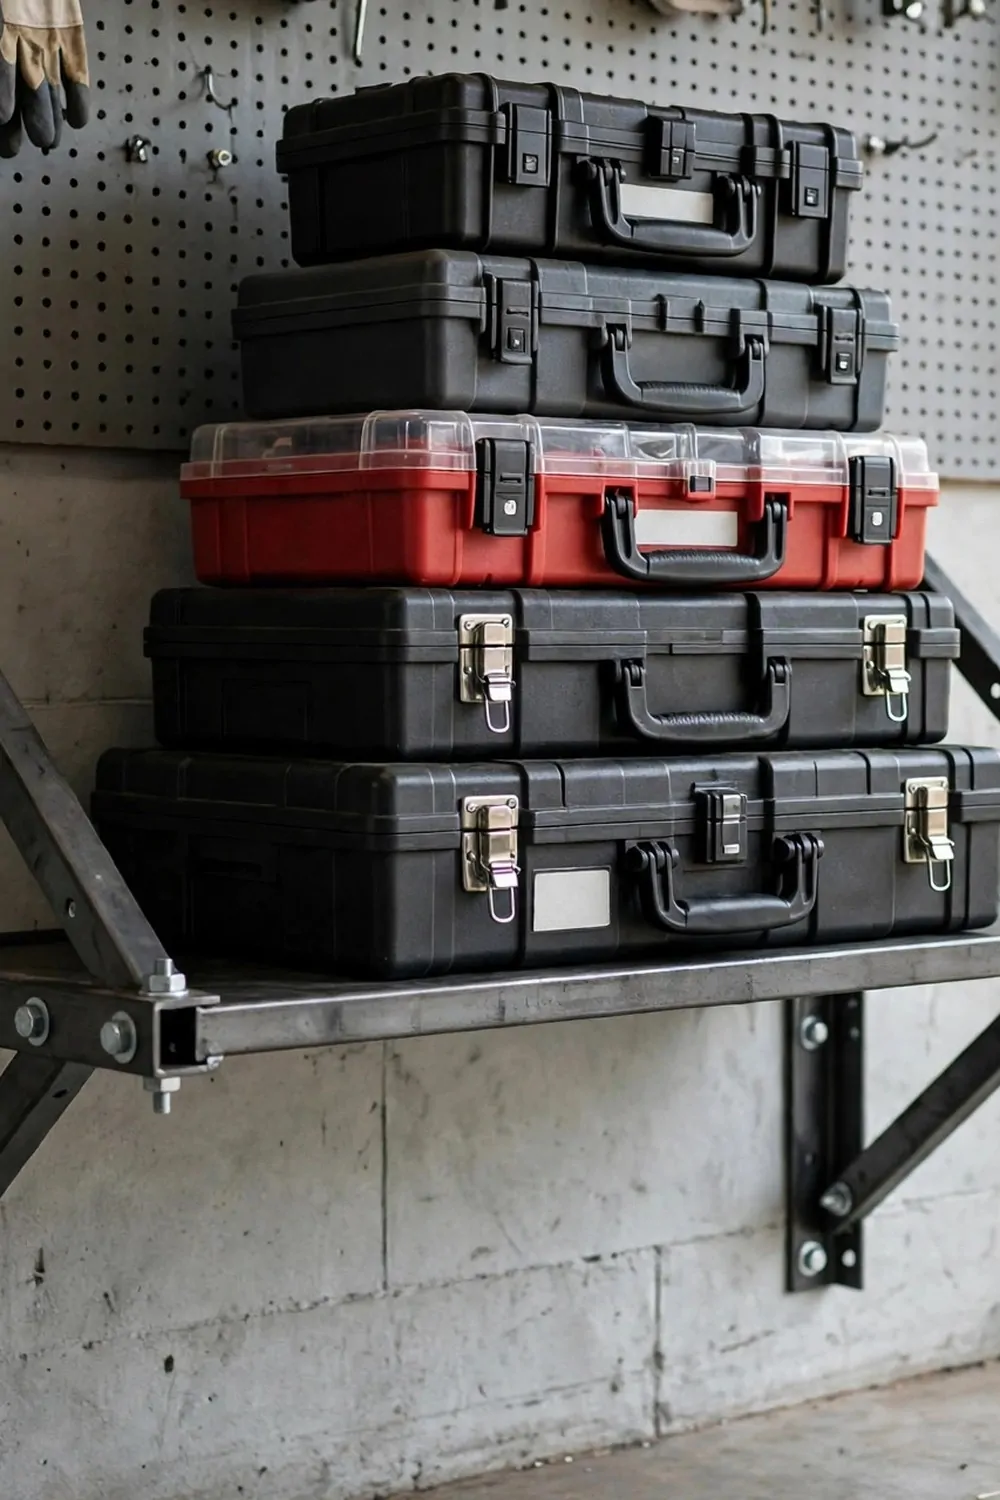
Toolboxes are heavy and they need strong brackets to hold them. Weak shelves bend and that is not safe. Heavy steel brackets keep them firm and level.
Pick brackets rated for more weight than your boxes. I always go stronger than I think I need. A heavy box plus tools inside weighs more than you expect.
Fix the brackets into wall studs, not just the plaster. Studs hold the weight and keep the shelf safe. I use a stud finder and mark each one before I drill.
Stack the boxes with the heaviest at the bottom. That keeps the pile steady. The box you use most should go on top where you can grab it fast.
Leave a small gap at the front of the shelf. You need room to lift a box off without scraping your knuckles. I leave a hand width of space and it works well.
Label each box on the front so you know what is inside. I use a strip of tape and a marker. It is quick and it saves me from opening three boxes to find one tool.
Check the brackets once a season for any bend or loose screw. Heavy loads pull down over time. A quick check keeps the whole shelf safe.
Strong brackets turned a floor pile into a neat wall stack. I can see each box and I can reach it with ease. The floor is clear and the garage feels bigger.
Wall-Mounted Dustpan and Broom Holders
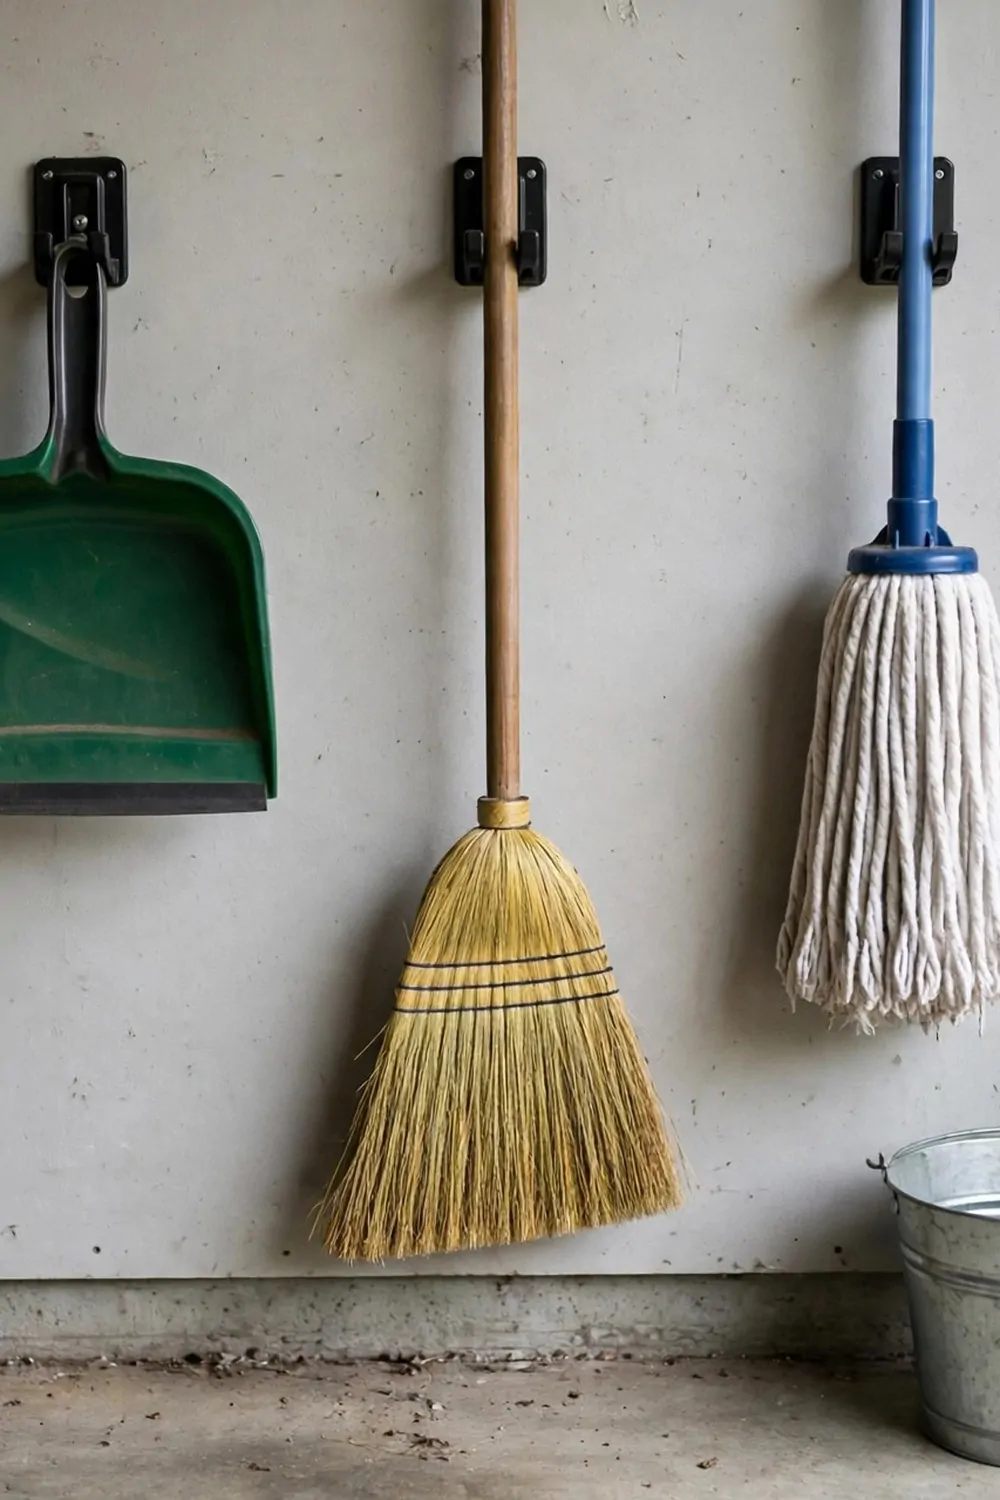
Cleaning tools used to fall over in a corner of my garage. The broom would slide down and the dustpan would end up under a shelf. Wall clips hold them all upright.
Fit the clips at a height where the broom handle rests easy. The head should hang just above the floor. I measured my longest broom before I fitted the clips.
Keep the dustpan beside the broom so they are a pair. I clip mine right next to it. When I sweep, I grab both in one go and I am done fast.
Hang the mop on its own clip with the head down. That lets it dry and stops smells from building up. I rinse mine and hang it back while it is still damp.
Put a small bucket under the cleaning tools for rags and sprays. I keep mine on the floor right below the clips. Everything for a quick clean lives in one spot.
Teach the family to put the broom back after use. I had to remind my kids a few times. Now they hang it up without being asked and it makes me smile.
Wipe the clips now and then so they grip well. Dust can make them slip. A quick wipe keeps the broom firm in its clip.
This small wall spot keeps my garage clean with ease. I sweep the floor in two minutes and put the tools back. A tidy garage starts with tools you can find.
Label Every Hook and Bin
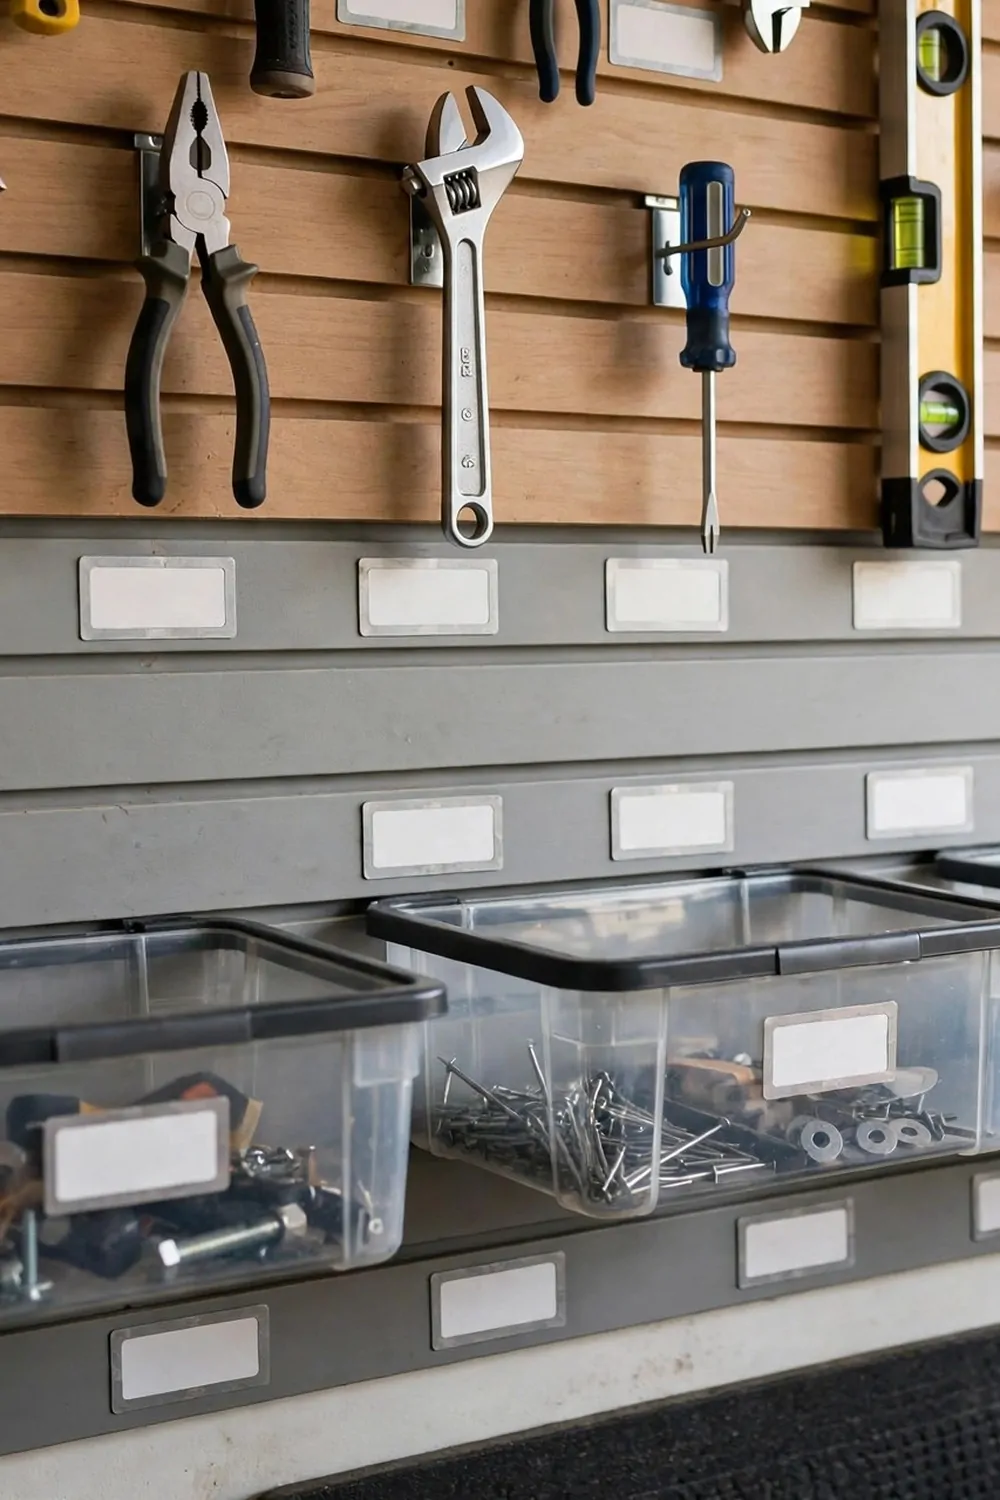
Labels sound simple but they change everything in a garage. When each hook has a name, every tool has a home. I put labels up and my family finally puts things back.
Use clear words on each label. Write hammer, not tools. Write nails, not small bits. The clearer the word, the faster your hand finds the right spot.
Put the label right under the hook or on the front of the bin. It should be easy to see when you hold the tool in your hand. I stick mine where my eyes land first.
Use labels that can take dust and damp. Paper labels peel off in a garage. I use tape and a thick marker and they last for months.
Make a label for each tool, even the ones you think are clear. I labelled my spare hooks too. Now no one hangs a random bag on a tool hook.
Check the labels once a month and fix any that are worn. A faded label is no use to anyone. I rewrite mine while I do my weekly tidy up.
Let the kids help with the labels if they use the garage. They learn where things go and they take pride in it. My youngest made labels for the garden tools and they are still up.
Labels are the cheapest win in this whole list. They cost almost nothing and they take one afternoon. But they keep the wall tidy long after the work is done.
One Wall for Car Care Supplies
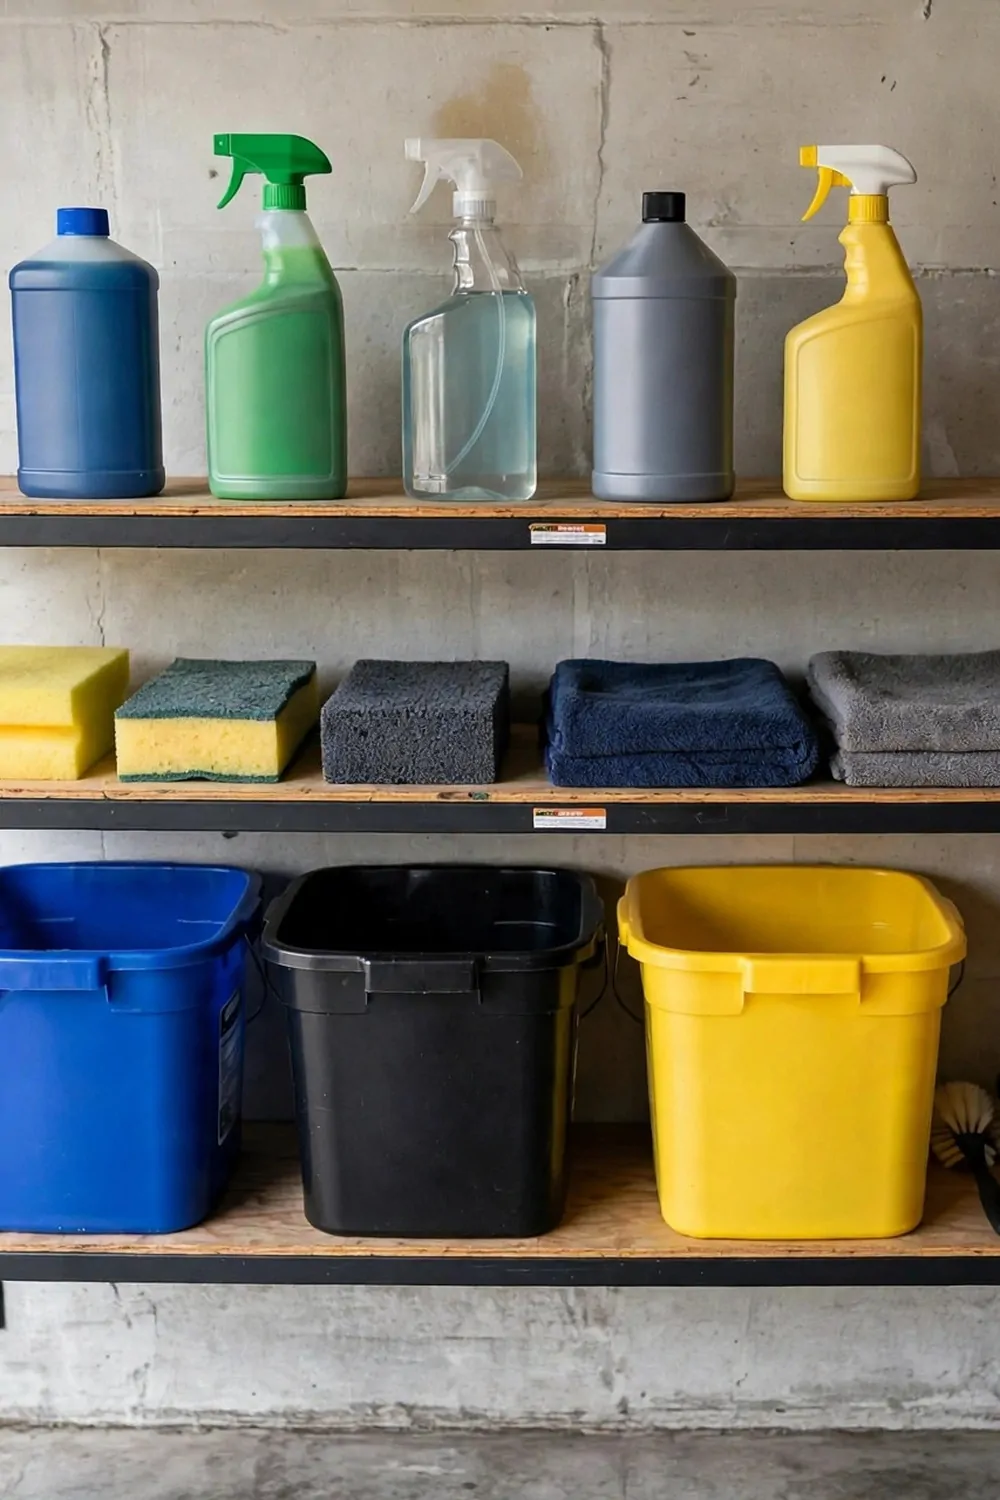
Car wash stuff used to live all over my garage. Sponges in one box, soap on a shelf, buckets by the door. One wall for it all makes wash day so much easier.
Pick a wall near the garage door so you can carry things out fast. I use the wall beside the car. The hose reaches it and the buckets are right there.
Put the bottles on a shelf at chest height. You can read the labels and grab the right one with ease. I sort mine with wash soap on the left and wax on the right.
Hang the sponges on hooks so they dry between washes. A damp sponge left in a box can smell bad. I hang mine by a small loop and they dry in a day.
Stack the buckets under the shelf in a neat row. I nest mine inside each other to save space. One bucket holds the cloths and the other holds the brushes.
Keep a small towel rail on the same wall for drying cloths. I fitted a short rail under the shelf. The cloths hang there after a wash and they are ready next time.
Label the shelf if more than one person washes the car. I wrote wash, wax and wheels on small tags. Now no one grabs the wrong bottle by mistake.
This one wall turned wash day from a hunt into a quick job. I grab my bucket, my soap and my sponge in one trip. The car gets clean and the garage stays tidy.
Wall-Mounted Fold-Down Drying Rack
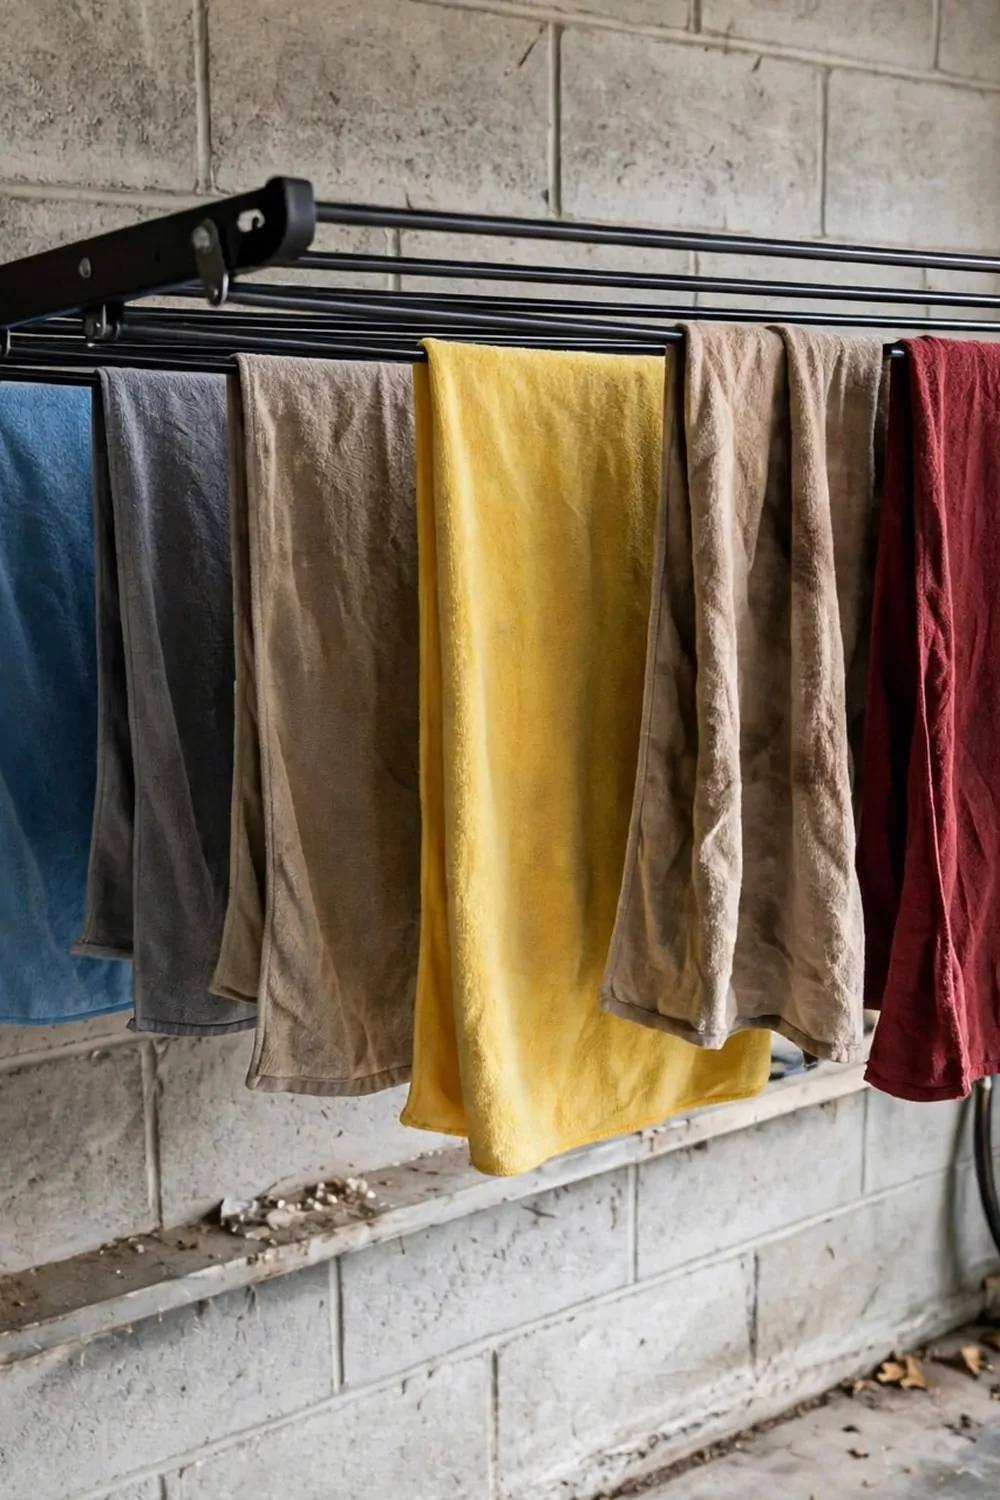
A drying rack that folds down is a smart trick for a garage. You pull it out when you need it and fold it flat when you do not. It takes up no floor space at all.
Fit the rack at a height where cloths hang free and do not touch the floor. I put mine above a small shelf so drips fall onto the tray below. It keeps the floor dry.
Use the rack for rags, cloths and small towels after a wash. I hang mine in a neat line with a gap between each one. Air moves round them and they dry fast.
Fold the rack up when it is empty. I push mine flat against the wall after the cloths are dry. The wall looks tidy and I can walk past with ease.
Wipe the rack arms now and then so they stay clean. Dust and soap can build up on them. A quick wipe keeps the cloths fresh and clean too.
Do not overload the rack with heavy wet towels. It is made for light cloths and rags. I keep heavy towels for the line outside and light ones go on the rack.
Keep a small basket under the rack for dry cloths. I fold mine and put them in the basket when they are done. That way the rack is free for the next load.
This rack is a quiet hero in my garage. It does its job, folds away, and asks for nothing. I wish every garage had one on the wall.
Overhead Wall Shelves Near the Ceiling
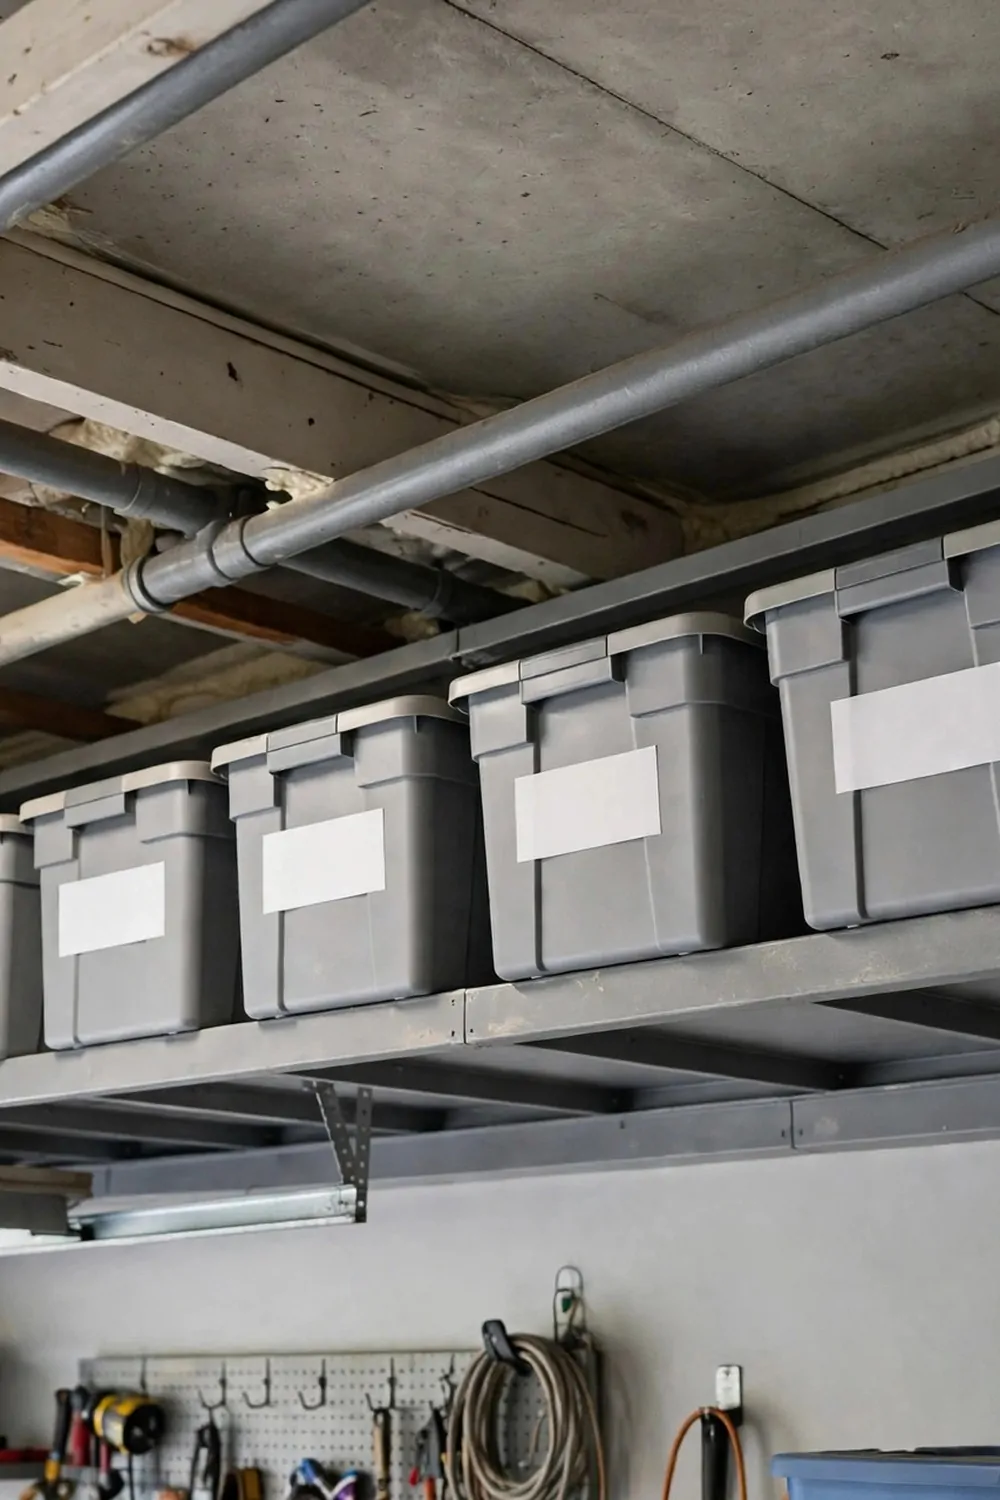
High shelves near the ceiling use space that most people forget. I put boxes up there that I only need a few times a year. The floor stays clear for daily stuff.
Fit the shelves strong and level because they hold a lot of weight. I fixed mine into studs and I test them with a firm pull. Safety comes first up high.
Use boxes that are the same size so they sit in a neat row. I use clear boxes with lids so I can see what is inside. Labels on the front help even more.
Keep a small step stool near the shelves. You should not stand on a chair to reach a high box. I keep a folding stool in the corner and it is always there.
Put light things up high and heavy things down low. I store spare blankets and seasonal gear up top. Heavy tools stay at waist height where they are safe.
Check the boxes once a season to make sure the lids are shut tight. Dust can get in if a lid is loose. I lift each box down, check it, and put it back.
Write the contents on the label in big clear words. I write what is inside and the season it is for. That saves me from pulling down three boxes to find one item.
High shelves gave me back a whole wall of floor space. The garage feels bigger and calmer. It is a simple fix that uses space I was wasting.
| Weekly job | Takes | What it fixes |
|---|---|---|
| Put one tool back in its home | Two minutes | Stops the slow pile-up on the bench |
| Sweep the floor under the wall | Five minutes | Keeps the walkway clear and safe |
| Check hooks and bins | Five minutes | You catch a loose hook before it falls |
A Weekly Five Minute Wall Reset
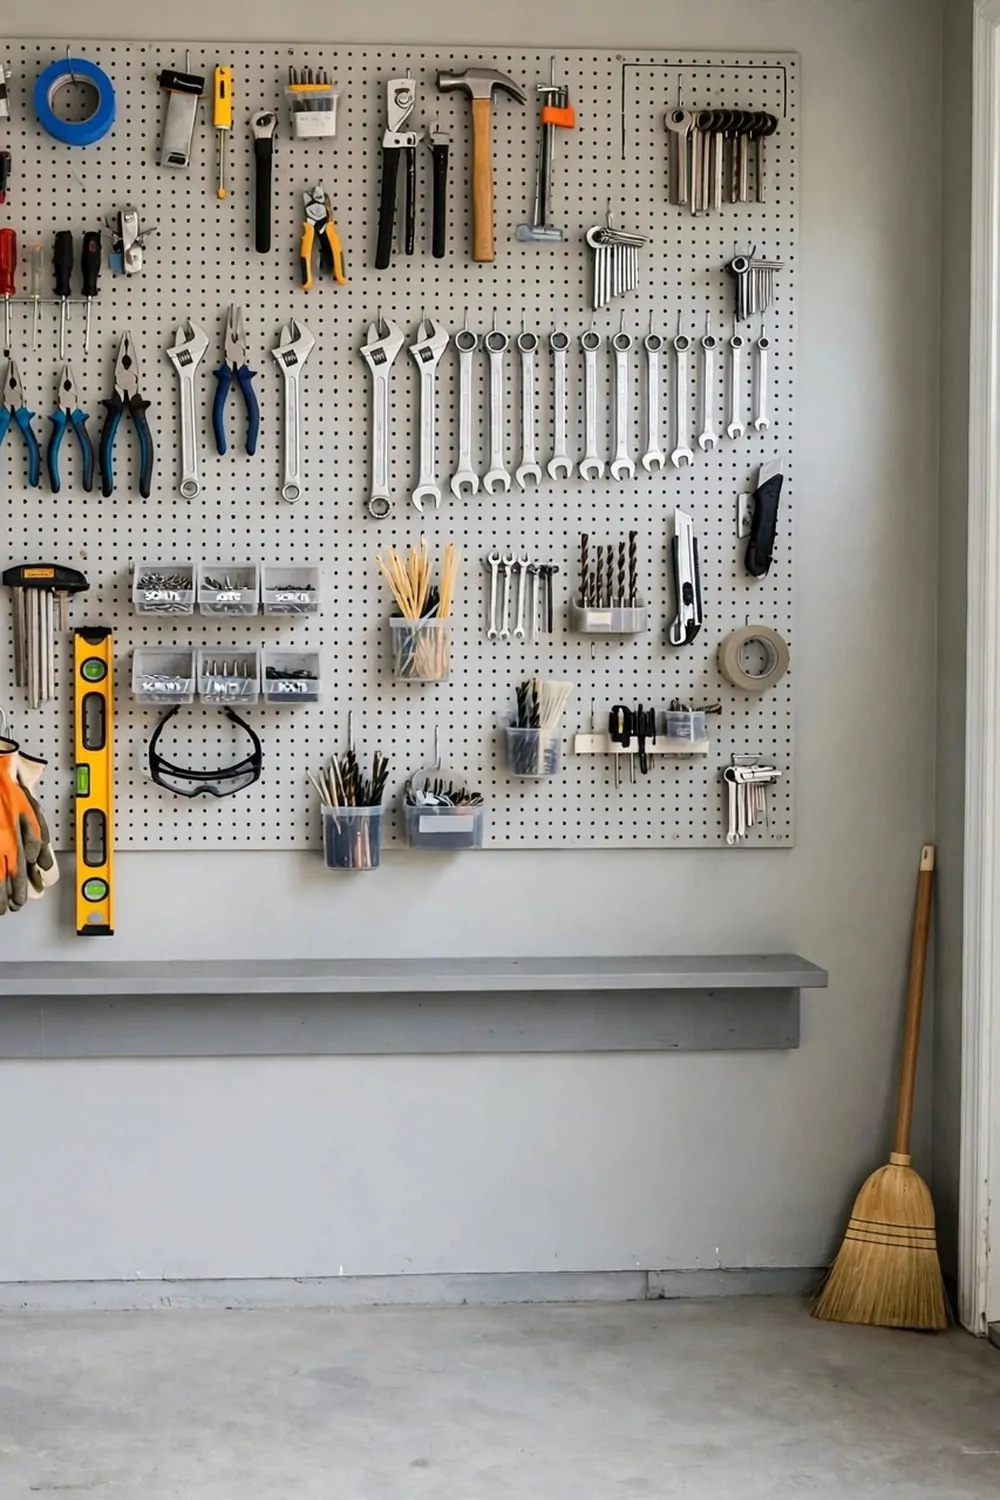
A tidy wall does not stay tidy on its own. It needs a small reset each week. I give mine five minutes and it stays neat all week long.
Pick a set day and time for your reset. I do mine on Sunday after lunch. It is a small habit now and I do not even think about it.
Start by putting back any tool that is out of place. I walk along the wall and hang each one on its hook. Most weeks there are only two or three to fix.
Sweep the floor under the wall next. Dust and bits build up there fast. I sweep it into a small pile and pop it in the bin.
Check each hook and bin with a quick tug. A loose hook can fall and take a tool with it. I tighten any screw that feels wobbly before it becomes a problem.
Wipe the pegboard and shelves with a dry cloth. It takes one minute and it keeps the dust down. A clean wall looks good and it feels good too.
End by standing back and looking at the wall. I love that moment when everything is in its place. It makes me want to keep it that way for one more week.
Five minutes a week is all it takes. That is less time than a cup of tea. Your wall stays tidy, your tools stay safe, and your garage feels calm.
Keep Reading
I hope one of these ideas made you smile and think, that could work in my garage. You do not need to do all forty at once, and I would not ask you to try. Pick the one that fixes your biggest daily annoyance and start there this weekend.
A single hook or a small shelf can change how your whole garage feels. I have seen it in my own home, and I know you can feel it too. Start small, keep it simple, and enjoy the calm that comes with a tidy wall.
- 41 Custom Kitchen Cabinet Organization Ideas Worth Stealing
- 34 Luxury Laundry Room Ideas With Beautiful Built-In Cabinets
- 32 Mudroom Locker Ideas That Keep Busy Families Organized
- 39 Laundry Room Cabinet Ideas That Make Storage Look Beautiful
Thank you for reading all the way to the end, and I hope your garage wall brings you a little joy each time you walk in.