28 Under-Sink Bathroom Storage Ideas That Hide the Mess

The cabinet under my bathroom sink is the smallest storage spot in my whole house, and it holds the biggest mess.
I open those doors and stuff just stares back at me, bottles fall over and sponges slide to the back. I can never find the thing I need most.
It is funny how such a tiny space can cause so much stress in the morning. You just want your face wash. You end up moving ten bottles to reach it.
I used to think the problem was that I had too much stuff. Then I looked closer and I saw the real problem. Nothing in there had a home.
Every bottle was just sitting loose on the floor of the cabinet. The pipes took up the middle. The back corner was a dark hole where things went to hide.
So I started small, I tried one bin and then I added a hook. Then I moved things around until the space made sense. It did not take a lot of money or a full weekend.
In this post I share 28 simple under-sink bathroom storage ideas that hide the mess. They are easy, cheap, and they work in a small cabinet just like mine.
1. Stackable Bins That Fit Around the Pipes
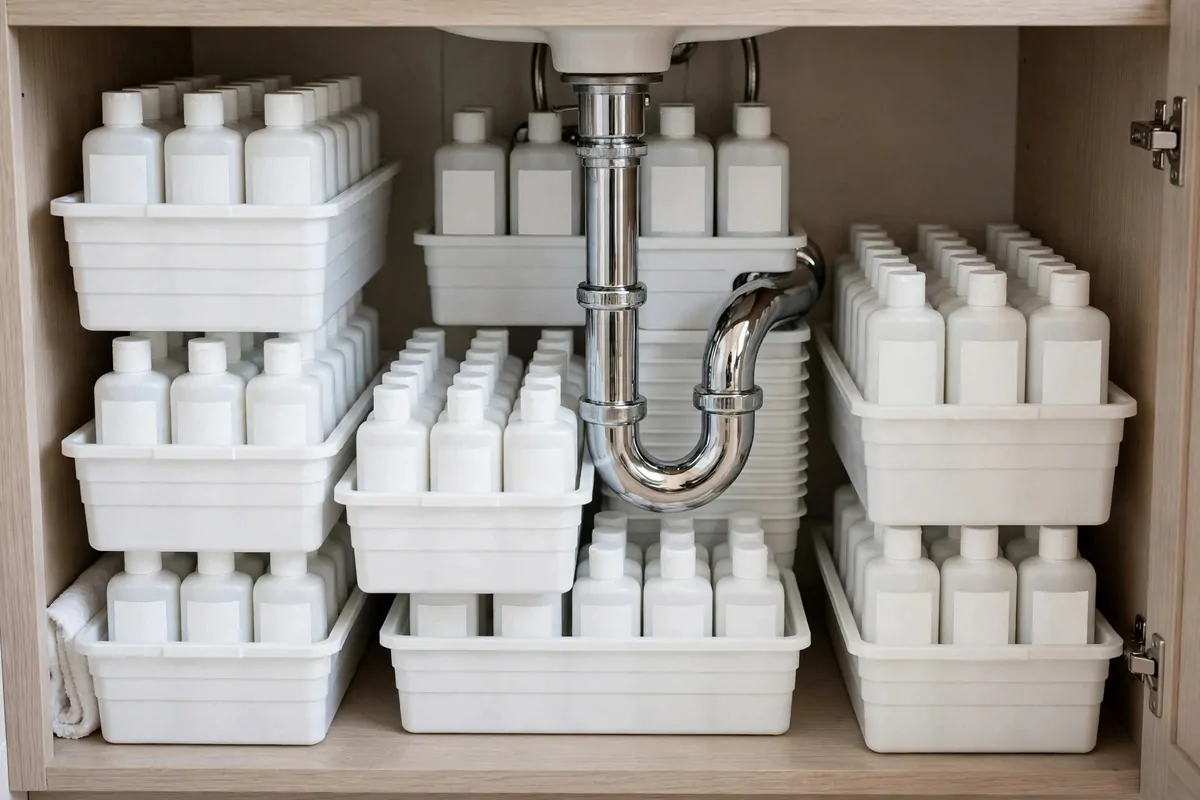
The pipes under my sink used to eat up all the space. I thought I could not fit anything around them.
Then I tried stackable bins and it changed everything. They fit on each side of the pipes like they were made for that spot.
I put one bin on the left and one on the right. The pipes sit in the middle and nothing gets stuck behind them now.
You can stack two bins on top of each other too. That gives you a top level and a bottom level in the same small spot.
I keep my daily stuff in the top bin. My face wash, my toothpaste, and my small creams live there.
The bottom bin holds the extras. Refills, spare soap, and things I do not use every day go down there.
Pick bins that are short and wide. Tall bins hit the pipes and tip over. Short ones slide in easy.
Clear bins work best for me here. I can see what is inside without pulling the whole bin out.
If a bin wobbles, I put a small non slip mat under it. That keeps it still when I open and close the doors.
2. A Two-Tier Sliding Drawer
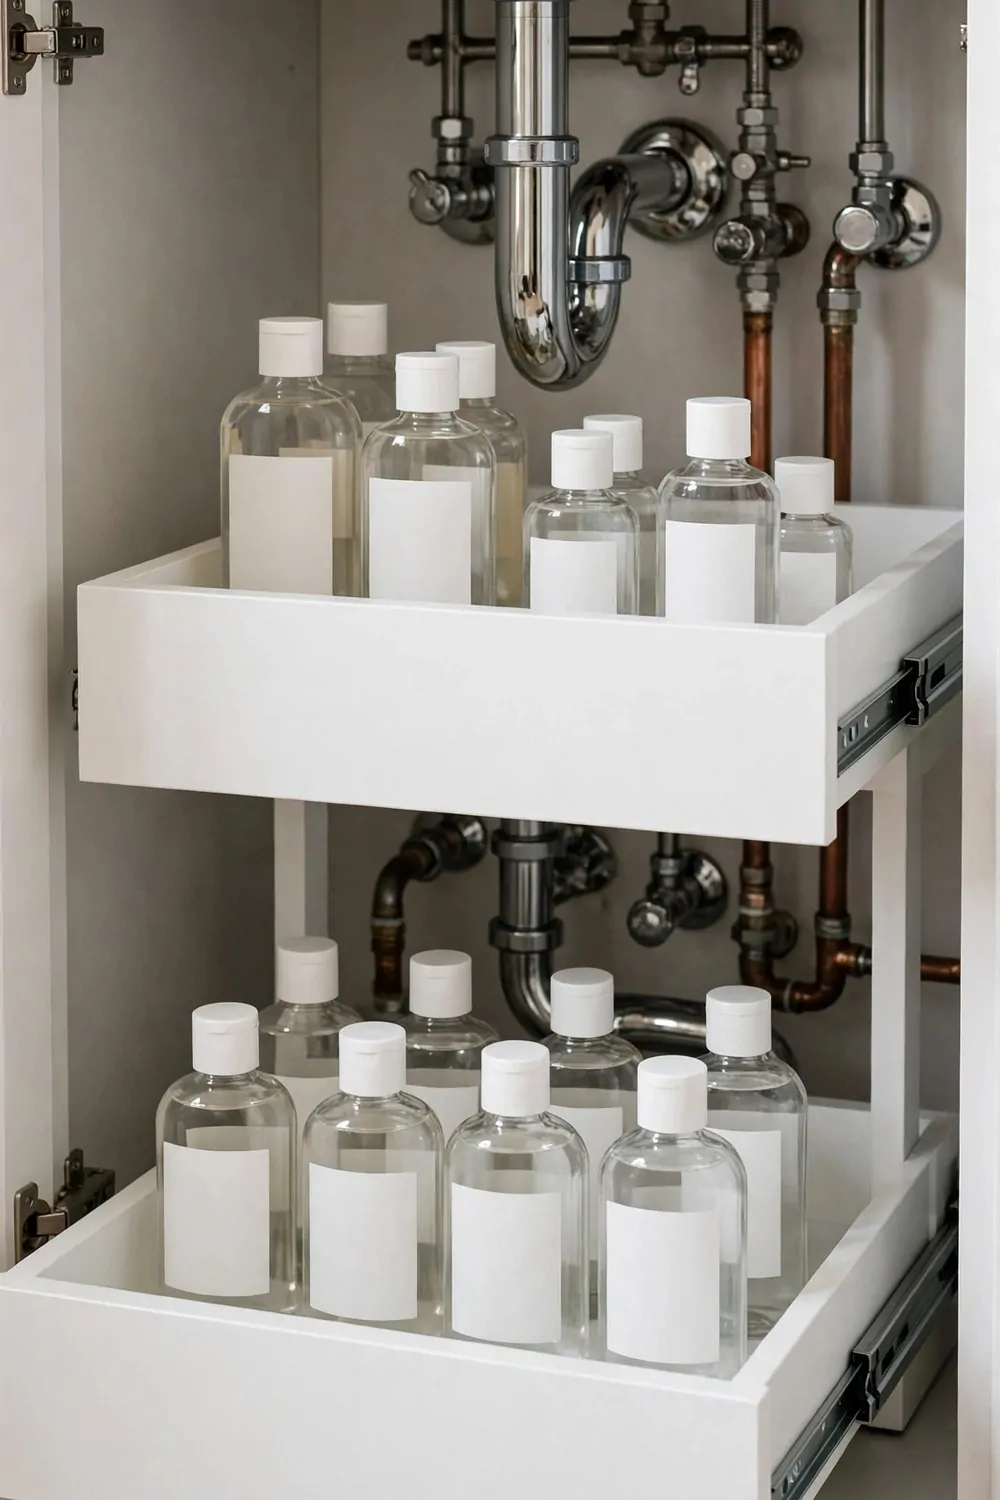
A two-tier sliding drawer is my favorite fix for this cabinet. It pulls out toward you like a little drawer.
You do not have to reach into the dark back corner anymore. You just pull the drawer and everything comes to you.
The top tier is shallow. I keep small bottles and tubes up there. Nothing falls over because the sides hold them in.
The bottom tier is deeper. Big bottles fit there without a fight. My shampoo refills and cleaning spray sit on that level.
It feels a bit like magic the first time you use it. You pull once and you see it all. No more digging.
Measure your cabinet before you buy one. You need room for the pipes and room for the drawer to slide.
Most of these drawers cost between 15 and 35 dollars. That is a fair price for how much time they save you each day.
Here is a quick look at the main types so you can pick the one that fits your cabinet best.
| Drawer Type | Best For | Typical Cost |
|---|---|---|
| Single pull-out drawer | Small cabinets with one open side | 15 to 25 dollars |
| Two-tier sliding drawer | Taller cabinets with lots of bottles | 20 to 35 dollars |
| U-shaped drawer | Cabinets where pipes run down the middle | 25 to 45 dollars |
I clean mine once a month. I pull it out, wipe it down, and put things back in the same spots.
If you rent your home, pick one that does not need screws. A lot of them just sit in place and work fine.
3. Tension Rods for Spray Bottles
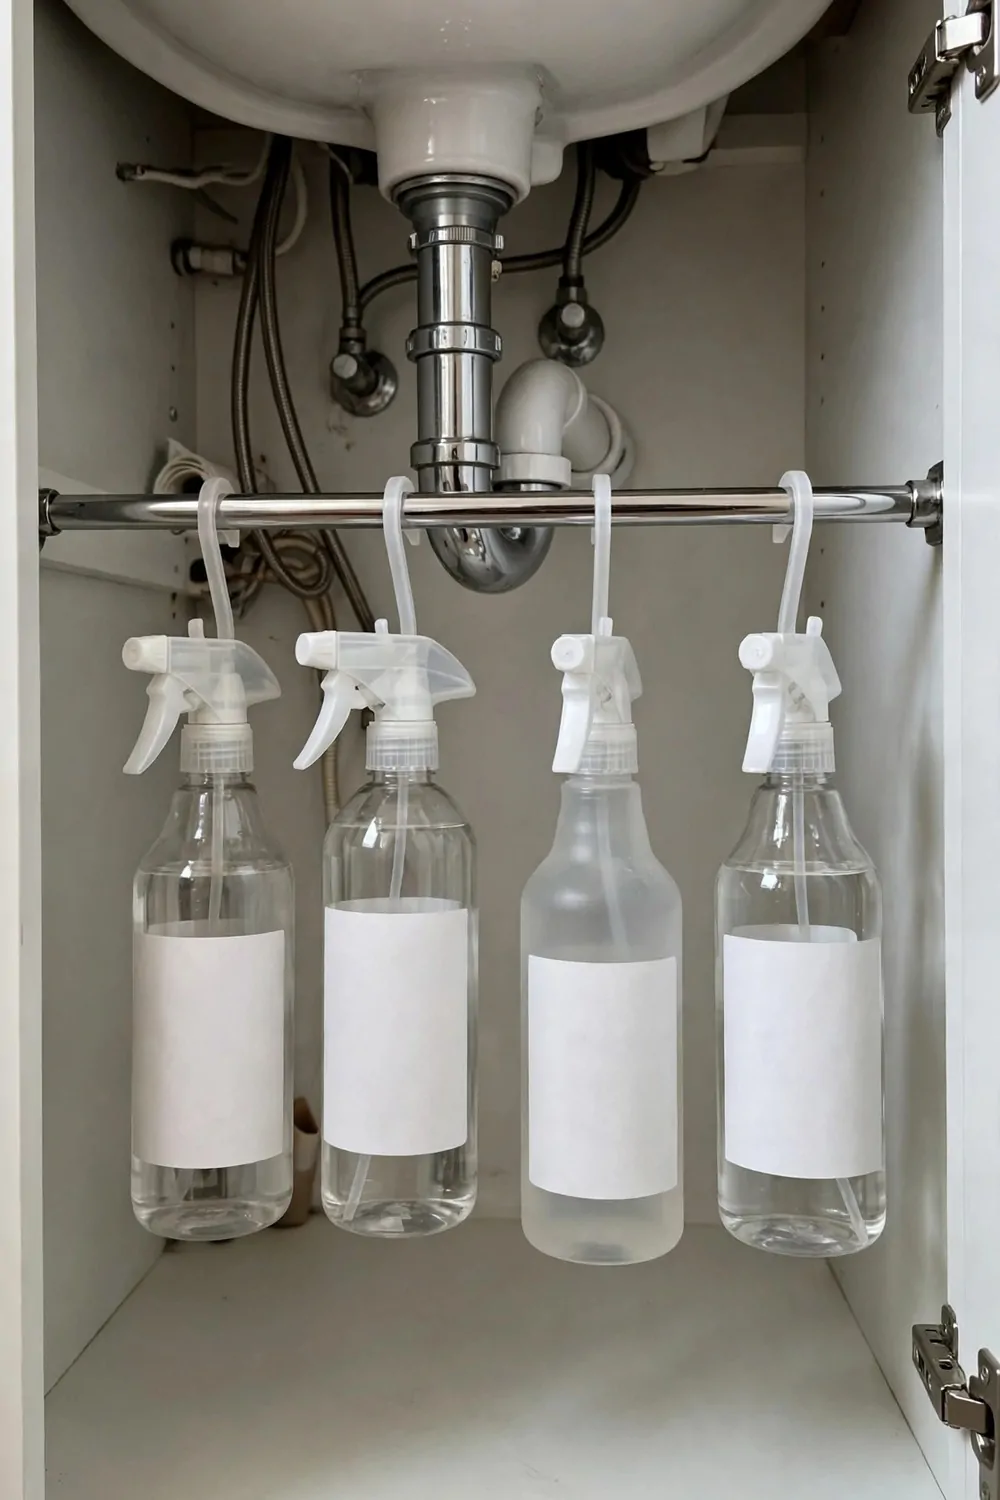
A tension rod is one of the cheapest tricks I know. You twist it to fit and it stays put between the two walls of the cabinet.
I hang my spray bottles from the rod by their triggers. They hang in a neat row and they do not fall over anymore.
Before this, my spray bottles always tipped. One would fall and knock two more down with it. It drove me a bit crazy.
Now they hang up high and the floor of the cabinet stays clear. I can put bins or a small basket under them.
You can fit three or four spray bottles on one rod. That is usually all the sprays most of us have.
Make sure the rod is tight. Give it a little tug after you set it. If it slips, twist it a bit more until it holds.
I also hang a small spray bottle for glass cleaner on the same rod. It is light and it fits right next to the others.
This trick costs about 5 to 10 dollars. It takes two minutes to set up and it saves you space every single day.
If your cabinet is wide, use two rods. One near the front and one near the back. That way nothing gets crowded.
4. Hooks on the Inside of the Doors
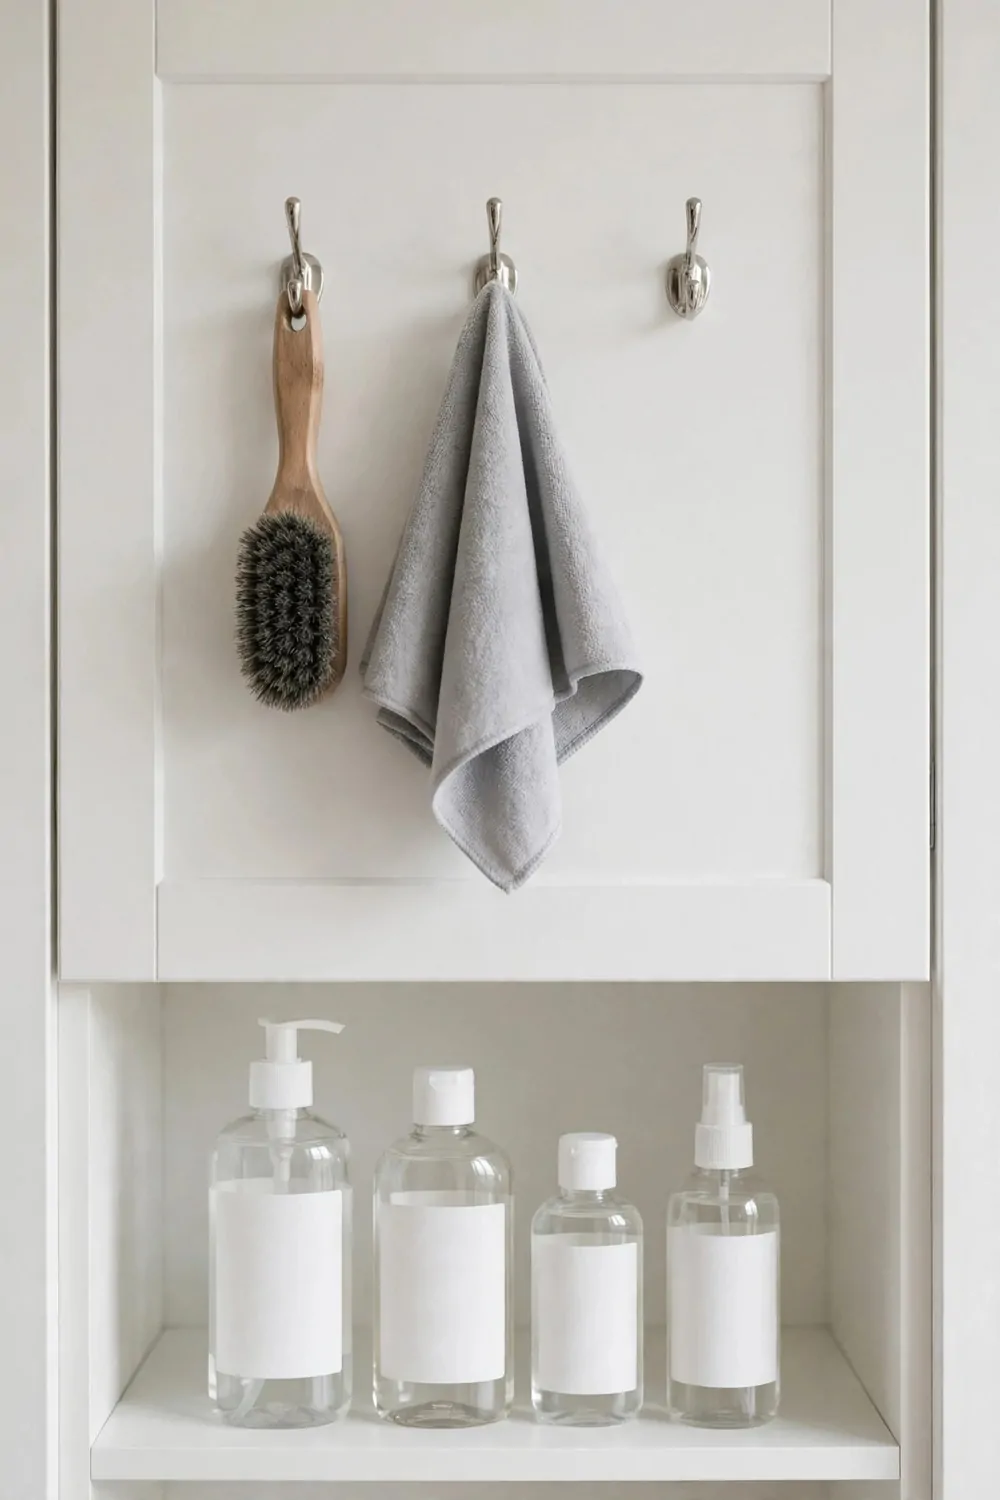
The inside of the cabinet doors is free space. I ignored it for years and that was a waste.
Now I stick small hooks on each door. They hold so much stuff that used to pile up on the floor.
I hang my hair dryer cord, a small brush, and a cleaning cloth on one door. They are easy to grab and easy to put back.
The other door holds a small bag with extra sponges. It keeps them off the wet floor of the cabinet.
Use hooks that stick on with strong tape. You do not need to drill holes in your doors.
Keep the hooks light. Do not hang heavy bottles on a door hook. Heavy stuff will pull the hook off over time.
Here are a few things that work well on door hooks:
- Small brushes and combs
- Cleaning cloths and gloves
- A small bag for sponges
- A measuring cup for bath salts
I wipe the door first so the tape sticks well. A clean, dry door holds a hook much better than a dusty one.
Check the hooks once in a while. If one feels loose, press it back on or swap it for a new one.
5. A Small Lazy Susan for the Back Corner
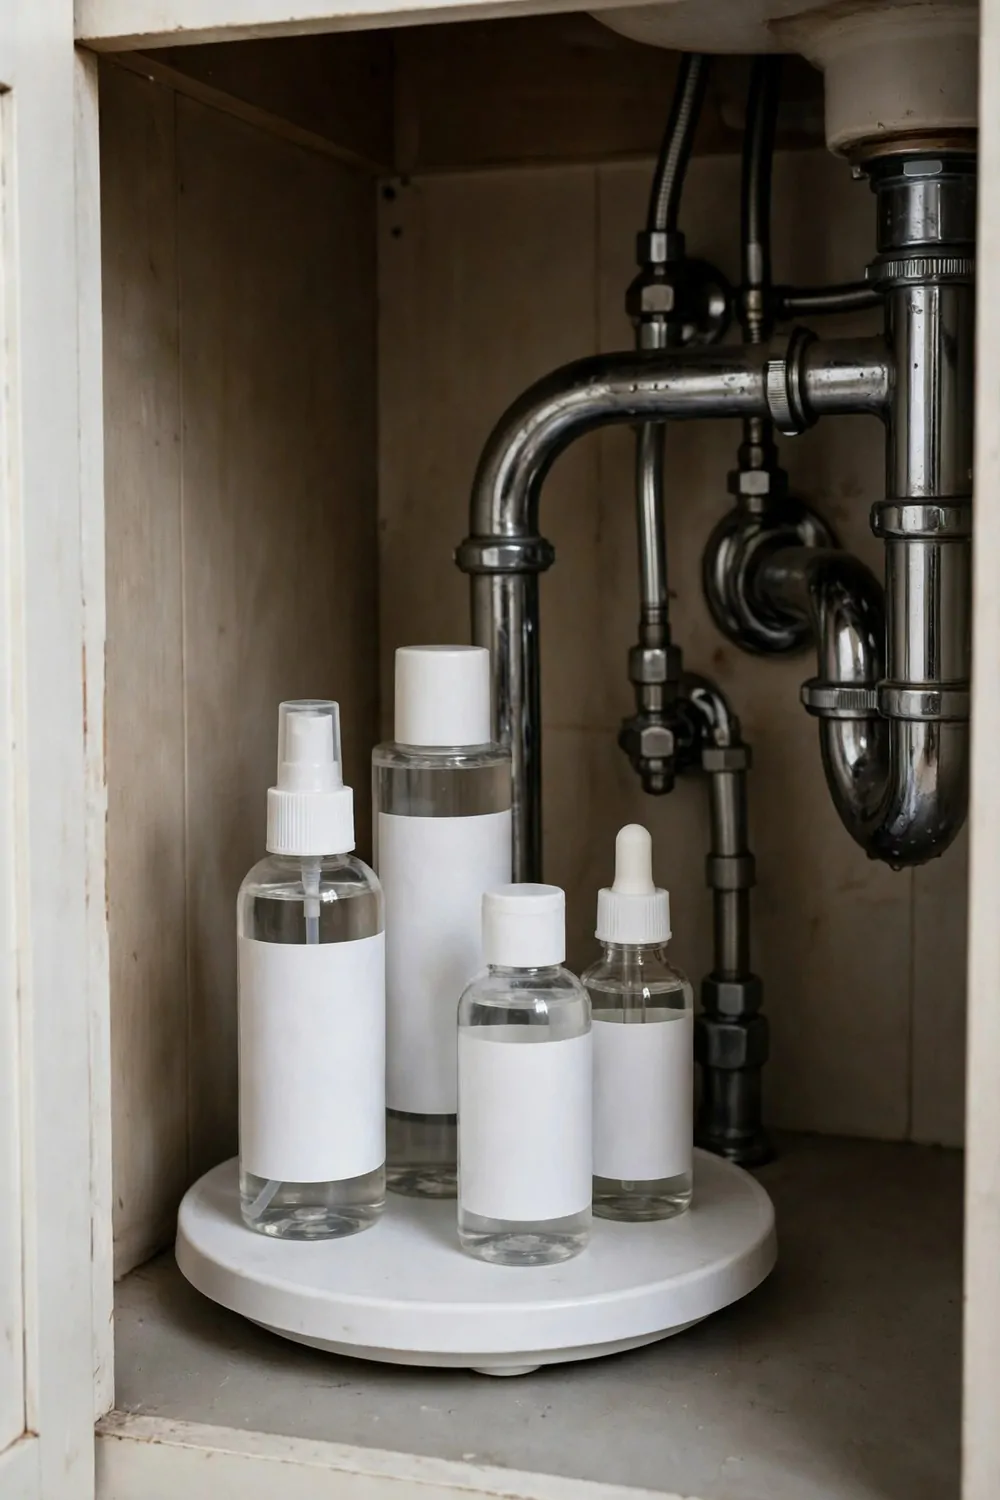
The back corner of my cabinet was the worst spot. Things went in there and I never saw them again.
A small lazy Susan fixed that. It spins, so you just turn it and the back stuff comes to the front.
I put my extra creams and small bottles on it. They spin around nice and easy when I need one.
Pick a small one that fits your cabinet. A big one will hit the pipes and it will not turn.
A lazy Susan with a low edge works best. The edge keeps bottles from sliding off when you spin it.
I keep things I use less often on this spinner. My weekly treatments and my spare lotions live back there.
It feels good to use the back corner at last. That space used to be dead space. Now it works for me.
Most small ones cost between 8 and 15 dollars. You can find them in plastic or wood. Both work fine.
Give it a spin after you load it. If it sticks, move one bottle. Sometimes one tall bottle is the whole problem.
6. Clear Bins So You Can See Everything
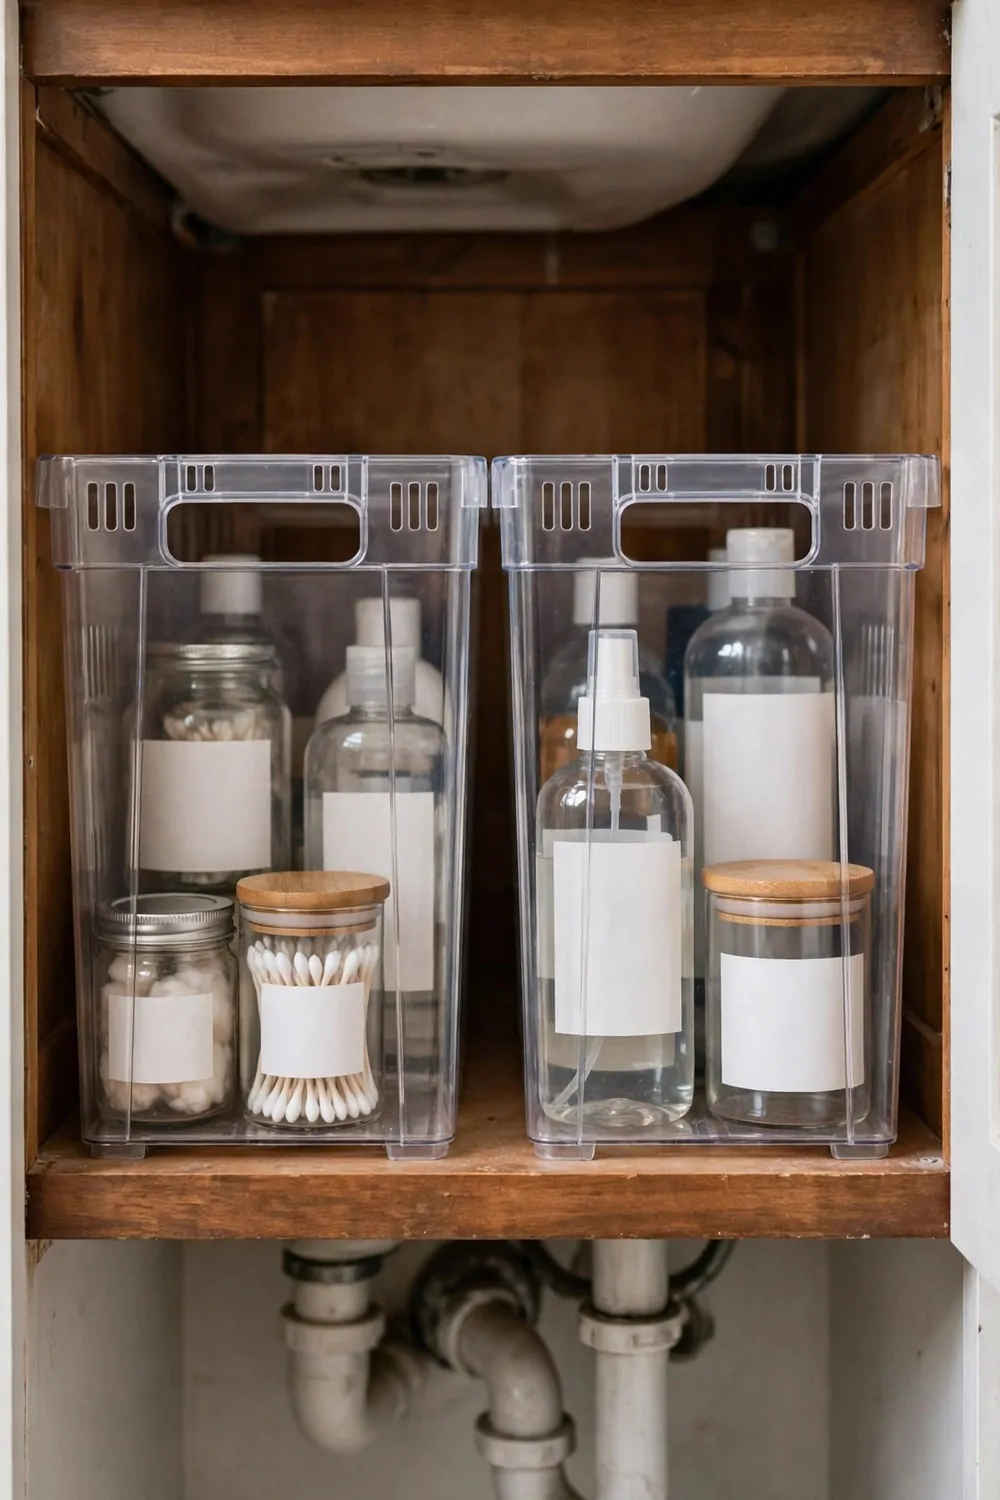
Clear bins are simple but they make a big change. You can see what is inside without opening every bin.
I used solid bins before and I forgot what was in them. I bought the same soap twice because I could not see it.
Now I look in the cabinet and I know in one second. That saves me money and it saves me time.
Clear bins also look neat. The cabinet feels calmer when you open the doors and you can see clean rows.
I use one clear bin for skin care, one for hair stuff, and one for cleaning bits. Each bin has its own job.
Pick bins with smooth sides so you can see through them well. Bins with a lot of ridges make it harder to see inside.
Here is a quick look at the main bin types so you can pick what works for your space.
| Bin Type | Best For | Typical Cost |
|---|---|---|
| Clear plastic bin | Seeing everything at a glance | 3 to 8 dollars each |
| Clear bin with handle | Pulling a full bin out like a drawer | 5 to 10 dollars each |
| Stackable clear bin | Small cabinets that need two levels | 6 to 12 dollars each |
I wash my bins every few weeks. Soap and dust build up fast under a sink. A quick rinse keeps them clear.
If you like a soft look, you can still use clear bins and add a small label on the front. You get the neat look and the clear view.
7. A Pull-Out Bin for Cleaning Bottles
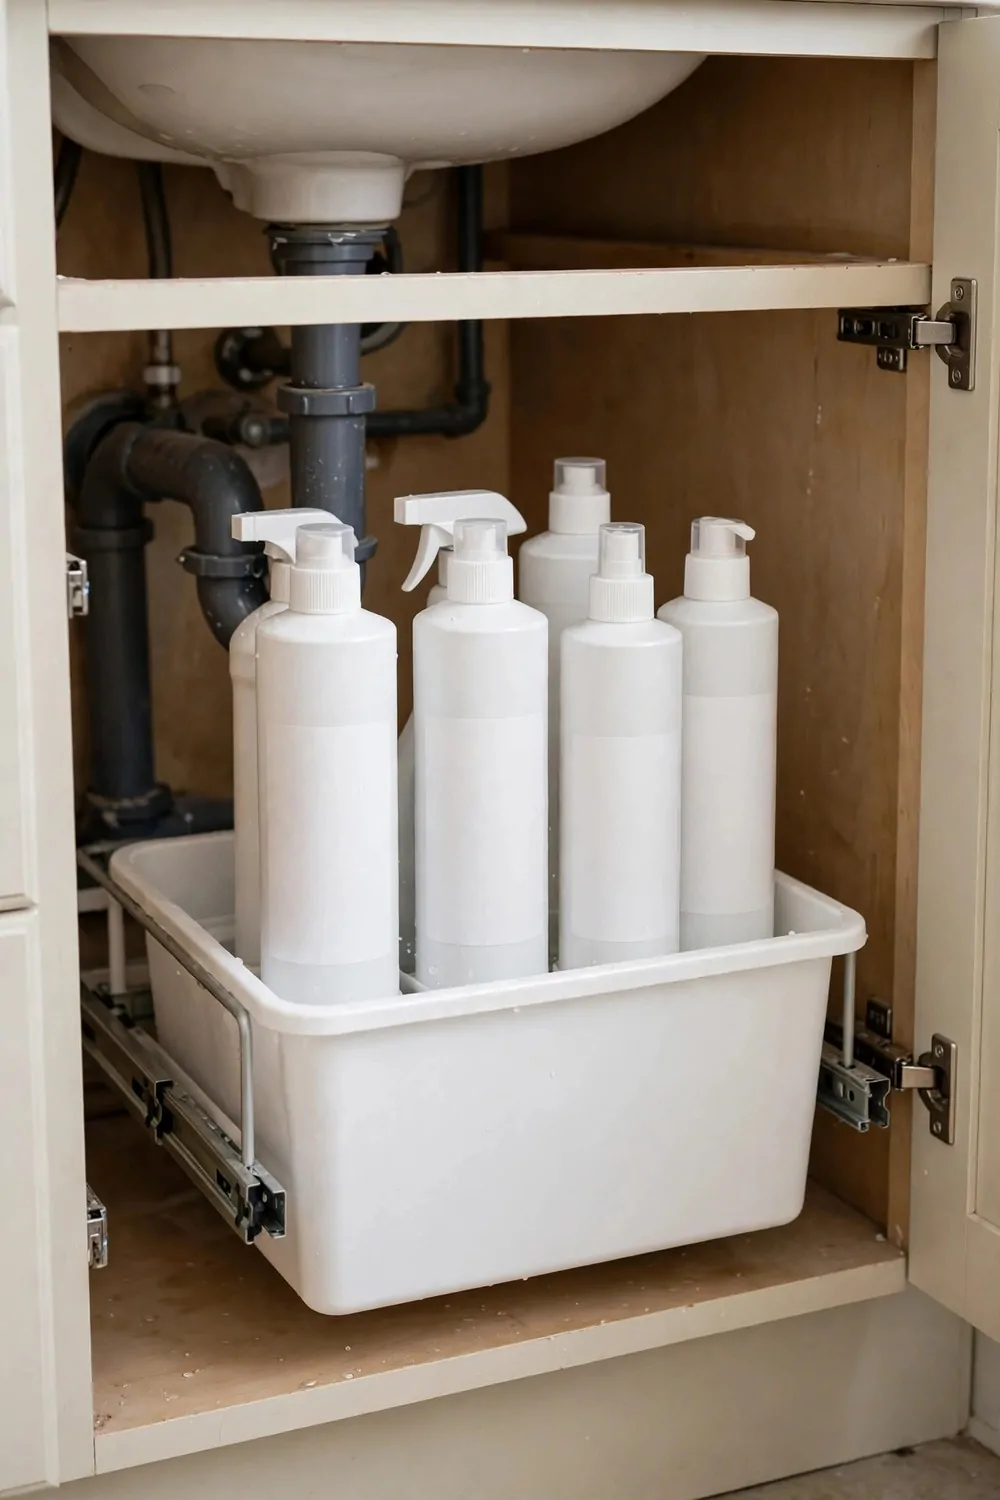
Cleaning bottles are tall and heavy. They always fell over when I kept them loose on the floor.
A pull-out bin changed that for me. It is a deep bin that slides out like a drawer when you pull the handle.
I keep all my bathroom cleaning bottles in this one bin. They stand up straight and they stay in a row.
When I need to clean, I pull the bin out and pick what I need. Then I push it back in. It takes five seconds.
Pick a bin with tall sides. Short sides let tall bottles tip. Tall sides hold them up.
I also keep my gloves in the front of this bin. They are right there when I start cleaning.
This keeps cleaning stuff away from my skin care stuff. I like that split. It feels safer and it looks tidier.
A good pull-out bin costs about 10 to 20 dollars. Look for one with a handle that feels strong in your hand.
If the bin is too wide, it will catch on the pipes. Measure first and pick a slim one that slides free.
8. Stackable Shelves That Double the Space
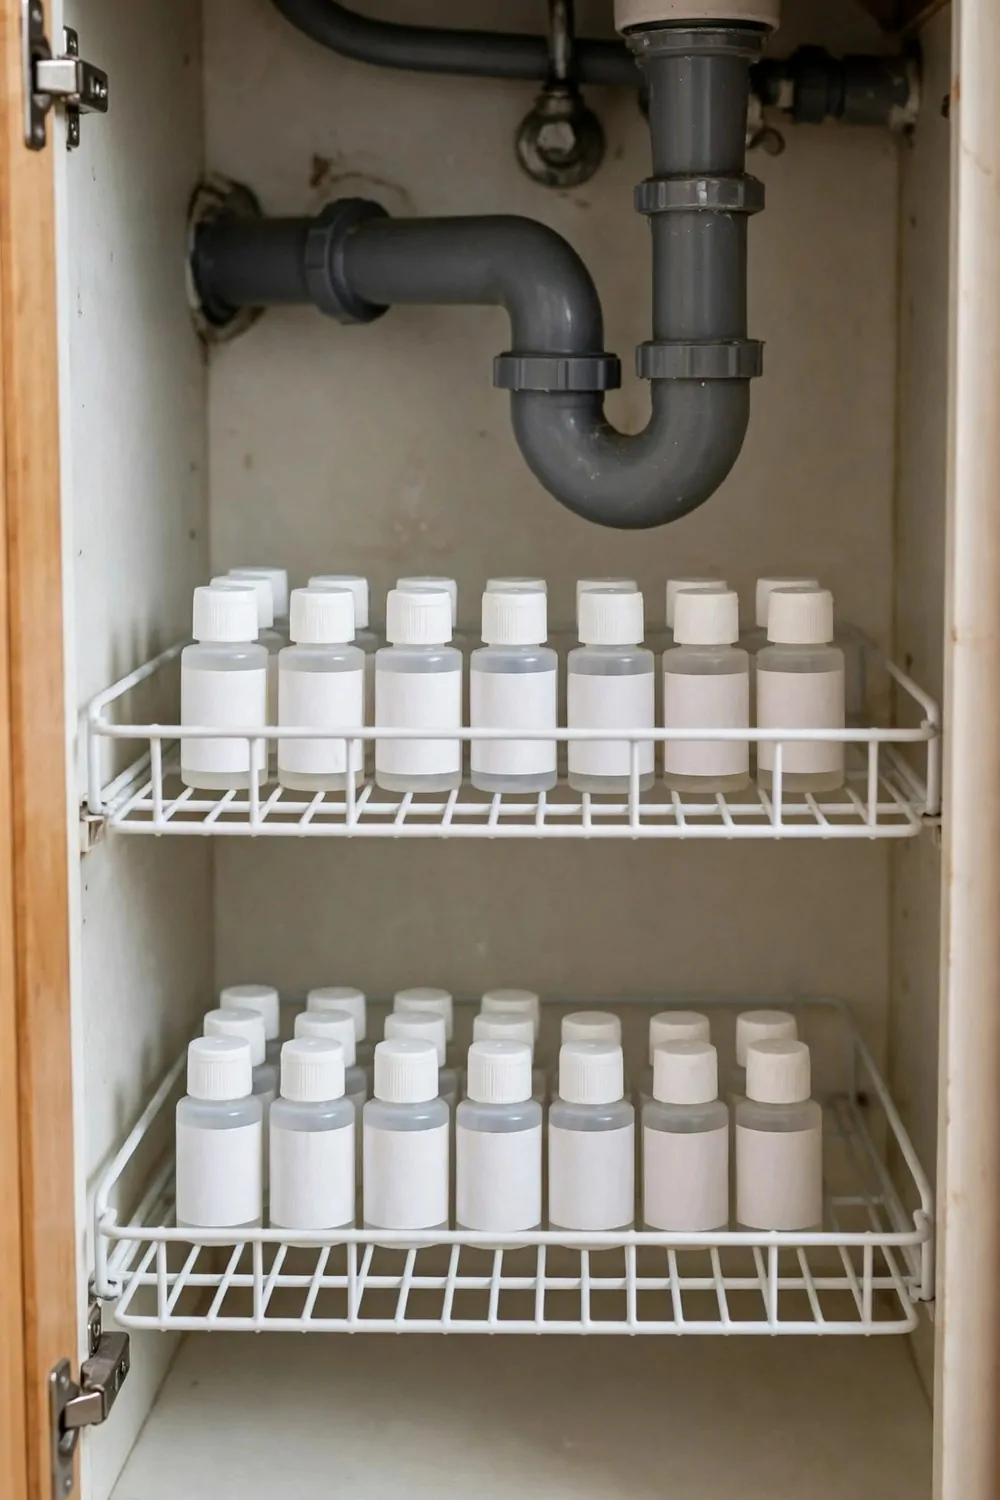
My cabinet had a lot of empty air at the top. I was only using the floor. That was such a waste.
Stackable shelves fix that. You put one shelf in and you get a second floor inside the cabinet.
I put small bottles on the top shelf. Bigger bottles stay on the bottom. Nothing is stacked on top of anything else now.
You can stack two shelves if your cabinet is tall enough. Just leave room for the tallest bottle you own.
Pick shelves that are strong. Cheap thin ones bend in the middle. A strong shelf holds steady even with full bottles.
I like shelves with open sides. I can see through them and I can reach in from the side if I need to.
Put the stuff you use most on the lower shelf. Put the extras up top. That way your hand goes to the right spot first.
These shelves cost about 10 to 20 dollars for a set. They are one of the best value buys for this cabinet.
I move my shelves around twice a year. My needs change a bit with the seasons and a small shift keeps things working.
9. A Basket Just for Cleaning Supplies
I used to mix cleaning supplies with my beauty stuff. It looked messy and it felt wrong.
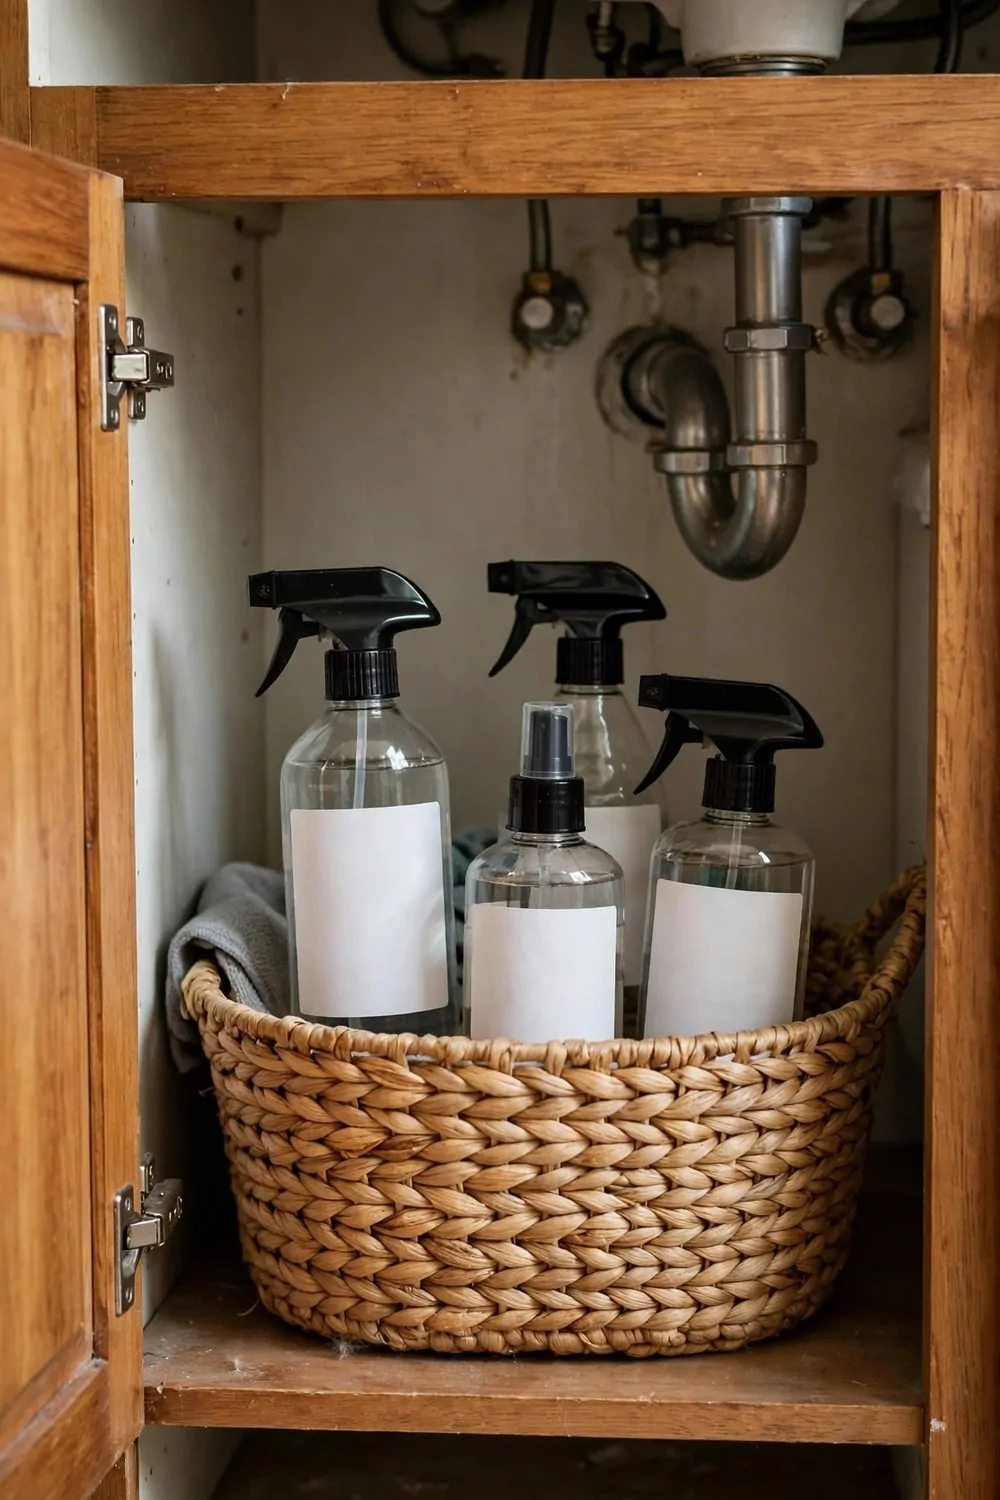
Now I have one basket just for cleaning supplies. Everything for cleaning lives in that one basket.
The basket sits on one side of the cabinet. It is easy to pull out when I clean the bathroom.
I keep my all purpose spray, my bathroom cleaner, and my sponges in there. My gloves sit on top.
A basket with handles is best. You can lift the whole basket out and carry it to the tub or the toilet.
Pick a basket that you can wipe clean. Plastic or coated baskets are best. A cloth basket will get damp under a sink.
I do a quick check each month. I toss empty bottles and I wipe the basket. It takes two minutes.
This one basket makes the whole cabinet look calmer. The cleaning stuff has a home now and it stays there.
If you have kids in the house, keep this basket at the back. It keeps cleaning bottles out of small hands.
10. A Towel Bar on the Inside of the Door
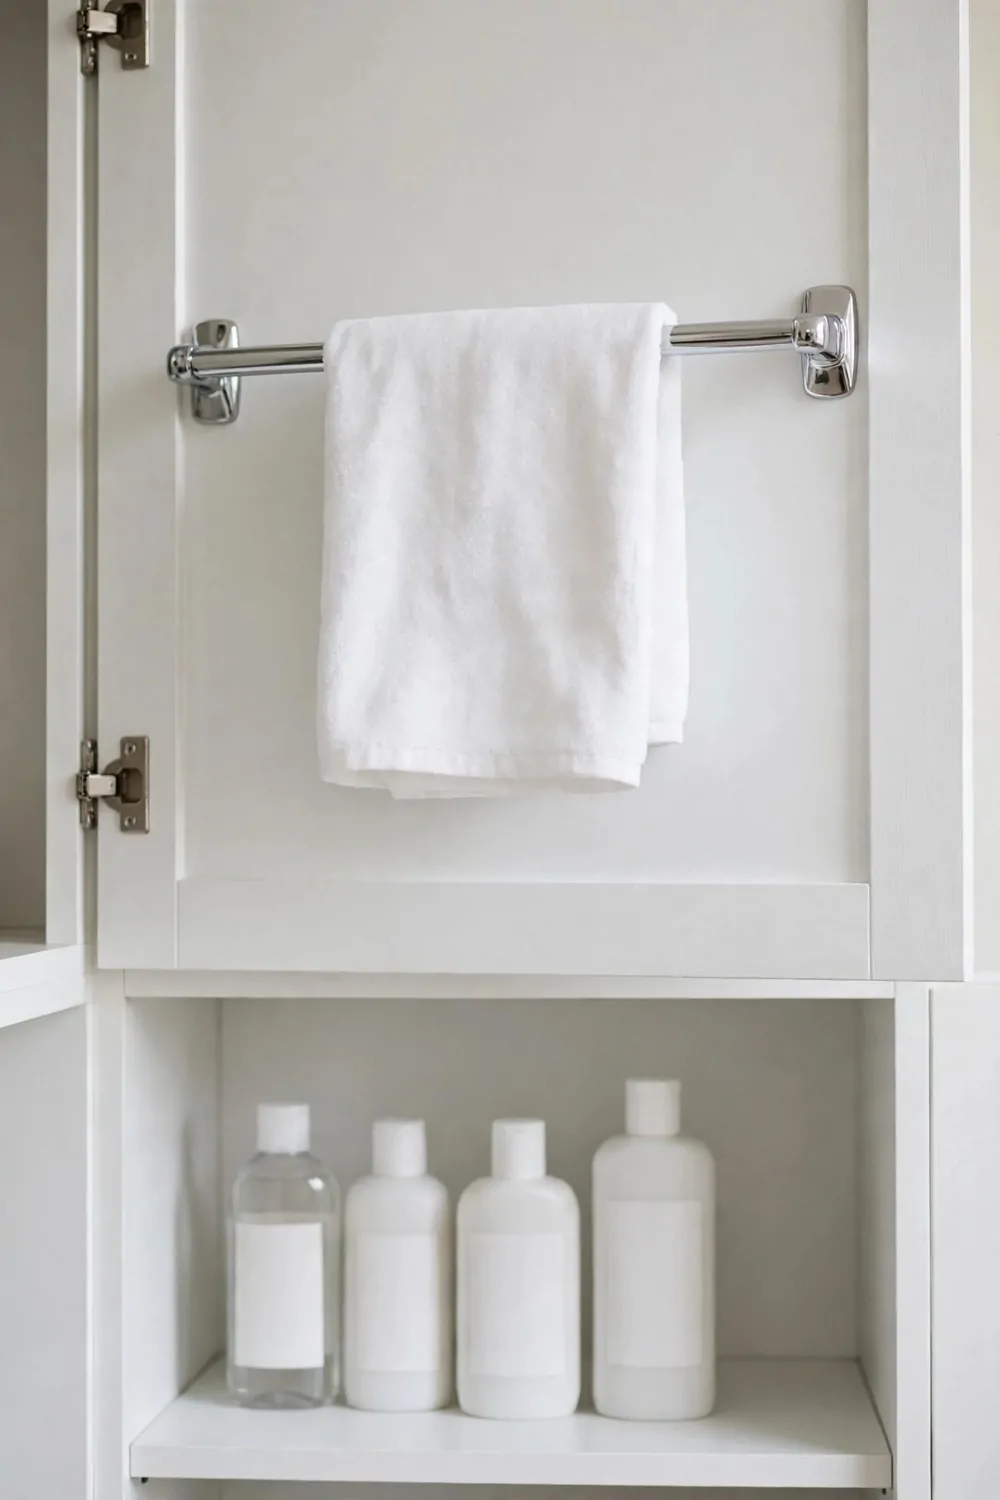
A small towel bar on the inside of the door is such a smart use of space. I wish I had done it sooner.
I hang a hand towel there. It is right where I need it after I wash my hands.
It also frees up space on my towel rail outside. My big towels have more room now.
Pick a short bar that fits your door. Measure the width first so it does not hit the frame when you close the door.
Use strong sticky tape or small screws to fix it. I used sticky mounts and mine has held for months.
Keep the towel light and thin. A thick heavy towel will make the door feel heavy and it dries slower in a closed cabinet.
I swap the towel every few days. A fresh towel keeps the inside of the cabinet smelling clean.
You can also hang a small cleaning cloth on the same bar. It is handy for quick wipes around the sink.
This bar costs about 5 to 12 dollars. It is a small buy that makes the cabinet feel much more useful.
11. A Small Caddy for Hair Tools
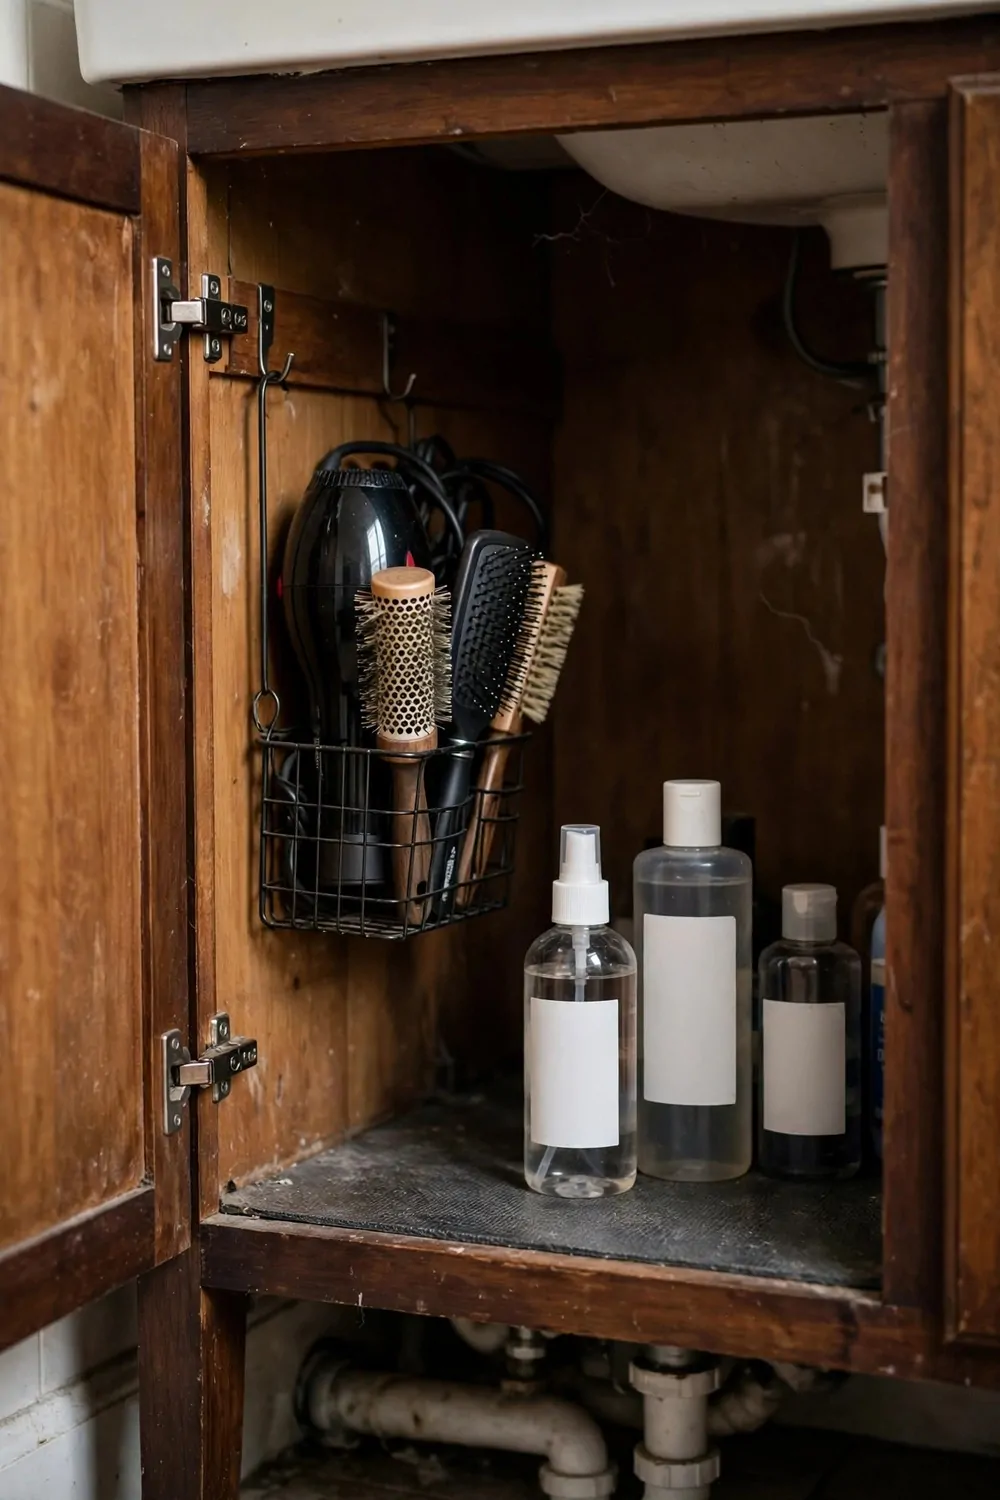
Hair tools are awkward. My dryer, my brush, and my straightener never fit neatly anywhere.
A small caddy fixed that for me. It holds each tool in its own slot so nothing tangles.
I keep my dryer in the big slot. My brush goes in the side slot. My straightener sits in the tall slot.
The caddy sits on one side of the cabinet. I pull it out when I get ready and I slide it back when I am done.
Pick a caddy that can take heat. A heat safe caddy lets you put a warm tool away without worry.
I wrap the cords loosely around the tools. Tight cords get tangled fast and they are a pain to undo.
This caddy keeps my hair stuff away from water. That matters a lot under a sink where drips happen.
Most small caddies cost between 10 and 20 dollars. Look for one with a steady base that does not tip.
I clean the caddy once a month. Hair and dust collect in the slots and a quick wipe keeps it fresh.
12. Labels on Every Bin
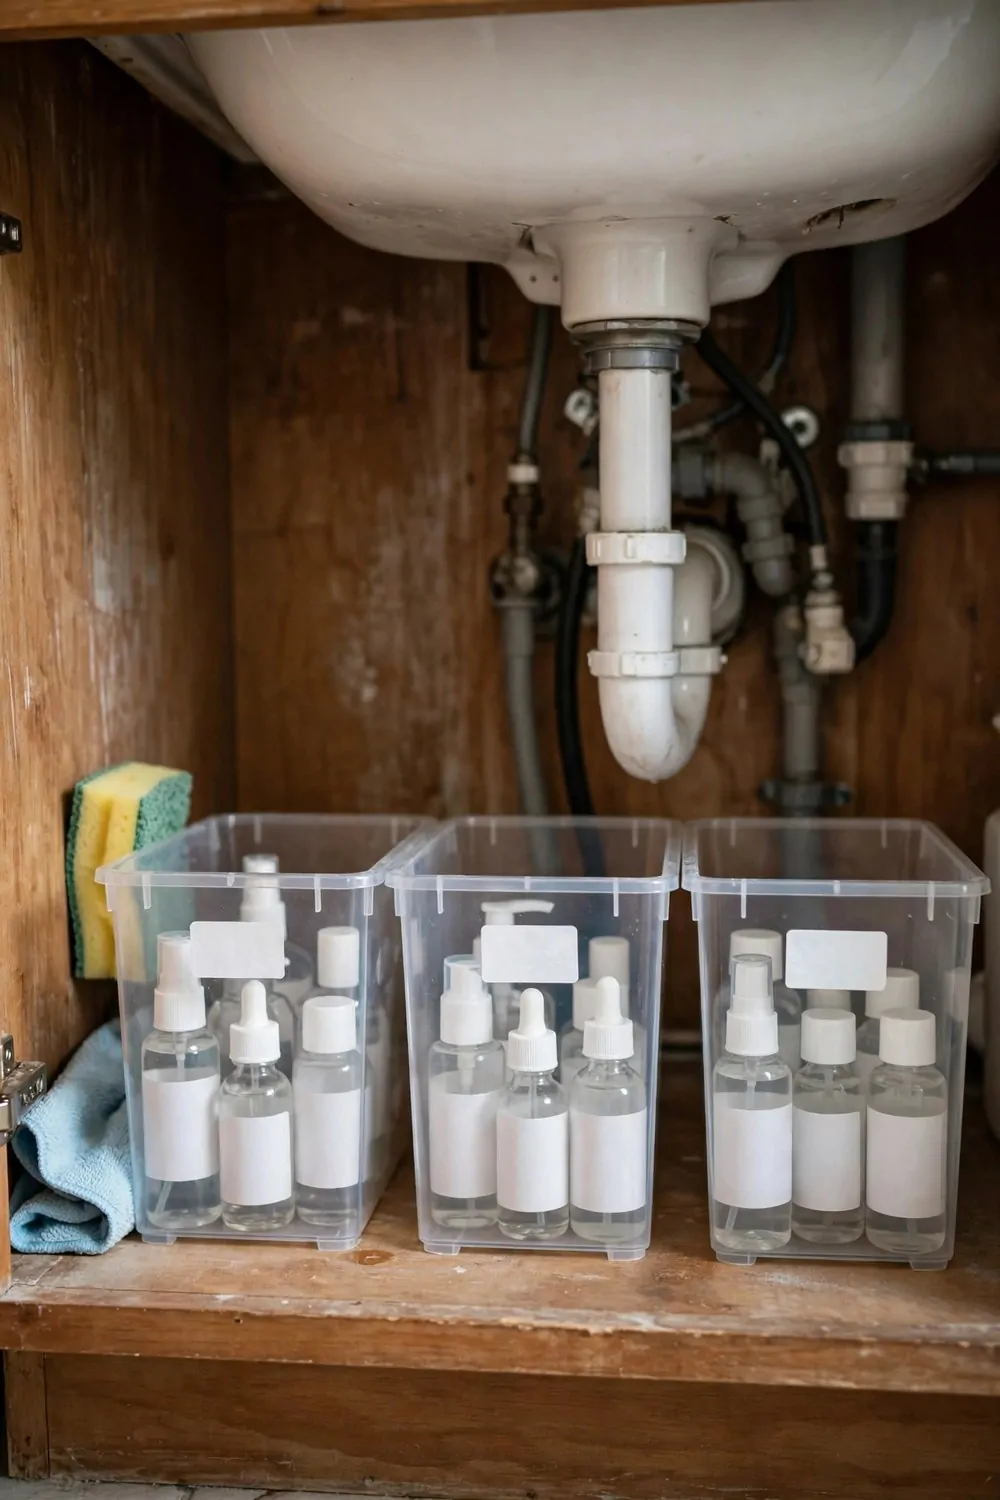
Labels sound small but they make a big change. When every bin has a label, everyone in the house knows where things go.
I label my bins with simple words like skin care, hair, cleaning, and extras. Nothing fancy, just clear words.
My kids can put things back now. Before the labels, they just dropped stuff anywhere. Now they read the label and they know.
You can use a label maker or just write on tape with a marker. Both work fine and both are cheap.
Put the label on the front of the bin where you can see it. A label on the side does not help when the bin is pushed in.
Here are a few label words that work well for most homes:
- Daily use
- Extras and refills
- Cleaning
- Hair tools
I keep my labels short. One or two words is best. Long labels are hard to read in a small dark cabinet.
If a bin changes its job, I change the label too. A quick new label keeps the system honest.
Labels also stop me from buying doubles. I can see I already have soap in the extras bin, so I do not buy more.
13. A Roll-Out Tray for Heavy Bottles
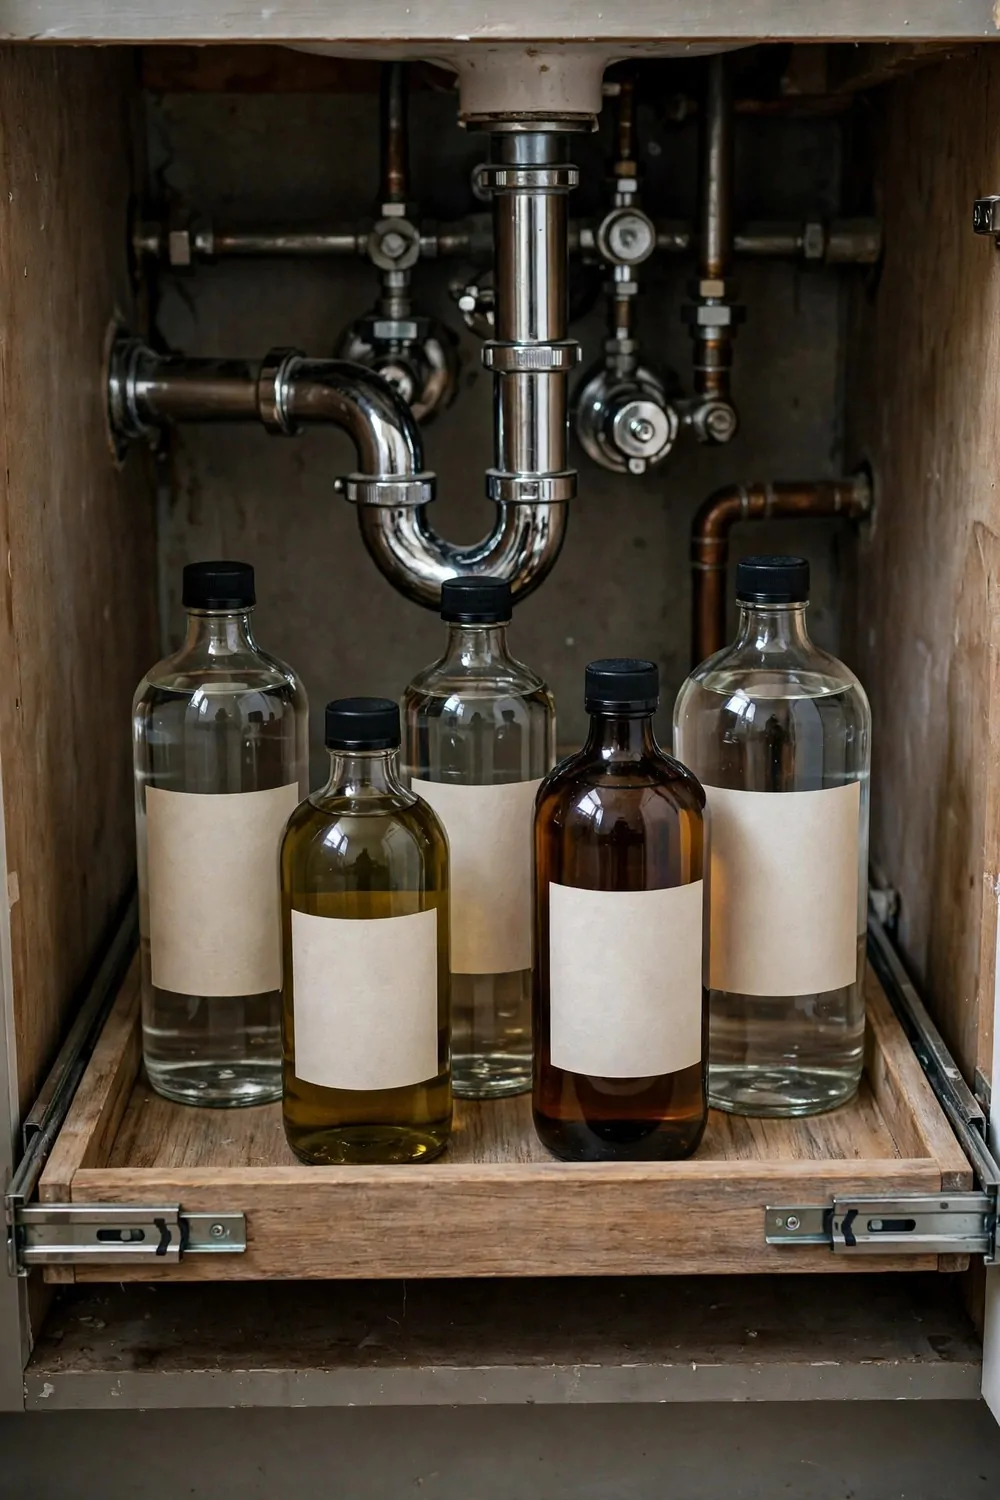
Heavy bottles are the hardest to reach. Big shampoo refills and large cleaning bottles hurt my wrist when I lift them from the back.
A roll-out tray solves that. It is a flat tray on small wheels that rolls out toward you.
I put all my heavy bottles on this tray. I roll it out, I pick what I need, and I roll it back in.
The tray has a low edge. That edge stops bottles from sliding off when the tray moves.
Pick a tray that rolls smooth. Cheap wheels stick and jerk. Good wheels glide and feel easy.
Keep the heaviest bottles in the middle of the tray. That keeps it balanced and it rolls straight.
This tray costs about 15 to 30 dollars. It is worth it if your back or your wrists get sore from reaching.
I wipe the tray each week. Water and soap drips collect under heavy bottles and a quick wipe stops sticky spots.
If your cabinet floor is uneven, put a thin mat under the tray. It helps the wheels roll flat and smooth.
14. A Slim Bin for Spare Rolls
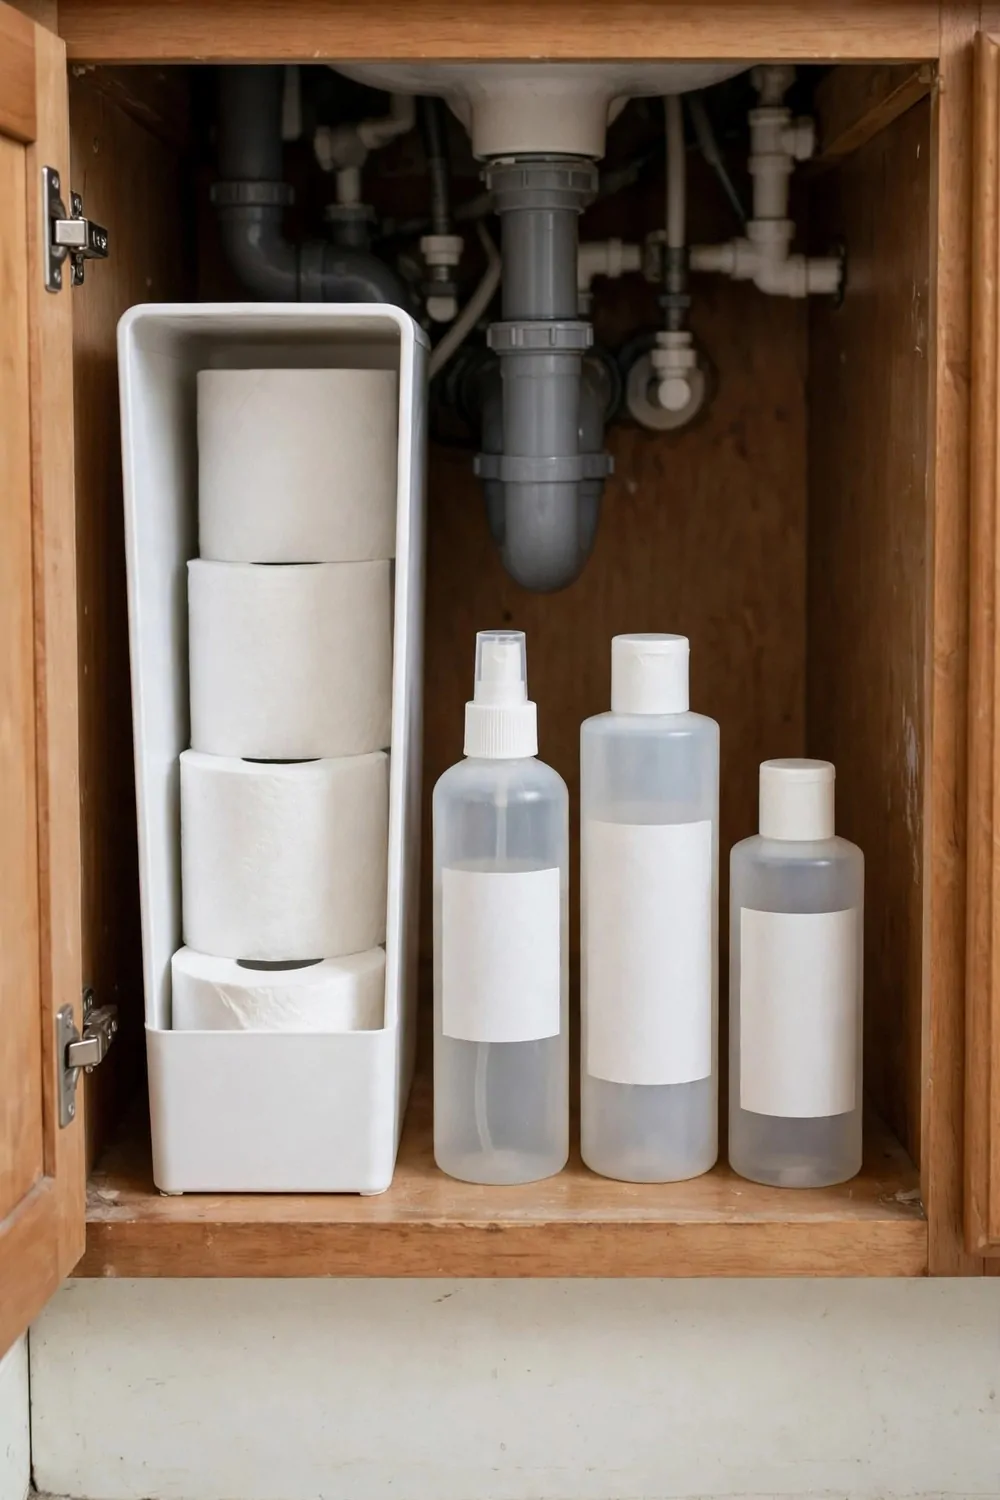
Spare toilet rolls always ended up in odd places in my home. Sometimes in a bag. Sometimes on top of the cabinet.
A slim bin under the sink fixed that. It is tall and narrow and it fits right beside the pipes.
I stand the rolls up in the bin like books on a shelf. I can see how many I have left at a glance.
The bin holds four or five rolls. That is enough for a week or two for most homes.
Pick a bin that is tall enough for a roll to stand up. A short bin lets rolls fall over and roll away.
I keep this bin near the front of the cabinet. That way I can grab a roll fast without moving other stuff.
A slim bin costs about 5 to 10 dollars. It is a simple buy but it ends the hunt for spare rolls.
I also tuck a small pack of tissues in the front of this bin. They fit in the slim gap and they are handy.
When the bin gets low, I know it is time to buy more. No more surprise empty moments.
15. A Magnetic Strip for Small Metal Things
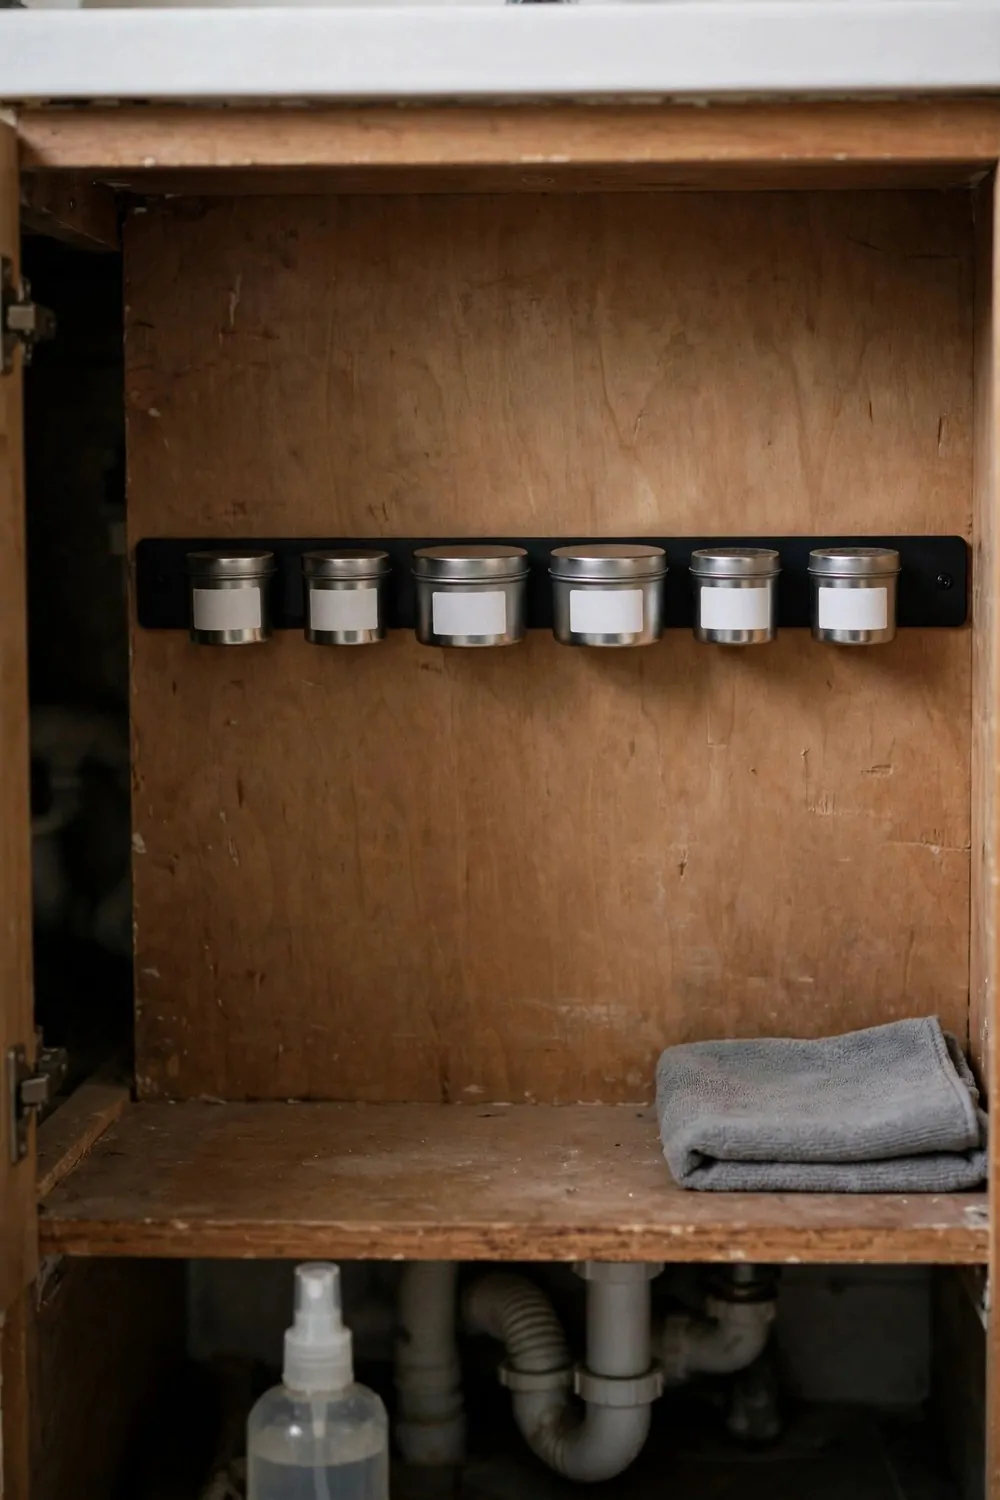
I found a little metal strip in my kitchen drawer one day and I had a small idea. I stuck it inside the cabinet door under the sink. It changed how I store small metal things.
You know those tiny things that always get lost. Hair pins. Nail clippers. Tweezers. They slip to the back of the cabinet and you never find them when you need them.
A magnetic strip holds them all in one neat line. You just press each item on the strip and it stays there.
I put mine on the inside of the door so it is easy to see. When I open the door I can grab what I need in one second. No more digging around.
You can get a strip with sticky tape on the back. No drill needed. Just clean the door, peel the tape, and press it on.
Make sure the spot is dry first. If the door is damp the tape will not stick well. I learned that the hard way and my strip fell off the next morning.
It is best for light metal things. A big pair of scissors might be too heavy. But small clips and pins work great.
I keep my hair pins on one end and my nail clippers on the other. It looks so tidy now. My husband even asked where I bought it.
You can cut the strip to fit your door. A short strip is fine if your door is small. Just measure first before you stick it on.
This little trick costs very little and it saves you time every single day. I wish I had done it years ago.
16. A Hanging Organizer on the Door
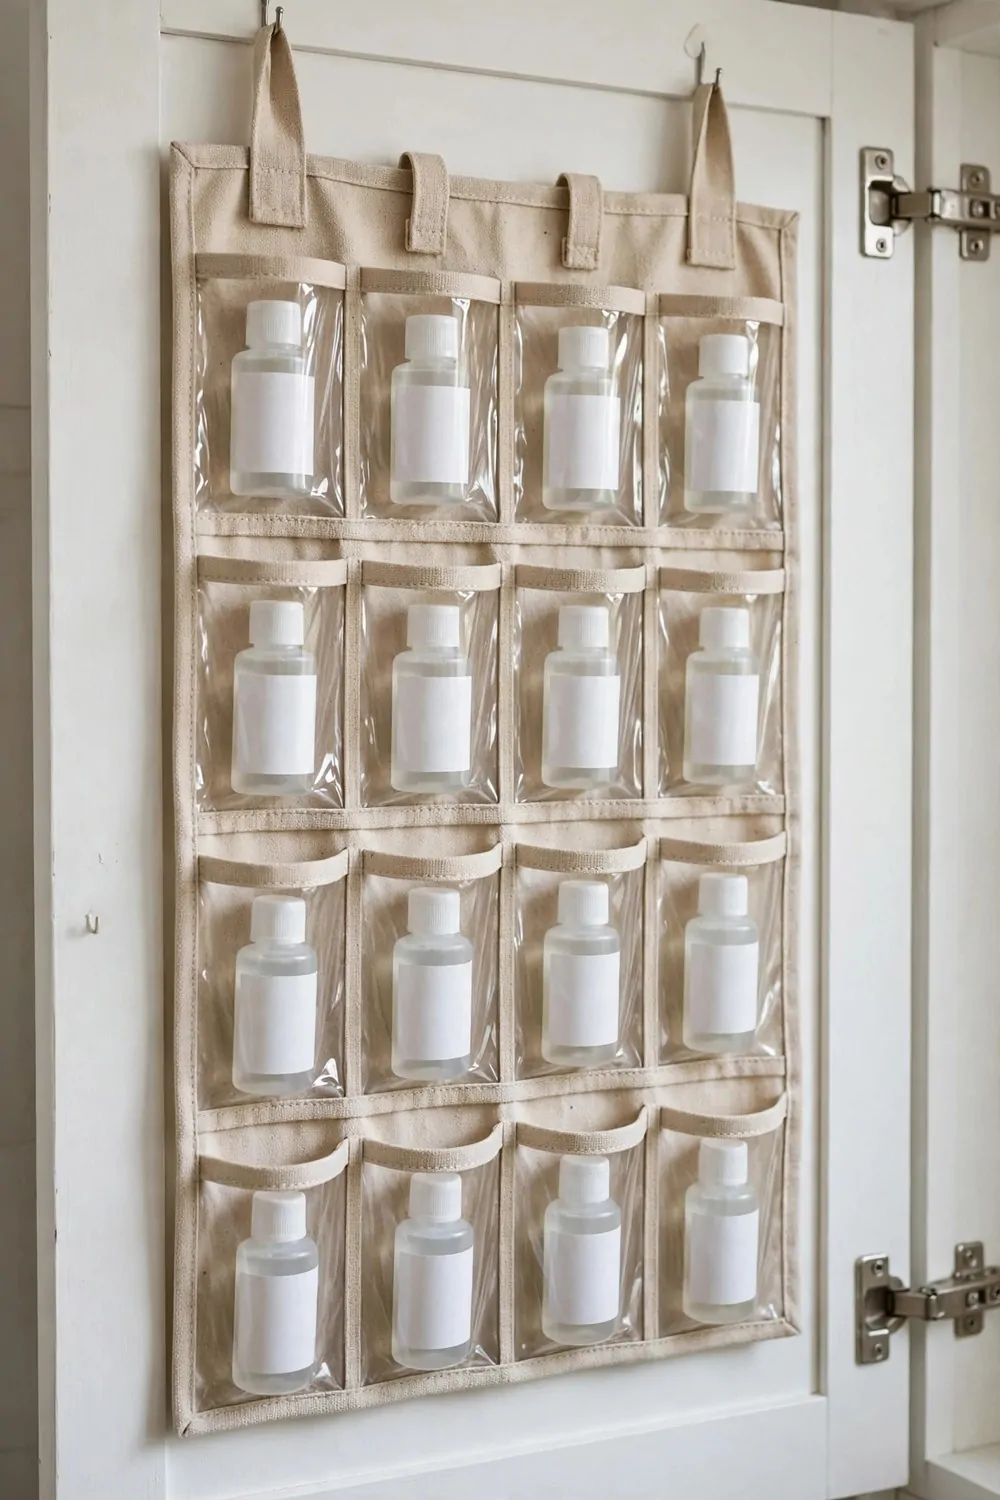
The inside of the cabinet door is free space. Most of us never use it. I hung a small organizer there and it gave me room I did not know I had.
You can buy a door organizer with clear pockets. Or one with wire baskets. I like the clear pockets because I can see what is inside.
My organizer has six small pockets. I keep my cleaning gloves in one. Sponges go in another. Small spray bottles fit in the bottom pockets.
It hangs over the top of the door with two hooks. You do not need screws or tools. It takes about one minute to set up.
Make sure the organizer is not too thick. If it is too thick the door will not close right. A slim one works best.
I check the weight too. If I load it with heavy bottles the door starts to sag a little. So I keep the light things in it and the heavy bottles on the floor.
My kids love this organizer. They know where the sponges are now. They grab one when they help me clean.
You can also use it for hair tools. A small brush fits in a pocket. So does a comb and a pack of hair ties.
I wipe the pockets once a week. Water drips in sometimes. A quick wipe keeps it clean.
This is one of my favorite ideas in the whole list. It uses space that was just sitting there doing nothing.
17. A Small Shelf Above the Pipes
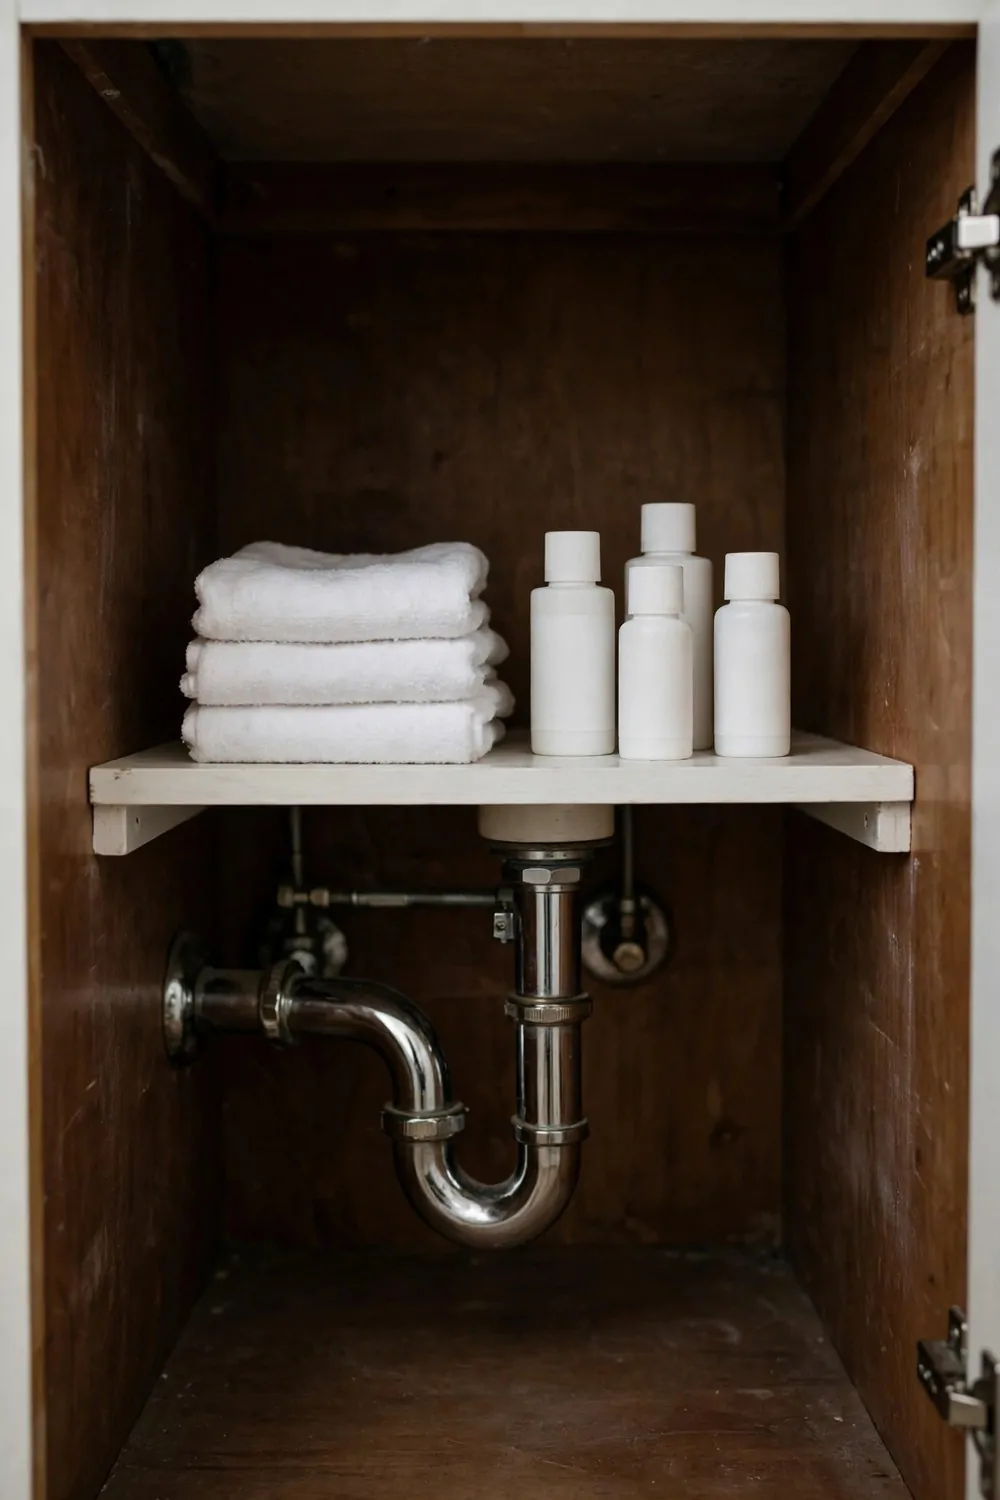
The pipes under the sink take up a lot of room. But there is often a little space above them. I put a small shelf there and it works so well.
You can find a small shelf that fits around the pipes. Some shelves have a cut out in the middle for the pipe. That is the kind you want.
I use mine for tall bottles. Shampoo and conditioner go up there. They stand tall and I can see them all.
Measure the space first. You need to know how high the pipes are and how wide the gap is. I measured twice before I bought mine.
A plastic shelf is fine for this spot. It does not rust if a little water drips on it. Wood can swell if it gets wet.
I keep only light things on the shelf. Heavy bottles could make it tip. Light bottles are safe.
It feels good to use that empty air above the pipes. Before the shelf, that space was just wasted.
If your pipes are in a tricky spot, you can try a small shelf on one side only. Even a tiny shelf helps.
I put a small mat on the shelf too. It stops bottles from sliding around when I open and close the door.
You will be surprised how much you can fit on one small shelf. It is like finding a secret cupboard.
18. A Waterproof Mat on the Cabinet Floor
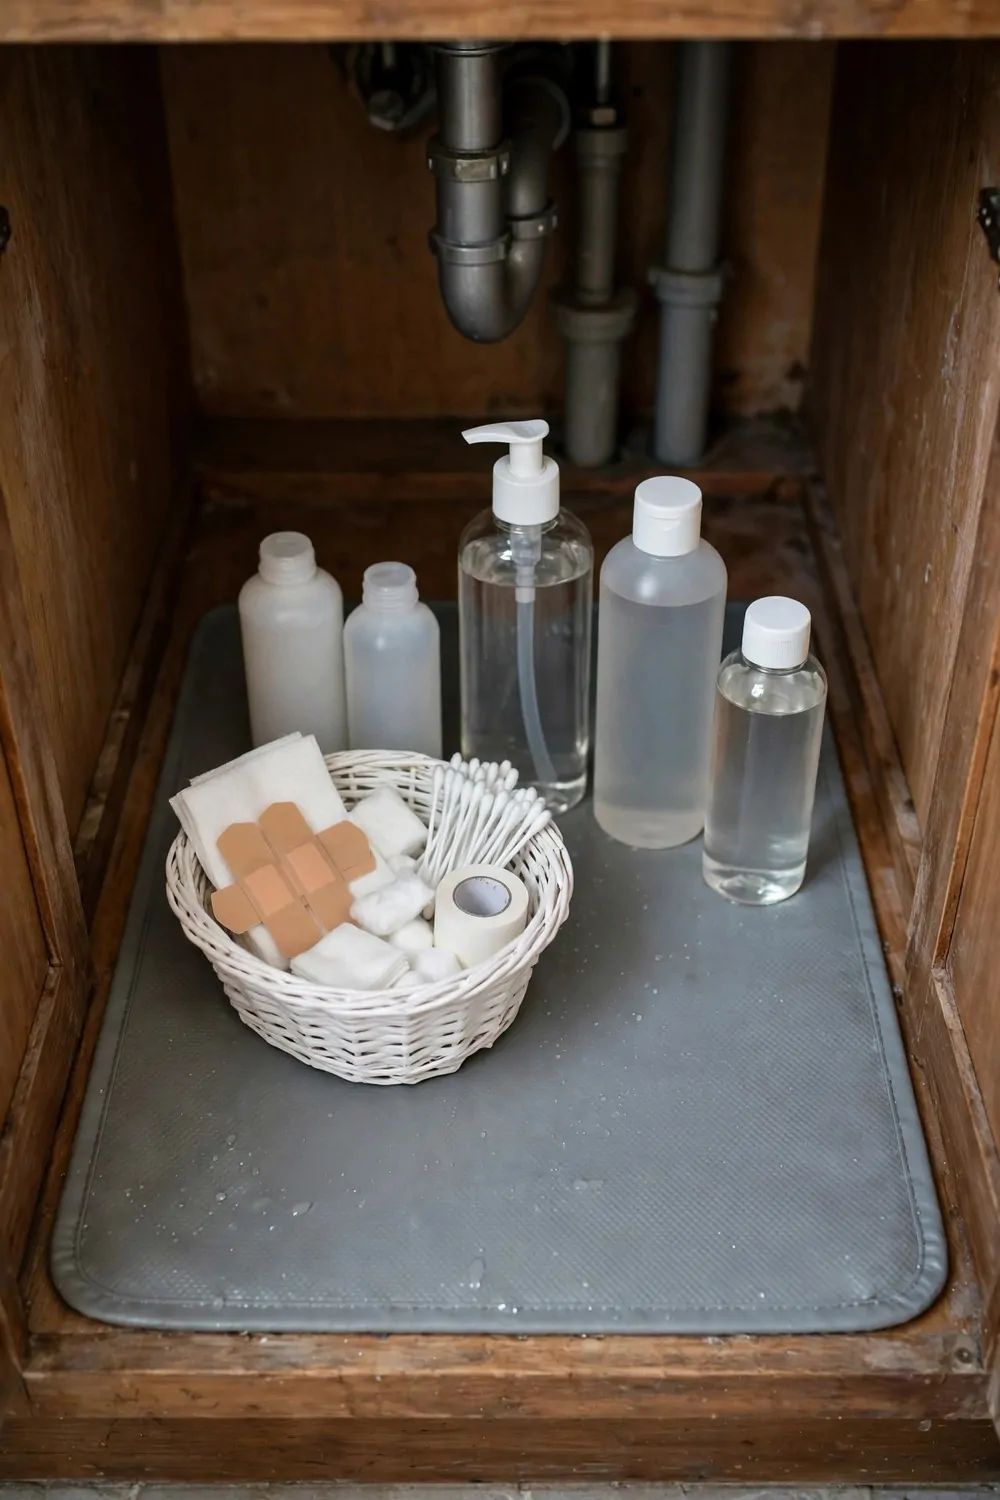
The floor of the cabinet under the sink gets wet sometimes. A small leak or a drip from a bottle can make a mess. I put a waterproof mat down and it saved my cabinet.
You can buy a mat made for under sink cabinets. It is thick and it has a little lip around the edge. The lip holds water in so it does not spread.
I got mine in a plain grey color. It fits the whole floor of the cabinet. I just laid it down and cut one corner to fit around the pipe.
It is so easy to clean. I pull it out, wipe it, and put it back. That is all.
Before I had the mat, a small leak left a dark mark on the wood. I did not see it for weeks. Now the mat catches the water first.
You can check the mat when you do your weekly tidy. Lift it up and look under it. If it is wet, dry it and check the pipes.
The mat also stops bottles from sliding around. They grip the mat better than the smooth wood floor.
I tell all my friends to get one of these. It is cheap and it protects your cabinet for years.
Pick a mat that is easy to cut. Some mats have lines on the back to help you cut straight. That makes fitting it much easier.
This is a small job but a big win. Your cabinet will thank you.
19. A Basket for First Aid Bits
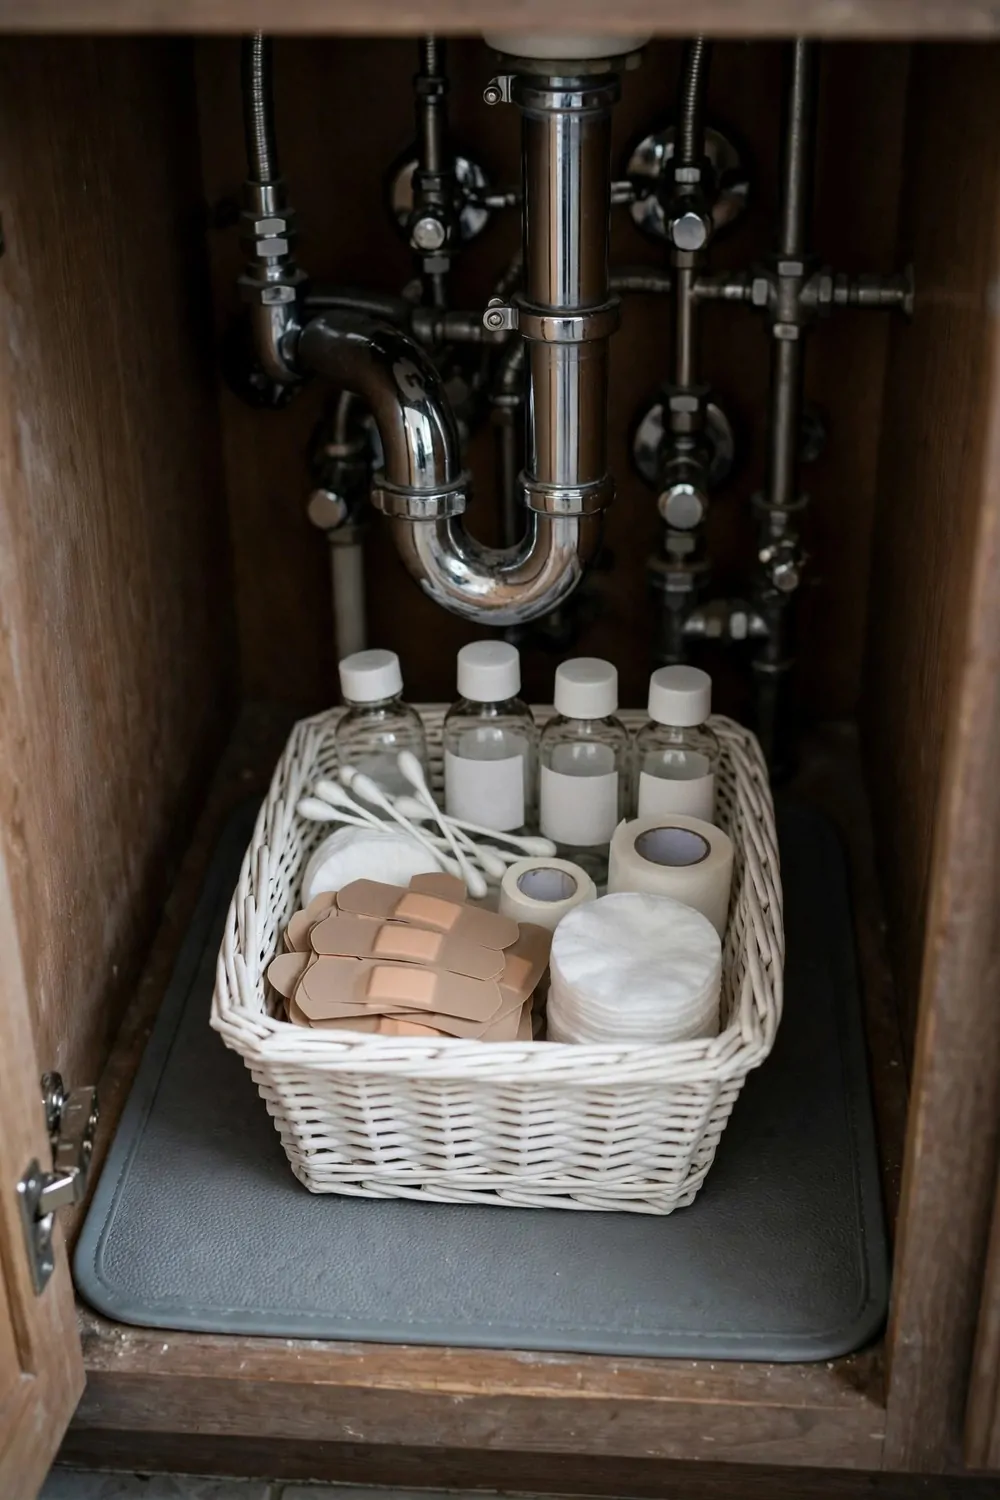
First aid bits are the things we need in a hurry. Plasters. A small cream. Some cotton pads. I keep mine in one small basket under the sink.
Before the basket, my plasters were all over the place. Some were in a drawer. Some were in a bag. I could never find one when my son cut his finger.
Now I grab the basket and everything is right there. It saves time when it matters most.
I use a small basket with a handle. I can lift it out with one hand. That helps when I am holding a plaster with the other hand.
I keep the basket on the left side of the cabinet. Everyone in my house knows where it is. Even my kids know.
Check the basket once a month. Throw away anything that is old or empty. I found two empty plaster boxes in mine last month.
I keep a small list inside the basket lid. It says what we use most. When something runs low I add it to my shopping list.
- Plasters in two sizes
- A small tube of antiseptic cream
- Cotton pads and a small roll of bandage
The basket does not need to be big. A small one is better. It fits in a tight spot and you can see everything inside.
I like that this basket keeps first aid stuff away from the cleaning bottles. They should never mix.
This one small basket gives me peace of mind. I know I can find what I need fast.
20. A Divider for the Drawer Under the Sink
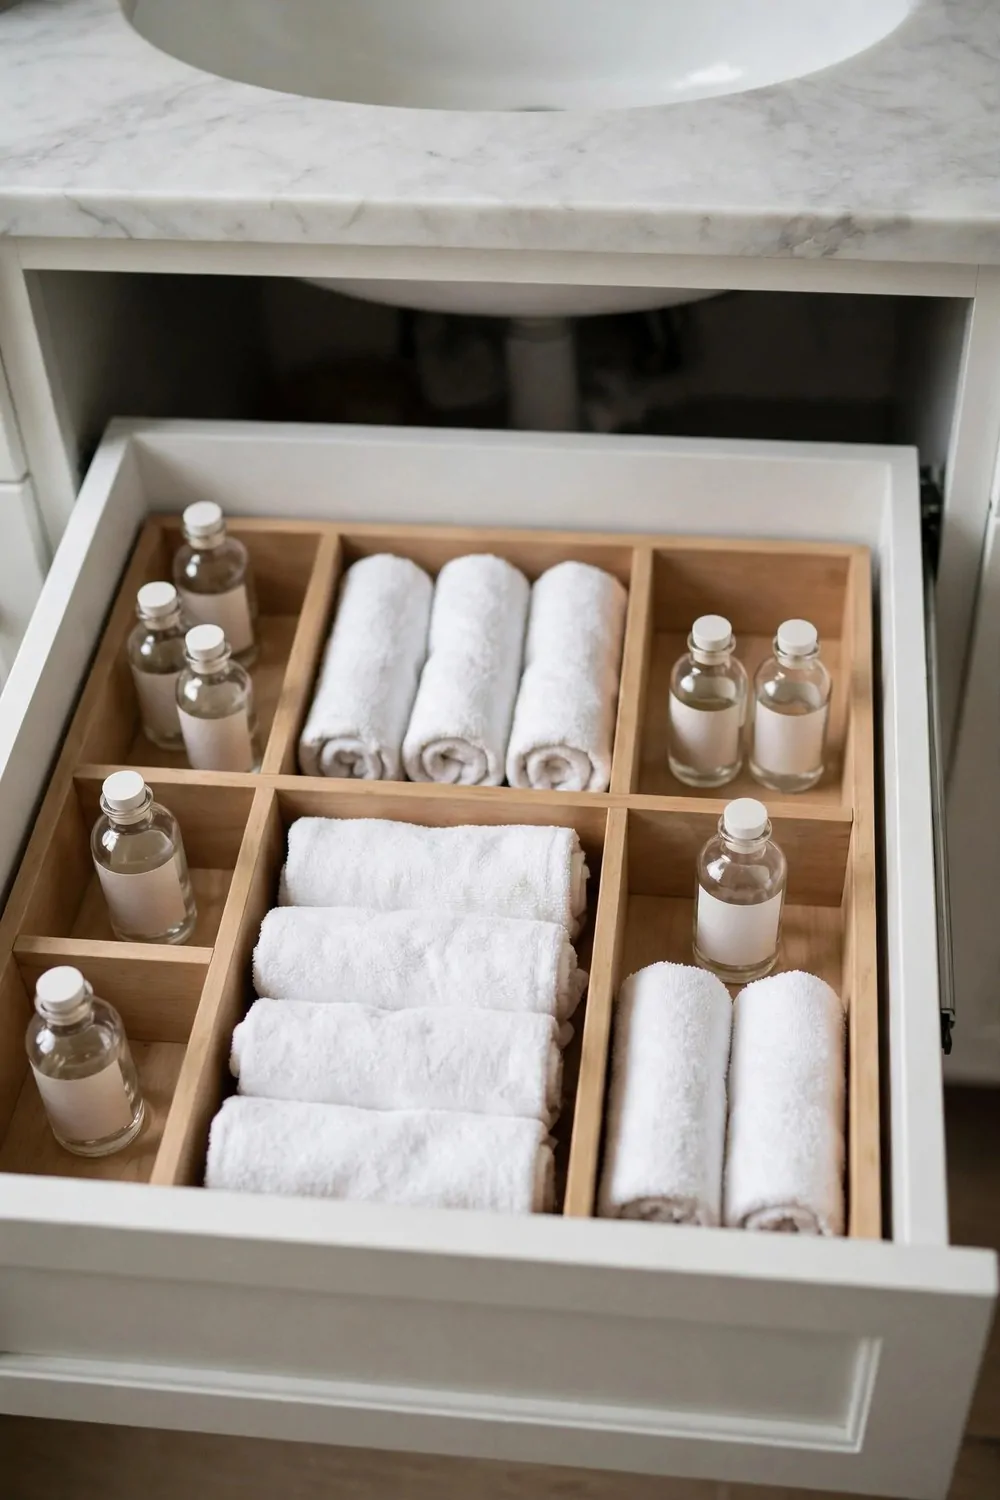
Some sinks have a small drawer right under them. Mine does. For a long time it was just one big messy space. Then I added dividers and it changed everything.
A divider splits the drawer into small parts. Each part holds one kind of thing. It is so simple but it works.
I have one part for hair ties. One part for clips. One part for small tubes and lip balm. Nothing mixes now.
You can buy dividers in many materials. I tried a few and I learned what works best. Here is a quick look at the choices.
| Material | Good Points | Watch Out For | Typical Cost |
|---|---|---|---|
| Plastic | Light, easy to clean, does not rust | Can crack if it is very thin | $5 to $15 |
| Bamboo | Looks warm and neat, strong | Needs drying if it gets wet | $10 to $25 |
| Fabric | Soft, can fold away, gentle on items | Gets damp and needs washing | $8 to $20 |
| Metal mesh | Very strong, air flows through | Can rust if it stays wet | $12 to $30 |
I picked plastic dividers for my drawer. They are easy to wipe and they do not mind a little water. They fit my drawer well.
Measure your drawer before you buy. Dividers come in many sizes. A divider that is too big will not fit.
You can also use small boxes as dividers. I used two small boxes I already had. They work just as well and they cost nothing.
I clean the drawer once a week. I take the dividers out, wipe the drawer, and put them back. It takes two minutes.
My drawer looks so neat now. I open it and I smile. It is a small thing but it makes my morning easier.
21. A Small Bucket for Wet Cloths
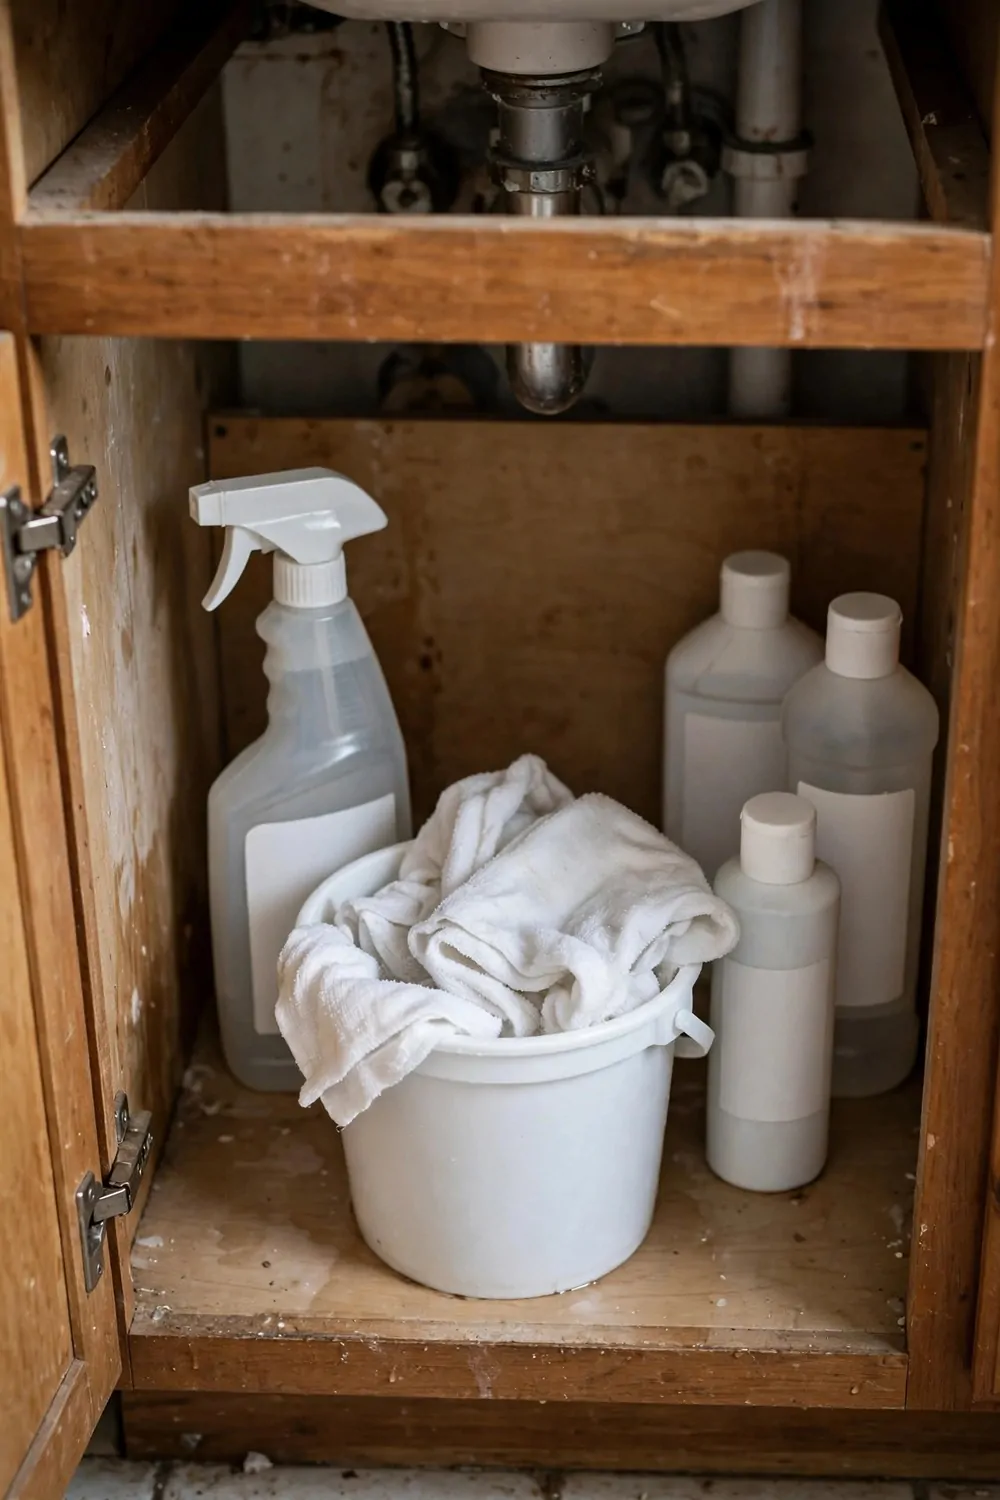
Wet cloths are a problem under the sink. They drip. They smell if you leave them in a pile. I keep a small bucket just for them.
The bucket sits in one corner of the cabinet. When I finish cleaning, I drop the wet cloth in the bucket. It catches all the drips.
I use a small plastic bucket with a handle. It is easy to lift out and empty. I take it to the sink and rinse it.
I wash the bucket once a week with soap and hot water. That stops any smell from building up.
Do not leave wet cloths in the bucket for days. They will start to smell bad. I hang mine out to dry after each use and only use the bucket for the short time while I clean.
The bucket also holds my cleaning cloths when they are dry. I fold them and stack them inside. They stay in one place.
I picked a bucket that is not too tall. A tall bucket wastes space. A short one fits under the pipes easily.
My bucket is a bright color so I can spot it fast. It sounds silly but it helps when I am in a rush.
This is a very cheap idea. A small bucket costs just a few dollars. But it keeps the cabinet dry and clean.
If you clean your bathroom often, you will love this bucket. It is a small habit that makes a big difference.
22. A Riser for Short Bottles
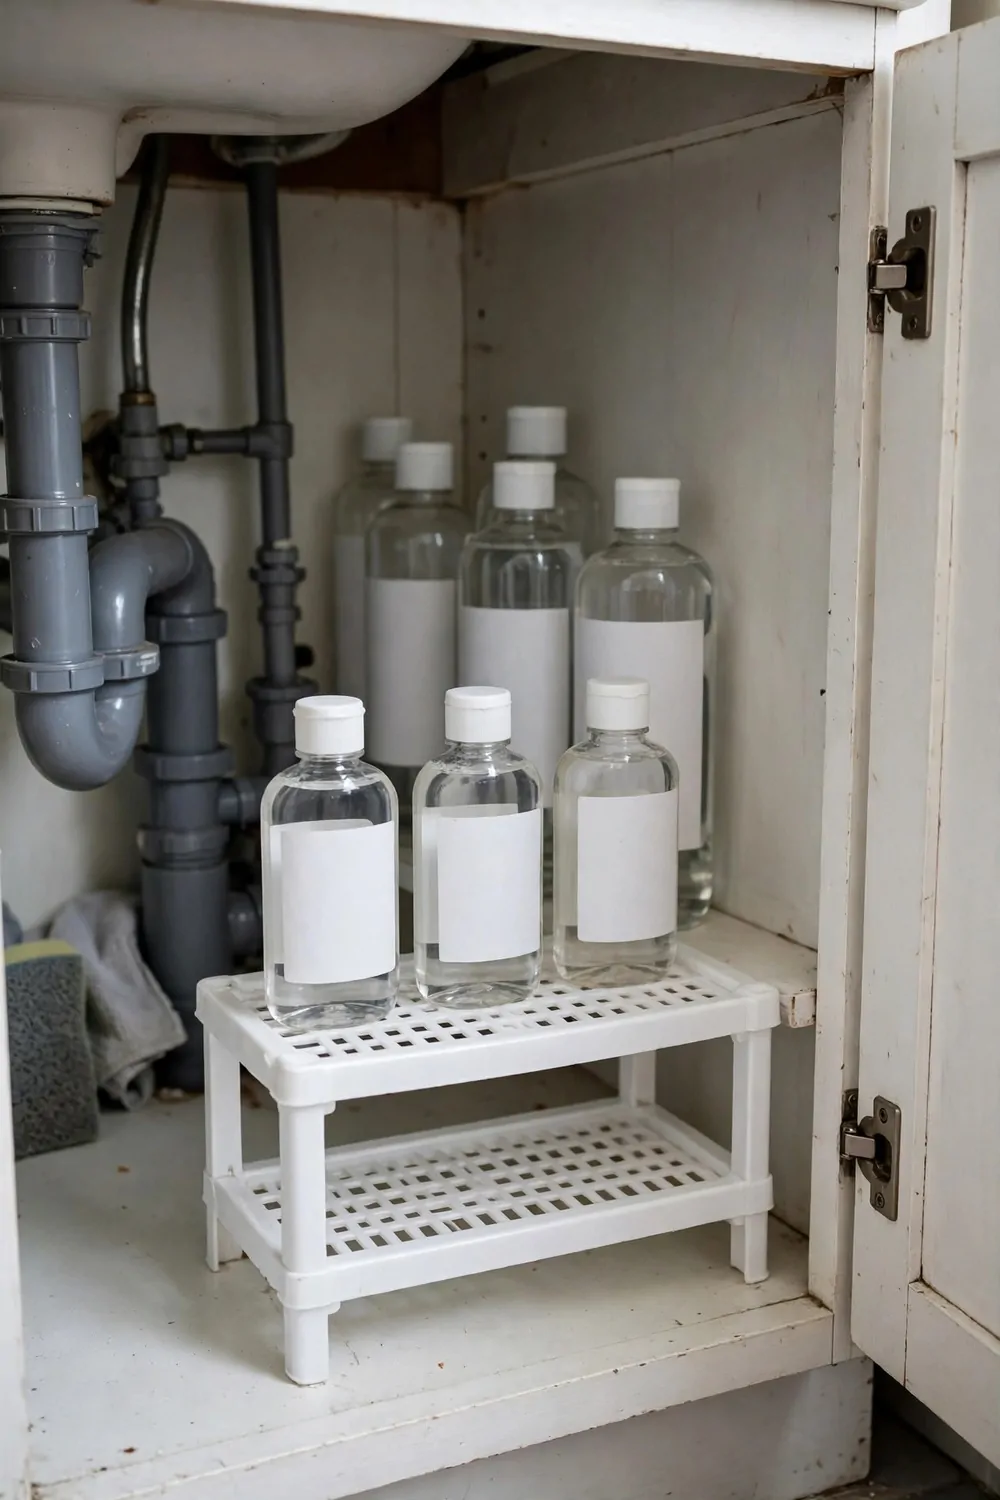
Short bottles are hard to see. They hide behind the tall ones. I put a small riser under them and now I can see them all.
A riser is like a tiny step. You put it on the cabinet floor and the short bottles stand on top of it. They sit a little higher.
I use a riser for my small tubes and jars. Face cream. Lip balm. Small bottles of oil. They all sit on the riser in a neat row.
You can buy a riser in plastic or wood. I like plastic because it wipes clean fast. Wood looks nice too if it stays dry.
Make sure the riser is stable. It should not wobble when you put bottles on it. I tested mine before I loaded it up.
I keep the tall bottles at the back and the riser at the front. That way I can reach the small things without moving the big ones.
The riser cost me less than ten dollars. It was one of the cheapest changes I made. And it made a big difference.
You can also stack two small risers if you need more height. Just make sure they are steady and safe.
I label the front of my riser with a small tag. It says “small bottles” so my kids know where things go.
This idea is so simple. But it stops the daily hunt for that one tiny bottle you need.
23. A Bag for Spare Sponges and Cloths
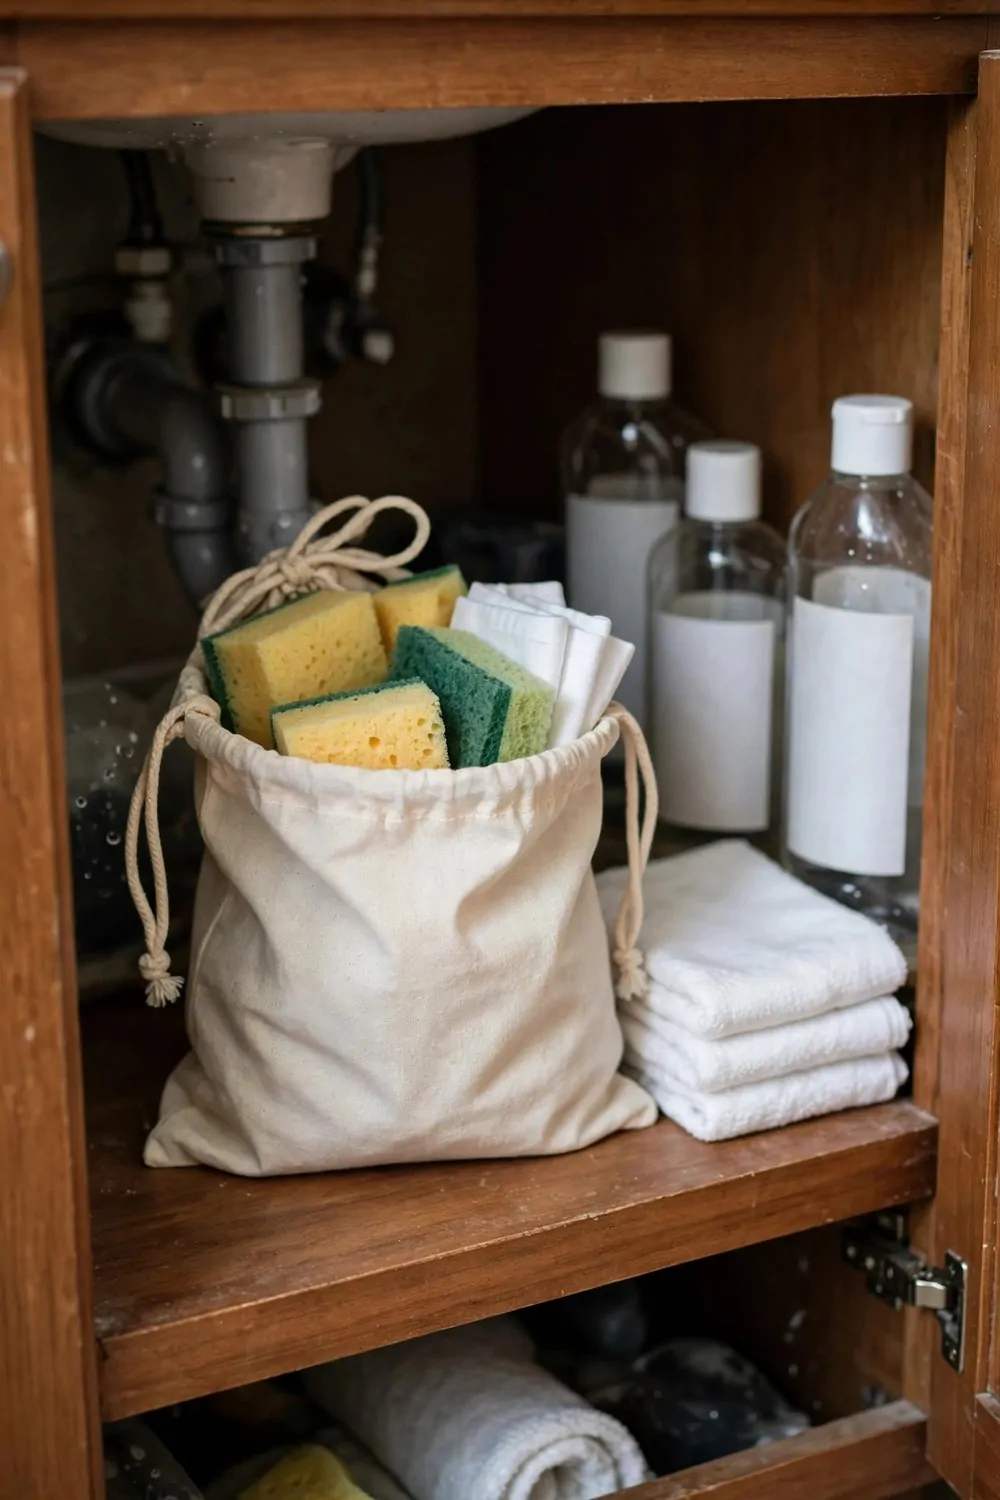
Spare sponges and cloths pile up fast. I used to have them in a loose heap under the sink. Now they live in one bag and it is so much neater.
I use a small drawstring bag. It hangs from a hook inside the cabinet. The bag keeps everything together and off the floor.
The bag is made of mesh. Air can flow through it. That helps the sponges dry and stops them from getting smelly.
I keep new sponges in the bag and used ones in the bucket. That way I always know which ones are clean and ready.
When I buy new sponges, I put them straight in the bag. I do not leave them in the shopping bag on the floor.
The bag is easy to wash. I throw it in the wash once a month. It comes out fresh and clean.
I picked a bag that is not too big. A big bag would hang down and get in the way of the pipes. A small one fits just right.
My kids know to take a sponge from the bag when they help me. They put the used one in the bucket. It is a simple system.
You can also use a small cloth bag if you do not have mesh. Just make sure the sponges are dry before you put them in.
This bag costs almost nothing. But it keeps my spare cloths tidy and easy to grab.
24. A Clip for the Plunger and Brush
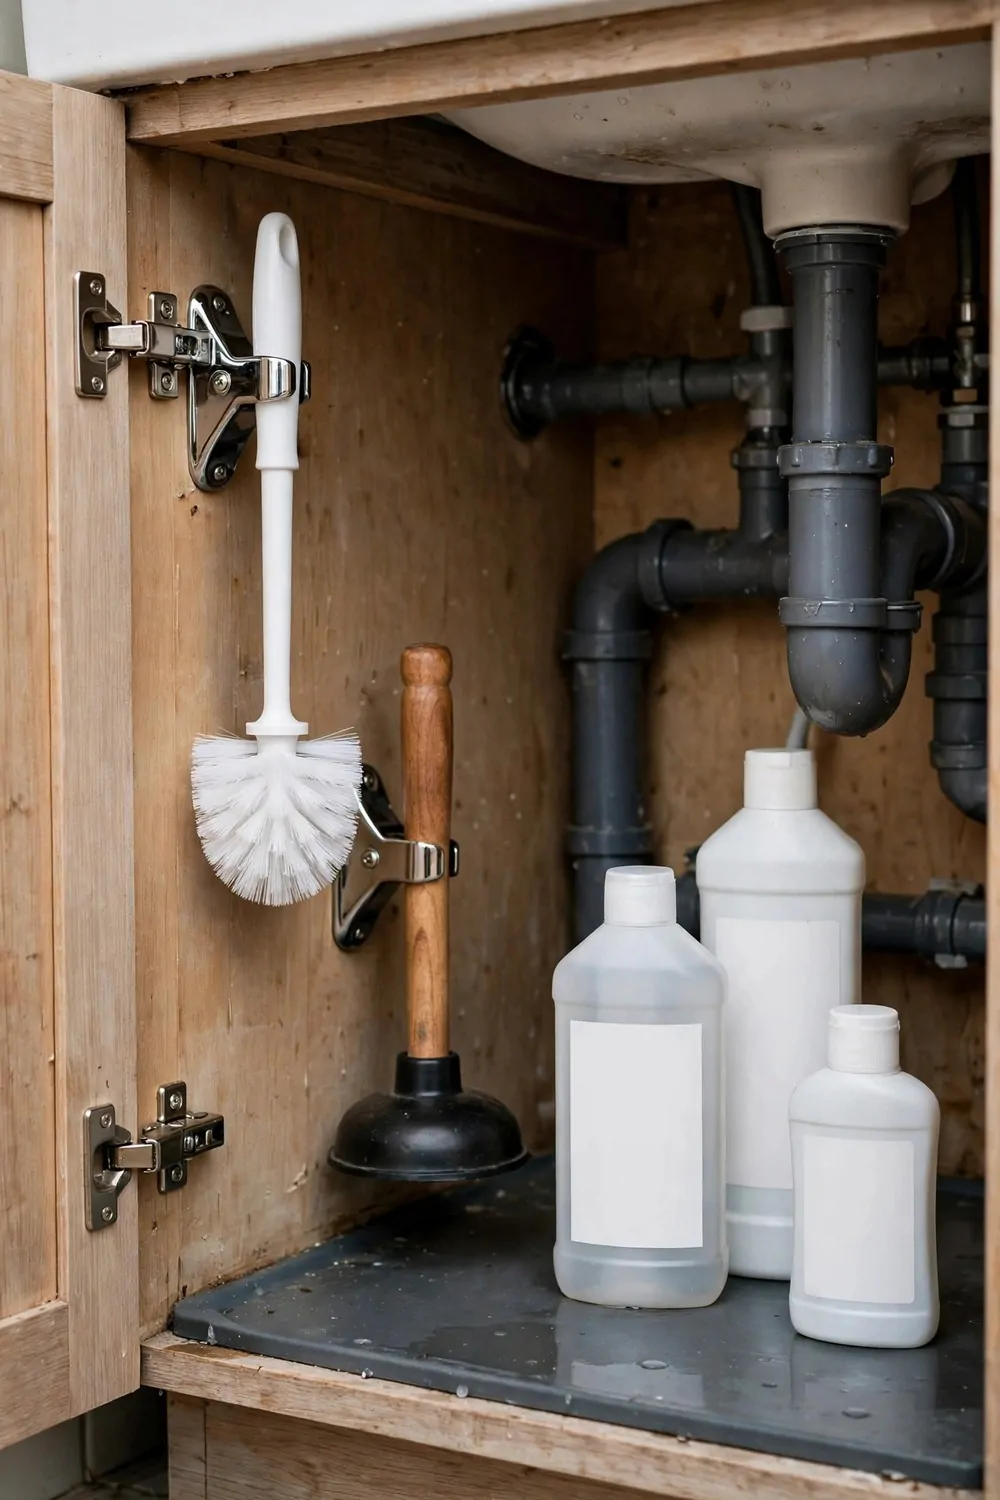
The plunger and the toilet brush are awkward to store. They fall over. They take up floor space. I fixed this with two simple clips.
I screwed a small clip to the inside wall of the cabinet. The plunger handle clicks into the clip and stands upright. It stays put.
The brush has its own clip next to it. It hangs upside down so any drips fall into its holder. No mess on the floor.
Make sure the clips are strong enough. A plunger is heavier than it looks. I used clips made for brooms and they hold well.
I keep the plunger at the back of the cabinet. It is out of the way but I can still reach it fast when I need it.
This idea freed up floor space for other things. I can now fit a small basket where the plunger used to lie.
Clean the plunger and brush after each use. Rinse them well and let them dry before you clip them back in. That keeps the cabinet fresh.
If you do not want to screw into the cabinet wall, you can use strong sticky hooks. They work well on smooth wood.
I was worried the clips would damage the cabinet. They did not. The screws are small and the wood is fine.
This is one of those ideas that sounds small but feels big. My cabinet floor is clear now and I love it.
25. A Small Bin for Hair and Makeup Bits
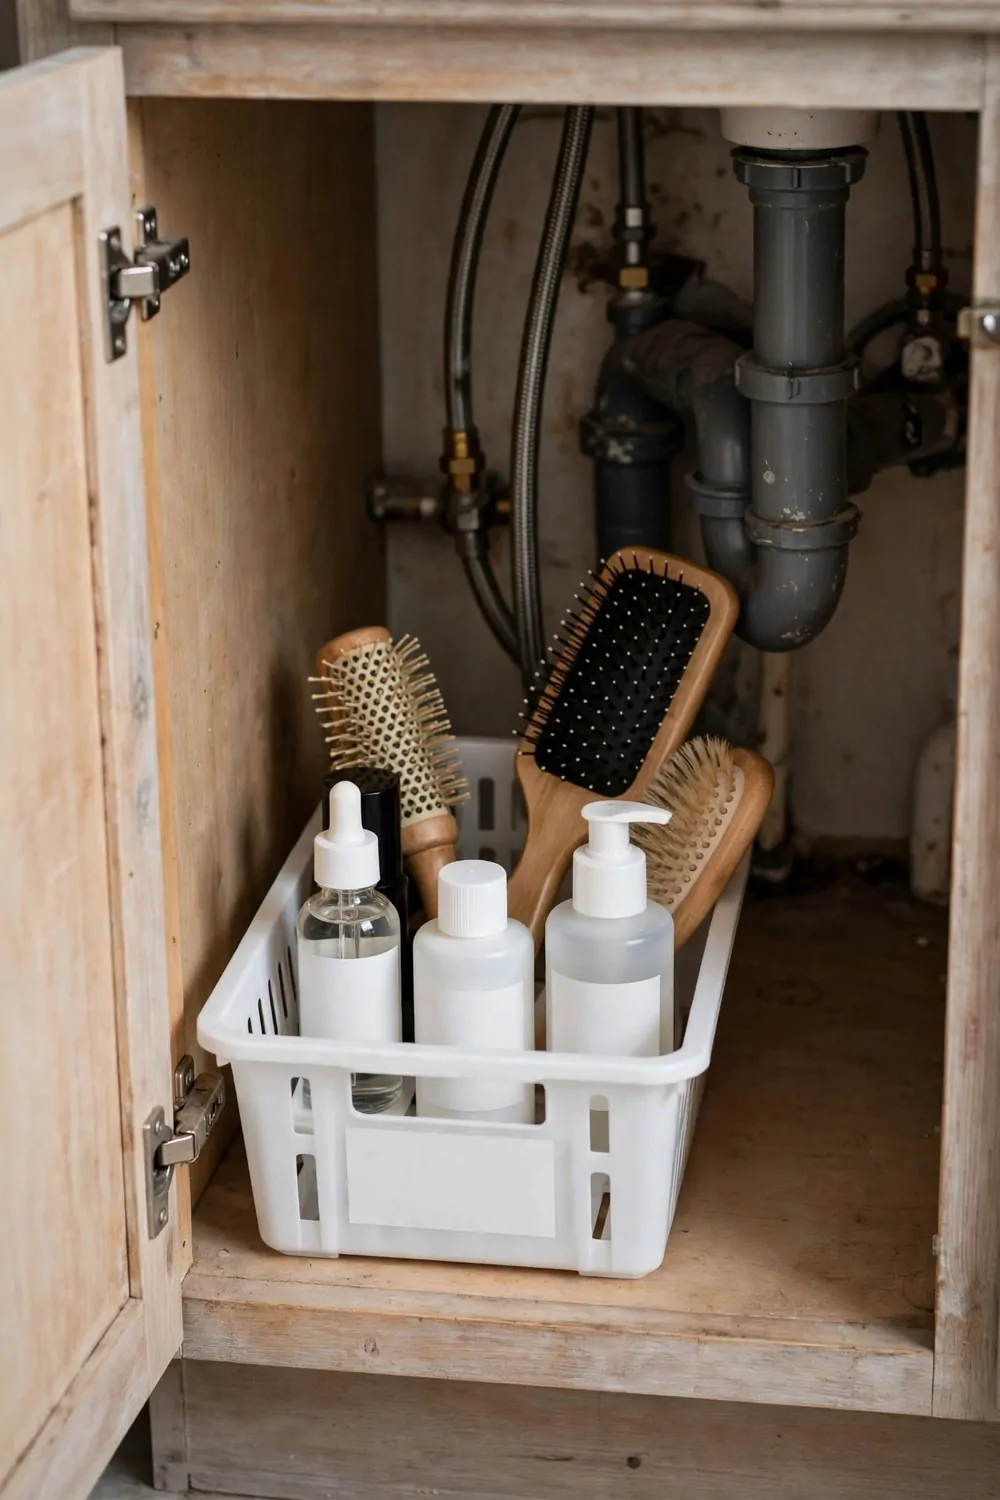
Hair and makeup bits are tiny and they get everywhere. Bobby pins. Cotton buds. Small makeup wipes. I keep them all in one small bin.
The bin sits on the right side of my cabinet. It is small and open at the top. I can see inside it and grab what I need.
I sort the bits into little groups inside the bin. Hair pins go in one small cup. Cotton buds go in another. It sounds fussy but it saves time.
I use a bin with a smooth inside. It wipes clean in seconds. Makeup dust comes off fast.
Do not overfill the bin. If it is too full, things spill out when you open the door. I keep mine half full at most.
I clean the bin every Sunday. I take everything out, wipe the bin, and put back only what I still use. Old makeup goes in the trash.
My daughter has her own small bin next to mine. She keeps her hair ties and clips in it. She loves having her own spot.
The bin cost me just a few dollars. It is one of the cheapest things in my whole cabinet. But I use it every single day.
- Small bin for hair pins and clips
- Tiny cup inside for cotton buds
- A little space at the back for makeup wipes
This bin keeps the tiny bits from hiding under the pipes. I used to lose pins all the time. Now I never do.
If you wear makeup or tie your hair up, this bin will make your mornings so much easier.
26. A Foldable Step Stool Tucked Inside
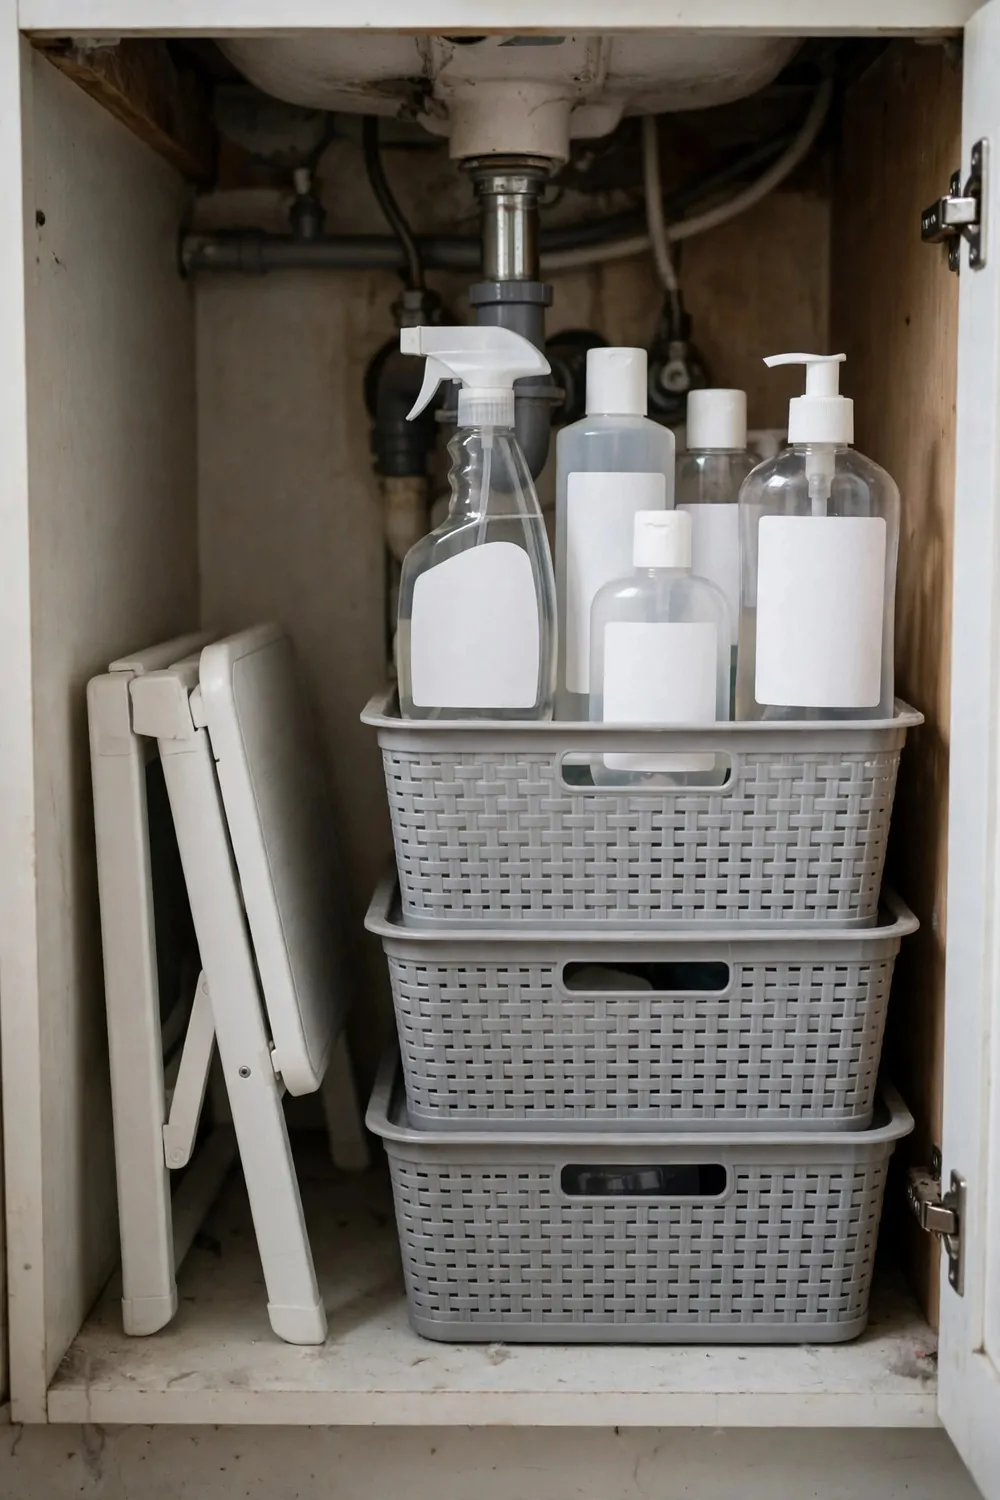
I am not very tall. I need a step stool to reach the top shelf in my bathroom. I keep a foldable one tucked inside the cabinet under the sink.
The stool folds flat. It slides in next to the pipes and takes up almost no room. When I need it, I pull it out and open it up.
It helps my kids too. They use it to reach the sink to wash their hands. They can get it themselves now.
Pick a stool that is light. A heavy stool is hard to pull out. Mine is plastic and my daughter can carry it with one hand.
Make sure the stool is steady when it is open. It should not wobble. I tested mine on the bathroom floor before I trusted it.
I keep the stool at the front of the cabinet so it is easy to grab. I do not bury it behind bottles.
The stool has a non slip top. That matters when the floor is wet. I do not want anyone to slip.
When we are done, we fold it and slide it back in. It takes five seconds. It is a habit now.
This stool cost me about fifteen dollars. It was worth every cent. I use it more than I thought I would.
If you have kids or a high shelf, try this idea. A stool tucked under the sink is always there when you need it.
27. A Weekly Under-Sink Tidy Routine
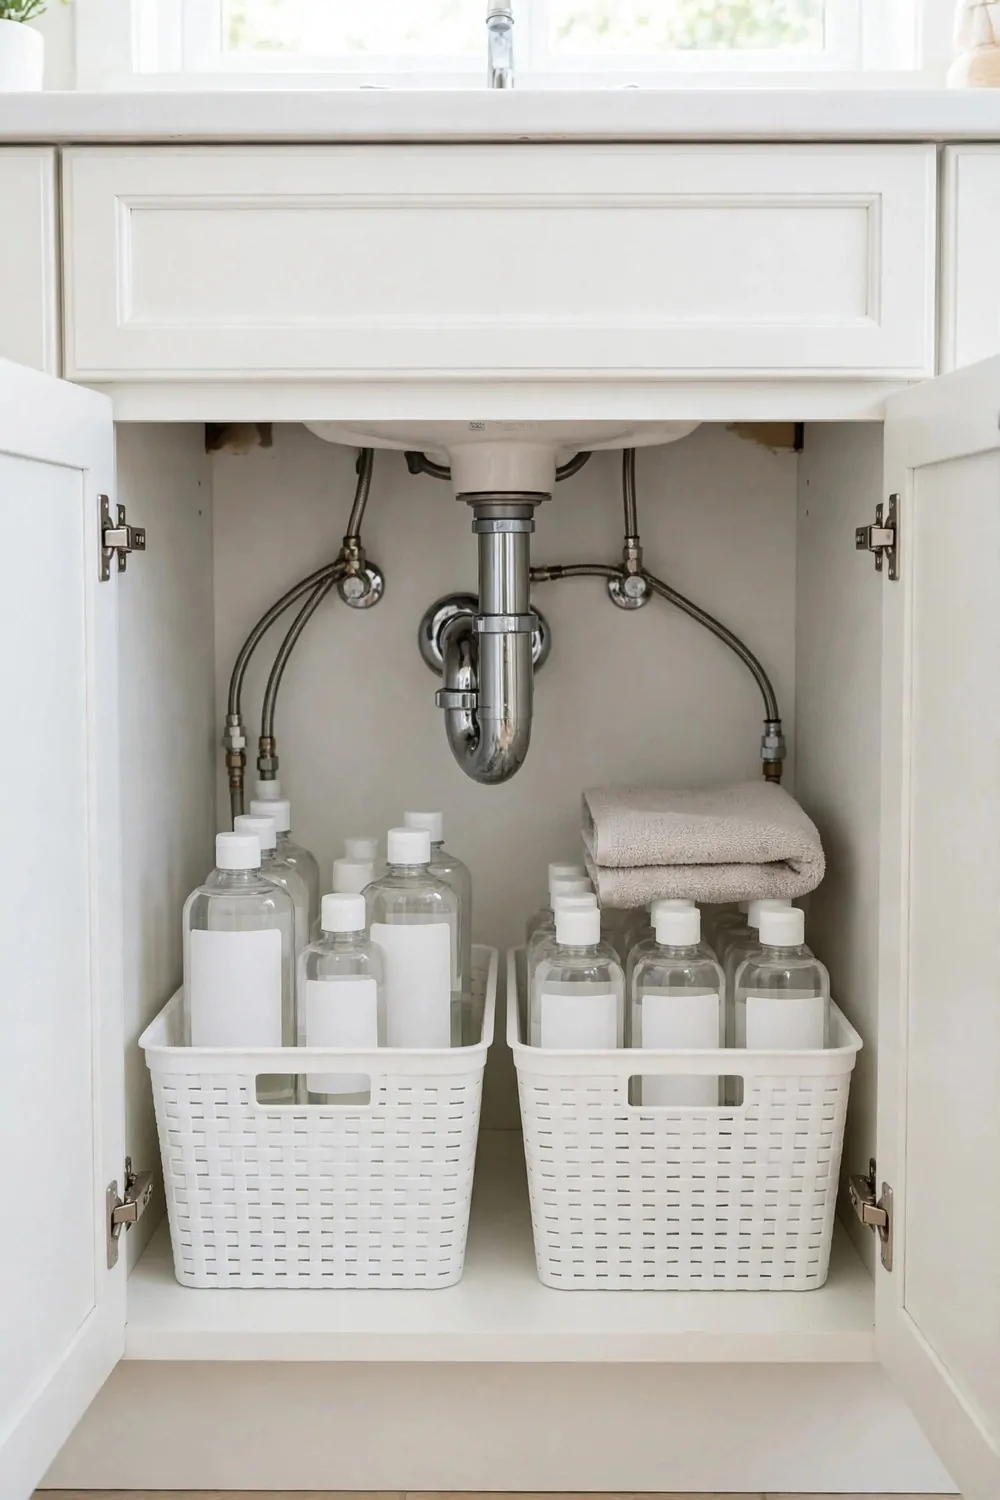
A tidy cabinet does not stay tidy by itself. I do a small tidy once a week and it keeps everything neat. It takes me about ten minutes.
I do it on Sunday morning. It is part of my weekly clean. I put on some music and I get it done fast.
First I take everything out. I put it on the bathroom floor in groups. Cleaning stuff in one group. Hair stuff in another.
Then I wipe the cabinet floor and the shelves. I check the mat too. If it is wet, I dry it and look at the pipes.
Next I throw away anything empty or old. Empty bottles go in the recycling. Old sponges go in the trash.
Then I put everything back in its home. Each thing has a spot. If something has no spot, I find one or I move it out.
Here is the simple weekly plan I follow. You can copy it or change it to fit your week.
| Day | Quick Job | Time Needed |
|---|---|---|
| Monday | Wipe the door and check the mat | 2 minutes |
| Wednesday | Toss empty bottles and old cloths | 3 minutes |
| Friday | Restock sponges and check the first aid basket | 3 minutes |
| Sunday | Full tidy, wipe shelves, put all back in place | 10 minutes |
I keep a small note on the inside of the door. It reminds me what to do each day. It is a simple list and it works.
The best part is that the weekly tidy stops the big mess from coming back. A small tidy each week is easier than one huge clean once a month.
Get your family to help. My kids do the Monday wipe. It is their small job and they feel proud.
Do not skip the weekly tidy for too long. Two weeks without it and the cabinet starts to look messy again. I learned that the hard way.
28. A Before-and-After Check So It Stays Neat
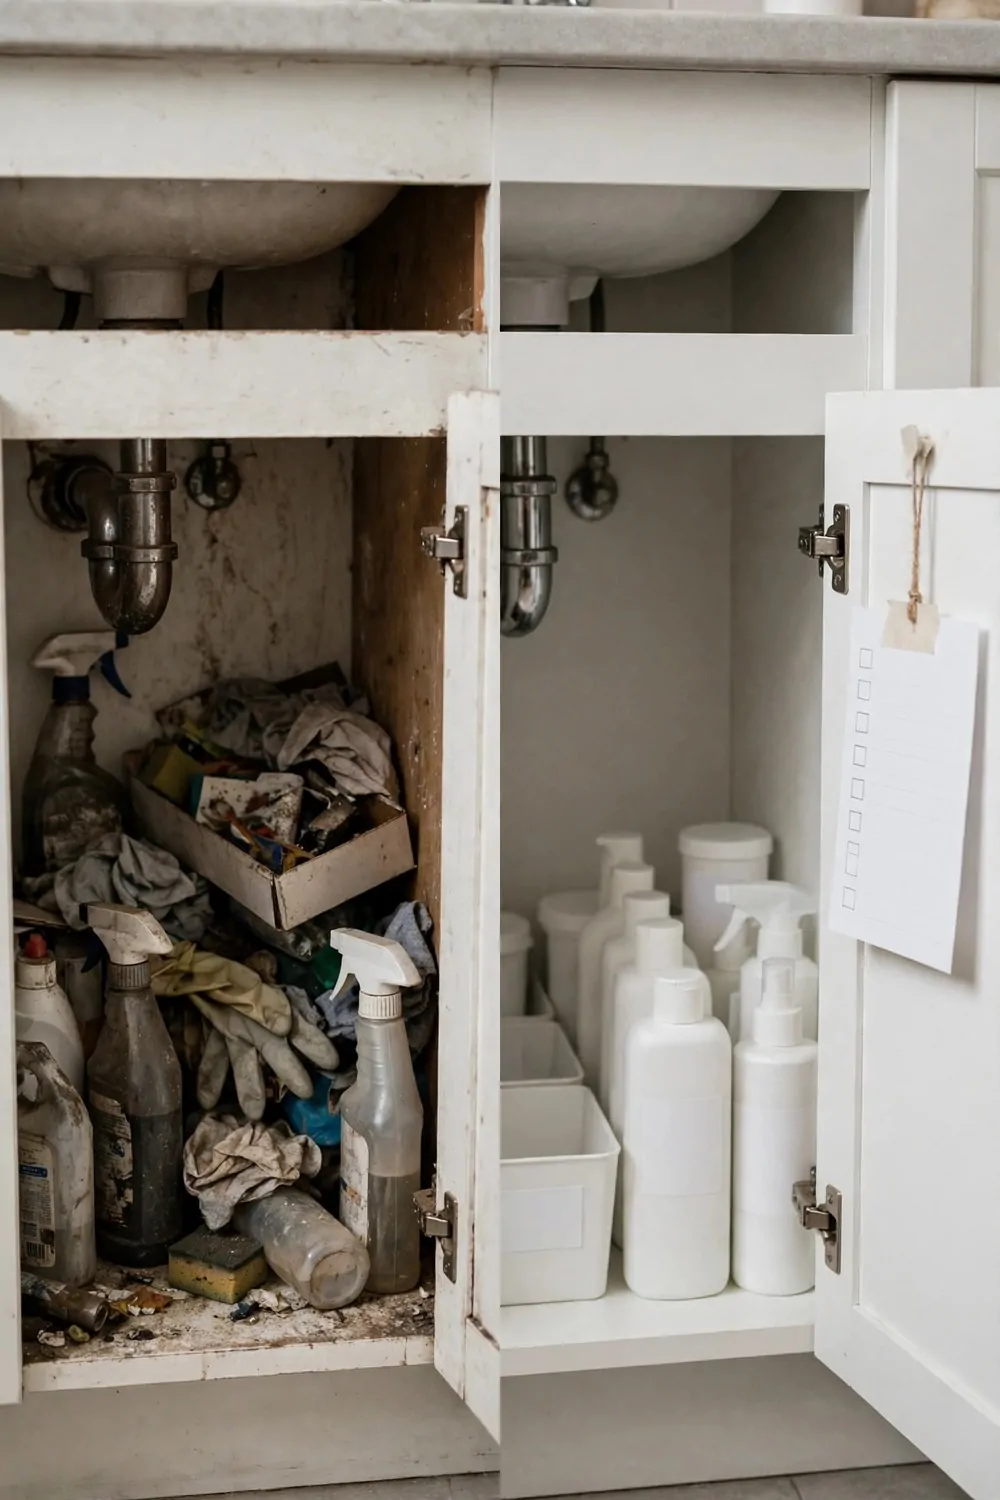
Before I started this whole project, I took a photo of my cabinet. It was a mess. Bottles everywhere. I keep that photo to remind me how far I have come.
After I finished all the ideas, I took another photo. The change was huge. My cabinet looked like a new space.
I do a quick before and after check every month. I take a fresh photo and I compare it with the tidy photo. If it looks messy, I know it is time for a reset.
You do not need a fancy camera. Your phone is fine. Take the photo from the same spot each time so you can compare them well.
Look at what has crept back in. Extra bottles. Things that do not belong under the sink. Take them out and put them where they belong.
I also check that each item still has its home. If the baskets have moved, I move them back. If a label fell off, I put a new one on.
Share your photo with a friend if you like. It feels good to show off a tidy space. My sister copied my whole setup after she saw my photo.
Keep the photos in a folder on your phone. I call mine “bathroom tidy”. It is fun to look back and see how neat it has stayed.
The check takes about five minutes once a month. That is all. Five minutes to keep your cabinet looking great.
This last step is the one that makes all the other ideas last. Without a quick check, the mess slowly comes back. With it, your cabinet stays neat for good.
Keep Reading
- 27 Bathroom Vanity Organization Ideas That Make Mornings Easier
- 24 Over-Toilet Storage Ideas That Save Space in Small Bathrooms
- 31 Shower Storage Ideas That Keep Everything Neat and Dry
- 22 Bathroom Towel Storage Ideas That Look Like a Hotel
- 24 Bathroom Decor Ideas Under $50 That Look Brand New
- 25 Tiny Home Ideas to Maximize Space and Style
Your under sink space does not need a big makeover to feel new. Pick one or two ideas from this list and try them this weekend. Start small, enjoy the tidy feeling, and add one more idea next week. You will be surprised how calm a neat cabinet can make your whole morning feel.