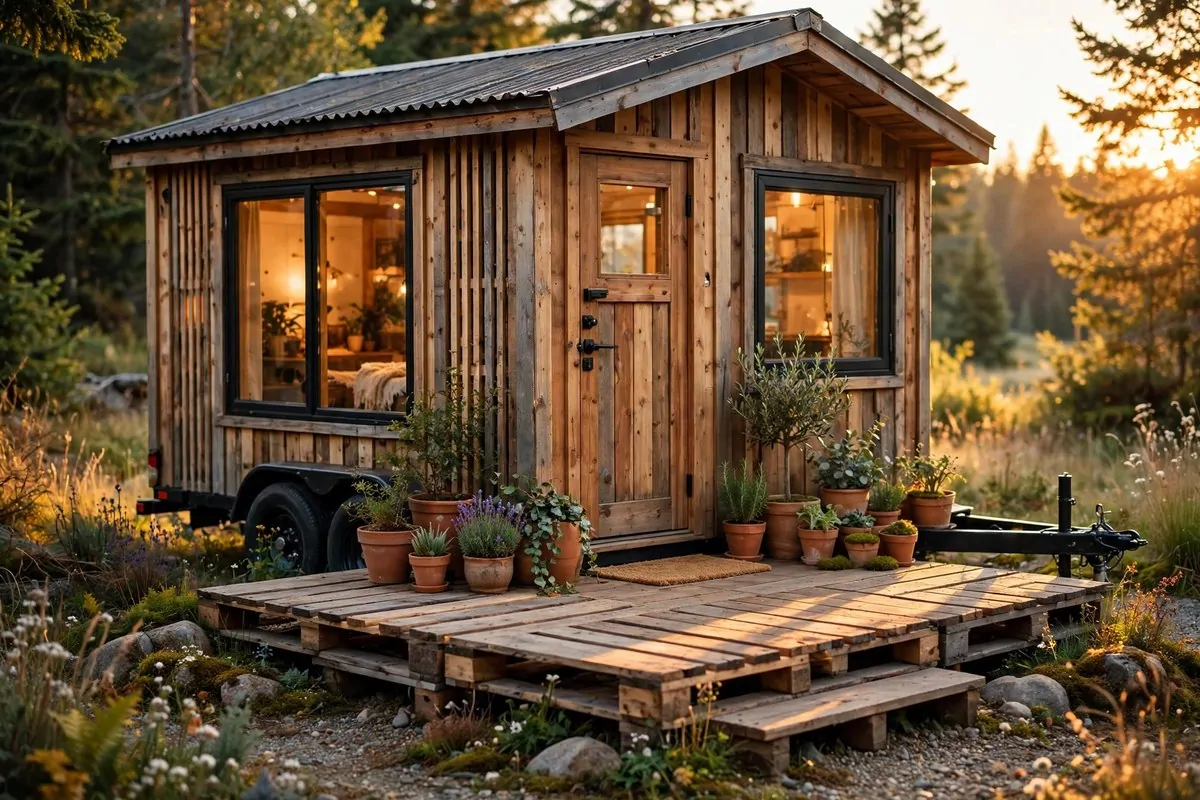
26 Tiny House Inspiration Interiors That Feel Spacious

There are three lies people tell you about tiny houses. Lie number one: they always feel cramped. Lie number two: you need a fortune to make one look good. Lie number three: small means boring.
I have walked through enough tiny houses to know that none of those are true. The prettiest tiny homes I have ever seen were not the biggest ones. They were the ones where somebody thought hard about light, space, and what actually matters.
Tiny House Inspiration Interiors is really about that one question. How do you make a small home feel open instead of tight? The answer is not more square feet. It is smarter choices.
That is what this list is for. Twenty six real ideas, each one tested in real tiny homes. You can use one or two of them. Or you can go all in. Either way, your home will feel bigger when you finish.
1. Keep the Palette Light and Soft
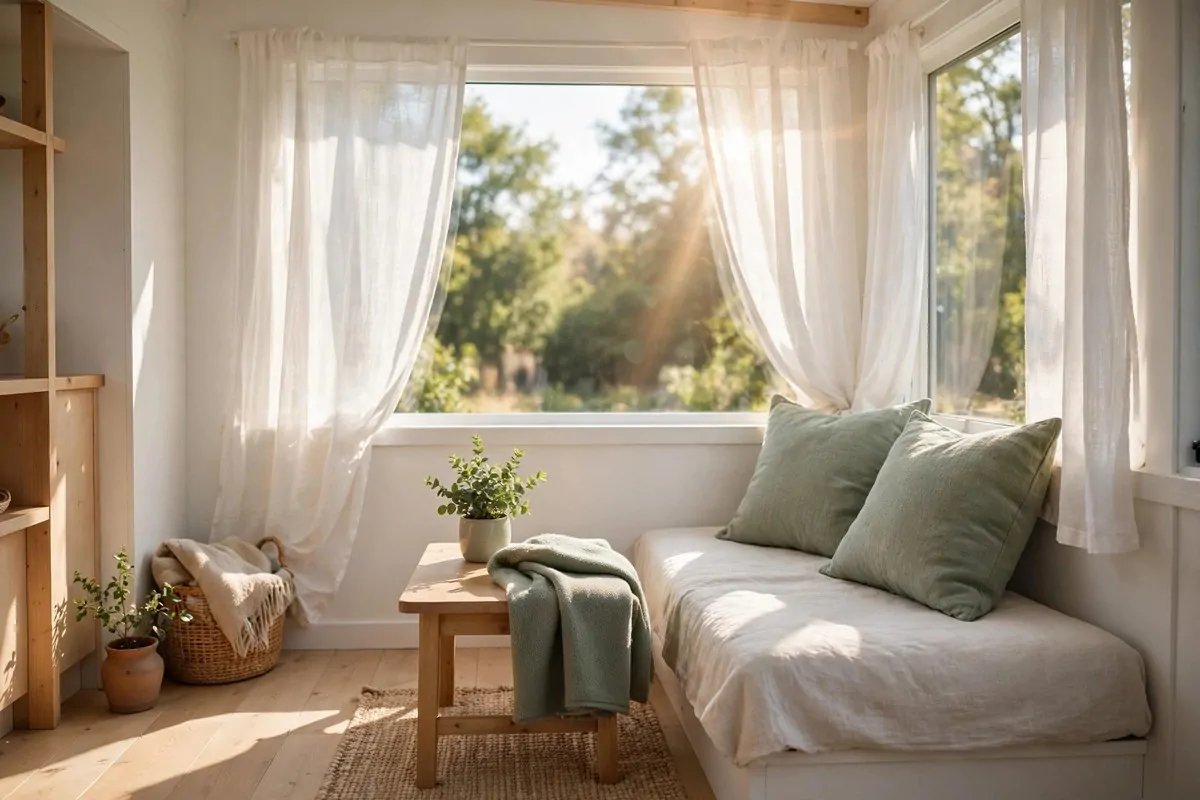
Paint is the cheapest trick in this whole list. Light walls bounce light around the room. Dark walls drink it up.
White is the classic pick, but it does not have to be plain white. Warm white feels soft and homey. Cream keeps things calm. Pale sage adds a little nature without closing the room in.
I once helped a friend repaint her tiny living room from a deep blue to a warm white. The room did not change size at all. It felt almost twice as big.
The rule is simple. Keep the big surfaces light. Walls, ceiling, and your largest furniture piece should all live in the same light family.
Then bring in your color with the small things. A sage pillow. A terracotta pot. A little art print you love.
- Best light colors for tiny spaces: warm white, cream, linen, pale sage, light warm gray.
- Keep bold colors to small accents you can swap out easily.
- Paint the ceiling the same color as the walls. This erases the line between them and the room feels taller.
A word of caution. Do not mix five different light colors across one tiny room. It sounds fun, but your eye reads every change as a new room, and the space feels chopped up.
Here is a mistake I see a lot. People pick a bright white that feels cold and a little blue. Then the room looks like an office. Go one step warmer. It changes everything.
Also, natural light behaves differently at different times of day. Test your paint with a small patch first. Look at it in the morning and at night before you commit.
The good news is paint costs almost nothing compared to furniture. If you hate it, you just paint again. That is the beauty of starting here.
2. Hang a Big Mirror Opposite the Window
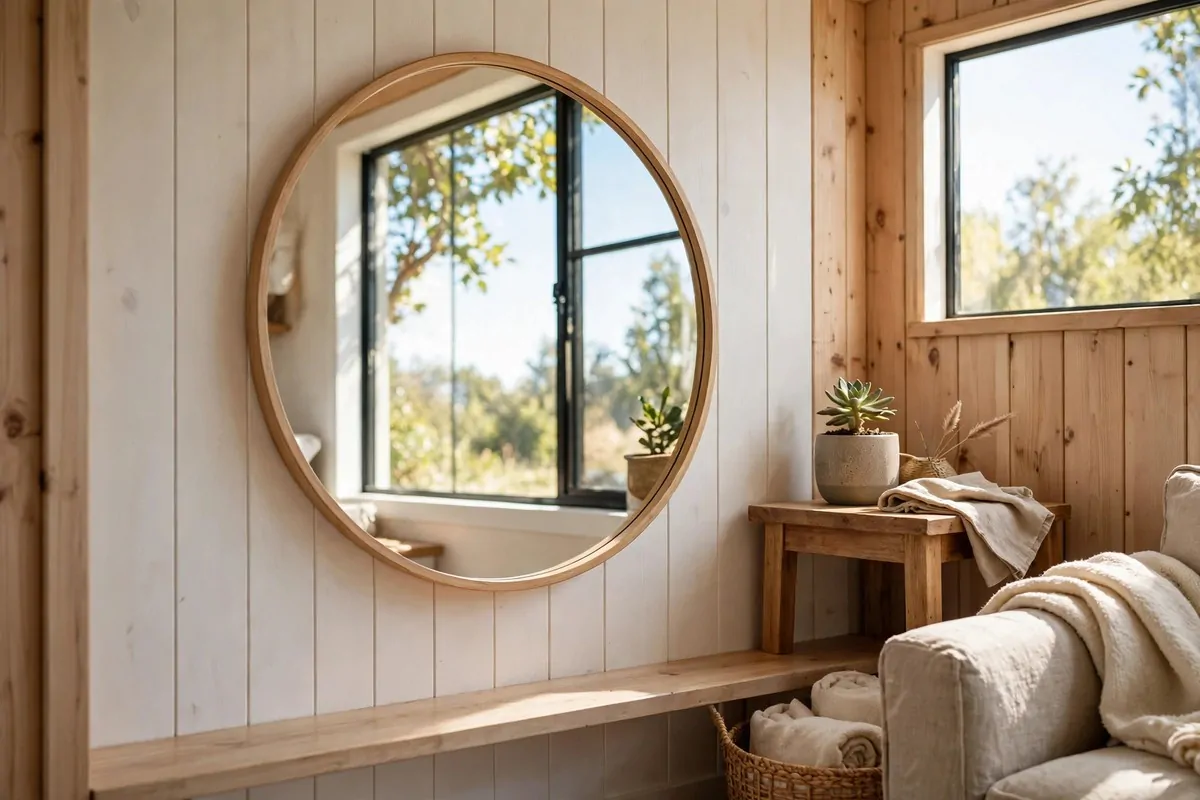
This is the oldest trick in small-home design. It works every single time. A mirror across from a window doubles your light.
Your brain sees the reflection and reads it as more room. It is a gentle trick, but it is powerful. I put a big round mirror across from the window in my own hallway. People always ask what I did to make it brighter.
Placement matters a lot here. The mirror should catch the window, not the clutter. Sit where you will look at the mirror most, then check what it reflects.
A full-length mirror leaning against the wall works too. So does a row of small mirrors if one big one feels like too much.
Size matters more than shape. Go as big as you dare. A small mirror looks like decoration. A big mirror changes the whole room.
- Hang the mirror at a height where it catches daylight, not the ceiling.
- In a dark corner, place a mirror where it can catch light from a lamp.
- Avoid mirrors that face a messy counter or the TV. They will double the wrong things.
I once stayed in a tiny house where the owner had mirrors on the inside of her cabinet doors. Clever, right? Every time she opened a cabinet, light bounced out. It cost her almost nothing.
One more tip. Keep the glass clean. A dusty mirror in a tiny home is worse than no mirror at all. Dust shows up fast in small spaces.
If drilling holes scares you, use a sturdy leaning mirror. No holes, no fuss, same big effect.
3. Build Shelves All the Way to the Ceiling
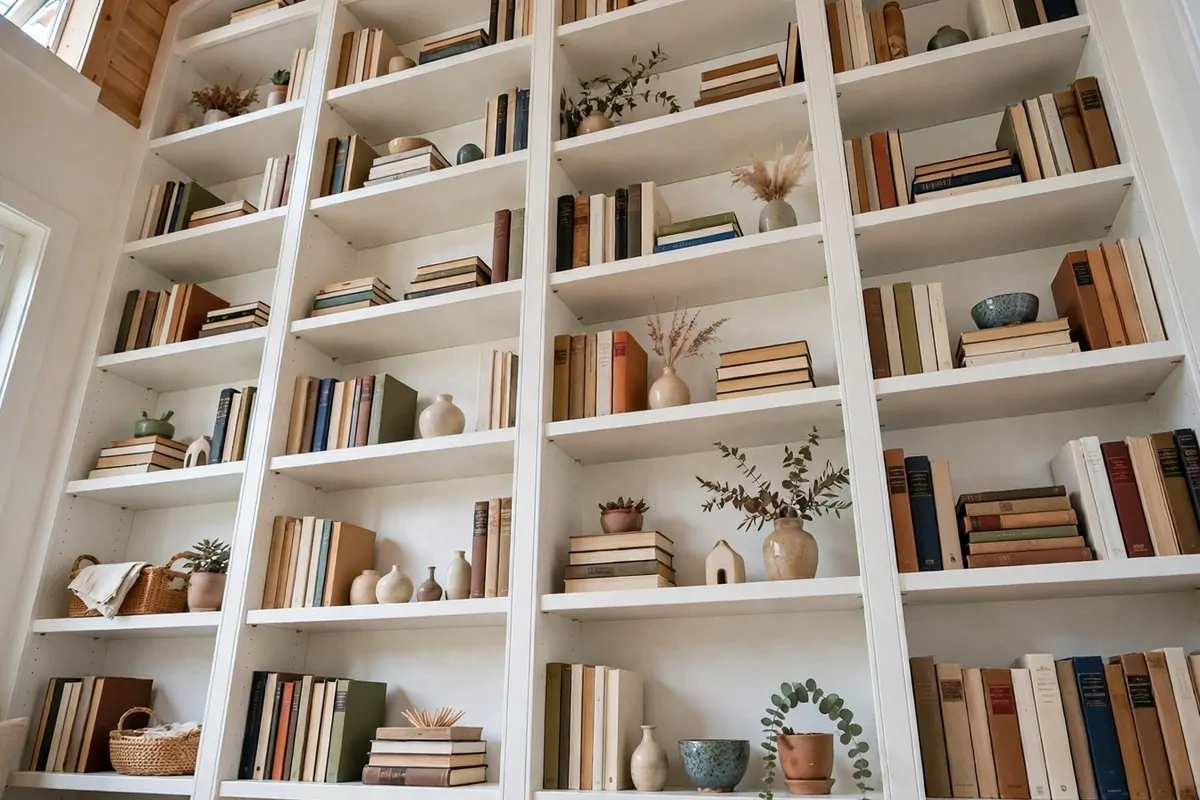
Short shelves chop a wall in half. Tall shelves pull your eyes up. And eyes that travel upward read a room as bigger.
Floor-to-ceiling shelving does two jobs at once. It stores a ton of stuff. It also makes the ceiling feel higher than it is.
You do not need custom carpentry for this. A tall bookshelf from the store works if you secure it to the wall. Style it with breathing room and it will look built in.
Here is how I style tall shelves so they do not look cluttered. The top third holds pretty things you rarely touch. The middle third holds daily stuff. The bottom third holds baskets that hide the messy bits.
Leave some space empty on every shelf. This is the part people skip. Empty space is what makes shelves look calm instead of busy.
Books look great sideways in small stacks, not just standing in rows. It breaks up the lines and feels more relaxed.
- Anchor tall shelves to the wall so they are safe.
- Use baskets on the bottom shelves to hide clutter.
- Keep the top shelves for light, pretty items.
If you rent, use tall freestanding shelves. They come down clean when you move. You still get the tall-shelf effect.
One warning: do not let tall shelves turn into a junk wall. Every month, pull one thing off. Your shelves should earn their space.
I have a friend whose whole tiny kitchen is one wall of floor-to-ceiling shelves. She keeps her dishes there. It looks like a shop display and it saves her a fortune in cabinets.
4. Choose Furniture With Legs You Can See
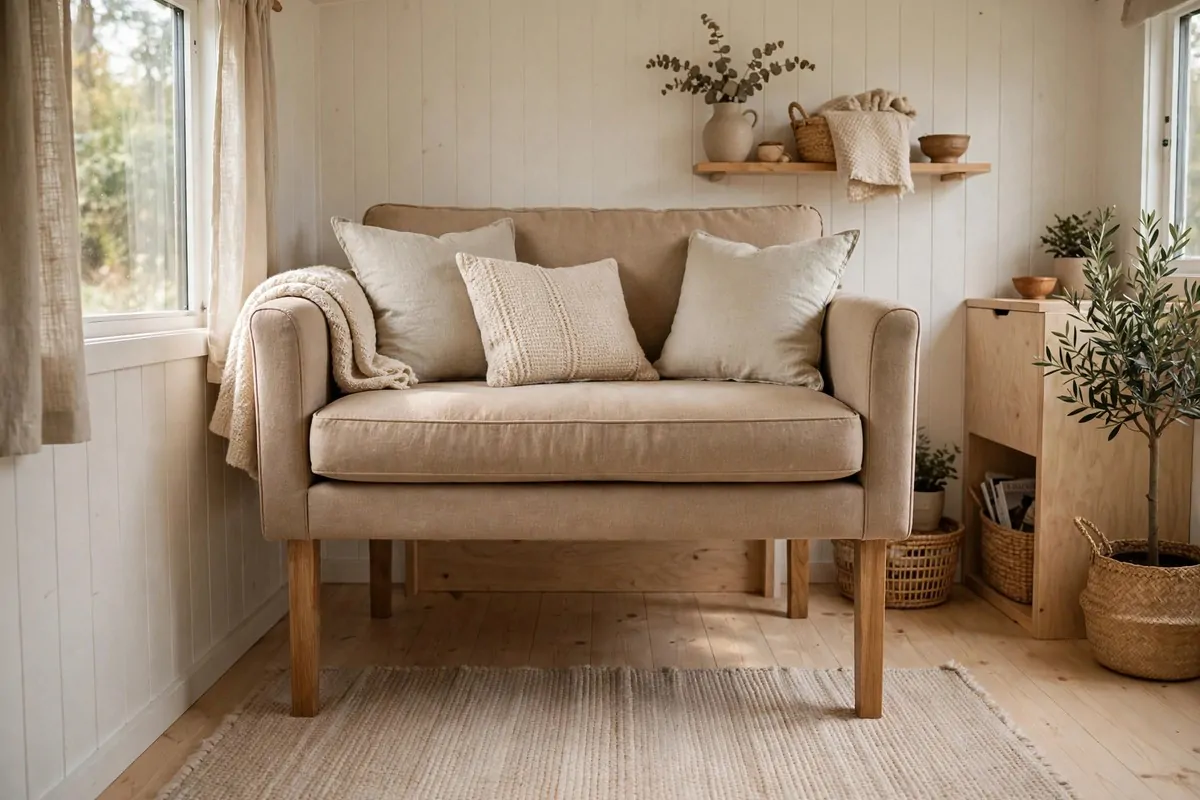
Heavy furniture that sits flat on the floor feels like a block. Your eye stops at it. The room feels smaller.
Furniture on legs is different. You can see the floor underneath. The floor keeps going, and your brain reads the room as bigger.
This is why mid-century pieces are so popular in tiny homes. They were made for small apartments. Tall legs, slim frames, light look.
Swap a boxy sofa for a loveseat on legs. Swap a chunky coffee table for one with a slim frame. You will feel the difference the same day.
It works for the bed too. A bed frame on legs feels lighter than a solid base. Bonus: you can slide storage boxes under it.
- Look for sofas and chairs with legs at least six inches tall.
- Slim frames beat bulky frames in every small room.
- Glass or clear pieces are even lighter looking.
Here is the catch. Stuff will roll under leggy furniture. Socks, crumbs, the odd lost toy. Plan a quick weekly sweep under everything.
I learned this the hard way in my first tiny apartment. My new sofa looked amazing. My cat's missing toys were all under it. Now I sweep on Sundays. Problem solved.
Tall legs also make cleaning easier. Your vacuum slides right under. In a tiny home, easy cleaning is a big deal.
If you love a heavy piece, keep it to one. One solid anchor piece is fine. Three or four will make the room feel stuffed.
5. Swap the Shower Curtain for Glass
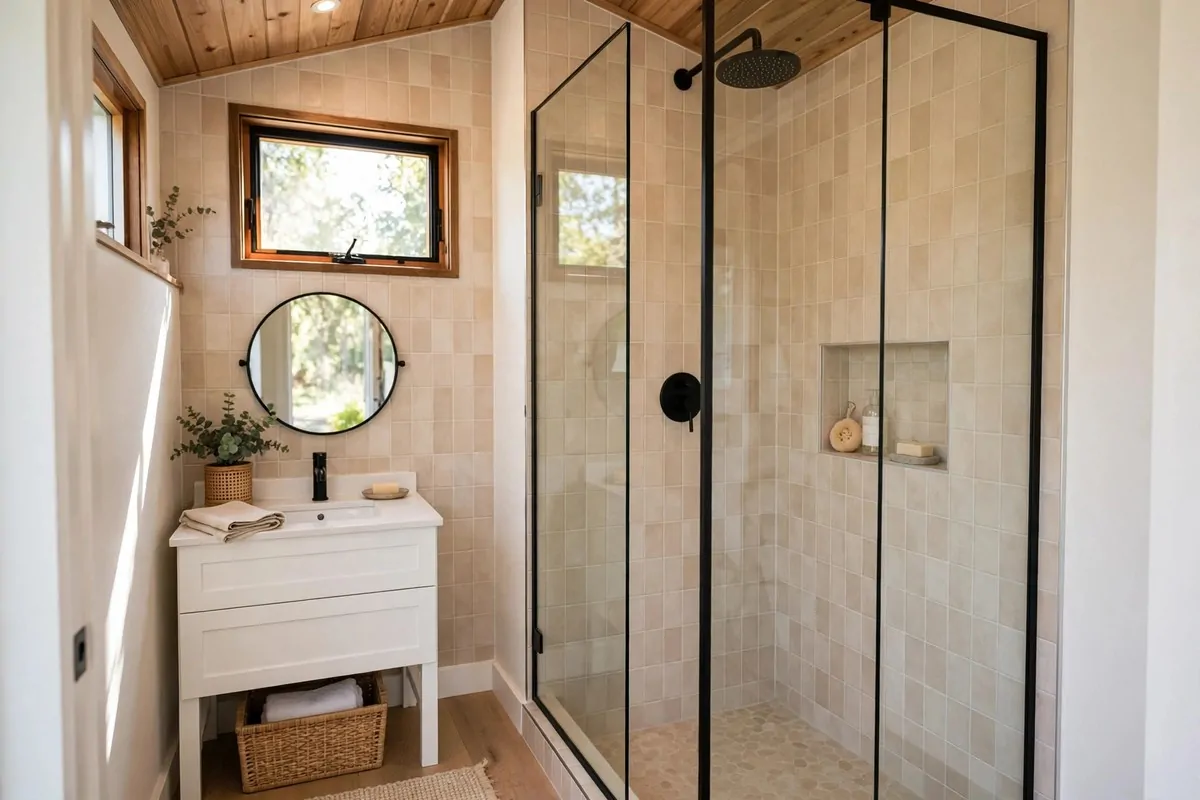
A shower curtain is a wall. A glass panel is a window. In a tiny bathroom, that difference is huge.
With a clear glass shower, your eye travels across the whole room. The bathroom feels open. With a curtain, everything stops at the curtain.
If glass is out of budget, a light fabric curtain is your next best move. Pick white or very pale gray. Skip the dark patterns.
Continue the same floor tile into the shower area. When the floor looks like one piece, the bathroom feels bigger. This is one of the best Tiny House Inspiration Interiors tricks for small baths.
A few more bathroom brighteners:
- Wall-mounted sink or a slim vanity keeps the floor visible.
- A tall mirror above the sink doubles the light.
- Keep the counter almost empty. One soap, one plant. That is it.
I once saw a tiny house bathroom with a frosted glass door instead of a solid one. It borrowed light from the bedroom. Genius move for a windowless bath.
Small bathrooms need good air. A little fan or a window you can crack open stops the steam from living on your mirrors all day.
Also, light grout looks bigger but stains faster. Medium grout is the happy middle. It stays clean-looking longer.
Here is a tip nobody tells you. A curbless shower, where the floor just flows in, feels way bigger than a shower with a big raised edge. If you are building, ask for it.
Do not overfill a tiny bathroom with matching sets. One nice towel set is enough. The rest just makes it busy.
Your bathroom is the smallest room. It is also the easiest one to make feel bigger. Start with the glass.
6. Cut a Skylight Into the Main Room
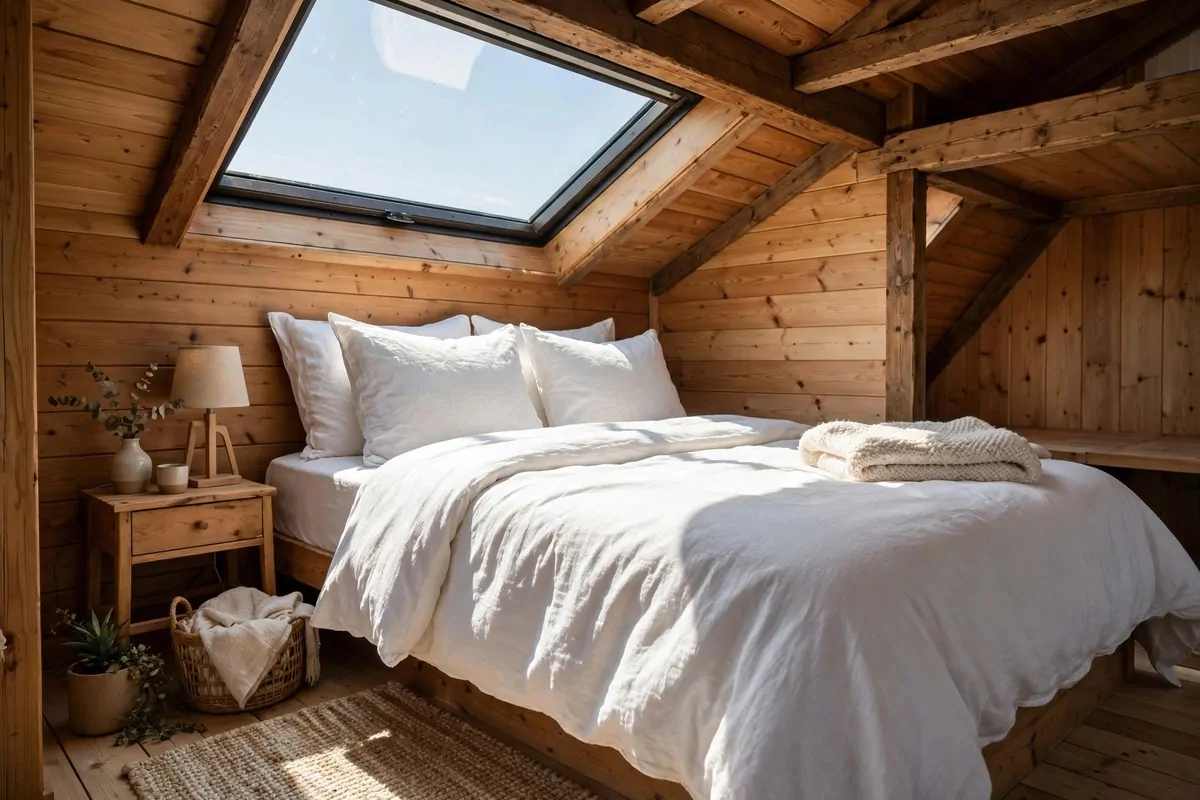
Overhead light changes everything. A skylight pours daylight into the middle of the house. No wall needed.
In tiny homes, the middle of the room is often the darkest spot. Windows only reach the edges. A skylight fixes the middle.
Rain sounds amazing on a skylight. Stars at night too. It is one of those upgrades that feels like magic every single day.
If you are building new, plan the skylight early. It is cheaper to add during the build than later. Over the bed or the main living space are the two best spots.
For an existing home, a sun tube is the budget cousin. It is a small tube that pulls daylight from the roof down into the room. Much cheaper and it still works.
- Skylights over the bed turn your loft into the best room in the house.
- Venting skylights let hot air escape in summer.
- Always get good seals. A tiny leak is a big problem in a tiny home.
I stayed in a tiny house where the whole kitchen sat under one big skylight. Washing dishes in sunlight felt like being outside. I never forgot it.
One thing to watch: skylights can get warm in summer. A shade or tint keeps it cool. Some come with remote blinds now, which is fun.
Also check your roof first. If your tiny home moves around on wheels, pick a skylight rated for mobile homes. The frame matters.
Light from above also makes photos look amazing. If you ever share your home online, this is the move.
Bottom line: one skylight can do more for brightness than three extra lamps. Daytime light is free. Use it.
7. Pick a Sofa That Turns Into a Bed
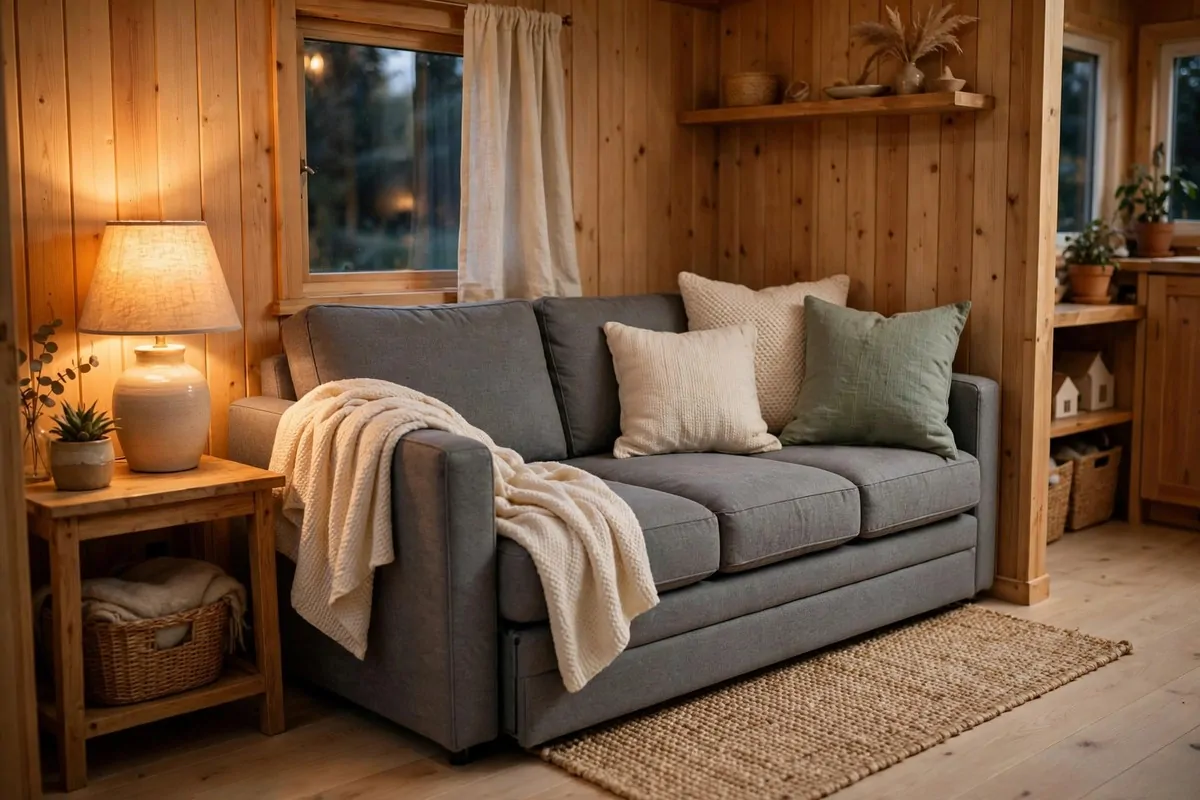
Every tiny house needs a guest bed. Almost nobody has room for a real guest room. The sofa bed solves this perfectly.
Daytime: it is your couch. Nighttime: it is a bed. One piece of furniture, two jobs. That is the tiny house way.
Modern sofa beds are nothing like the old lumpy ones. The new ones are slim and actually comfortable. Some fold out in seconds.
| Type | Best For | Watch Out For |
|---|---|---|
| Pull-out sofa bed | Real overnight guests | Heavy to move, needs floor space to open |
| Click-clack futon style | Tight spaces, daily use | Thinner sleeping surface |
| Daybed | Reading nook plus guest bed | Takes up bed-sized space all day |
Pick your type based on how often guests actually sleep over. Daily nappers love daybeds. Weekly guests love pull-outs.
Keep bedding nearby. A storage ottoman next to the sofa can hold the guest sheets. Then guests feel welcome, not like a burden.
Test the folding mechanism in the store if you can. Some are stiff and annoying. The easy ones fold with one hand.
Size the sofa to your room first. A queen pull-out in a room built for a loveseat will eat your whole floor. Measure twice.
I have a friend whose sofa bed guests fight over. She keeps the pillows good and the blanket soft. Little things make a fold-out feel like a real bed.
Also, pick a washable cover. Guests spill. Life happens. A removable cover saves the whole sofa.
One more idea: some tiny houses use a daybed as the main sofa. With good pillows, it looks like a couch. With a blanket, it is a bed. Simple.
8. Use a Fold-Down Table for Meals
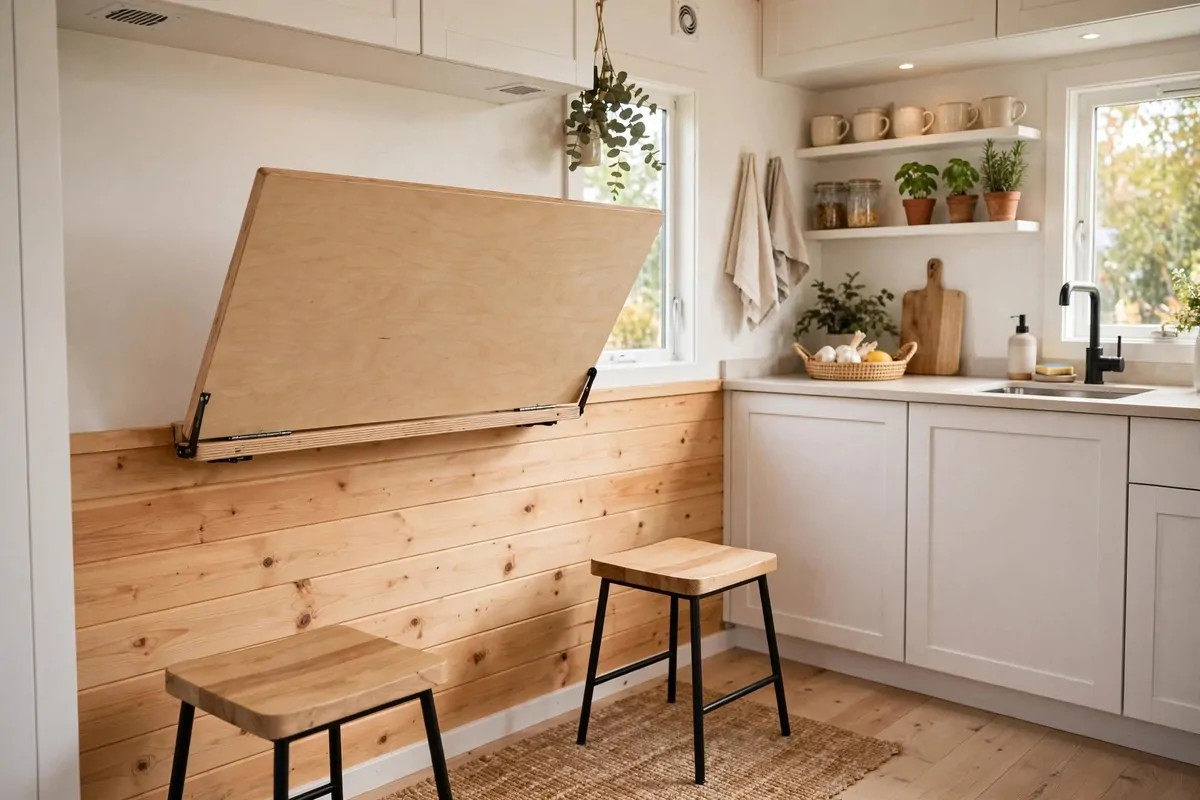
A full dining table eats four to six feet of floor. A fold-down table eats zero feet when it is up. The math is simple.
These mount to the wall. Pull them down for dinner. Push them up when you are done. Your floor stays open all day.
They work as desks too. Morning coffee spot, evening work spot. One little table, three jobs.
Place yours near the kitchen if you can. Short walk with hot food. Nobody wants to carry soup across the house.
Pick a sturdy one. A wobbly wall table is worse than no table. Check the weight rating and use the right wall anchors.
- Round drop-leaf tables are another option. They seat two normally, four with leaves up.
- Nesting tables slide together when not needed.
- Some tiny homes use the kitchen counter as the table with two stools.
Chairs matter here. Stackable stools tuck into a corner. Folding chairs hang on the wall. Keep them out of the walking path.
I once ate dinner in a tiny house where the table folded down over the window bench. We ate watching the sunset. Then the table went up and the room was back. Beautiful.
Measure your elbow room. You need about two feet per person at the table. A 36-inch round table fits two people fine.
Kids do homework at fold-down tables too. It is a great height for little ones. Wipeable top is a must with kids.
Do not skip this one. Eating on the couch every night gets old fast. A real table makes a tiny house feel like a real home.
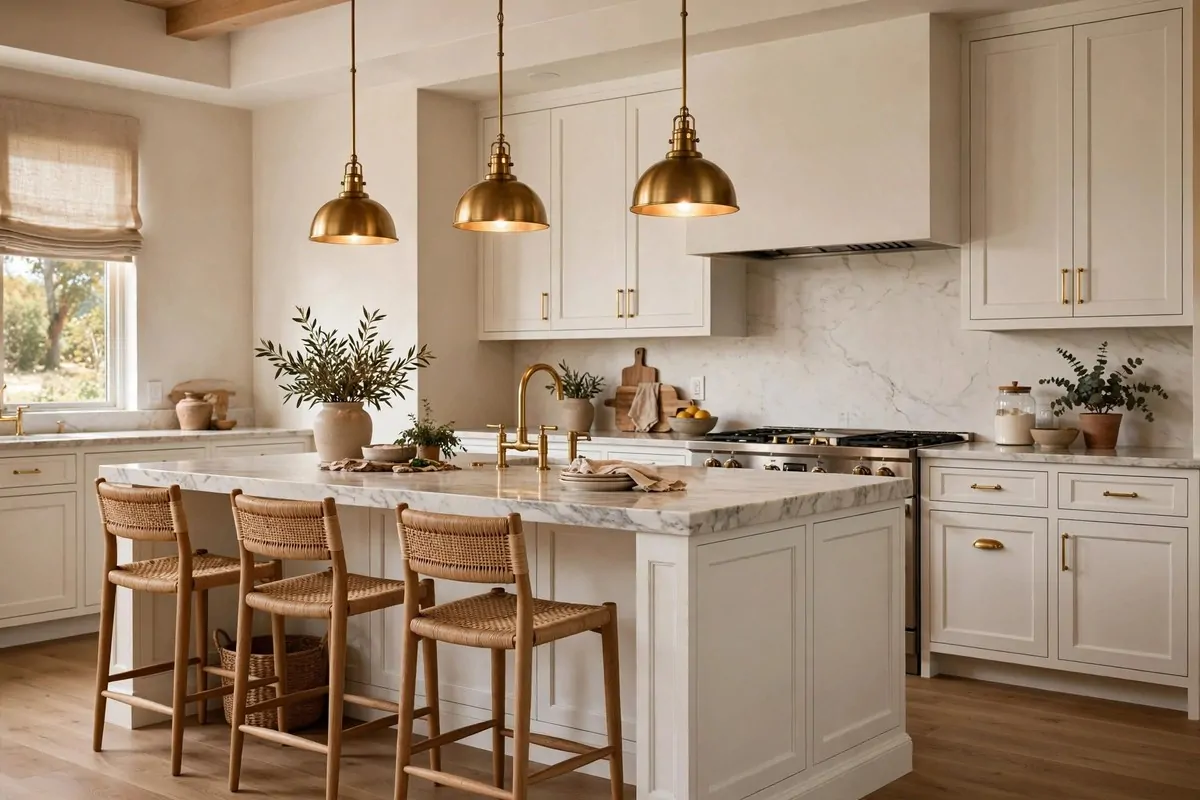
9. Go for Open Shelves in the Kitchen
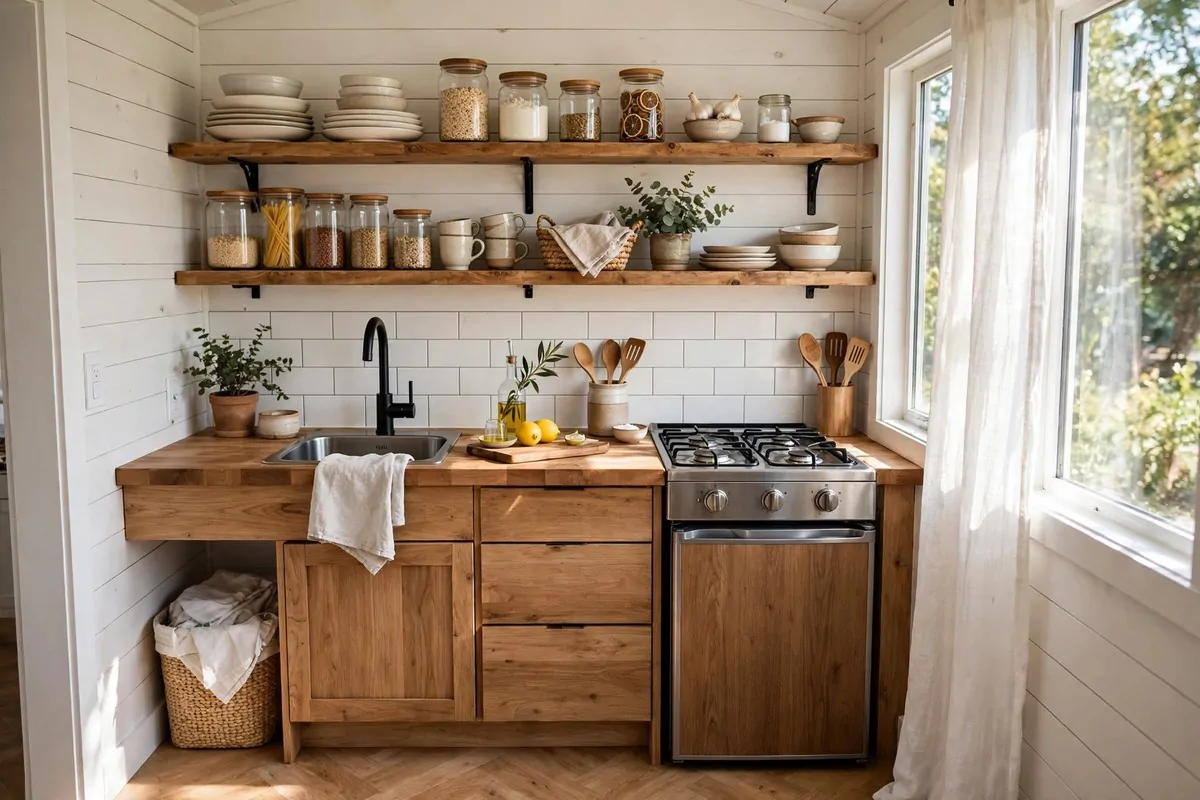
Upper cabinets are boxes on your wall. Open shelves are just a line. Your eye flows past them. The kitchen feels airier instantly.
They also force a good habit. You only keep out what you actually use. Clutter hides in cabinets. It cannot hide on open shelves.
Keep your shelves edited. Pretty plates, a few glass jars, one small plant. That is the look. Not seventeen mugs and a pile of lids.
Wood shelves warm up a white kitchen. White shelves disappear into a white wall. Pick based on the mood you want.
- Dust them once a week. Tiny kitchens dust fast.
- Group items by color for a calm look.
- Keep one shelf low enough to reach without a stool.
I know someone who ditched her upper cabinets and never looked back. She says cooking feels calmer now. Everything she needs is right there in sight.
The downside: grease. If you fry food a lot, shelves near the stove get sticky. Put your prettiest stuff on the far shelves.
Mix one closed cabinet in if you need it. Nobody says the whole kitchen has to be open. One hidden cabinet for the ugly stuff is smart.
Under-shelf hooks are great for mugs. A rail under the shelf for utensils. Use the underside too. Tiny kitchens need every inch.
Open shelves also cost less than cabinets. Way less. That savings can go toward nicer counters or better lighting.
Start small if you are nervous. Replace just one cabinet with shelves. Live with it a month. Then decide.
10. Lift the Bedroom Into a Loft
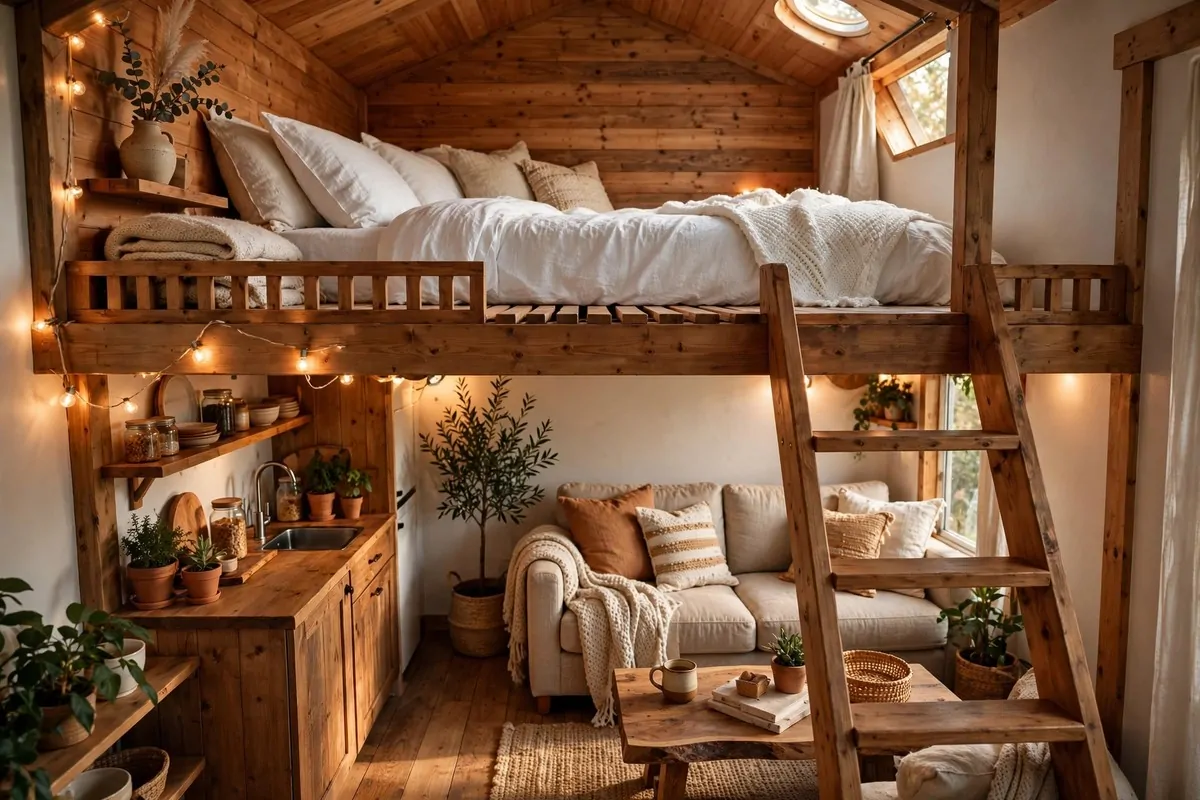
The loft bed is the tiny house classic. Sleep upstairs, live downstairs. One footprint, two floors.
This one move doubles your usable space. The bedroom leaves the ground floor completely. That floor becomes living space.
Lofts work best with good ceiling height. You need enough room to sit up in bed. Measure before you build. Nobody likes a loft you cannot sit up in.
A low railing keeps it safe. A skylight up there makes it dreamy. Reading lights on each side make it feel like a real bedroom.
Access matters. A ladder takes little space. Stairs take more but are easier at night. Stairs with storage inside are the best of both worlds.
- Keep the loft simple. Bed, lights, a small shelf. That is all you need.
- Heat rises, so lofts get warm. A small vent or fan helps a lot.
- Use the space under the loft for seating, storage, or a tiny office.
I slept in a loft with a skylight right above the pillows. Falling asleep under the stars, inside my own bed, felt like camping with walls. I still think about that night.
Lofts are not for everyone. Bad knees, small kids, midnight bathroom trips. Be honest with yourself about the stairs.
If a loft feels scary, a raised platform bed is the middle ground. It lifts the bed a few feet and gives you storage underneath. No ladder needed.
One more tip: keep the loft airy with a railing, not a solid wall. A solid wall makes the space below feel like a cave. Open railings keep the light moving.
The loft is what makes a tiny house feel like a house, not just a room. It gives you that upstairs-downstairs feeling in 300 square feet.
11. Slide the Doors Instead of Swinging Them
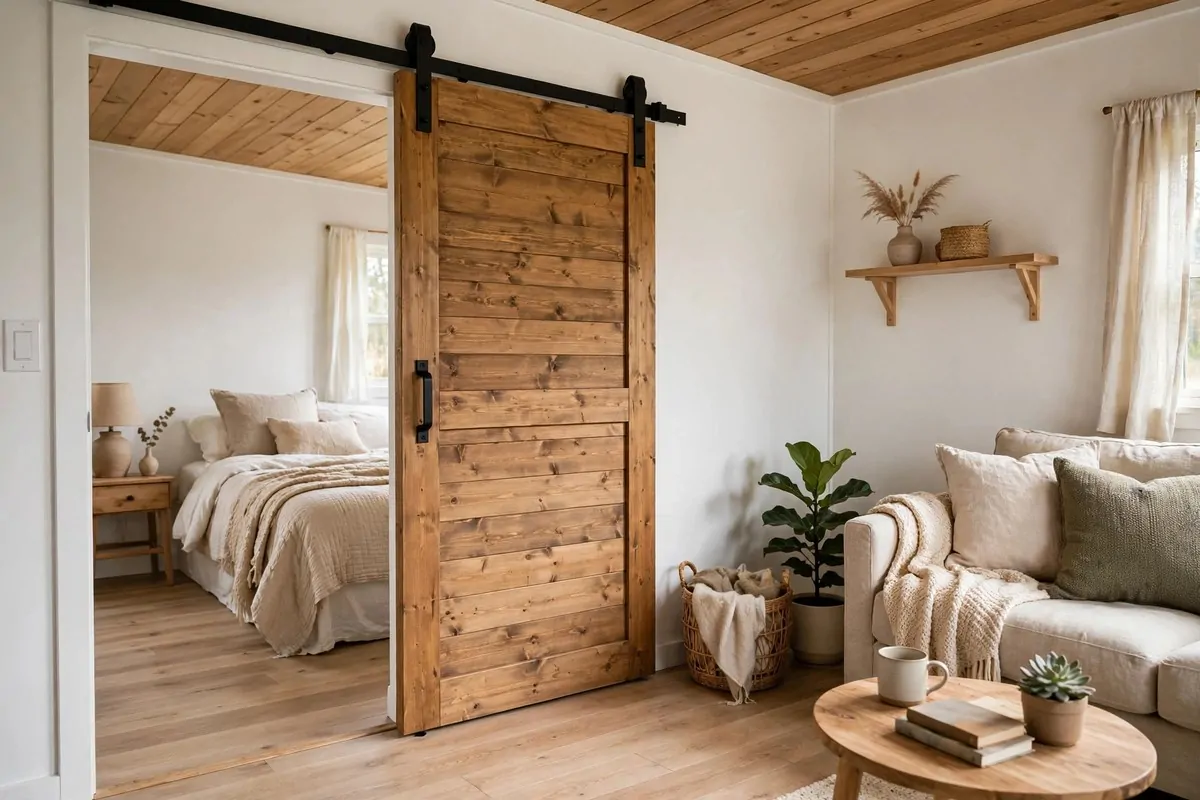
A swinging door needs a full arc of empty floor. In a tiny house, that arc is precious real estate. A sliding door needs zero.
Barn doors are the popular pick. They slide along a rail on the wall. They look great and save that whole swing zone.
Pocket doors are even better. They slide inside the wall itself. Nothing shows when open. But they are harder to add to an existing wall.
Use sliding doors for bedrooms, bathrooms, closets. Anywhere a door swings into your walking path. You will gain floor space you can actually use.
- Barn doors are easy to add to most walls.
- Pocket doors are best planned during a build.
- Frosted glass sliding doors let light through between rooms.
I once measured the swing space of the doors in a tiny house. Two bedrooms, one bath. The doors ate up almost 20 square feet. That is a whole closet.
The look matters too. A sliding door becomes a design feature. Wood, glass, painted color. Pick something you love to look at.
One honest downside: sliding doors are less private for sound. A bathroom sliding door will not block noise like a solid door. Plan accordingly.
Also, keep the track clean. Dust in the track makes the door sticky. A quick wipe now and then keeps it gliding.
Hardware is cheap and comes in every style. Black metal for modern, wood for rustic. It is a small detail with a big payoff.
If you can only change one door, change the bathroom door. That swing arc is usually the worst one in the house.
12. Run One Color Story Through the Whole House
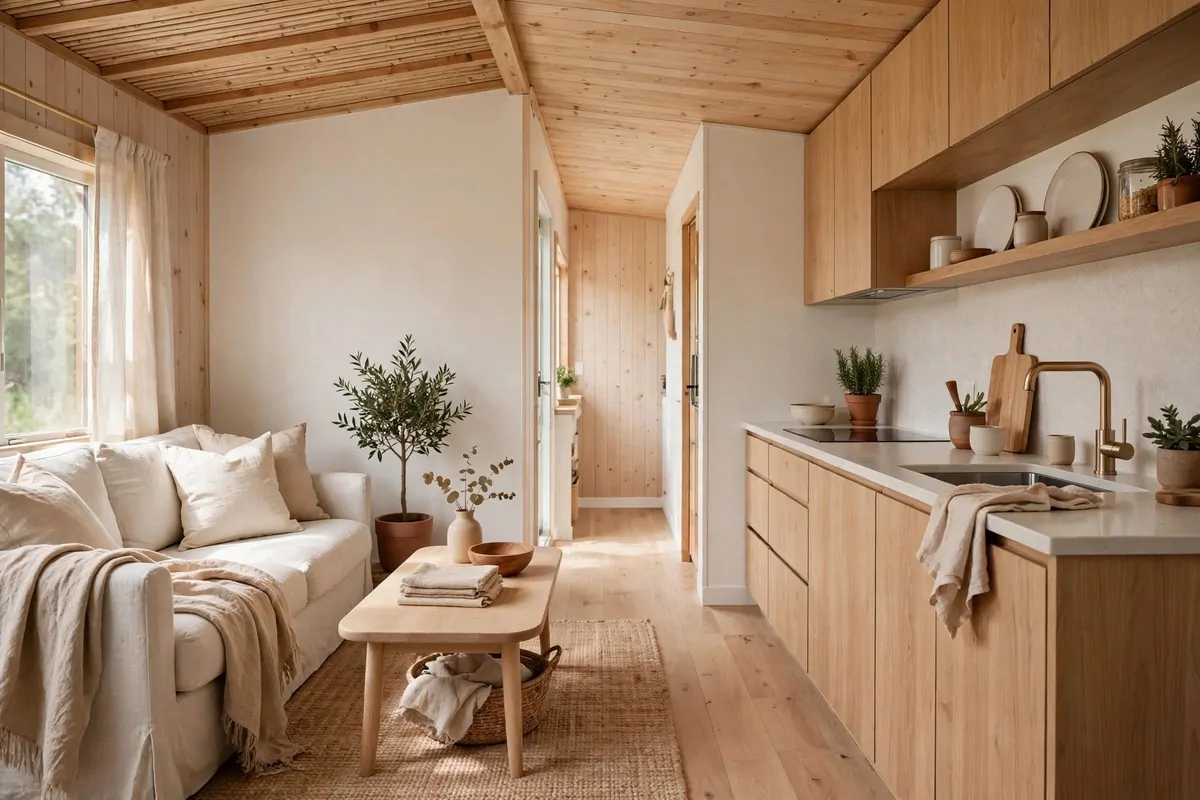
When every room is a different color, your brain reads many small rooms. When the colors flow, your brain reads one big space. This is the seamless trick.
Pick two or three colors and repeat them everywhere. Walls, bedding, kitchen, bath. The whole house whispers the same story.
This is a core Tiny House Inspiration Interiors principle. One palette ties a tiny home together. It feels calm instead of busy.
Your palette does not have to be boring. Warm whites plus wood plus one accent color. Sage green, soft blue, terracotta. Pick what makes you happy.
- Repeat your accent color at least three times in the house. Your eye will connect them.
- Keep the big surfaces neutral. Bring color in through small things.
- Write your palette on a card and carry it when you shop. It stops impulse buys that clash.
I made this mistake once. Every room in my small apartment was its own color. It felt like five tiny rooms. One paint weekend fixed it. Suddenly it felt like one home.
Flooring counts too. One floor material running through the whole house stretches the space. Breaks in flooring are like fences for your eyes.
Curtains, bedding, towels: keep them in the family. They do not have to match exactly. Same family is enough.
This rule also saves money. You buy less stuff because fewer things fit the palette. Your home stays calm and your wallet stays happier.
New tiny house owners ask me where to start. Start with three colors. Everything else gets easier after that.
13. Dress Windows With Sheer Curtains
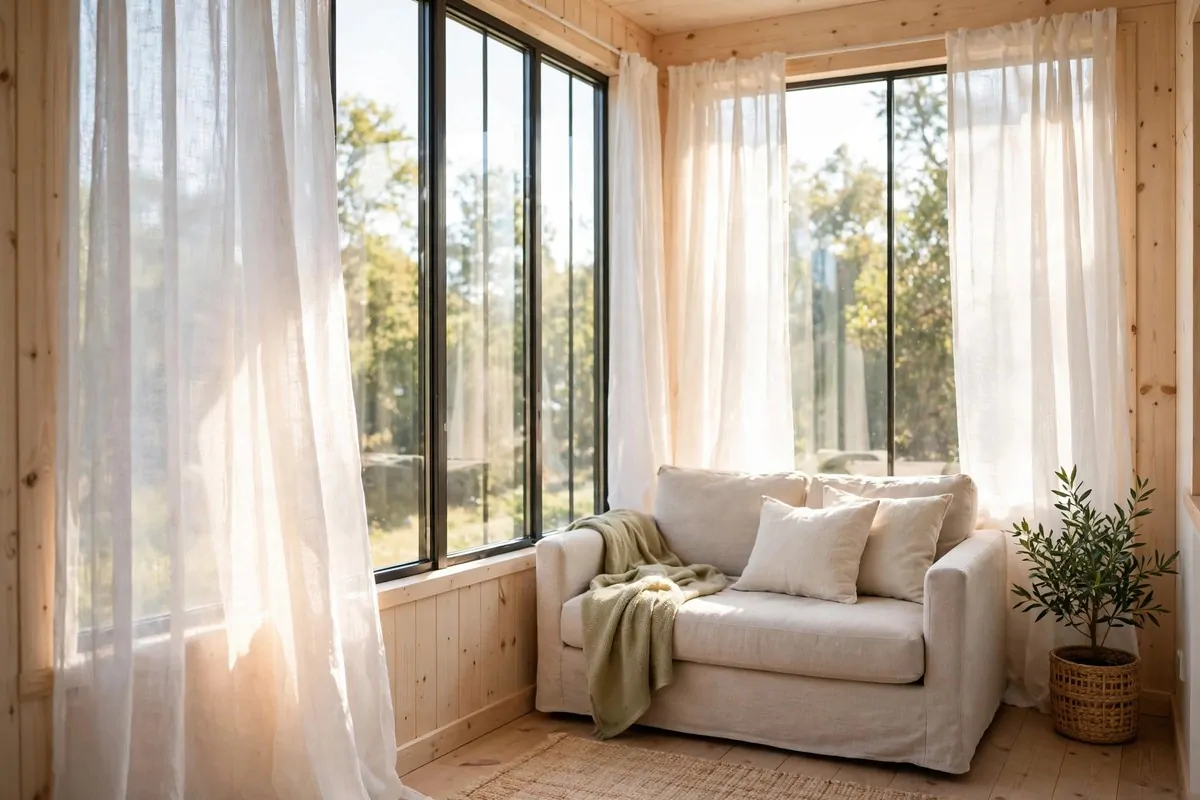
Heavy curtains eat light and wall space. Sheer curtains let the daylight pour in. They also give you privacy without the dark.
The trick is hanging them high and wide. Mount the rod near the ceiling and past the window frame. The window looks bigger. The wall looks taller.
Light fabrics in white or cream are best. They glow when the sun hits them. At night they soften the lamp light too.
- Hang curtains as close to the ceiling as you can.
- Extend the rod beyond the window so the glass is fully clear by day.
- Skip heavy tiebacks. They add bulk in small rooms.
I replaced thick curtains with sheers in my bedroom once. The room felt like it had new windows. Same windows. Just light, finally allowed in.
If privacy is a worry, use a double rod. Sheers for day, heavier panels for night. You get both worlds.
Blinds work too. Slim roller blinds take almost no space. But they do not soften the light the way fabric does.
Wash your sheers twice a year. They catch dust quietly. Clean sheers glow. Dirty sheers look gray and sad.
One more idea: leave one window bare if the view is great. A garden view is better than any curtain. Just make sure you are not flashing the neighbors.
Sheers cost very little. The effect is instant. This is one of the fastest wins on this list.
14. Turn Your Stairs Into Drawers
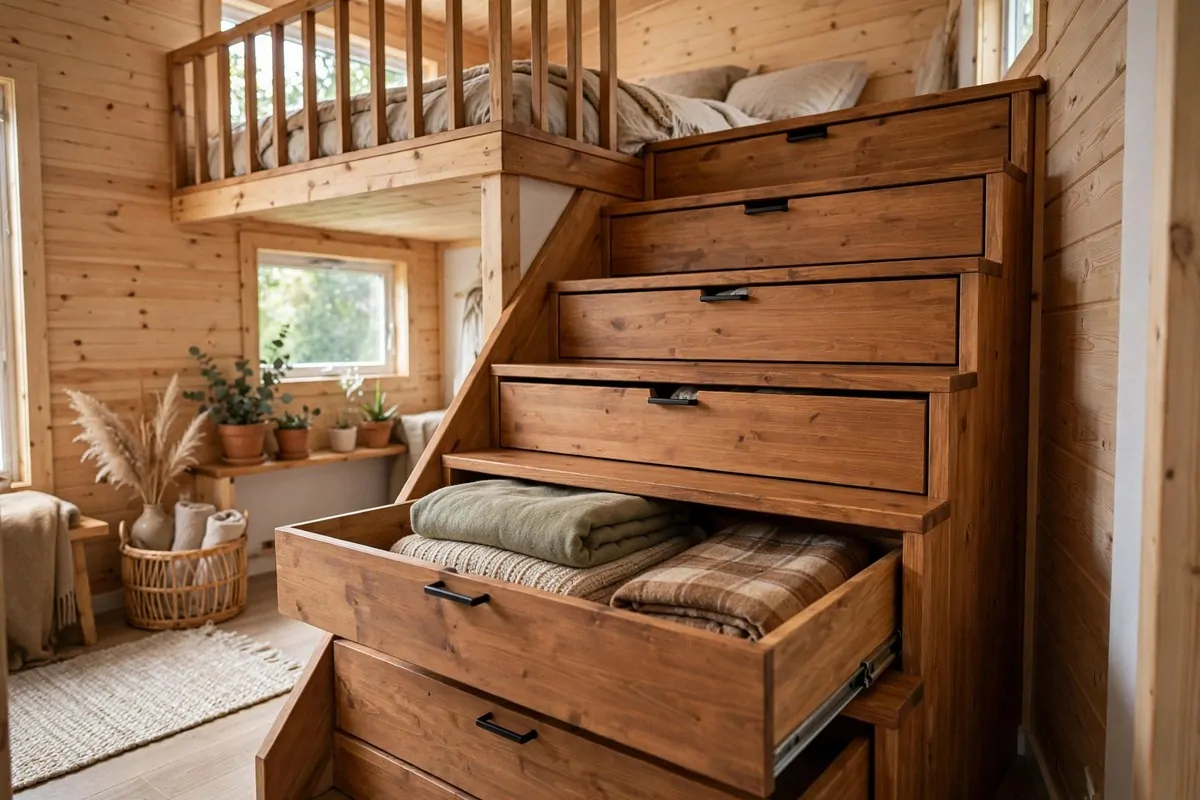
If you have loft stairs, you are sitting on hidden storage. Each step can be a deep drawer. That is a whole dresser's worth of space.
This works best with wide stairs. Each tread pulls out like a drawer. Socks, towels, books, games. Whatever you need out of sight.
Plan this during the build if you can. Retrofitting stairs is possible but fiddly. Built-in from the start is sturdier and smoother.
| Stair Storage Idea | Good For |
|---|---|
| Pull-out tread drawers | Clothes, linens, everyday items |
| Side cubbies under stairs | Shoes, bags, cleaning supplies |
| Lift-up stair lids | Seasonal stuff you rarely touch |
| Open risers with baskets | Quick grab items, plants |
Use smooth drawer slides. Cheap slides stick and squeak. Good ones glide with one finger. Worth the small extra cost.
Label the drawers if you share the house. Nobody wants to hunt through six stairs for socks. A little tag saves arguments.
Keep the top step clear. That is your landing zone. Do not store daily things where you have to climb to reach them.
I once stayed in a tiny house where the whole staircase was storage. The owner had no dresser at all. Her stairs were her dresser. It blew my mind a little.
Safety first. Locking drawers or soft-close slides stop drawers from sliding open when you climb. Test them with weight before you trust them.
Also, keep the treads non-slip. A rug strip on each step is cheap insurance. Stairs are not the place to cut corners.
This is one of those ideas that makes guests say wow. And it saves you from buying a bulky dresser. Win-win.
15. Take Kitchen Cabinets to the Ceiling
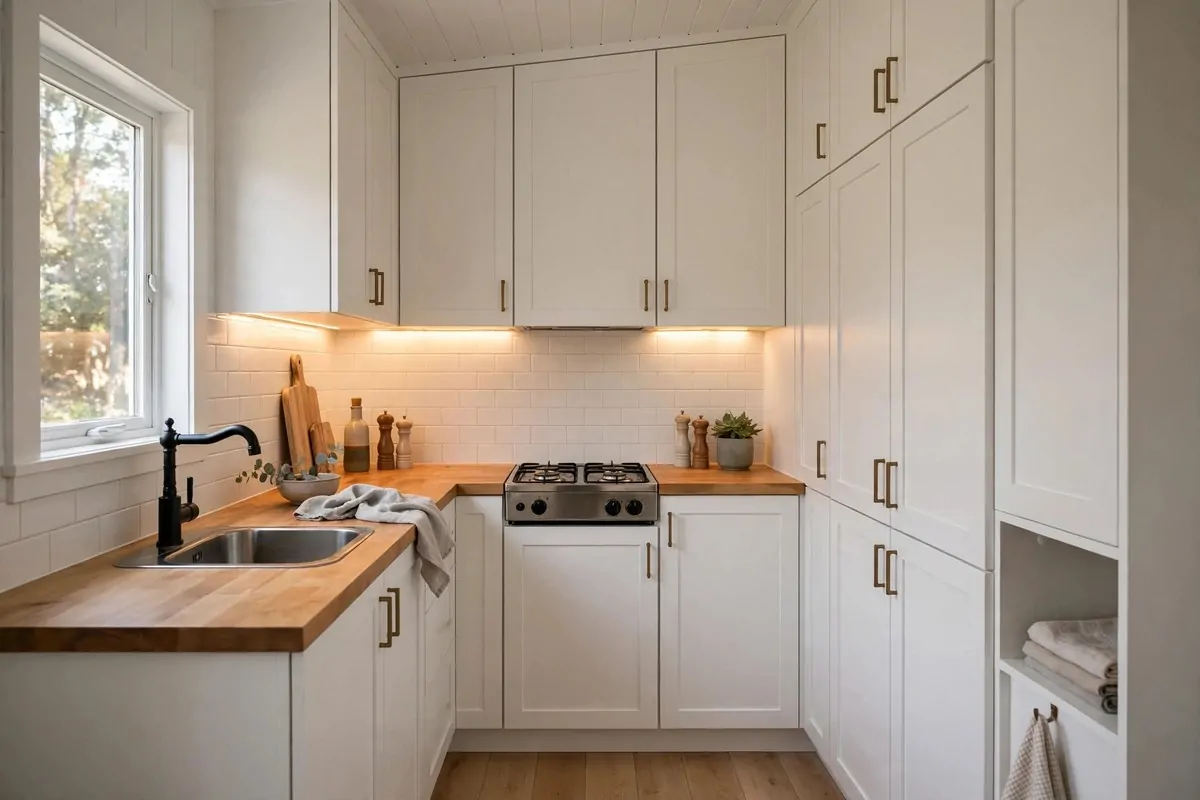
The gap between cabinets and ceiling is dead space. It collects dust and grease. Take the cabinets all the way up and you win twice.
You get way more storage. The tall line also pulls your eyes up. The kitchen feels taller and grander.
Keep a small step stool nearby. The top shelves hold things you use rarely. Holiday dishes, the big pot, the backup paper towels.
Light-colored cabinets keep it airy. White, cream, pale wood. Dark tall cabinets can feel like a wall closing in.
- Store rarely used items up top.
- Use shelf risers inside so you can see everything.
- Under-cabinet lighting makes the counter glow and feel bigger.
I have a friend with a galley kitchen and ceiling-height cabinets. She jokes her kitchen is a filing cabinet for food. But it works. Everything has a home.
Avoid glass fronts on the very top cabinets if you are short. You will see the clutter. Solid doors up top, glass in the middle if you want the look.
Measure your reach. Anything above your comfortable reach needs the stool. Be honest about what you will actually climb for.
This is more of a build-stage move. But if you are redoing a kitchen anyway, it is the best storage upgrade per dollar.
One more tip: crown molding at the top makes tall cabinets look custom. A cheap trim piece, a huge visual payoff.
Tall cabinets, open shelves in the middle, done. That is a tiny kitchen that works hard.
16. Let Plants Climb the Walls
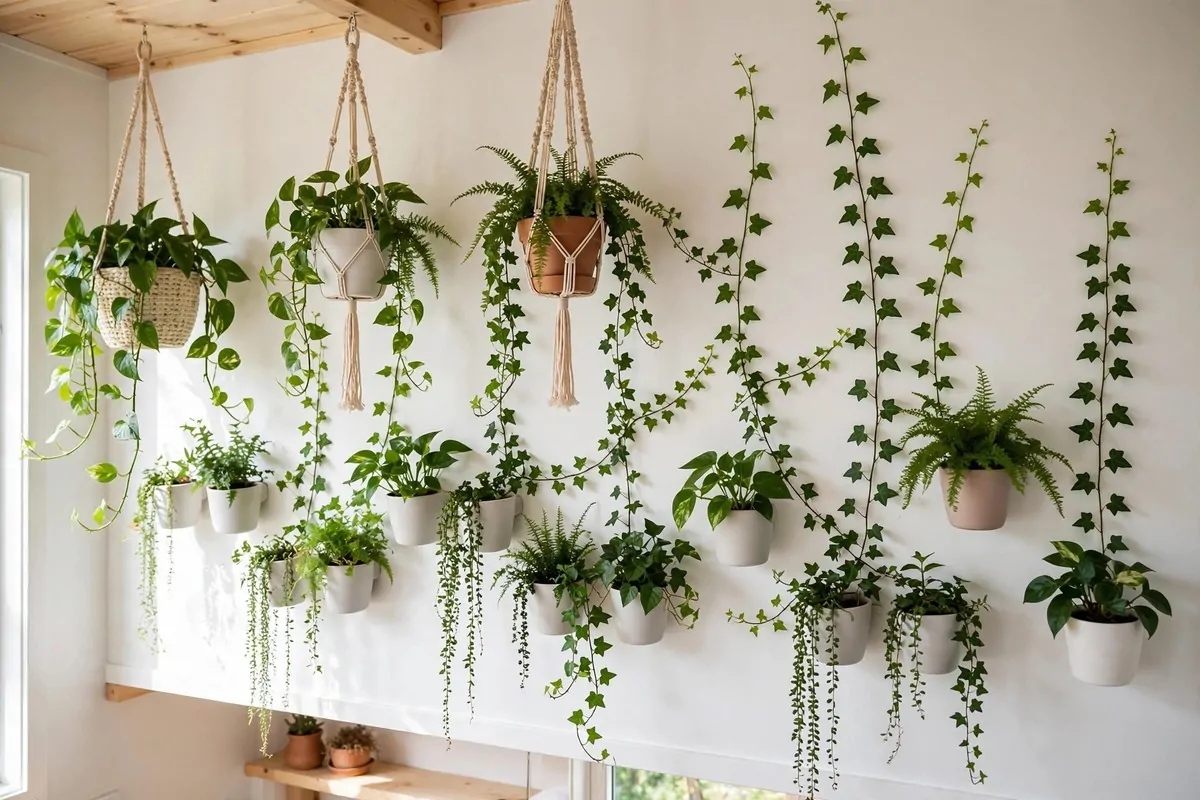
Floor space is gold in a tiny house. Plants on the floor spend that gold. Plants on the wall spend nothing.
Wall planters, hanging pots, a small trellis. Green going up instead of out. Your eyes travel up, and the room feels taller.
Plants also clean the air a little and add life. A tiny house with plants feels like a home. Without them it can feel like a very neat box.
Pick easy ones. Pothos, philodendron, spider plants. They forgive you when you forget to water. Which, be honest, will happen.
- Wall-mounted planters keep counters clear.
- Trailing plants on high shelves soften the edges.
- One statement plant beats ten tiny ones in a small space.
I killed three plants before I learned this. Now I only buy the tough ones. They are thriving and I feel like a plant person.
Watch the watering. Wall planters can drip. Put a tray under them or water them in the sink. Drip stains on white walls are not cute.
A small herb wall in the kitchen is two wins in one. Fresh basil for dinner and green on the wall. Start with basil and mint. They are nearly impossible to kill.
Fake plants are fine too, honestly. A good fake trailing plant on a high shelf fools everyone. No guilt, no watering.
Do not block your light with plants. Keep them off the window glass. Light is your most precious resource in a tiny home.
Green is a color that always fits. It goes with every palette on this list. Add it last and watch the room wake up.
17. Build a Gallery Wall in the Hallway
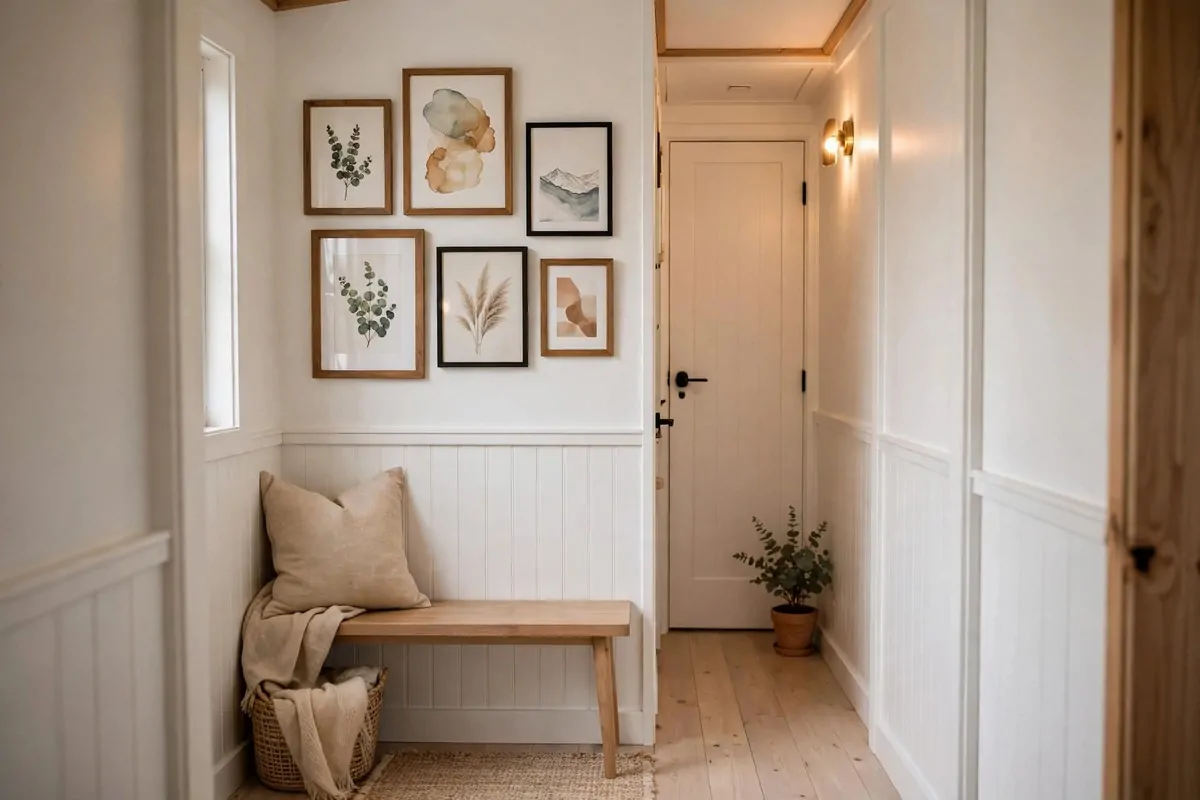
Hallways and dead walls are free real estate. A gallery wall adds personality without using a single inch of floor.
Mix frames you love. Photos, art prints, a little mirror in the mix. Keep the frames in one color family so it looks calm, not chaotic.
Plan it on the floor first. Lay the frames out and move them around. When it looks right, take a photo. Then hang from the photo.
- Use paper templates taped to the wall to plan spacing.
- Keep the center of the gallery at eye level.
- Mix sizes but keep one unifying element, like all black frames or all wood.
I made my first gallery wall without planning. It looked like frames had fallen and stuck to the wall. Paper templates saved the second try.
Small frames are your friend in tiny spaces. A gallery of postcard-size prints feels intentional. Oversized art can swallow a narrow hall.
Command strips work for renters. No holes, no lost deposit. Just check the weight rating on the strip.
Leave breathing room around the gallery. A packed wall of frames on every wall is too much. One gallery wall per home is plenty.
Include something personal. A photo from a trip, a drawing your kid made. That is what makes it yours and not a store display.
Tiny homes can feel a little hotel-like if they are too neat. A gallery wall fixes that. It says real people live here.
18. Try Clear Acrylic Pieces
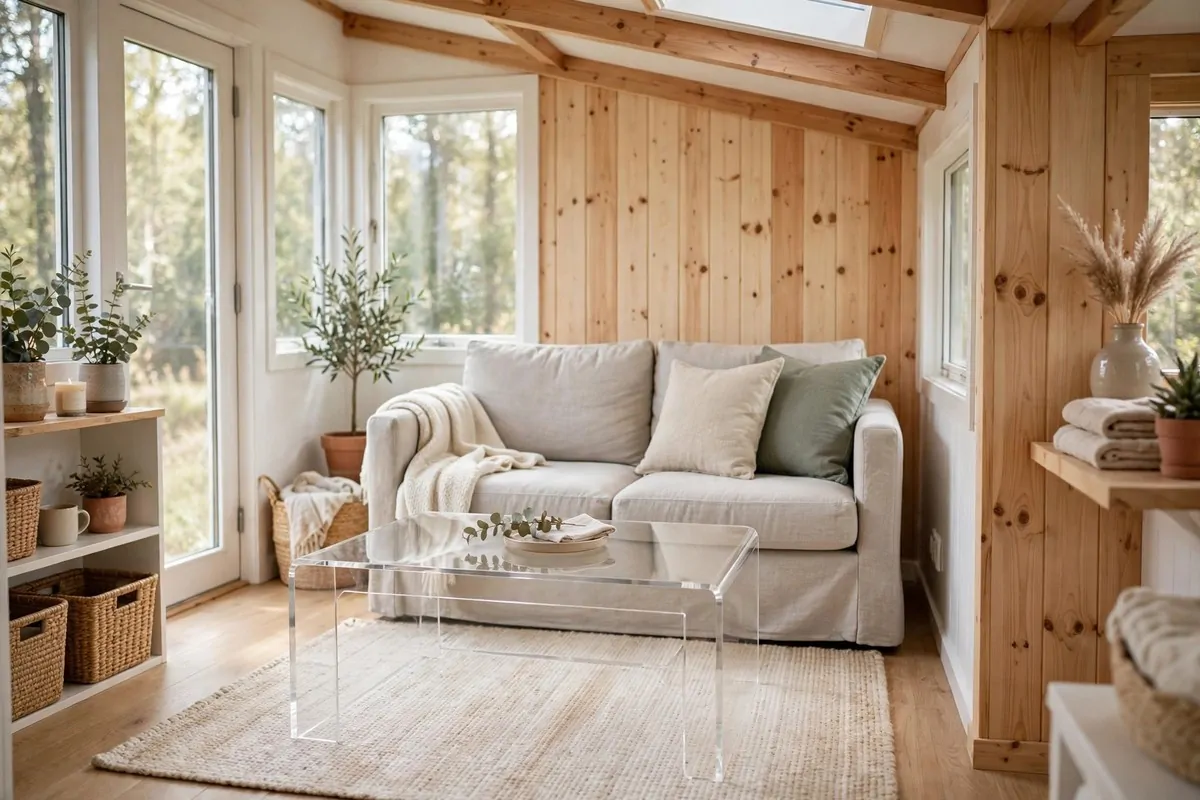
An acrylic coffee table is almost invisible. Your eye passes right through it. The room keeps its sense of space.
This is the see-through furniture trick. Clear chairs, glass tables, acrylic stools. They do their job without adding visual weight.
Use one or two clear pieces, not ten. A whole room of plastic looks like a waiting room. One clear table with a real sofa is the sweet spot.
- Clear coffee table in the living room is the classic move.
- Acrylic dining chairs tuck under the table and vanish.
- Glass shelves on the wall hold things without looking heavy.
I sat on a clear chair at a friend's tiny apartment and forgot it was there. That is the point. Furniture you do not notice is furniture that does not shrink the room.
Keep them clean. Fingerprints show on acrylic fast. A quick wipe with a soft cloth keeps them invisible.
They scratch, so be a little careful. Felt pads under anything that sits on a glass table. Coasters are not optional here.
Mix clear pieces with warm wood. The wood grounds the room. The clear piece floats in it. That contrast looks really good.
Kids and clear furniture can be a rough mix. Little hands, sticky fingers. If you have toddlers, maybe save this idea for later.
One clear piece costs less than you think. And it might be the lightest-looking thing you own.
19. Hide Storage Under the Window Seat
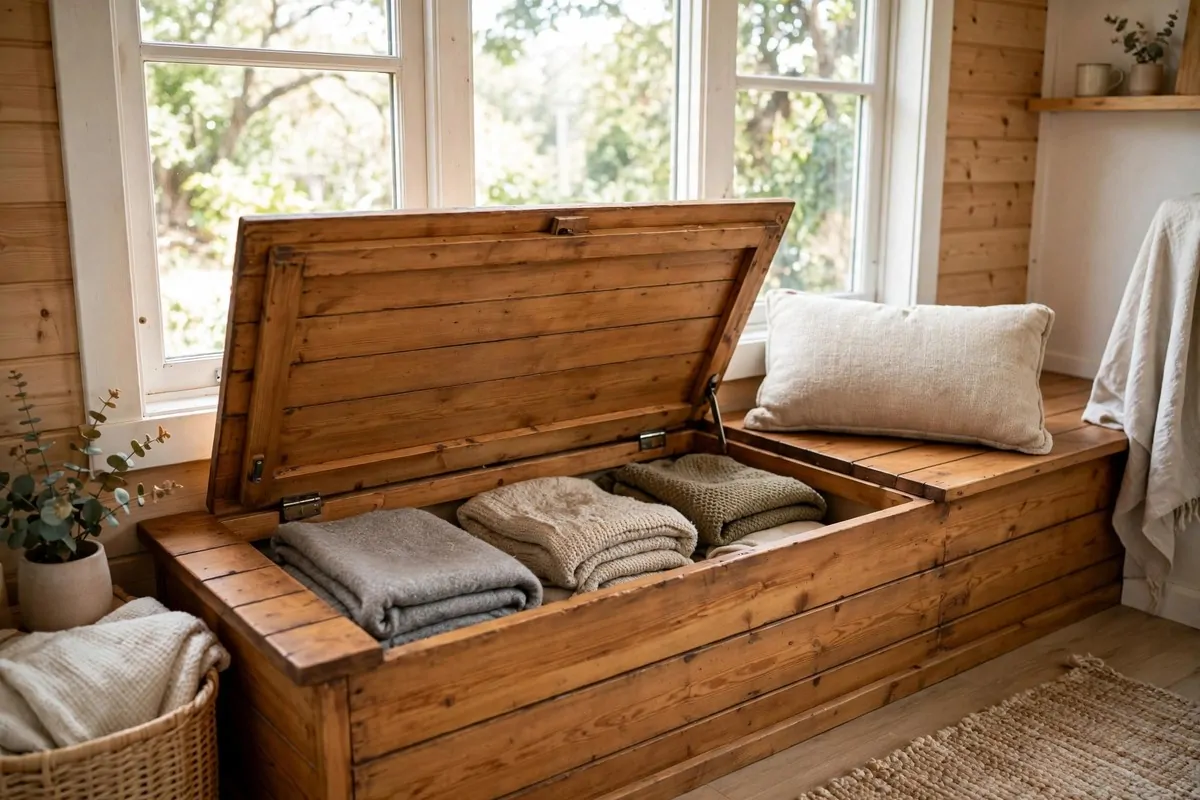
A window seat is already lovely. Add storage under it and it becomes a workhorse. Seat, storage, and a view in one piece.
The lift-up lid style is simplest. One big compartment for blankets, board games, off-season clothes. The cushion on top hides the secret.
Drawer style under the seat is easier for daily stuff. Pull, grab, push. No lifting the cushion off your lap.
Build it under a window and you get the reading nook of dreams. Cushion, pillow, blanket, book. This is where everyone will sit.
- Add a cushion at least three inches thick. Thin cushions hurt after ten minutes.
- Vent the inside so stored things stay fresh.
- Keep the lid light enough to lift with one hand.
I once stayed in a tiny house where the window seat held every blanket in the home. The owner called it her blanket box. It was my favorite seat in the whole place.
If you rent, a storage ottoman by the window does the same job. Not as built-in looking, but zero construction.
Measure the window height first. A seat at normal chair height, around 18 inches, is most comfortable. Too low and your knees complain.
Pillows make or break a window seat. Two or three good ones. Different sizes. Suddenly it looks like a magazine.
This is one of those Tiny House Inspiration Interiors ideas that feels like a luxury. But it is really just smart storage wearing a pretty outfit.
20. Add a Murphy Bed With Shelves
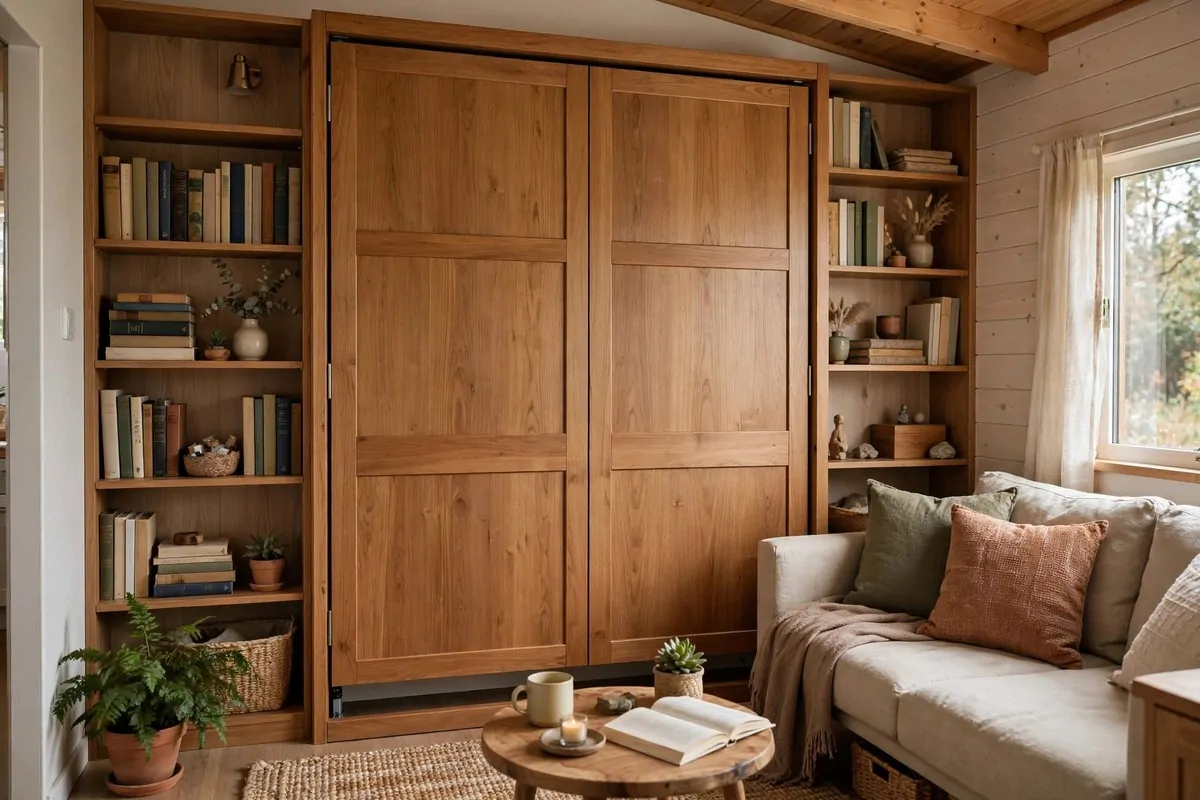
A Murphy bed folds into the wall. Daytime: you have a whole living room. Nighttime: you have a real bed. It is the ultimate tiny house move.
The modern ones are beautiful. They look like a nice cabinet when folded up. Add side shelves and it looks like built-in furniture, not a trick bed.
Real mattresses fit in most models now. Not thin pads. A proper mattress you can sleep on every night. That changes everything.
- Check the ceiling height. The bed needs room to fold down fully.
- Secure it to wall studs, not just drywall. This is a safety must.
- Keep the bedding strapped on so setup takes seconds.
I know a couple who live full time in 280 square feet with a Murphy bed. Their living room is a real living room all day. Guests never guess a bed is hiding there.
The cost is the honest downside. Good Murphy beds are not cheap. But compare it to the cost of a bigger house. Suddenly it is a bargain.
Daily folding sounds annoying but it takes under a minute. Most owners say it becomes a habit fast. Like making the bed, but better.
Add the side shelves with books and a lamp. When the bed is down, you have a nightstand. When it is up, you have a bookcase. Two jobs again.
If the price scares you, a daybed is the budget version. Same idea, less magic. Still very good.
A Murphy bed lets one room be two rooms. In a tiny house, that is like getting a free room.
21. Layer Your Lighting Like a Designer
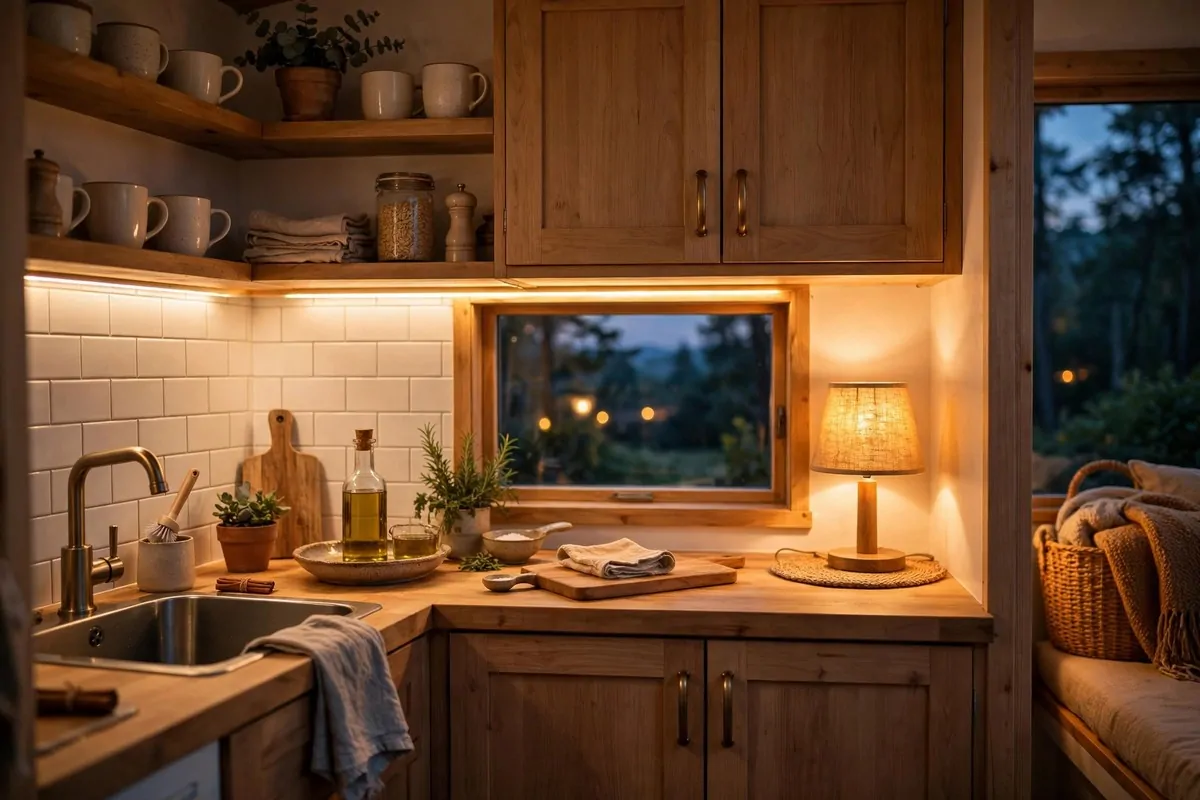
One bright ceiling light makes a tiny room feel flat and harsh. Three or four small lights make it feel deep and warm. Layers beat brightness.
Think in three layers. Overhead for general light. Task light for cooking and reading. Accent light for mood. Each one has a job.
Under-cabinet LED strips are tiny house gold. They light the counter, they glow at night, they use almost no power. Stick-on ones cost very little.
- Use warm bulbs, around 2700K. Cool white feels like an office.
- Put dimmers on the main lights. Mood control in one twist.
- Light the corners. Dark corners make rooms feel smaller.
I stayed in a tiny house with seven small lights instead of one big one. At night it glowed like a lantern. I wanted to move in on the spot.
Table lamps on shelves work great. So do little wall sconces. Anything that puts light at different heights adds depth.
Skip the giant floor lamp in a tiny living room. It eats a corner. A small table lamp on a shelf does the same job with no floor space.
Battery and plug-in lights mean no wiring needed. Great for renters and quick upgrades. Just hide the cords.
Night lighting matters most in tiny homes. You spend your evenings in one or two rooms. Make those rooms glow.
Good lighting is the difference between a small room that feels cramped and one that feels like a hug. Layer it up.
22. Zone Corners With Small Round Rugs
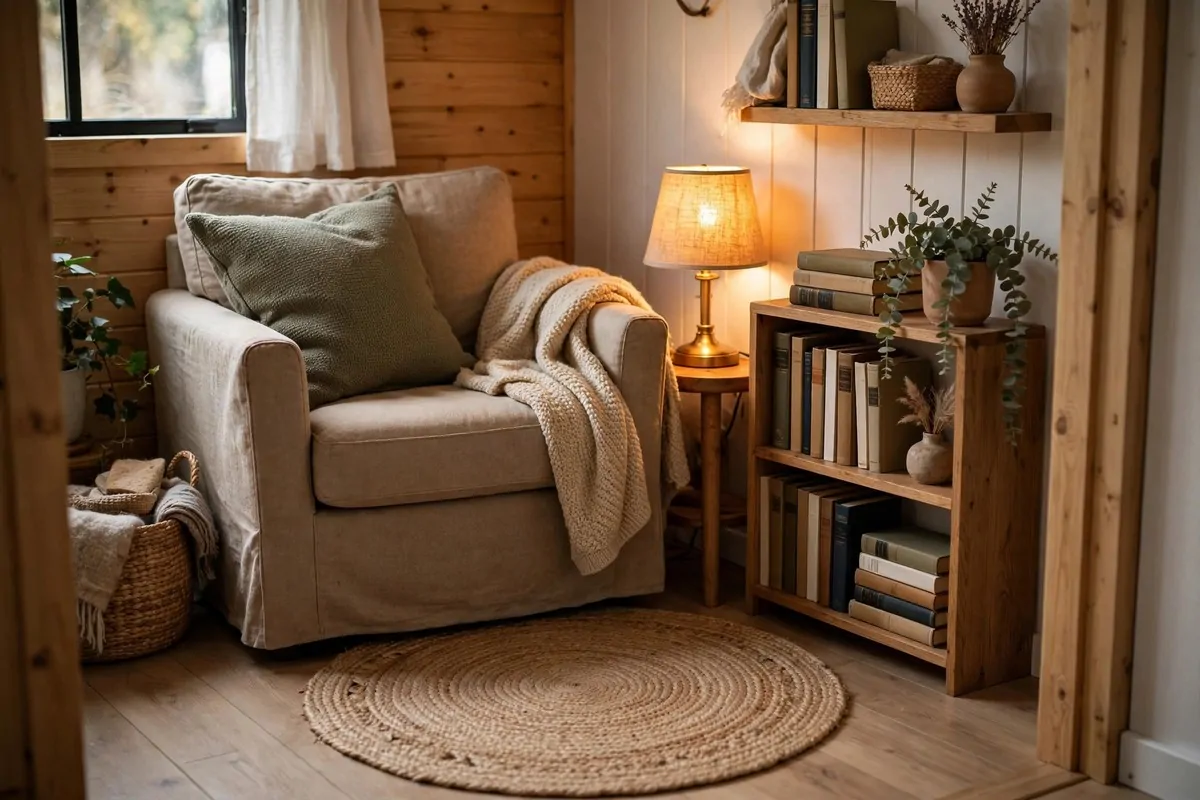
Open-plan tiny homes have one problem. Everything blends into one big room. Rugs fix that without walls.
A small round rug says: this corner is its own place. Reading nook here. A rug under the sofa says: living room here. Your brain gets the zones.
Round rugs are softer on the eye in small spaces. Squares and rectangles add hard lines. Round adds flow. It feels less boxed in.
- Size the rug to the furniture, not the room. Front legs on the rug is the rule.
- Low-pile rugs are easier to clean in tiny homes.
- Jute and cotton rugs add warmth without heaviness.
I put a round rug under my reading chair and it became my favorite corner overnight. Same chair, same lamp. The rug made it a destination.
Layer rugs if you are brave. A flat jute rug with a soft smaller rug on top. Cozy and it looks styled.
Washable rugs are the tiny house hero. Drag it outside, hose it down. Done. No dry cleaner needed.
Skip the wall-to-wall look. One rug per zone, floor showing between them. The visible floor keeps the space feeling open.
Rug pads stop slipping. In a tiny house, a sliding rug is annoying fast. A thin pad fixes it and adds a little softness.
Rugs are cheap zone-makers. No walls, no furniture, no construction. Just a circle of fabric that tells your brain where things happen.
23. Lay Light Floors in One Long Direction
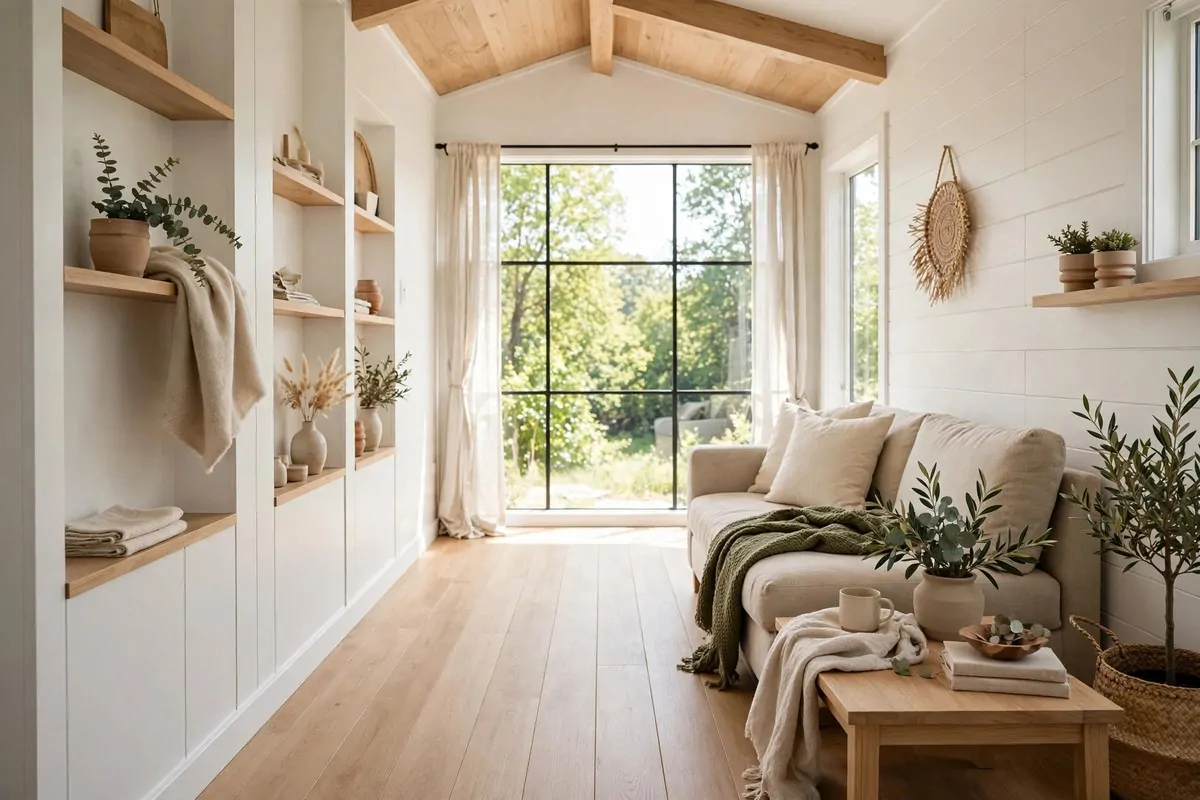
Flooring has a direction. Lay the planks running toward the longest view and the room stretches. It is a simple visual trick that really works.
Light floors bounce light. Dark floors absorb it. In a tiny house, light floors win almost every time. Oak, ash, pale laminate. All good picks.
Run one floor through the whole house. No breaks between rooms. Every break is a visual stop sign. One flow is one bigger space.
Wide planks look calmer than narrow ones. Fewer seams, less busy. In a small space, calm reads as big.
- Lay planks lengthwise toward the main window or the longest wall.
- Keep one floor material for the whole ground floor if you can.
- Light colors visually expand. Medium wood is the darkest I would go.
I once saw a tiny house where the floor changed three times in 300 square feet. It felt like a maze. One floor would have doubled the calm.
Luxury vinyl plank is the tiny house favorite. Tough, waterproof, easy to install, looks like wood. It handles tiny-house life well.
Big tiles work in the bathroom. Large format tiles mean fewer grout lines. Fewer lines, calmer look, bigger feel.
Mats at the door save the floor. One doormat inside, one outside. Tiny floors show dirt fast. Catch it at the door.
Your floor is the biggest surface in the house. Get it light and flowing and everything above it feels lighter too.
24. Carve Out a Pocket Office
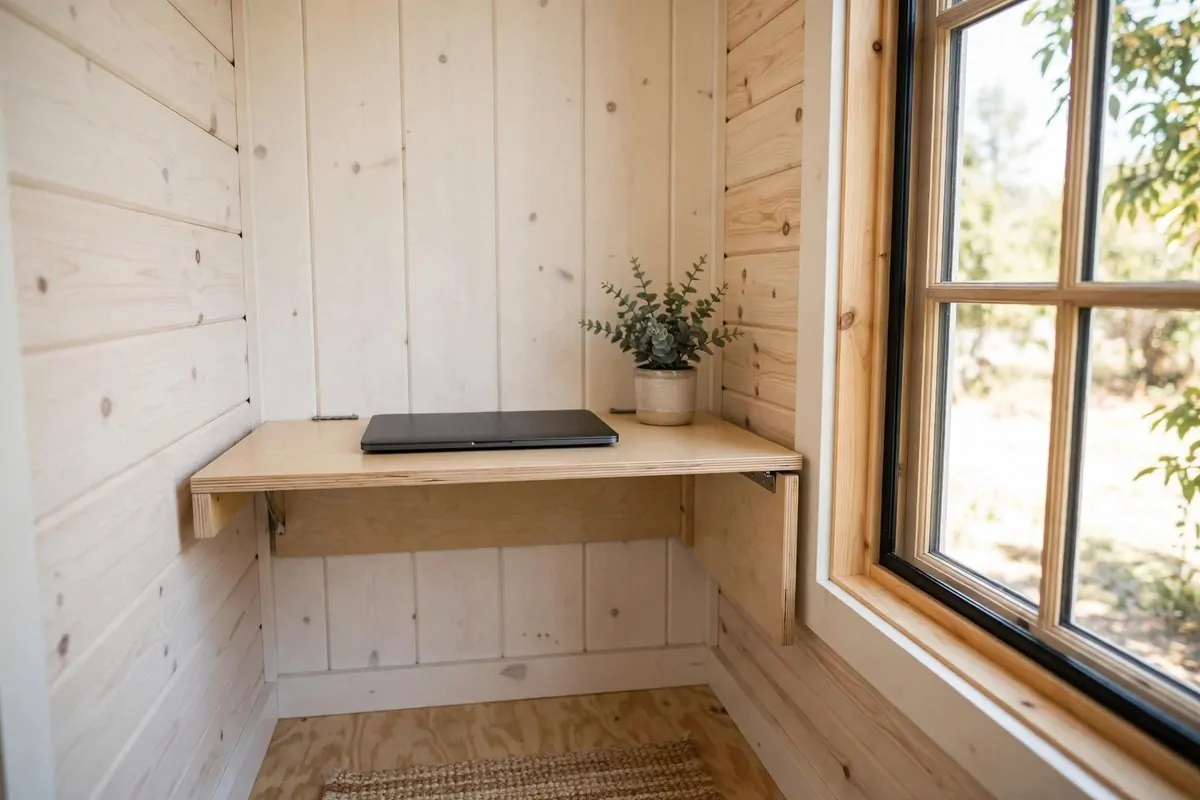
Working from the couch gets old. But a full office needs a room you do not have. The pocket office is the middle path.
It is tiny. A fold-down desk, a chair that tucks in, a shelf above. When work ends, the desk folds up and the corner is a corner again.
The best spot is near a window. Daylight keeps you awake better than coffee. A corner you barely use is perfect. Dead space becomes work space.
- Fold-down desks vanish when the workday ends.
- A good chair matters more than a big desk. Your back will thank you.
- Keep office stuff in one box or drawer. Clutter kills the corner.
I worked from a pocket office for a year. Folding the desk up at 6pm felt like leaving the office. My brain learned the difference fast.
Light it well. A small desk lamp beats overhead light for video calls. Your face looks better and you look more awake.
Cable control is the secret. One power strip, cords tucked away. Messy cables make the smallest corner look like a server room.
If two people work from home, stagger the corners. One pocket office by the window, one in the loft. Headphones help. Boundaries help more.
A pocket office costs almost nothing. A desk, a lamp, a chair you already own. But it changes how a tiny house feels every single weekday.
Work deserves its own spot, even a tiny one. Your couch deserves to go back to being just a couch.
25. Make the Bathroom Shine With Mirrors and Tile
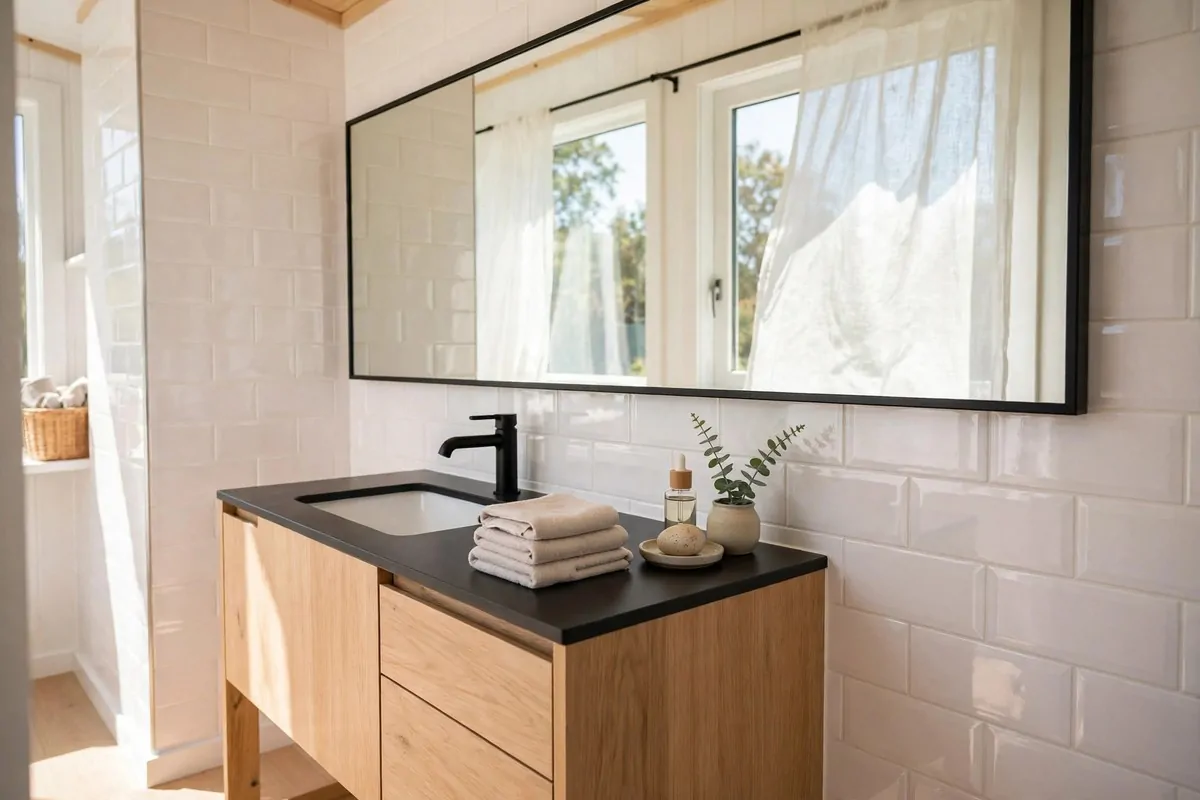
The bathroom is the smallest room and the easiest to brighten. Mirrors and glossy tile bounce every bit of light around.
Go big on the mirror. As wide as the vanity, as tall as you dare. It doubles the room visually. It is the cheapest square footage you will ever buy.
Glossy light tiles reflect light. Matte dark tiles absorb it. In a tiny bath, glossy wins. You do not need much. One wall of pretty tile is enough.
- A wide mirror above the vanity is the number one move.
- Glossy subway tile is classic and affordable.
- Keep the counter clear. One soap, one small plant.
I once used a tiny bathroom with a mirror that covered the whole wall. It felt like a normal bathroom. The real size was barely bigger than a closet.
Light fixtures matter too. A bright light above the mirror beats a dim ceiling light. You see yourself better and the room glows.
Avoid heavy shower curtains here too. Glass or a light liner. We covered this in idea 5, but it is worth repeating. The curtain is the enemy.
Small bathrooms forgive bold tile. One patterned floor or one accent wall. In a big room it would be loud. In a tiny bath it is jewelry.
Keep towels light colored. Dark towels in a white bathroom look like holes. White or cream towels keep the glow going.
This whole bathroom refresh can cost very little. Mirror, light, clear the counter. Three moves, huge change.
26. Borrow the View Outside
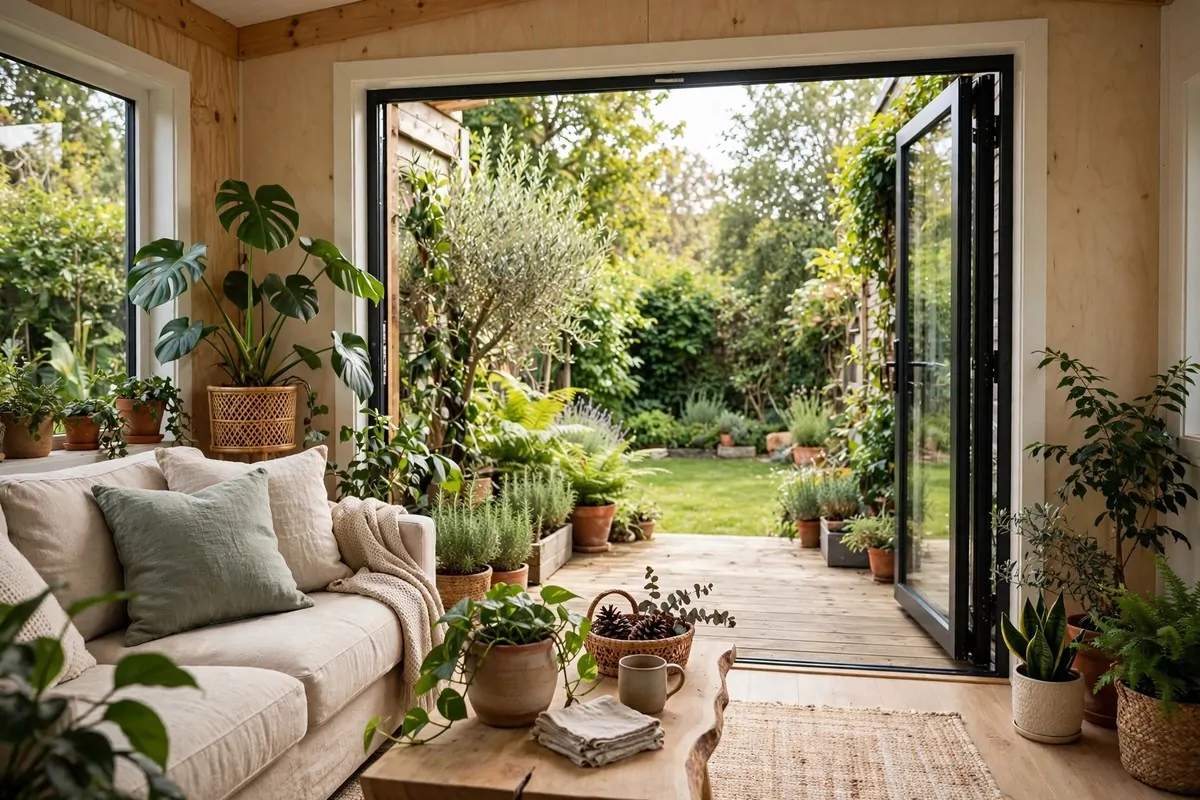
Here is the biggest trick on the list. Your house ends at the walls. Your view does not have to.
Big glass doors that open to the outside erase the boundary. Inside and outside become one space. A 300-square-foot house with a deck feels like 600.
Even without doors, a big window facing the garden borrows that view. Your eye travels past the glass. The room feels deeper.
Keep the view clear. No heavy curtains, no clutter on the sill. The window is a picture frame. Let the picture show.
- Glass sliding doors are the dream, but big windows work too.
- A small deck or patio doubles as your second living room.
- Line up the indoor rug with the outdoor mat. The flow feels endless.
I drank morning coffee in a tiny house with the back doors wide open. Birds, breeze, green everywhere. The house felt huge. It was 250 square feet.
Plants inside near the glass blur the line further. Inside green meets outside green. Your brain stops noticing the wall.
If your view is not pretty, make it pretty. A few pots on the patio, a little fence, some string lights. You are framing your own painting.
Privacy matters. A tall planter or a simple screen keeps neighbors out of your view. You keep the openness, they keep their distance.
This is the heart of Tiny House Inspiration Interiors. The best tiny homes do not fight their size. They open up and let the world in.
That is all twenty six. Twenty six ideas that make small feel spacious. Now let me tell you the part that matters most.
You do not need all of them. Start with the ones that made you nod. Paint, a mirror, better light. Small moves, big feeling.
Tiny houses are not about living with less space. They are about living with more intention. Every inch gets a job. Every corner gets loved.
Pick three ideas from this list this weekend. Just three. Then stand in your doorway and look at your home with fresh eyes. I think you will feel the difference.
Your tiny house is not too small. It is just waiting for the right ideas. Now you have twenty six of them. Go make it feel like yours.