23 Walk-In Shower Ideas That Make Bathrooms Feel Like a Spa

The first shower I took in our new walk-in shower felt like stepping into warm rain. I stood there a little longer than I needed to. The warm water ran down my back and my shoulders felt loose for the first time that day.
Our old shower was small and dark. I had to push a stiff door and step over a high tray every time.
I wanted a shower that felt open and calm.
We took out the old tray and the door. We made the floor flat and the walls plain. It took a few weeks, but it was worth every day of dust.
Now I walk in with no step and no door in my way. The room feels bigger, and my mornings feel slower.
I learned a lot while we built it, and I made a few small mistakes too.
You will find all 23 ideas in this one post. I put them here so you can read them in one go and pick the ones you love for your own home.
1. Go Doorless for a Clean Look
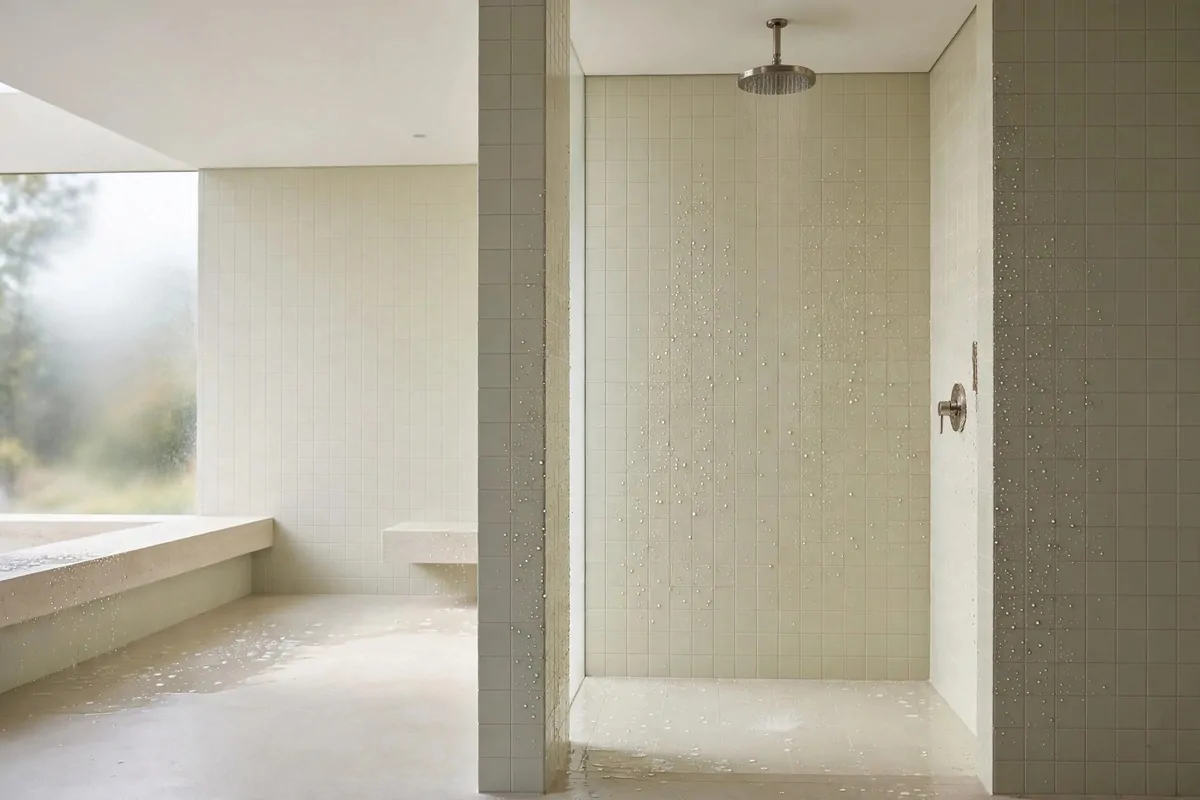
A doorless shower makes the whole room feel open the moment you walk in.
There is no glass door to push or pull. You just step in and the space feels calm and wide.
I love how the floor runs in one smooth line from the rest of the room.
Our old shower had a door that always left marks. I wiped it every day and it still looked dull. Now there is nothing to wipe on the way in.
You need a good slope on the floor so water runs to the drain. A builder can check the fall before you start.
A wide opening works best if you have room to spare.
I keep a small mat just outside the wet area. It soaks up the few drops that wander out.
My builder charged $900 to $1800 to open the floor and set the new drain. That price covered the floor work and the new waste pipe. I paid a little more because our old floor was uneven.
If you like a simple and open feel, this is a lovely place to start.
2. Add a Glass Panel to Keep Water In
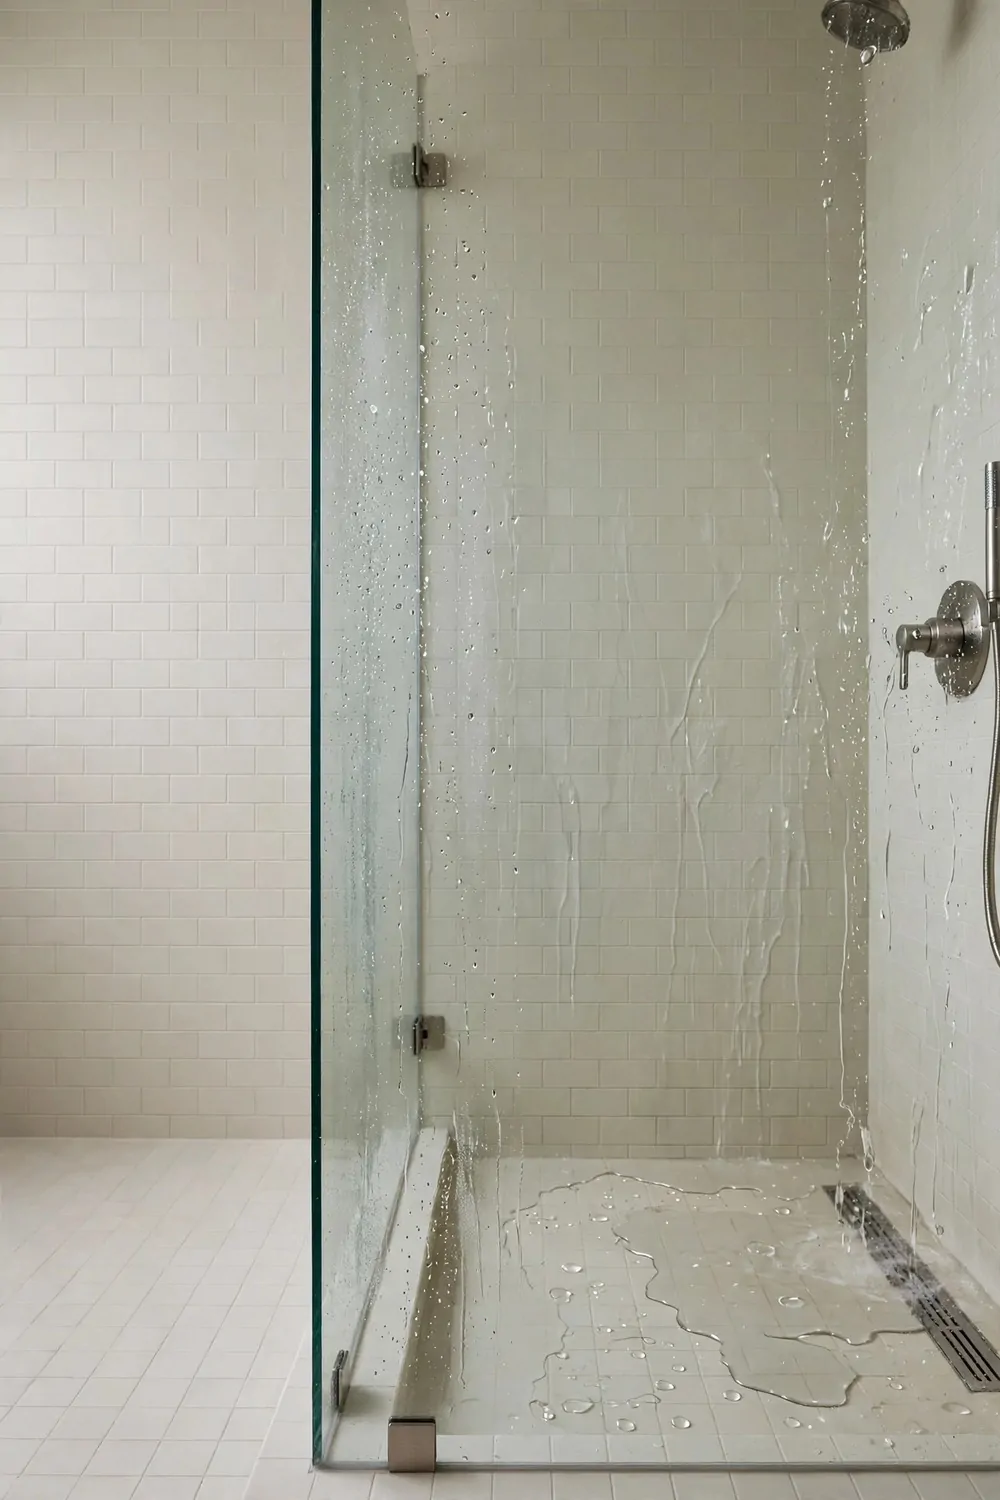
A glass panel keeps the water where it belongs without closing the room in.
It stops most of the spray from reaching the dry floor. You can still see right through it, so the room stays bright.
I picked a clear panel with no frame on the top edge.
It makes the shower feel bigger than it is. The light moves through the glass and the tiles show up well. I clean it with plain soap and water.
A fixed panel is simple because it does not move. There are no hinges to fix later.
Measure the gap well before you order the glass.
I set aside $250 to $600 for the panel and the fixings.
My panel is just wide enough to block the spray from the shower head. I can step round it with ease and it never feels in the way.
A short panel can work in a small room too, if the head points away from the gap.
3. Pick Large Tiles for Fewer Lines
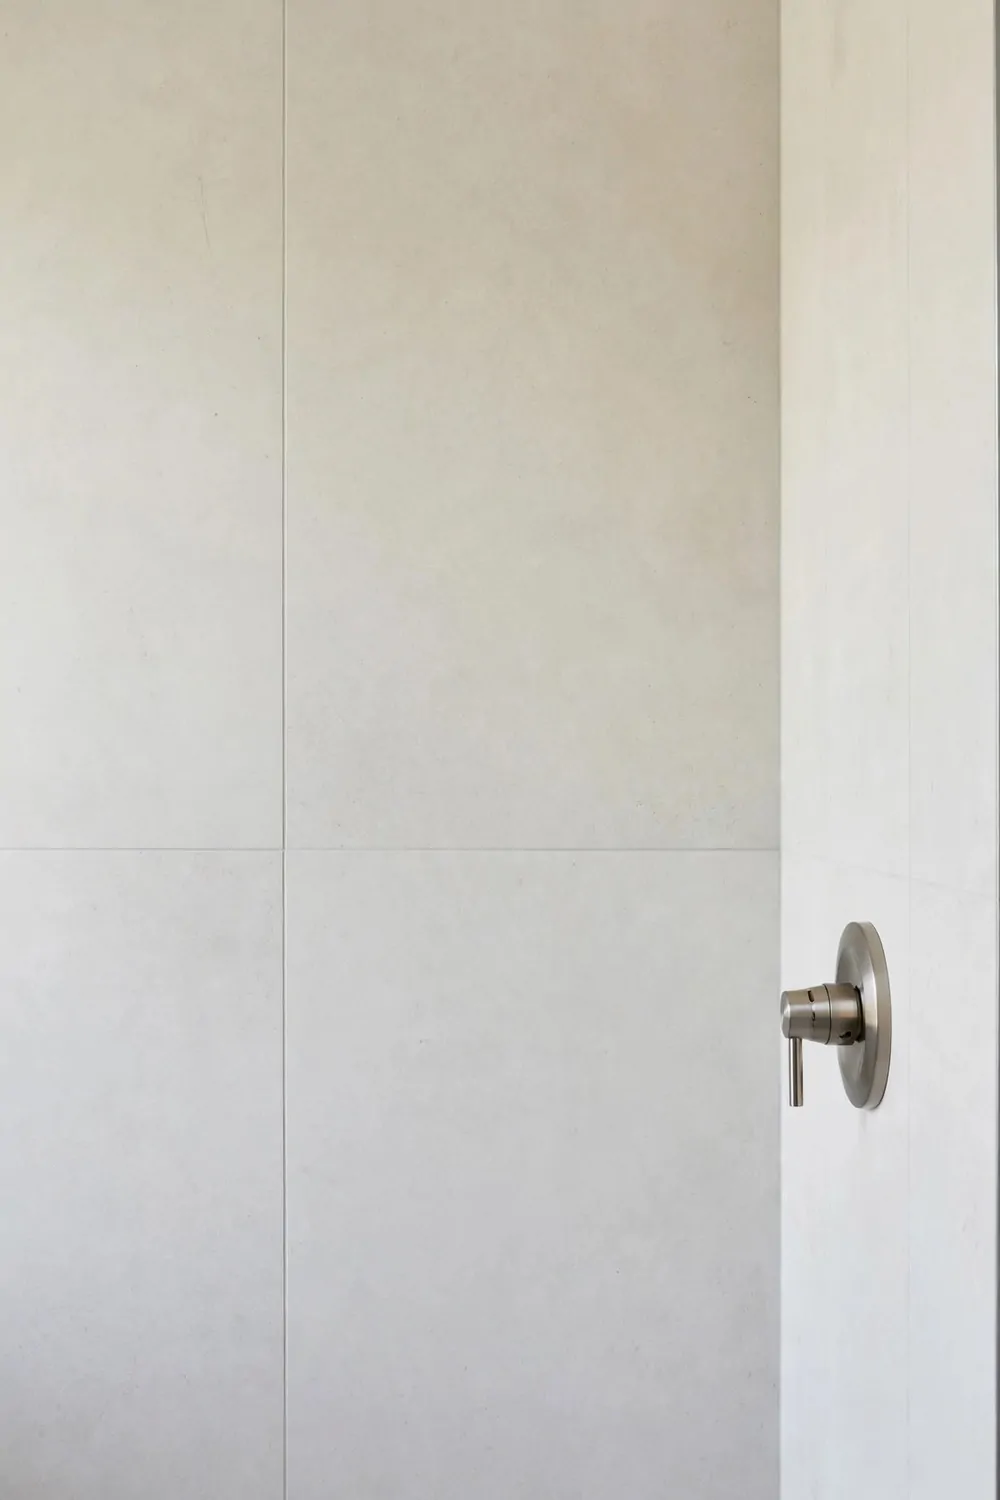
Large tiles make a shower wall look calm and tidy.
There are fewer lines across the wall, so your eyes rest. The room feels less busy and a little bigger.
I chose big plain tiles in a soft warm white.
They show less dirt than small busy tiles did in our old shower. I wipe them down fast after a shower. The wall dries in no time.
You need a flat wall for large tiles to sit well.
A good tiler will take time with the first row, and the rest will follow.
Large tiles and fitting ran $800 to $1600 in my small bathroom.
I kept the grout a pale grey so the lines blend in. It still looks neat after months of use.
If you want a quiet and clean look, big tiles are a safe pick.
4. Add a Rain Shower Head
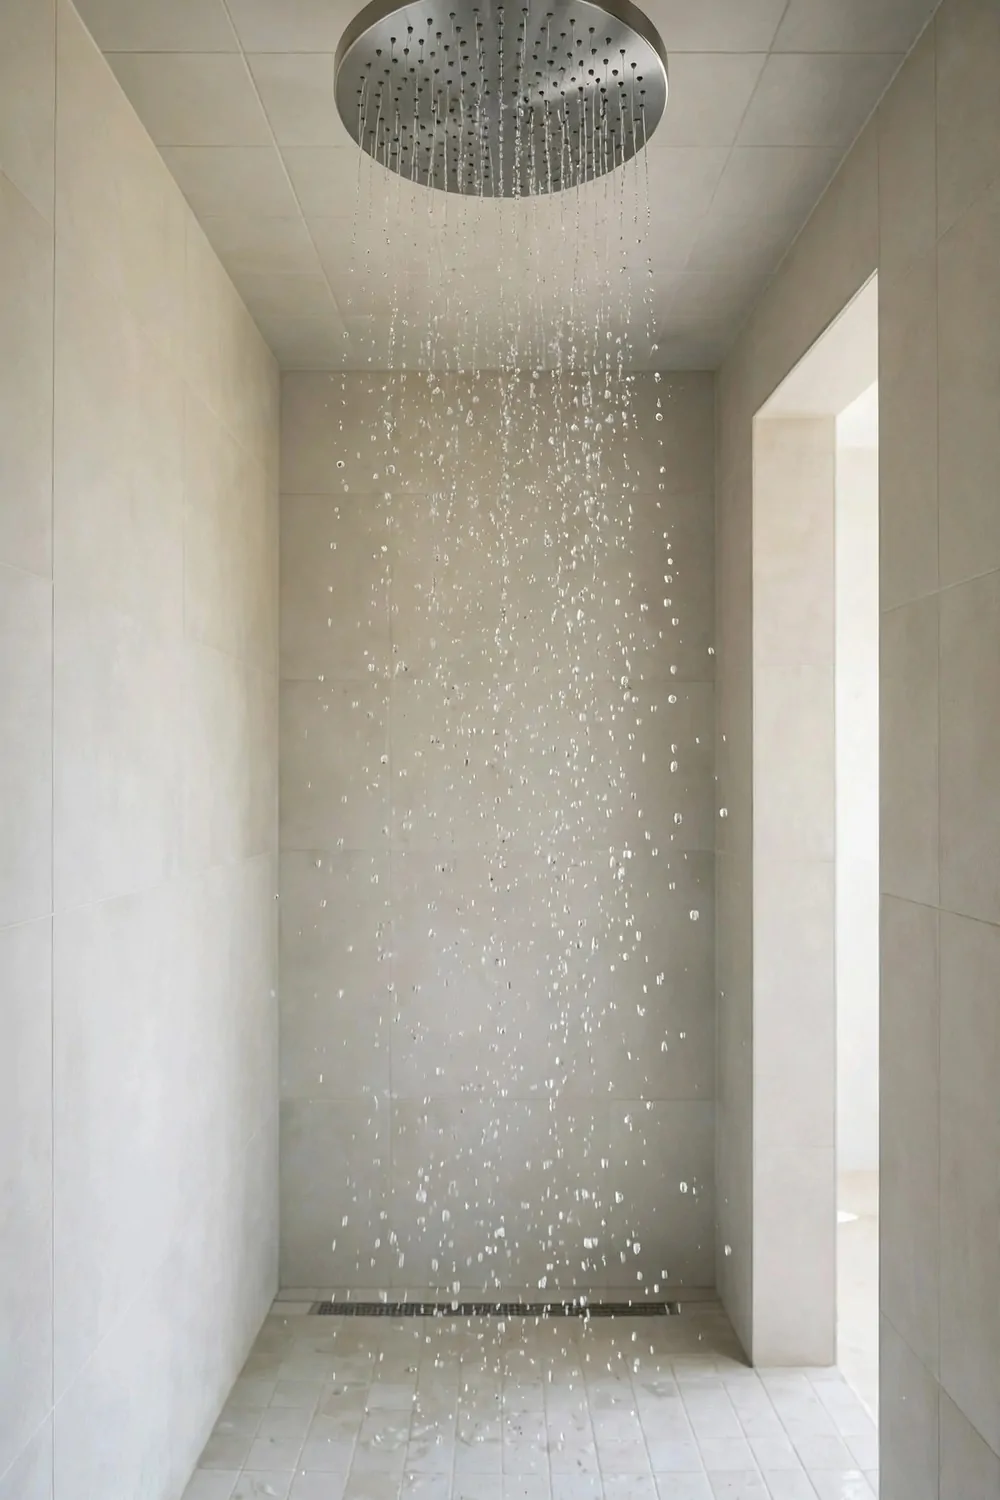
A rain shower head turns a quick wash into a slow and soft treat.
The water falls straight down in a wide and gentle spread. It covers your head and shoulders all at once.
I stand under it for a minute before I wash.
It feels like warm rain on a summer day, but inside your own home. I close my eyes and let the water run. My shoulders drop and I breathe out slow.
You can fit one on the ceiling or high on the wall.
A high fit gives the water room to fall soft and even.
A rain head and fitting came to $120 to $300 in my home.
I keep the flow low on busy mornings. On slow days I let it run a little longer and enjoy the calm.
It is a small change that makes a big difference to how the shower feels.
5. Fit a Handheld Shower Head
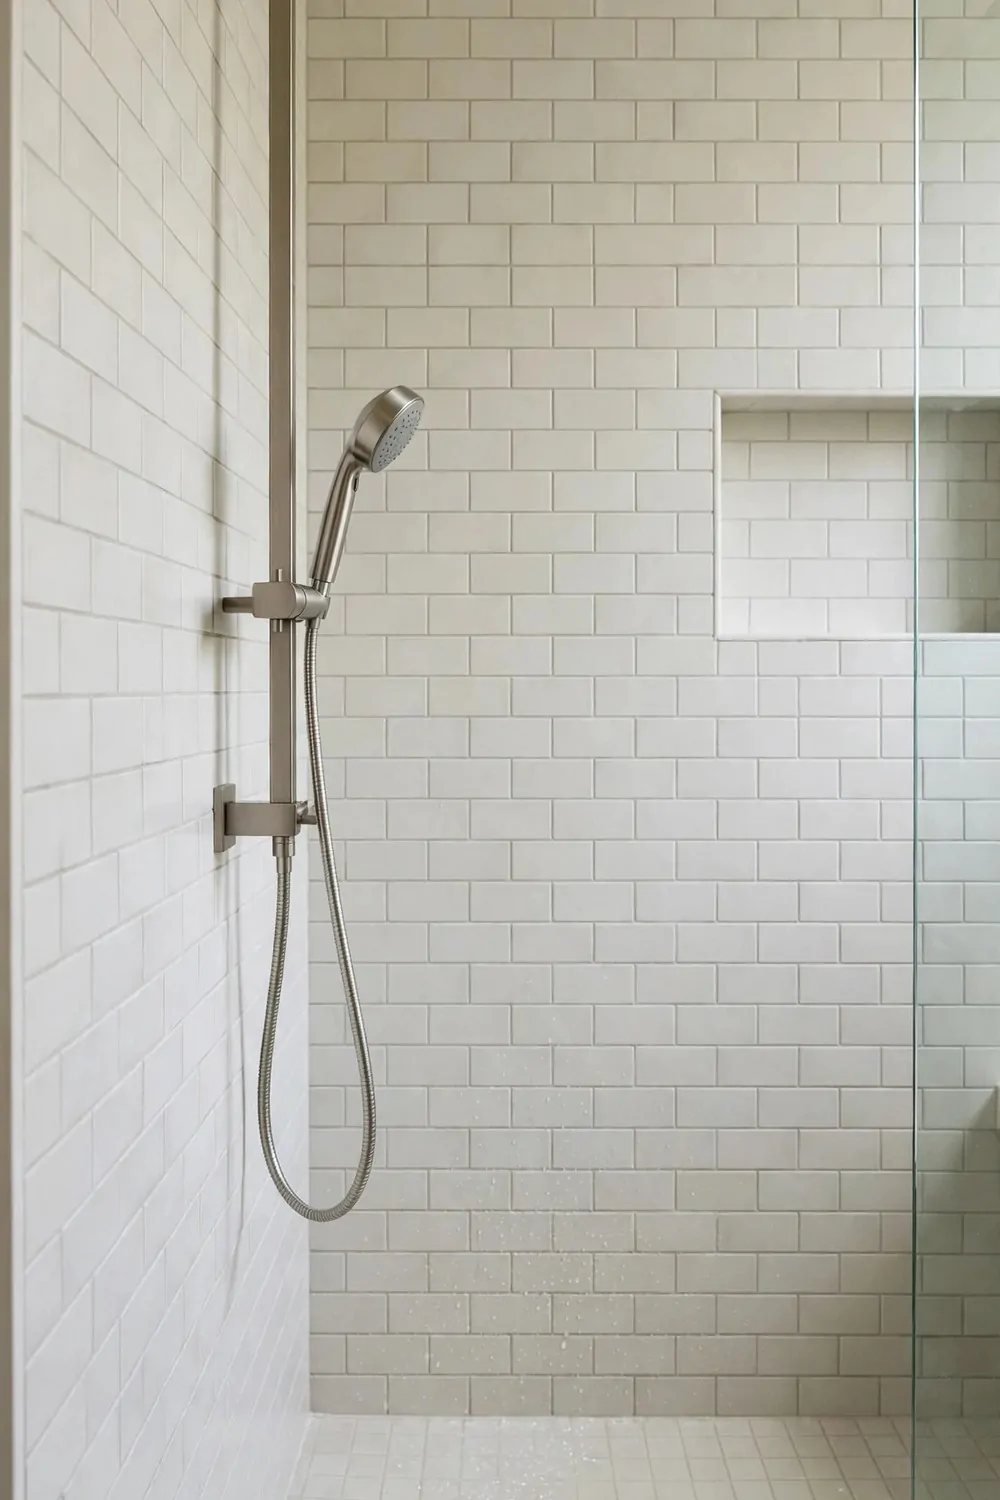
A handheld shower head is one of the most useful things in my shower.
You can move it where you need it. It helps you wash your hair and rinse the walls too.
I use it to wash my feet after a long day.
It is also handy for cleaning the shower itself. I rinse the tiles and the bench with it in seconds. The floor stays clean with very little work.
Pick a hose that is long enough to reach the far corner.
A holder on the wall keeps it neat when you are done.
I spent $90 to $220 on a good handheld head and a long hose.
My kids use it to rinse off after play outside. It makes bath time much easier for all of us.
A handheld head is cheap, simple, and worth every penny.
6. Add a Built-In Bench
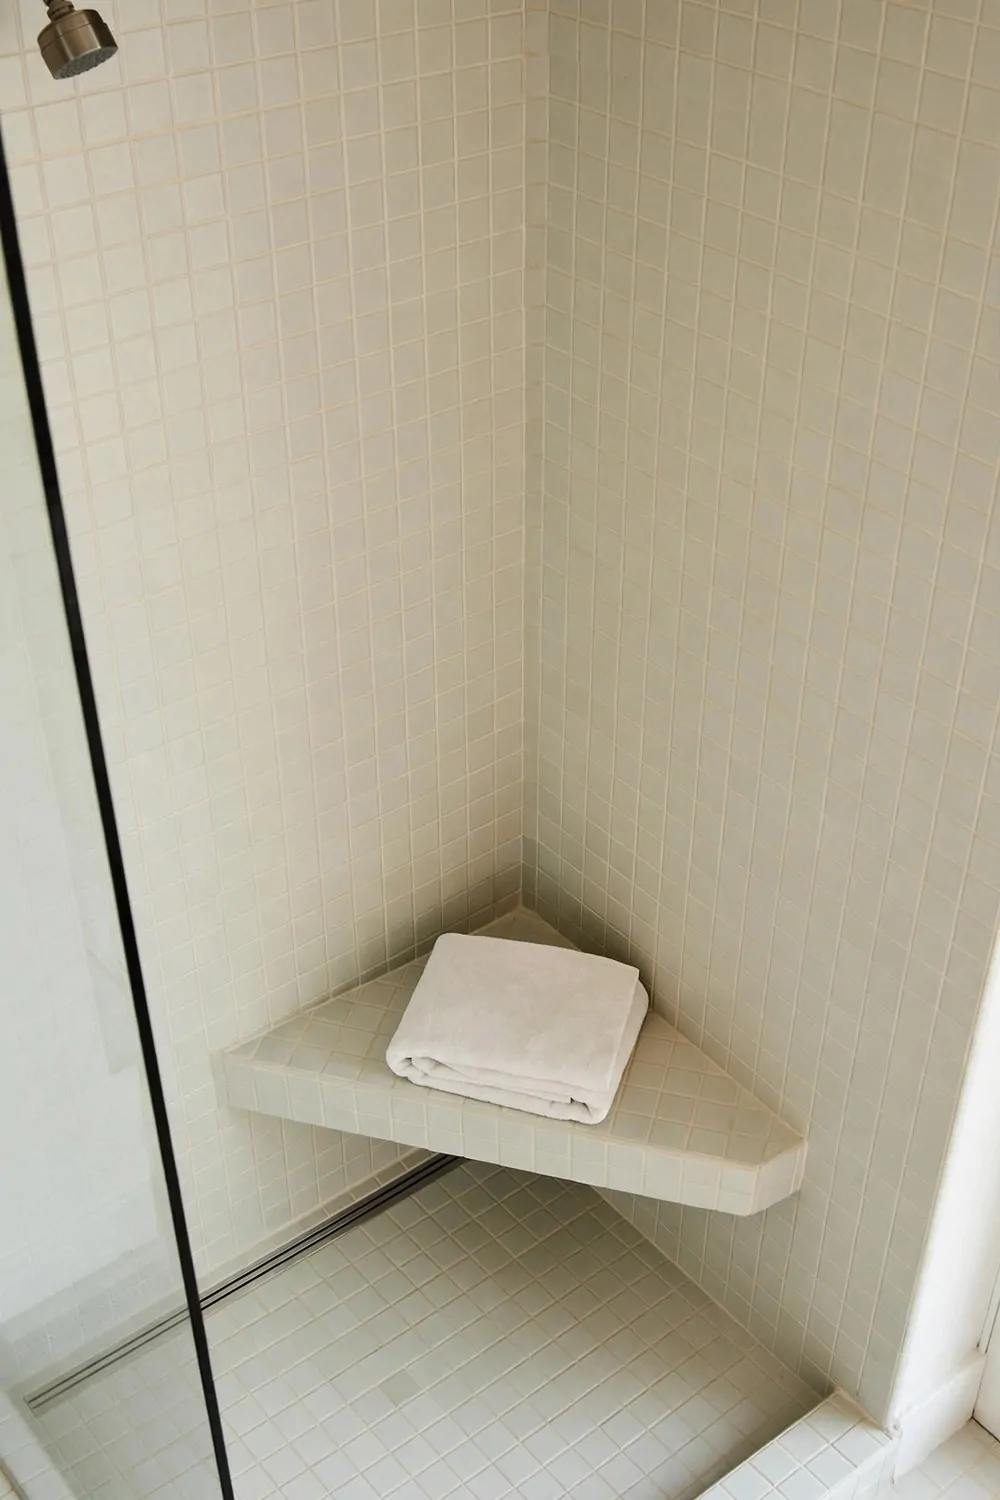
A built-in bench gives you a place to sit and slow down.
I sit on mine while I wash my legs. It is also a good spot to rest a foot while I shave.
It feels solid because it is part of the wall.
We tiled it to match the shower walls. It blends in so well that guests often miss it at first. It still holds towels and bottles when I need it to.
A bench needs a good slope so water runs off it.
Ask your builder to tilt it a little toward the drain.
A tiled bench like mine cost $400 to $900 to build.
I put a folded towel on it when I want a soft seat. It dries fast and the tiles stay cool in summer.
If you like long and slow showers, a bench is a must.
7. Add a Niche for Bottles
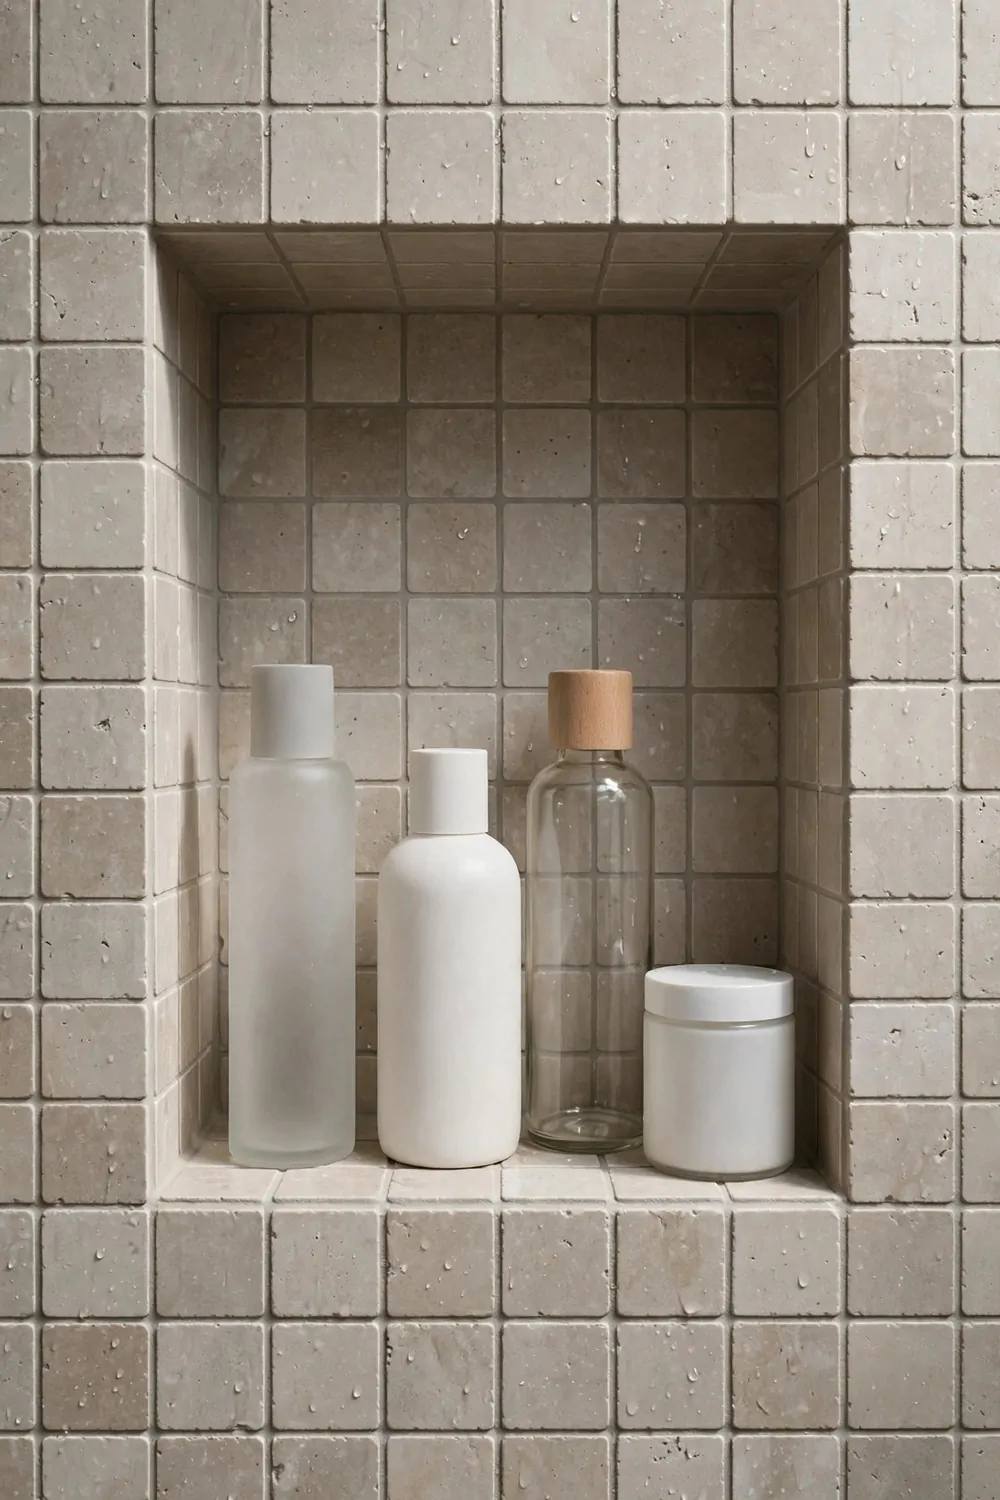
A niche is a small shelf cut into the shower wall.
It holds your bottles out of the way. There is no more clutter on the floor or on the bench.
I keep my soap and wash bottles in mine.
It keeps the bottles at hand height. I can reach them without bending down. The shelf stays neat because each bottle has its own spot.
A niche works best on a wall that is not too thin.
Your builder can tell you which wall will suit it.
My niche cost $150 to $350 to cut in and tile.
I added a small lip at the front so bottles do not slide off. It has saved many bottles from a fall.
A niche is a small detail that makes daily showers much easier.
8. Use Pebble Tiles on the Floor
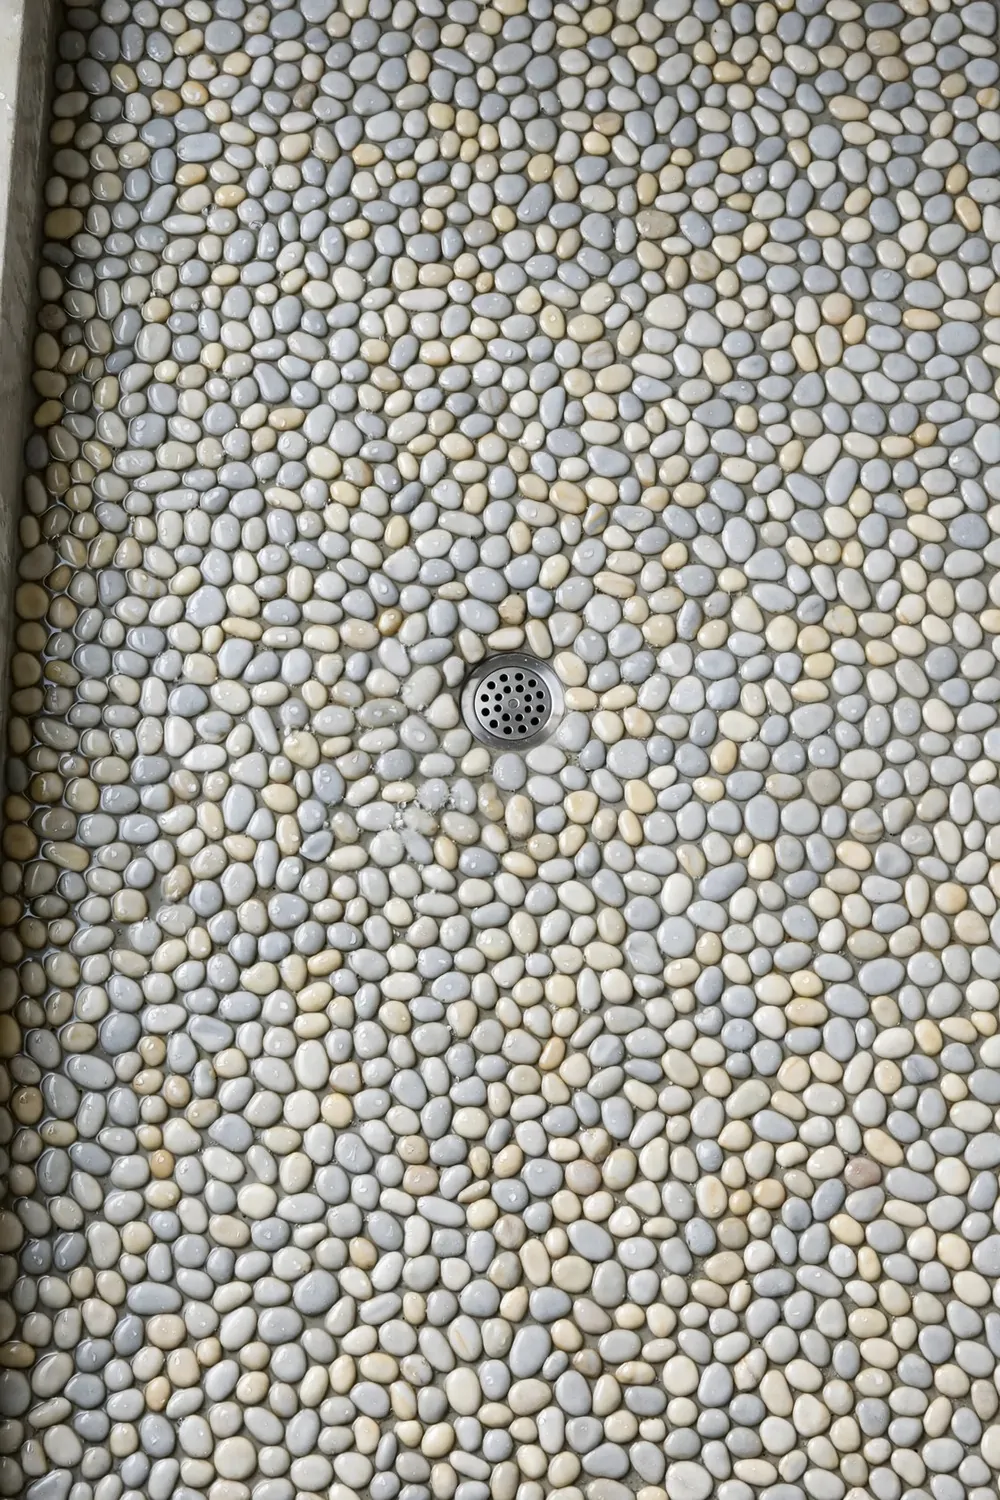
Pebble tiles on the floor feel lovely under bare feet.
Each stone is smooth and round. They give your feet a soft rub as you stand and wash.
I love the natural look they bring to the room.
They suit a spa feel because they look like river stones. The mix of soft greys and creams warms the floor. I smile every time I step on them.
Pebbles need good grout to hold them firm.
A sealer helps keep the stones looking fresh.
Pebble tiles for my floor came to $300 to $700 with fitting.
I rinse the floor well after each shower. Plain soap and water keep the stones clean and bright.
If you want texture under your feet, pebbles are a warm choice.
| Idea | Typical Cost |
|---|---|
| Go Doorless for a Clean Look | $900 to $1800 |
| Add a Glass Panel to Keep Water In | $250 to $600 |
| Pick Large Tiles for Fewer Lines | $800 to $1600 |
| Add a Rain Shower Head | $120 to $300 |
| Fit a Handheld Shower Head | $90 to $220 |
| Add a Built-In Bench | $400 to $900 |
| Add a Niche for Bottles | $150 to $350 |
| Use Pebble Tiles on the Floor | $300 to $700 |
9. Add a Long Drain
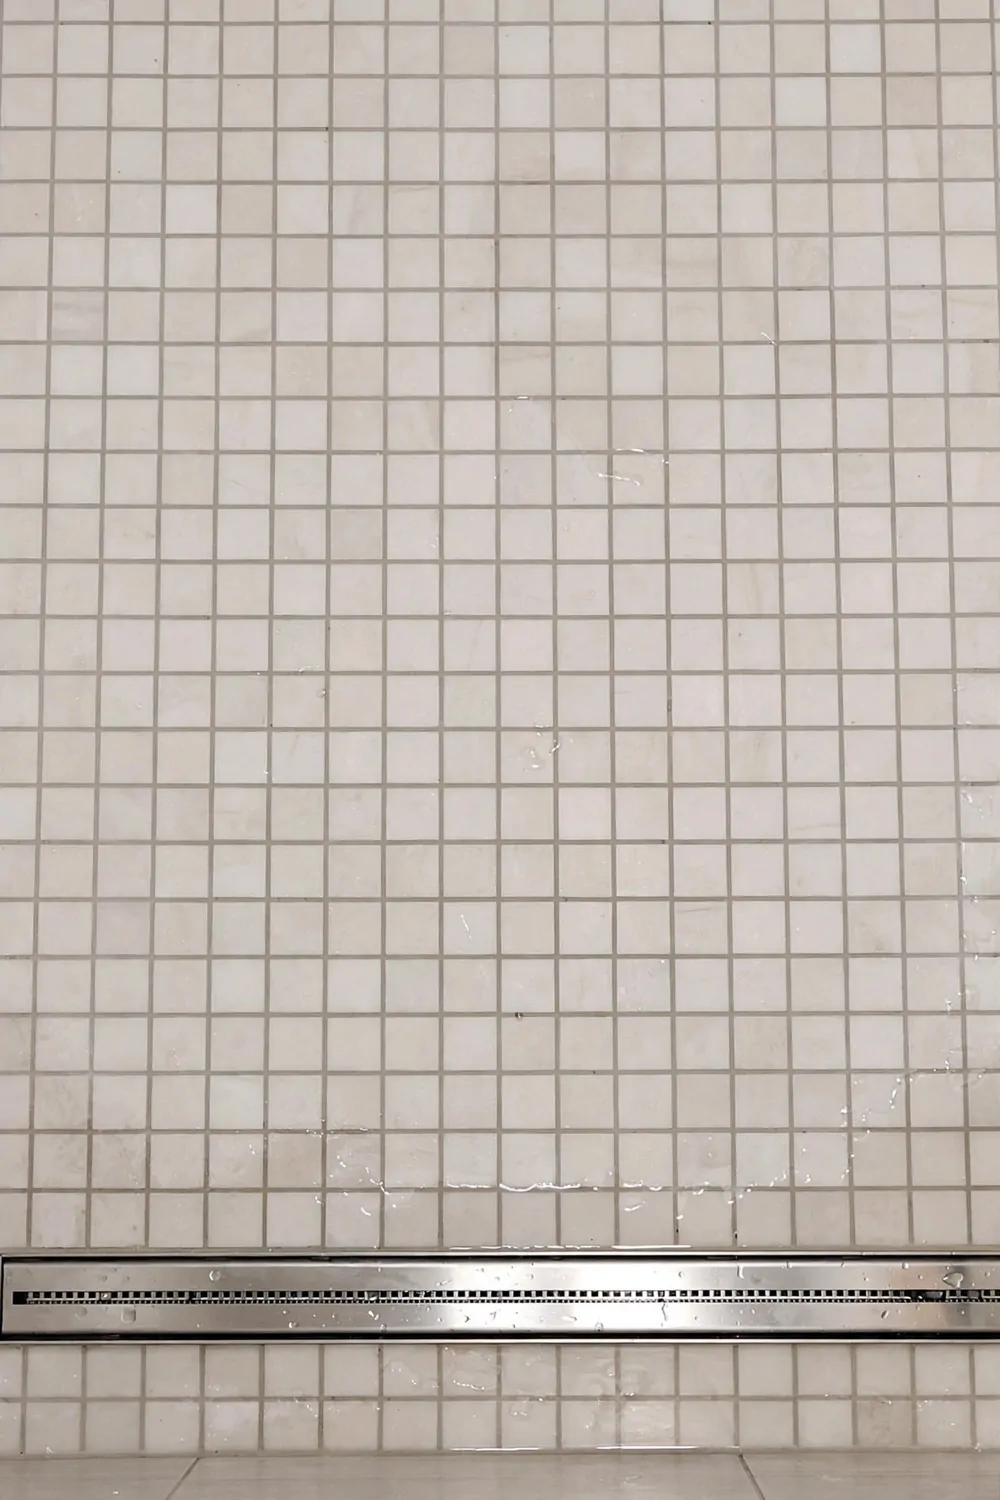
A long drain runs in a neat line along one edge of the floor.
It takes water away fast. You will not see puddles sit in the corners.
I like how clean and modern it looks.
It suits a doorless shower because the water has a clear path out. The floor stays safe to walk on. I never worry about water creeping to the dry side.
The floor must slope gently toward the drain line.
A builder can set the fall so the water moves well.
A long drain and the floor work cost $350 to $800 in my home.
I lift the cover once a week and clear any hair. It takes a minute and keeps the drain flowing free.
A long drain is a smart pick for a wide and open shower.
10. Pick a Matte Black Shower Set
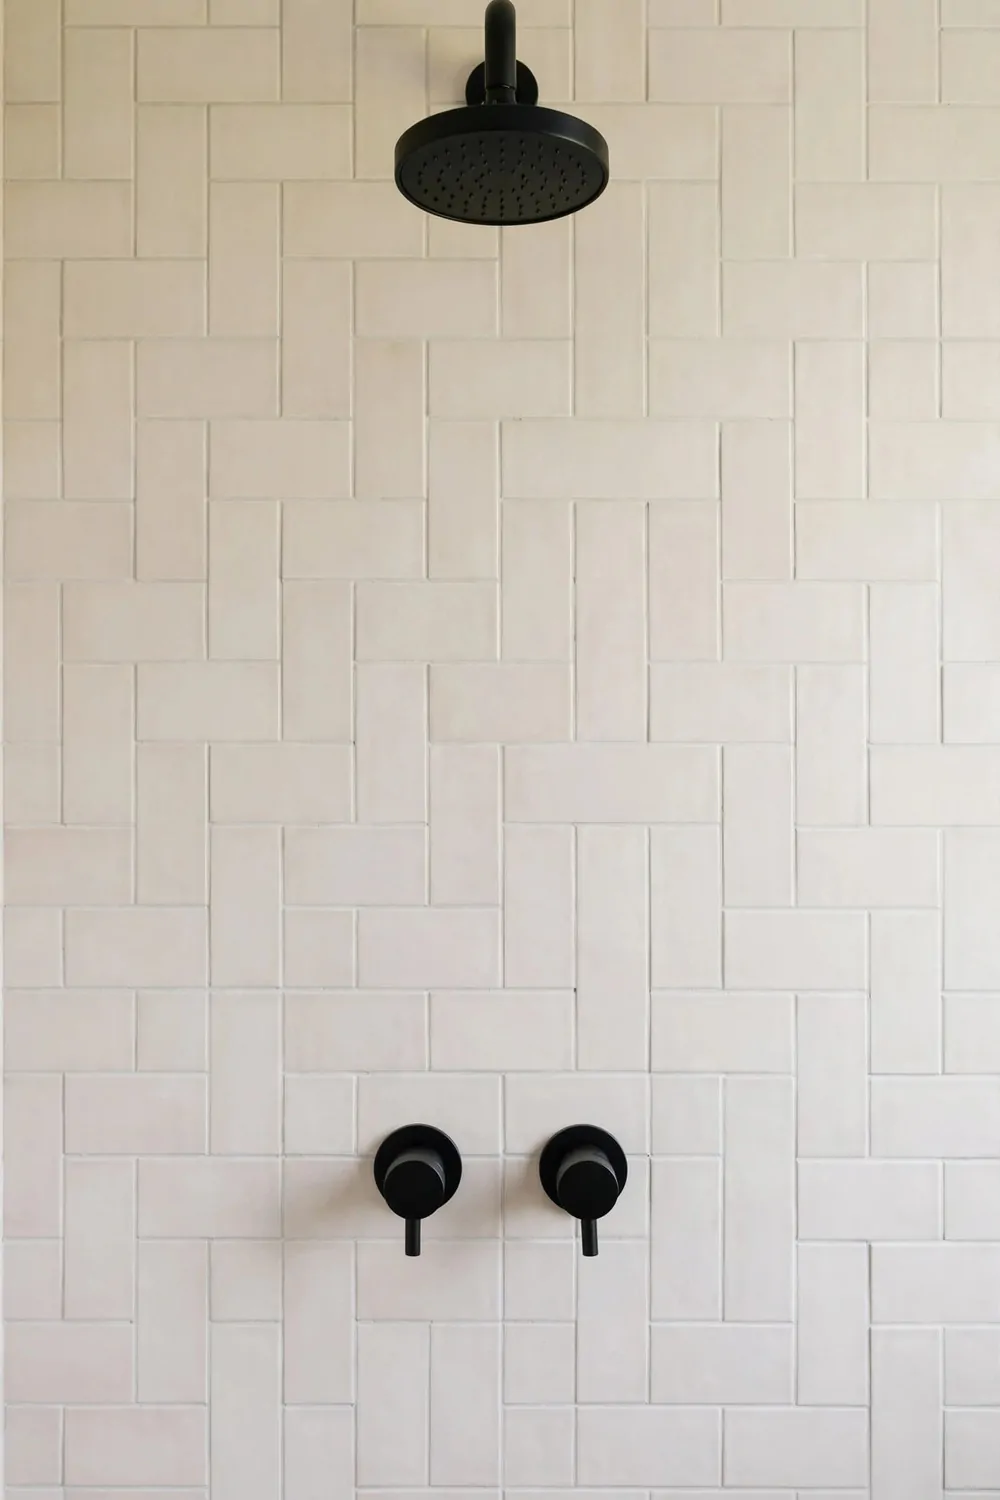
A matte black shower set adds a bold and modern touch.
The dark finish stands out against pale tiles. It gives the room a smart and tidy edge.
I picked black taps and a black shower head to match.
They look strong without feeling cold. The soft matte coat does not show marks as much as shiny chrome did. I wipe them with a soft cloth and they look new.
Keep the rest of the room light so the black does not feel heavy.
White tiles and a pale floor work well with it.
A matte black set cost me $200 to $500 in total.
I matched the black with dark hooks on the wall. The small details tie the whole room together.
If you want a modern look, black fittings are a simple way to get it.
11. Add Soft Lights in the Shower
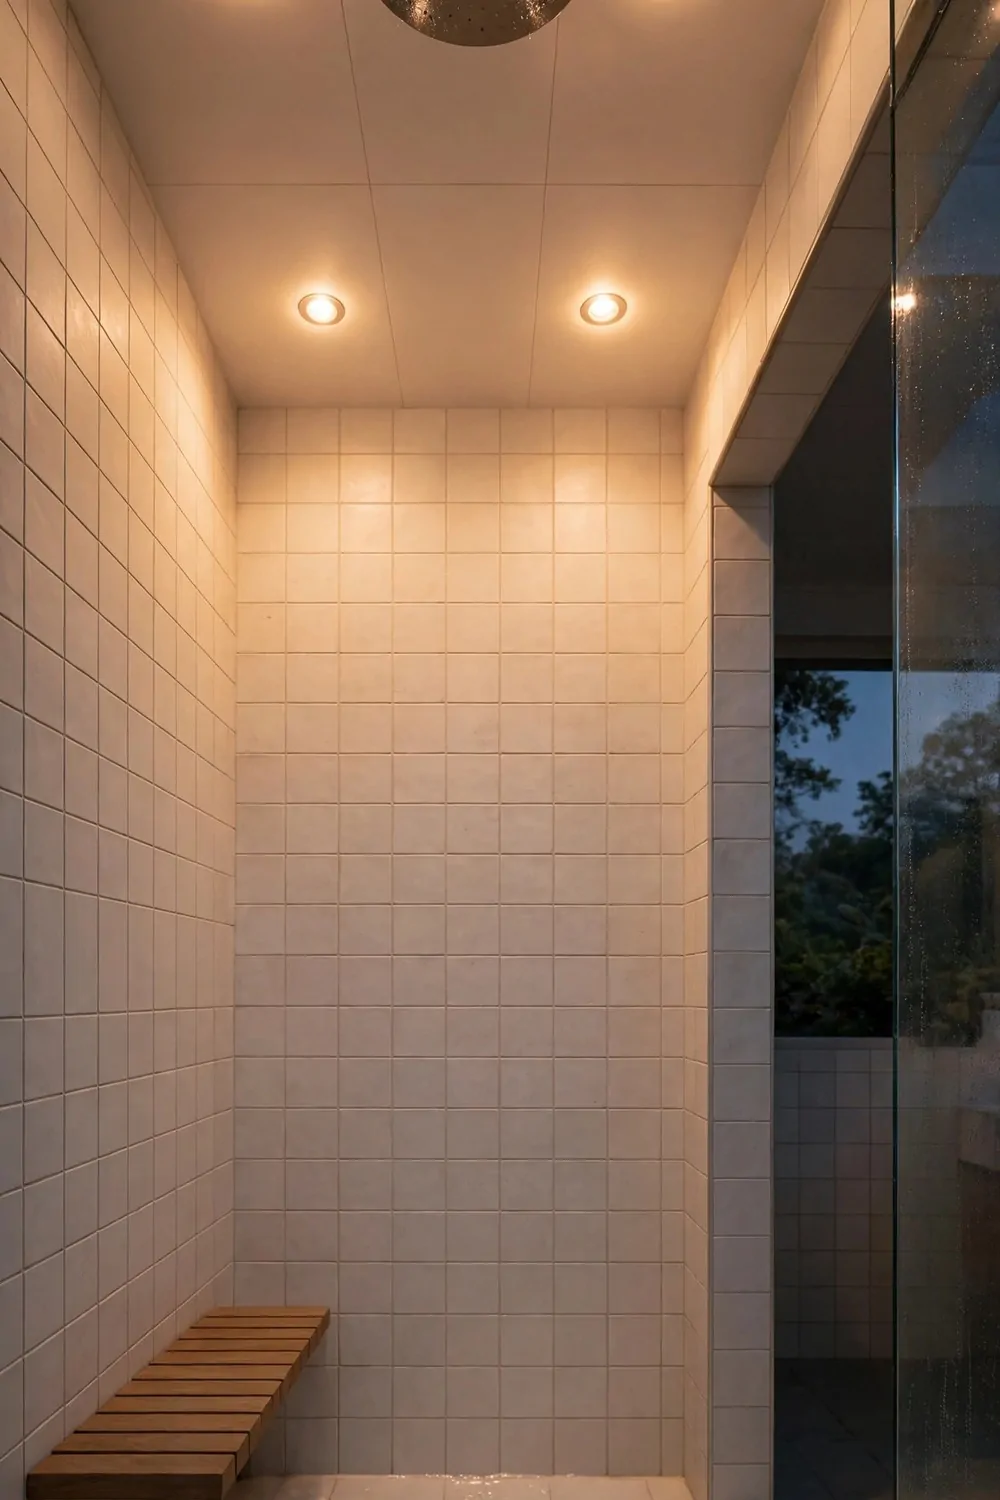
Soft lights in the shower make the whole room feel calm at night.
I switch them on for a late shower. The warm glow helps me wind down after a busy day.
They turn a plain shower into a quiet retreat.
We put small lights high in the ceiling, away from the spray. They cast a soft light on the tiles. The room feels warm and still, even on cold nights.
Use lights made for wet rooms only.
An electrician can fit them safe and check the wiring.
Soft lights in my shower cost $180 to $450 to add.
I keep the main light off when the soft lights are on. It feels like a small spa in my own home.
Soft light is a small touch that changes the mood a lot.
12. Use a Half Wall for Privacy
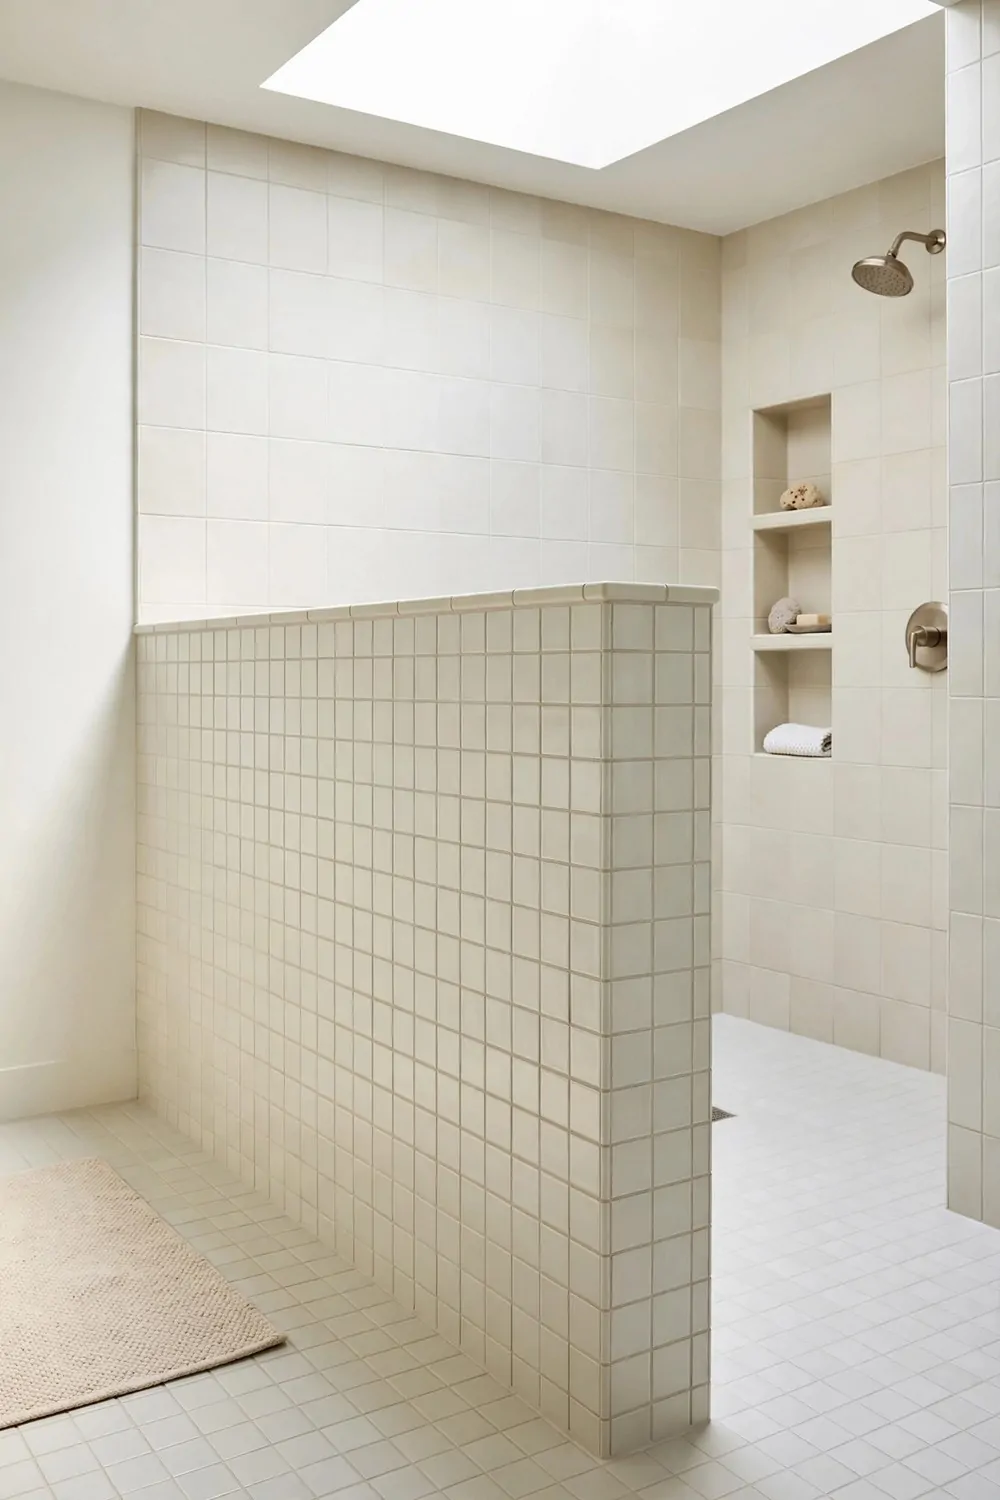
A half wall gives you privacy without closing the shower in.
It blocks the view from the door. You can still see light over the top of it.
I like how it keeps the room feeling open.
We built ours from blocks and tiled it to match the walls. It feels solid and it holds the shower head on one side. A small ledge on top holds a plant in a pot.
A half wall works well in a wide bathroom.
It can also hide the pipes and the drain run.
A half wall cost $600 to $1200 to build and tile.
I rest a towel on the ledge while I shower. It stays dry and close at hand when I step out.
If you want privacy and light at the same time, a half wall is a great pick.
13. Add a Frameless Glass Door
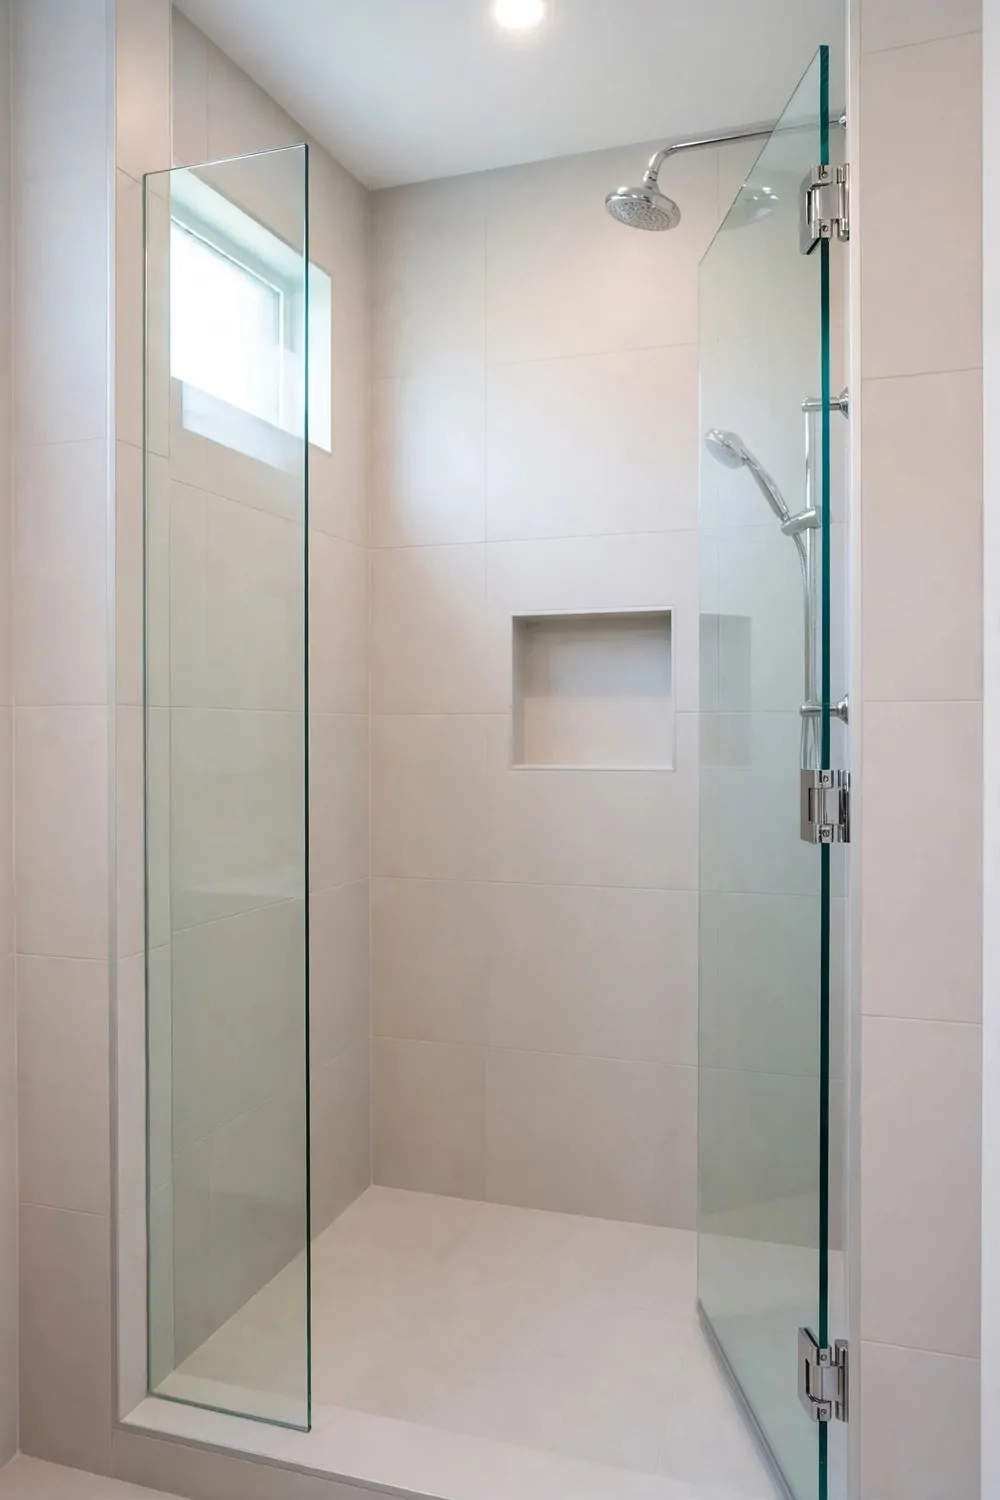
I love how a frameless glass door opens up a small shower. You can see right through it, and the room feels bigger in one second.
A thick glass panel keeps the water in while it lets the light pass through. I wipe mine down after I shower, and it stays clear for a long time.
You do not need a heavy frame around the edge to make it work.
I picked a door with plain hinges and a simple handle, and it looks calm and neat. You can pick clear glass if you want the most light, or a soft frosted look if you want a bit more privacy. It feels light, not heavy.
Ask your fitter to check the wall is straight before they order the glass. A wonky wall can leave a small gap, and that gap lets water sneak out onto the floor.
I keep a small squeegee on a hook right by the door. It takes me less than a minute to run it over the glass, and it stops spots from building up.
Most fitters will charge $900 to $1800 for the glass, the hinges, and the fitting work together.
If your shower is in a tight corner, a door that swings out can feel a bit awkward. A sliding panel or a fixed panel with a gap to walk through can feel much easier in that kind of space. A fixed panel can suit a small room best.
I think this one change makes the whole bathroom feel fresh. You walk in, you see tile and light, and the shower feels like a real part of the room.
14. Fit a Mixer Tap You Can Set Once
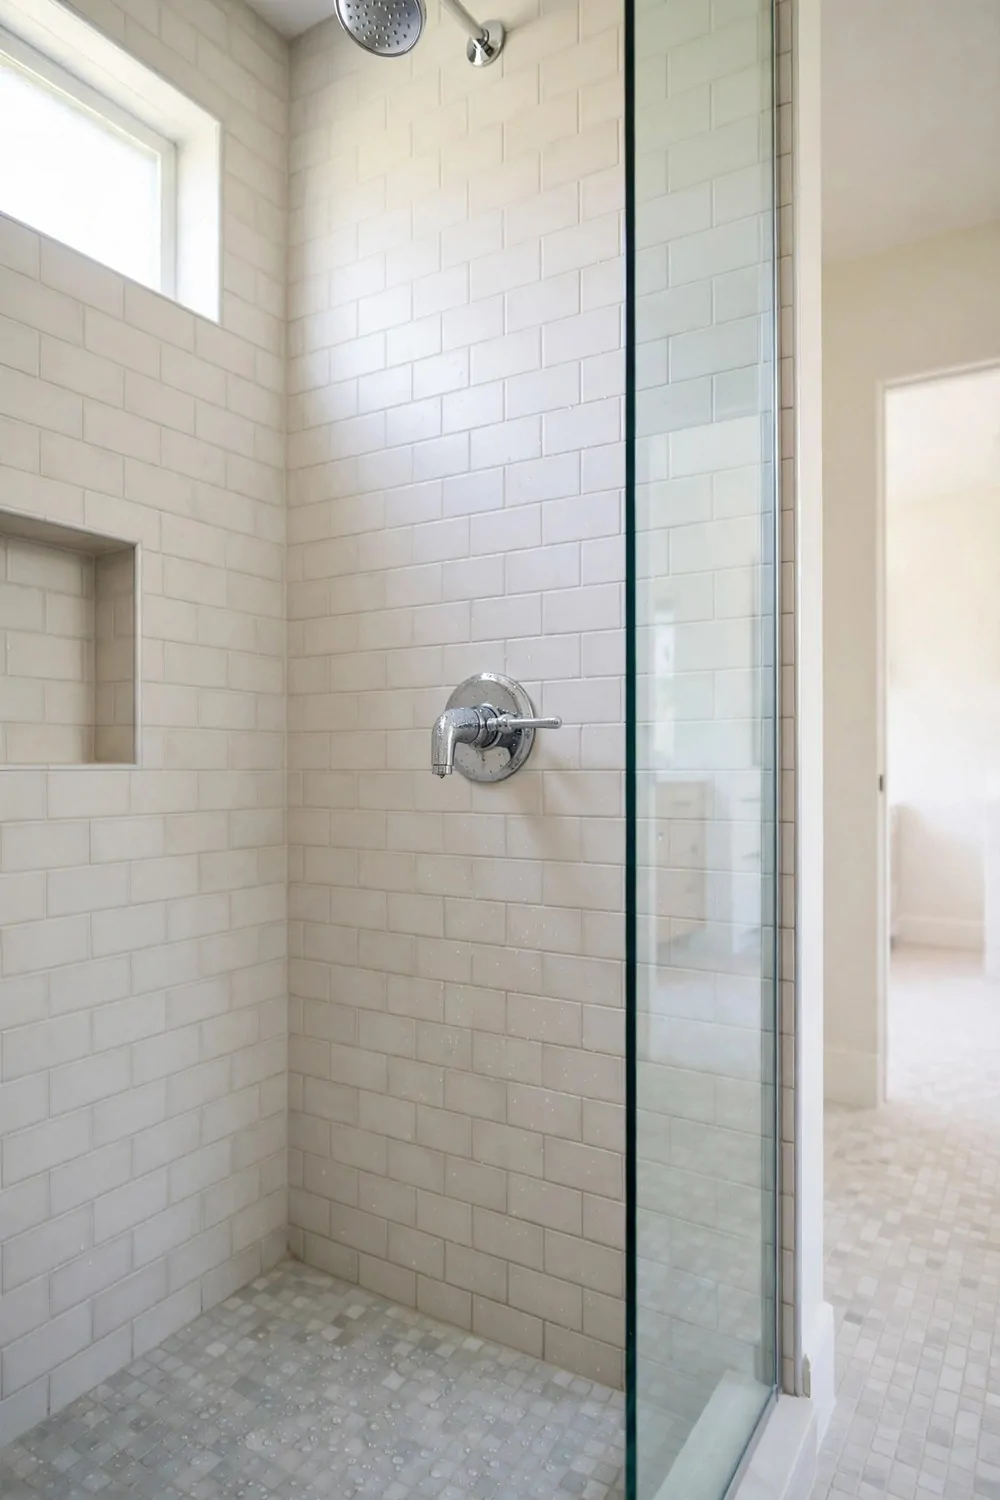
I used to fiddle with my shower taps every single morning. One turn too far and the water was too hot, then too cold, then hot again.
A mixer tap fixes that mess. You set the heat you like once, and it stays near that same heat each time you turn it on.
It makes mornings feel a lot calmer.
You turn one lever to start the water, and a second small control sets the heat. I like that I can find my spot fast, even when I am half asleep. I check it once, then I leave it alone.
If you have kids at home, this kind of tap helps a lot too. You can set a safe heat so the water never comes out too hot for small hands.
Pick a finish that matches the rest of your bathroom, like plain chrome or a soft brushed look. I went for a simple round plate, and it suits the tile around it.
Your plumber can fit one for around $180 to $420, and that price covers the tap and the fitting work in most homes.
Before you buy, check that the tap fits the pipes you already have. A quick photo of your old tap helps the shop point you to the right one. The shop can help you match it up.
I wish I had done this years ago. It is a small change, but it takes the fuss out of every shower.
15. Add a Second Shower Head
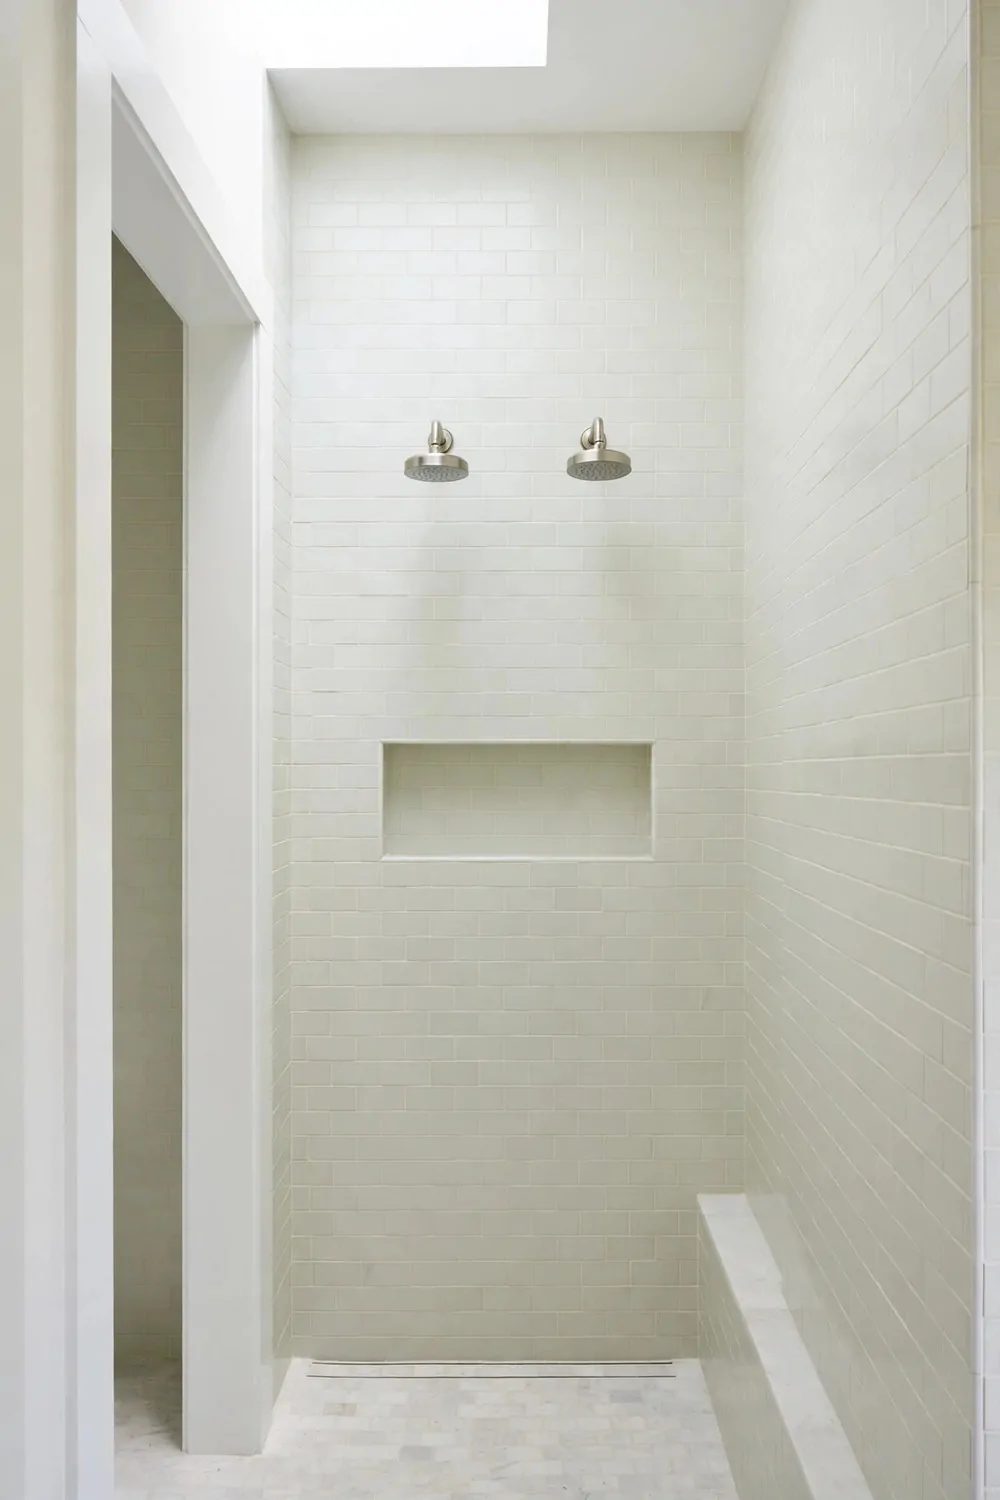
I never thought I needed two shower heads until I tried one at a friend’s house. Now I would not go back to just one.
Both heads stay fixed high on the wall, side by side. You can use one for a full rinse, and the other for a quick wash or to rinse the walls down after.
It is so handy when you need to wash the shower itself too.
If you share the bathroom, a second head means you can both wash at the same time. My husband and I use one each on busy mornings. That small change makes sharing much easier.
Two heads also make it easy to wash the shower itself. You can aim one head at the wall while you wipe the tiles down.
Look for a head with a simple switch between a soft spray and a stronger spray. I use the soft one most days, and the stronger one when I want to wake up fast.
All in, a second head with fitting tends to run $150 to $380.
Check your water pressure before you buy a fancy wide head. A very wide head can feel weak if your pressure is low, and a smaller head often feels much better. A smaller head often gives a stronger feel.
I think this is one of the best small upgrades you can make. It costs less than a full refit, and you feel the difference every single day.
16. Warm the Shower With Wood Touches
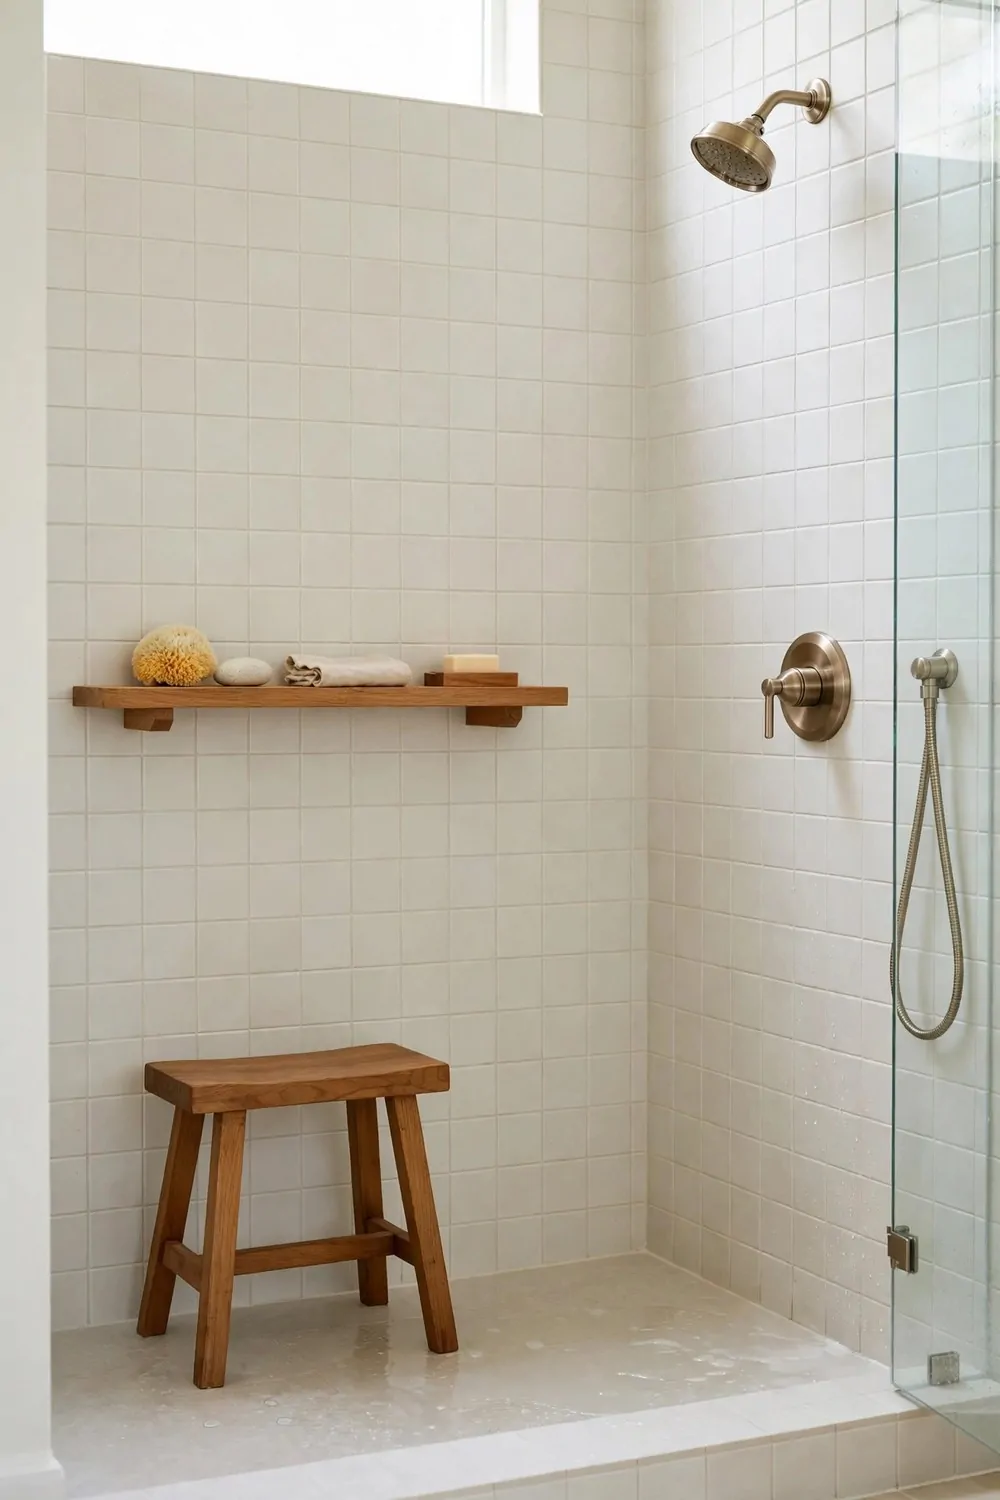
A shower can feel cold and hard when it is all tile and glass. A little wood warms it up in a soft, natural way.
I added a small wooden stool in my shower, and it changed the feel of the whole corner. I sit on it to dry my feet, and I rest my towel on it while I shower.
It looks warm and it feels warm too.
You can also try a wooden bath mat, a small shelf, or a plain wooden tray for your soap. I like pale wood best, as it keeps the room light and fresh. It adds a soft touch to a hard room.
Pick wood that can cope with steam and splashes, like teak or a well sealed board. Plain raw wood will soak up water and go dark, so a sealed finish really matters here.
Wipe the wood dry after your shower if it gets wet. It only takes a few seconds, and it keeps the wood looking good for years.
Adding a few wood touches like this usually costs $120 to $300, based on what pieces you pick.
Keep wood away from the spot where water hits it direct. A shelf on the dry wall or a stool set back from the spray lasts far longer than wood right under it. That keeps the wood dry and safe.
I love the mix of cool tile and warm wood. It makes the shower feel like a calm place, not just a wet box.
| Idea | Typical Cost |
|---|---|
| Add a Long Drain | $350 to $800 |
| Pick a Matte Black Shower Set | $200 to $500 |
| Add Soft Lights in the Shower | $180 to $450 |
| Use a Half Wall for Privacy | $600 to $1200 |
| Add a Frameless Glass Door | $900 to $1800 |
| Fit a Mixer Tap You Can Set Once | $180 to $420 |
| Add a Second Shower Head | $150 to $380 |
| Warm the Shower With Wood Touches | $120 to $300 |
17. Add a Plant Near the Shower
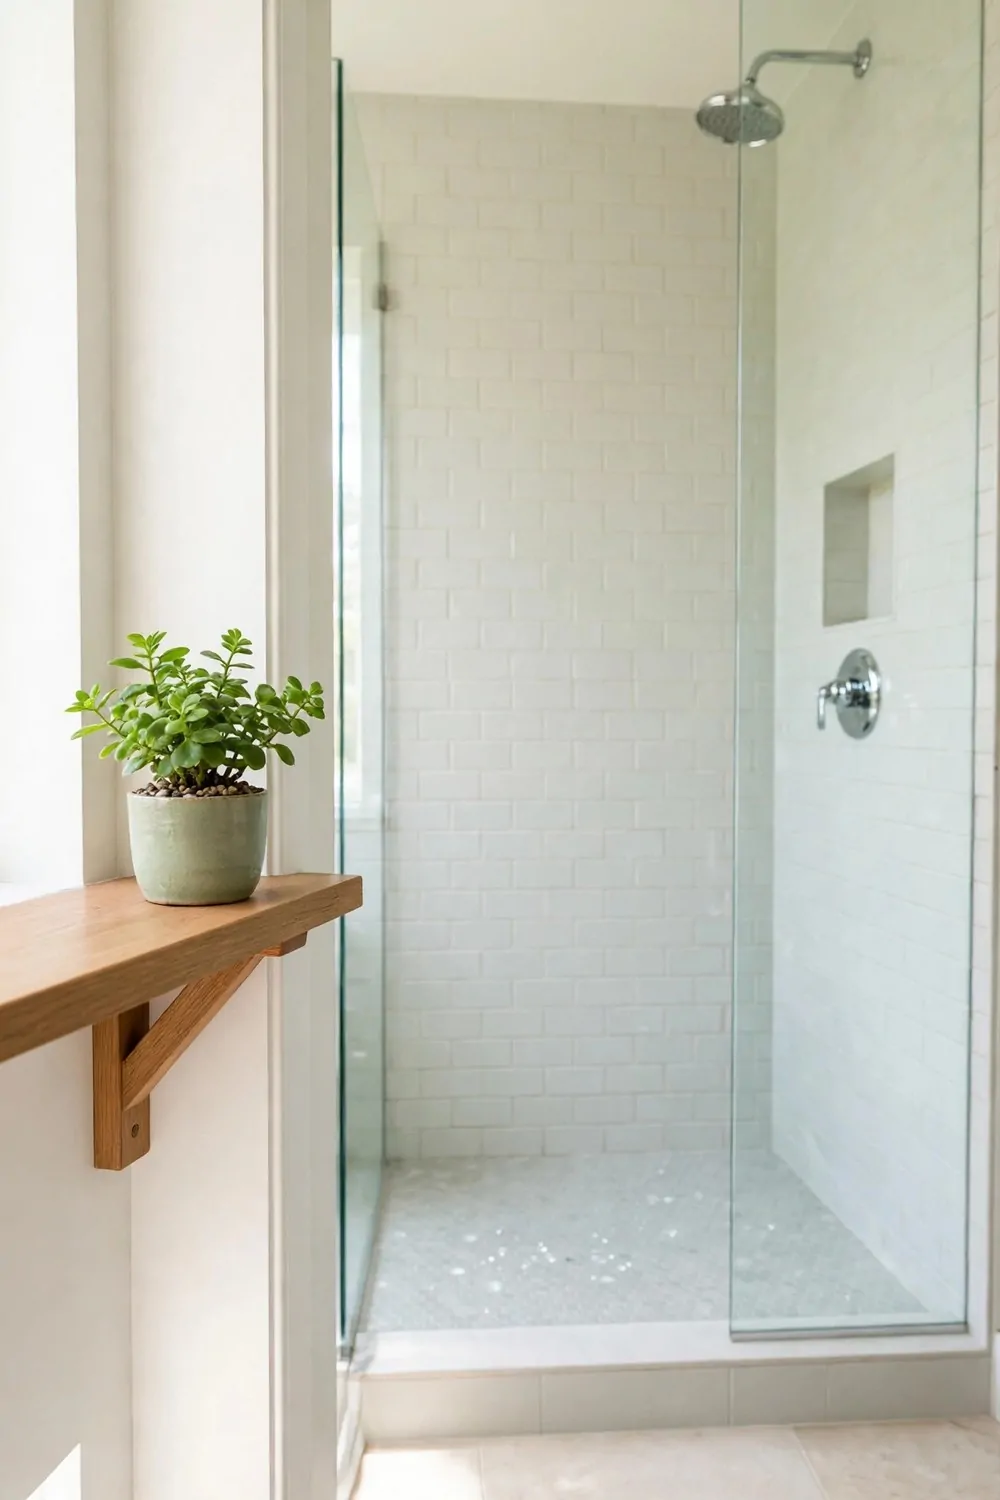
I did not think a plant would last in a bathroom, but mine loves it there. The steam keeps the air soft, and the light from the window is just right.
A small green plant near the shower makes the room feel alive. You walk in and you see leaves, not just white tile and glass.
It is a tiny thing, and it makes a big difference.
Pick a plant that likes damp air and low light if your bathroom has a small window. I keep mine in a plain pot on a shelf, well away from the direct spray. I move it a bit if the leaves look pale.
Water it a little less than you think, as the steam already gives it some damp air. I check the soil with my finger, and I only water it when the top feels dry.
If you have no shelf space, a hanging pot can work well too. Hang it high on the wall, where it gets light but stays out of your way.
A plant and a simple pot together often cost $25 to $60 from a local garden shop.
Choose a pot with a hole in the bottom and a tray under it. That way extra water can drain out, and it will not sit and make the roots soggy. Wet roots can rot fast, so drainage helps.
I smile every time I see my plant in the morning. It turns a plain bathroom into a soft, fresh place to start the day.
18. Fit a Fold-Down Seat
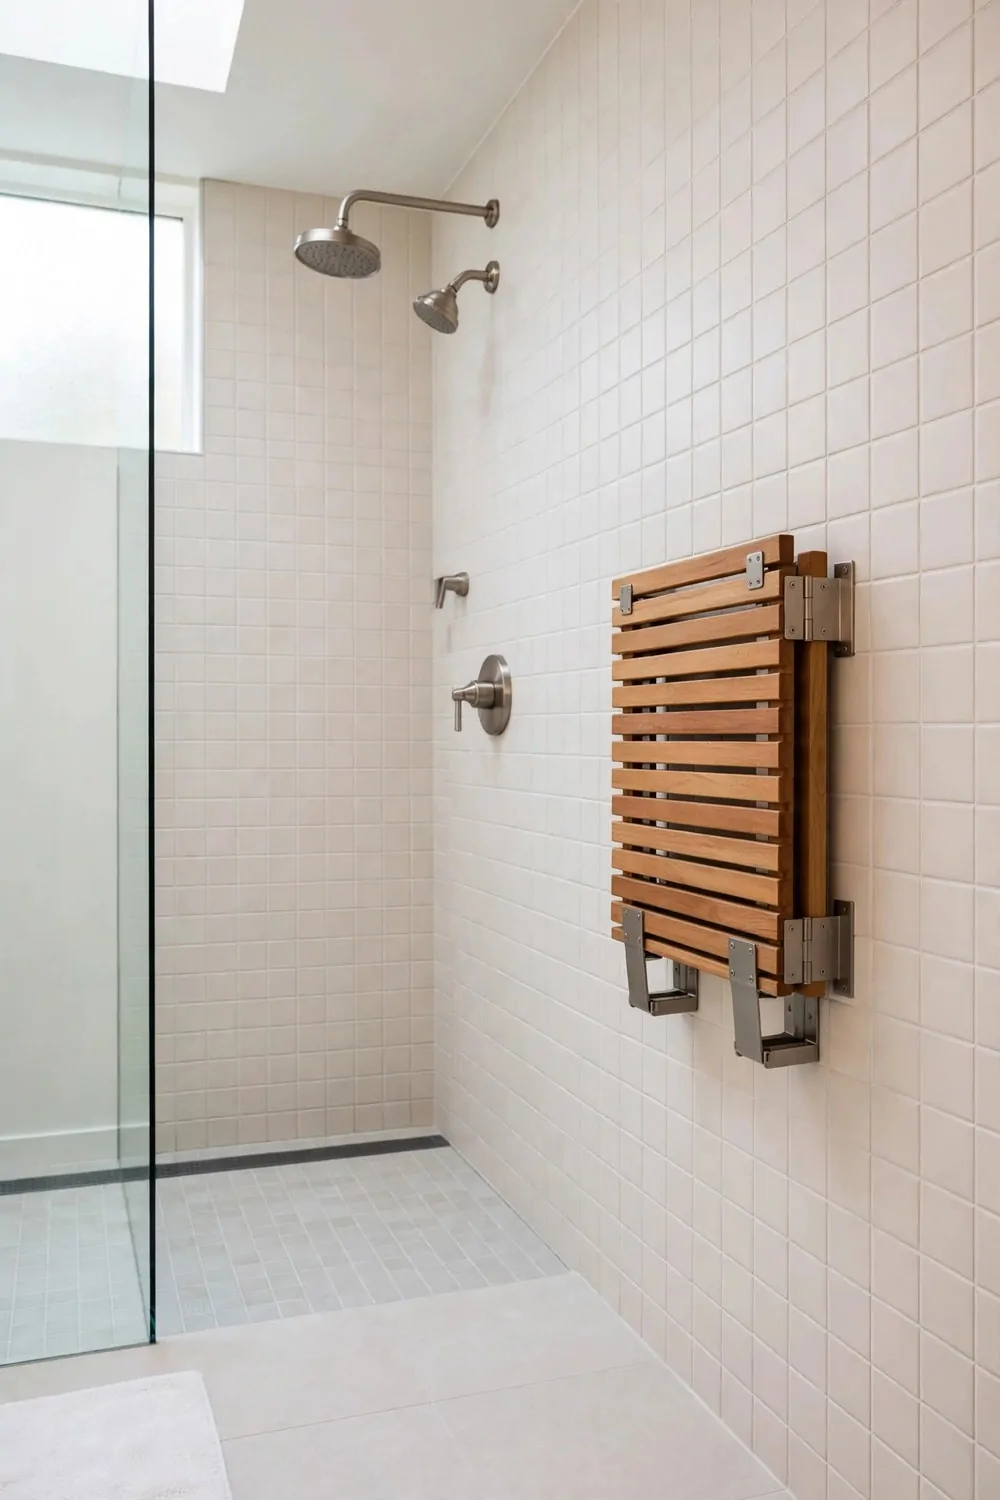
A fold-down seat sounds like a small thing, but it makes a shower so much easier to use. You flip it down when you need it, and you flip it up when you do not.
I use mine to sit and shave my legs, and to rest for a minute on a slow morning. My mum uses it every time she visits, and she says it makes her feel safe.
It is there when you need it, and out of the way when you do not.
Pick a seat that folds flat right against the wall. A slim seat takes up almost no room, and it does not block the water when it is folded up. It stays firm, with no shake at all.
Make sure it is fixed into a solid wall, not just into tile. A good fitter will find the studs behind the wall so the seat can hold your weight with no wobble.
Wood or a warm plastic seat feels nicer than cold metal on bare skin. I went for a simple wooden slat seat, and it dries fast after a shower.
You can expect to pay $140 to $350 for a good seat and a safe fitting job.
Put the seat at a height where your feet still touch the floor when you sit. Too high feels awkward, and too low makes it hard to stand back up. A good height makes sitting and standing easy.
I think every walk-in shower should have one. It helps young kids, older folks, and anyone who just wants a slow, comfy shower.
19. Go Curbless for a Flat Entry
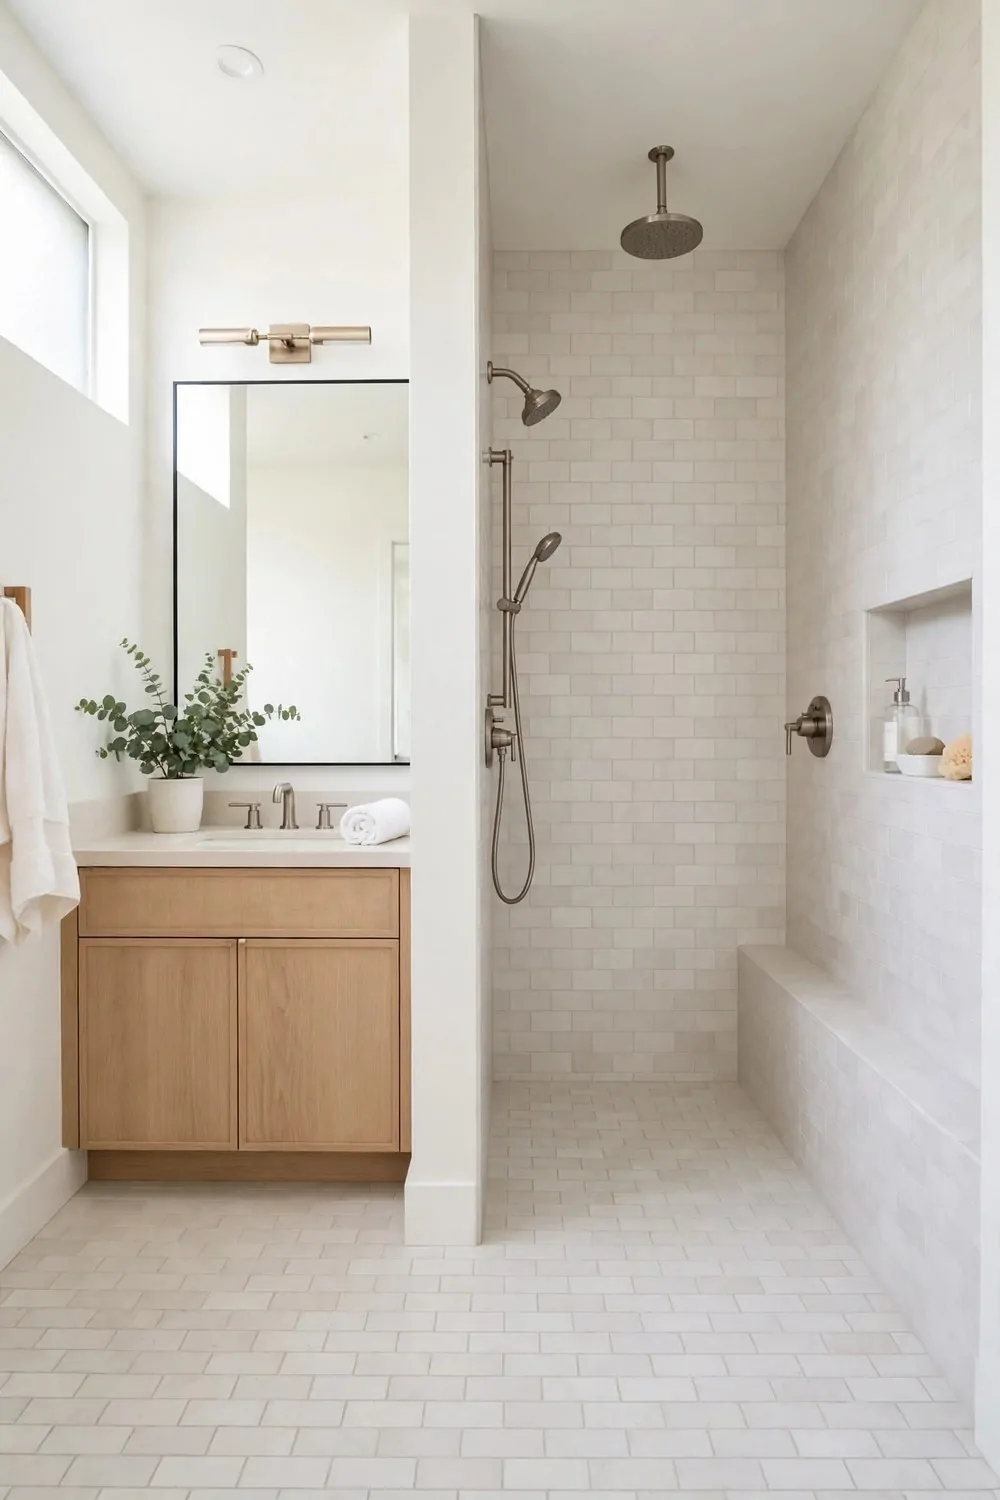
A curbless shower has no step or lip to climb over. You just walk straight in, and the floor runs flat from the bathroom right into the shower.
I love how open it feels. There is no edge to trip on, and the room looks much bigger with no raised tray in the way.
It feels smooth under your feet too.
This kind of entry works well if you use a wheelchair, a walker, or you just want an easy shower as you get older. It also helps if you have sore knees and hate lifting your leg over a tray. It keeps the room safe for everyone.
The floor needs a gentle slope so the water runs to the drain and not out into the room. A good tiler will set that slope just right, and you will hardly notice it when you walk on it.
You will need a long drain along one edge or a neat drain in the middle. I like a long drain, as it takes the water away fast and looks tidy.
A curbless change like this can cost $1200 to $2800, as the floor often needs to be lowered and retiled.
Ask your builder to check the floor joists before you agree to the work. In some homes the floor cannot drop much, and a very shallow ramp may be the best they can do. A shallow ramp can still feel smooth.
I think a flat entry is worth the effort. It makes the shower feel open, safe, and easy for everyone in the house.
20. Use White Tiles on the Walls
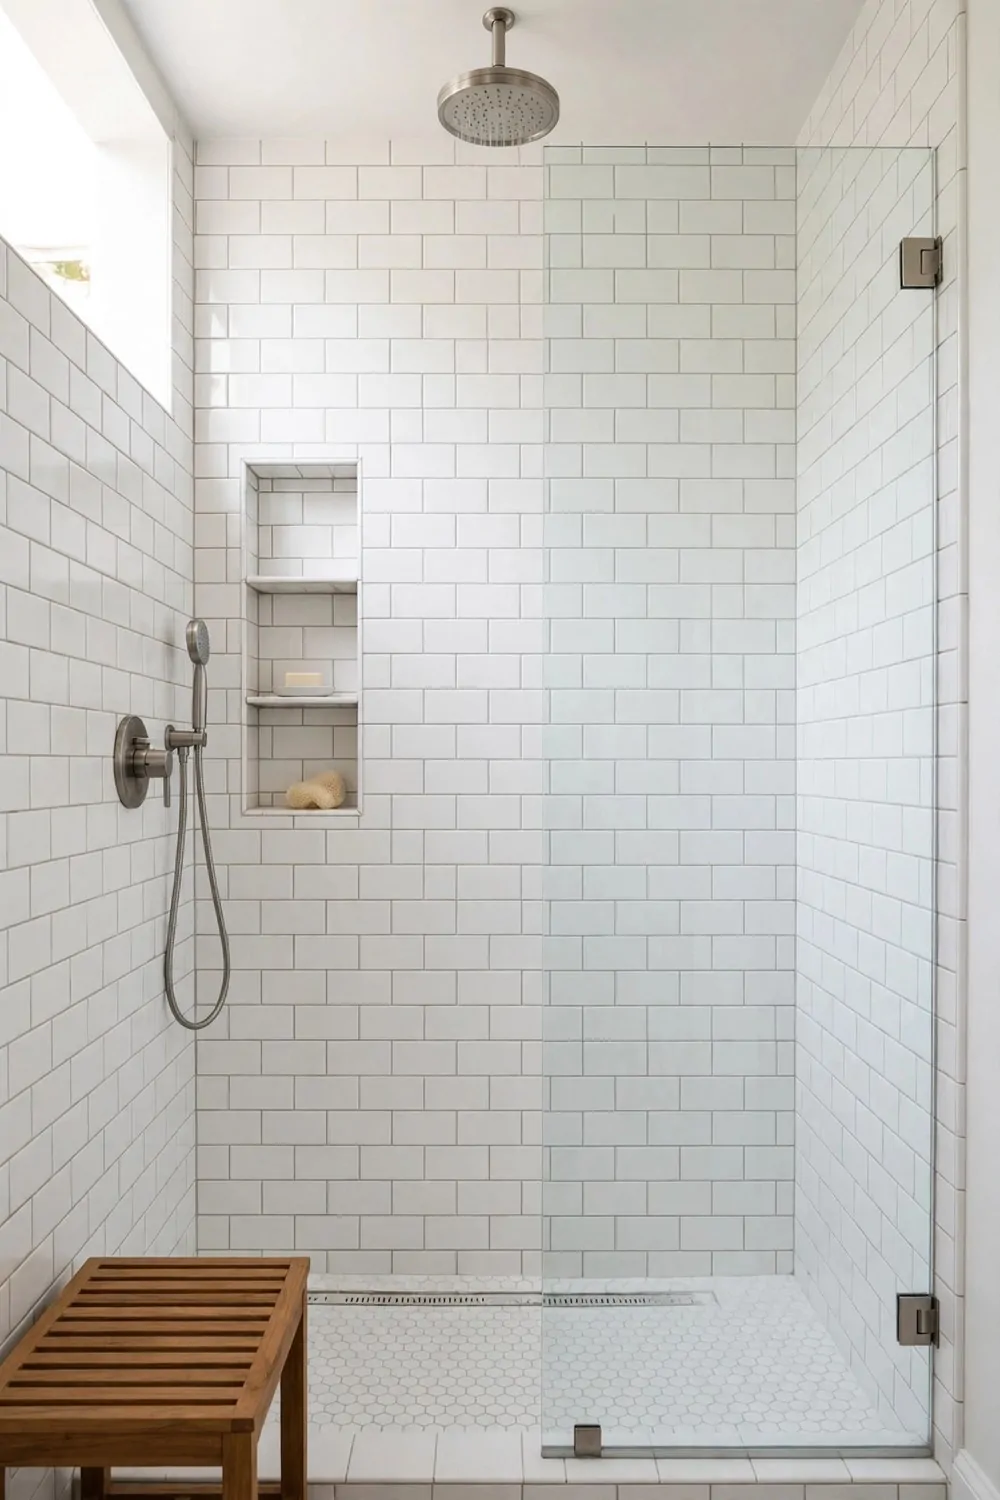
White tiles make a shower feel clean and bright. They bounce the light around, and even a small shower can feel airy.
I picked plain white tiles for my shower walls, and I have never felt bored of them. They go with any towel colour, any mat, and any shelf you add later.
They are a safe pick that still looks lovely.
You can lay them in a simple straight grid, or in a brick pattern for a bit more charm. I went for the brick pattern, and it gives the wall a soft, classic feel. It adds charm without much fuss.
Big tiles mean fewer grout lines to clean, and that saves you time each week. Small tiles look sweet too, but they do take more scrubbing.
Use a grout that is made for wet rooms, and seal it well when it is dry. I wipe my grout once a week with plain soap and water, and it still looks fresh.
Retiling the shower walls in white usually works out at $800 to $1900, with the tiles and the labour in that range.
Ask to see a few tile samples in your own bathroom light before you pick one. A white that looks warm in the shop can look cold at home, so check it in the real room. That small check can save you a lot of bother.
I love how white tiles make the shower feel like a fresh, calm space. You step in, and it feels clean before you even turn the water on.
21. Add a Warm Towel Rail Near the Shower
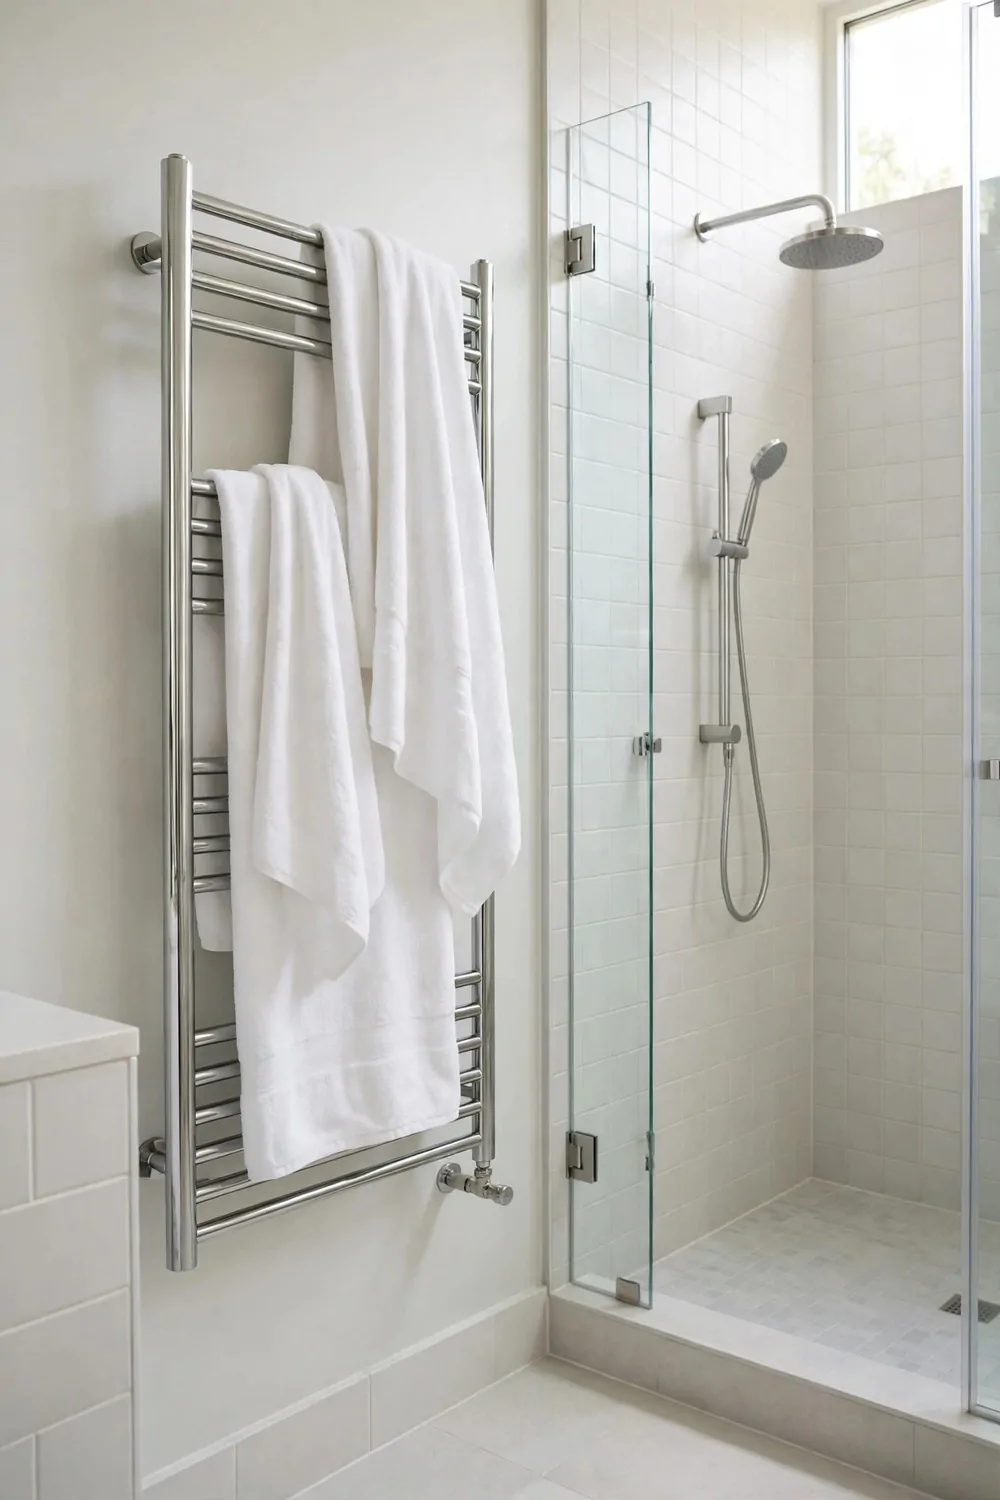
There is nothing quite like stepping out of a warm shower and grabbing a warm towel. It feels like a small treat, every single day.
I put a heated rail on the wall right next to my shower, and now my towel is dry and warm when I reach for it. It also helps the towel dry fast between showers.
No more damp towel smell in the morning.
You can pick a rail that plugs into the wall or one that joins your heating system. I went for a simple electric one with a small switch, and I turn it on an hour before my shower. It is a simple habit, and it works well.
Hang your towel flat over the bars so the warm air can reach all of it. A bunched up towel stays damp in the middle, and that defeats the whole point.
A rail also warms the air in a small bathroom a little. It will not heat a big cold room on its own, but it takes the chill off the space near the shower.
For the rail and the fitting, most people pay $200 to $550 in total.
Keep the rail close enough to reach from the shower door, but not so close that it gets soaked. About an arm’s length away works well in most bathrooms. That spot is easy to reach, and it stays dry.
I think this is my favourite comfort upgrade. It is simple, it is warm, and it makes every shower feel a bit more special.
22. Pick Non-Slip Tiles for the Floor
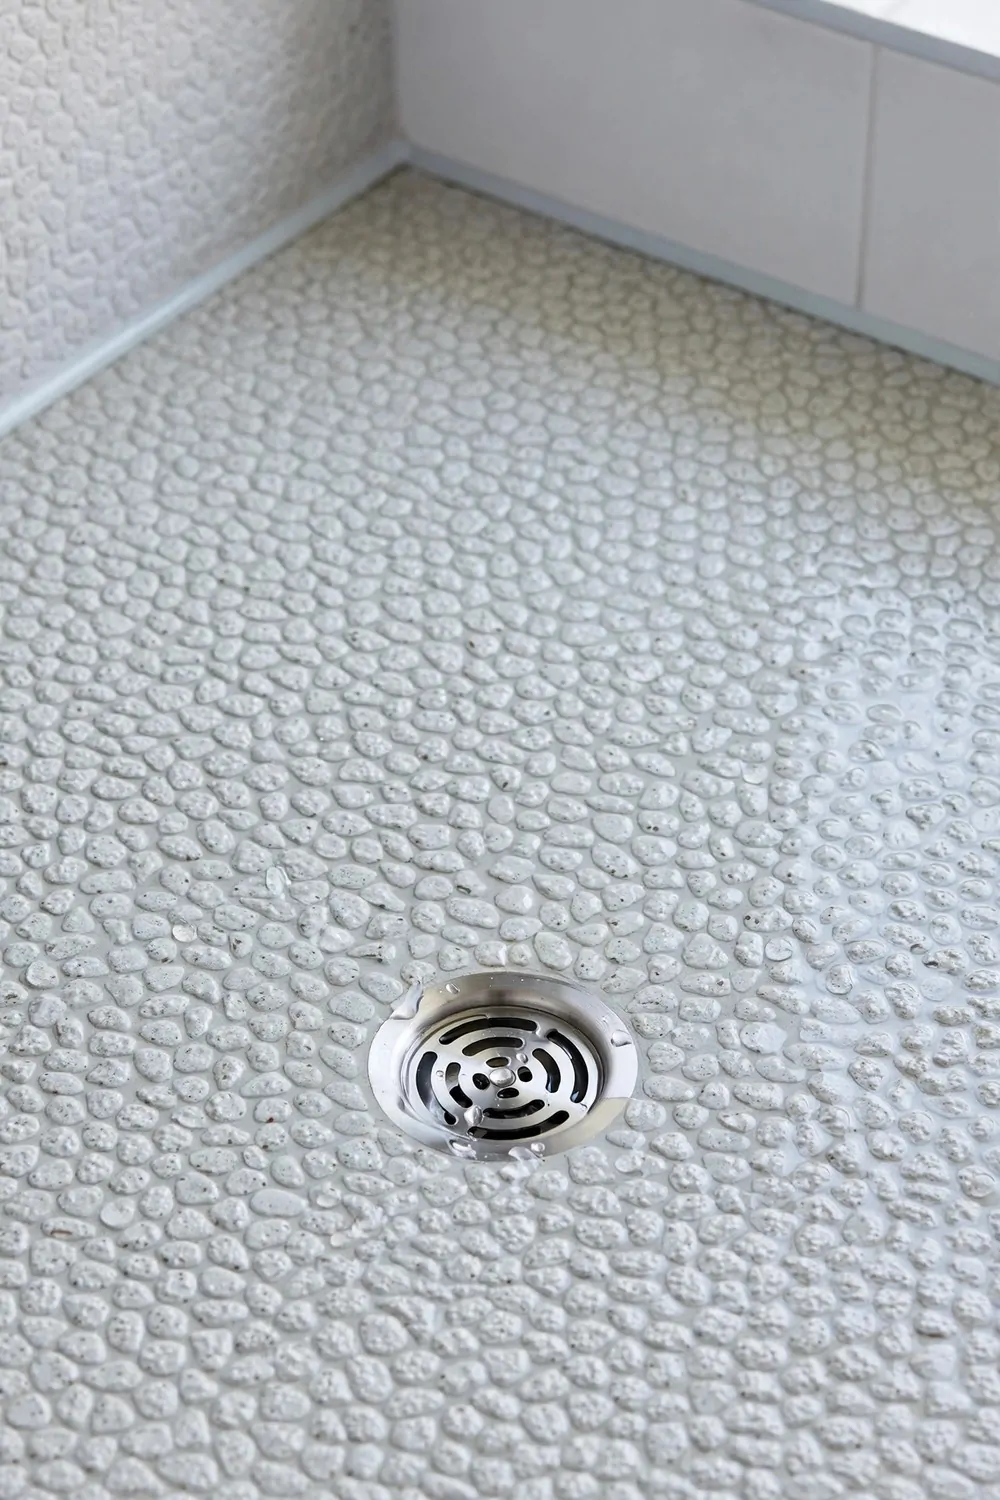
Wet tile can be very slippery, and a shower floor needs a bit of grip. Non-slip tiles give your feet something to hold onto, even when the floor is wet and soapy.
I picked small matte tiles for my shower floor, and I feel safe every time I step in. The surface feels a little rough under my feet, but not sharp or sore.
That grip gives me peace of mind.
Look for tiles marked as non-slip or with a high grip rating at the shop. The staff can show you a sample, and you can run your wet hand over it to feel the grip for yourself. The grip feels firm, even with wet feet.
Small tiles work well here, as the rough surface adds extra grip too. I used small round pebble tiles, and they feel steady underfoot.
Keep the floor clean with plain soap and water, and rinse it well after. Soap left on the floor can make even a good tile feel slick, so a quick rinse matters.
New non-slip floor tiles for a walk-in shower often cost $600 to $1400, with fitting in that price.
Avoid shiny polished tiles on a shower floor, even if they look lovely on the wall. What looks good in the shop can turn into a slide when it is wet. A dull finish is safer than a shiny one.
I would not skip this one. A safe floor lets you relax in the shower, and that is what a spa feel is all about.
23. A One-Weekend Shower Refresh Plan
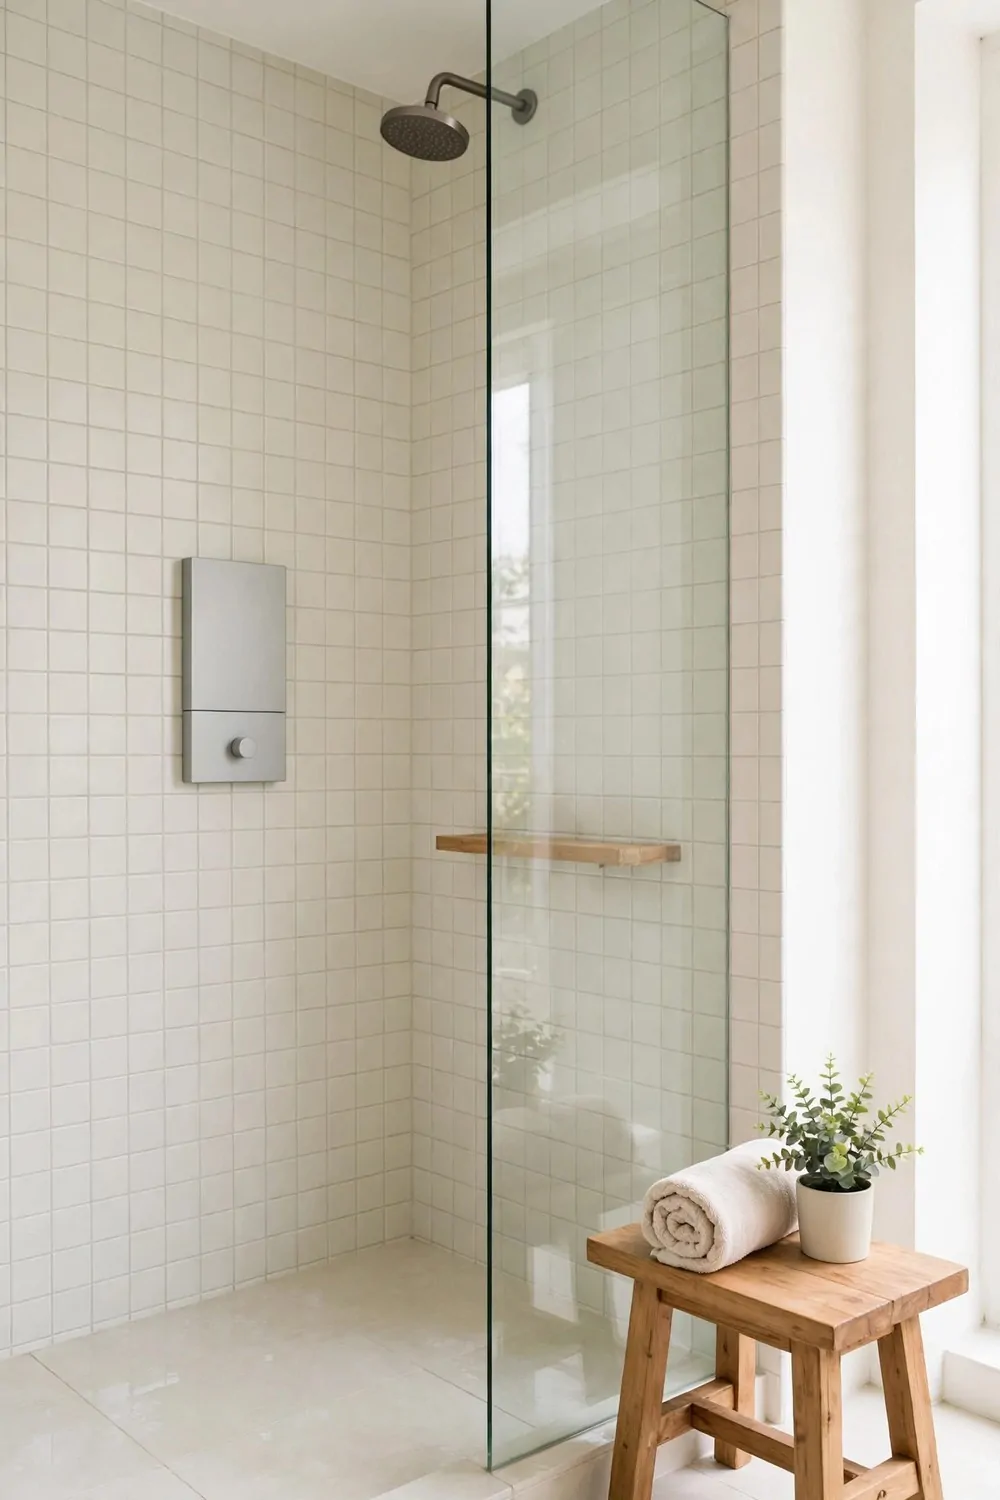
You do not need a full refit to make your shower feel new. I gave mine a fresh look in one weekend, with a few small buys and a bit of time.
Start on Saturday morning with a good clean. I washed the tiles with plain soap and water, wiped the glass, and cleared out old bottles I no longer used.
A clean base makes every new thing stand out more.
Next, swap your old shower head for a new one. A new shower head costs $40 to $90, and it can change how the water feels in one go. I picked a simple one with a soft spray, and I fitted it myself in under half an hour.
Then add a small shower shelf for your soap and wash. A shower shelf costs $12 to $25, and it keeps everything neat and off the floor. I put mine at chest height, where I can reach it without bending down.
On Sunday, lay a fresh mat on the shower floor. A non-slip mat costs $15 to $30, and it makes the floor feel safer under your feet. I rinse mine each week so it stays fresh.
Hang up fresh towels, soft and clean. Fresh towels cost $20 to $45 for a small set, and they make the whole bathroom feel new. I picked plain white ones, and they match the tiles so well.
Last of all, add a small plant on a shelf near the shower. A small plant costs $10 to $25, and it brings a soft green touch to the room. I water mine once a week, and the steam keeps it happy in between.
Add it all up and the whole refresh comes to $97 to $215 in all. That is a small spend for a shower that feels fresh, safe, and calm every morning.
| Area | Main change | Typical cost |
|---|---|---|
| Shower head | A new shower head | $40 to $90 |
| Shower shelf | A small shower shelf for soap and wash | $12 to $25 |
| Non-slip mat | A fresh non-slip mat for the shower floor | $15 to $30 |
| Fresh towels | A small set of fresh towels | $20 to $45 |
| Small plant | A small plant on a shelf near the shower | $10 to $25 |
| Total | Whole shower refresh in one weekend | $97 to $215 |
Keep Reading
If you liked these ideas, you will love these posts too.
- 27 Small Bathroom Remodel Ideas That Look Expensive
- 30 Kitchen Remodel Ideas With Before and After Photos
- 25 Kitchen Renovation Ideas That Add Value to Your Home
- 33 Bathroom Renovation Ideas on a Small Budget
- 29 Bathroom Vanity Remodel Ideas for Every Budget
- 28 Basement Remodel Ideas That Turn Dead Space Into Living Space
Try one small shower change this week and see how it feels. A new shower head or a clear shelf can shift how your whole bathroom works. Then look at the next idea on the list and see if it fits your shower.