20 DIY Closet Office Ideas That Look Store-Bought

My friend moved into a flat half the size of mine last spring. She asked me where she should put her office. I pointed at the closet in her bedroom, and she laughed.
She stopped laughing about two weeks later. Her closet now holds a desk, two shelves and a lamp, and the whole thing looks like it came from a furniture catalogue. That is what this list is about.
A closet office, or cloffice if you like that word, is just a small closet turned into a workspace. People build them with cheap furniture, a little paint and a few clever tricks. The best ones fool everyone. Guests see them and ask which shop the setup is from.
Below are 20 DIY closet office ideas I have studied, tried and loved. Each one looks store-bought. None of them cost store-bought money.
1. The IKEA LACK Shelf Desk Hack
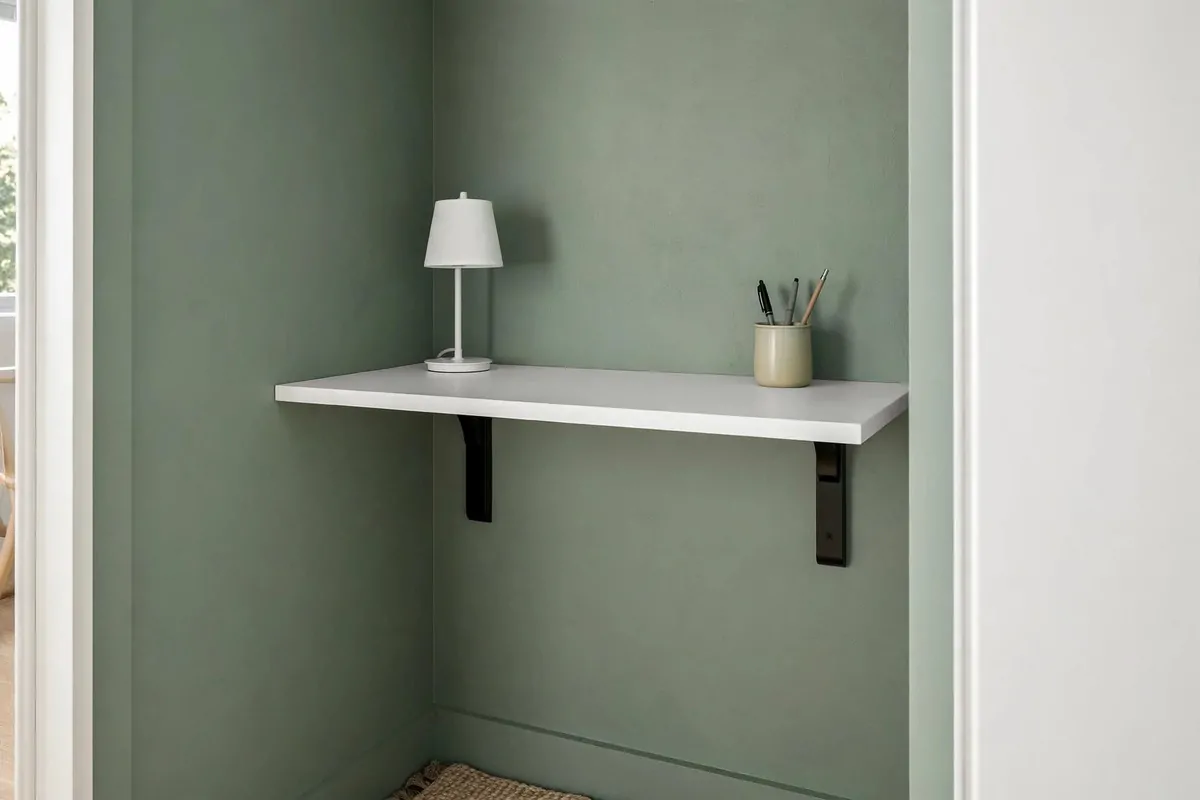
The LACK wall shelf was never meant to be a desk. That is exactly why it works so well as one.
It is shallow, light and cheap, and it comes in colours that match almost any closet. I have seen people mount one at desk height on strong brackets and honestly, you cannot tell it started life as a shelf. It just looks like a neat floating desk.
The trick is the brackets. Use heavy duty ones that go into the wall studs, not just the drywall, because a shelf desk holds your laptop, your elbows and sometimes your coffee. Cheap anchors will sag over time and then the whole illusion falls apart.
Measure your closet width first. Most reach-in closets take one long LACK shelf almost wall to wall, and that near-perfect fit is what makes it look custom. A tiny gap on each side can be hidden with a small strip of painted wood.
I like this hack for renters too. When you move out, you fill four bracket holes and the wall is fine. Compare that to a full desk you have to haul down three flights of stairs.
Paint the shelf edge if the colour is slightly off from your walls. A ten minute touch-up with sample paint makes the join look deliberate, like the desk was made for the space.
Under the shelf, add a small basket or a hanging organiser for cables. You do not see the storage from the doorway, but you feel the tidiness. That is the whole point of a cloffice.
Style the top with three things only. A lamp, a pen cup and one small plant or frame. Less stuff means the desk reads as furniture, not as a shelf doing a job it was not hired for.
My friend did this one in her hallway closet. Total build time was one Saturday afternoon, and her mum asked where she bought the desk. That is when you know a hack worked.
2. The KALLAX Desk Trick
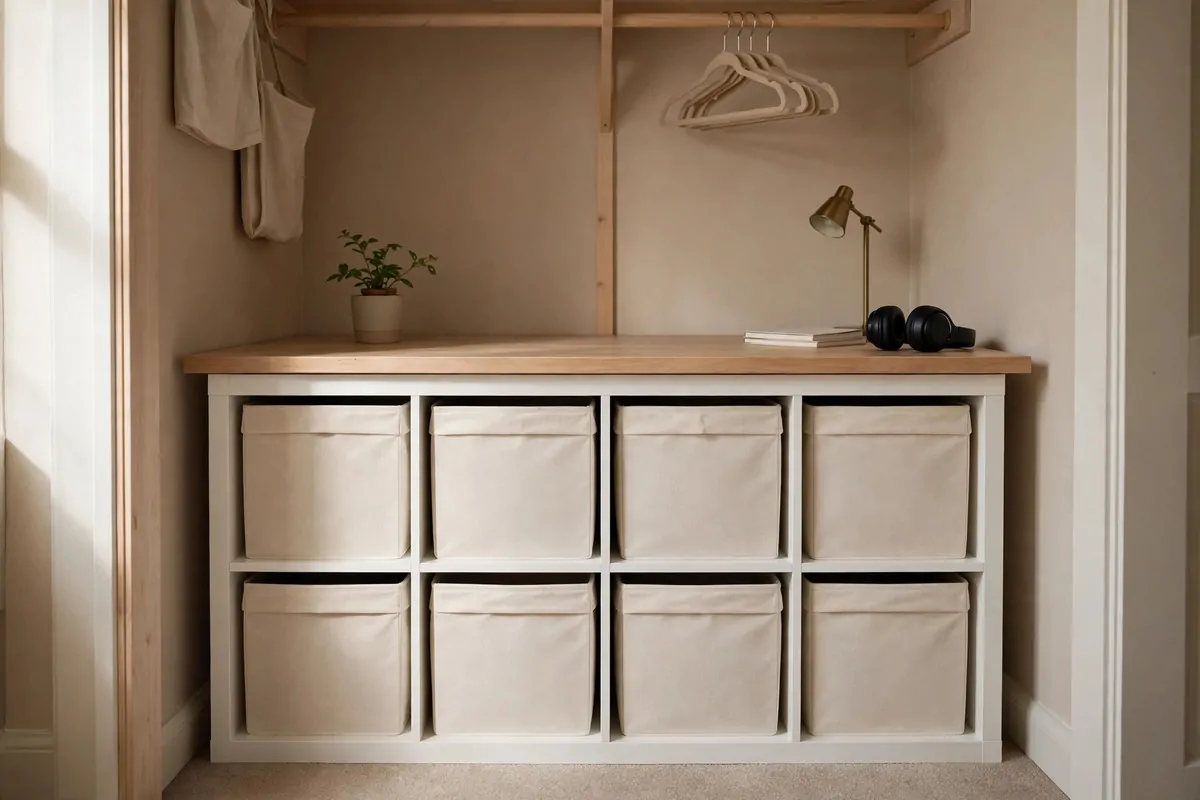
The KALLAX is the hardest working box in budget furniture. Turned sideways in a closet, it becomes both your desk base and your storage wall.
The classic move is simple. Lay a 2 by 2 KALLAX on its side, set a tabletop across the top, and leave the other half open for your legs. One cheap unit now holds your desk up and stores your supplies at the same time.
What makes it look store-bought is what you put in the cubes. Matching fabric bins or simple drawer inserts turn open holes into something that looks designed. Mixed random boxes turn it back into a dorm room, so keep them matching.
This trick loves narrow closets. The unit is about 30 inches wide and only 15 inches deep, so it slides into reach-in closets with room to spare. You get real storage without eating your legroom.
I always tell people to anchor it to the wall. The anti-tip strap comes in the box and takes five minutes. A desk that wobbles is a desk nobody trusts.
Pick a tabletop that hangs past the KALLAX by a few inches on the sitting side. That overhang gives your knees space and makes the whole thing read as a proper desk, not a shelf balanced on a box.
For a fancier look, paint the KALLAX before you build it. White is safe, but a deep green or warm grey makes it look like something from a much more expensive shop. Paint the inside of the cubes too, since open cubes show everything.
Add small legs or a plinth under the unit and it stops looking like flat-pack furniture. Even two inch furniture feet change the whole silhouette. It is a tiny detail with a big payoff.
Cable holes are worth drilling in the back panel. One hole behind where your monitor sits, and the wires drop straight down out of sight. Suddenly the setup looks wired by a professional instead of tangled by a human.
3. The ALEX Drawer Unit Desk
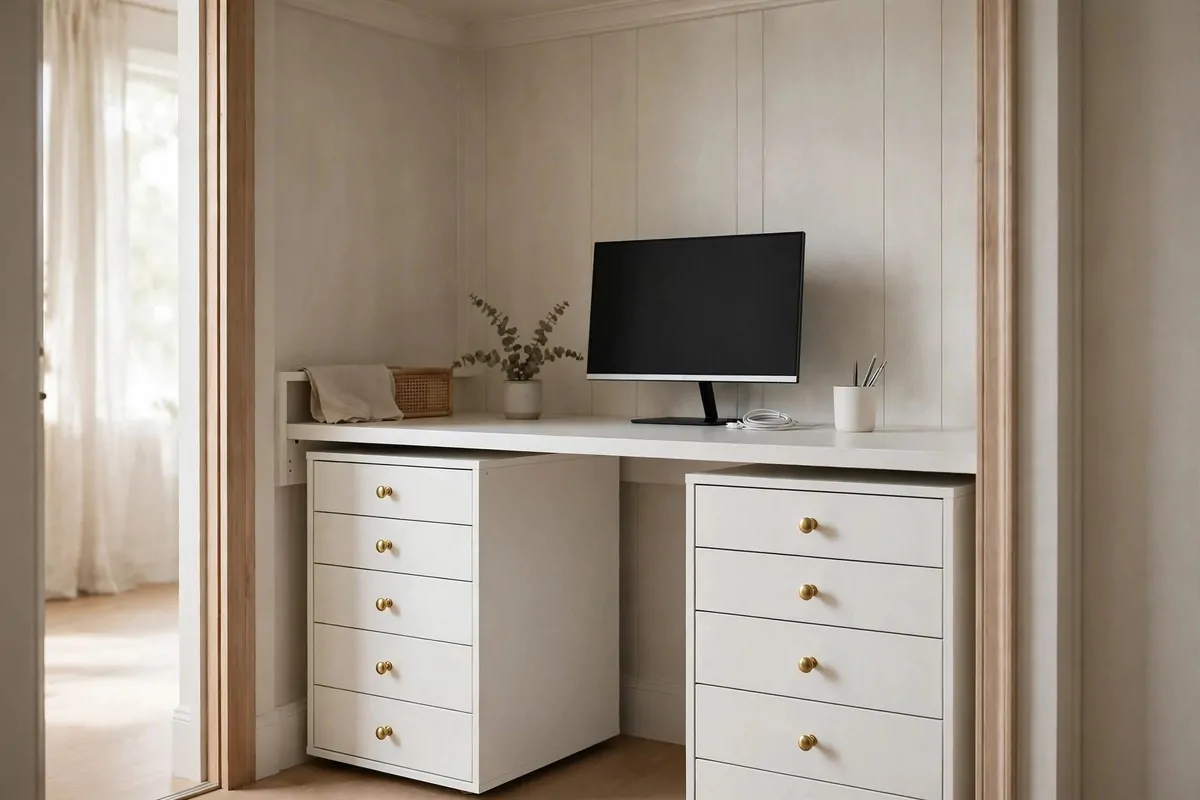
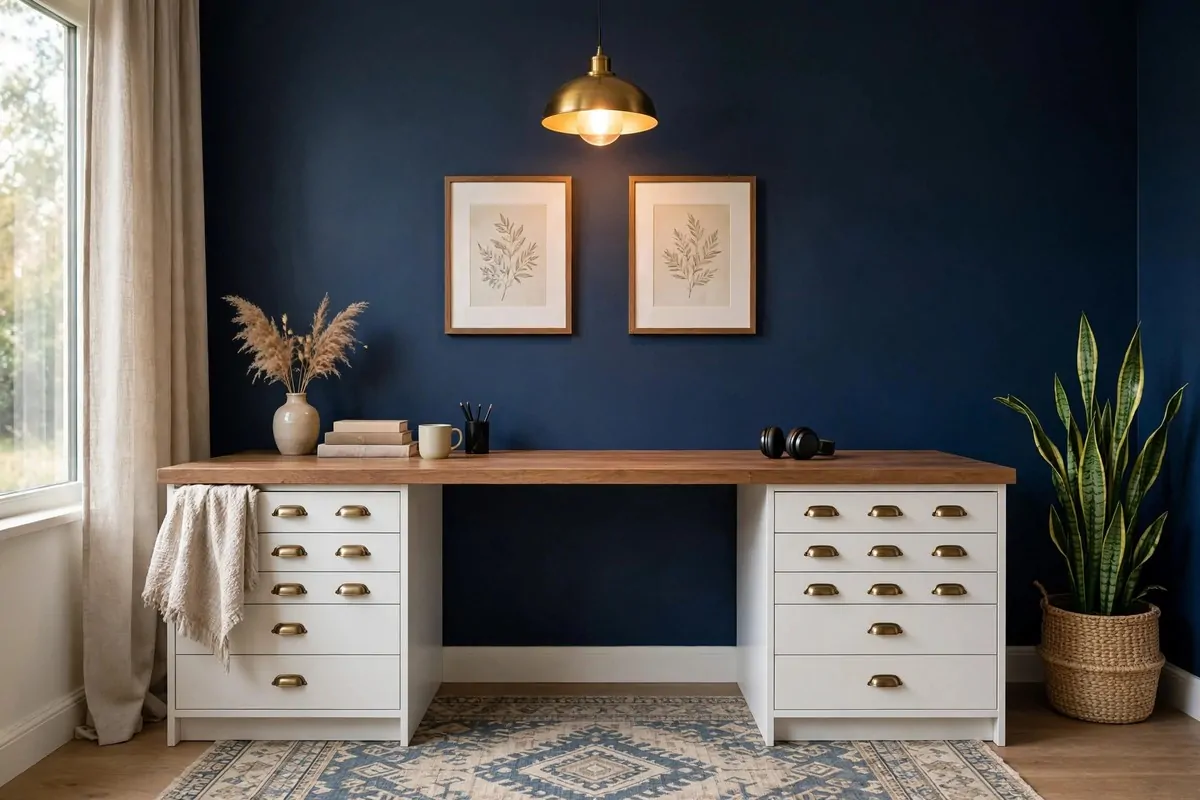
If you want your cloffice to look like a real office and not a craft corner, drawers are the secret. The ALEX drawer unit is almost exactly standard desk height, which makes it a perfect desk leg.
The famous build uses one ALEX on each side of the closet with a tabletop across the top. For a typical reach-in closet, a 47 inch top fits nearly flush. The result looks like a proper workstation that was measured for the space.
Drawers change how a desk feels. Pens, chargers, notebooks and sticky notes all get a home, so the top stays clear. A clear desk top is maybe the biggest single thing that separates “store-bought” from “thrown together.”
Cost-wise, this is one of the priciest builds on the list, but it still lands far below a real custom desk. One or two drawer units plus a tabletop usually stays in the low hundreds. I think of it as the “buy it once” option.
You can cheat the price with one unit instead of two. Put the ALEX on one side and a simple leg on the other. You keep half the drawers and save real money, and from the doorway nobody can tell the difference.
Keep the drawer fronts aligned and the handles matching. ALEX units come with basic pulls, but swapping them for small brass or black knobs is a five minute job. New hardware is jewellery for furniture, and it shows.
I painted my tabletop edge once when the raw edge looked too plain. A thin line of paint or iron-on edge banding hides the particleboard look. It is a small job that pays off every time you glance at the desk.
Legroom matters here. If your closet is shallow, slide the drawer units toward the back wall so your knees get the front inches. Comfort is what makes you actually use the office instead of admiring it.
Finish with a cable tray under the tabletop. Screw a small wire basket underneath, drop the power strip in it, and the floor stays clean. Clean floors photograph well, and they feel even better under your feet.
4. The Floating Plank Desk
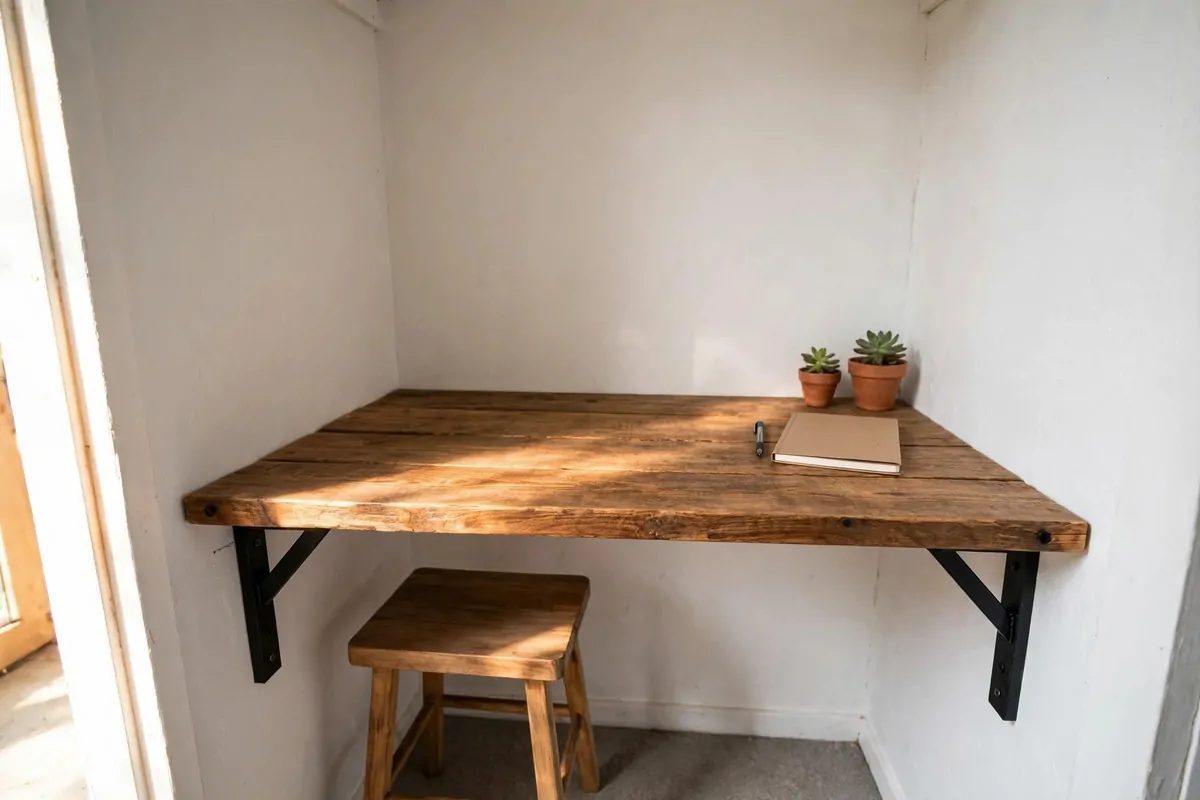
Sometimes the best desk is just a plank of wood. Cut to the exact width of your closet, mounted on brackets, it looks like a built-in shelf made for working.
This is the cheapest real desk on this list. A board and two brackets from a home improvement store usually cost less than a takeaway dinner for two. I have seen whole cloffices built for under fifty with this as the desk.
The wood is where you win the “store-bought” game. A pine board with visible grain, sanded smooth and sealed with a clear coat, looks warm and intentional. Stain it a little darker and it can pass for walnut at a glance.
Brackets matter more than the board. Chunky black L-brackets give an industrial look. White floating brackets nearly disappear and make the desk look like it grows out of the wall. Pick the vibe you want and commit to it.
Always screw into studs. A floating desk holds your forearms, your laptop and your coffee mug, and drywall anchors alone will let it droop. A stud finder costs little and saves the whole project.
Sand the front edge round. Sharp square edges feel cheap and hurt your wrists after an hour. A few minutes with sandpaper makes it comfortable and gives it that soft, finished furniture edge.
Leave a finger gap behind the board if you can. Even one inch between the desk back and the wall lets cables drop through neatly. It is the oldest cable trick in the book and it still works.
I love a plank desk under a window closet or a closet with the doors removed. Light hits the wood grain and the whole nook glows. Cheap wood plus good light beats expensive wood in a dark corner every time.
If the plank looks lonely, add a second shorter shelf above it in the same wood. Two matching boards read as a set, and a set reads as designed. That is really all “store-bought” means.
5. The Fold-Down Wall Desk
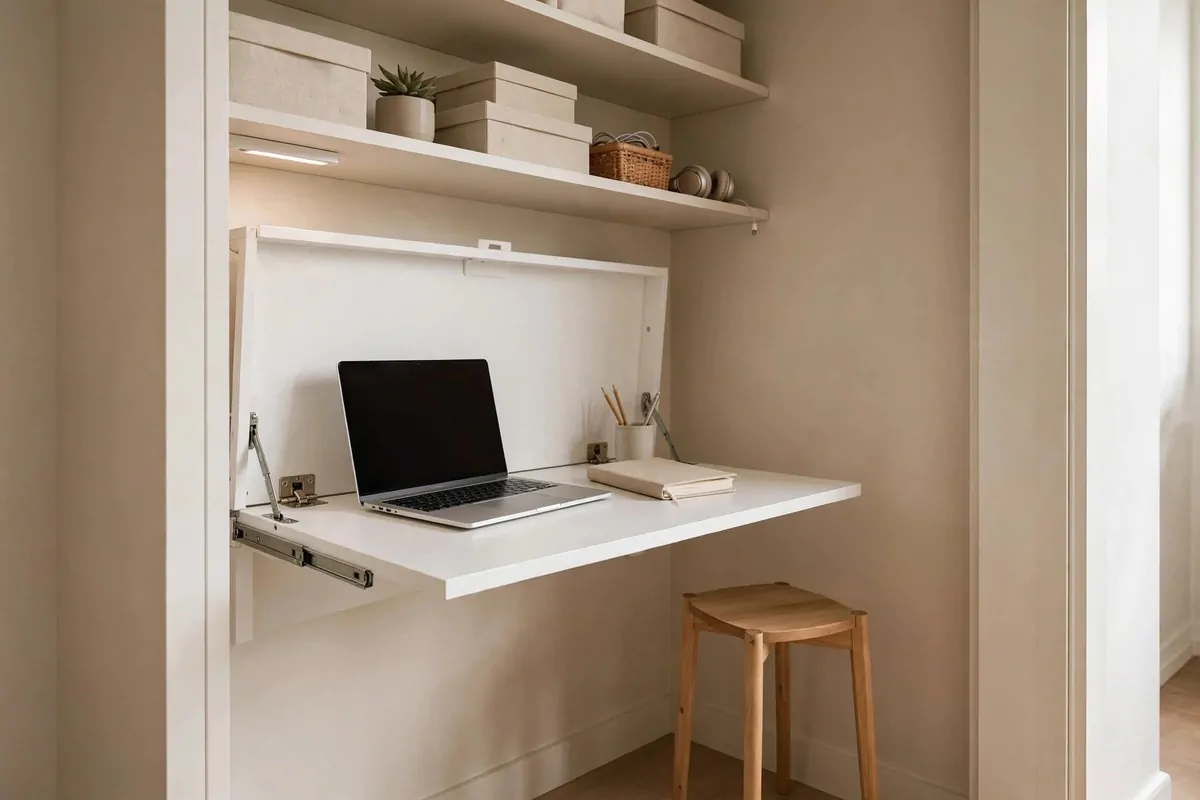
Not every closet can stay an office all day. Some closets still need to be closets, or the room needs the space back at night. That is when a fold-down desk earns its place.
The idea is old and good. A desk surface hinged to the wall folds up flat when you finish work. Some designs close into something that looks like a slim cabinet or even a picture frame. Your office literally disappears.
This is the best pick for shared bedrooms. Close the desk at six and the room is a bedroom again. Your brain learns the ritual fast, and switching off work becomes a physical act instead of a wish.
Buy the mechanism, not just the board. Good folding brackets lock flat when open and hold real weight. Cheap ones sag or, worse, collapse. Read reviews like your laptop depends on it, because it does.
Mount it at proper sitting height, around 29 inches. Too high and your shoulders ache. Too low and your back complains. Sit in your chair, hold your arms like you are typing, and mark the wall where your hands fall.
Inside the folded desk, add shallow pockets or a magnetic strip. Pens, scissors and a small notebook can live on the inside face, so opening the desk sets up your whole station in one motion. I love details like that.
Paint it the same colour as the wall and it vanishes when closed. Guests will walk past it for months without knowing it is a desk. Then you open it and get the best reaction in home DIY.
The chair matters more here than with a normal desk. Pick a stool or slim chair that slides fully under the closed desk or into the closet beside it. If the chair blocks the fold, the full trick fails.
I think of this as the polite cloffice. It does its job all day and then quietly leaves the room. Small homes need furniture with manners like that.
6. The Peel-and-Stick Wallpaper Back Wall
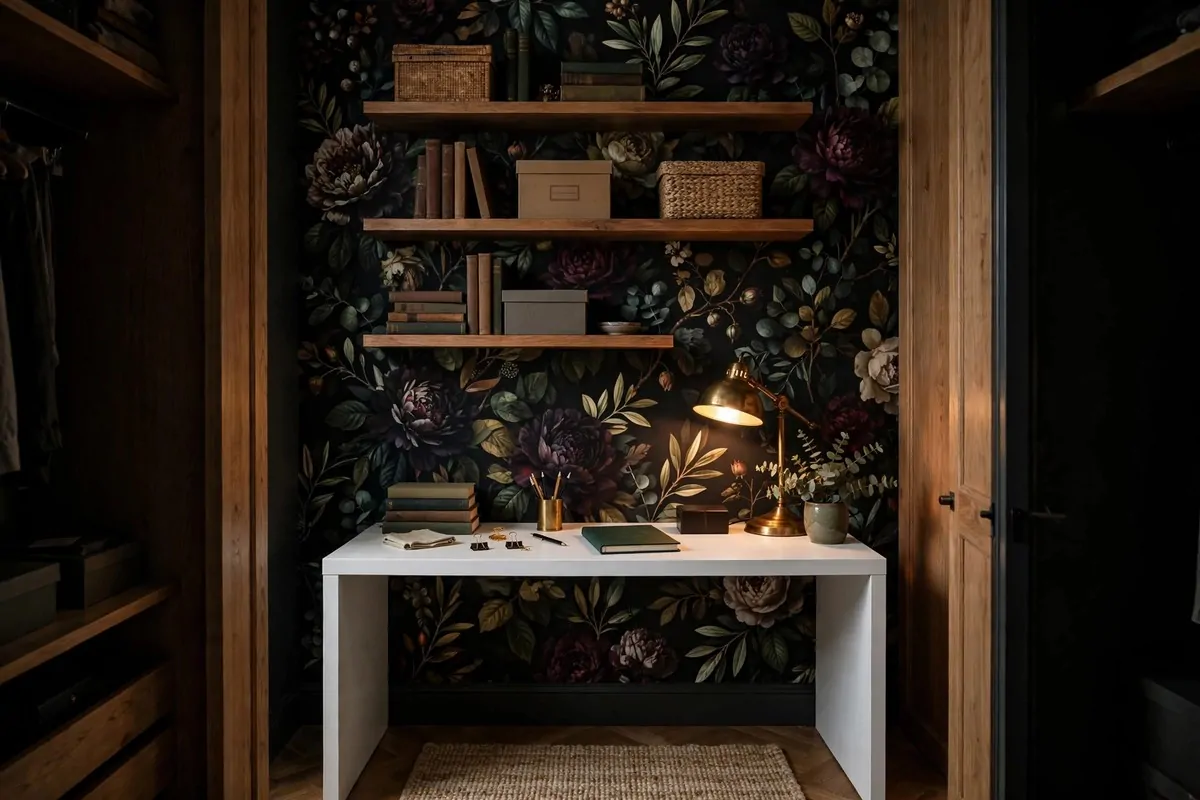
Paint is nice, but wallpaper is a shortcut to expensive. One accent wall behind your desk does more for the look than any furniture upgrade, and peel-and-stick makes it renter safe.
The back wall of the closet is the perfect spot. It is small, so one roll is usually enough. And it sits right behind your desk, which means it shows up in every video call and every photo. Maximum impact, minimum square footage.
Pick a pattern with some courage. Closets are tiny, so a bold print reads as confident instead of loud. I have seen moody florals, thin pinstripes and soft arches all work. Plain walls make small spaces feel like storage. Pattern makes them feel like rooms.
Lining it up is the only hard part. Start at the top centre and smooth outward, and keep a credit card handy to push bubbles out as you go. Peel back and redo a panel rather than living with a wrinkle you will stare at for years.
Take the shelves down first if you can. Wallpapering around brackets is fiddly and leaves little gaps that catch the eye. It is faster to remove, paper, and remount than to cut perfect notches.
Match one colour from the paper to your storage bins or chair cushion. That single echo ties the whole nook together. Designers do this on purpose, and now you are doing it too.
When your lease ends, it peels off. Warm it with a hairdryer if a corner resists, and pull slowly. Most decent brands leave the paint underneath untouched, which is the whole deal with renter friendly decorating.
I did a stripe in my own closet office and the change shocked me. Same desk, same shelves, totally different room. Visitors now ask who designed it, and the honest answer is a roll of sticky paper and a Saturday.
One warning from experience. Cheap paper with weak glue will curl at the edges in a warm room. Spend a little more on a known brand. The wall is small, so the price difference is tiny and the regret difference is huge.
7. The Painted Closet Interior
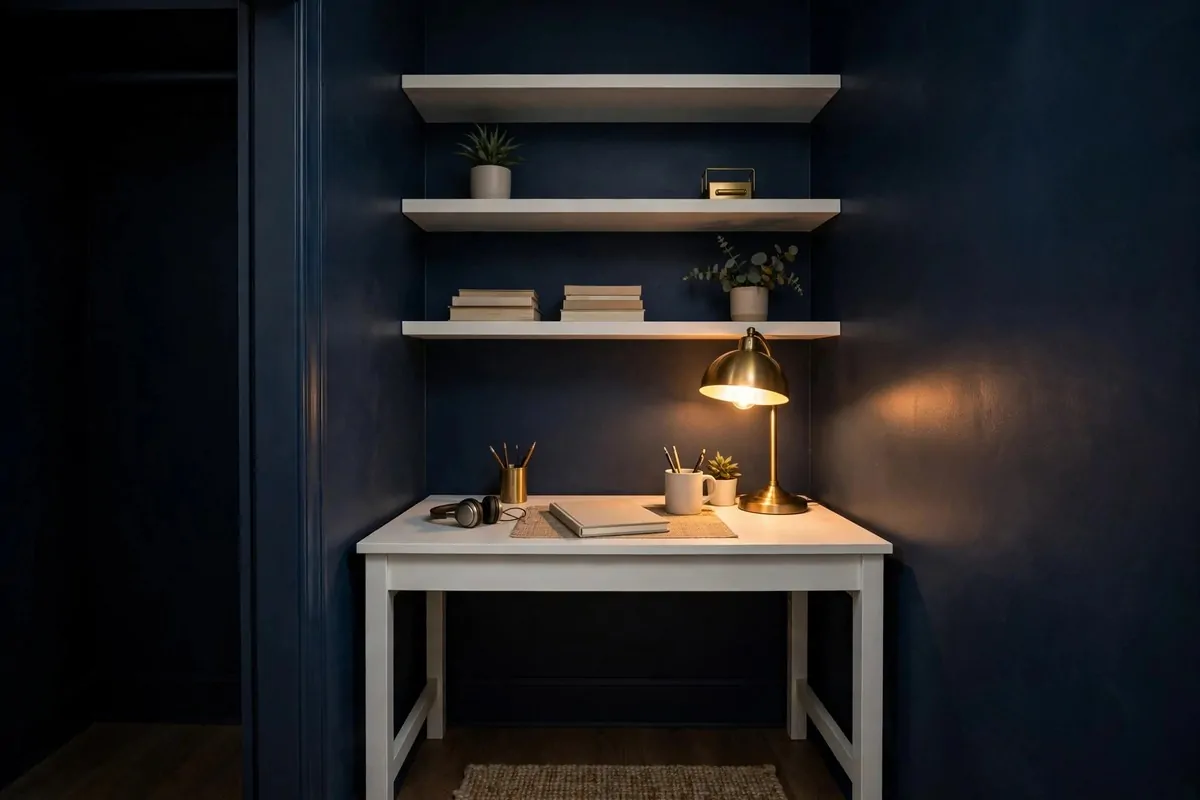
A tin of paint is the cheapest room makeover ever invented. Inside a closet, one bold colour turns a storage box into a place with a mood.
Dark colours work best in here, which surprises people. A deep navy, forest green or warm charcoal makes the small space feel like a snug study instead of a cupboard. Light colours can make a closet feel bigger, but dark colours make it feel intentional.
Paint everything, not just the back wall. The side walls, the inside of the door frame, even the ceiling of the closet if you are brave. One colour wrapped all around reads as a designed room. A single painted wall reads as an accident.
Use satin or eggshell finish, not flat. Closets get touched, bumped and leaned on, and satin wipes clean. Flat paint shows every mark and then your moody office looks tired by month three.
White furniture pops against dark walls. A simple white desk, white shelves and light wood suddenly look crisp and graphic. It is the oldest stylist trick there is, and it works in four square metres as well as it works in a loft.
Do not forget the trim. Painting the inside trim the same colour as the walls gives that wrapped, custom look. Leaving old white trim can work too, but it needs to look like a choice, not like you ran out of paint.
Ventilation matters while you paint. Closets have no windows, so the fumes sit there. Keep the room door open, point a fan at the closet, and give it a full day to air out before you move the desk back in.
I painted a closet office a deep teal once and the owner texted me a photo every week for a month. She just liked sitting in it. That is what colour does. It makes you want to be in the room, which is the whole point of an office.
Sample pots first. Paint looks different in a windowless box than it does on the shop card. Paint a big board, lean it in the closet, and live with it for two evenings before you commit to the whole interior.
8. The Contact Paper Countertop
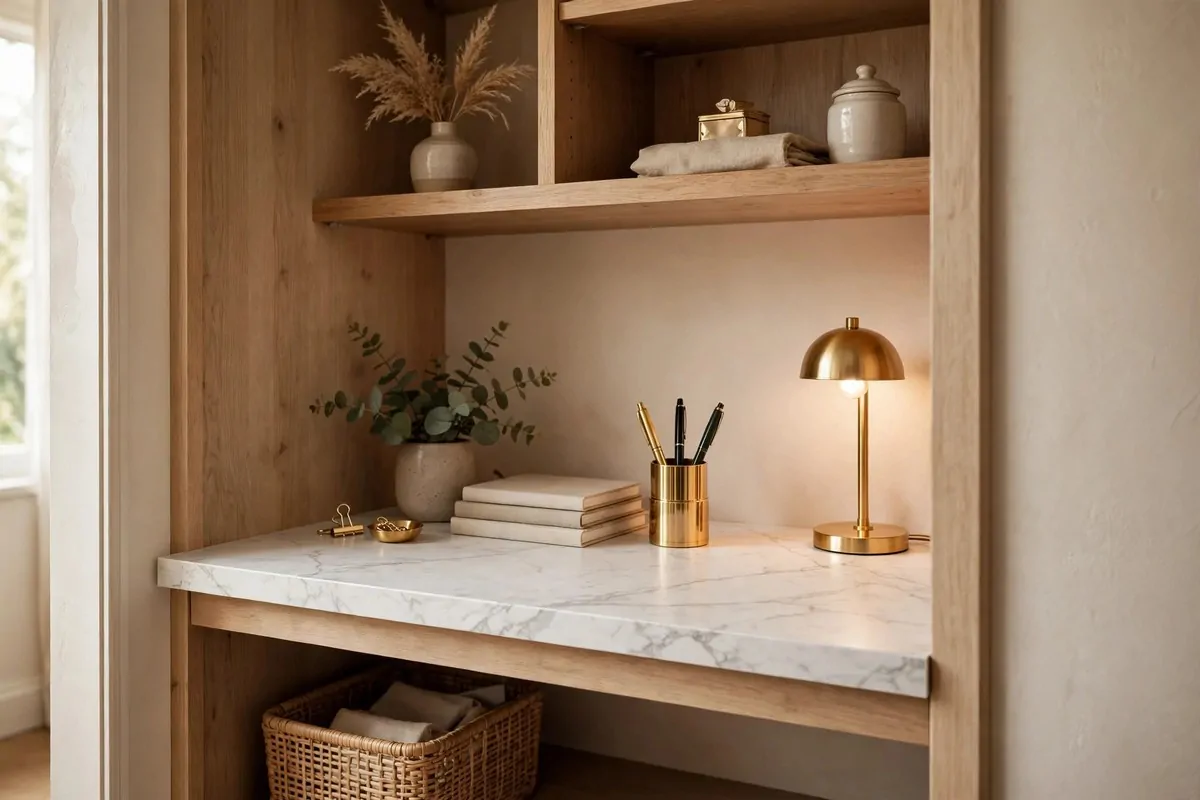
Old desks have good bones and bad tops. Scratches, stains and that dull 90s finish can all disappear under one roll of contact paper.
Marble print is the famous one, and it fools people constantly. From two feet away, a well-applied marble contact paper top looks like real stone. Your guests will tap it. Let them. It is more fun that way.
The secret is in the application. Clean the top, peel a little at a time, and smooth with a soft cloth as you go. Water with a drop of soap in a spray bottle lets you slide it into place before it sticks for good. That trick saves beginners.
Wrap the edges, do not just cover the top. Fold the paper around the front edge and trim underneath. A raw edge with paper stopping dead is what gives the game away. Wrapped edges look like a solid slab.
Wood prints work too. A warm oak contact paper can rescue a desk whose real wood is too far gone to sand. It will not fool a carpenter, but it will fool everyone on a video call, which is who you need to fool.
Protect it after. Contact paper scratches less than bare laminate, but a desk mat under your keyboard and mouse keeps it perfect for years. Treat it like a real stone top and it will behave like one.
This is a brilliant fix for a free desk. Someone gives you a solid old office desk, you spend almost nothing on a roll of paper, and the result looks boutique. I love a makeover where the before photo does all the talking.
Edges lifting is the main enemy. Press them down hard at the start and keep heat and steam away from the desk. A kettle parked right next to it every morning will test the glue, so give hot things some distance.
If a corner bubbles after a month, do not redo the whole top. Poke the bubble with a pin, press the air out, and smooth it flat. Five second fix, invisible result. Good as new.
9. LED Strips Under the Shelves
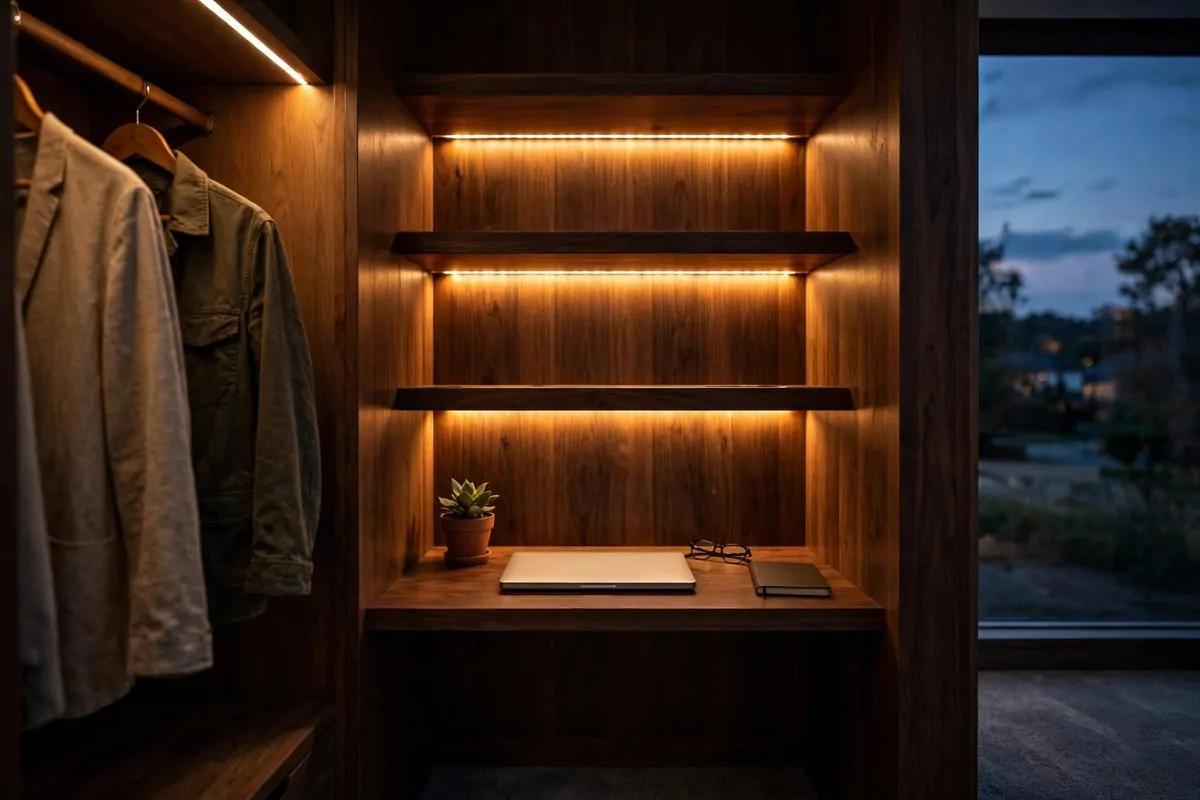
Closets are dark. That is their nature. And bad light makes even nice furniture look sad, while good light makes cheap furniture look expensive.
LED strip lights fix this for the price of a pizza. Stick them under your shelves and the desk glows like a display counter. The light bounces off the worktop and suddenly your cloffice has atmosphere.
Warm white is the colour to buy. Cool white makes a small space feel like a hospital corridor. Warm white, around 2700 to 3000 kelvin, feels like evening sun and makes wood tones glow. Your face looks better on calls too.
Battery strips exist if you have no outlet nearby. They run on a remote and last for weeks on a set of batteries. Plug-in strips are brighter and never die mid-meeting, so use those if you can reach a socket.
Hide the strip itself. Mount it an inch back from the shelf edge so you see the glow, not the dots. Seeing the little LED dots ruins the magic. The light should look like it comes from nowhere.
Here are the light types people use most, and what each one is good for:
- LED strip lights: best under shelves, soft wash of light, cheapest per metre.
- Battery puck lights: best inside dark cubbies, tap on and off, no wiring at all.
- Clip-on task lamps: best for real work light, aim where you need it.
- Plug-in sconces: best for style, they look like proper fixtures.
Layer two types if you can. A strip for glow plus a small lamp for task light gives you options. One light source in a closet always leaves a dark corner. Two sources make the space feel finished.
A dimmer is worth the extra few pounds. Full brightness for work, low glow for evening emails. Being able to change the mood of the room with one slider feels very grown up.
I added strips to a friend’s cloffice and she said it felt like a different room the same night. Nothing else changed. Same desk, same shelves. Light is honestly the highest return upgrade on this whole list.
And keep a spare set of batteries or a spare strip in a drawer. When a light dies mid-project, you will thank past-you for the two minute swap instead of a dark week.
10. The Framed Pegboard
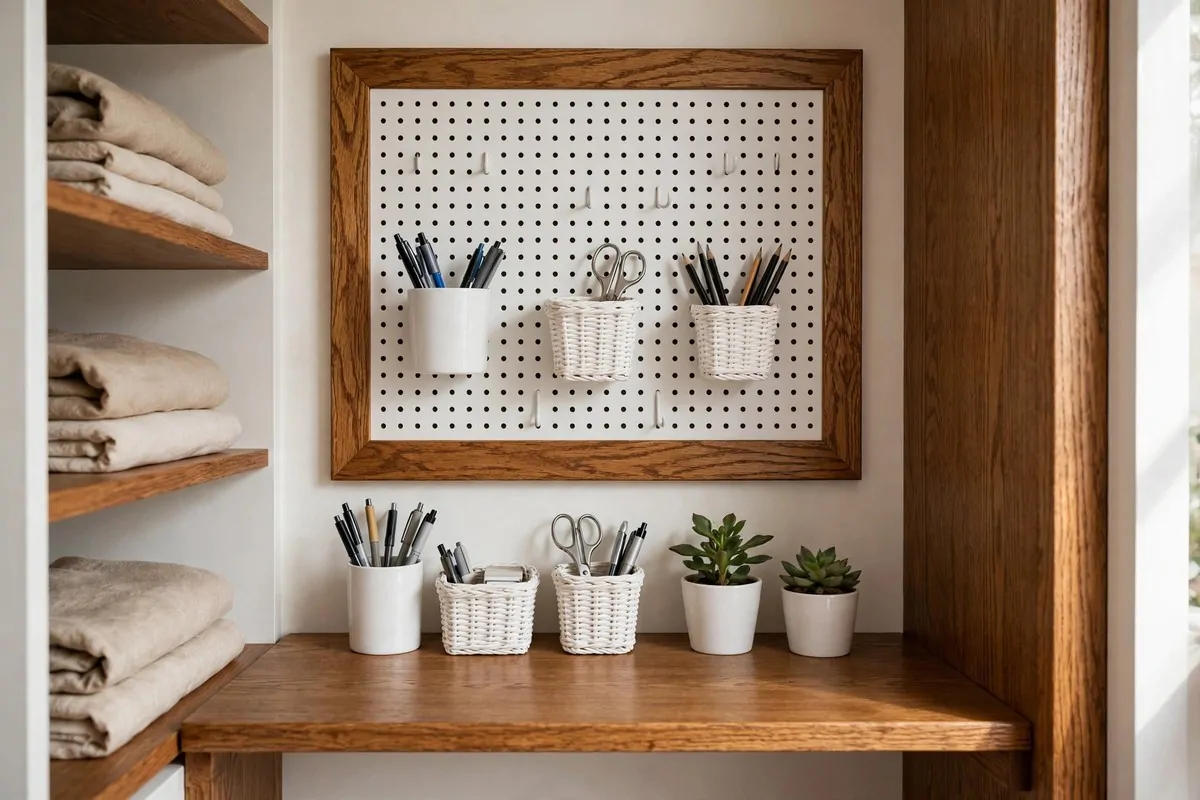
A pegboard is the hardest working wall in a small office. But a raw pegboard can look like a garage. The frame is what turns it into furniture.
Build or buy a simple wood frame around a standard pegboard panel. Stain the frame to match your desk and suddenly the pegboard looks like a designed piece, not a workshop leftover. The frame hides the cut edges, which is where the cheap look lives.
Pegboards earn their wall space. Scissors, tape, headphones, chargers and notebooks all hang within reach. Every item on the board is one item not cluttering your desk. In a closet, desk space is gold, so this trade is always worth it.
Small containers are the styling secret. Matching cups, tiny baskets and little shelves in one colour family make the board look styled. Random mugs and loose hooks make it look like a junk drawer that learned to climb.
Plan the layout on the floor first. Lay the board down, arrange your holders, and only then hang it up. Moving hooks around on a hung board means extra holes and a lot of standing on a chair.
Keep the daily stuff at arm height. Pens, your headphones, the notebook you grab every morning. Pretty but rarely used things go higher. A pegboard should work as hard as it looks.
Paint the pegboard itself if the brown hardboard is not your style. White keeps it bright, black makes it moody, and a colour matched to your wall makes it nearly disappear until you need it. Paint before you add the frame.
I have seen framed pegboards sell a whole cloffice. People photograph them, pin them, copy them. It is the one element guests always ask about, which tells you everything about its impact.
Dust it now and then. Pegboards collect dust on every little hook, and dusty looks dusty no matter how nice the frame is. A quick wipe once a month keeps it sharp.
11. The Shiplap Back Wall
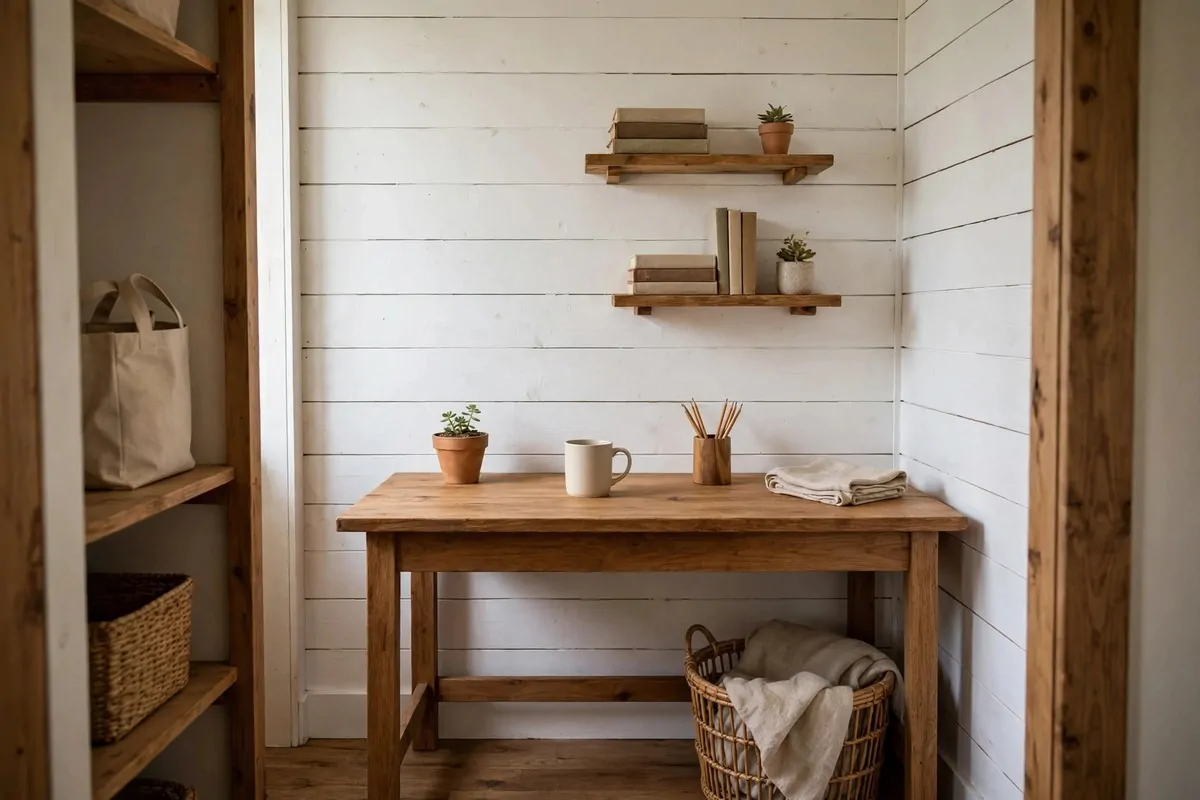
Shiplap makes anything look built-in. Those thin horizontal lines tell your eye that a carpenter was here, even when it was just you and a Saturday.
You do not need real shiplap boards. Thin plywood strips, or even peel-and-stick shiplap panels, give the same lines for less money and less weight. In a closet, lightweight matters because the walls are small and the fixings are simple.
Run the boards horizontally. Horizontal lines make a narrow closet feel wider, which is exactly what a narrow closet needs. Vertical boards would make it feel taller but also more like a corridor, so horizontal wins here.
Paint it white or a soft cream for the classic look. White shiplap behind a wood desk is a combination that never fails. It photographs beautifully and it makes the small space feel clean and bright.
Mind the gaps. Real shiplap has a small shadow gap between boards, and that shadow is the whole look. If your strips sit perfectly flush with no gap, it just looks like a flat wall. A coin’s width between boards is about right.
Caulk the edges where the boards meet the side walls. That one step is what separates DIY from professional. Caulk fills the wavy line where board meets wall and paint over it makes the join vanish.
This is a great use for leftover material. I know someone who lined her cloffice with offcuts from a bigger project and spent nothing at all. The back wall is so small that scraps go a long way.
Add a small shelf or two in front of the shiplap and style them simply. The texture behind does the decorating for you. You do not need much on the shelves when the wall itself is the feature.
Keep the rest of the closet simple when the wall is this textured. Busy wall plus busy shelves equals visual noise. Let the shiplap be the star and everything else play a quiet supporting role.
12. The Chalk-Painted Thrifted Desk
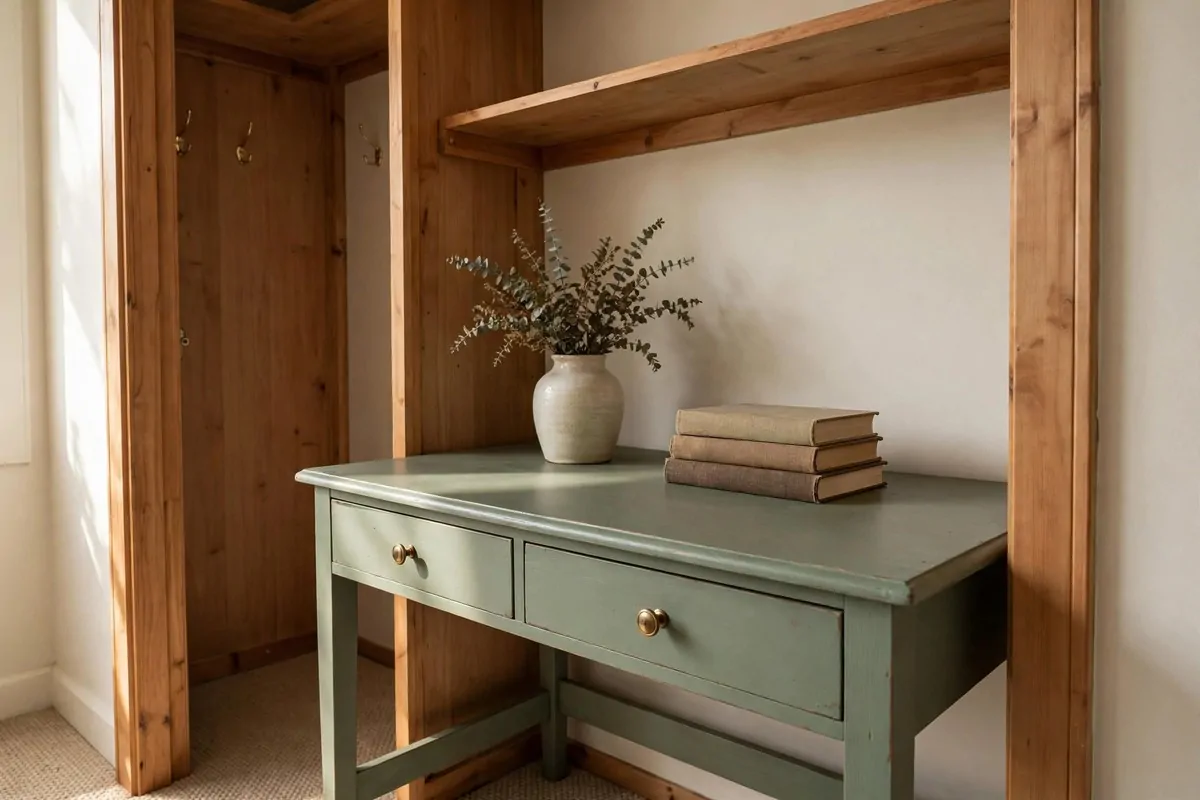
Thrift shops are full of solid wood desks with ugly finishes. Chalk paint is how you turn a ten pound ugly desk into a hundred pound pretty one.
Chalk paint sticks to almost anything with barely any prep. A quick clean and a light sand is usually enough. No primer, no stripping, no drama. For a beginner, it is the friendliest paint there is.
Sage green, warm white and dusty blue are the colours that sell the “store-bought” look. They read as modern farmhouse, which is a style people pay good money for. Brown orange 80s varnish is what you are covering, and any of these colours buries it.
Two thin coats beat one thick coat. Thick chalk paint dries lumpy and shows brush marks. Thin coats dry smooth and even. Patience here is literally the difference between handmade and homemade.
Wax it or seal it after. Chalk paint is soft until sealed, and a desk takes daily abuse. A clear wax or a water-based sealer protects the finish from coffee rings and pen scratches. Skip this step and you will repaint in six months.
New knobs finish the job. The old wooden knobs date the piece instantly. Small brass or matte black pulls cost little and drag the whole desk into the present day. It is the fastest transformation per pound on this list.
Distress it lightly if you like that look, or not at all if you prefer clean. A little sanding on the edges gives a soft worn feel. No distressing gives a crisp modern finish. Both look intentional, so pick the one you like and commit.
Measure the desk against your closet before you buy it. Thrifted desks come in odd sizes and closets do not forgive. Take a tape measure to the shop like a professional. Your future self will thank you.
I found my own cloffice desk at a charity shop for less than a takeaway. Painted, waxed and fitted with new knobs, three separate visitors asked which shop it was from. That never gets old.
13. The Stock Cabinet Conversion
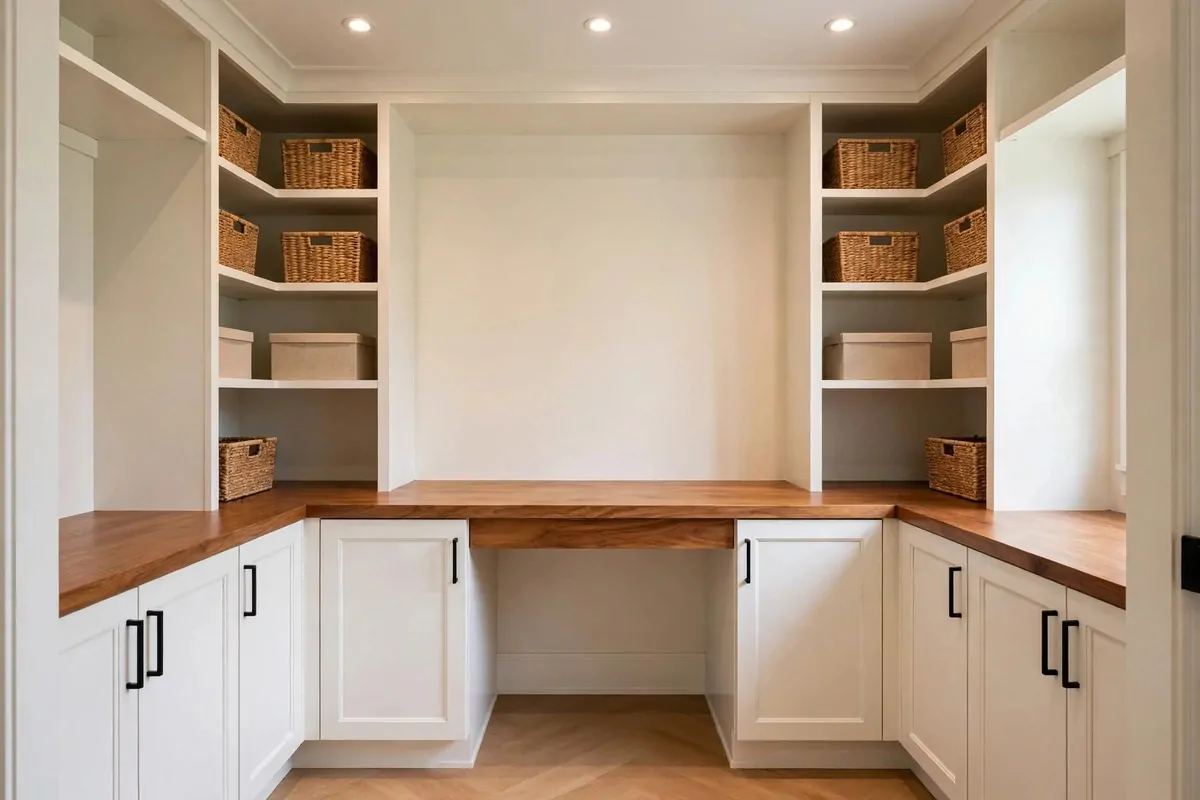
This is the closest a DIY build gets to a real fitted office. Stock kitchen base cabinets, set into the closet with a wood top, look like a joiner made them for the space.
The concept is simple. Buy ready-made base cabinets in a width close to your closet, slide them in, and top them with a wood worktop cut to fit wall to wall. Add a strip of trim and some caulk, and the gaps disappear.
Cabinets give you deep drawers and cupboards where a desk would give you knees. In a walk-in closet this trade is wonderful. You get office storage and craft storage and filing in one wall of furniture.
Here is a rough idea of what the build needs and what each part does:
| Part | What it does | Tip |
|---|---|---|
| Stock base cabinets | The desk body and all the storage | Measure the closet first, buy to fit |
| Wood worktop | The desk surface, cut wall to wall | Overhang the front by an inch |
| Trim and caulk | Hides gaps for the built-in look | Paint everything one colour |
| New handles | Lifts cheap cabinets instantly | Match them to your lamp or frame |
Leave one cabinet bay open for your chair. This is the part people forget. Two cabinets with a knee gap between them gives you storage on both sides and a proper sitting spot. Three cabinets wall to wall gives you a very pretty shelf you cannot sit at.
Level the cabinets before the top goes on. Closet floors slope more than you think. Little plastic shims under the cabinet feet take five minutes and stop the worktop rocking forever.
Paint the cabinets and the trim one colour. That single colour is what fuses separate boxes into one built-in. White is classic, but a deep colour here looks incredibly high end against a wood top.
The worktop edge is worth finishing well. Sand it smooth and oil it or seal it. Your forearms live on that edge all day, and a rough edge will annoy you within a week.
This build suits a walk-in closet best. Reach-in closets can work if they are wide, but measure twice. Cabinets are deep, and you still need room to roll your chair back.
I call this the forever cloffice. It costs more and takes a weekend, but it looks like part of the house. Estate agents would photograph it. That is the level we are talking about.
14. Door-Back Storage
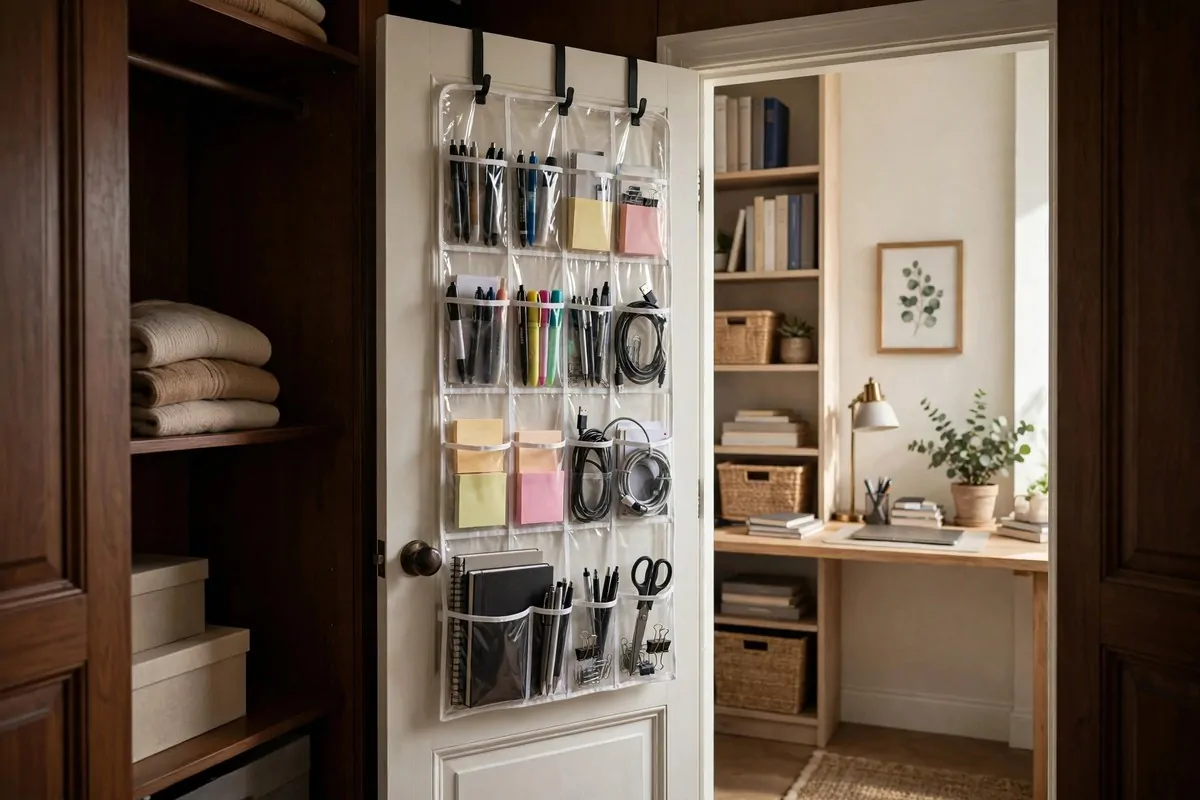
If your closet kept its door, the back of that door is free real estate. An over-door organiser turns dead space into your supply cupboard.
Clear pocket organisers are the classic. Every pocket holds mail, cables, sticky notes or chargers, and you can see everything at a glance. No digging through drawers. No mystery boxes. Just grab and go.
This is pure function, but it protects the look of the whole office. Every item living on the door is an item not sitting on your desk. Clear desks look expensive. Cluttered desks look like Monday morning.
For bifold doors, use the inside faces. Adhesive hooks, slim magnetic strips and narrow racks all work on the flat inner panels. Keep it slim so the doors still fold flat. Test the fold before you load it up.
Match the organiser to your colour scheme. A natural canvas organiser suits a warm wood office. A clear or white one suits a bright modern setup. Even a storage pocket can look styled if the colour is right.
Do not overload it. Door organisers have weight limits, and a sagging organiser full of heavy stuff looks messy and strains the hinges. Light supplies only. Heavy things belong in drawers.
Cables love door storage. A pocket just for chargers and adapters ends the daily hunt for the right cable. Coil each one and drop it in its own pocket. Future you is grateful every single day.
Kids’ art supplies, wrapping paper, gift bags, all the small stuff that ruins a tidy desk can live here too. The door becomes the junk drawer, except it is organised and hidden. Best of both worlds.
I think of door storage as the backstage of the cloffice. The audience sees the beautiful desk. The crew works behind the door. Every good production needs both.
15. The Rolling Cart Tuck-Away
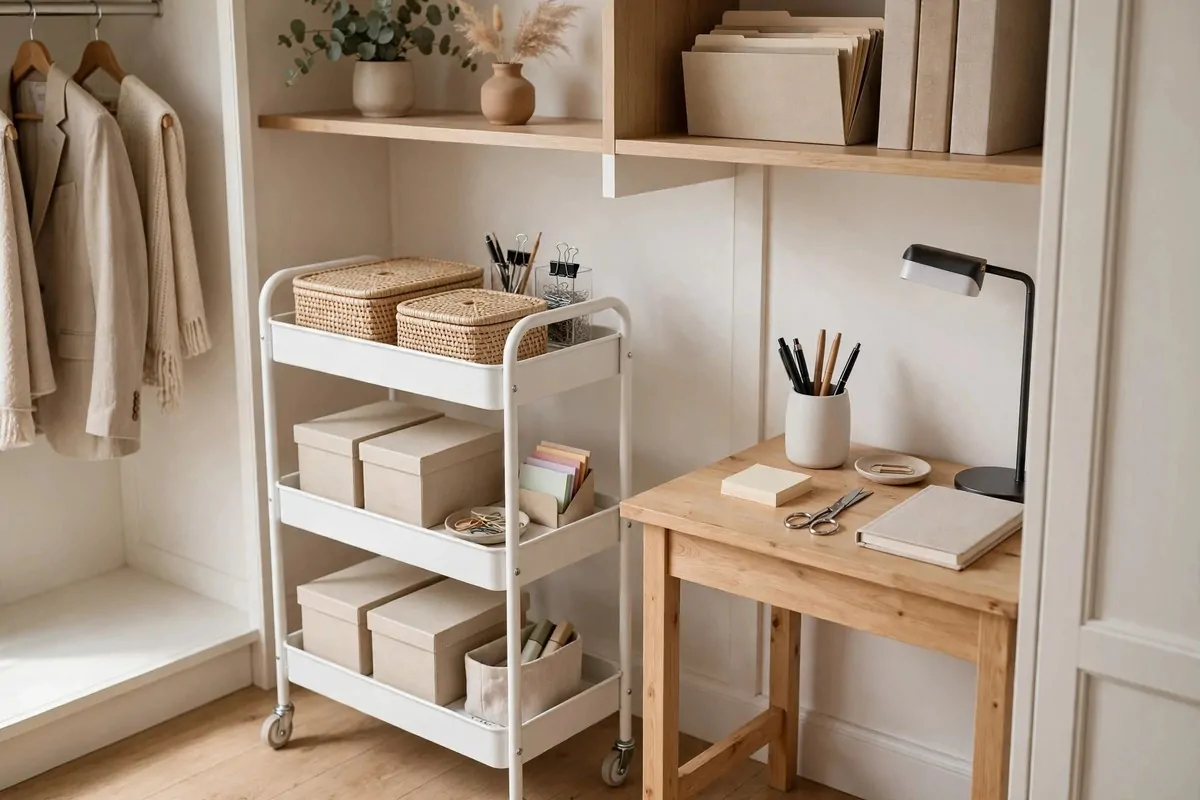
Commitment is scary in a small space. A rolling cart lets you build an office without committing to anything, and it still looks smart.
The three-tier metal cart is the famous one. It holds a surprising amount: laptop on top, notebooks in the middle, chargers and supplies at the bottom. Then it rolls wherever you need it and parks in the closet when you finish.
This is the renter’s dream setup. No holes in walls, no heavy furniture, nothing to disassemble on moving day. You just roll it into the van. Landlords love tenants whose offices have wheels.
Style the tiers like shelves, not like storage. A small tray on top, matching boxes in the middle, a tiny plant on the bottom. Styled carts photograph like furniture. Unstyled carts photograph like a hospital trolley.
Use it as a side table next to a small desk. The cart becomes your printer stand, your filing drawer and your supply cupboard in one slim footprint. Beside a floating desk, it completes the office without a single extra piece of furniture.
Lock the wheels when you work. Most carts have two locking castors. Lock them and the cart stops drifting every time you bump it. Release them when the workday ends and roll it away. Simple ritual, tidy room.
Colour matters here too. White carts disappear into bright closets. Black carts look sharp against light walls. Pick the one that matches your other metal, like your lamp or shelf brackets, and it all ties together.
I lent my cart to a friend during her flat renovation and she tried to keep it. That is the review that matters. Useful things earn their place, and this one earns it daily.
Pair it with a fold-down desk for the ultimate flexible cloffice. Desk folds up, cart rolls into the closet, doors close. The whole office vanishes in under a minute. Guests never know it was there.
16. The Curtain Instead of Doors
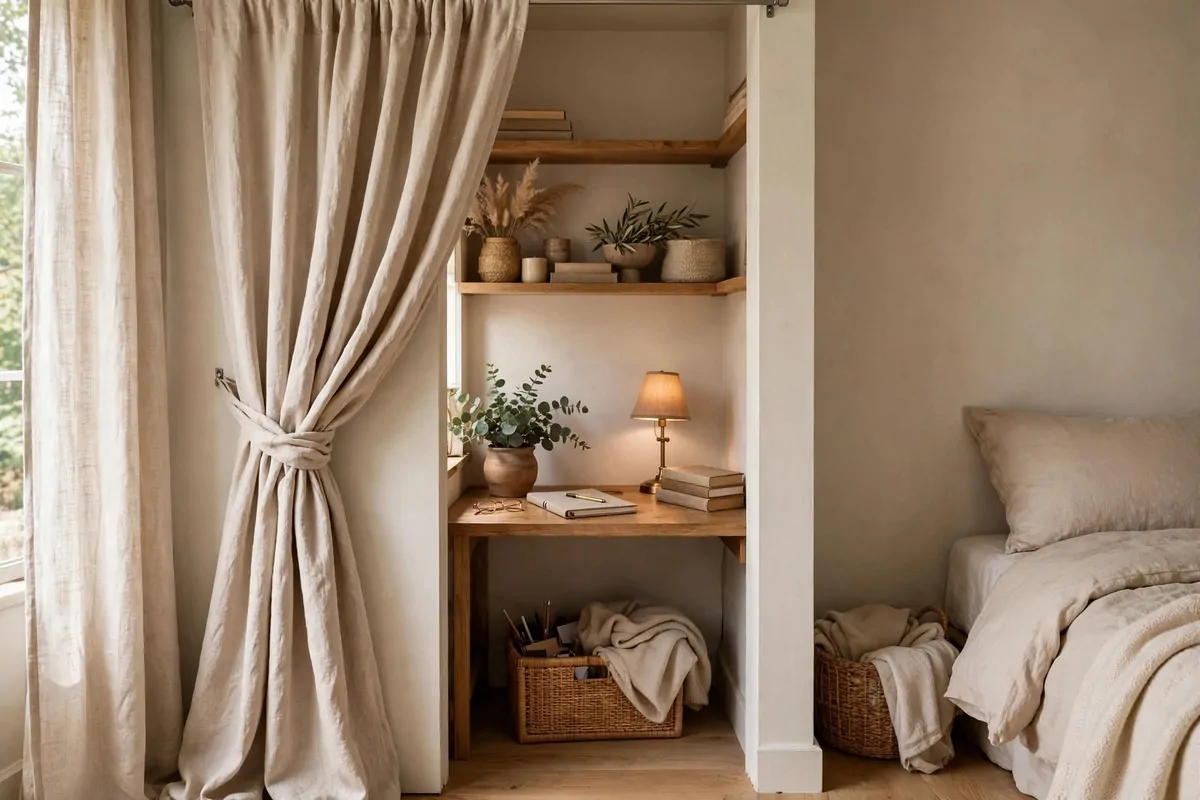
Closet doors are the enemy of a cloffice. They swing, they block light, and they take up wall space. A curtain solves all three problems and looks softer doing it.
A tension rod inside the closet opening holds a curtain with no drilling. Pull it closed and the office vanishes. Tie it back and the office is open for business. It is the cheapest room divider you will ever buy.
Fabric choice changes everything. A natural linen curtain reads calm and high end. A bold print makes the nook feel like a designed corner. Match it to your bedding or your rug and the closet becomes part of the room instead of a hole in it.
Hang the rod as high and wide as you can. A curtain hung high makes the opening look taller, the oldest curtain trick there is. Let it just kiss the floor for a tailored look, or puddle slightly for something softer.
This is the shutdown ritual made physical. At the end of the workday, you pull the curtain and work is gone. No laptop glowing at you from the corner. No papers reminding you of tomorrow. Out of sight, out of mind, genuinely.
Light still gets through most fabrics, which is a bonus. A closed door makes a closet dark and airless. A closed curtain keeps it soft and breathing. Your plants and your paint will thank you.
Washable fabric is the practical pick. Closets collect dust and office life is messy. A curtain you can throw in the wash once a season stays fresh. Dry clean only fabric in a workspace is a mistake you make once.
I love the tie-back moment best. A curtain swept to one side with a simple tie looks styled even when the desk behind it is mid-project chaos. It frames the office like a little stage. Very charming.
For couples sharing a bedroom, this is peace in fabric form. One person sleeps in while the other works, and the curtain draws a soft line between them. Small kindness, big difference.
17. The BILLY Bookcase Flank
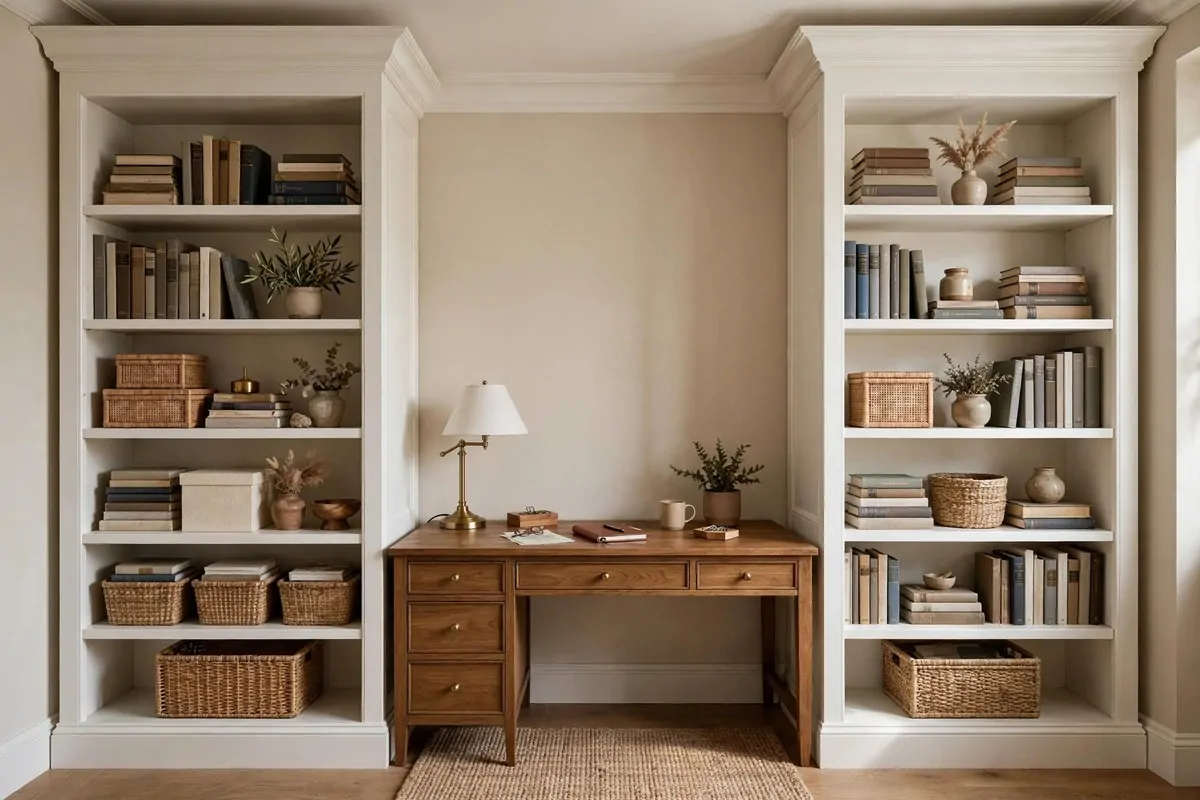
Wide closets can hold more than a desk. Flank the desk with tall narrow bookcases and the whole wall starts to look like a custom library office.
The narrow BILLY is made for this. At about 16 inches wide and nearly 80 inches tall, one unit on each side of the desk gives you floor-to-ceiling storage in a tiny footprint. Books, files, boxes and pretty things all get a home.
Anchor them to the wall. Tall bookcases in a workspace must be secured, especially with kids or pets around. The anti-tip strap is in the box. Use it. Safety first, always.
The built-in trick is trim. A strip of wood along the top where the bookcase meets the ceiling, caulked and painted, fuses the units to the room. Suddenly flat-pack looks fitted. This one detail does most of the visual work.
Paint the backs of the bookcases for extra style. A coloured backing, wallpaper, or even wrapping paper behind the shelves turns each shelf into a little display. It is a small job with a big payoff when the doors are open.
Style the shelves in thirds. One third books, one third storage boxes, one third pretty things like frames and small plants. That mix looks collected and personal. All books looks like a library. All boxes looks like a stockroom.
Keep the desk zone clear between the towers. The bookcases are the frame, the desk is the picture. If the desk area gets cluttered, the whole composition falls apart. Let the middle breathe.
This setup photographs incredibly well. Symmetry pleases the eye, and two matching towers around a desk is symmetry you can buy. It is the most pinned cloffice layout I know, and for good reason.
Measure your total width before you shop. Desk plus two bookcases needs a wide reach-in or a walk-in closet. Forcing it into a narrow closet just makes everything feel squeezed. The right closet matters as much as the right furniture.
18. The Monitor Arm and Clean Cables
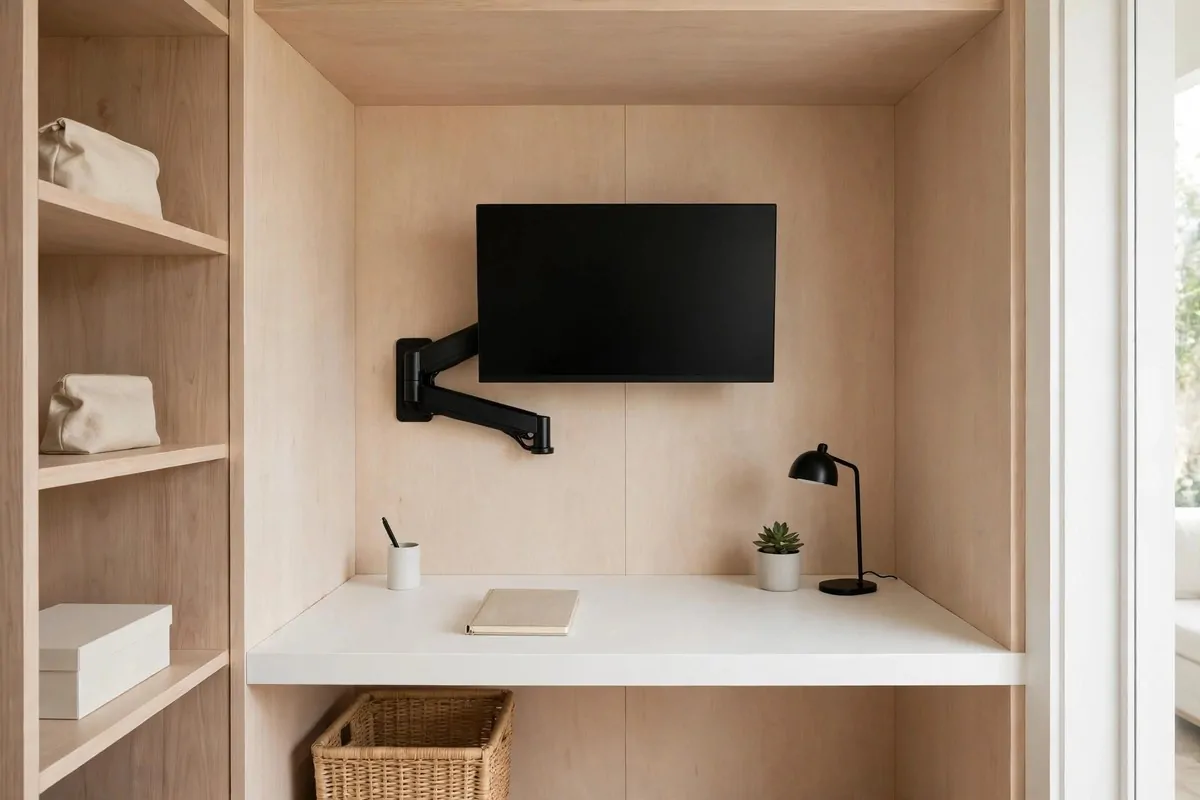
A monitor arm lifts the screen off the desk and clamps to the back edge. Instantly you gain the whole footprint the monitor stand was eating. In a closet, that reclaimed space is the difference between cramped and comfortable.
Arms also fix your posture. Raise the screen to eye level and your neck stops aching by lunch. A closet desk is often a compromise on depth, so getting the screen height right matters even more here.
Then hide every cable. This is the unglamorous work that creates the store-bought look. Here is the quick routine I use:
- Bundle: group cables with reusable velcro ties, not zip ties you have to cut.
- Drop: run the bundle down the back of the desk leg or through a desk grommet hole.
- Hide: stick the power strip in an under-desk tray or a small lidded box.
- Label: tag each plug with tape so unplugging one thing does not mean unplugging everything.
Flat plug power strips save real inches behind a desk pushed to the wall. Standard chunky plugs push the whole desk forward. A flat plug strip lets the desk sit flush, and flush looks fitted.
Match your cable covers to the wall colour. A white raceway on a white wall disappears. A black one on a white wall draws a line across the room. Details like this are invisible when right and obvious when wrong.
Charge devices out of sight. A small shelf or drawer with a multi-plug inside becomes the charging station. Phones and tablets charge hidden away instead of sprawled across the desk in a tangle.
I redid my own cables one Sunday and the desk looked new. Same desk, same monitor, same everything. Just no spaghetti. It genuinely felt like an upgrade I had paid for.
Do a cable check every few months. New gadgets sneak new cables in, and clutter creeps back. Ten minutes with velcro ties keeps the illusion alive all year.
19. The Chalkboard Paint Wall

A wall you can write on turns a closet into a planning room. Chalkboard paint on one section gives you lists, doodles and reminders with zero paper clutter.
Pick one panel, not the whole closet. The wall beside the desk or a strip above it is plenty. A full chalkboard closet can feel dark and busy. One panel feels clever and useful.
Prep matters more than the paint. Chalkboard paint shows every bump underneath, so fill holes and sand smooth first. Two or three thin coats give the best writing surface. Let it cure fully before the first doodle, or the chalk ghosts forever.
Frame the panel with thin trim for the finished look. A simple wood border turns a painted rectangle into a proper board. Paint the trim to match or stain it like your desk. Either way, the frame says this was planned.
Use it for the weekly stuff. Top three priorities, a small calendar grid, a quote you like. When the week ends, wipe it and start fresh. That wipe-clean ritual is weirdly satisfying.
Chalk markers write cleaner than real chalk and smudge less. Real chalk gives the classic dusty look but gets on your sleeves. I use markers for lists and real chalk for doodles. Best of both.
Keep a little ledge or cup for the markers right beside the board. If the pens live somewhere else, the board slowly goes blank and stays blank. Convenience is what keeps systems alive.
This is wonderful in a family cloffice. Kids can doodle on the lower half while you work above. A shared wall makes the tiny office feel like it belongs to everyone, not just to work.
Photograph the board before you wipe it. Some weeks the plan is so good you want to remember it. A quick photo keeps the ideas without keeping the clutter. Then wipe, breathe, and start the new week clean.
20. The Mini Pendant Light
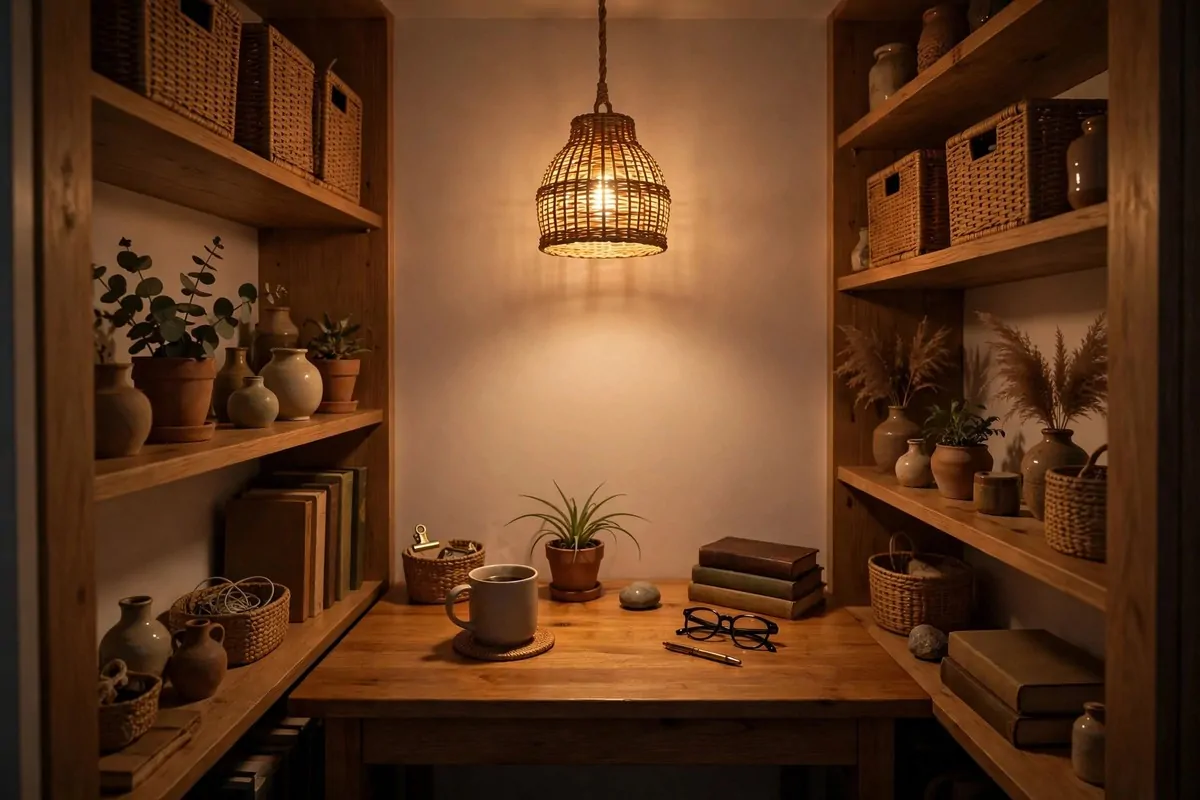
Overhead light changes a closet more than almost anything. A small pendant hung in the middle of the cloffice says this is a real room, not a cupboard with a desk in it.
Scale is everything. A big pendant in a tiny closet looks silly and hangs in your face. A small shade, eight to twelve inches across, gives light without eating headroom. Think jewellery, not chandelier.
Plug-in pendants exist for closets with no ceiling wiring. The cord runs to the wall and down to an outlet, and a cord cover keeps it neat. No electrician, no holes in the ceiling, full pendant look.
Battery puck lights can fake it too. Stick one inside a small shade or a paper lantern and hang it from a hook. It will not light the whole desk, but the glow makes the space feel finished and cosy.
Warm bulbs only. A daylight bulb in a tiny space feels harsh and flat. A warm bulb makes wood glow and skin look good on video calls. It is a two pound decision with a two hundred pound effect.
Hang it slightly in front of the desk, not directly over your head. Light falling on the work surface beats light falling on your head. You want to see your work, not wear a spotlight.
A dimmer switch or a smart bulb lets you change the mood. Bright for spreadsheets, low for evening admin. Small rooms respond dramatically to light changes, so this control feels luxurious.
I hung a rattan shade in a friend’s cloffice and the whole family started using the nook. Light invites people in. Dark corners repel them. It really is that simple.
Dust the shade now and then. Pendant shades collect dust on top where you never look, and then one day you do look. A quick wipe keeps the jewel of your cloffice sparkling.