16 Tiny Art Studio Space Hacks for Artists With Little Room

Vincent van Gogh painted some of his most famous works in a bedroom so small that his bed nearly touched both walls. He did not wait for a big bright studio with high ceilings. He painted where he could, and the room never held him back.
I think about that whenever an artist tells me they have no room to make art. A Tiny Art Studio Space is not about square footage. It is about setting up one spot where everything you need sits close to your hand, and the mess has a place to go.
Most of us are working in a corner of a bedroom, a slice of the living room, or a closet we cleared out last spring. That is enough. These 16 hacks come from real artists in tiny homes and small apartments, and every one of them makes a small space work harder without spending much money.
1. Roll It Away: An Art Cart That Parks Anywhere
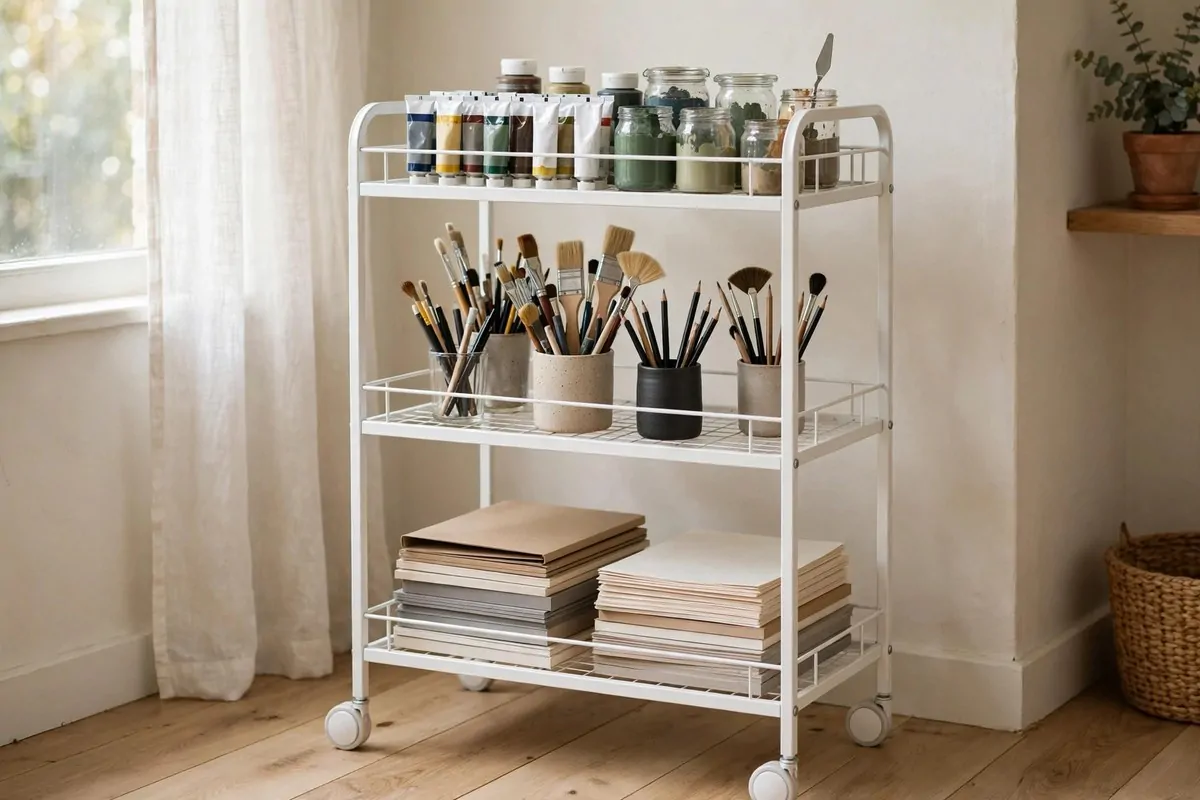
If I could only pick one thing for a Tiny Art Studio Space, it would be a rolling cart. It is the first thing I tell every artist friend who says they have no room.
A three-tier cart holds paints on one shelf, brushes and pens on another, and paper or sketchbooks on the last. The wheels are the whole point. You roll it to your table when you work, and you roll it into a corner or a closet when you are done.
It costs less than a pizza night, and it gives you a studio that packs away in one minute. No more spreading supplies across the dining table and then rushing to clear them before dinner.
I like carts with high rims on each shelf. Paint tubes slide right off flat trays, but a little lip keeps everything in place when you roll over a rug.
Clear cups or small baskets inside the cart keep brushes upright. You will grab what you need in two seconds instead of digging.
Label each tier with a strip of washi tape if you work in more than one medium. Watercolor on top, drawing in the middle, collage stuff at the bottom, for example.
The cart also works as a side table when you are mid-painting. Roll it close, park your palette on top, and your main table stays free for the canvas.
For digital artists, the cart holds your sketchbooks, pen case, and reference books next to your laptop setup. It still earns its floor space.
Keep the cart light enough to move with one hand. If it is heavy, you will stop moving it, and then it is just a shelf.
When guests come over, roll the cart into the bedroom and shut the door. Your living room looks normal again in thirty seconds.
That is the real magic of this hack. It gives you a full studio setup that disappears on demand, which is exactly what small-space artists need most.
2. A Desk That Folds Down Off the Wall
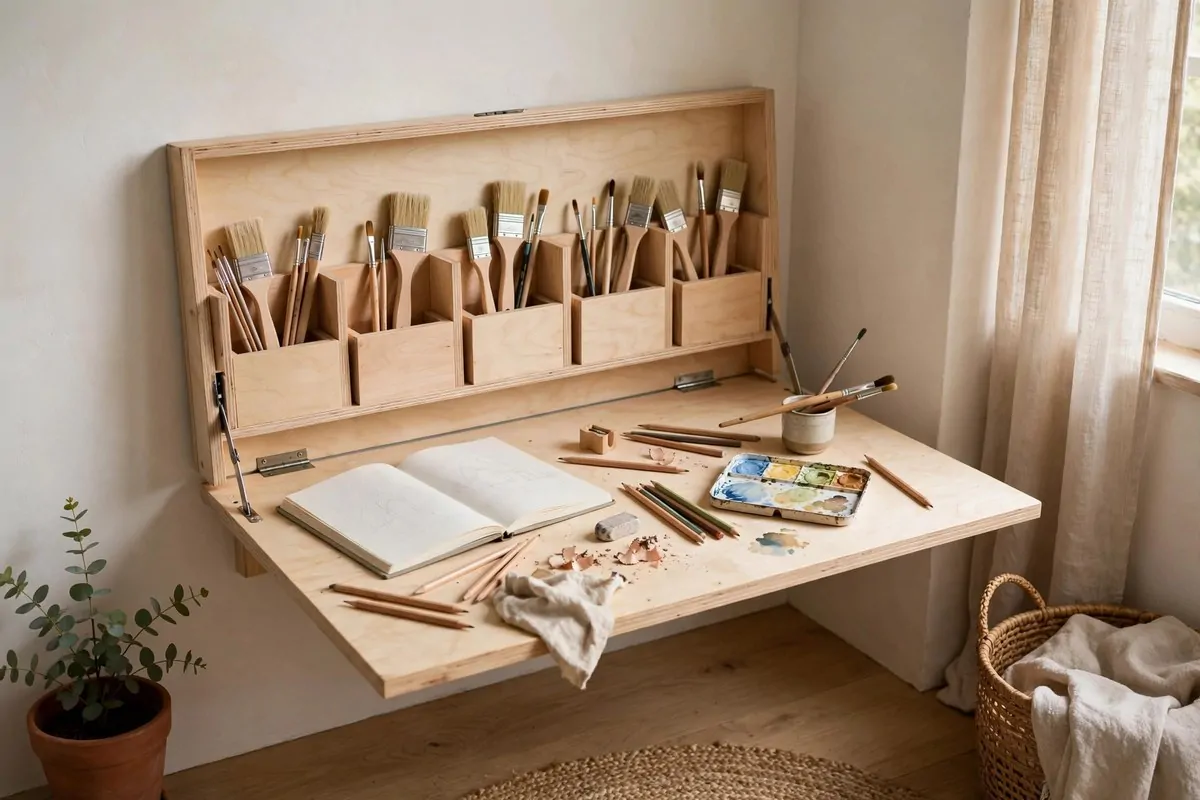
A wall-mounted fold-down desk is the closest thing to magic I have seen in small homes. When it is closed, it looks like a slim cabinet on the wall. When you open it, you have a real work surface.
You can draw, paint small pieces, and do digital work on it. The inside of the lid often has little cubbies for pencils and brushes, so your tools are right there when the desk comes down.
When you finish, fold it back up. Your room goes back to normal. I love this for people who share a living room or work in their bedroom, because the studio does not stare at you all night.
Mount it at a height that lets you sit comfortably. Measure your chair first, then hang the desk. This one step saves a lot of sore backs later.
Make sure it goes into a stud or use strong wall anchors. Art supplies are heavier than they look, and a desk full of paint jars can pull right out of weak drywall.
Keep the surface clear when you fold it up. If stuff piles on it, you will never fold it away, and the hack stops working. Make it a rule: fold, done.
Some fold-down desks come with a corkboard on the back of the lid. Pin your color chart or a reference sketch there, and it is waiting for you every time you open up.
For renters, there are no-drill versions that rest on the floor and lean on the wall. They give you the same fold-away trick without a single hole.
I once watched a friend open hers in about four seconds and close it in three. That is the speed you want. If it is fast, you will use it every day.
A fold-down desk also teaches you to work small, which is a gift. Tiny studies and sketches are easier to finish, and finished pieces keep you going.
3. A Pegboard Wall That Holds Every Tool
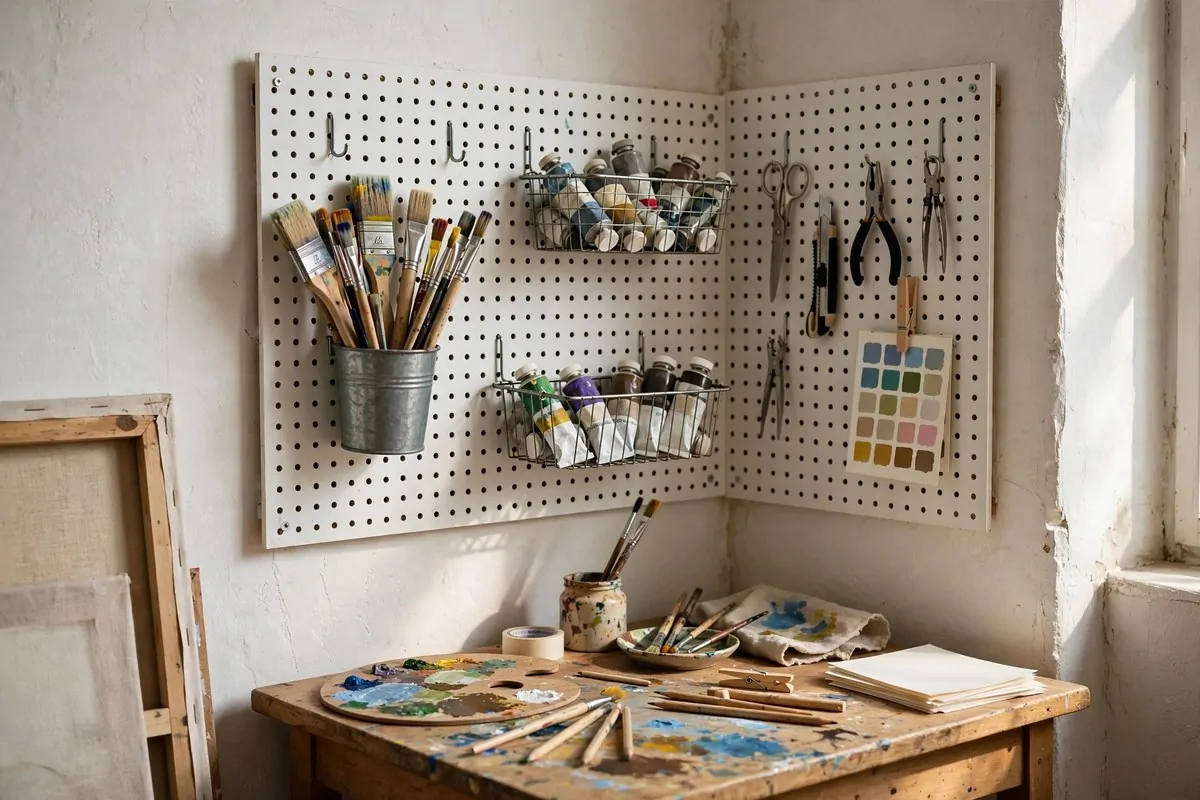
Pegboards are the best wall in a Tiny Art Studio Space, and I will die on this hill. A blank wall does nothing for you. A pegboard wall works like a second desk.
Hang cups for your brushes and pens. Hook on small baskets for paint tubes. Pin up a color swatch or two between the baskets. Everything is visible, so you never buy a second set of scissors because you could not find the first.
The hooks are cheap, and you can move them any time your setup changes. Start painting with a new medium? Shift the hooks around in five minutes. No tools needed.
Keep it to one pegboard, about the size of a large poster. Any bigger and it starts to look busy. That one board can hold a shocking amount of stuff though.
Paint the pegboard a calm color that matches your room. White or soft beige keeps it light. A sage green looks lovely if your walls are white.
Group your tools by job. Cutting tools in one spot, painting tools in another, measuring tools in a third. Your hand will learn where things live, and you will work faster.
Do not hang wet brushes on the pegboard. Let them dry flat or in a jar first. Wet paint on the wall behind the board is no fun to clean.
Add a small shelf along the bottom of the pegboard for jars of water or mediums. That way your liquids stay near your tools but never above your paper.
For renters, command strips can hold a light pegboard with small items. Test the weight first and keep heavy jars on a shelf instead.
The best part is the morning feeling. You walk to your corner, and every tool is right there waiting, lined up like a team. It makes starting so much easier.
4. A Tabletop Easel Instead of a Floor Monster
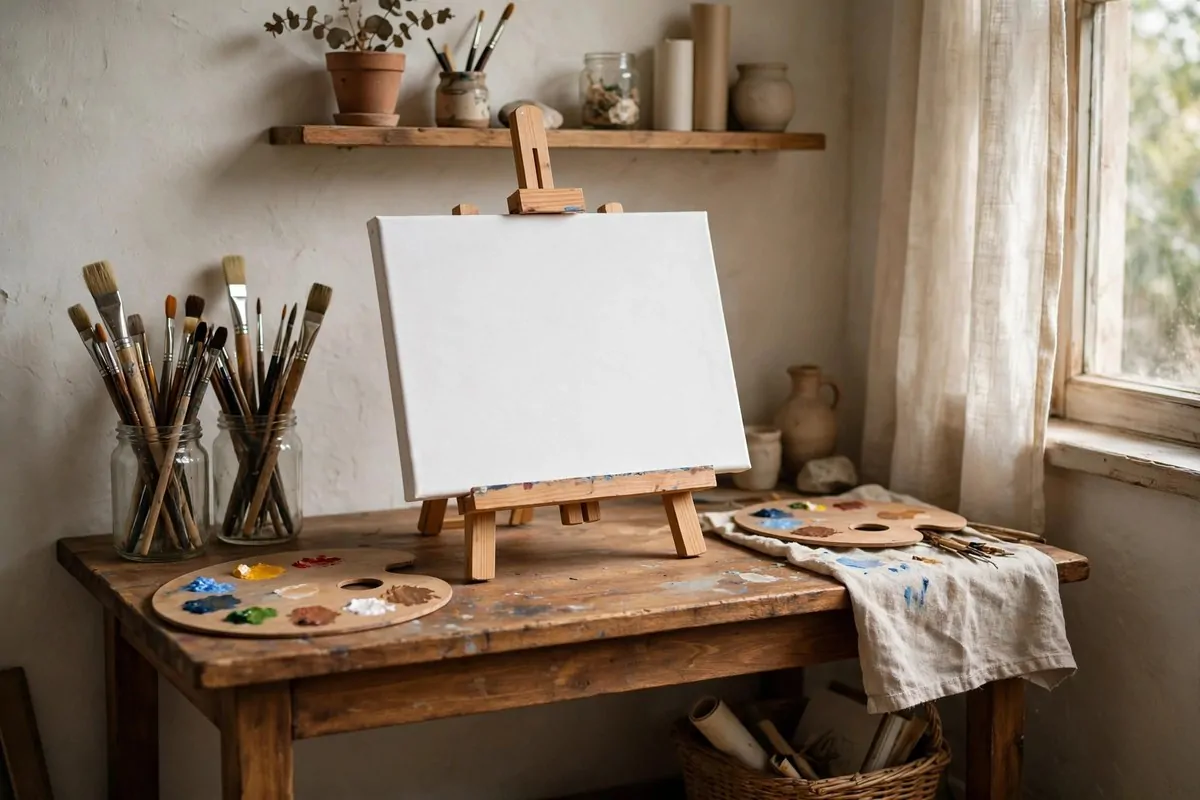
A full-size floor easel eats a corner of the room like a hungry pet. In a Tiny Art Studio Space, switch to a tabletop easel and get that corner back.
Tabletop easels sit right on your desk and hold canvases up to about 16 by 20 inches. That is plenty for studies, gifts, and most daily painting practice. They fold flat and slide under a bed when you are done.
They also tilt, so you can angle your canvas toward the light or flat for detail work. I find painting at a slight tilt is kinder on my neck than hunching over a flat table.
Wooden tabletop easels look beautiful on a shelf when you are not using them. Some artists keep a small painting on theirs all the time as decor. It makes the room feel creative even on rest days.
If you paint big, use a collapsible H-frame easel instead. It folds down to a slim bundle that leans behind a door. You still get to work large, just not every day.
For watercolor, skip the easel and use a drawing board propped on a book or a small wedge. Boards stack flat and take up almost no room at all.
Keep a folded easel near your cart or desk, not in a closet across the house. If it takes more than a minute to set up, you will paint less.
A cheap tabletop easel does the job fine. You do not need the fancy brass one until you are sure this is your forever setup.
Kids and small rooms love these too. A tabletop easel on a kitchen table turns dinner space into art space and back again with zero drama.
The lesson here is simple. Work at the size your space allows, and save the giant canvases for the rare day you can borrow more room.
5. A Vertical Rack for Canvases and Paper
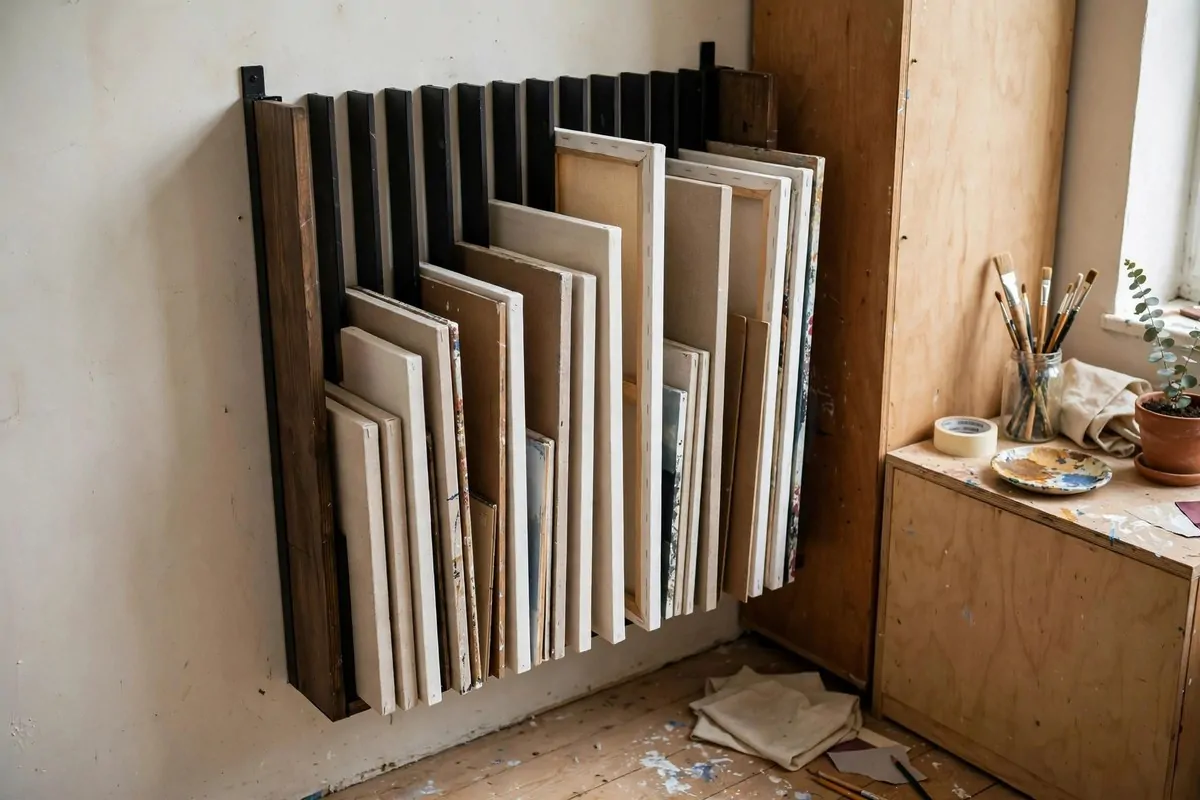
Canvases are the hardest thing to store in a small studio because they are big, flat, and fragile. Lay them on the floor and they get stepped on. Stack them against the wall and they warp.
The answer is vertical storage. A simple wall rack with slots lets you slide canvases in upright like records on a shelf. They stay flat, they stay clean, and you can flip through them to find the one you want.
You can buy a canvas rack, or you can make one with two rows of dowels or a tension rod in a narrow gap. Even the space behind a door works. That dead zone between the door and the wall is perfect.
Keep finished work in the back and works in progress in the front. That way you never have to move ten canvases to reach the one you are painting today.
Paper and pads store the same way. A tall magazine holder or an upright file box keeps pads straight. Bent paper is sad paper, and this one fix stops most of it.
Label the slots with tape if you have many pieces. “To finish” and “Done” is enough. It sounds silly, but it stops the pile from growing into a mystery stack.
Keep this rack near your work area but not in your walkway. A canvas rack in a hallway gets bumped, and bumped corners ruin edges fast.
If you are short on walls, the side of a bookshelf works too. Screw two small rails onto the side panel and slide your boards in. Nobody will even notice it is there.
This hack protects the work you already made, which matters more than most people think. A painting that gets dented in storage hurts more than a painting that never got painted.
And when you can see your finished pieces lined up, you remember why you keep making more.
6. A Drying Rack That Uses the Air, Not the Table
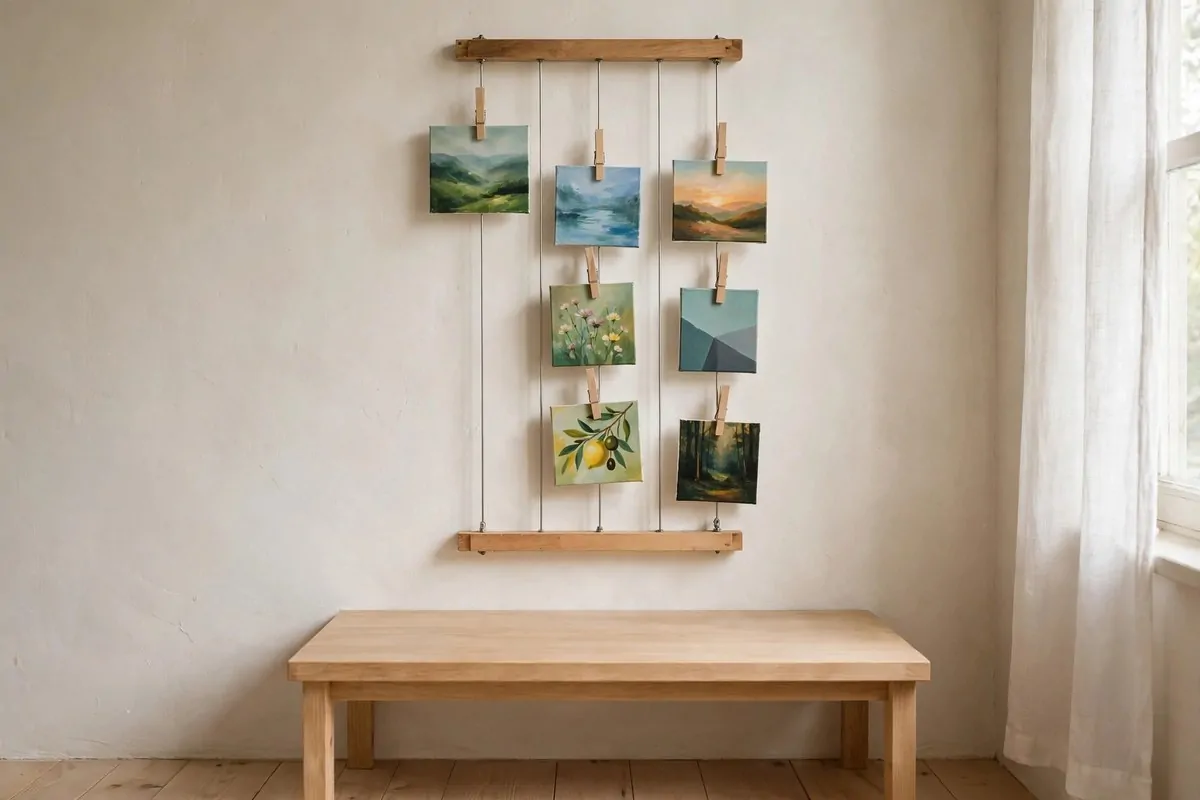
Wet paintings are the true enemy of a small studio. They lie flat on your table for two days, and you cannot use that table for anything else. It drives artists a little crazy.
A vertical drying setup fixes it. Hang a wire or a narrow shelf on the wall, add clothespins or small clips, and your paintings dry upright while your table stays free. The air reaches both sides, so they dry faster too.
A string with clothespins across one wall corner works for paper and small canvas boards. It costs almost nothing and holds a whole week of work.
For bigger canvases, a wall-mounted drying rack with slots is worth the money. It looks like a narrow bookshelf, and each slot holds one painting standing up.
Keep the drying spot away from direct sun and heat vents. Sun fades some pigments, and heat can crack thick paint. A shaded wall near your desk is ideal.
Never stack wet paintings face to face, even for a minute. They will stick, and peeling them apart ruins both. I learned this the hard way, and I still wince thinking about it.
If you use oil paint, give the rack extra room. Oils take days or weeks, and a crowded rack means touching wet paint every time you grab a canvas.
Label the back of each piece with the date you finished it. Then you know which ones are safe to move or frame.
Small tip: put a cheap plastic mat under the drying rack. Drips happen, and a mat saves your floor from a hundred tiny paint freckles.
This one change gives you your table back the same day you paint. In a Tiny Art Studio Space, that table is precious, and you should not lend it to drying paint.
7. Park by the Window, Then Add Daylight Light
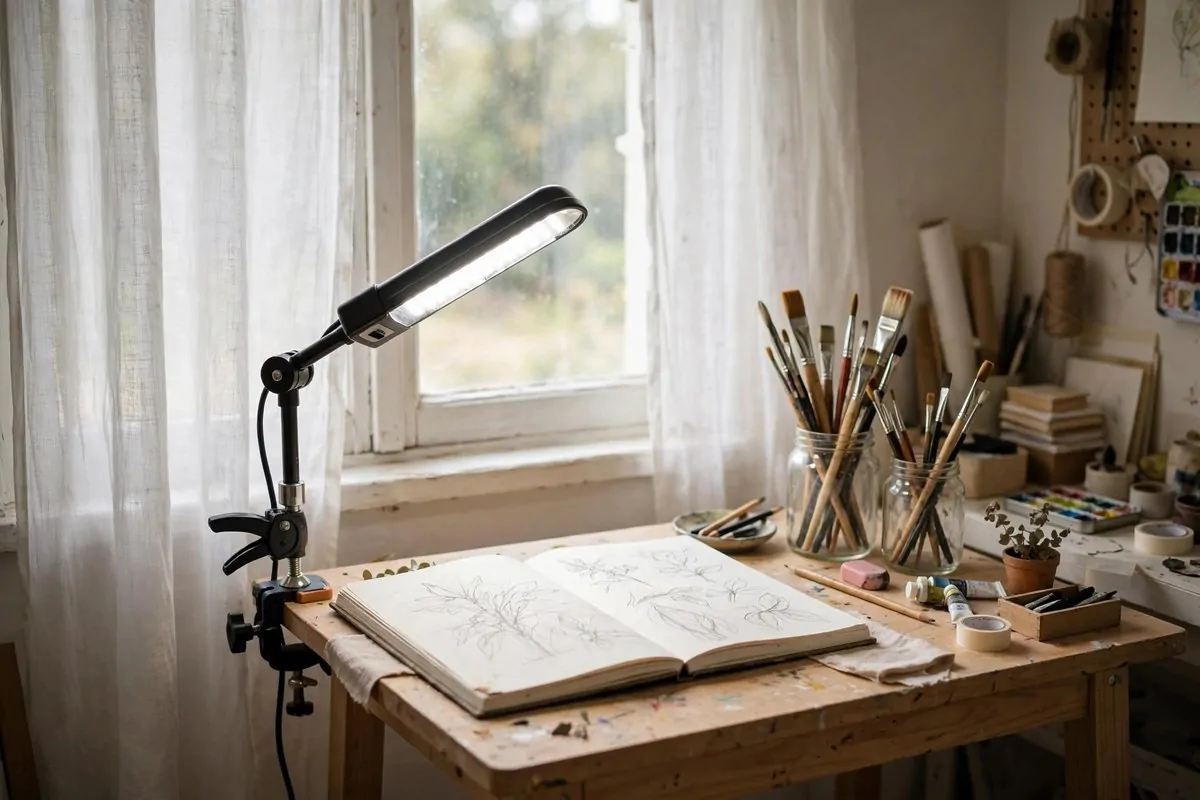
Light is the one thing you cannot fake in a Tiny Art Studio Space. Bad light makes your colors lie to you, and a painting that looks perfect at night can look muddy in the morning.
Start by putting your work table near the brightest window you have. Painters have loved north-facing light for centuries because it stays steady all day, but any window beats a dark corner.
Keep the window uncovered or use sheer curtains. You want the light to wash over your work surface, not blast your eyes. A work plane beside the window, not facing it, cuts the glare.
For evenings, get a daylight-balanced LED lamp. It mimics real daylight, so your colors stay true after dark. Clamp-style lamps save desk space and aim exactly where you need them.
Look for a lamp with adjustable color temperature. Use the cool daylight mode for color work, and switch to warm mode for sketching at night. Your eyes will thank you.
Avoid the big ceiling light as your only source. Overhead lights throw shadows from your own hand, and you will keep shifting the canvas to see.
A small mirror on the opposite wall bounces window light deeper into the corner. It also makes the whole studio feel a little bigger, which is a nice bonus.
Keep your lamp clean. A dusty shade can cut the light by a surprising amount, and a quick wipe every month costs you nothing.
If your only window faces a wall or another building, do not despair. Two daylight lamps, one on each side of your desk, give you balanced light with no harsh shadows.
Good light is the cheapest upgrade in this whole list. It costs less than a set of brushes, and it improves every single painting you make.
8. Magnetic Strips for Your Metal Tools
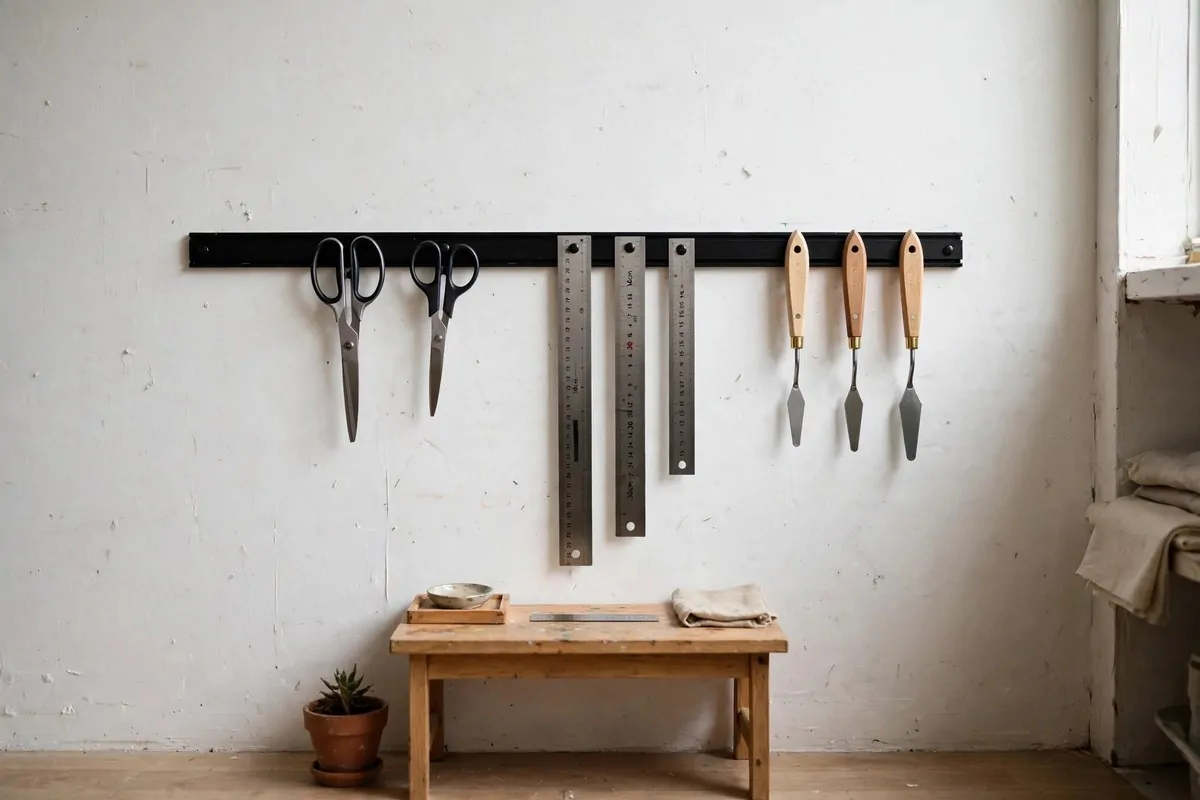
Magnetic knife strips are not just for kitchens. In a Tiny Art Studio Space, a magnetic strip on the wall holds scissors, palette knives, rulers, and metal clips right where you can see them.
They snap on and off with one hand. When you are mid-painting with a brush in your other hand, that one-hand grab matters more than you would think.
Mount the strip beside your work area at eye level. Tools you use every ten minutes should live within arm’s reach. Tools you use once a week can live in a drawer.
Keep sharp edges pointing up or sideways so you do not brush against them. A little care here saves a lot of bandages later.
These strips are cheap, and most of them screw into the wall with two screws. For renters, the strong adhesive versions hold light tools just fine.
Sort your palette knives by size along the strip. You will stop grabbing the wrong one, and your mixes will get cleaner.
Metal rulers stick to the strip too, which keeps them from hiding under paper piles. A lost ruler always shows up the day after you needed it.
Wipe the strip now and then. Metal dust and a little dried paint build up on magnets, and a damp cloth brings the grip right back.
Do not put your phone or your drawing tablet right next to a strong magnet strip. Magnets and electronics are not friends.
This is a tiny hack with a big payoff. Ten dollars, ten minutes, and a whole drawer of tools moves to the wall where it belongs.
9. Spice Racks and Wall Rails for Brushes and Jars
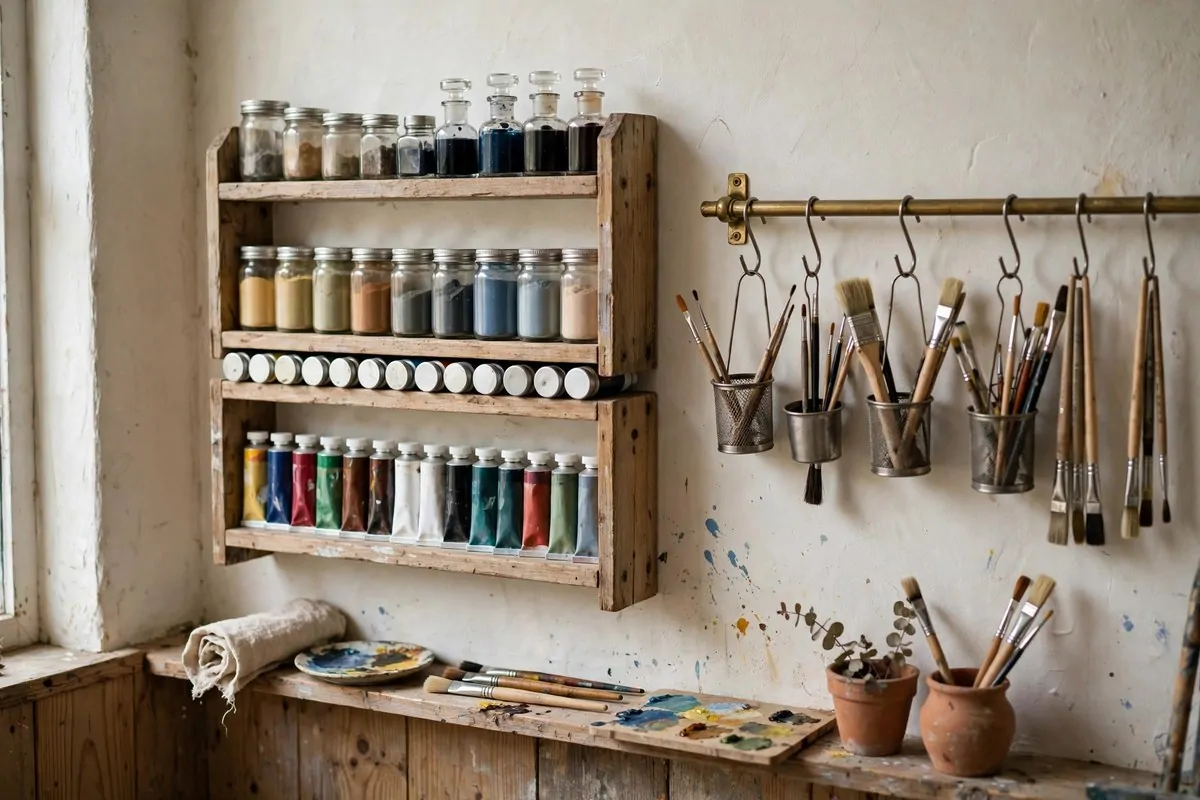
Walk through the kitchen aisle of any store and you will find your next studio organizer. Wooden spice racks are the perfect size for paint tubes, small jars, and ink bottles, and they cost almost nothing.
Screw two or three of them to the wall beside your desk. Each little shelf holds a row of supplies standing up, labels facing out. You can read every tube at a glance.
This beats a deep drawer every time. Deep drawers are where supplies go to be forgotten. A wall rack shows you everything you own in one look.
Paint the racks to match your room if the raw wood is not your style. White racks disappear on white walls, which keeps a small corner feeling calm.
For brushes, use a wall rail with small cups or S-hooks. Ikea makes one that artists swear by. Hang your most-used brushes there, bristles down, and they stay shaped and ready.
Keep the brush rail near your water jar. When you finish a wash, the rinse and the rest happen in one motion, and your brushes last years longer.
Group your jars by color family. Warm colors on one rack, cool colors on another. When you are mixing, your eyes find the right tube without thinking.
Do not overload the racks. If they are packed tight, you will knock things over reaching for the back row. Leave a little breathing room.
Check the weight as you load them. Paint tubes are heavier than spice jars, so use real screws in studs for the fullest racks.
These little racks turn a dead strip of wall into a paint library. Every Tiny Art Studio Space has a dead strip of wall somewhere, and now you know what to do with it.
10. A Craft Cabinet With Drawers and a Pegboard Door
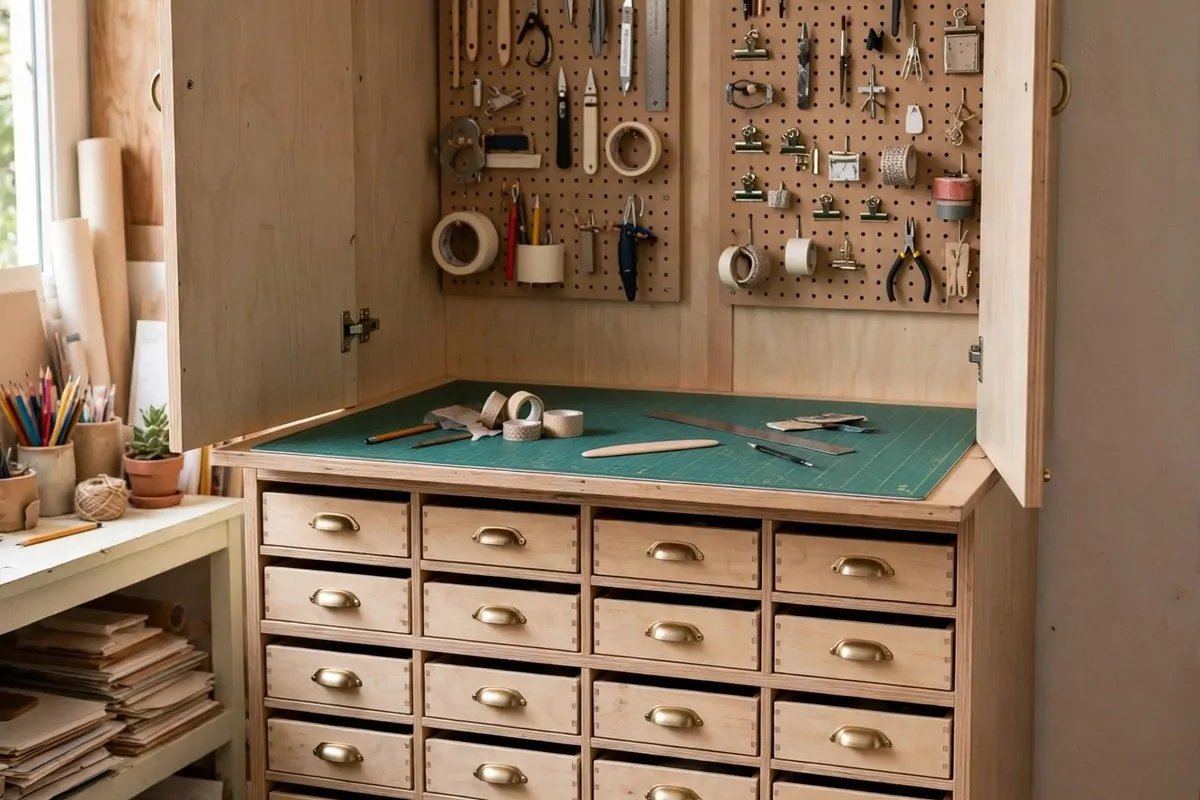
A craft storage cabinet is like a rolling cart that grew up and bought a house. It stands against one wall and holds a whole studio’s worth of supplies in the space of a bookshelf.
Look for one with lots of shallow drawers. Shallow drawers beat deep ones for art supplies, because nothing hides at the bottom. One drawer for pencils, one for pastels, one for collage papers, and so on.
Some cabinets have pegboard panels on the inside of the doors. Open the doors and your tools are right there on the board. Close the doors and everything vanishes. It is the fold-down desk trick, but for storage.
Keep the top of the cabinet clear and use it as extra work space. A cutting mat on top turns it into a second station for trimming paper or mounting prints.
Label every drawer. I use little chalk labels so I can change them when my supplies change. It takes twenty minutes and saves you years of opening the wrong drawer.
Put your most-used drawer at elbow height. Your hands should find it without bending or stretching. Rare stuff goes high or low.
A cabinet with doors keeps dust off your supplies. Dust on pastels and charcoal is fine, but dust in your watercolor pans is not.
Measure your space before you buy. These cabinets are tall, and a low ceiling or a sloped attic wall can surprise you. Measure twice, buy once.
If a big cabinet is too much, two small drawer towers stacked in a closet work the same way. The idea matters more than the furniture.
This is the hack for artists who own a lot. If your supplies have taken over the house, give them one tall home, and take your house back.
11. A Portable Studio Box That Packs Down in Five Minutes
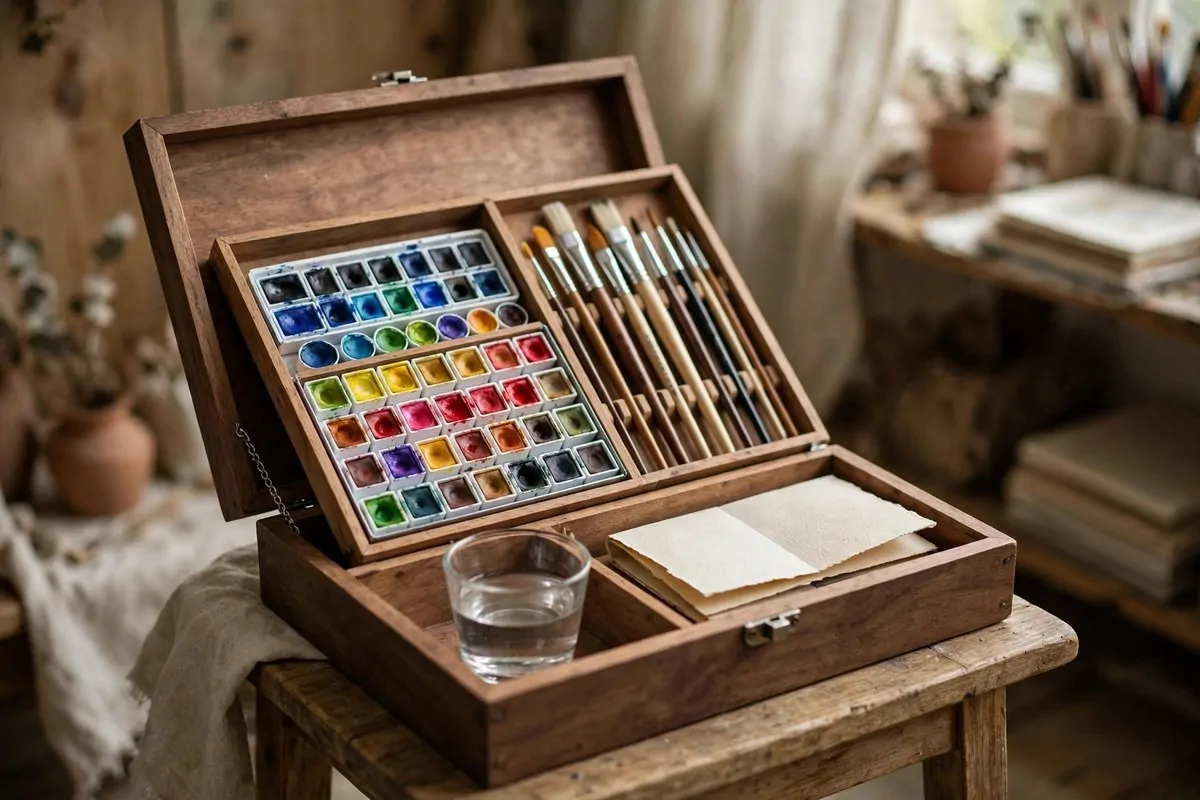
Not every artist gets a permanent corner. If you work at the kitchen table, on a shared desk, or in a room you share with someone else, a portable studio box is your answer.
The idea is simple. One lidded box holds everything you need for your main medium. Watercolors, brushes, paper, and a water cup all fit in a box the size of a small suitcase.
When you want to paint, you open the box and you are set up. When you finish, you close it and slide it under the bed or onto a shelf. Setup takes five minutes, teardown takes three.
Use small trays or pencil cases inside the box so things do not slide around. An art box that rattles like a toolbox is annoying to carry, and your tubes will thank you.
Keep a folded painting smock in the lid. You can change into it in ten seconds, and your good clothes stay clean even in a shared space.
Refill the box after every session. Nothing kills tomorrow’s motivation like opening your box to find dried-out brushes and no paper. Make it a two-minute habit.
This box is also your travel studio. Take it to a friend’s house, to the park, or on a trip, and your whole practice comes with you. Artists who travel love this hack most.
For digital artists, the box can be a slim laptop sleeve plus a pouch for your stylus, cables, and sketchbook. Same idea, different tools.
The beauty of the portable box is what it does to your excuses. You never have to clean a room to start painting. You just open the box.
A Tiny Art Studio Space can be a box on a shelf. The studio is not the furniture. It is the habit of opening the box and starting.
12. One Small Mood Board, Not a Messy Wall
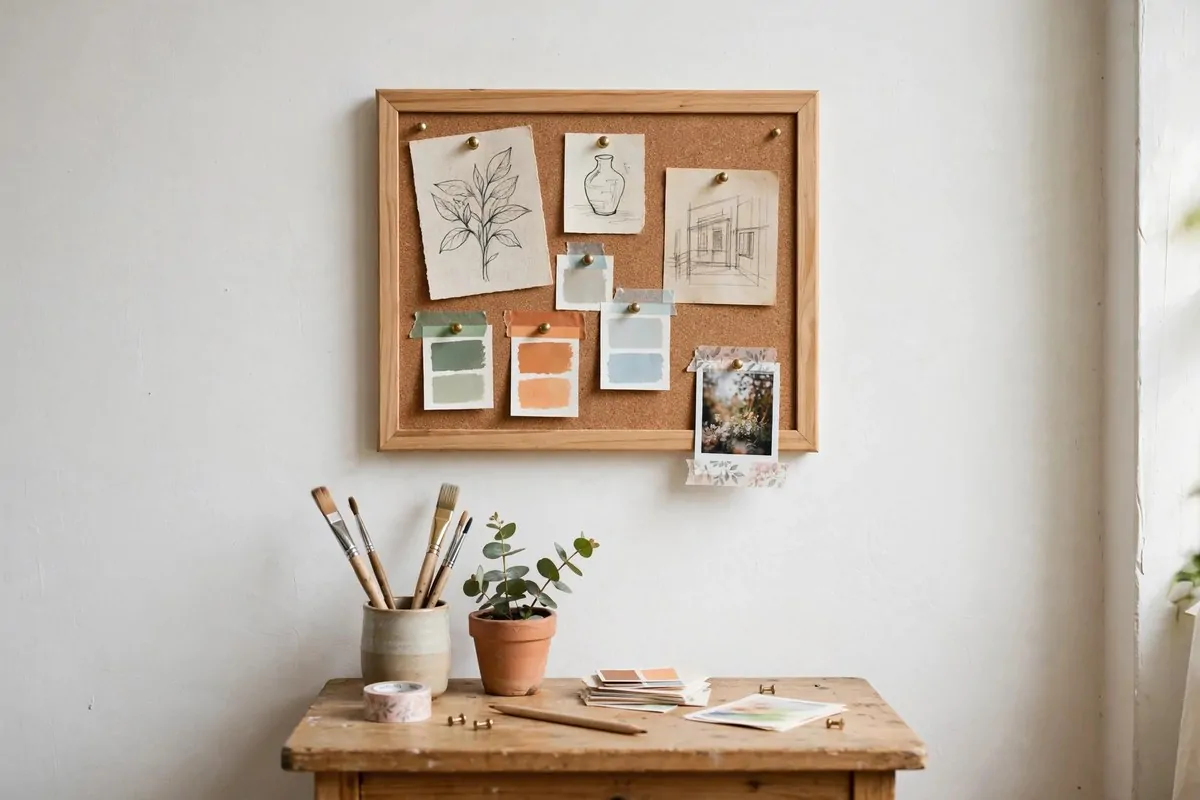
Every studio needs inspiration, but in a tiny space, inspiration can turn into clutter fast. The fix is one small mood board, kept tight and on purpose.
Use a single corkboard or a framed pin board about two feet wide. Pin up your current color palette, a sketch you love, a photo that gives you ideas, and one quote that keeps you going. That is enough.
Keep it to one board. When the board is full, something has to come down before something new goes up. This rule keeps the wall from growing into a paper jungle.
Change the board when you start a new project. Take down the old pieces, put up the new direction. It feels like a fresh start, and it focuses your eye on what you are making now.
Use washi tape or small clips instead of pins if you rent. They hold paper fine, and they come down clean when you move the board or change your mind.
Hang the board where you see it while you work, but not where it blocks your light. Above the desk or to one side is usually perfect.
A mood board is also a great place for your own finished mini pieces. Pin up a small sketch you are proud of. Seeing your own work next to your inspirations builds real confidence.
Do not pin up other people’s finished masterpieces and compare yourself to them. That is the fast road to feeling bad. Pin things that teach you, like a color mix or a composition you want to try.
Keep a little envelope on the back of the board for future ideas. Tear out magazine bits, save postcards, and drop them in. When the board needs a refresh, the envelope is full of candidates.
One board, changed often, beats a whole wall of old pins every time. In a Tiny Art Studio Space, your inspiration should energize you, not bury you.
13. Picture Ledges for Your Own Micro-Gallery
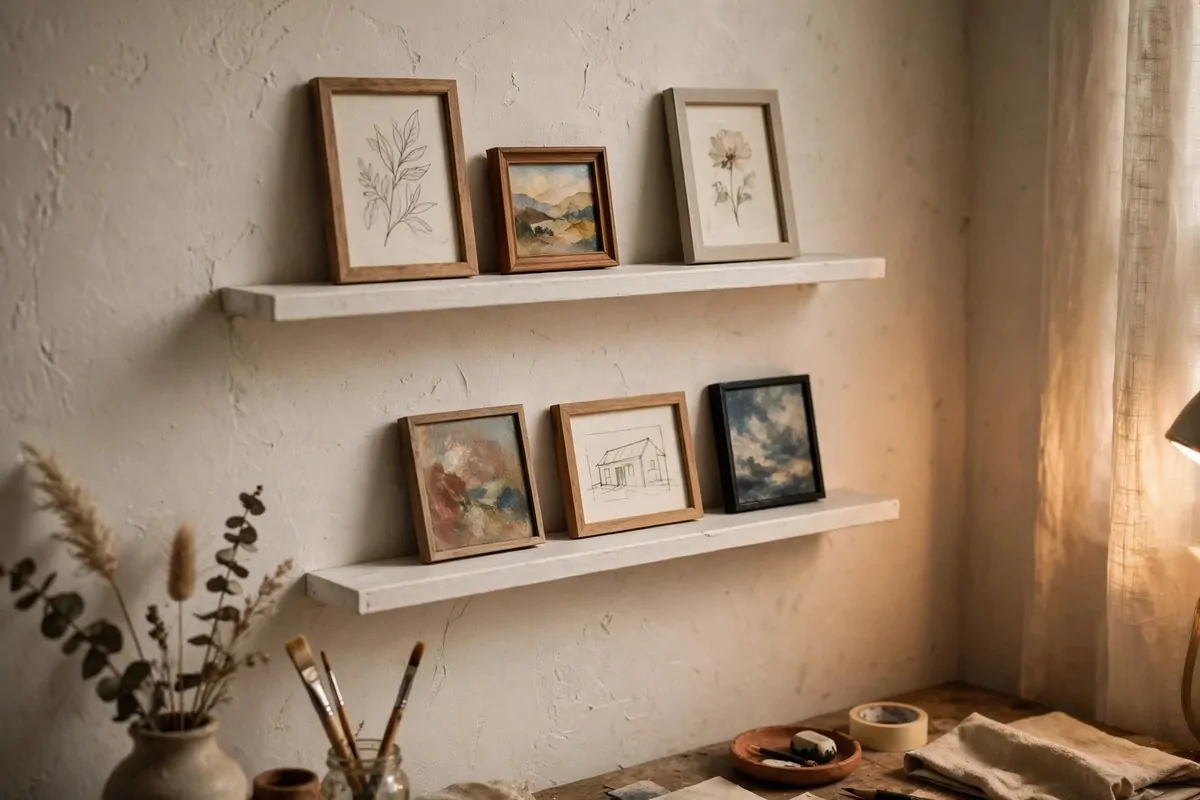
Artists need to see their finished work. It reminds you that you are actually making things, on the days when you feel like you are not. In a tiny studio, narrow picture ledges give you a gallery without giving up wall space.
A picture ledge is a slim shelf with a lip, made for leaning frames and small canvases. Mount two or three of them on one wall, and you have a gallery you can rearrange in seconds.
Lean your finished pieces on the ledges. No nails, no holes for each piece, no commitment. Swap them out when you make something new, and the wall always feels fresh.
Mix sizes for the best look. A tall piece in the back, small ones in front. Overlap them a little, like books on a shelf. It looks curated even when it took you two minutes.
Here is a quick guide to what works on ledges of different depths:
| Ledge depth | Best for | Tip |
|---|---|---|
| 2 inches | Small prints and postcards | Use sticky tack for extra grip |
| 3 inches | Canvas boards and framed sketches | The sweet spot for most art |
| 4 inches | Stretched canvases and small sculptures | Add a tiny lip so nothing slides |
Keep one ledge just for works in progress. Seeing them every day nudges you to finish them. A half-done painting on a shelf is a gentle kind of pressure.
Put the ledges where you see them when you sit down to work. Above your desk or on the wall you face. Let your own work be the first thing your eyes land on.
For renters, there are no-drill ledges with strong adhesive strips. They hold light frames fine. Test one with a cheap print before you trust it with your best piece.
Dust the ledges when you dust the room. Art on a dusty shelf looks forgotten, and you made that art, so it deserves better.
A micro-gallery also helps you track your progress. Line up this month’s work next to last month’s, and you will see how far you have come. That feeling is worth more than any new supply.
Your Tiny Art Studio Space should show your art back to you. That is what turns a corner with supplies into a studio.
14. A Two-Bucket Cleanup Station Under the Desk
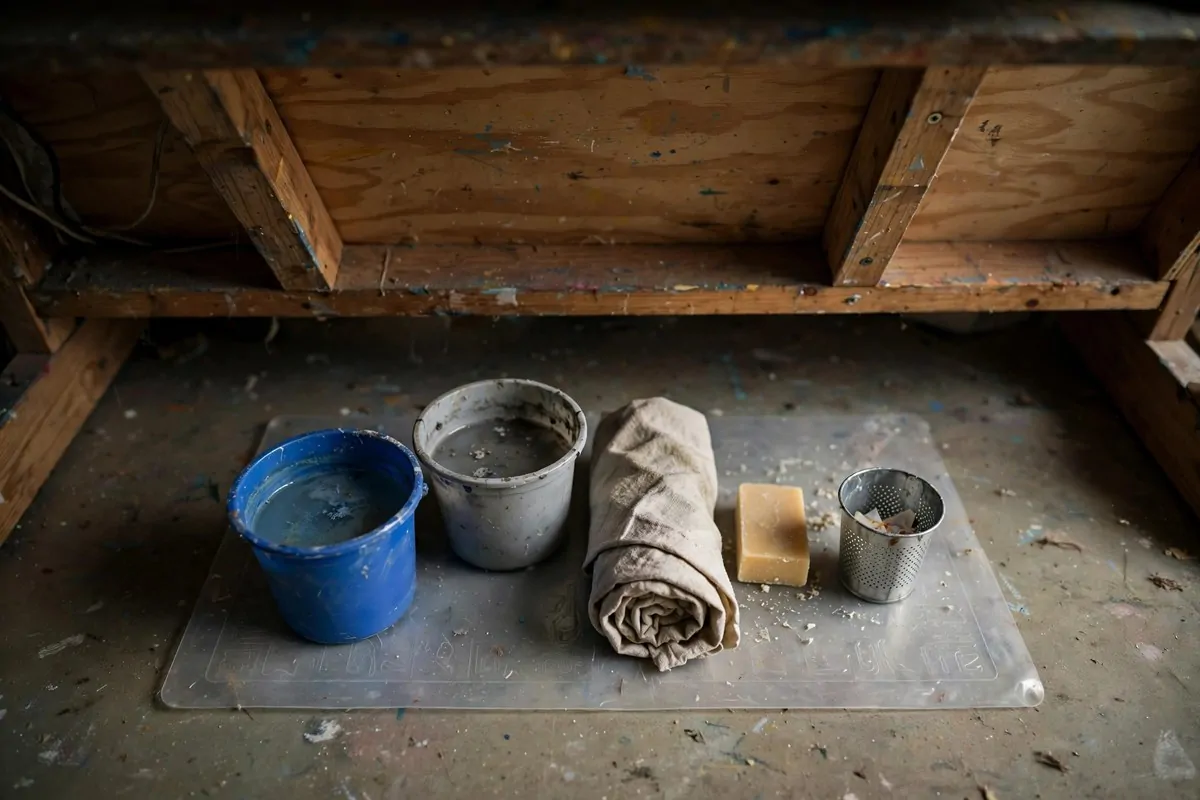
Cleanup is where tiny studios fall apart. You finish painting, and now there are dirty brushes, murky water, and paint on your hands, and the sink is two rooms away.
Build a small cleanup station that lives under your desk. Two small buckets or jars, a roll of rags or paper towels, a bar of brush soap, and a tiny trash bin. That is the whole station.
Use the two-bucket method for rinsing brushes. First rinse in bucket one, which gets dirty fast. Second rinse in bucket two, which stays cleaner. Your colors stay brighter because you are not painting with muddy water.
Keep a folded towel on the desk edge for wiping your hands. A damp towel beats ten trips to the sink, and it keeps paint off your door handles.
A roll of reusable rags is cheaper and kinder than paper towels. Cut up old t-shirts, roll them up, and keep the roll by the buckets. Toss dirty ones in a small bag and wash them together.
Here is what fits in a basic under-desk cleanup kit:
| Item | Why it matters | Size tip |
|---|---|---|
| Two rinse buckets | Keeps wash water clean longer | Soup-can size is plenty |
| Brush soap | Saves your good brushes | One bar lasts months |
| Rag roll | Handles spills in seconds | Old t-shirts work great |
| Tiny trash bin | Stops the paper pile | Fits under any desk |
Change the rinse water when it turns opaque. Painting with dirty water muddies every color you mix. Fresh water is free, so do not be stingy.
For oil painters, swap the water for a small sealed jar of solvent and keep it closed when you are not using it. Ventilate the corner well.
Empty the trash bin at the end of every session. A full bin of paper scraps and tape is how a clean studio slowly turns into a messy one.
This station makes cleanup a five-minute job instead of a twenty-minute chore. And when cleanup is easy, you paint more often. That is the real hack hiding inside this hack.
15. Turn a Closet Into a Mini Studio
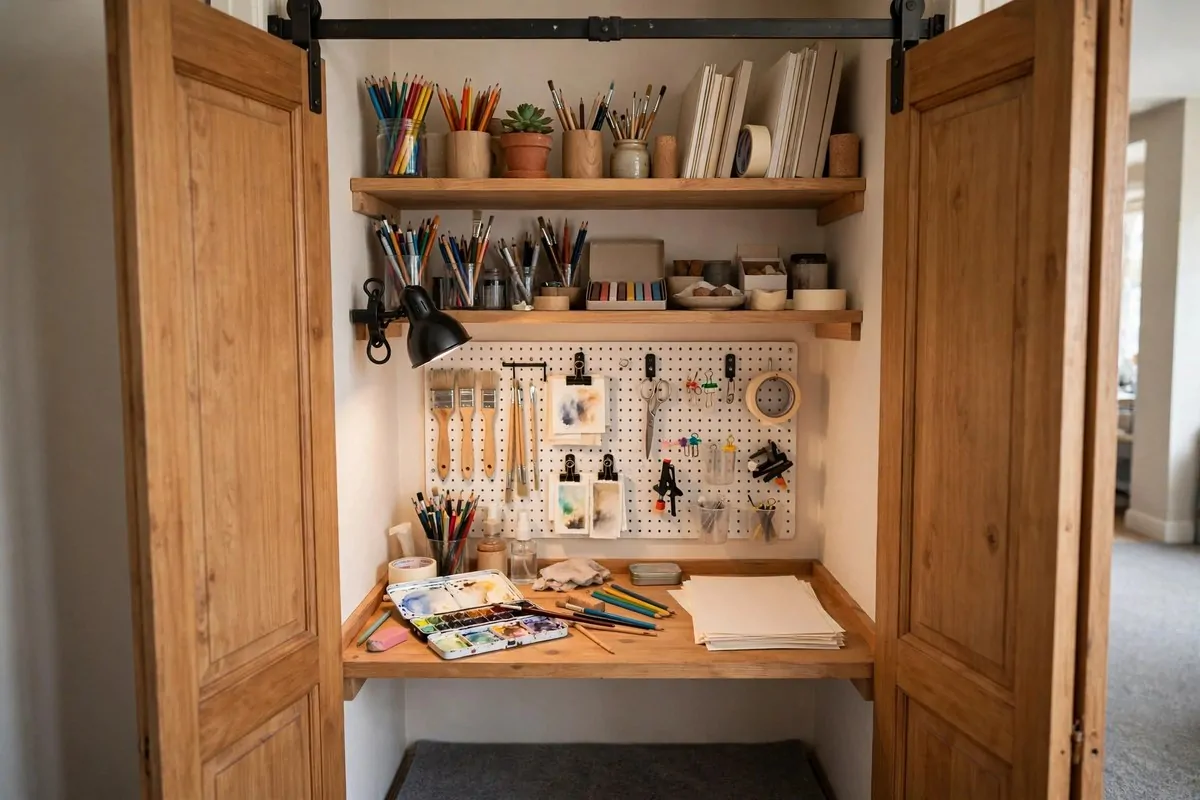
The most wasted space in most homes is a closet nobody opens. If you have one, you might be sitting on a whole Tiny Art Studio Space that is just waiting for a desk.
Take the doors off if you can, or slide them open. Put a small desk or a board across two shelf brackets inside. Add a shelf above for supplies, a pegboard on the back wall, and a clip-on light.
The beauty of a closet studio is the closing. When you are done, you shut the doors, and the studio is gone. Your room looks tidy, and your brain gets to leave work behind.
Lighting is the one thing you must add. Closets are dark. A daylight LED strip or a clip-on lamp fixes it for very little money. Aim it at your work surface, not at your eyes.
Ventilation matters if you use anything with fumes. Keep the doors open while you work with solvents or spray fixative. Your lungs will thank you.
Use the closet walls hard. Pegboards, spice racks, magnetic strips, all the hacks from this list fit perfectly inside a closet. It is a small box, so every wall earns its keep.
Keep a small stool that tucks fully under the desk. When the doors close, nothing should stick out. Measure the stool against the closet depth before you buy.
If the closet has a high shelf, use it for flat paper storage and finished work. It is out of the way and safe from spills.
This setup works beautifully for digital artists too. A closet holds a monitor, a keyboard, and a tablet arm with room to spare, and the doors hide the whole glowing setup at night.
A closet studio is proof of the big idea in this list. You do not need a room. You need a door you can close, a light you can switch on, and a spot where your tools live.
16. A Curtain and a Mirror to Carve Out Your Zone
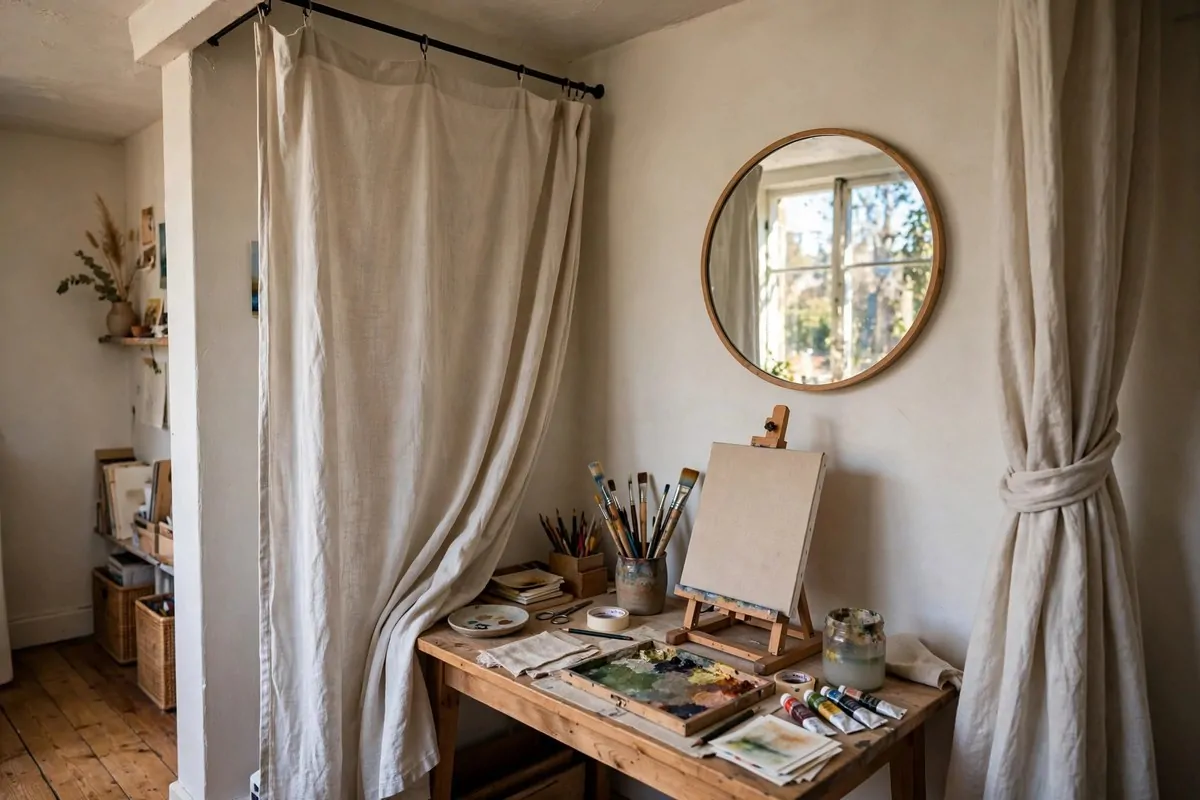
Sometimes the last thing a Tiny Art Studio Space needs is not furniture. It is a boundary. A simple curtain tells your brain that this corner is the studio, and the rest of the room is home.
Hang a curtain rod from the ceiling or use a tension rod between two walls. A light fabric curtain divides your art corner from the bedroom or living room without making the space feel closed in.
Choose a curtain in a calm color or a fun print you love. It becomes part of the studio’s personality. I know an artist whose sunflower curtain makes her smile every time she pulls it open.
Pull the curtain closed when you start working. It is a little ritual that says art time has begun. Pull it open when you finish, and the room breathes again.
A mirror on the studio side of the curtain does two jobs. It bounces your window light deeper into the corner, and it makes the whole zone feel bigger. A round mirror above your desk looks lovely and costs little.
Place the mirror so it reflects the window, not your screen or your canvas. Reflected light is the goal, not reflected glare.
Keep the curtain washable. Paint splatters happen, and a curtain you can toss in the wash is a curtain you will not stress about.
If a curtain feels like too much, a folding screen does the same job and needs no rod. Open it when you paint, fold it flat when you are done.
This is the cheapest zone-maker in the whole list. One rod, one curtain, one mirror, and your corner stops being a corner and starts being a studio.
Your brain loves clear edges. Give your art a home with walls, even soft fabric ones, and you will be amazed how much more you make there.