23 Family Photo Studio Ideas for Portraits You’ll Treasure

In twenty years your kids will not remember what color the backdrop was. They will not remember the softbox, the stool, or which camera lens the photographer used.
What they will remember is the feeling. The laughing fit in the middle of the shoot. Your hand squeezing theirs right before the shutter clicked. That warm, squished-together joy of being a family, caught on purpose.
That is why these 23 Family Photo Studio Ideas matter more than they look. A studio setup is not about fancy gear. It is about building a little world where your family feels safe enough to be silly, sweet, and completely themselves.
I have set up studios in living rooms, spare bedrooms, and one very dusty garage. Some of the ideas below cost almost nothing. Others are simple upgrades that change everything. Pick the ones that fit your space and your family, and start with just one.
1. The Seamless Paper Sweep
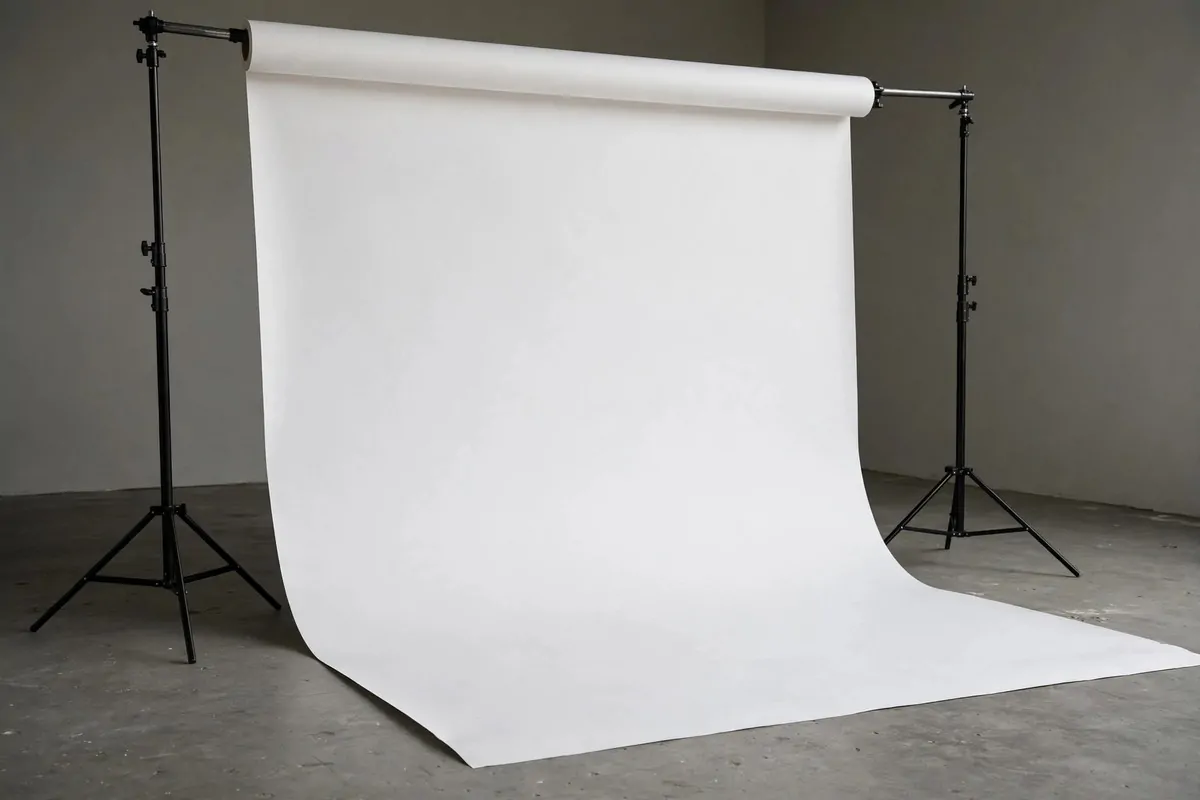
The white seamless paper sweep is the oldest trick in studio photography. One roll of paper. Unrolled from a stand. Curved gently onto the floor.
That curve is the whole magic. It erases the line where the wall meets the floor, so your family floats in a clean white space with no edges and no corners to distract the eye.
You can buy a roll of seamless paper in white, gray, black, or soft pastel colors. White is the friendliest place to start. It suits every outfit and every skin tone.
Hang the roll on a simple backdrop stand, the kind with two tripods and a crossbar. Pull the paper down and let it sweep forward about four or five feet onto the floor.
Keep your family a few steps in front of the paper, not pressed against it. That little gap is what keeps shadows soft and the portraits looking three dimensional.
Dirty footprints happen, especially with little kids. Just cut off the used strip and pull down a fresh piece. That is the beauty of paper. Every session gets a brand new background.
A wide angle view looks best when the paper is wide enough for the whole group. For a family of five or six, pick the widest roll you can find so nobody gets cropped by the paper edge.
2. The Steamed Muslin Backdrop
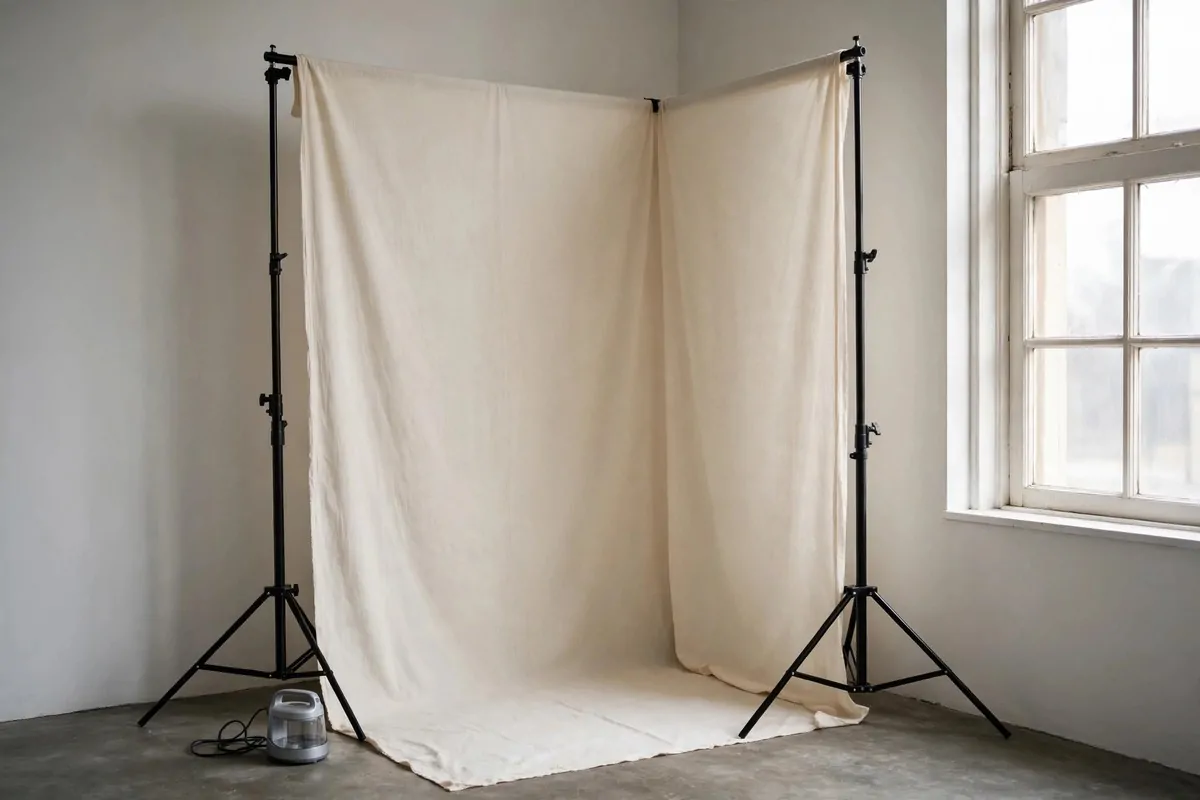
Muslin is the fabric backdrop that real studios have used for decades. It is a soft, woven cotton that hangs with gentle folds and never looks flat or shiny.
The color range is huge. Warm creams. Soft grays. Sage greens. Dusty blues. Pick a color that suits your home style and the season you are shooting in.
The number one rule with muslin is to steam it first. Wrinkles catch light and draw the eye away from your family. Ten minutes with a handheld steamer saves the whole shoot.
A sturdy backdrop stand matters more than you think. Muslin is heavier than paper, and a wobbly stand will sag in the middle. Tighten every knob and check the balance before your family arrives.
I like to clip the bottom corners slightly forward with small clamps. That tiny pull smooths the fabric and keeps it from billowing when someone walks past.
You can wash muslin in a gentle cycle and hang it to dry. Roll it, do not fold it, for storage. Folds turn into hard creases that even steaming struggles to remove.
This backdrop gives portraits a soft, fine-art feel that white paper cannot quite match. It whispers instead of shouts. Your family becomes the brightest thing in the frame.
3. The White Shiplap Wall
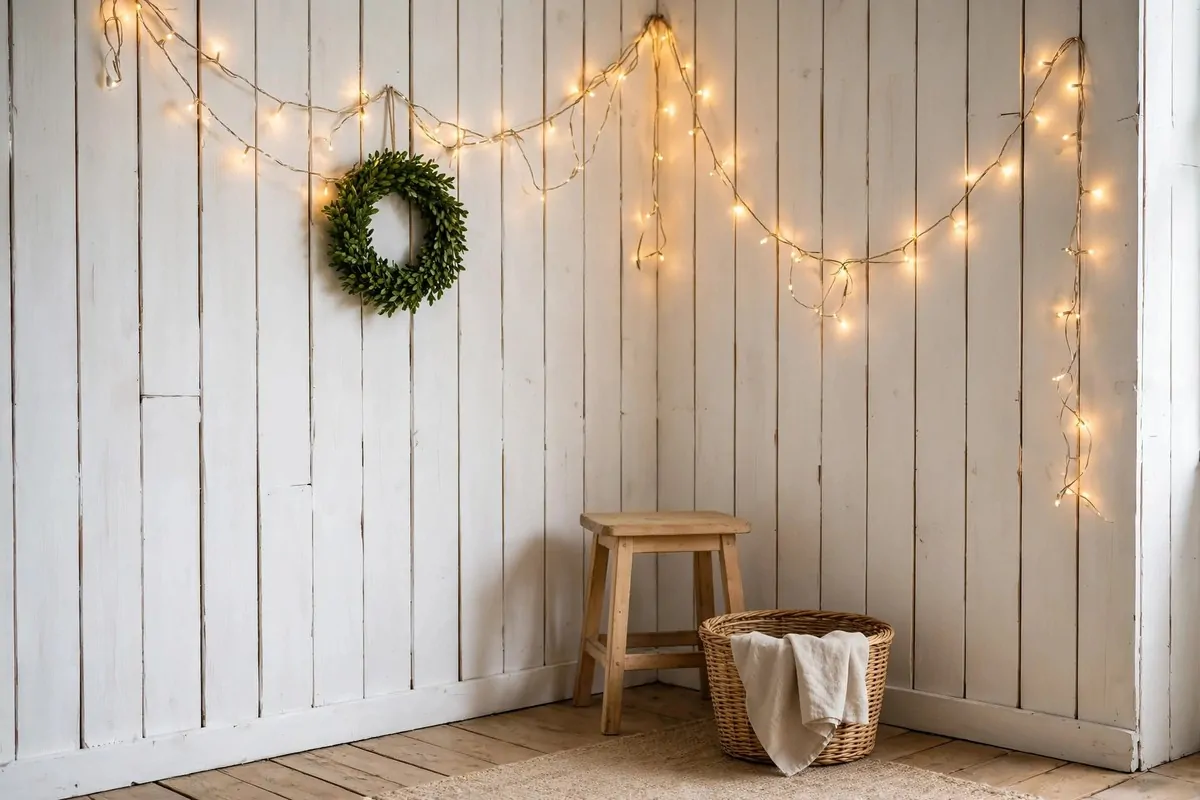
A shiplap wall brings the farmhouse look straight into your studio. Those long horizontal planks in white or soft gray read as warm and homey in every single photo.
You do not need to rebuild a wall to get this look. Real painted planks are best if you have a permanent space. A vinyl backdrop printed with shiplap pattern works beautifully for everyone else.
Dress it lightly. A small boxwood wreath. A string of warm fairy lights draped in a loose swag. That is plenty. The planks already carry the charm.
Keep props low and wooden. A plain stool. A woven basket with a folded throw. Anything too shiny fights the cozy farmhouse mood.
This backdrop loves texture in clothes. Knit sweaters. Denim. Soft flannel shirts. These fabrics echo the wood grain and make the whole photo feel tied together.
Sand the edges of painted planks just a little if you want a weathered feel. The bare wood peeking through adds age and story to the wall, and the camera loves it.
One warning. Keep your family at least a couple of feet from the wall. Standing too close makes the planks compete with faces for attention, and faces should always win.
4. The Flower Wall
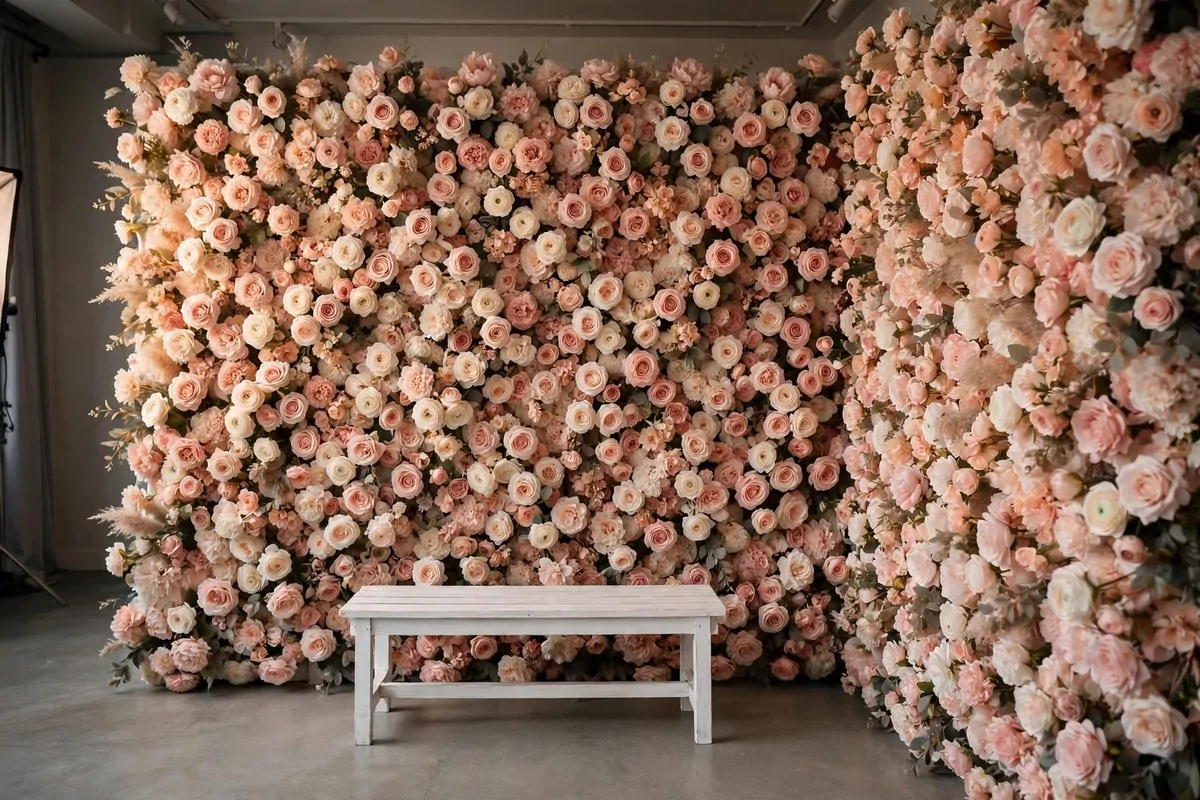
A flower wall is pure joy in backdrop form. Hundreds of artificial blooms packed tightly together make a wall of soft color that glows in photos.
Use high quality artificial flowers, not the thin shiny kind. Layer different sizes and a few shades of the same color family. Blush pink, cream, and peach never go wrong together.
Build it on a simple frame or a large fabric panel. You can zip-tie stems to a wire grid, then hang the whole thing like a picture. It sounds like work because it is, but the result is stunning.
Lighting matters here. Side light rakes across the petals and shows off their texture. Flat front light turns the wall into a mush of color. Move your softbox to the side and watch it come alive.
Keep outfits simple and solid colored. The wall is the busy part of the photo, so let your family be the calm part. Cream, white, and soft denim all work.
A small white bench in front of the wall gives kids a place to sit and couples a natural pose. Without it, people stand awkwardly and nobody knows what to do with their hands.
This setup is a favorite for spring sessions, motherhood portraits, and any family that loves a little romance in their photos. It photographs like a dream every time.
5. The Balloon Garland Corner
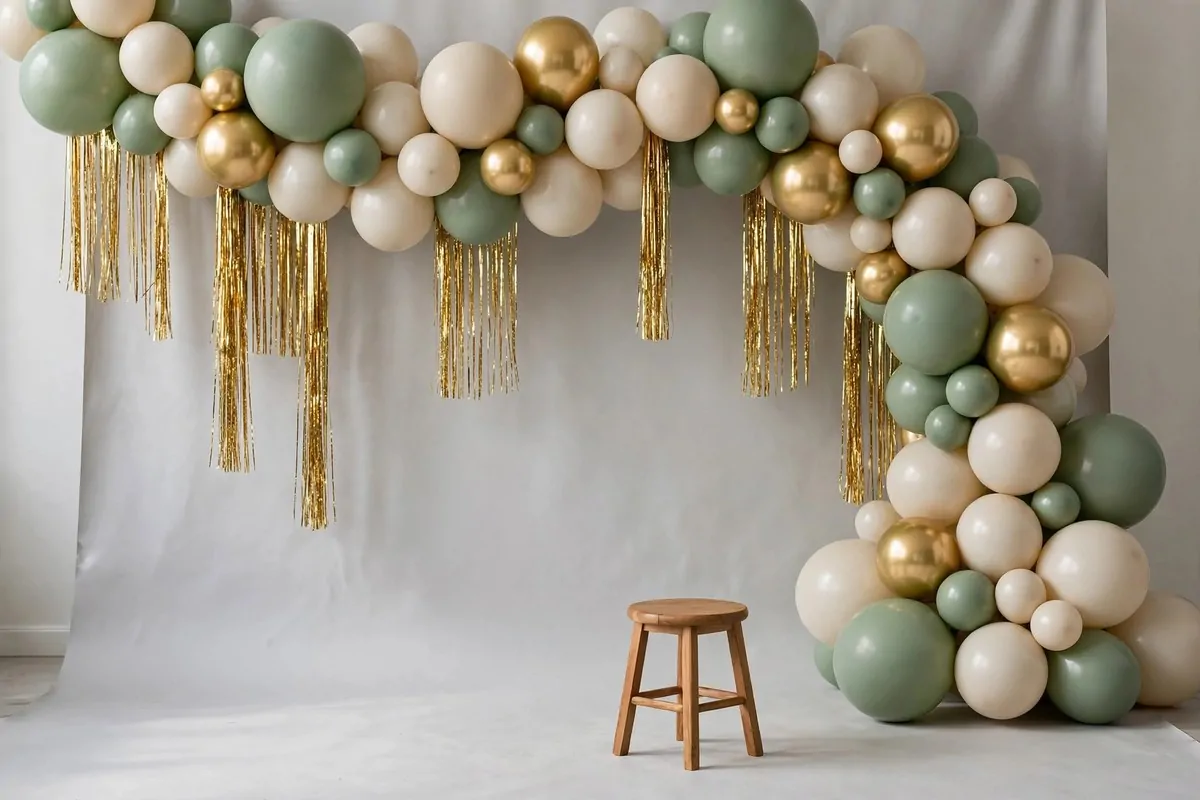
Balloons turn an ordinary portrait session into a celebration. An organic garland, where balloons cluster in different sizes, looks far more expensive than it is.
Mix three sizes of balloons. Five inch, eleven inch, and big twenty four inch ones. The size mix is what makes it look professional instead of party store.
Add a few metallic balloons in gold or rose gold. They catch the light and give the whole corner a little sparkle without going over the top.
A decorating strip makes assembly much faster. It is a plastic strip with holes that holds each balloon knot. Plan two to three hours to build a full arch, and do it the night before.
Hang the garland from a stand or secure it to the wall with removable hooks. It should drape like a loose arch or a swooping cloud, not a flat line.
Put one small stool or a round pouf in front. It anchors the composition and gives your family a clear place to gather around.
This corner is perfect for birthdays, milestone photos, new year portraits, and any session where you want real smiles. Kids light up the second they see balloons, and genuine joy is the best prop of all.
6. The Fairy Light Bokeh Wall
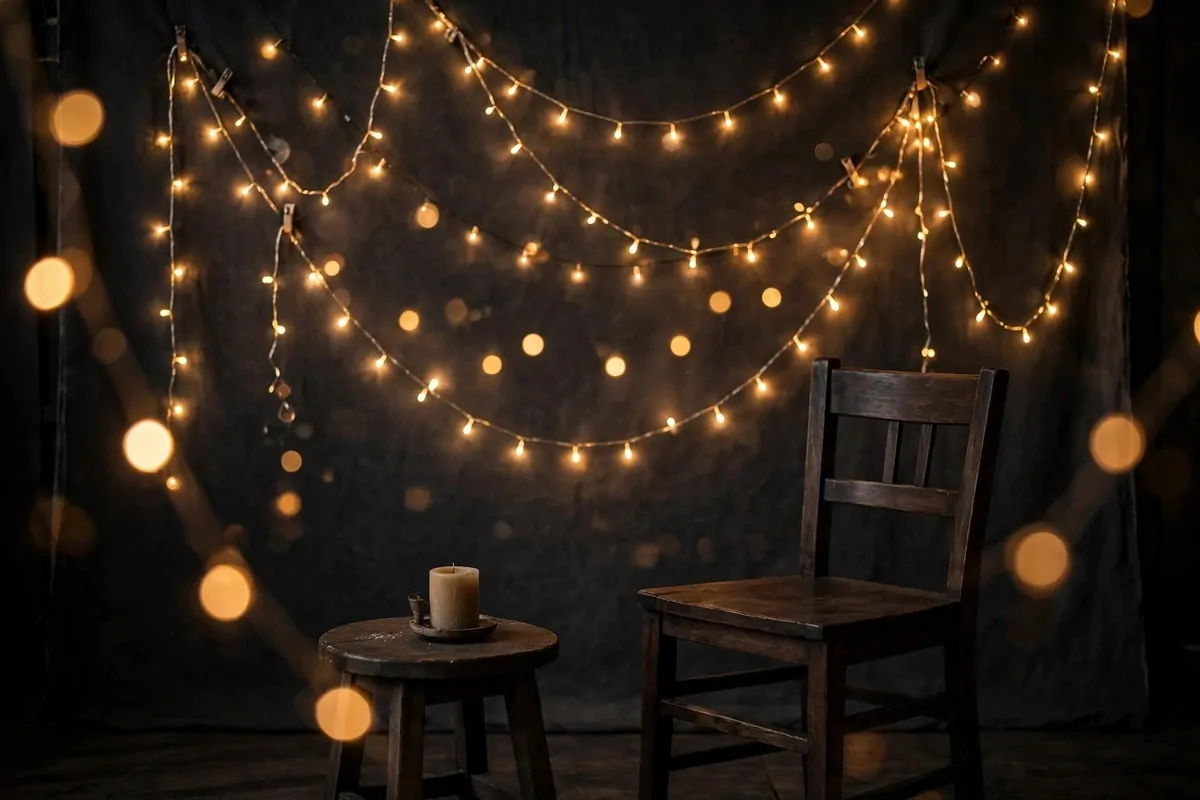
Fairy lights behind your family turn into soft glowing circles in the photo. Photographers call this bokeh, and it makes portraits feel like a warm memory.
Hang the lights on a dark wall, charcoal or deep navy. Dark fabric or paper makes the warm dots pop much harder than a light wall would.
Layer the strands at different depths. Some close to the wall, some hanging a foot in front. The layers make the bokeh dots different sizes, which looks rich and real.
Choose warm white lights, not cool blue ones. Warm light flatters skin and feels cozy. Cool light feels like an office, and nobody wants that in a family portrait.
Put your family several feet in front of the lights. The distance is what melts the bulbs into soft circles. Too close and the lights look like sharp dots instead of dreamy blurs.
A wide open camera aperture helps too, but even a phone camera blurs background lights nicely these days. You do not need pro gear to pull off this look.
This setup shines for evening sessions, holiday portraits, and any family that wants that warm glow feeling. It looks far fancier than the ten dollars of lights you hung up.
7. The Vintage Chair Prop Corner
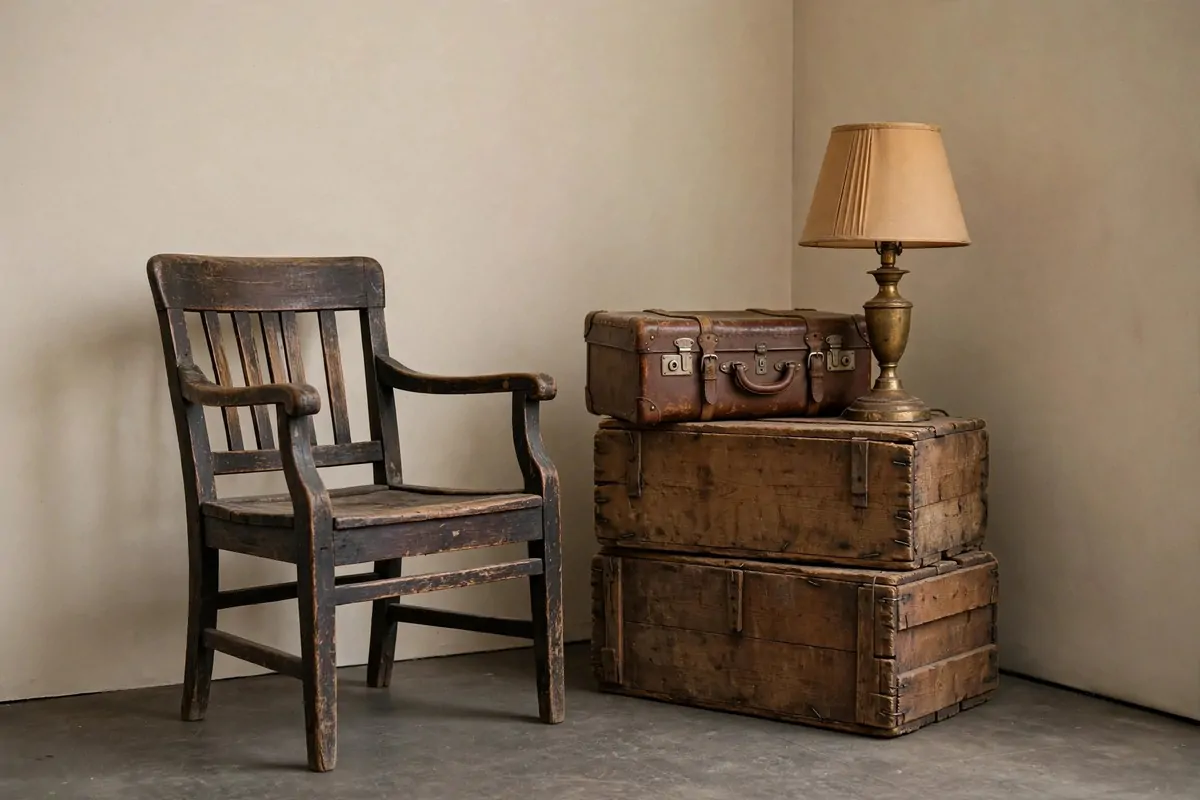
One great old chair can carry an entire portrait session. A weathered wooden armchair or a leather reading chair gives your family something natural to pose around.
Shop thrift stores and flea markets. The best prop chairs cost less than a pizza and look like they have stories to tell. Scratches and wear are a feature, not a flaw.
Build a little scene around the chair. Stack two wooden crates beside it. Put an old suitcase on top. Add a small lamp with a warm shade and you have a cozy reading corner.
Keep the background simple. A plain beige or gray wall lets the chair be the star. Too much behind it and the scene turns cluttered.
This corner works for every age group. Grandparents look regal in a vintage chair. Toddlers look tiny and sweet climbing into it. Big families gather around it like a campfire.
Wipe the chair down and check for wobble before the shoot. A chair that creaks or tips will make everyone nervous, and nervous faces do not photograph well.
Vary your angles. Shoot straight on for formal portraits. Move to the side for a relaxed lifestyle feel. One chair gives you five or six different looks if you keep moving.
8. The Classic Three Light Setup
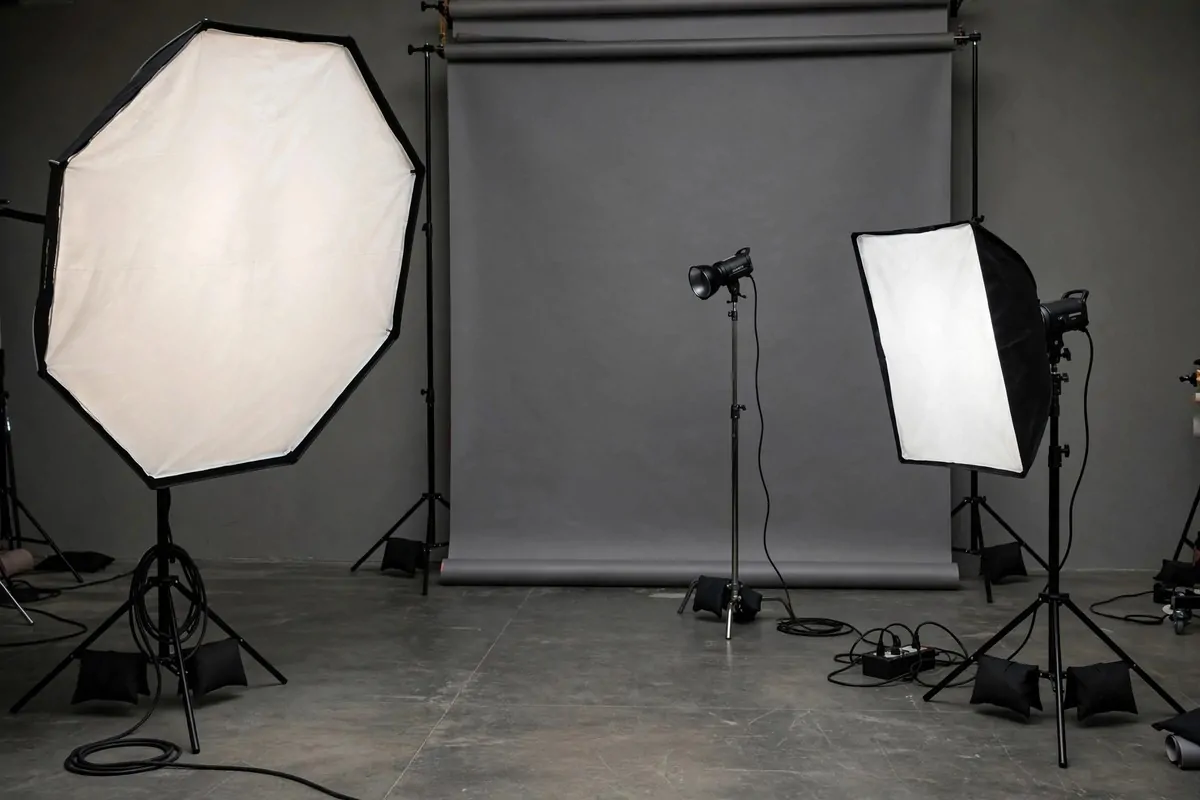
The three light setup is the backbone of professional portrait photography. One key light. One fill light. One light behind. Once you learn it, every photo gets easier.
The key light is the big one, usually a large softbox at about forty five degrees to one side. It does most of the work and shapes the faces.
The fill light sits on the opposite side, softer and dimmer. It opens up the shadows without erasing them completely. A little shadow is what gives faces shape.
The third light goes behind your family, aimed at their hair and shoulders. It draws a bright rim that separates them from the backdrop. Without it, dark hair melts into a dark background.
Start with just the key light on and add the others one at a time. That way you see exactly what each light is doing. It is much easier than guessing with all three blazing at once.
You do not need expensive strobes. Two affordable continuous LED softboxes and one small accent light get you the same look. Your wallet will thank you.
Keep light stands sandbagged or weighted if kids are around. A toppled softbox is dangerous and expensive. Safety first, always.
Here is a quick cheat sheet for where each light goes.
| Light | Position | Job |
|---|---|---|
| Key light | 45 degrees to one side, slightly above eye level | Main illumination, shapes the face |
| Fill light | Opposite side, dimmer and closer | Softens shadows, keeps detail |
| Rim or hair light | Behind subjects, aimed at heads | Separates family from backdrop |
9. The Ring Light Portrait Look
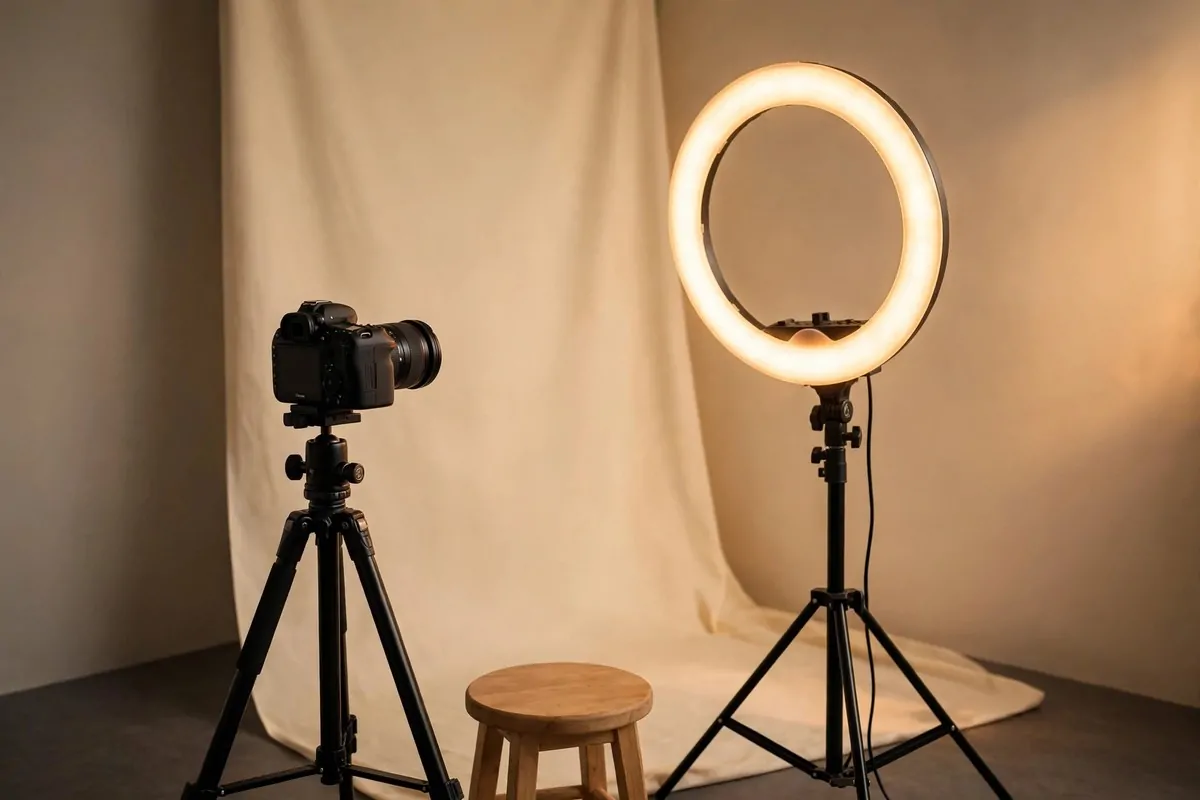
A ring light wraps faces in soft, even light with almost no harsh shadows. That is why it became the favorite of portrait shooters working in small spaces.
Set the ring light on a stand at eye level with your family. Put your camera in the middle of the ring or just behind it. Faces glow like they have their own little sun.
The signature look is the small ring shaped catchlight in the eyes. Kids especially look bright and alert under a ring light. Their eyes sparkle in every shot.
Ring lights are gentle on wrinkles and skin texture. The flat, even light smooths everything without filters. Older family members will love you for choosing it.
Keep the background a little darker than usual. The flat light can make everything look the same brightness, so a mid gray or cream backdrop adds the depth the light takes away.
Do not stand the family too close to the ring. About six to eight feet is the sweet spot. Closer and the light gets hot and harsh. Farther and it loses its wrap-around softness.
You can dim most ring lights, so start low and raise it slowly. Take a test shot between each step. Your eyes adjust fast in a bright room, so trust the camera, not your eyes.
10. The Window Light Studio
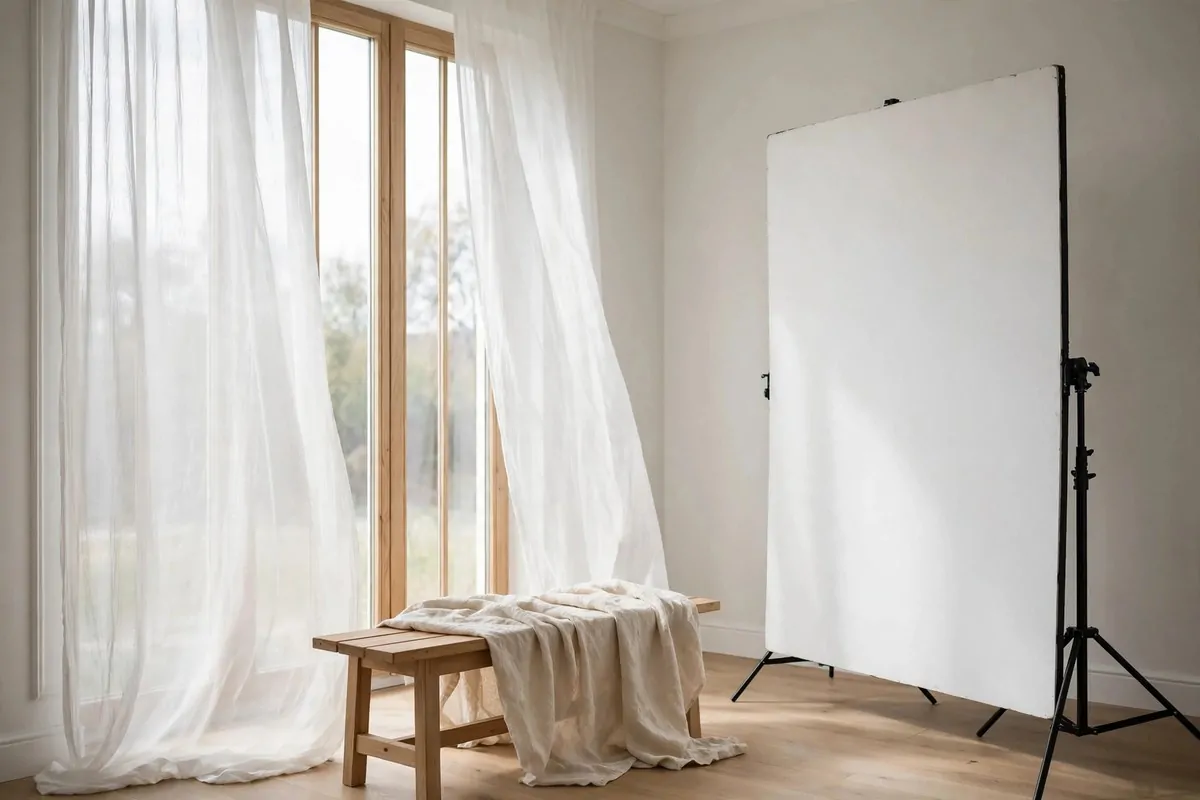
The cheapest studio light ever made is a big window. Soft, free, and more flattering than gear costing thousands. Photographers have known this forever.
Hang sheer white curtains on the window. They turn harsh sunlight into a giant softbox. The bigger the window, the softer the light, so pick the largest one in the room.
Place your family at a slight angle to the window, not straight in front of it. Side light carves out cheekbones and gives portraits that painterly, classic feel.
Put a white reflector or even a white bedsheet on the opposite side. It bounces light back into the shadow side of faces. A folding reflector panel costs very little and lasts for years.
Shoot on overcast days if you can. Cloudy skies are nature’s softbox. Bright midday sun is the hardest light to tame, even with sheers.
This setup is perfect for a lifestyle studio look. A bench with a linen throw. Bare feet. Relaxed poses. The photos look like a quiet Sunday morning.
Morning light is usually softer and warmer than afternoon light. If you can choose, book your session for the first two hours after sunrise. Your portraits will glow.
11. The Personalized Name Sign
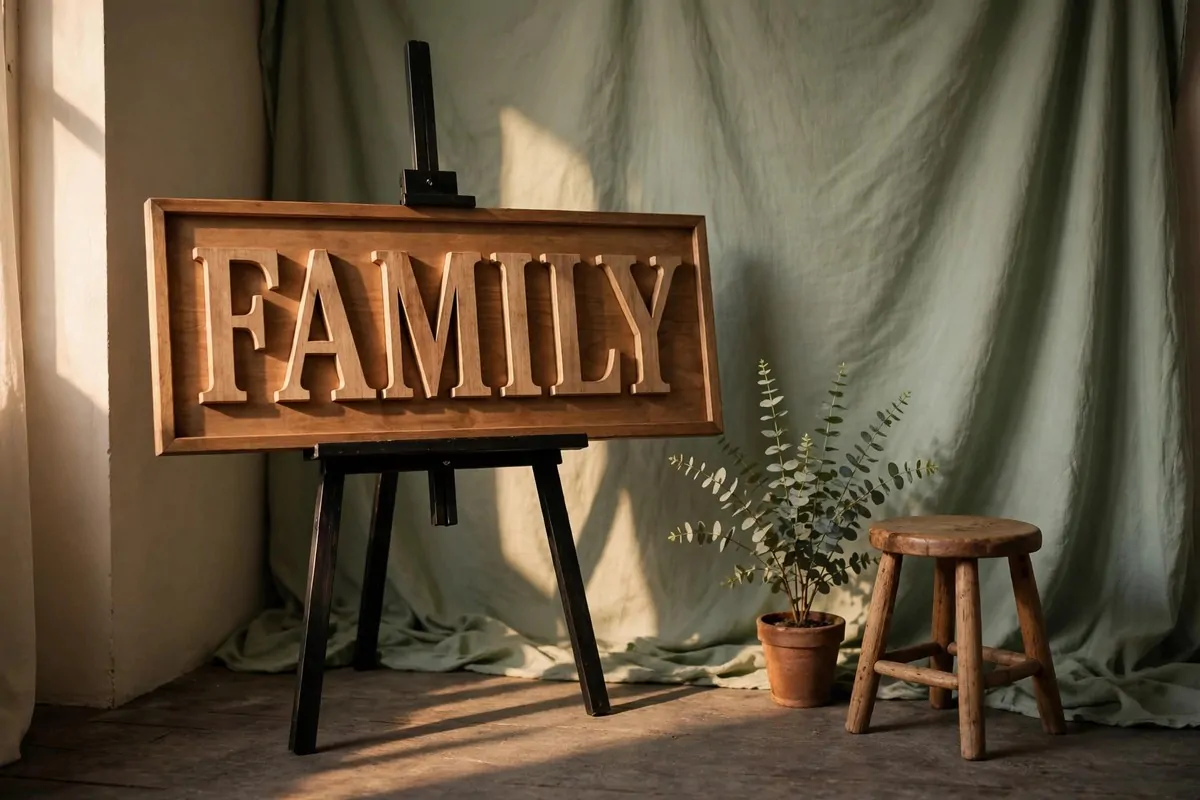
A family name sign turns a portrait into a keepsake. Big letters with your last name make the photo feel made just for your family, because it was.
Order a wooden sign with raised letters from a craft shop or online maker. Pick a timeless font, simple serif or clean script, so it still looks good in twenty years.
Make the letters big enough to read in the final photo. Small letters disappear behind the family. Think bold and proud, like a shop sign for your own little tribe.
Set the sign on a sturdy easel at eye level. It should sit just behind the family, close enough to be sharp but not so close it crowds anyone.
Match the sign to your backdrop. Stained wood suits rustic and farmhouse setups. Gold or white letters suit modern and minimal styles. The sign should belong to the scene.
This idea is wonderful for milestone years. A new home. A new baby. A big anniversary. The sign stamps the moment in time, and the photo becomes a family heirloom.
After the shoot, hang the sign in your hallway. It pulls double duty as home decor, and guests will ask about it every single time.
12. The Rustic Barn Door
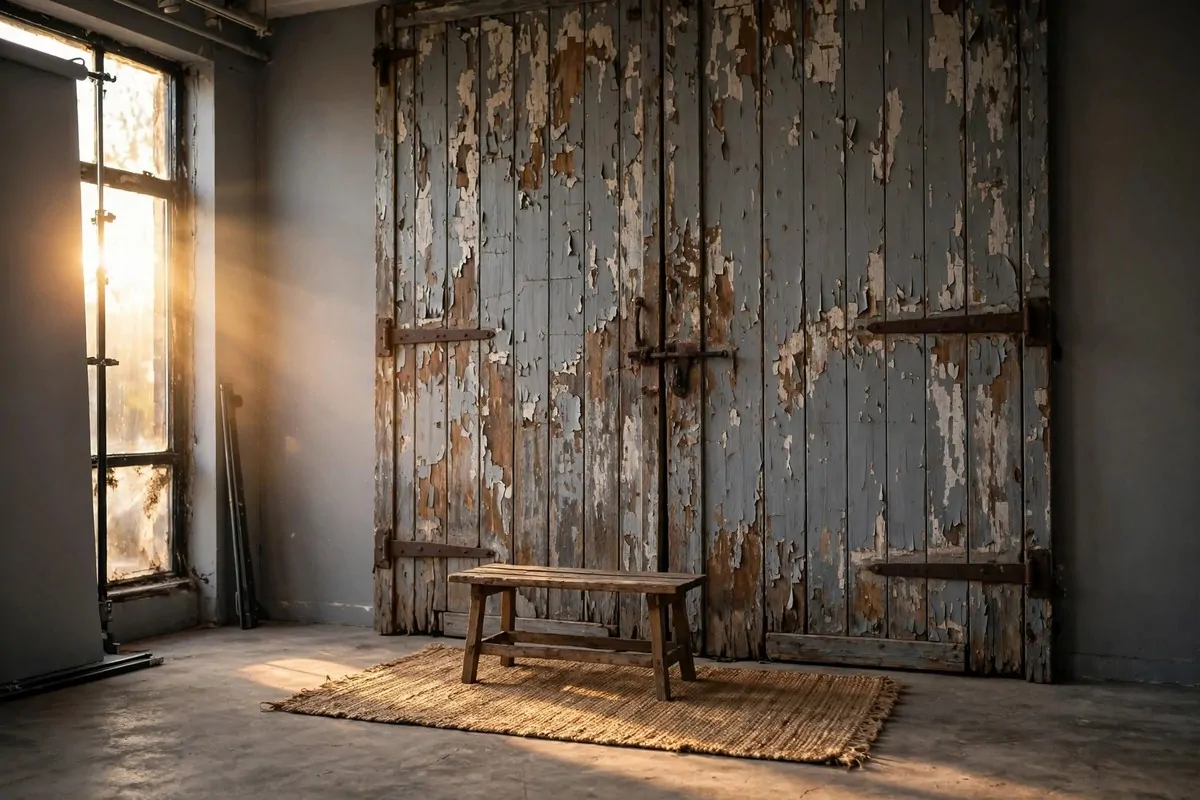
A weathered barn door brings instant country soul to a portrait session. The old wood, the peeling paint, the iron hinges, it all tells a story before anyone even smiles.
You do not need a real barn. A single salvaged door propped against a wall works. Faux barn door panels made of lightweight wood do the same job and store flat.
Warm side light is this backdrop’s best friend. It slides across the wood grain and makes every crack and knot glow. Shoot in late afternoon light if you can.
Keep props simple and honest. A wooden bench. A jute rug. Maybe a small potted plant. The door is doing the heavy lifting, so let it.
Outfits should match the mood. Earthy tones. Denim. Soft plaids. Creams and warm browns. These colors sit happily against old wood and never clash.
This backdrop is a star for autumn sessions and multi generational portraits. Grandparents, parents, and kids lined up in front of an old door looks timeless in the best way.
Check the door for splinters and loose nails before anyone leans on it. A quick sanding and a wipe down keeps little hands safe.
13. The Hand Painted Canvas Backdrop
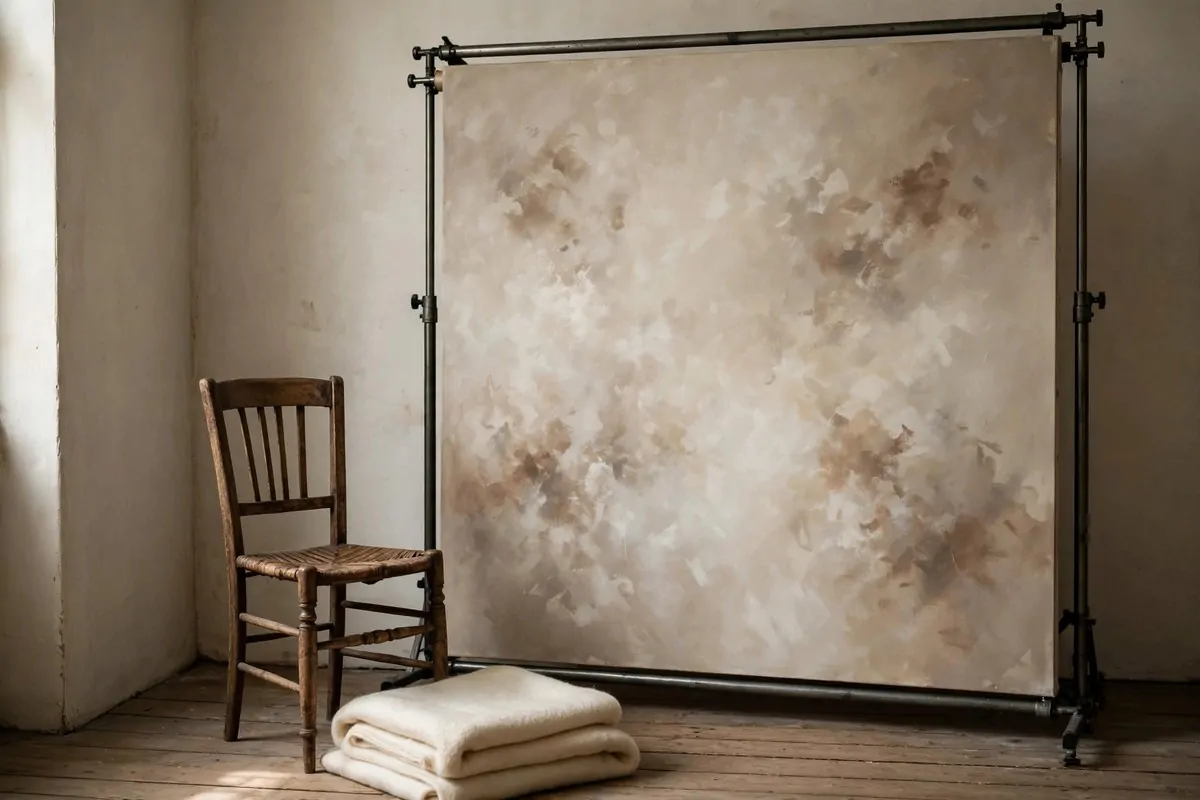
Hand painted canvas backdrops give portraits a fine art feeling that flat paper cannot touch. The mottled texture looks like an old master painting behind your family.
Buy one ready made or paint your own. A large canvas drop cloth, some house paint in two or three close tones, and a sea sponge are all you need. Dab, do not brush.
Hang it on a roller stand so you can move it anywhere. The texture looks best with soft side light, which brings out every dab and swirl of paint.
Neutral tones work hardest. Warm taupe. Soft ivory. Muted gray. These let skin tones shine and outfits stay the star of the photo.
Add one antique style chair and a folded blanket. That is the whole scene. Restraint is what makes this look elegant instead of busy.
This backdrop suits formal portraits, motherhood sessions, and families who want something that looks like art on the wall. It ages beautifully, just like the photos you take on it.
Roll the canvas paint side out for storage. Never fold it. Folds crack the paint and leave lines you will see in every photo afterward.
14. The Brick Wall Backdrop
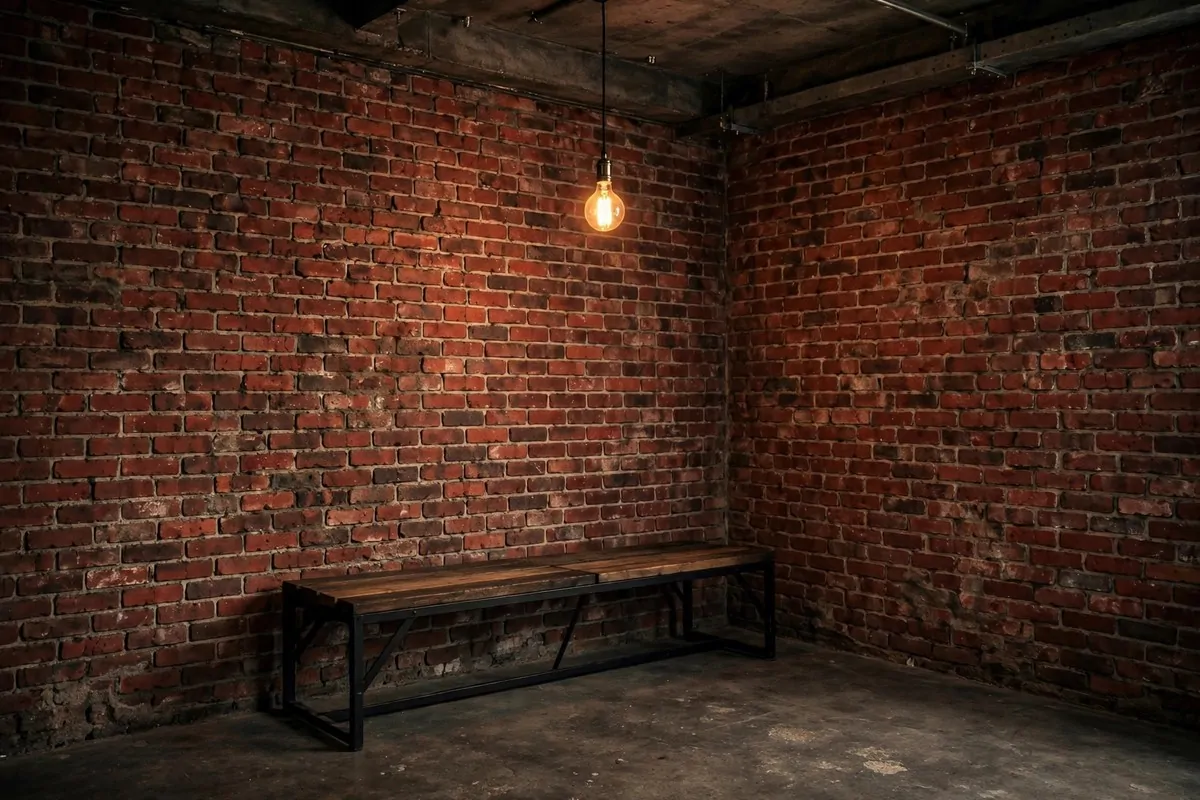
A brick wall gives portraits an urban, editorial edge. It feels modern and a little moody, like a family that just stepped out of a city magazine.
A printed vinyl brick backdrop is the easy route. It hangs flat, wipes clean, and stores rolled. Real brick texture in print looks convincing on camera.
One warm pendant light or an Edison bulb string completes the mood. Brick loves warm light. It brings out the reds and browns and makes the wall glow.
Keep the furniture dark and simple. A black metal bench. A wooden stool. Nothing bright or fussy, or the industrial vibe falls apart.
This backdrop suits older kids and teens especially well. They look cool and confident against brick, and the photos have a street style energy that plain white cannot match.
Coordinate outfits in darker neutrals. Charcoal. Olive. Deep denim. These sit comfortably against brick without competing with it.
Watch your white balance under mixed lights. Brick plus warm bulbs can push photos orange. A quick custom white balance check saves hours of editing later.
15. The Newborn Basket Corner
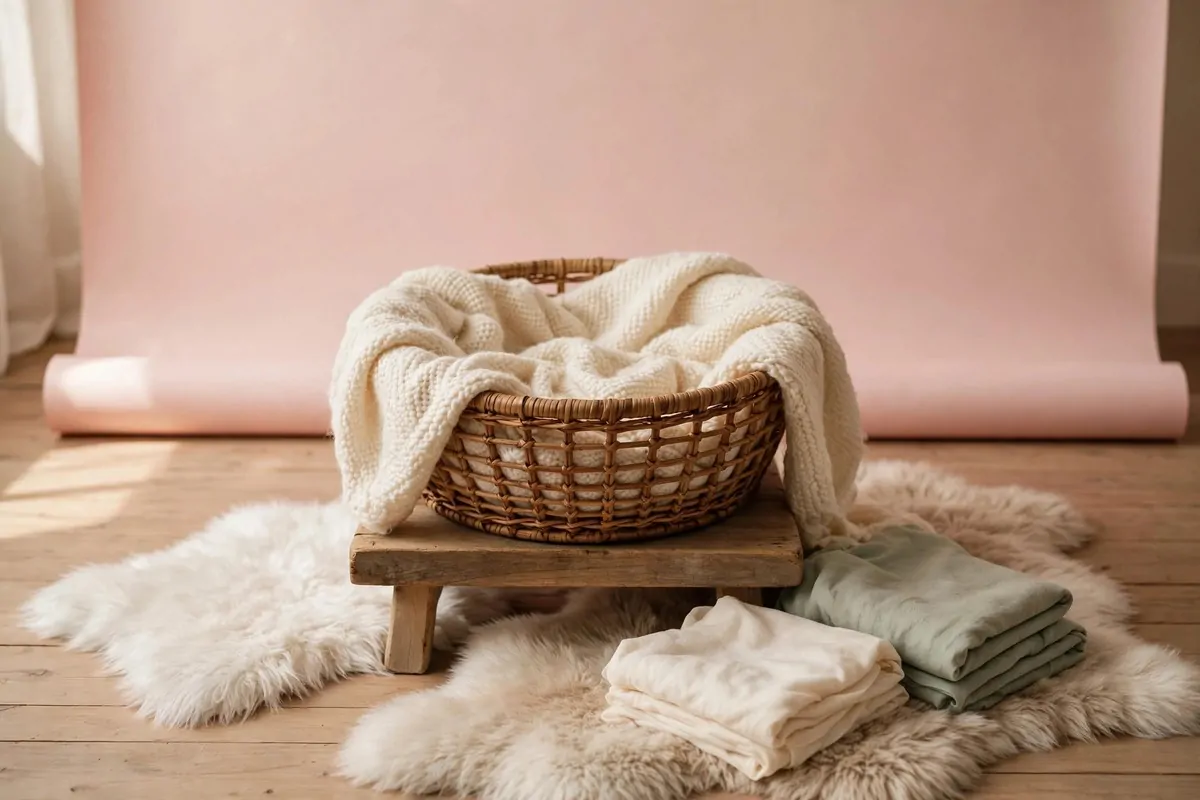
A tiny basket makes the tiniest family member the star of the show. Newborn portraits feel precious when the setup is soft, simple, and safe.
Line a round woven basket with a thick knit blanket so the baby sits on padding, never on hard wicker. Comfort and safety come before everything in newborn sessions.
Surround the basket with small faux fur rugs and folded wraps in cream, blush, or sage. Pastels keep the mood gentle. Bright colors can overpower a tiny baby.
Keep the room warm, really warm. Newborns sleep best in a cozy room, and a sleepy baby is a cooperative baby. Think warm blanket weather indoors.
Plan for a short session. Feed and soothe the baby first, then shoot quickly while the sleep lasts. Twenty calm minutes beat two fussy hours every time.
Have an extra set of hands nearby. A parent or helper should always be within arm’s reach of the basket. Never leave a newborn unattended on a raised prop.
This corner is for the youngest portraits your family will ever take. They only stay this small once, so a simple, safe setup is worth every bit of care.
Here is a quick checklist to keep the session safe and smooth.
- Warm the room before the baby arrives
- Feed and settle the baby first, shoot second
- Line every hard prop with thick soft padding
- Keep a helper within arm’s reach at all times
- Sanitize baskets and fabrics between sessions
- Keep sessions short, calm, and unhurried
16. The Teepee Nook
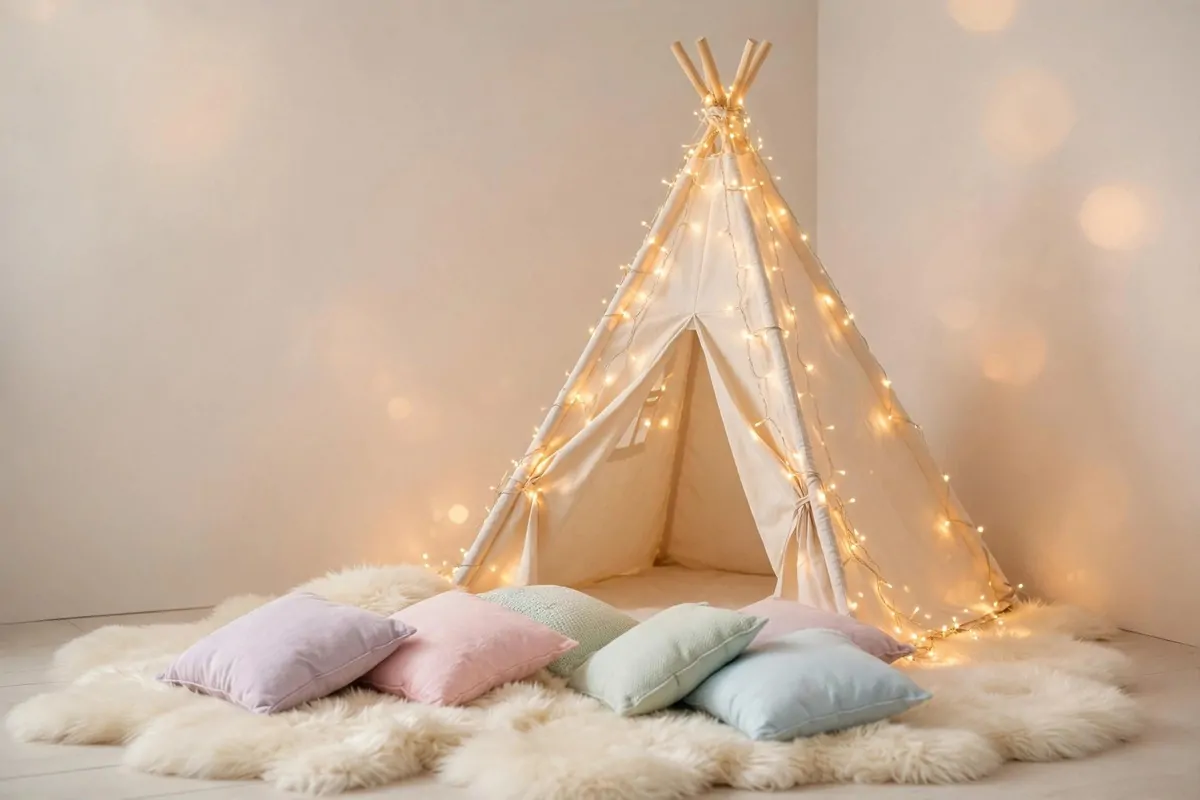
A little canvas teepee turns a studio corner into a childhood dream. Kids climb inside without being asked, and that natural excitement photographs itself.
Wrap the teepee poles in warm fairy lights. The glow through the canvas makes the whole tent feel magical, especially in a slightly dimmed room.
Pile soft rugs and cushions in front of it. Faux fur. Pastel pillows. A knit throw or two. The floor becomes an invitation to sit, snuggle, and play.
Keep the backdrop wall plain and light. Cream or soft beige lets the tent and its glow be the focus. Busy walls fight the magic.
This nook is perfect for young families. Siblings peek out of the tent together. Parents sit with toddlers on their laps. The poses happen on their own.
Let the kids play first and shoot second. Ten minutes of free play inside the tent burns off the wiggles and gets you real giggles instead of stiff smiles.
Check the teepee for stability before the shoot. Stake or weight the poles so an excited toddler cannot topple it. Safety keeps the magic fun.
17. The Chalkboard and Bunting Setup
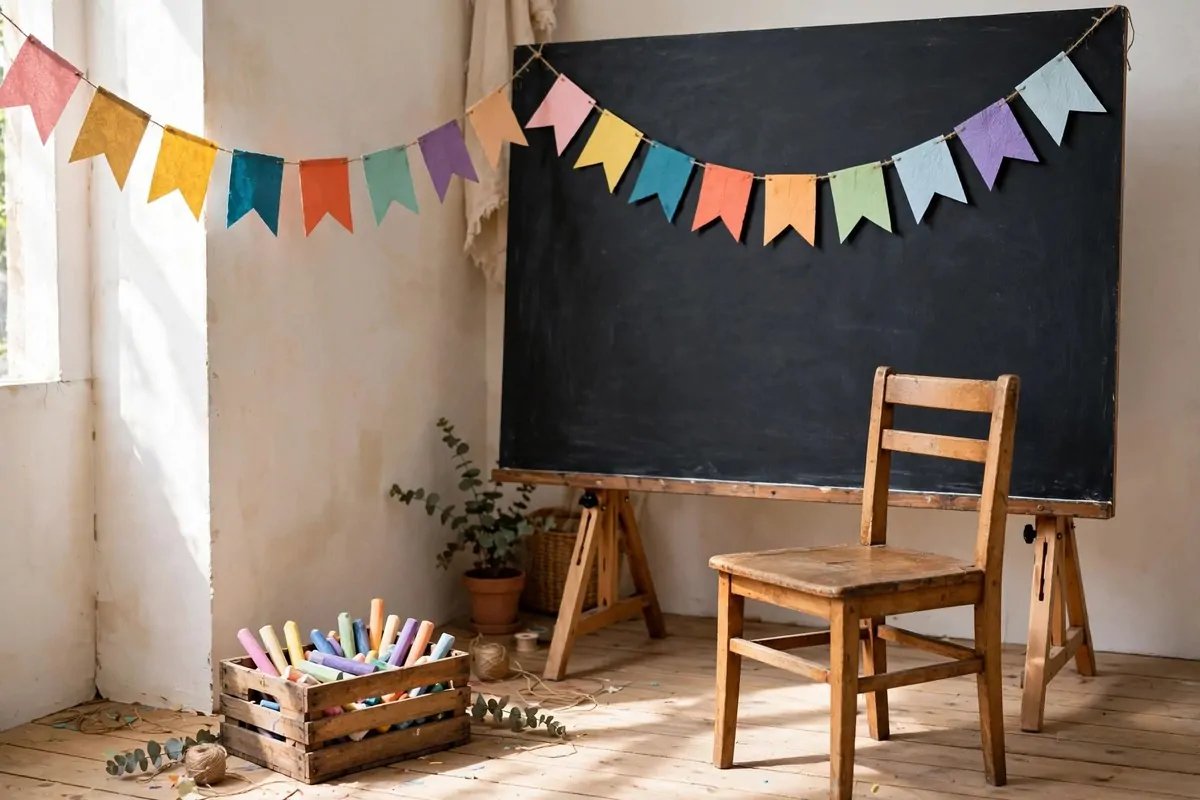
A big chalkboard panel plus handmade bunting gives your studio a playful, personal touch. It feels like a birthday party and a classroom had a very cute baby.
Hang a large dark panel on a stand as your background. Deep charcoal or chalkboard green both work. The dark surface makes colors pop.
String paper bunting across the top. Let the kids help make it. Handmade triangles in bright colors add a personal touch that store bought decor cannot copy.
Keep a box of colored chalks nearby. Let family members draw a heart, write a date, or doodle a silly face on the board. The board becomes part of the memory.
This setup is brilliant for milestone sessions. A big chalk number for a first birthday. A drawn frame for a graduation. The photo tells its own story.
Keep outfits bright and fun. Primary colors and playful patterns match the energy of the setup. This is not the place for muted minimalism.
Wipe the board between ideas if you want a clean slate. Or leave the drawings and layer the history. Both approaches make wonderful photos.
18. The Giant Picture Frame Prop
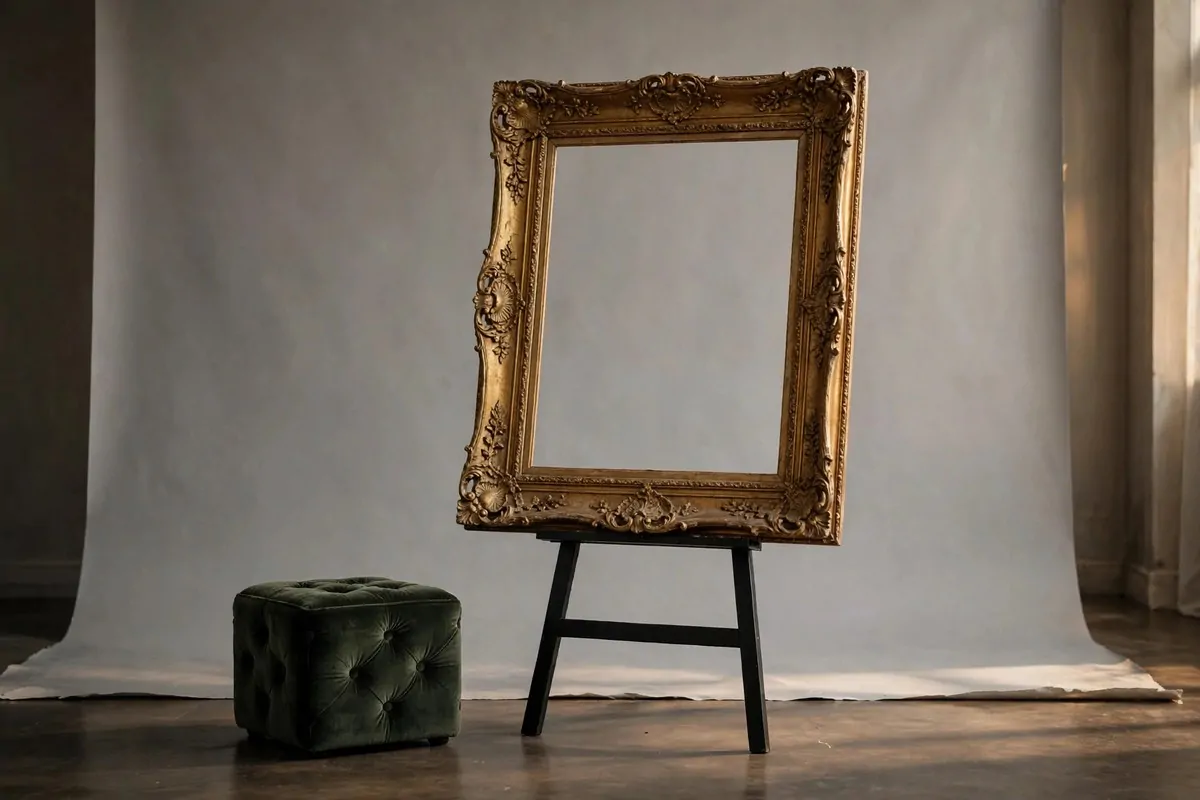
An oversized empty frame turns your family into a living painting. It is playful, a little theatrical, and kids absolutely love climbing into it.
Find a big ornate frame at a thrift store or craft market. Gold or whitewashed wood photographs beautifully. The more dramatic the frame, the better the effect.
Mount it on a sturdy easel in front of a simple gray or cream backdrop. The frame should stand on its own so hands stay free for hugging and waving.
Pose one child inside the frame while the family gathers around it. Or have everyone peek through from behind. Every arrangement looks like a storybook illustration.
Keep the rest of the scene minimal. A small velvet ottoman is plenty. The frame is the star and everything else is just the stage.
This prop works for holiday cards, silly family portraits, and any session where laughter is the goal. Nobody can stay serious inside a giant frame.
Check the frame for sharp edges and loose corners before the shoot. A quick once over keeps it fun instead of fussy.
19. The Cozy Lifestyle Corner
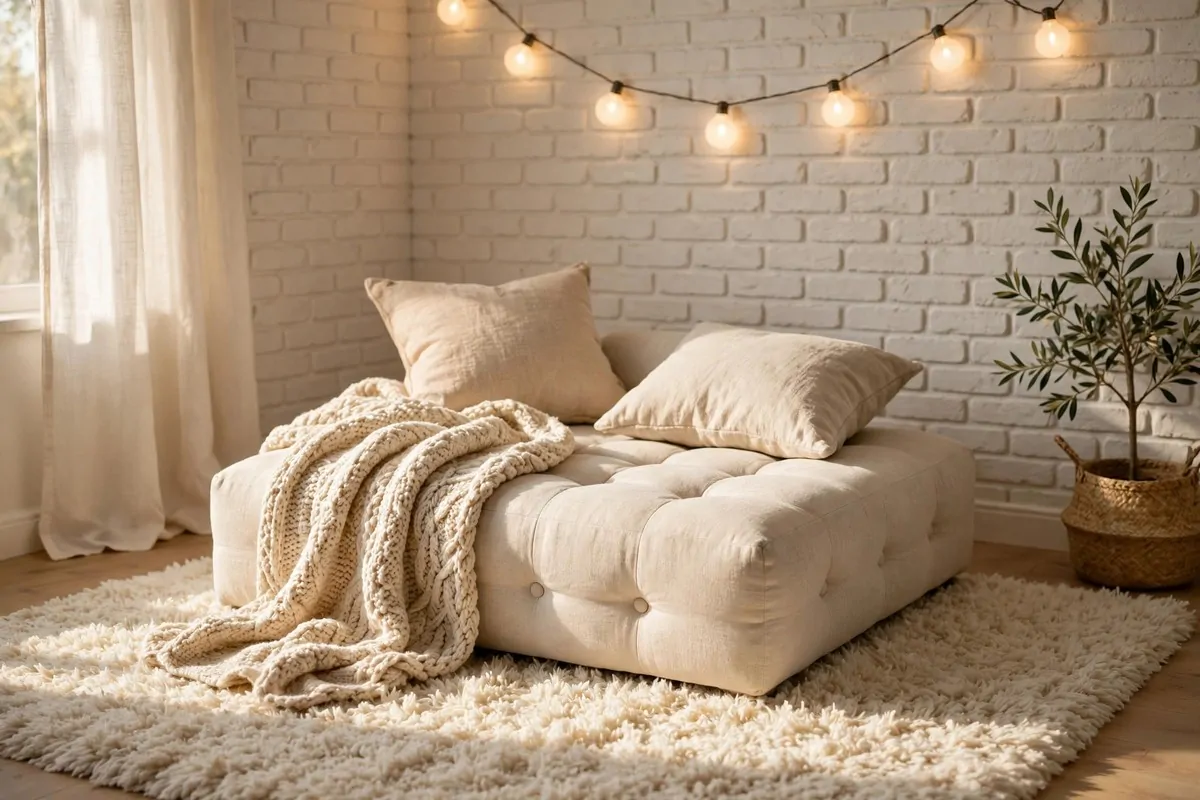
Not every studio portrait needs to look posed. A cozy lifestyle corner makes photos feel like real life, just a little prettier.
Start with a low ottoman or a deep pouf. Add a thick shaggy rug under it. Throw a chunky knit blanket and a couple of linen cushions on top.
Use a warm backdrop. A light painted brick wall or warm white plaster works. Hang a string of soft globe lights above for a gentle glow.
Shoot in the morning if you can. The light feels honest and soft, like the start of a good day. Bare feet and relaxed clothes complete the feeling.
This corner is made for snuggling poses. Parents lean in with kids between them. Toddlers tumble on the rug. The camera catches the in between moments that posed shots miss.
Keep the palette calm. Creams. Warm whites. Soft oatmeal tones. Loud colors break the quiet mood, and this corner is all about quiet.
The best part is how easy it is. No special gear. No tricky lights. Just soft textures and a family that feels at home.
20. The V Flat Light Control Setup
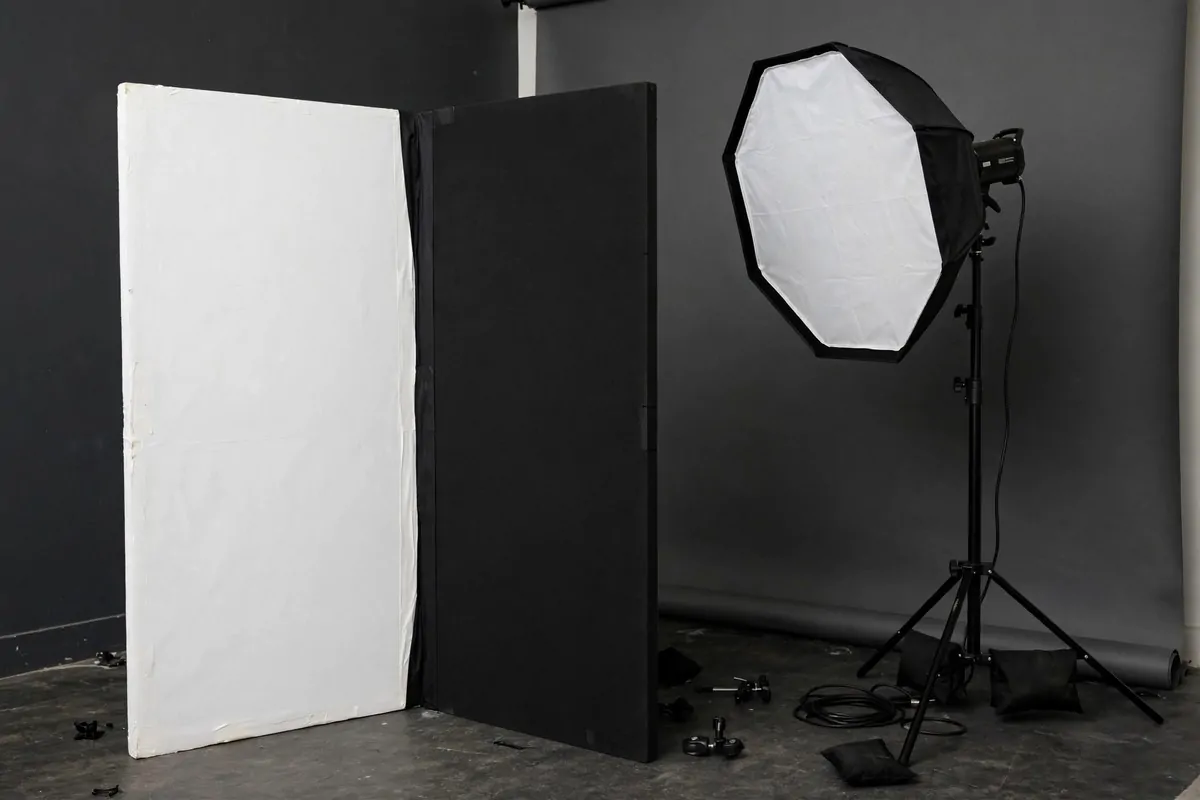
V flats are the secret weapon of studio photographers. Two big foam boards hinged in a V, and suddenly you control light like a pro.
The white side bounces light back onto your family. Place it opposite your key light and watch shadows open up beautifully. It is like a second light that costs almost nothing.
Flip it around to the black side and it does the opposite. It eats light. Use it to deepen shadows and add drama to a portrait without buying another lamp.
Position the V right next to your family, just out of frame. The closer it sits, the stronger its effect. Small moves make big differences with these panels.
They are cheap and light. A hardware store sells foam core boards for a few dollars. Tape two together with strong tape and you have a pro tool.
Store them flat against a wall when the shoot is done. They take up almost no space, which is more than I can say for most studio gear.
Once you try V flats, you will wonder how you ever shot without them. They are the simplest upgrade with the biggest payoff in this whole list.
21. The Moody Gray Minimal Look
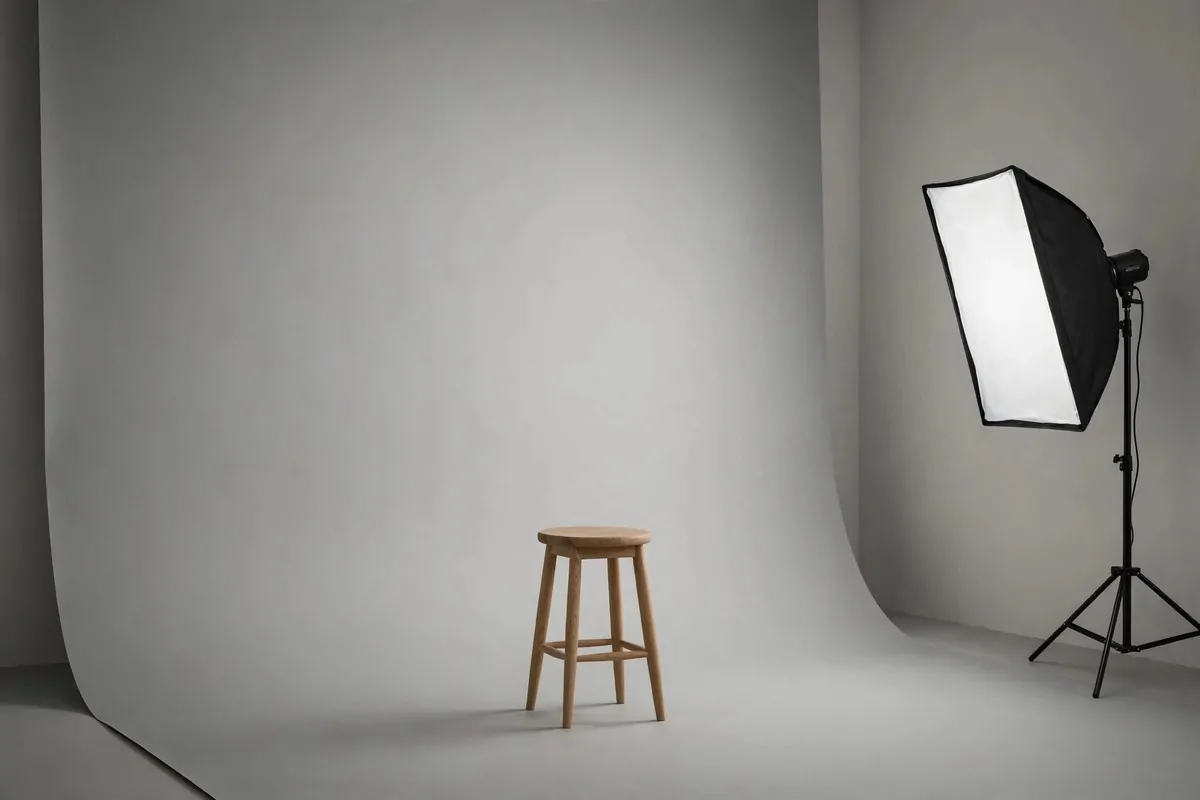
Sometimes the bravest studio choice is the simplest one. A smooth gray backdrop with one stool and one light makes portraits that feel like fine art.
Pick a mid gray seamless paper. Light it evenly so it fades into a soft gradient behind your family. The gentle darkening at the edges is called a vignette, and it draws every eye to the center.
One softbox is enough. Place it to the side for gentle shaping. The minimal light keeps the mood quiet and serious in the best way.
Dress simply. Dark jeans. Solid sweaters. Bare feet. The fewer details in the clothes, the more the faces carry the photo.
This look suits families who want something timeless. No props to date the photo. No trends to regret in ten years. Just your family, beautifully lit.
It also flatters everyone. Gray is kind to every skin tone and every outfit color. Nobody clashes with gray.
Keep poses simple too. Seated. Close together. Hands resting naturally. When the setup whispers, the family should whisper with it.
22. The Green Screen Trick
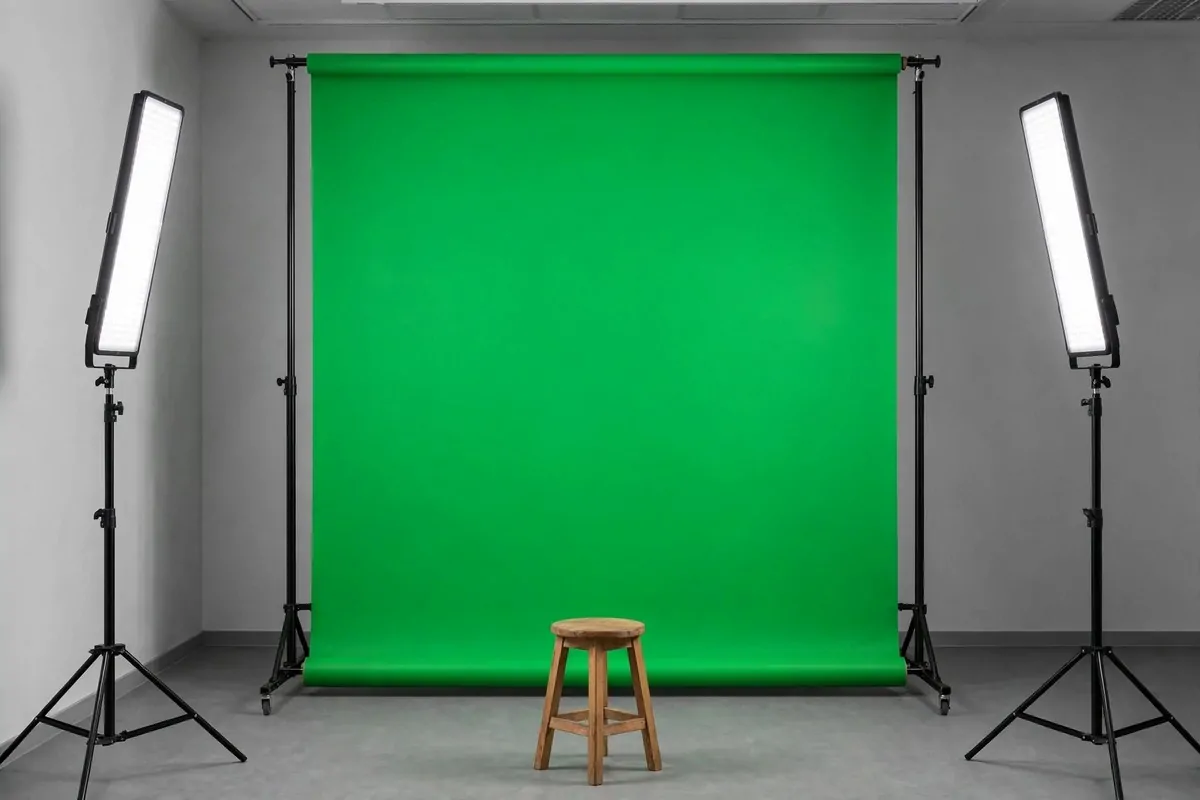
A green screen lets you put your family anywhere. A beach. A snowy mountain. A storybook castle. Shoot once, and the background is whatever you dream up.
The trick is even lighting. Light the green screen separately from your family. Two LED panels, one on each side, keep the green smooth and wrinkle free.
Keep your family a good distance from the screen. Green light bounces off the fabric and tints hair and shoulders. Space fixes most of that spill.
Avoid green clothes. This sounds obvious, but one green shirt will vanish into the background in editing. Stick to every other color.
Shoot slightly wider than you need. Editing the edges is easier with room to crop. Tight framing makes masking a headache.
This setup is a hit with kids who love imagination. Let them pick the background after the shoot. A dinosaur land. A rocket ship. Their portraits become adventures.
You do not need fancy software to start. Simple editing apps handle basic green screen swaps now. The results will make you grin every time.
23. The Winter Wonderland Corner
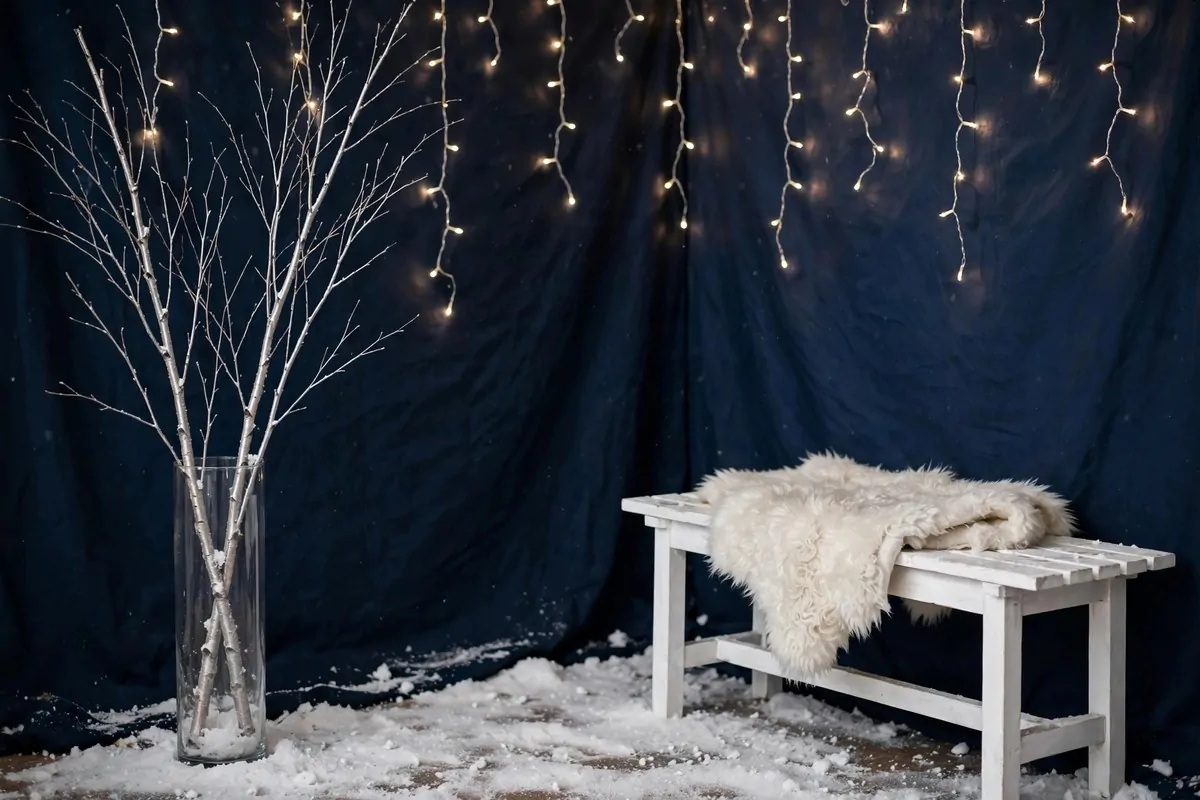
A winter corner brings the magic of the cold season indoors without anyone freezing. Deep blues, soft snow, and twinkle lights make portraits feel like a fairy tale.
Start with a dark navy backdrop. It reads as a night sky and makes white snow and warm lights glow against it. Dust the floor with soft fake snow.
Hang cool white twinkle lights in the background. They sparkle like stars and turn into dreamy bokeh in the photo. Layer them at different depths for richness.
Add bare birch branches in a tall vase. Their pale bark and fine twigs look like a frozen forest. They are simple, elegant, and very photogenic.
A white wooden bench with a faux fur throw gives your family a place to sit. The textures, rough bark, soft fur, smooth snow, make the photo feel rich.
Keep outfits in cool tones. Navy. Cream. Soft gray. A pop of deep red works too. These colors sing against the winter blues.
This corner is perfect for winter portraits, seasonal cards, and any family that loves the cozy side of cold weather. It looks like a movie set, but it takes an afternoon to build.
| Setup | Budget | Best for |
|---|---|---|
| Seamless paper sweep | Low | Clean classic portraits |
| Flower wall | Medium | Spring and motherhood sessions |
| Balloon garland | Low | Birthdays and milestones |
| Three light setup | Medium | Pro looking portraits at home |
| Window light corner | Very low | Soft lifestyle portraits |
| Winter wonderland | Low | Seasonal and holiday cards |