18 Closet Office Ideas Small DIY Builds You Can Finish in a Weekend

The whole build started with one pine board leaning against the wall at the hardware shop. It was just a plain board, a bit rough on the edges, and it cost less than a takeaway dinner.
I carried it home on Saturday morning and stood it up inside my closet. It fit wall to wall like it had been cut for that exact spot. That was the moment I knew this closet was going to be an office by Sunday night.
These Closet Office Ideas Small Diy builds are all like that. Small jobs, cheap materials, and one weekend of work. No builder, no big budget, and no waiting weeks for a delivery van.
You do not need to be good at DIY to try them. I am not a carpenter. I can measure, I can drill a straight hole most of the time, and I know how to paint a wall without dripping too much. That is enough for every build in this list.
Each idea below takes a few hours at most. Some take less than one hour. Do one on Saturday morning, live with it for a day, and do the next one on Sunday if you feel like it.
Start with the desk, because everything else hangs off that one choice. Then pick the storage and lighting ideas that fix the problems your closet actually has. By Sunday night you will have a real office, built by your own hands, in a closet that used to hold nothing but coats.
The Wall to Wall Shelf Desk
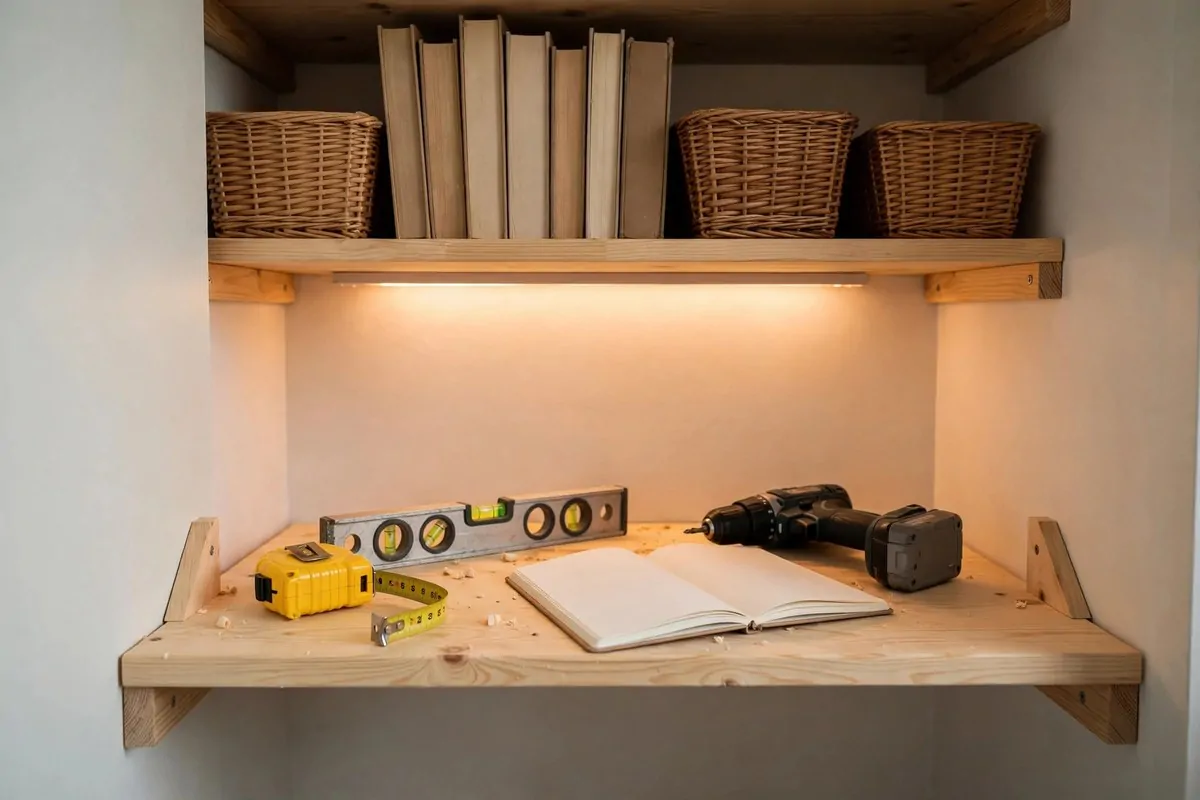
A wall to wall desk is one board and two cleats. That is the whole build, and it is the best desk you can put in a closet.
Measure the width of your closet first, wall to wall, in three spots. Closets are rarely square, so take the smallest number and cut your board to fit that. A board that is too long will not go in, and a board that is a little short still works fine.
Pick a pine board about 20 inches deep. That gives you room for a laptop and a notebook, and your knees still fit under it. Thicker boards feel sturdier, so go for one that is at least an inch thick if you can.
Screw two wooden cleats into the side walls at desk height. The cleats carry the board, so fix them into studs if you can find them. If you cannot find a stud, use good wall anchors and test the hold before you put your laptop on it.
Rest the board on the cleats and check it with a level. If it rocks, slip a thin shim under one end. A desk that rocks will drive you mad by lunch, so fix it now while it is easy.
Sand the front edge smooth before you sit down to work. Your wrists will rest on that edge all day, and a rough edge gets sore fast. Ten minutes with sandpaper saves you a week of sore arms.
You can screw the board down to the cleats if you want it fixed forever. Or leave it resting loose, so you can lift it out and paint behind it later. I left mine loose for a month, and I liked being able to change my mind.
Paint or oil the board if you like. A coat of white paint makes it look built in. A clear oil keeps the wood grain showing, and it feels warm under your hands. Either one takes one evening to dry.
This desk costs very little and takes one morning to build. It uses the full width of the closet, so no space goes to waste, and it looks like it was always meant to be there.
The Fold Down Desk on Hinges
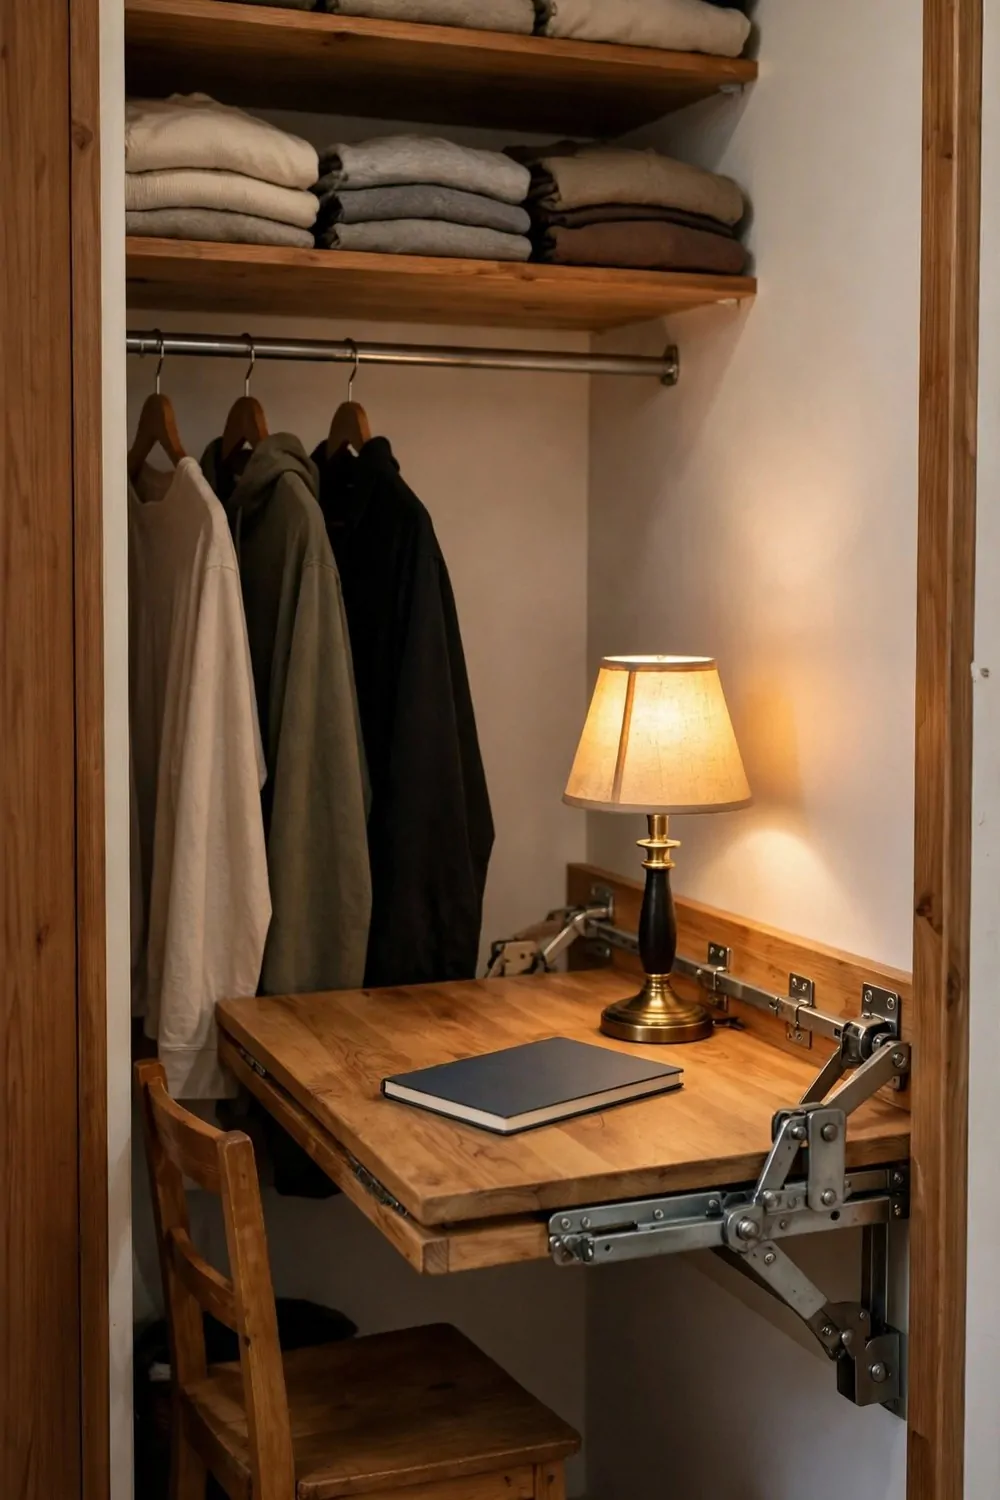
A fold down desk is perfect when your closet still has to be a closet. You pull it down to work, and you fold it flat when you are done.
Start with a board the width of your closet and about 18 inches deep. It needs to be light enough to lift with one hand, so do not pick the thickest board in the shop.
Fix two strong hinges to the wall at desk height. Hinges made for folding tables hold the weight best, and they are sold in most hardware shops. Cheap hinges will sag, and a sagging desk makes typing feel awful.
Add folding brackets under the board, one near each end. The brackets swing out to hold the desk up, and they fold flat when you close it. Test them twice before you trust them with your laptop.
Put a small latch or a magnetic catch at the top to hold the desk flat against the wall. Without a catch, the desk can swing down on its own, and that is not a surprise you want at midnight.
Keep the top clear when you fold it up. I learned this the hard way with a mug that slid off and hit the floor. Now I move my mug to a shelf first, and folding up takes ten seconds.
Mount the desk at the same height as a normal desk, and test it with your chair before you drill the last holes. Too high and your shoulders ache. Too low and your knees hit the front edge.
A fold down desk works best for laptop only work. If you need two big monitors and a printer, this is not your best pick, and that is fine. Pick the wall to wall desk instead.
The best part is the little ritual at the end of the day. You fold the desk up, the latch clicks, and your closet is a closet again. Work is done, and your evening is yours.
The Hairpin Leg Desk for Narrow Closets
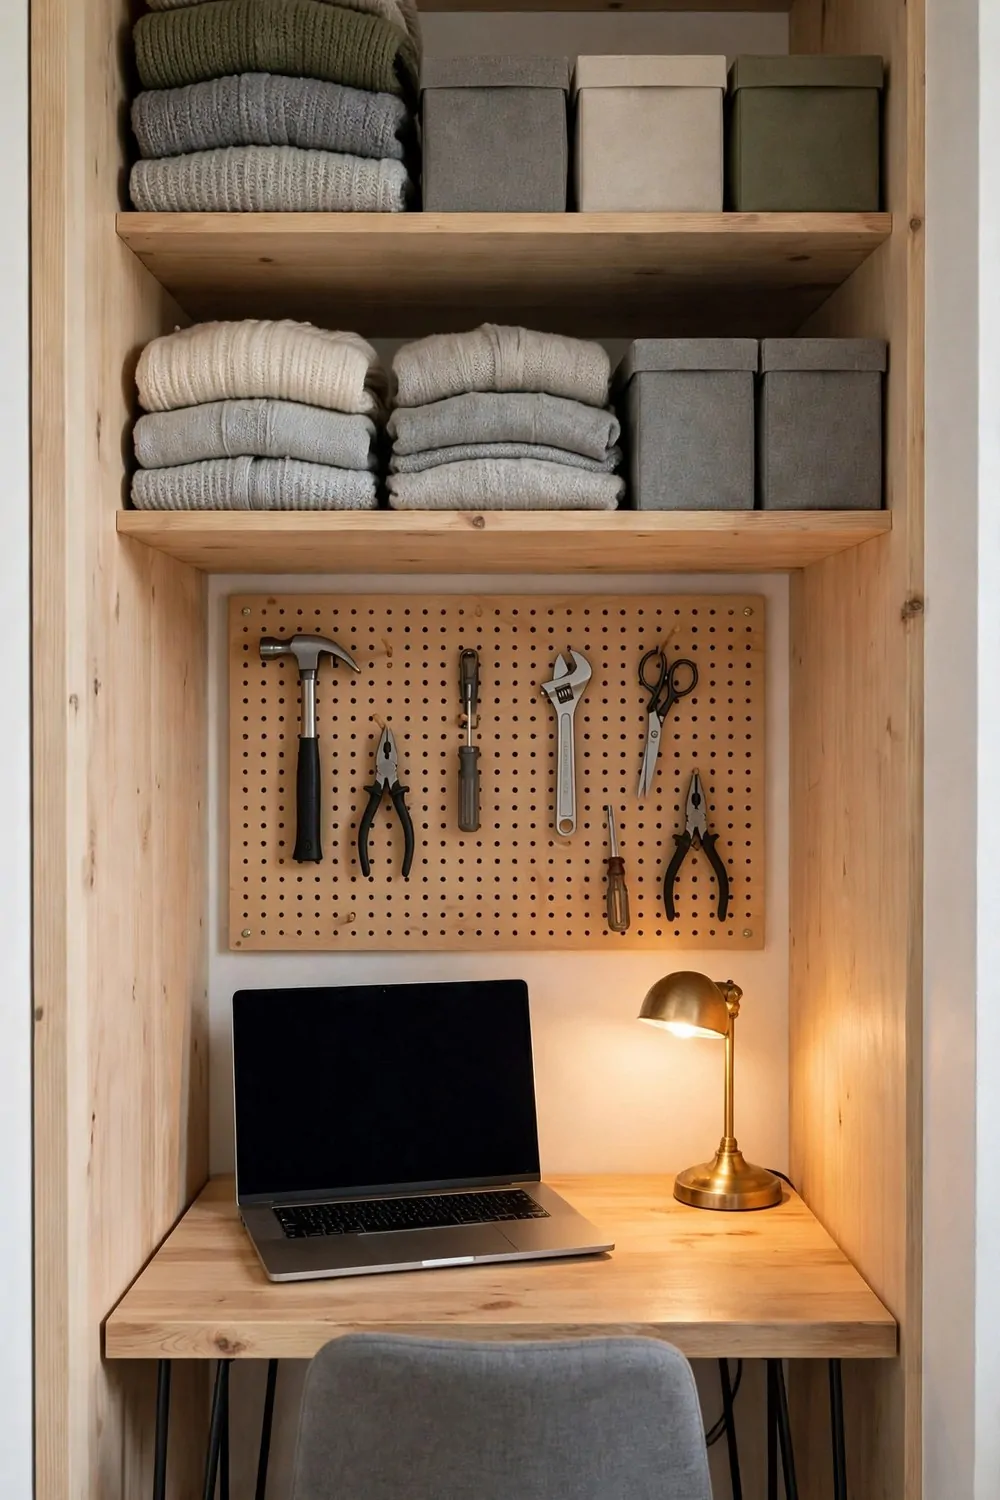
Some closets are too narrow for a wall to wall desk, and too awkward for brackets. A desk on hairpin legs fits those closets just right.
Hairpin legs are thin steel legs bent into a U shape. You screw four of them to the underside of a board, and you have a desk in about twenty minutes. No wall fixings at all, which renters love.
Pick a board that leaves a clear path down the middle of the closet. You need to walk in, sit down, and stand up without squeezing past anything. Mark the outline on the floor with tape first and test it.
| Closet width | Desk depth | Why it fits |
|---|---|---|
| Under 3 feet | 16 inches | Laptop only, chair slides right under |
| 3 to 4 feet | 18 inches | Laptop plus a notebook |
| Over 4 feet | 20 inches | Room for a lamp and papers too |
Choose legs that match your desk height. Most hairpin legs come in one standard height that suits a normal chair, and that is what you want. Measure from the floor to the top of the board once the legs are on, and aim for the same height as your kitchen table.
Screw the legs in from the underside with short screws that will not poke through the top. Mark the spots with a pencil first so all four legs sit square. Wonky legs make a wobbly desk, and a wobbly desk spills coffee.
Add small felt pads to the feet if your closet floor is hard. The pads stop scratches, and they make the desk easy to slide out when you need to clean behind it.
Keep the desk top simple. One laptop, one notebook, one lamp. A hairpin desk looks best when it is light and clear, and a cluttered top hides the pretty legs.
This build is a great first DIY job. Four legs, one board, and you are done before lunch. If you can use a screwdriver, you can build this desk.
When you move house, the desk comes with you. Unscrew the legs, carry the board under one arm, and set it up in the next closet in half an hour.
The Crate Tower That Holds Everything
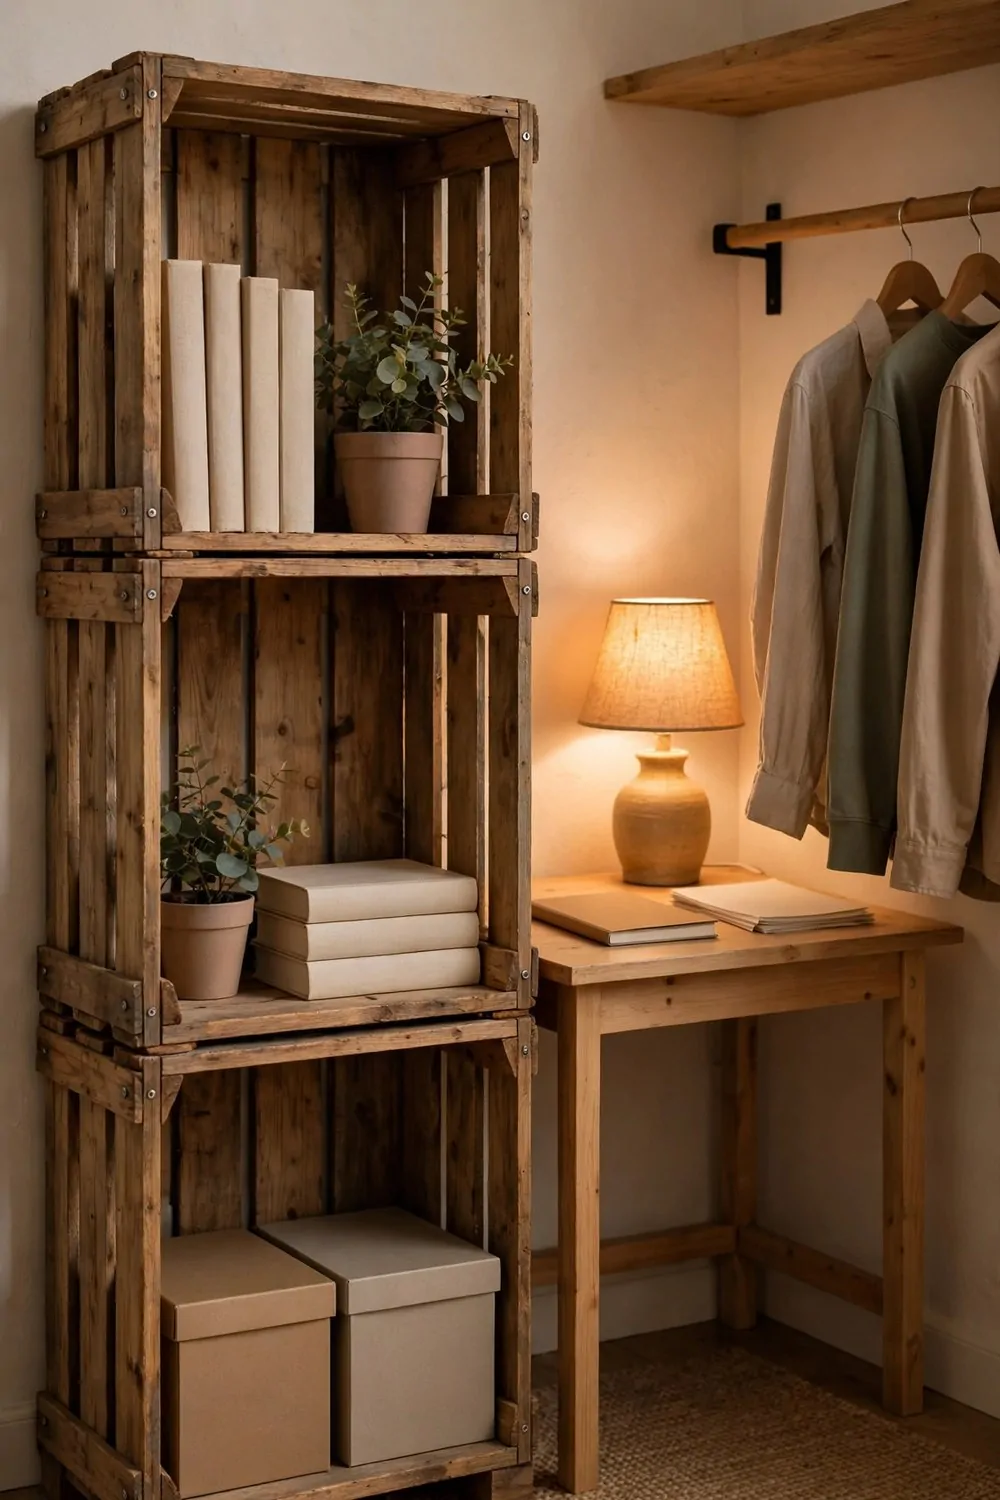
Wooden crates are the cheapest storage you can buy, and a stack of them makes a storage tower in one afternoon.
Buy three or four plain wooden crates from a craft shop or a market. They should all be the same size, so they stack neat and square. Check each one for rough edges and sand them smooth.
Stack the crates on their sides so the open faces point out into the room. That turns each crate into a shelf cubby, and you can see everything inside without pulling boxes out.
Screw the crates together where they touch, so the tower cannot wobble or slide apart. Two short screws per joint is plenty. This matters most if you have kids or pets who might bump into it.
Fix the tower to the wall with one small bracket at the top. A tall stack of crates can tip forward if a heavy drawer is pulled out, and one bracket stops that for good.
Use the bottom crate for heavy things like books and files. Heavy low down keeps the tower steady. Use the top crates for light things like notebooks, cables, and spare chargers.
Paint the crates if you want them to match your desk. One coat of white paint makes cheap crates look like real furniture. Leave them raw wood if you like the rustic look, and add a coat of clear oil to stop splinters.
Label each cubby with a small tag tied to the front. A tag that says pens, or cables, or papers, saves you digging through three crates to find one charger.
A crate tower costs less than one shop bought shelf, and it holds just as much. It also looks handmade in a good way, like you meant it to look like that.
The Pegboard Wall for Tools and Bits
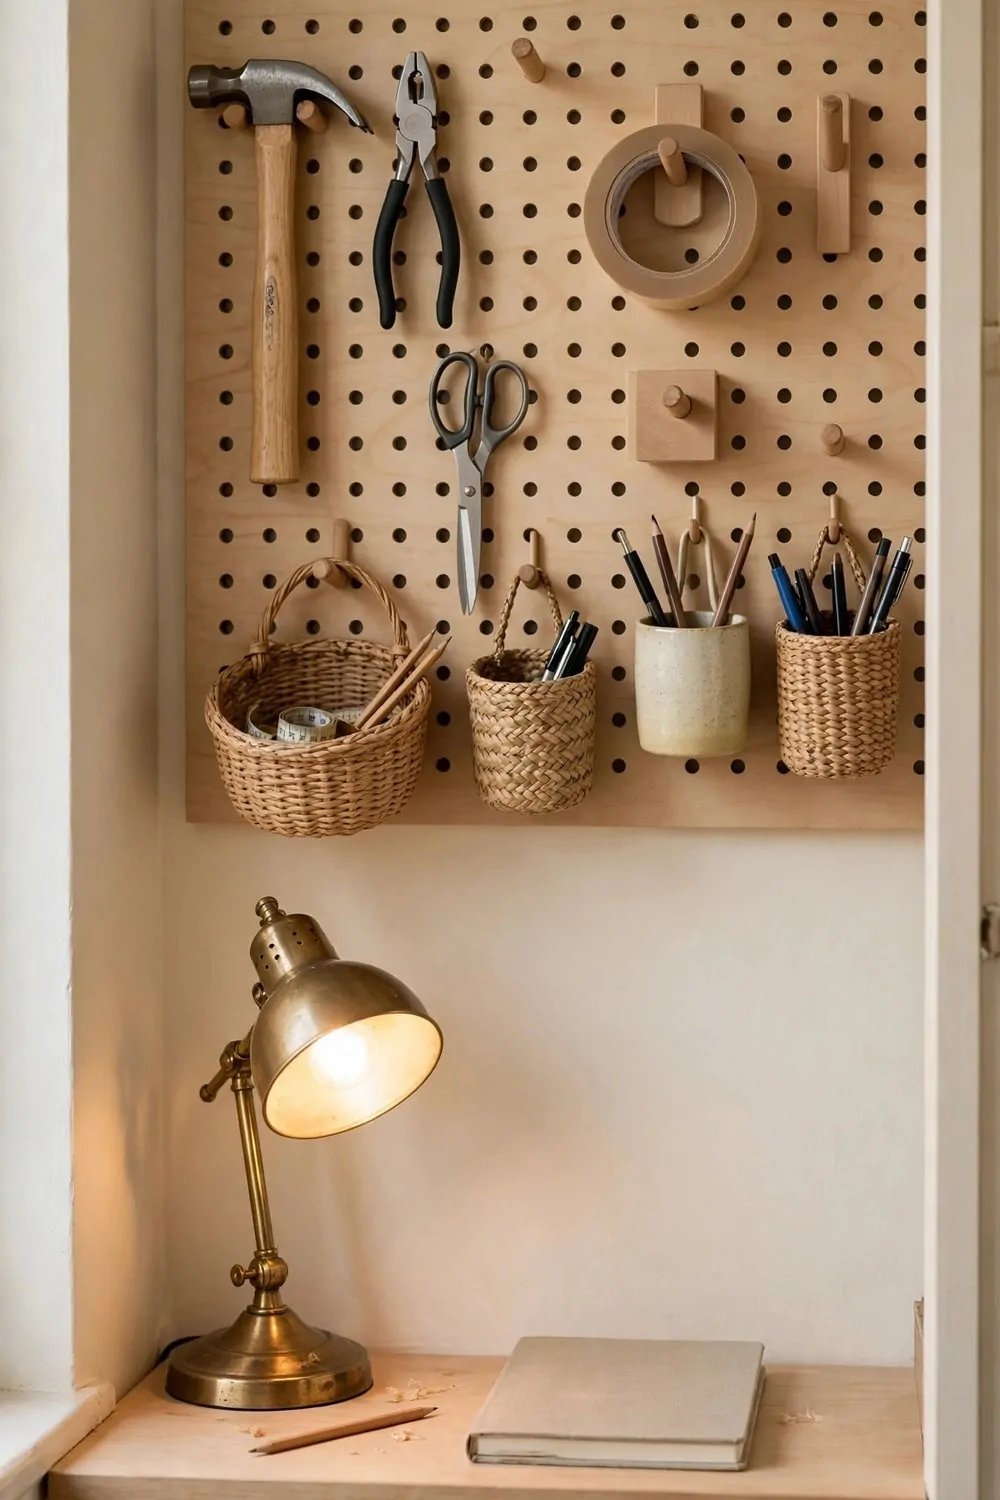
A pegboard wall turns a blank closet wall into storage you can see at a glance. Every hook holds one thing, and you always know where it lives.
Buy a sheet of pegboard cut to fit the wall above your desk. Most hardware shops will cut it to size for you, which saves you a messy job with a saw.
Fix small wooden spacers behind the board before you mount it. The hooks need a gap behind the board to sit in, or they will fall out every time you pull something off.
Screw the board to the wall through the spacers, into studs if you can. A board full of tools gets heavy, and you do not want it pulling away from the wall.
Start with a few hooks, small baskets, and one cup for pens. You can add more as you learn what you reach for most. A board that starts simple stays useful, and a board that starts full gets messy fast.
- Hooks for scissors, tape, and your headphones
- Small baskets for cables and clips
- A cup for pens and pencils
- Clips for notes and lists you need to see
Hang your headphones on a wide hook so the cord does not kink. A narrow hook can bend the cord over time, and that gets annoying when the sound starts cutting out.
Paint the pegboard the same color as your wall if you want it to blend in. Paint it a soft accent color if you want it to be a feature. Both look good, so pick the one that suits your room.
Leave some empty holes on the board. Empty holes are room to grow, and a board that is full to the edges feels busy and hard to use.
At the end of each day, hang things back on their hooks. It takes one minute, and your tiny office looks calm the next morning when you open the door.
The One Plank Floating Shelf
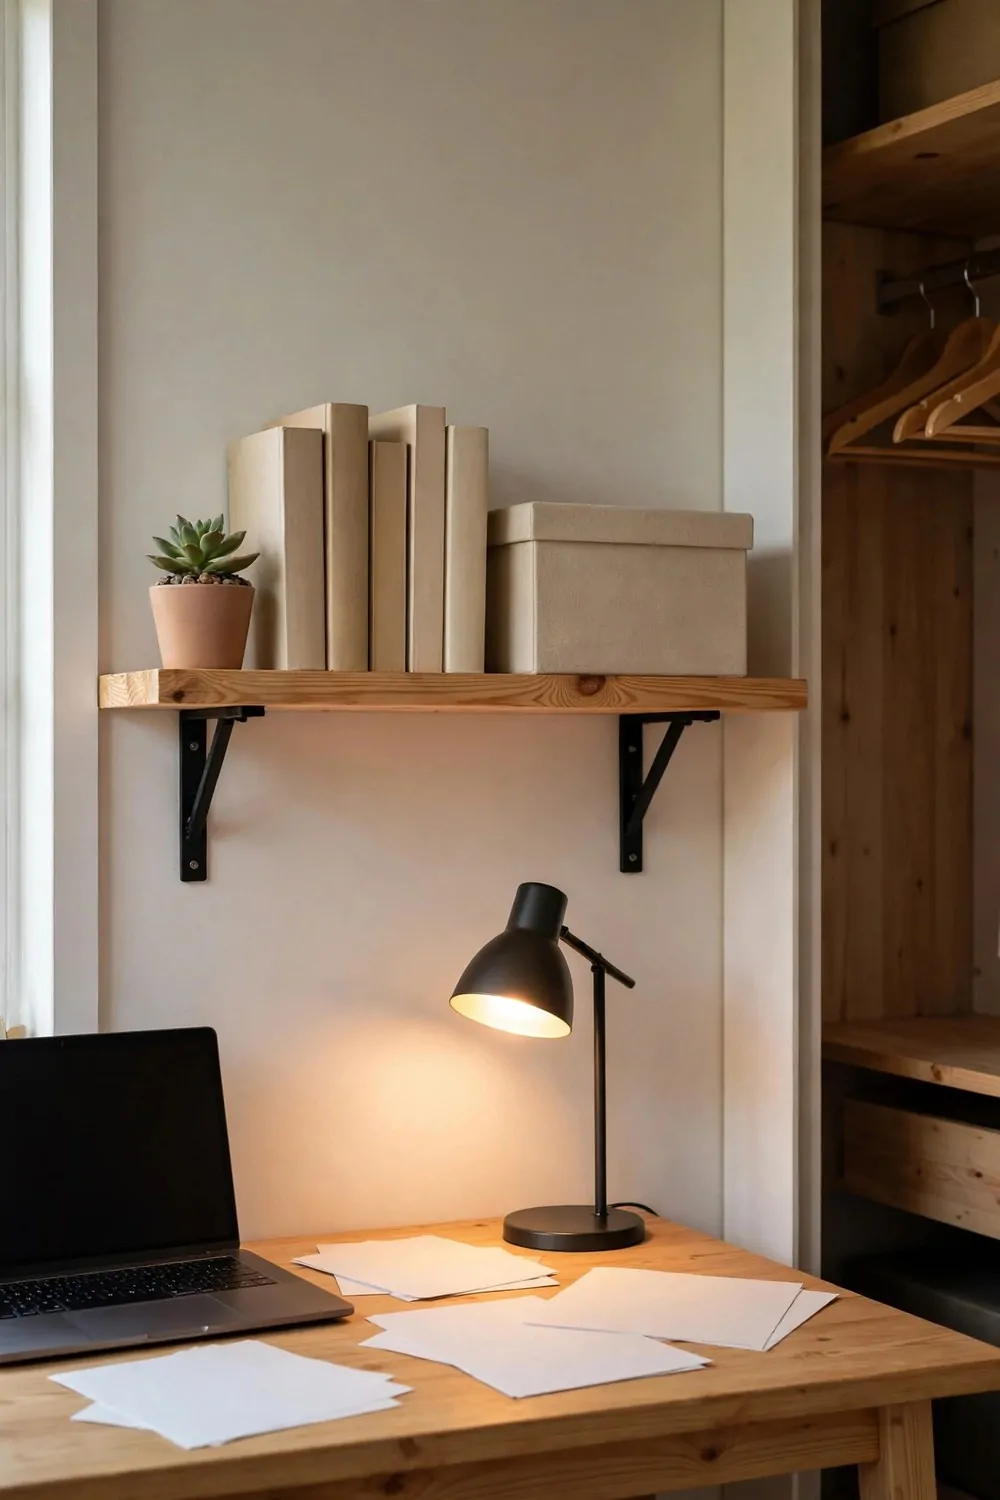
One plank, two brackets, and you have a floating shelf that holds your books and your plant. It is the simplest build in this whole list.
Pick a plank that matches your desk wood if you can. Matching wood ties the shelf to the desk, and the whole closet starts to look planned instead of thrown together.
Fix two strong L brackets to the wall at the height you want. Use a level to get them even, because a shelf that slopes will slide everything to one end. I learned that with a plant that kept creeping sideways.
Rest the plank on the brackets and screw it down from underneath. Screwing from below hides the screws, and the top stays clean and smooth.
Keep the shelf at a height you can reach while sitting down. Your daily notebooks and your pen cup belong here. Things you use once a week can go higher, on a second shelf later.
Do not overload the shelf. A plank full of heavy books will bow in the middle over time, even with good brackets. Keep it to books, one plant, and one box, and it will stay straight for years.
Add a small strip of wood along the front edge if you want a lip. The lip stops pens and small things from rolling off, and it makes the shelf look a bit more finished.
Put your prettiest things on this shelf, because it sits right at eye level. A small plant, a framed photo, or a neat row of books makes the whole desk feel cared for.
This shelf takes under an hour, counting the trip to the shop. It is a good warm up build before you try the bigger jobs in this list.
Stand back and look from the doorway when you finish. One shelf can change how a whole wall feels, and it gives you storage without stealing one inch of floor.
The Curtain Door You Sew in an Hour
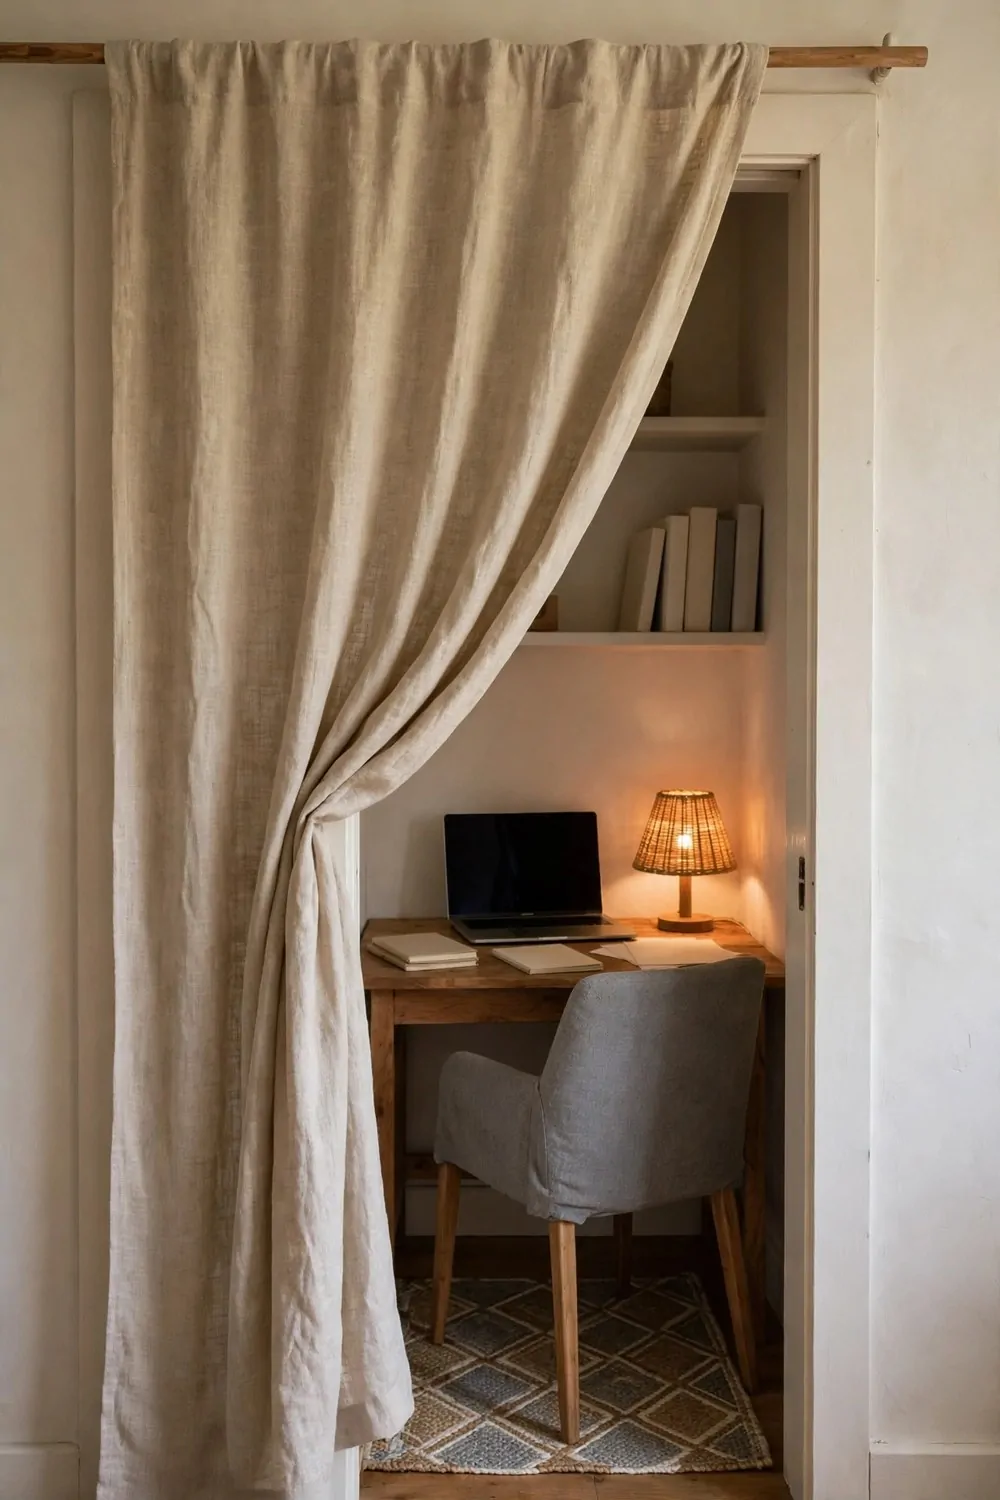
Some closets have no door at all, and some have a door that eats half the room when it swings. A curtain fixes both problems in one hour.
Buy a length of plain fabric a little wider than your closet opening. Linen and cotton both work well, and they hang soft without looking heavy. Pick a calm color that matches your room.
Hem the top edge into a pocket for the rod, or use clip rings if you do not sew. Clip rings are faster, and you can take the curtain down to wash it in seconds. No sewing machine needed at all.
Hang a tension rod inside the closet frame. A tension rod needs no drilling, so renters can use it too, and you can move it up or down until the curtain hangs just right.
Let the curtain reach the floor, or stop it just above the floor if you have a rug. A curtain that drags on the floor will catch on your chair wheels, and that gets old fast.
Pull the curtain closed at the end of work. That one move hides the office and tells your brain the day is done. It is a small ritual, but it makes evenings feel like evenings again.
Tie the curtain to one side while you work, with a simple fabric tieback. You get light from the room, and you still have privacy when you need it. I tie mine back in the morning and let it fall at night.
Wash the curtain once a month if your closet is dusty. A clean curtain smells fresh, and it stops dust settling on your desk while you sleep.
This is the cheapest door you will ever hang. One rod, one piece of fabric, and your office hides away in one pull.
The Under Desk Cable Tray
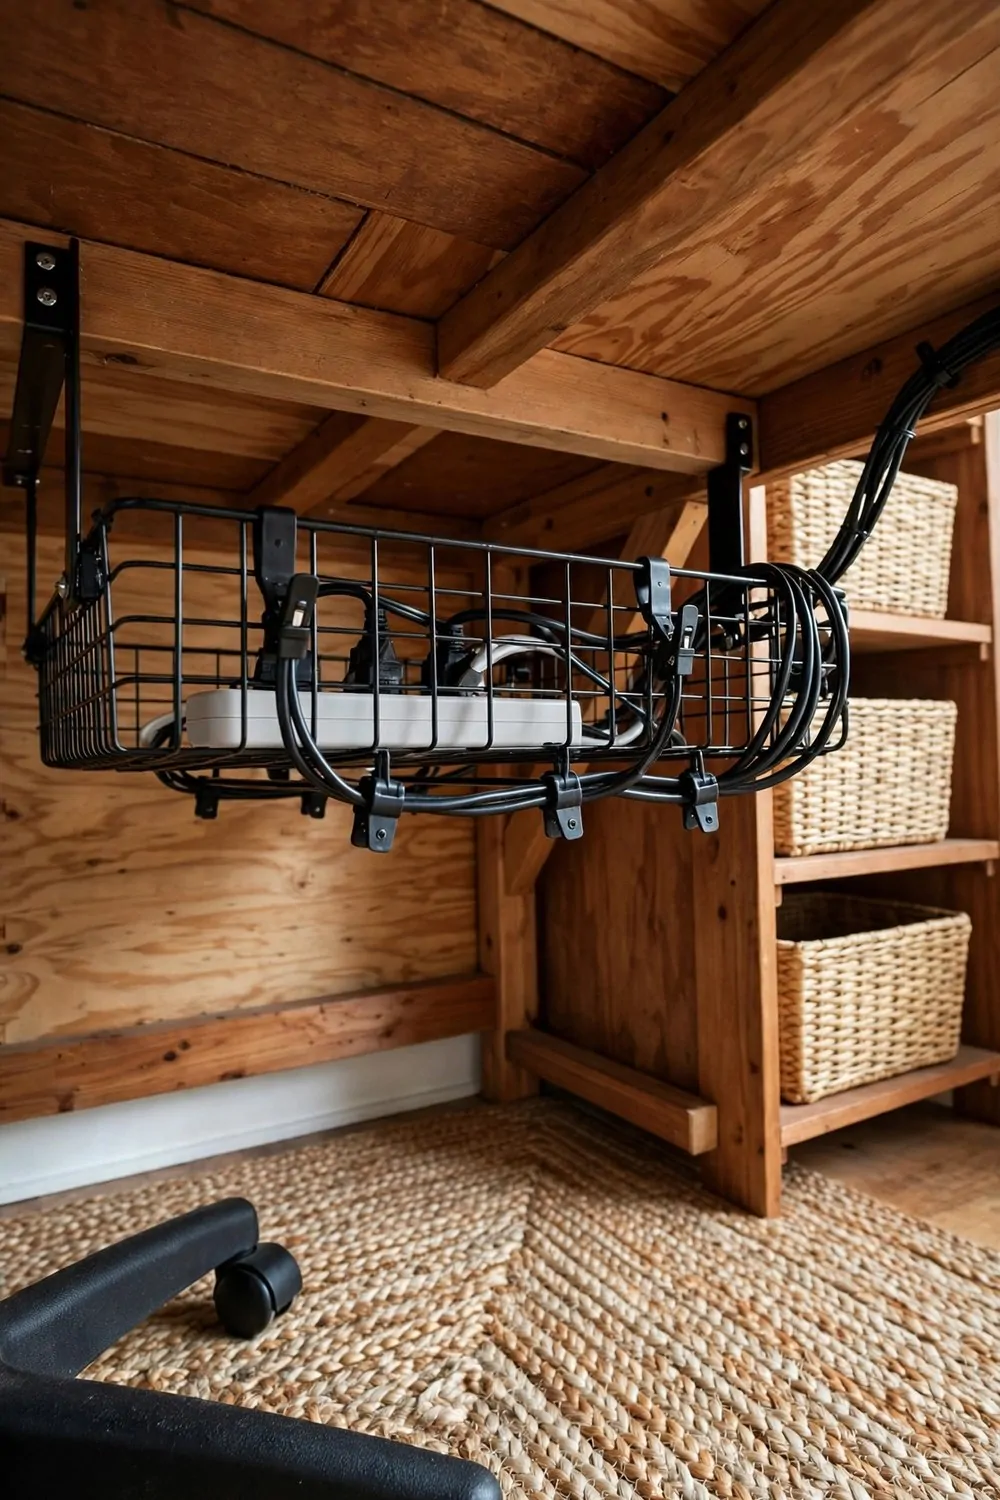
Cables under a desk turn into a tangle in one week. A cable tray fixes that with one board and two screws.
A cable tray is just a shallow box or a wire basket fixed under the back edge of your desk. Your power strip sits in it, and the cables run along it instead of hanging down to the floor.
Buy a wire cable tray from an office shop, or make one from a length of rain gutter cut to size. The gutter trick costs almost nothing, and it works just as well as the shop version.
Screw the tray to the underside of the desk, near the back edge. Keep it where you can reach the power switch without crawling under the desk. If you cannot reach the switch, you will never turn it off.
- Power strip fixed inside the tray, off the floor
- Charger cables clipped along the back edge
- Spare cable length coiled with a twist tie
- One label on each plug so you unplug the right thing
Run each cable through small clips along the back edge of the desk. The clips keep cables neat, and they stop cords sliding off the desk onto the floor.
Plug in only what you use each day. A laptop charger, a lamp, and a phone charger are enough for most closet offices. Every extra plug is one more cable to tame.
Keep the tray clear of dust and paper. Cables and paper scraps under a desk are a fire risk in a tight space, so give the tray a quick check once a month.
Do not run cables across the walking path in the closet. A cable on the floor is a trip risk, and in a small space you will step on it sooner or later.
When the cables are hidden, the desk looks bigger and the room feels calmer. That quiet look is worth the half hour it takes to fit the tray.
The Magnetic Strip for Scissors and Clips
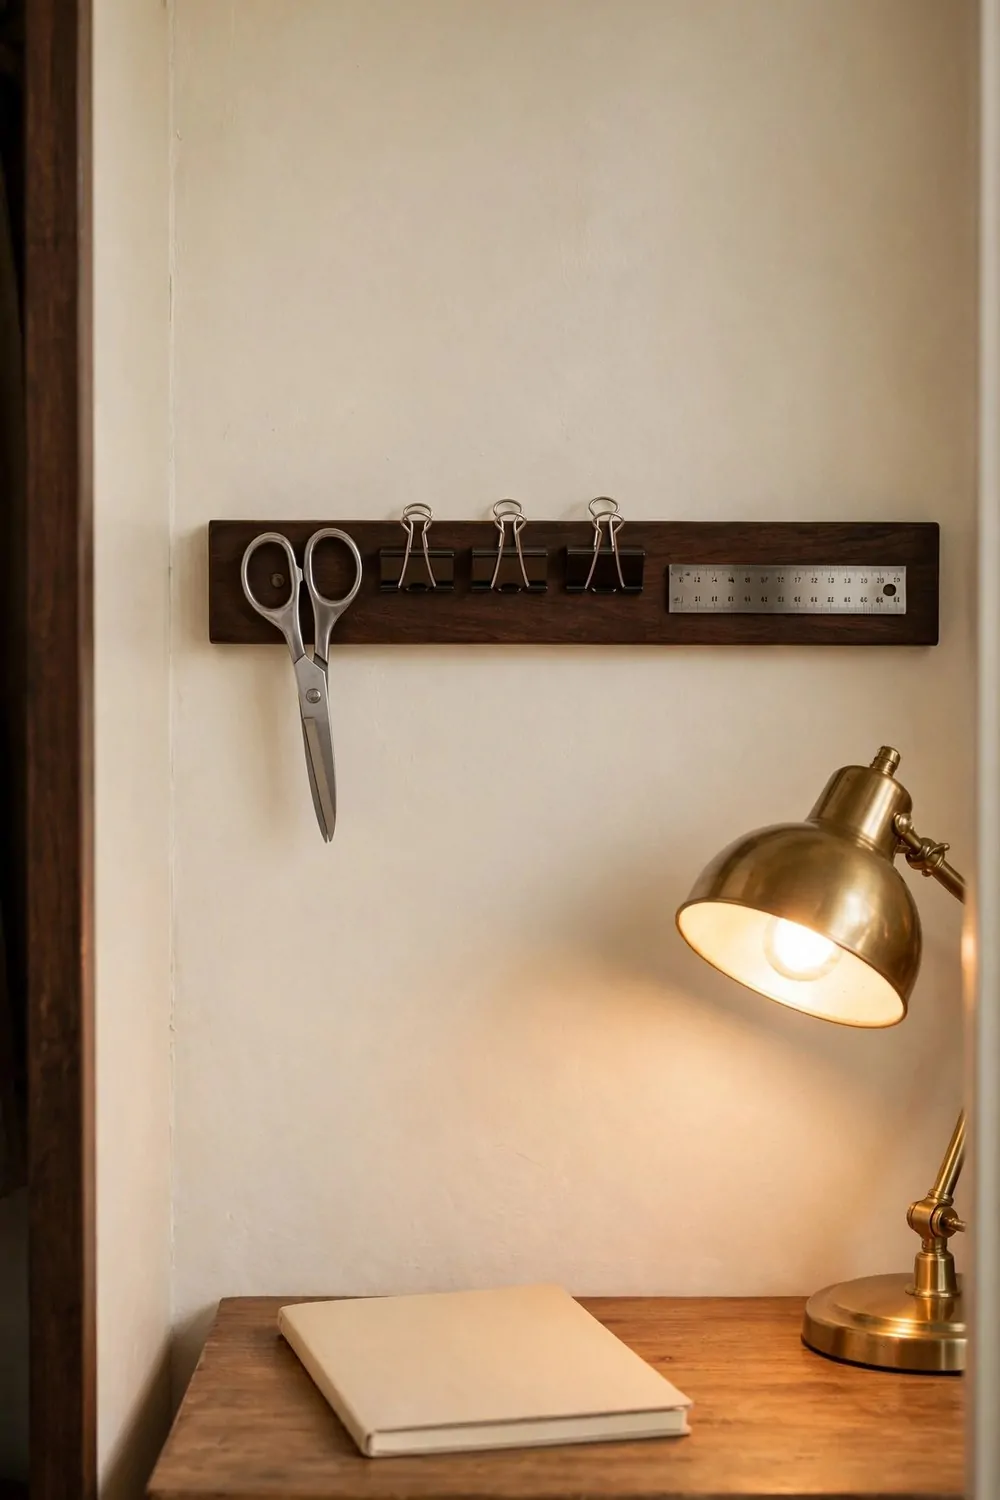
A magnetic strip on the wall holds scissors, clips, and other metal bits right where you can grab them. It costs very little, and it frees up a whole drawer.
Buy a magnetic tool strip from a hardware shop, the kind made for holding tools in a garage. Pick one with screw holes, not just sticky tape on the back. Tape can peel off in a warm closet, and a falling strip with scissors on it is not safe.
Mount the strip at arm height, beside your desk. You should be able to reach it without standing up, and without stretching across your laptop.
Screw it into the wall, into a stud if you can. Test the hold with your heaviest pair of scissors before you load it up. A strip that holds when you press it and fails later is worse than no strip at all.
Stick your scissors on the strip with the points facing down. Keep sharp items pointing down or sideways, never up. If little hands can reach the strip, put it higher or keep sharp items in a drawer instead.
Line up binder clips and paper clips in a row along the strip. You can see at a glance what you have left, and you stop buying clips you already own.
Add a small metal cup on the strip for loose paper clips. A cup keeps them from sliding off, and it keeps the strip looking tidy instead of scattered.
Wipe the strip once a week. Dust and paper bits stick to magnets, and a quick wipe keeps the hold strong.
Do not hang anything heavy on a light strip. A full stapler belongs in a drawer. The strip is for small metal tools only, and that balance keeps your wall tidy.
This build takes fifteen minutes with a drill, and it saves you a drawer full of digging. It is one of those small jobs you wish you had done a year ago.
The One Tin Paint Job
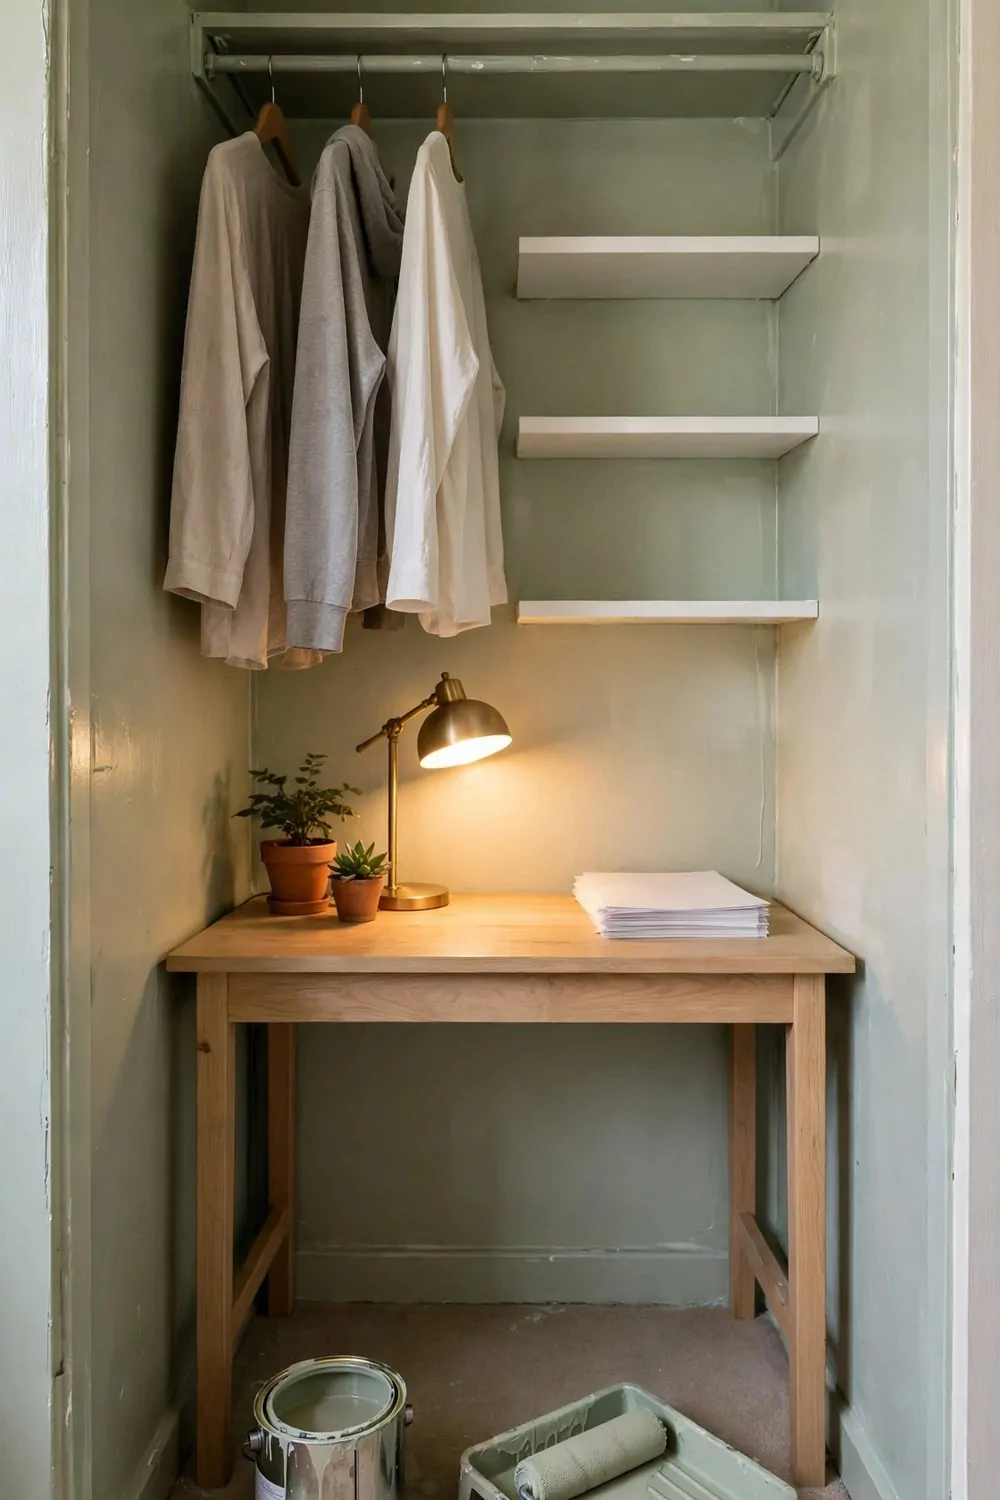
One tin of paint is the cheapest way to make a closet feel like a real room. Pale walls bounce light around, and the whole space opens up.
Empty the closet first, right down to the floor. Painting around boxes and rails takes twice as long, and you will miss the corners that show the most. An empty closet paints in one morning.
Pick a warm white or a very pale color. Sage green, pale blue, and soft cream all work well in a closet office. Dark paint can look rich in a big room, but in a tiny closet it can close the walls in fast.
Use a paint finish that wipes clean. Closets get scuffed by chairs and boxes, and a washable finish keeps the walls looking fresh with one damp cloth.
| Paint finish | Feel | Best for |
|---|---|---|
| Flat matte | Soft and calm | Ceilings and walls that never get touched |
| Eggshell | A little glow | Closet walls, easy to wipe |
| Satin | Smooth and tough | Trim and shelves that get knocked |
Test a small patch first and watch it in your closet light. A color that looks perfect in the shop can look gray or yellow under a warm lamp. Paint a square, live with it for a day, then decide.
Paint the ceiling the same pale color as the walls if you can. A matching ceiling blurs the edge where wall meets ceiling, and the room feels taller.
Use painter tape on the trim and the floor edge, and take your time with the first coat. Two thin coats beat one thick coat every time. Thick paint drips, and drips show forever in a small room.
Let the paint dry fully before you put the desk back. Paint that feels dry can still mark when a desk leg presses on it, so give it the full night if you can.
Stand in the doorway when the paint dries and the lights are on. If the closet looks bright and airy, the paint has done its job. That bright feeling is hard to beat for the price of one tin.
The LED Strip That Fixes Dark Corners
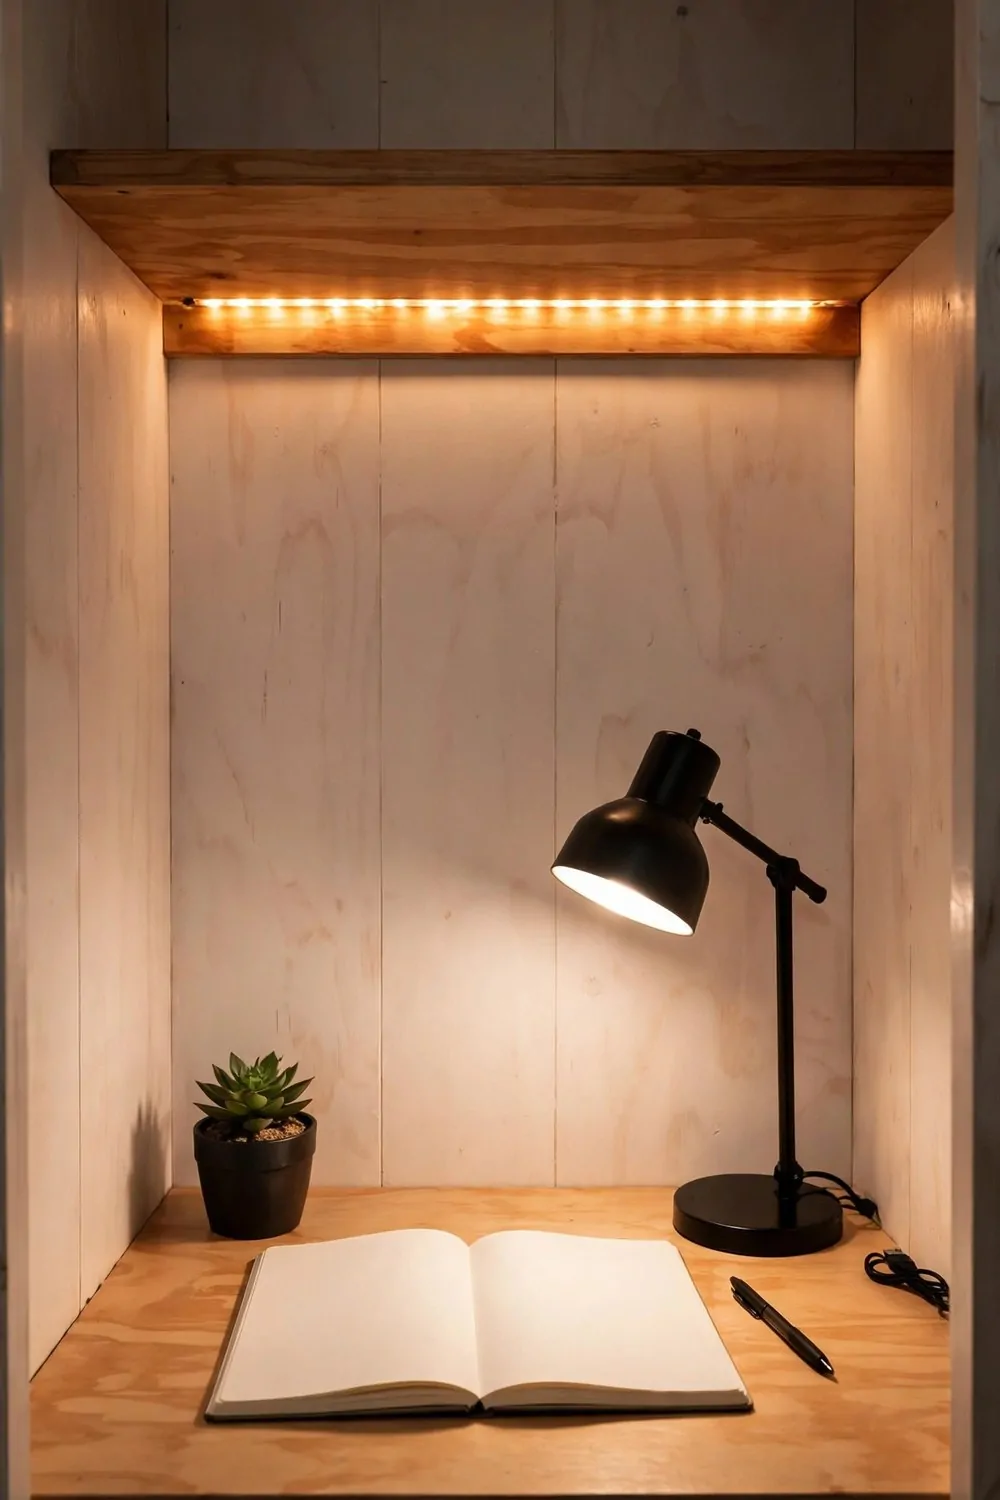
Most closets have one light in the ceiling, and it leaves the desk in shadow. A strip of LED lights under a shelf fixes that in half an hour.
Buy a warm white LED strip with a sticky back. Warm light feels like a room you want to sit in. Cool harsh light can feel like a storage room, and you will not want to stay.
Stick the strip under the shelf above your desk, near the front edge. That spot throws light down onto your work, right where your hands and your notebook are. It leaves the rest of the closet soft.
Run the strip the full width of the shelf if you can. A short strip in the middle leaves dark patches at the ends, and your eyes will keep sliding toward the bright spot.
Hide the power cable along the side of the shelf with small clips. A dangling cable ruins the clean look, and it can catch on things you pull off the shelf.
Plug the strip into the power strip in your cable tray, so one switch turns it off at night. If the strip has a remote, keep the remote in one fixed spot, or you will lose it in a week.
Check for glare on your screen before you settle on the final spot. Move the strip a little forward or back, and the shine on the screen goes away.
Add a second strip under a higher shelf if the closet still feels gloomy. Two soft strips beat one harsh ceiling light, and they make shadows less sharp.
This is a no drill job, which makes it perfect for renters. Peel, stick, plug in, and your closet office has proper working light by lunch.
The Crate on Wheels Rolling Cart
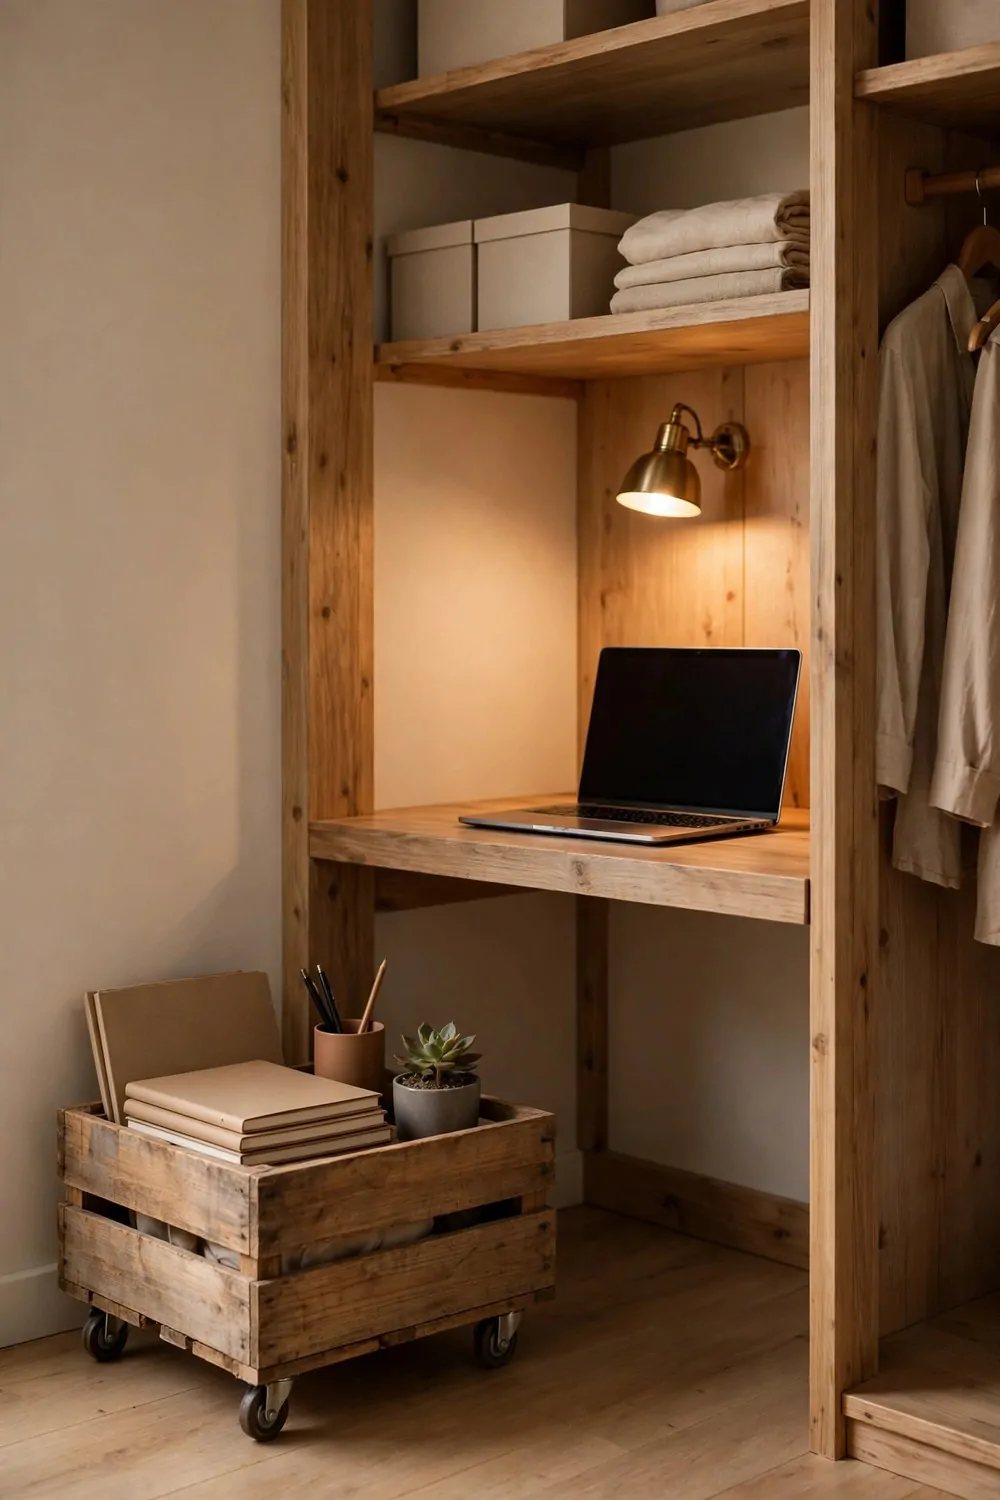
A rolling cart is storage you can move, and a crate on wheels is the cheapest one you will ever own.
Take one sturdy wooden crate and screw four caster wheels to the bottom. Pick casters with locks, so the cart stays put while you work. A cart that rolls away when you lean on it is funny once and annoying every time after.
Use the crate for things you need every day. Pens, a notebook, and your charger sit on top, right where your hand can find them. Papers and folders stand upright inside.
Keep the cart light on top and heavier at the bottom. Heavy things low down keep the cart steady, and it will not tip when you pull it out fast.
Roll the cart into the gap beside your desk when you work, and roll it into the closet corner when you are done. That little bit of movement makes a tiny space feel flexible.
| Cart spot | What lives there | Why it works |
|---|---|---|
| Top of the crate | Daily pens, notebook, charger | Easy reach while seated |
| Inside the crate | Papers and folders upright | Keeps paper neat and dry |
| Bottom of the crate | Books and heavy items | Keeps the cart steady |
Lock the wheels when you sit down to work. Then unlock them when you want to move the cart out of the way. The locks are small levers on the wheels, and they take one toe tap.
Paint the crate to match your desk if you like. One coat of paint makes a plain crate look like part of the furniture, and it takes ten minutes with a brush.
Clear the cart once a week if it starts to fill up. Carts collect clutter fast, and a weekly clear out keeps it useful instead of messy.
A crate on wheels is a good test before you buy real furniture. If you use the cart every day for a month, you know that kind of storage suits you.
The Door Back Organizer
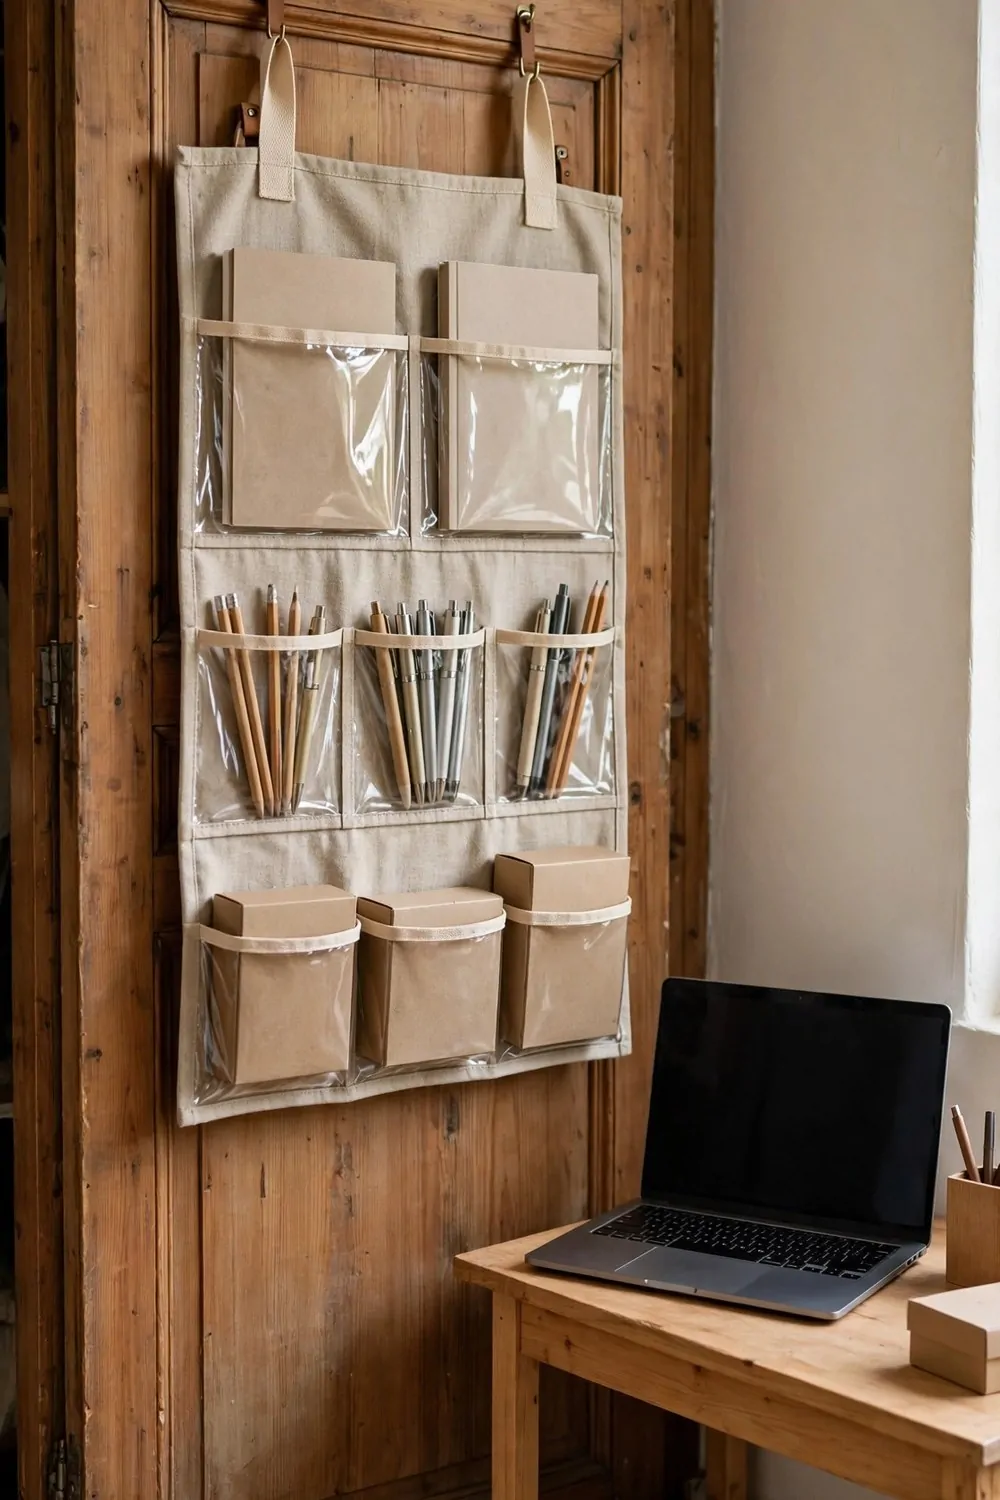
The back of the closet door is free storage, and a handmade organizer uses every inch of it.
Sew or glue a row of fabric pockets onto a backing cloth the size of your door. Clear vinyl pockets work best, because you can see what is inside without pulling everything out. If you do not sew, fabric glue and iron on tape will hold light pockets just fine.
Hang the organizer over the door on two flat hooks. Flat hooks let the door close properly, which matters a lot. A hook that is too thick will stop the door shutting, and the whole trick fails.
Keep the pockets for light, flat things only. Tape, stamps, cables, and small notebooks are perfect. A heavy organizer will pull the hinges and make the door hard to close.
- Top pockets: stamps, tape, and sticky notes
- Middle pockets: cables, earbuds, and a small calculator
- Lower pockets: envelopes and spare paper clips
- Hook on top: headphones and a light tote bag
Put your most used item at eye level on the door. That way you do not have to bend down in a tight space. Your knees will thank you after a long day of sitting.
If your closet has sliding doors, this idea needs a change. Use a hanging strip on the inside wall instead, or a small rack fixed with strong tape. You still get the same easy reach.
Check the pockets once a week and toss dried out pens. It is a two minute job, and it stops the pockets filling with things you will never use again.
Keep the organizer slim and flat. If it bulges out, the door will not close, and your hidden office will peek out all evening.
This build takes one afternoon with fabric and glue, and no power tools at all. It is a good job for a Sunday when you do not feel like drilling.
The Cork Tile Pinboard Wall
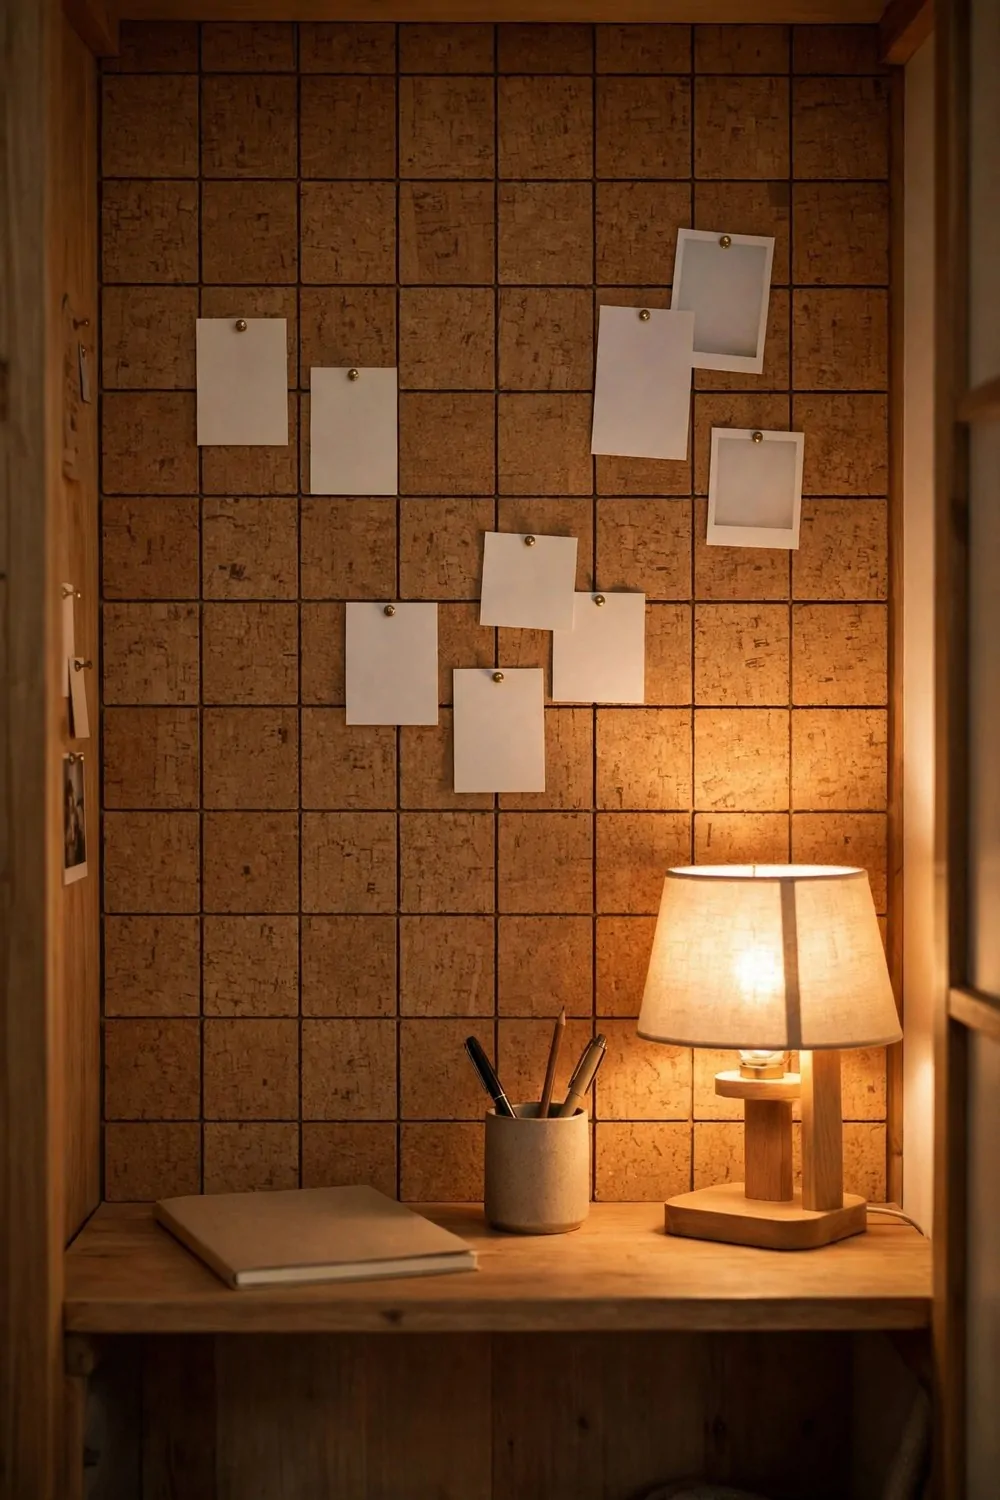
Cork tiles turn a blank wall into a pinboard you can change any time. They are cheap, light, and they stick up with tape, so renters can use them too.
Buy a pack of square cork tiles from a craft shop. They usually come in packs of four or six, and one pack covers a good patch of wall above a desk.
Stick the tiles to the wall in a grid, using strong mounting tape on the back of each one. Press each tile hard for thirty seconds, and leave them overnight before you pin anything to them.
Line the tiles up with a level as you go. A row of tiles that creeps uphill will annoy you every time you look at it, and it is hard to fix once the tape sets.
Pin up things that make you happy and things you need to see. A sweet card, a photo, a color swatch you love, and your one key list for the week. Your board should feel like you.
Keep one part of the board for work only. A small list, a key date, or a note you need to see every day. The rest of the board can be just for fun.
Change the board often. Swap a photo, add a new card, take down a note you no longer need. A board that never changes starts to fade into the wall, and you stop seeing it.
Use plain pins with big heads, so they are easy to pull out. Tiny pins are fiddly in a small space, and they end up on the floor where chair wheels find them.
Frame the tiles with a thin strip of wood if you want a finished look. A frame makes a plain board look like it was always part of the room, and it takes one extra strip of trim.
This wall costs less than a night out, and it gives your closet office a personal touch no shop bought board can match.
The Filing Crate on Wheels
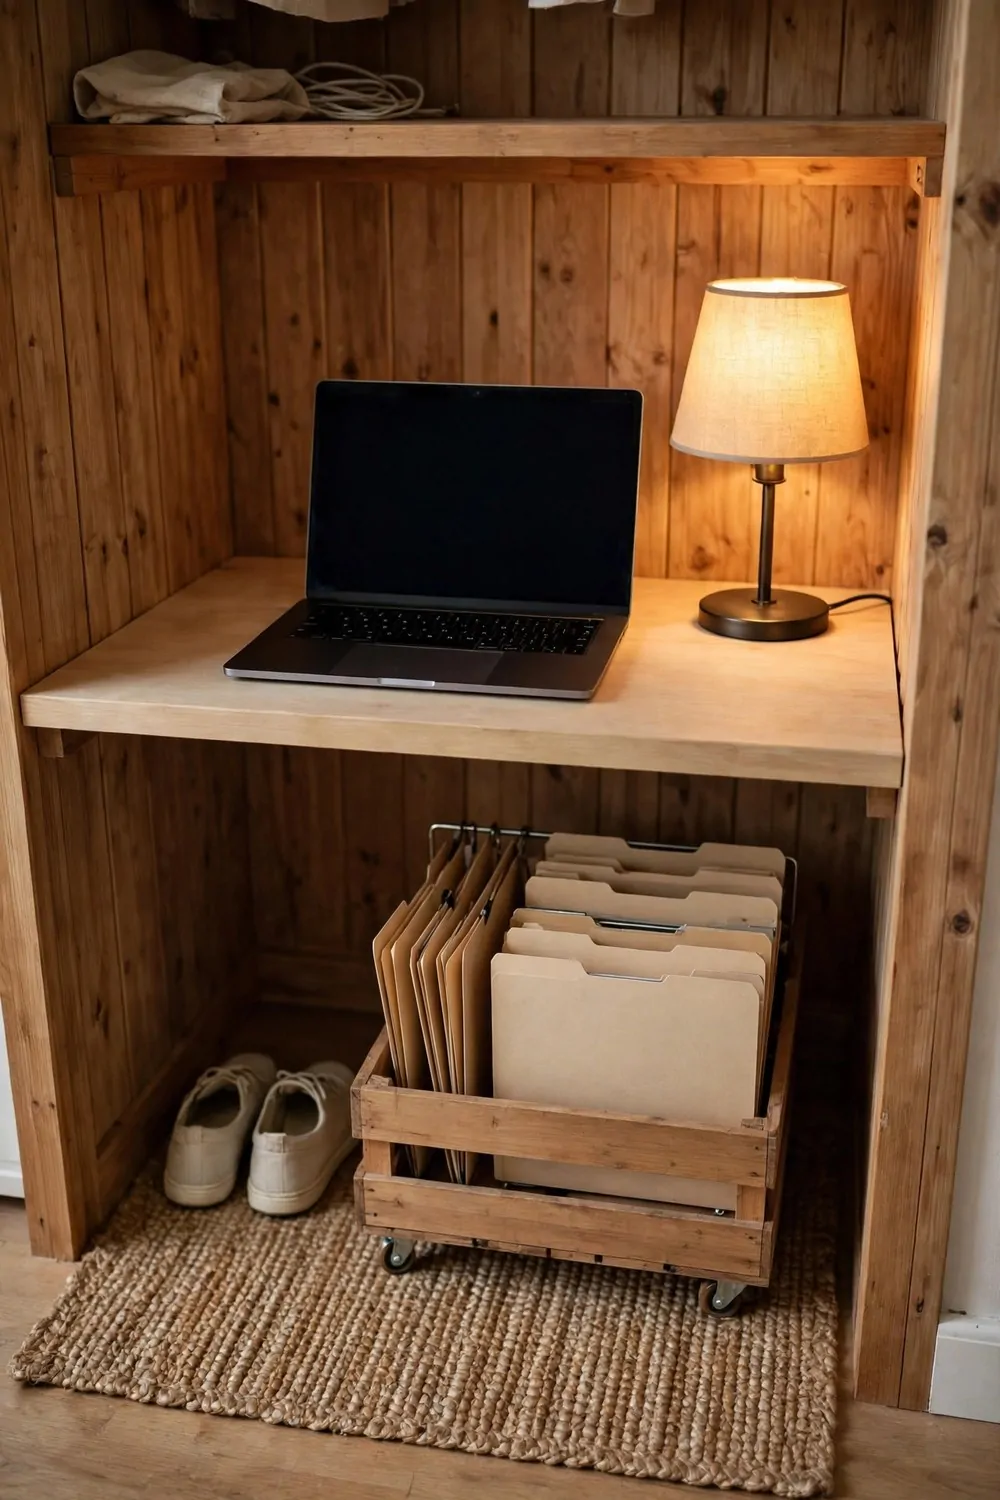
Paper is the one thing that can bury a small office in a week. A filing crate on wheels keeps it under control.
Take a sturdy crate and fix a simple hanging rail inside it, one bar across each short end. Hanging folders hook over the rails, and they slide along like a tiny filing cabinet.
Screw four caster wheels to the bottom so the crate rolls under your desk. The crate needs to be low enough to slide under, so measure the gap under your desk before you buy the wheels.
Hang one folder per project, with a plain blank tab on each. Keep the tabs short and simple, one or two words each. Long labels are hard to read at a glance, and they defeat the point.
Keep only live projects in the crate. Finished work goes in a box on a high shelf, or it gets scanned and tossed. A filing crate that holds everything holds nothing useful.
Roll the crate out when you need a file, and roll it back when you are done. The whole filing system lives under your desk, and your desk top stays clear.
Put a small label on the front of the crate, so anyone else in the house knows it is your work files and leaves it alone. A crate that gets borrowed for toys or shoes stops being a filing system fast.
Check the crate once a month and pull out anything you have not touched. If a folder has sat still for a month, it probably belongs on the high shelf or in the bin.
This build takes one hour and one crate. It is the simplest filing system that actually works in a closet, and it costs less than a shop bought drawer unit.
Your future self will thank you the first time you find a paper in ten seconds instead of ten minutes. That feeling is worth the hour it took to build.
The Monitor Riser From One Board
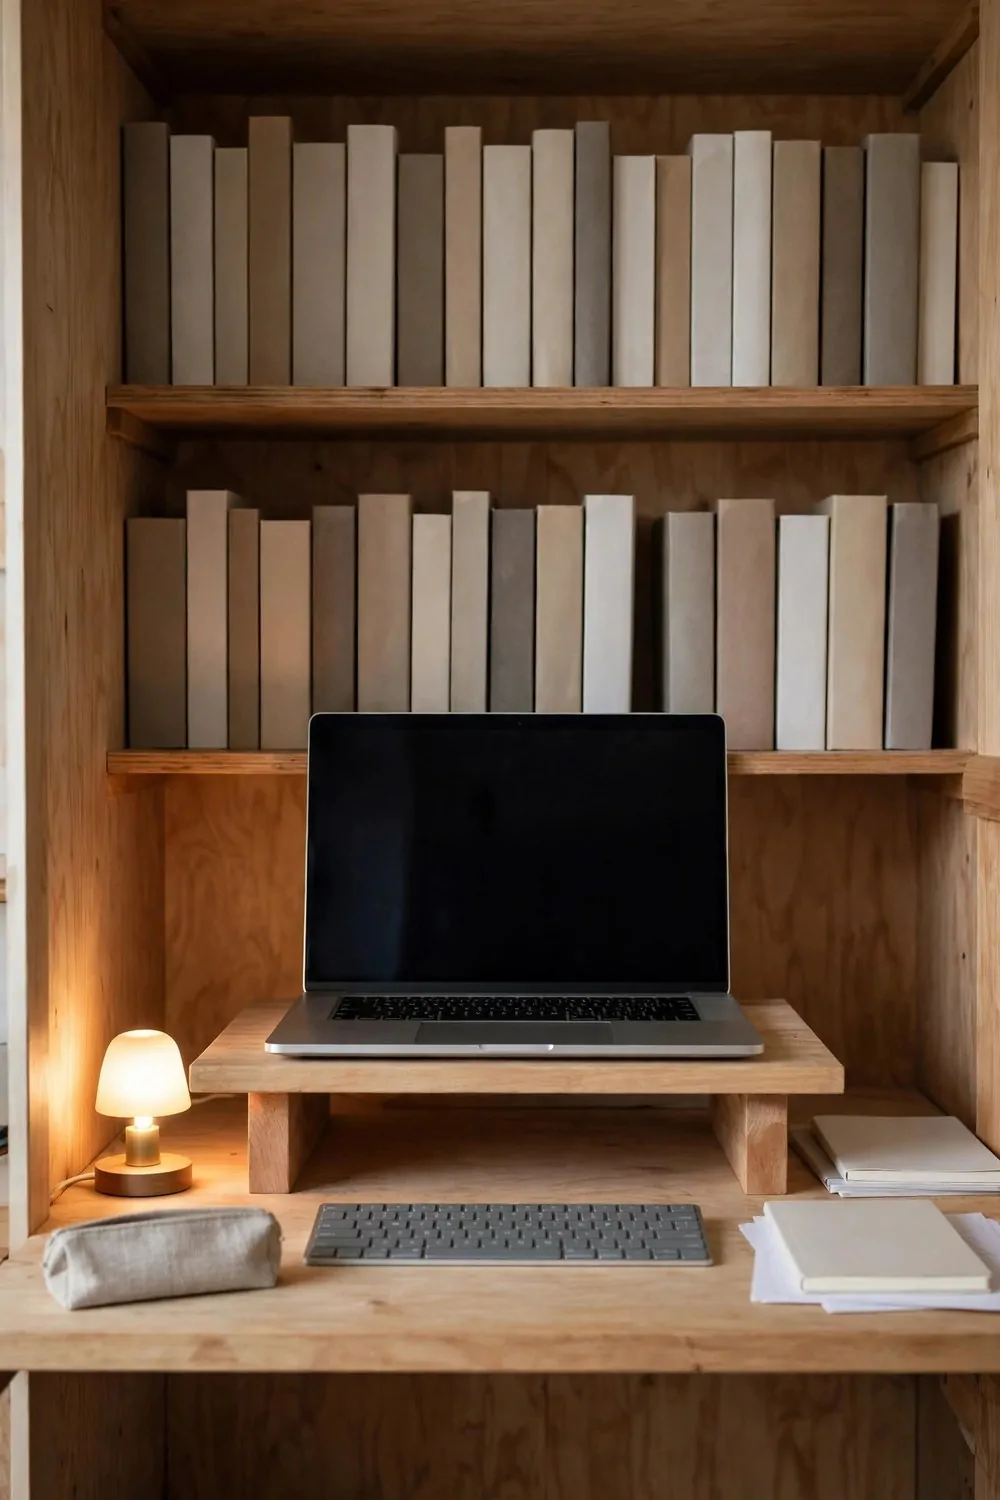
A monitor at the wrong height hurts your neck by lunch. A riser made from one board fixes it in half an hour.
Cut a shelf board to fit your desk, about 12 inches deep and as wide as your screen plus a little extra. Sand the edges smooth, because your hands will brush past it all day.
Rest the board on two small wooden blocks, one at each end. The blocks lift the board about four inches, which puts most laptop screens close to eye level. Screw the blocks to the board from underneath so they cannot slide.
Set your laptop or monitor on the riser and sit in your chair. The top of the screen should sit level with your eyes when you look straight ahead. If it is too high, use shorter blocks. If it is too low, add a thin shim under each block.
Slide your keyboard and mouse under the riser when you are not typing. That keeps the desk top clear, and it gives you back the space in front of the screen for a notebook.
Keep cables tidy behind the riser. Run them through one clip on the back edge, so they drop straight down behind the desk instead of pooling on top.
Paint the riser to match your desk if you like. A matching riser looks like it came with the desk, and nobody will guess it was a weekend job.
Do not put heavy books on the riser with your screen. The extra weight can bow the board over time, and a bowed riser wobbles. Keep it to the screen and one small notebook.
This is a great build for anyone with a sore neck. Four inches of lift changes how your whole upper body feels by the end of the day.
Test it for one full workday before you call it done. If your neck feels better at five than it did at nine, the riser is doing its job.
The Pull Out Keyboard Tray
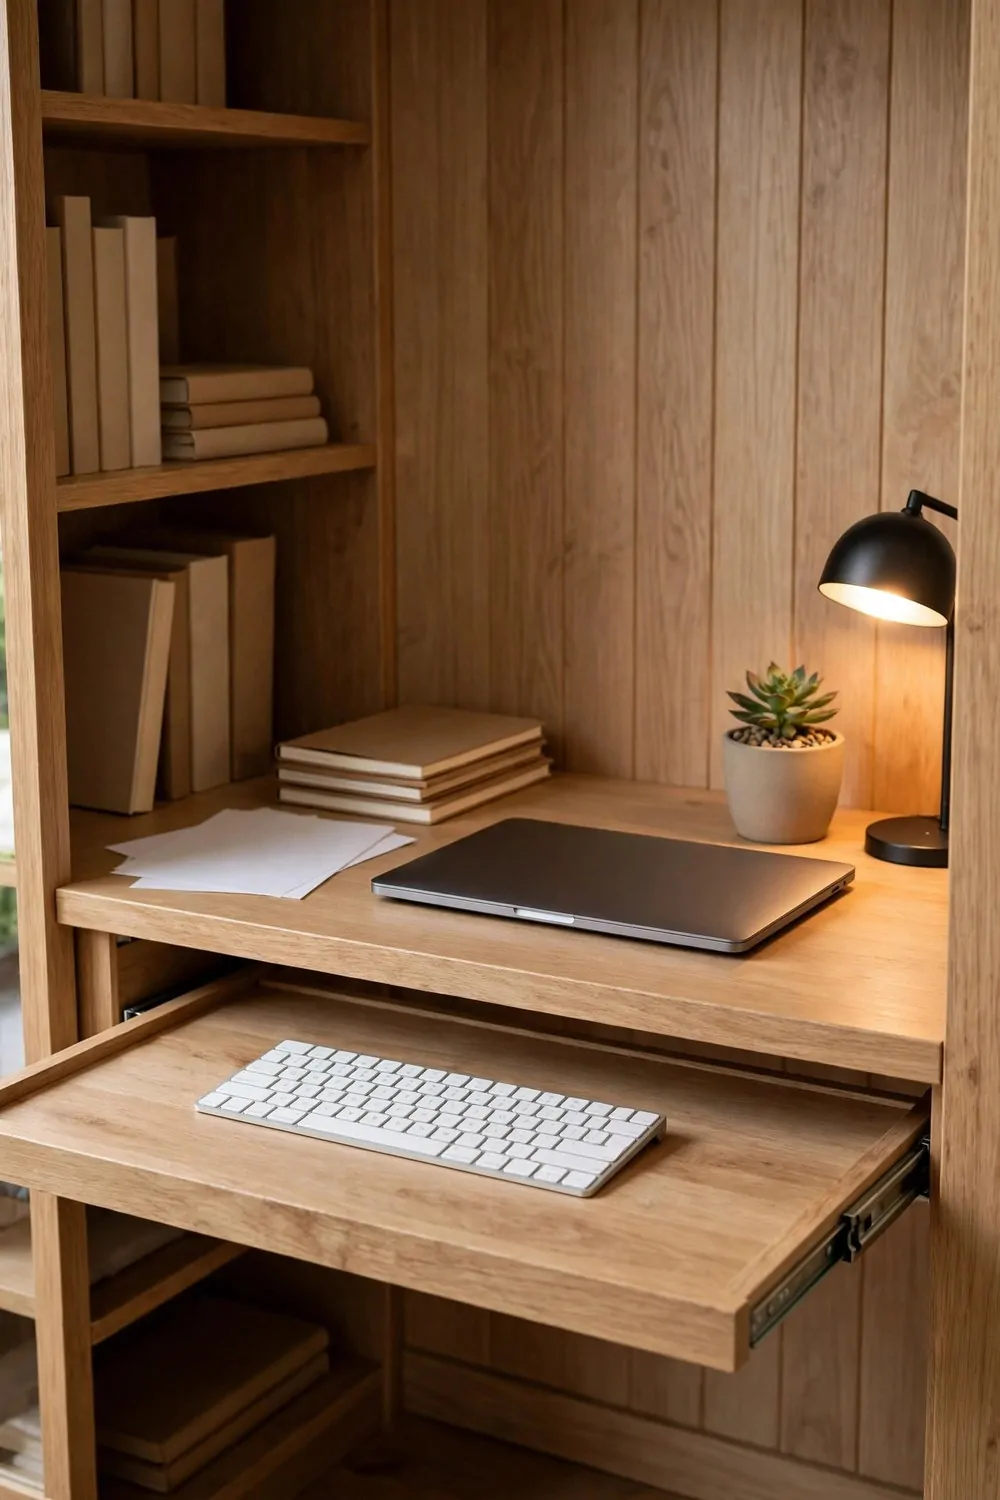
A pull out keyboard tray gives you desk space back. Your keyboard slides away under the desk, and the top stays clear for papers and coffee.
Buy a pair of drawer slides from a hardware shop, the kind made for kitchen drawers. They need to be as long as your keyboard is deep, plus a little extra for smooth travel.
Cut a thin board to hold the keyboard, a little wider than the keyboard itself. Sand it smooth and round the front corners, because your wrists will rest near that edge.
Screw one half of each slide to the underside of the desk, and the other half to the sides of the tray board. Keep both slides level and parallel, or the tray will stick halfway out and jam.
Test the slide empty first, in and out ten times. If it sticks, loosen the screws a little and adjust. A tray that sticks will annoy you every single day, so fix it now.
Set the tray height so your elbows rest easy when you type. For most people that is a little lower than the desk top, which is why a tray feels so good on long typing days.
Keep the tray for the keyboard and mouse only. If you pile notebooks on it, it gets heavy and hard to slide, and you lose the whole point of the build.
Add a small stop block at the back so the tray cannot slide too far in. Without a stop, the tray can bump the wall and knock things off the desk behind it.
Run the keyboard cable through a clip under the desk, with a little slack. The cable needs room to move with the tray, but not so much slack that it hangs down to the floor.
This build takes about an hour, and it is the one that makes people say your desk looks bigger. Same desk, same closet, just more room to work.
The Sunday Label and Hook Finish
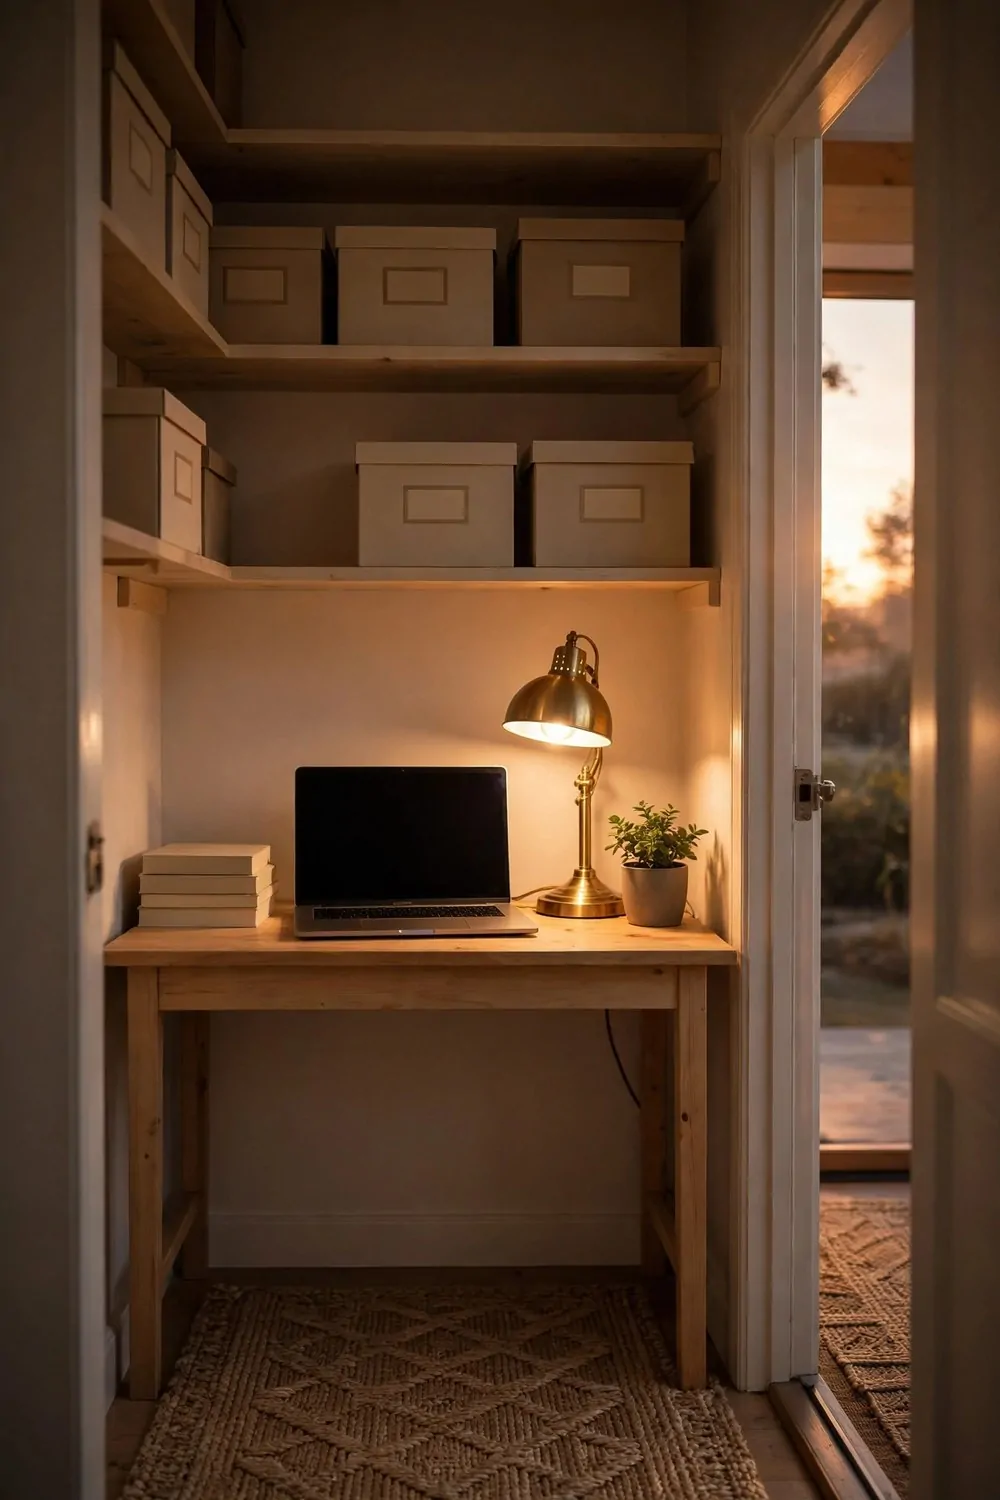
Sunday is for finishing touches. Labels and hooks are the smallest jobs in this list, and they make the biggest difference to how the office feels to use.
Start with labels. A label maker is nice, but tape and a pen work just as well. Label every box, every crate, and every drawer with one or two plain words. If you cannot read it at a glance, it is too long.
Label the power strip plugs too, with a tiny strip of tape on each one. You will never again unplug the lamp when you meant to unplug the charger.
Next, add hooks. Screw three or four small hooks into the wall by the door, at the height you can reach without stretching. Hooks hold your bag, your headphones, and your jacket, and they keep the floor clear.
Put one hook inside the door for your work lanyard or your keys. When you sit down, you hang them there. When you stand up, you grab them. That one habit stops the daily hunt for keys.
Add a small hook under the desk for your headphones. Headphones on a hook stay untangled, and they do not take up desk space. A hook under the desk is out of sight, which keeps the desk looking calm.
Step back and look at the whole closet with fresh eyes. Walk out, count to ten, and walk back in like a guest. What do you see first? If it is clutter, label it or hook it. If it is calm, you are done.
Take a photo of the finished office on your phone. You will want it later, on the days when the desk is messy and you need to remember how good it can look.
Then close the door or pull the curtain, and go and enjoy your Sunday evening. You built an office this weekend, with your own hands, in a closet that used to hold nothing but coats. That is a weekend well spent.
Come Monday morning, sit down, take a breath, and start work in a room that fits you. You made it, and that makes it yours in a way no shop bought office can ever be.